
This week I focused on planning and designing end unit
I chose based on the method ducat for flexibility of treading covering
I tested two different options of the board slots (5 mm polypropylene)
השבוע התמקדתי בתכנון ועיצוב יחידת הקצה
בחרתי להתבסס על שיטת הדוקטה לצורך הגמשה של משטח הדריכה
(בחנתי שני אופציות שונות לחריצה של הלוח (פוליפרופילן 5 מ”מ
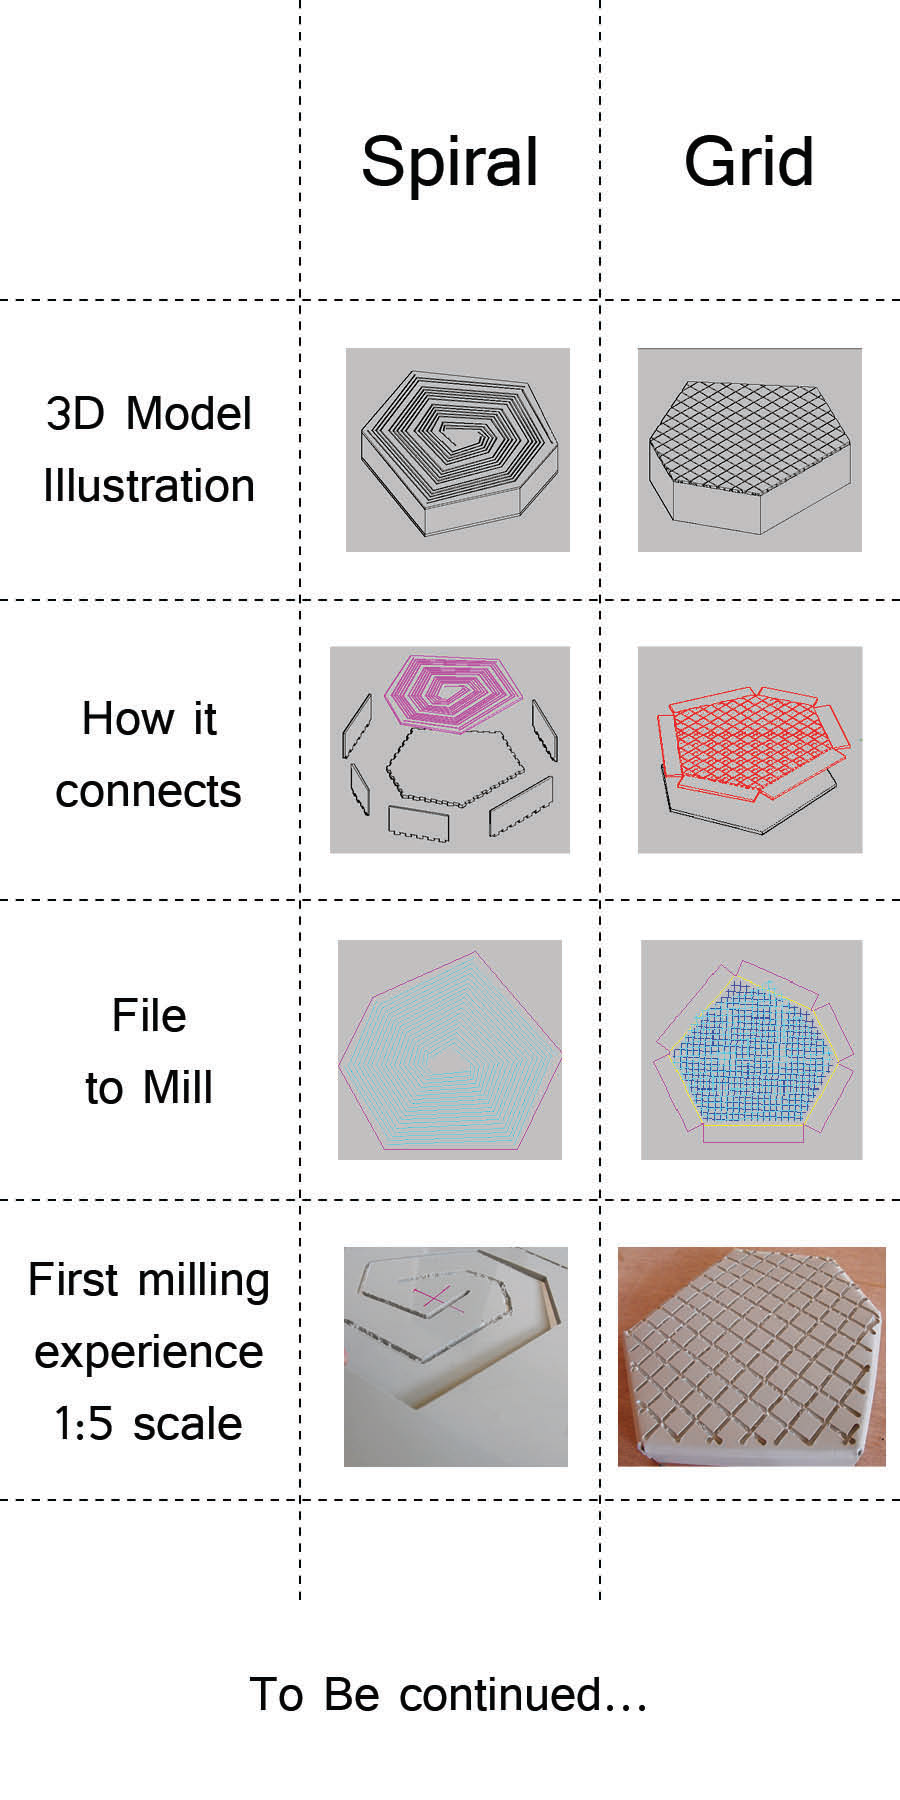
After the test I chose to focus on the technique of the grid because it creates a bowl shape controllable contrast spiral
לאחר הבדיקה בחרתי להתמקד בטכניקה של הגריד מפני שהיא יוצרת צורה קערתית הניתנת לשליטה בניגוד לספירלה
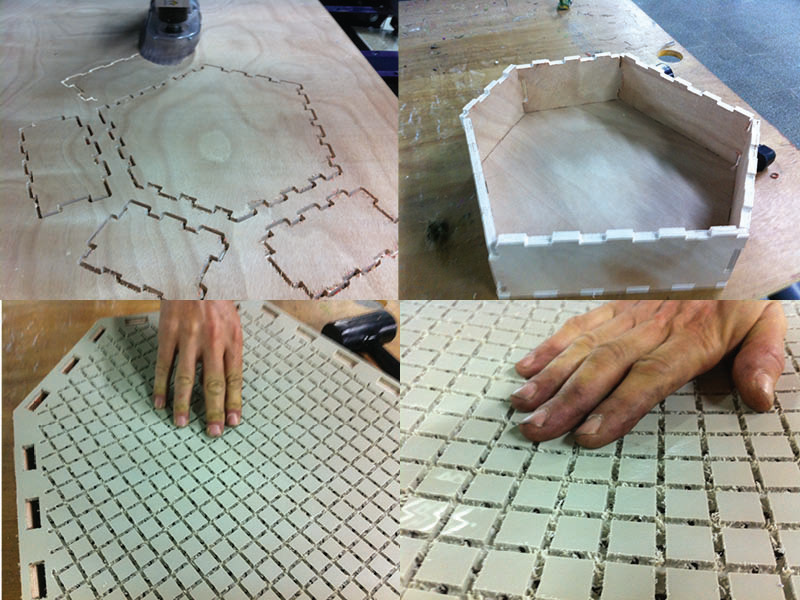
Step covers:
:מכסה דריכה

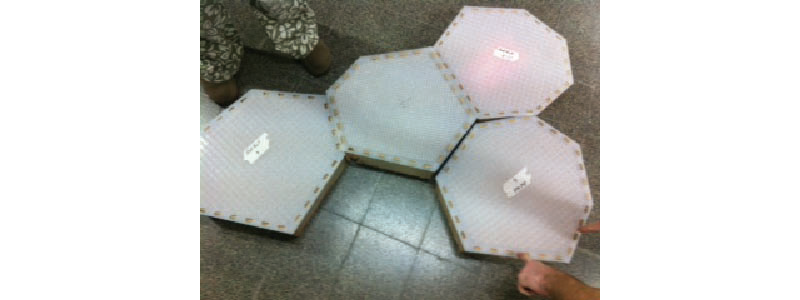
Box:
:קופסא

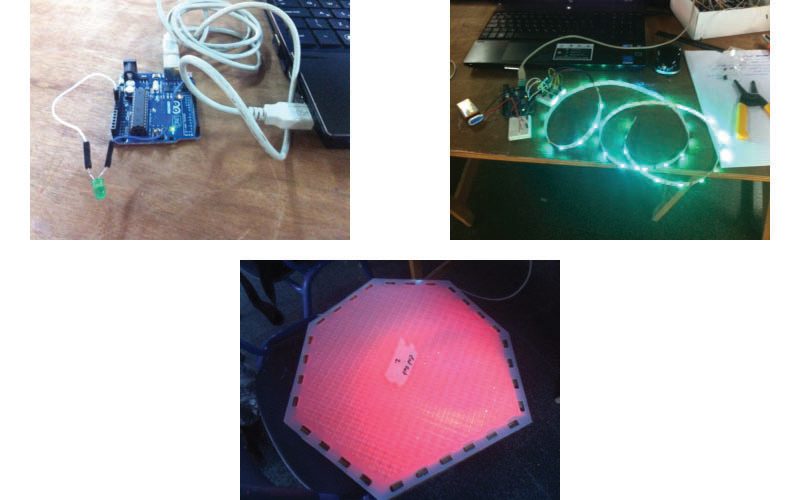
The next step is to program the end unit…
… הצעד הבא הוא לתכנת את יחידת הקצה
Input – bending of the cover
Liron made pressure sensor, I connected the flexible button under the lid of the end unit, programming mapping the range of values of the volume term Hsansor every message is from 0 to -127
אינפוט -כיפוף של המכסה
לירון הכינה חישן לחץ, אני חיברתי את הלחצן מתחת למכסה הגמיש של יחידת הקצה, בתכנות מיפיתי בין טווח הערכים של הסאנסור לטווח הווליום של הודעת מידי שהוא בין 0 ל-127
Atfot – LED Lighting
We use a RGB LED serif 12 V, programming was based on existing code that plays with shades of the LED. Each end unit received its own game
אטפוט – הדלקת נורת הלד
שתמשנו בסריפ לאדים של 12 וולט, בתכנות התבססתי על קוד קיים שמשחק עם הגוונים של הלאדים. כל יחידה קיבלת משחק משלה
To be continued…
…המשך יבוא