
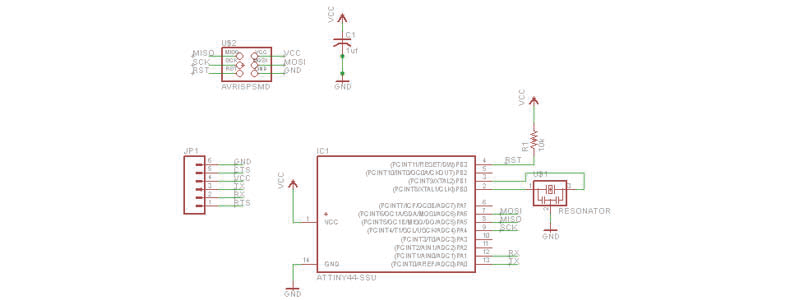
Step 1: Download the files
You have to download the schematic file
שלב 1: הורדת הקבצים
יש להוריד את הקובץ הסכימתי של הלוח
Step 2: Download and install the components library
שלב 2: הורדה והתקנה של ספריית הרכיבים
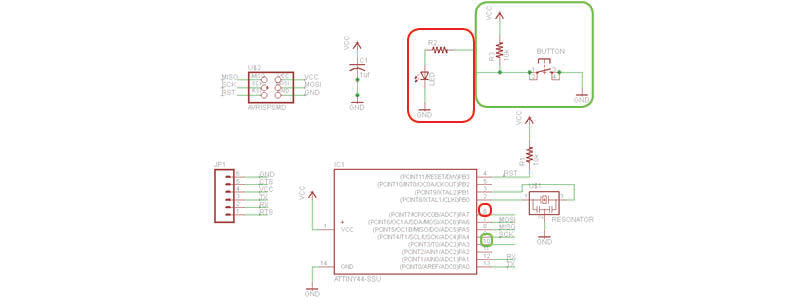
Step 3: Adding LED and Button and Edit the schematic
In the schematic I would add the LED and the button and we’ll make the connections
שלב 3: הוספת לאד וכפתור ועריכה של הסכימתי
בשרטוט הסכמתי נוסיף את הלאד והכפתור ונבצע את החיבורים
Step 4: Creating Connections and Design the board
To make the connections we need to go to the board , there is an automatic בommand that creates for us the connections, used it and then add the missing connections
שלב 4: יצירת החיבורים ועיצוב הלוח
בכדי ליצור את החיבורים נעבור לשרטוט בלוח, ישנה פעולה אוטומטית היוצרת לנו את החיבורים, נעזר בה ולאחר מכן נוסיף את החיבורים החסרים

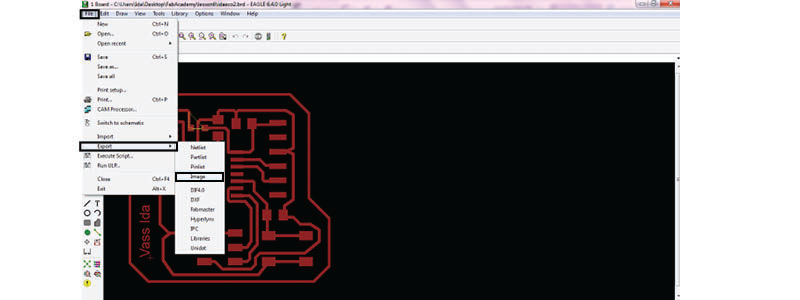
Step 5: Save the file as a picture
Is very important to save the image in monochrome at 600 DPI
שלב 5: שמירת הקובץ כתמונה
DPI חשוב מאוד ששומרים את התמונה לשמור בשחור לבן, ב-600
Step 6: Convert the image to G-Code
With the FabModols software will convert the image file to a G-Code
G-Code-שלב 6: המרת התמונה ל
G-Code- בעזרת תוכנת הפאב מודולס נמיר את קובץ התמונה ל

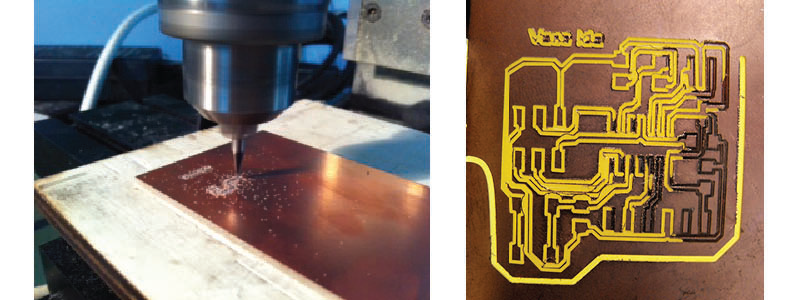
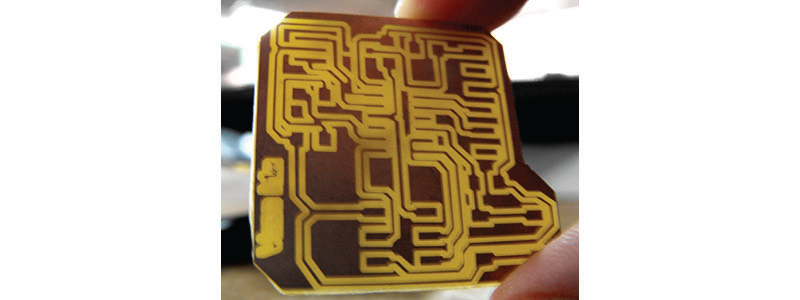
Step 7: Milling the board
I milled the board on SherLine mini milling machine (this identical to the Modella)
שלב 7: כרסום הלוח
(את הלוח כרסמתי במכונת שר-ליין (מכונה זה למדאלה
As you can see, The first trying to milled failed because the board was not flat (well glued to milling table). Second attempt succeeded…
…כפי שניתן לראות, ניסוין ראשון לכרסום לא הצליח בגלל שהלוח לא היה שטוח (מודבק טוב לשולחן הכרסום). ניסיון שני הצליח
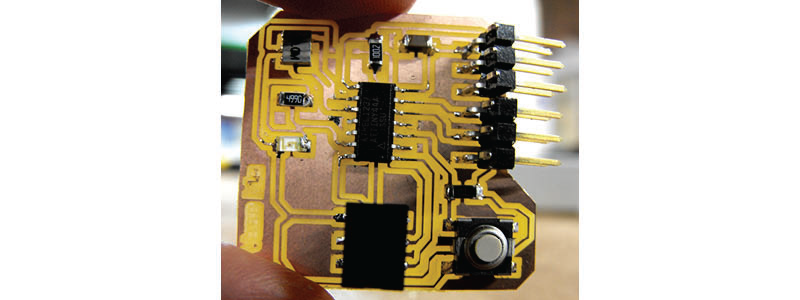
Step 8: soldering components
שלב 8: הלחמת הרכיבים
And that’s it …The programming will come soon…
Programming comes next
…וזהו…התכנות יבוא בהמשך
Final file:
:קובץ סופי