This week we discussed abuot molding and costing molds, I chose to deal with two different ways to create molds.
השבוע עסקנו בכרסום תבניות ליציקה, אני בחרתי להתעסק בשתי דרכים שונות ליצירת תבניות
The first option: laser + vacuum forming
Step 1: I created a two dimensional sketch of a pendant in AutoCAD
אופציה ראשונה: חיתוך לייזר + ואקום פורמינג
בשלב 1: יצרתי שרטוט דו מימד באוטוקאד של תליון לשרשרת
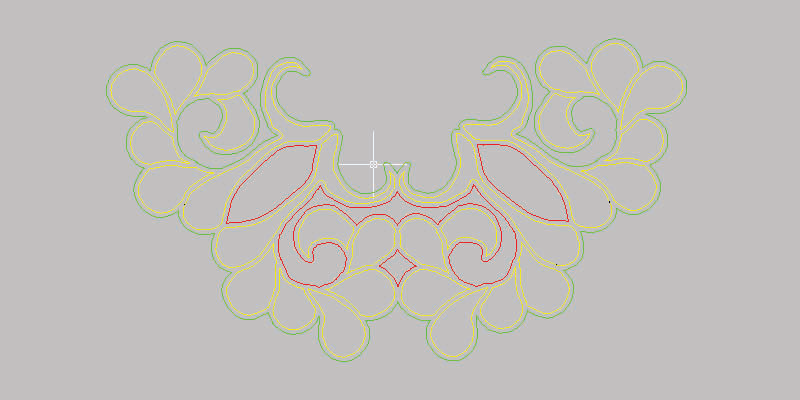
Note:
~You can draw a lines shape and then give it an offset to two directions for getting thickness.
~While doing offset, consider the material that you cutting.
~The different colors of the lines indicate the order of the cutting, the red lines are cut first because they’re the most interior, Then the yellow lines and finally the green lines that are the frame of shape.
:הערות
.ניתן לצייר את הצורה כציור קווי לאחר מכן לתת עובי לשני כיוונים ~
.כשנותנים עובי יש לקחת בחשבון את החומר אותו אנו חותכים בלייזר~
הצבעים השונים של הקווים מסמנים את סדר החיתוך, הקווים האדומים נחתכים ראשונים בגלל שהם הכי פנימי ~
.לאחר מכן הקווים הצהובים ולבסוף הקווים הירוקים שהם המסגרת של כל הצורה
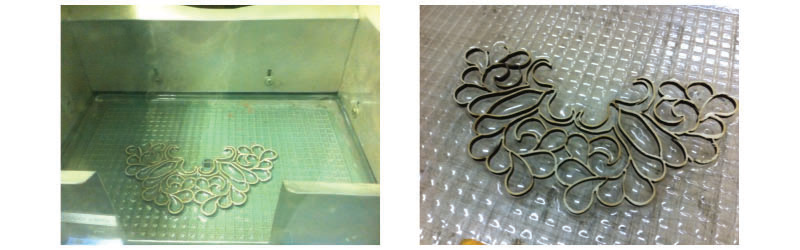
Step 2: Laser cut to shape: I used leftover of Birch 4 mm
שלב 2: לחתוך בלייזר את הצורה: אני השתמשתי בשאריות של בירץ 4מ”מ

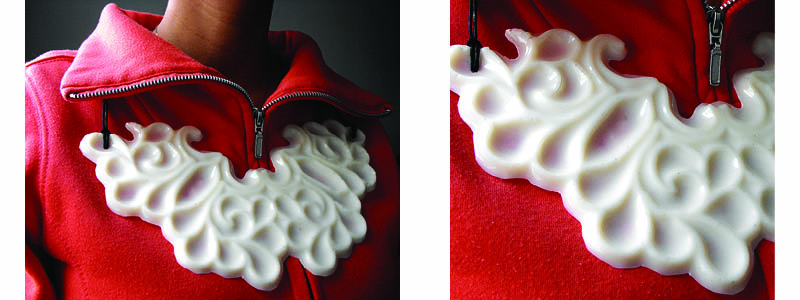
Step 3: Vacuum forming on the stencil, I used PVC 1 mm to create the final mold
.שלב 3: לעשות וואקום פורמינג על השבלונה שנוצרה, אני השתמשתי בפי.בי.סי 1 מ”מ ליצירת התבנית הסופית
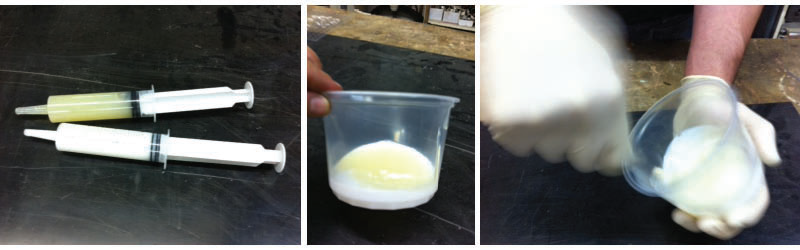
Step 4: Preparing the molds and material
~The mold has oil, I used a transparent oil spray
שלב 4: הוא הכנת התבנית ליציקה והחומר
את התבנית יש לשמן , אני השתמשתי בספריי שמן שקוף~

~The material I poured is an epoxy glue – 3M 460 white, usually used as a glue for it’s rigidity and durability.
~Material itself consists of base and hardener – mixing ratio is 2:1.
~For added strength 15% Arrosil powder was added to the mixture.
~You need to stir the mixture well until a uniform texture. While stirring you sold tap the bowl on the table to remove the air bubbles.
.החומר אותו יצקתי הוא דבק אפוקסי 3-אם 460 לבן, המשמש להדבקה, נוקשות ועמידות~
.החומר עצמו מורכב מבסיס ומקשה, יחס הערבוב הוא 1:2~
.בנוסף על מנת להוסיף חוזק לתוצר הסופי הוספתי אבקת ארוסיל, בערך 15% מכמות התערובת~
.את התערובת יש לערבב טוב עד לקבלת מרקם אחיד. תוך כדי הערבוב כדי לתפוח את הקערה על השולחן כדי להוציא את בועות האוויר~
Then pour the mixture into the PVC mold and finish by cleaning the excess with a putt.
Tap the mold on the table several times.
לאחר מכן יש לשפוך את החומר לתבנית והסוף על ידי שפכטל לנקות את העודפים
.גם את התבנית יש לטפוח על השולחן מספר פעמיים

After six hours You can remove the casting, and using a knife to clean the edges
Now, just, puta a string to the pendant … and enjoy…
לאחר שש שעות ניתן לחלוץ את היציקה, ובעזרת סכין לנקות את השוליים
….עכשיו נישאר רק לשים חוט לתליון…ולהנות
Final file:
:קובץ סופי
Second option: Four parts milled mold and injection of material
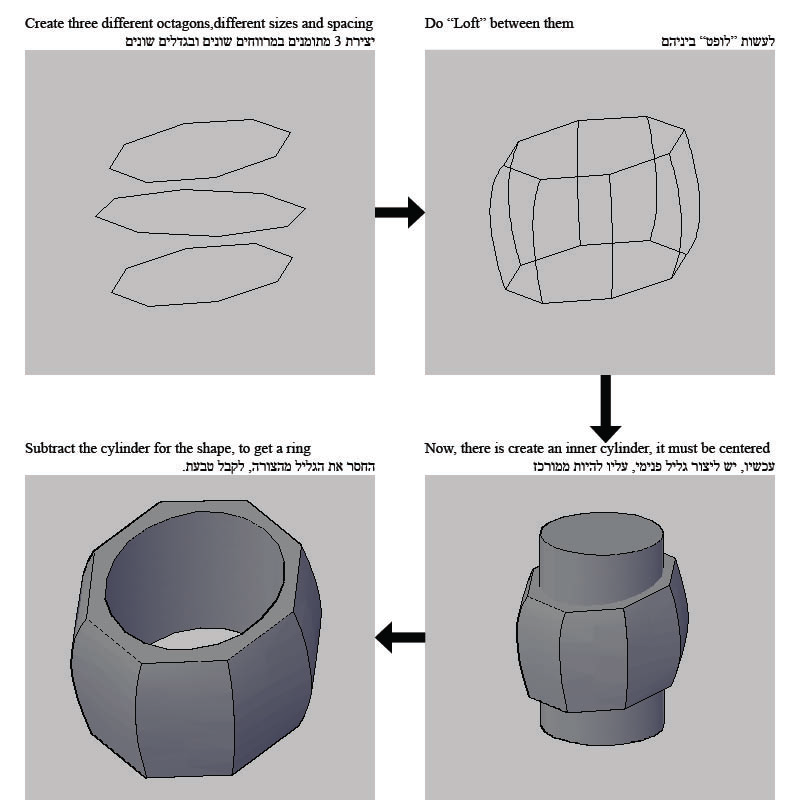
Step 1: Create a model of a ring
אופציה שנייה: תבנית ארבעה חלקים מכורסמת והזרקה של החומר
שלב 1: יצירת מודל של טבעת
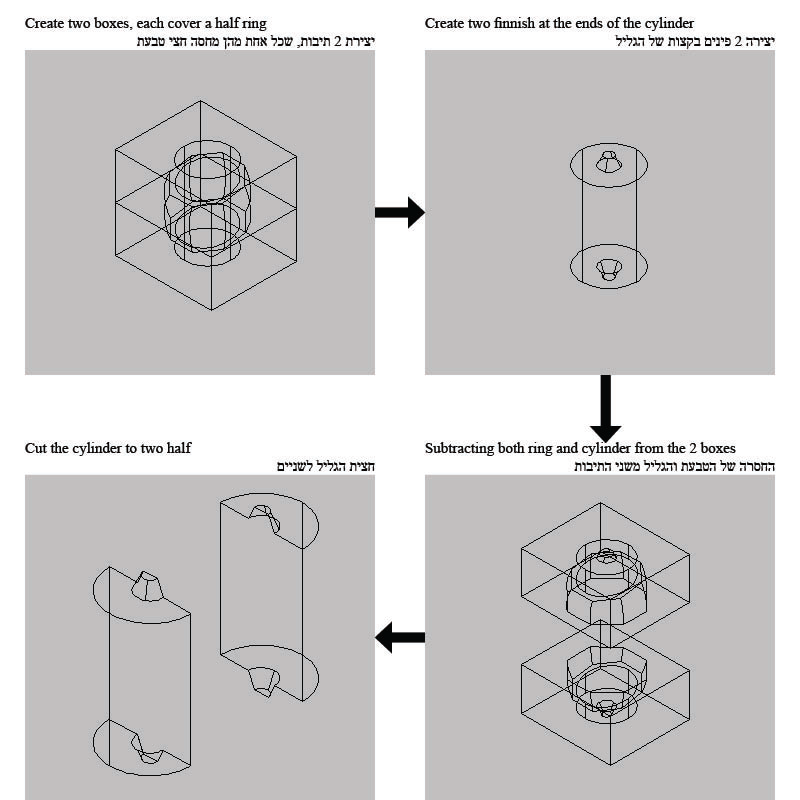
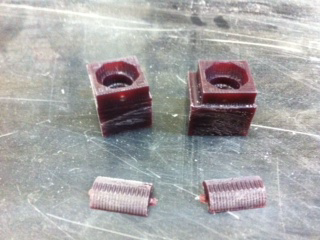
Step 2: Create the four parts of the mold
שלב 2: יצירת ארבעת חלקי התבנית
Step 3: Connect all the parts to one wax block
שלב 3: חיבור כל החלקים לגוש שעווה אחד

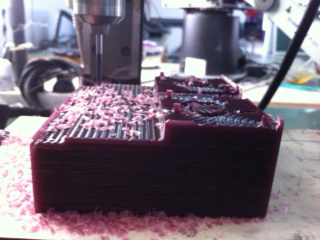
Step 4: Milling the wax block in two stages
Stage 1, rough, milling with 3.7 mm round edge. Stage 2, finish, with 3 mm flat edge.
שלב 4: כרסום השעווה בשני שלבים
שלב ראשון כרסום: גס עם כרסום 3.7 מ”מ קצה עגול ולאחר מכן כרסום גימור עם כרסום 3 מ”מ קצה שטוח
Step 5: Separation of the four parts from the wax block with a chainsaw delicate
שלב 5: הפרדה של ארבעת החלקים מהגוש בעזרת מסור עדין
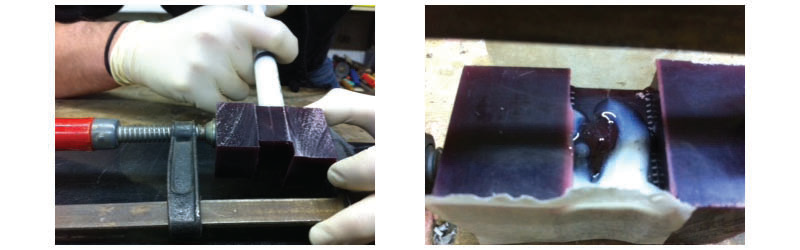
Step 6: Connection of the parts and injection material to the end of the air pipe material
שלב6 : חיבור החלקים והזרקת החומר עד ליציאה של החומר מצינור האוויר
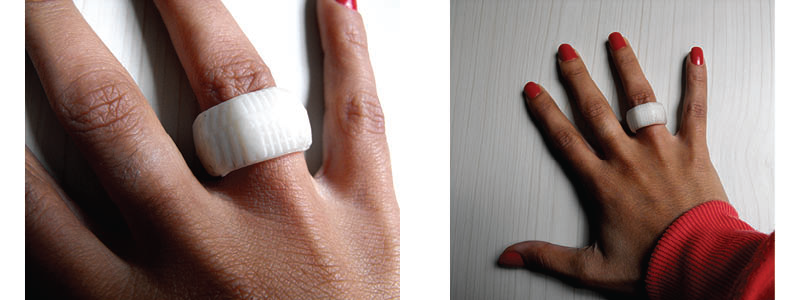
Step 7: extraction of the ring after seven hours of drying
To extract the ring easily put the total bowl of warm water for a few minutes to melt the wax slightly
שלב 7: חליצה של הטבעת לאחר 7 שעות יבוש
על מנת לחלץ את הטבעת בקלות הכנסתי את הכל לקערת מים חמים למספר דקות בכדי להמס מעט את השעווה
Step 8: fine sanding ring…and enjoy…
…שלב 8: שיוף עדין של הטבעת ולהנות
Final file:
:קובץ סופי