Software: Digitizer
Before starting, a design must be chosen for sure or created. I chose the apple logo ... again, and i think by now you can expect that xD, the logo is found here:
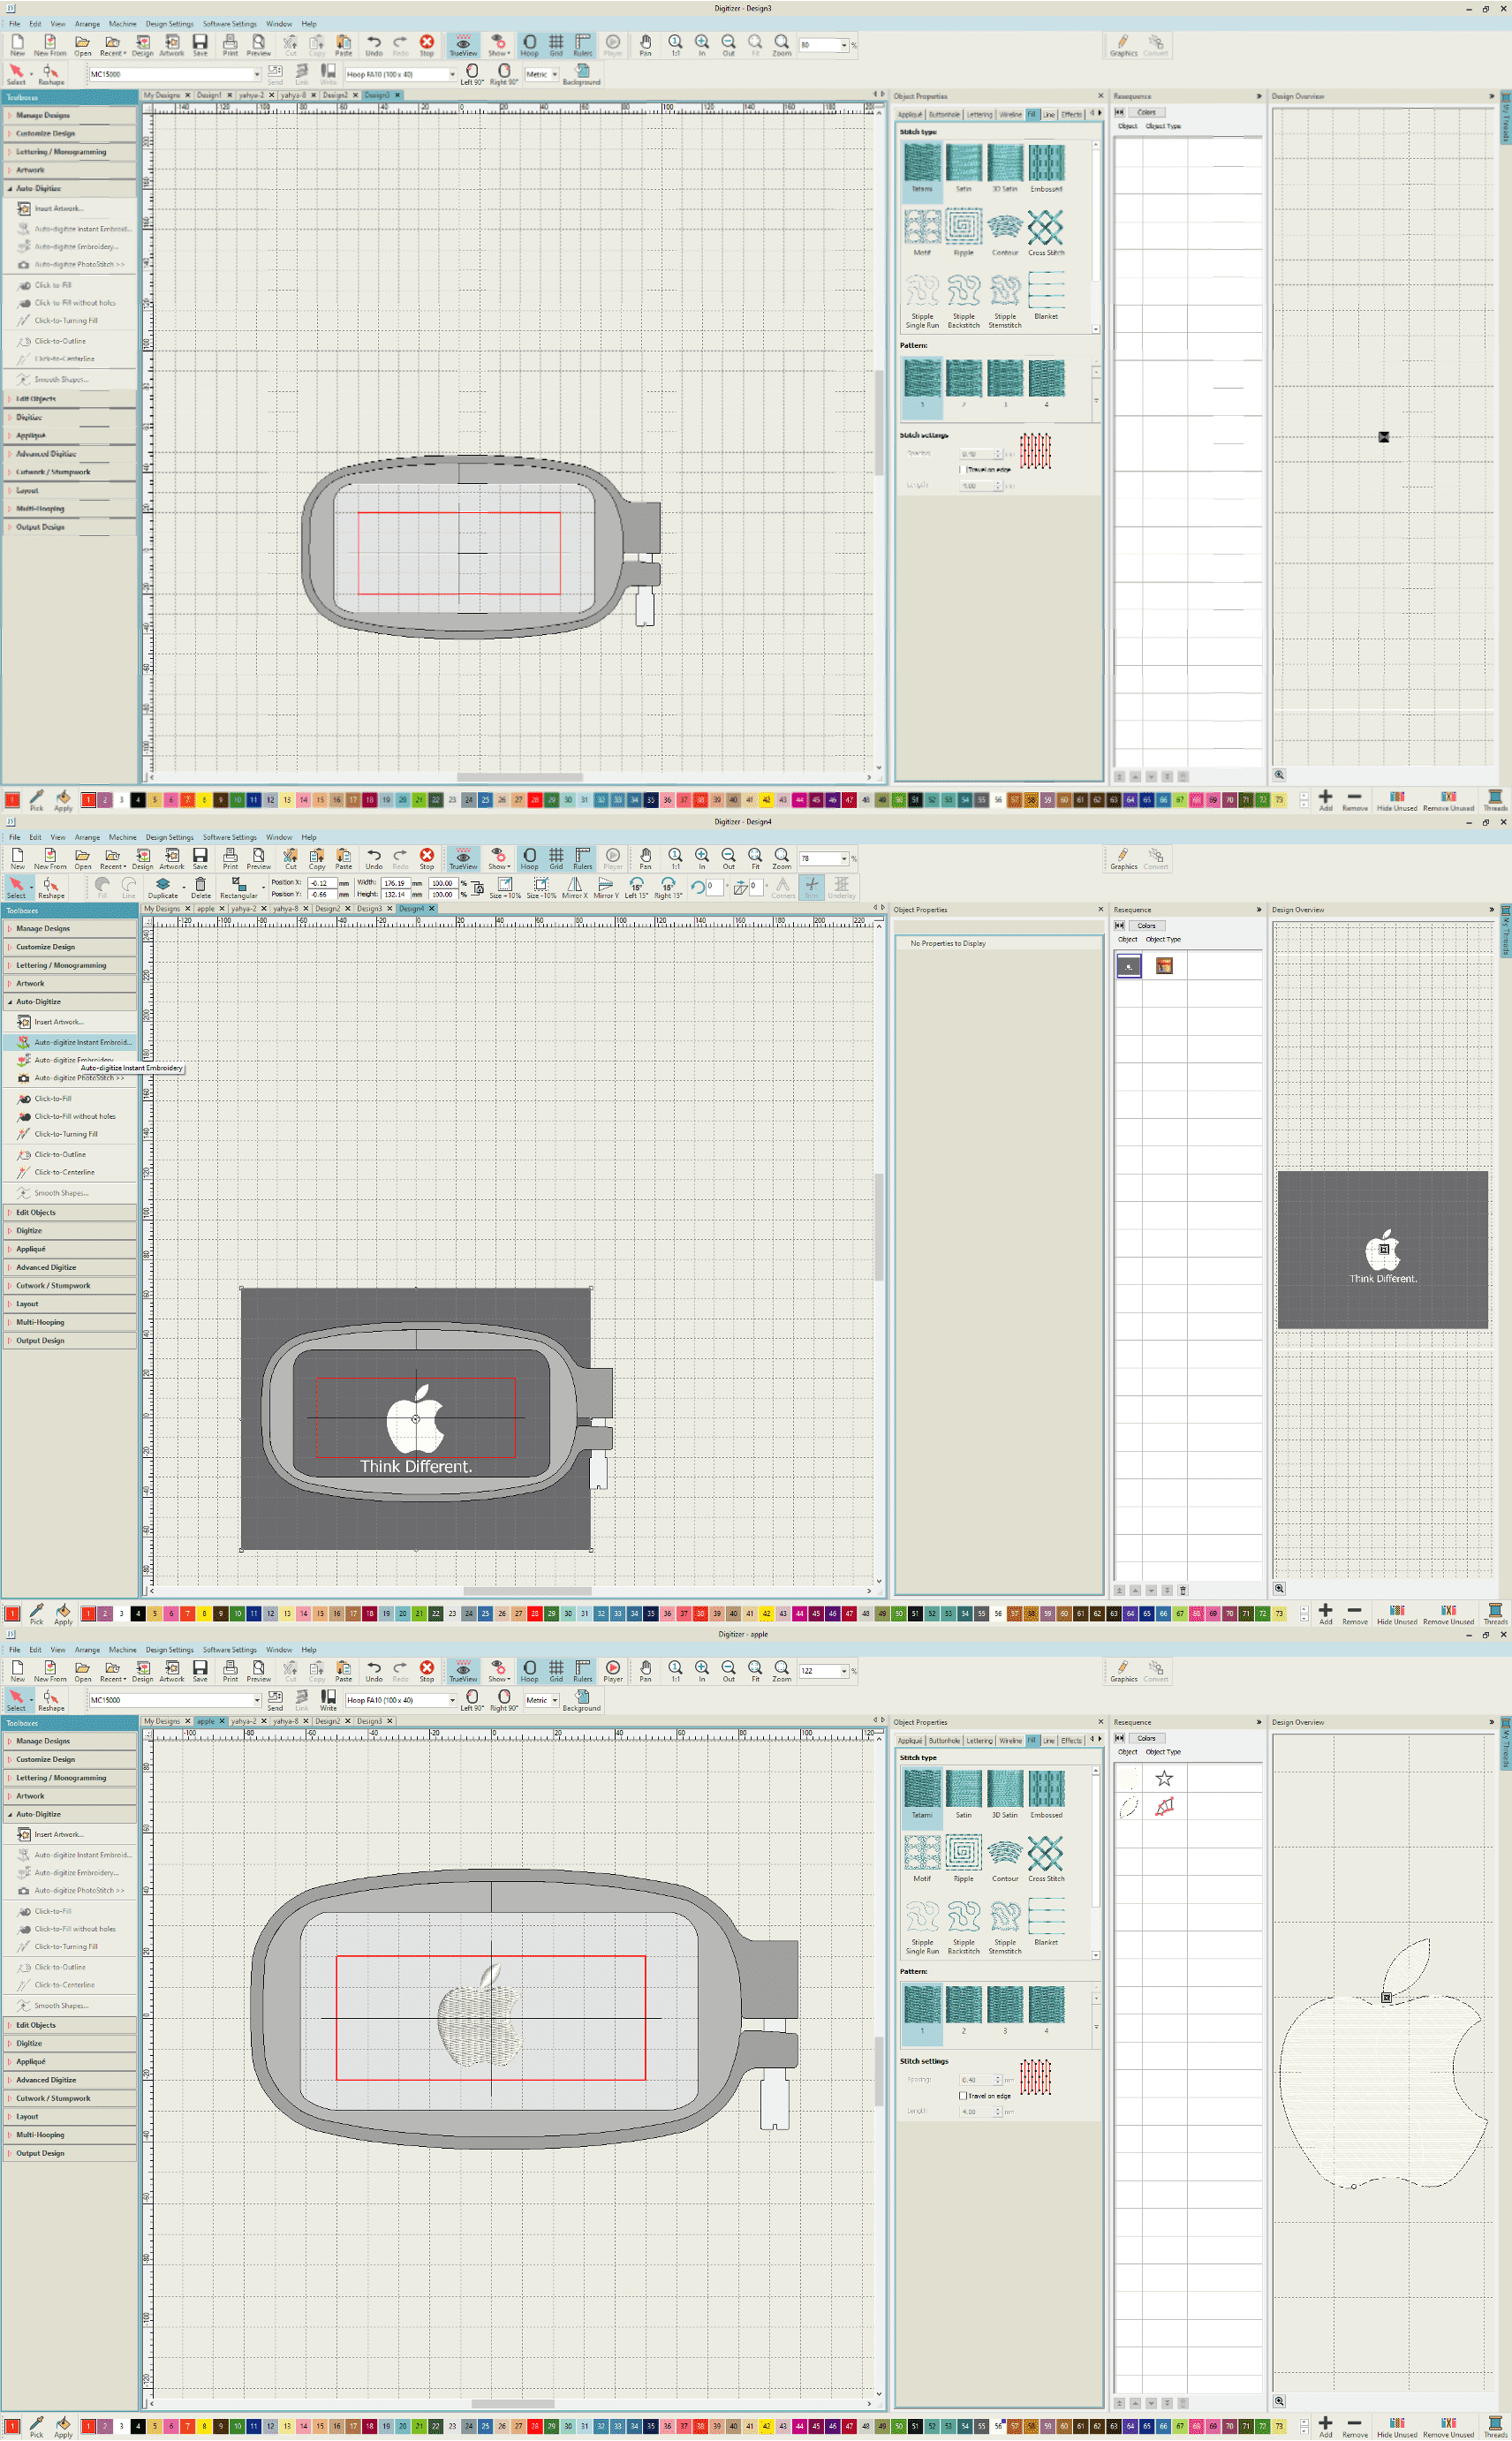
Apple Logo File. Now, ready to start with the software part. I opened the sewing machine application called "Digitizer" and did the following:
Opened a new page
Depending on the design, the size of the hoop is determined and then chosen from the Hoop icon on the top tab. The hoop size is found on the base of hoop itself in case of confusion.
On the left hand side tab,under artwork i chose " insert artwork"
Then the apple logo picture was chosen
After that, the picture will be viewed with the hoop to allow us to resize based on the required size.
Under the Auto-Digitize tab, Auto-digitize instant embroidery option was chosen, after that the picture will be converted as an embriodered piece to mimic the actual look.
Stich preferences are also available to be chosen, and under the "resequence" tab, all components of the design will be broken down into individual items that can be selected separately, from there i was able to delete the unwanted parts of the design.
Design is ready to be exported to machine.
Downloads
Downloads
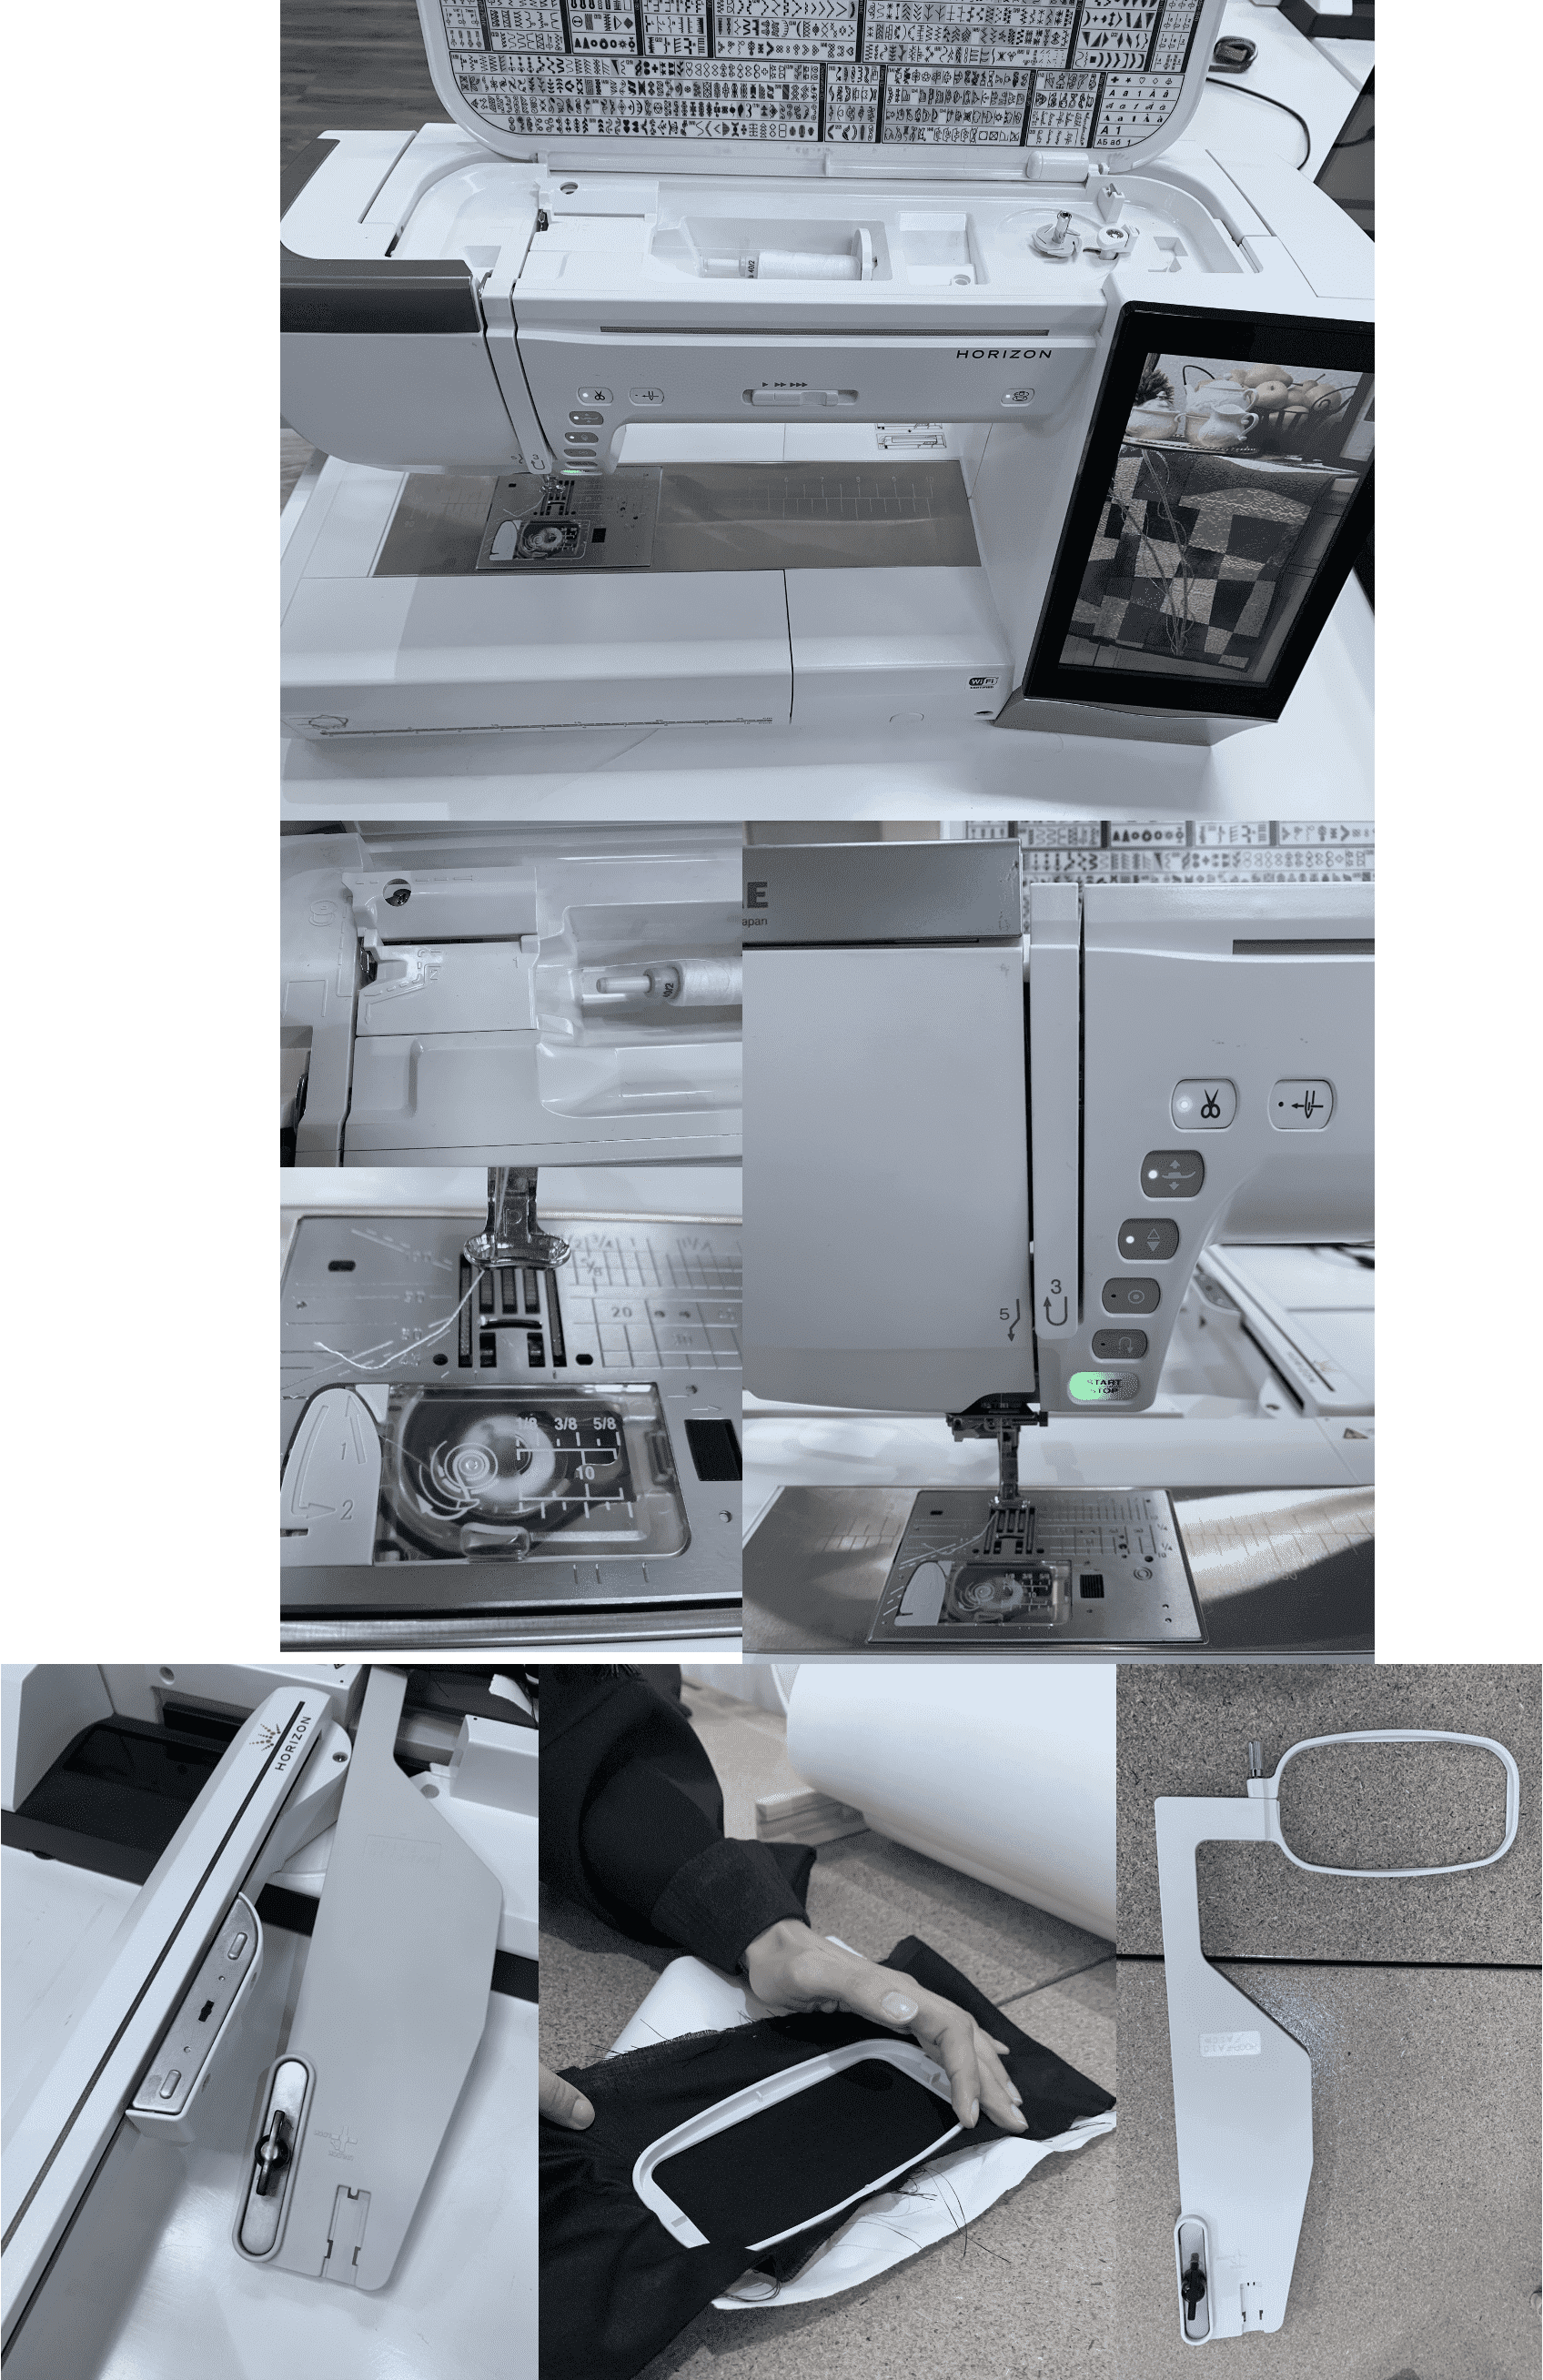
Machine: Janome Horizon Quilt Maker MC15000
Before importing the design, the machine must be prepared first. What 's really great about the machine is that full guidance is shown on the body itself. Beginning with the insertion of the main thread, the path of the thread is shown in 5 steps until it is inserted in the needle.The same applies for the bottom thread and for inserting and locking the hoop.
After the material is chosen, a piece of paper is cut and placed in the hoop under the material and then pressed on, making sure that it is stretched and not loose, the paper serves as a flat base for making the sewing process smooth.
Now, we are ready for importing the design. After connecting the USB, the steps are straight forward, the folder icon at the bottom of the screen is chosen and then from the usb we can see all available files and find our design. After choosing the design, we just need to make sure that the settings such as the hoop size and everything is in place to start the process, also there will be section stating the total duration and how long it will take to finish the design. Then the button on the machine "Start/Stop" is pressed. Results are shown below.
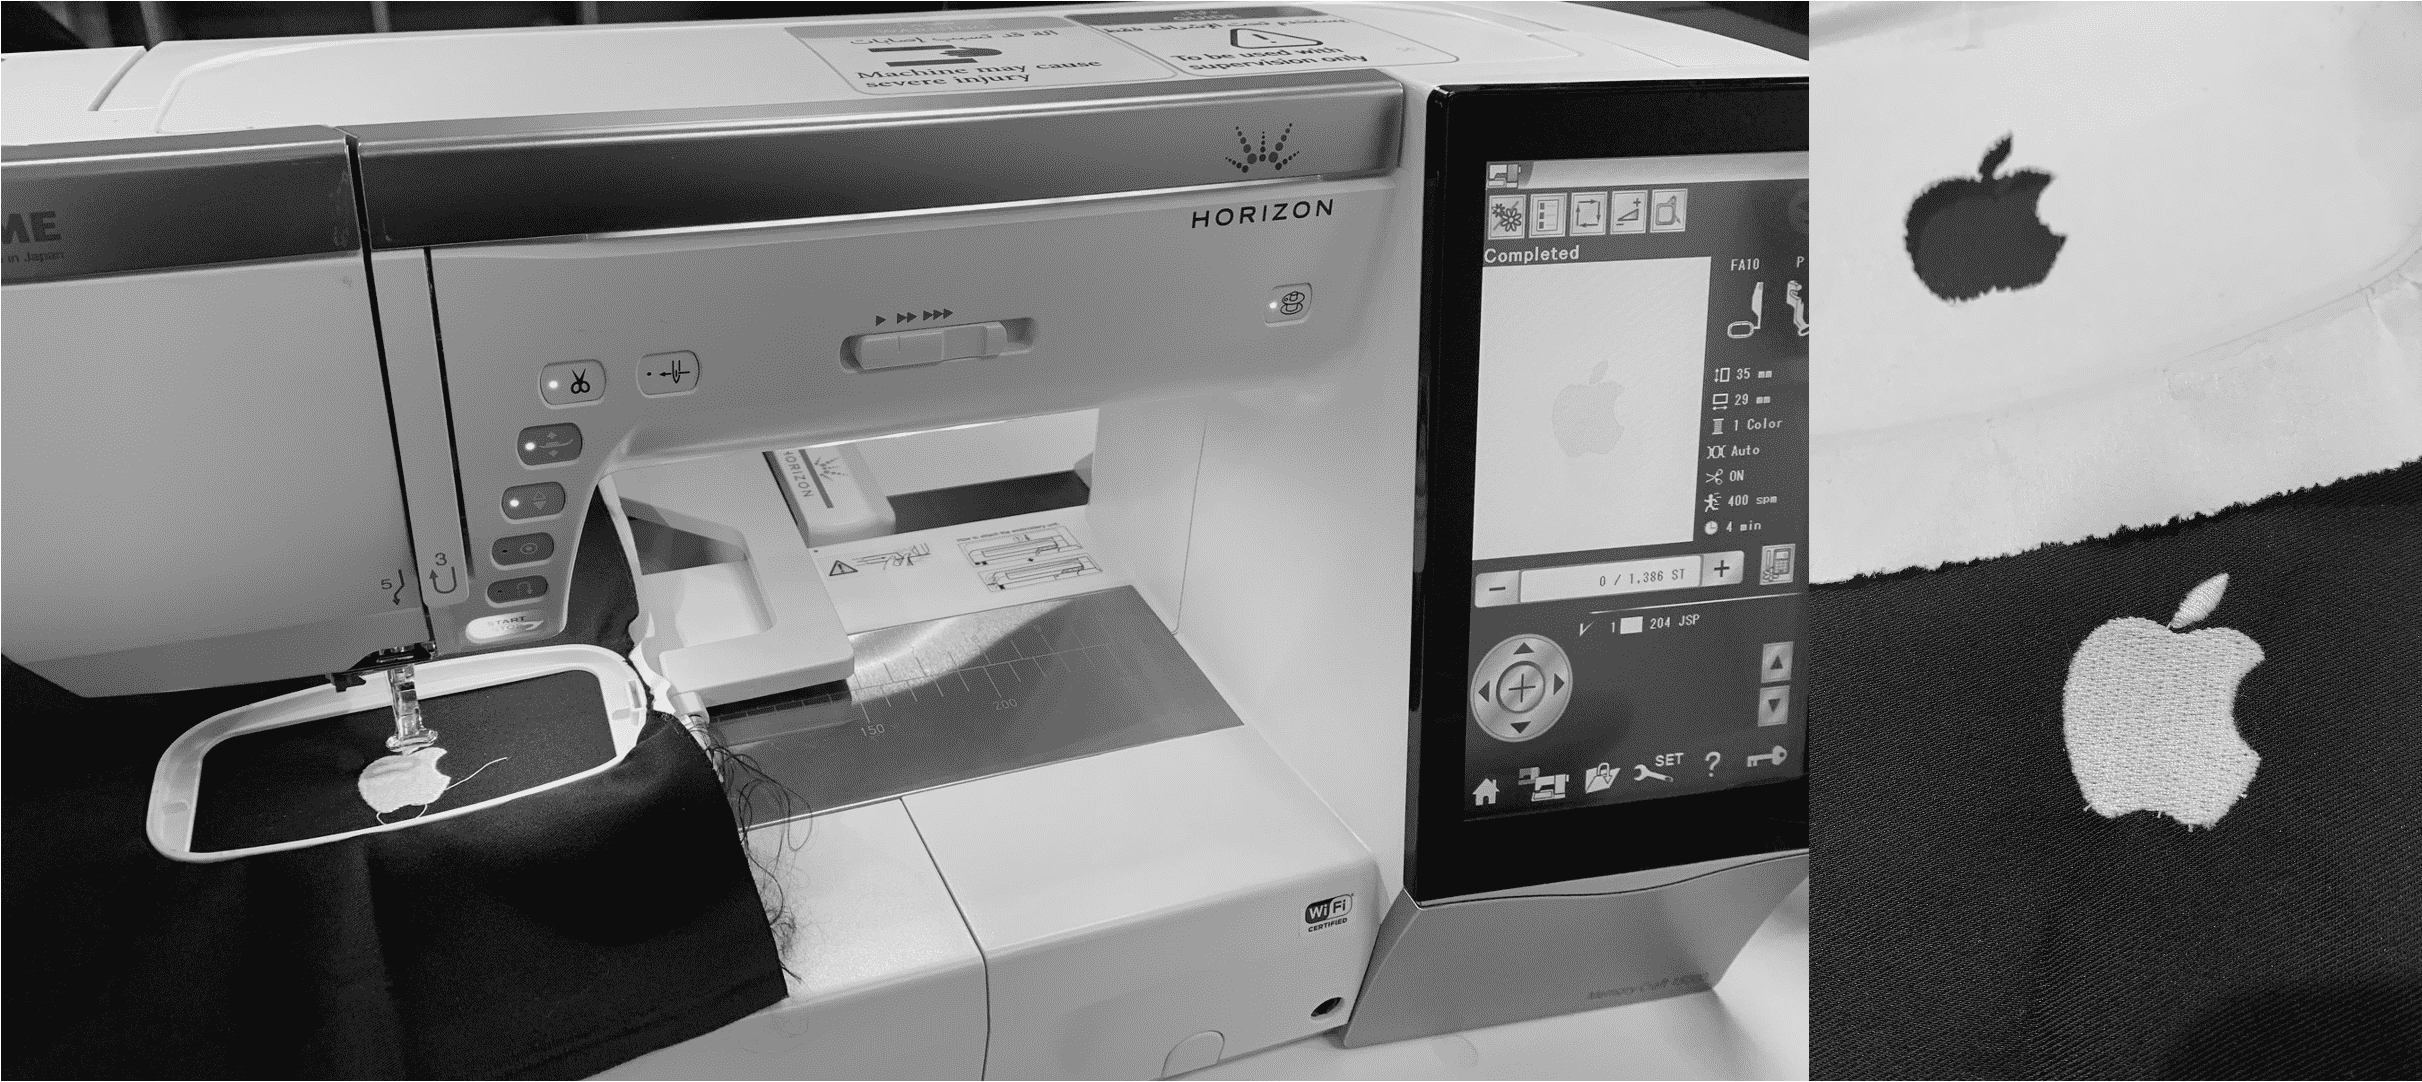
Result
Experience
At the beginning, i thought the sewing process will be similar to the traditional one and wasn't really looking forward to it since i was never really intrested in handcrafts or similar things, but the digital part of the machine is what made it interesting and the fact that it can be done in less than 10 minutes! There are many machines to explore in the lab and i'm looking forward to do so.