Using C language
C language is used to program the microcontroller, but the microcontroller itself understands hex instructions which are hard to code for us humans. Thus, the program is compiled to obtain the hex instruction to flash it in the microcontroller.The c compilation process converts the source code taken as input into the object/machine code. The compilation process can be divided into four steps:Pre-processing, Compiling, Assembling, and Linking.
The Attiny44 used here is part of AVR , which is a family of microcontrollers developed since 1996 by Atmel. Thus, AVR® Toolchain needs to be installed which is a collection of tools/libraries used to create applications for AVR microcontrollers.
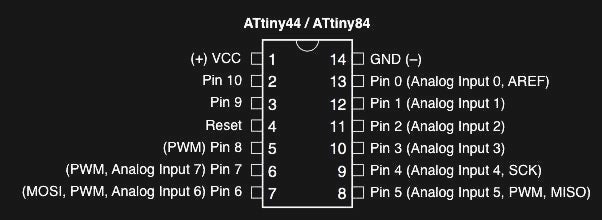
Before writing the code, we were introduced t0 the basics of I/O Pins for an AVR Microcontroller, and then the pinout of the attiny44 was studied to write the code using the correct pins from the datasheet, which also defines the function of each pin, this will make us design the code and board according to our needs and with respect to availability of pins. For writing the code, we used the software CodeBlocks, which is a free open source C, C++ and Fortran IDE, and Freematics Builder which is a fully self-contained utility which integrates all the toolchains, Arduino cores and libraries for easily uploading Arduino sketches or pre-compiled binaries to one of AVR based Arduino boards . Mac users weren't able to install it thus we had to borrow a windows laptop to work on it. It is worth mentioning that an Arduino is just an AVR microcontroller with some special boot loading code and a USB-to-serial converter. We had the opportunity to test the softwares on Arduino board by making it blink. In Code Blocks, the processor chosen before writing the code is Atmega328p which is found in the Arduino. Then, after verifying that the code is free of errors, the file is converted to .hex, which is used to inputd in the Freematics Builder to upload the code onto the board where the arduino starts to blink, verifying the validity of the code.
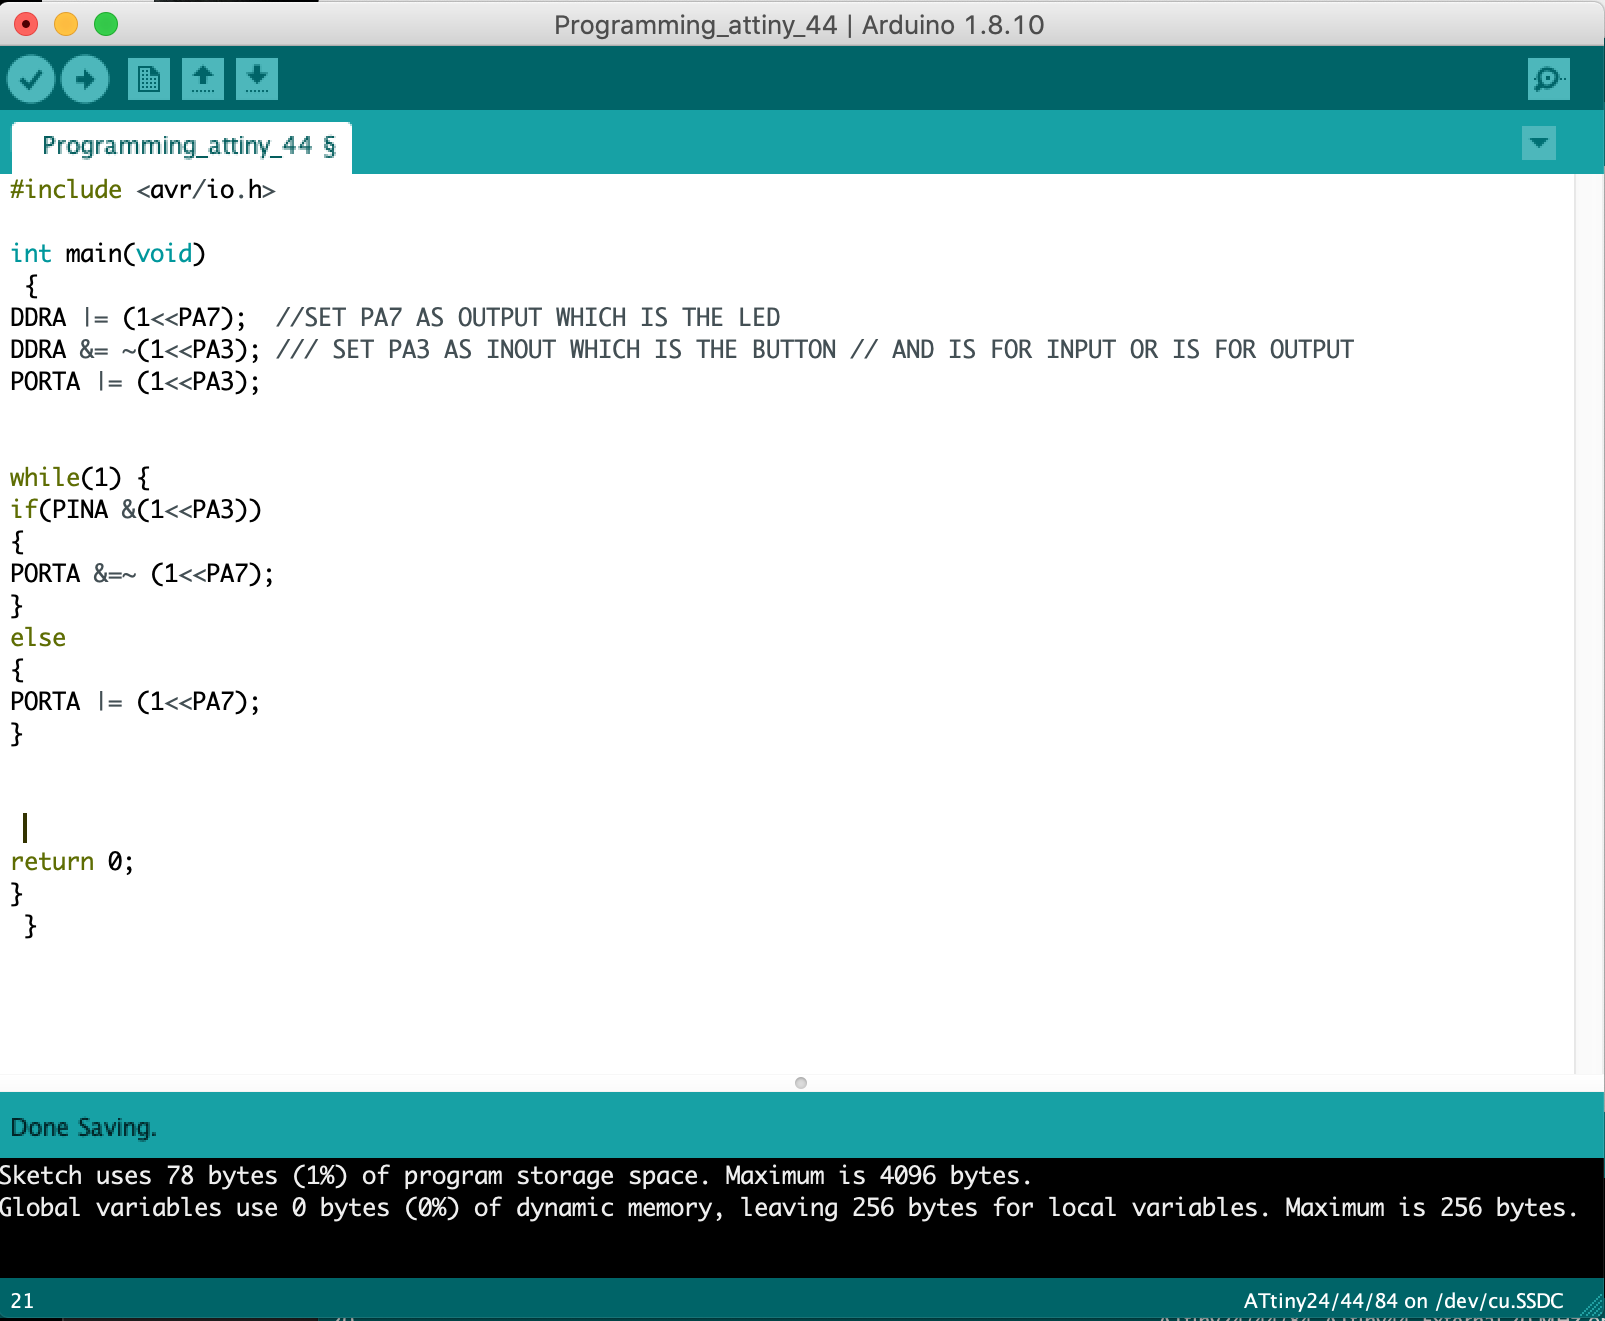
In the same manner, i wrote the code for the Attiny44 board and copied it to be used in the Arduino IDE.I connected the FabISP to board using the ribbon cable.Here i faced some issues making the laptop recognize my FabISP, thus i had to complete the process on my colleagues laptop. After detecting the FabISP, the following steps were followed in Arduino IDE:
Downloads
The Attiny44 used here is part of AVR , which is a family of microcontrollers developed since 1996 by Atmel. Thus, AVR® Toolchain needs to be installed which is a collection of tools/libraries used to create applications for AVR microcontrollers.
Before writing the code, we were introduced t0 the basics of I/O Pins for an AVR Microcontroller, and then the pinout of the attiny44 was studied to write the code using the correct pins from the datasheet, which also defines the function of each pin, this will make us design the code and board according to our needs and with respect to availability of pins. For writing the code, we used the software CodeBlocks, which is a free open source C, C++ and Fortran IDE, and Freematics Builder which is a fully self-contained utility which integrates all the toolchains, Arduino cores and libraries for easily uploading Arduino sketches or pre-compiled binaries to one of AVR based Arduino boards . Mac users weren't able to install it thus we had to borrow a windows laptop to work on it. It is worth mentioning that an Arduino is just an AVR microcontroller with some special boot loading code and a USB-to-serial converter. We had the opportunity to test the softwares on Arduino board by making it blink. In Code Blocks, the processor chosen before writing the code is Atmega328p which is found in the Arduino. Then, after verifying that the code is free of errors, the file is converted to .hex, which is used to inputd in the Freematics Builder to upload the code onto the board where the arduino starts to blink, verifying the validity of the code.
In the same manner, i wrote the code for the Attiny44 board and copied it to be used in the Arduino IDE.I connected the FabISP to board using the ribbon cable.Here i faced some issues making the laptop recognize my FabISP, thus i had to complete the process on my colleagues laptop. After detecting the FabISP, the following steps were followed in Arduino IDE:
- Tools>Board>Attiny24/44/84 (after installing Attiny44 library)
- Processor>Attiny44
- Clock>External 20MHz
- Programmer>USBtinyISP
- Tools>Burn Bootloader (this step is only done once)
- Sketch>Upload
Downloads
Using Arduino Language
Due to their simplicity, the programs that are written using the Arduino IDE are called sketches, which are text files written in Arduino language.
There are three main parts that make up the
Arduino programming language:
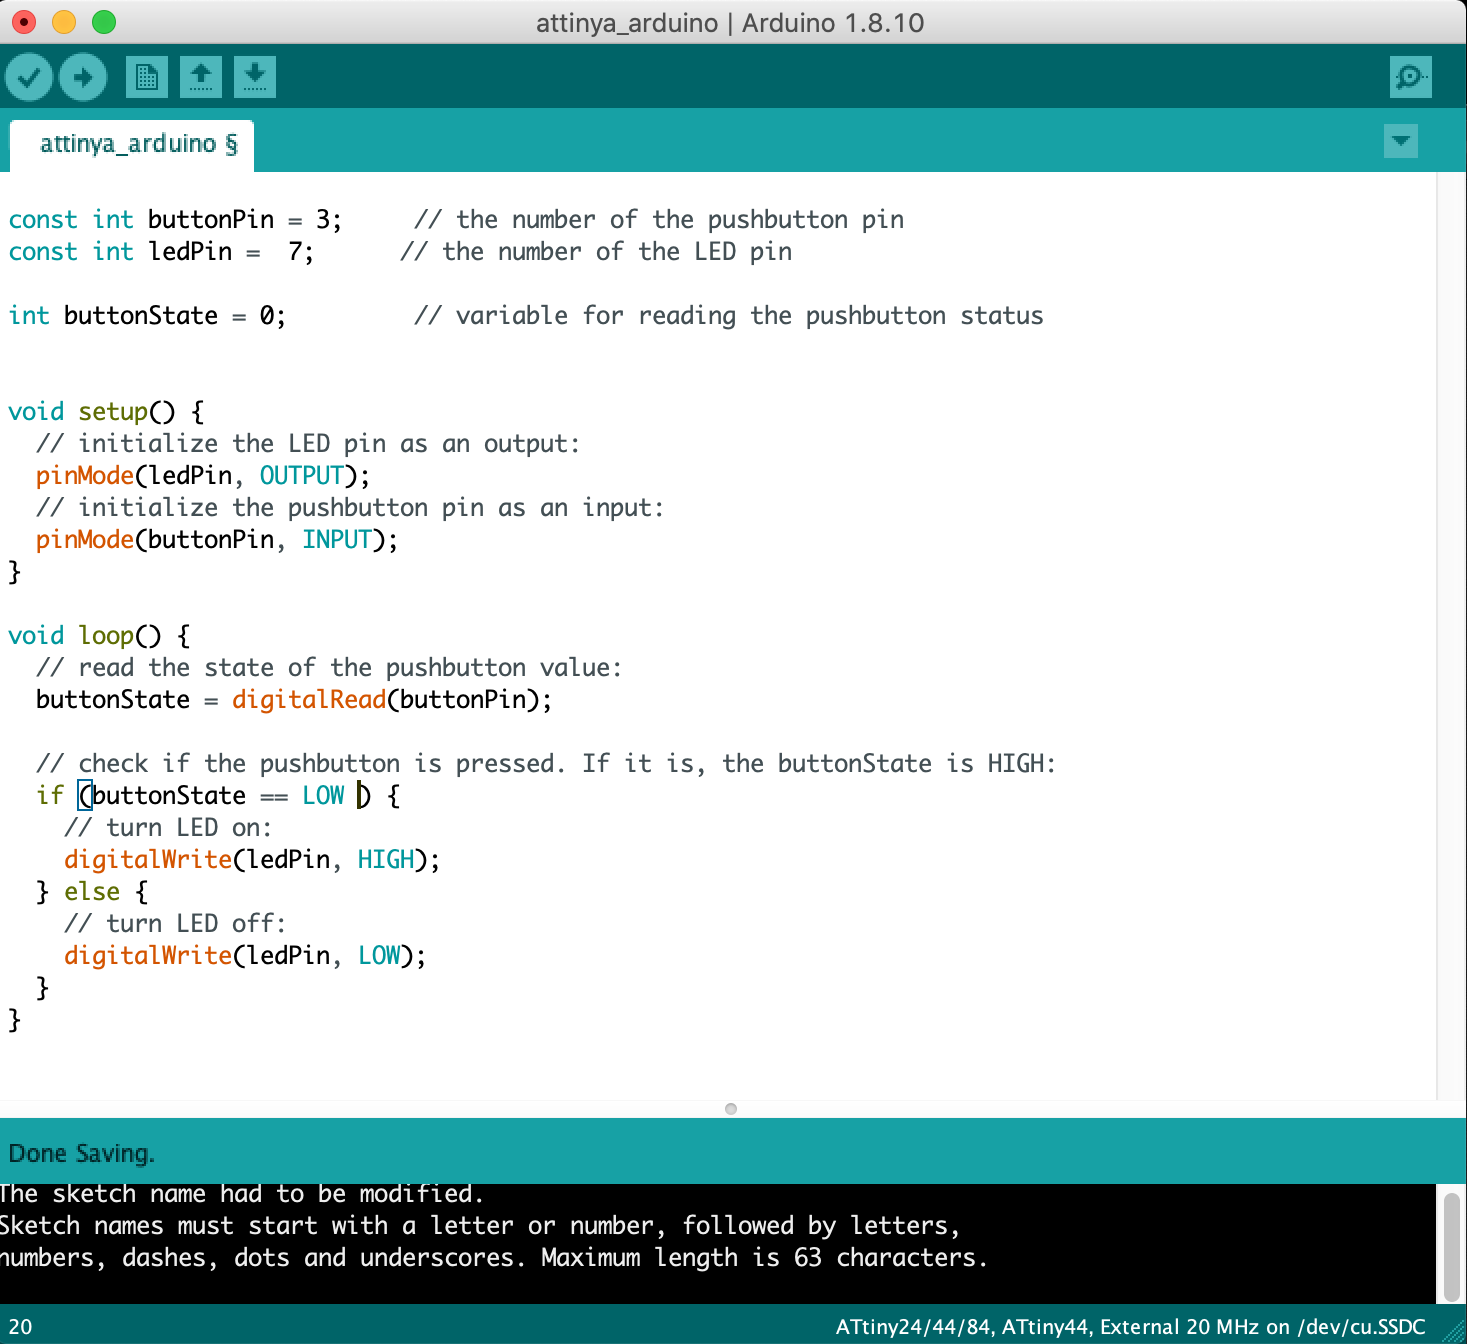
Keeping the last settings used in the C language section, the code was written and was uploaded only without burning bootloader. Board was working fine, this time i inverted the switch use to see the difference whether or not the program is loaded or only saved from last time.
- Functions: Allows to control the board, it can analyze characters, perform mathematical operations, and perform various other tasks.An example of functions are the two functions that are found in every sketch written in Arduino language are setUp() and loop(). A sketch always starts with setUp(), which executes once after the board is powered-up or after reset. Loop() is used then to loop the program repeatedly until the power is off or the board is reset.
- Variables:Arduino data types and constants, most of the data types (array, bool, char, float, etc.) are similar to those of C++.
- Structure: The elements of Arduino (C++) code, it contains small code elements, such as operators.
Keeping the last settings used in the C language section, the code was written and was uploaded only without burning bootloader. Board was working fine, this time i inverted the switch use to see the difference whether or not the program is loaded or only saved from last time.
Downloads

Using FTDI Cable
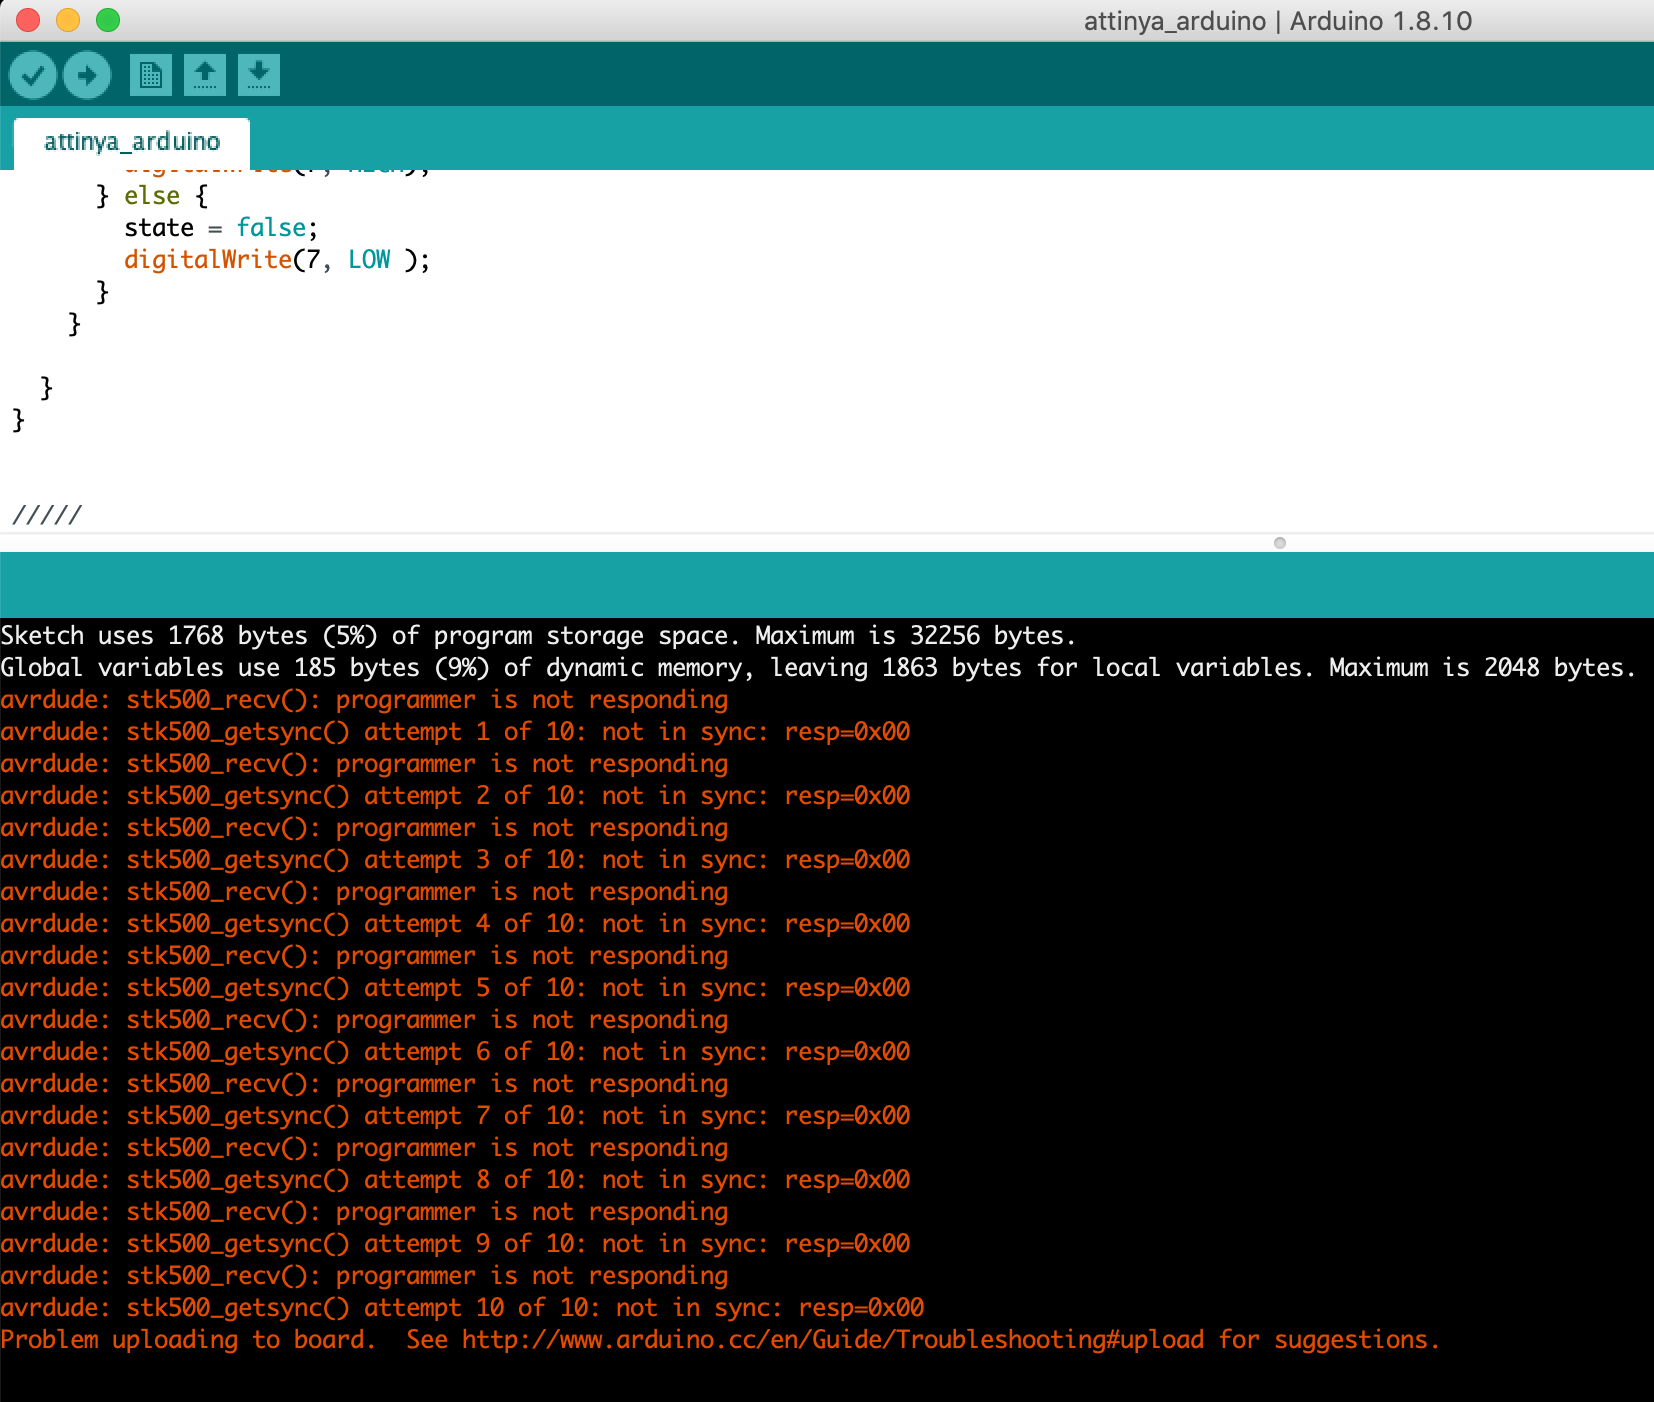
Unfortunately, some ATtiny chips do not have direct support for hardware based serial, if anyone tries to load a program through the FTDI directly to attiny 44, an error message will be displayed as shown in the picture. But, it is easy to add a SoftwareSerial object and view output in the Arduino IDE.
So first step is to load the sketch onto the ATtiny44 using FabIsp.I used the same code used previously but this time i added to it the library "SoftwareSerial" and set the data rate for the SoftwareSerial port to 115200, in addition to printing the status of the LED on serial monitor. After loading the program to the board using the FabISP, i removed the FabISP and connected the board to the ftdi and to the laptop, the only setting that will change is the board to be changed to arduino and the port will be ftdi, after clicking the serial monitor the status will be displayed as the button is clicked.
Downloads
Group Assignment
For this task, we need to do the following:
Compare the performance and development workflows for different microcontroller families.
The link to the group assignment page is found here.
Experience
Programming the board and succeding in getting the required functions is the best part. I had previous knowledge with C languages, especially with arduino, but it was my first time to use Code Blocks & freematics builder, unfortunately i wasn't able to install since it is not compatible with MacOS, thus I had to borrow a windows laptop to work on it. I also faced difficulties with the usb cables, since my mackbook has one USB-C port, so to connect any cable i had to use an extender/hub, even after using the extender, i need to make sure that it is listed under the USB tab in the System report page from apple menu.