Steps for Configuring Git (Mac)
- To start off with the fablab journey, i made sure that i downloaded the correct version of git and make sure it is installed, Git was downloaded from: https://git-scm.com/download/mac
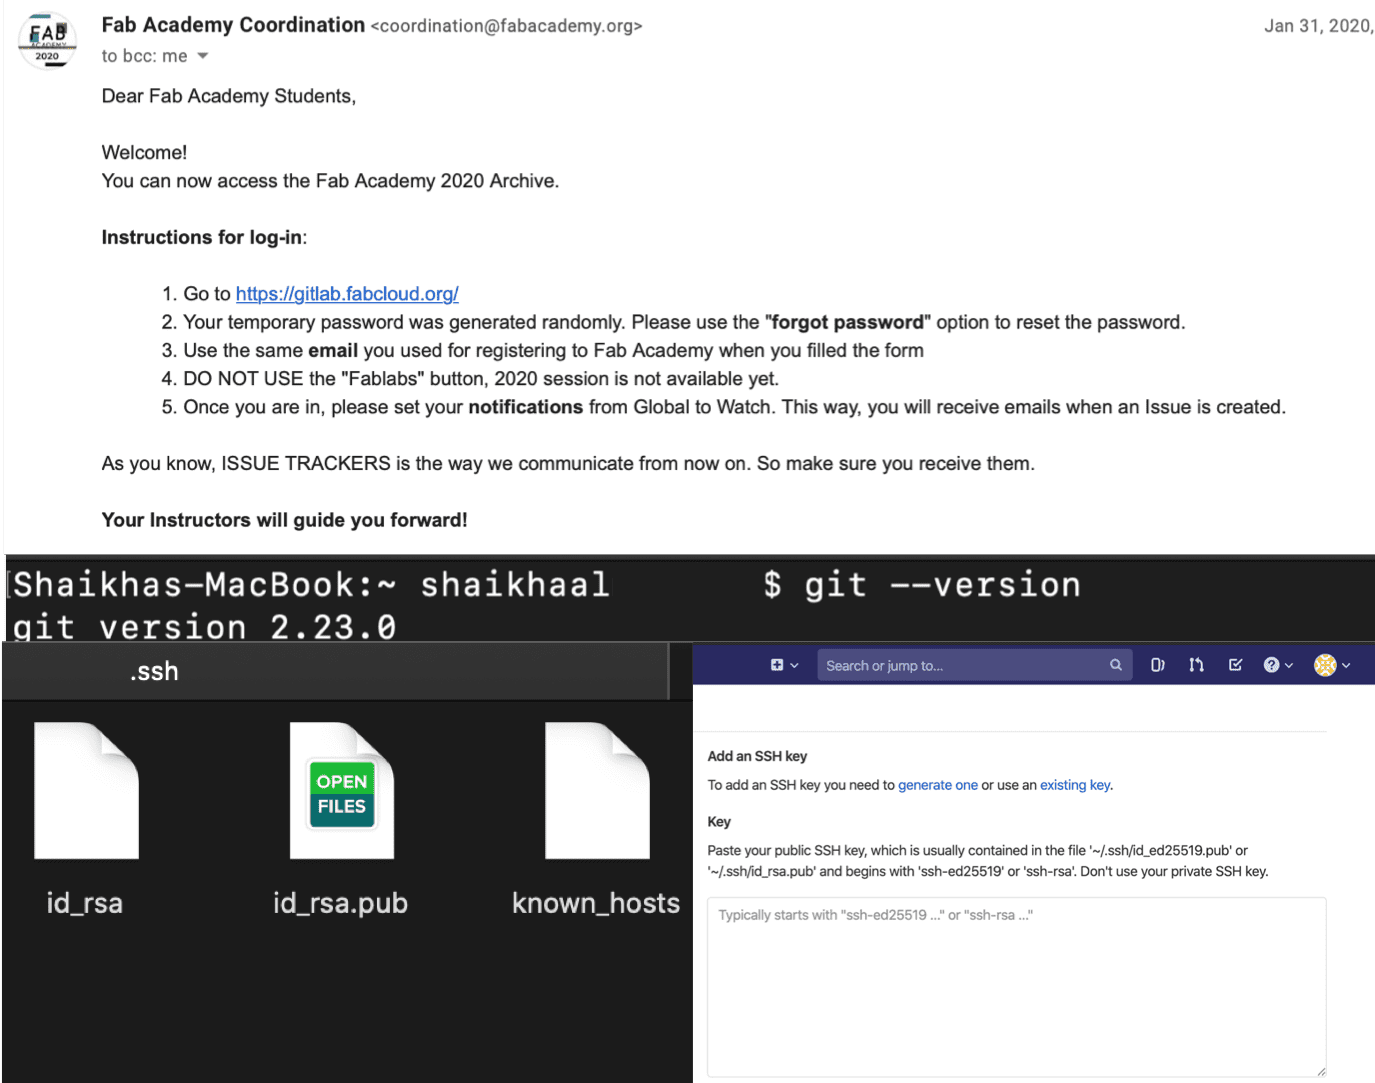
- Then to verify that it was installed successfully, I typed on the Terminal: git --version,which displayed the version installed, so far so good.
- Moving on to the welcoming email I received from FabAcademy, the instructions were followed to access my account on https://gitlab.fabcloud.org/
- Then, to connect to gitlab in a secure way without the need of logging in everytime needed, we generate the ssh key through typing the following in terminal:, then a folder will be created under the name .ssh, a file will be located inside called id_rsa.pub. which contains the generated key that needs to be copied and inserted in the SSH section in User Settings , this step is only done once since gitlab will recognize the device used . After that, i received an email that confirms that an SSH key was added to my account.
Cloning a GitLab Project and Synchronization
-
After the SSH key comes another important step that's also done once, which is Cloning. The clone command downloads an existing Git repository to the local computer, while the original repository is located on a remote server (in our case GitLab), thus Cloning repository is made to sync between the two locations. The steps for cloning are as follows:
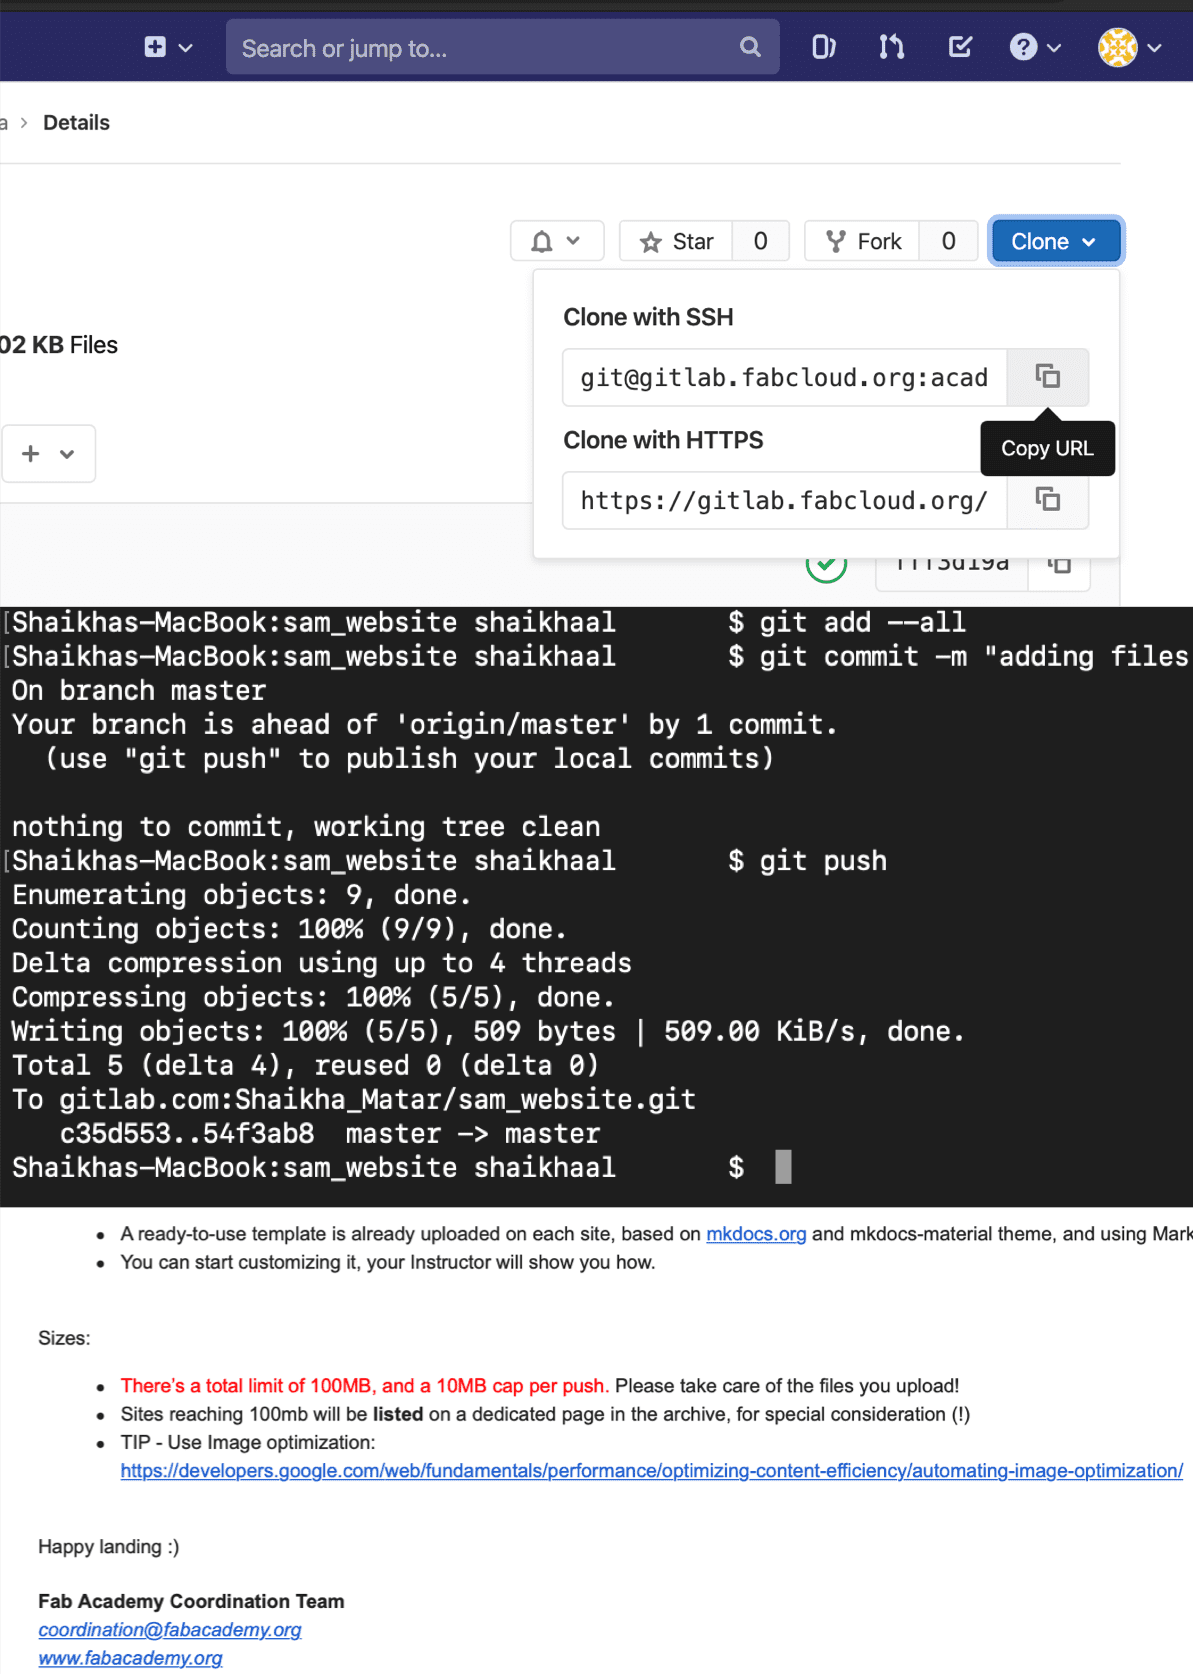
- From the main page on gitlab account, the URL for "Clone with SSH" was copied.
- In the Terminal,I specified the location for placing the folder and entered there using the cd command.
- Then, the command git clone "copied clone url" was entered or in other words . After that the folder can be seen in the specified location and can be accessed directly without the terminal.
- To start with the synchronization process, we created an account in gitlab before applying directly on the official one for the sake of practice and to prevent pushing incorrect sizes that might lead to increasing the account usage which has limit as mentioned in the welcoming email 100MB. Then, to push the files to GitLab, in the terminal we go to the folder location and the following commands are typed:
- git add--all
- git commit -m "notes" , this will add notes to each push to be able to track down the steps whenever required, can be seen as label to every push.
- git push .
Creating a Website
I was able to explore three options for creating my website:
For the purpose of ease, an existing template was used from Startbootstrap website and then HTML/CSS files were modified using the software Brackets which can be downloaded from Brackets website .
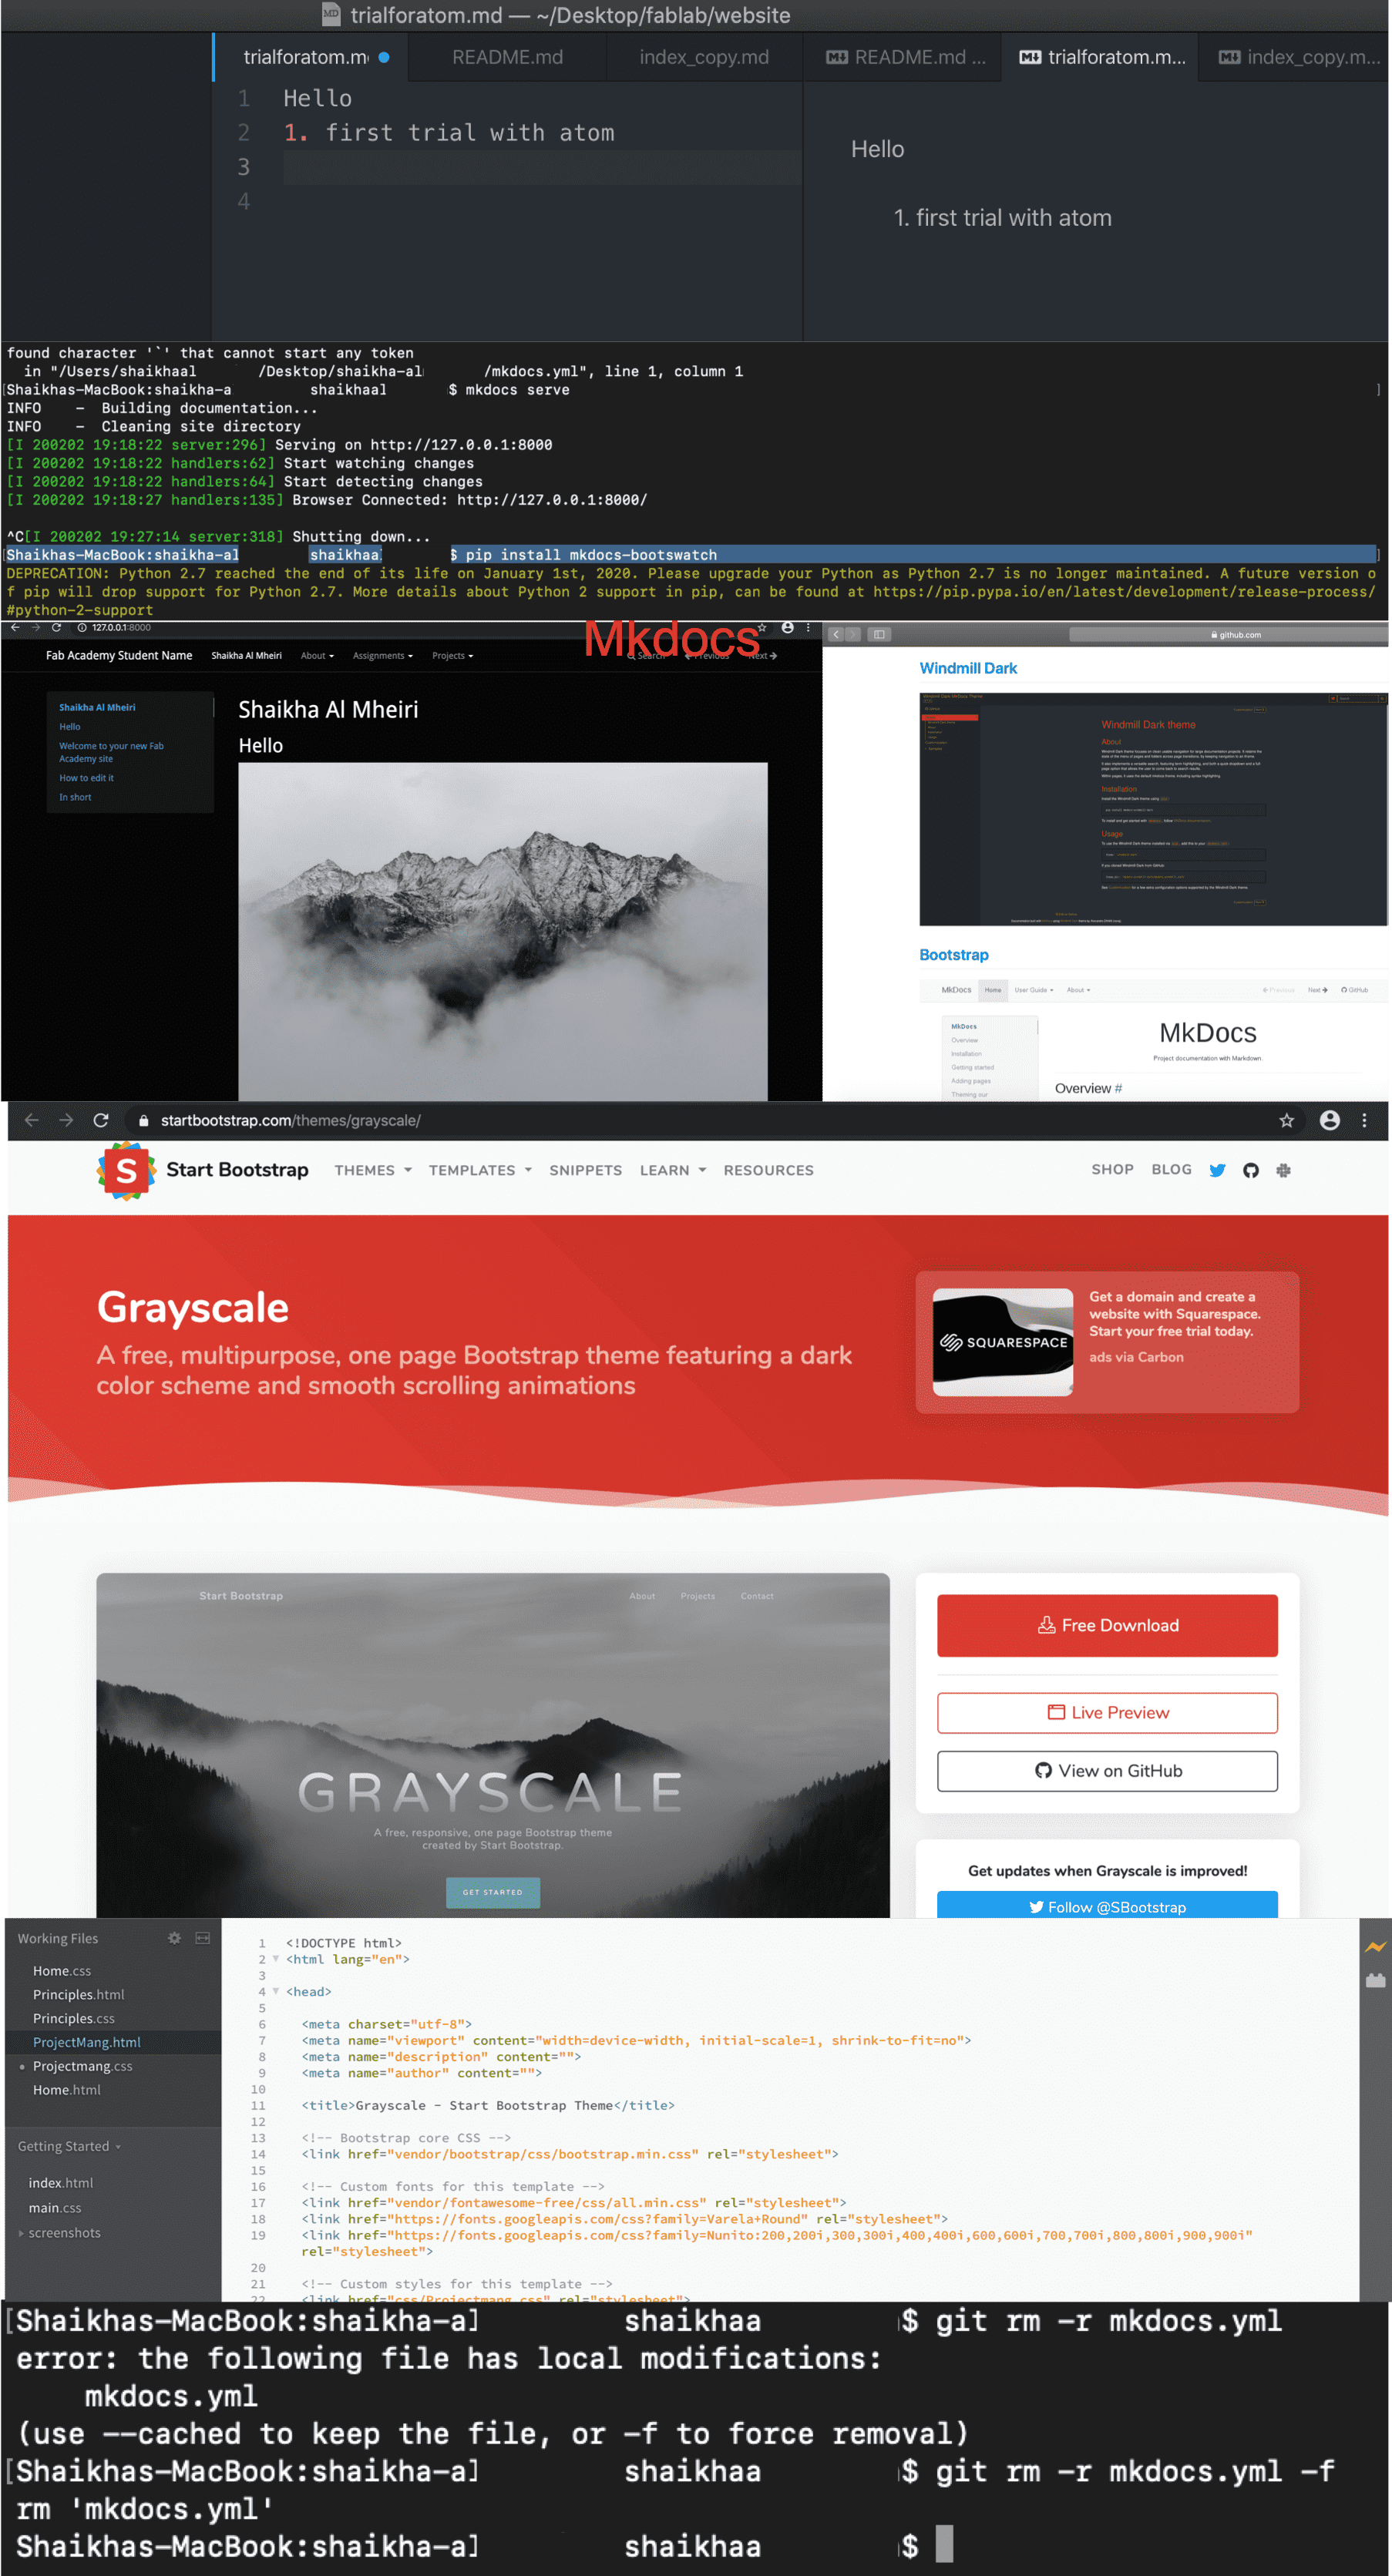
Now since our fabacademy account on gitlab already contains Mkdocs files, and since i chose to continue with html & css for directly editing my website, i used the command to remove the existing file before adding my new files to push them, i used the -f command to force it since i had error messages.
- Markdown Language: An easy way for creating a website, it is a text-to-HTML conversion tool for web writers which allows us to write using an easy-to-read, easy-to-write plain text format, then convert it to structurally valid XHTML (or HTML). An editor software called atom is used in this case to modify and insert the input to create the webiste, which can be downloaded from atom website , template is basic and similar to dealing with documents, but this option will require converting it from .md to .html using a software called panodc which also required to be installed, after that the conversion command in terminal can be used .
- Mkdocs: a fast and simple site generator for building project documentation. Documentation source files are written in Markdown, and configured with a single YAML configuration file. Editor used was atoms, python was also required to be downloaded but is found in OSX by default we only needed to upgrade the version. Mkdocs doesn't require any conversion to HTML since it is done by default. Steps on MKdocs website were followed for installation. A tip for Mac users, when installing any software using the Terminal, it is always recommended to do it as admin using the sudo command which is placed before any command used. Other themes that i explored were from here
- HTML & CSS : working directly on html and styling HTML with CSS. Hypertext Markup Language (HTML) is the standard markup language for documents designed to be displayed in a web browser. It can be assisted by technologies such as Cascading Style Sheets (CSS) and scripting languages such as JavaScript.Brackets Software was installed to edit HTML and CSS.
For the purpose of ease, an existing template was used from Startbootstrap website and then HTML/CSS files were modified using the software Brackets which can be downloaded from Brackets website .
Now since our fabacademy account on gitlab already contains Mkdocs files, and since i chose to continue with html & css for directly editing my website, i used the command to remove the existing file before adding my new files to push them, i used the -f command to force it since i had error messages.
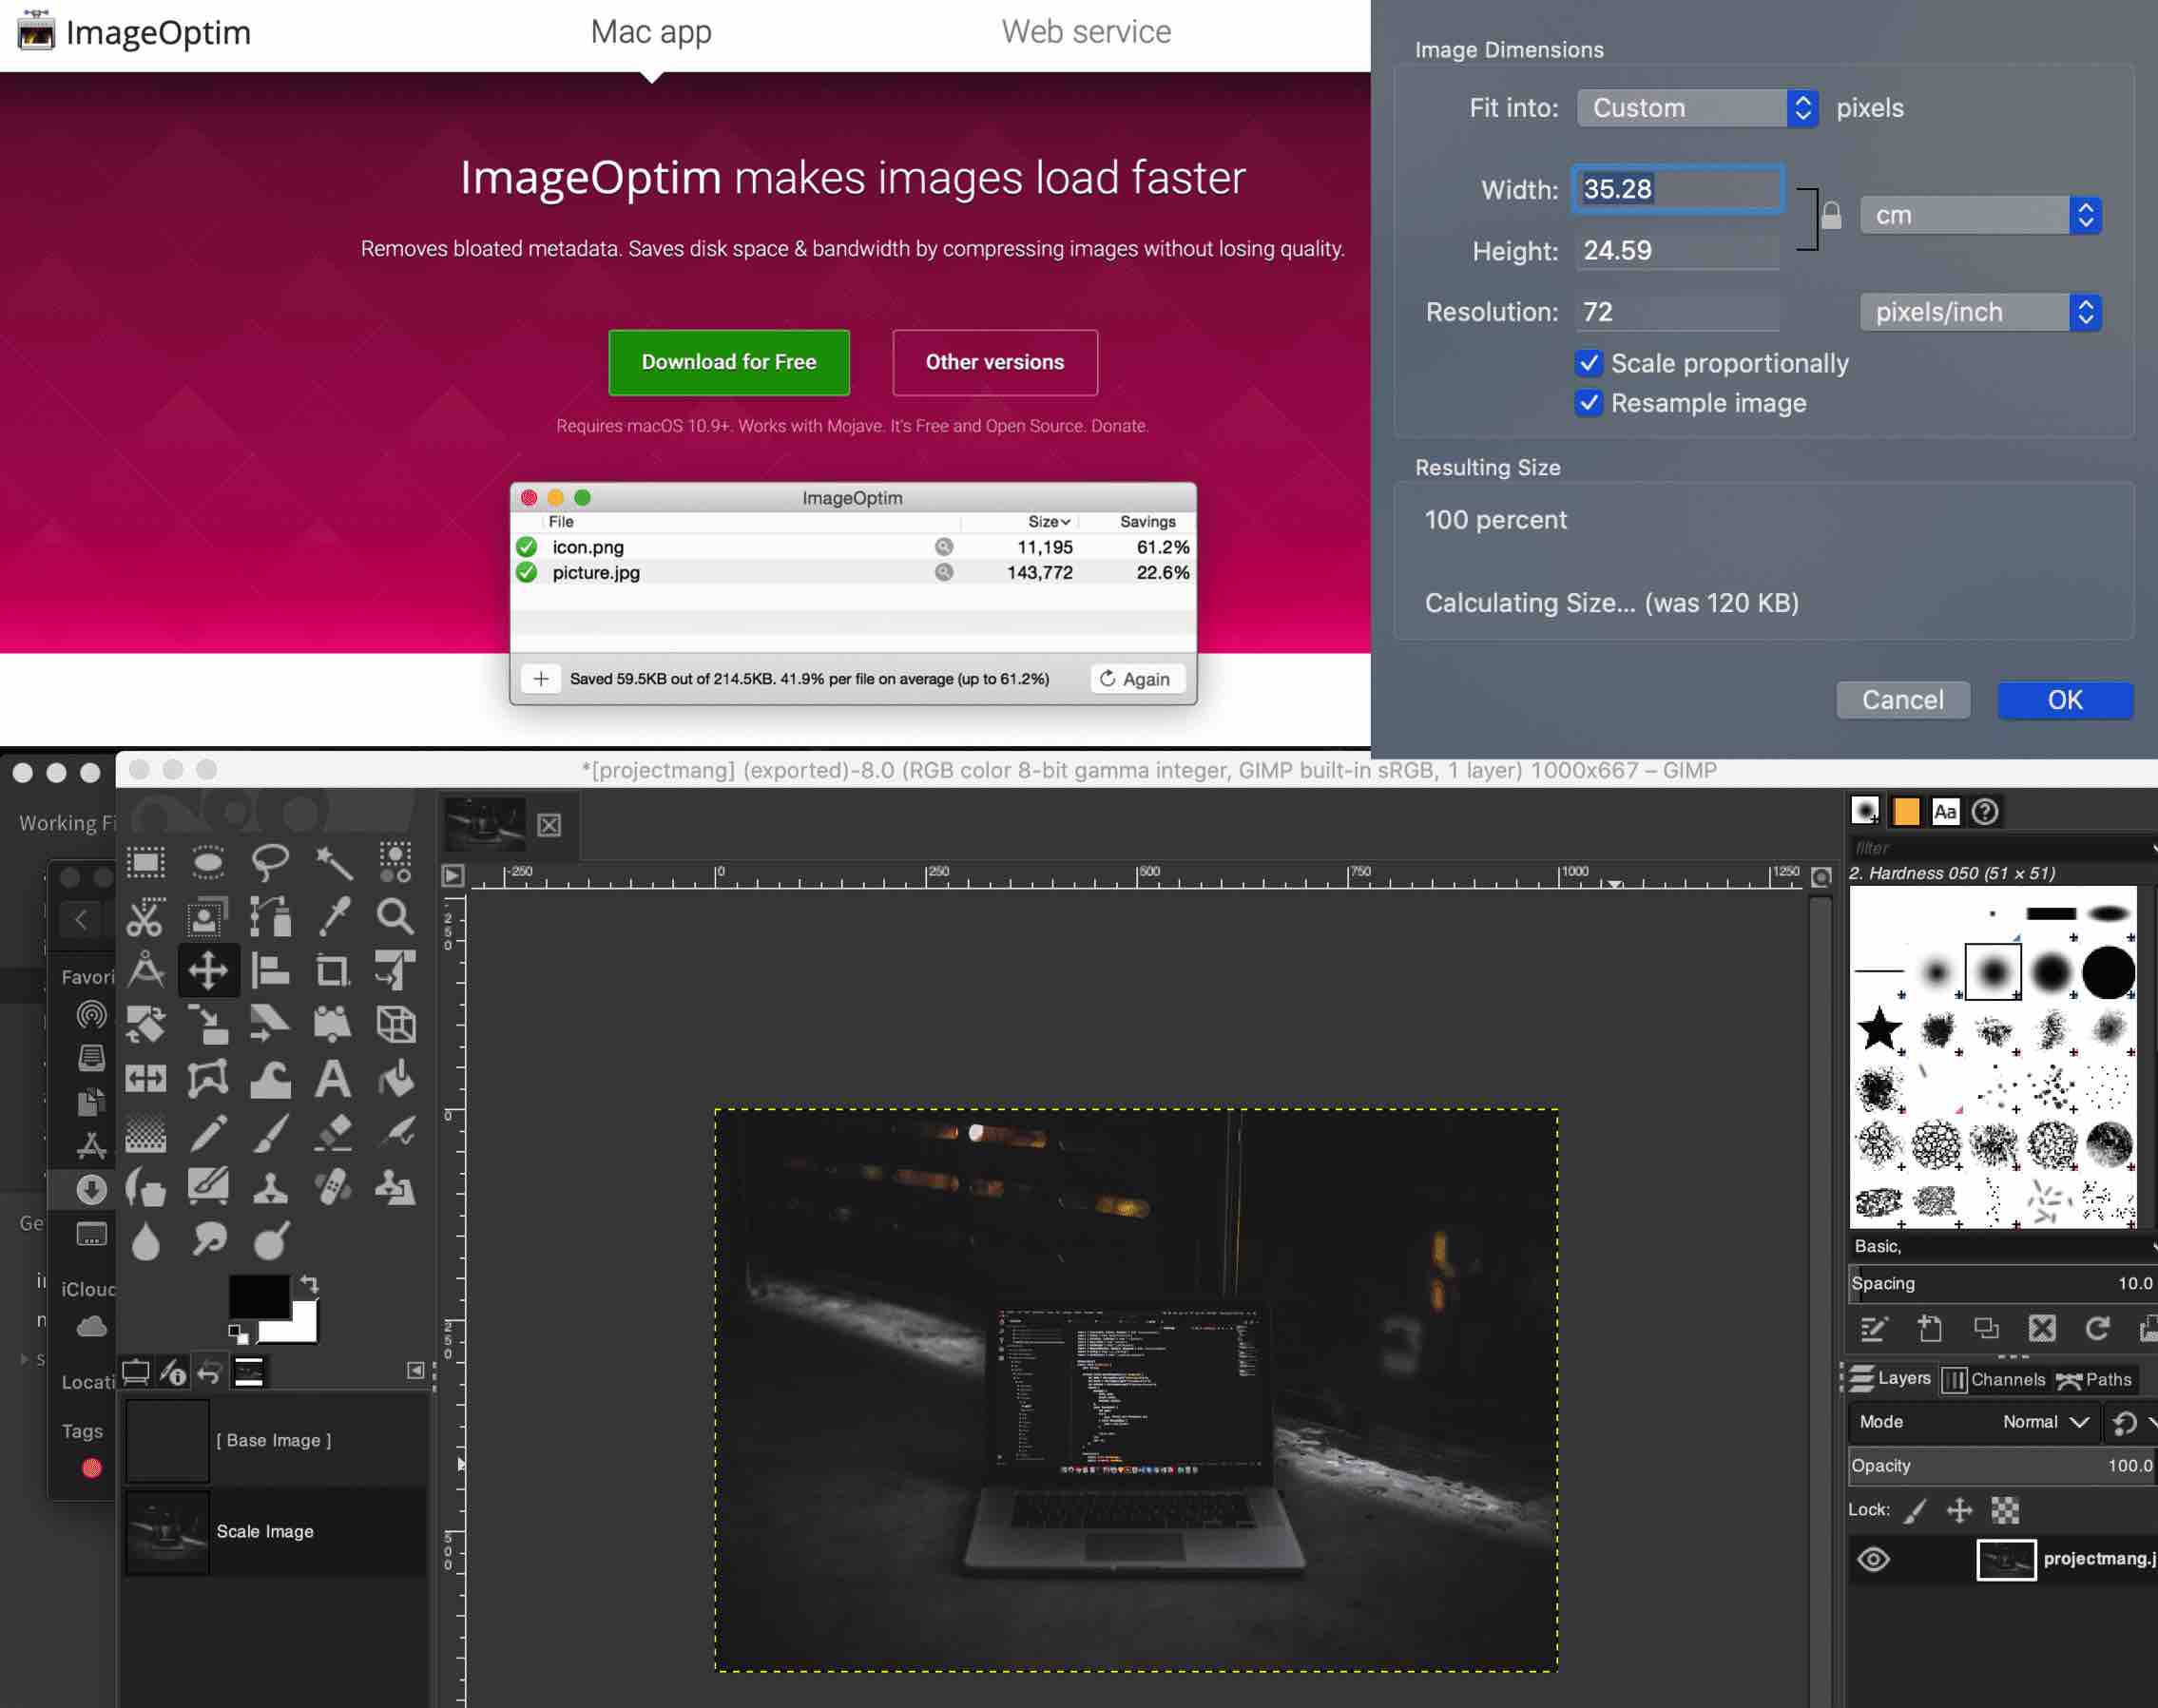
Image Reducing Softwares
Since the Fabacademy email clearly mentions that the Maximum push should be 10Mb with Total limit of 100MB for the account, I tried several softwares that reduces the images while maintaining the quality:
- Gimp: I got to know this image editor from the Fabacademy reference. Quality was fine but it is not user friendly and not very easy to edit.
- Preview on OSX: This app is by default found on all Mac devices, it contains an option for adjusting the size, it is good but sometimes the quality is compensated.
- ImageOptim: I found this amazing application by coincidence while searching, it is mainly built for OSX devices but contains a window/linux and also online option. Quick and Easy to use since you only drop the image in the app and choose the format and quality pecentage, i really recommend this app.
Experience
This was my first time creating a website from scratch, it was a unqiue experience and i cant say that i have full experience on this subject but i know that with time i can improve my skills. Tutorials from W3schools helped me alot in exploring almost all the basic features that i needed to know to create a website, most importantlty html and css tutorials. We, mac users, faced a bit of difficulties at the beginning since almost all our colleagues are windows users, also most instructions and guidlines are based on windows, but we were able to solve all issues that we encountered.