Machines & Softwares
Device/Machine:
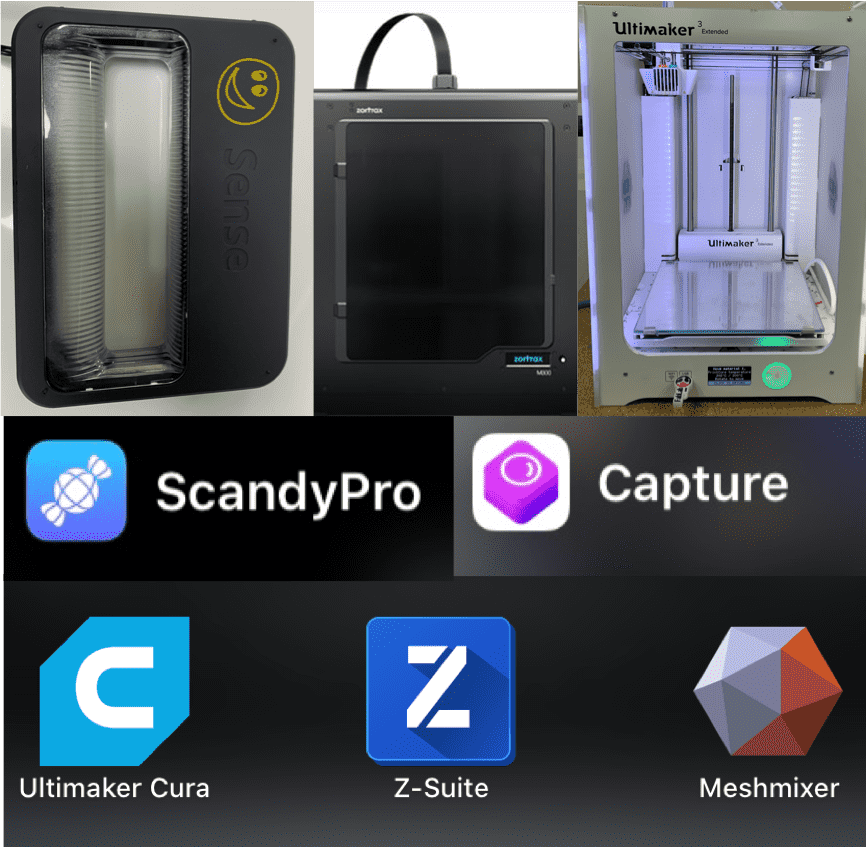
- Ultimaker Extended 3 (Best when using PLA)
- Zortax (Best when using ABS)
- Sense 3D Scanner
- Ultimaker Cura
- Tinkercad
- Z Suite
- Meshmixer
- Sense 3D Scanner
- Capture
- Scandypro

3D Designing
For the 3D printing design, i tried 2 softwares: Fusion and MeshMixer. I didn't have something in mind so i kept designing several things without printing them. I lacked creativity at that time since i kept disrtacting myself with the features so that i can know more about them. For Example, I tried using the Mesh feature in Both Fusion and MeshMixer. I then had to think of designs that the CNC couldnt cut, so i designed threads and designed a rectangular enclosure with a sphere inside. I have to admit that even though MeshMixer is much simple and easy compared to Fusion complicated features, but i love fusion way more since i feel that i have the ability to control the design more. Below i'm attchaing the files that i chose for printing.
Downloads
Downloads
3D Printing
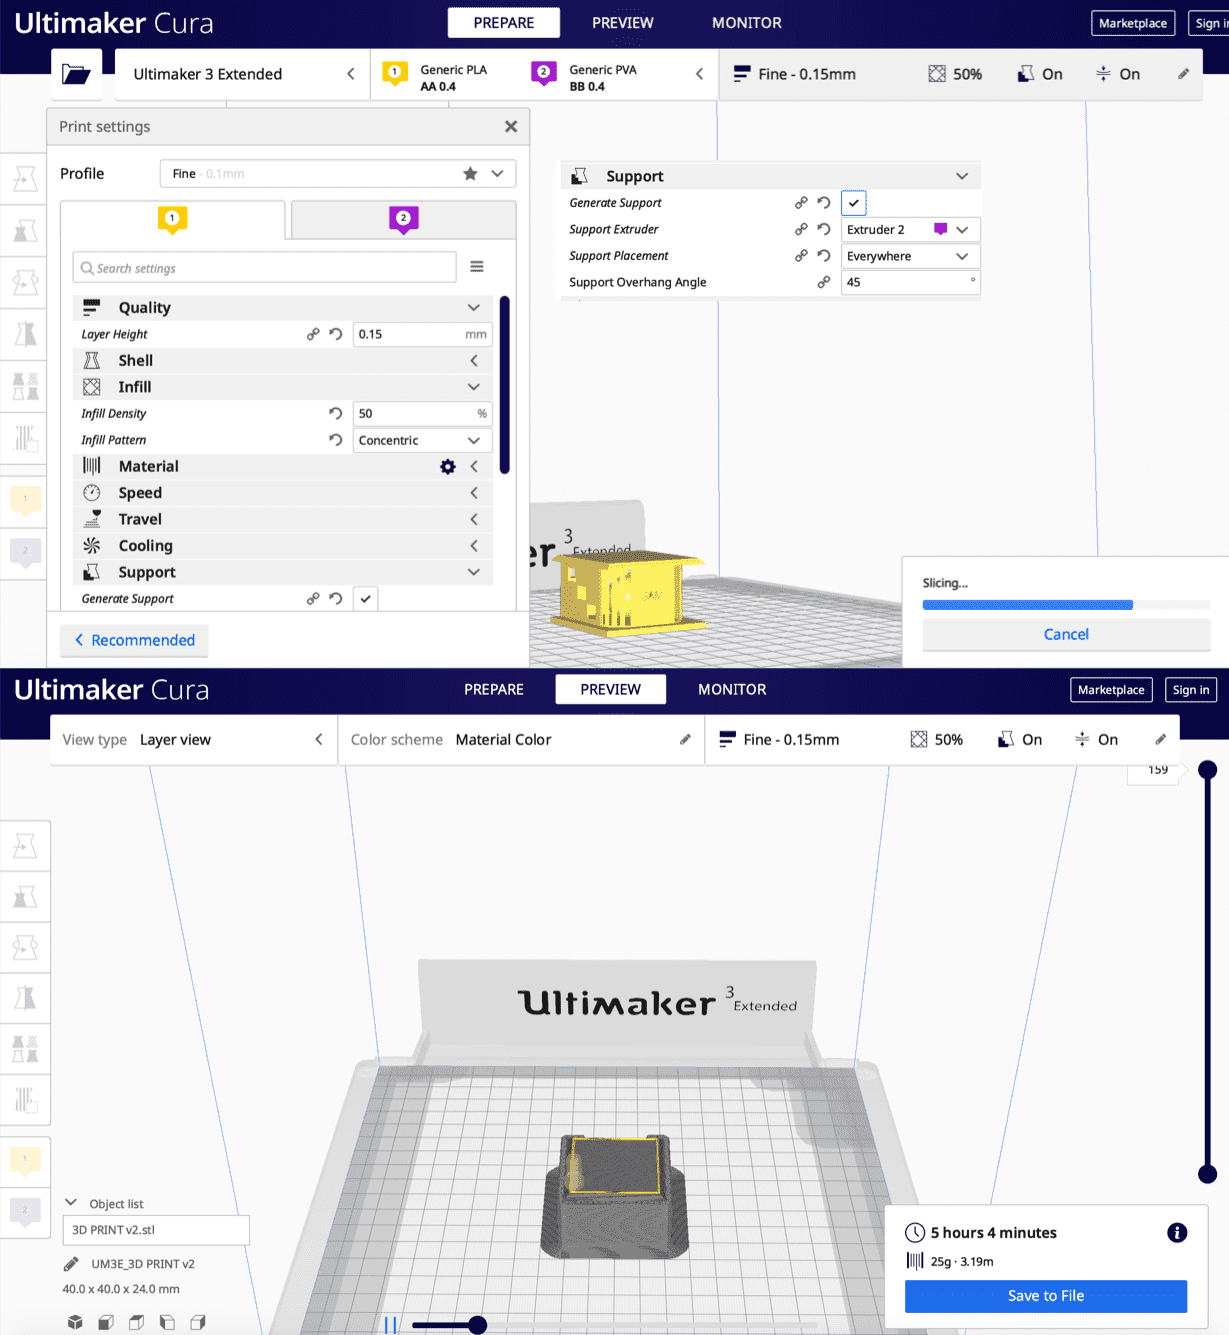
After getting done with the 3D, I exported the files as .stl so that i can open in the 3D printer software. I used Ultimaker Extended 3 with PLA and PVAmaterial and its software Cura. As for Zortax , we were introduced to it at the lab and we had the chance to try some of its features in addition to its software Z suite, but it wasn't primarly used during this week since it is best used for ABS which isn't required at this stage for the designs that are made.
PLA & ABS are both thermoplastics, which are melted and then extruded through a nozzle to build up the layers that create a final part through Fused Deposition Modeling (FDM) or Fused Filament Fabrication (FFF). PLA (Polylactic Acid) is biodegradable (under the correct conditions) and ideal for 3D prints where aesthetics are important. Due to its lower printing temperature is easier to print with and therefore better suited for parts with fine details. ABS (Acrylonitrile Butadiene Styrene) is best suited for applications where strength, ductility, machinability and thermal stability are required. ABS is more prone to warping.
Back to printing, the Group Assignment introduced us to different parameters that we should consider after importing the files in Cura before printing.Also, I used PVA for creating the supports since i have a sphere inside and after the first trial i noticed that the sphere moved and couldnt be printed.
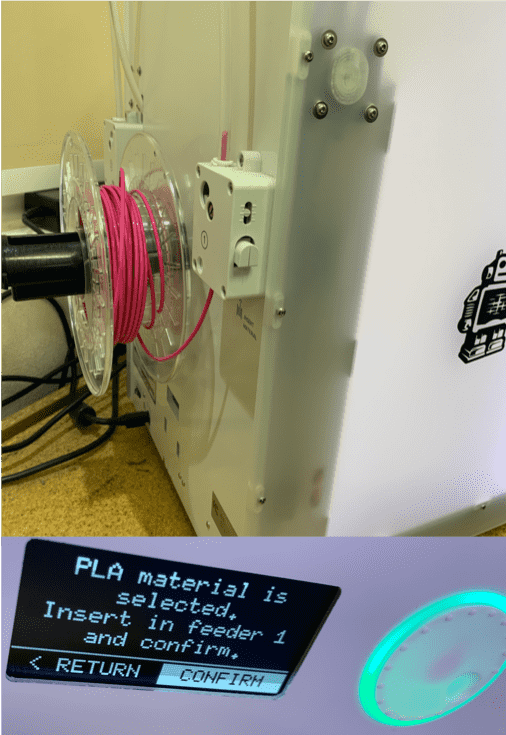
Before printing, it is very important to make sure to setup the printer based on the requirement, and to prepare it. This includes loading the correct material (in our case PLA) and making sure that the nozzle is releasing the correct material as some residue of the previous printing might still be there and might affect the printing since different materials use different temperatures. Leveling the plate is a crucial step which will assure that the plate is straight enough from all sides, an unleveled plate may prevent the printer from printing the design in the correct manner, the steps followed for leveling are found in Ultimaker website , also many other calibration steps are found in the website which helped me set up the printer in the correct way.
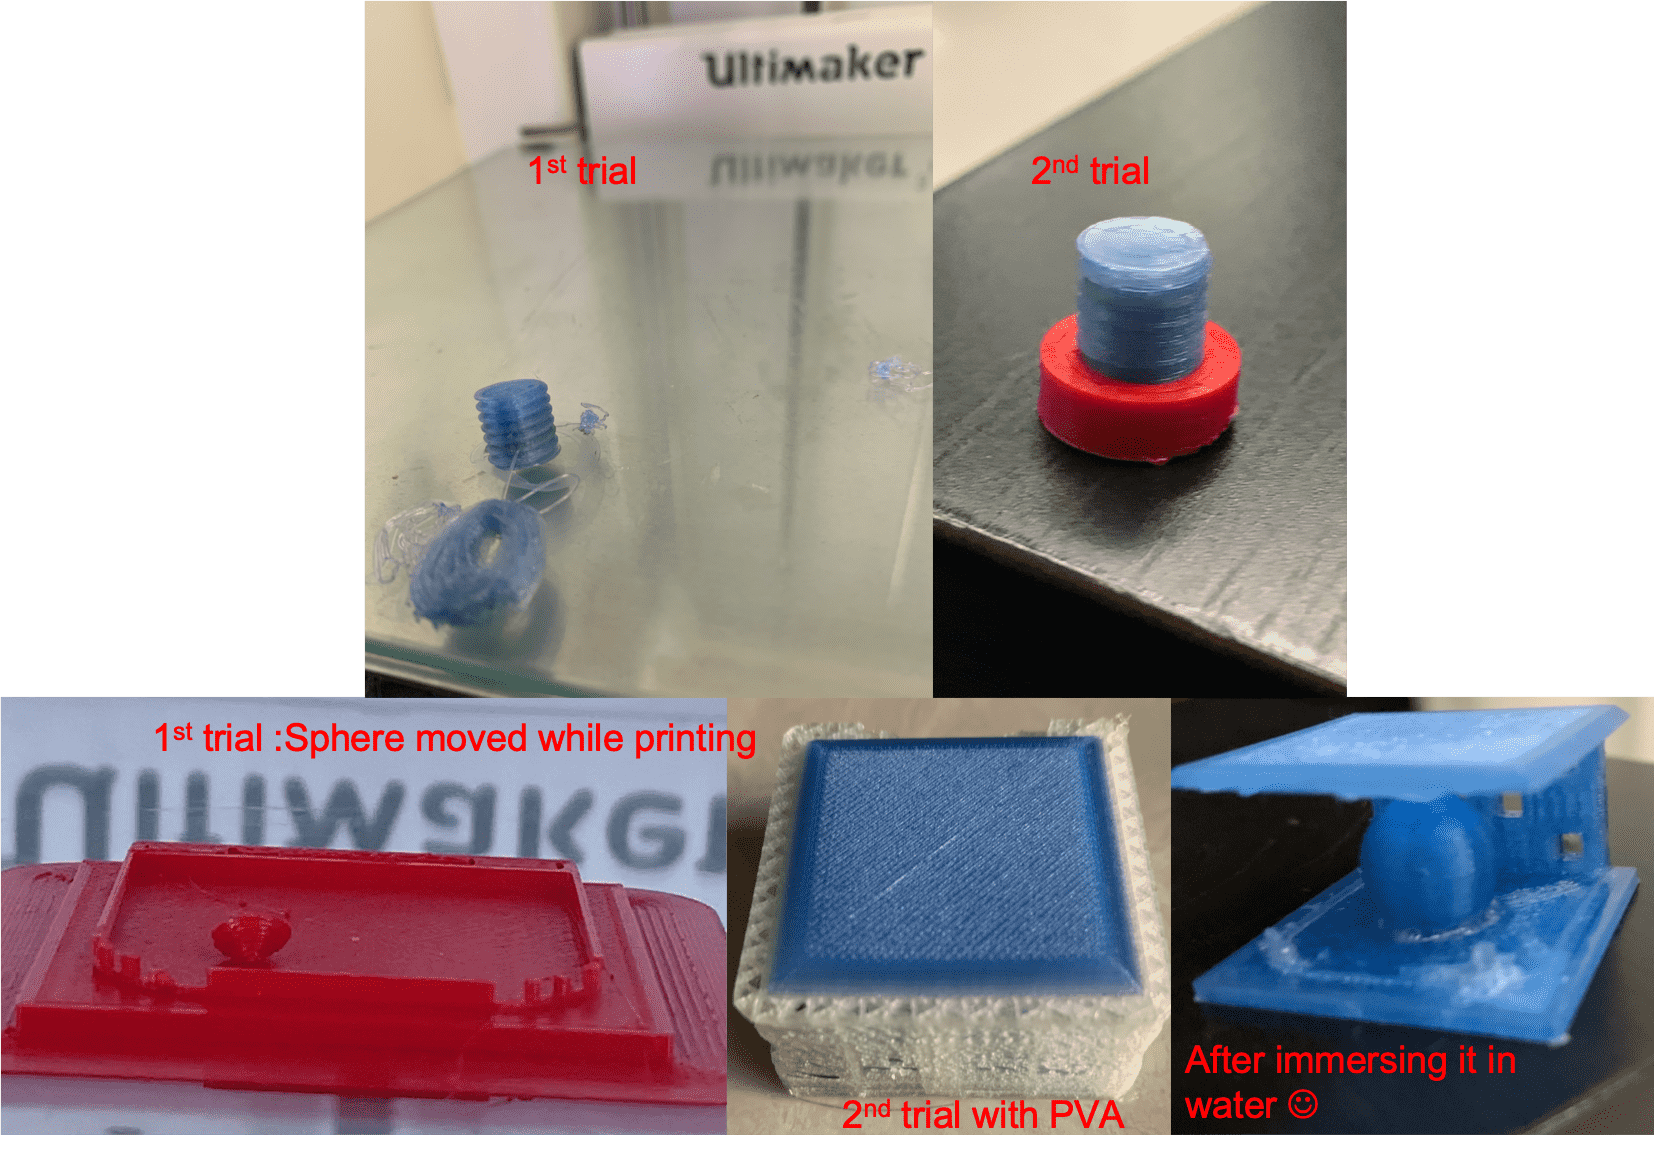
For printing the threads, in my first trial the leveling wasn't done correctly as i thought i did since it didn't stick to the plate and thus kept moving. After releveling the plate, it printed the design correctly.
For the rectangular enclosure, my first trial did go as planned, in the middle of printing the inner sphere got removed and couldnt finish the printing. So what i did, i increased the size of the inner sphere and i added supports (PVA). After printing, i had to immerse it in water so that the PVA melts away and only the PLA remains which is the main design. Suprisingly, some of the coloumns went off with PVA as it shows in the picture. Maybe the period of immersion was alot ? since thickness is same everywhere but gaps are different. I will try it again next time. The reason why i created this design was for the purpose of trying the characteristics of designs that cannot be done using the subtractive manufacturing, which is having a sphere inside a hollow rectangular enclosure. Because additive manufacturing refers to the process that creates an object by adding multiple layers while subtractive manufacturing removes or cuts away material to create parts. That's why 3D shapes that are complex or that are hollow/have other shapes from the inside cannot usually done by subtractive methods.
For the Final Project, I used the Zortax for the enclosure of the device.
PLA & ABS are both thermoplastics, which are melted and then extruded through a nozzle to build up the layers that create a final part through Fused Deposition Modeling (FDM) or Fused Filament Fabrication (FFF). PLA (Polylactic Acid) is biodegradable (under the correct conditions) and ideal for 3D prints where aesthetics are important. Due to its lower printing temperature is easier to print with and therefore better suited for parts with fine details. ABS (Acrylonitrile Butadiene Styrene) is best suited for applications where strength, ductility, machinability and thermal stability are required. ABS is more prone to warping.
Back to printing, the Group Assignment introduced us to different parameters that we should consider after importing the files in Cura before printing.Also, I used PVA for creating the supports since i have a sphere inside and after the first trial i noticed that the sphere moved and couldnt be printed.
Before printing, it is very important to make sure to setup the printer based on the requirement, and to prepare it. This includes loading the correct material (in our case PLA) and making sure that the nozzle is releasing the correct material as some residue of the previous printing might still be there and might affect the printing since different materials use different temperatures. Leveling the plate is a crucial step which will assure that the plate is straight enough from all sides, an unleveled plate may prevent the printer from printing the design in the correct manner, the steps followed for leveling are found in Ultimaker website , also many other calibration steps are found in the website which helped me set up the printer in the correct way.
For printing the threads, in my first trial the leveling wasn't done correctly as i thought i did since it didn't stick to the plate and thus kept moving. After releveling the plate, it printed the design correctly.
For the rectangular enclosure, my first trial did go as planned, in the middle of printing the inner sphere got removed and couldnt finish the printing. So what i did, i increased the size of the inner sphere and i added supports (PVA). After printing, i had to immerse it in water so that the PVA melts away and only the PLA remains which is the main design. Suprisingly, some of the coloumns went off with PVA as it shows in the picture. Maybe the period of immersion was alot ? since thickness is same everywhere but gaps are different. I will try it again next time. The reason why i created this design was for the purpose of trying the characteristics of designs that cannot be done using the subtractive manufacturing, which is having a sphere inside a hollow rectangular enclosure. Because additive manufacturing refers to the process that creates an object by adding multiple layers while subtractive manufacturing removes or cuts away material to create parts. That's why 3D shapes that are complex or that are hollow/have other shapes from the inside cannot usually done by subtractive methods.
For the Final Project, I used the Zortax for the enclosure of the device.
3D Printing Pros & Cons
From my experience with 3D printing, I listed down few pros and cons from my point of view and from the knowledge I gained:
| Pros | Cons |
|---|---|
| Various of materials & colors (Solid, Flexible, Matt, Shiny etc.). | As the design size, details & complexity of the design increases, finishing time increases. |
| Recyclable Material options available. | If environment is not maintained (temp), errors might occur and leads to stopping the printing, which might causes loss of time & material. |
| Ability to create “impossible” geometries & complex designs. | Inevitable layer lines produced. |
| Ability for any user, even those with limited CAD experience, to create designs. | Materials being degradable over time and affected during outdoor exposure. |
| Design import is easy, each 3d printer has its own software which is quite easy & user friendly. | Design size is limited to the printer build volume. |
| Can use Open-source designs, so there is some work done already by the community. | Machine requires maintenance. |
| Compared to other manufacturing techniques, complex 3D objects can be made with fine details in a short timeframe. | Final product can sometimes have flaws that might affect not only the object’s design, but also its functionality. |
| Less waste, waste is almost zero during the production compared to subtractive manufacturing processes for example. | |
| Less amount of human interaction required, with low level of expertise for the operator. |

3D Scanning
As the title implies, i chose several items to scan them in 3D. It sounded easy at the beginning, but it was one of the toughest tasks for this week. Scanners weren't accurate and the objects chosen must have good color contrast for better detection in addition to correct movement to be able to create the 3D pic. I had to explore different apps to find the best results:
For exporting the 3D scan files, i tried exporting with Scandy pro & Capture but the sizes were almost 10 mb per file, after compressing it went down to 3mb per file which is still high, that's why i uploaded the file on Google drive and the link to those files are found here.
- Sense 3D Scanner: I began with this system which contains a hardware and a software. A device is held for capturing the image and from the system the characterisric of the object is captured is chosen for better results. Unfortunately the detection was very hard since it kept lagging and stops detection several times. There are editing options where we can fill in the gaps that result in the 3D image, but the quality isn't considered high.
- Capture: I had to explore other options after seeing the results from Sense. I found this application on my iPad which was very easy to use compared to sense with less lagging. Front camera is used on the iOS device and is rotated (or object is rotated) until the 3D image is created.
- Scandypro: An extra iOS application that i found and tried but only once since it requires a subscription after the free trial. Results are acceptable.
For exporting the 3D scan files, i tried exporting with Scandy pro & Capture but the sizes were almost 10 mb per file, after compressing it went down to 3mb per file which is still high, that's why i uploaded the file on Google drive and the link to those files are found here.
Group Assignment
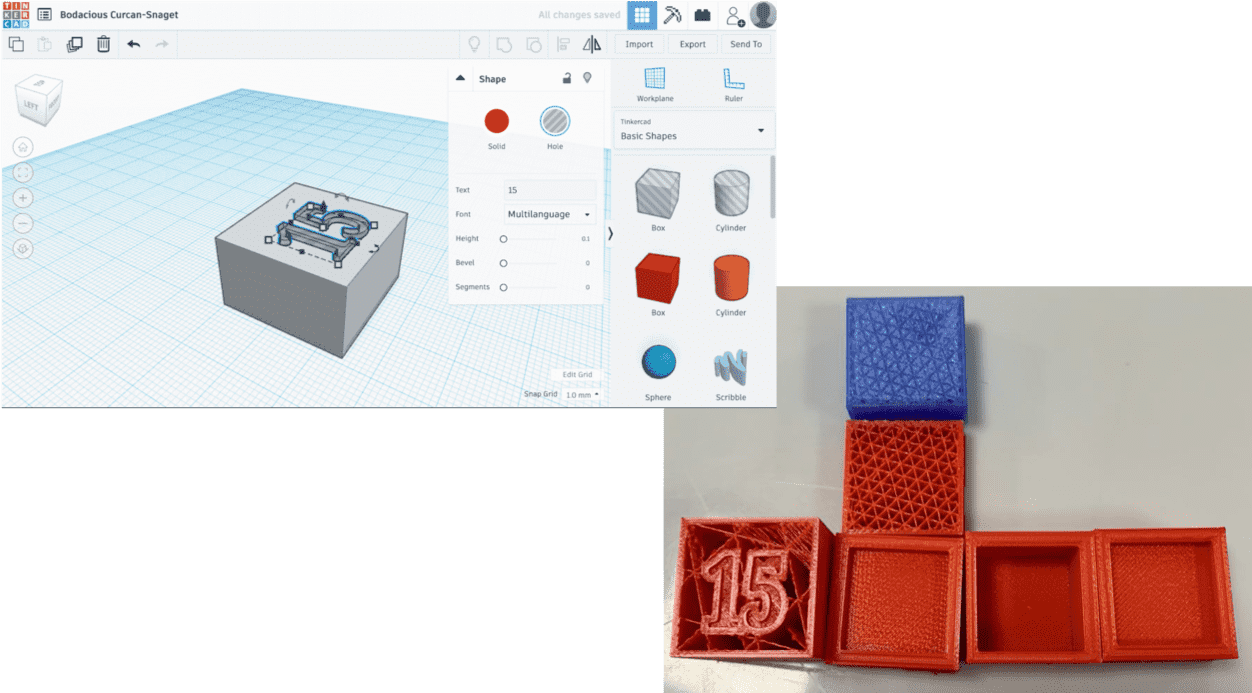
In the group assignment, we had the opportunity to try changing different parameters in addition to exploring the features and limitations of 3D printing. My part was about testing the infills percentage and looking for the best shape. For the group assignment i used Tinkercad since it is quick and simple, and then i imported the drawings in Cura to print it using Ultimaker Extended 3.
The details are found in 3D scanning & printing Group Assignment.
Experience
This was my first time printing a 3D object. I didn't like the 3D scan and i dont feel that i want to use it unless i am provided with high quality scanners of course. 3D printing gave me the opportunity to create and print my own design and experience it. I was also introduced to many websites that provide ready 3D printing design files such as Thingverse and Grabcad, which will come in handy in the future.