16. Molding and casting
Group Assignment
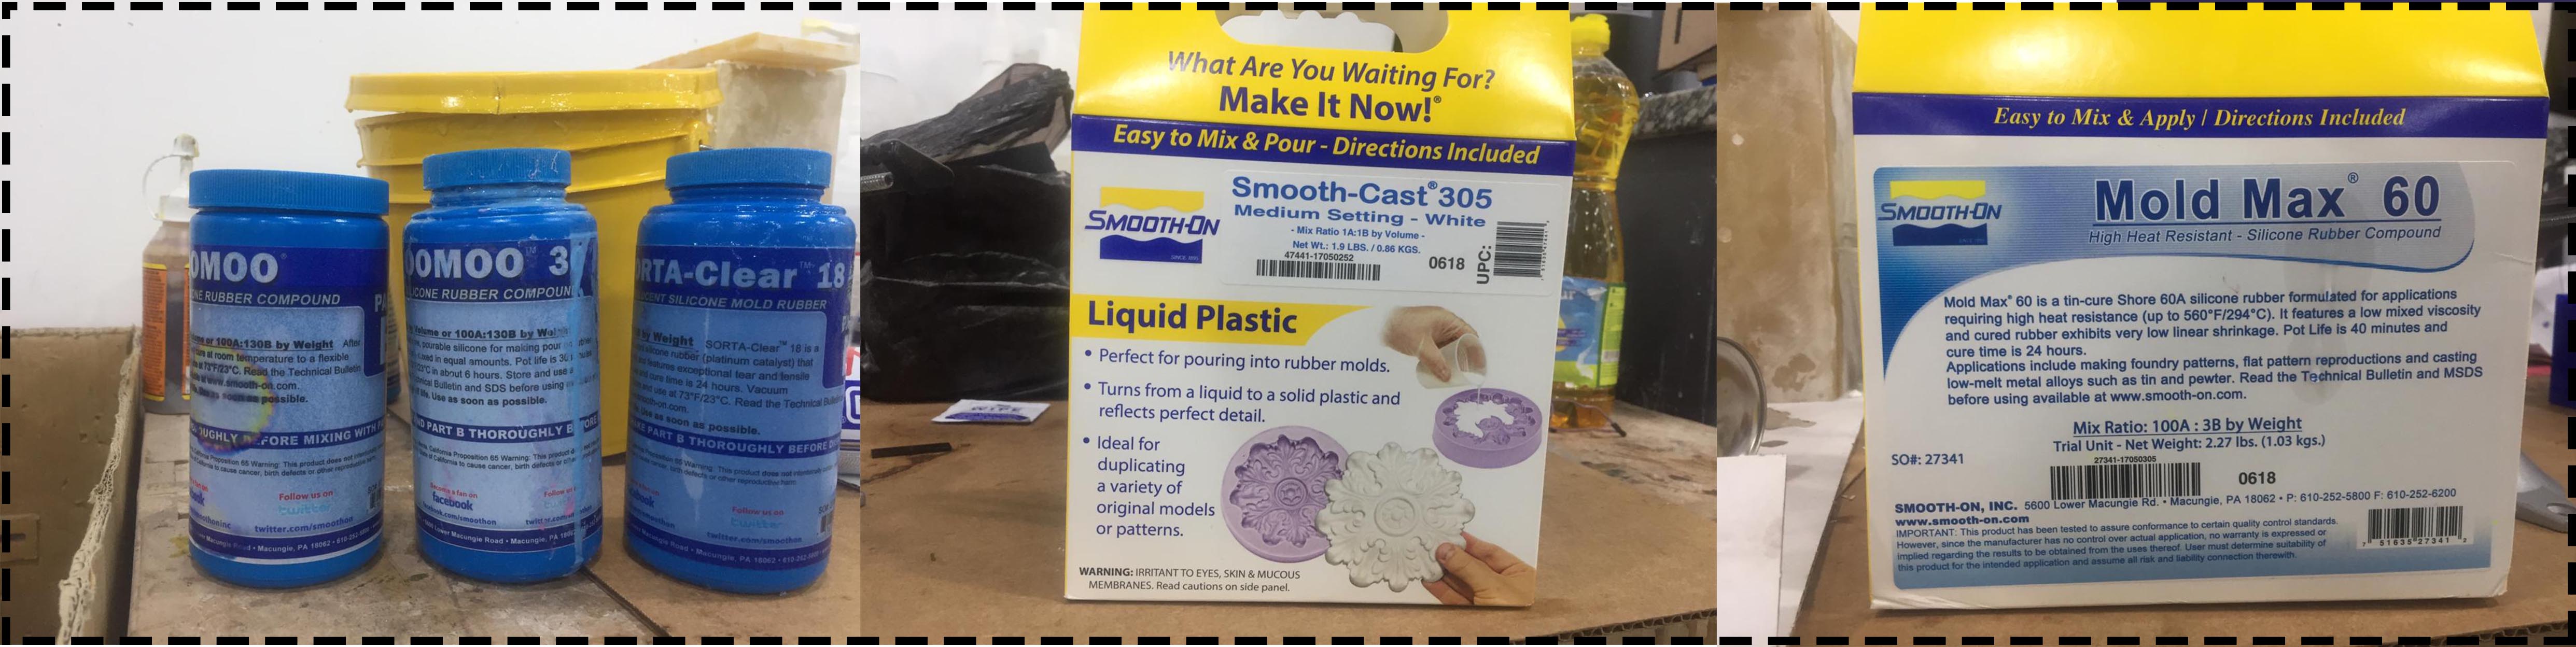
In this part we read and reviewed the technical and safety datasheet of casting and molding material we have in the lab.
Safety and Technical Datasheet :
Technical and safety datasheets are linked for each material. The technical datasheet provides operational data like technical specs and processing recommendations. The safety datasheet describes different hazards associated to the material and risk levels. Note that SORTA-Clear™ 18 is the only safe food material.
OOMOO™ 30
OOMOO™ 25
Mold Max™ 60
SORTA-Clear™ 18
Food safety technical datasheet
Smooth-Cast® 305
For example, the following risks are listed in the safety datasheet of Smooth-Cast® 305.

And also, the following first aid measures are listed in the safety datasheet for the same material.

In the technical datasheet information about working on the material could be found. For example, for OOMOO™ 25 the following guidelines are listed (in addition to safety ticket!).

Molding and Casting Material
The image and table blow show the material we have in the lab.
| Material | Category | Series |
|---|---|---|
| OOMOO™ 30 | Silicone Rubber-Tin Cure | OOMOO™ |
| OOMOO™ 25 | Silicone Rubber-Tin Cure | OOMOO™ |
| Mold Max™ 60 | Silicone Rubber-Tin Cure | Mold Max™ |
| SORTA-Clear™ 18 | Silicone Rubber-Tin Cure | SORTA-Clear™ |
| MSmooth-Cast® 305 | Urethane Resins | Smooth-Cast® |
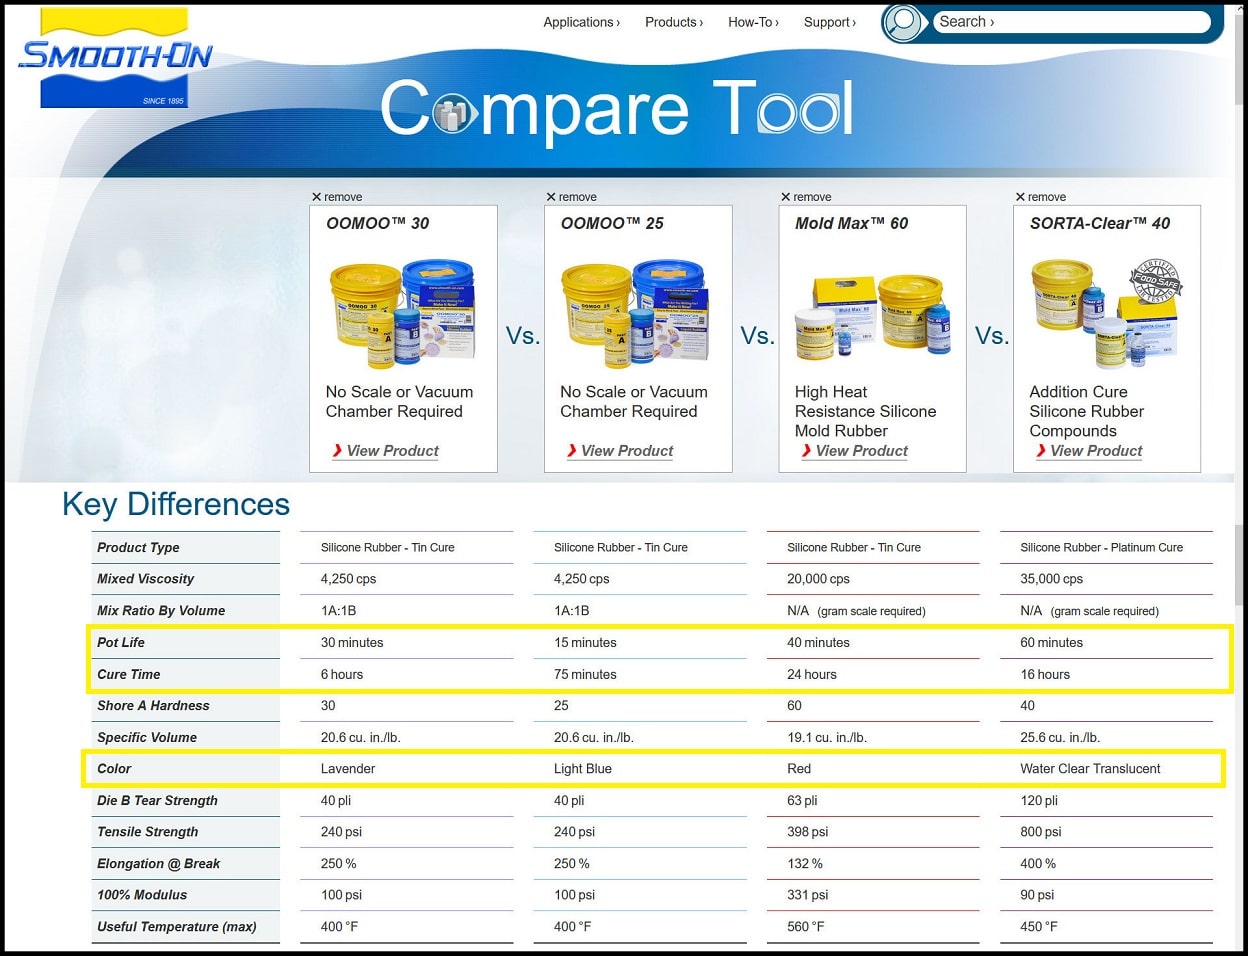
The picture above showing the features for four different liquid rubbers such as cure time, pot life, color.
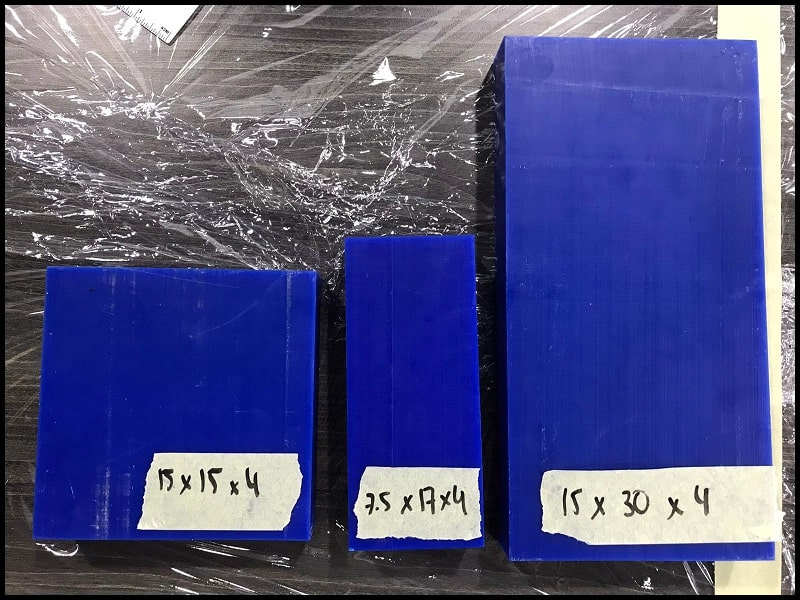
Machinable Wax
In the lab we have 3 sizes of machinable wax (dimensions in cm). This will be used to mill the positive mold of the final product.
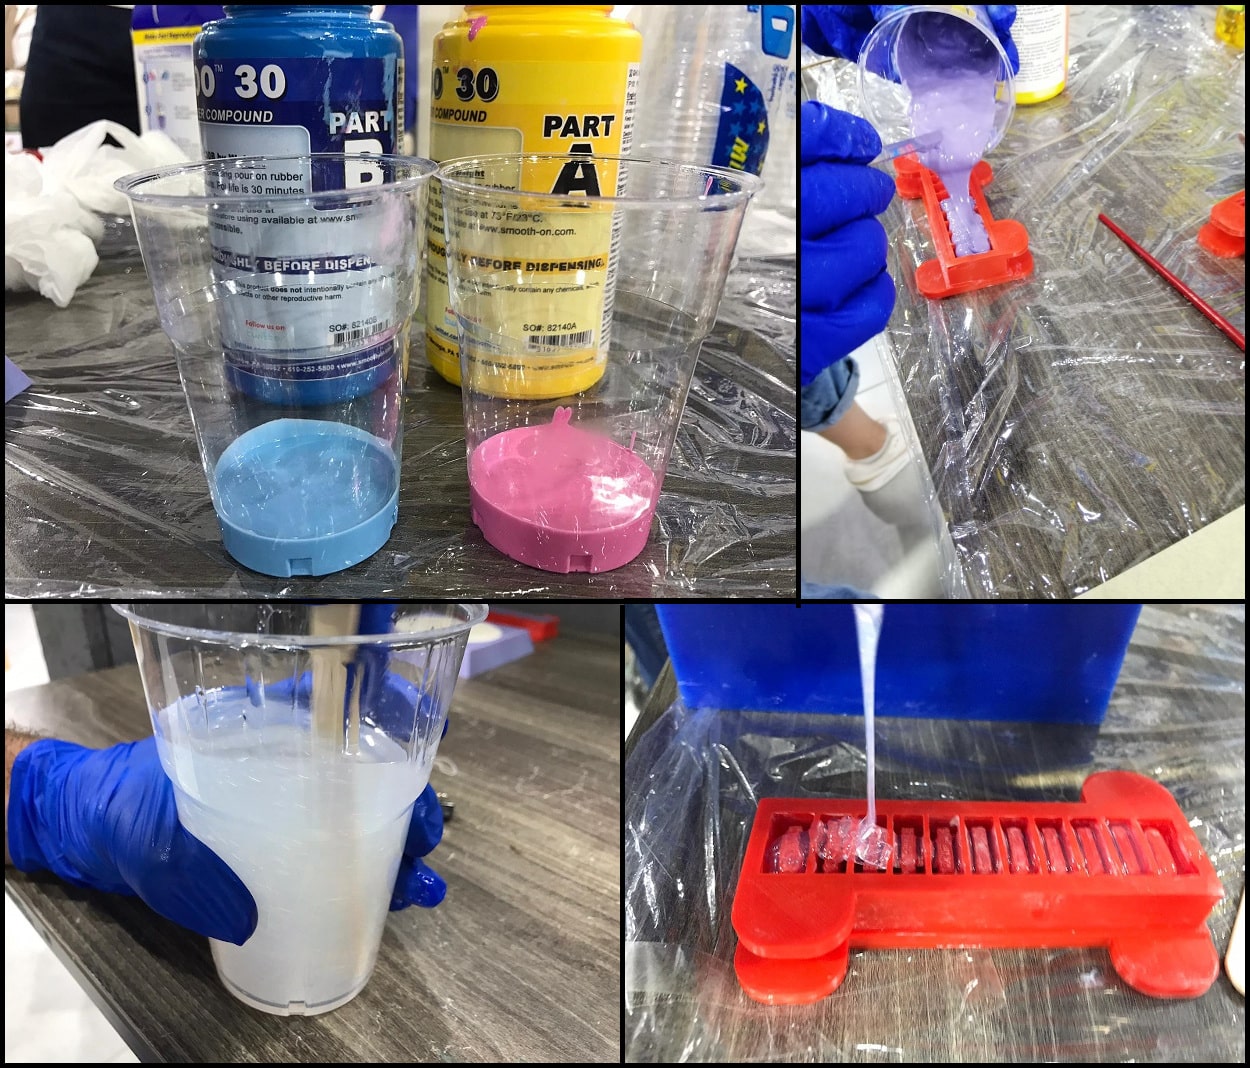
Material Test Casts
We made test casts using OOMOO™ 30 and SORTA-Clear™ 18 silicone rubbers. We followed the mixing guides in technical datasheets for both materials.
Individual assignment
review the safety data sheets for each of your molding and casting materials,then make and compare test casts with each of them
files
Design
Check the video below for the Mold design.
Tutorial 2 from Omar Rawashdeh on Vimeo.
For this week i want to make a geometrical patterned Mold to pour bio-material recipes to get the same pattern.

Molding
For machinable wax, I will use 150 mm x 150 mm x 80 mm block.
Tip : Make sure that the wax box walls have an angel around 5 DEG to remove the silicone easily AFTER THE CURE.
First :
Roughing and Finishing Toolpaths
I used VCarve to create the toolpaths. For rough toolpath, I used straight 0.25” bit, and for finish toolpath I used ball nose 0.125” bit.

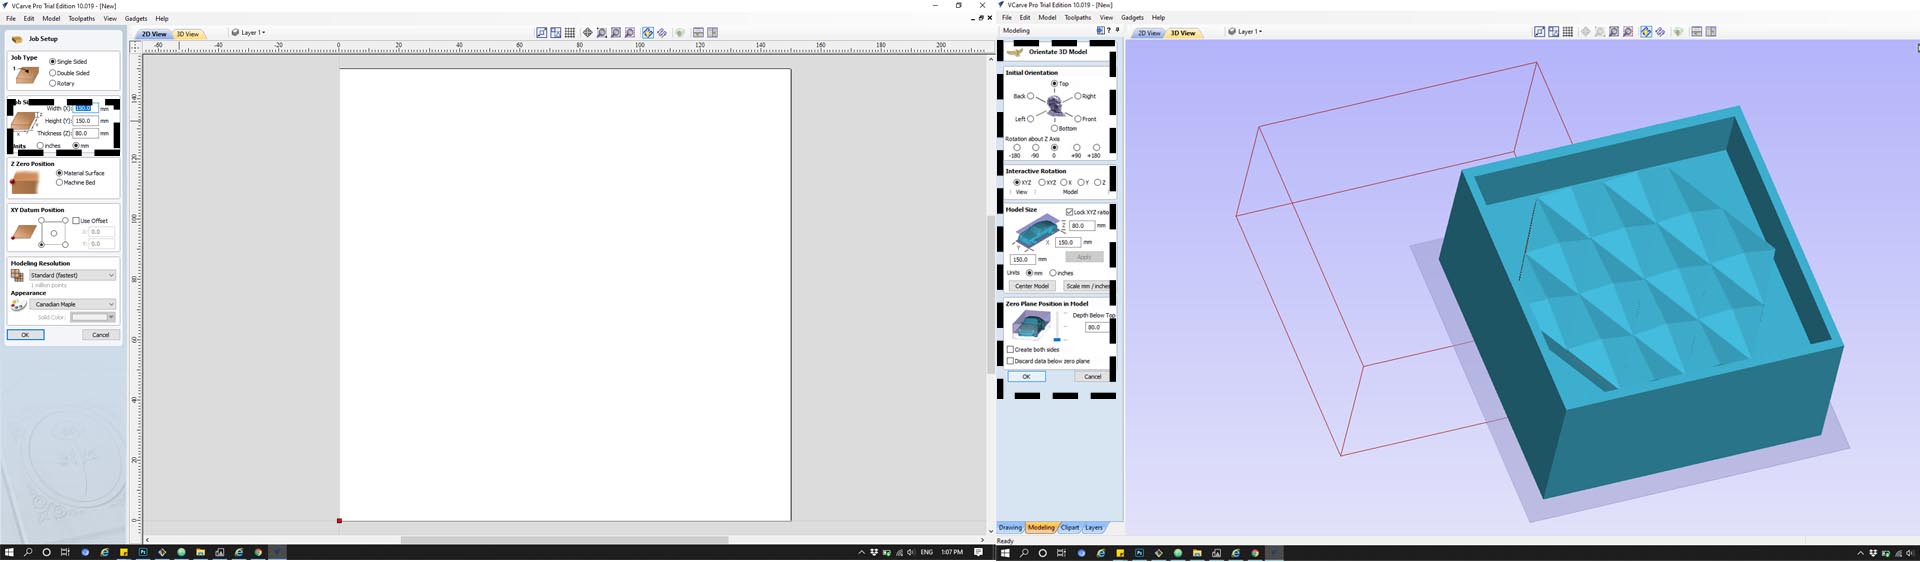
Step 1: Open VCarve and create a new file. In job setup, insert your machinable wax block size. Click “File > Import > Import Component/3D Model” and import your 3D STL file.
Step 2: Click on “3D Roughing Toolpath” and fill for material setup. Click Ok.
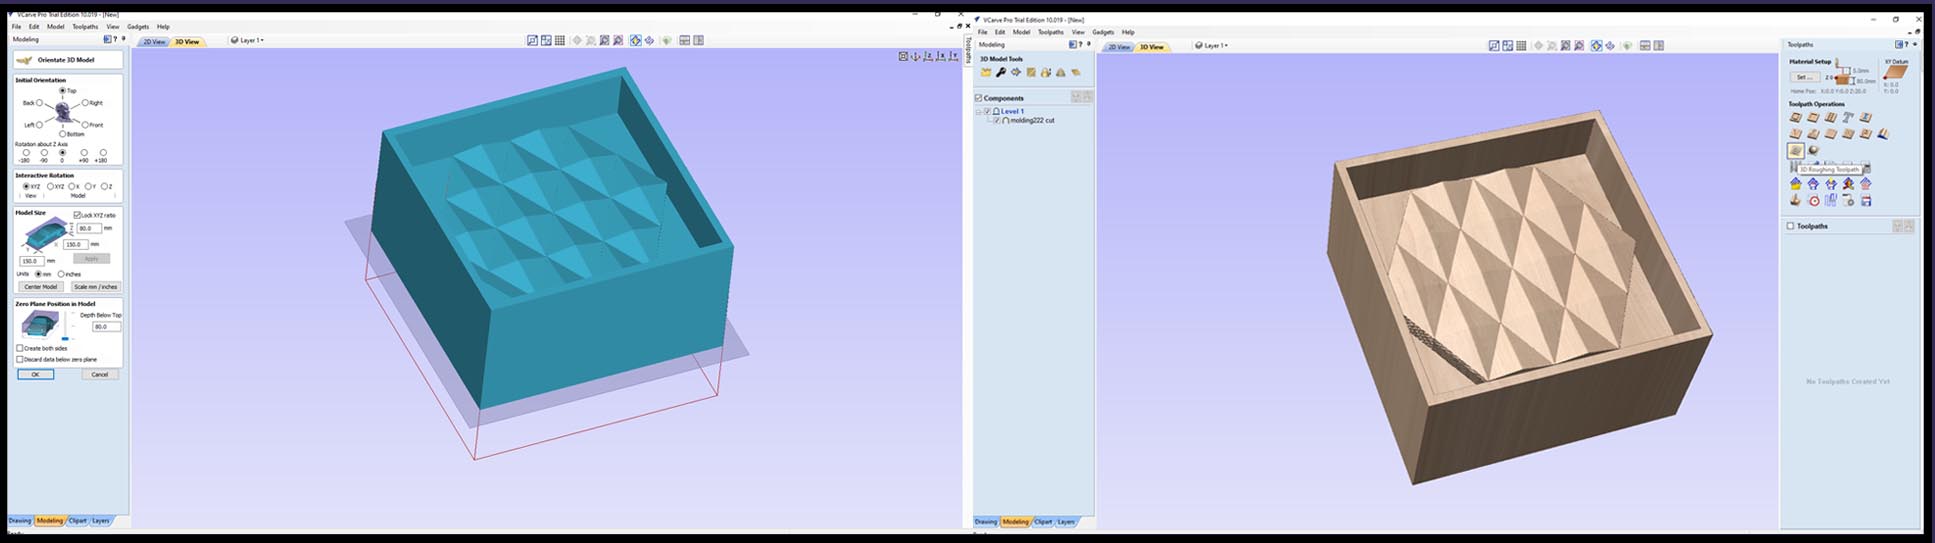
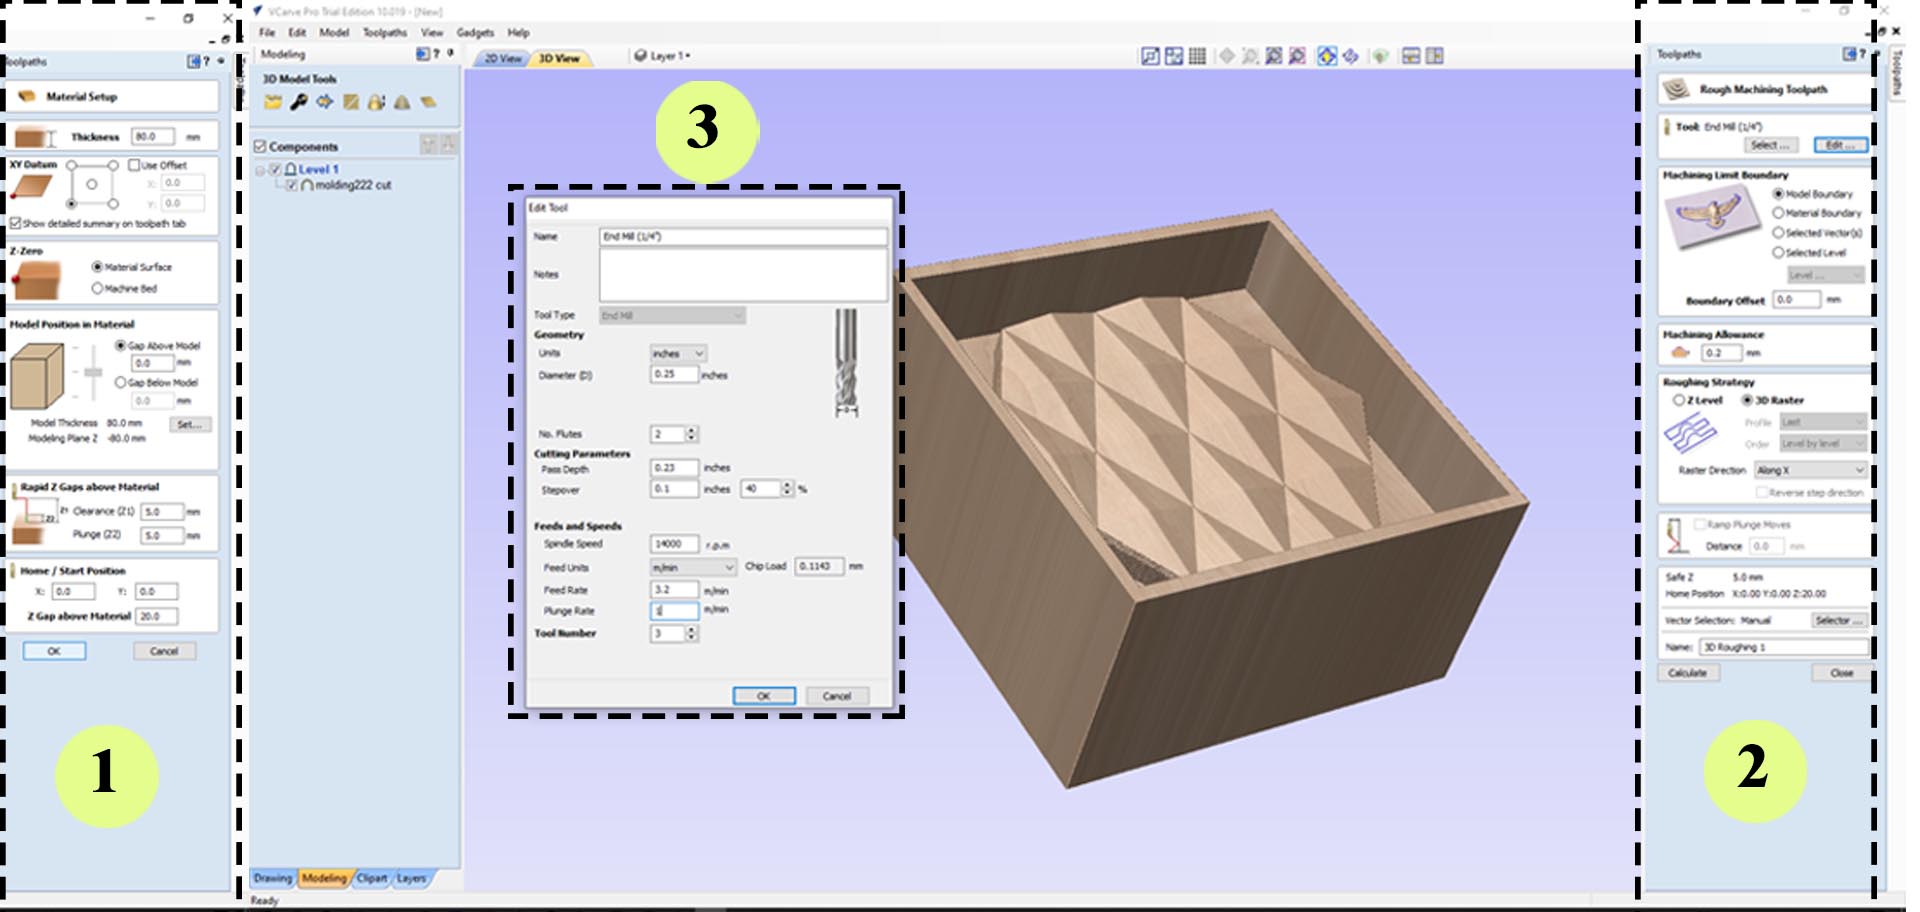
Step 3: Select the tool for 3D roughing, in my case 1/4” endmill. Click “Calculate”
#### The Media below shows the result after the 3D roughing.
Step 4: Click on “3D Finishing Toolpath” and select the tool for 3D finishing, in my case 1/8” ball nose. Edit the endmill and change the step over to a small value (I used 8%). Note that the 3D finishing toolpath is a single pass.
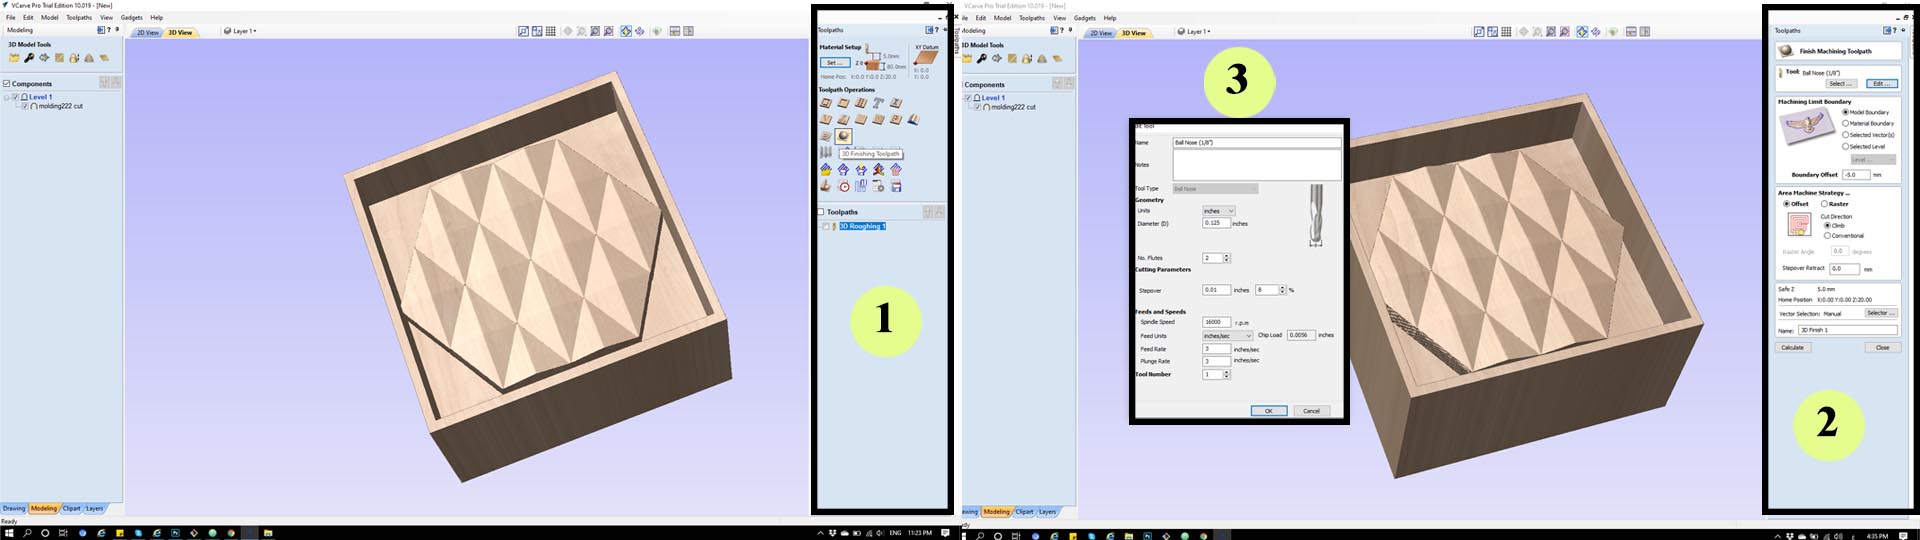
Step 5: Save toolpaths to use on the machine.
Milling the positive
Software
I used machinable wax stock (150 mm x 150 mm x 40 mm). We fixed the block to ShopBot table using wood pieces and wood screws.
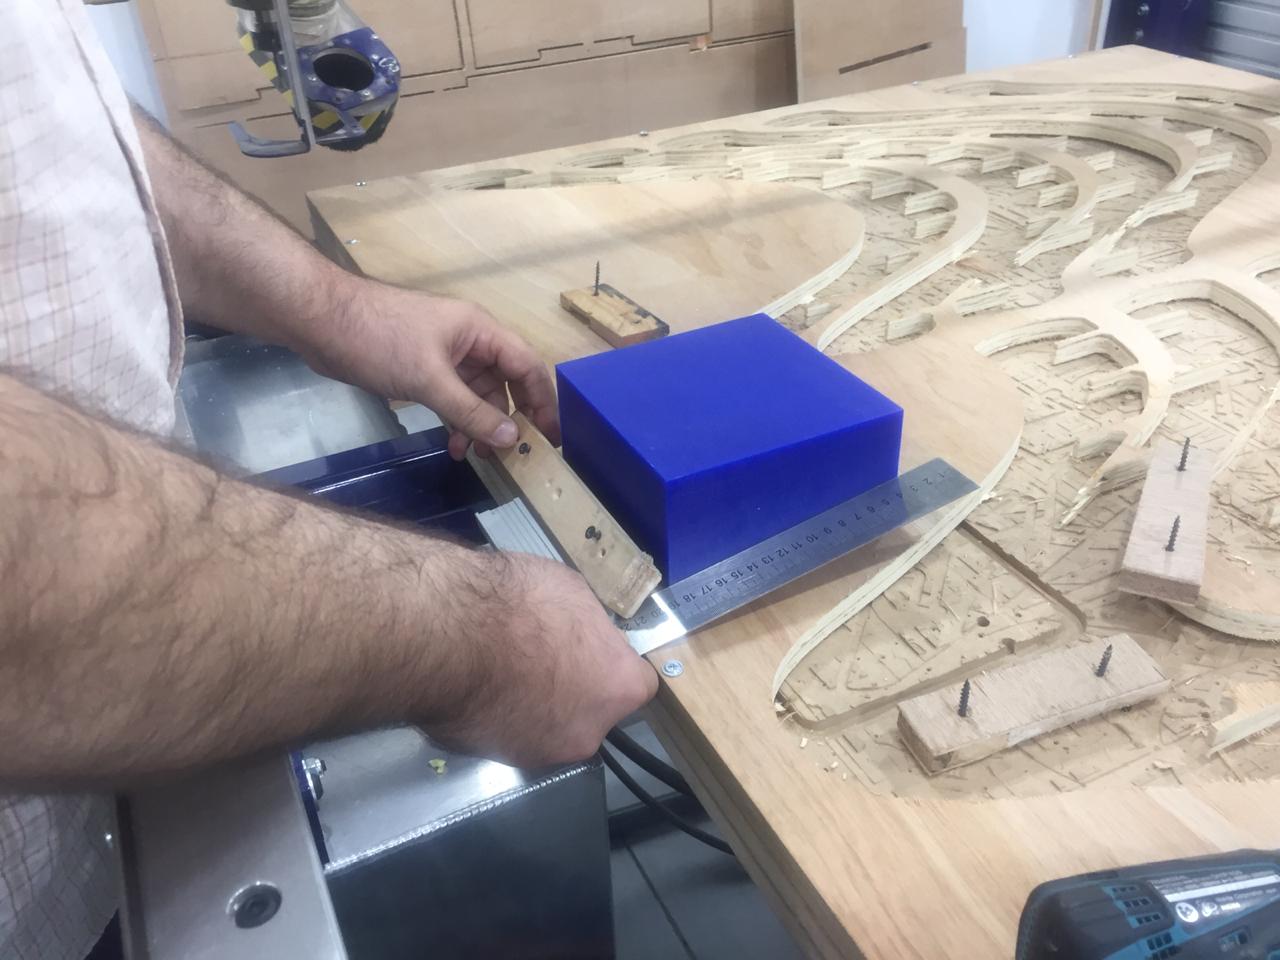
The 3D roughing took 42 minutes and the 3D finishing took 33 minutes.
Roughing
Finishing
HERO SHOT
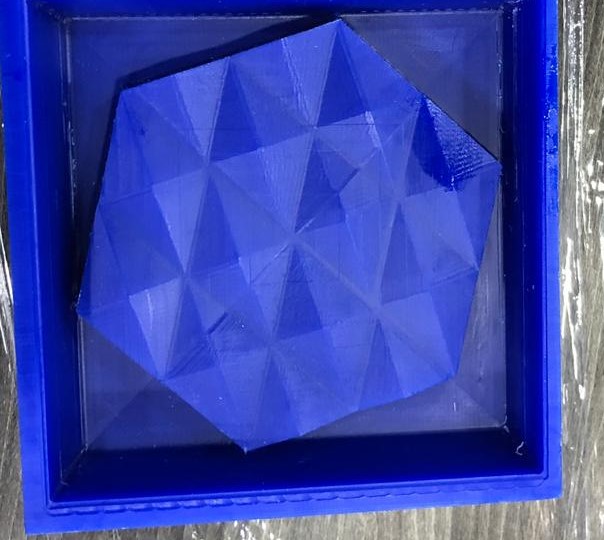
Molding the Negative Mold Using Silicone Rubber :
I used Sorta-clear
First I've used release Agent to make the de-molding step easier.
Step 1 :
Based on the Datasheet the ratio between A:B is 100:10 so i mixed 400 :40 from sorta-clear 2 minutes to get the mold filled.
Step 2 :
I started pouring material to the lowest point and slowly so material could find its way in the mold. This will reduce trapped air bubbles inside.
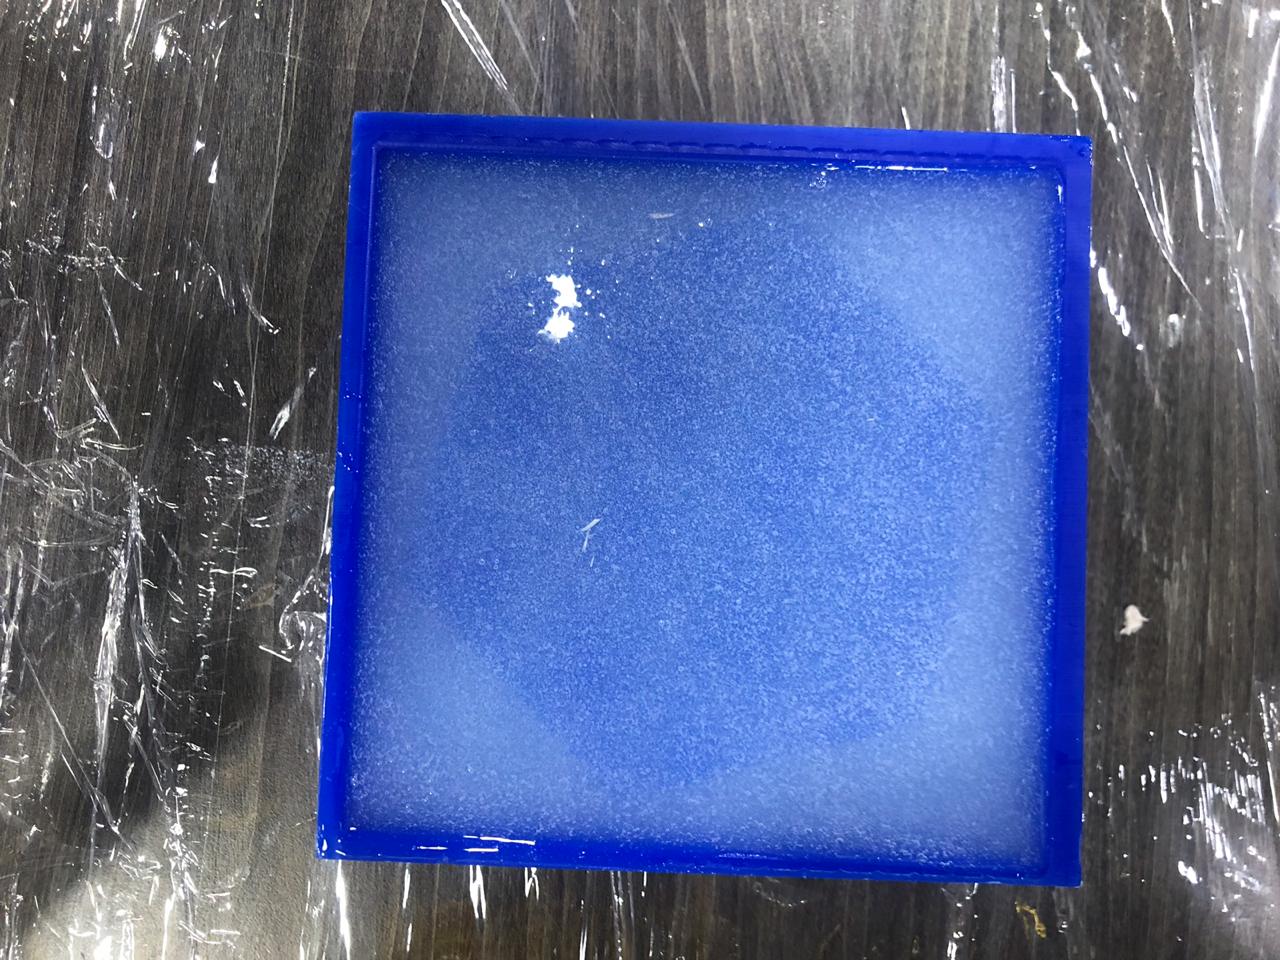
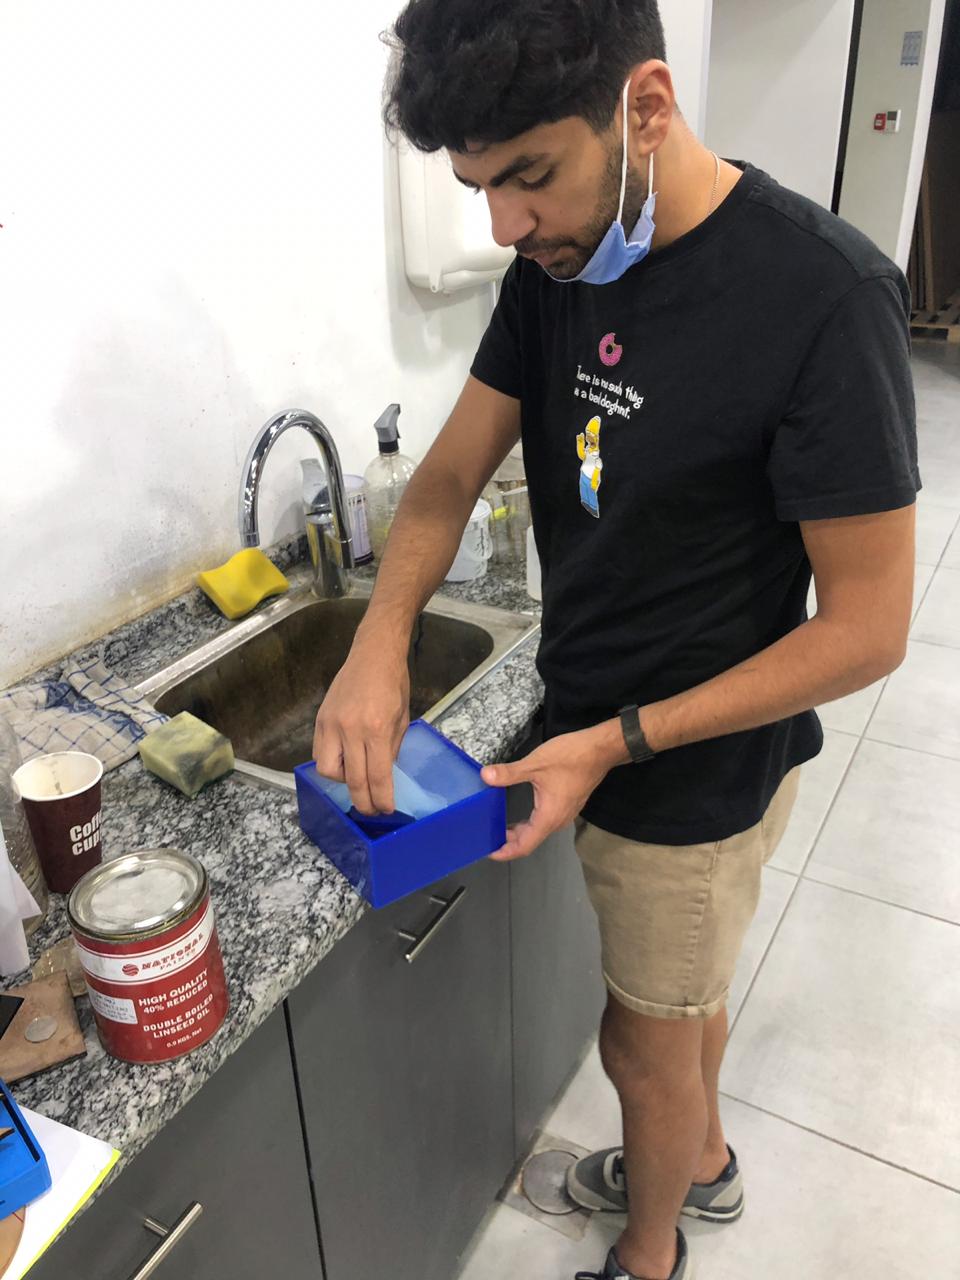
Step 3 : The cure time is 24 hours so after the estimated time i have de-molded the rubber as shown below :
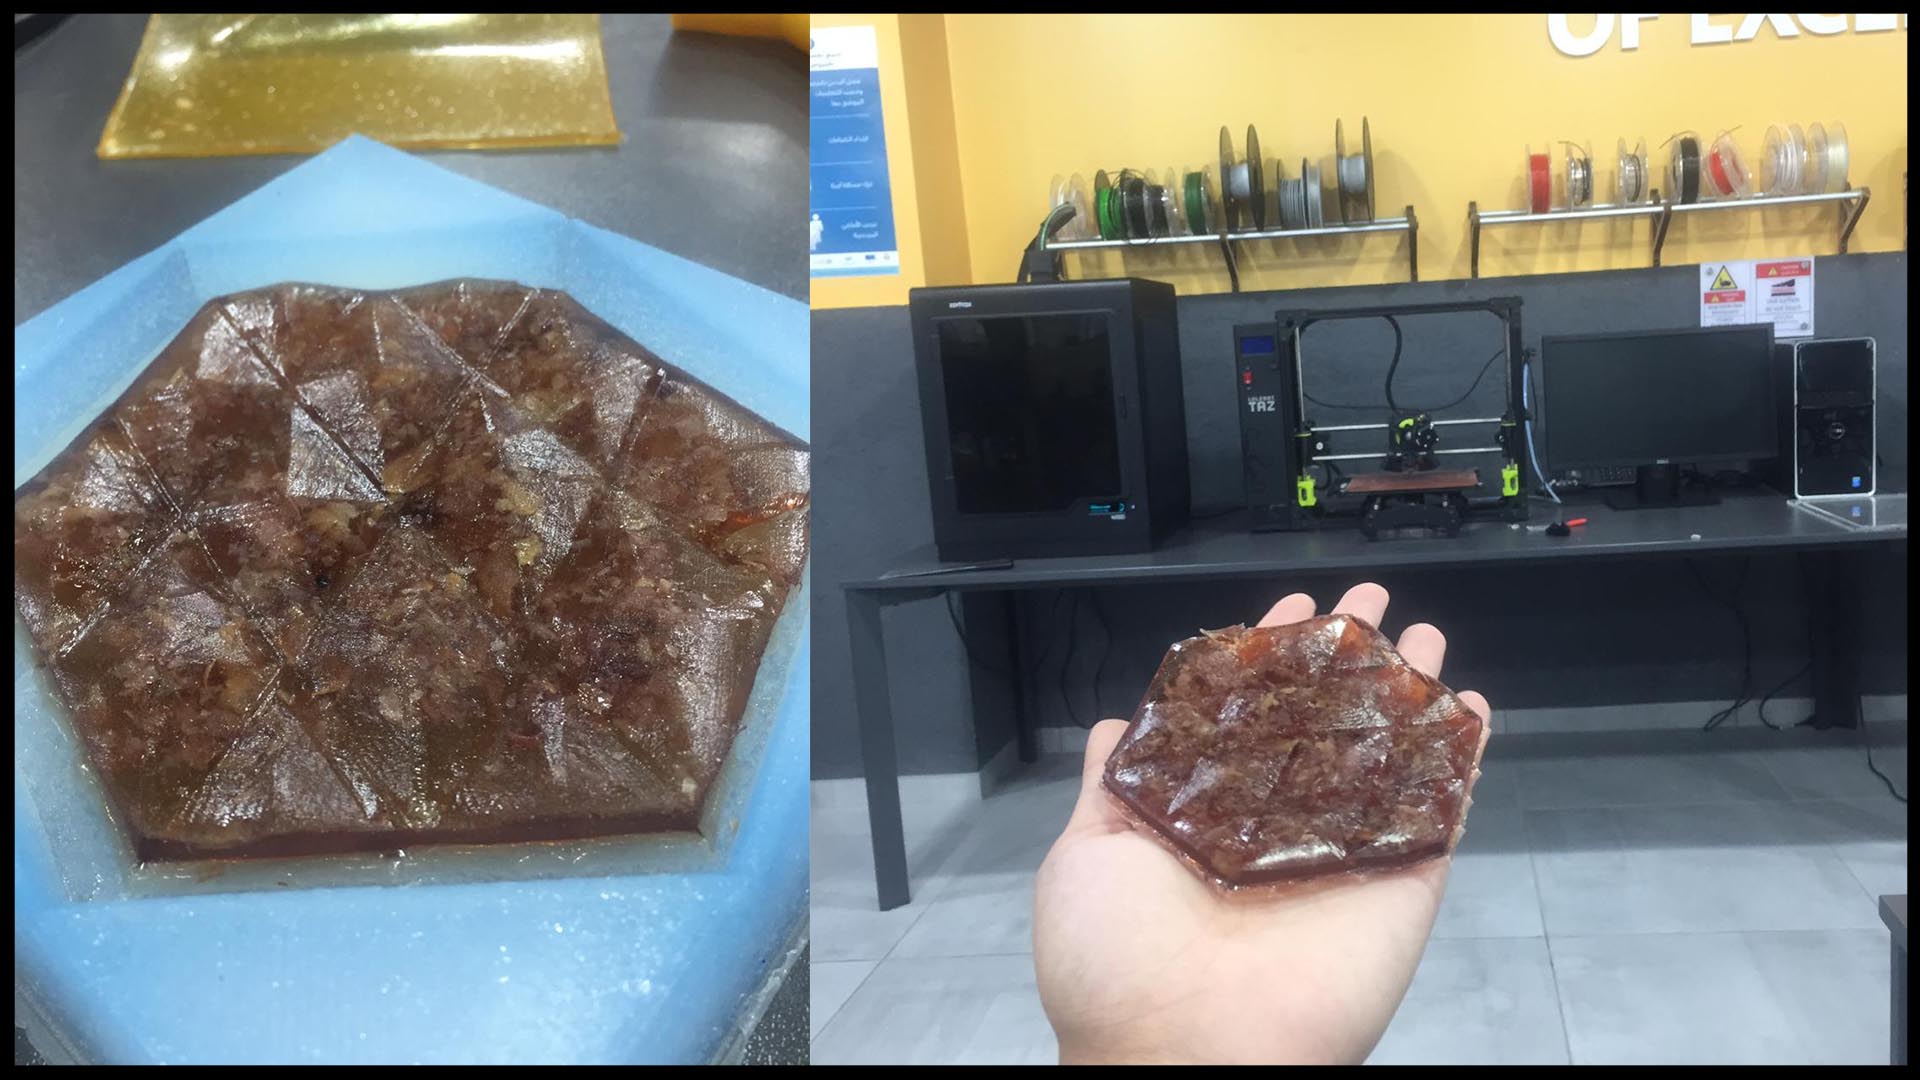
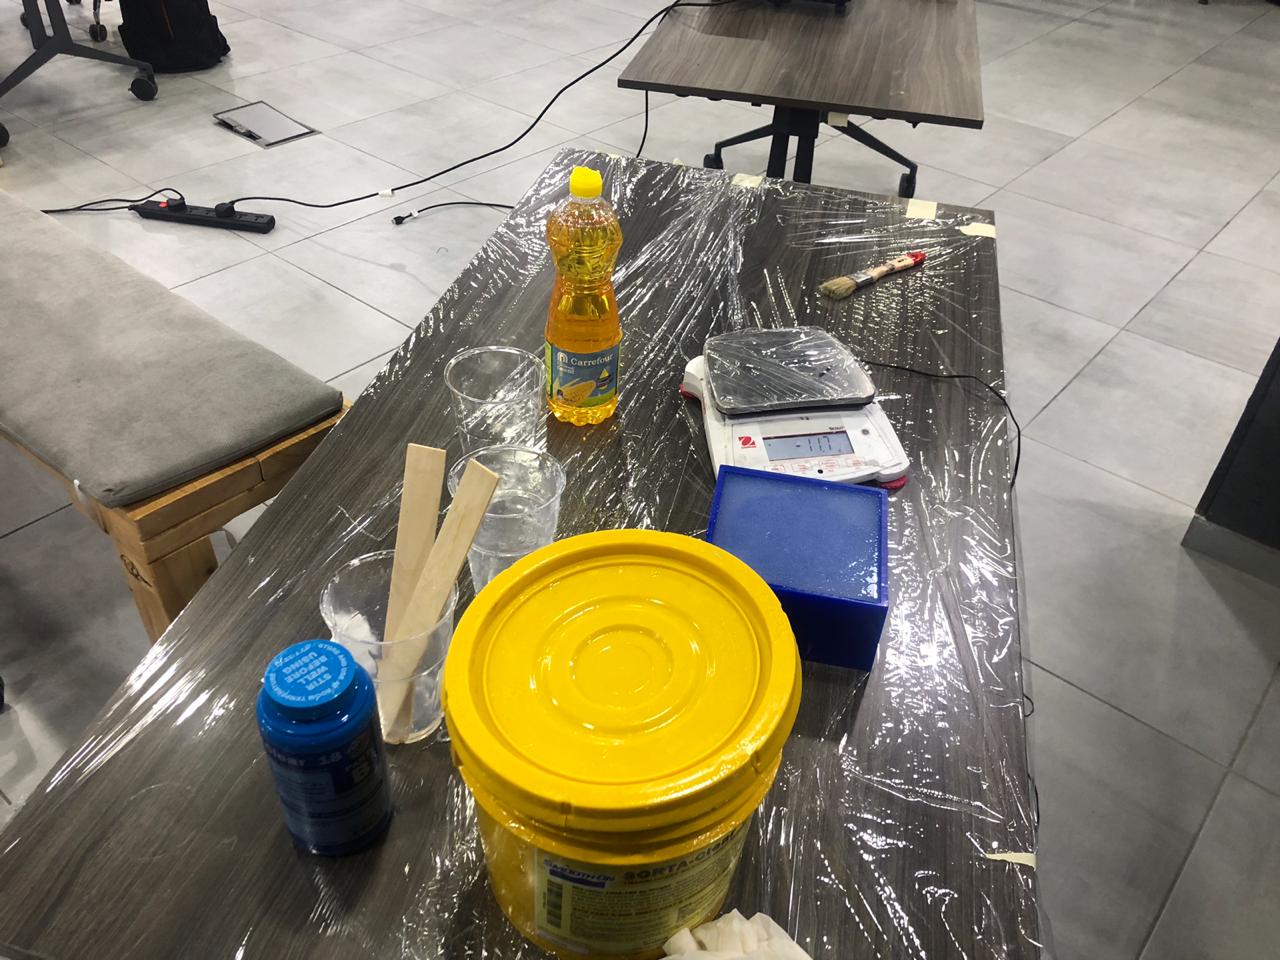
Casting Bio material inside the negative mold :
Step 1 :
Prepare the Ingredients as shown in the table below:
| Material | Q |
|---|---|
| Water | 100 ml |
| Gelatine | 30 g |
| glycerin | 20 ml |
| Dry roses | 5 g |
Step 2 :
Heat up the water on a stove
Step 3 :
Add the Gelatine then mix the Mixture until it gets thick.
Step 4 : Add the glycerin and mix the Mixture until it gets thin again
Step 5 :Add the Dry roses to the Mixture then pour the mixture in the mold.
Step 5 : The cure time to get the material dry is 24 hours,
HERO SHOT