3. Computer Aided design
Week introduction.
The Second week of the fab academy we should model and sketch on many differents softwares such as ( CAD, Vectors, parametric).
Most of the Designers and Architects have a good background in 2D and specifically 3D softwares, for me i do have a good knowledge in (Autocad, sketchup, revit, Rhino) for 3D and (Photoshop, illustrator) for 2D.
Files :
Files
Week assignment:
So for this week assignment i want to test another softwares to get a good knowledge to choose some of to work on for the assignments and for the final project.
2D.
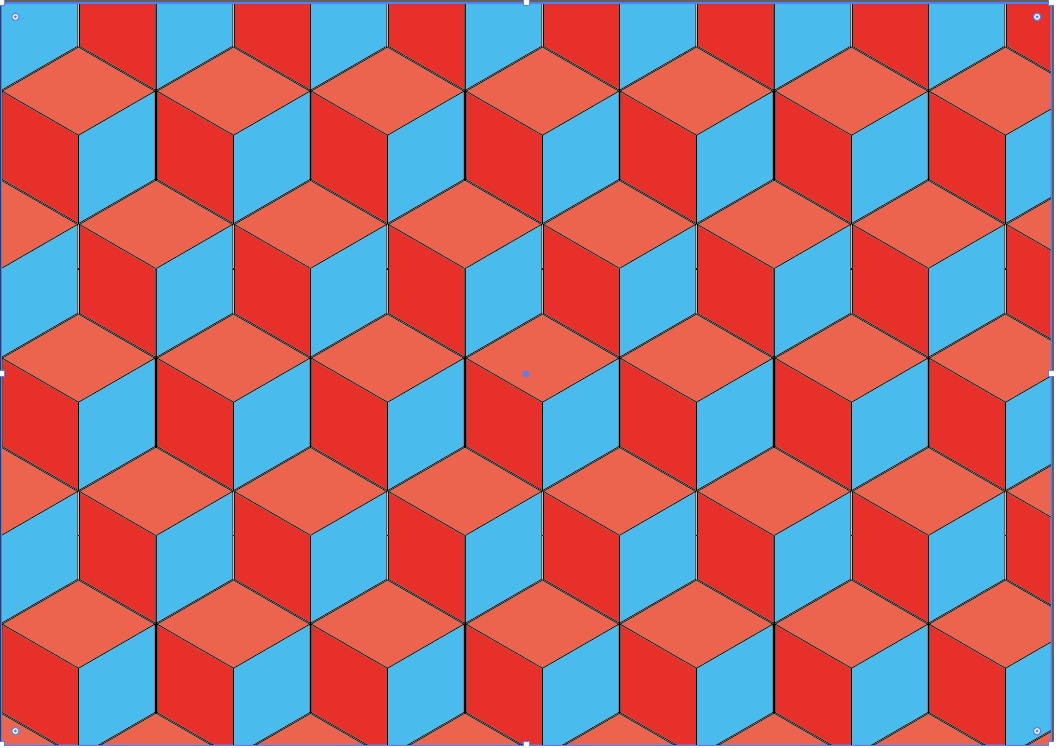
So i decided to draw a pattern to get familiar with Illustrator vectors:
Step 3 : choose the canvas size if you have specific ratio from the right corner for your drawing, but for me i clicked on the default size the the App offer for the user.
Step 4 : then the work space will be ready to start your project it will be white blank canvas.
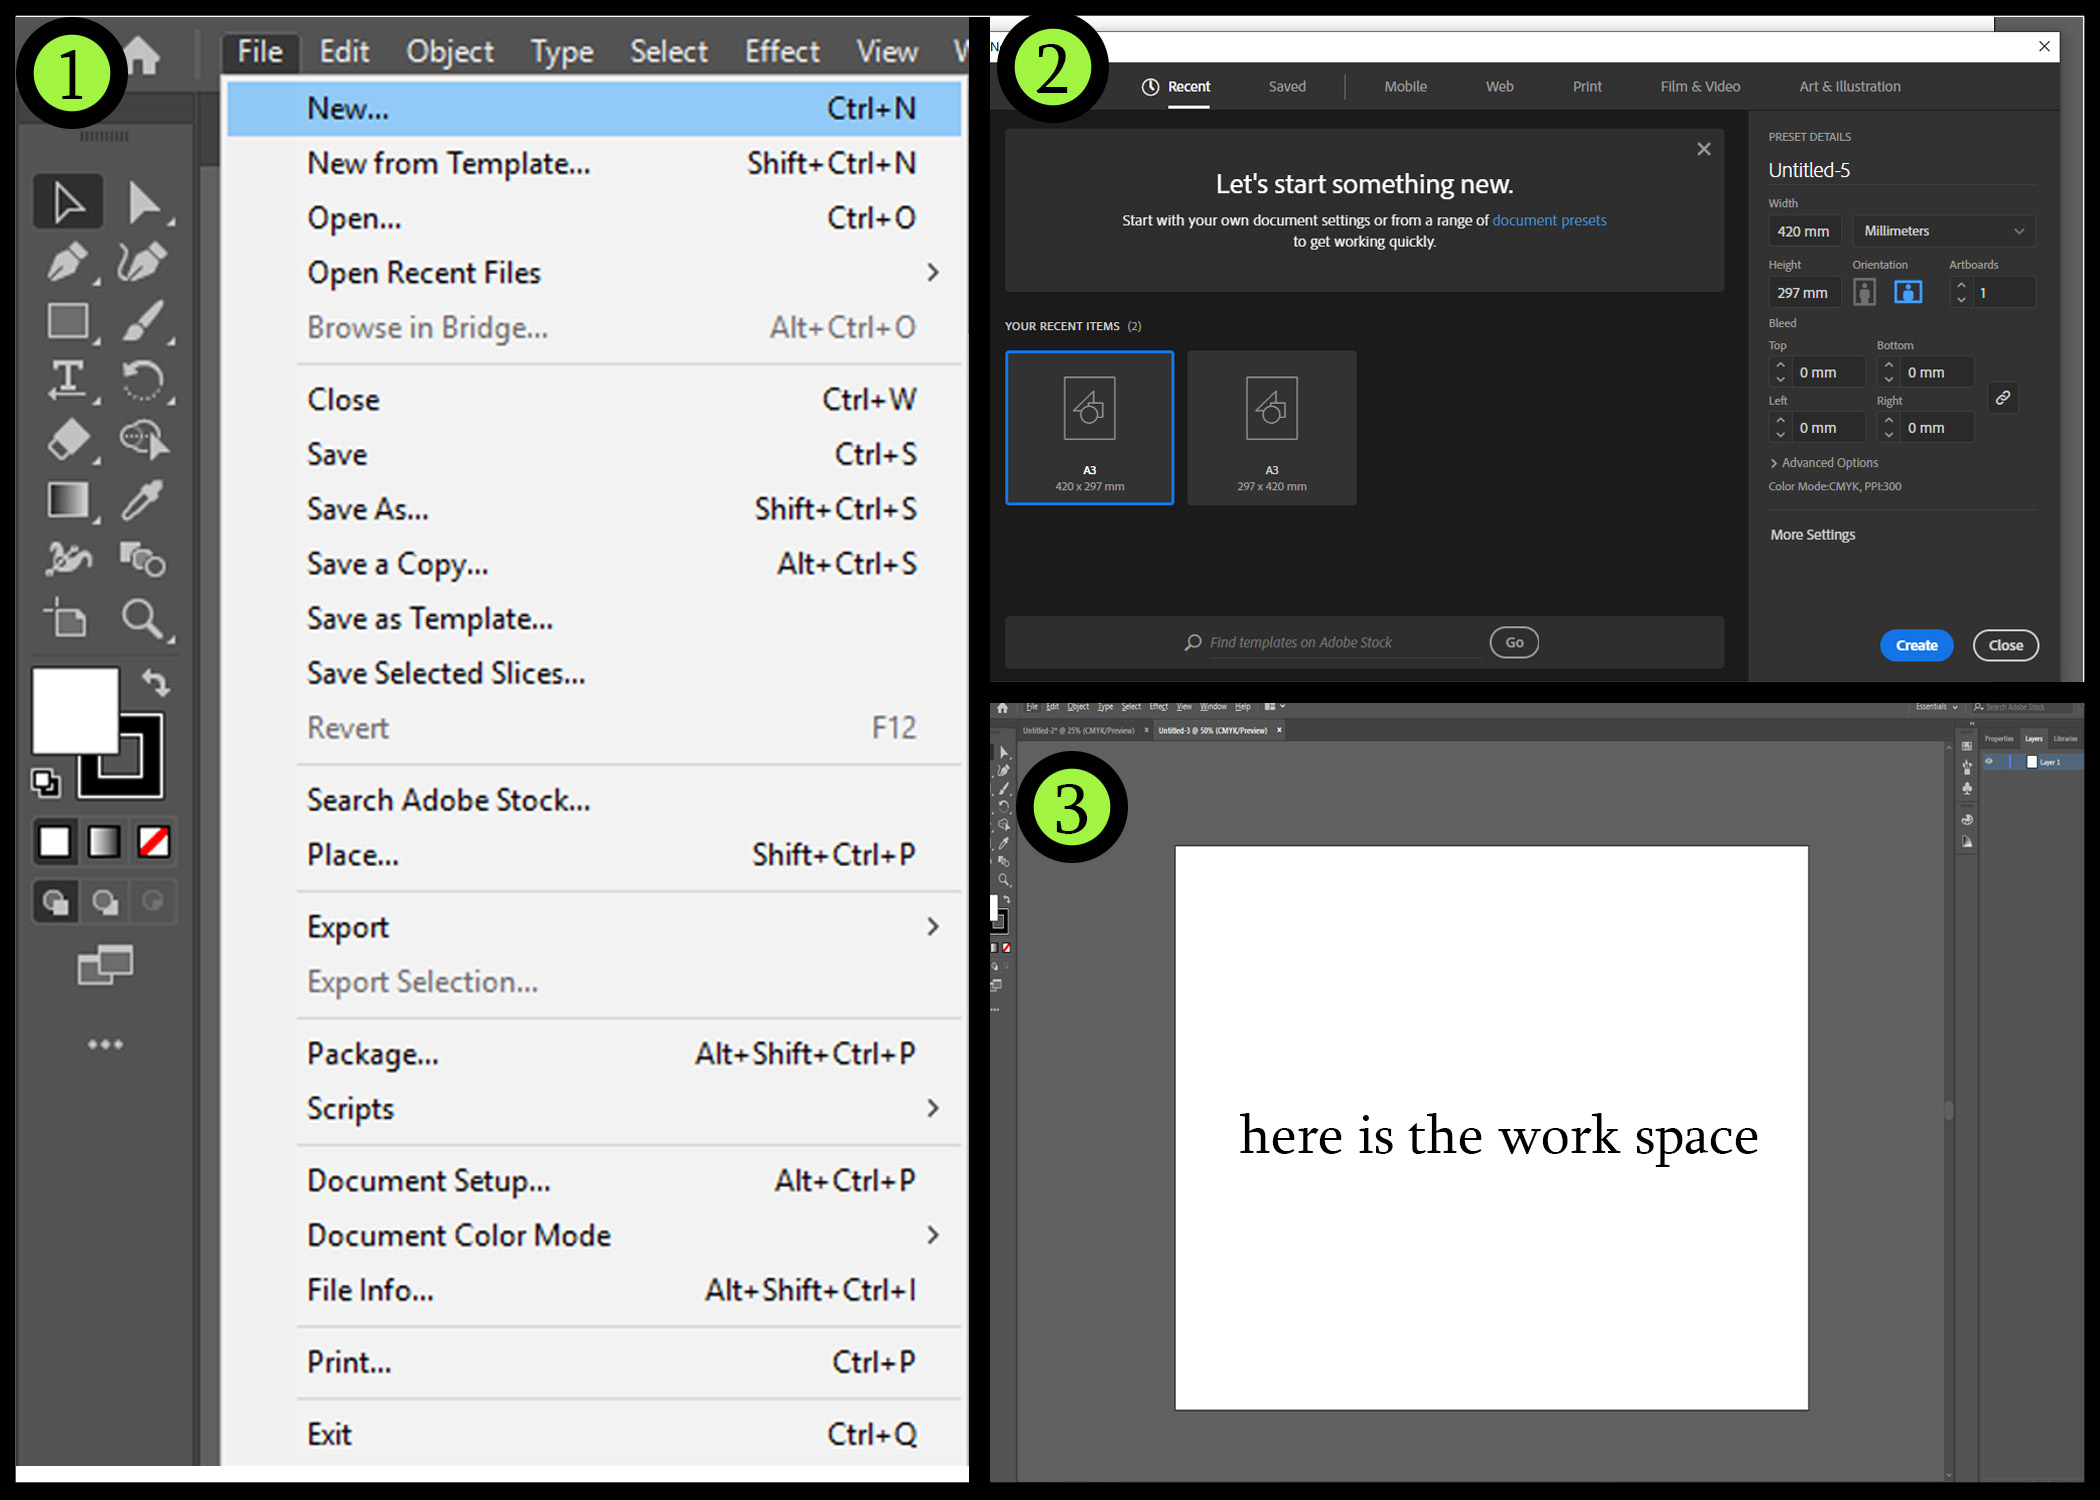
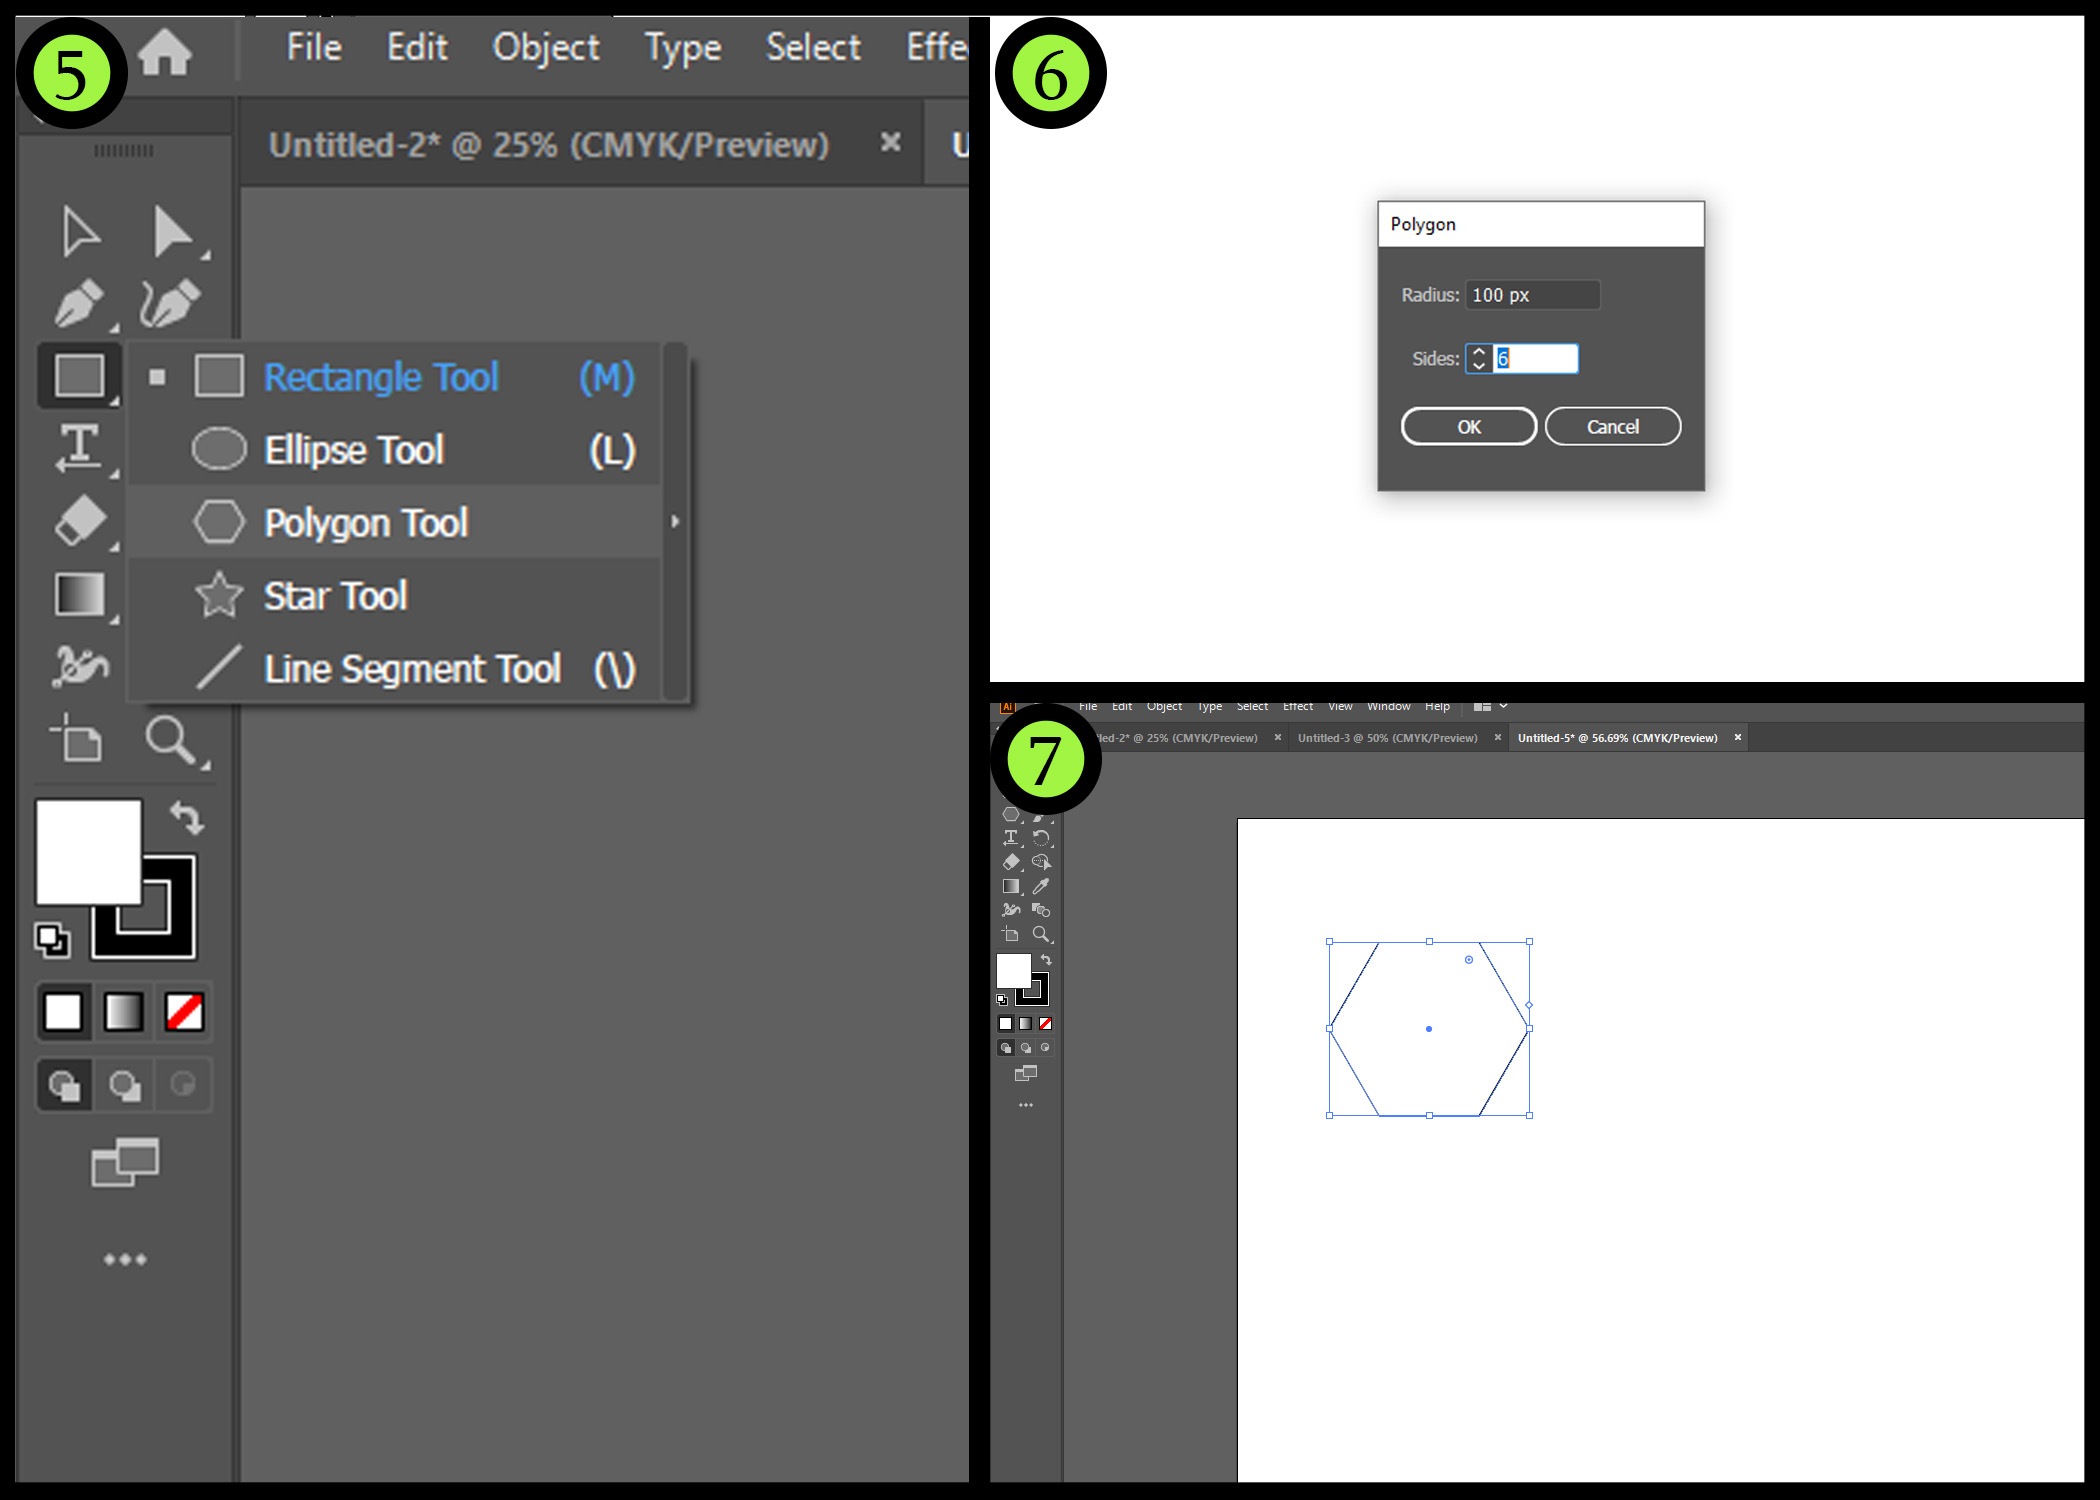
Step 5 : to start with pattern click on polygon from left corner bar.
Step 7 : The polygon shape will apper on the canvas with the same dimetries to start work and edit on it.
Step 8 : After i got the shape on the canvas i have ROTATE the polygon 90” degree by click on shift to get the rotation in the fixed degrees.
Step 10 : Start from point and drag the line to the matched corner for the three corners that shown in the picture below.
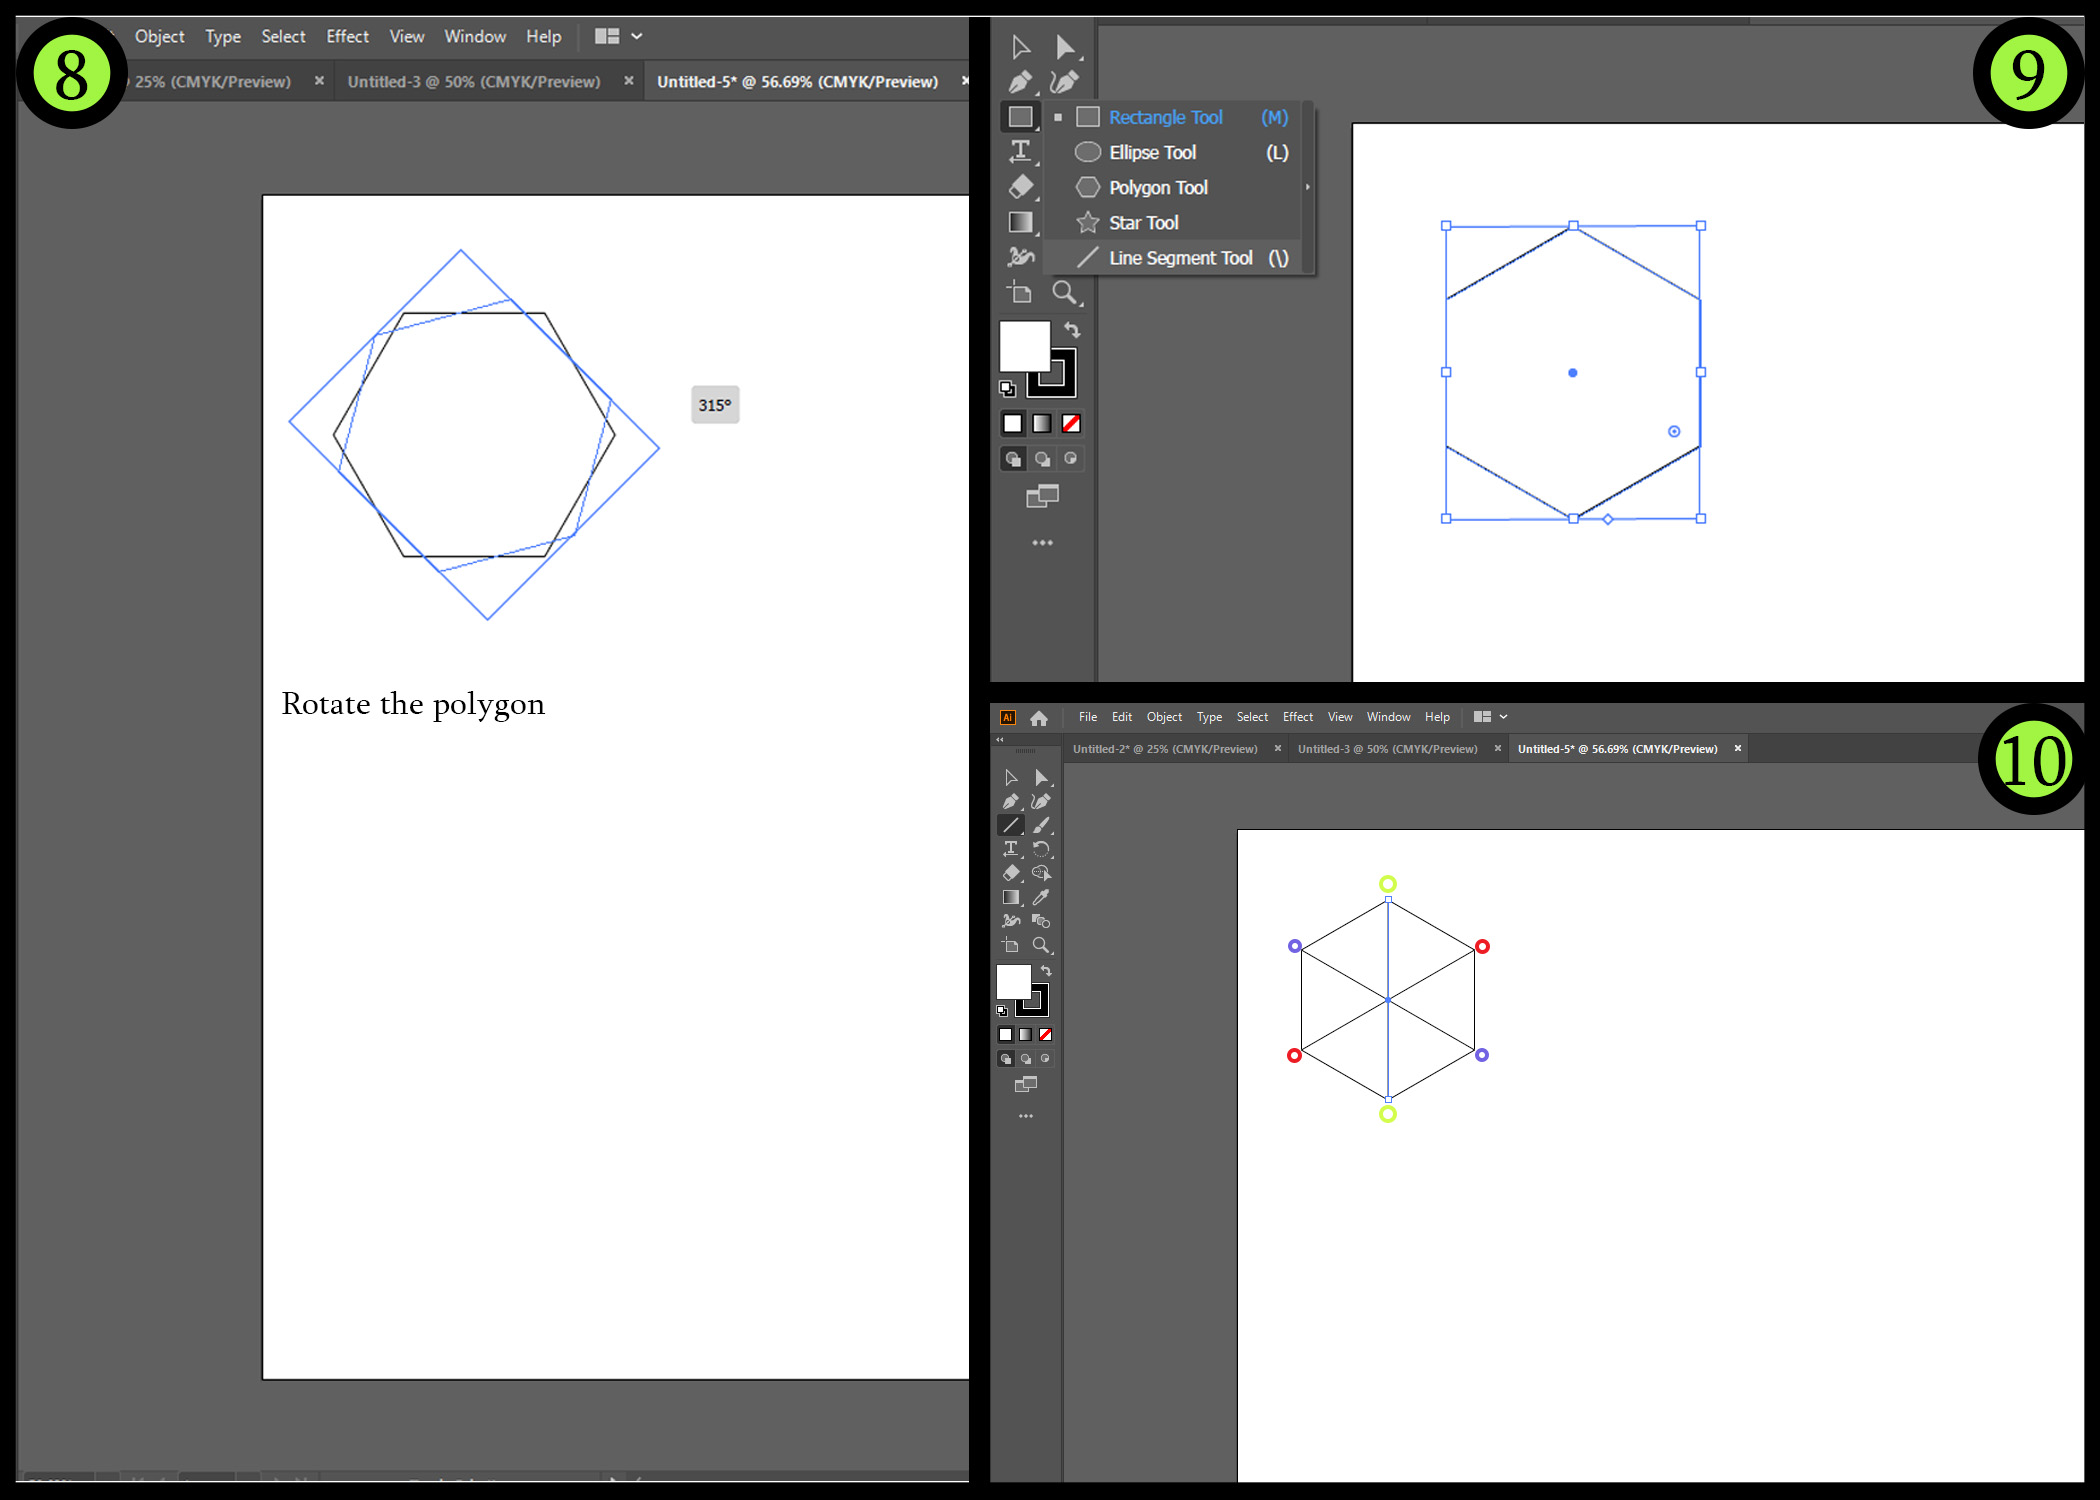
Step 11 : select the all the vectors and shapes on the canvas by clicking on “A”.
Work with the coloring :
Step 1 : click on of the faces edge in order to select it then choose the color from the color wheel and do the same for the other faces.
Then give the other faces lighter shades from the same color.

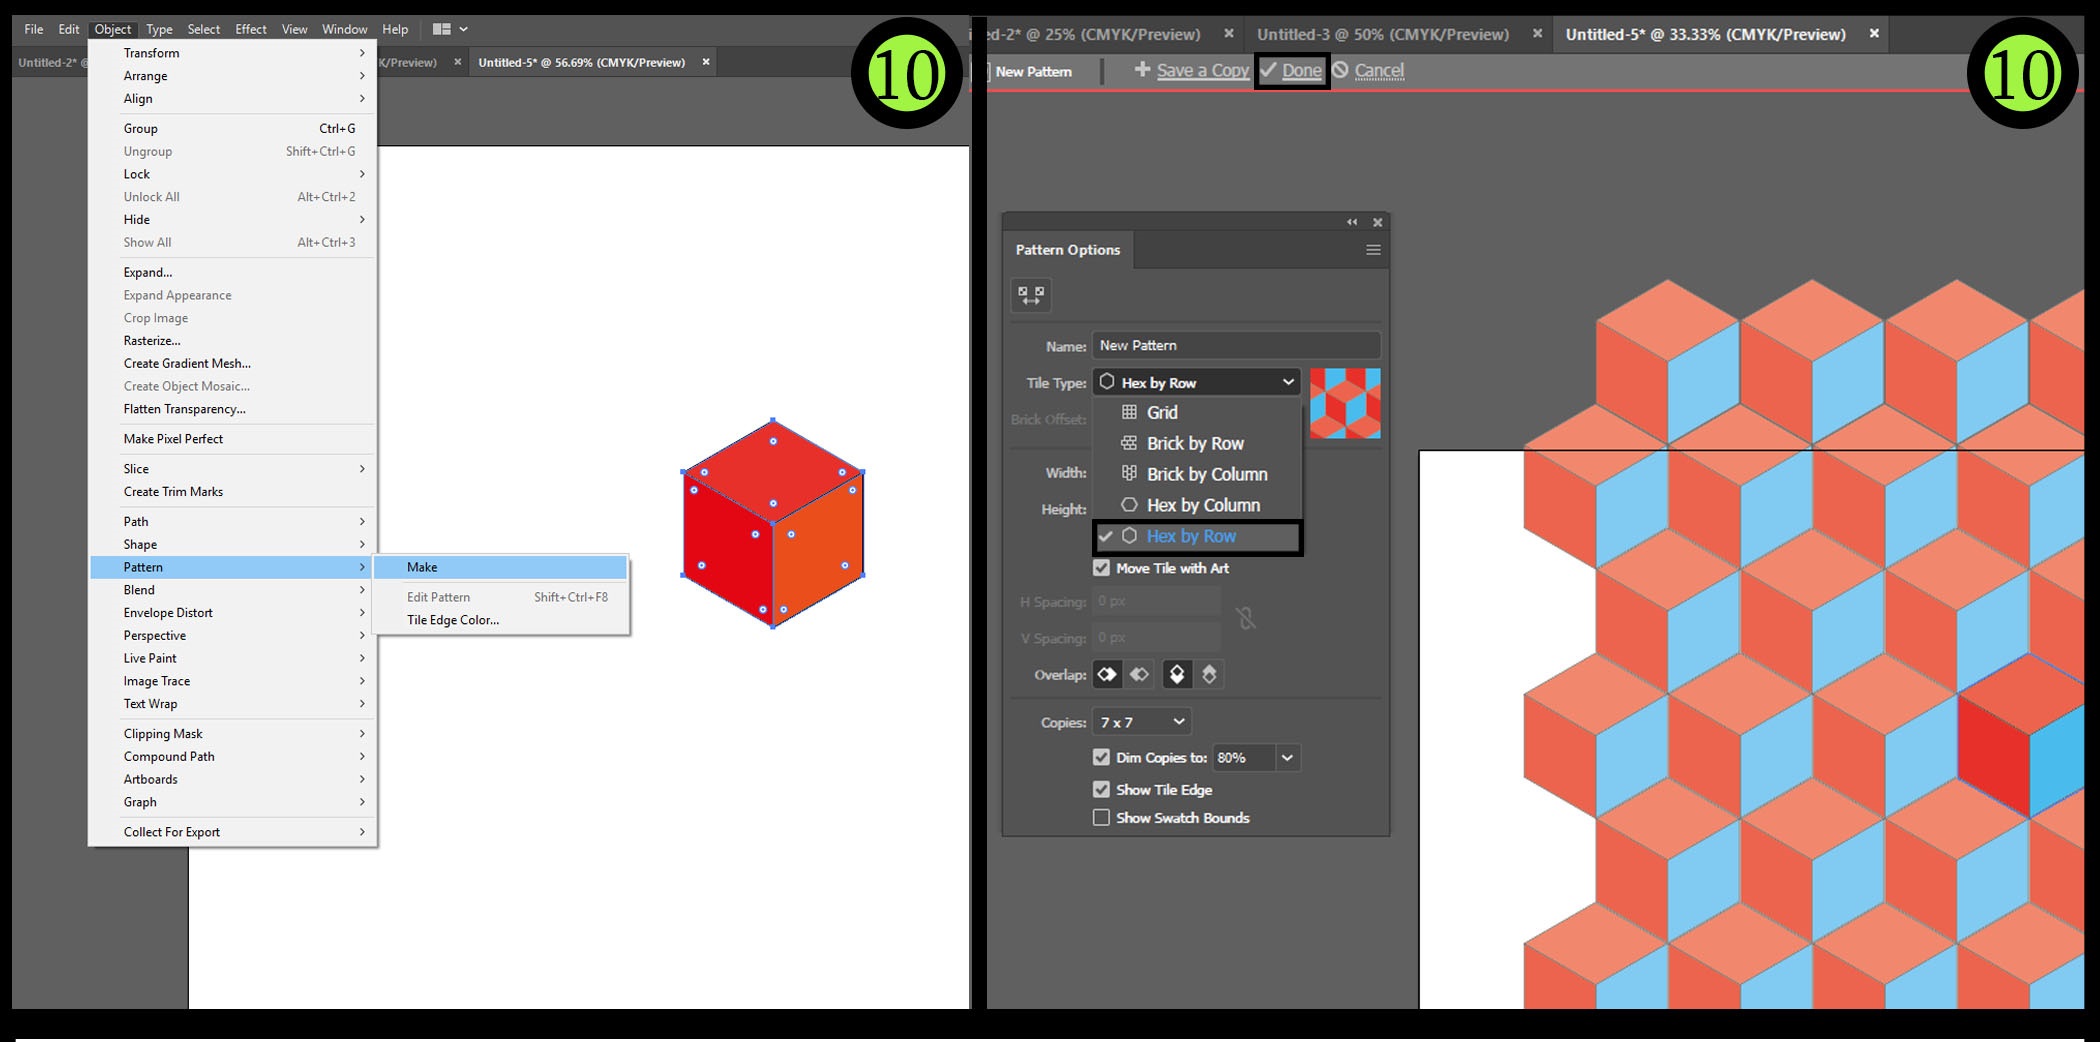
Patternize The shape :
First click in Orgnize from the upper bar the click on pattern in the bottom then click on Make
HERO SHOT
Illustrator Tutorilas :
File :

3D
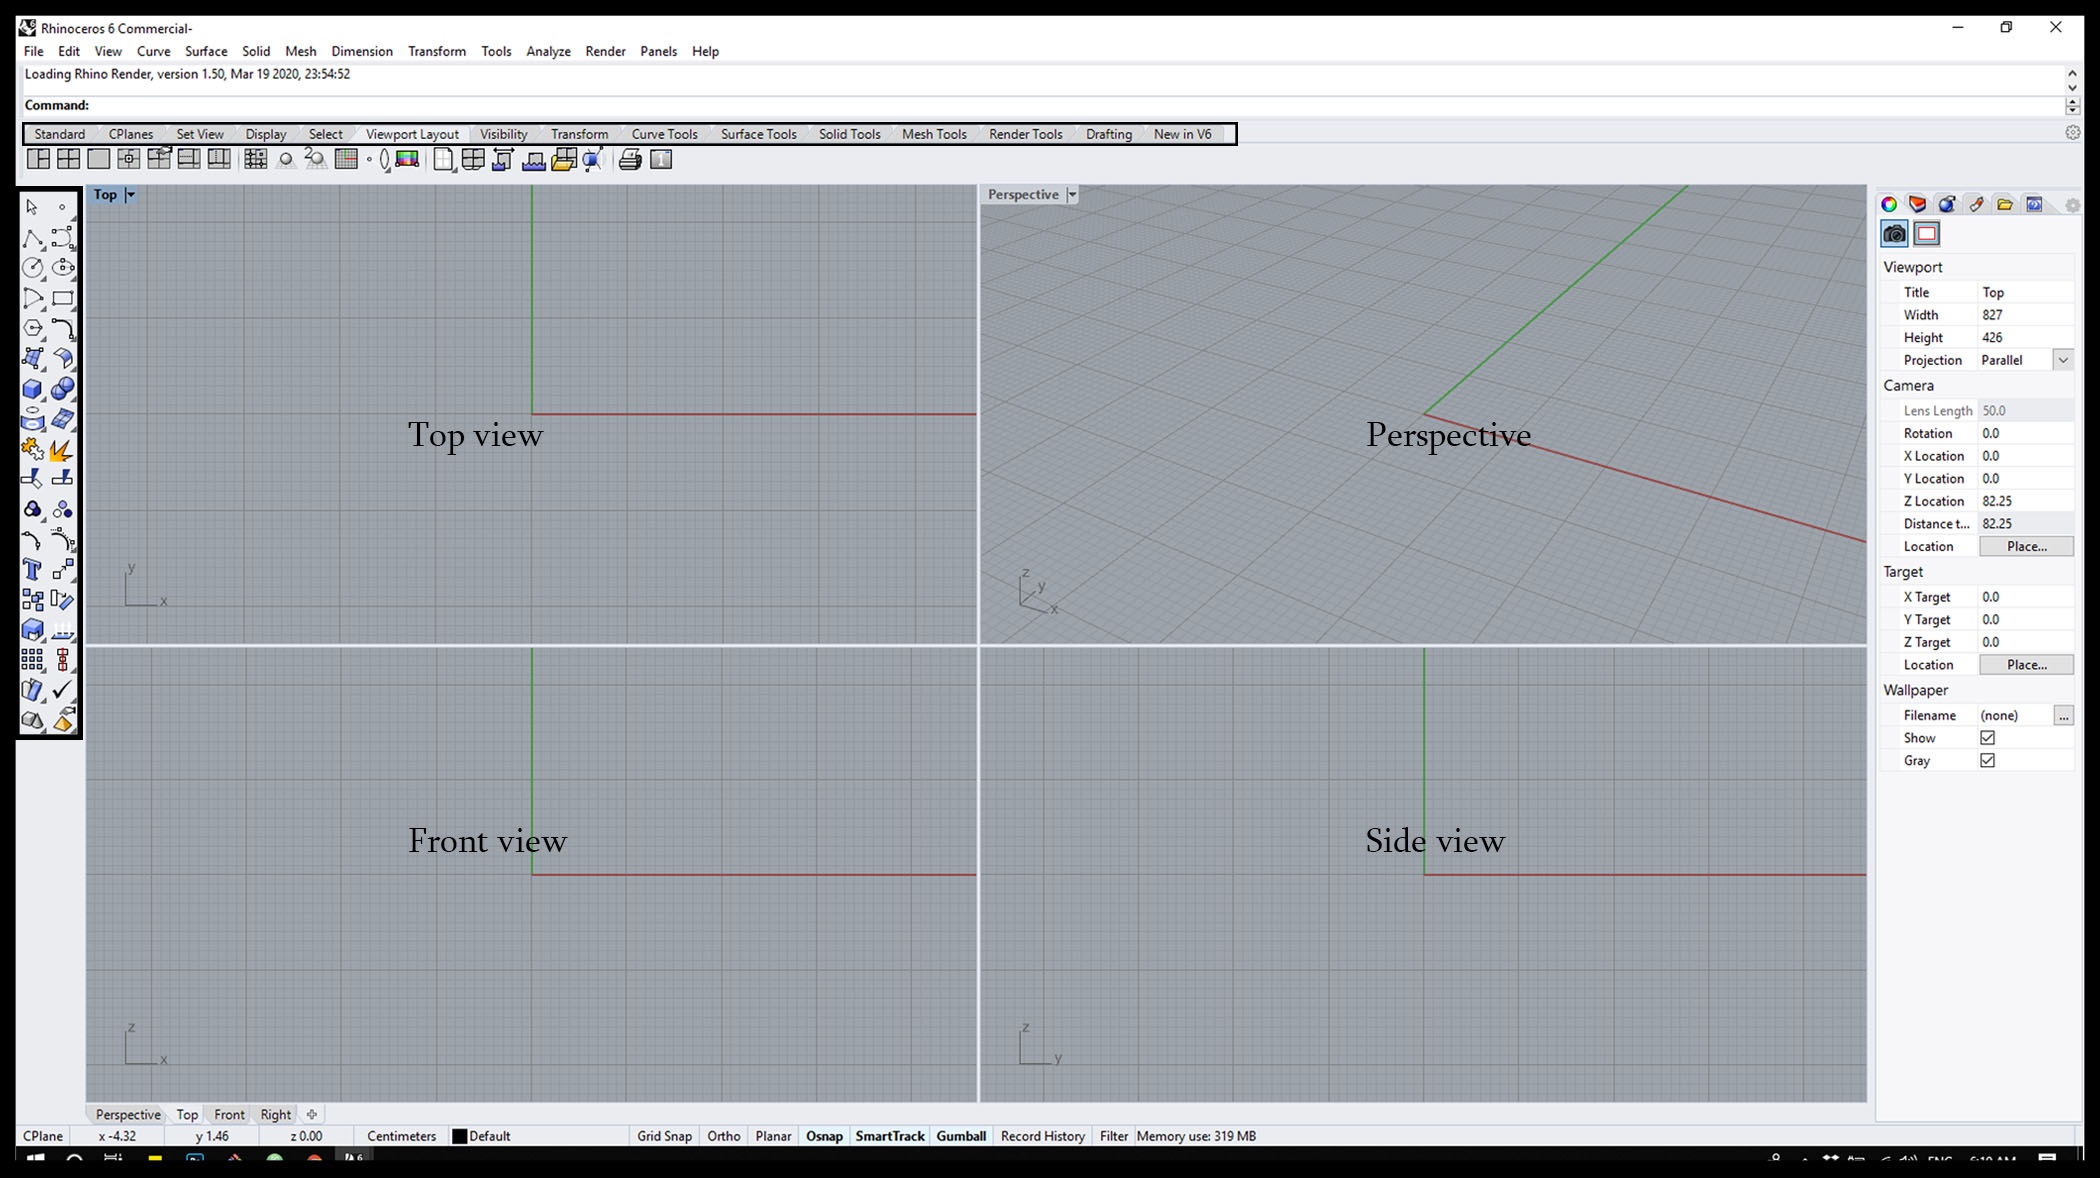
Rhino is a 2D/3D design program, which you can do a simple modeling with fixed coordinates and dimensions, or parametric modeling based on algorithmic thinking that enables the expression of parameters and rules that, together, define, encode and clarify the relationship between design intent and design response.
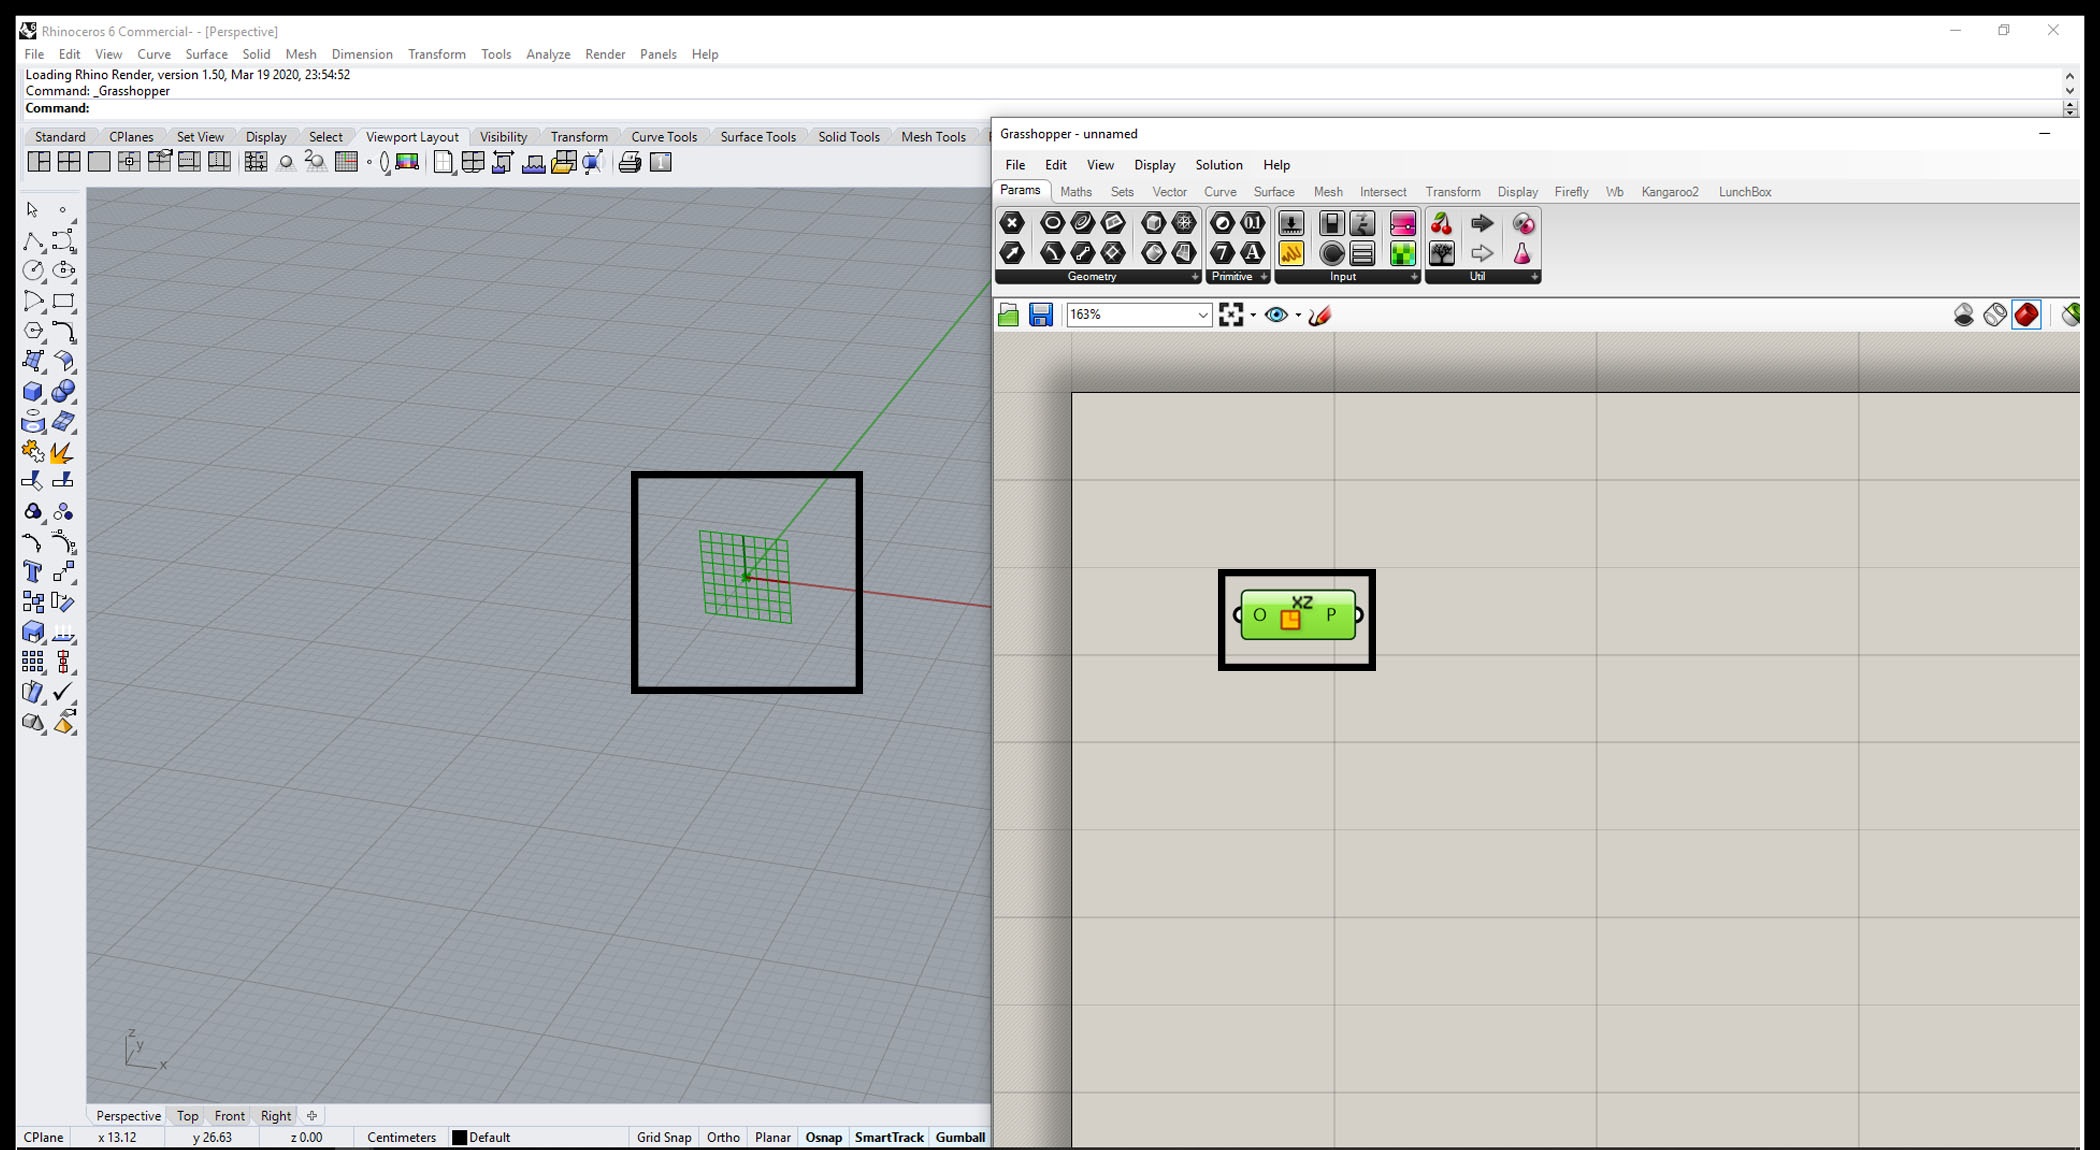
For Rhino i have used grasshopper plugin to make an organic shape Using point attractor Technique as it shown below!

# Then add the parameters for your project.
Work with pattern :
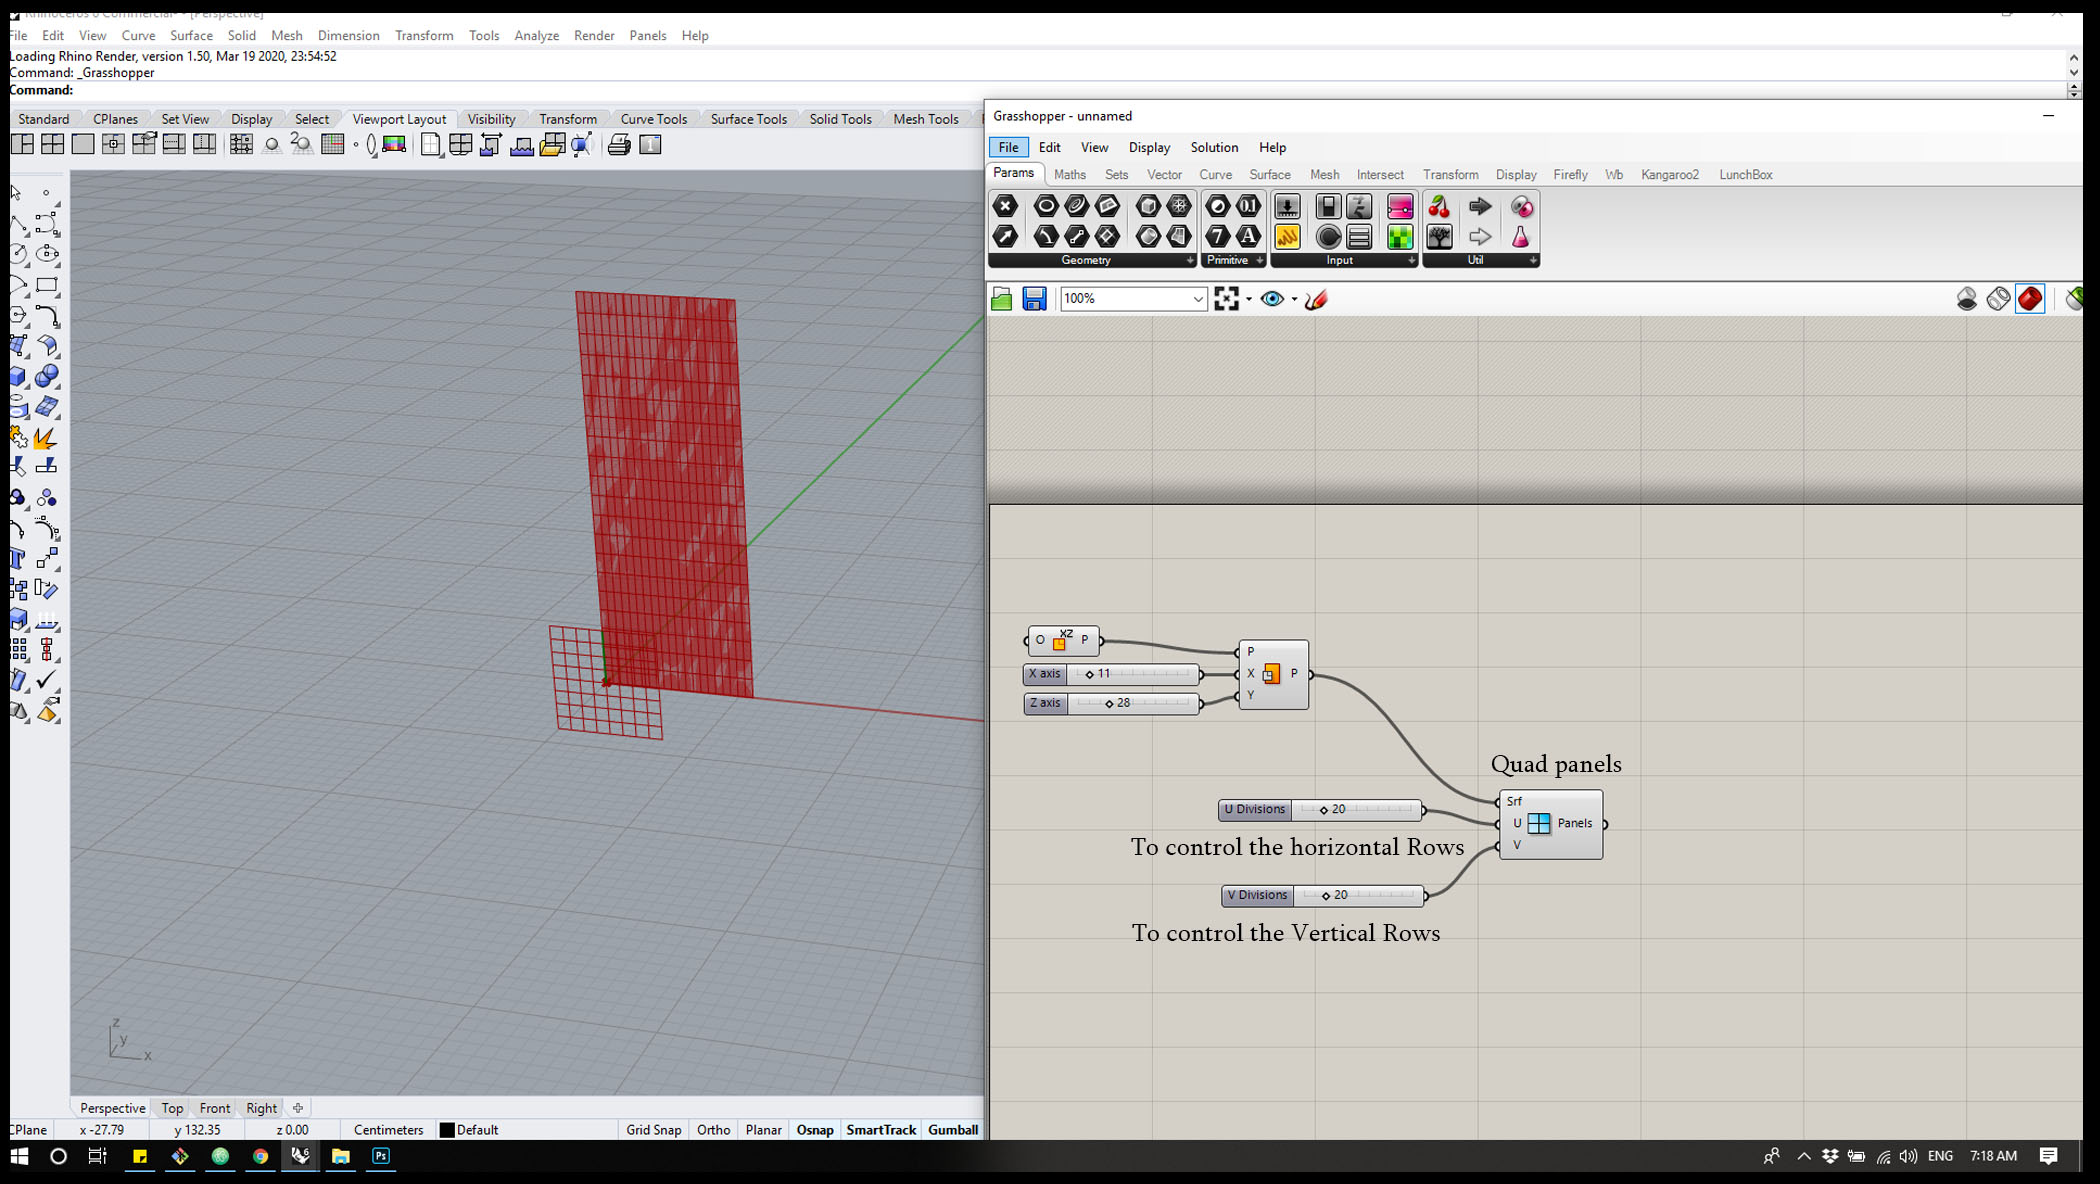
Step 1 : Add parameter ” xz “ to get a grid on the X , Y axis.
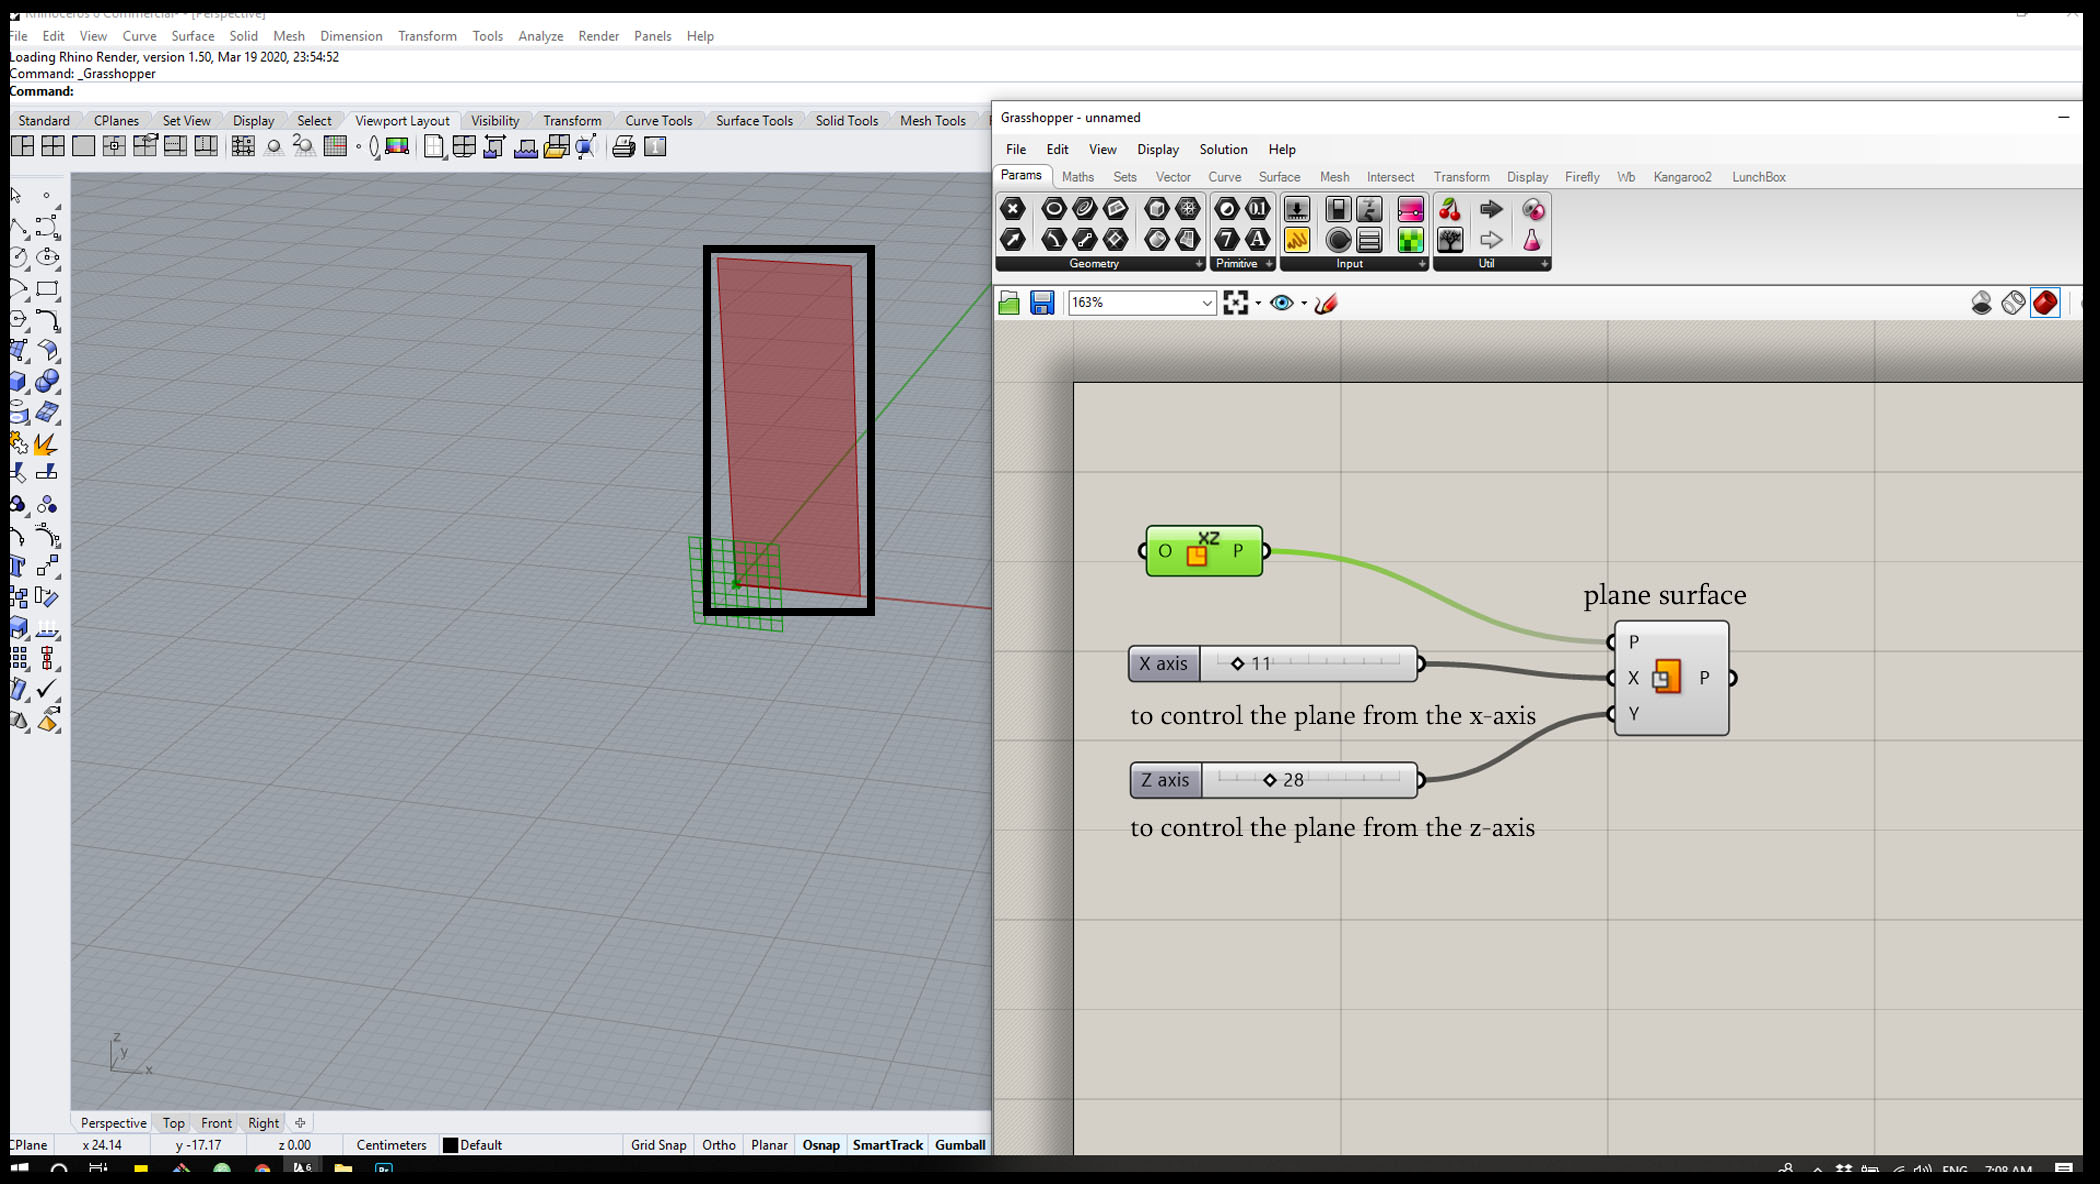
Step 3 : Add Quad panels parameter and two sliders to control the horizontal and Vertical Rows on the surface to get divided.
Step 4 : Add evaluate surface parameter and link the panel to the surface and right click one surface to Reparametrize then add two MD sliders and link the sliders to to the Points in order to define it as a point attached to the surface.
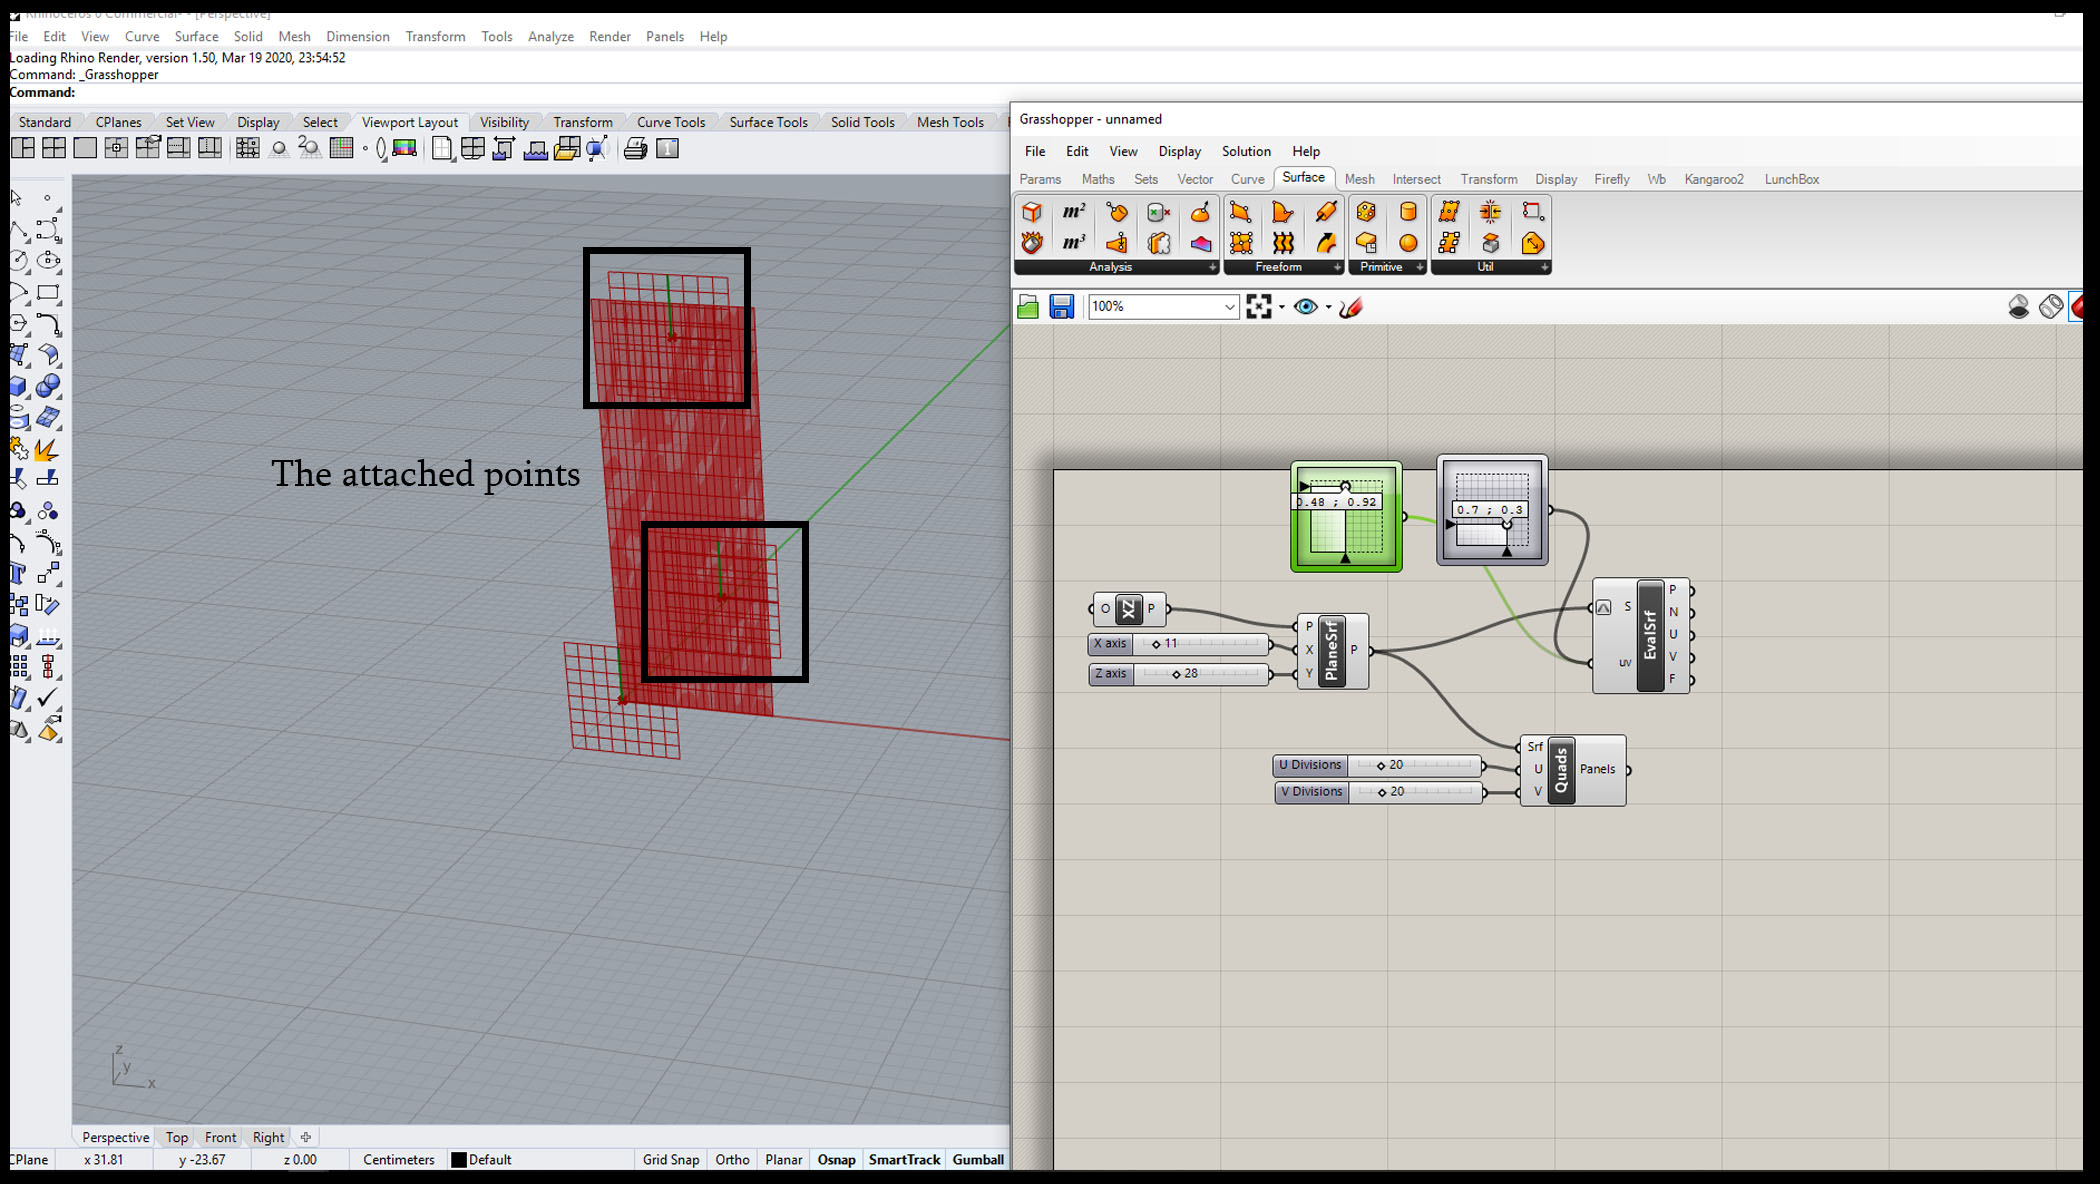
Now the points are ready to control the movement on the surface.
Then follow the Schematic below to get the final grid :
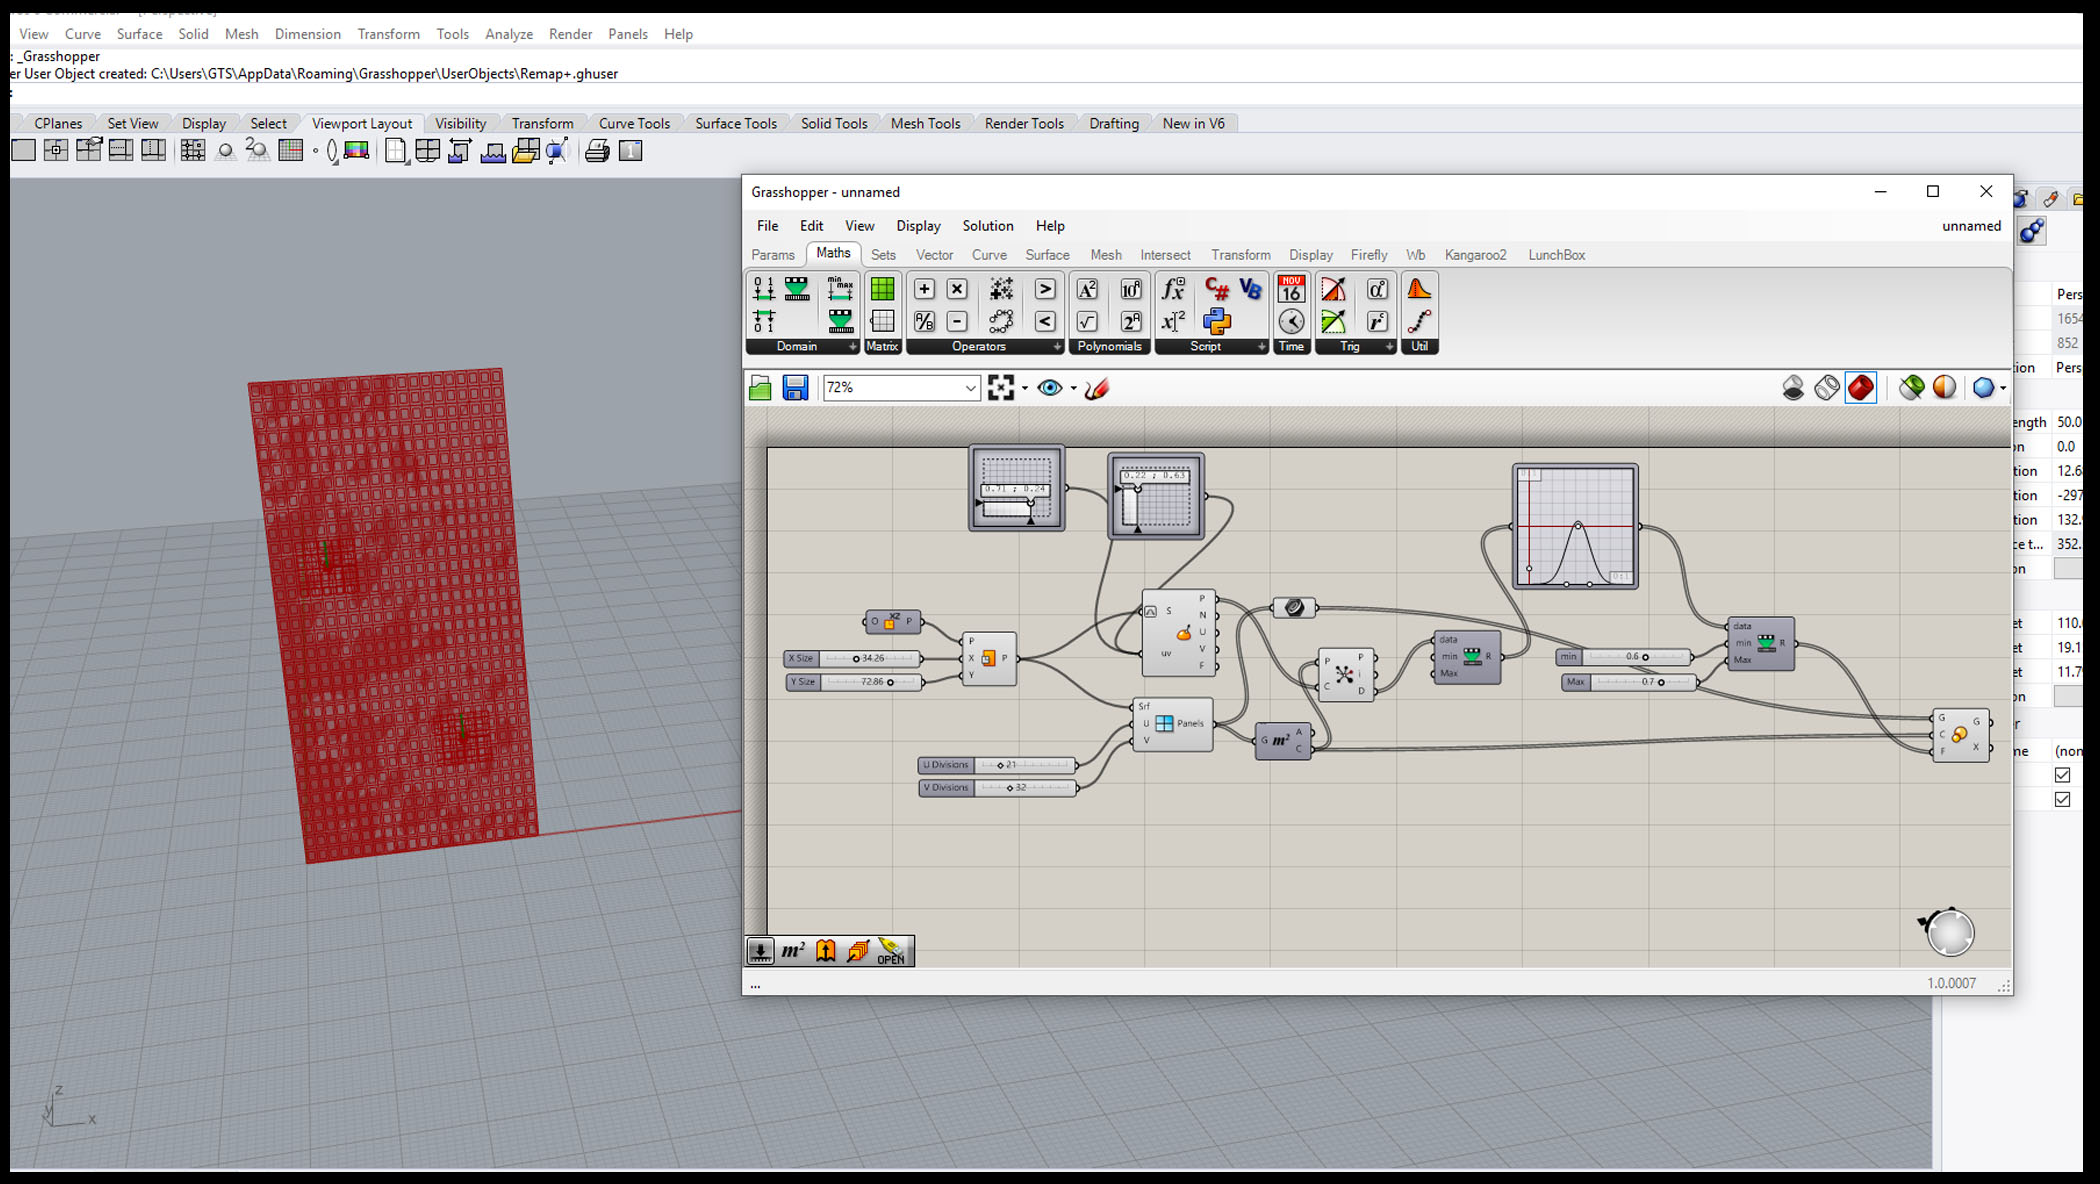
HERO SHOT!
Files :
Point Attractor