-
00. FA20 Hyunho
-
01. Principles and Practices, Project management
-
02. Computer-Aided design
-
03. Computer controlled cutting
-
04. Electronics production
-
05. 3D Scanning and printing
-
06. Electronics design
-
07. Computer controlled machining
-
08. Embedded programming
-
09. Input devices
-
10. Applications and implications
-
11. Output devices
-
12. Interface and application programming
-
13. Invention, intellectual property, and income
-
14. Networking and communications
-
15. Molding and casting
-
16. Wildcard week
-
17. Mechanical design, Machine design
-
18. Project development
-
19. Final Project
Week15
Molding and casting
Group Assignment Link
Assignment
Before this week's class, I tried to finish this week as quickly as possible to make up for my delayed parking homework
But I fell in love with the casting and casting process and became the most fun week of my Academy class!
We decided to reuse old wax to make molds
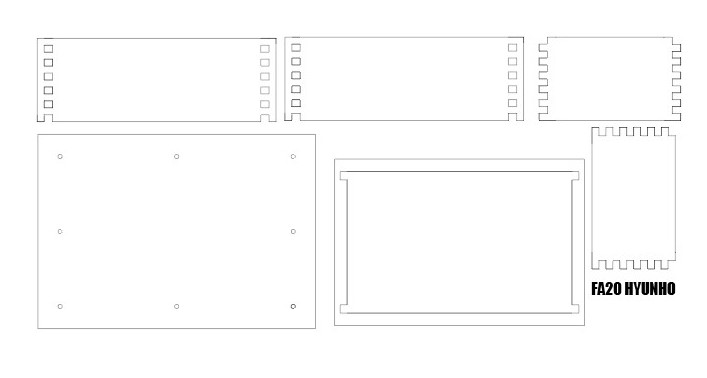
I made an acrylic case that can be melted and turned back into blocks
Materials and Equipment Used
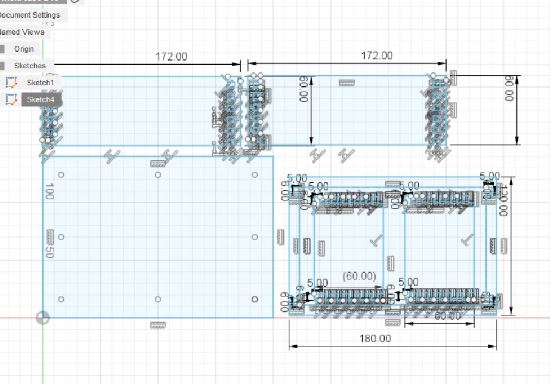
I used a fusion to draw a 2D drawing
3rd Week Kerf and Parametric Design Reference
Week3 Group work Link (We learned about kerf, power of raser, and parametric design this week)
I used illustration to reduce the gap (to save the acrylic)
Here is my design file (.dxf)
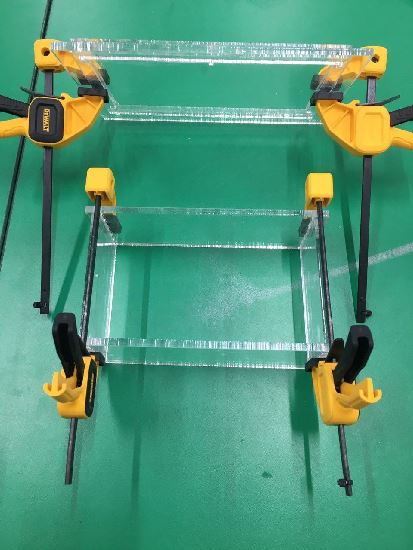
Adhesion using epoxy and clamp
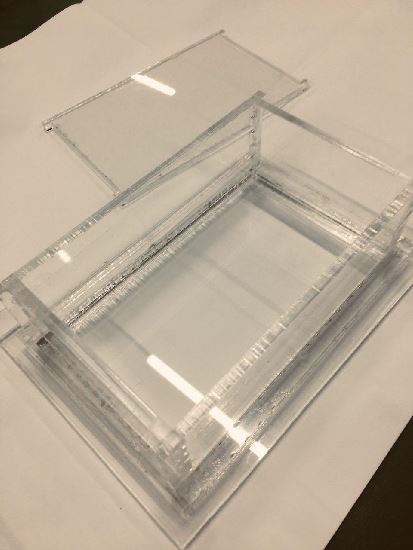
Acrylic mold case completion
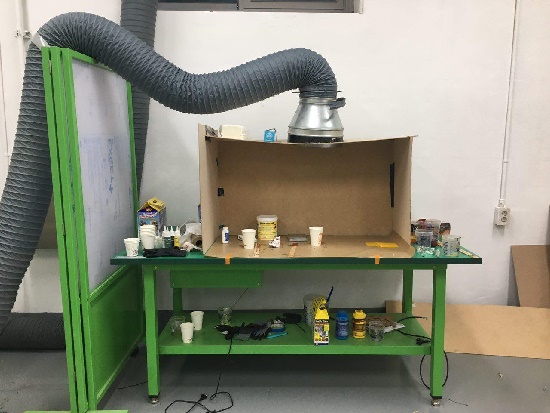
And we built a temporary molding station with Craig and Seokmin

Tiny-cnc this week's equipment to cut wax blocks into molds
Workspace is 600*600*200mm
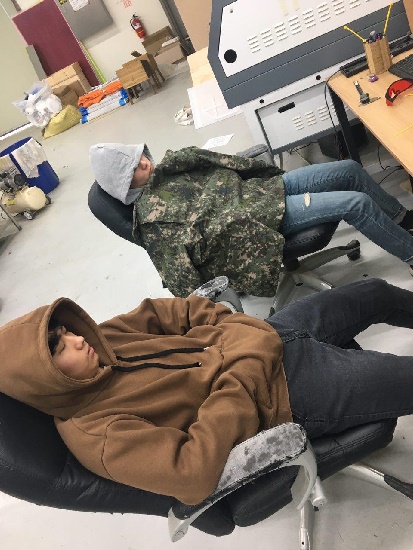
The warriors fell asleep because of the long class
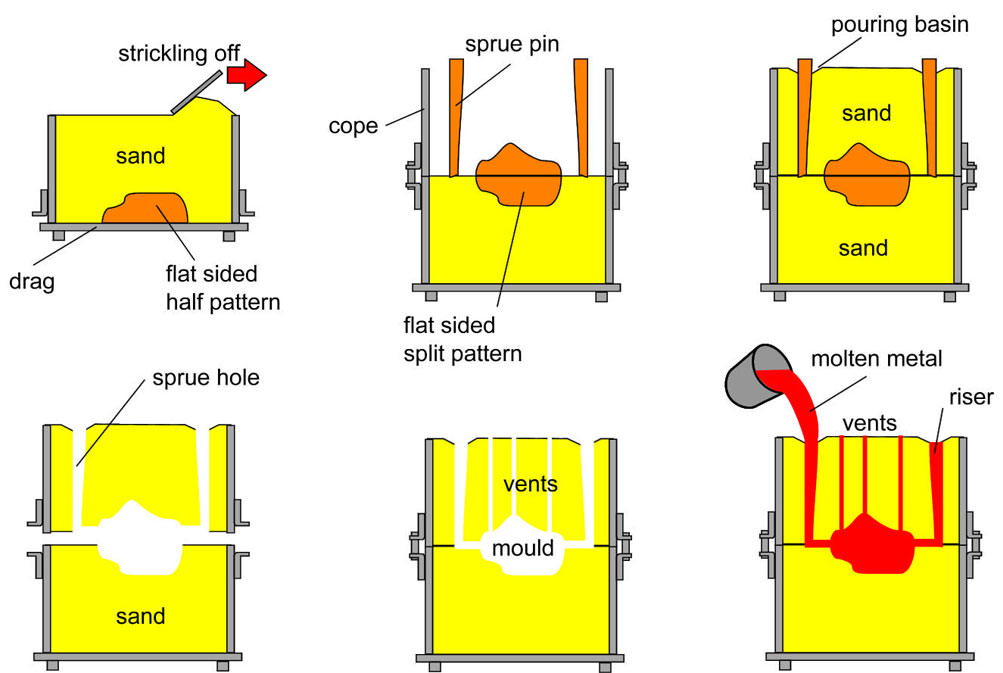
It's a sand casting process
Good example of understanding casting (for me)
And in class, we learned about the ratio, working hours
and hardening time through material safety sheets and data sheets
I designed the mold using Fusion 360
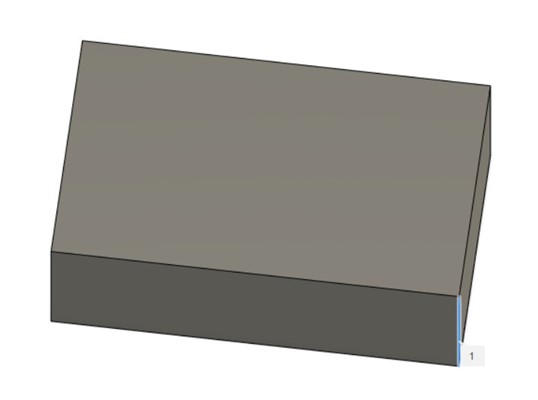
First, I measured my wax size and then made a block that looked like wax (150*90*50)
Fusion's Extrude -Cut to Start Designing
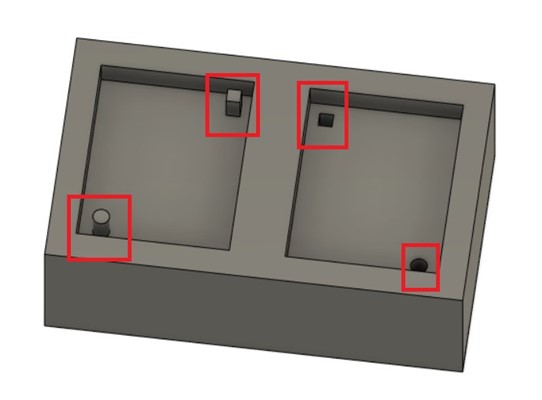
The joints were shaped differently for top and bottom verification of the mold
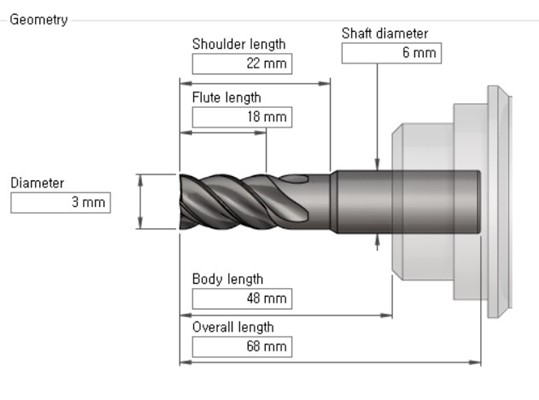
I'm going to use a 3mm end mill, so I made a bigger hole
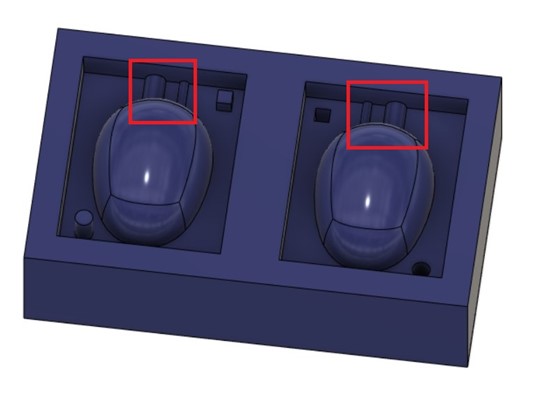
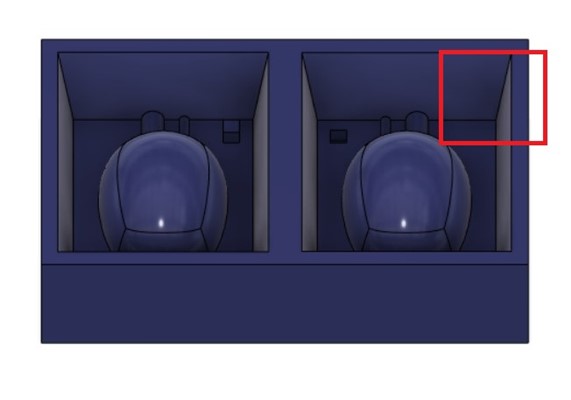
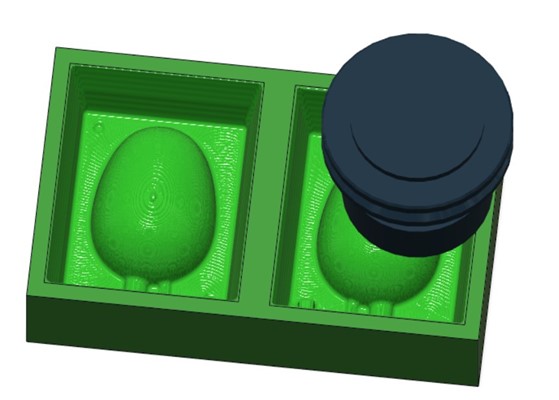
I used the foam to make an egg shape
large hole is a hole for pouring material
Small hole is a air hole
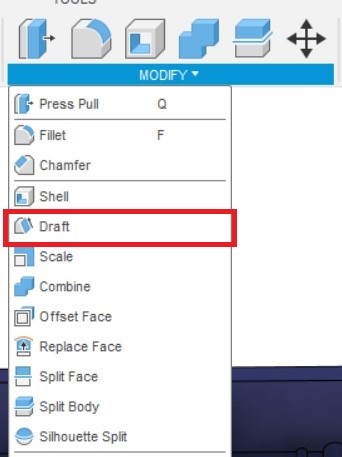
I gave a draft to make it easier to get the material out
You have to give me more than a degree
I used a short end mill, so I gave it more than 5 degrees
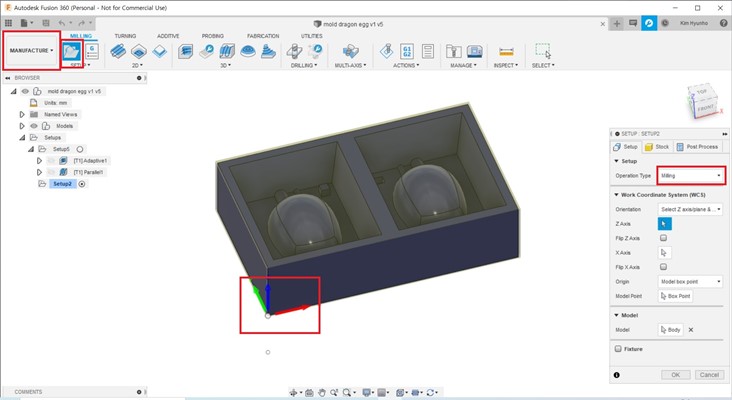
First in Manufacture make Set up and Set the origin
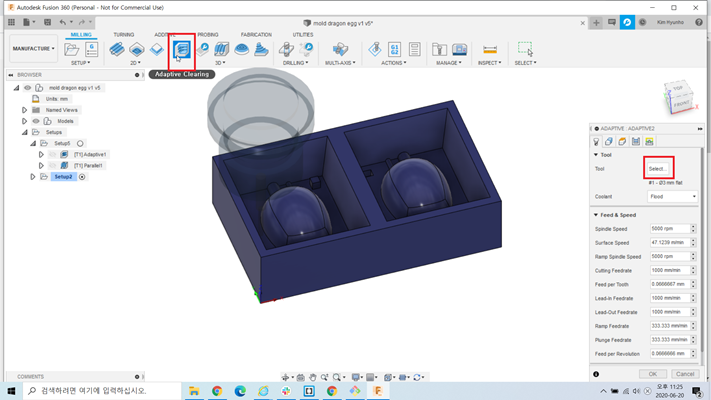
Adaptive Clearing
Select Tools

put in the figures for my end mill(3mm 2flute Down cut)
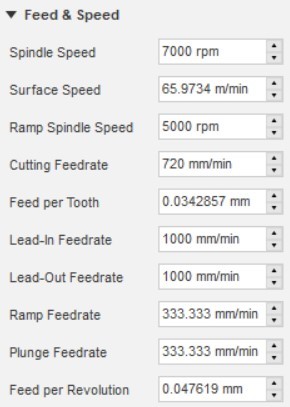
feed/speed
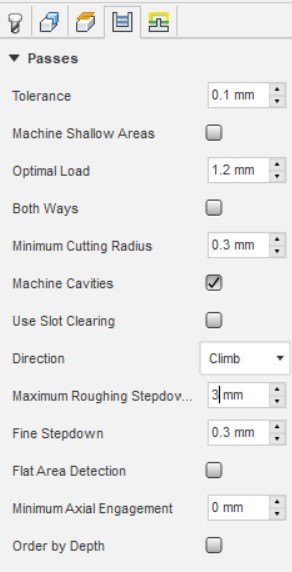
Select passes
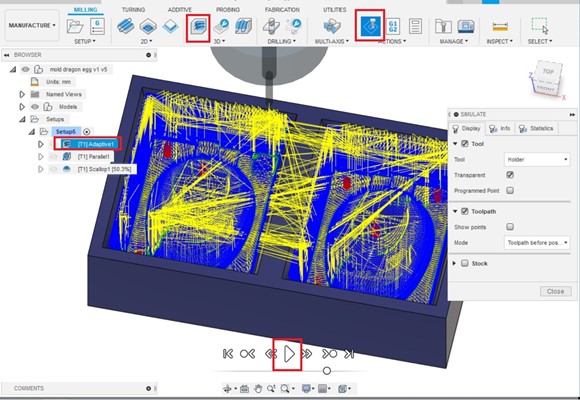
Confirm by pressing the simulation button
Press the stock and see it more intuitively
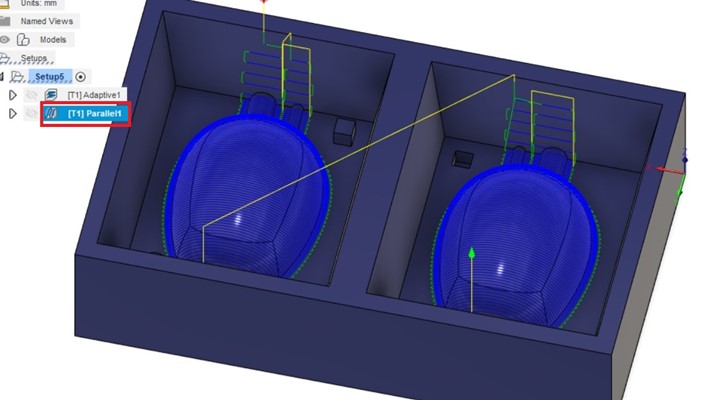
Parallel/scallop has made the section of the circle cleaner
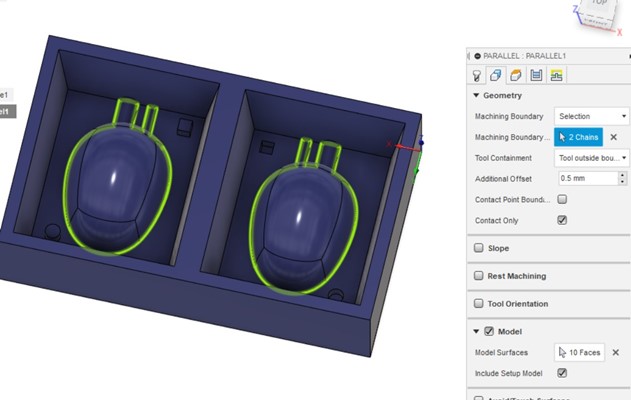
Set area for processing with pararelle
I made my mold using 'TinyCNC-3035C' equipment and a software called 'MACH3'
TinyCNC-3035C Link
MACH3 Link
I used TinyCNC-3035C to refer to student Kim Jihwan's document
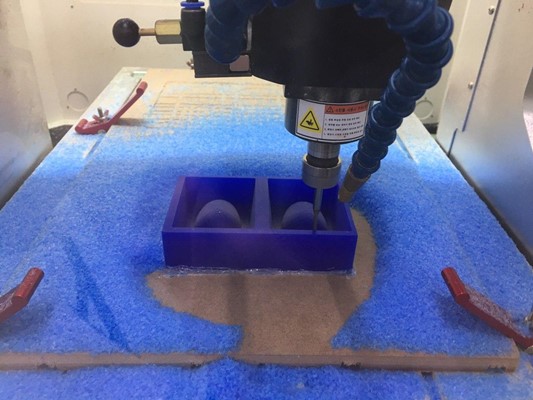
Image of Adaptive Clearing
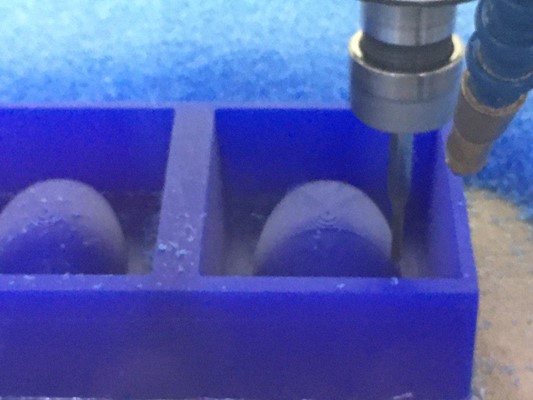
Image of Parallel Clearing
I used Tiny-cnc instead of Shopbot because
Wax was fixed using a glue gun
The origin is set in the lower left corner of the wax
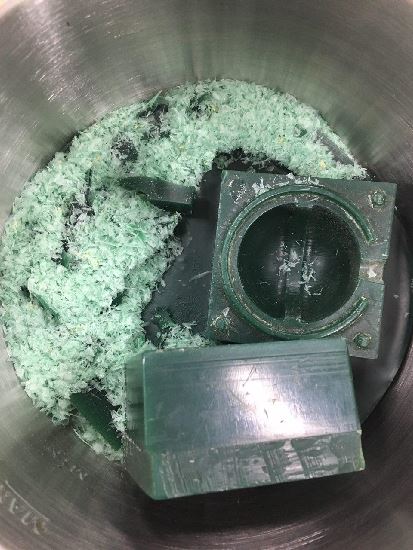
There's a bin underneath, so you can collect the wax back and recycle it
Air assist, so I can see the work with my assist
We learned the casting process through group work
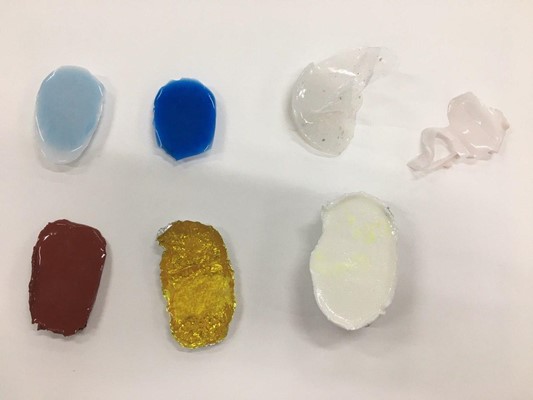
I tested a few more materials
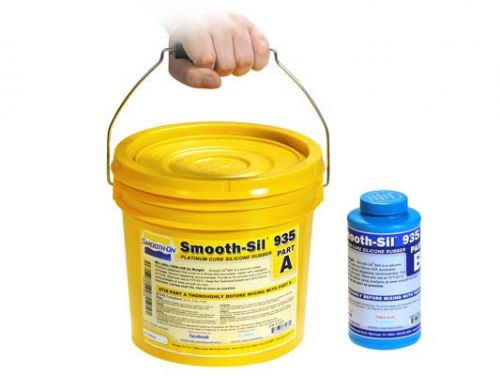
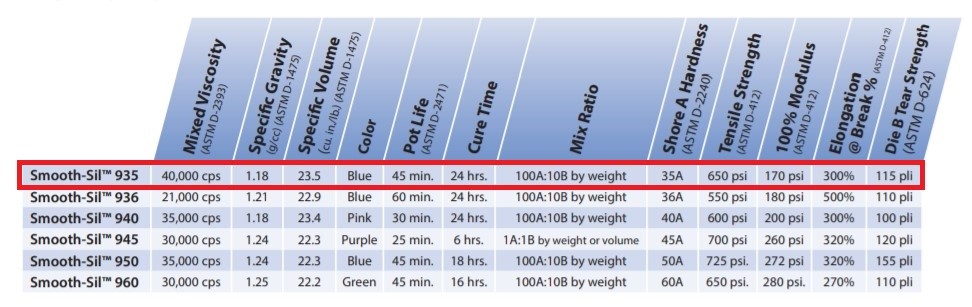
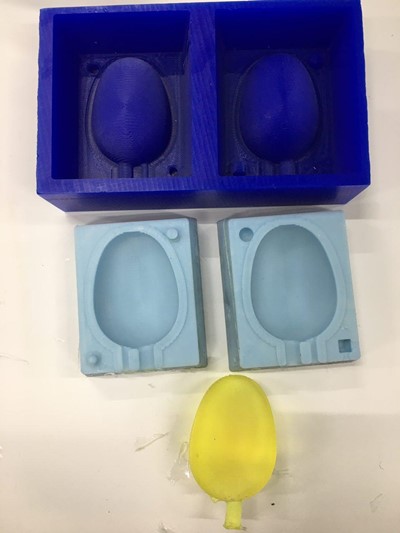
The materials used in casting molds is smooth sil 935
[Smooth-Sil 935 Link]
45min pot life 24hrs cure time
100A: 10B mix ratio
I chose it because it would be difficult to take it out if I cast hard on a hard mold
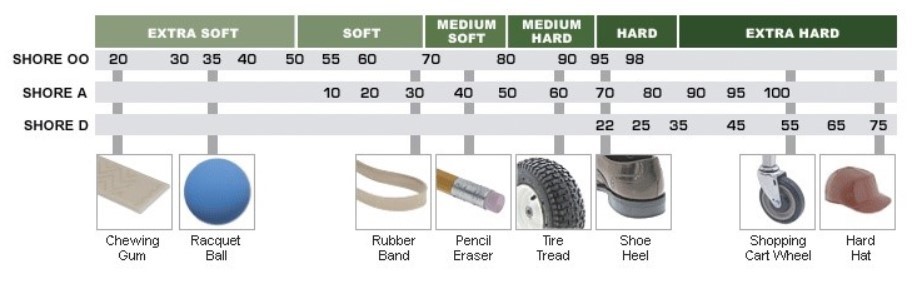
what is shore a hardness
The hardness of any object is defined as the magnitude of its resistance to deformation when it is pressed into another object
[Shore A Hardness Referer Link]
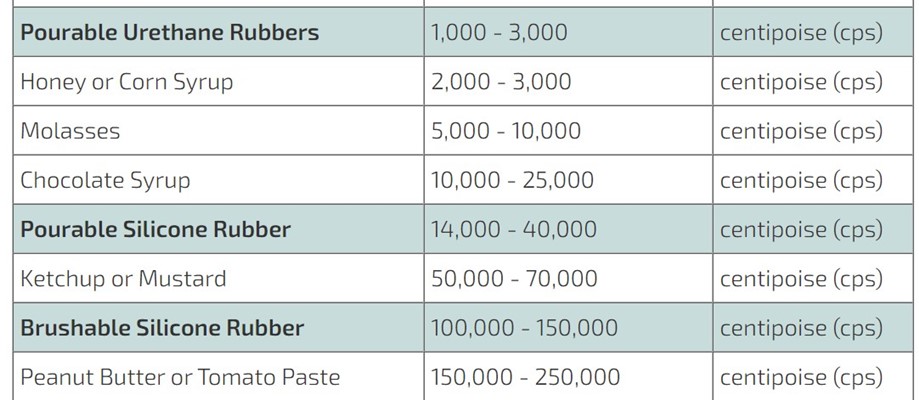
what is mixed viscosity
In layman’s terms, viscosity defines a fluid’s resistance to flow
If you are using a mold rubber with a high viscosity, there is a chance the rubber will cure with
air bubbles that may then be reflected in a finished casting
If the mixed viscosity of the mold rubber you are using is higher than 15,000 cps,
you may want to consider vacuum degassing the liquid mold rubber
[Viscosity Referer Link]
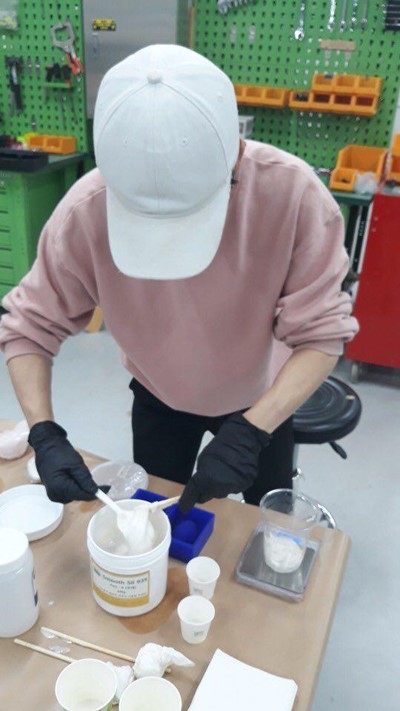
Mix the smooth sil A together to soften them
Mix it in a ratio of 10 to 1 using the scale
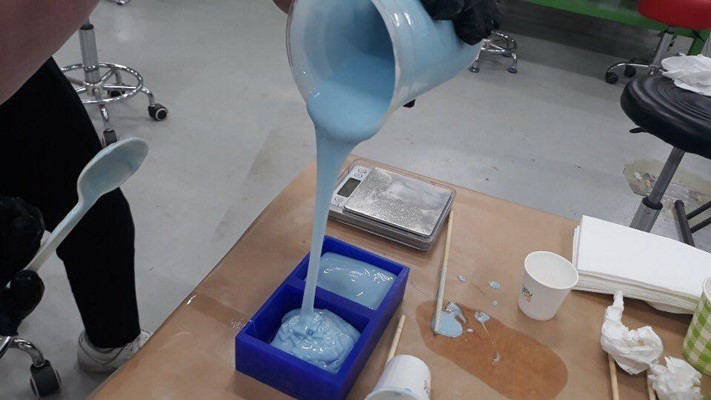
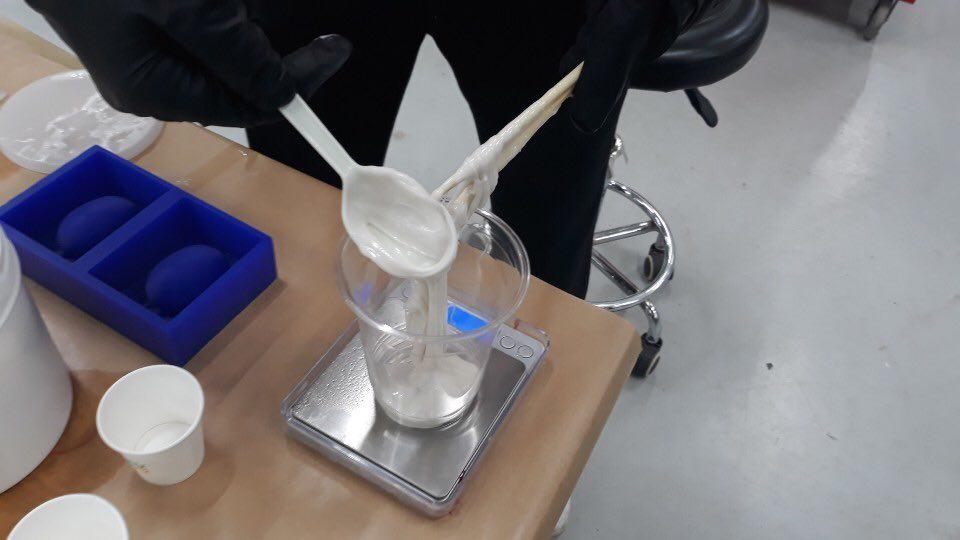
Lightly pour into the mold
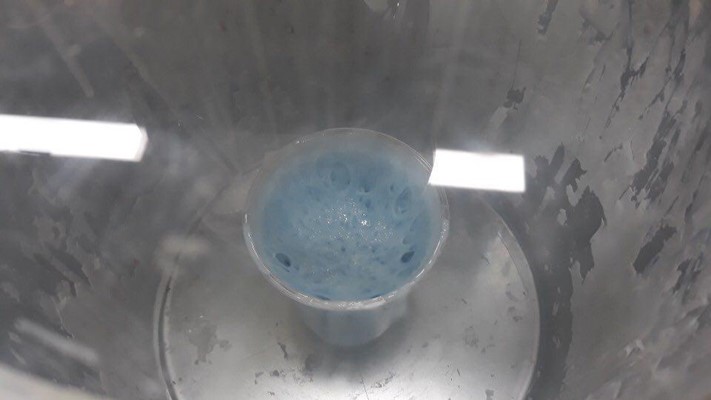
I had 45 minutes pot life so i used a vacuum dispenser to remove air from the material
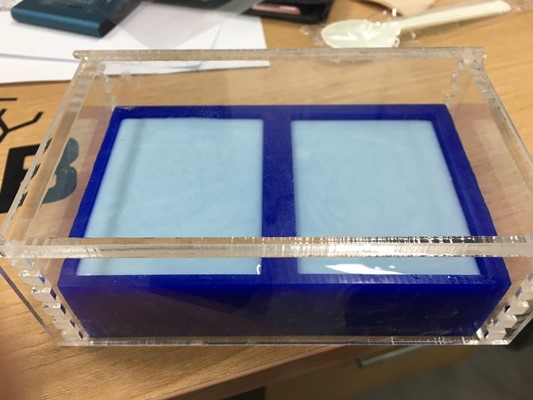

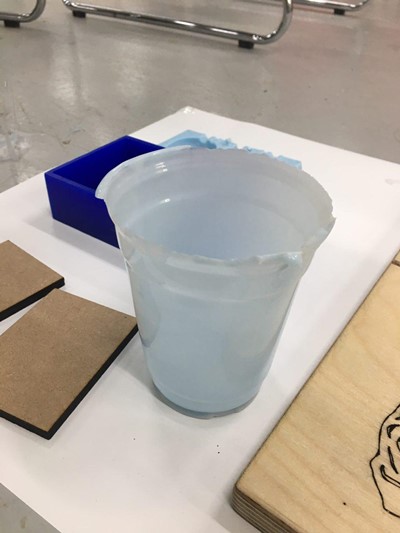
Completed My Mold
Unintentionally, the egg goes in
Actually, I wanted to put in the pine cone, but I couldn't find it the size I wanted after the rain
unintentional work piece
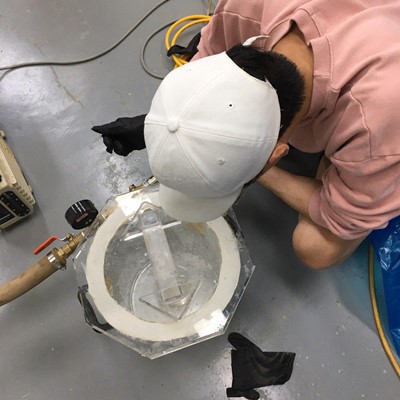
10 minutes of pod life was not enough time to take many pictures.
But still, use the vacum to get rid of the air
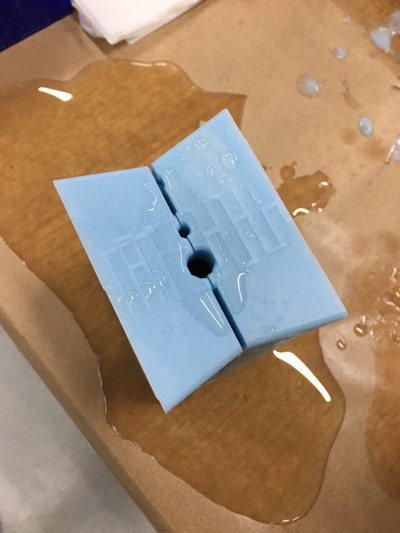
The last casting material is smooth cast 326
smooth cast 326 Link
10min pot life 2-4hrs cure time
1A:1B mix ratio
I wanted to see the last piece of work as soon as possible
It was a mistake to fix the mold with only a one rubber band

half work piece
There are no two mistakes
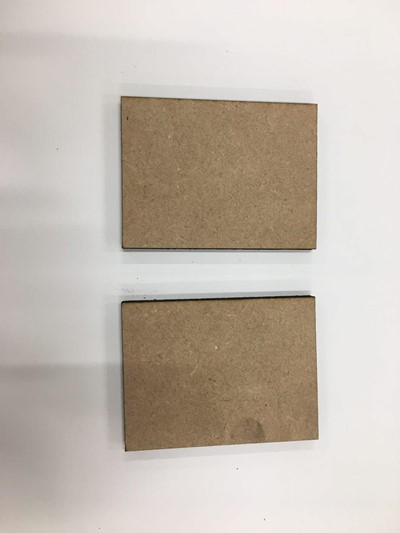
To secure the mold, I cut the mdf into mold size with a laser cutter
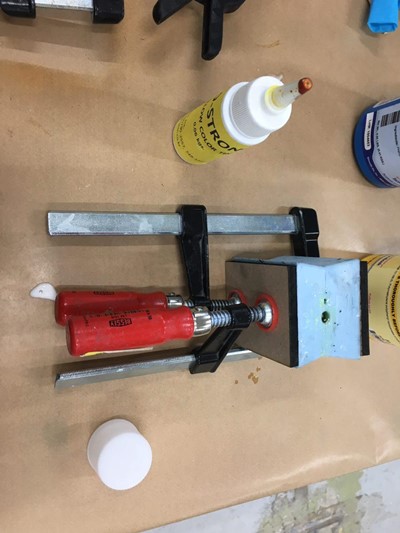
Fix it with a vise
I added a yellow dye(A very small amount is enough. Not more than 1g)
Hero Shot of this Week
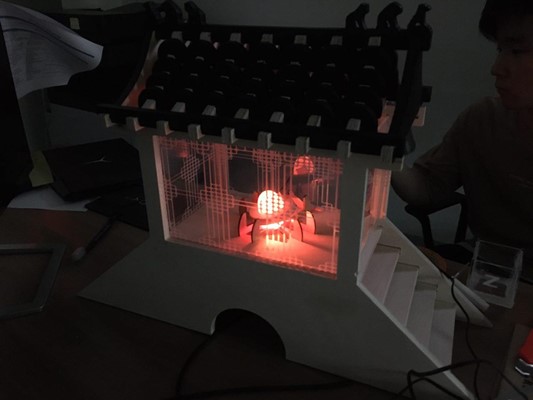
Half the work was used for the final project
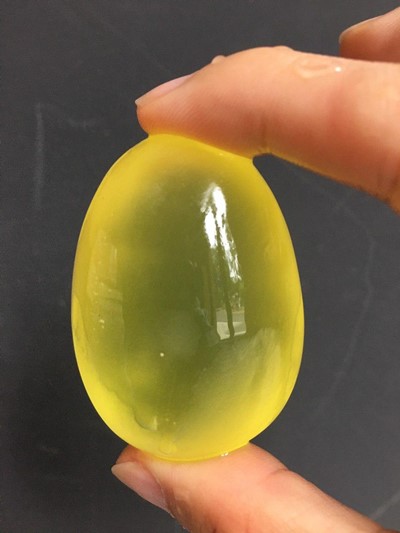
Finished 220,400,1500 sandpaper in running water
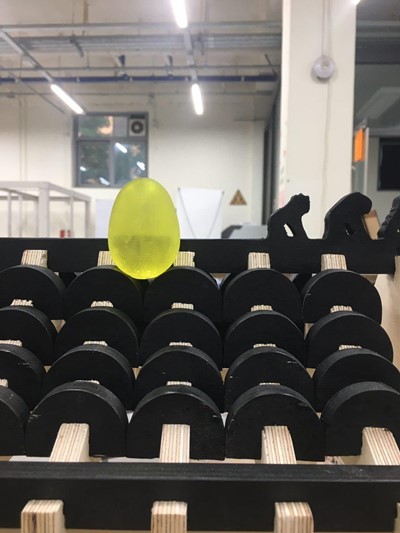
The final work will be decorated on the roof of final project
File
mold.f3d file
mold.stl file