Interface and Application programming "API"
This week's mission is to do an experiment that connects an input or output device. I was supposed to do the experiment on the electronic board that I designed several weeks ago in "Elcetronics Design" week, but I left the electronic board in the Lab and I can no longer access it due to the circumstances And Corona Virus so I did the experiment on my parts.
I have used several parts to do homework and use "Arduino UNO - Breadboard - Resistant - LED - Conductive Wires - Python Software and Arduino".
First I installed Python software through the official website of version 3.8.2 and started working on it
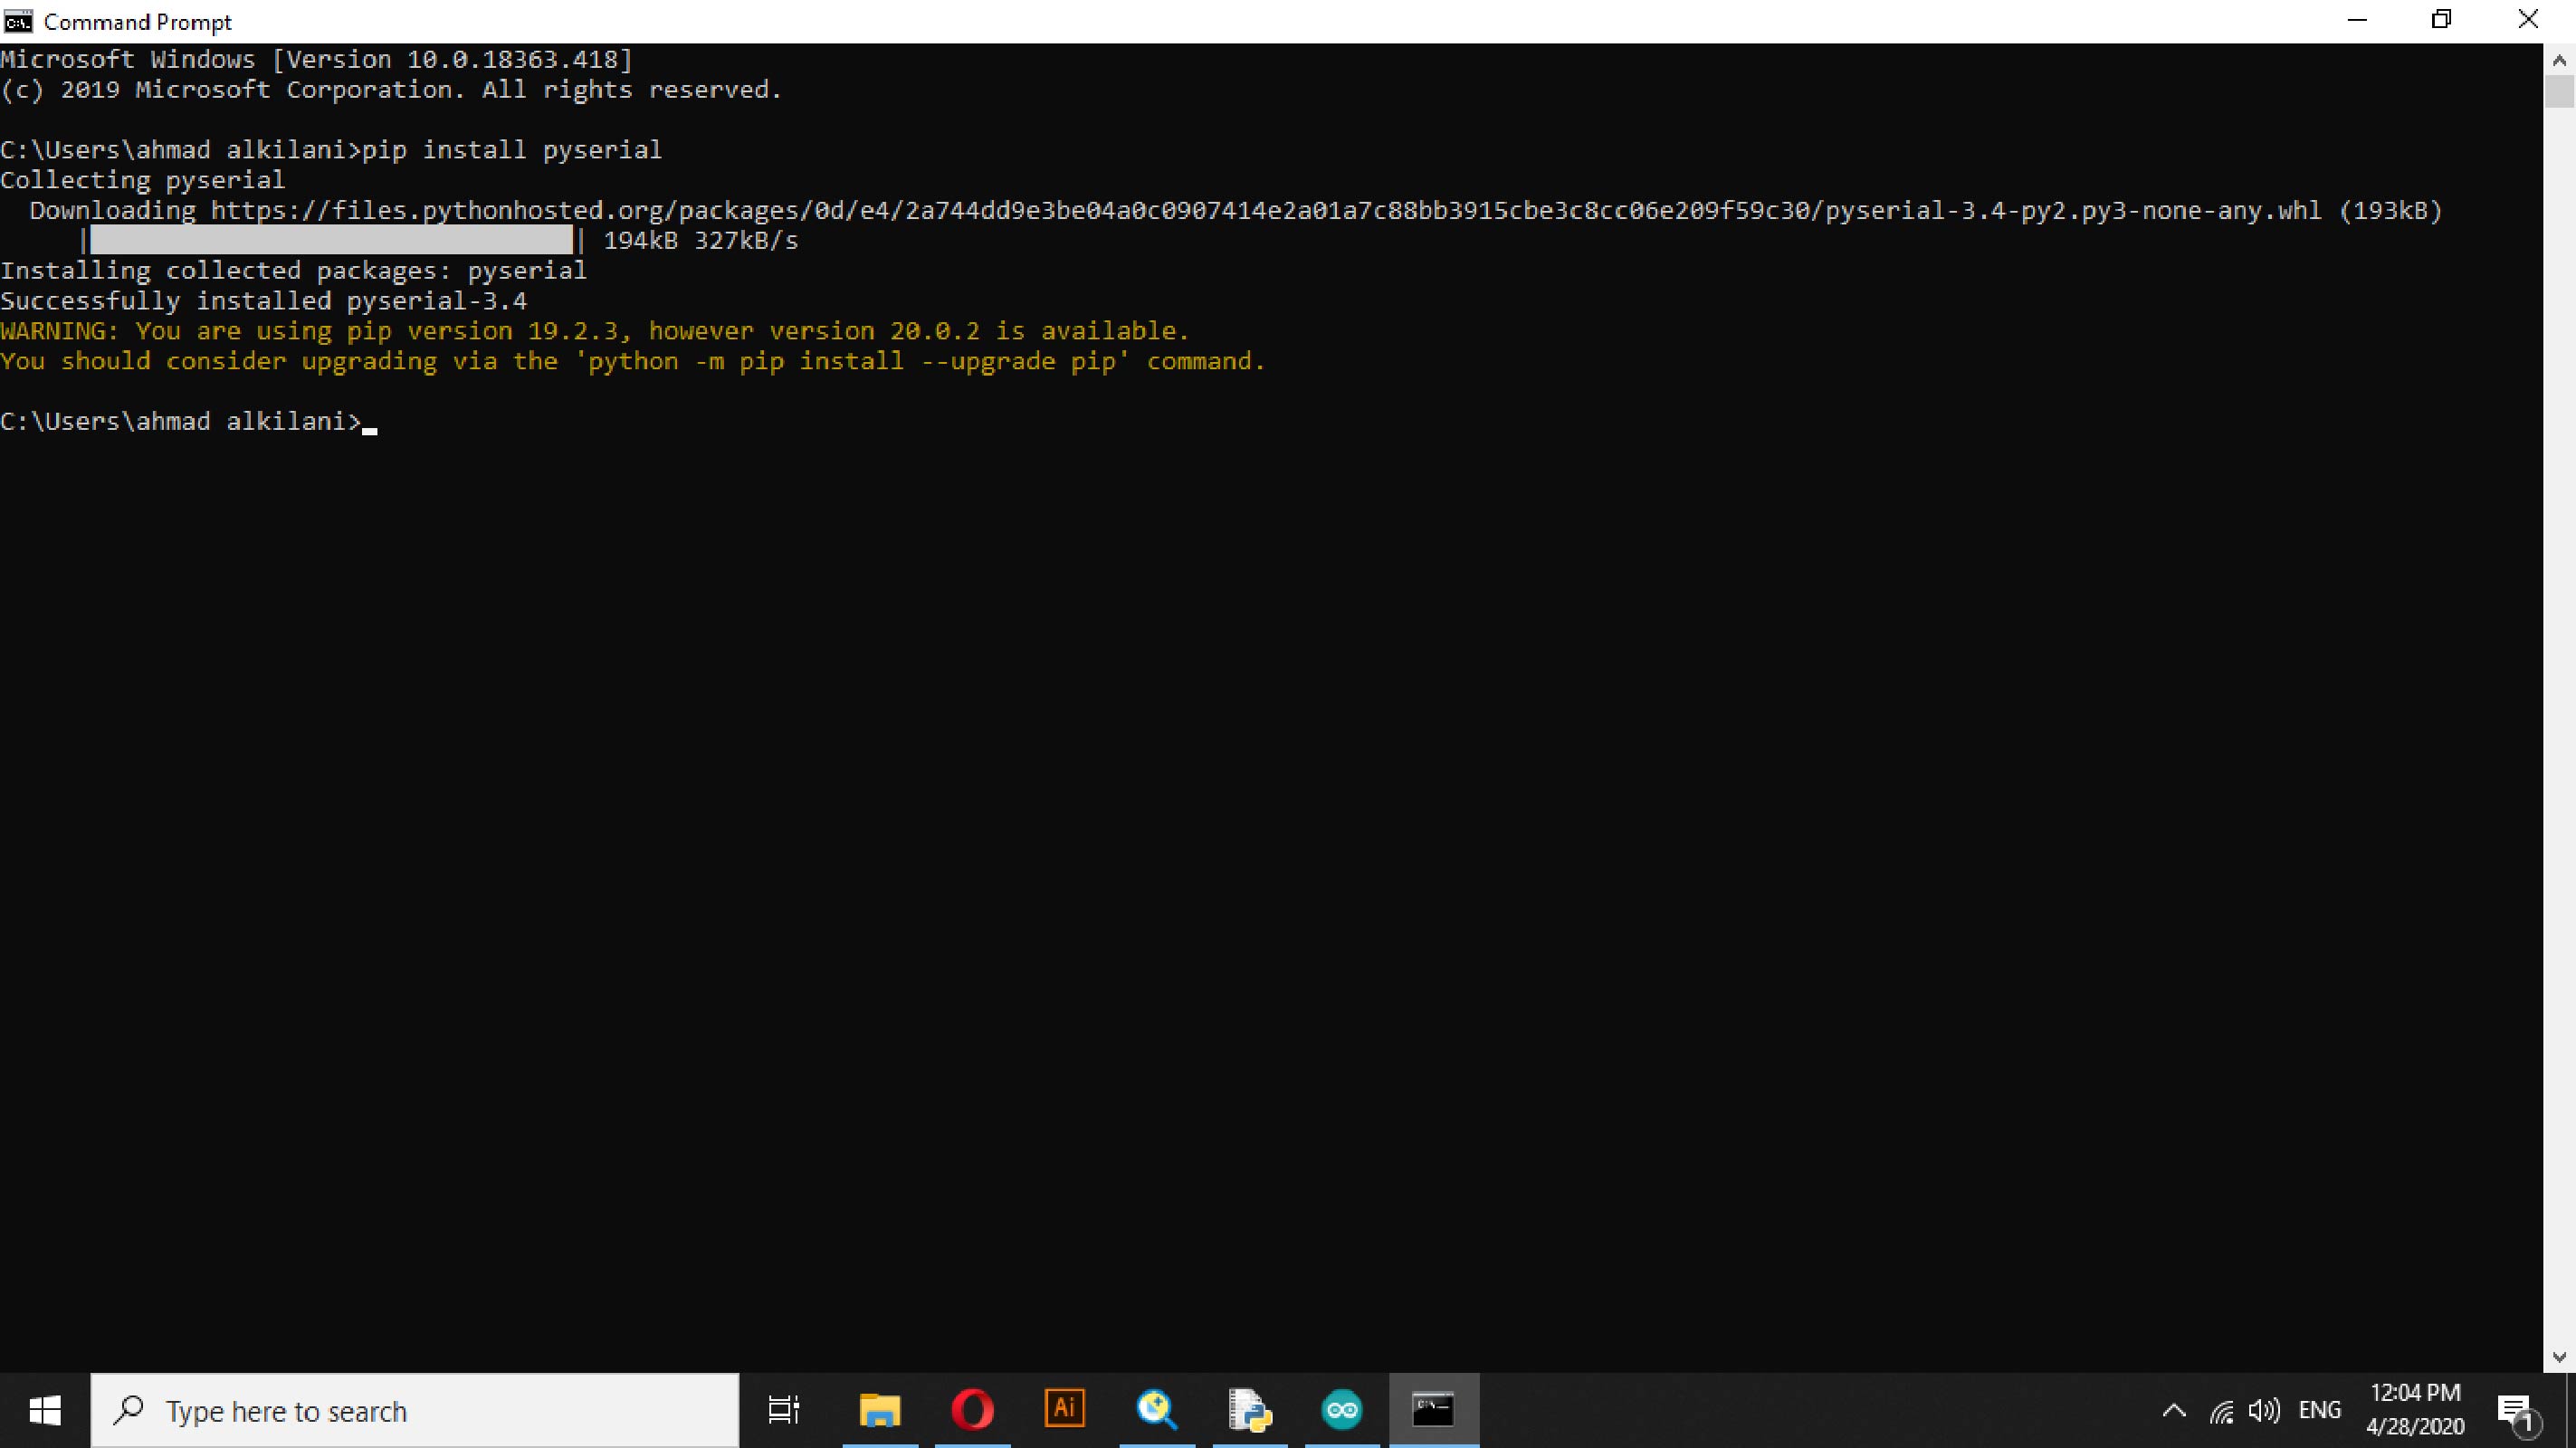
When installing, I chose to install the IDLE environment to shorten the time as this library is an integrated development environment through which programs can be created and experiments can be made on them so I installed them directly without the need to install them later, also after the installation process was completed I needed to install the "pyserial" library and to do that I By opening the "CMD" command port, you used a specific code from which to call any available Python library, and it will install it automatically.
pip install NAME LIBRARY This is the code that I used for the installation process, I tried to run the LED without installing the library but I got an error that the library must be installed in order to be able to create the application for that as I mentioned I opened "CMD" and entered the following command "pip install pyserial" and then I gave him the execution command, A few seconds and the library was installed as shown in the image below.
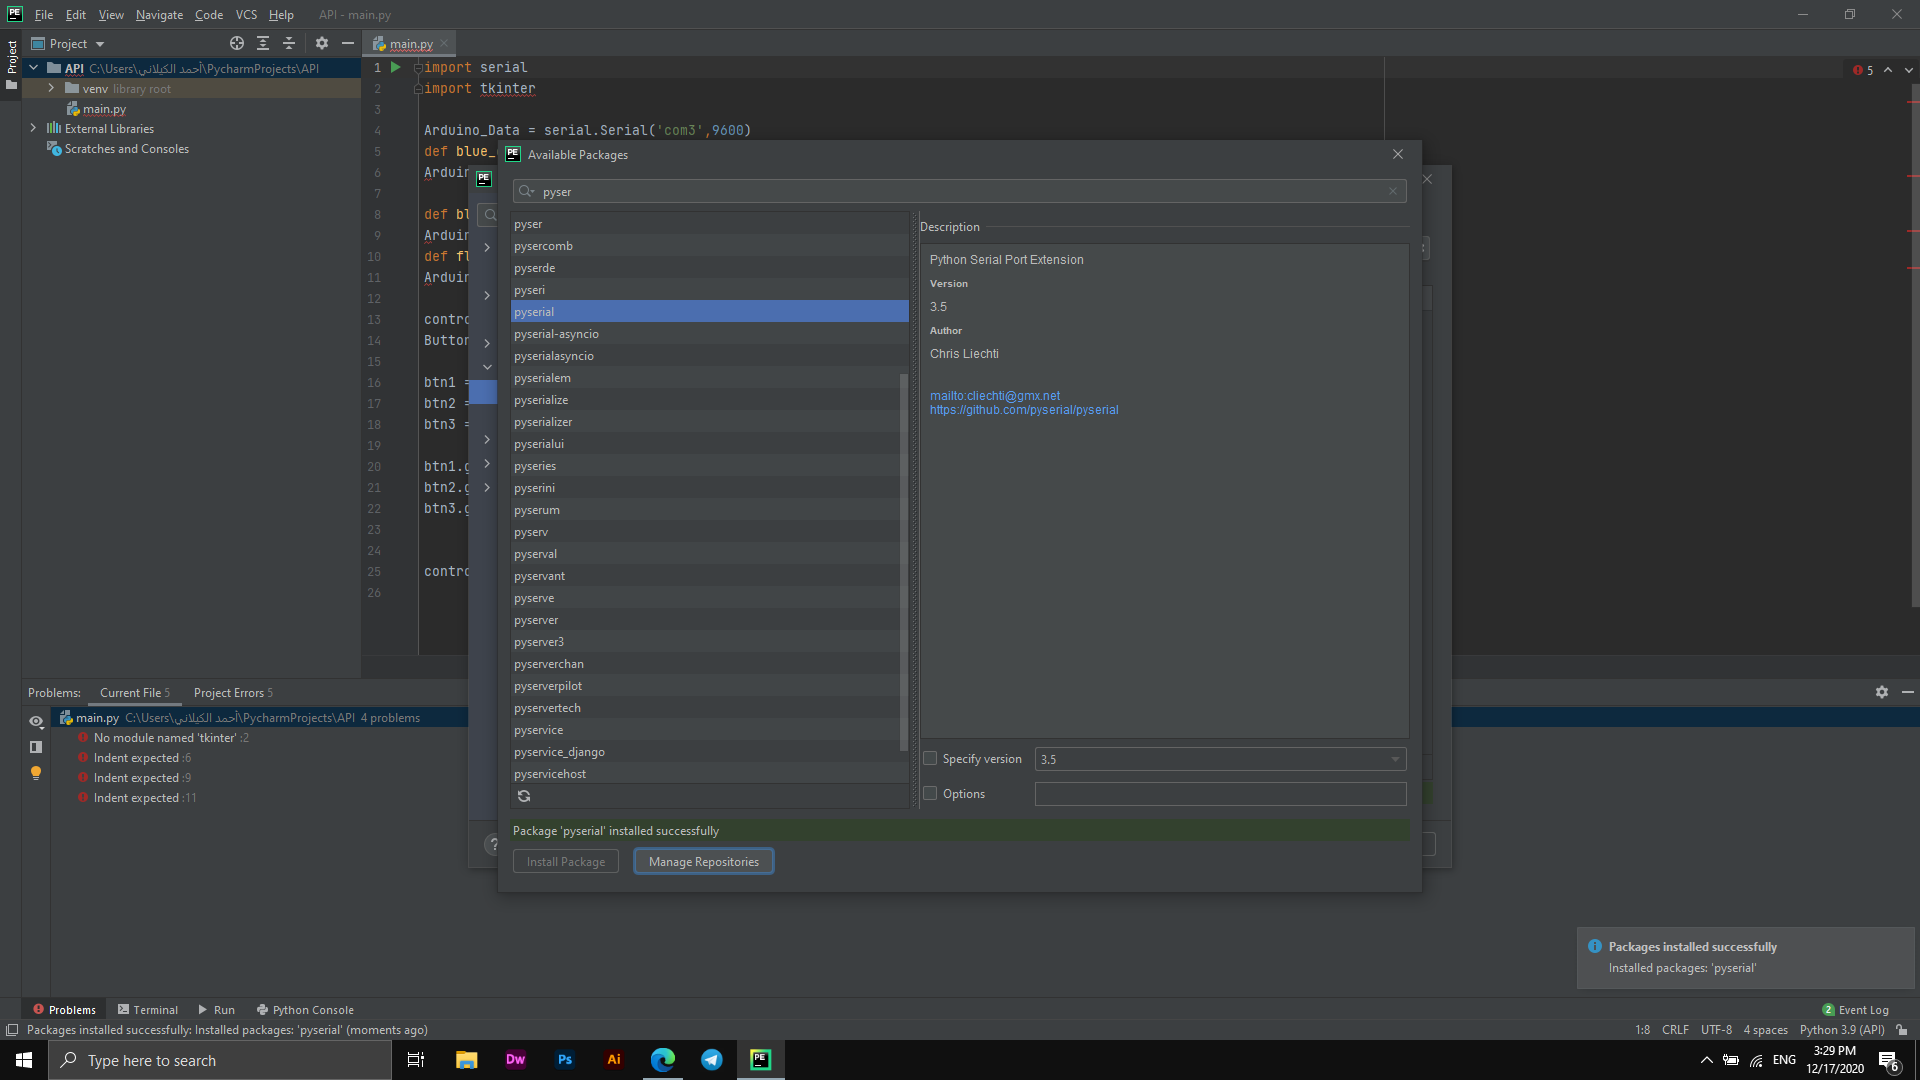
Through File - Settings - Project API - Python Interpreter - Desks can be installed by pressing Alt + Insert or + Button at the bottom of the tab, I have typed the name of the offices that I want to install, I have installed my (PySerial & Serial) library as required by the code My, the following picture shows how to install the libraries.
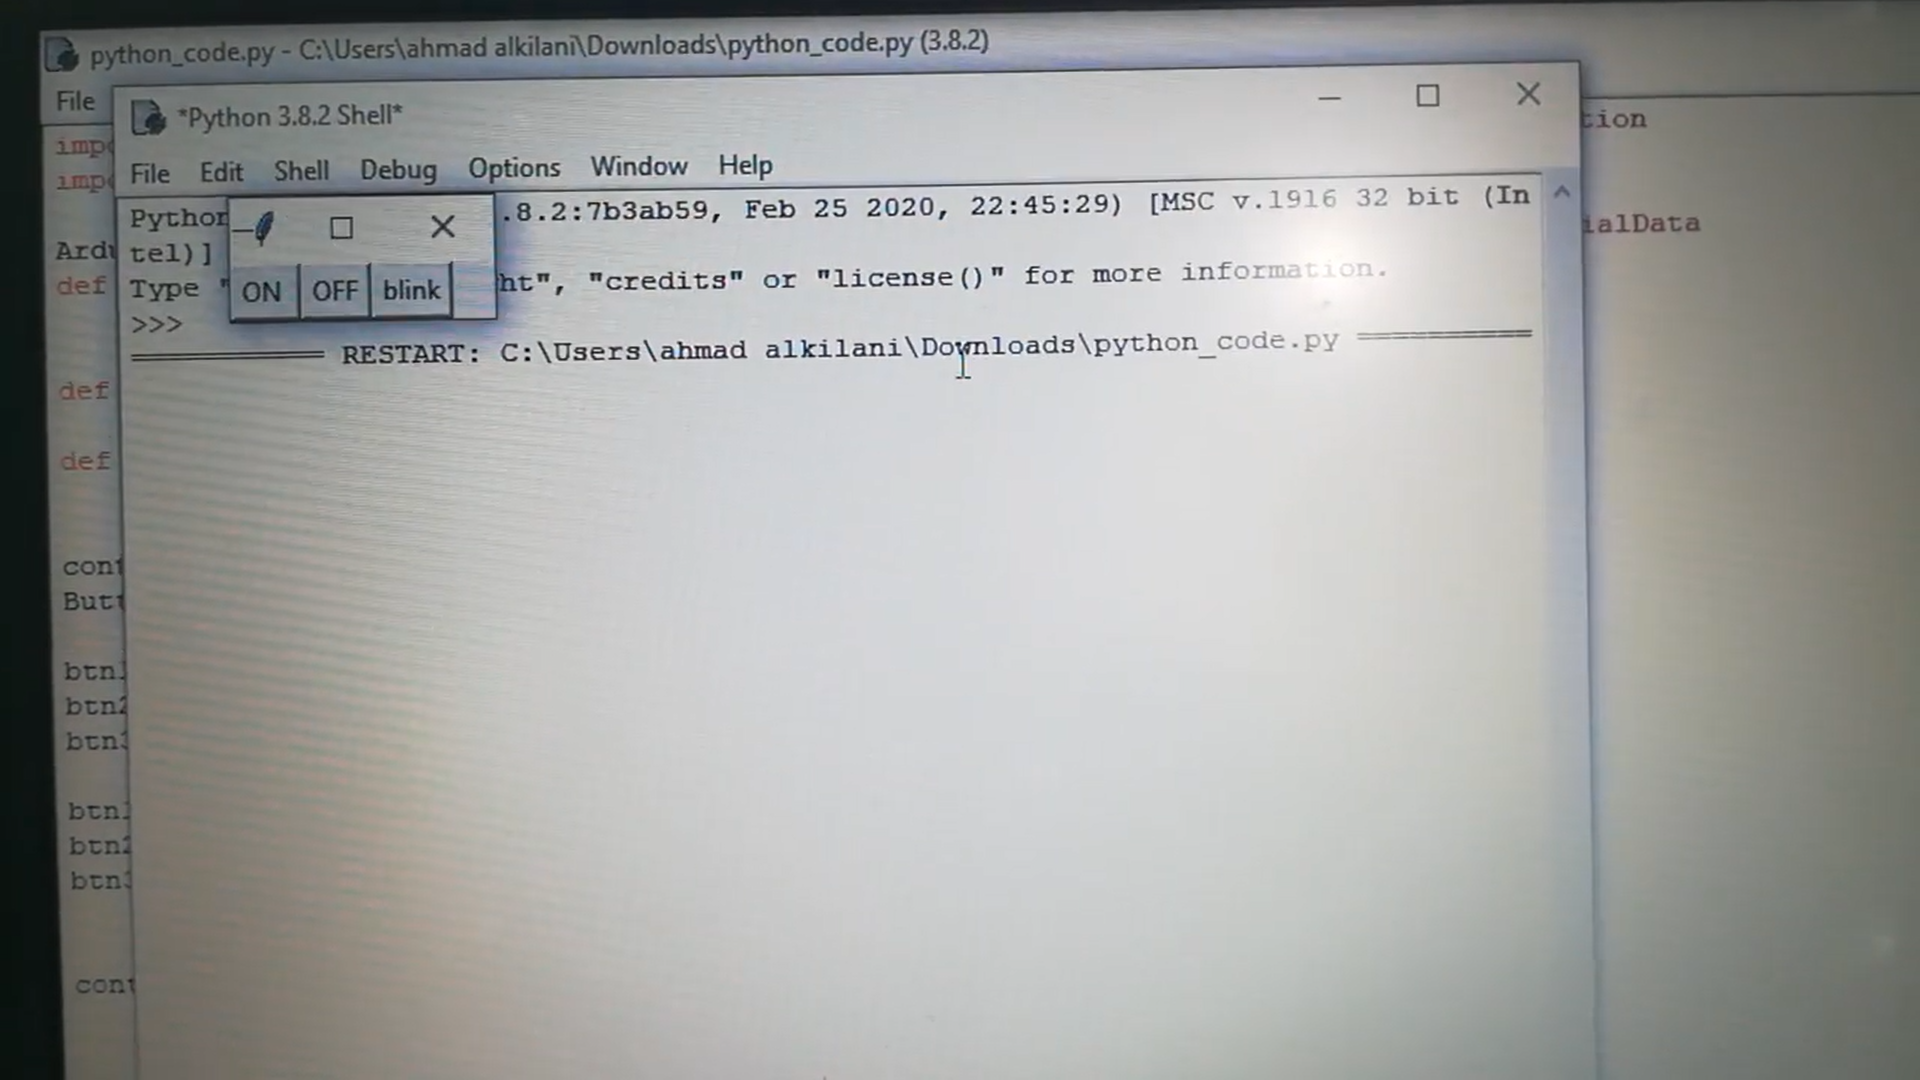
The picture below shows the Python code that I used while creating the app as a beginner in this field. I have learned and provided programming bids using Python through the Fab Academy also through the official Python website and watching some videos on YouTube.
In the code that I used, I managed to send different commands to my application, each of which sends a different command among the three commands placed "one button to turn off and the other to turn on the LED and the stability of the lighting and in the other command Blink by half a millisecond.
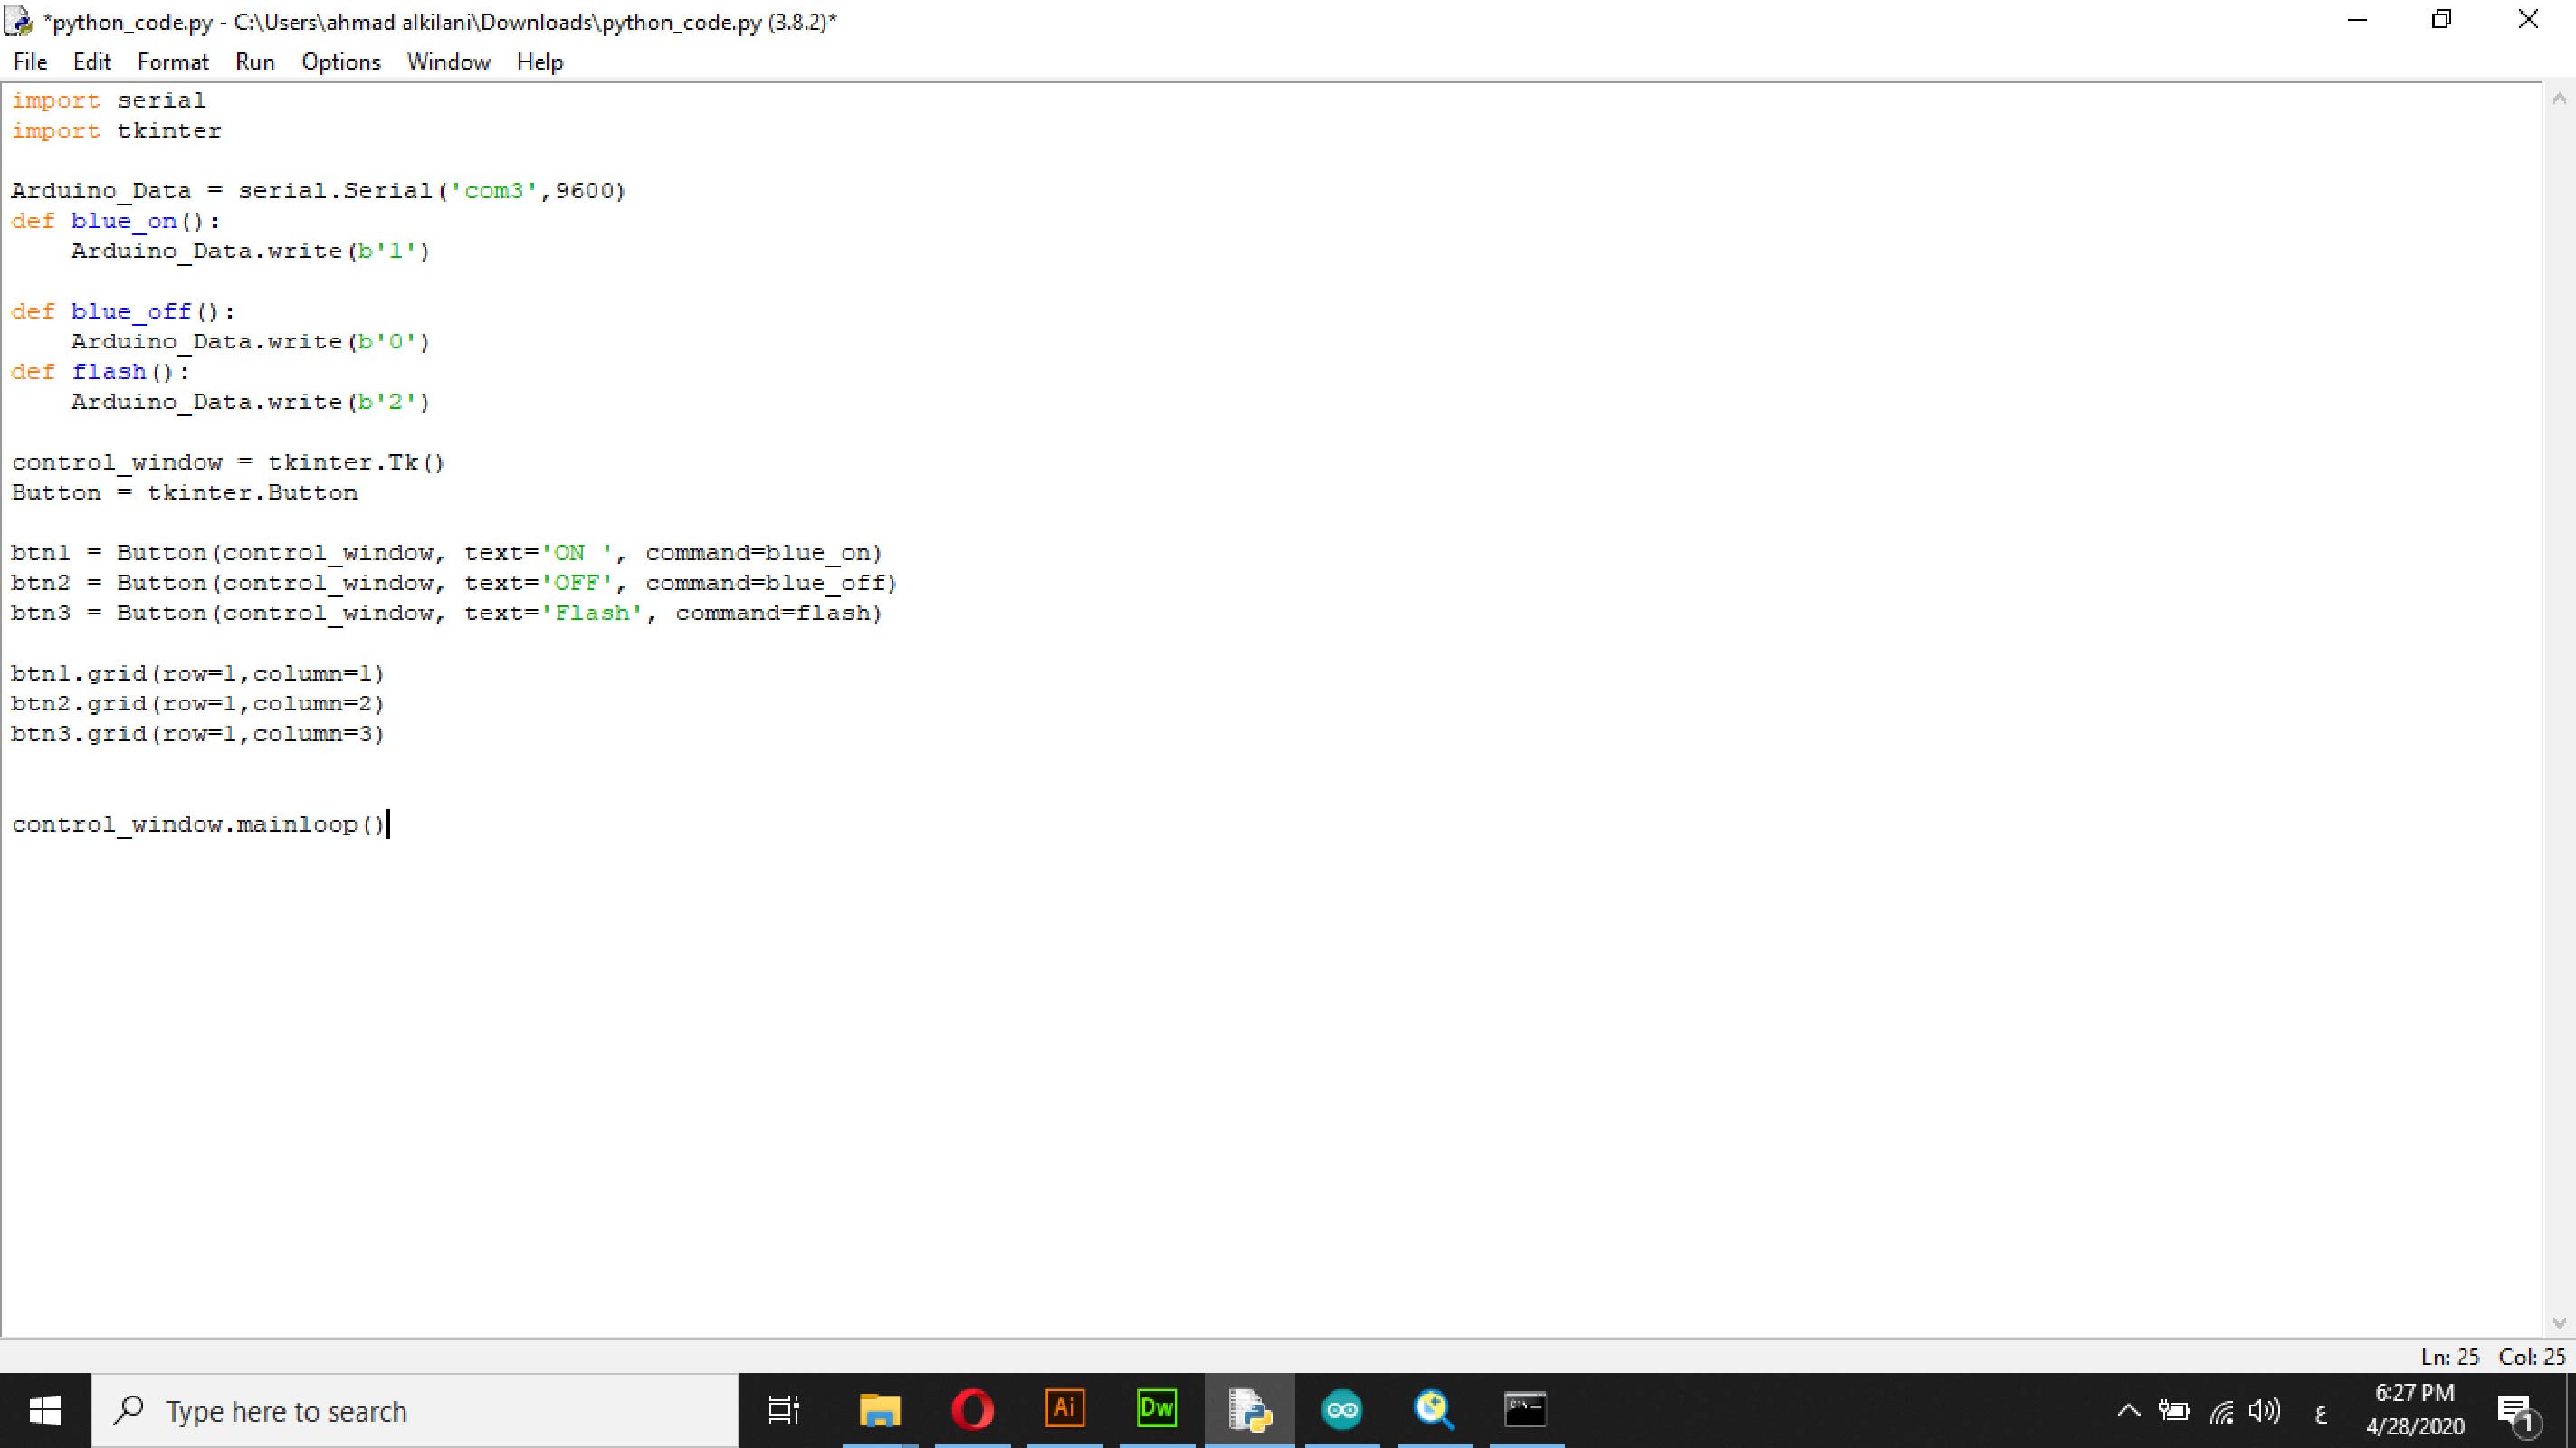
Python Code
import serial            //import serial to enable sending and receiving data using the serial port

import tkinter            //tkinter is the GUI for python

Arduino_Data = serial.Serial('com3',9600)            //define the com of the arduino and the baud rate which is set to 9600

def blue_on():            //This is to turn the LED on, we send one over the serial port and in the arduino code we turn the
led on using digitalWrite

Arduino_Data.write(b'1')

def blue_off():            //This is to turn the LED off, we send one over the serial port and in the arduino code we turn the
led off using digitalWrite

Arduino_Data.write(b'0')

def flash():

Arduino_Data.write(b'2')

control_window = tkinter.Tk()

Button = tkinter.Button

btn1 = Button(control_window, text='ON ', command=blue_on)            //A button to turn ON the LED

btn2 = Button(control_window, text='OFF', command=blue_off)            //A button to turn OFF the LED

btn3 = Button(control_window, text='Flash', command=flash)            //A button to BLINK the LED

btn1.grid(row=1,column=1)

btn2.grid(row=1,column=2)

btn3.grid(row=1,column=3)

control_window.mainloop()
Also, I wrote an Arduino code that corresponds to my experience, too. Through the Arduino code, I specified the duration of the Blink in the application so that the light is lit by half a millisecond. The following code explains the entire process.
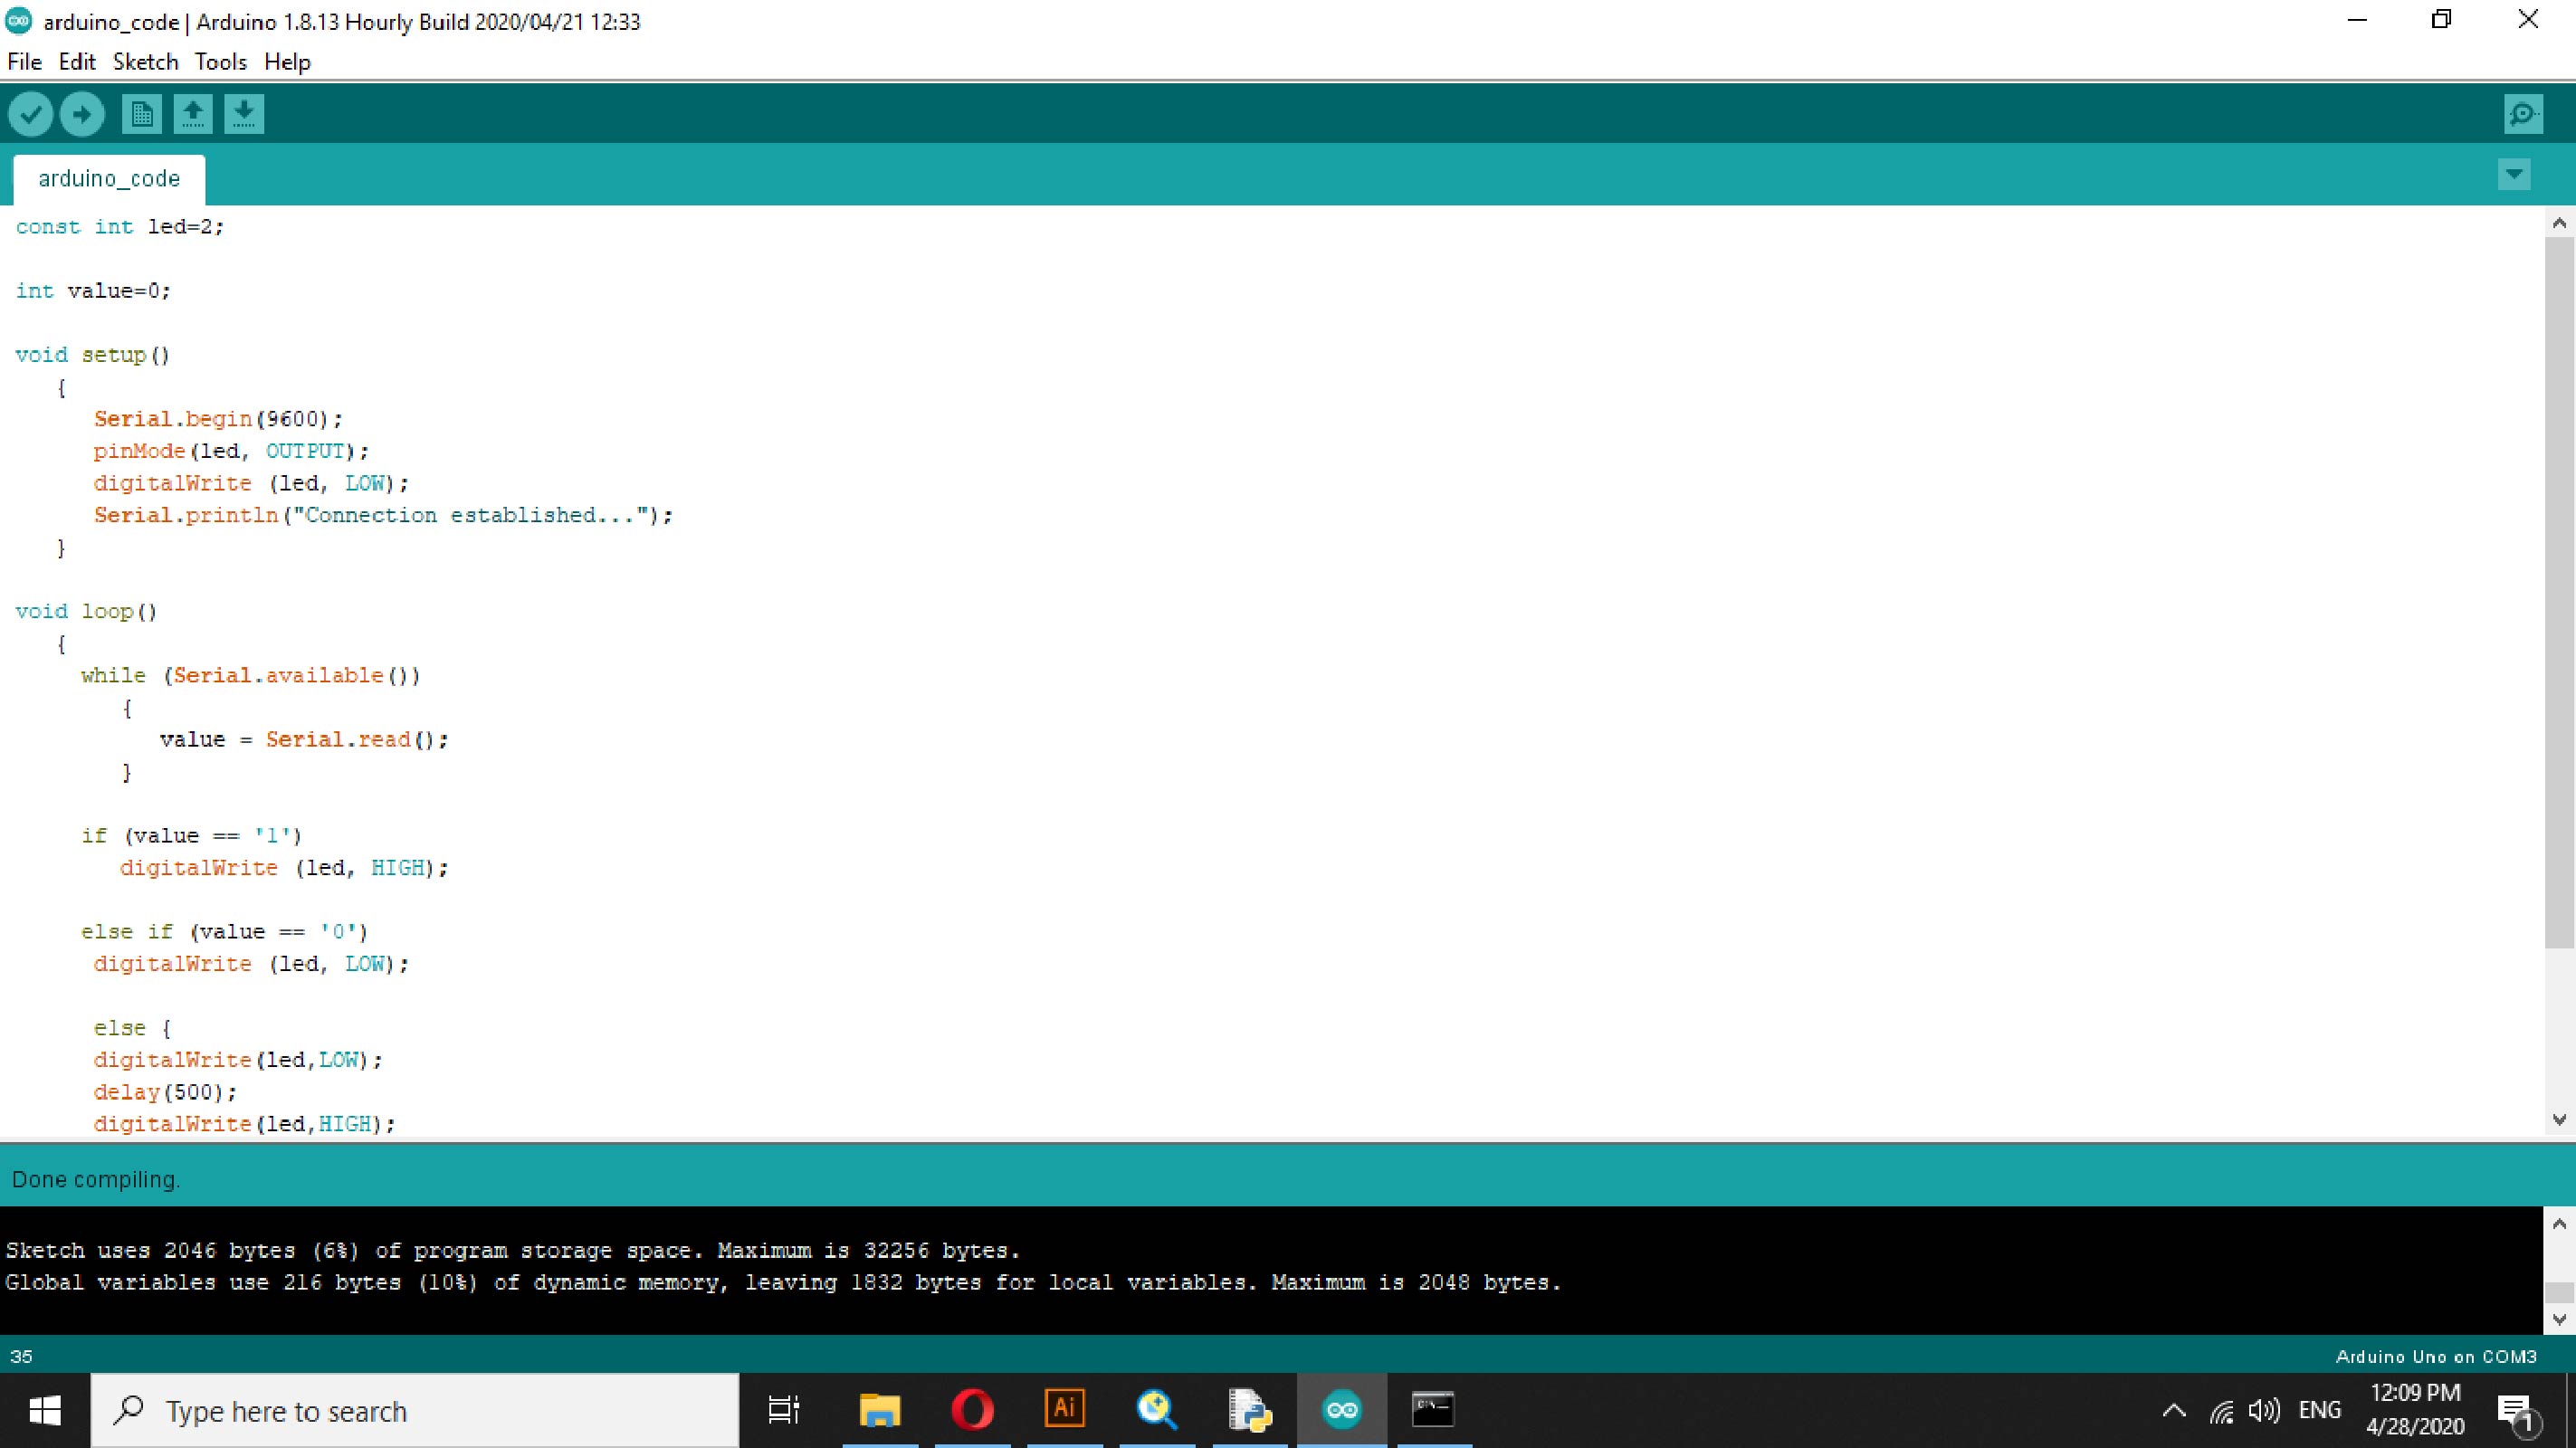
Arduino Code
const int BLUE = 2;

int value=0;

void setup()

{

Serial.begin(9600);

pinMode(BLUE, OUTPUT);

digitalWrite (BLUE, LOW);

Serial.println("Connection established...");

}

void loop()

{

while (Serial.available())

{

value = Serial.read();

}

if (value == '1')

digitalWrite (BLUE, HIGH);

else if (value == '0')

digitalWrite (BLUE, LOW);

else {

digitalWrite(BLUE,LOW);

delay(50);

digitalWrite(BLUE,HIGH);

delay(50);

digitalWrite(BLUE,LOW);}

}
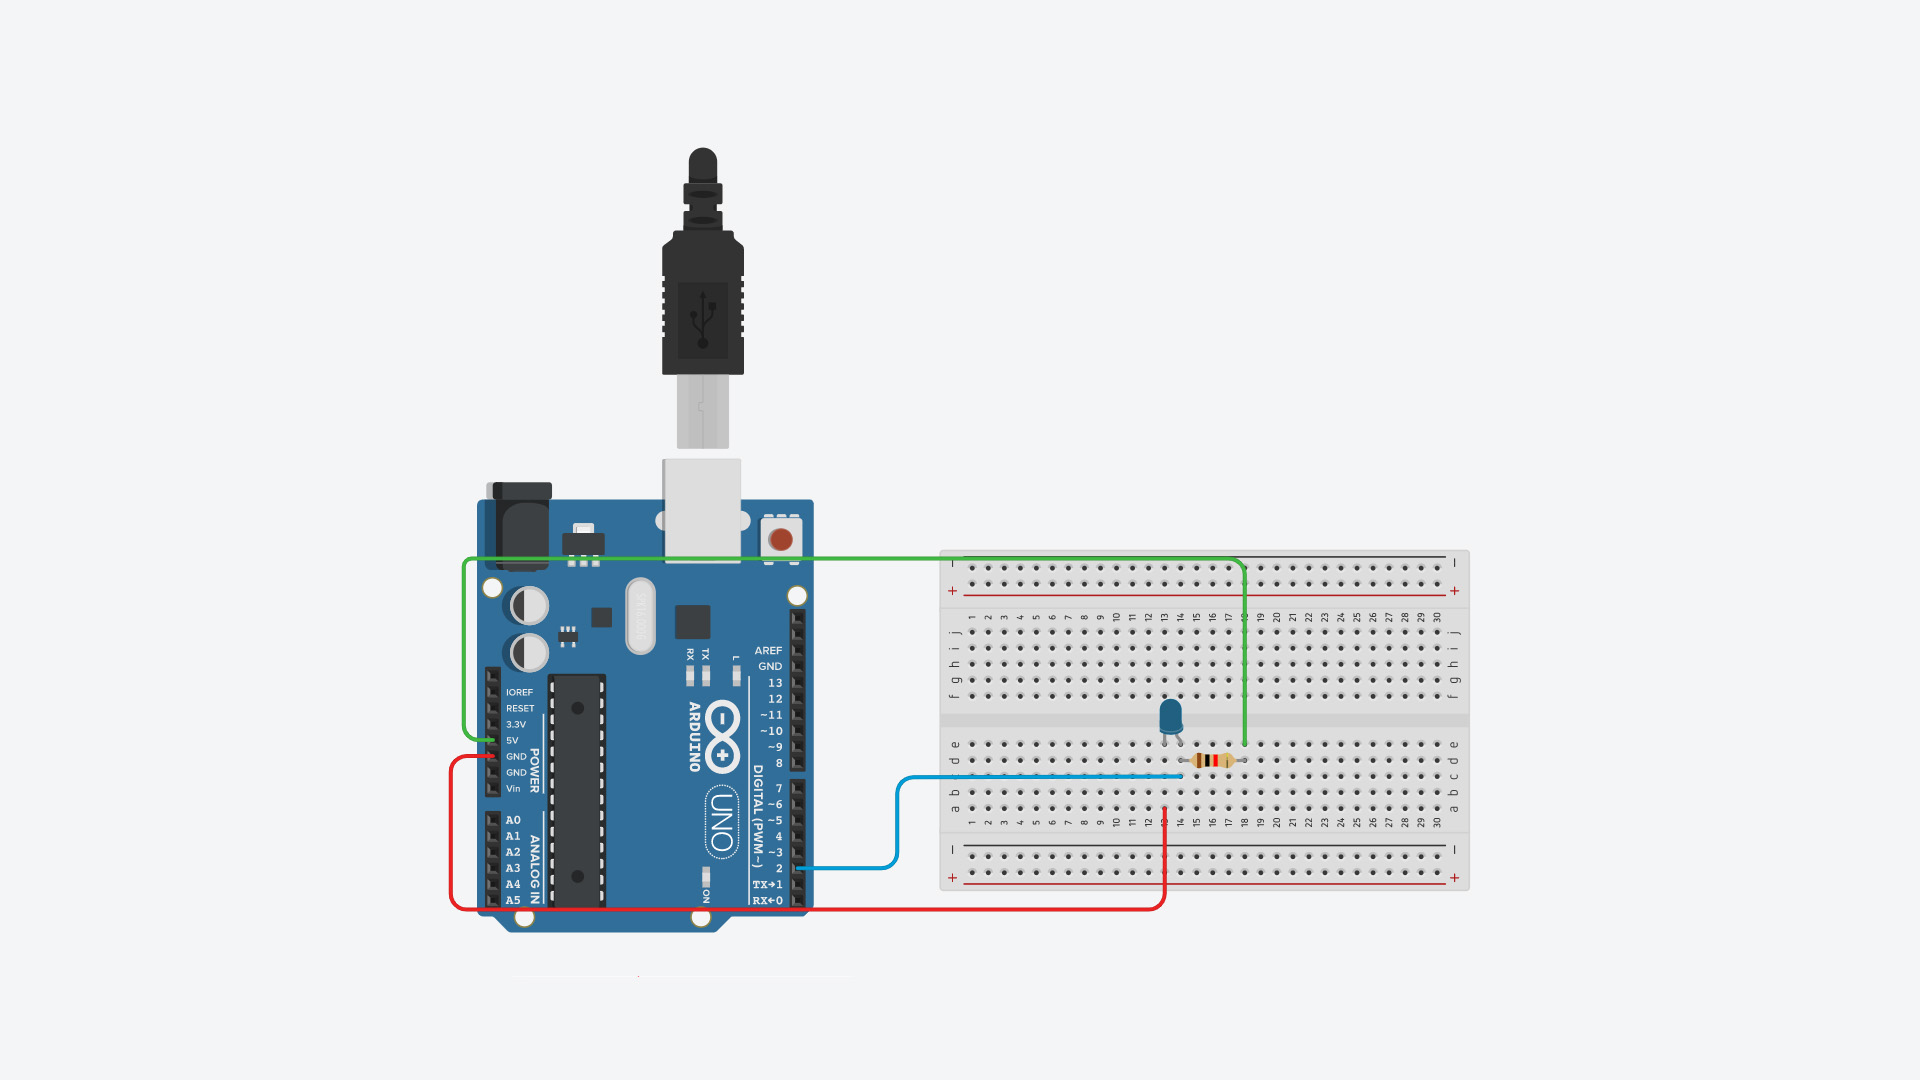
The Connections
I connected the LED to the Arduino board as it was supposed to run the LED using the Arduino with a resistor, a 5V port and a port for the LED, I connected the Arduino to my computer and loaded the Arduino code onto the connected board, after that I opened the PyCharm software or it could through Python and ran it, As shown in the video below.
The following image shows the connections I made with my Arduino for this week mission.
Codes