W09│ Embedded Programing
- Compare the performance and development workflows for other achitectures
- Read a microcontroller data sheet.
- Program the Echo Hello-world board to do something, with as many different programming languages and programing enviroments as possible.
1.Group Assignment
2. Individual Assigment.
2.1 PROGRAMMING THE ECHO HELLO-WORLD BOARD
This week's assignmet was about programming the Echo Hello-World board we made on week 07 to do something. To be honest, at the begining it was difficult for me to start with this assigmnet because it was my first time dealing with microcontrollers and programing languages. But, thanks to the information i read on the data sheet, some video tutorials I found, a codecademy begginer's Python course and help from my coworkers; I know understand the basic information to start with the assigmnet.
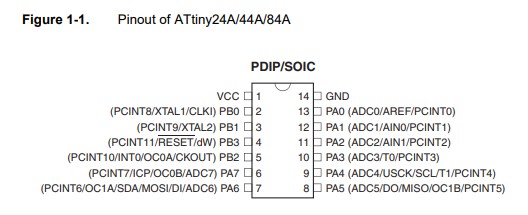
It is important to have some infomation related on microcontrollers. What I learnt is, depending on the amount of PINS it has its capabilities will be different, we can attach to them power conections, communications connections and input and output conections. Each PIN has a name and especific functions. The microcontroller used for this assignment was the ATtiny44, it has 14 PINS and in the
- VCC: Supply voltage
- GND: Ground
- PORT B: 4-bit I/O port - internal pull-up resistors - Digital inputs & outputs.
- PORT A: 8-bit I/O port - internal pull-up resistors - Analog-to-digital converter (ADC)
- RESET: Resets the program

On
Recognized what are the equivalences between the ATtiny44 and Arduino PINS:

Image retrieved from:
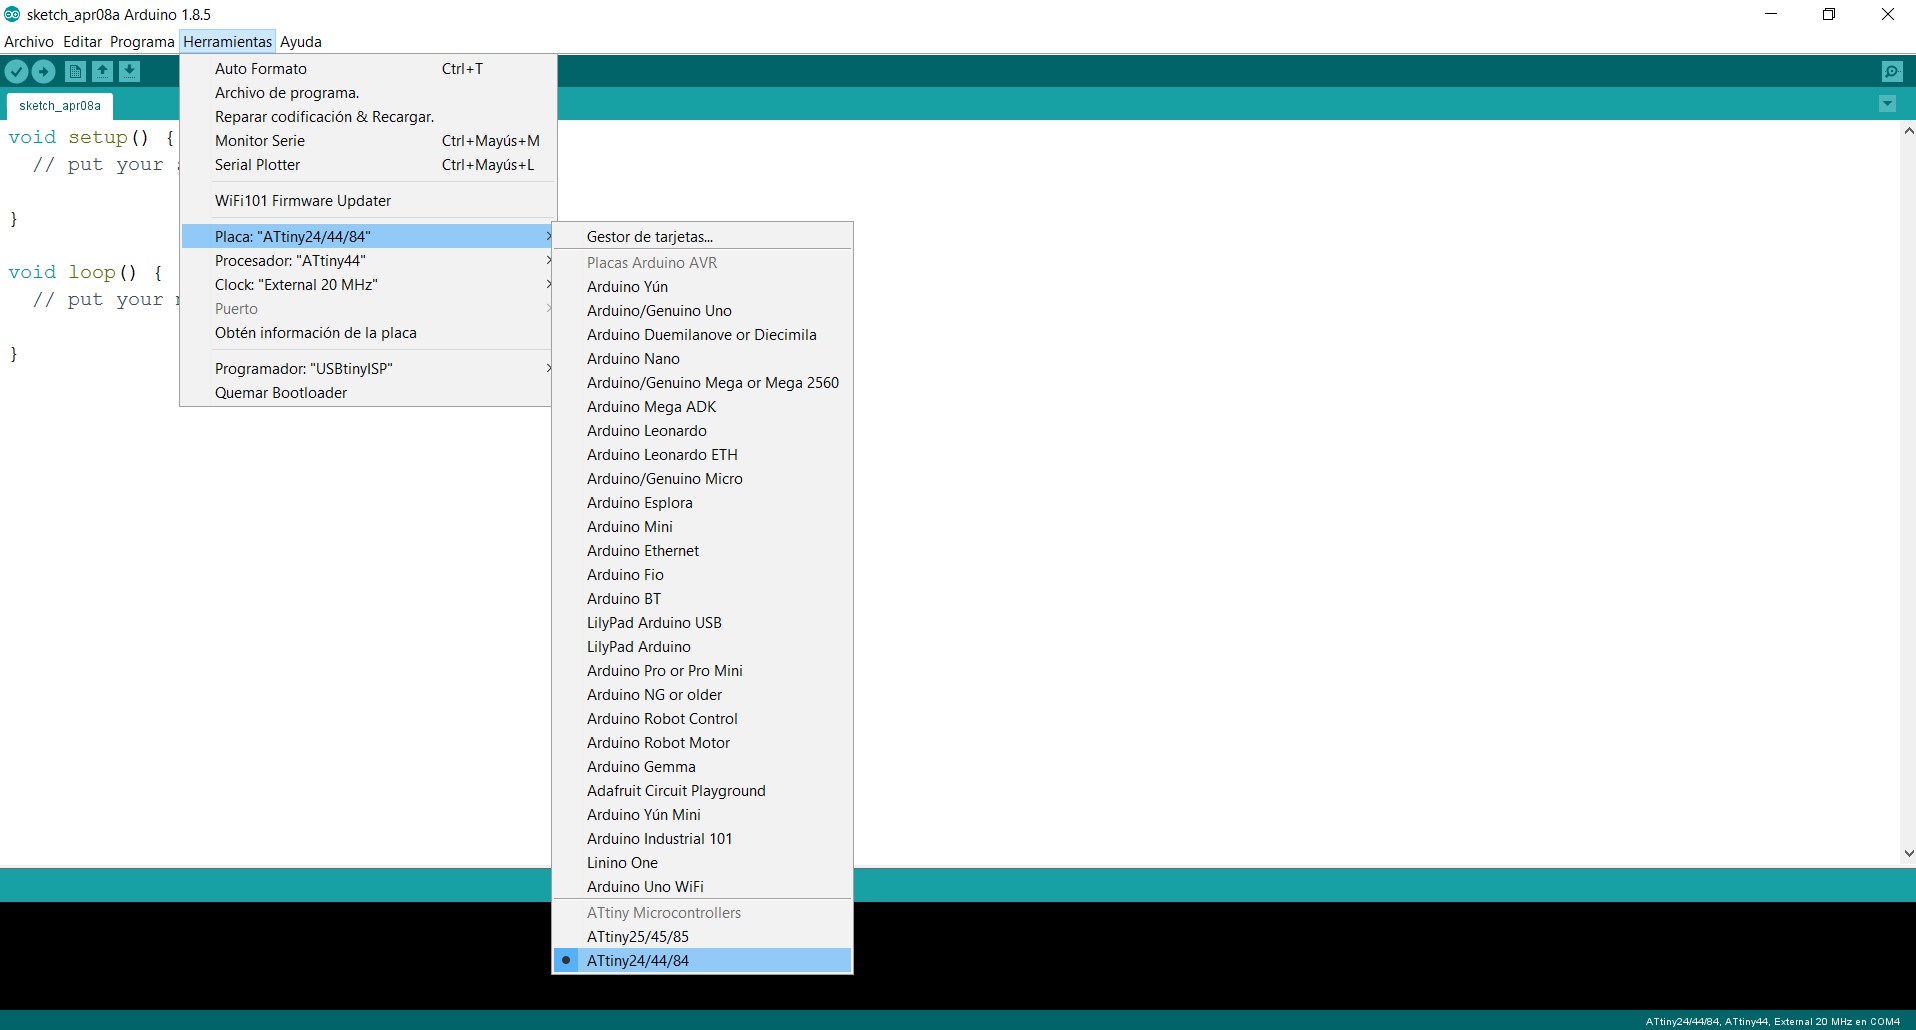
Installing the ATtiny support:
- Go to tools and select the board:
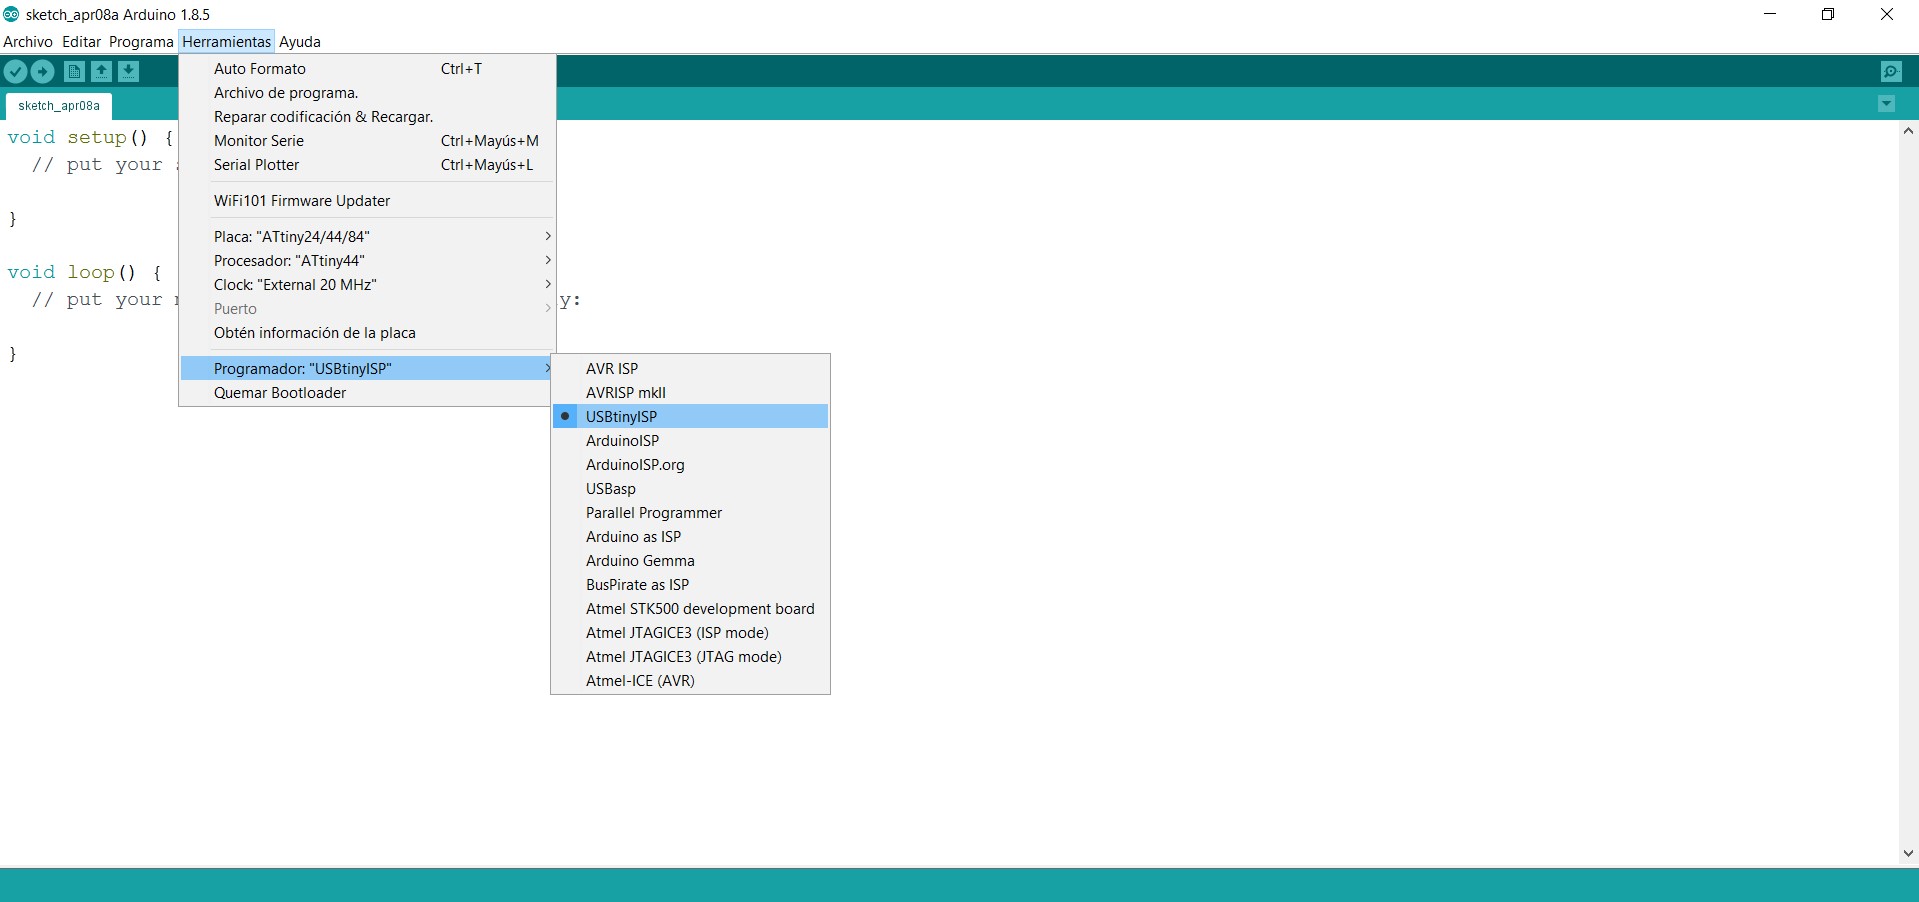
"ATtiny24/44/84" - Select the programmer:
"USBtinyISP"


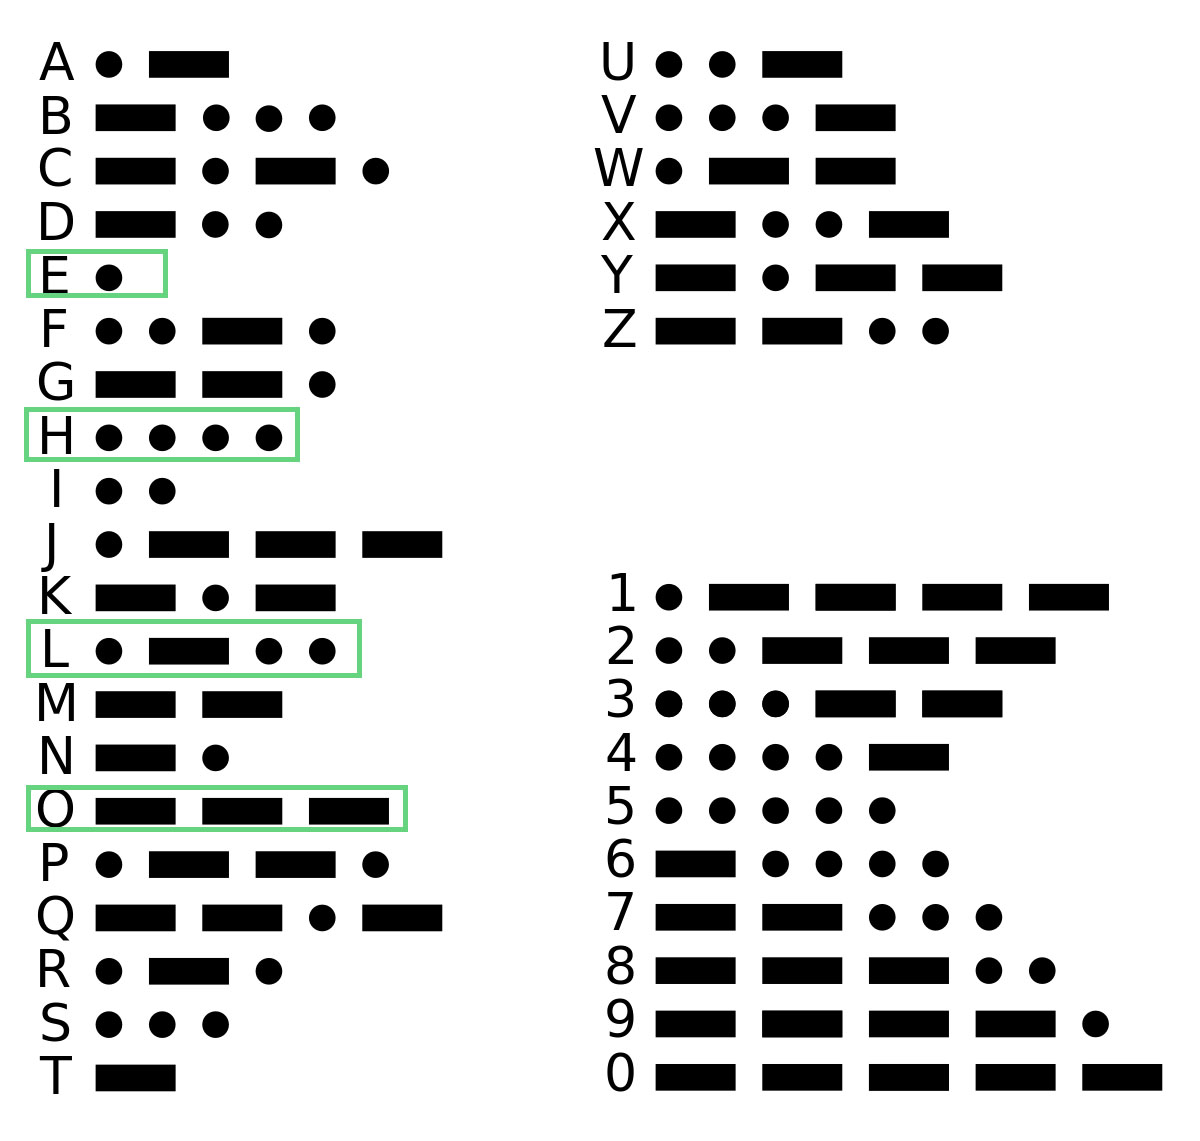
I wanted to test a Morse Code with my board so I looked up some examples and I found a
- cons int: To assign LEDPin & BUTTONPin Numbers
- void setup: Setup code
- void loop: Main code, to run repeatedly
- pinMode(): Configures INPUT/OUTPUT/INPUT_PULLUP
- digitalWrite(): Pin value, HIGH(on) or LOW(off)
- delay(): Pauses the program. Arduino works with milliseconds as a parameter
I decided to write the code for
- 01 POINT: delay(500)
- 01 LINE: delay(1000)
- DELAY BETWEEN POINTS OR LINES: delay(100)
- DELAY BETWEEN LETTERS: delay(1500)

Hello Morse Code from alucyem on Vimeo.
2.2 OTHER PROGRAMMING LANGUAGES AND ENVIROMENTS
I wanted to try other languages so I took a
I set up the breadboard with: the Adafruit Pi Cobbler with GPIO cable, 1 Diffused 10 mm Red LED, a resistor & 02 jumper wires.
I tested the same message "HELLO" on Morse Code and the funtions I used where:
- def: to defin a function
- print():to show the funtion
- time.sleep(): pauses the program. Phyton works with seconds.
- def loop(): when you have a block of code which you want to repeat a fixed number of times.
import RPi.GPIO as GPIO
import time

GPIO.setmode(GPIO.BCM)

GPIO.setup(18,GPIO.OUT)

def punto():

GPIO.output(18,GPIO.HIGH)
time.sleep(1.5)

GPIO.output(18,GPIO.LOW)
time.sleep(1)

def n_puntos(n):
for x in range (0,n):
punto()

def raya():

GPIO.output(18,GPIO.HIGH)
time.sleep(4)

GPIO.output(18,GPIO.LOW)
time.sleep(1)

def n_rayas(n):
for x in range (0,n):
raya()

def loop():
#H
print "H"
n_puntos(4)

time.sleep(1)

#E
print "E"
punto()

#L
for x in range (0,2):
print "L"
punto()
raya()
n_puntos(2)

time.sleep(1)
#O
print "O"
n_rayas(3)

time.sleep(1)

####while True:
##    loop()
##    print('end loop')

##if __name__ == "__main__":
loop()