W06│ 3D Scanning and Printing
- What is FDM?.
- General Design Considerations.
- Design and 3D print an object.
- 3D scan an object.
1.Group Assignment
For this week's assigment we have use a
You can download the User Manual
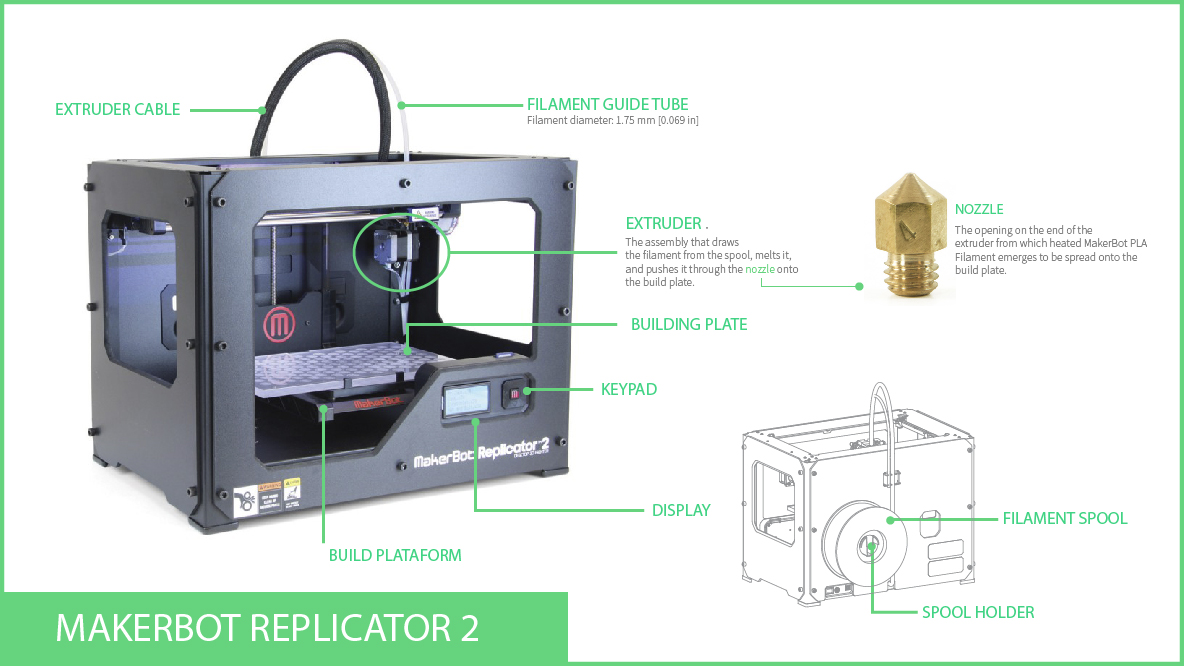
What is FDM?
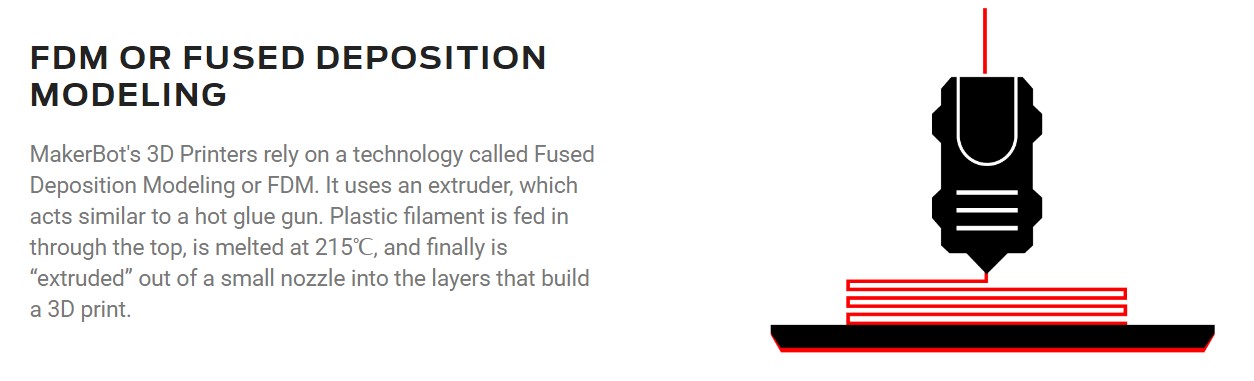
Image retrieved from:https://www.makerbot.com/learn/
1.1 HOW IT WORKS?
To start we prepared a simple geometry(hexagon) on Rhinoceros and exported it as
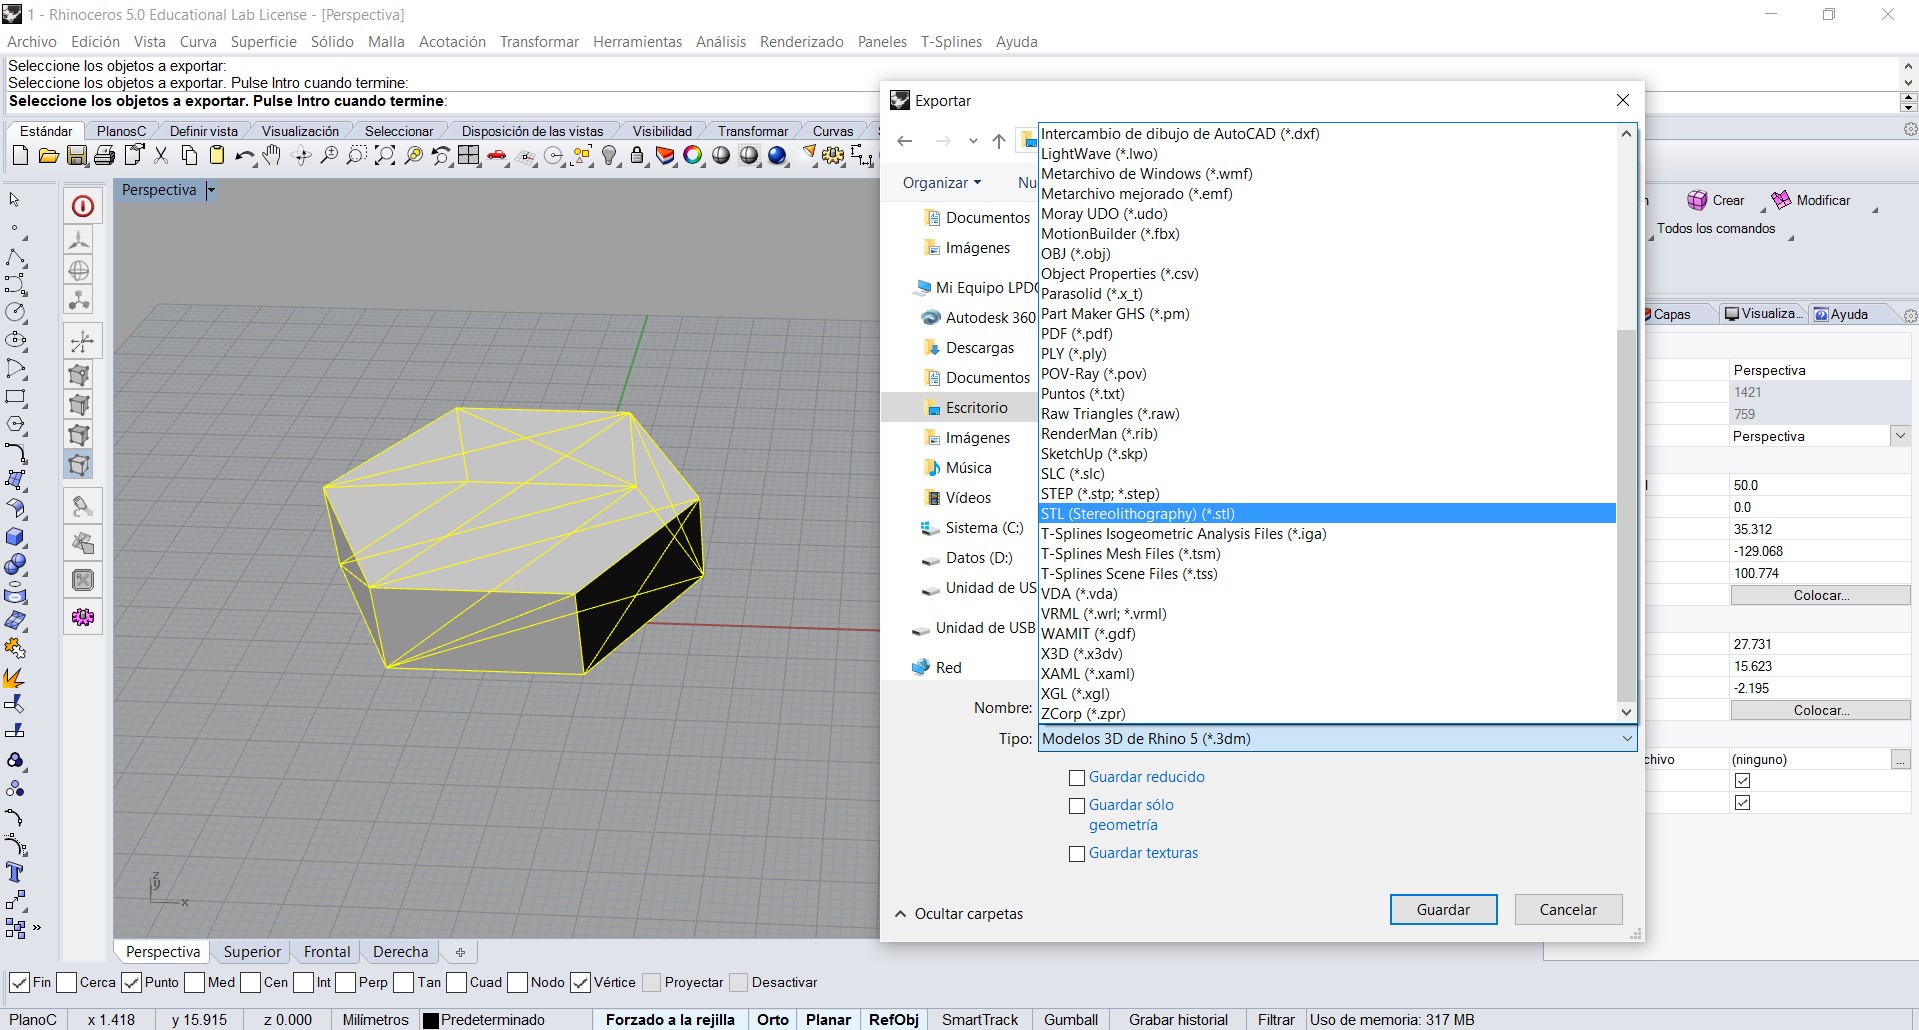
Image retrieved from:https://www.makerbot.com/learn/
MakerWare is really easy to understand and to work with, here we let you the most important information: Settings & Preview.

We recomend to click on
1.2 GENERAL DESING CONSIDERATIONS FOR 3D PRINTING
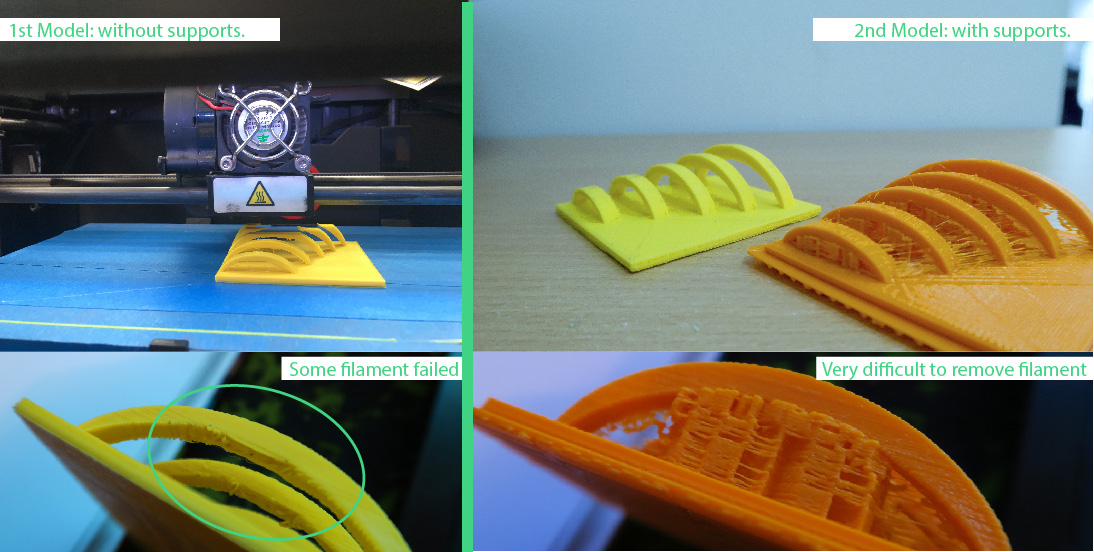
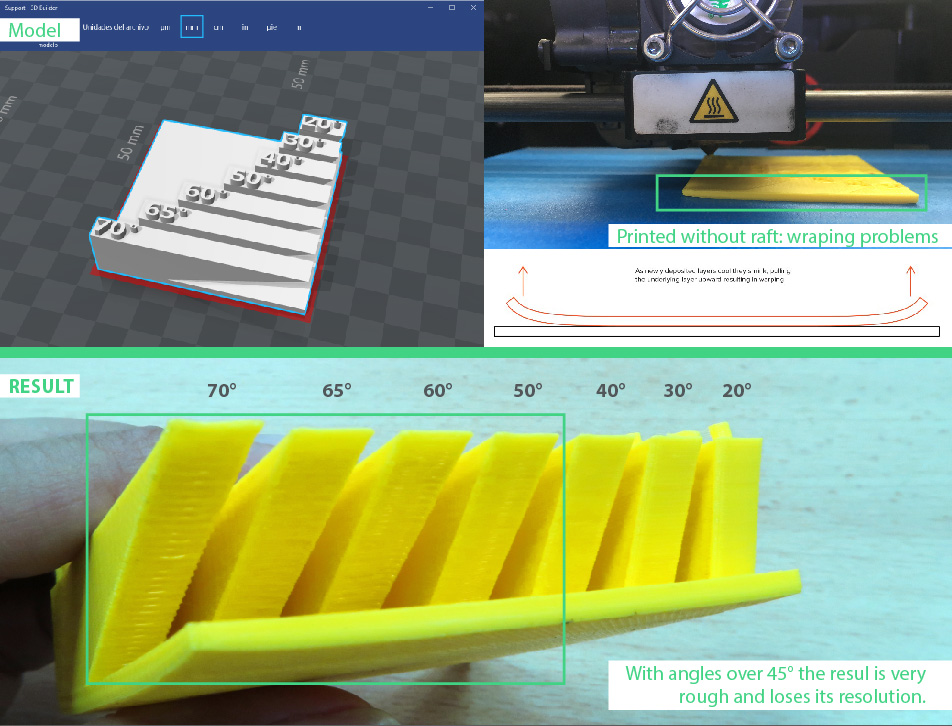
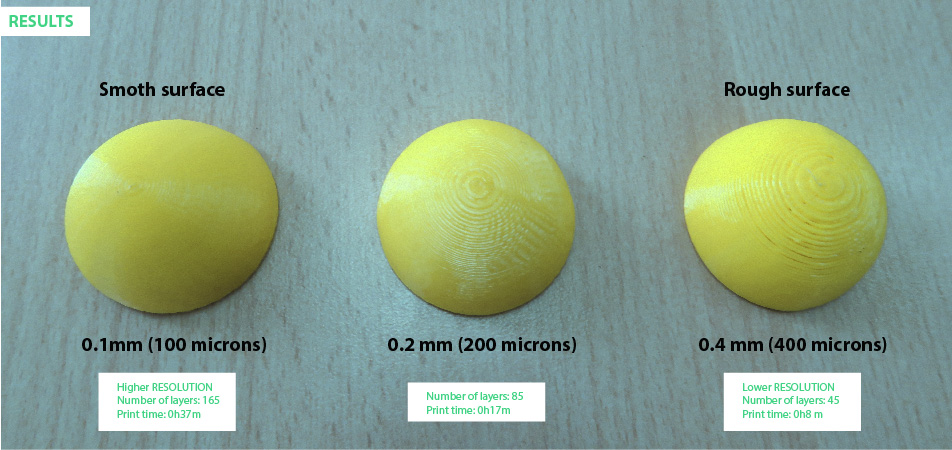
According to the research we made about 3D printing, when we design we have to know what are the different capabilities and design restrictions. We have tested:
Checkout this interactive image were you will find all the parameters and considerations we took. We didn't experience any trouble at printing.
We downloaded a 3D Model from
Parameters: Infill 20% / N° of shells: 2 / Rooft: 0.80 / Layer Heigth:0.2 / Print time: 1h20
Parameters: Infill 20% / N° of shells: 2 / Rooft: 0.80 / Layer Heigth:0.2 / Print time: 1h33
Parameters: Infill 15% / N° of shells: 2 / Rooft: 0.80
2. Individual Assigment.
2.1 DESIGN & 3D PRINT AN OBJECT
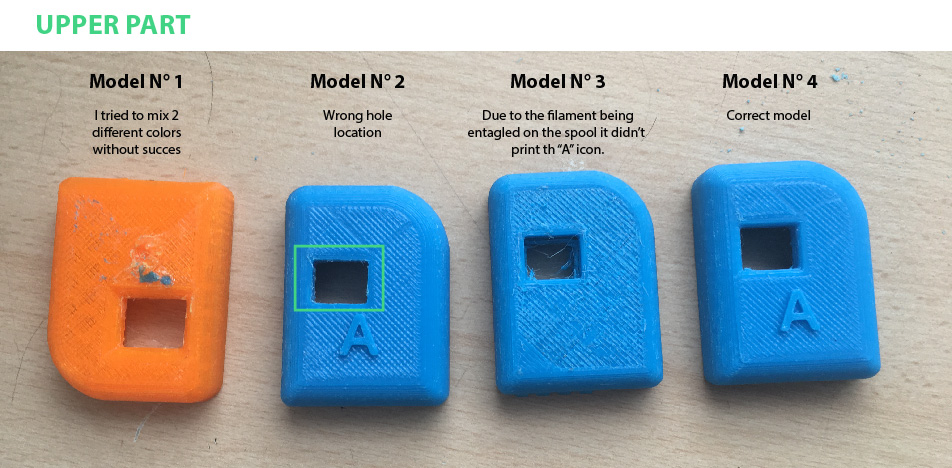
I designed and printed a case for my FabTiny using Fusion 360. Here you can check the 3D Model ↓
To assembly both pieces (uppber & bottom) I used a space tolerance of 0.04
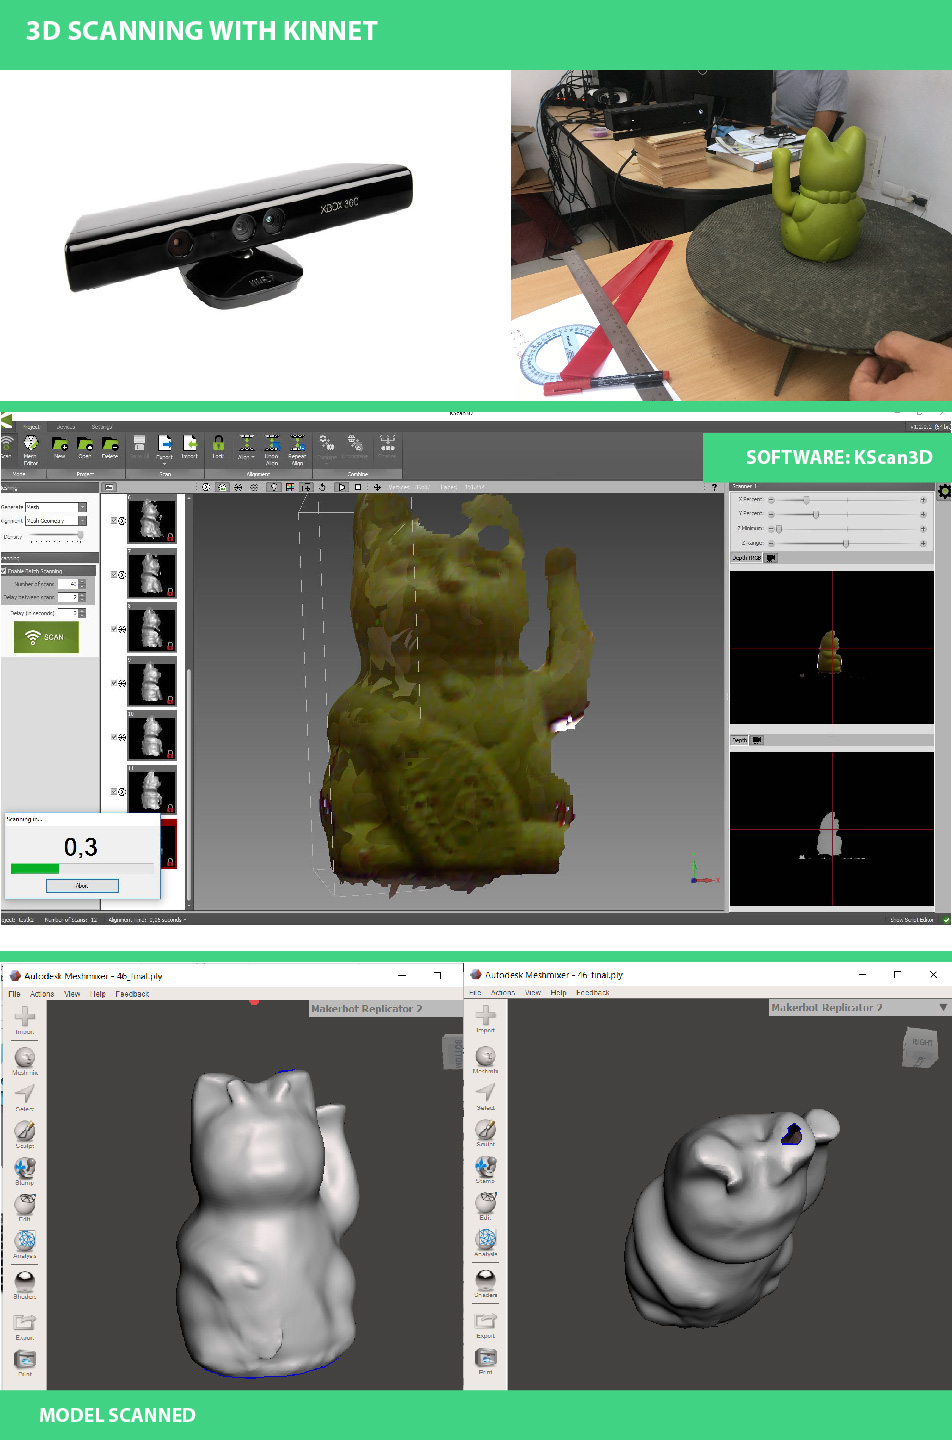
2.2 3D SCANNIG
I used to methods to scan an object: With
To be able to work with the Sense Scan, I used a "holder prototype" localy built that help us to rotate the scanner around the object. Due to the prototype, it was imposible to do it alone because I hab to hold the computer during the scang process. Future adjustment: Modify holder design.
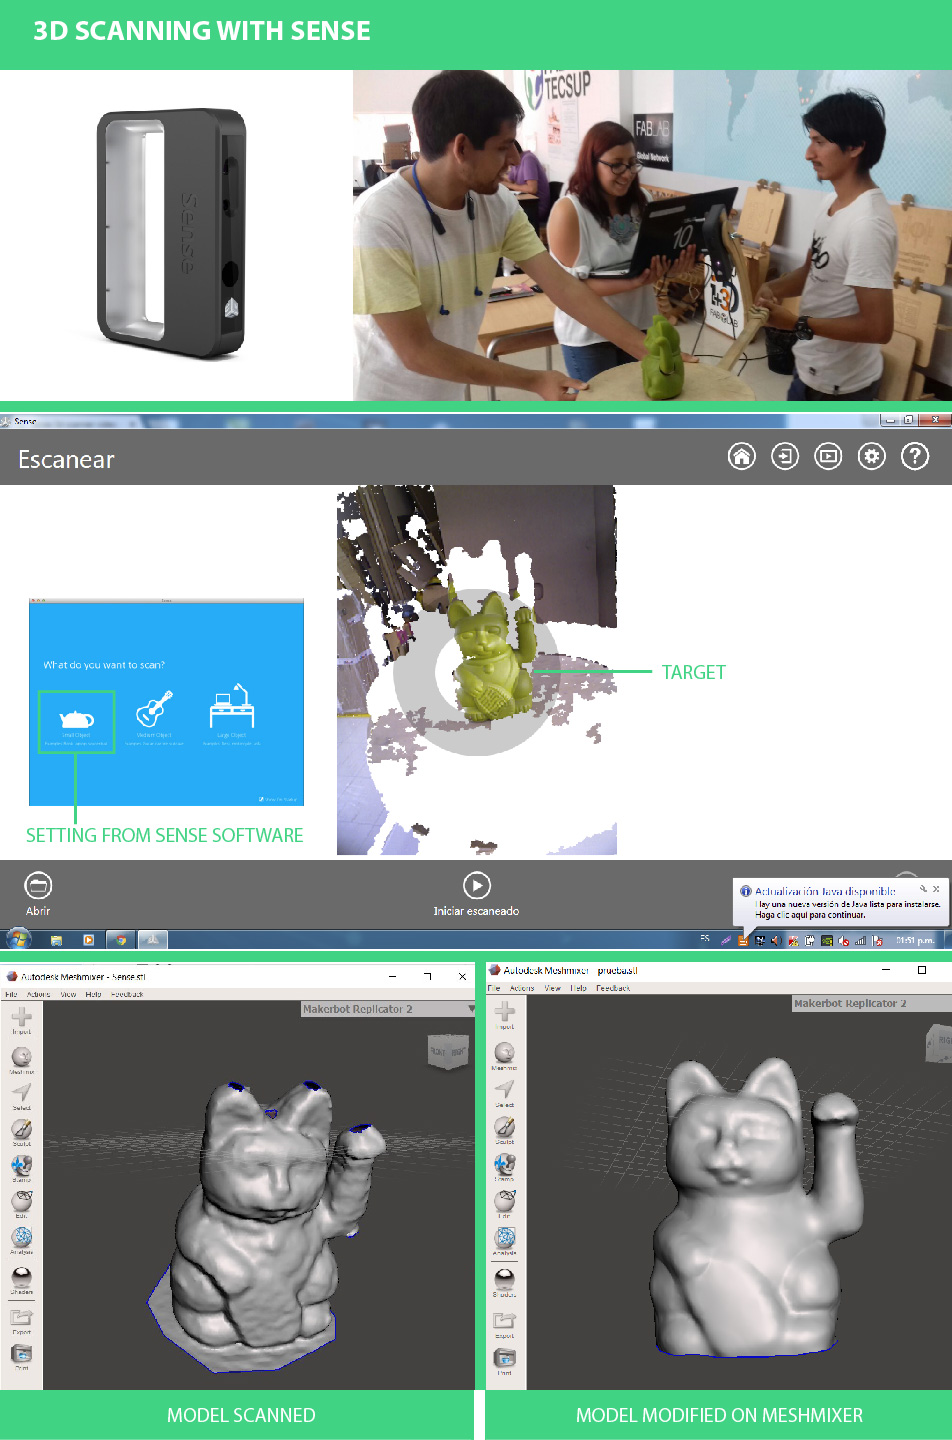
As you can notice on the photos
As you can notice on the photos below ↓ the resulting model was less damage but with less details. The most important difference is that with this type of scannig I didn't rotate the SCANNER, instead of it I rotated the object and I used a metal rotating support.I could do it without any help and using Kinnet's Software:KScan3D. You can download it
3D Case: Download Fusion File
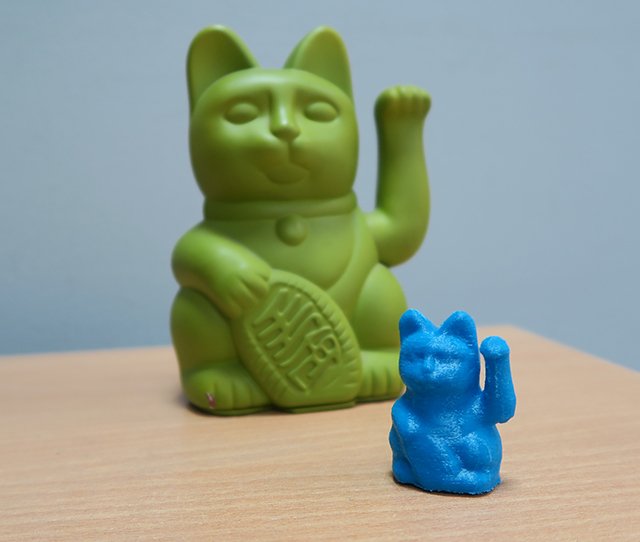
Cat: Download STL File