Week 5: 3D Printing and Scanning.
Where I fogot to check the units before hitting ctrl + P (╥﹏╥)
Assignment brief:
- Test design rules for the 3D printer (tolerance, overhangs, bridging, wall thickness, support structures).
- Design and 3D print a small, intricate object (few cm³) with complex geometry that can't be made subtractively
- 3D scan a physical object, refine the mesh, and optionally 3D print the scanned model.
3D Printing
3D printing, also known as additive manufacturing, is a process of creating three-dimensional objects layer by layer from a digital model 🧩. Unlike subtractive manufacturing, which removes material from a solid block, 3D printing adds material only where needed, allowing for efficient production and complex geometries ✨.
⚙️ How 3D Printing Works-
🧠 Designing the Model – A 3D model is created using CAD software
(e.g., SolidWorks, Fusion 360, Blender).
✂️ Slicing the Model – The model is converted into thin layers using slicer software (e.g., Cura, PrusaSlicer, OrcaSlicer).
🖨️ Printing the Object – A 3D printer follows the sliced model’s instructions and prints the object layer by layer.
🎨 Post-Processing – The printed object may require support removal, sanding, or painting.
💡Overview of 3D Printing at Riidl FabLab:
Riidl FabLab features two powerful FDM 3D printers: Creality Ender 3 v3 KE and the Creality Ender 3 S1. Both are used for prototyping, product development, and functional model creation but they serve slightly different needs.
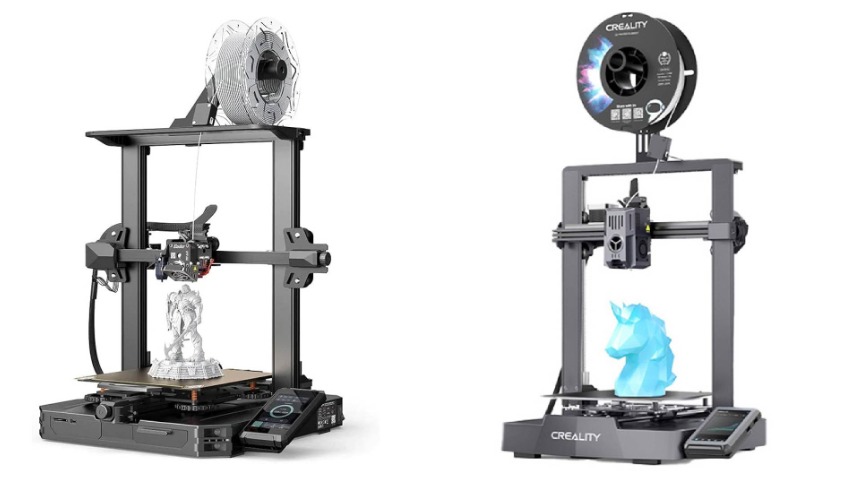
The Ender 3 v3 KE is a precise, beginner-friendly, and budget-conscious 3D printer. Its Cartesian-style structure makes it compact and easy to use.
- Sturdy metal frame
- 220 × 220 × 250 mm build volume
- Textured build plate
- Creality extruder with cooling fan
- Touchscreen display
- USB / SD card connectivity
The Ender 3 S1 is built for speed, stability, and higher precision. Its rigid CoreXY cubic frame reduces vibration and improves accuracy.
- Rigid cubic aluminum frame
- 220 × 220 × 280 mm build volume
- High-speed printing (~250 mm/s)
- Stable Z-axis bed movement
- Reduced wobble
- Heated build platform
👯 Group Assignment:
Before jumping into our individual projects, my fabmates Vivan and Vignesh ran a test print to evaluate the design rules of our 3D printers. This helped us understand the machine’s strengths and limitations so we could design smarter and avoid print failures later.
The test model examined:
- Tolerance
- Overhangs
- Bridging
- Wall thickness
- Support structures
With these parameters tested and understood, we were ready to move confidently into our weekly assignment (ง •̀_•́)ง
Link to Group Assignment.⚙️ 3D Printing on Ender 3 v3 KE
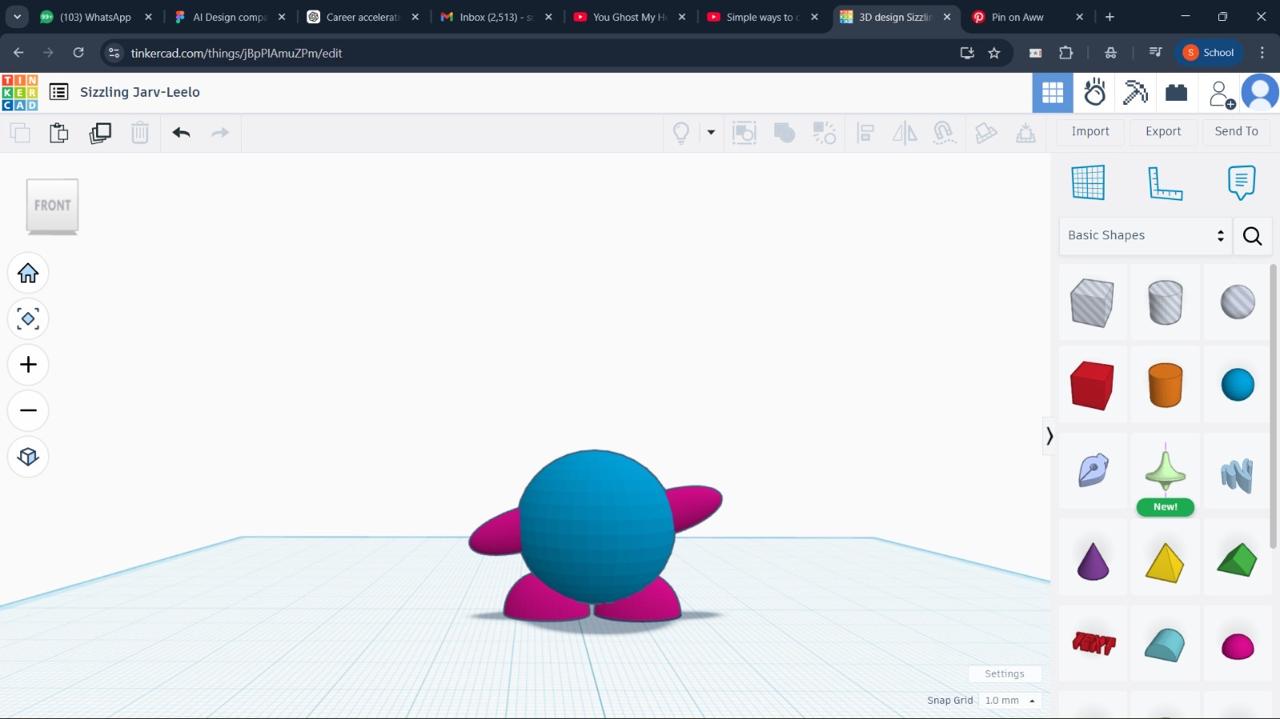
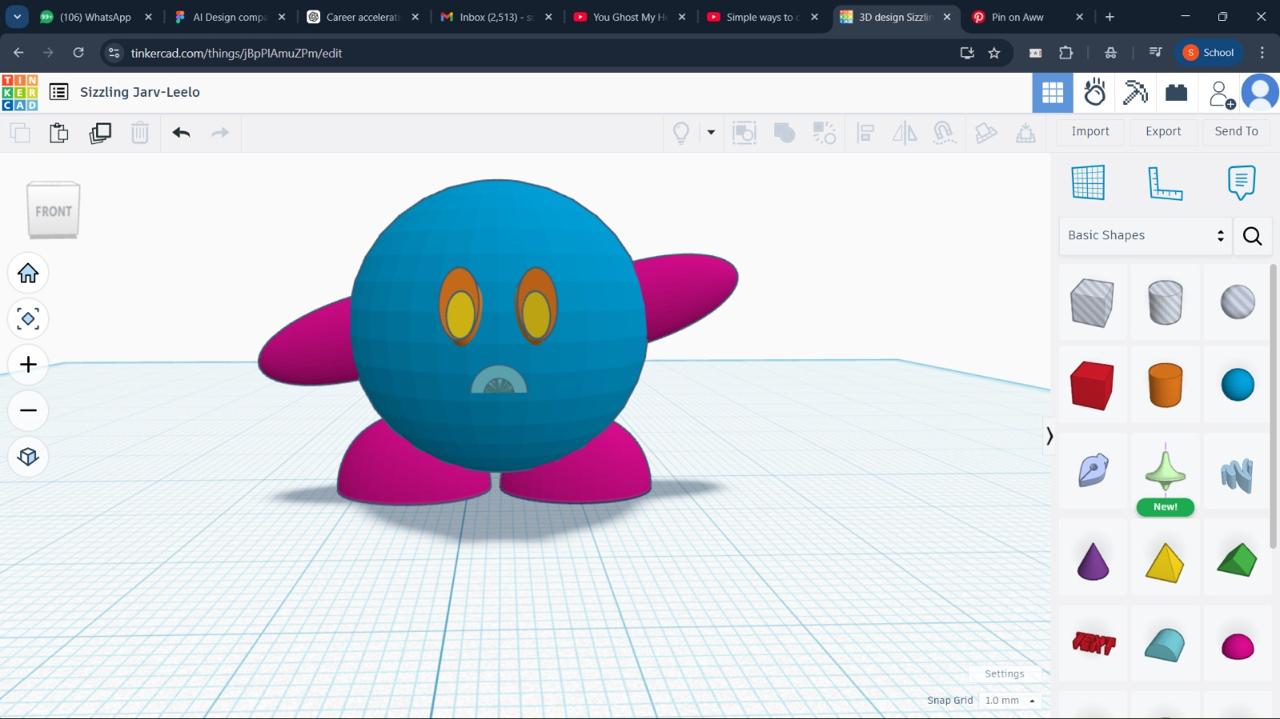
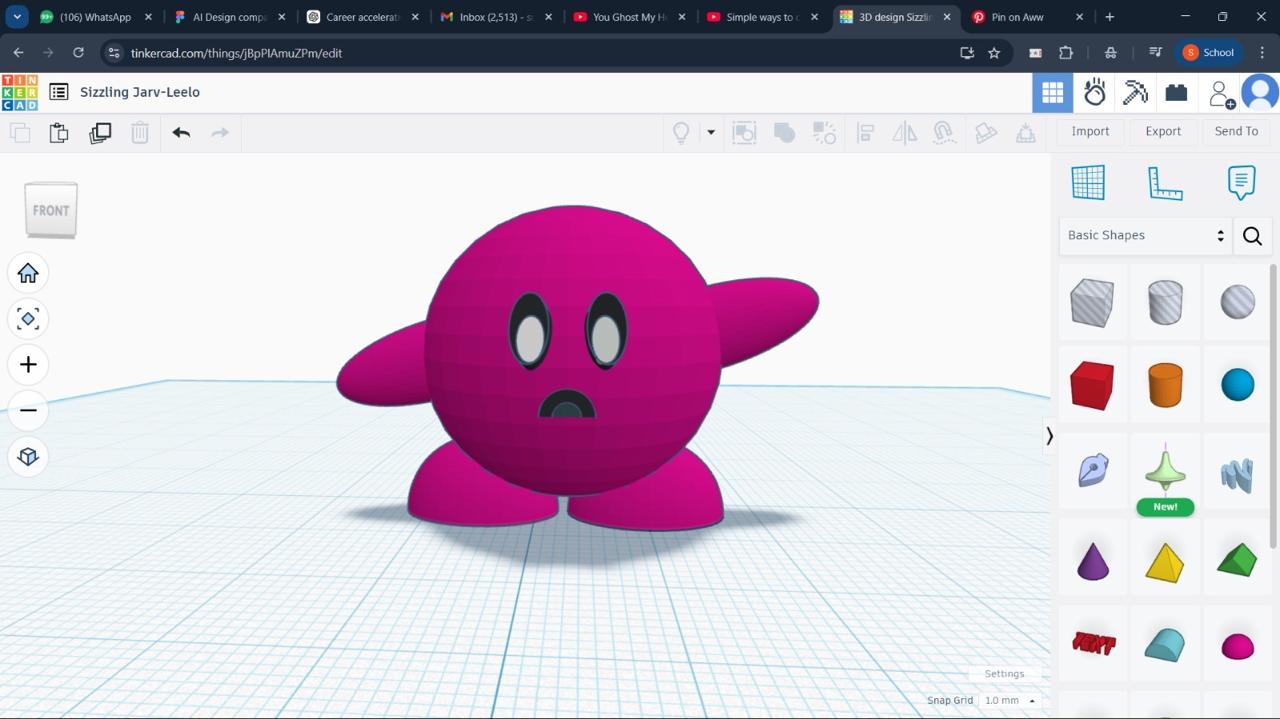
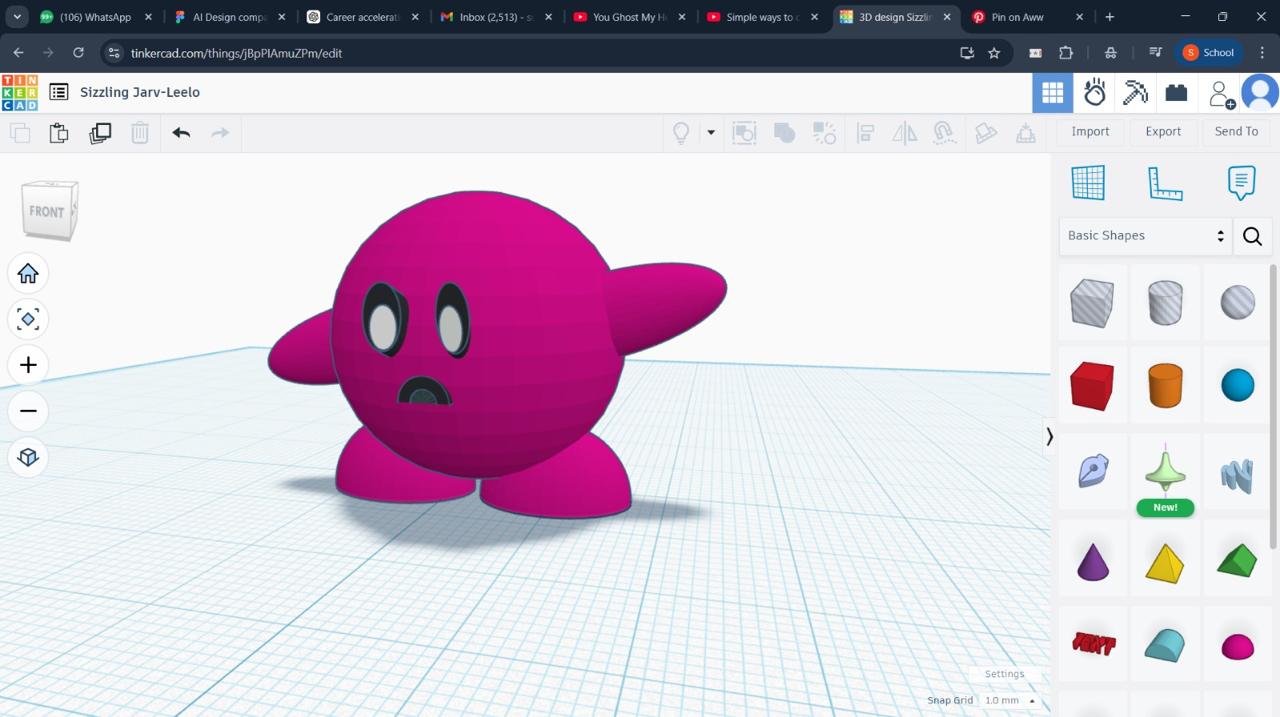
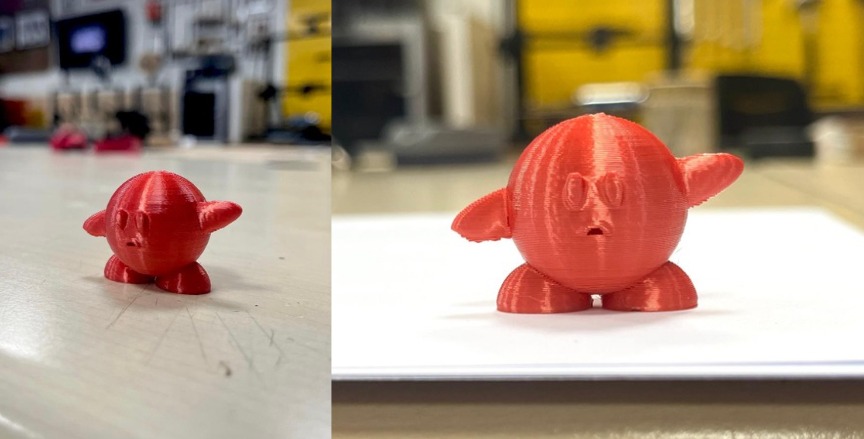
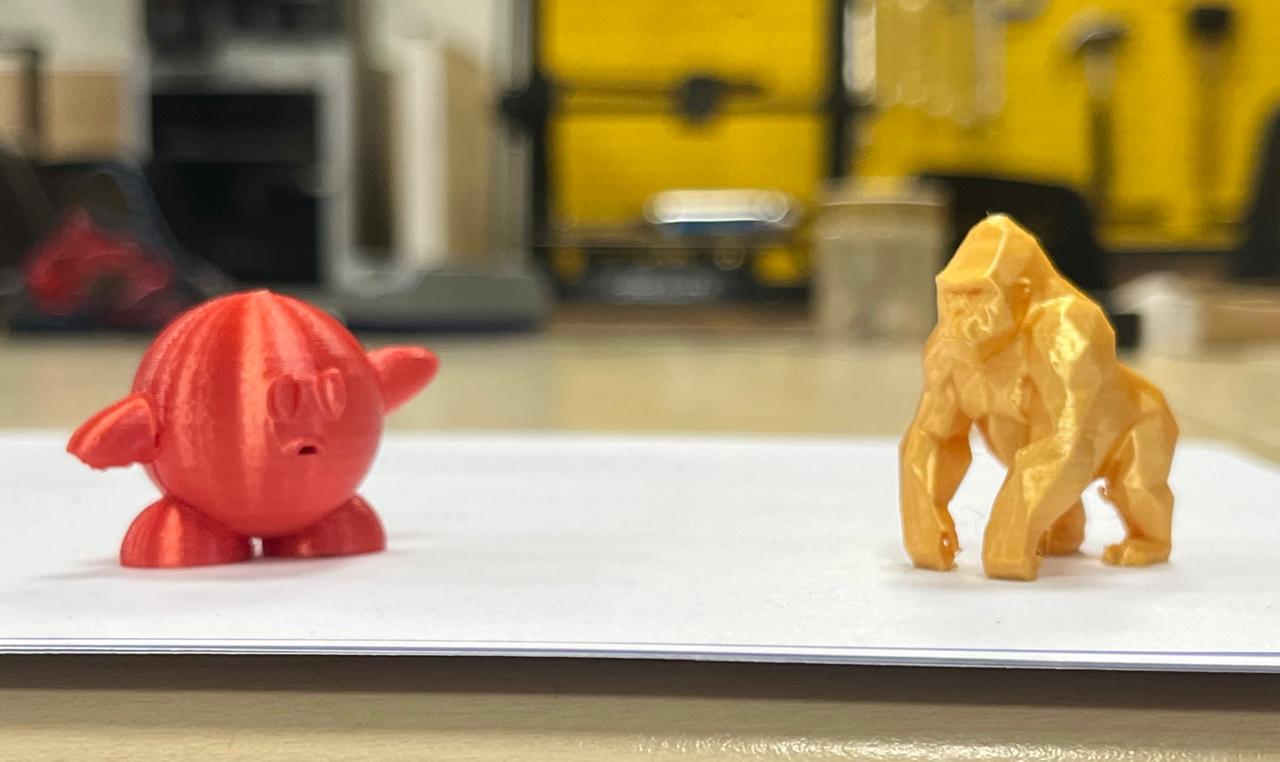
The objective was to design and 3D print a small object that would be difficult (or nearly impossible 👀) to manufacture using subtractive methods. Instead of going basic, I chose to model Kirby (the absolute GOAT) (๑˃ᴗ˂)ﻭ in TinkerCad.
Kirby’s smooth, organic curves and rounded geometry make him tricky to machine using traditional techniques like CNC milling or laser cutting. I added internal hollows and kirby's sort of conical but elliptical hands are easy for 3D printing but a nightmare for subtractive fabrication (¬‿¬).
In short:
3D printing = yes ✨
CNC trying to make Kirby = suffering (ಥ﹏ಥ)
👩🍳Making Kirby on TinkerCad:
✂️Slicing:
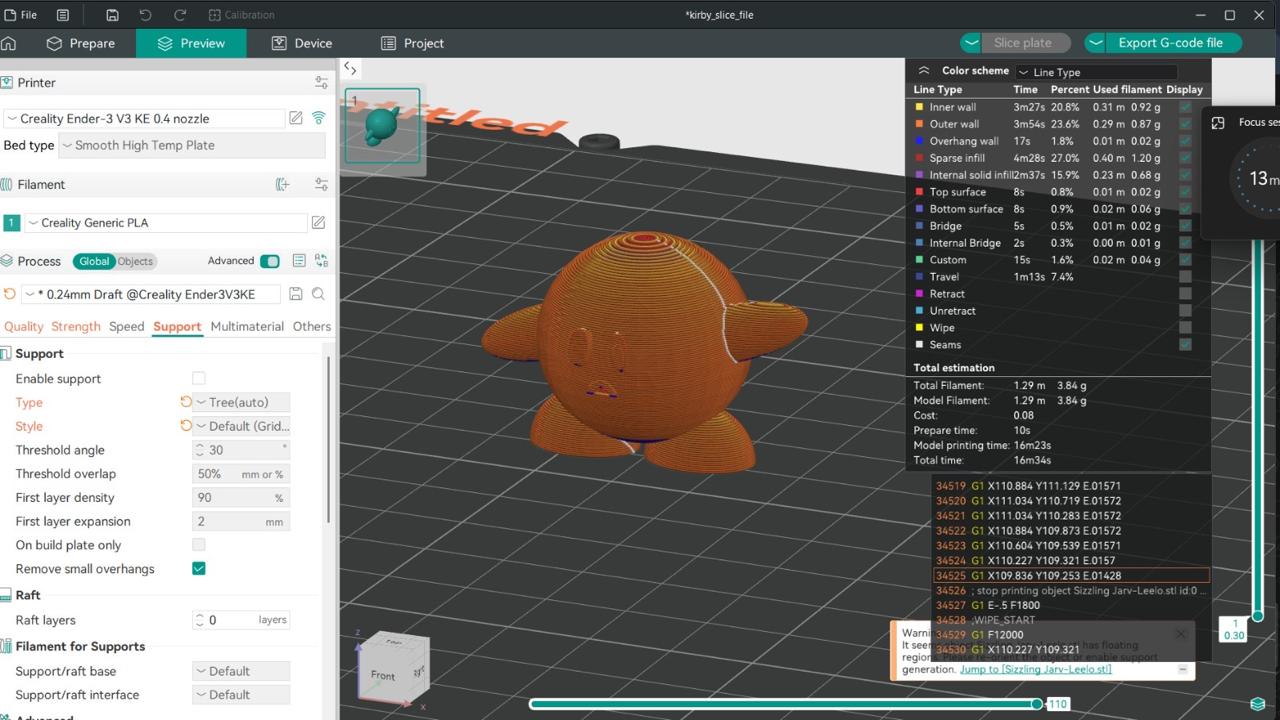
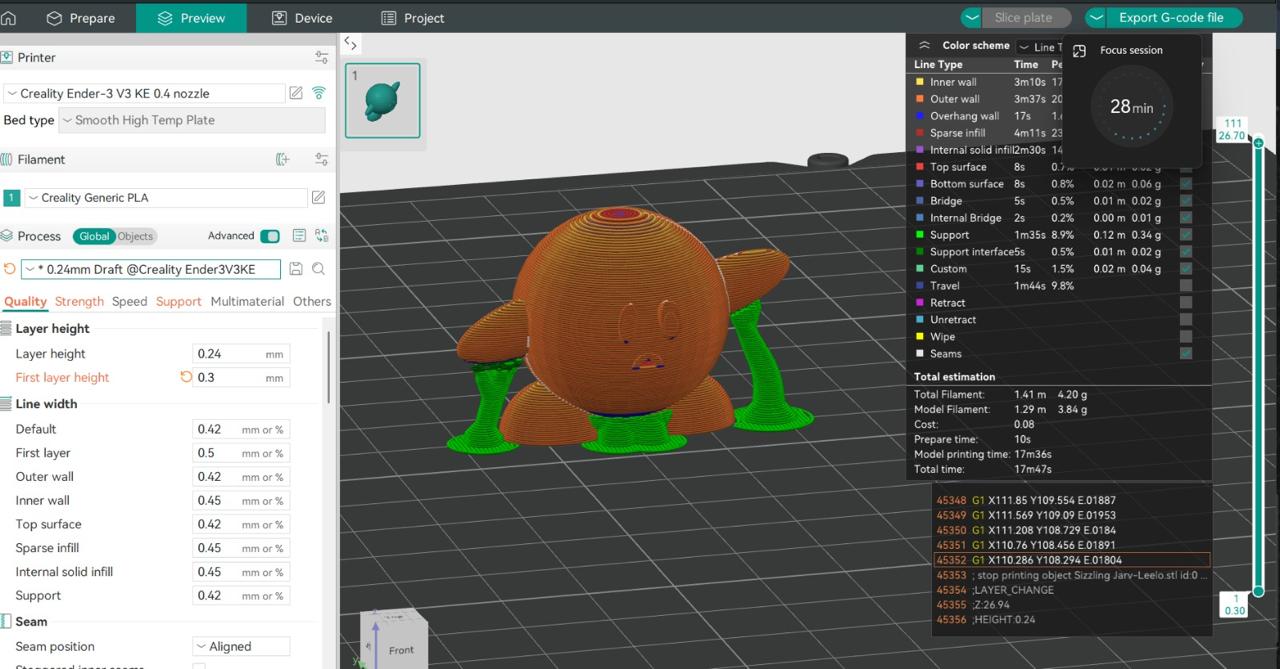
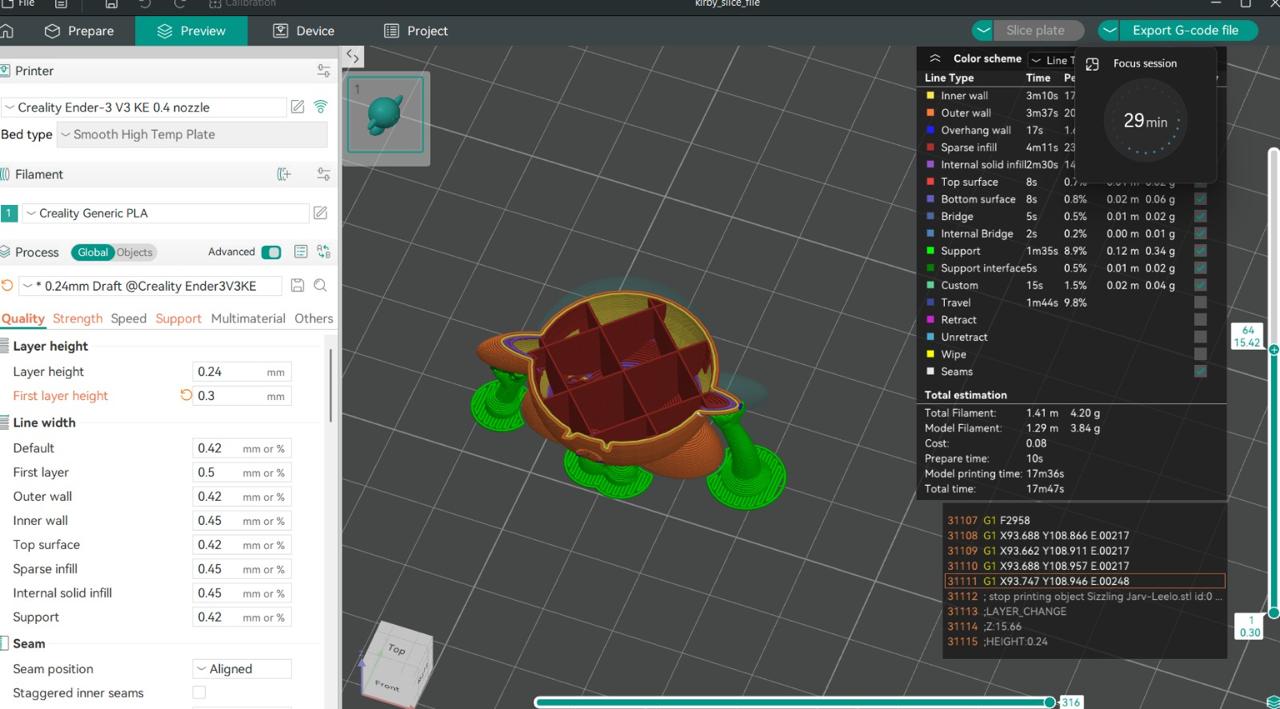
🦺 Prep for Printing:
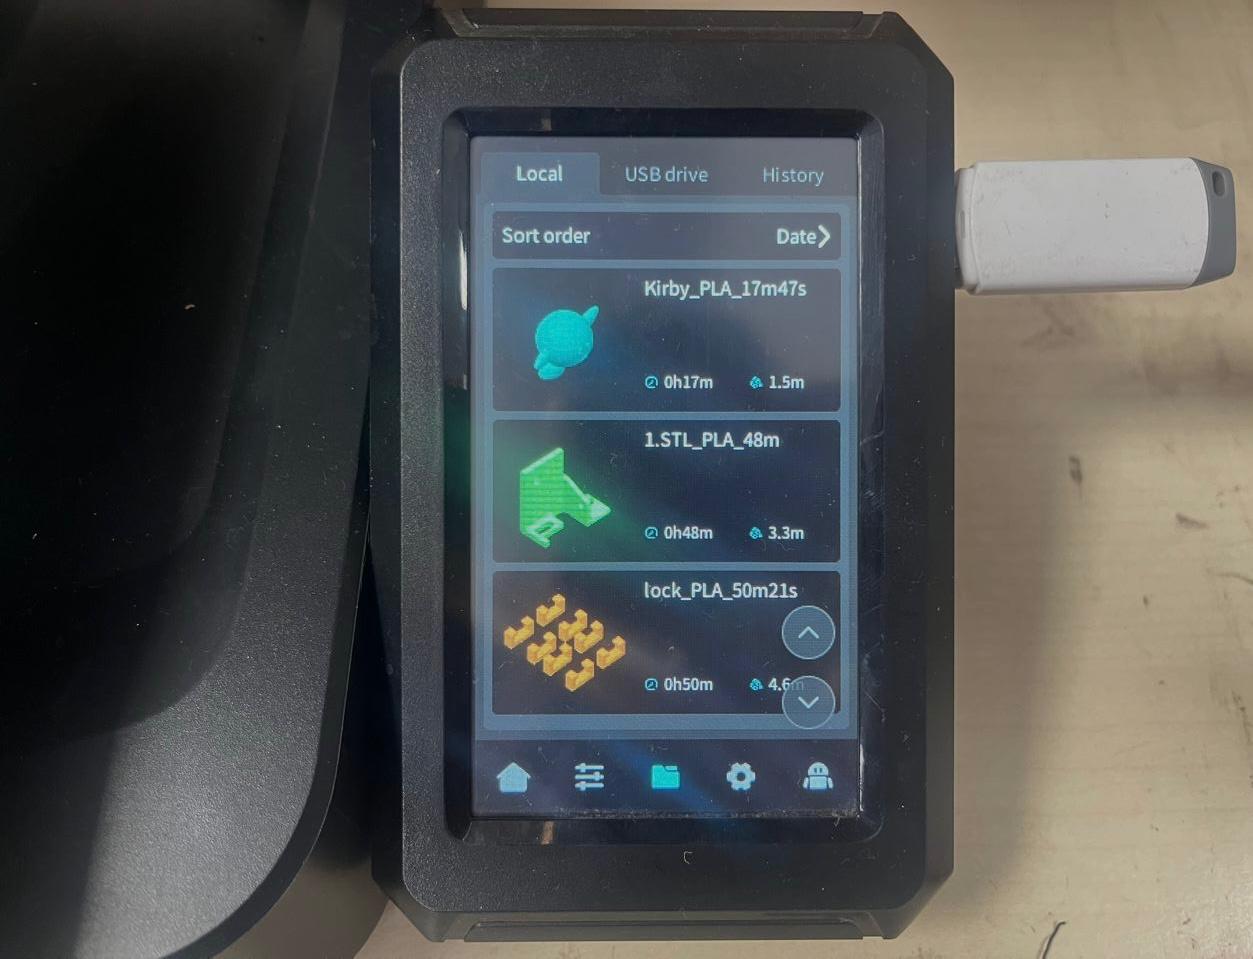
Save the G-code file onto a USB drive.
Then insert the USB into the Ender 3 v3 KE touchscreen panel.
🔧 Machine Preparation:
Before printing:
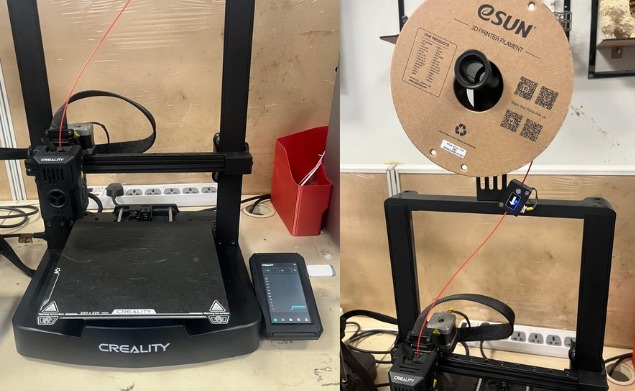
- Ensure PLA filament is properly loaded
- Check the spool feeds smoothly
- Confirm the nozzle and bed are clean
- Verify build plate is secure
- Run auto-calibration if needed
The printer's touch screen shows:
- File selection
- Calibration
- Temperature monitoring
⭐ Starting the Print:
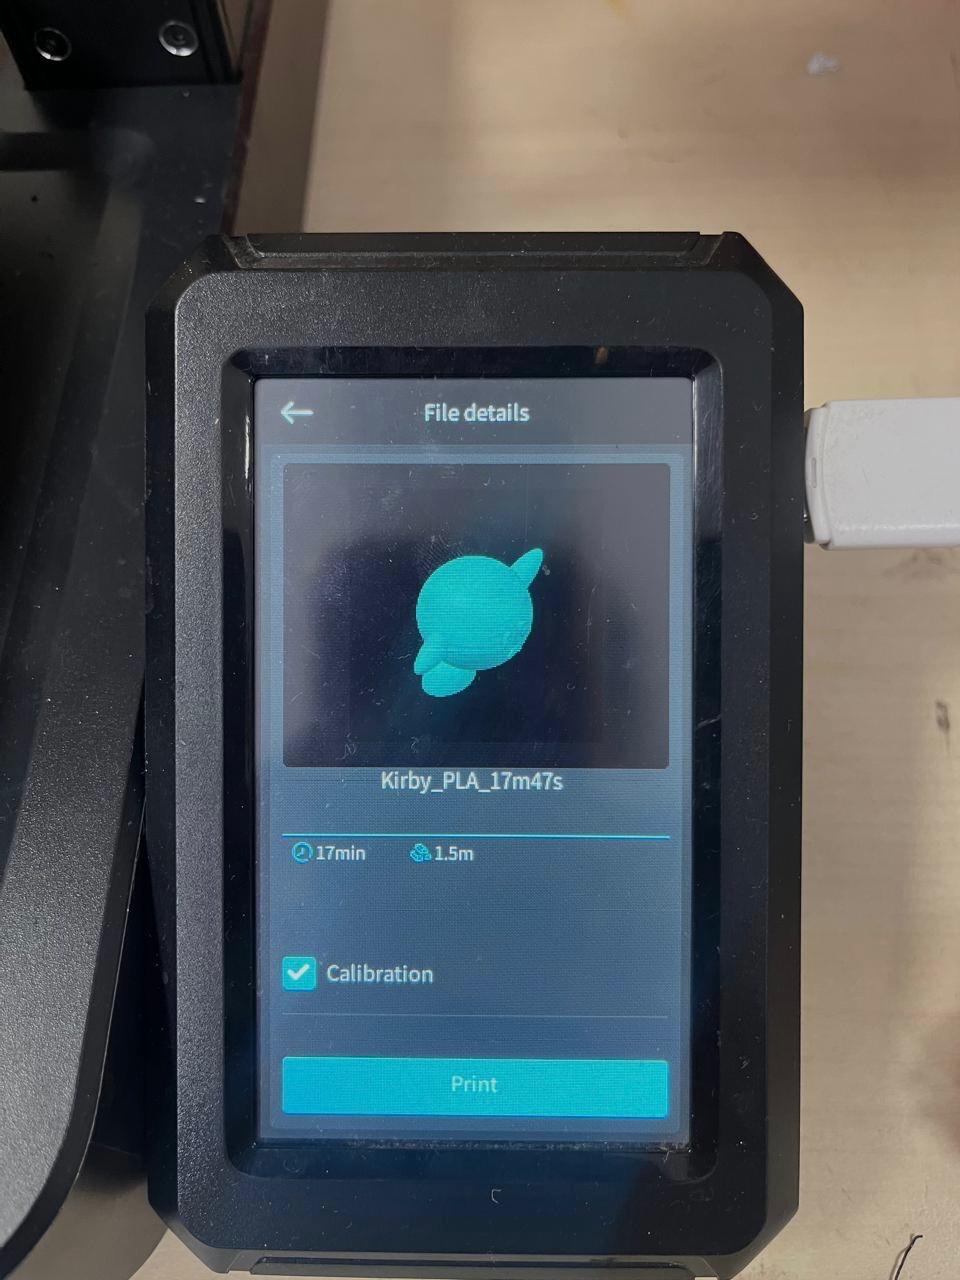
Select the Kirby file from the USB.
Confirm calibration.
Press Print.
From there, Kirby slowly comes to life (๑˃ᴗ˂)ﻭ✨
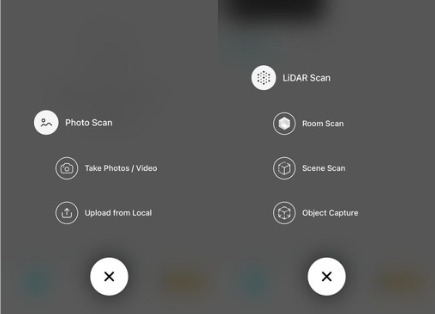
🤳3D Scanning using Kiri Engine.
For this assignment, I explored two different scanning methods using KIRI Engine to understand how photogrammetry works in real time 📱✨.
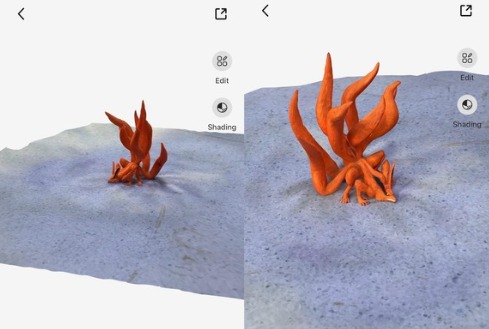
The Kurama (nine-tailed fox) model was scanned using video capture 🎥. I slowly moved around the object while recording, allowing the software to extract frames and reconstruct the 3D geometry.
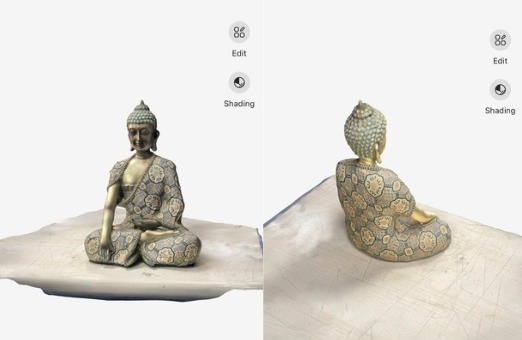
The Buddha statue, on the other hand, was scanned using multiple still images 📸. I took photos from different angles around the object, ensuring full coverage. The app then stitched the images together into a detailed 3D mesh. This method gives more control and often results in cleaner texture mapping and finer surface detail ✨ (¬‿¬).
Both scans demonstrate how real-world objects can be digitized into editable 3D models — basically turning physical reality into geometry 😌🔄.
I definitely want to scan my room...OH!!! maybe I can scan my dollhouse next??🫨
💭 Final Thoughts
This week has been fun although being stressful!!
I went from designing cute chaos (Kirby supremacy) to scanning real objects and turning them into 3D models.
I learned that 3D printing isn’t just “press print and pray,” but understanding settings, supports, and respecting the machine’s mood 🖨️ (¬‿¬).
Anywayyy… onto the next week and whatever new chaos awaits 🚀😌
📁 Design Files
Kirby CAD FileKirby Slice File