Week14 - Molding and Casting
Objectives of the Week
-
Design appropriate objects within the limitations of your process
-
Demonstrate workflows used in mold design, construction and casting
Schedule
Wednesday, April 22st - Molding and Casting
Thursday, April 23nd : Materials and Processes
Group Assingment Summary
- Review the safety data sheets for each of your molding and casting materials
- Make and compare test casts with each of them
- Compare printing vs milling molds
Site content
-
Material selection
a. Casting material
b. Mold material
-
Overview of the casting process
-
Key considerations for molding and casting
a. Alignment of parts of your mold
b. Getting your parts our of your mold
-
Example casting process
c. Material selection
d. Safety data sheet review
e. Recipe execution
f. Final product comparison

Materials
Cast Materials
As a class we looked at a variety of casting materials and reviewed the casting process of different objects and materials.
Considerations for the casting material include:
-
Size and shape of the object
-
Asthetic you would like
-
Mechanical properties you need
-
Cost
-
Environmental impact
-
Curring time and process
In the global class we were introduced to a material library of tried and tested casting materials. This library can be found at the Materiom Database
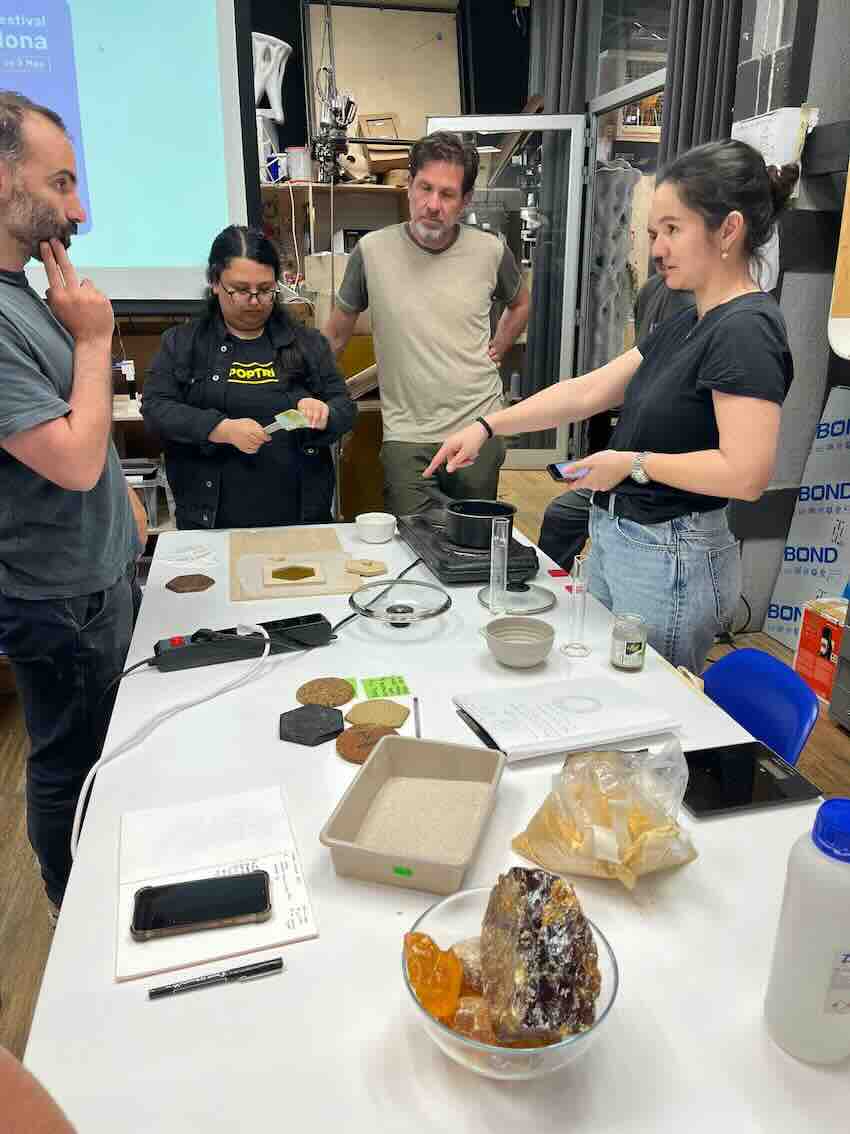
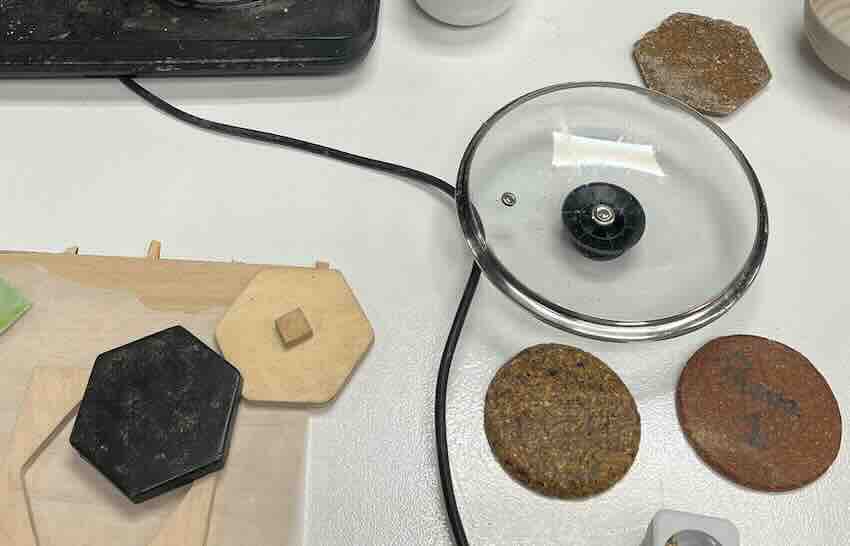
Examples of interesting casting materials that have been used here in the Barcelona Lab.
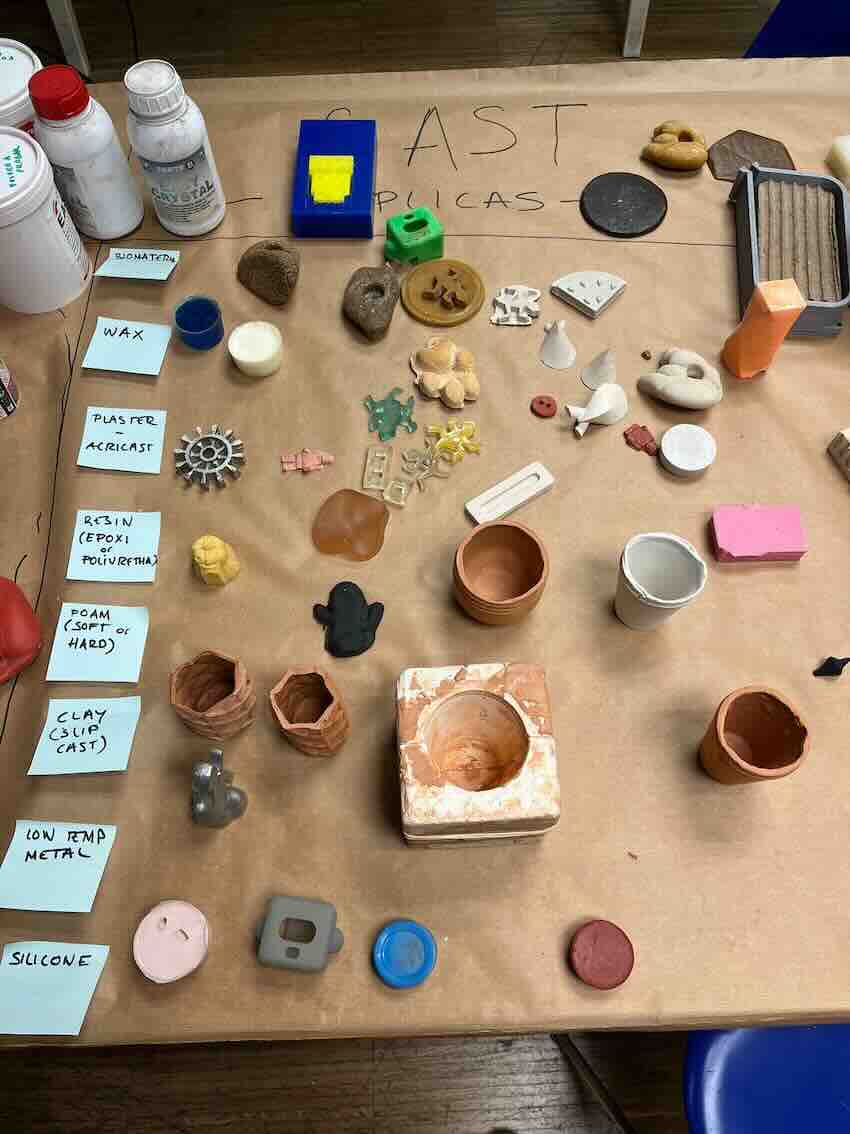
As show in the image above, example materials include: - Wax - Plaster - Resin, appoxy and polyurithean - Foam - Clay - Metal (low temp) - Silicon
Mold Materials
Another major consideration is the material that is used to make the mold for the cast form. Some of the critical properties that should be considered include:
-
Rigidity of the the mold - If you are working with a complicated shape that has small overhanges you will need a flexible material for your mold.
-
Number of casts you need to create - If the goal is to make many replicas you need to select a mold material that is durable
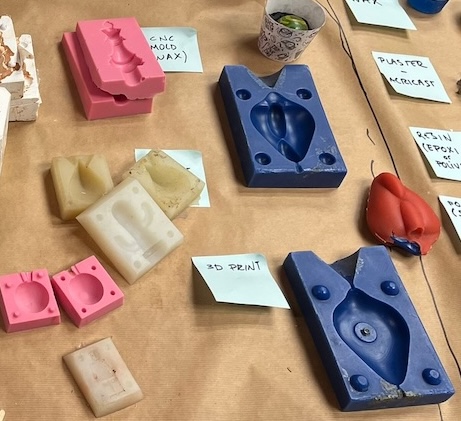
Examples of molds materials that we have available here in the Barcelona Lab.
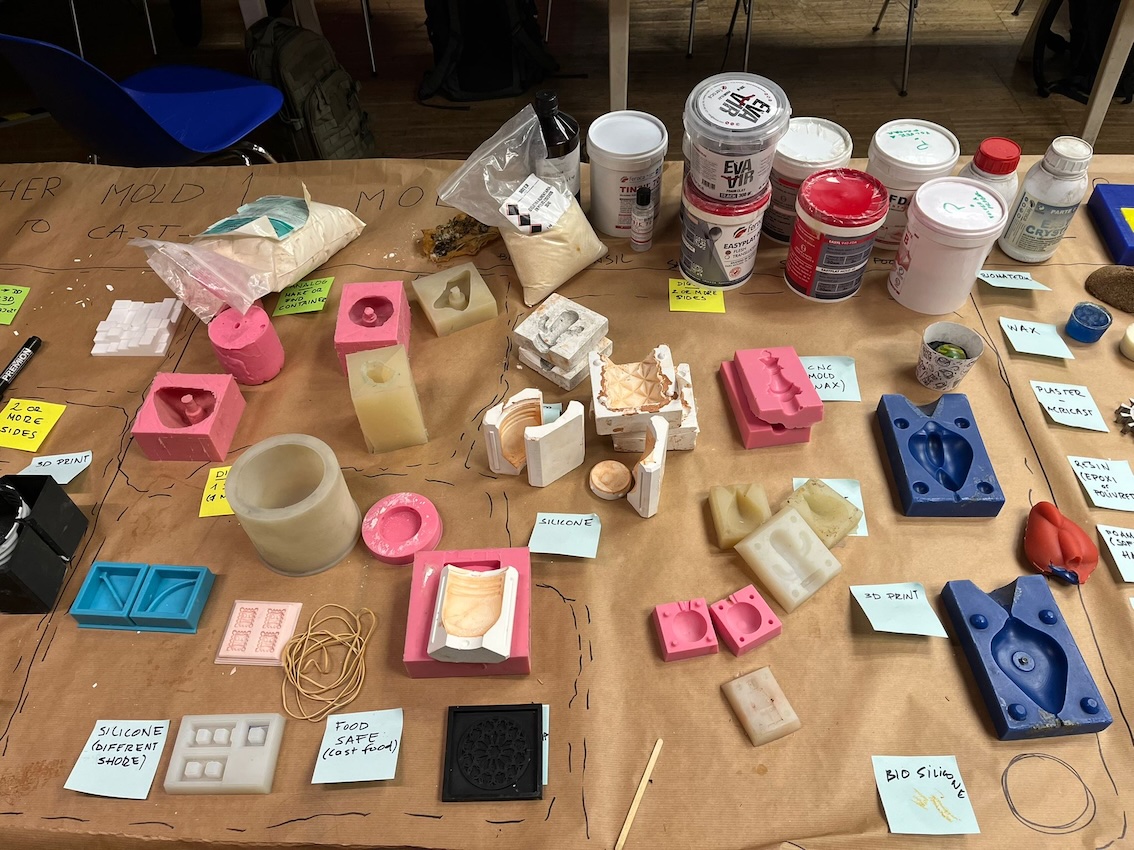
As show in the image above, example materials include: - Silicon - 3D prints - Plaster
Casting Process
The casting process depends heavily on choice of object and material. In general the process involves:
-
Selecting an object to cast
-
Creating a mold
-
Mixing casting materials
-
Casting and curring
-
Cleaning up the cast form after casting
Note - Depending on the object, step 2 (creating a mold) my take many more steps. In some cases a mother mold needs to be created first. This is a mold that is used for making molds.
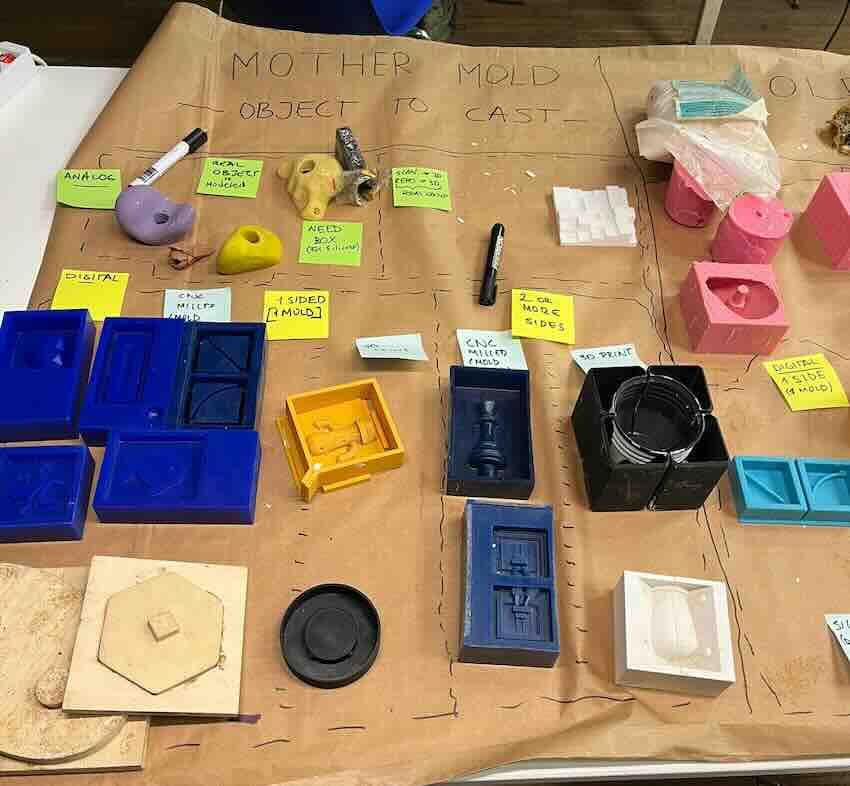
Workflow for mold making and casting.

Key consideration for mold making and casting
Alignment of parts of your mold
a. Consider where to part your object:
As you can see from the image below, it is difficult to completely elimate a parting line that occurs where the two halves of a mold or a molded object meet. It is important to consider where you want to split your object in order to make it as easy as possible to clean up or hide this line on your final object.
Parting line on a plastic bottle
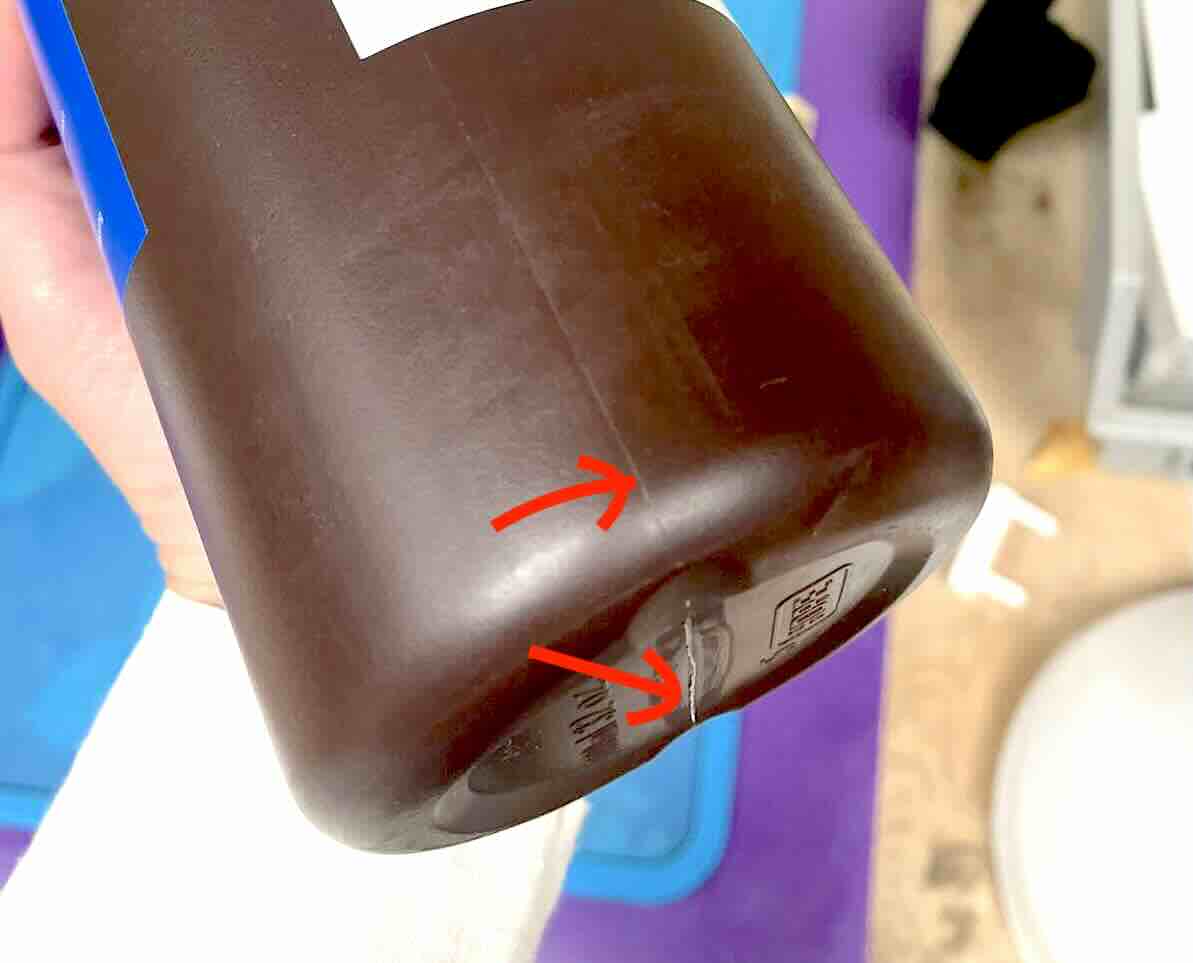
On simple objects such as the bottle above, it does not matter much where the partin line occurs. However, you can imagine that if you have inportant paternning on the surface of your object you would want to avoid passing through this with the parting line.
Parting lines are particularly visible on solid plastic objects. Once you become aware of them you can find them on many common items. Examining them is good way to practice and identify how complex shapes can be acheived through multi-part molds. Small plastic animals are a great example of this.
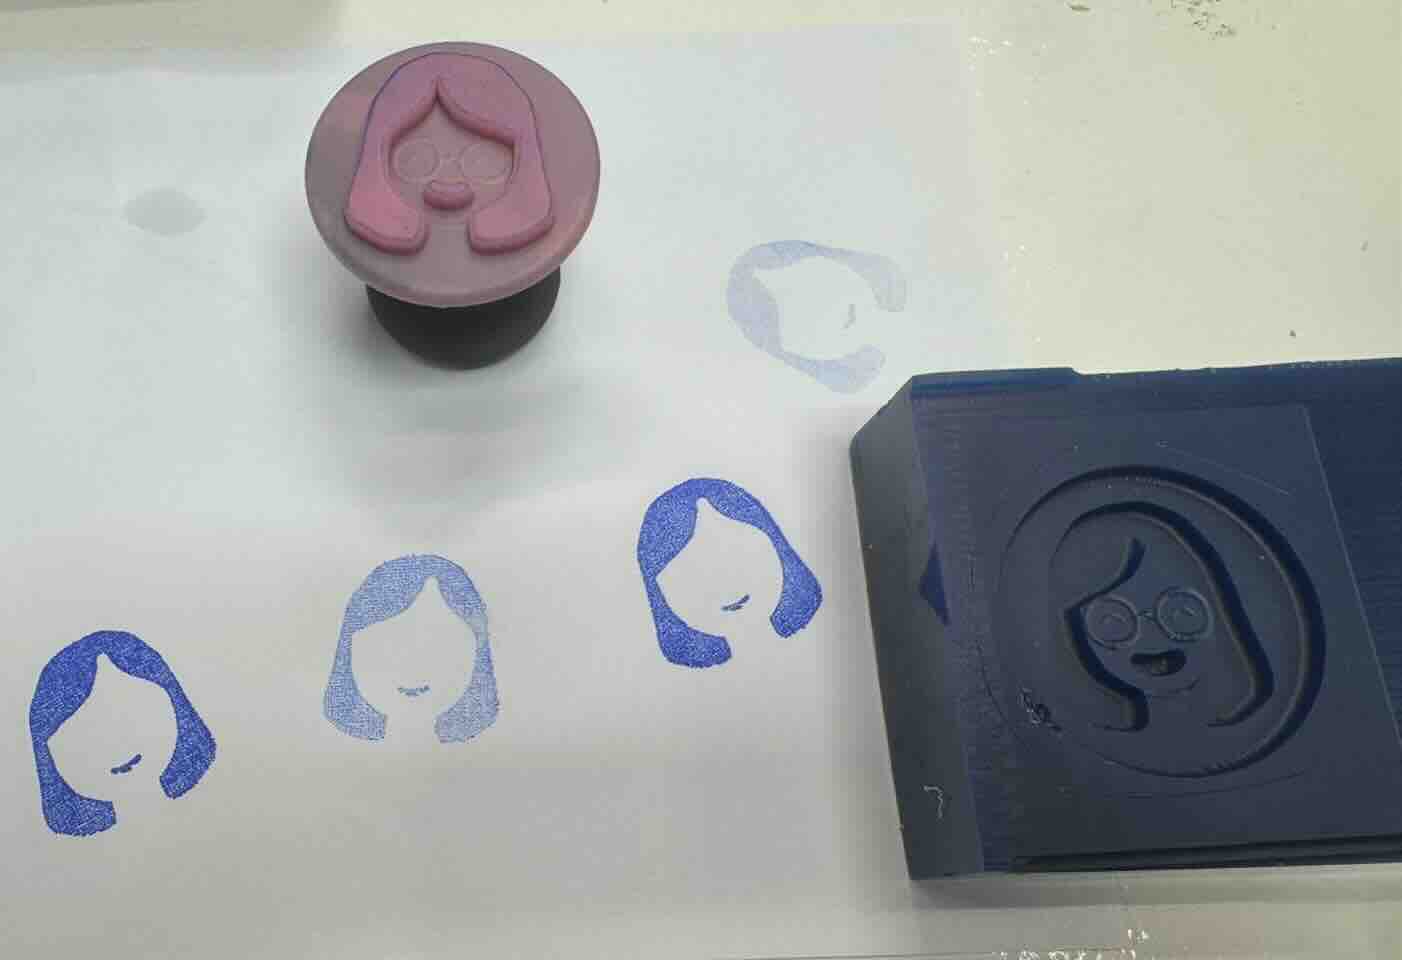
b. How will you ensure that the parts of your mold align:
If your mold is round, square or shaped irregularly, it can be difficult to ensure that the parts of your mold line up perfectly. If they do not, you will be left with exagerated parting lines at the least, or a distorted shape. One way to solve this by adding keys to your mold. The image below shows examples of keys. These are feature that are included in the mold to ensure that it alligns porperly but do not show up in the final product.
Example of mold keys
Getting your part out ouf your mold
a. Eliminating overhangs or using a flexible material:
It is important to remember that you need to be able to remove your final object from the mold. If you use a ridgid matrial for your mold, you must be able to see every surface and face from a single directly. If there are any overhanges (surfaces or reseses that are not visible) it is highly likely that it will be impossible to separte the final form from the mold without breaking either the mold or the form. This often includes parralel sides of an object. If you want to ensure that the object detaches easily it is best to include draft (a small angle to the sides).
Flexible molds are another option for ensuring that the object can be detatcheds. Depending on how flexible the mold material is, you can acheive separtaion with various degrees of object complexity.
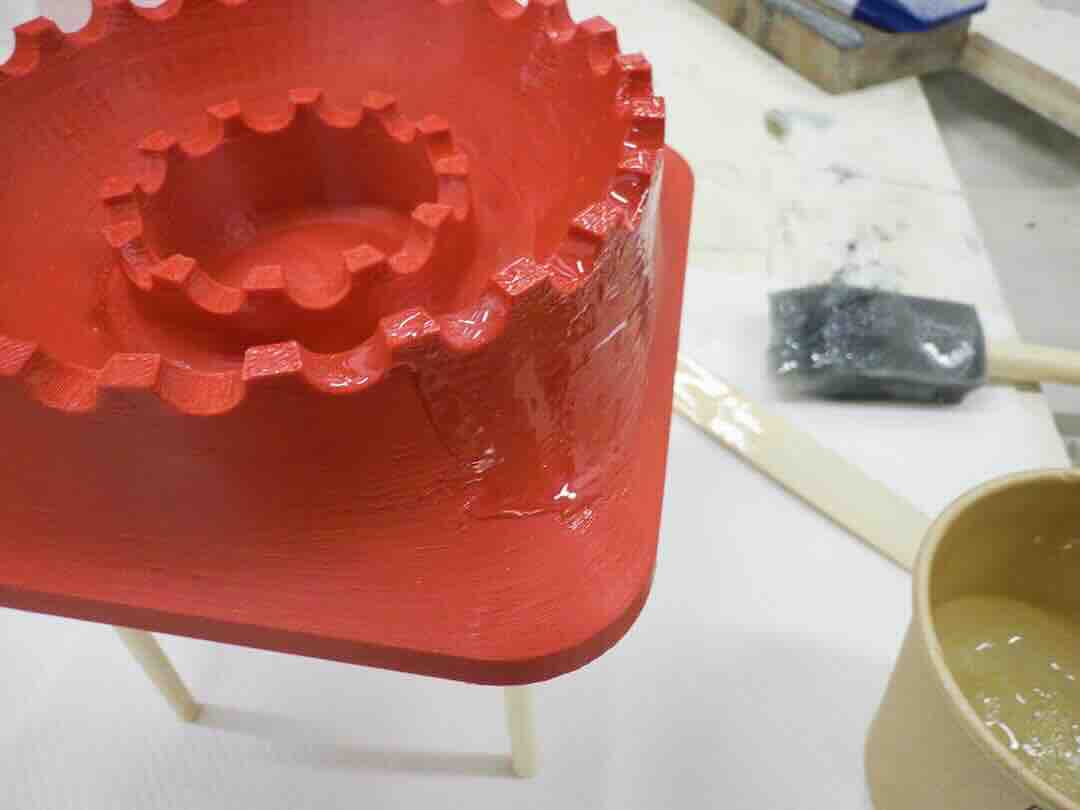
b. Minimize adhearance of cast material to mold material:
Sertain products are designed to prevent adhereance of the cast material to the mold material. Here in the Barcelona lab we primarily used a Polytex release agent.
In addition, common products such as Vassoline can be used to acheive the same thing. The basic principle of these products is that they create a barrier of non adhesion between the materials. This is becuase they seal any pore space that could be filled with the cast material.
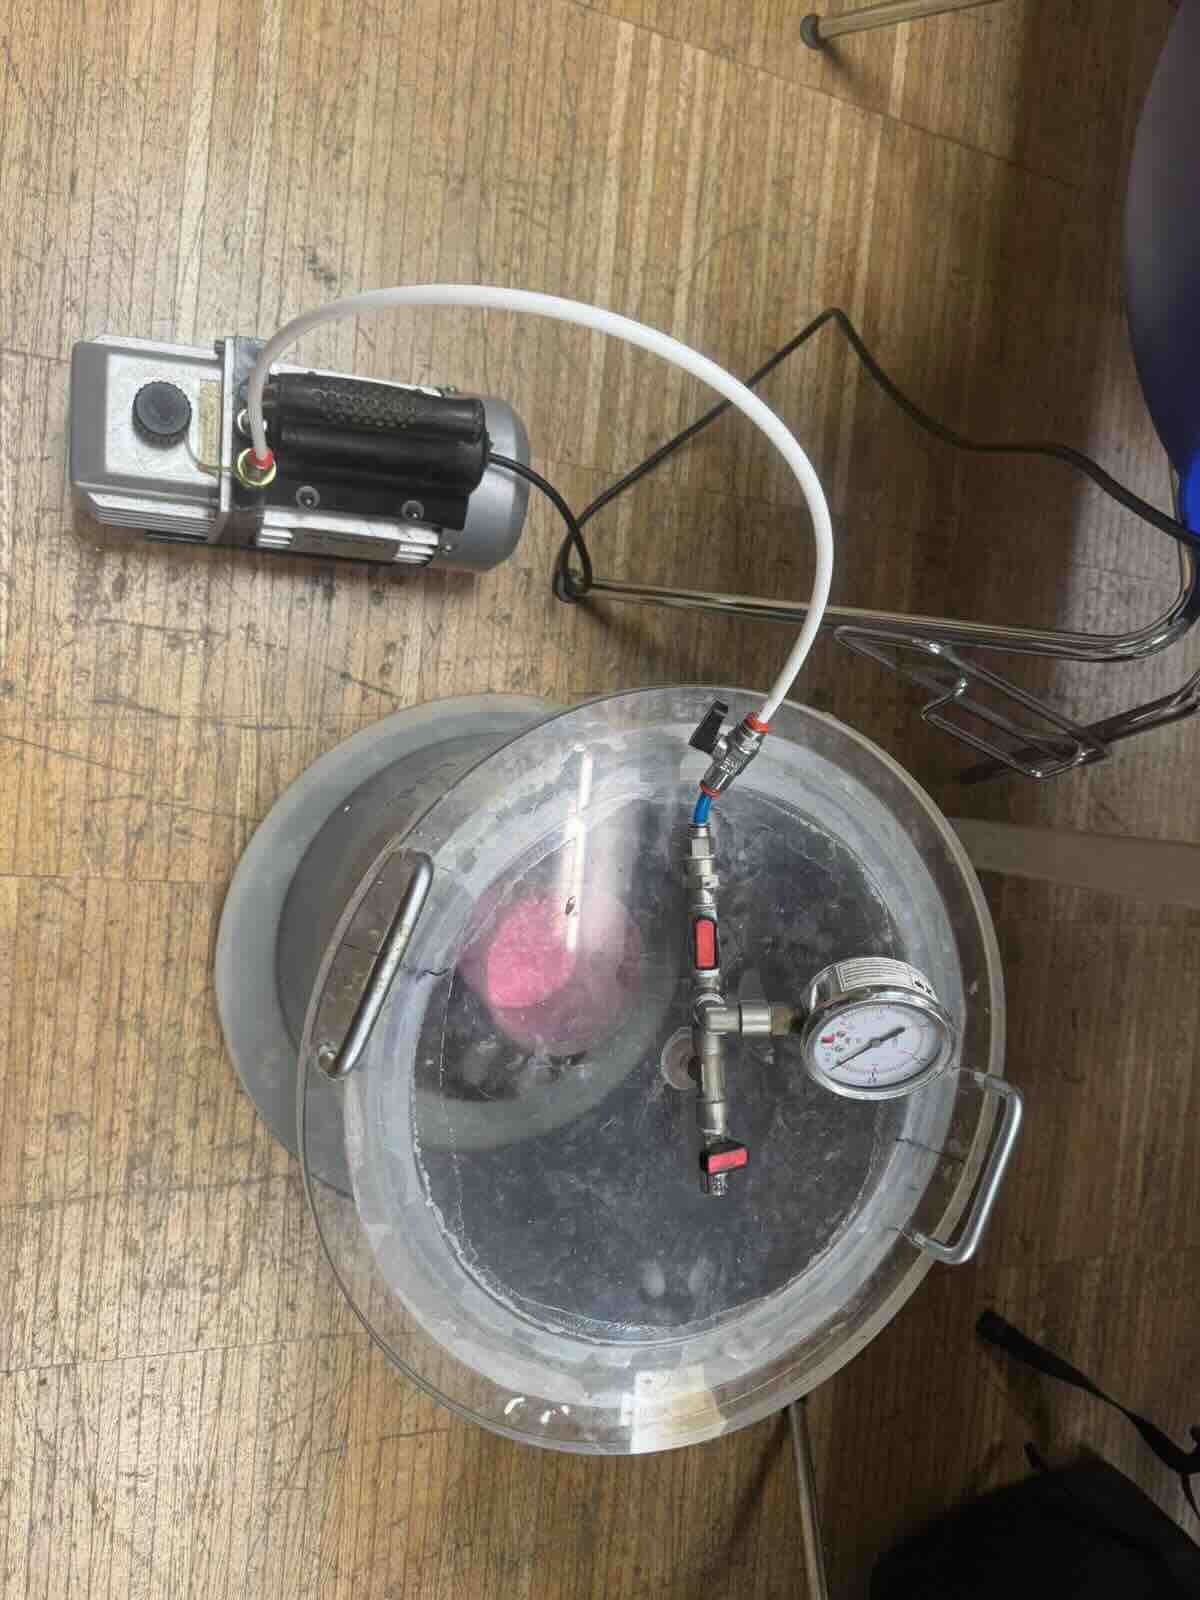
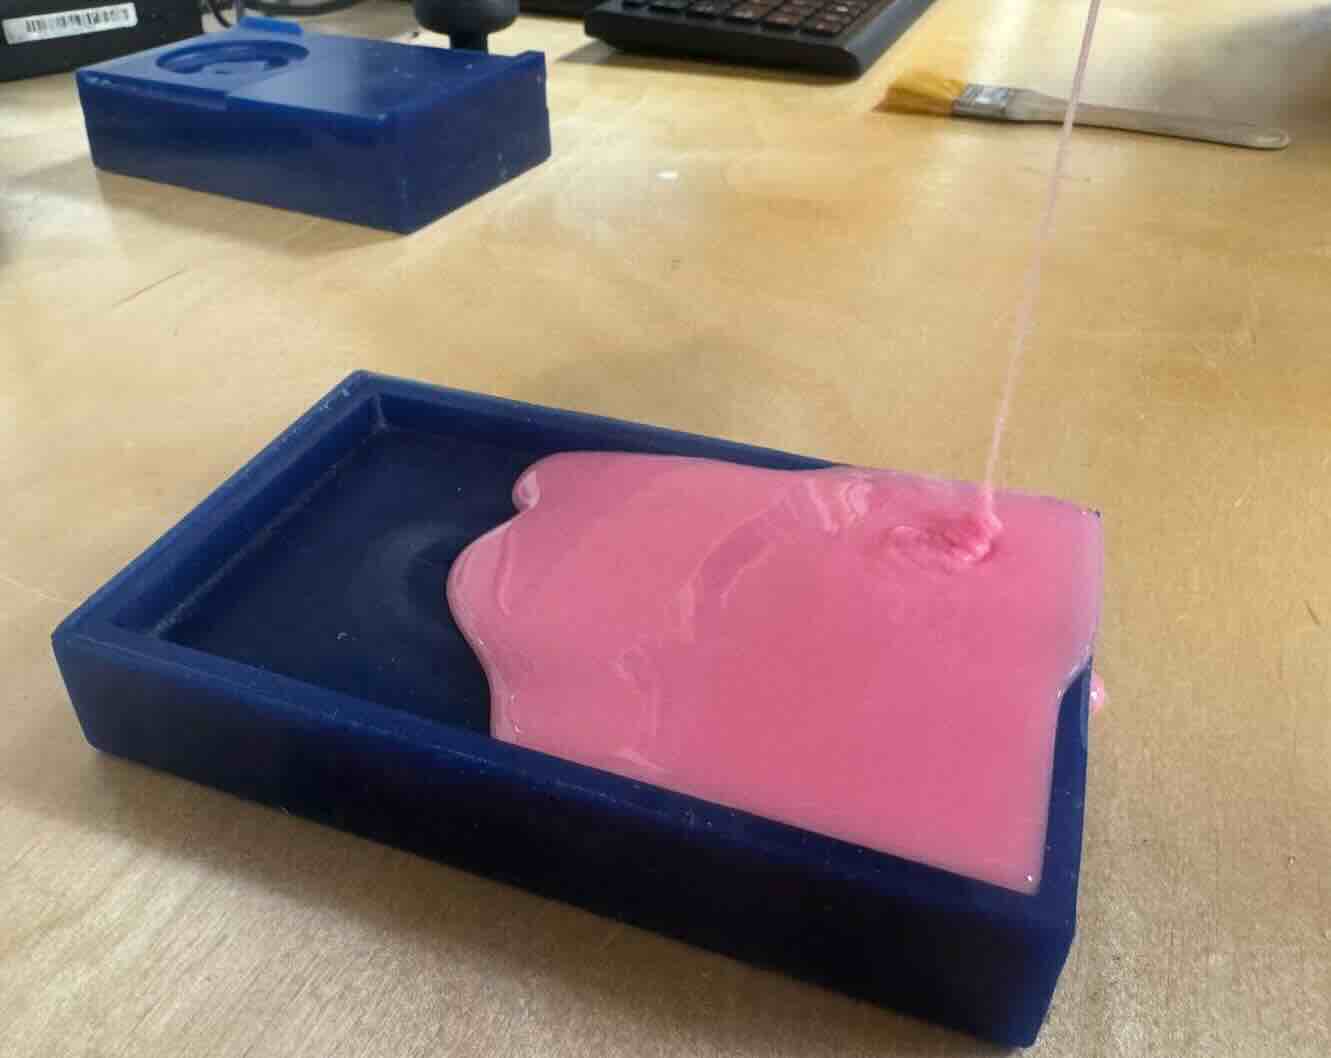
Leaving a way for air to escape
a. Add sprues
Allowing air to escape (venting) is essential to prevent trapped air from causing bubbles, voids, or incomplete fills. This is typically done by adding sprues (or vents) at the highest points of the mold or using vacuum/pressure systems
Include image here
b. Rotate the mold as you poor
If your mold is mobile and the parts can be securely held together, turning the rotating the mold as you poor can be a way to minimize trapped gas. This can help prevent bubbles that from only at specific angles but are easily freed at other angles. Note that in the case of objects with true overhangs this is not a sufficient solution.
Safety Data Sheets (SDS)
A Safety Data Sheet (SDS) is a standardized document that provides essential information about a chemical substance or material, including its hazards, safe handling procedures, storage requirements, emergency measures, and environmental considerations.
SDSs are designed to help users understand the risks associated with a material and how to work with it safely. Most SDS documents follow an internationally recognized 16-section format required under regulations such as REACH and GHS.
THe data sheets can typically be found on-line or thorugh a site provided on the back of material containers.
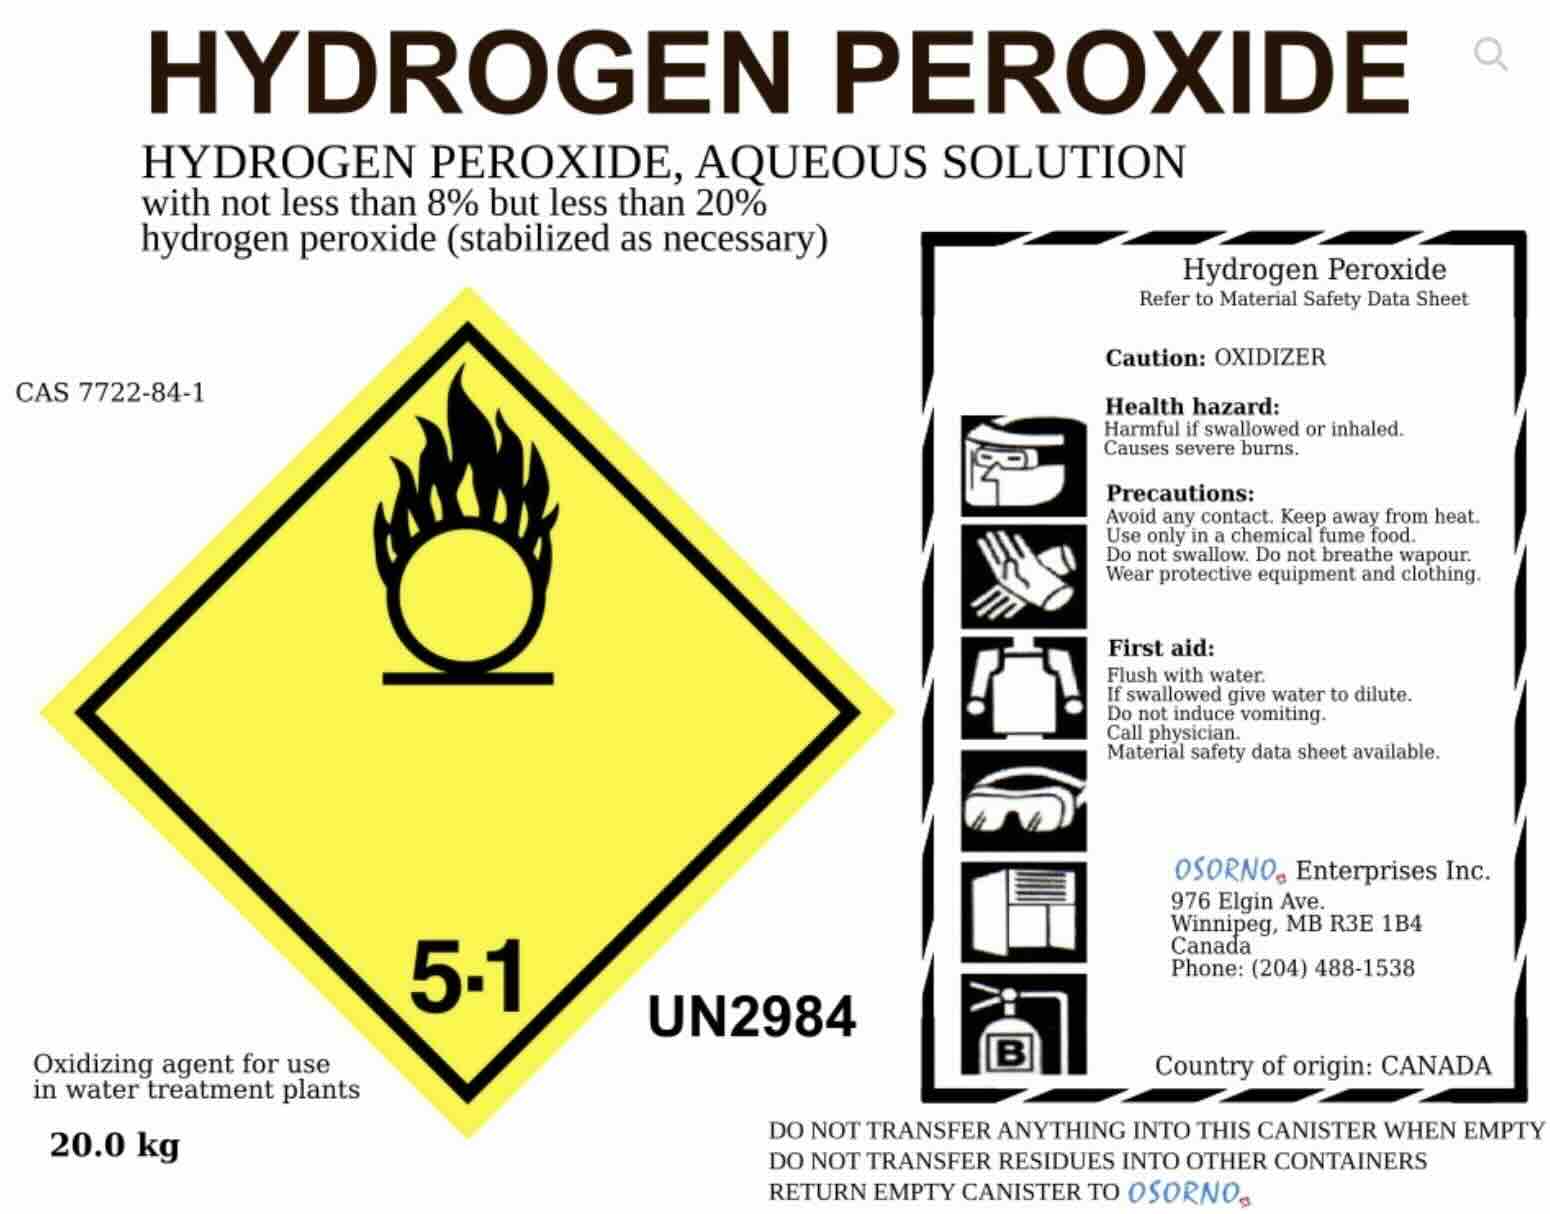
Note - The back of material containers should include the most relevant information in a clear and consise format.
Example Back of Container Label for a Semi-Hazardous Product
Content Summary of a SDS
Typical SDS Contents
An SDS serves as the primary reference document for understanding a material's hazards and ensuring that it can be handled, stored, transported, used, and disposed of safely throughout its lifecycle.
1. Identification
-
Product name and identifier
-
Manufacturer or supplier information
-
Emergency contact information
-
Intended uses and restrictions
2. Hazard Identification
-
Classification of hazards
-
Warning labels, symbols, and signal words
-
Other potential hazards
3. Composition / Information on Ingredients
-
Chemical identity
-
CAS numbers
-
Ingredient concentrations (for mixtures)
4. First Aid Measures
-
Recommended actions following:
-
Inhalation
-
Skin contact
-
Eye contact
-
Ingestion
-
Important symptoms and required medical treatment
5. Firefighting Measures
-
Suitable extinguishing methods
-
Fire and combustion hazards
-
Protective equipment for firefighters
6. Accidental Release Measures
-
Spill containment procedures
-
Cleanup methods
-
Environmental precautions
7. Handling and Storage
-
Safe handling practices
-
Storage requirements
-
Incompatible materials
8. Exposure Controls / Personal Protection
-
Exposure limits
-
Recommended personal protective equipment (PPE)
-
Engineering controls and ventilation requirements
9. Physical and Chemical Properties
-
Appearance
-
Odor
-
pH
-
Density
-
Solubility
-
Flammability and other physical characteristics
10. Stability and Reactivity
-
Chemical stability
-
Conditions to avoid
-
Incompatible substances
-
Hazardous decomposition products
11. Toxicological Information
-
Health effects and exposure routes
-
Acute and chronic toxicity
-
Carcinogenicity, mutagenicity, and other health risks
12. Ecological Information
-
Environmental impacts
-
Persistence, biodegradability, and bioaccumulation potential
13. Disposal Considerations
- Recommended disposal methods for the material and its packaging
14. Transport Information
-
Shipping classifications
-
UN numbers
-
Transport hazard information
15. Regulatory Information
- Applicable safety, environmental, and chemical regulations
16. Other Information
-
Revision history
-
Definitions and abbreviations
-
Additional references or notes
In general the most improtant sections for a user to be aware of are:
- Hazard Identification – Understand the risks.
- Handling and Storage – Prevent accidents and material degradation.
- Exposure Controls / Personal Protection – Protect yourself while working.
- Disposal Considerations – Dispose of materials safely and responsibly.
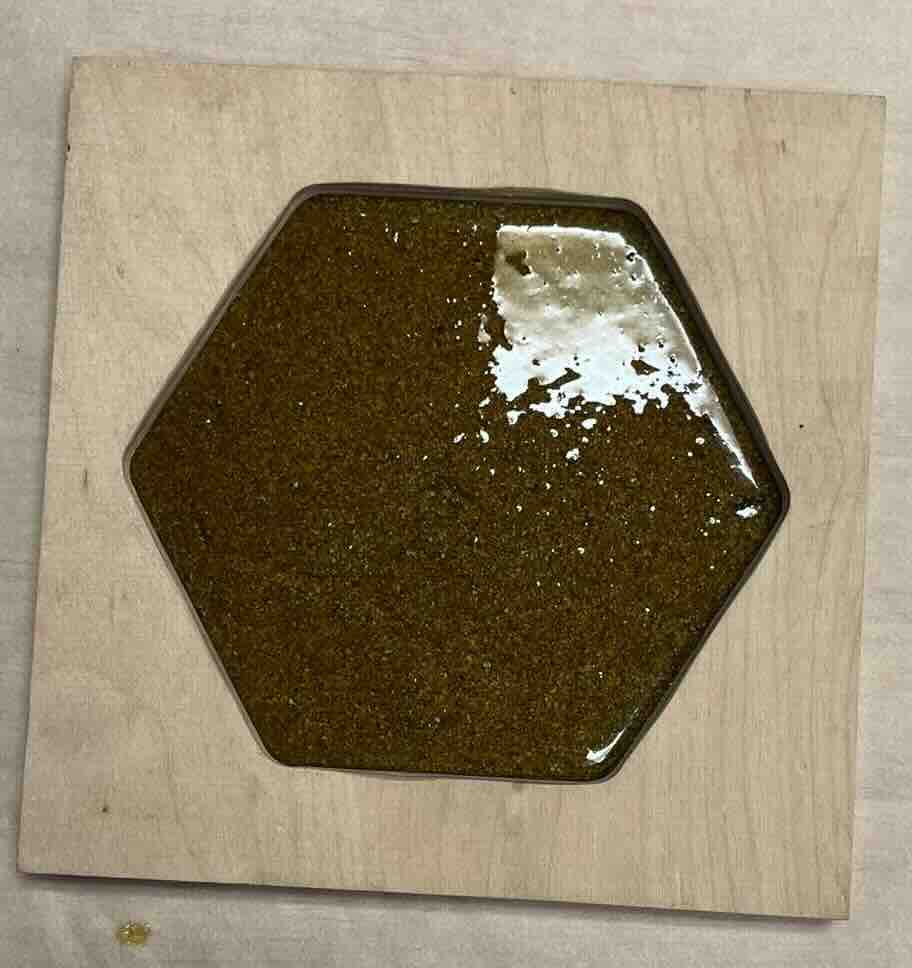
Example Cast From Recipies
Our team compared several casting materials and processes
- Gelatin
- Resin
- Silicon
Health and Safety Comparison
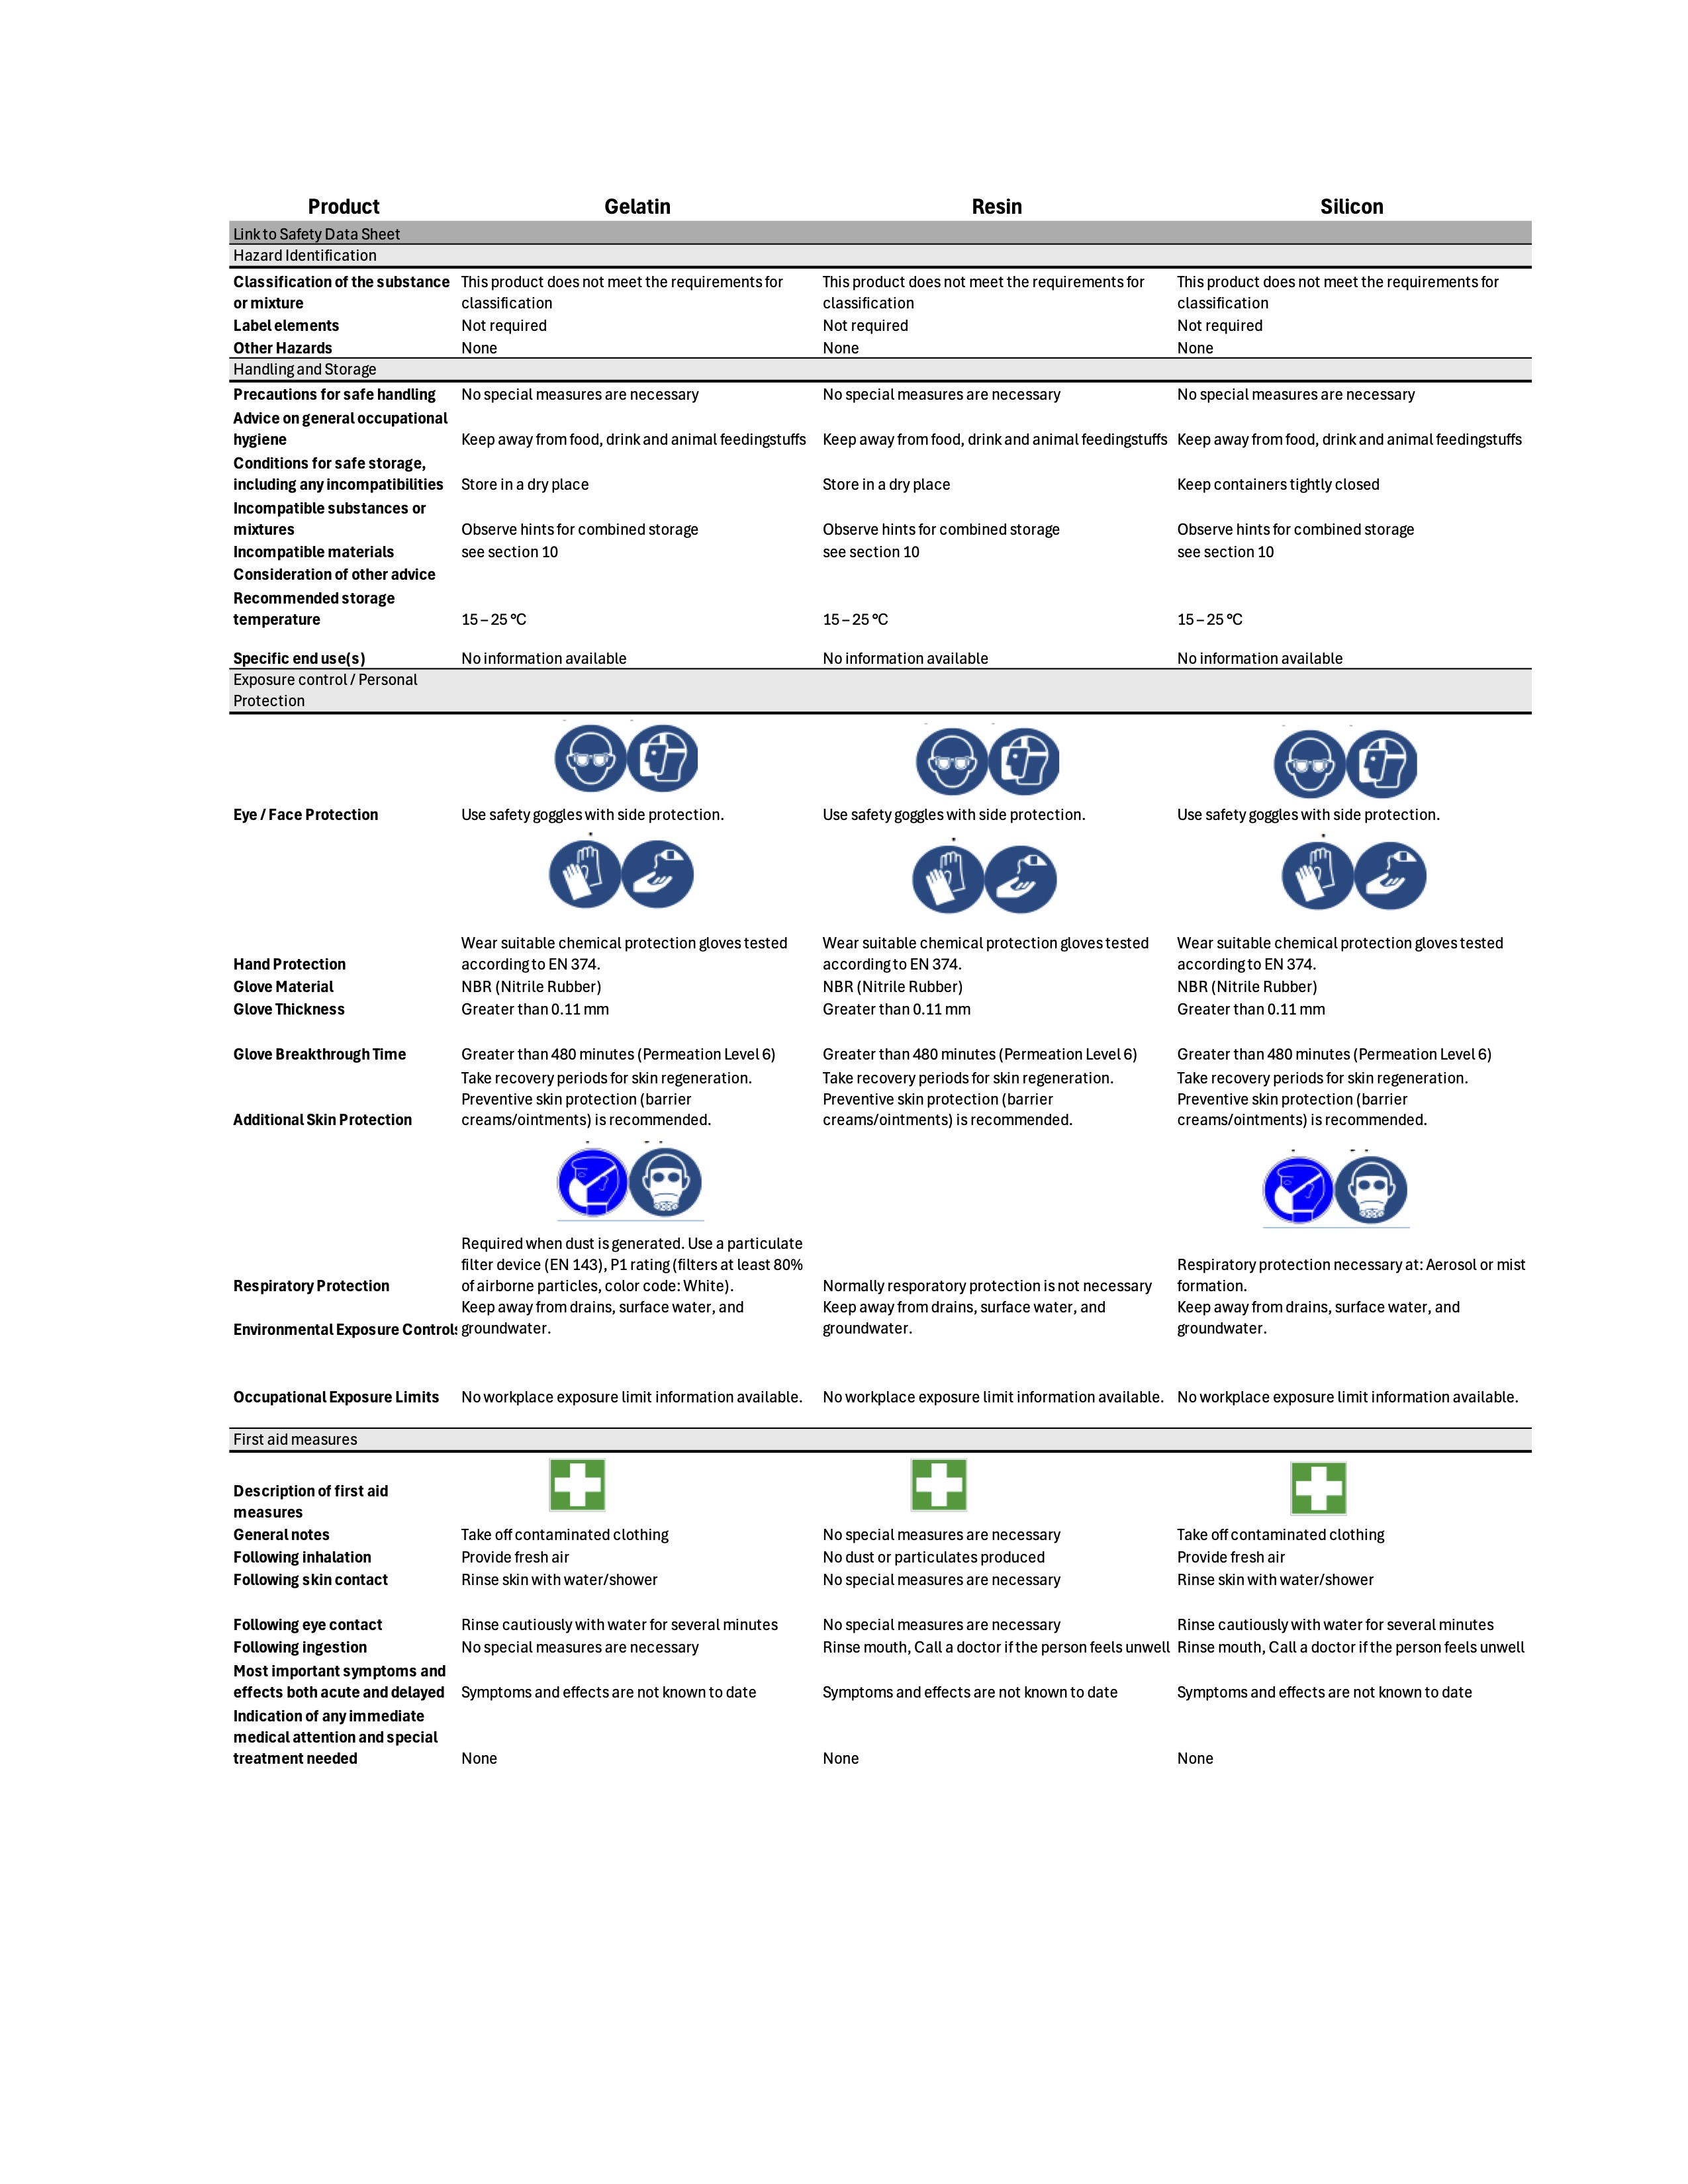
Link to data sheets
Gelatin - Data Sheet
Resin - Data Sheet
Silicon - Data Sheet
In summary, all of these products are very safe. There is very little risk associated with using any of these products. For all products the use of safetly glasses is recommended.
Process Comparision
Gelatin
Gelatin has a low melting point that makes it easy to work with. There are many food safe options for gelatin but it is important to note that all steps in the process must be food safe in order to have a food safe process.
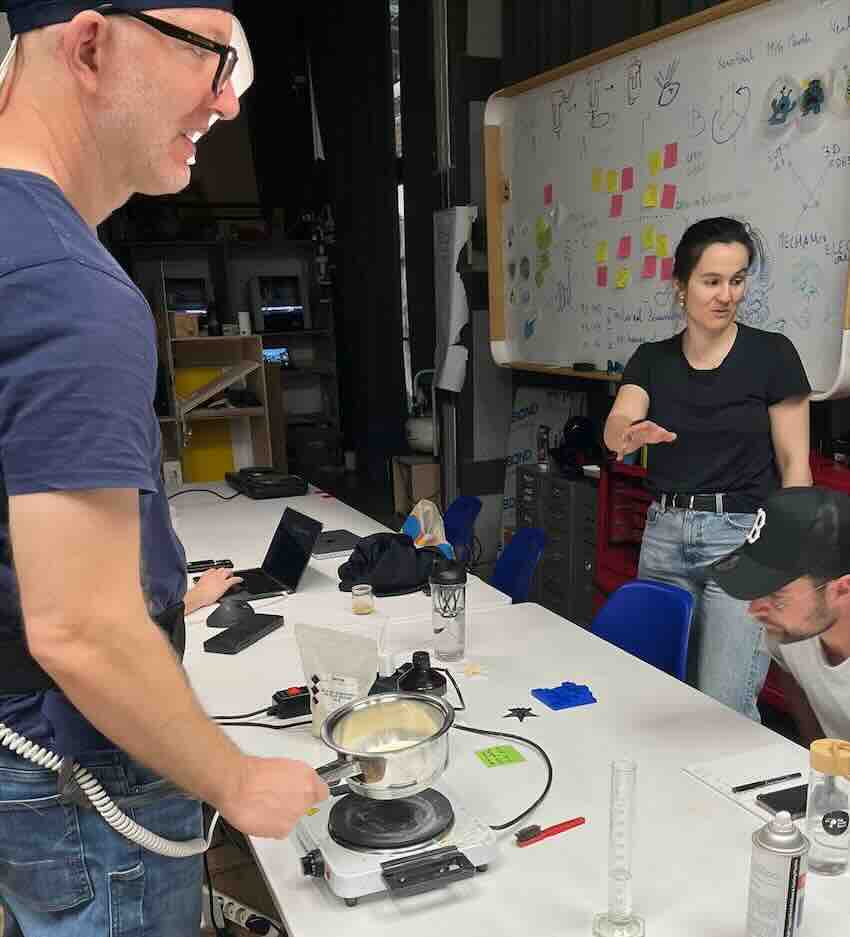
This photo shows our team mixing gelatin over a burner in our lab.
Resin
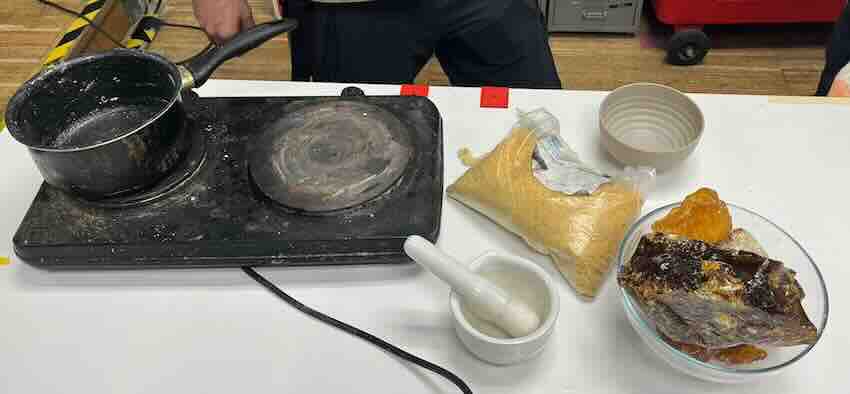
Resin is a natrually occuring material that can be harvested from trees (like tree sap). this material has a low melting point and is thus a easy material with which to cast. It can be mixed with other materials such as wood fiber or starch to create different ashthetic and mechanical properties. While the low melting point makes it easy to work with, it also limits the uses. In direct sun or heat exposure the cast form will become sticky or even melt.
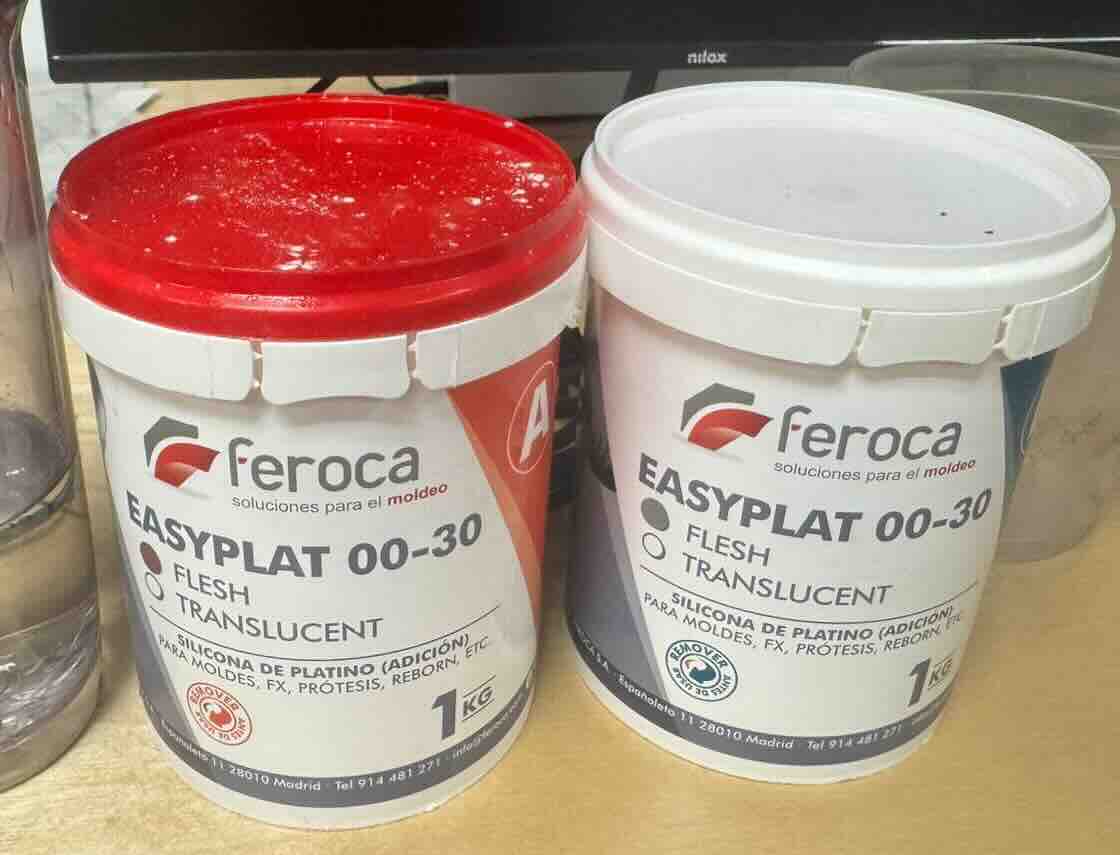
Silicon
Silicone rubber is a versatile smaterial made from silicon, carbon, hydrogen, and oxygen. Silicone rubber is highly valued across multiple industries for its physical and chemical characteristics including temperature resistance, resistant to weathering, ozone, and ultraviolet (UV) light, flexibility & elasticity, safety: Non-toxisity, and electrical insulation.Silicone requires careful two-part mixing — get the ratio wrong and it either won't cure or cures brittle.

Comparison Conclusions
During the group assignment we compared gelatin bioplastic against silicone rubber as casting materials. Silicone requires careful two-part mixing — get the ratio wrong and it either won't cure or cures brittle. Gelatin and resin are much simpler: bloom, heat, pour. No ratio to measure, no pot life to race against.
The trade-off shows up over time. Silicone stays the same — same flexibility, same feel, same dimensions — weeks or months later. Gelatin hardens unpredictably as it ages, loses its rubbery feel, and can shrink or warp slightly in dry conditions. Resin does not change in shape or hardness over time but is sensitive to heat and can become sticky to the touch.
Conclusion: gelatin is faster and friendlier to work with for prototyping, but silicone is the right choice for anything that needs to stay consistent over time.
Printing Vs. Milling
Two common process used in mold making and casting are 3D printing and milling. These processes can be used to create either the mold or the form from which the mold is created. Here I will discuss the difference between the two processes with regard to mold making but, in general, the same benefits and drawbacks occur when creating the orignial form.
| Aspect | 3D Printed Mold | Machinable Wax Mold (CNC Milled) |
|---|---|---|
| Cost | Low cost equipment and materials | Higher equipment cost (CNC machine required) |
| Speed of Fabrication | Fast for simple molds; can run unattended | Setup and machining time required |
| Design Complexity | Can produce highly complex internal geometries and undercuts | Limited by tool access and cutter geometry |
| Surface Finish | Layer lines often visible; will require post-processing | Excellent surface finish directly from machining |
| Dimensional Accuracy | Moderate; depends on printer and settings | Generally higher accuracy and repeatability |
| Detail Resolution | Good with resin printers, moderate with FDM | Excellent for accessible features and sharp details |
| Draft Angles | Can print vertical walls easily | Must consider tool access and machining constraints |
| Material Waste | Minimal material waste | Significant material removed during machining |
| Durability | Printed molds may degrade with repeated use | Wax molds typically intended for limited use |
| Post-Processing Required | Sanding, filling, or coating often needed | Usually minimal post-processing required |
| Casting Surface Quality | May transfer print layer texture to casting | Produces smoother cast surfaces |
Summary
Machinable wax is a synthetic wax formulated to cut cleanly on CNC machines — it holds fine detail, doesn't melt from tool friction at normal feeds and speeds, and releases cast material easily without a mold release agent.
3D printing in a familiar process for all of us at this point. Printing can be used to qiuckly create forms that can be used to generate molds in order to create the same form in other materials. Although not as common of a practice, the print can also be used directly as the mold.
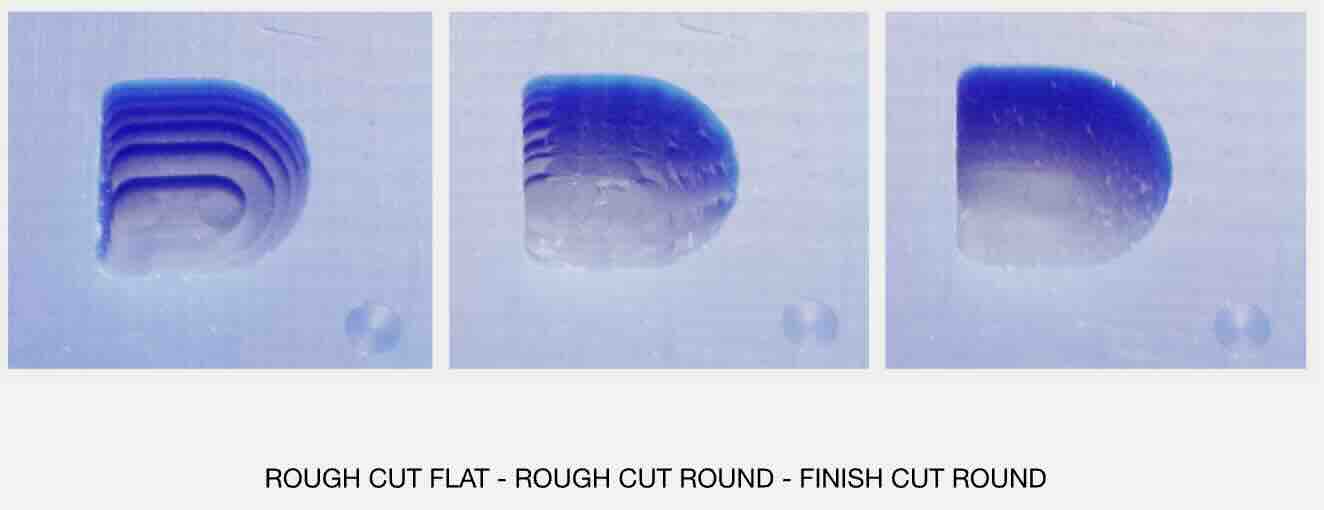
Milling Wax
Workflow
Modela Player 4 is the dedicated CAM software for the Roland SRM-20. Unlike Mods — which works from 2D image exports — Modela takes a 3D STL file directly and generates roughing and finishing toolpaths from the geometry. The workflow is more familiar to anyone who's used RhinoCAM: import model, set stock dimensions, select tools, configure passes, export.
Import the STL file → use the Compass to set origin at bottom-left-upper corner → set Material to Modeling Wax → set all Modeling Form margins to 0 → add tools (⅛″ square end mill for roughing, ball-nose for finishing) → create Roughing process (contour line toolpath, Cutting Area: Partial) → create Finishing process (Scan Line X+Y, same area) → preview toolpath in the visualiser → export as .prn files.
Settings
Material preset: Modeling Wax. Two tools: ⅛″ square end mill (3.18 mm flute) for surfacing and roughing; ⅛″ ball-nose for finishing. Settings were loaded from the Modela Player 4 preset for Modeling Wax then adjusted — cut-in amount for roughing set manually to 1.2 mm for a safe step-down in wax.
| Parameter | Surfacing | Roughing | Finishing |
|---|---|---|---|
| Tool | 1/8" square (3.18 mm) | 1/8" square (3.18 mm) | 1/8" ball-nose |
| XY Speed | 17.74 mm/s | 17.74 mm/s | 19.49 mm/s |
| Z Speed | 10 mm/s | 10 mm/s | 19.49 mm/s |
| Spindle | 7000 rpm | 7000 rpm | 7000 rpm |
| Cut-in Amount | 0.44 mm | 1.2 mm | 0.2 mm |
| Path Interval | 1.91 mm | 1.91 mm | 0.2 mm |
| Finish Margin | 0 mm | 0.44 mm | 0 mm |
3D printing
The biggest challenges when using 3D printing in the casting process are: 1. Ensuring that the texture of the print does not show up on the final product 2. Ensuring the cast separates from the printed part
As noted above tehre are several ways to improve separation of your print from the casting material. Additionally a coating material such as Smooth-On XTC-3D can be used. This material can be challenging to work with because mixing ratios are critical and curing time is very short. However, the result is a nice smooth finish with no voids to create texture or cause the casting material to bind.