Week 04 - Embedded Programming
Group Assignment
- Demonstrate and compare the toolchains and development workflows for available embedded architectures
- Document your work to the group work page and reflect on your individual page what you learned
ATTiny420 Setup Guide
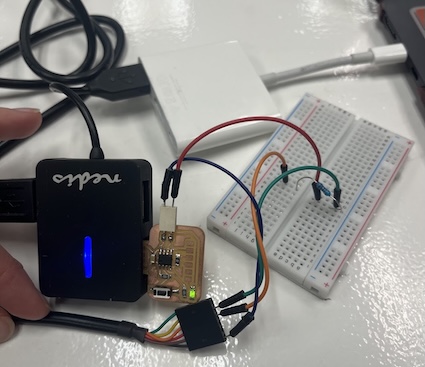
Physical connection
More info on hardware coming soon!
Install Board Package
This board package can be installed via the Arduino Board Manager.
Boards Manager URL:
http://drazzy.com/package_drazzy.com_index.json
Steps:
- Go to File → Preferences
- Enter the URL above into "Additional Boards Manager URLs"
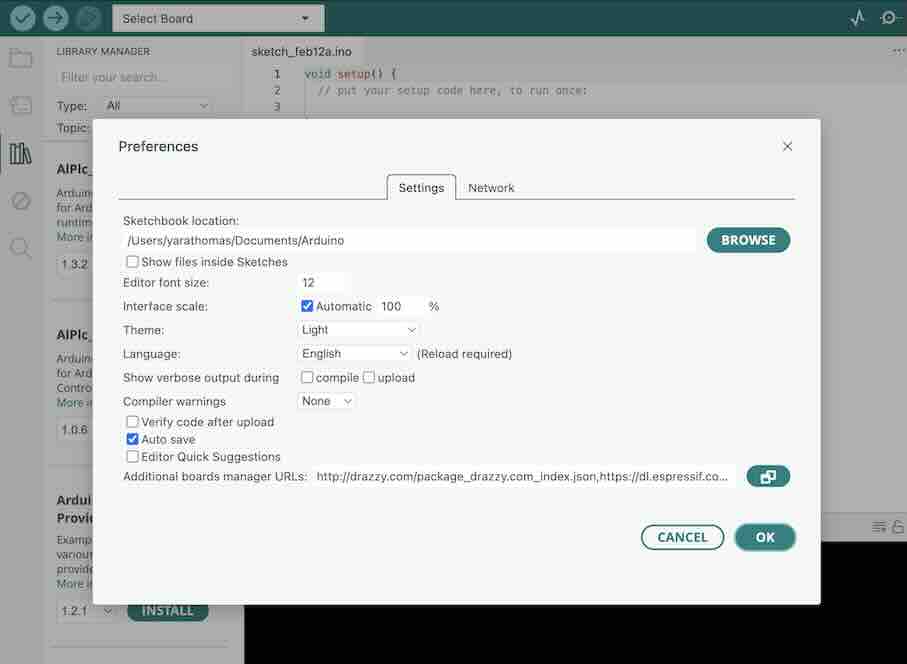
- Open Board Manager from the left side of the Arduino window
- Search for "megaTinyCore by Spence Konde"
- Click Install
- For best results, choose the most recent version
Issue: Board Manager Timeout Error
If you encounter a connection timeout error during installation:
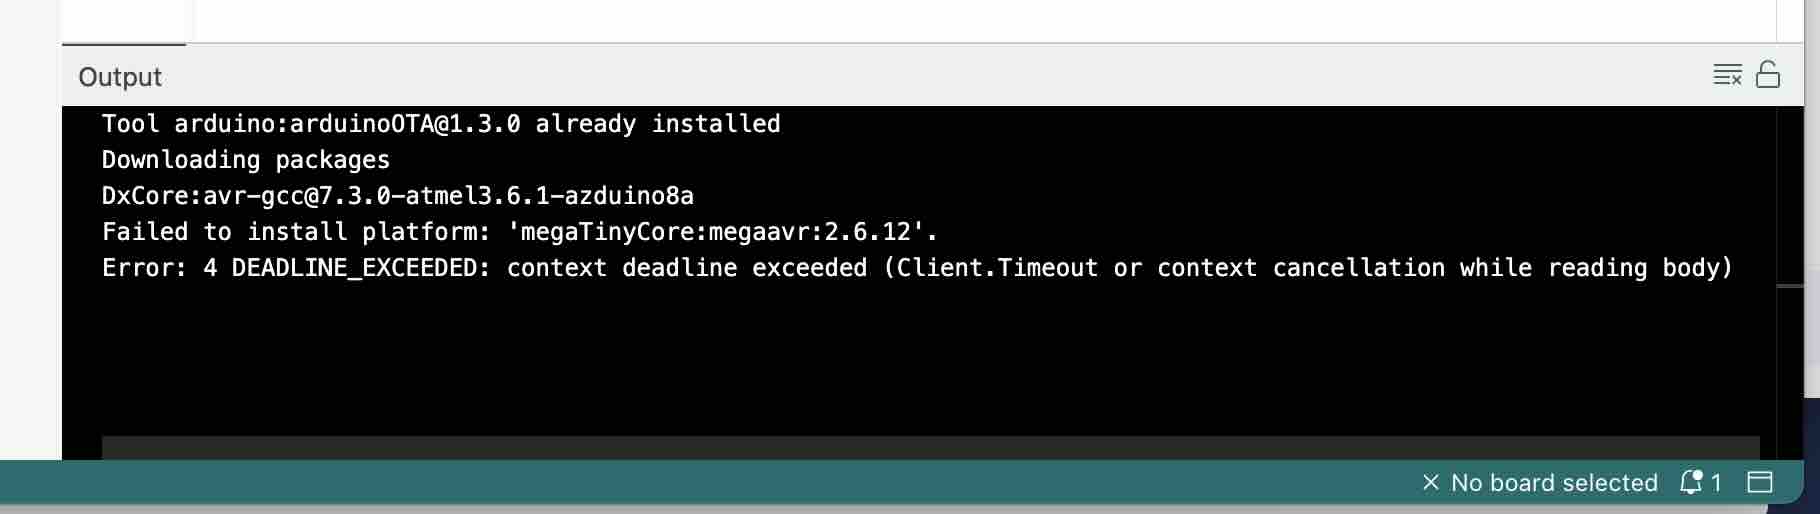
Fix:
- Navigate to:
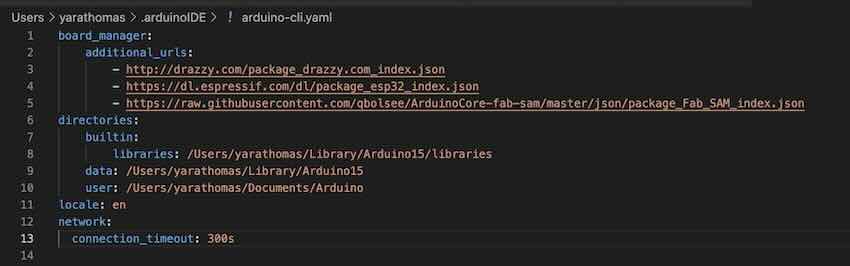
User → username → .arduinoIDE → arduino-cli.yaml
-
Open the file in Visual Studio (or any text editor)
-
Add the following:
network:
  connection_timeout: 300s
- Increase the timeout duration if necessary
- In this case, the timeout had to be increased to 1000s
Example:
network:
  connection_timeout: 600s
Setup to Load Code to the Microcontroller
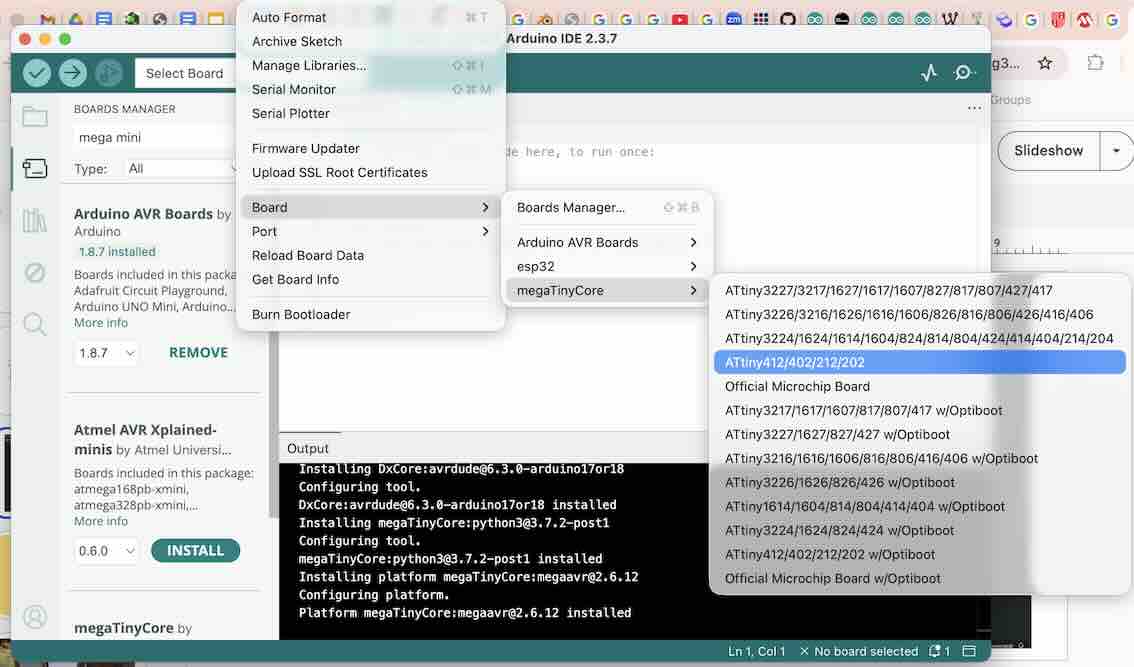
1. Select the Board
- Go to Tools → Board
- Select the correct ATTiny board
2. Select the Port
- Go to Tools → Port
- Select the correct port
Once the board and port are set, additional options will appear in the Tools menu.
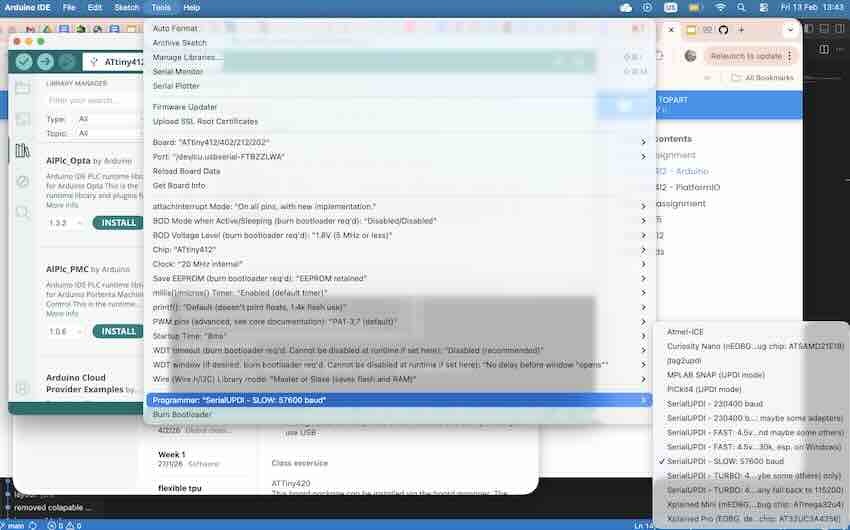
3. Select the Programmer
- Go to Tools → Programmer
- Select SerialUPDI – Slow
If this does not work, try another option.
(There is a more precise way to determine this, but it is more advanced.)
If the connection is faster, you may be able to use a different programmer, but in this case it failed on this microcontroller.
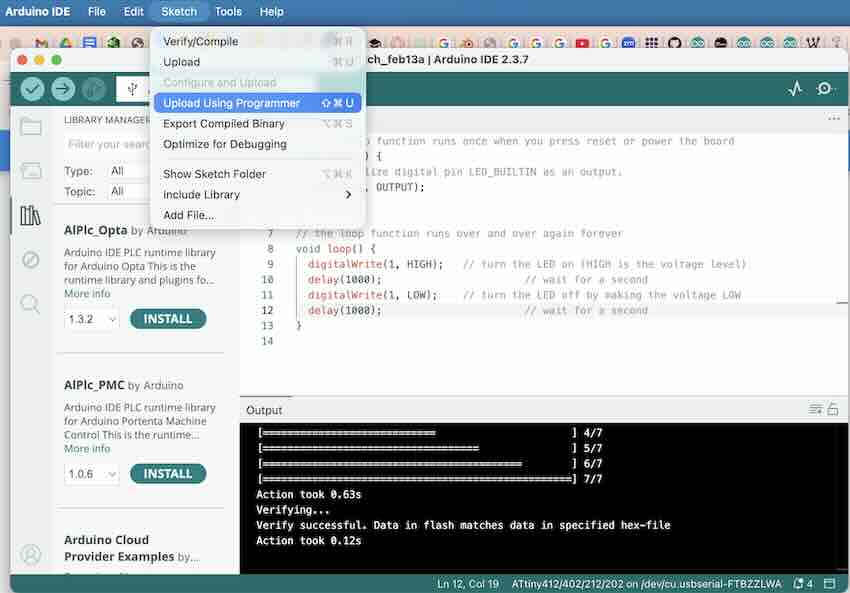
Upload the Program
To upload your sketch:
- Go to Sketch → Upload Using Programmer
Programming a Barduino 3.0 (ESP32) Using a SAMD11C Programmer
This section walks through using a SAMD11C-based CMSIS-DAP programmer to flash a Barduino 3.0 (ESP32) board from the Arduino IDE.
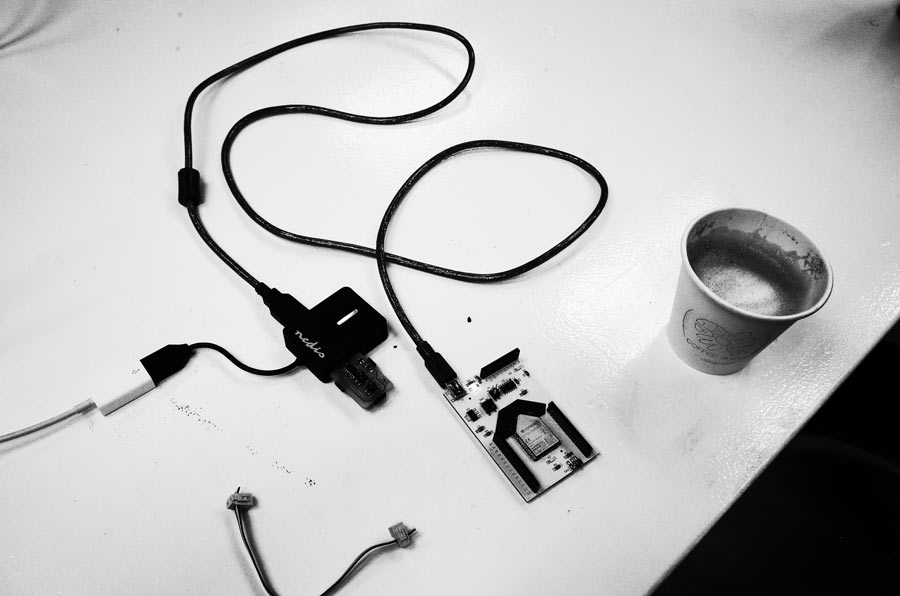
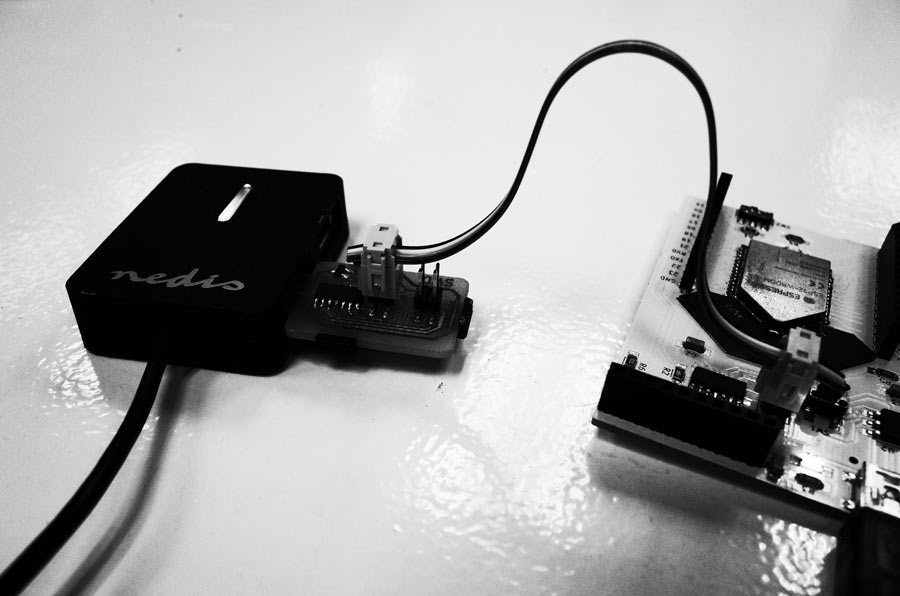
Hardware Connections
- Plug the SAMD D11C14A programmer into your computer via USB.
- Connect the Barduino 3.0 ESP32 to the SAMD using a 4-pin serial connector.
- Make sure the cable is connected to the SWD output pins on the SAMD, not the programming pins. The two 4-pin headers on a SAMD11C programmer look similar but serve opposite roles — one is used to program the SAMD itself, the other is the programmer output you use to flash a target board.
Arduino IDE Setup
- Add the Fab SAM core JSON URL to your Arduino IDE preferences (File → Preferences → Additional Boards Manager URLs).
- Open the Boards Manager and install Fab SAM core for Arduino.
- Select Tools → Board → Fab SAM core for Arduino → Generic D11C14A.
- Select Tools → Programmer → CMSIS-DAP (not Atmel-ICE — Atmel-ICE will fail to find the programmer).
Burning the Bootloader and Uploading
- With the SAMD plugged in and the SWD cable connected to the output side, run Tools → Burn Bootloader.
- If you get a
Missing programmererror, double-check that the programmer is set to CMSIS-DAP and that the cable is on the SWD output pins.
- If you get a
- Open the sketch you want to flash to the Barduino.
- Run Sketch → Upload Using Programmer. The program is sent over SWD through the SAMD11C and written to the ESP32 Barduino.
Sanity Check
To confirm the board is actually being programmed via the 4-pin SWD cable (and not via its own USB), disconnect the Barduino's USB and power it from an external supply instead. The upload should still complete — proving the SAMD11C is doing the programming.
Programming the SAMD11C Programmer Itself
A SAMD11C-based programmer is, at its core, just a SAMD11C running CMSIS-DAP firmware (in this case, the Free-DAP free_dap_d11c_mini.bin build). To turn a blank SAMD11C board into a working programmer, you flash that firmware onto it — and to do that you need an existing working CMSIS-DAP programmer to act as the host. In other words, a programmer programs the programmer.
Reference: Programmer SWD D11C — Flashing firmware
Tooling
We use edbg, a small command-line CMSIS-DAP host written by Alex Taradov. It speaks SWD through a CMSIS-DAP adapter to erase, program, and verify the target chip.
Key flags used below:
-e— erase the target before writing-p— program the target-v— verify after programming-b— print verbose progress-t samd11— tell edbg which chip family it is talking to-f <file>.bin— the firmware image to flash-l— list all attached CMSIS-DAP debuggers
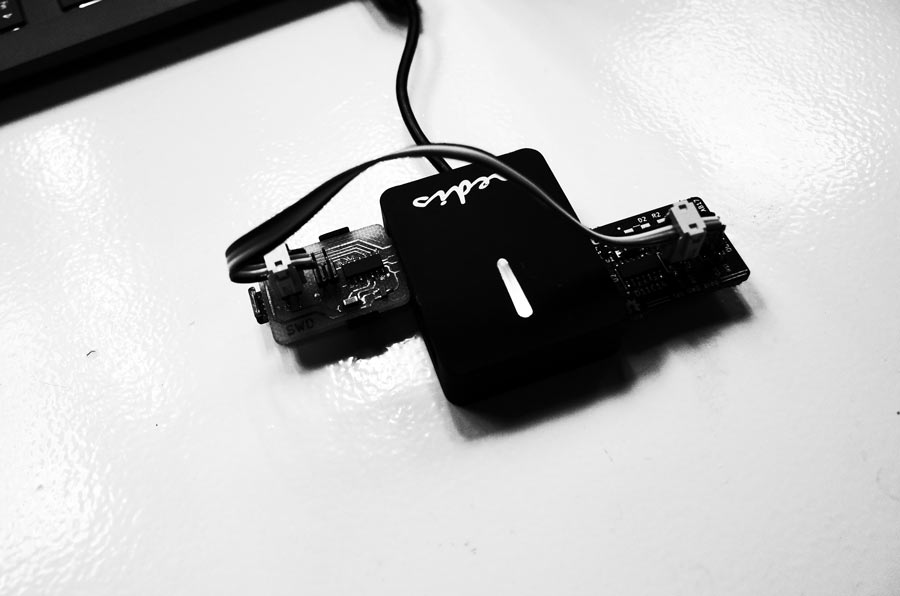
Wiring
Connect the SWD output of your working SAMD11C programmer to the SWD programming input of the blank SAMD11C board (output → input). The working programmer also stays plugged into your computer over USB; the blank board does not need its own USB connection — it is powered and clocked through the SWD cable.
Step 1 — Confirm the Host Debugger Is Visible
Open a terminal in the folder that contains the edbg binary and the free_dap_d11c_mini.bin firmware (here: ~/Documents/SAMD). Run edbg -l to list attached CMSIS-DAP debuggers. If the host programmer is plugged in and recognized, it appears in the list.
$ edbg -l
Attached debuggers:
  0: 4AF40EA6 - Alex Taradov Generic CMSIS-DAP Adapter (1)
If nothing shows up, the host programmer is not being detected — check the USB cable, drivers, and that you are running edbg with the right permissions.
Step 2 — First Attempt (the "no debuggers found" case)
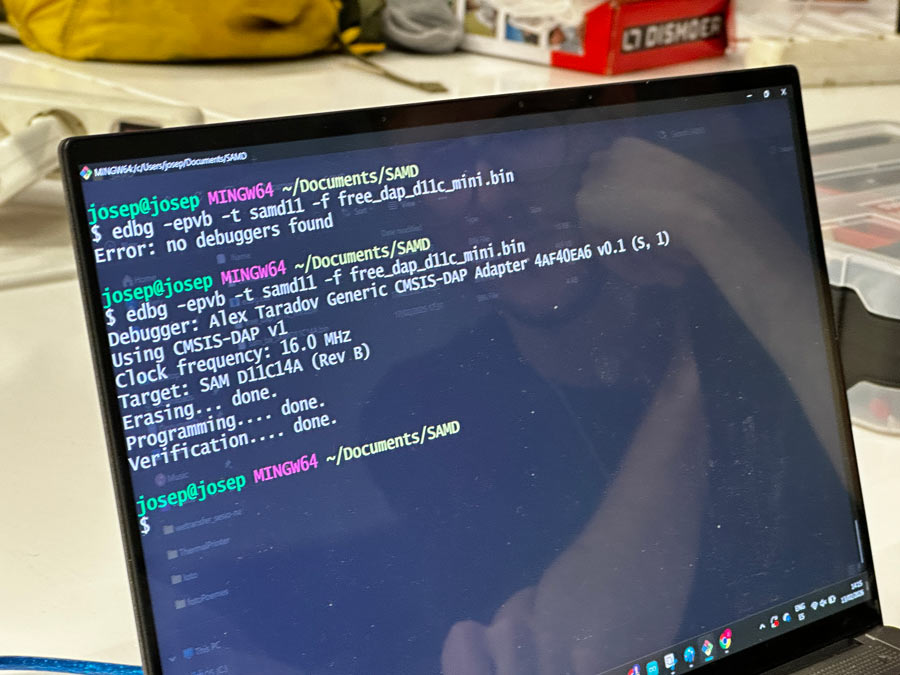
Running the flash command before the host programmer is detected gives a clear error:
$ edbg -epvb -t samd11 -f free_dap_d11c_mini.bin
Error: no debuggers found
This is not a problem with the target board — edbg simply has no CMSIS-DAP adapter to talk through. Plug in / reconnect the host programmer and try again.
Step 3 — Flash the Firmware
With the host CMSIS-DAP programmer attached and the blank SAMD11C wired to its SWD output, run the same command again:
$ edbg -epvb -t samd11 -f free_dap_d11c_mini.bin
Debugger: Alex Taradov Generic CMSIS-DAP Adapter 4AF40EA6 v0.1 (S, 1)
Using CMSIS-DAP v1
Clock frequency: 16.0 MHz
Target: SAM D11C14A (Rev B)
Erasing... done.
Programming.... done.
Verification.... done.
What just happened, in order:
edbgfound the host debugger (Alex Taradov Generic CMSIS-DAP Adapter).- It connected over SWD at 16 MHz to the target chip and identified it as a
SAM D11C14A (Rev B)— confirming the wiring is correct. - It erased the target's flash, wrote
free_dap_d11c_mini.bin, and read it back to verify.
Step 4 — Verify the New Programmer Is Alive
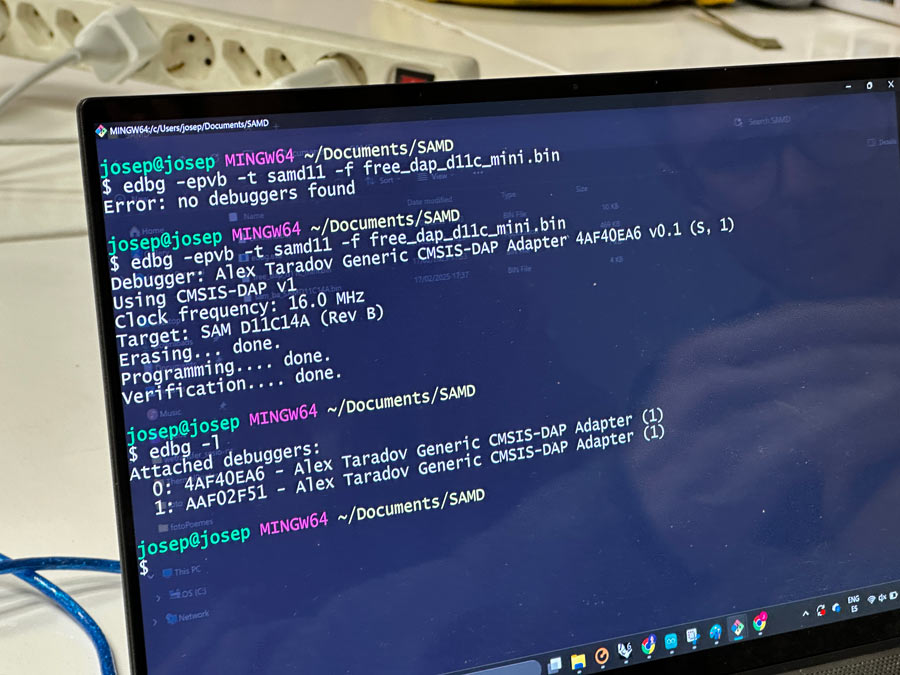
Unplug the freshly flashed board's SWD cable, then plug that board into your computer via USB. Run edbg -l again — the new programmer should now show up alongside the original host as a second CMSIS-DAP adapter, with its own serial number:
$ edbg -l
Attached debuggers:
  0: 4AF40EA6 - Alex Taradov Generic CMSIS-DAP Adapter (1)
  1: AAF02F51 - Alex Taradov Generic CMSIS-DAP Adapter (1)
Two devices in the list means the flash succeeded and the new SAMD11C is enumerating as a CMSIS-DAP programmer — it is now ready to be used to flash target boards (e.g. the Barduino 3.0 workflow described above).
Common Pitfalls
Error: no debuggers found— host programmer not plugged in, not powered, or not recognized by the OS. Checkedbg -lfirst.Error: invalid response during transfer— usually a wiring issue (SWD swapped, loose contact) or the target side has no power. Confirm the cable is on the programming input of the blank board and the output of the host.- Cable on the wrong header — the SAMD11C programmer board has two 4-pin headers that look identical. The one labeled as the programmer's output is what flashes targets; the other one is used to flash the SAMD itself.