The goal of the project is for the Xiao to get gas readings, have the buzzer sound if the ppm gets above a dangerous threshold, and log the ppm and current time to the flash memory of the xiao. The Xiao connects to Wifi when it is finally in range of a wifi network, and the Xiao will push the contents of its csv file in flash memory to a Firebase real-time database. There is a schema for making sure that entries aren't re-pushed to the firebase database if they've already been read once (I have a separate file recording up to what point we've read to). I'm using the xiaoesp32c3, rtc module, mq2 sensor, active buzzer, transistor, flash memory, and a realtime database. I'm discussing how they work and the challenges I encountered below.
/*********
Rui Santos & Sara Santos - Random Nerd Tutorials
Complete instructions at https://RandomNerdTutorials.com/esp32-firebase-realtime-database/
*********/
#include
#include
#include
#include
// Network and Firebase credentials
#define WIFI_SSID "insert yours here"
#define WIFI_PASSWORD "insert yours here"
#define Web_API_KEY "insert yours here"
#define DATABASE_URL "insert yours here"
#define USER_EMAIL "insert yours here"
#define USER_PASS "insert yours here"
// User function
void processData(AsyncResult &aResult);
// Authentication
UserAuth user_auth(Web_API_KEY, USER_EMAIL, USER_PASS);
// Firebase components
FirebaseApp app;
WiFiClientSecure ssl_client;
using AsyncClient = AsyncClientClass;
AsyncClient aClient(ssl_client);
RealtimeDatabase Database;
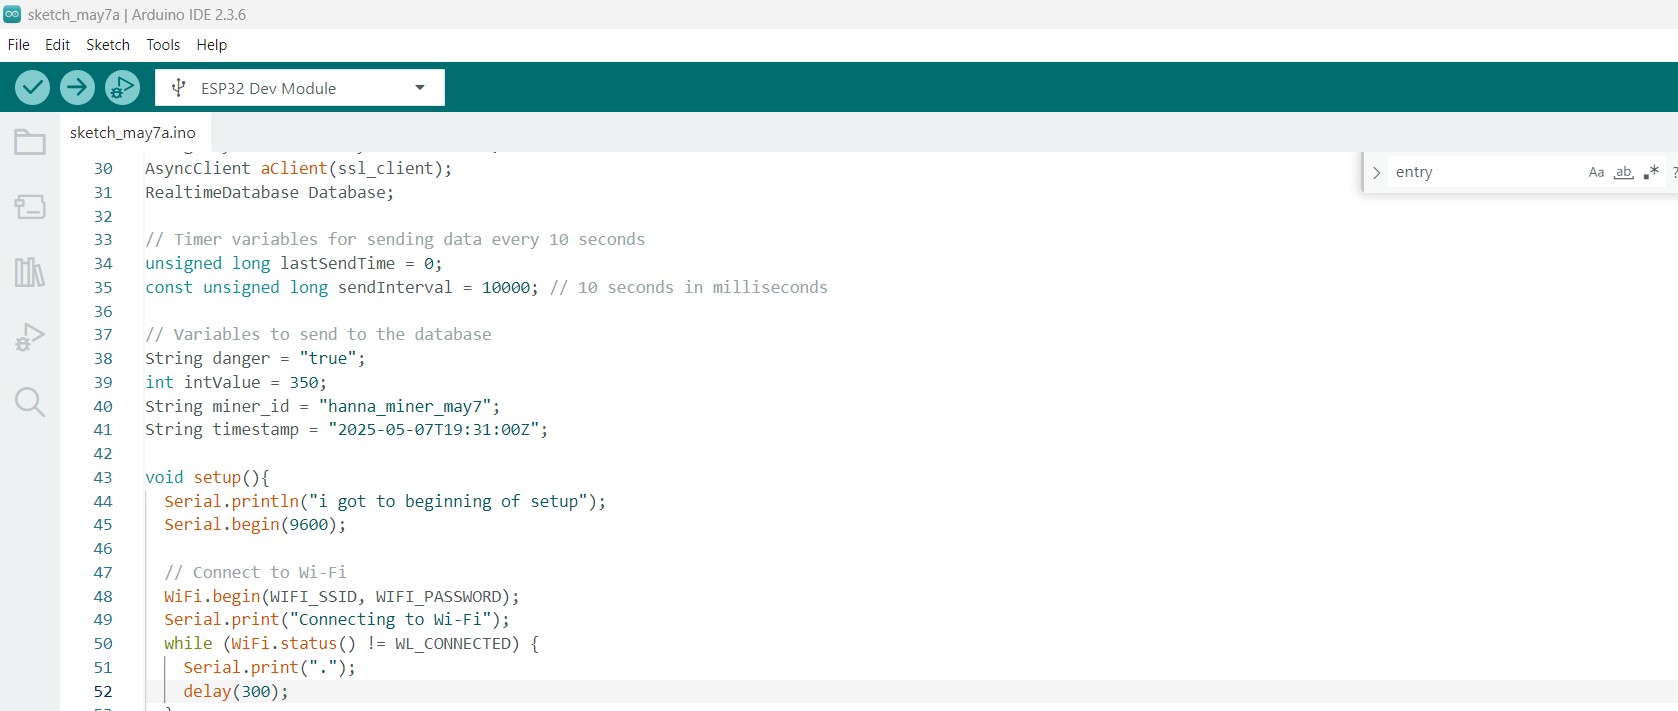
// Timer variables for sending data every 10 seconds
unsigned long lastSendTime = 0;
const unsigned long sendInterval = 10000; // 10 seconds in milliseconds
// Variables to send to the database
String danger = "true";
int intValue = 350;
String miner_id = "hanna_miner_may7";
String timestamp = "2025-05-07T19:31:00Z";
void setup(){
Serial.println("i got to beginning of setup");
Serial.begin(9600);
// Connect to Wi-Fi
WiFi.begin(WIFI_SSID, WIFI_PASSWORD);
Serial.print("Connecting to Wi-Fi");
while (WiFi.status() != WL_CONNECTED) {
Serial.print(".");
delay(300);
}
Serial.println();
// Configure SSL client
ssl_client.setInsecure();
ssl_client.setConnectionTimeout(1000);
ssl_client.setHandshakeTimeout(5);
// Initialize Firebase
initializeApp(aClient, app, getAuth(user_auth), processData, "🔐 authTask");
app.getApp(Database);
Database.url(DATABASE_URL);
Serial.println("i got to end of setup");
}
void loop(){
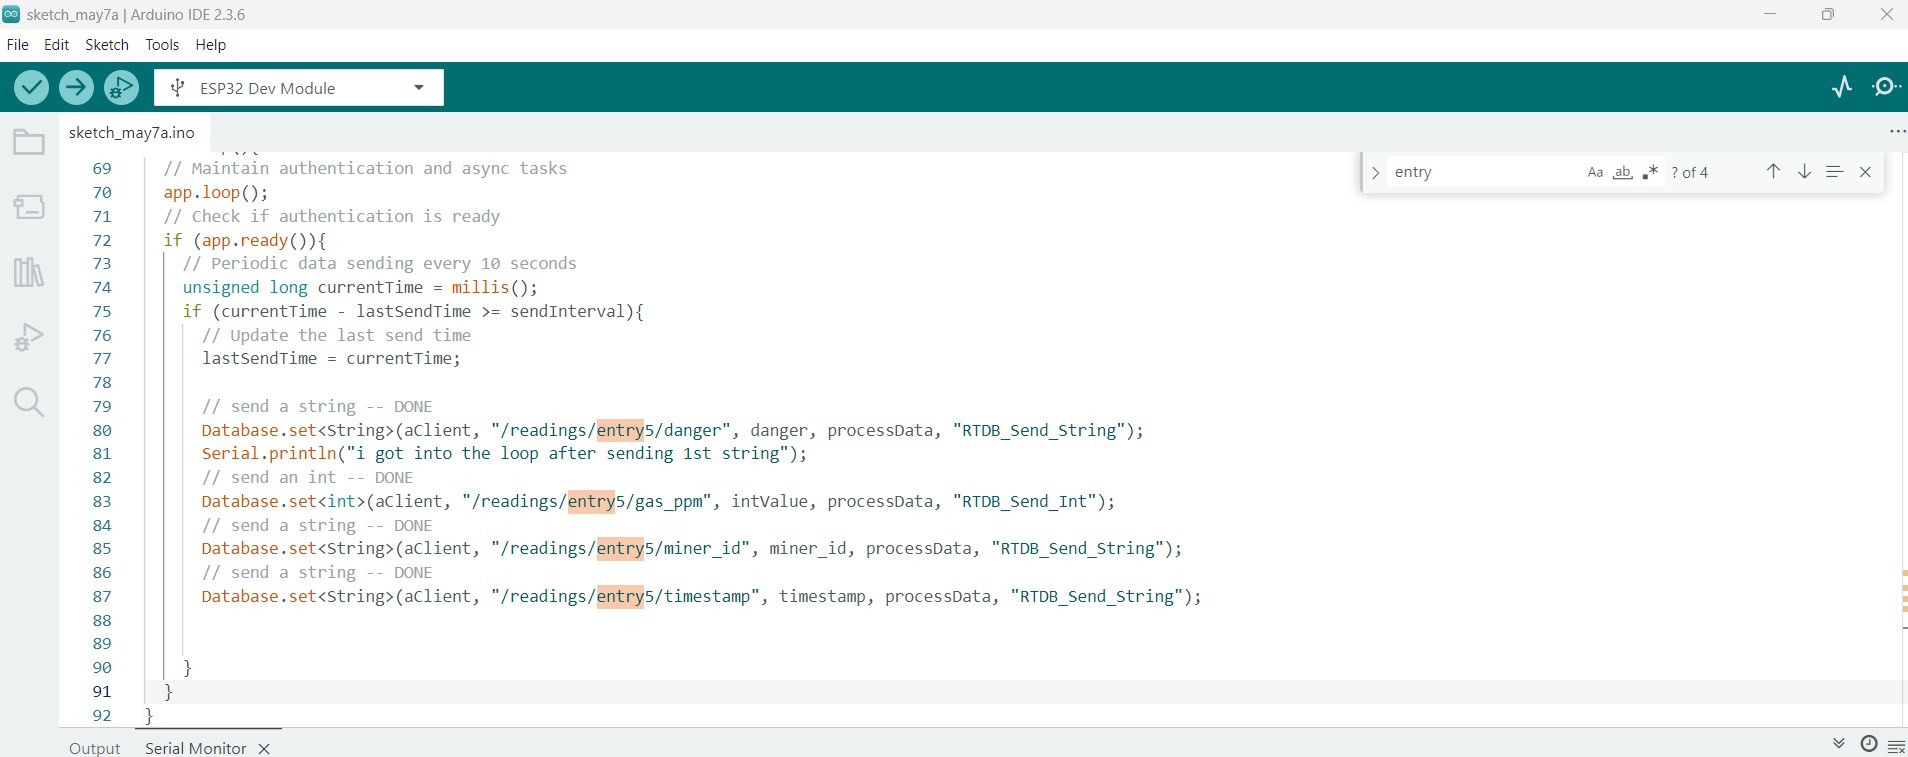
// Maintain authentication and async tasks
app.loop();
// Check if authentication is ready
if (app.ready()){
// Periodic data sending every 10 seconds
unsigned long currentTime = millis();
if (currentTime - lastSendTime >= sendInterval){
// Update the last send time
lastSendTime = currentTime;
// send a string -- DONE
Database.set(aClient, "/readings/entry5/danger", danger, processData, "RTDB_Send_String");
Serial.println("i got into the loop after sending 1st string");
// send an int -- DONE
Database.set(aClient, "/readings/entry5/gas_ppm", intValue, processData, "RTDB_Send_Int");
// send a string -- DONE
Database.set(aClient, "/readings/entry5/miner_id", miner_id, processData, "RTDB_Send_String");
// send a string -- DONE
Database.set(aClient, "/readings/entry5/timestamp", timestamp, processData, "RTDB_Send_String");
}
}
}
void processData(AsyncResult &aResult) {
if (!aResult.isResult())
return;
if (aResult.isEvent())
Firebase.printf("Event task: %s, msg: %s, code: %d\n", aResult.uid().c_str(), aResult.eventLog().message().c_str(), aResult.eventLog().code());
if (aResult.isDebug())
Firebase.printf("Debug task: %s, msg: %s\n", aResult.uid().c_str(), aResult.debug().c_str());
if (aResult.isError())
Firebase.printf("Error task: %s, msg: %s, code: %d\n", aResult.uid().c_str(), aResult.error().message().c_str(), aResult.error().code());
if (aResult.available())
Firebase.printf("task: %s, payload: %s\n", aResult.uid().c_str(), aResult.c_str());
}
HTML & CSS for UI (sorry i had to encode the HTML)
How it works: You must set up web app authentication through your firebase
project. Otherwise, this is basically HTML & CSS. One issue that I'm fixing right
now is that I originally had danger as 'yes' or 'no', but now I have
it as 'danger' or 'safe', so the UI is getting confused and thinks every entry
in danger: is a 'yes'.
<!DOCTYPE html>
<html>
<head>
<link rel="stylesheet" href="miner_css.css">
<title>Gas Exposure Dashboard</title>
</head>
<body>
<h2>Miner Gas Exposure Dashboard</h2>
<table>
<thead>
<tr>
<th>Miner ID</th>
<th>Timestamp</th>
<th>Gas (ppm)</th>
<th>Danger</th>
</tr>
</thead>
<tbody id="data-table"></tbody>
</table>
<script src="https://www.gstatic.com/firebasejs/9.22.2/firebase-app-compat.js"></script>
<script src="https://www.gstatic.com/firebasejs/9.22.2/firebase-database-compat.js"></script>
<script>
const firebaseConfig = {
apiKey: "AIzaSyDE3BncTtJQurEM3Zb-W99pMVIOlV2HOLI",
authDomain: "data-check-ccce9.firebaseapp.com",
databaseURL: "https://data-check-ccce9-default-rtdb.firebaseio.com",
projectId: "data-check-ccce9",
storageBucket: "data-check-ccce9.firebasestorage.app",
messagingSenderId: "754736489688",
appId: "1:754736489688:web:207e7573604c6daea863ad",
measurementId: "G-5HWVZWR6K6"
};
firebase.initializeApp(firebaseConfig);
const dbRef = firebase.database().ref("readings");
dbRef.on("value", (snapshot) => {
const data = snapshot.val();
const table = document.getElementById("data-table");
table.innerHTML = ""; // Clear existing
for (let key in data) {
const entry = data[key];
const row = document.createElement("tr");
row.innerHTML = `
<td>${entry.miner_id}</td>
<td>${entry.timestamp}</td>
<td>${entry.gas_ppm}</td>
<td style="color:${entry.danger ? 'red' : 'green'}">${entry.danger ? 'YES' : 'NO'}</td>
`;
table.appendChild(row);
}
});
</script>
</body>
</html>
Gas Exposure Dashboard
Miner Gas Exposure Dashboard
Miner ID
Timestamp
Gas (ppm)
Danger
          body {
            font-family: Arial, sans-serif;
            padding: 30px;
            background-color: #f9f9f9;
            color: #333;
          }

          h2 {
            text-align: center;
            margin-bottom: 30px;
          }

          table {
            width: 100%;
            border-collapse: collapse;
            margin: auto;
            background-color: white;
            box-shadow: 0 2px 8px rgba(0,0,0,0.1);
          }

          th, td {
            padding: 15px;
            text-align: center;
            border-bottom: 1px solid #eee;
          }

          th {
            background-color: #0077cc;
            color: white;
            text-transform: uppercase;
            font-size: 14px;
          }

          tr:hover {
            background-color: #f1f1f1;
          }

          .danger-yes {
            color: white;
            background-color: #e74c3c;
            font-weight: bold;
            padding: 5px 10px;
            border-radius: 4px;
          }

          .danger-no {
            color: white;
            background-color: #2ecc71;
            font-weight: bold;
            padding: 5px 10px;
            border-radius: 4px;
          }
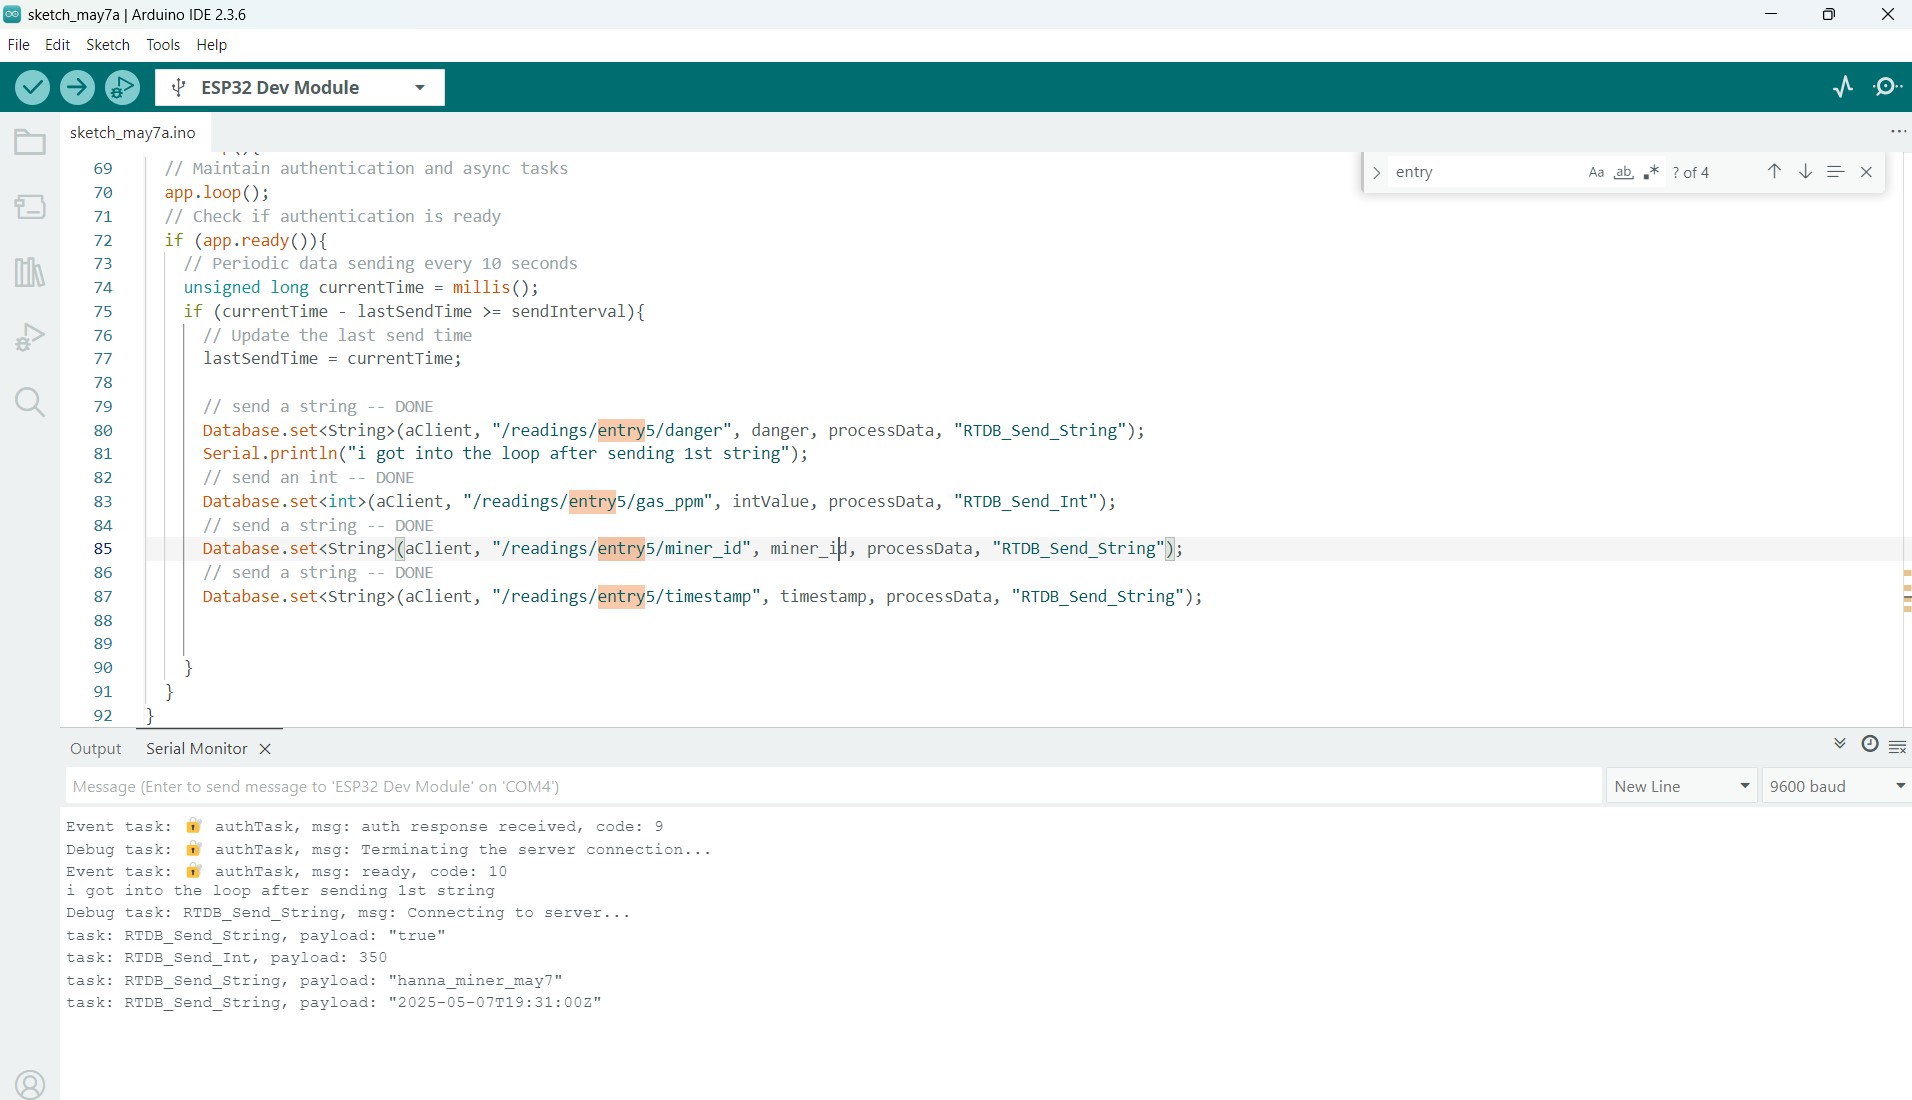
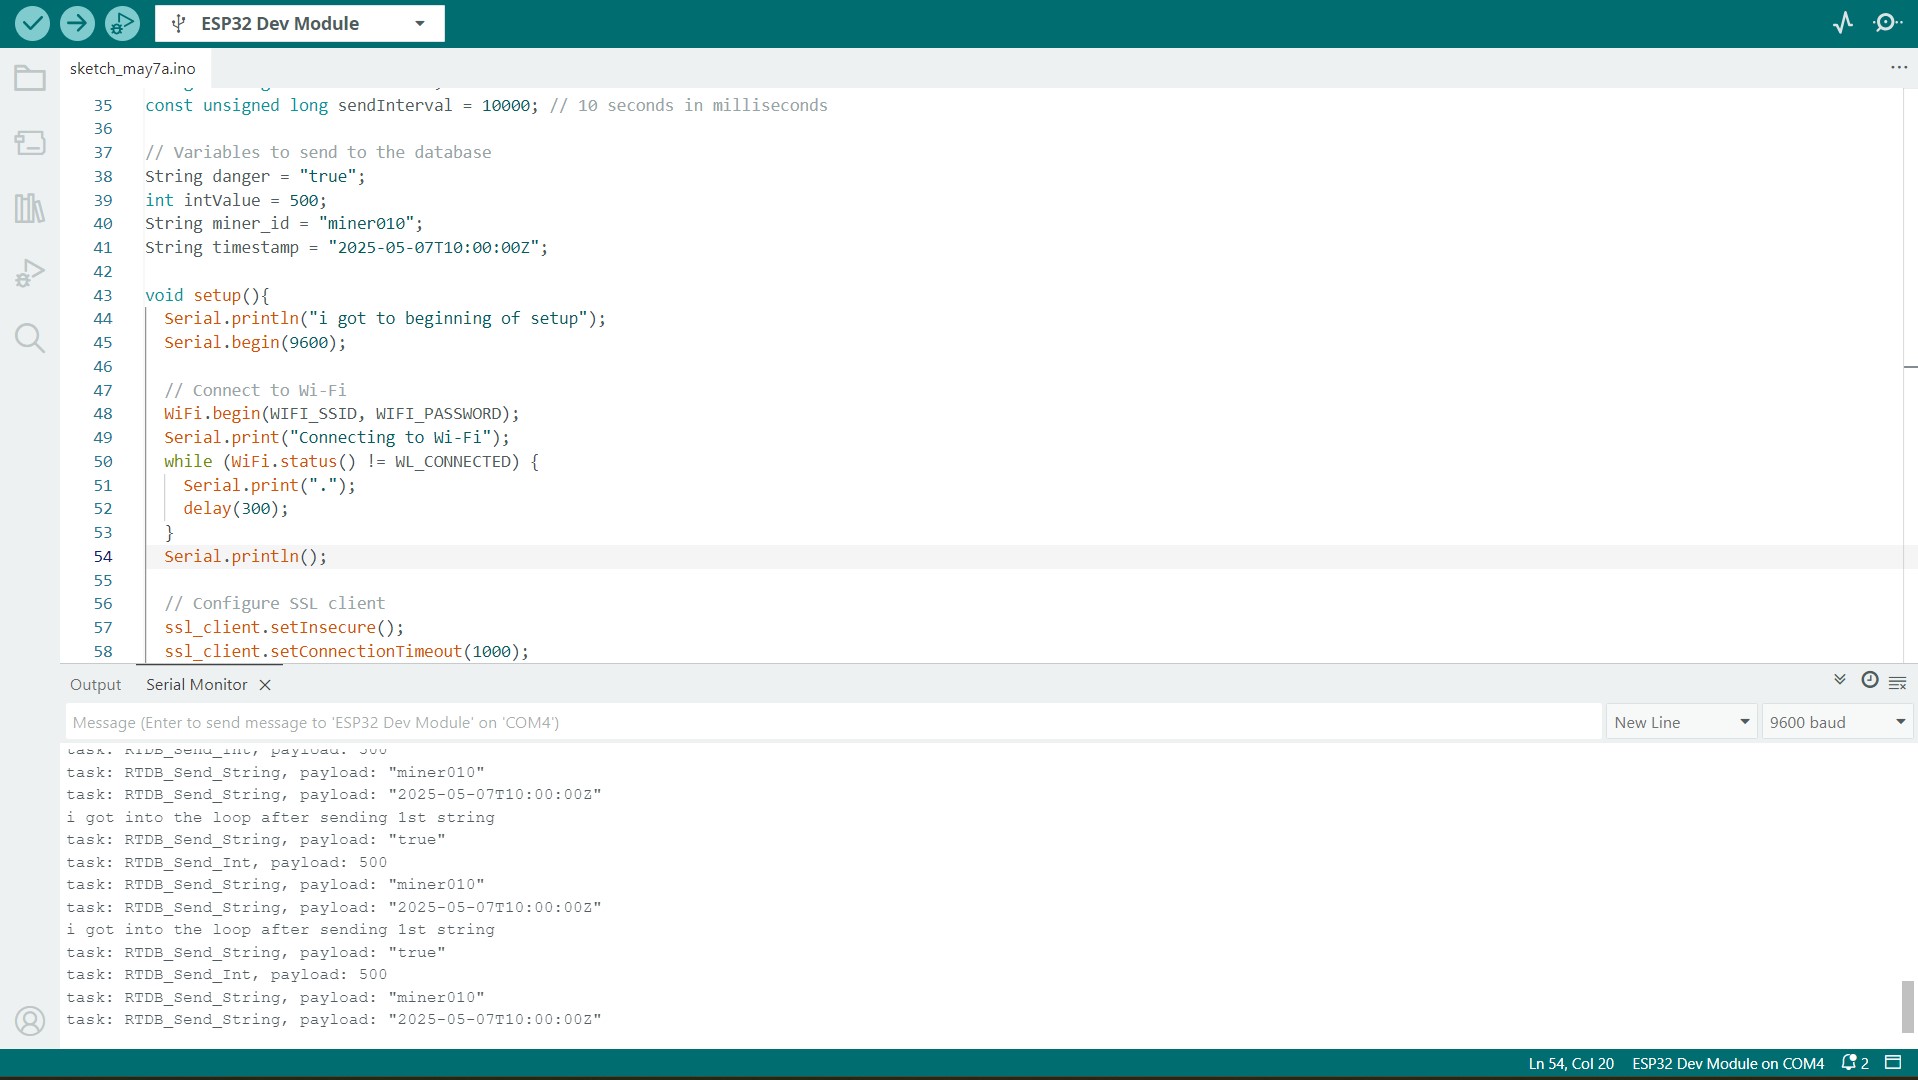
My code connecting to wifi and debugging each task, as well as sending each task (each of the items in the entry). This output in the serial monitor indicates a successful push to firebase.
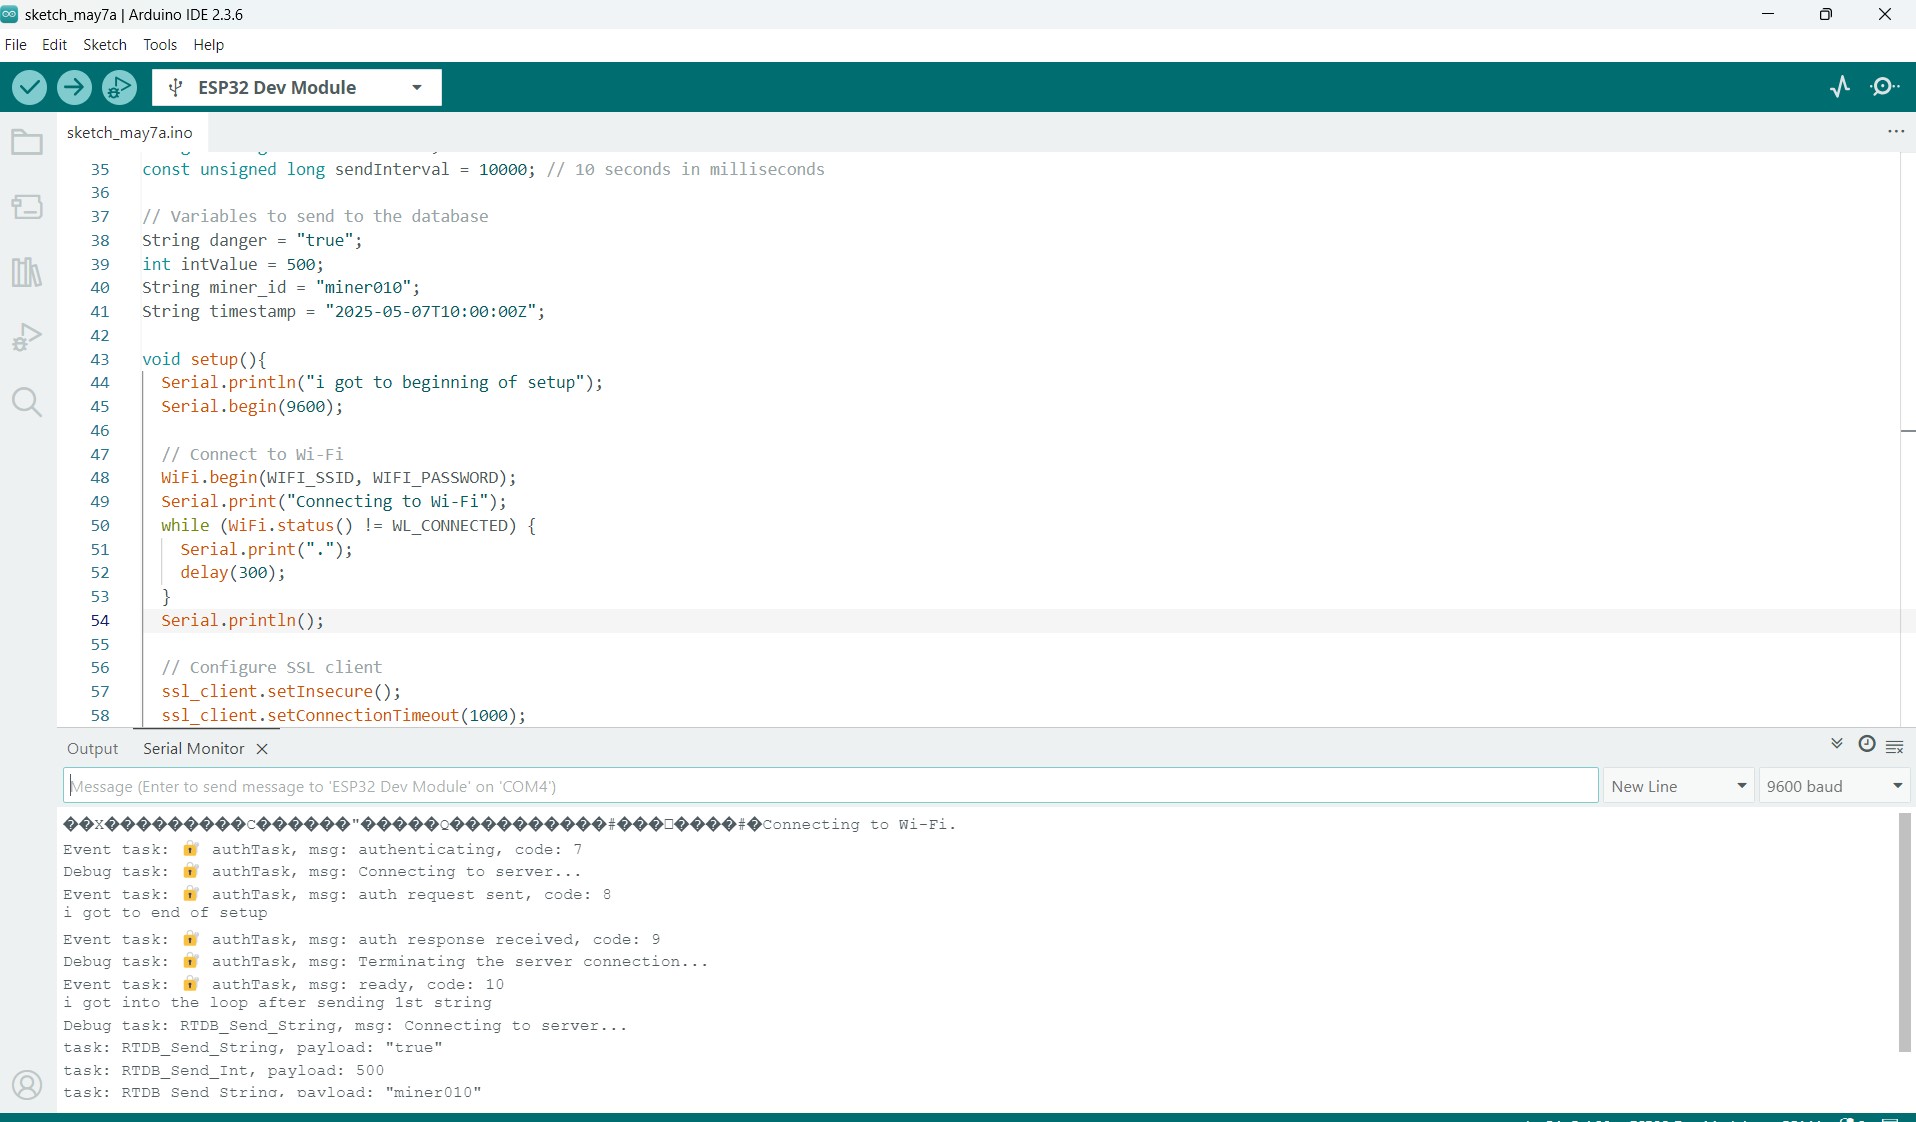
Look at that! The pushes were successful. One thing to note is that you cannot send things to firebase too fast or it will block your access. That is why I'm sending entries every 10 seconds.
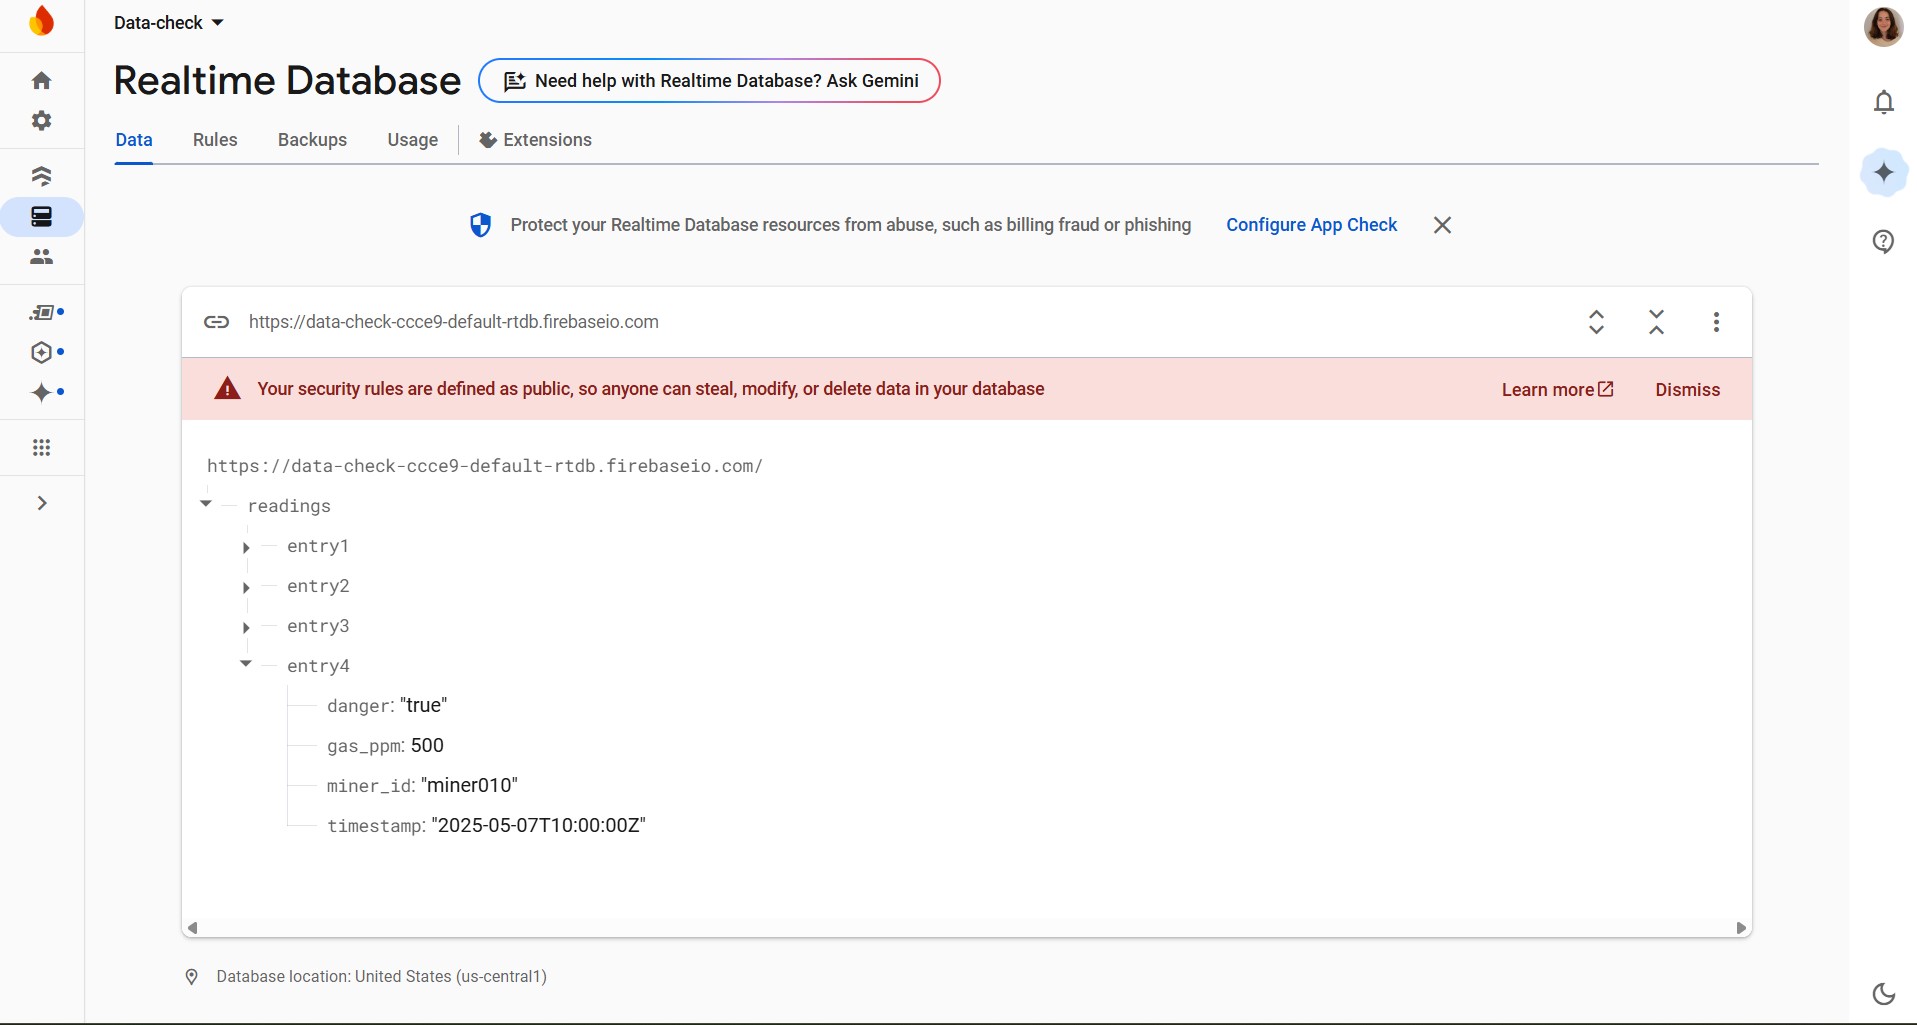
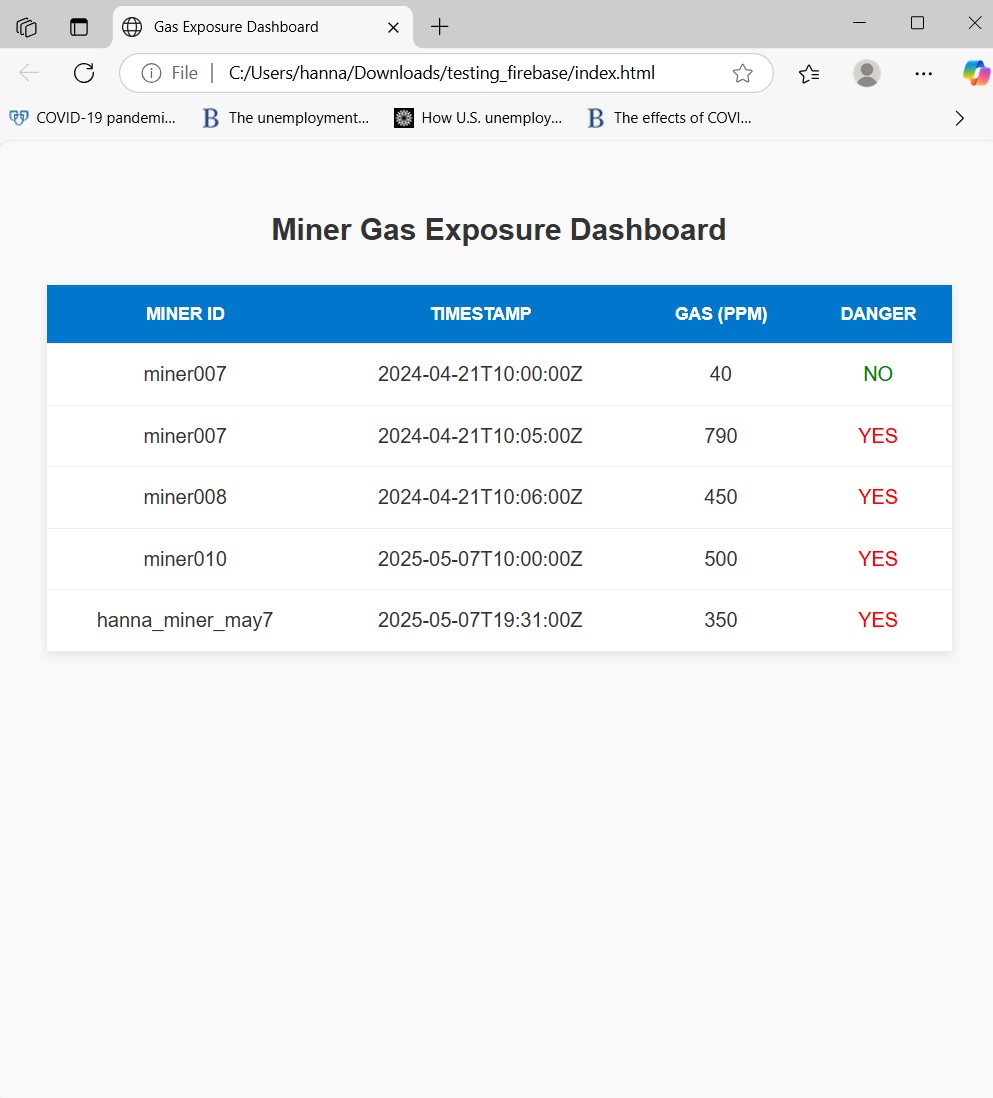
For now, I just have it sending the exact same entry information each time. The gas exposure screenshot below shows that the miner010 entry that I continually send shows up on the dashboard, not only just in the realtime database.
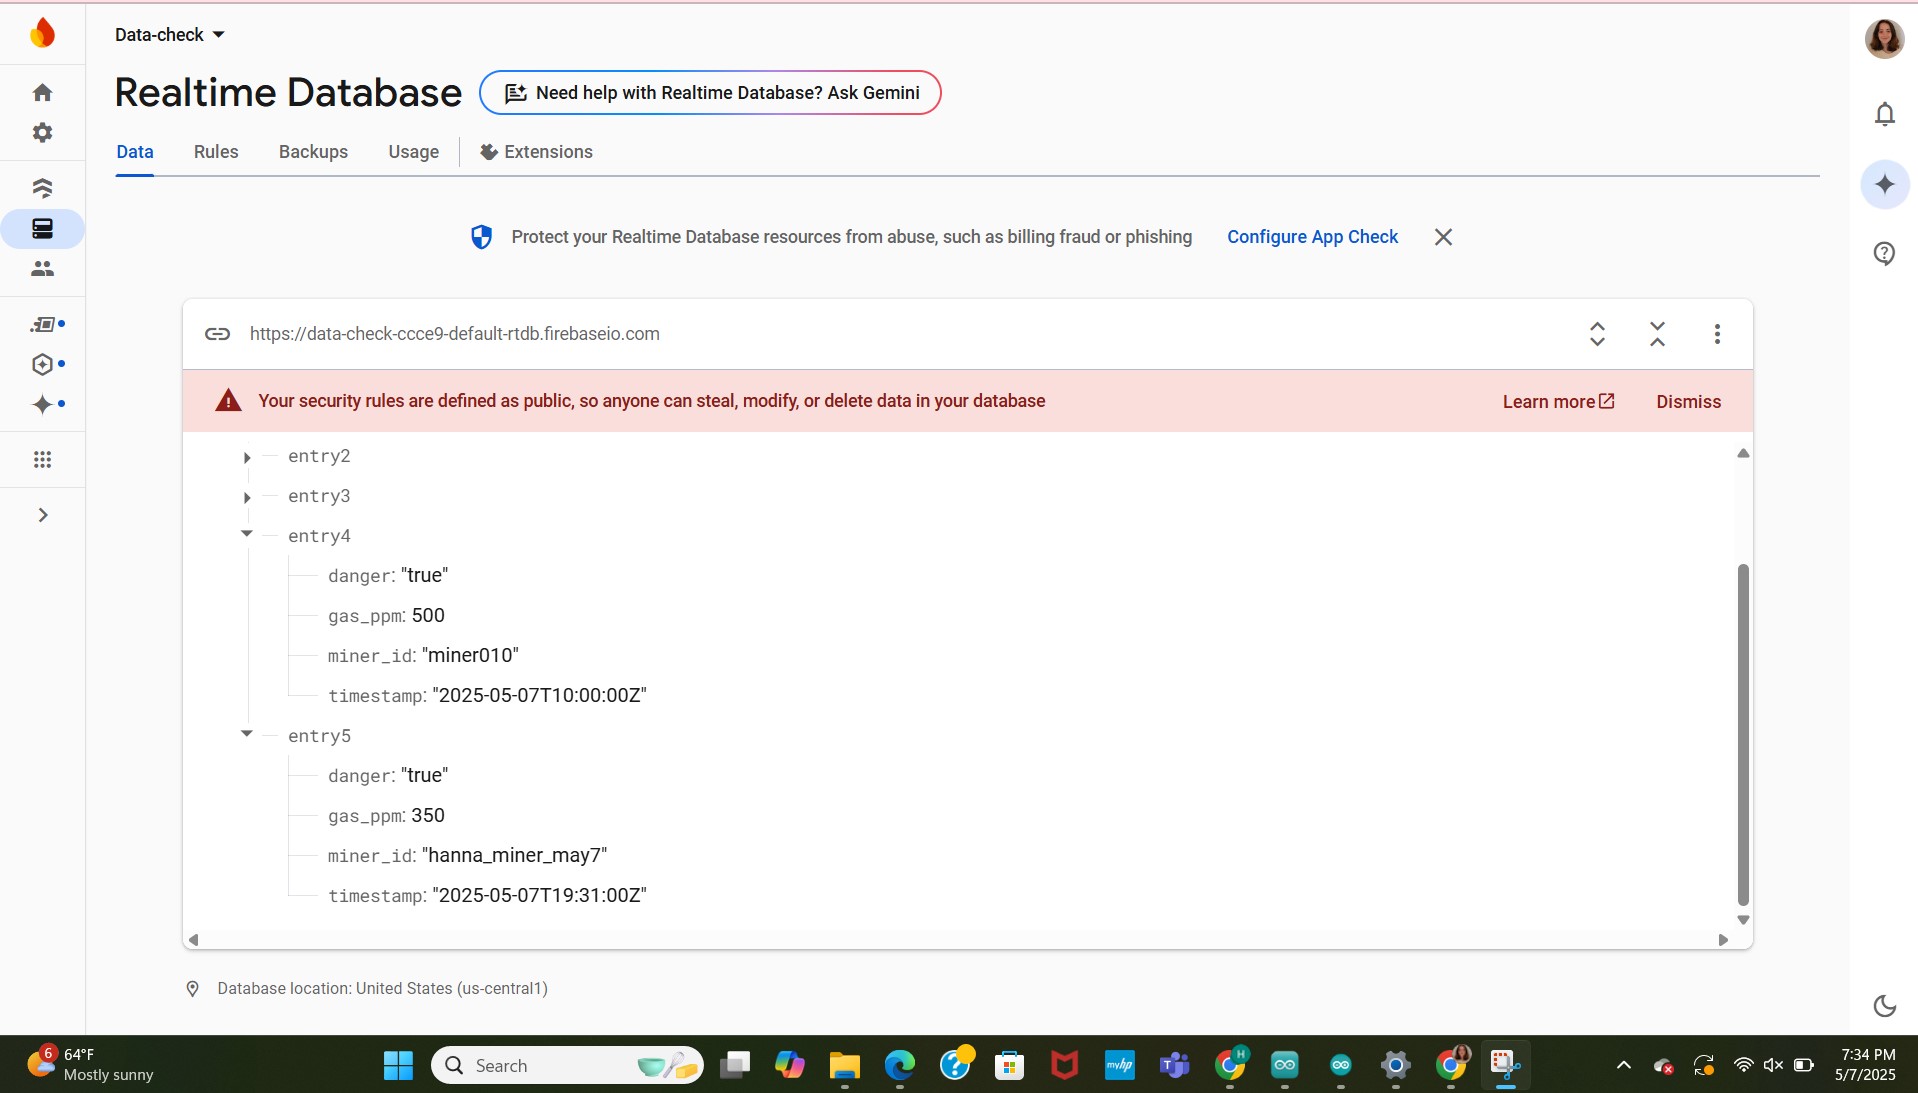
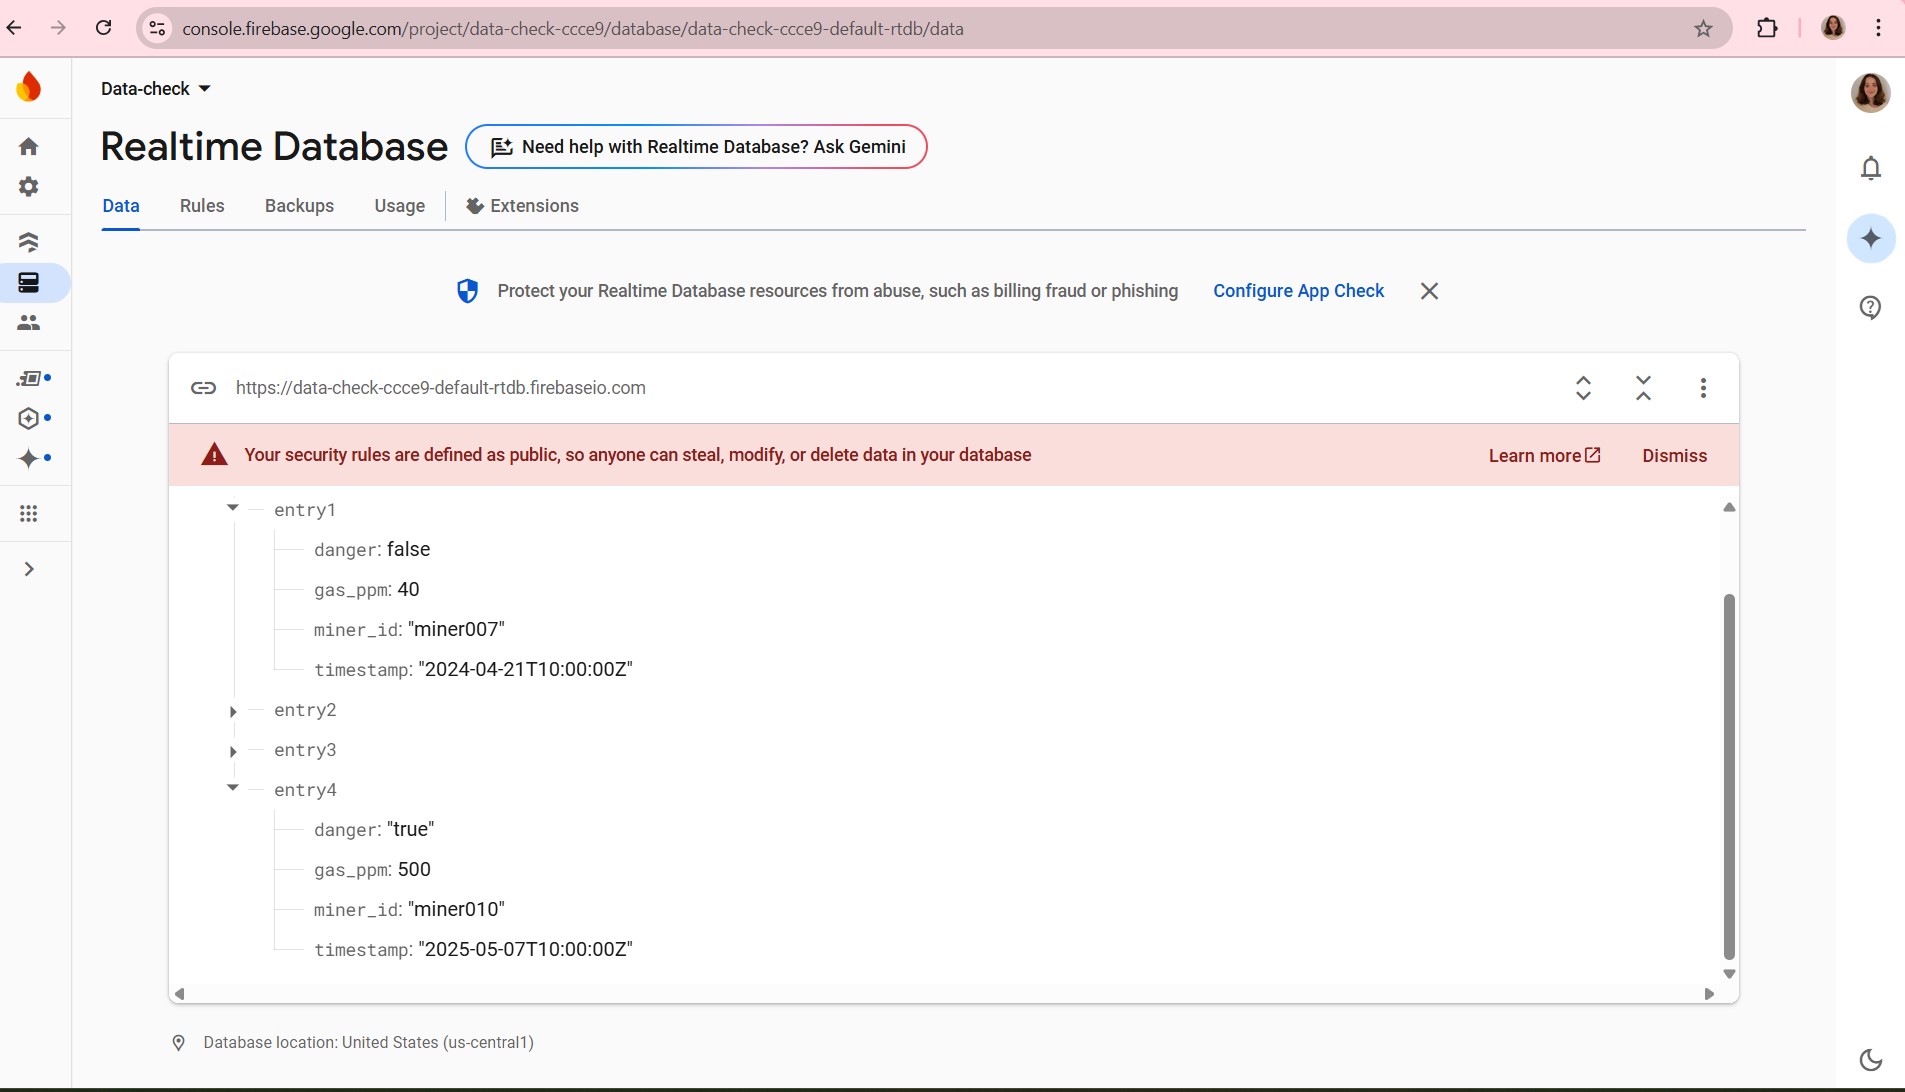
As you can see, the entry is here in the database too.
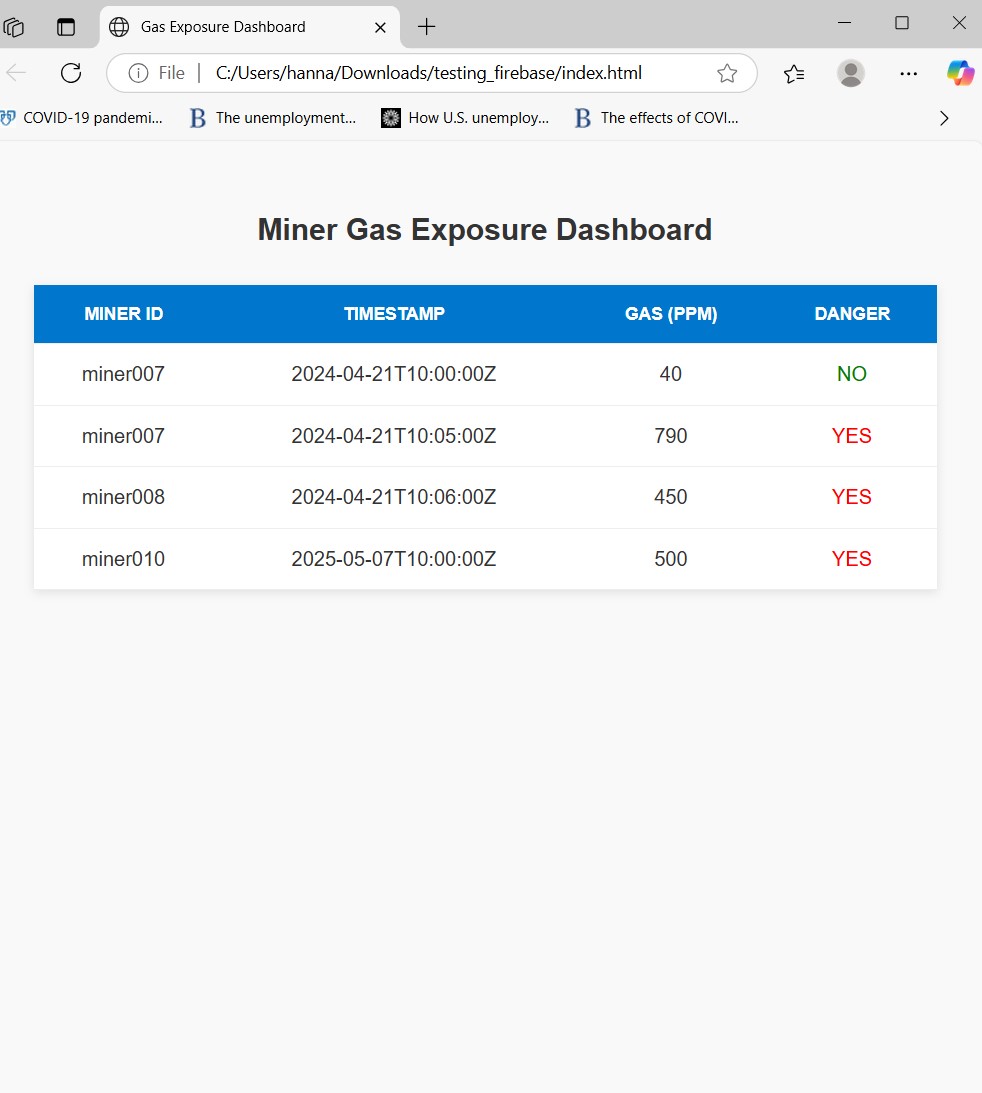
Below is proof that another entry with all new information, entry5 with a minerid of hanna_miner_may7 is successfully pushed to the realtime database and shows on the miner dashboard I've made.