Week 4
In this week’s lesson on embedded programming, we explored the foundation of how digital systems interact with the physical world. The focus was on the basics of digital logic and the essential components that form the backbone of embedded systems.
Digital Logic in an Analog World
Digital Logic in an Analog World Switches can represent information in the form of bits (0 and 1), and with multiple switches, different values can be stored. For example, 8 switches can represent 256 different values. Think About it like this:
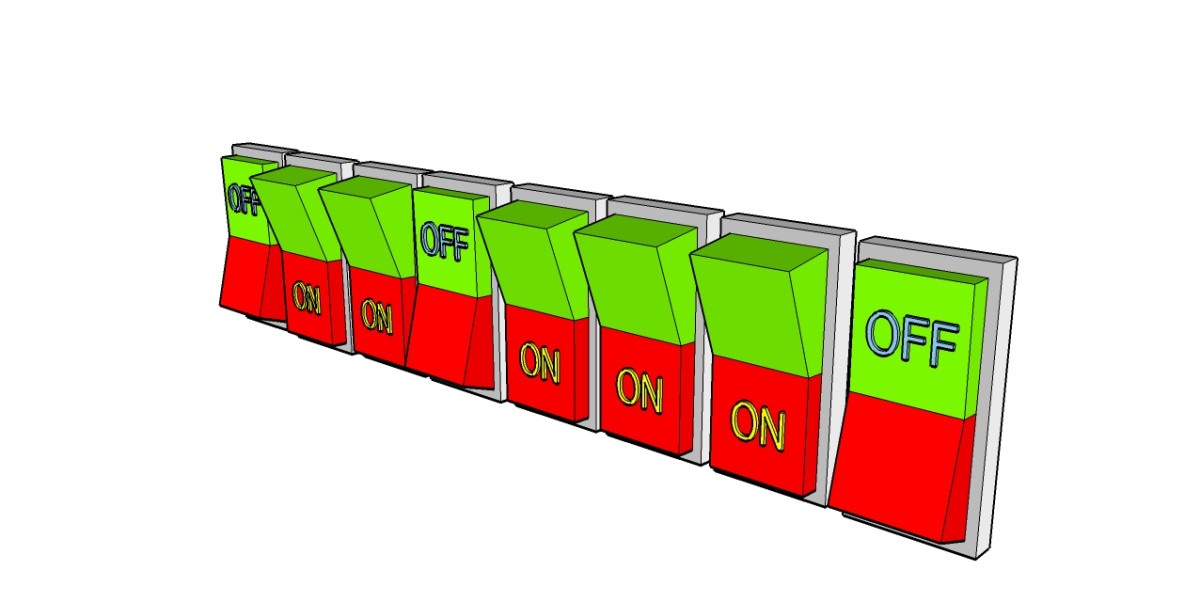
Each of those switches is called 1 bit, and 8 of them are a byte. This leads to the use of the binary system, where analog signals are converted into digital data for processing.
Logic Levels
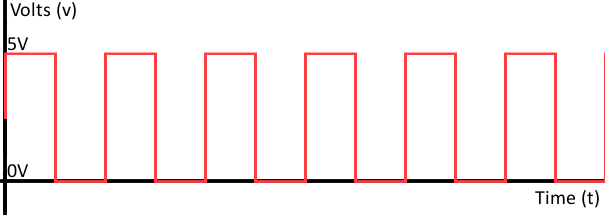
Logic levels in electronics define the voltage levels that represent logical "1" (high voltage) and "0" (low voltage). These levels are crucial for understanding how data is processed and communicated within digital circuits.
The Transistor
A transistor is like a tiny electronic switch that controls the flow of electricity. It has three parts: the collector, emitter, and base. By applying a small current to the base, it allows a larger current to flow between the collector and emitter.
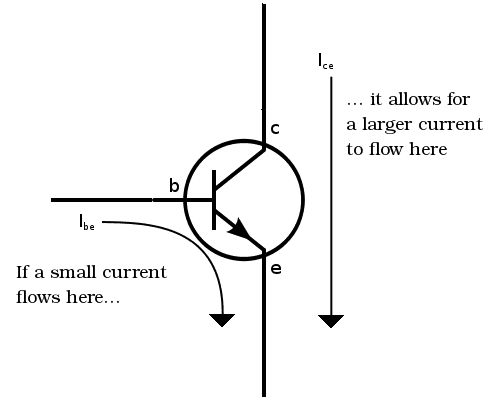
This means a small signal can control much larger voltages, making transistors essential for interfacing low-power devices like microcontrollers with higher-power components, such as controlling a light or motor.
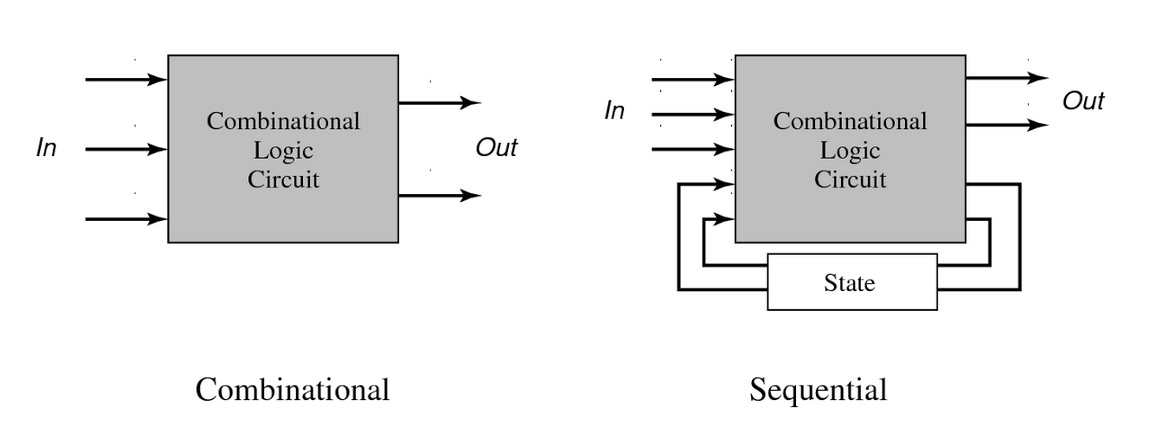
Combinational vs. Sequential Circuits
- Combinational Circuits: Output depends only on the current inputs (e.g., logic gates).
- Sequential Circuits: Output depends on both the current and previous inputs, utilizing memory elements like flip-flops and finite state machines.
Integrated Circuits (ICs)
Integrated circuits represent the evolution from discrete components to compact, efficient circuits. Microcontrollers (MCUs More on this ahead ;)* ), small computers on a single chip, are particularly important in embedded systems as they combine processing, memory, and I/O capabilities in one unit.
The Arduino Project
Arduino is introduced as an open-source hardware and software platform that simplifies embedded programming. It provides an accessible way to work with microcontrollers and create interactive projects.

This was my first controller for getting into electronics and coding, and if I could do it, you can too! Arduino is a fantastic tool for learning and is great for anyone wanting to dive into electronics projects. It’s easy to use, flexible, and a lot of fun—definitely an awesome way to start exploring the world of embedded systems!
Programming Languages
A distinction is made between high-level and low-level programming languages. High-level languages like Python, C++, and Java make it easier to write code because they are closer to human languages. Low-level languages, such as Assembly or C, are closer to the machine and allow for more control over hardware.
Flowcharts are also emphasized as a helpful tool for designing algorithms and planning the structure of code before writing it. If you want to think like a computer it would look like this:

Input/Output (I/O) Programming
Microcontrollers interact with the outside world through inputs (e.g., sensors) and outputs (e.g., actuators). I/O programming enables these interactions, allowing embedded systems to read data and control external devices.
Practical Embedded Programming
Variables
These are used to store data.

Think of a variable as a box with a label. The label is the variable’s name, and the type of box (like int, float, or String) determines what kind of information it holds. You can store data in the box, change it, and access it whenever needed, just like using a labeled box to keep track of different items.
Some common variables:
int– Stores integers (whole numbers), like 5 or -3.float– Stores decimal numbers, like 3.14 or -0.001.bool– Stores a true or false value (1 or 0).char– Stores a single character, like 'a' or '7'.String– Stores a sequence of characters or text, like "Hello".byte– Stores a small integer value (0-255).long– Stores larger integers (larger than int can handle).double– Stores decimal numbers with more precision than float.
ok!
Experimenting with code
At this stage, I dove into experimenting with code and familiarizing myself with key concepts like variables, references, processes, electronics, and the basics of embedded programming. Although I had some prior experience working with different Arduino boards and using Processing (Opensource visual programming software), it had been a while so I was a bit hestitant.
I used TinkerCad to practice some basic exercises involving switches, buttons, LEDs, and resistors. TinkerCad is an excellent tool for beginners because it lets you see your changes in real-time, which is great for those of us who are a little hesitant about electricity and the possibility of burning things out :s
 You can access this exercise and its code here!
Through this, I gained a better understanding of basic electronics concepts like ground and voltage.
Voltage is the difference in electrical potential between two points, which pushes the current through a circuit.
Current (amps) is the flow of electric charge, or how much electricity is flowing.
Resistance is the opposition to the current flow, and it's measured in ohms (Ω).

To calculate the resistor value in a circuit, I used Ohm's Law, which is expressed by the formula:
V is voltage (volts), I is current (amps) and R is resistance (ohms).
From this, you can rearrange to solve for any of the variables depending on what you know. This formula helps determine the right resistor value for the circuits to avoid overloading or damaging components.
Barduino
Bardunio is a simple, low-cost microcontroller platform developed at FabLab Barcelona! It’s based on the ESP32 and designed to help beginners learn about electronics and embedded systems. Using open-source software, it’s easy to program and experiment with sensors, actuators, and interactive projects—perfect for hands-on learning and prototyping.

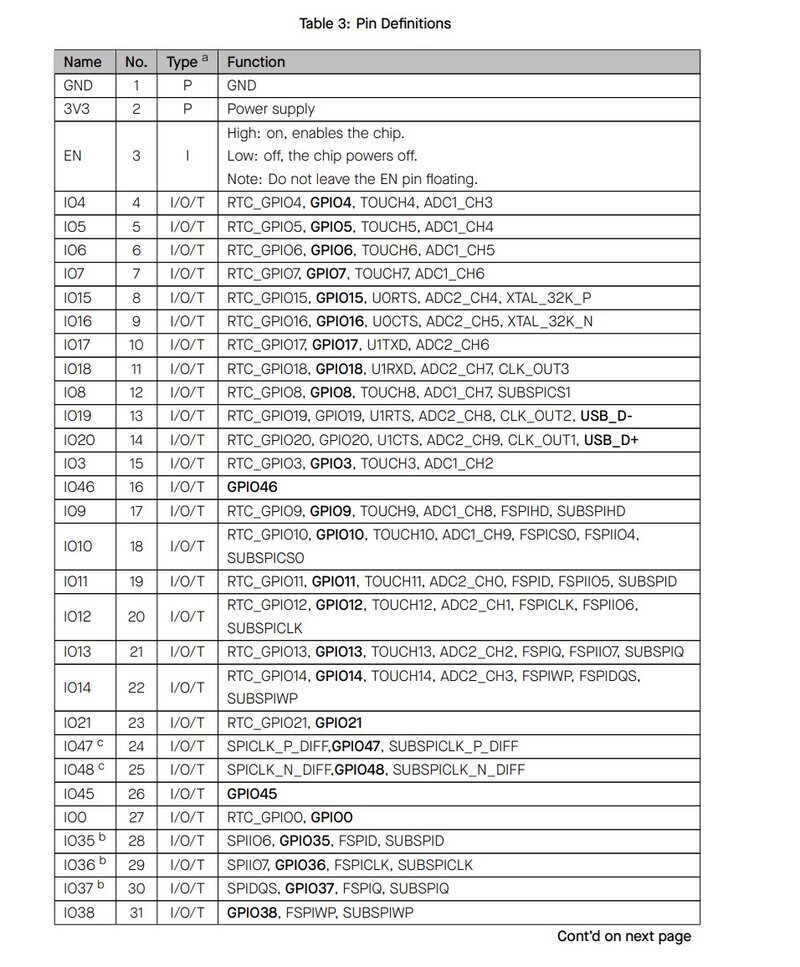
You can browse through its documentation here, where you will have access to the data pinout for example.

Does this matter?
YES. Understanding platforms like Bardunio and referring to resources like pinout diagrams is key for successful prototyping. This is where datasheets come in—they provide crucial details about components, like microcontrollers, sensors, and actuators, including their capabilities, pin configurations, and electrical characteristics.
Datasheets in Embedded Systems
It's a description on how component works, including its pinout, voltage levels, and power requirements. They are essential for correctly wiring components and ensuring everything in your embedded system functions properly.
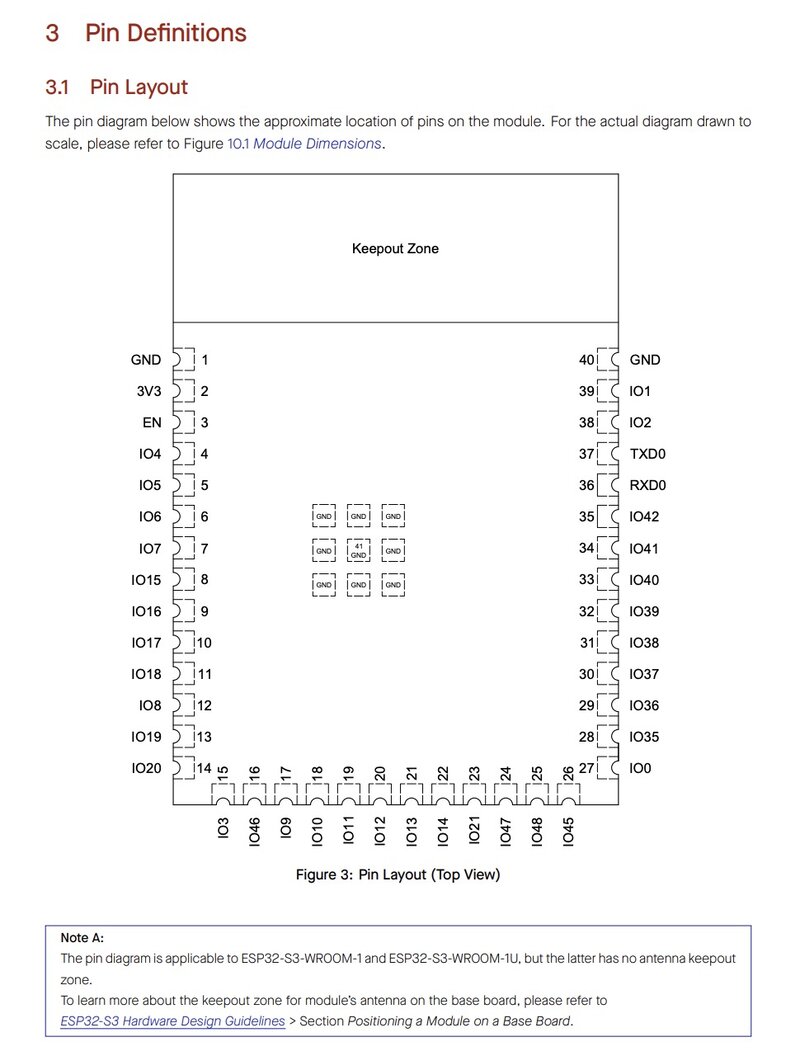
Let's see what the ESP3S data sheet looks like:
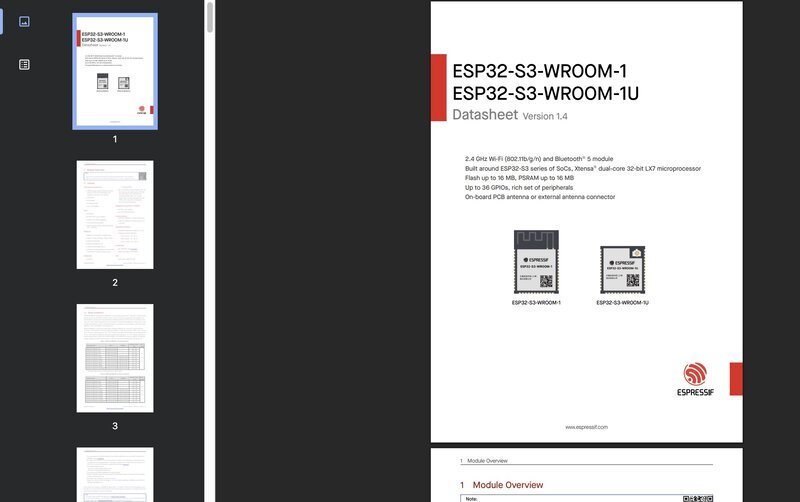
Esentially, what we are looking at is a virtual manual with valuable information. Might seem scary, but if I can browse through this, so can you.
And as all manual books, there is index, which in this case it's the Module Overview.
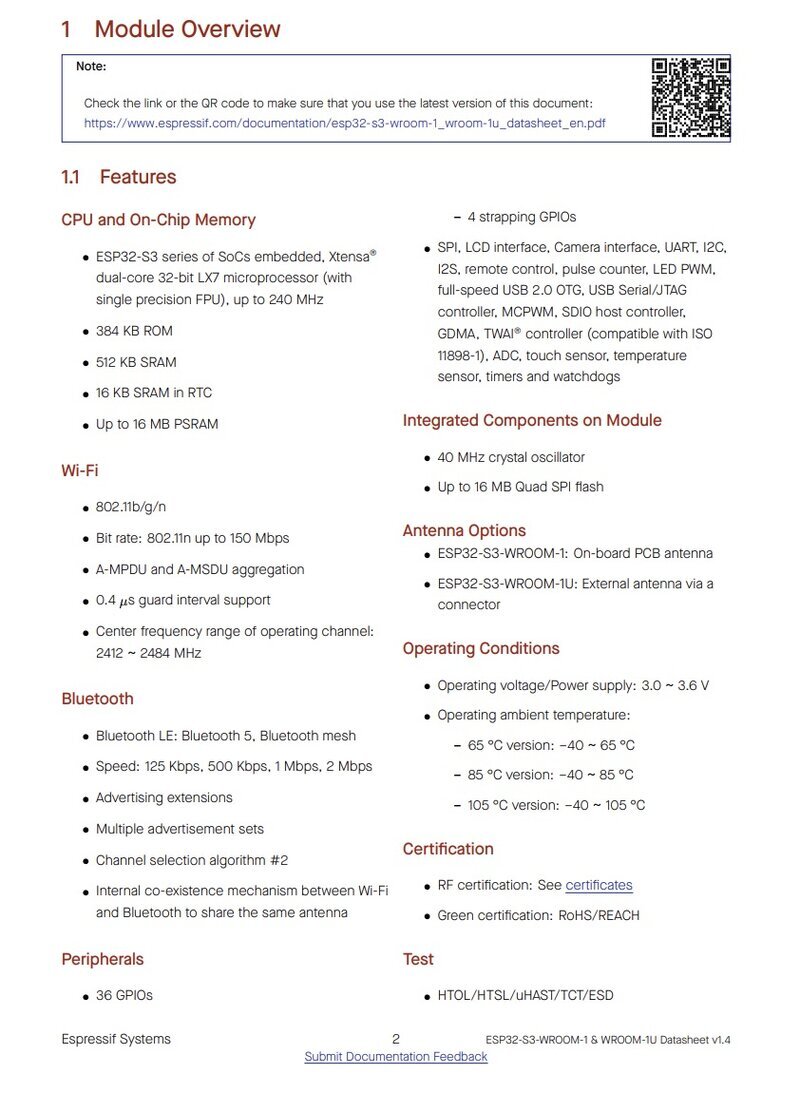
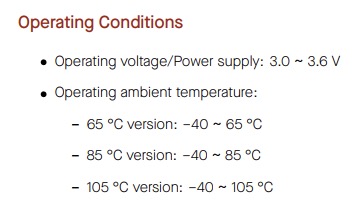
Look! We already see some key information on the Power Supply of the board. Now we now that the ESP32 can only take between 3.0 and 3.6 Volts.
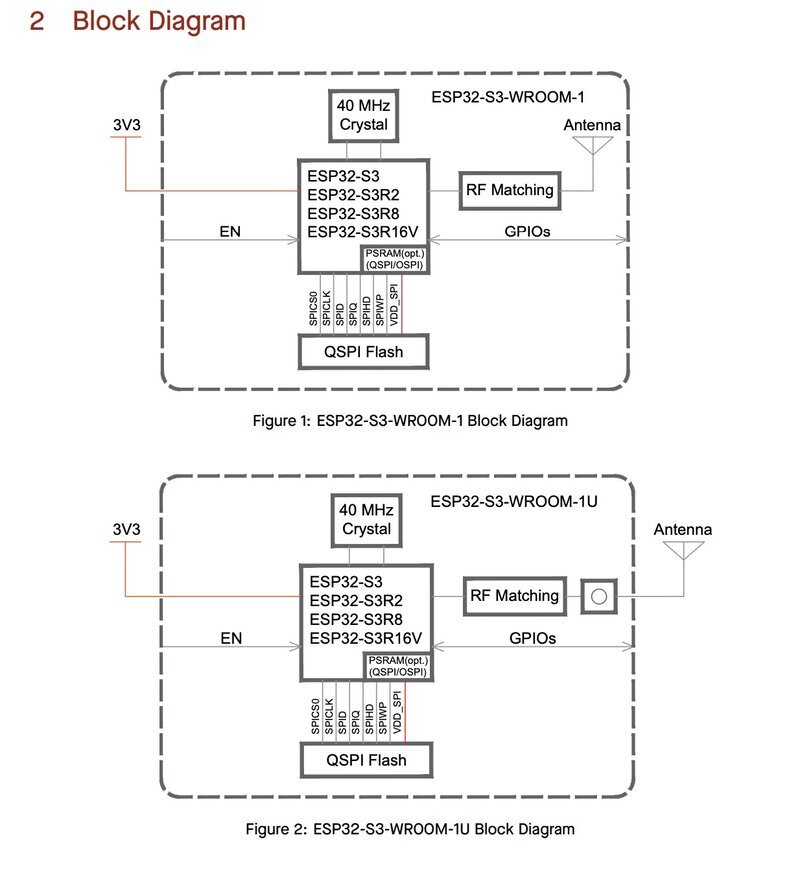
Awesome :D So, if you are resilient enough and keep browsing though it you can find extremely useful things like the block diagram (simplified graphical representation of a system that shows its main components and how they interac), the pin layout and the pin definition of each connection.
Programming the Barduino
To get started with programming the Bardunio, you first need to install the Arduino IDE, which is the software used to write and upload code to microcontrollers.
Open the IDE, then go to Preferences > Additional Board Manager URLs.
Add the following URLs to the field, one per line, to include the necessary board libraries for Bardunio:
https://dl.espressif.com/dl/package_esp32_index.json
https://raw.githubusercontent.com/qbolsee/ArduinoCore-fab-sam/master/json/package_Fab_SAM_index.json
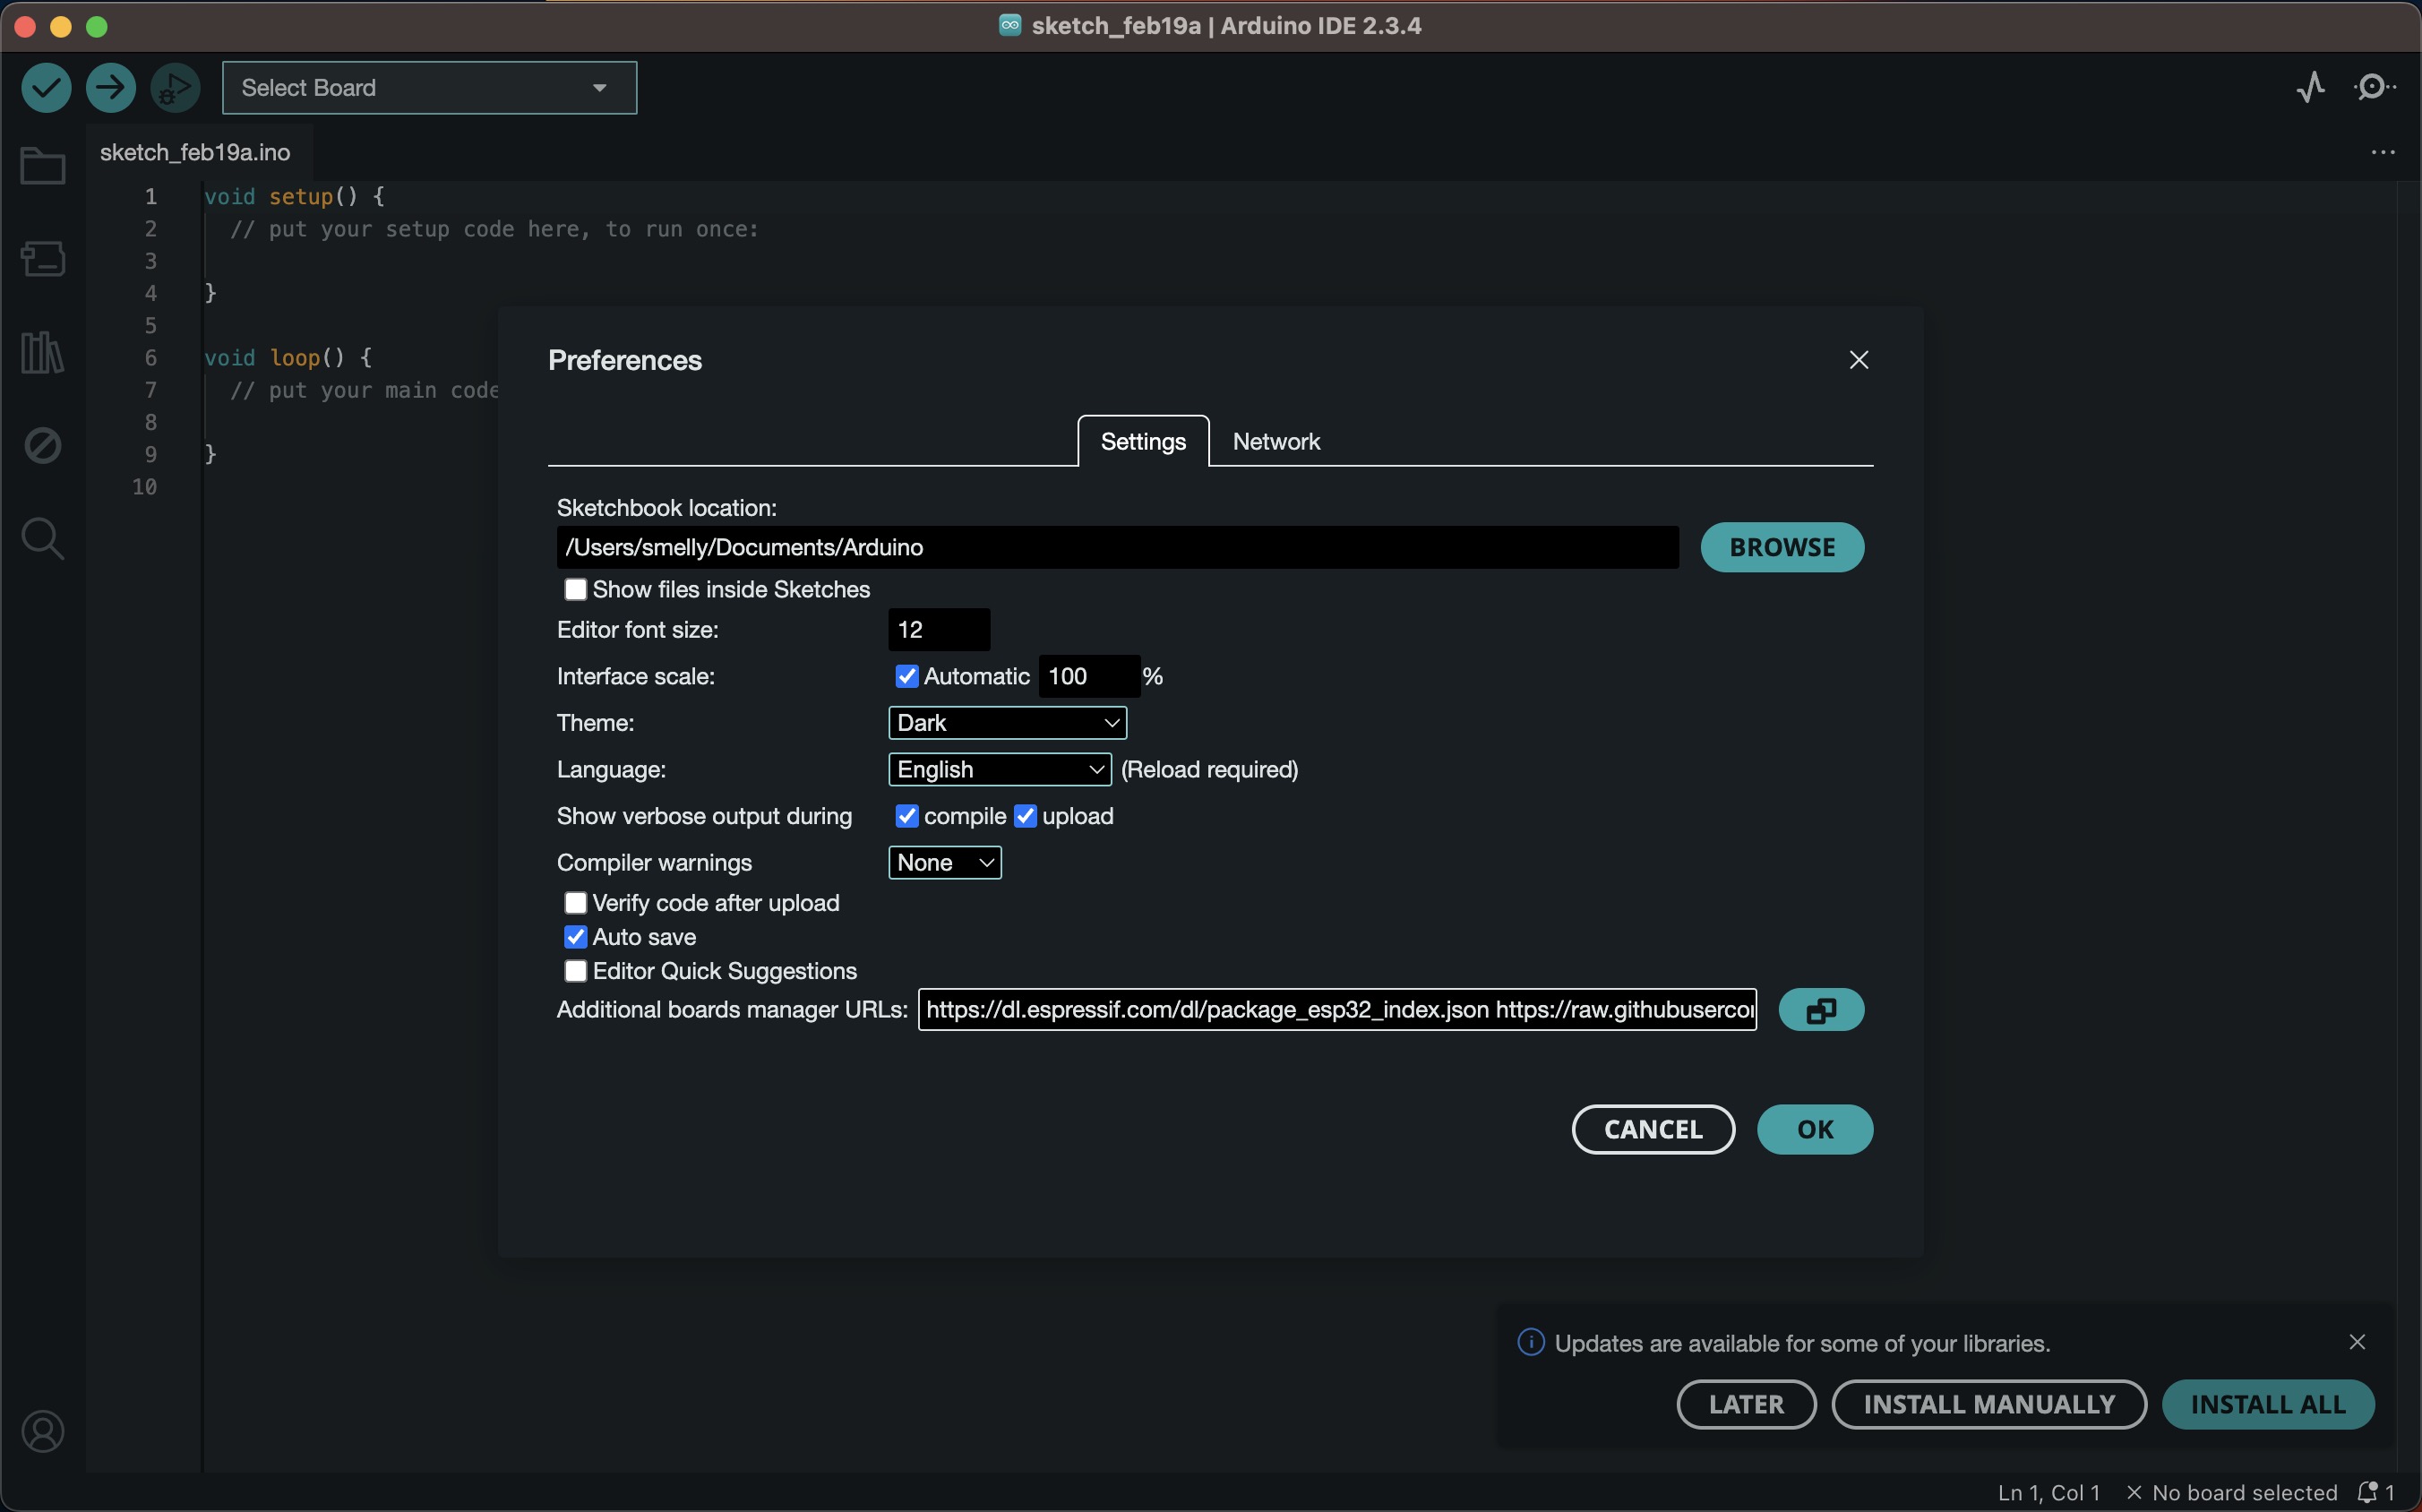
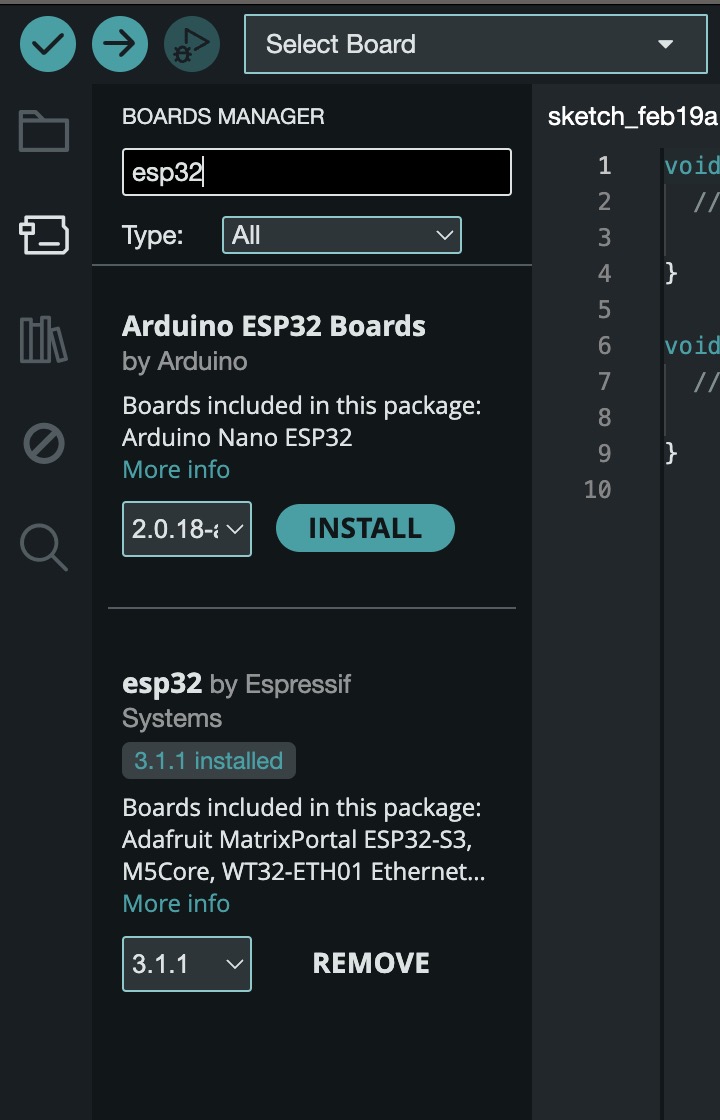
Once the URLs are added, click OK to save the preferences. Then go to the Board Manager (at the left) and browse for the ESP32 library.
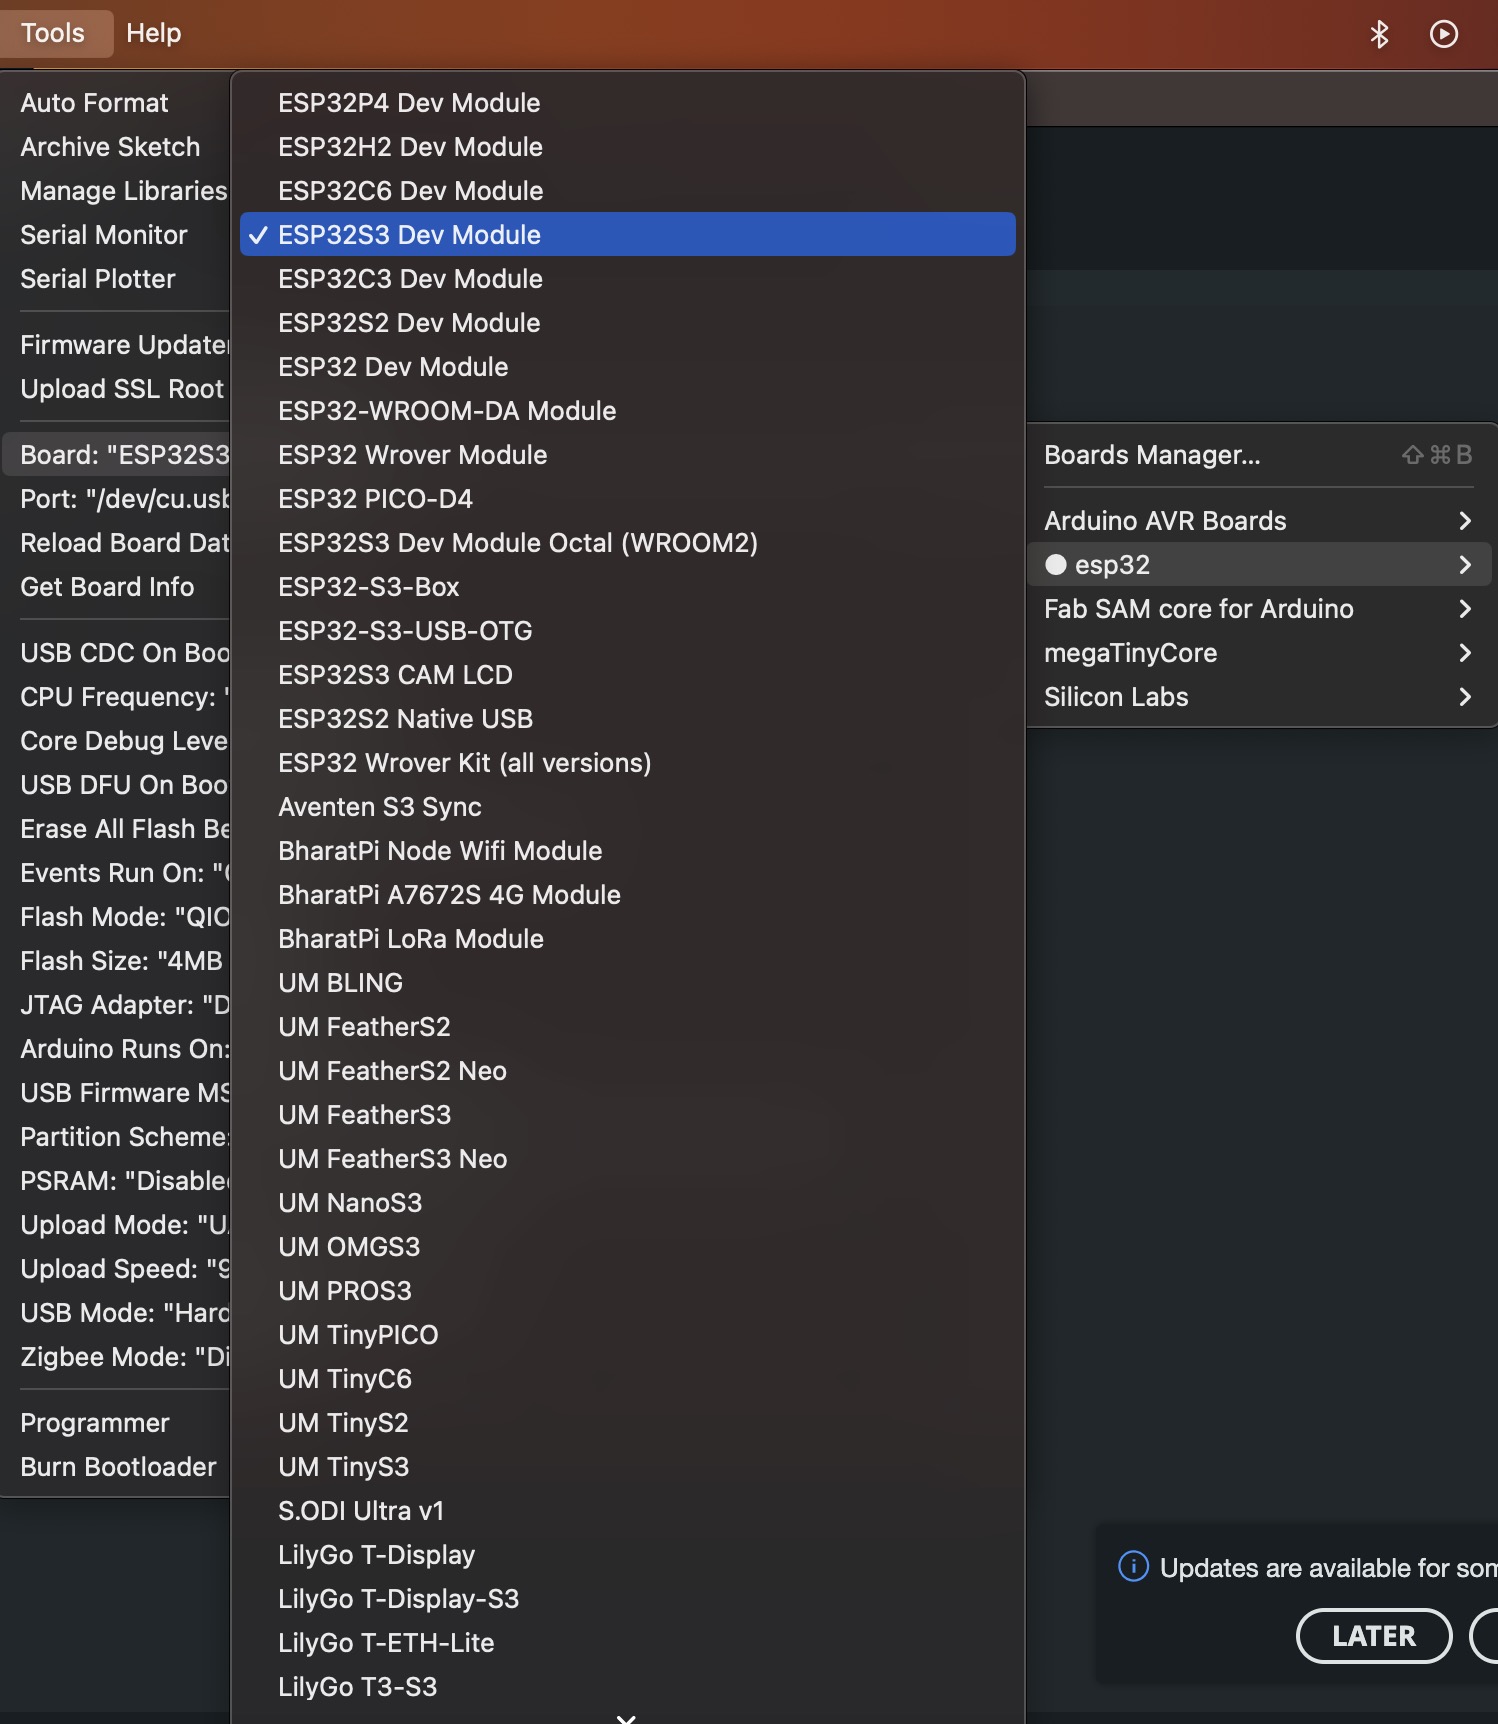
Select Your Board: Next, connect your Bardunio to your computer and open the Arduino IDE. Then, go to Tools > Board and select the appropriate board (ESP32s3 Module).
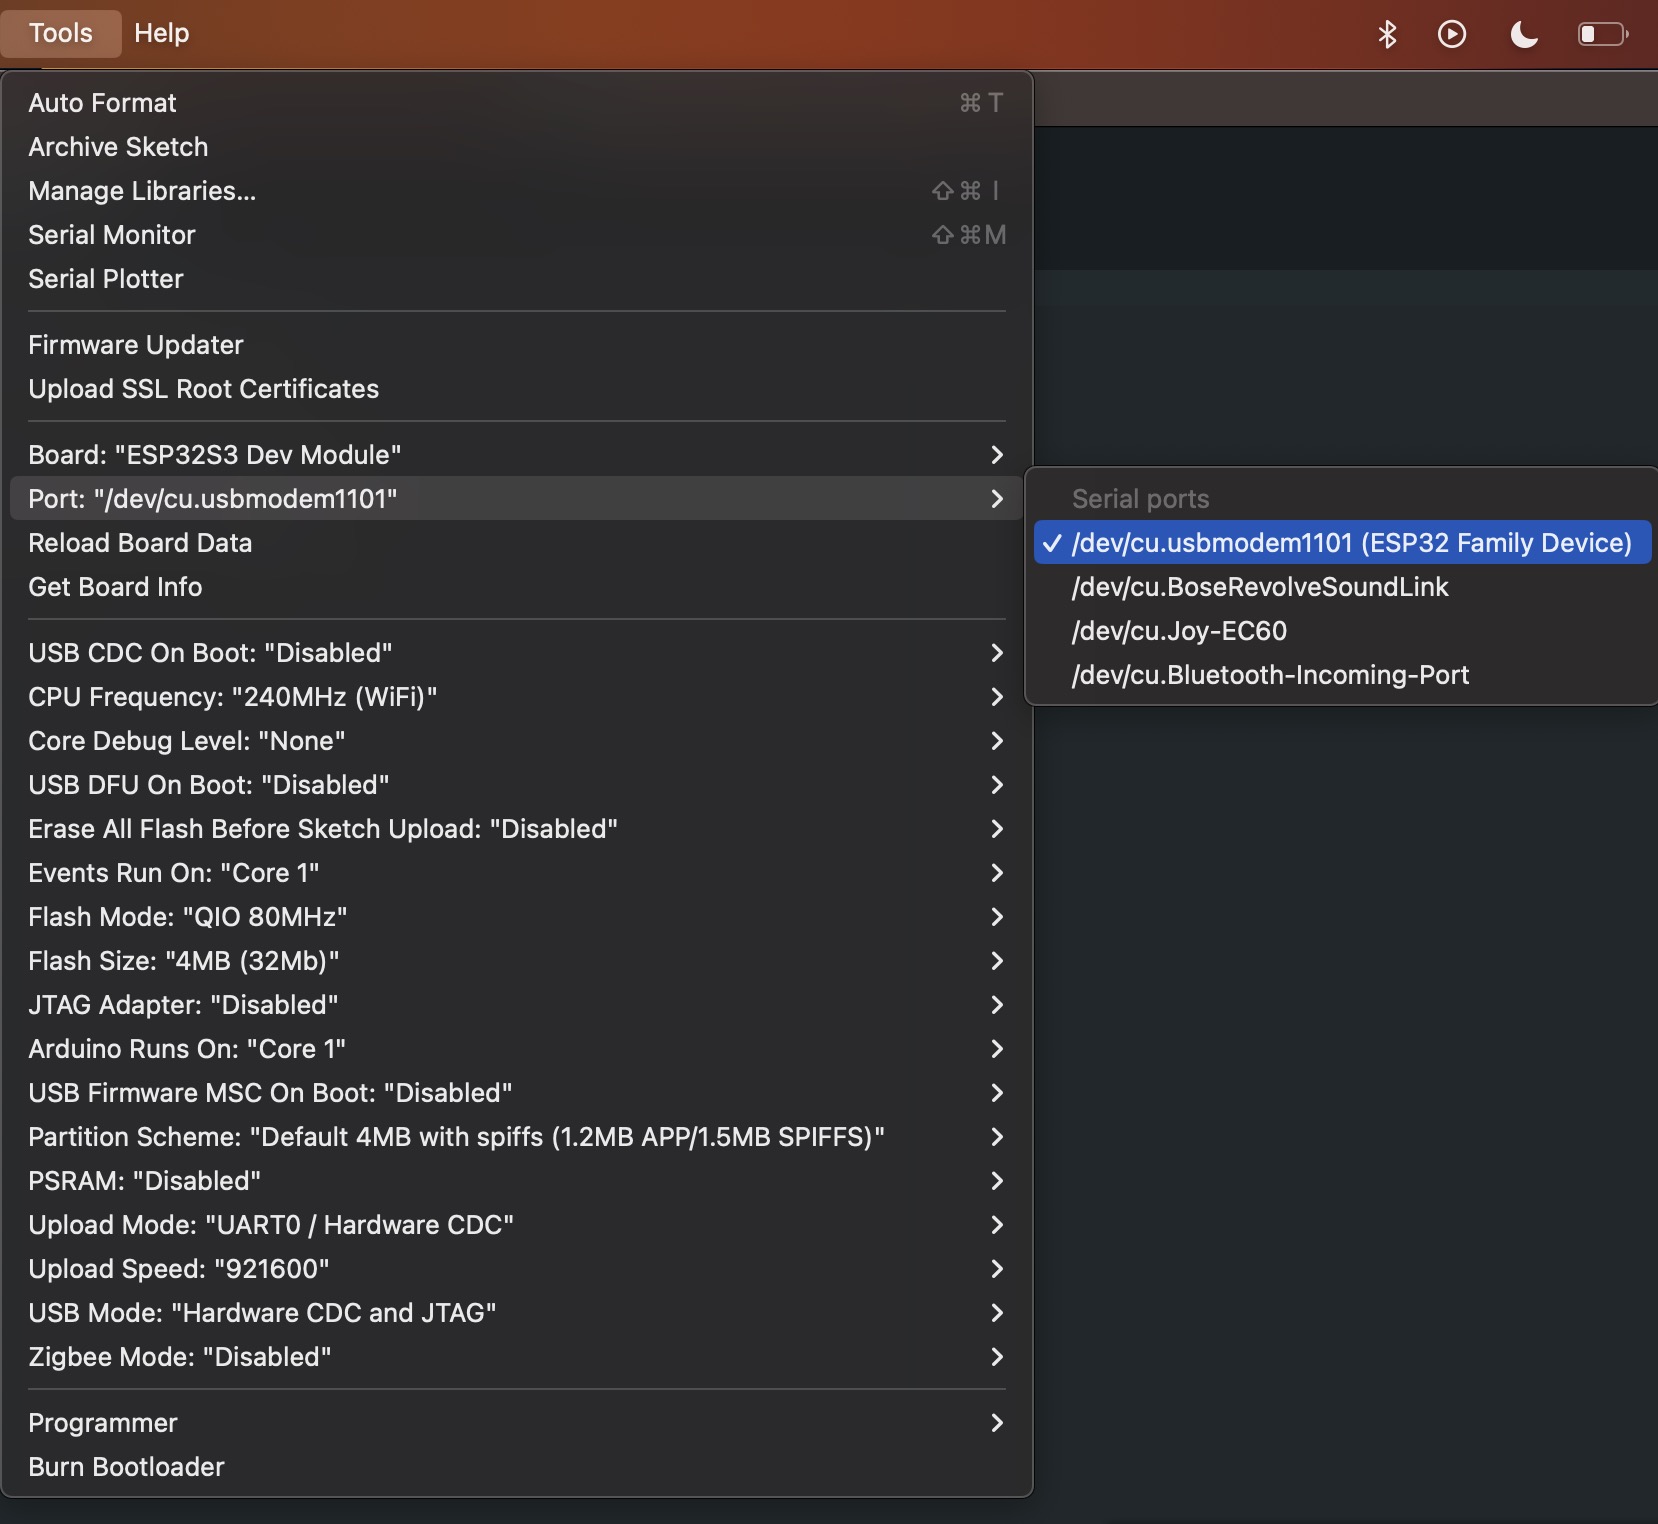
Select the Port: Go to Tools > Port, and select the correct port for your Bardunio. Usually the name of the board will pop up but if you are uncertain, just unplug your board and see which connection dissapears then you'll know.
Once these steps are completed, you’re ready to start programming your Bardunio!
Microcontroller Unit
MCU* Microcontroller Unit is a small computer on a single chip that contains a processor (CPU), memory, and input/output peripherals, all integrated into one package. It's designed to control and manage embedded systems like robots, appliances, and other devices.
MCUs are used in many applications where small, efficient, and low-power computing is required. Unlike regular computers, which require external components like a monitor or keyboard, MCUs are designed to interact directly with sensors, motors, and other hardware in embedded systems.
For example, an MCU in a Bardunio board controls how the board processes inputs from sensors and outputs to actuators, like turning on an LED or controlling a motor. These systems are programmed to perform specific tasks and are crucial in everyday electronics, from home appliances to cars and industrial machines.
The ones we will be getting familiar with at our FabLab will be the XIAO RP2040, ESP32, SAMD and ATTINY.
Keep browsing through this content at our group assigment documentation!
And follow up for more next week ;)