Week 16
This week was WILD. We did so much, from robotics to welding, to soft robotics, and embroidery. I am in love with this program. It has taught me so much. And I am very grateful to everyone who is complicit in my learning proccesses. I feel proud.
♡⸜(˶˃ ᵕ ˂˶)⸝♡
There is this idea I have been thinking of for a while now - one of many ;) .
It's about IGLOOS. I find a lot inspiration in the variations of water, specifically ice and the gradients of color it can achieve. I have never been in an igloo, but can only imagine how wonderful it must be to create life and heat inside cold material within such a hostile enviroment. Keeps me thinking... how is it that the creation of a heatsource necessary for survival keeps it functional?
I've learnt that igloos work because snow is an excellent insulator. Even though snow and ice are cold, they trap air in their structure. When a heat source (like a body, a small oil lamp, or a fire) is introduced inside an igloo, the temperature can rise to just above freezing, warm enough to sustain life, but not hot enough to melt the structure (at least not immediately).
In fact, a small amount of melting and refreezing helps to harden the inner walls, reinforcing the igloo.
So it’s almost paradoxical that survival requires warmth, yet warmth is also the undoing of the very thing that shelters you.
That tension, between cold and warmth, wearness and sustenance got me thinking on igloos as shelters, but as symbols — of human adaptability of how we coexist with extremes. Well, at least some braver people.
My surname is Simsiroglu, I am from a family of inmigrants, and I've become one myself. Everytime I move I put in a lot of effort at my home. Even though I don't know how long I might stay. It's important for me to create heat and shelter, which I can only achieve when I feel like I do at home.
I create igloos :) Simsiroglu Igloo, Simsiro-Igloo.
Digital Embroidery
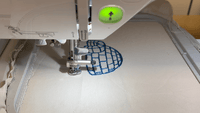
For this week I tried using the Brother Innovis NV870 sewing machine.

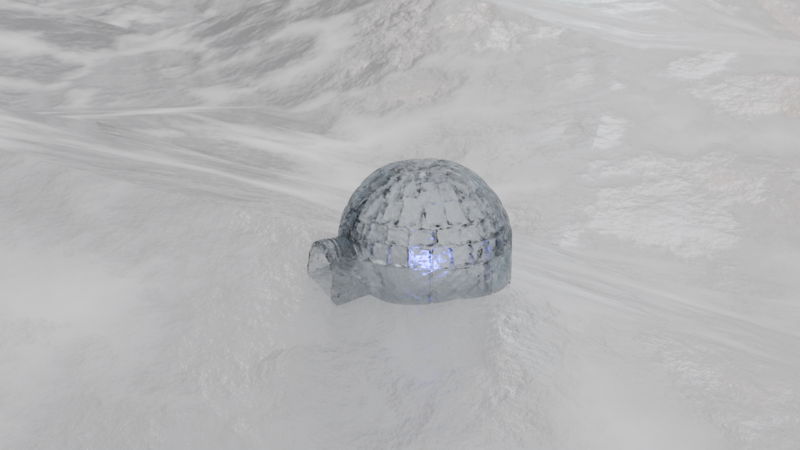
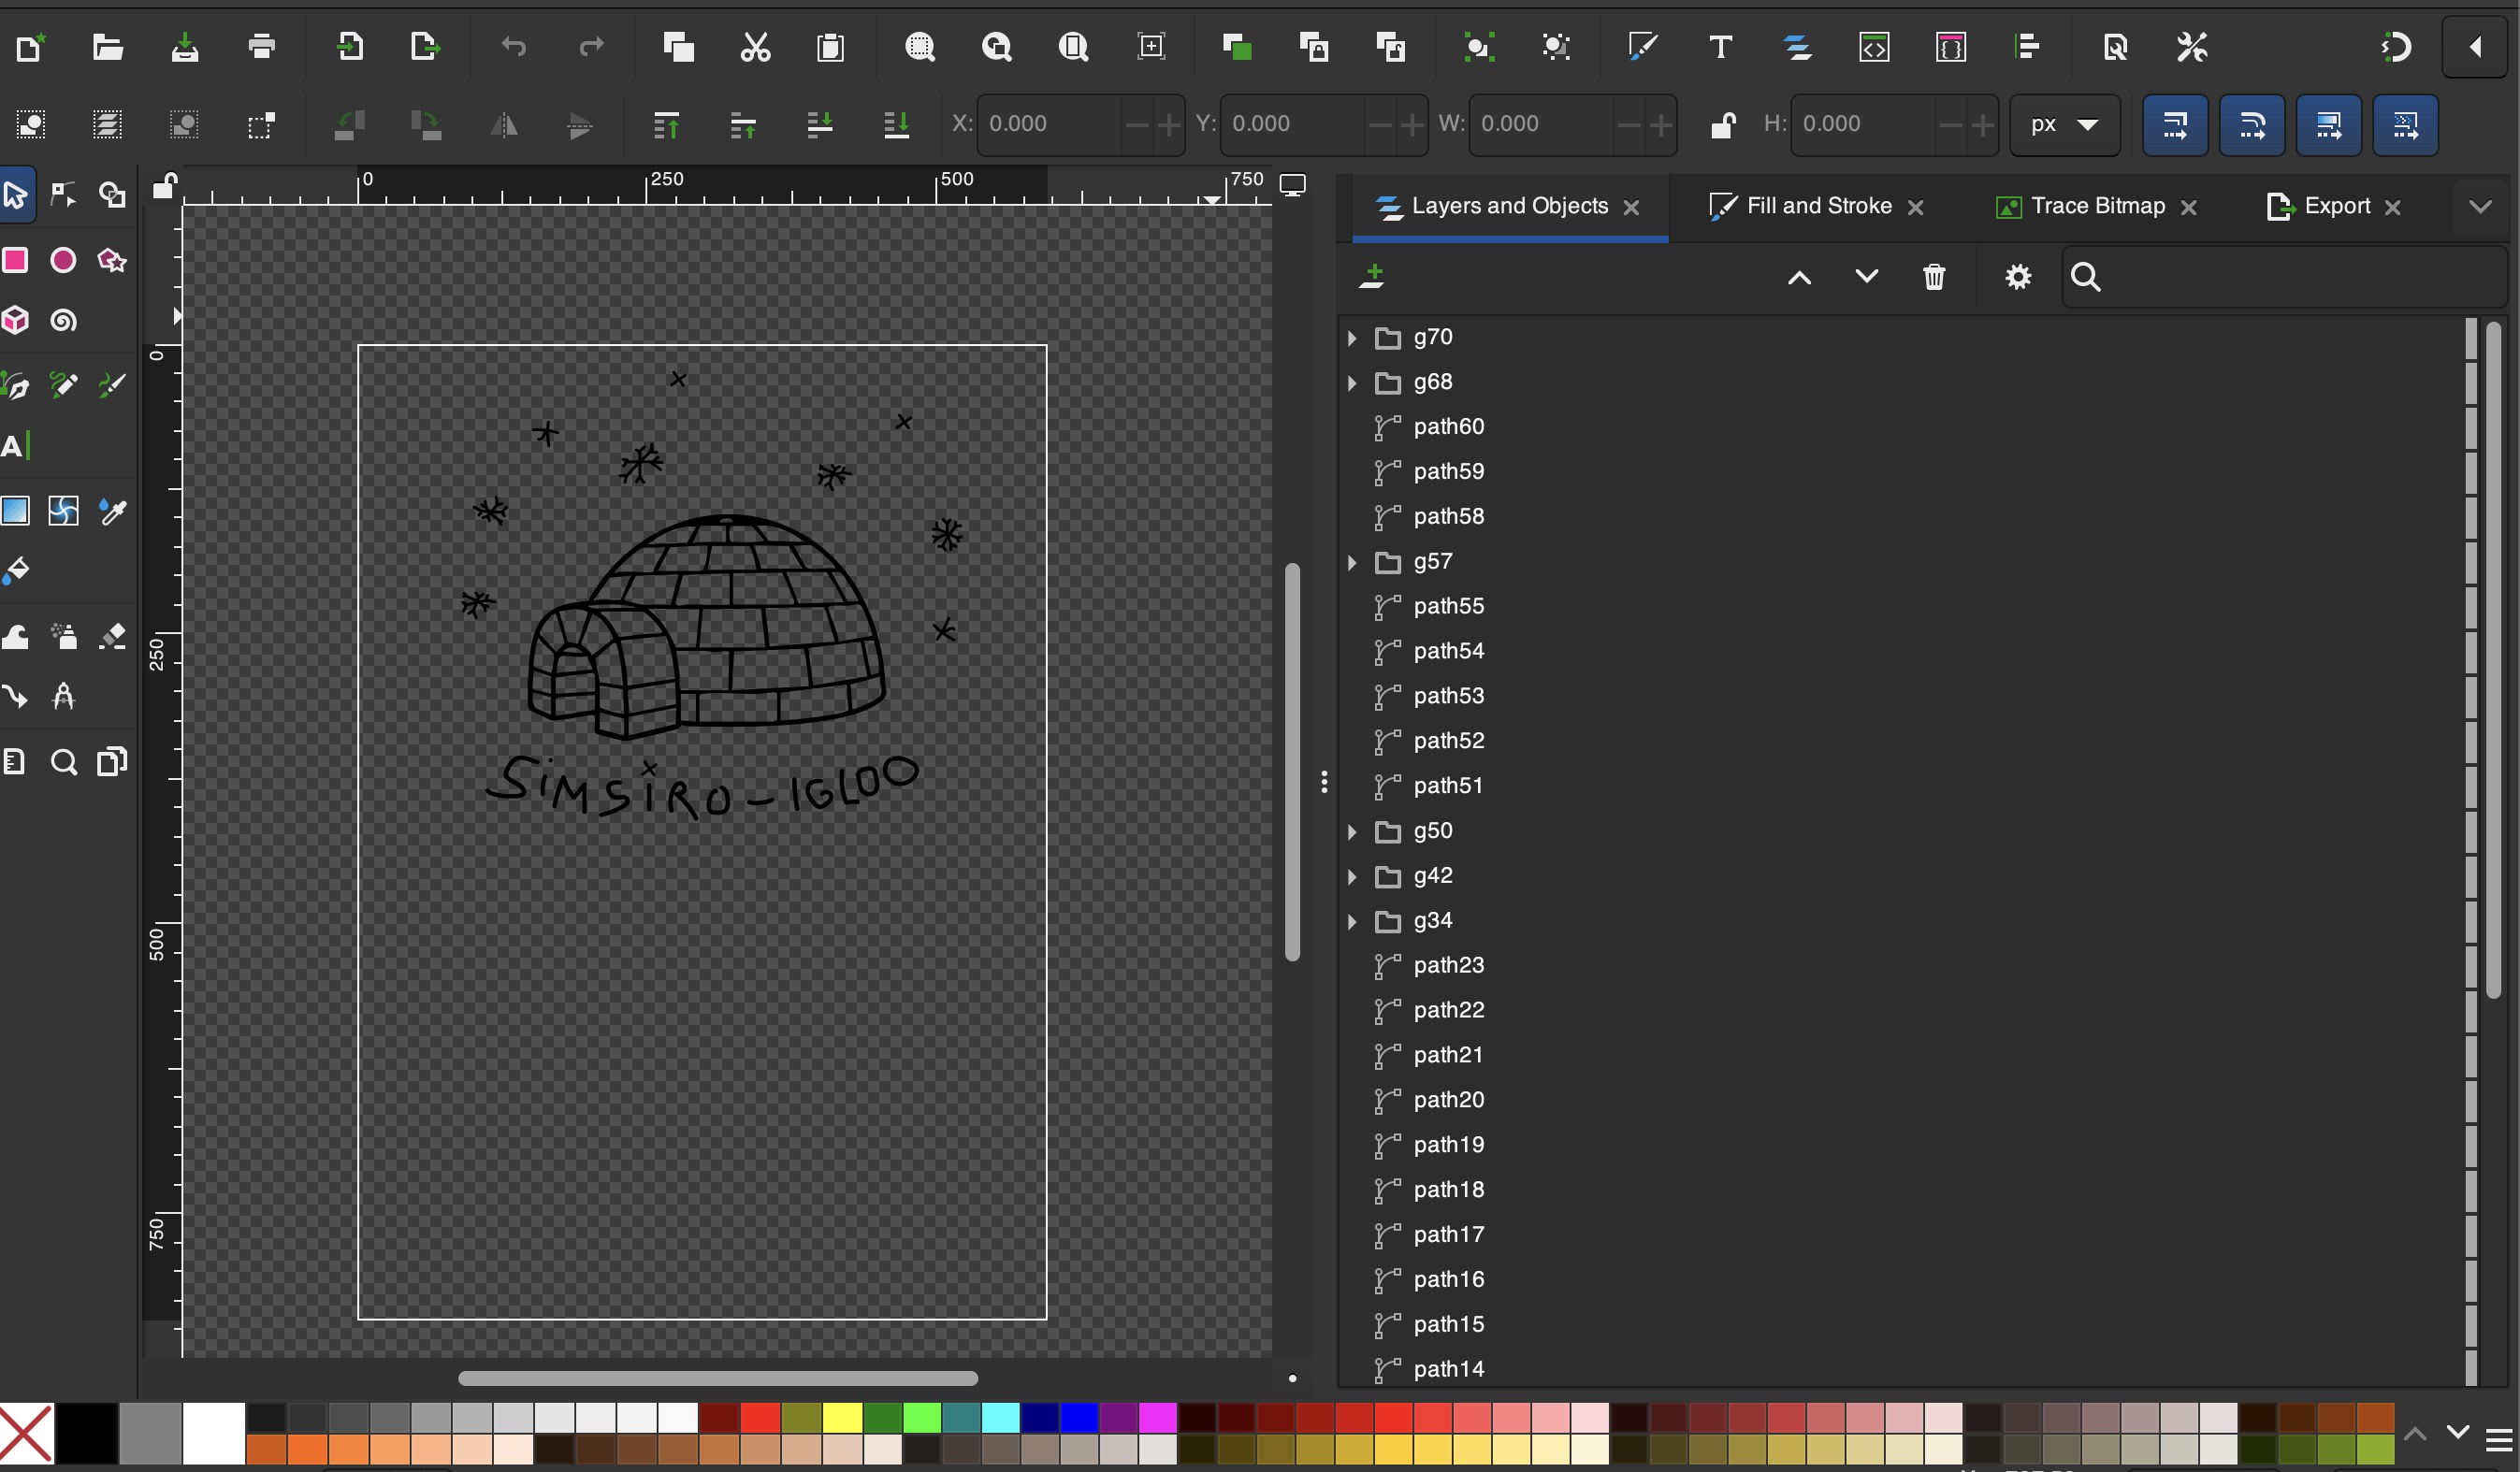
I made a design in Illustrator:

And then imported it to Inkscape:
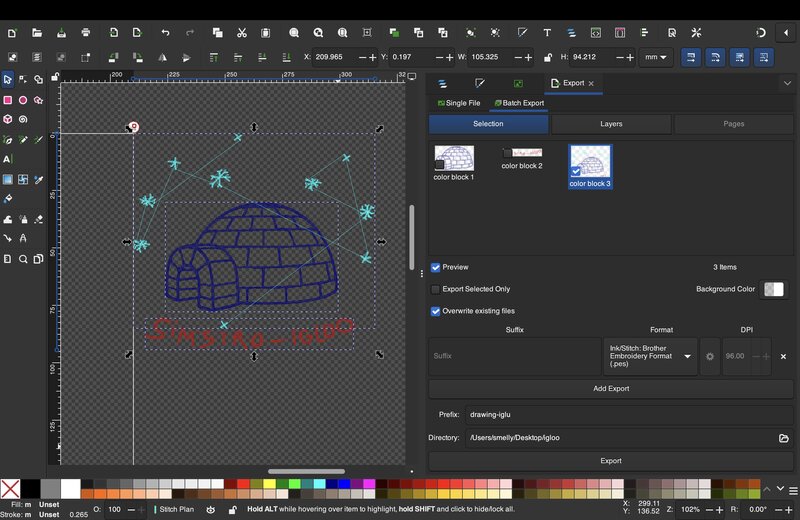
Why didn't I start right away from Inkscape? Because I am more fluent in Illustrator. However, in order to be able to talk to the machine we can only do it through an extension in Inkscape called InkStich.
I selected my design and assigned different colors to the groups, simulating how they would look once I change the threads.
Then I clicked on Extensions > InkStich > Params and assigned a Manual Stitch.

Exported it as a .pes file:
Loaded it to the machine and got kicking!
There we go :)

But that was not it. I decided to make a small resin igloo that would hold lights inside. Using to a tilt switch it would turn off whenever it was upside-down.
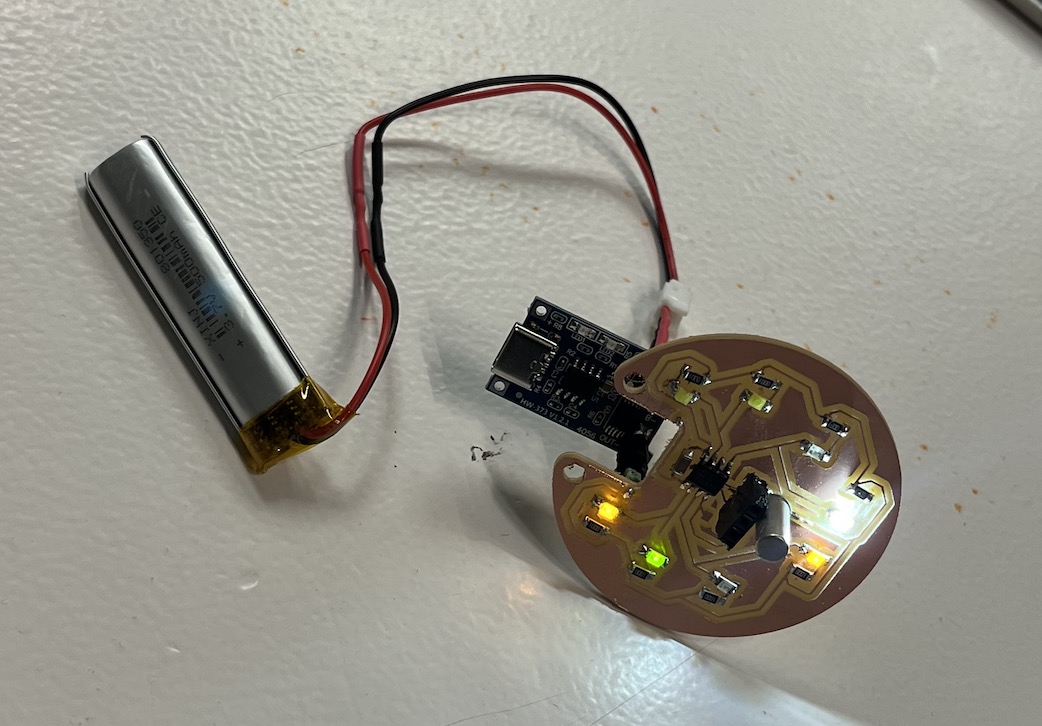
I assigned this project to wild-card week because I had been eyeing Battery Management System for quite long now, hopeing one day I could make my projects portable.
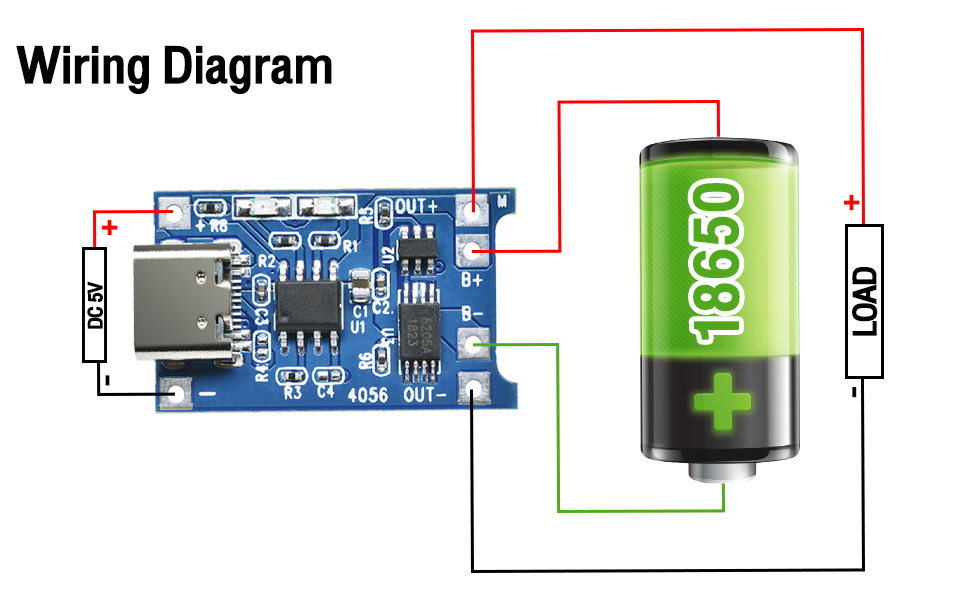
After a lot of trial and error, a lot of shipping and returning policies, I used this module called the TP4056 for charging lithium-ion batteries.
I got this LiPO 801350, 3,7 V, 500mAh battery.

The module is designed to safely charge single-cell 3.7V Li-ion or LiPo batteries from a 5V power source, which in this case is the assembled USB-C port.
Once it is unplugged from the power source, the battery takes over and charges whatever is connected to the OUT + and OUT - outputs.
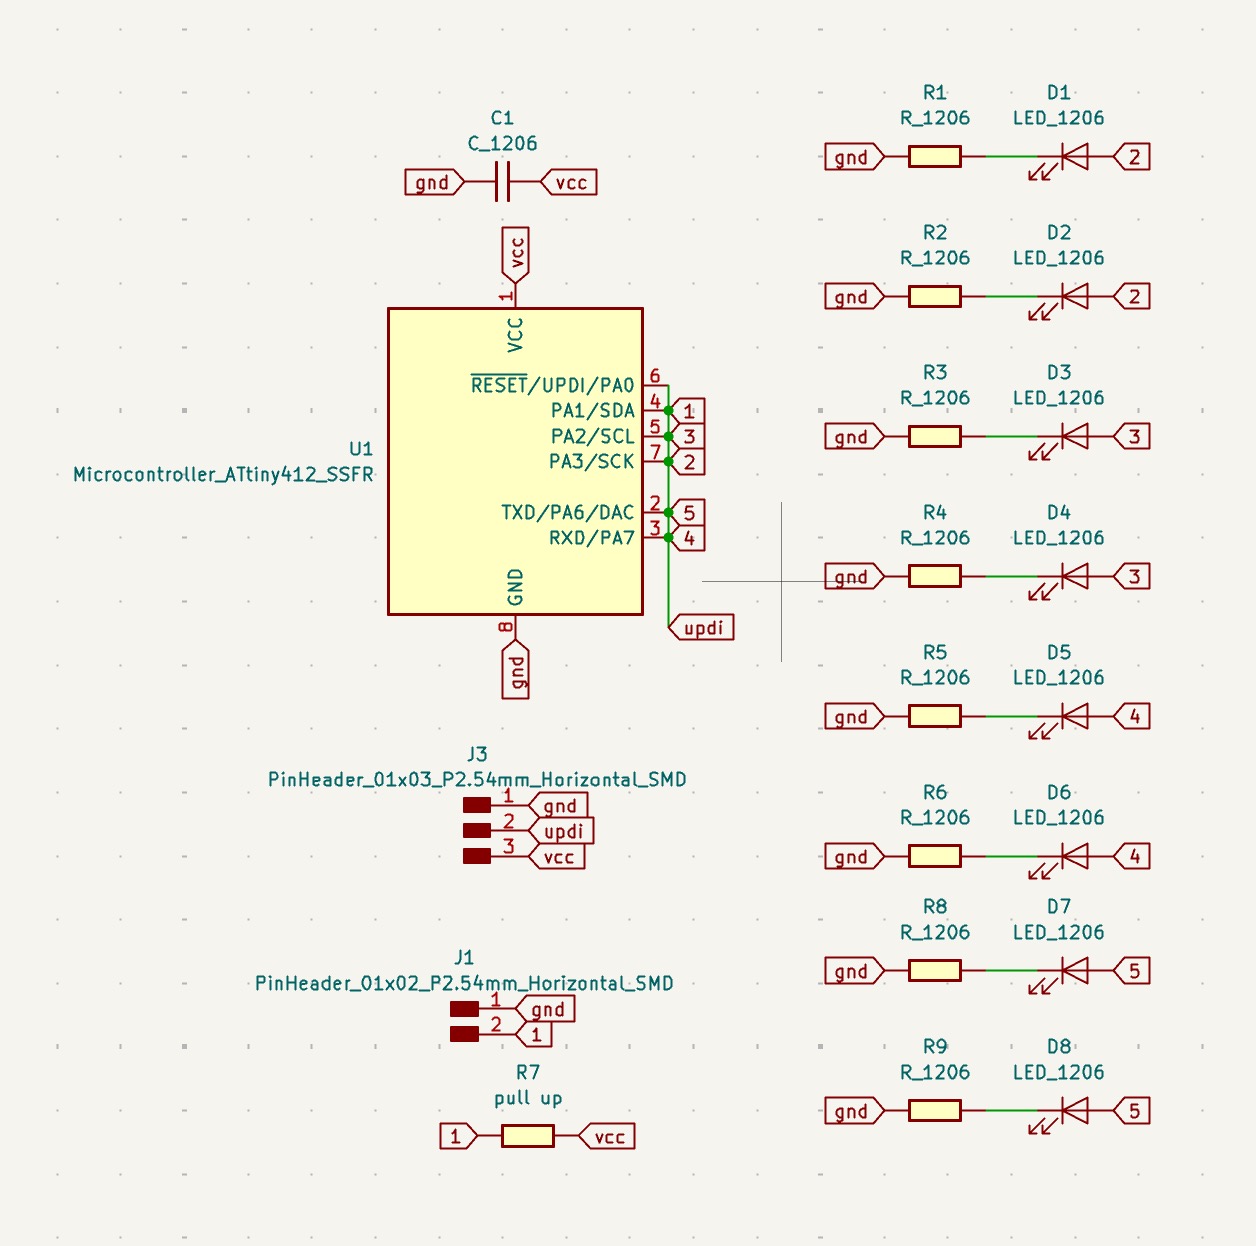
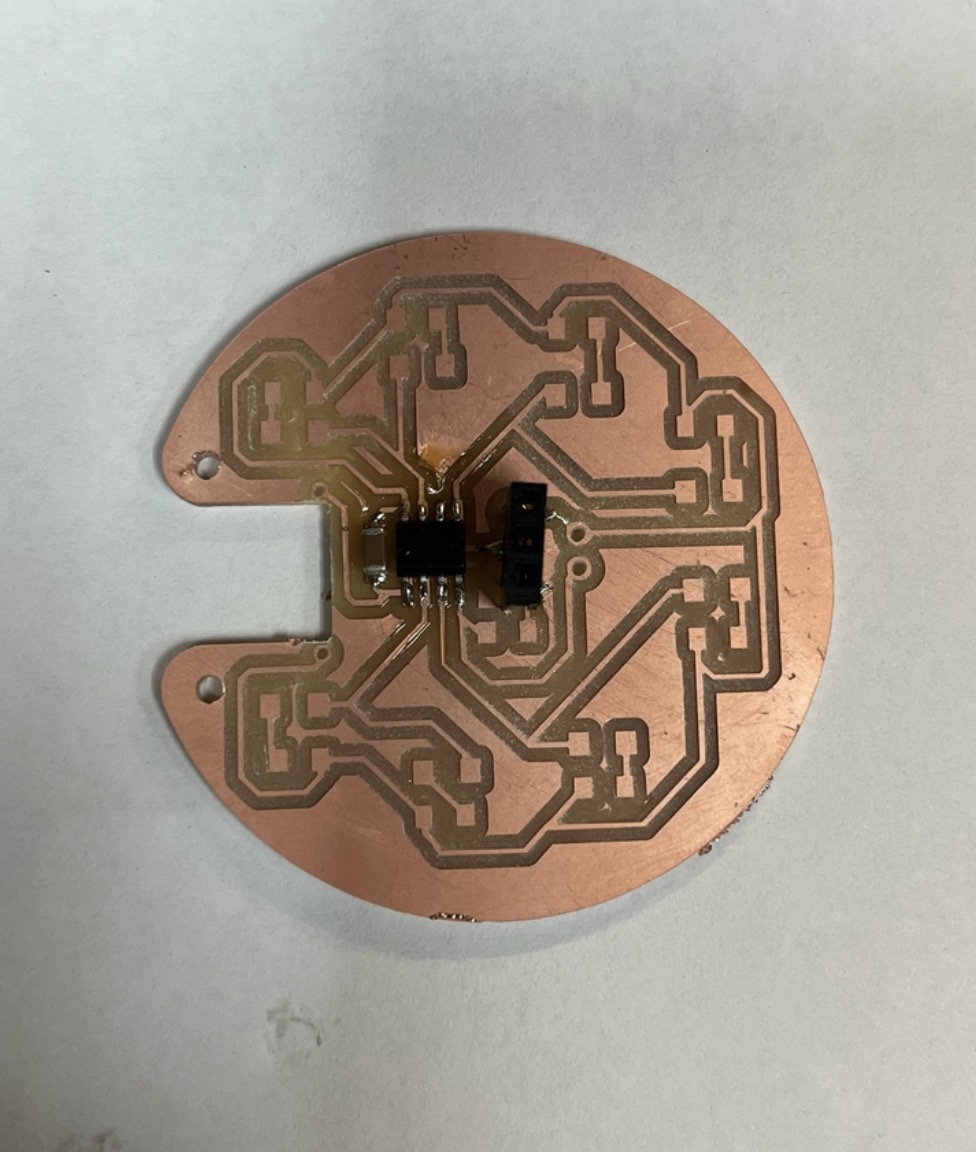
I went over to KiCad and drew the schematics.
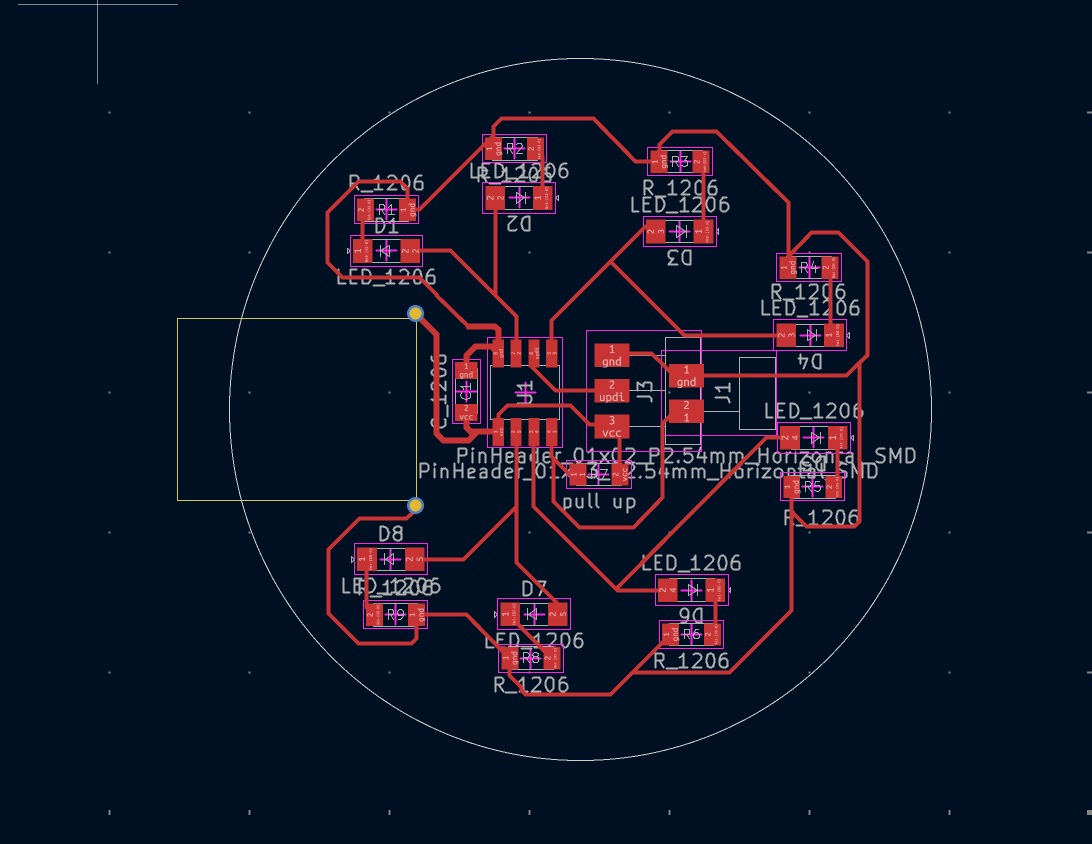
This is how it looked on the PCB editor.
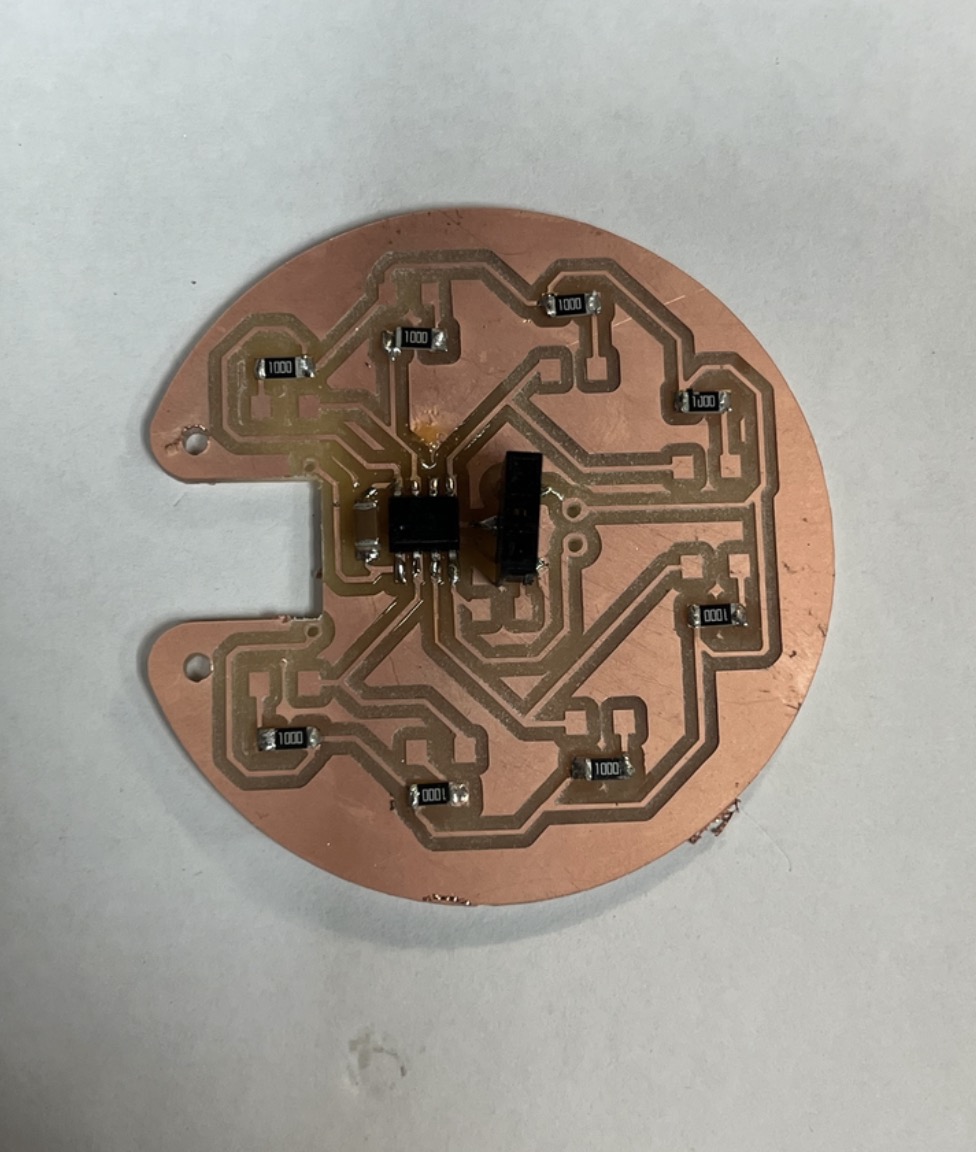
This setup includes: an ATtiny412 microcontroller, a 3-row connector header for UPDI programming, a tilt switch with a pull-up resistor, a 10 μF capacitor, and 8 LEDs arranged in 4 parallel pairs, each with its own resistor.
There are also two output pads for connecting a TP4056 charging module to VCC and GND.
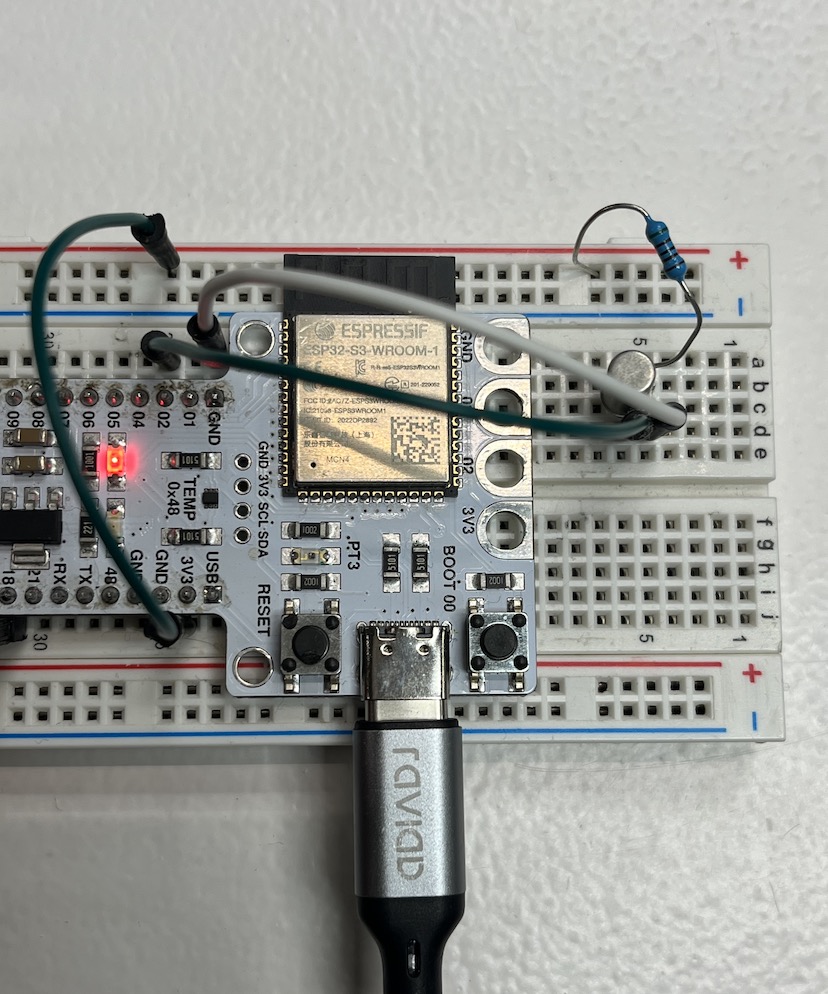
I used the Barduino to try out the tilt switch and confirm that it worked as expected with an external pull-up resistor.
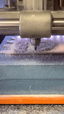
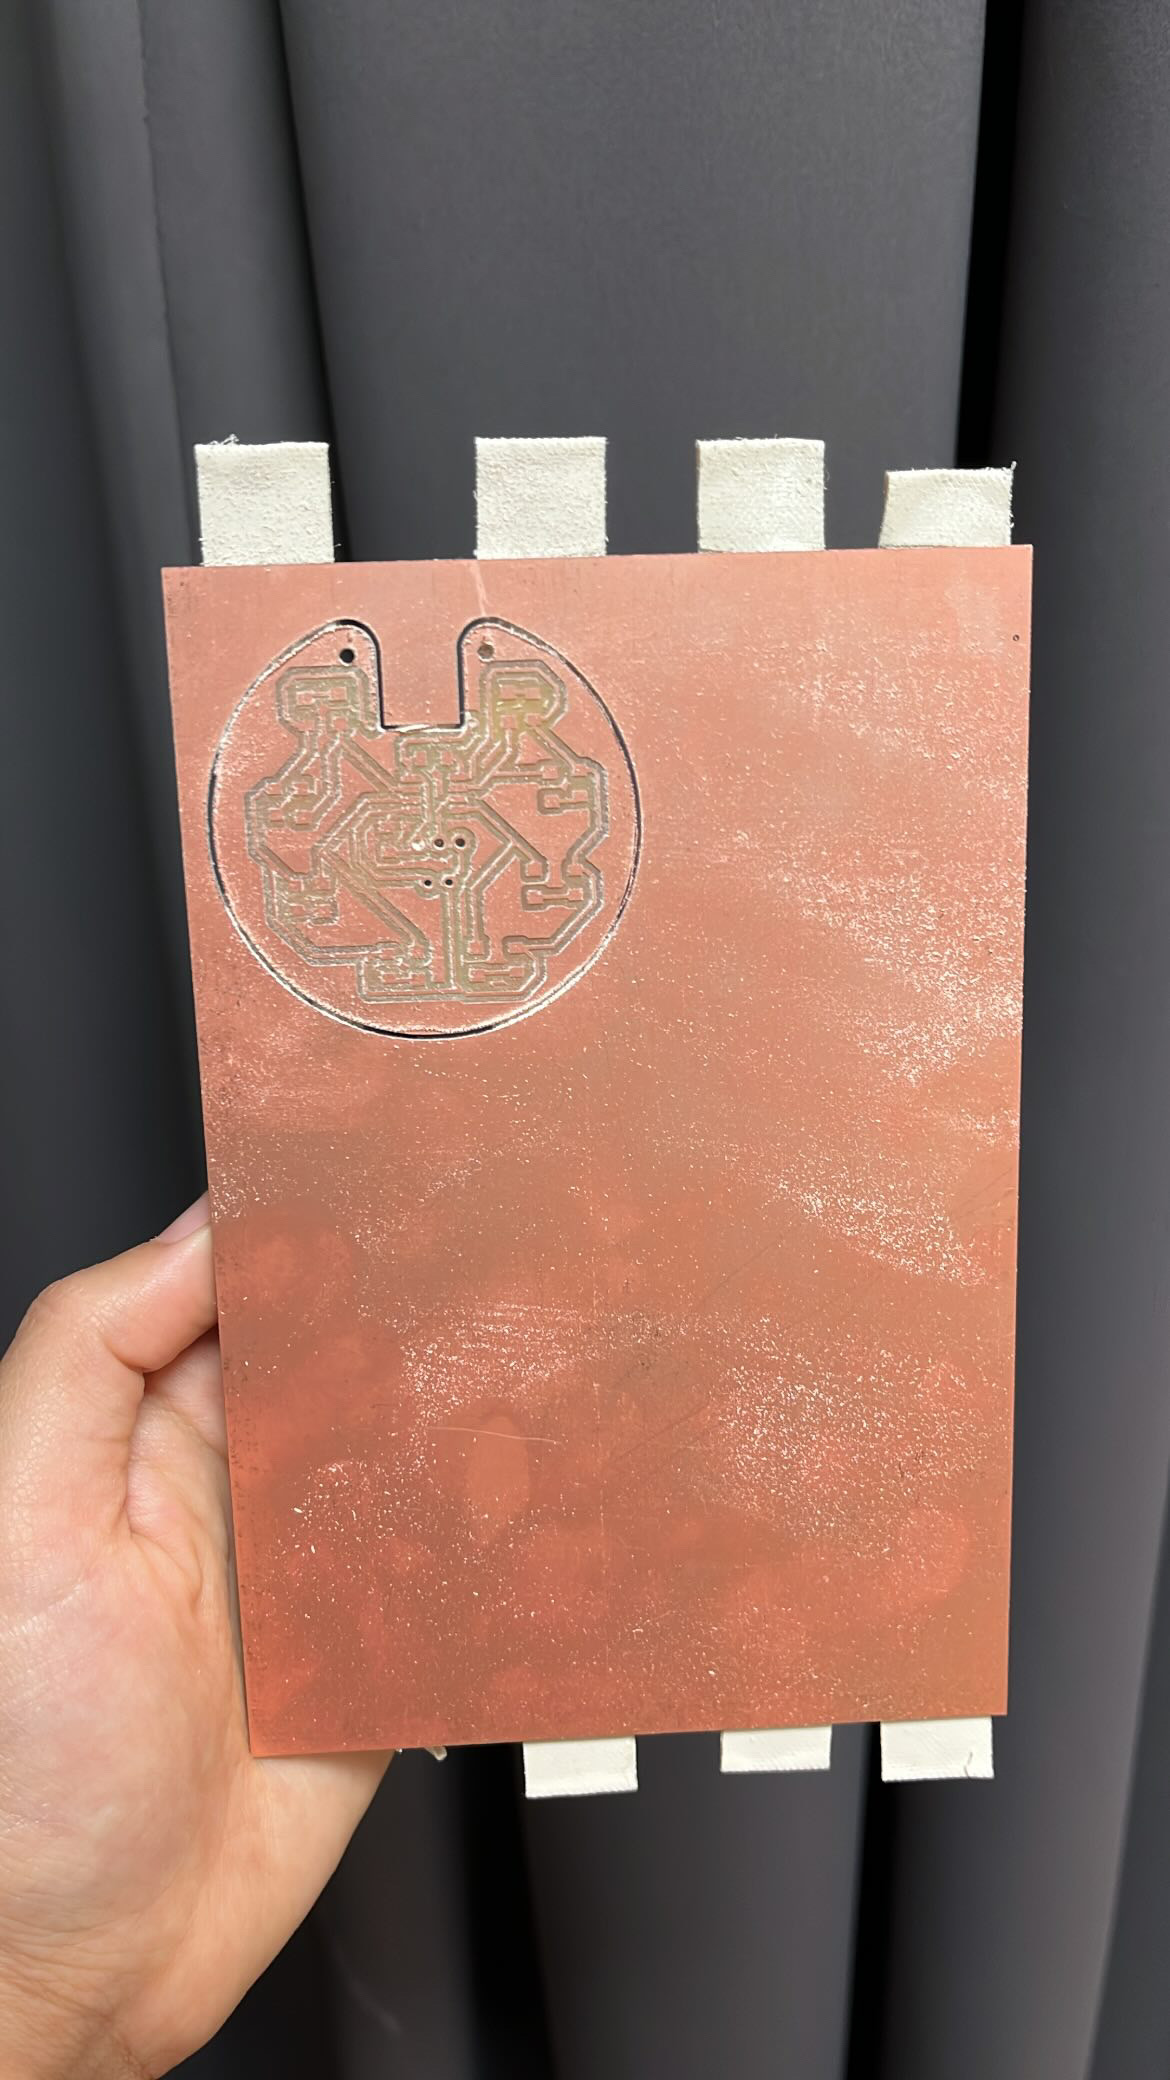
I went ahead and milled the PCB on the Roland.
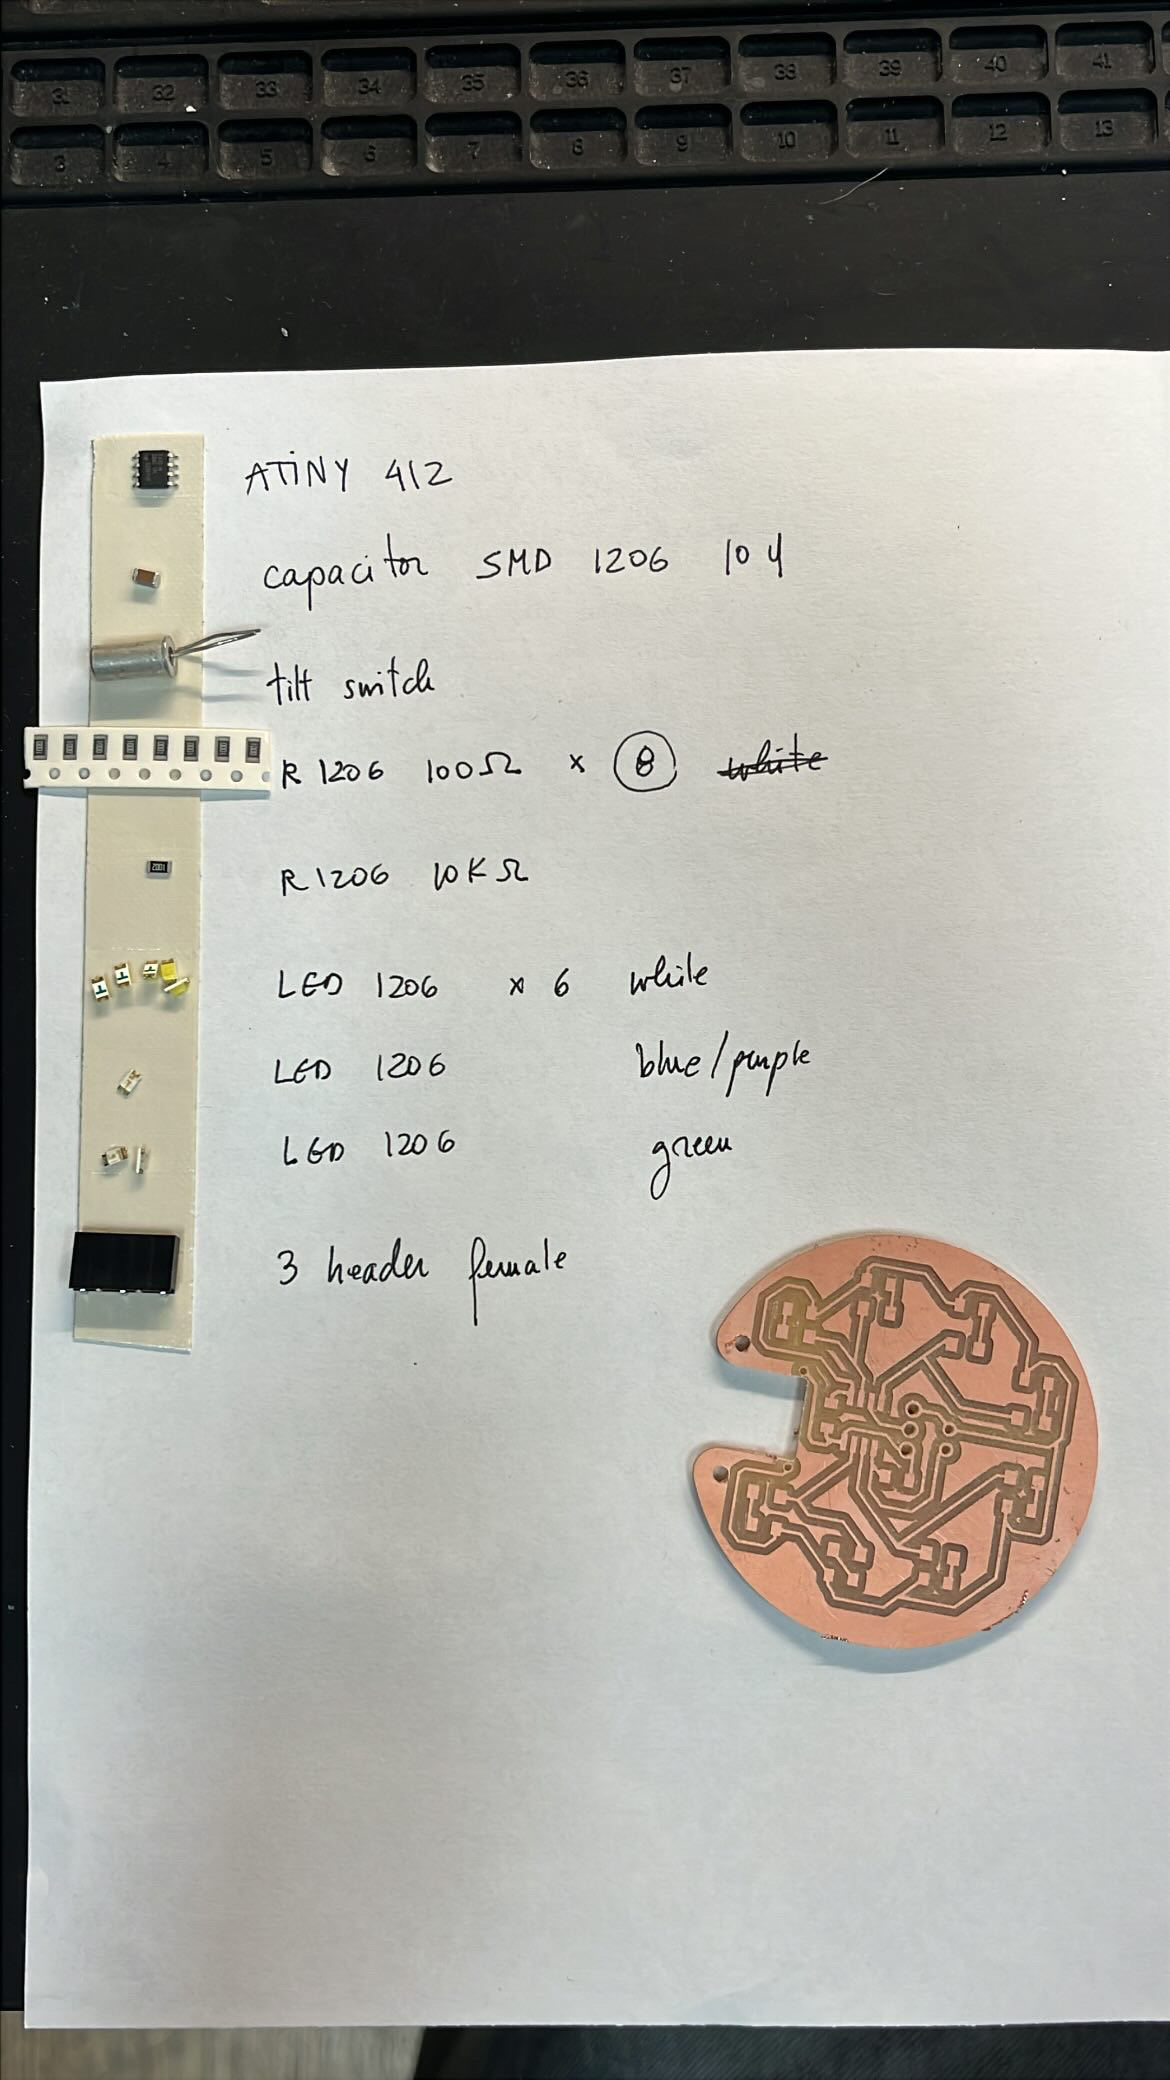
Did some soldering...
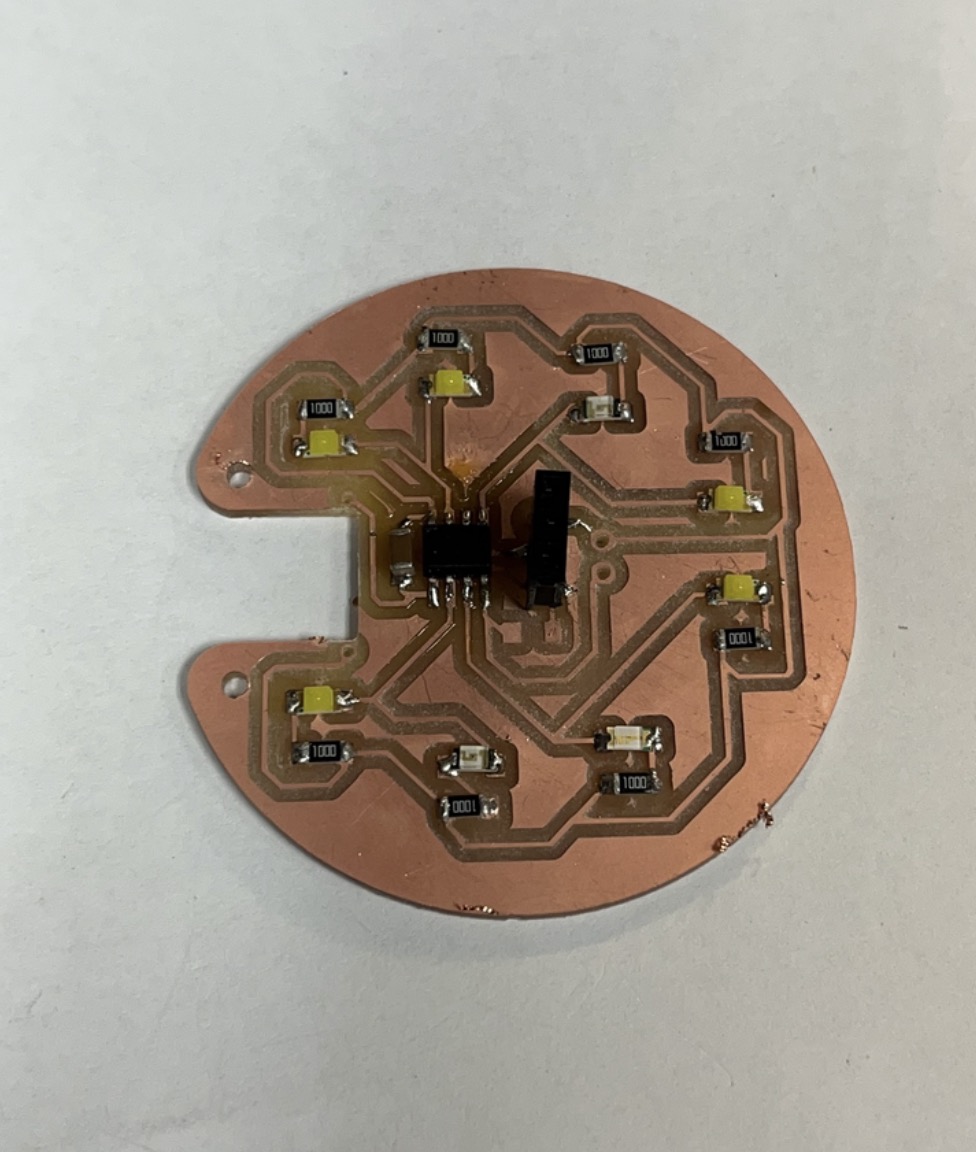

Uploaded the following code:
const int LED1 = 0;  // PA2
const int LED2 = 1;  // PA3
const int LED3 = 3;  // PA5
const int LED4 = 4;  // PA7

const int TILT = 2;  // PA4

void setup() {
  pinMode(LED1, OUTPUT);
  pinMode(LED2, OUTPUT);
  pinMode(LED3, OUTPUT);
  pinMode(LED4, OUTPUT);

  pinMode(TILT, INPUT);  // or INPUT_PULLUP if you're still unsure about the external resistor
}

void loop() {
  bool tiltActive = digitalRead(TILT) == LOW;

  digitalWrite(LED1, tiltActive ? HIGH : LOW);
  digitalWrite(LED2, tiltActive ? HIGH : LOW);
  digitalWrite(LED3, tiltActive ? HIGH : LOW);
  digitalWrite(LED4, tiltActive ? HIGH : LOW);

  delay(10); // simple debounce
}
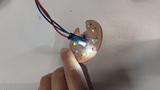
Here is the final result with the board working battery-powered.