Week 14
HeY!
This week focused on designing and developing software interfaces to communicate with the physical systems we've been building. The goal was to bridge the digital and physical worlds by creating applications that interact with input/output devices through graphical or command line interfaces.
To me this feels like an endless topic, doesn’t it? The idea that I can build countless physical devices, each capable of communicating with an equally vast number of software interfaces… Just too many possibilities.
I've got to start simple.
For now, my goal is just to blink an LED connected to an ATtiny412, triggered by clicking on an image in Processing. The image is a PNG of a vector drawing of a horse. When I click the white background, the LED turns off. When I click on the horse, it turns on.
Easy!
Let's create the code in proccessing using chatgpt with the following prompt:
Make a Processing sketch that shows an image of a horse. When I click on the horse (black pixels), send '1' over serial. When I click on the white background or outside the image, send '0'. Use brightness to check the pixel color and include serial setup.
And the code.
import processing.serial.*;

PImage img;
int imgX = 100, imgY = 100;
float imgScale = 0.5;

Serial serial;

void setup() {
  size(500, 500);
  img = loadImage("horse.png");
  img.loadPixels();

  println(Serial.list());  // List serial ports in console
  println(Serial.list()[5]);  // List serial ports in console
  serial = new Serial(this, Serial.list()[5], 115200);  // Pick the right port here
}

void draw() {
  background(255);
  image(img, imgX, imgY, img.width * imgScale, img.height * imgScale);
}

void mousePressed() {
  int scaledW = int(img.width * imgScale);
  int scaledH = int(img.height * imgScale);
  int localX = mouseX - imgX;
  int localY = mouseY - imgY;

  if (localX >= 0 && localX < scaledW && localY >= 0 && localY < scaledH) {
    int origX = int(localX / imgScale);
    int origY = int(localY / imgScale);
    int loc = origY * img.width + origX;

    if (loc >= 0 && loc < img.pixels.length) {
      color c = img.pixels[loc];
      float b = brightness(c);
      float a = alpha(c);

      if (a > 0 && b < 50) {
        println("Black pixel clicked! Sending '1'");
        serial.write(1);  // Turn ON signal
      } else {
        println("Non-black pixel clicked! Sending '0'");
        serial.write(0);  // Turn OFF signal
      }
    }
  } else {
    println("Clicked outside image! Sending '0'");
    serial.write('0');
  }
}
Awesome.
Now that i got it running let's communicate it with the Arduino IDE over serial. Wait a moment..... I can t communicate the Attiny412 because it doesn't have serial.
Oh no!
After discussing with my local instructors, we came up with the idea of using an FTDI adapter to send live data to the Attiny412 via its TX and RX pins, using UART communication—which the ATtiny412 supports.
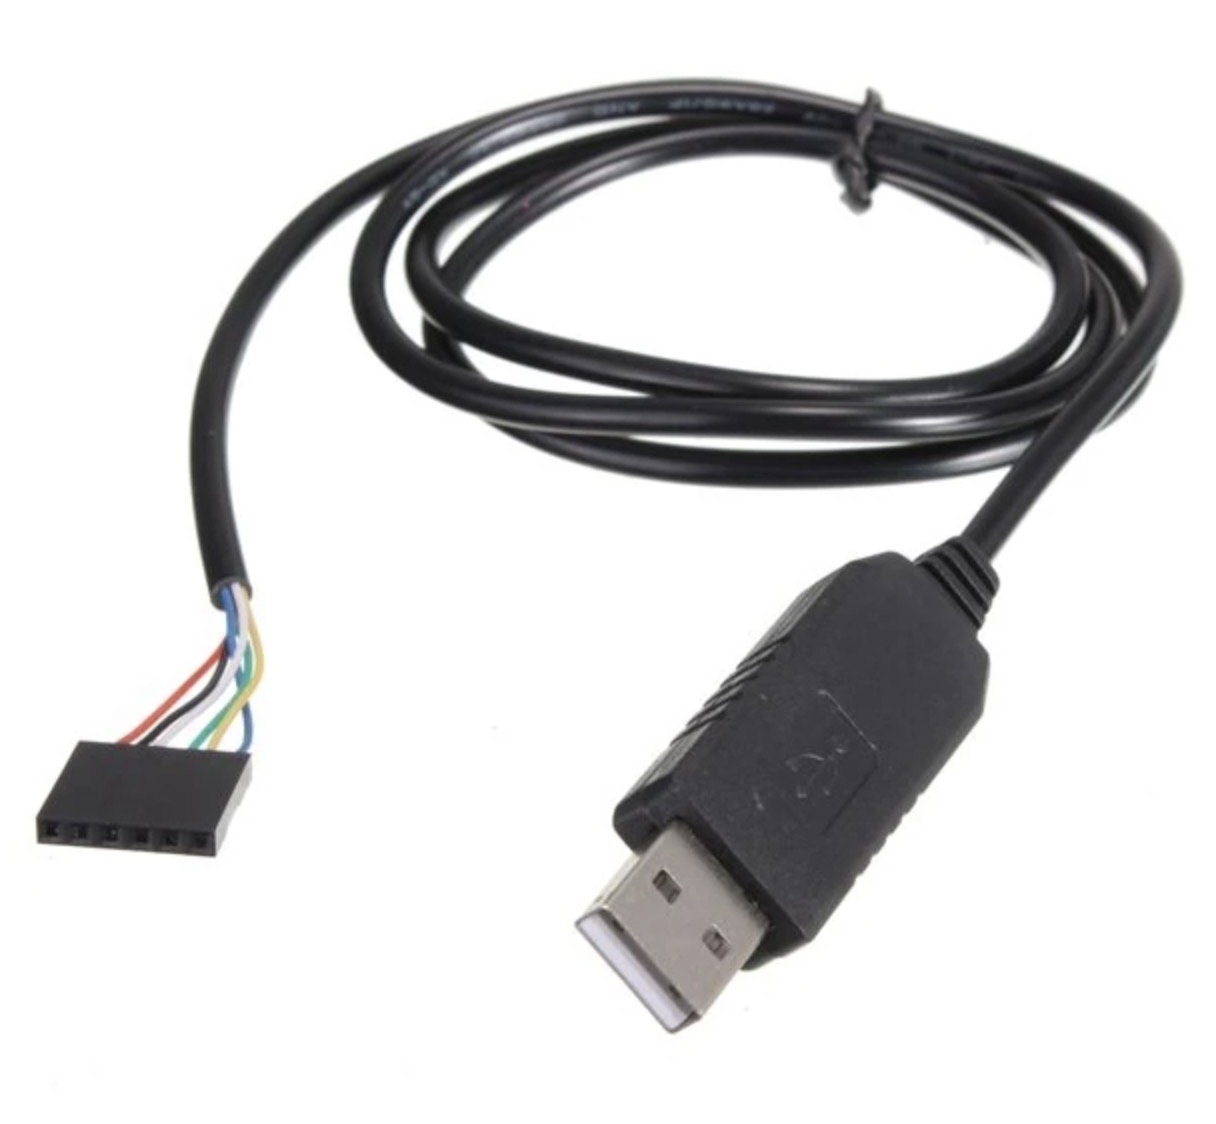
Essentially, an FTDI is a type of USB-to-Serial adapter. It allows your computer to communicate with microcontrollers or other serial devices using USB and it looks like this:
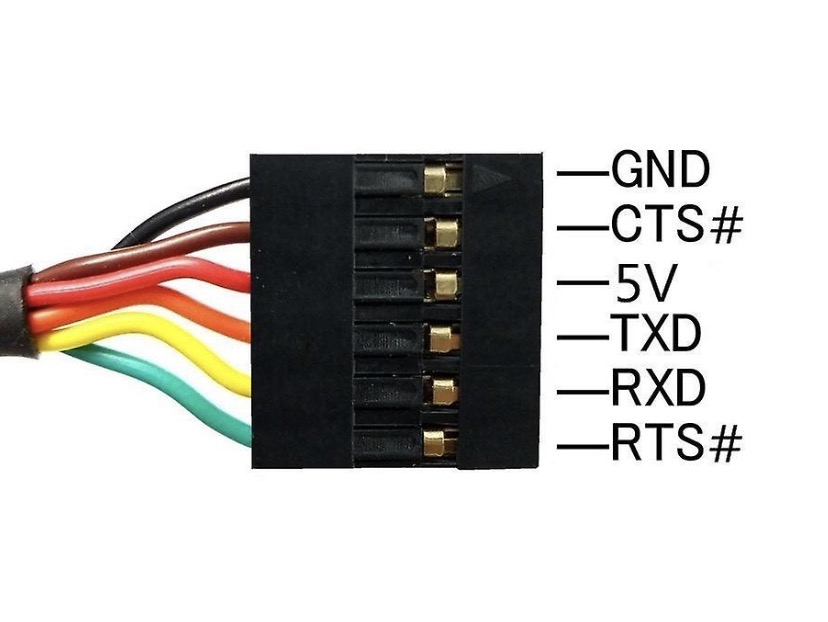
This diagram shows that the TX is the orange cable and the RX is the yellow one.
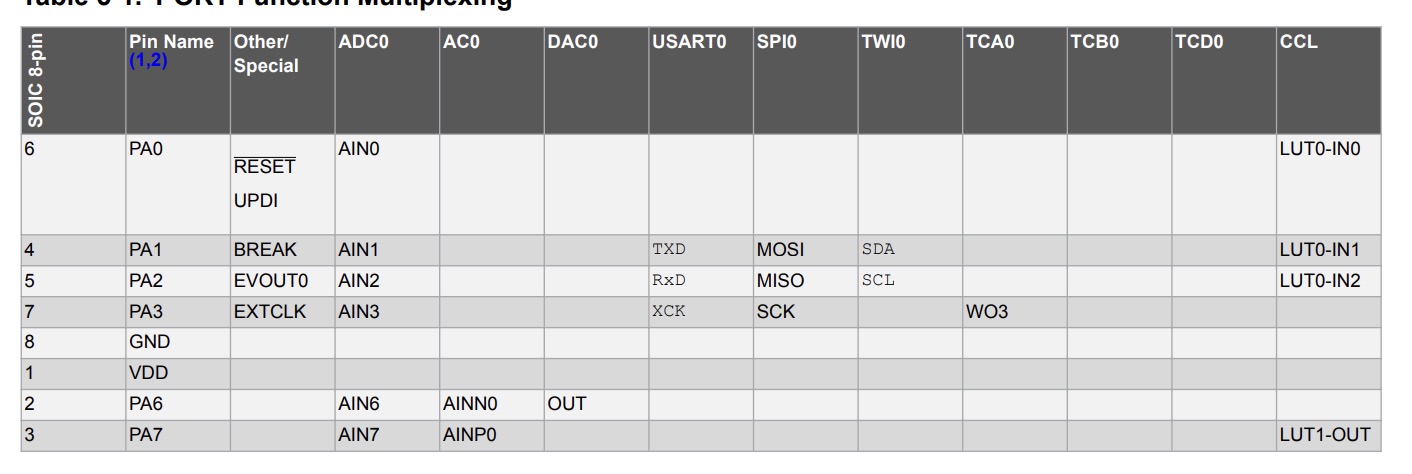
From the pinout of the Attiny412 we see that RX is PA2 and TX is PA1.
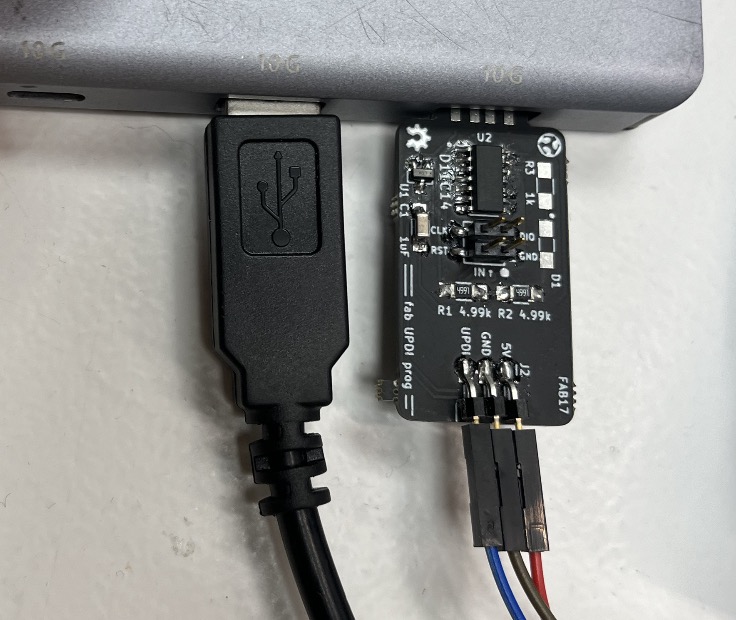
The plan is to upload the code to the ATtiny412 through the UPDI pin, and then use the RX pin to receive data from Processing, sending simple integers (1 or 0) to control the behavior.
This was my setup.
I uploaded the following code:
void setup() {
  // put your setup code here, to run once:
  Serial.begin(115200);
  pinMode(2, OUTPUT);
}

void loop() {
  // put your main code here, to run repeatedly:
  while (Serial.available()>0){
    int state = Serial.read();
    if (state == 1){
      digitalWrite(2, HIGH);
    }
    else{
      digitalWrite(2, LOW);
    }
  }
  delay(100);

}
What this does is read an integer from the serial data sent by the Processing sketch through port 5, where the FTDI is connected. The ATtiny412- also connected via UPDI for programming - listens on its RX pin for this serial data via FTDI.
The received integer is then interpreted via UART to turn the LED on or off. Like this!
Every project I’ve done with the ATtiny412 has taught me something new. Just when I think I’ve got it figured out, it surprises me again. It’s truly an amazing little chip, and I’m really glad I chose it for so many projects.
This is my short appreciation post for the ATtiny412. Don't forget to check out our group documentation for this week. See you next one. Bye!