10. Mechanical design - Machine design
Hero shot
group assignment
- design a machine that includes mechanism+actuation+automation+application
- build the mechanical parts and operate it manually
- actuate and automate your machine
- document the group project and your individual contribution
You can find our group page here and this week group assignement here
Through our discussion, we decide to create a ceramic printer.
Planification
First we read some documentation and watched videos about it. Anoush and Michelle shared us some links for inspiration :
- https://www.bryancera.com/cerastruder
- https://3dprinting.com/news/transform-your-3d-printer-into-a-versatile-paste-extrusion-add-on/
We first agreed on the general design of the machine, which is a Cartesian machine inspired by the Ender CR10S5 with a DirectDrive extrusion. Considering the presumed weight of the tank, a movable bed on the Z axis seemed more relevant to us to avoid overloading the motor. Then, we divided the tasks: Alexis took care of the bed and the overall structure of the machine, Jean-Come handled the motor programming and then worked on the X and Y axes, and Pol-émile worked on the extrusion system.
I also contacted Adel Kheniche (maker, fabmanager and former Fabac student and instructor) I met last year in a FabLAb in Genneviliers, whose experimenting ceramic printing for about a year to share experiences whit it, advantages and inconvenients with the printer he uses…
Bed and overall structure
Bed first sketch
I took measurements of the potential oven that will be used to dimension the printing surface. The width is 39cm, the depth is 40cm, and the height is 44cm.
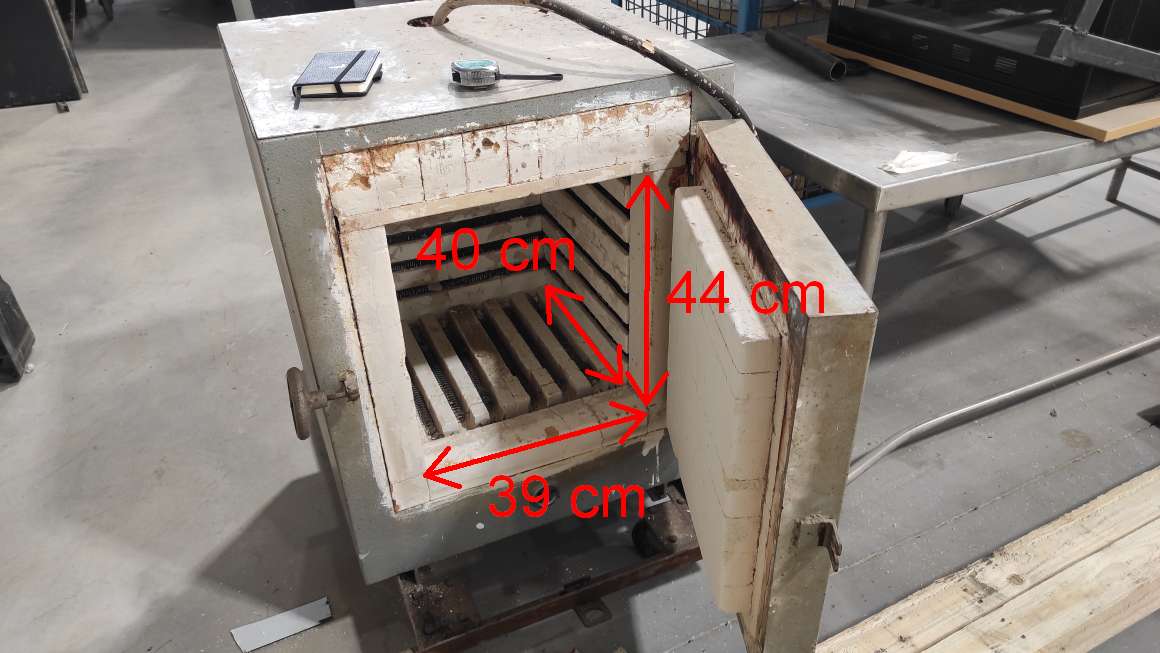
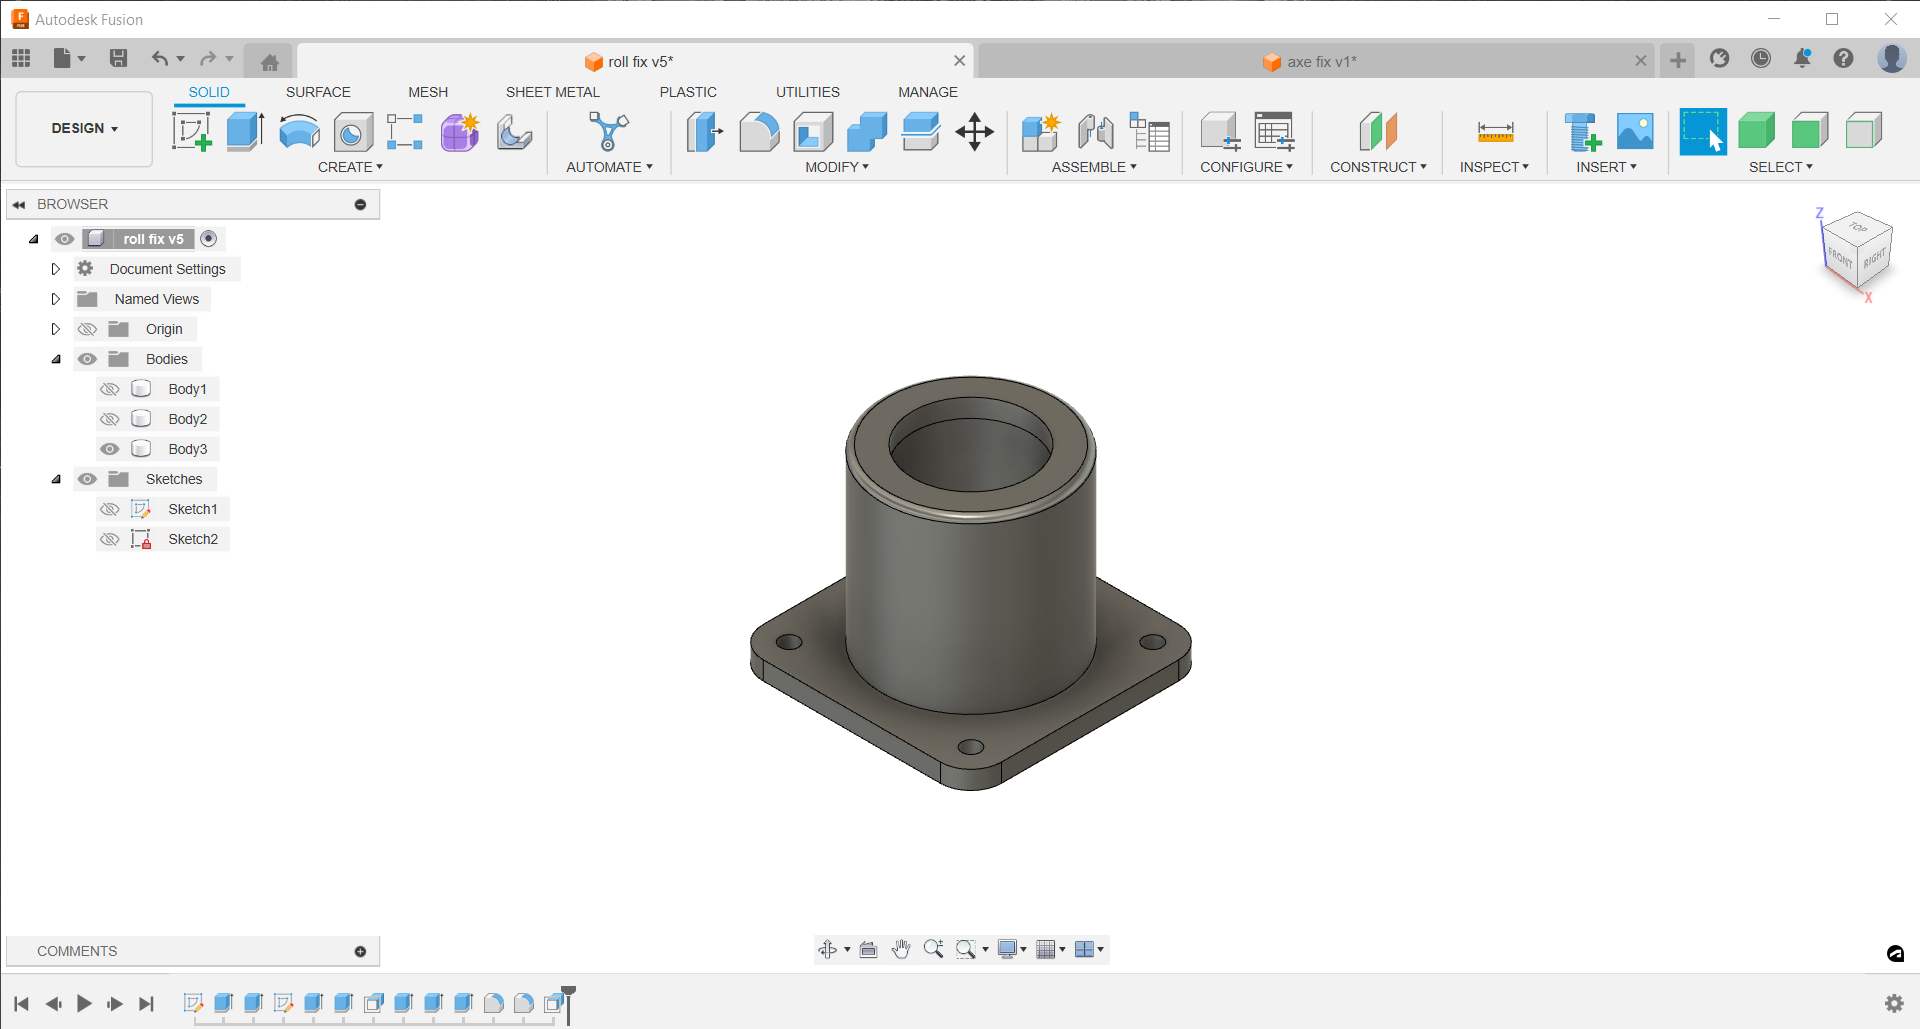
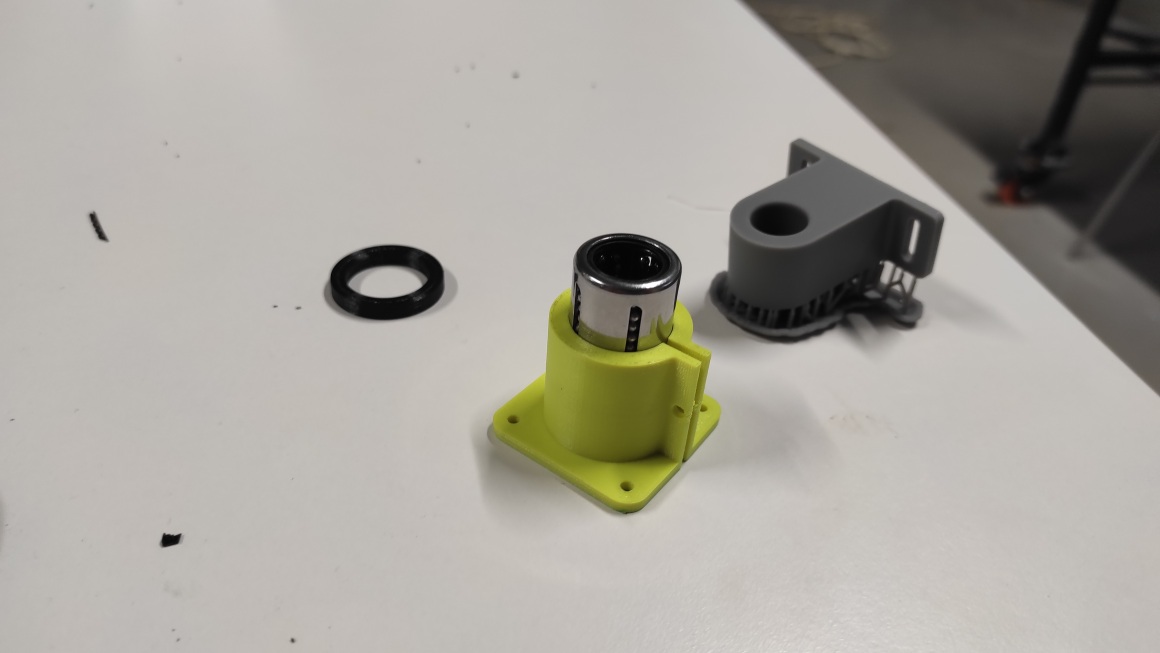
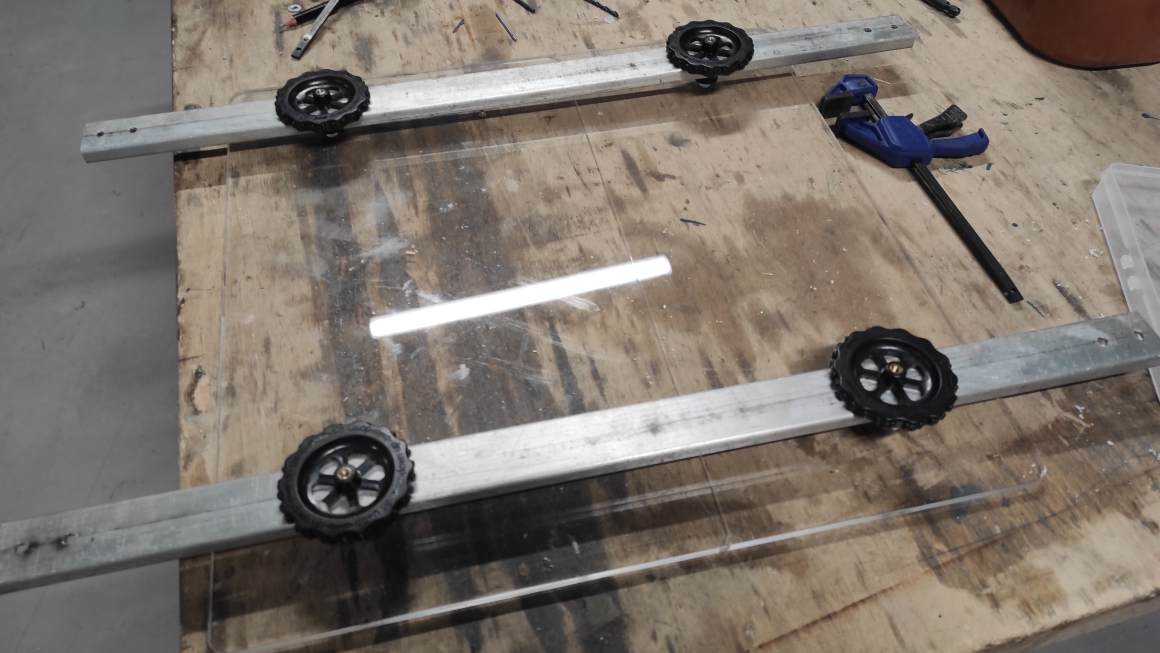
Adel informed us that we need to leave a distance of 1.5cm from the walls during cooking. I opted for a square base of 36cm on each side. For the height, I chose to keep the length of the trapezoidal screws since I don’t yet know what the space requirement will be under the bed. I added an additional safety margin of 1.5 cm. I also created a support on which the bed would rest, which would be attached to trapezoidal screws and axes with ball bearings.
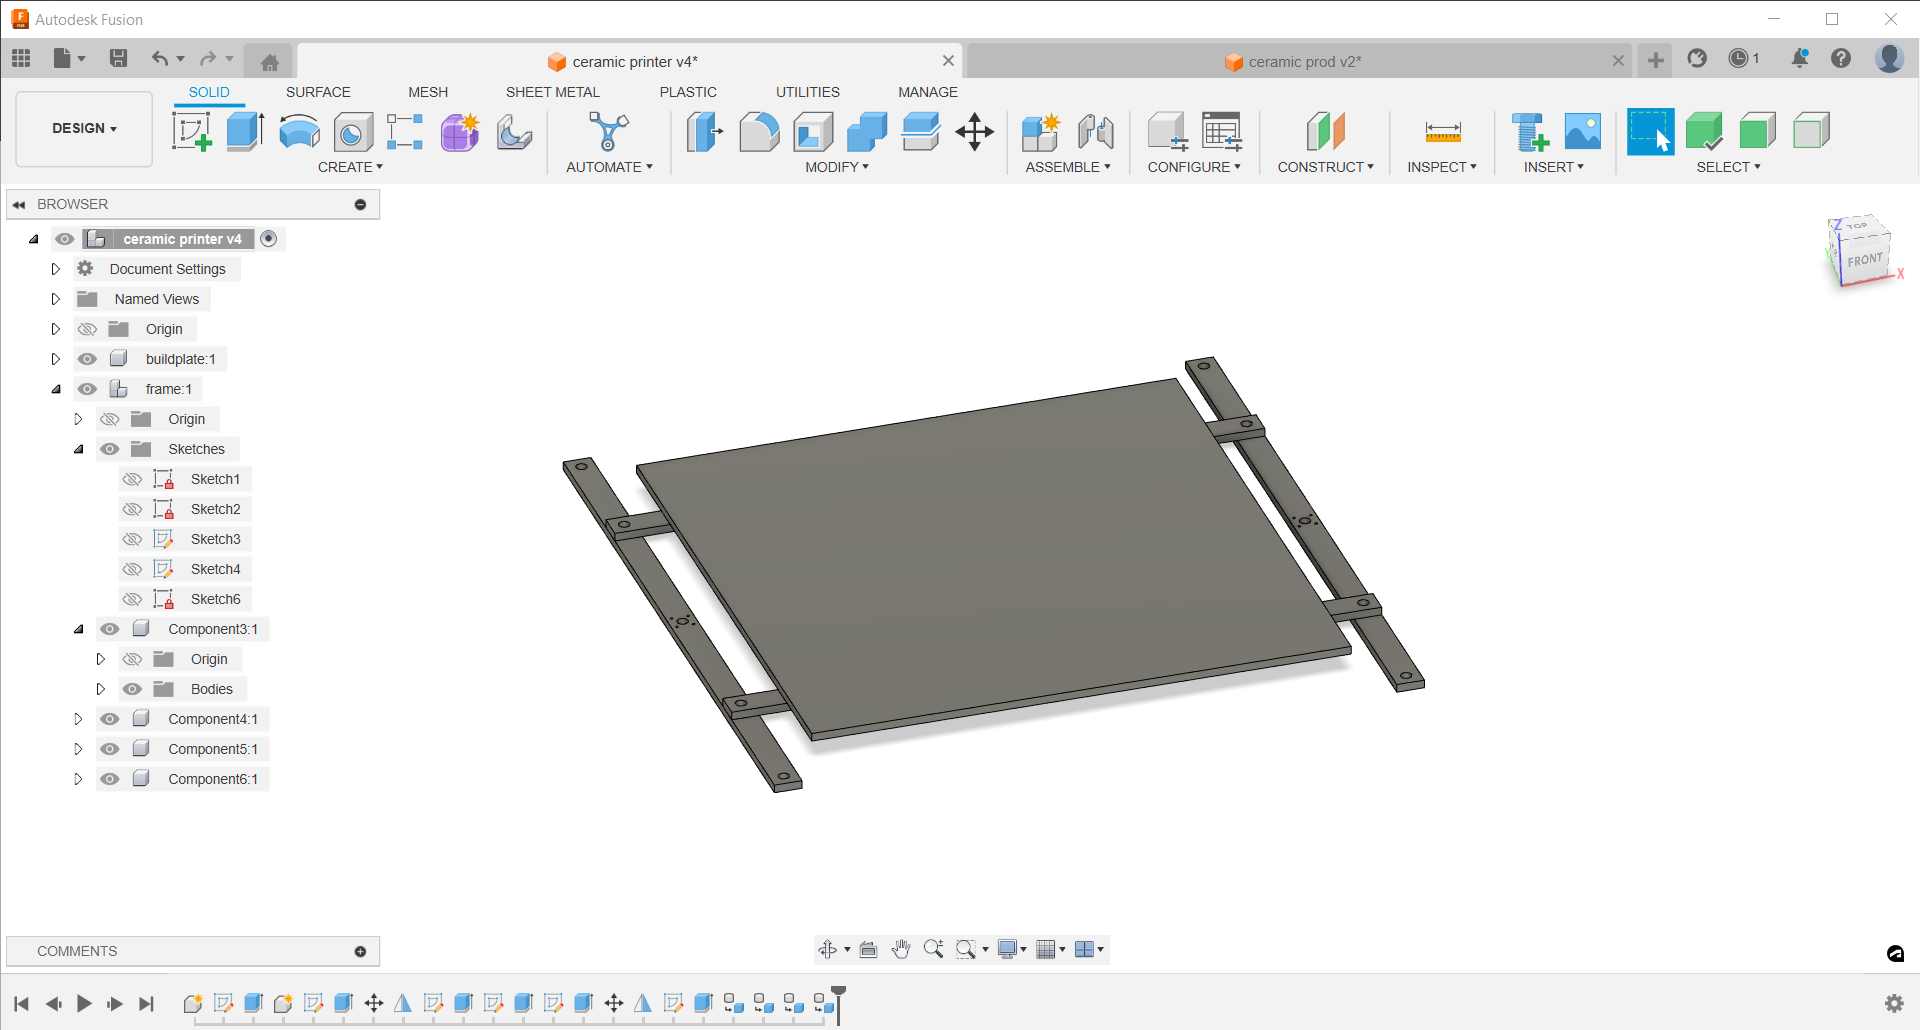
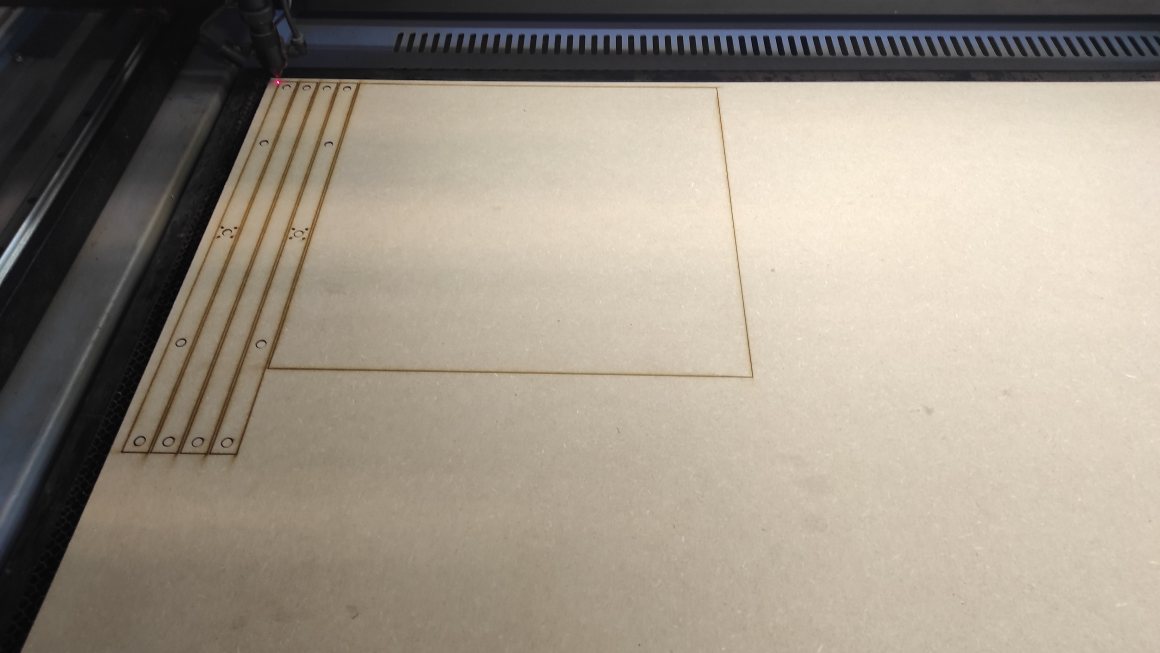
I used a derived model (Fusion360 option) to nest in order to make a first test with the laser cutter. Then we tested it with a simple program using the stepper motors that Jean-Come was testing on his side.

Small parts 1
Then I made a piece to encapsulate the bearings and attach the axes to the supports, as well as a piece to fix the axes to the profiles that will form the structure of the printer. I had to change my supports design to fit the new parts.

Outer structure
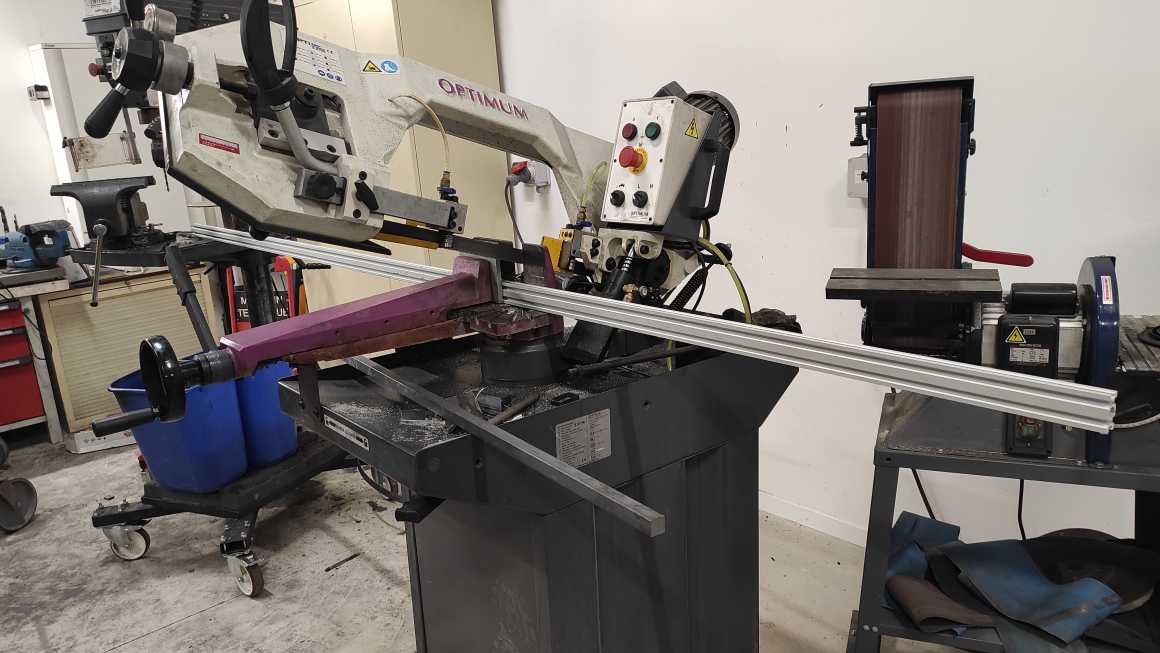
With Jean-Côme making progress on the extruder carriage, I was able to define the necessary margins and start building the outer structure of the machine. I cut some profiles with the band saw and started assembly using small profile brackets.

Small parts 2
I had to design plates to attach the motors to the profiles, and since the motors were also larger than the profiles, I also had to add feet which I made.

We were able to test the overall assembly with the parts made by Jean-Côme.
Improvement
Since the structure lacked rigidity, I added PMMA brackets to each corner. I also tried to make the bed support with the plasma cutter, but the result lacked precision (especially the hole sizes and shapes).
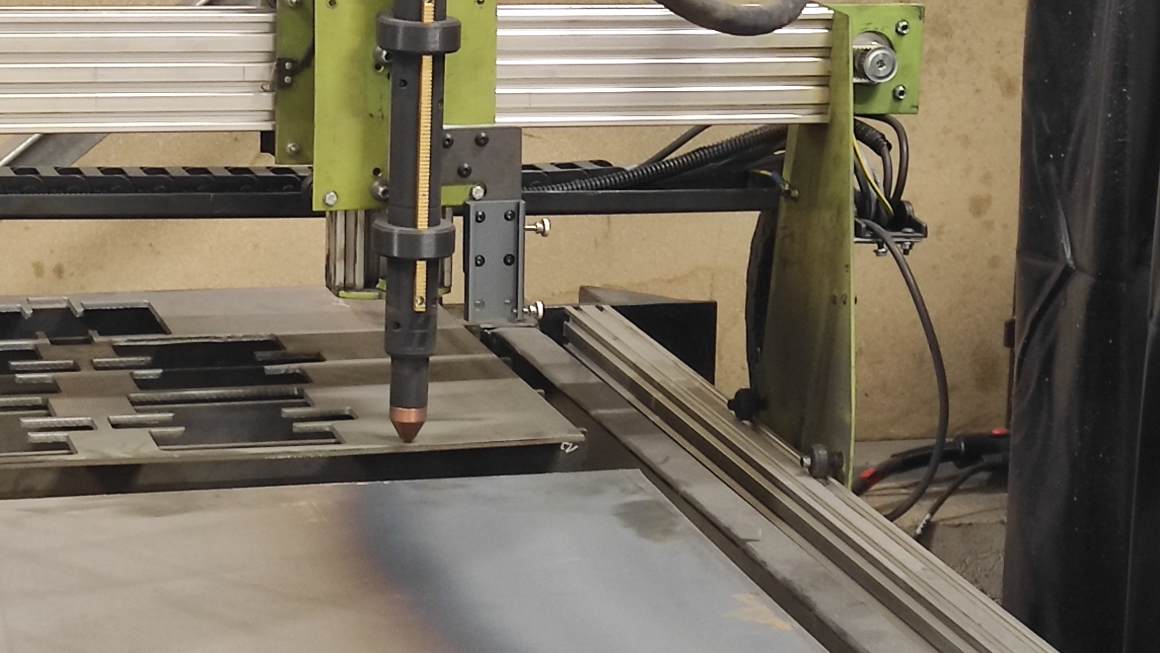
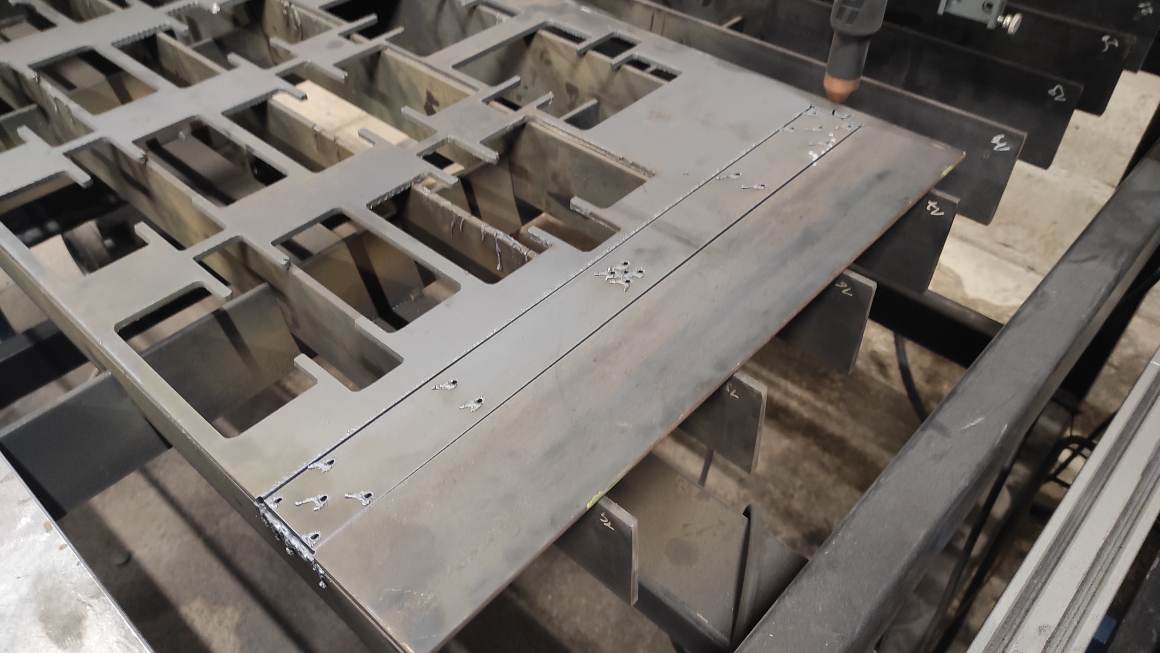
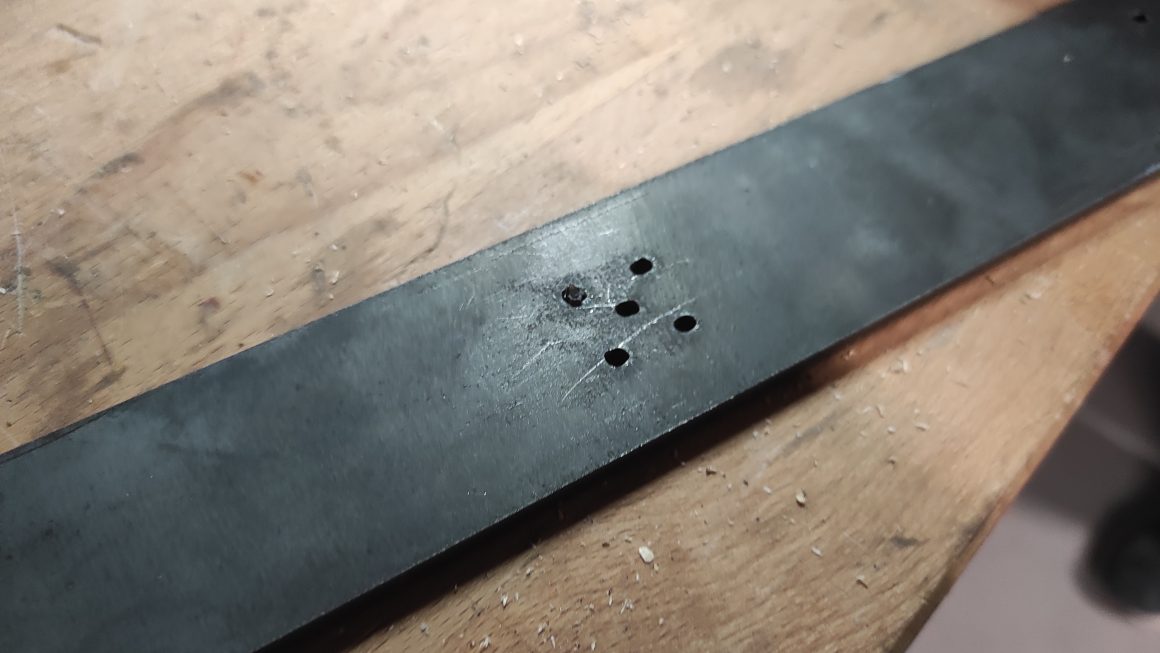
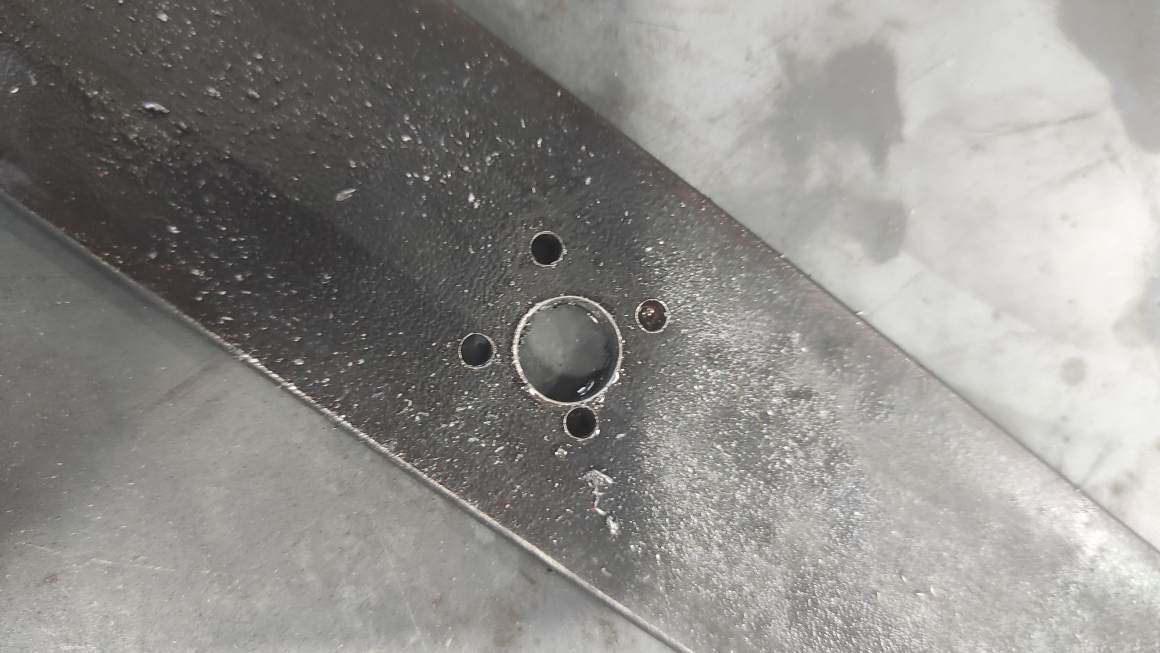
I then tried again by drilling the holes myself with the drill press, but this time I lacked precision. Additionally, the steel seemed too heavy.
I finally opted for profiles and created plates to connect with the axes. To finish, I made the bed and the plates out of 6mm PMMA. I added leveling screws that I had because I had changed them on my 3D printer.
Small parts 3
To finish the assembly, I had to add the endstop sensors micro-switch on the profiles. I had to design various small prints again to place them in relevant locations. I used Farnell Datasheet to have dimension as the size seemed to be standard ZV Lever.


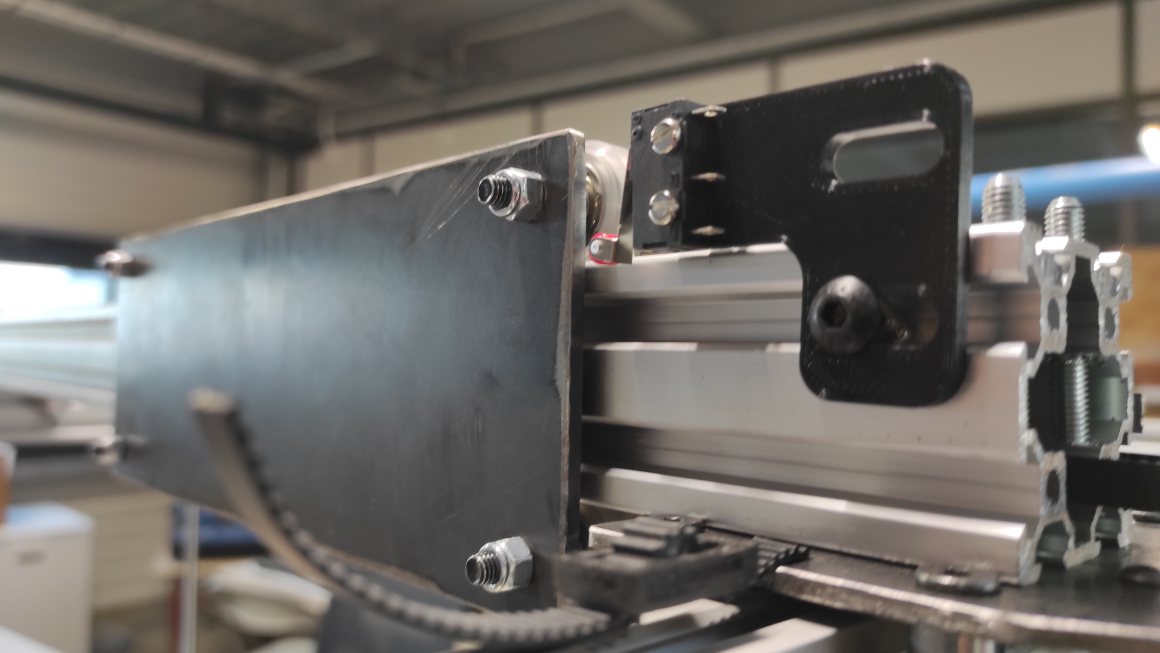
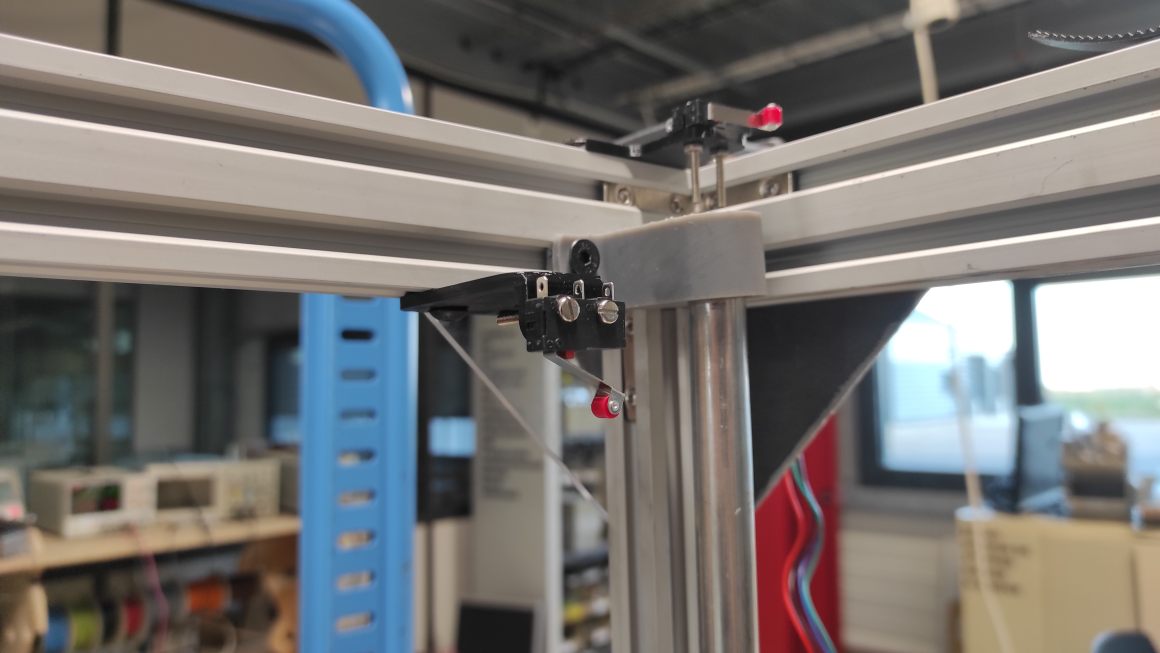
I am not completely satisfied with the results (the one for the X axis is not well fixed enough and the one for the Z axis lacks adjustment possibilities), but I ran out of time to redo them as desired.
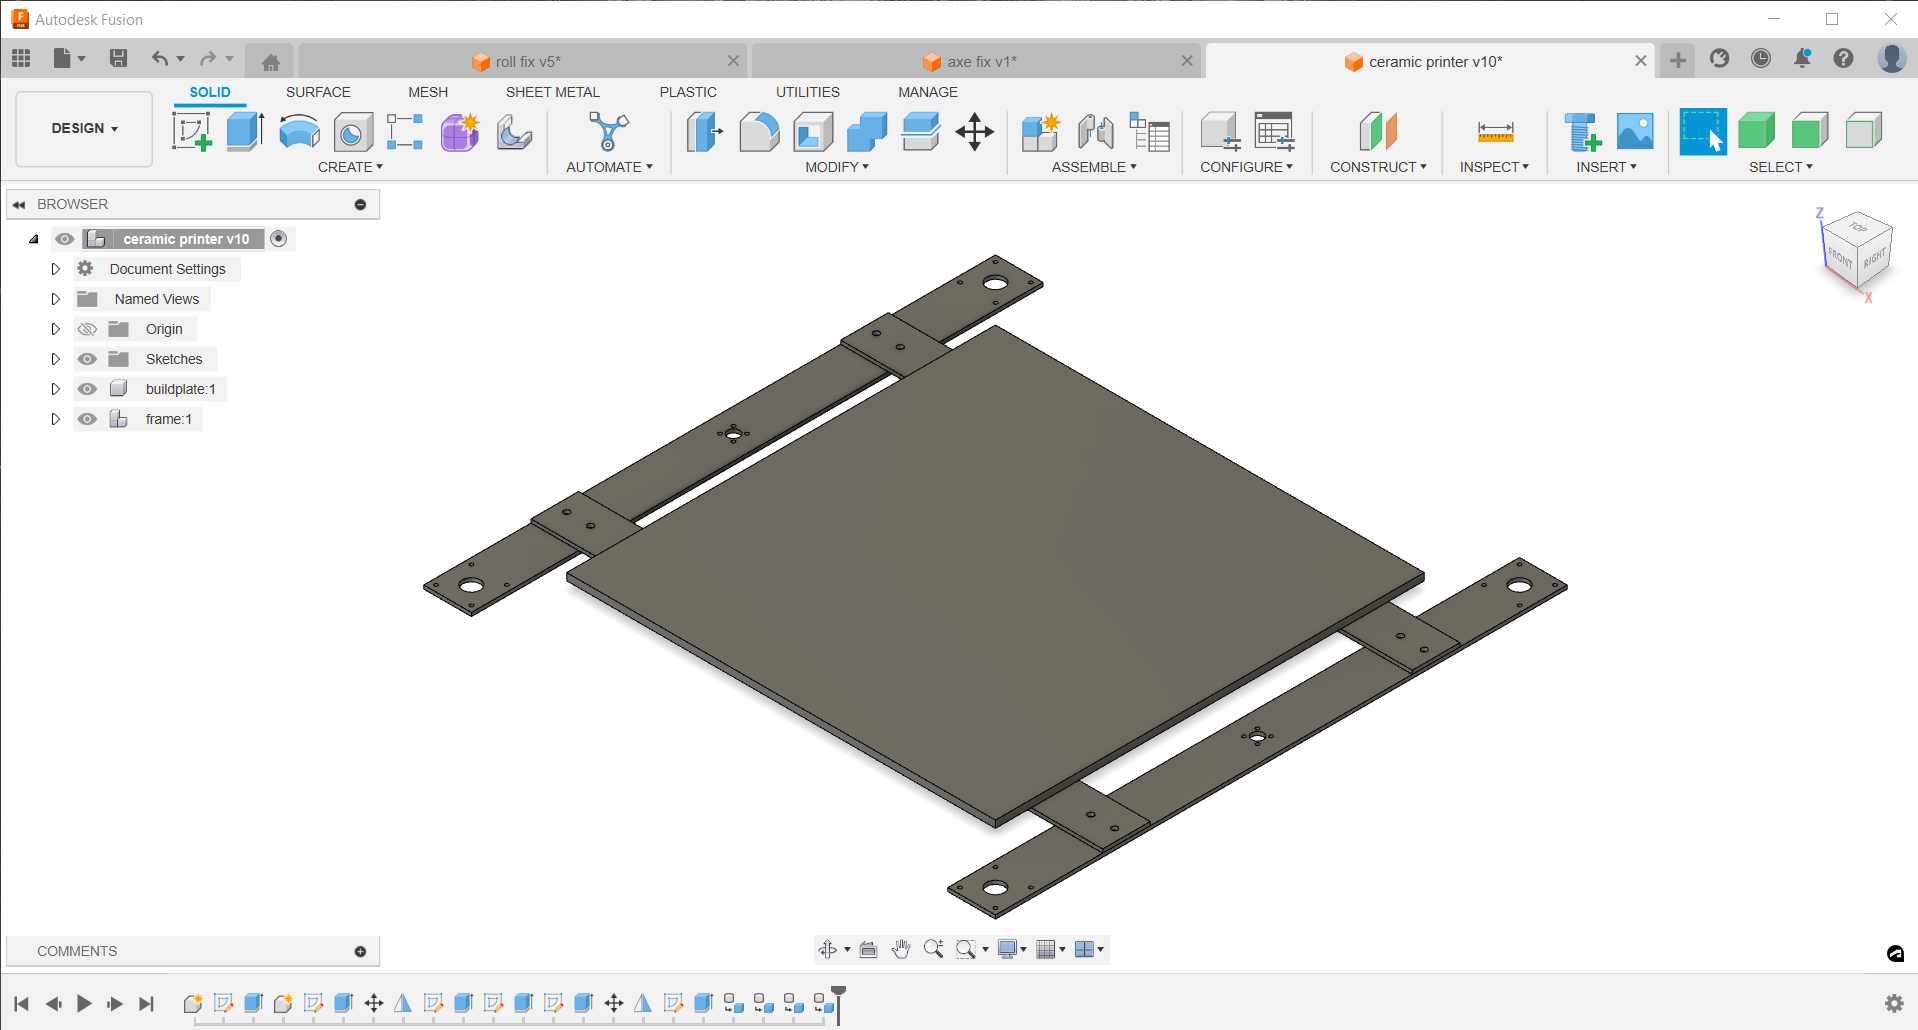
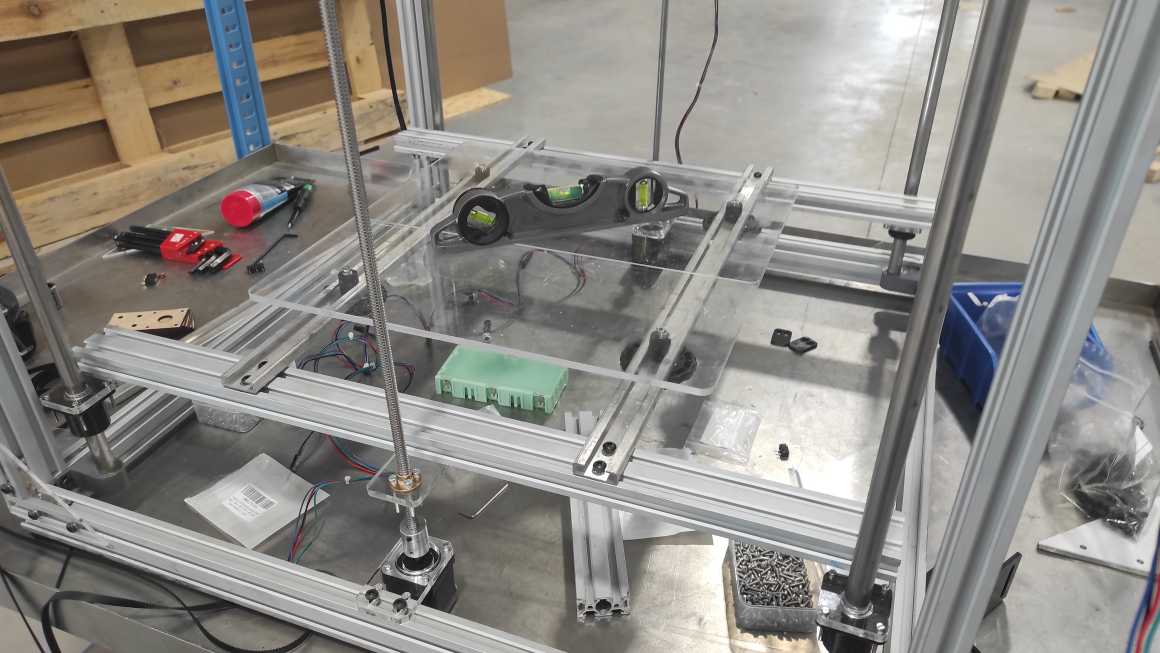
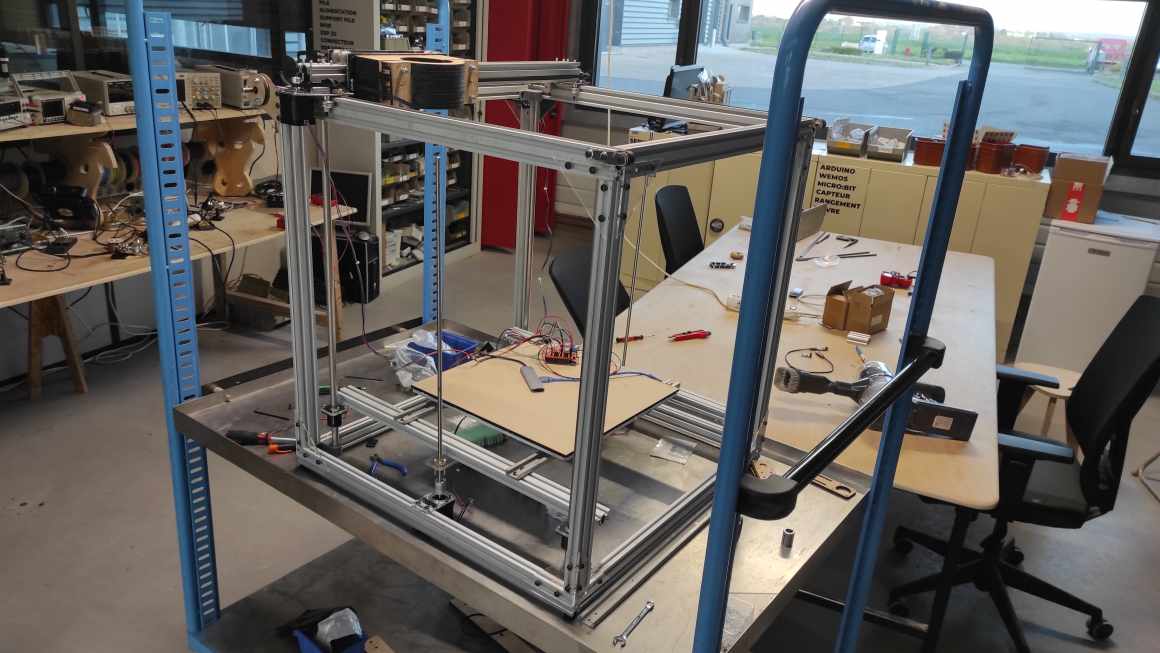
Final design
And here is the complete structure without the extruder.
BOM
Profiles
| Quantity | Type | Dimensions | Comments |
|---|---|---|---|
| 2 | 10*30mm profile | 550mm | Support Plate |
| 1 | 40*40mm profile | 730mm | X Axis |
| 2 | 20*40mm profile | 630mm | Support Plate |
| 4 | 20*40mm profile | 650mm | Height |
| 4 | 20*40mm profile | 652mm | Width |
| 4 | 20*40mm profile | 692mm | Depth |
Brackets and Supports
| Quantity | Description | Dimensions | Comments |
|---|---|---|---|
| 32 | Profile brackets | ||
| 14 | 10*10mm PMMA brackets | 6mm transparent | |
| 3 | PLA Fixations (Extruder, Endstop) | ||
| 5 | Steel plates | 3mm | Variable size |
| 1 | PMMA Plate | 390*390mm | |
| 6 | PMMA Plates | 40*80mm | |
| 2 | PMMA Plates | 42*74mm | |
| 8 | Resin axis supports | ||
| 1 | PLA Piston Support | ||
| 4 | PLA Bearing Supports | ||
| 1 | PLA Motor Support |
Screws and Nuts
| Quantity | Description | Dimensions | Comments |
|---|---|---|---|
| 120 | M5 Set Screws | ||
| 56 | M5 Countersunk Screws | 8mm | |
| 16 | M5 Countersunk Screws | 8mm | |
| 25 | M5 Countersunk Screws | 12mm | |
| 8 | M5 Countersunk Screws | 10mm | |
| 4 | M4 Countersunk Screws | 35mm | |
| 8 | M3 Screws | 30mm | Brass nut fixation |
| 8 | M3 Countersunk Screws | 8mm | |
| 8 | M3 Countersunk Screws | 8mm | Motor fixation |
| 6 | M3 Countersunk Screws | 5mm | Motor fixation |
| 3 | M4 Screws | 16mm | |
| 3 | M5 Screws | 30mm | |
| 2 | M5 Hexagonal Screws | 50mm | |
| 8 | M5 Hexagonal Screws | 50mm | |
| 6 | M5 Hexagonal Screws | 50mm | Shorter possible |
| 6 | M5 Countersunk Screws | 30mm | |
| 16 | M5 Countersunk Screws | 8mm | |
| 4 | M6 Hexagonal Screws | 20mm | |
| 8 | M3 Nuts | ||
| 8 | M5 Nuts | ||
| 8 | M3 Nuts | ||
| 4 | M5 Nuts | ||
| 8 | M5 Excentric Nuts | ||
| 29 | M5 Lock Nuts | ||
| 4 | M5 Standard Nuts | ||
| 6 | M6 Nuts | ||
| 122 | M5 Hammer Nuts | ||
| 4 | M5 Threaded Rods | 120mm | |
| 6 | M2.5 Nuts | ||
| 16 | M2.5 Lock Nuts | ||
| 3 | M4 Nuts | ||
| 4 | M4 Nuts | ||
| 8 | M5 Nuts | ||
| 9 | M5 Spacers | 5mm | |
| 4 | M5 Spacers | 8mm | |
| 4 | Rubber Spacers | Levelling | |
| 28 | Precision Washers | 1mm |
Rods and Bearings
| Quantity | Description | Dimensions | Comments |
|---|---|---|---|
| 4 | 14mm Rods | 670mm | |
| 1 | 8mm Rod | 760mm | |
| 3 | M8 Brass Threaded Rods | 600mm | 2mm pitch, 1 missing |
| 1 | Trapezoidal Threaded Rod | 600mm | |
| 4 | Ball Bearings for Axis | ||
| 38 | Ball Bearings | ||
| 3 | Flexible Motor Supports | ||
| 3 | Toothed Wheels | ||
| 16 | Wheels |
Others
| Quantity | Description | Dimensions | Comments |
|---|---|---|---|
| 1 | PLA Nozzle | ||
| 3 | 1600mm Belts | ||
| 2 | PLA Gears | ||
| 1 | PLA Piston | ||
| 1 | PMMA Tube | 90mm diameter, 3mm thickness, 435mm length |
Electronic
| Quantity | Description | Dimensions | Comments |
|---|---|---|---|
| 1 | Arduino Uno | ||
| 1 | CNC Shield | ||
| 4 | Drivers | ||
| 3 | ZVlever Endstop Switches | ||
| 4 | Nema 17HS19 Motors | ||
| 1 | Nema 23HS30 Motor |
Class Archive
- Buildplate V1 - MDF prototypes
- Buildplate V2 - PMMA cutted + profiles
- Axe support - stereolithography
- Foot- 3d printed PLA
- PMMA Bracket - PMMA cutted
- Linear bearing support - 3D printed PLA
- Z motor fixation plate - PMMA cutted
- endstop fixation plates - 3D printed PLA
Impressions of the weeks
These past two weeks have been very challenging. Even though we have a fairly precise overall idea of the machine, there are always small setbacks that need to be managed within the limited time we have. There are a lot of ups and downs emotionally when we don’t achieve our daily goals or, conversely, when we progress faster than we imagined. Documentation for the week was much more difficult to manage due to the numerous setbacks in the construction of the machine, which took priority. I used ChatGPT for the first time to translate my texts to relieve the mental burden of writing everything directly in English. Our ceramic printer still requires a lot of improvement, but the foundations we have built seem promising.