group assignment:
review the safety data sheets for each of your molding and casting materials,
then make and compare test casts with each of them
extra credit: try other molding and casting processes
individual assignment:
design a mold around the stock and tooling that you'll be using,
mill it (rough cut + three-axis finish cut),
and use it to cast parts
extra credit: use more then two mold parts
The group assignment can be found hereThe individual assignment
Designing a mold around the stock
FOr my final project i will maka guitar parts.
one of those is a tuning knob:
this is how it normally looks:
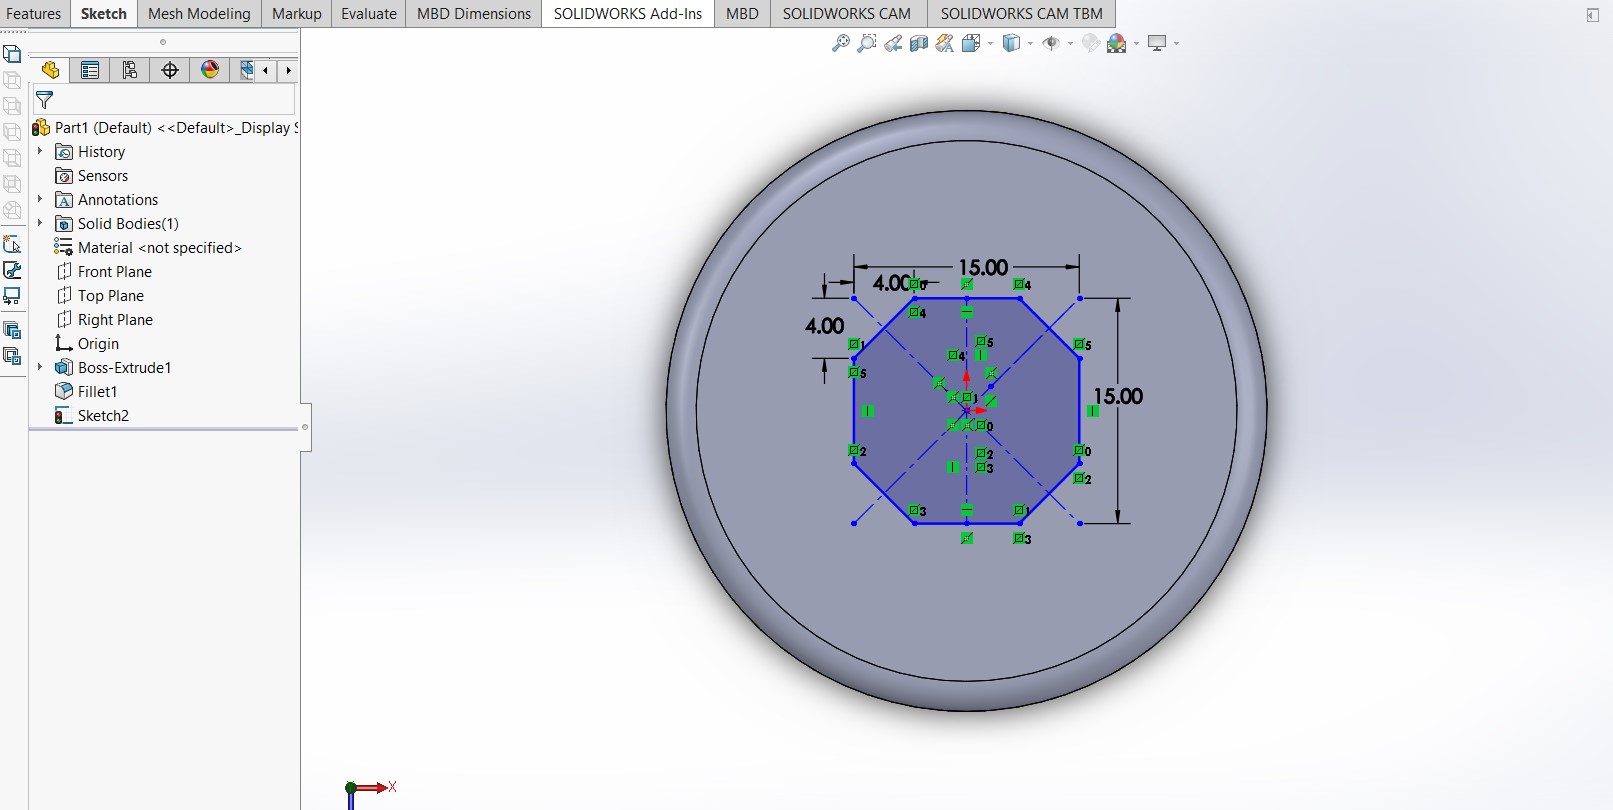
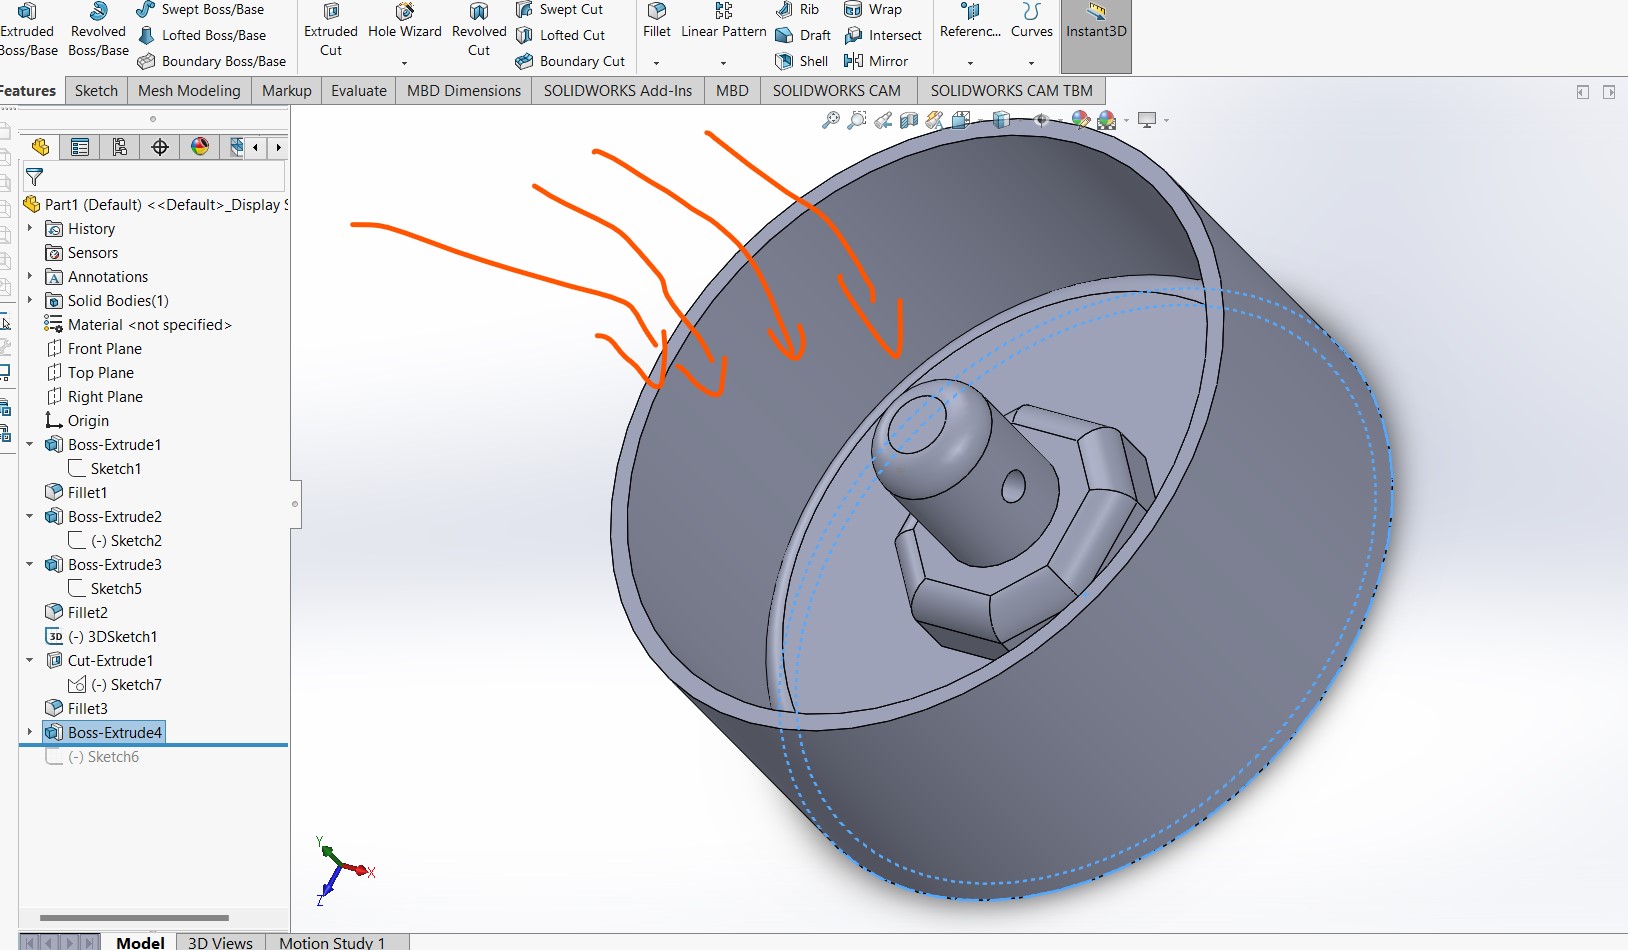
Using solidworks i sketched a knob
I built upon surfaces to create different shapes.
making sure that the base is bigger that the next shape.
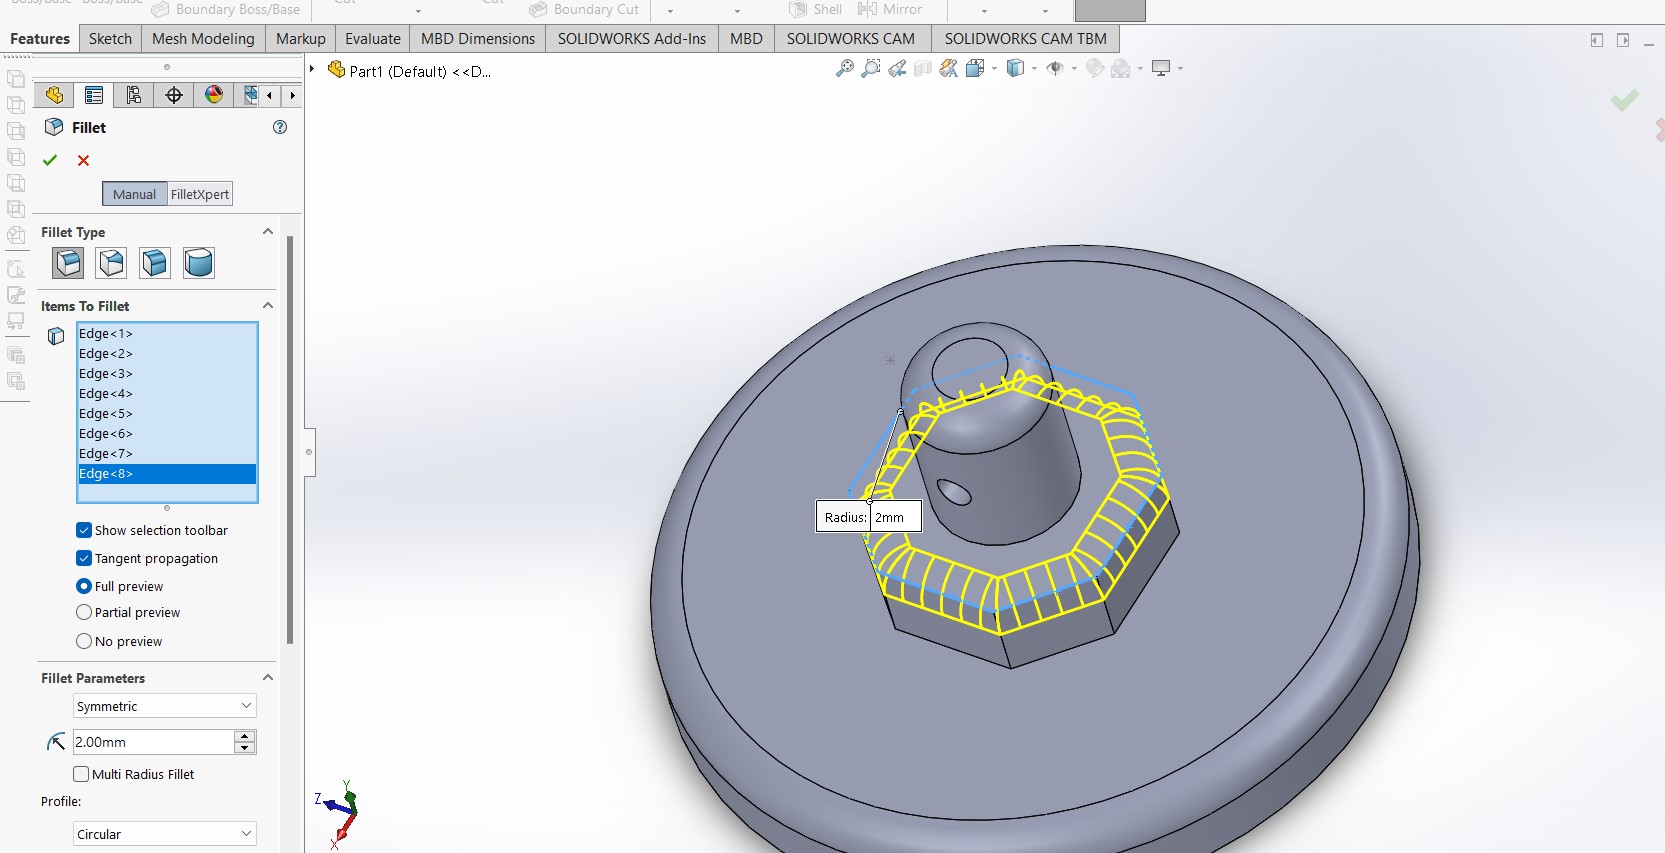
I used fillets on each edge
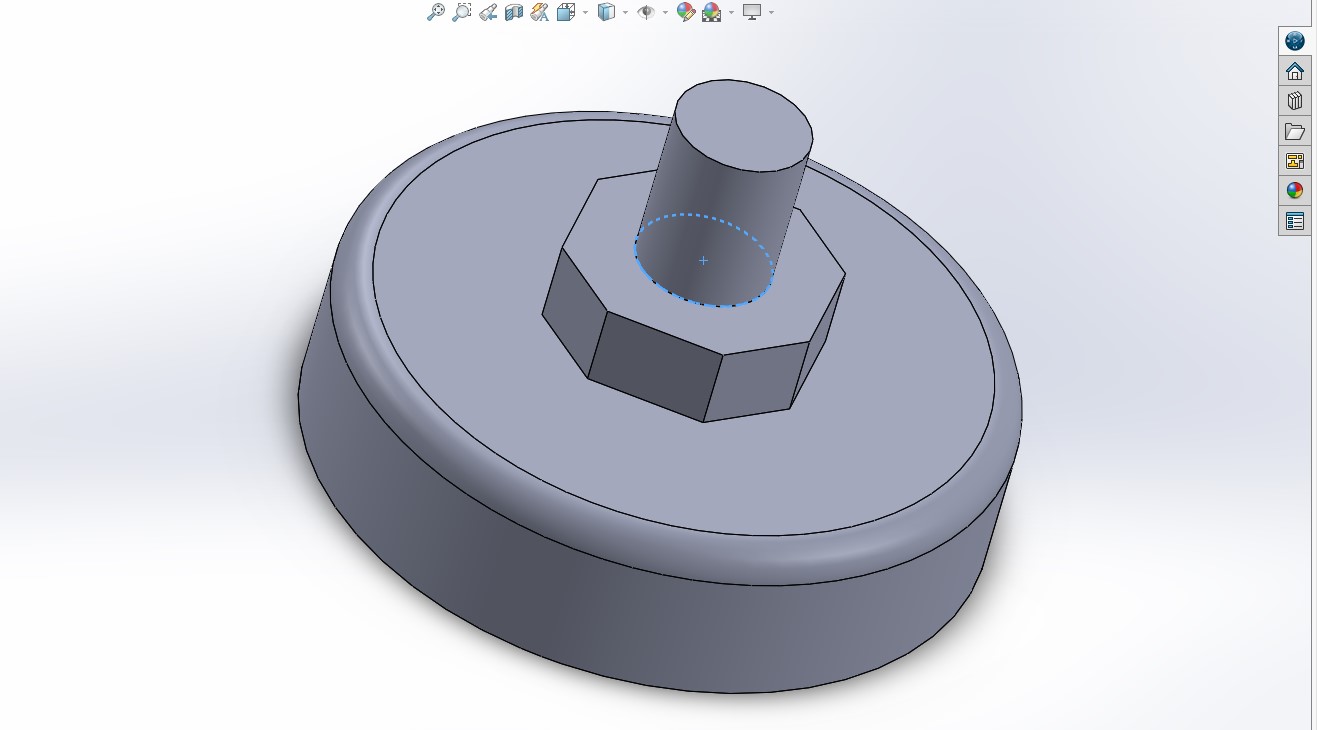
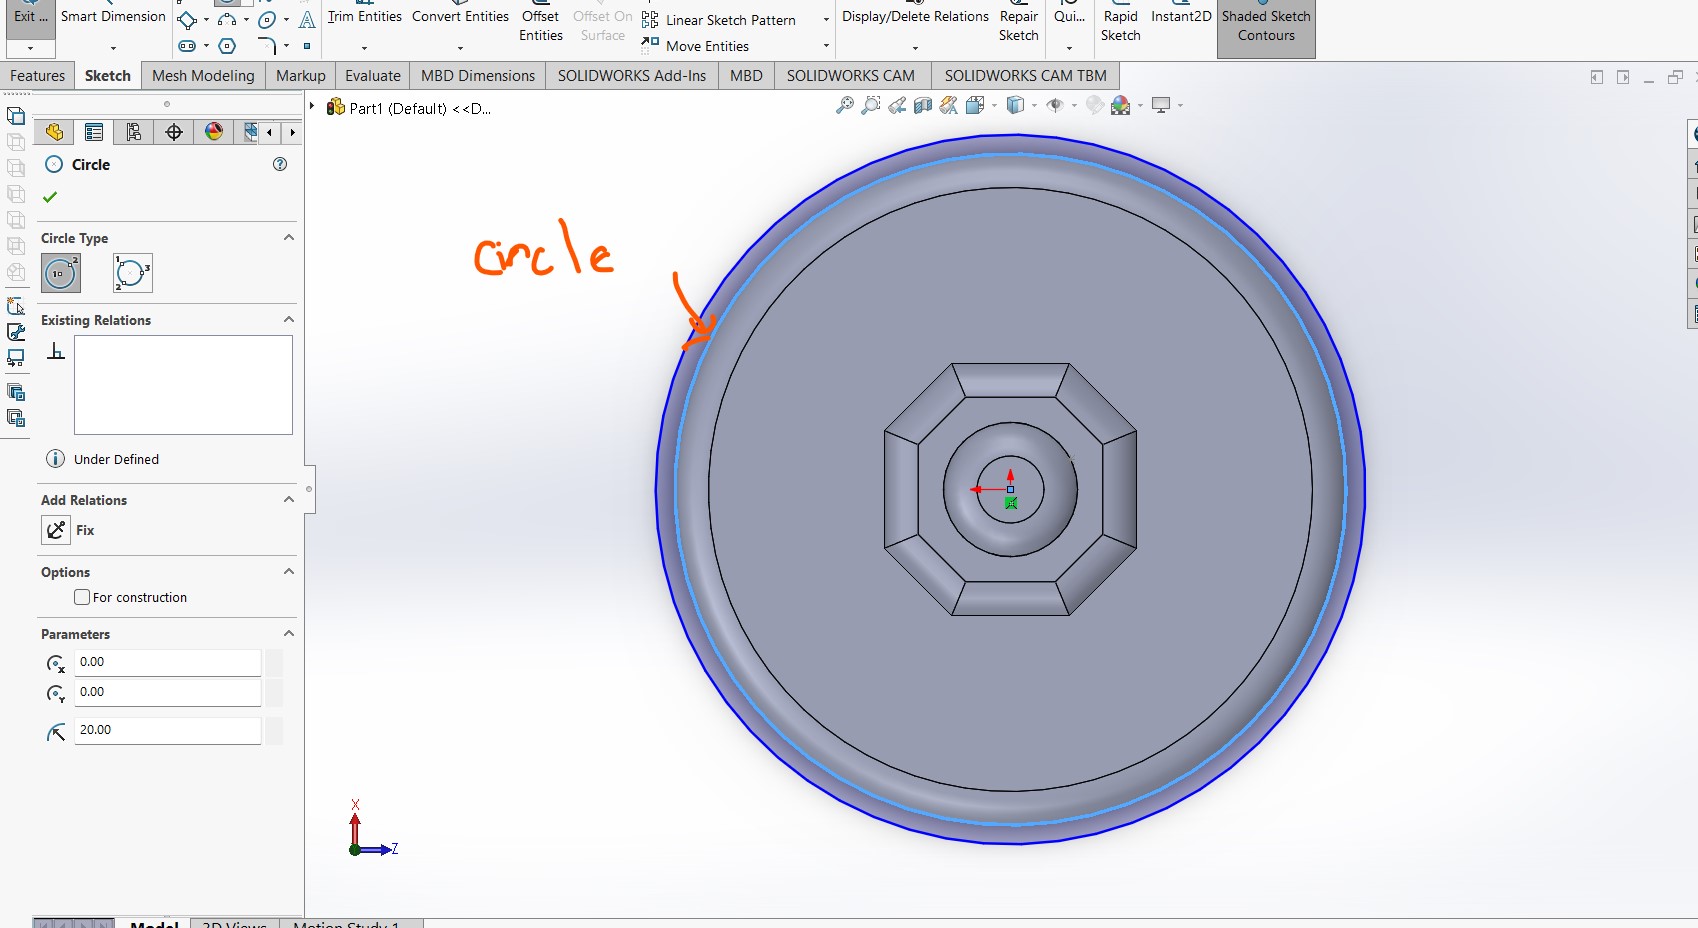
After making a string's hole in the elonged extrusion, i went back to the top plane and created two circoncentic circles around the knob
then I extruded their suface and made a sort of vessel which i plan to pour into the material that is going
to act as mold.
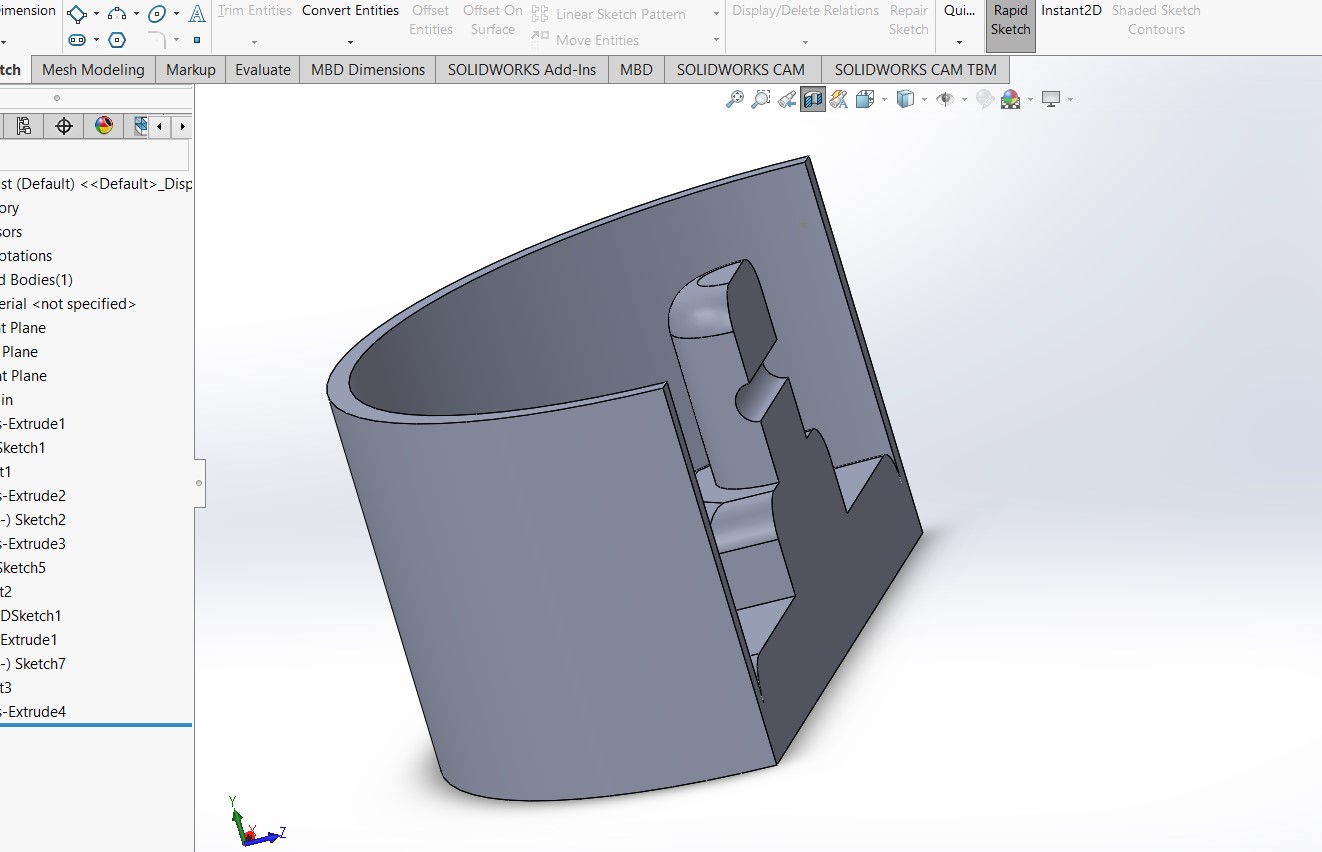
The plan is to cut the dier into two parts that fit, then separate them to remove the casted knob.
Things took a turn
I found out that the assignment requires to have a two-parts mold.
Hence i had to edit the design.
Opening the part in the assembly mode, i created a plane where i wanted to cut the part into two.
Then i used the mold and cast feature of solidworks to generate a cavity around the part.
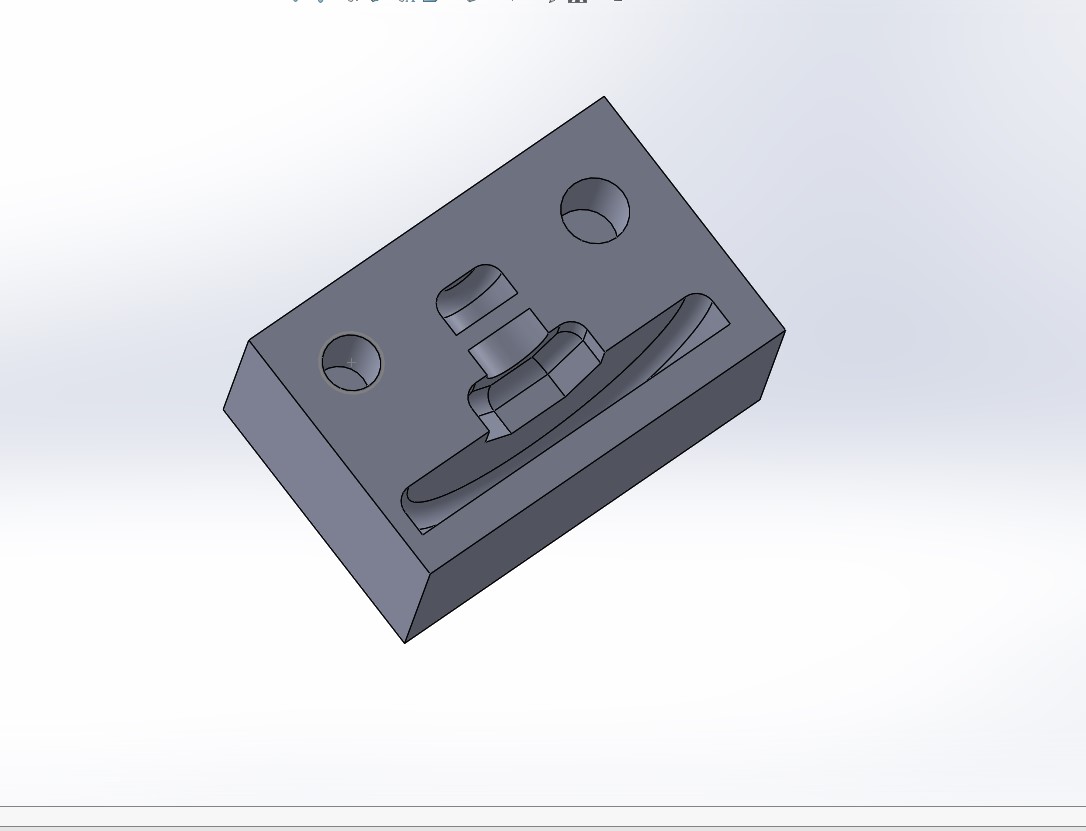
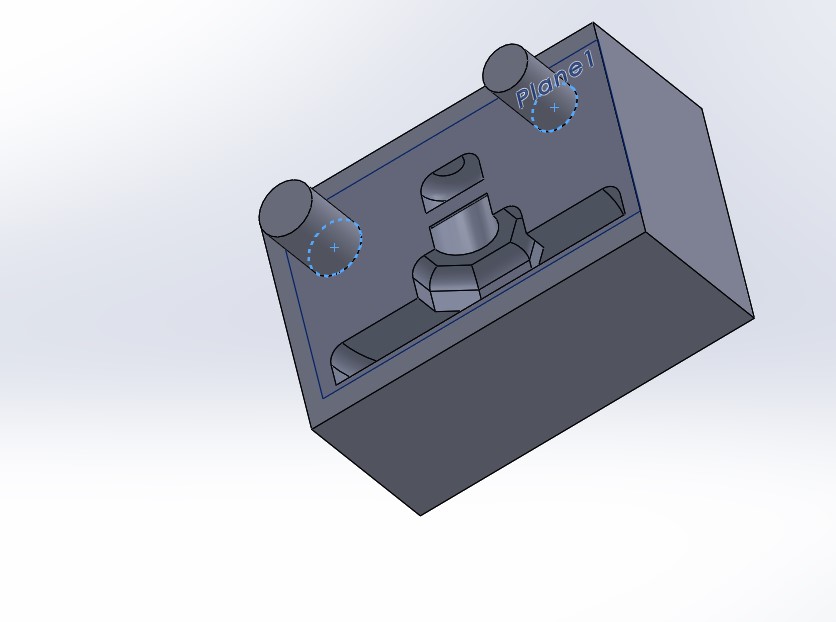
On one side, 2 circles that will act as joints were extruded, automatically on the other side,
extrude cuts are made.
Slight ajdutment is needed to create a clearance on the female side, so the joint becomes mechanically feasible.
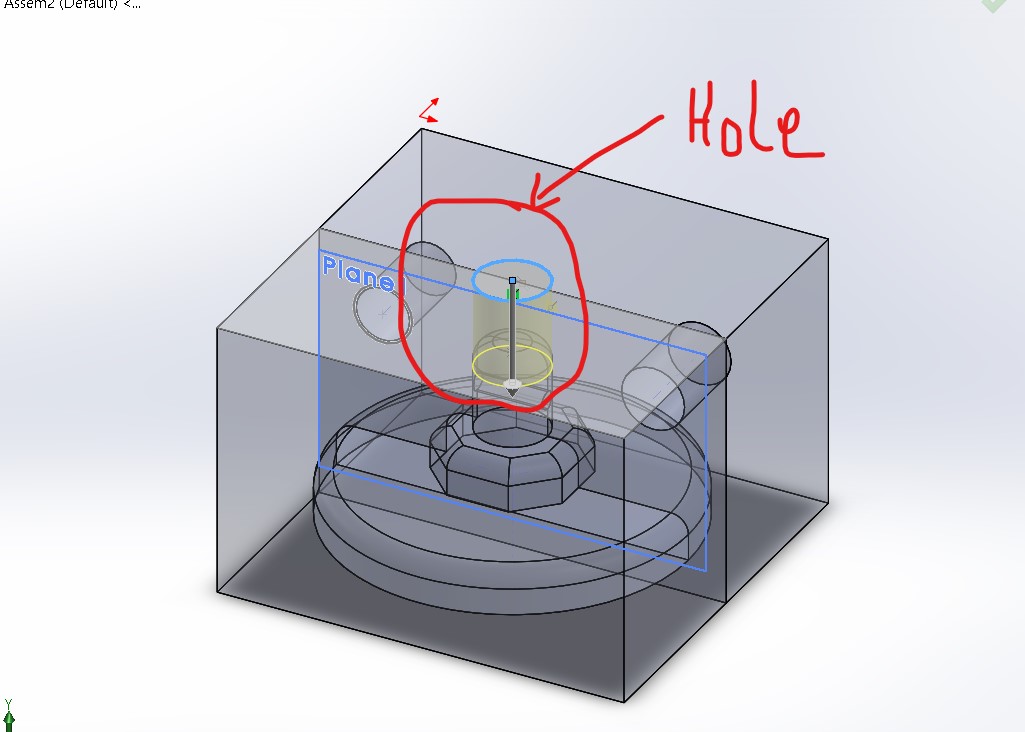
However, a hole where the casting material will pass is needed.
The next step is to print both parts separately,
Here what i did i exported stl files of both parts.
I imported one by one in aspire 9.0
I created a tool path, and loaded the saved g code into the mach3 machine control environement.
I use the blue elphant ELE6090 CNC machine
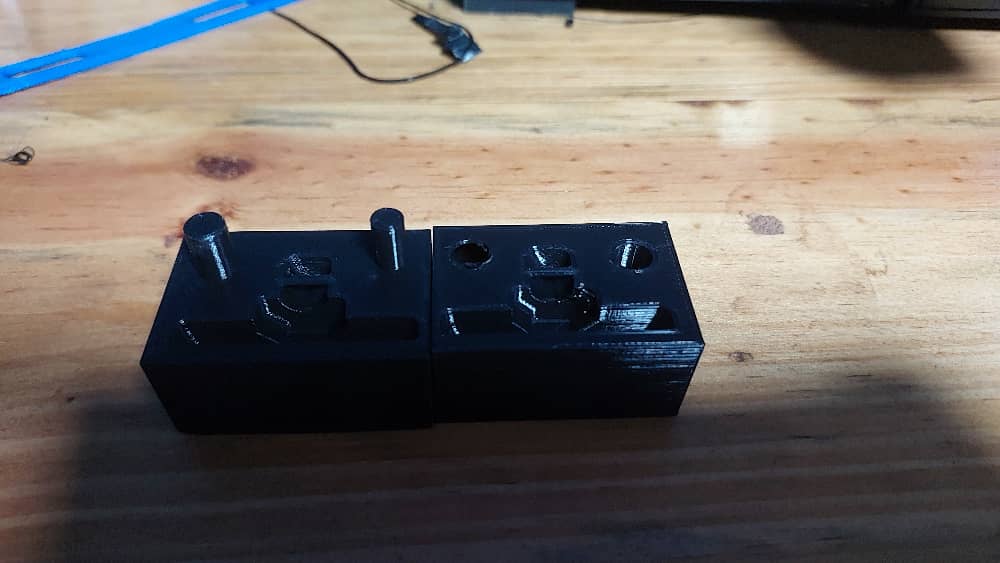
after a little cleaning the part looks like this:
I launched another part at a different position from the material
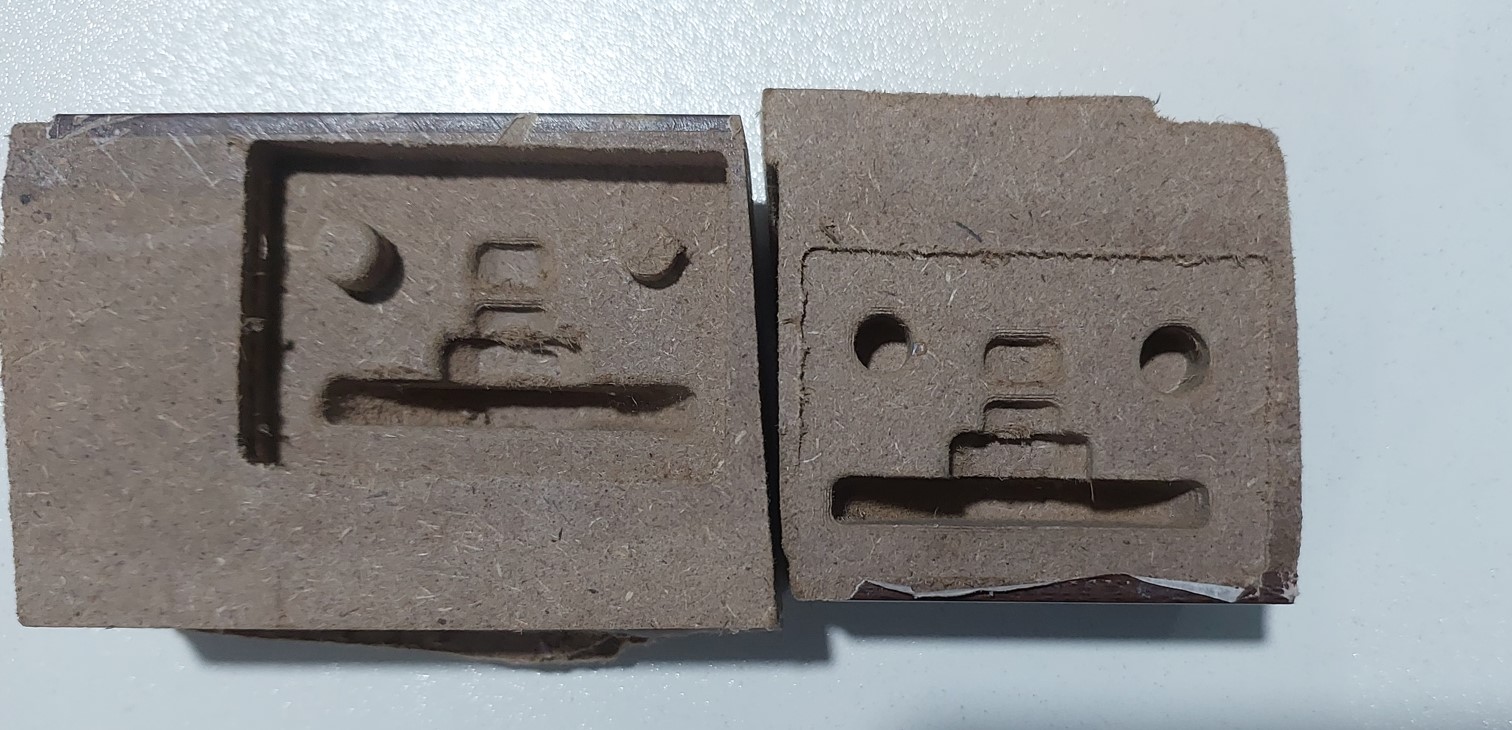
both parts after CNC job look like:
Then i proceded to 3d printing
machine printing the parts
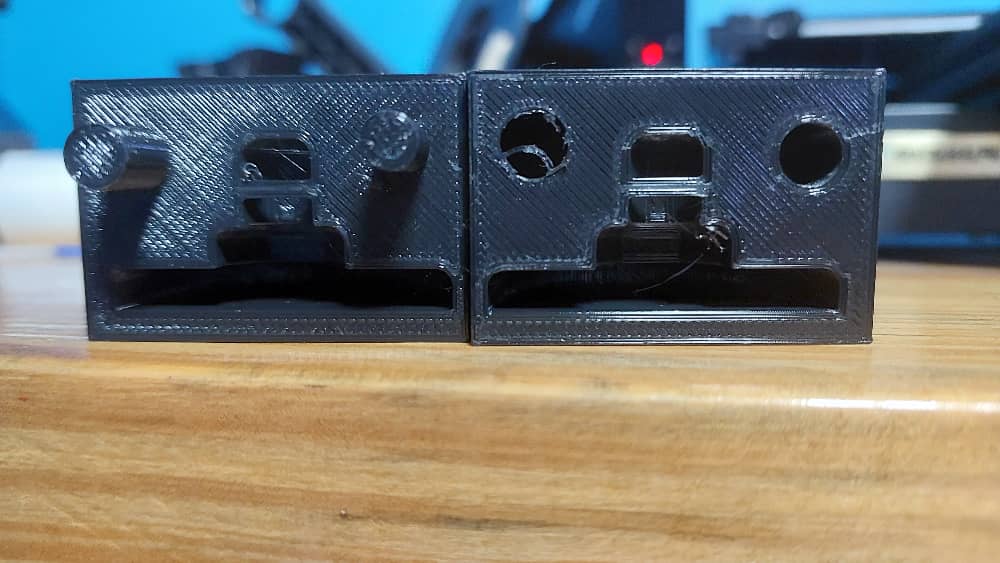
one male and female
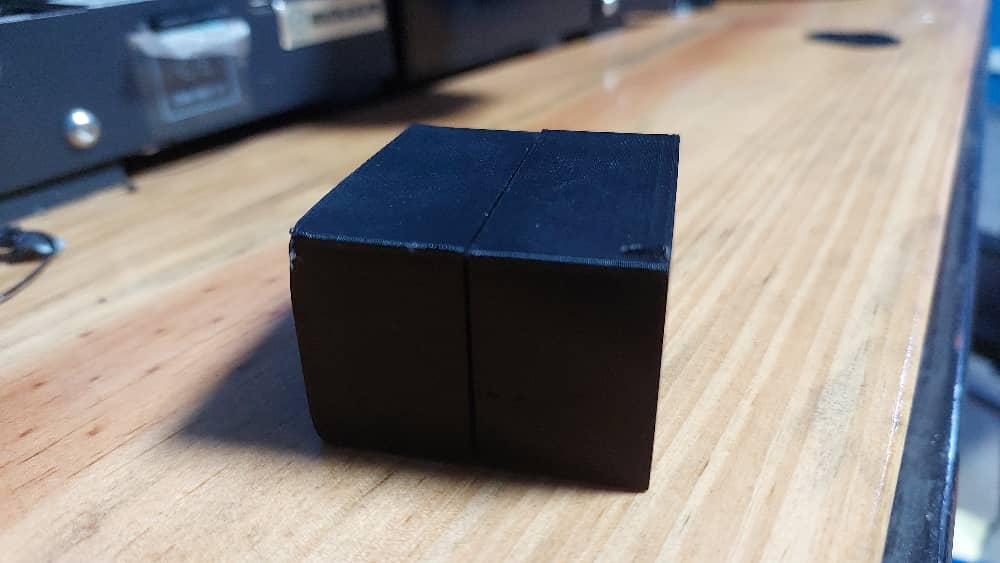
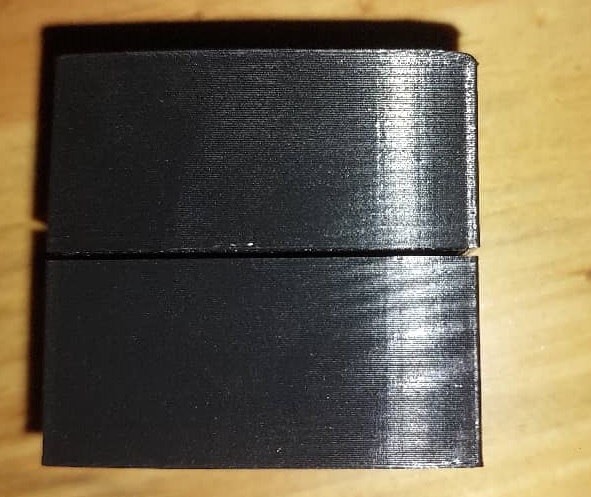
they fit each other
also
When we got the wax (from honey comb)
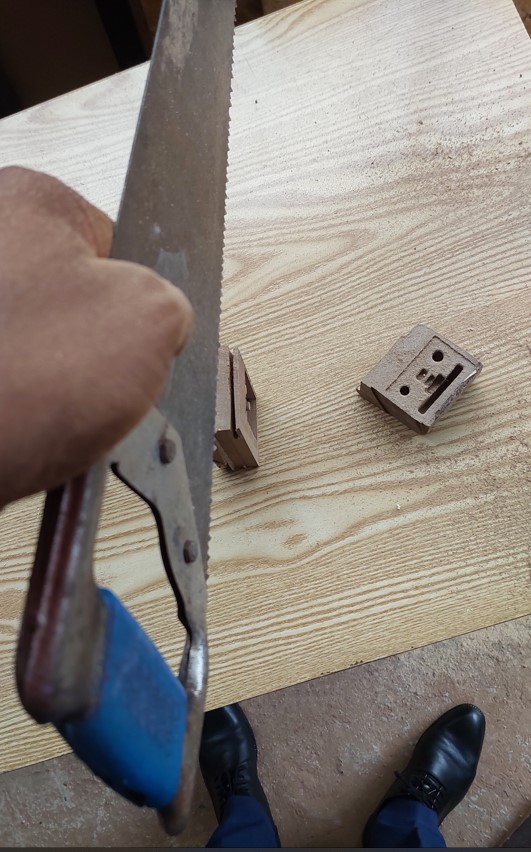
i started to prepare the mold i cut in the mdf
I however had to level the matting surfaces
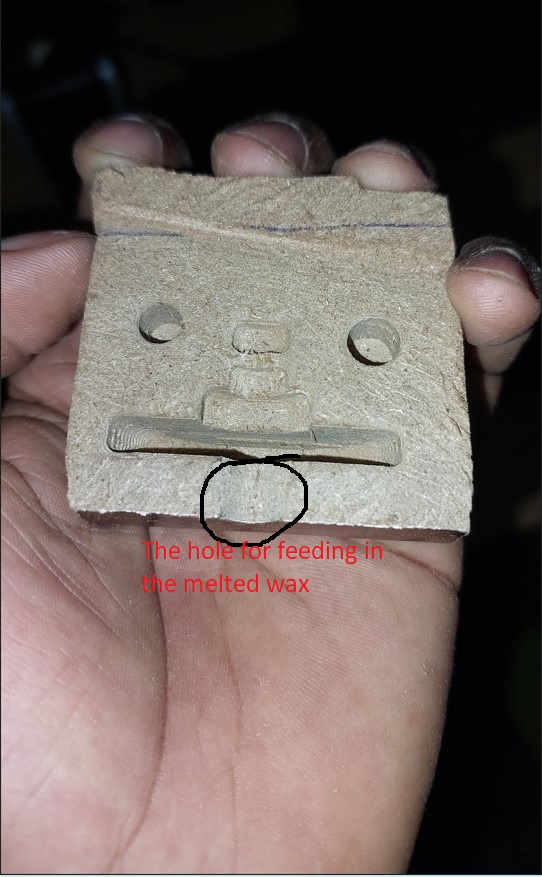
The hole where the melted wax will go in through
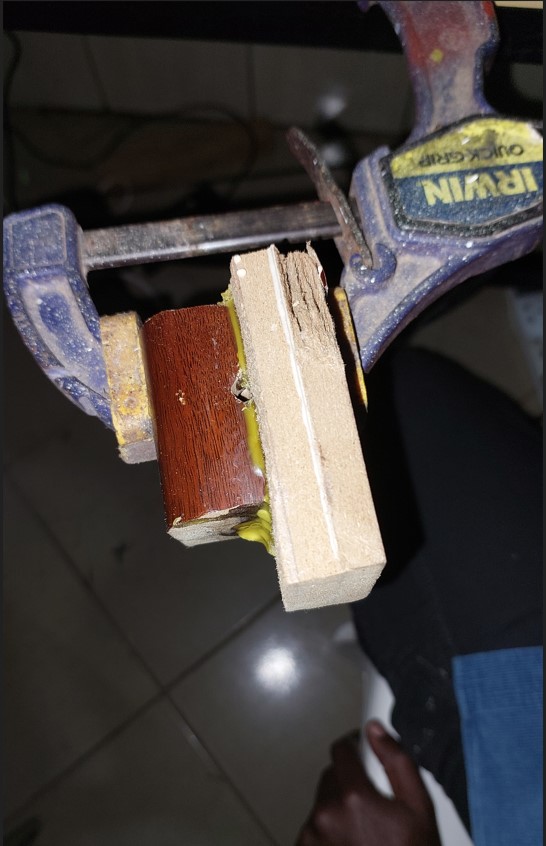
Glued together the two parts before pouring in the melted wax
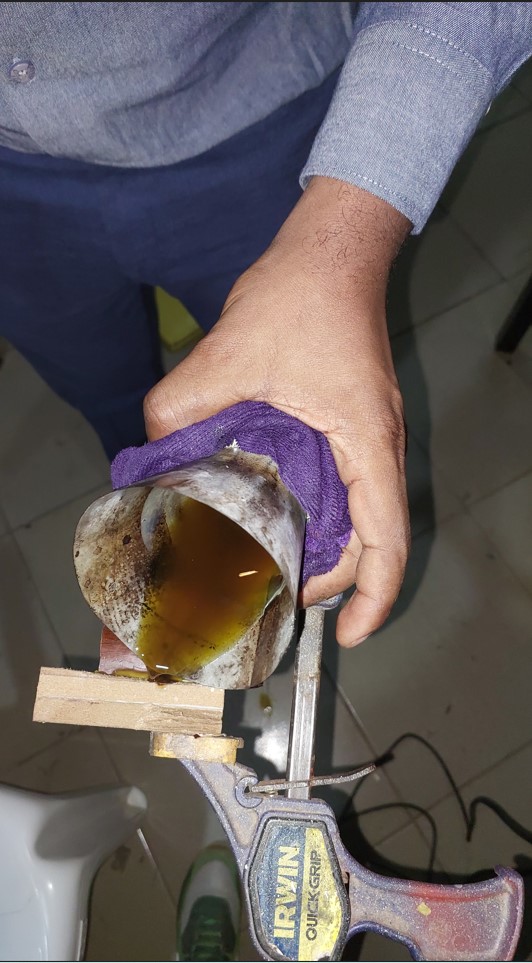
poured the wax in
Shake well so that the liquid goes all over
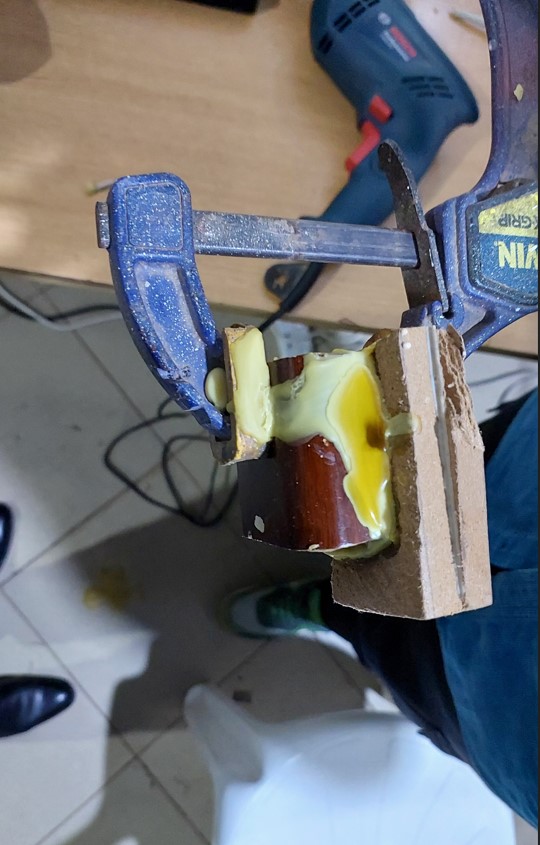
Let the piece rest for at least 30 minute
The error of not putting in oil before the wax cost me the model!!
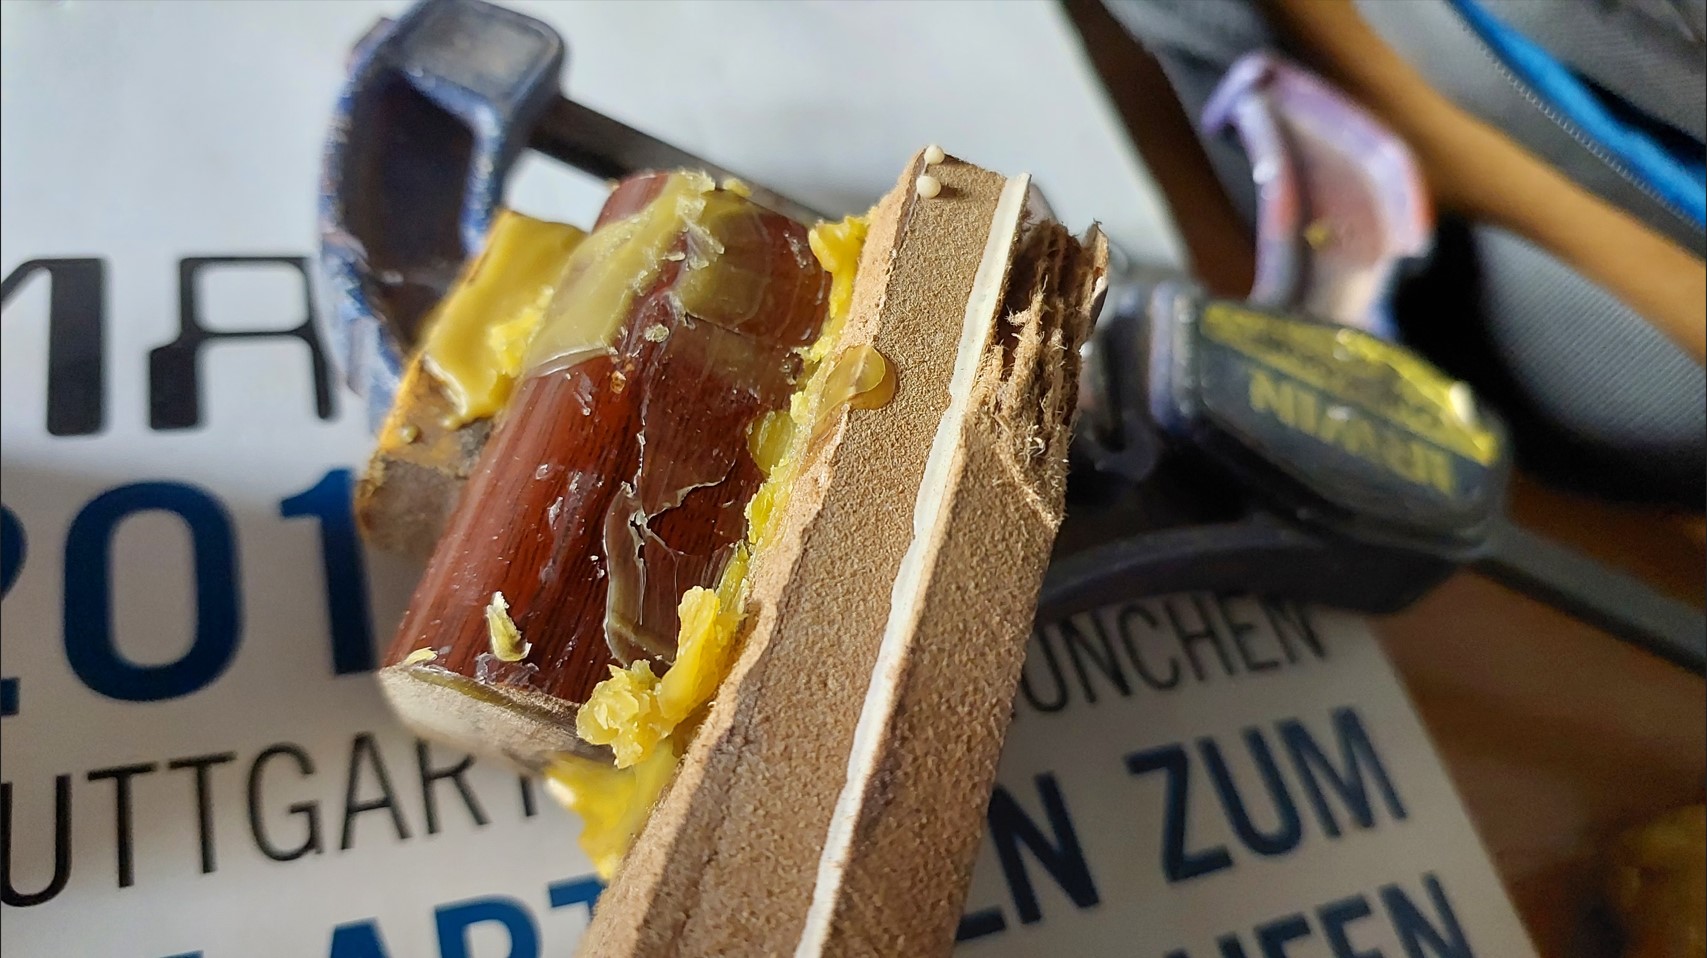
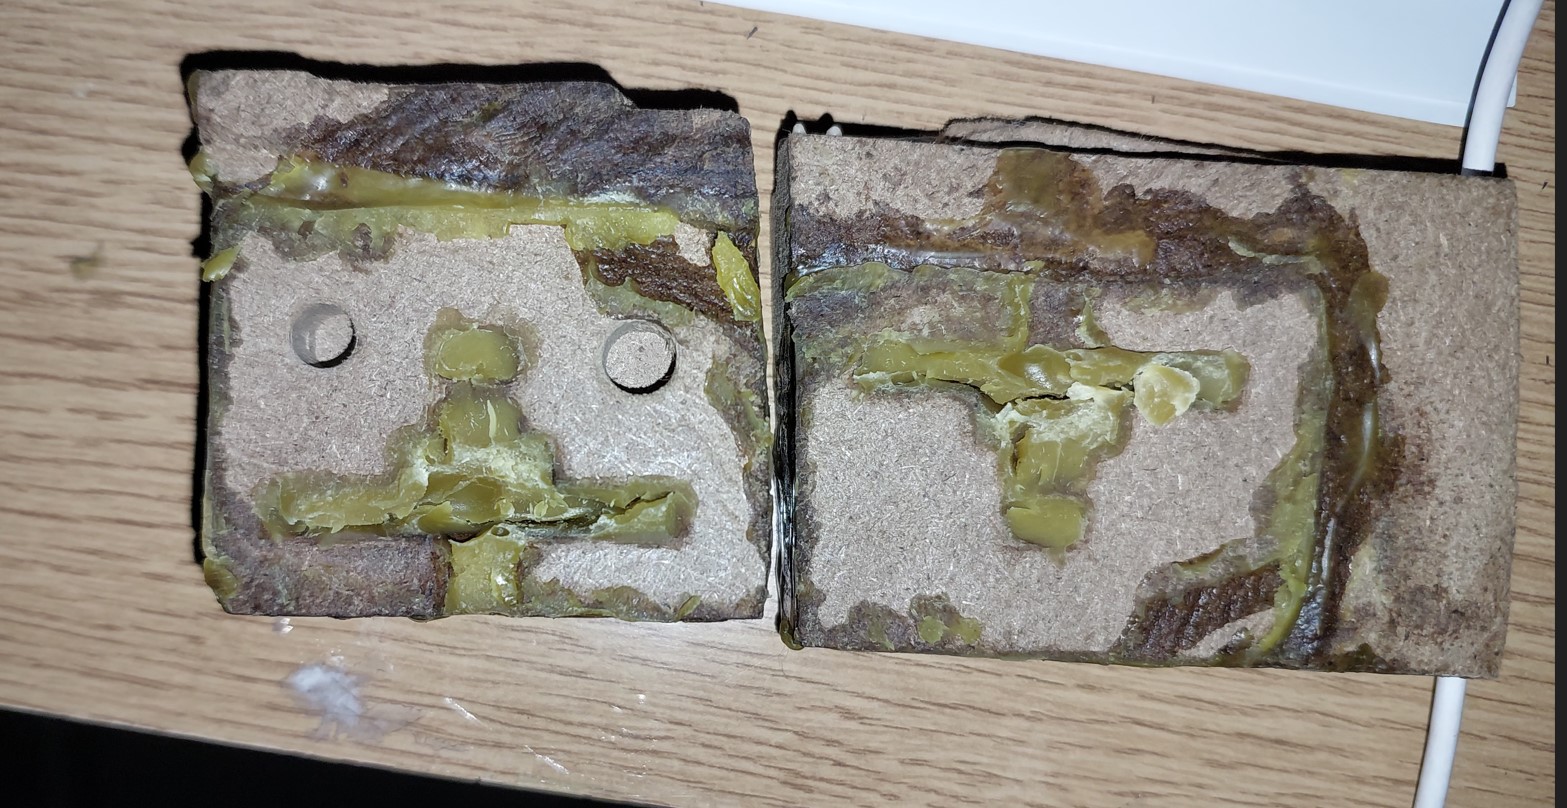
I unglued the parts but the cast piece was stuck glued to the mold as well.
When i pulled hard, the part got broken into two parts.
files:
If you want to have a look at the files i used in this assignment, you may find them here
 Using solidworks i sketched a knob
 I built upon surfaces to create different shapes.
making sure that the base is bigger that the next shape.
I built upon surfaces to create different shapes.
making sure that the base is bigger that the next shape.
 I used fillets on each edge
 After making a string's hole in the elonged extrusion, i went back to the top plane and created two circoncentic circles around the knob
 then I extruded their suface and made a sort of vessel which i plan to pour into the material that is going
to act as mold.
then I extruded their suface and made a sort of vessel which i plan to pour into the material that is going
to act as mold.
 The plan is to cut the dier into two parts that fit, then separate them to remove the casted knob.
 Then i used the mold and cast feature of solidworks to generate a cavity around the part.
 On one side, 2 circles that will act as joints were extruded, automatically on the other side,
extrude cuts are made.
On one side, 2 circles that will act as joints were extruded, automatically on the other side,
extrude cuts are made.
 Slight ajdutment is needed to create a clearance on the female side, so the joint becomes mechanically feasible.
 However, a hole where the casting material will pass is needed.
 The next step is to print both parts separately,
Here what i did i exported stl files of both parts.
I imported one by one in aspire 9.0
I created a tool path, and loaded the saved g code into the mach3 machine control environement.
The next step is to print both parts separately,
Here what i did i exported stl files of both parts.
I imported one by one in aspire 9.0
I created a tool path, and loaded the saved g code into the mach3 machine control environement.
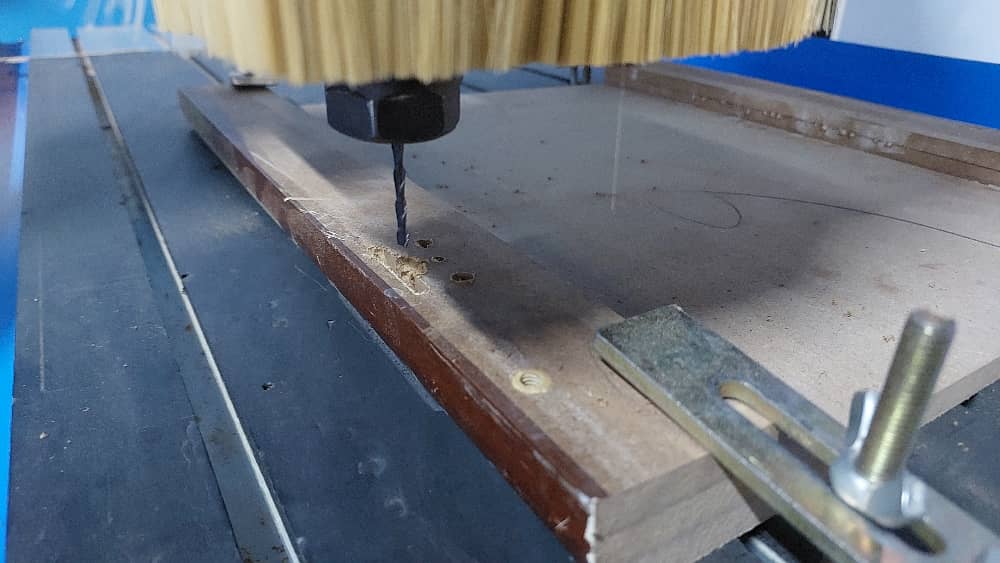 I use the blue elphant ELE6090 CNC machine
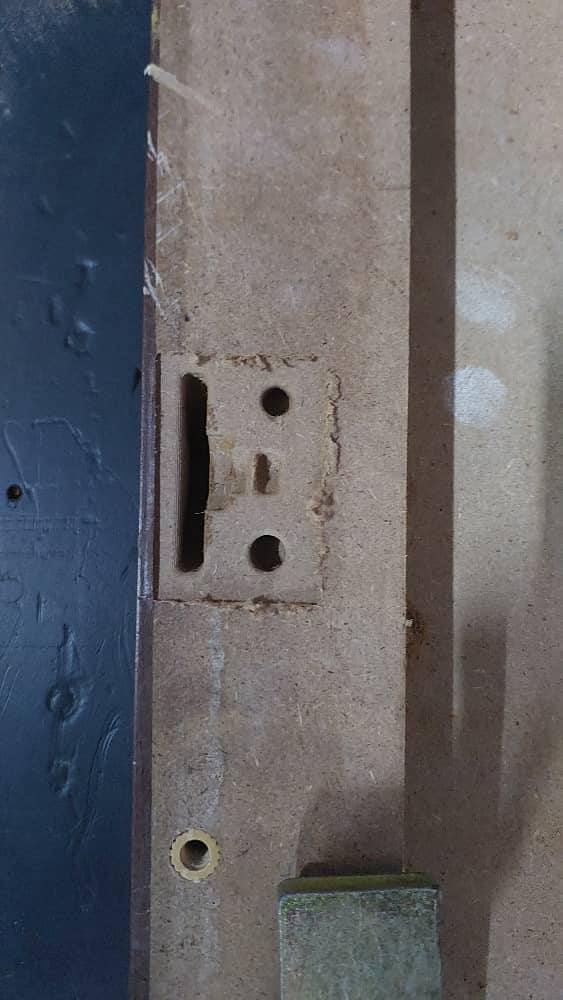
after a little cleaning the part looks like this:
I use the blue elphant ELE6090 CNC machine
after a little cleaning the part looks like this:
 I launched another part at a different position from the material
both parts after CNC job look like:
I launched another part at a different position from the material
both parts after CNC job look like:
.jpeg) Then i proceded to 3d printing
Then i proceded to 3d printing
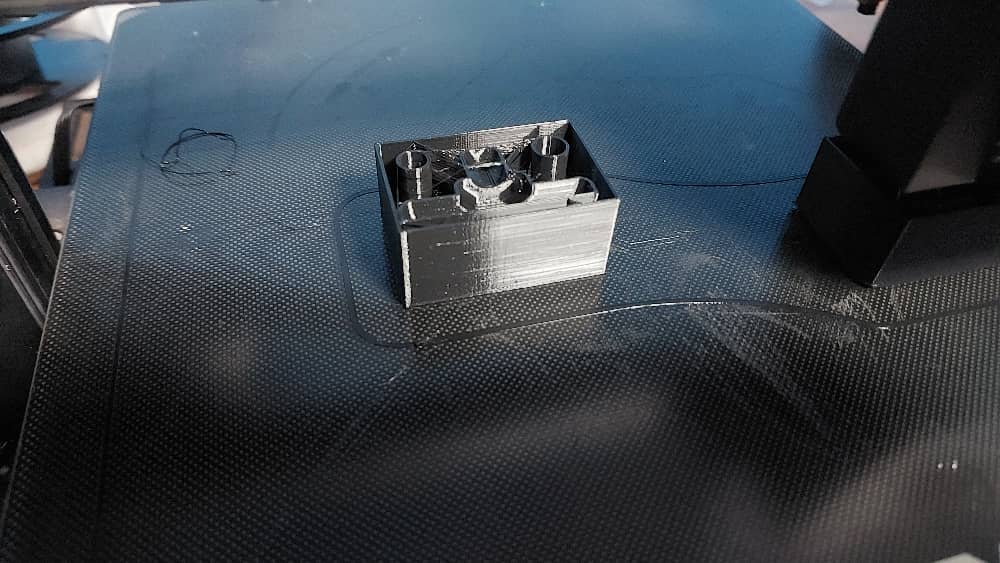 machine printing the parts
 one male and female
 they fit each other
 also
also
 When we got the wax (from honey comb)
i started to prepare the mold i cut in the mdf
When we got the wax (from honey comb)
i started to prepare the mold i cut in the mdf
 I however had to level the matting surfaces
 The hole where the melted wax will go in through
 Glued together the two parts before pouring in the melted wax
 poured the wax in
 Shake well so that the liquid goes all over
 Let the piece rest for at least 30 minute
 files:
If you want to have a look at the files i used in this assignment, you may find them here
files:
If you want to have a look at the files i used in this assignment, you may find them here