Computer Aided Design (CAD)
The following tools were explored and exercises done.
-
Fusion360 (3D modelling)
a. ChainMail v1
b. Chainmail v2
c. Sphericon
d. Anti-Oloid -
CorelDraw (2D Vector)
a. Einstein's Hat
-
Midjourney (AI Generator)
a. Project Prompts
Tools
Fusion360
Fusion360 is something I have been using and teaching for a few years now. Some of my explorations that I will combine with 3D printing later are attached below.
Grasshopper + Rhino
Grashopper is a favourite, but I don't get to work in it enough apart from personal projects. I am planning to purchase an Edu version so I can play with it over the course of the year.
FreeCAD
This is something I would like to explore further !
CorelDraw
CorelDraw is my goto software for all my lasercutting needs.
MidJourney
While I had tried Dall-E at some point, I was not too impressed with its image generating capabilities. Eventually, I purchased some MidJourney Credits, primarily to try it out, but also to generate thumbnails for my FabAcademy page. The results are shockingly impressive visually, as well as usually on-point with what I am describing and visualising.
Exercise
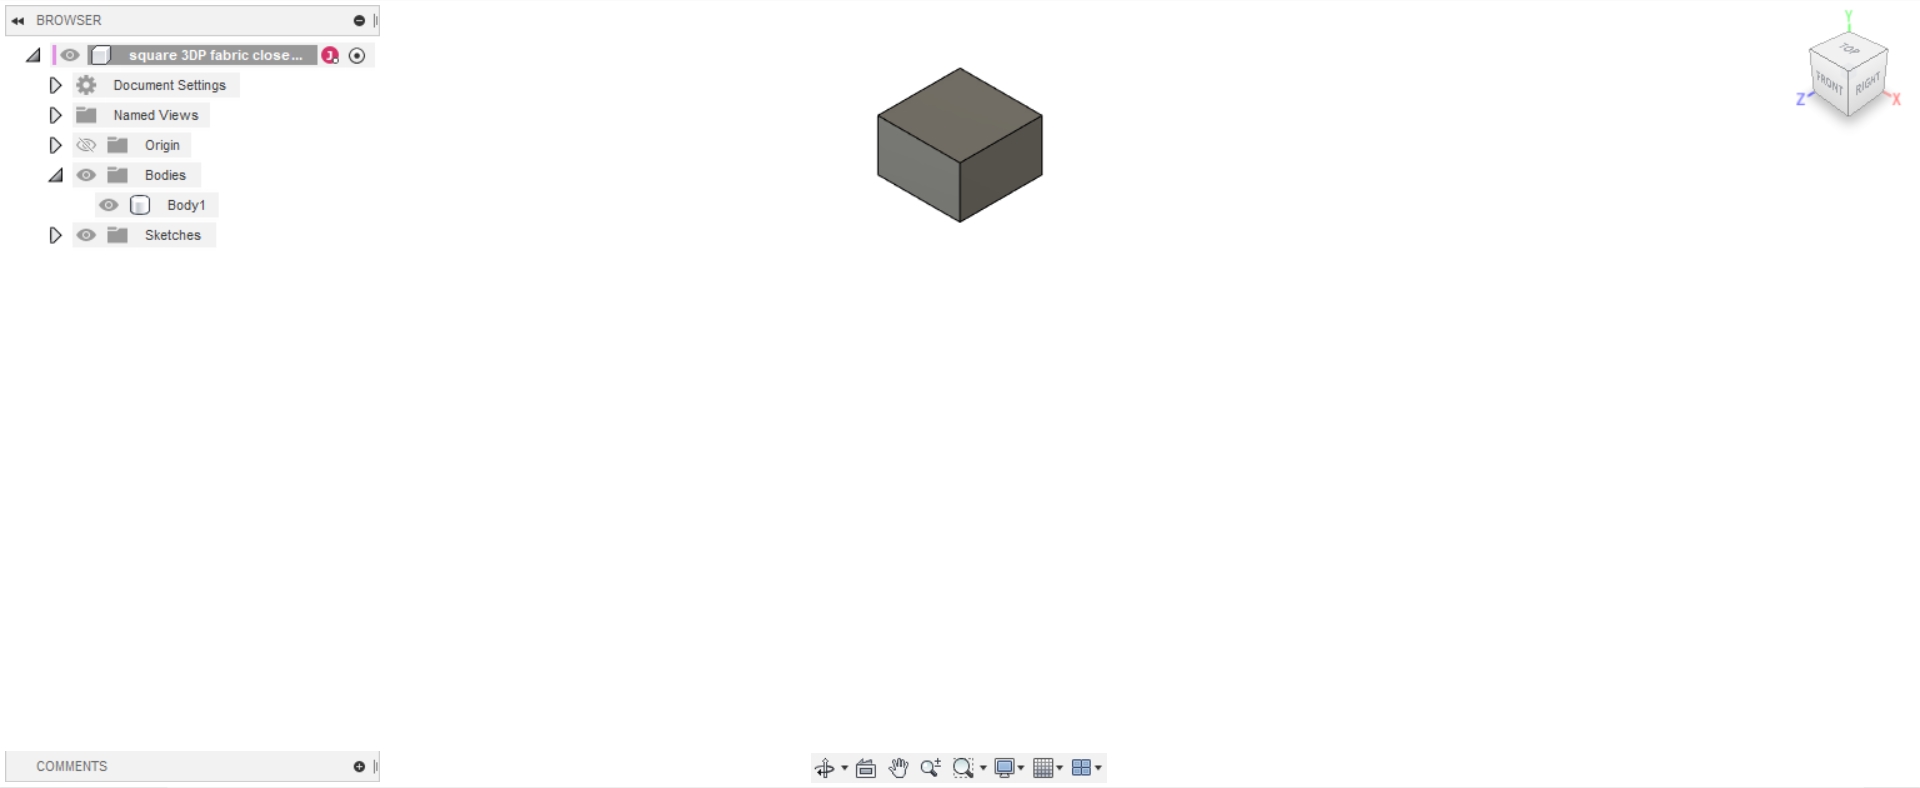
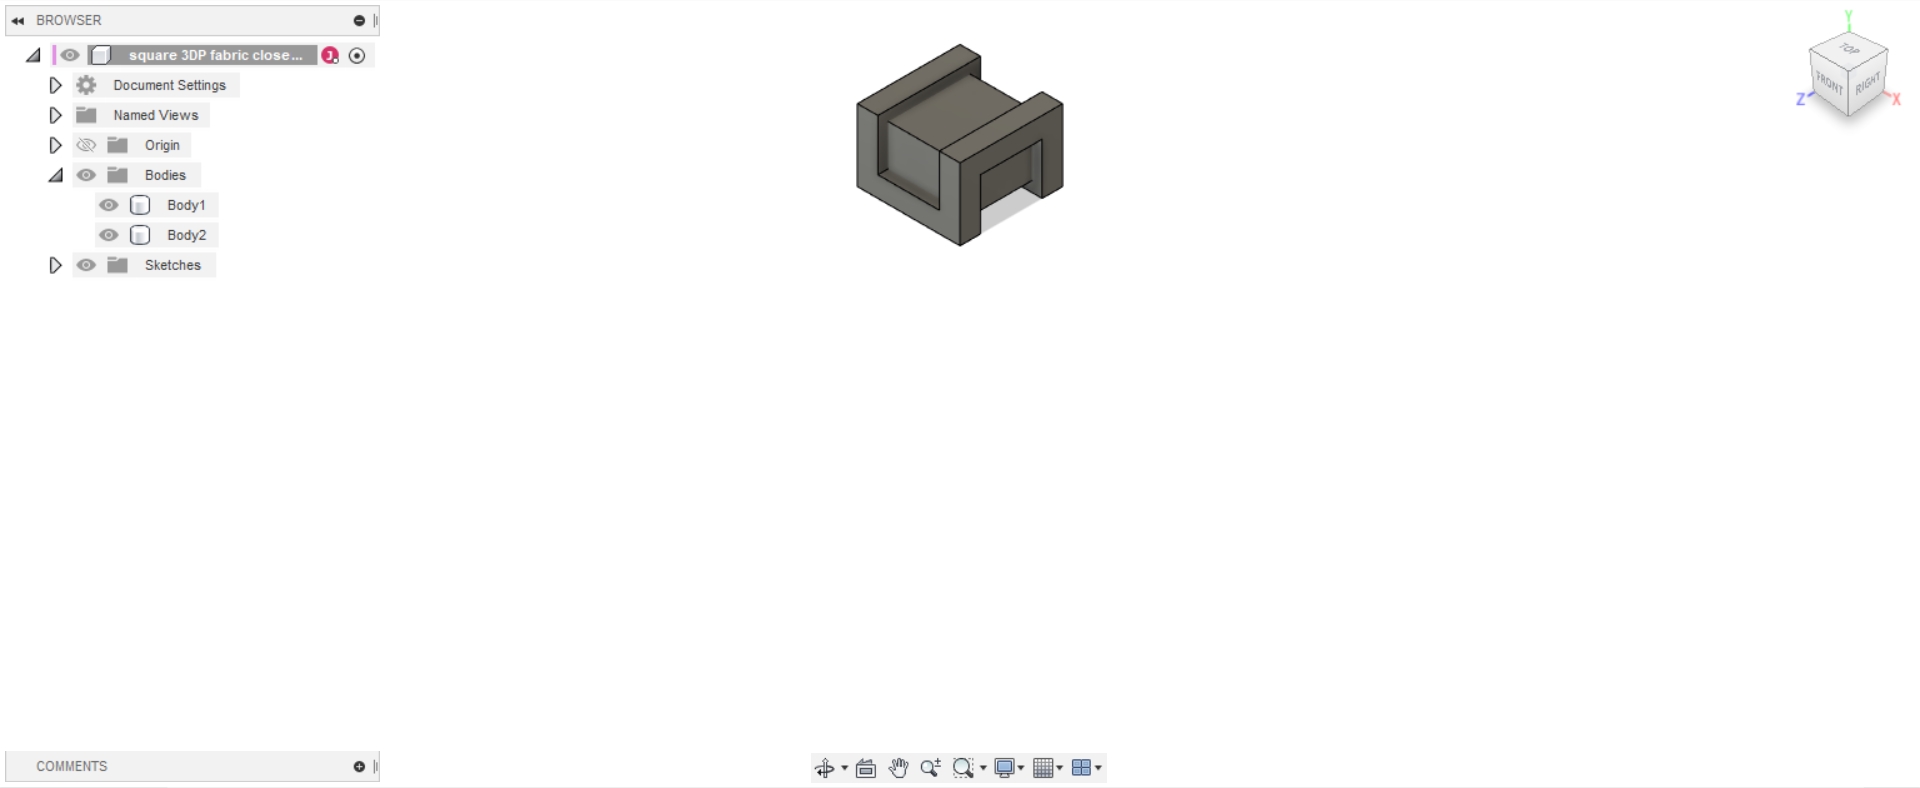
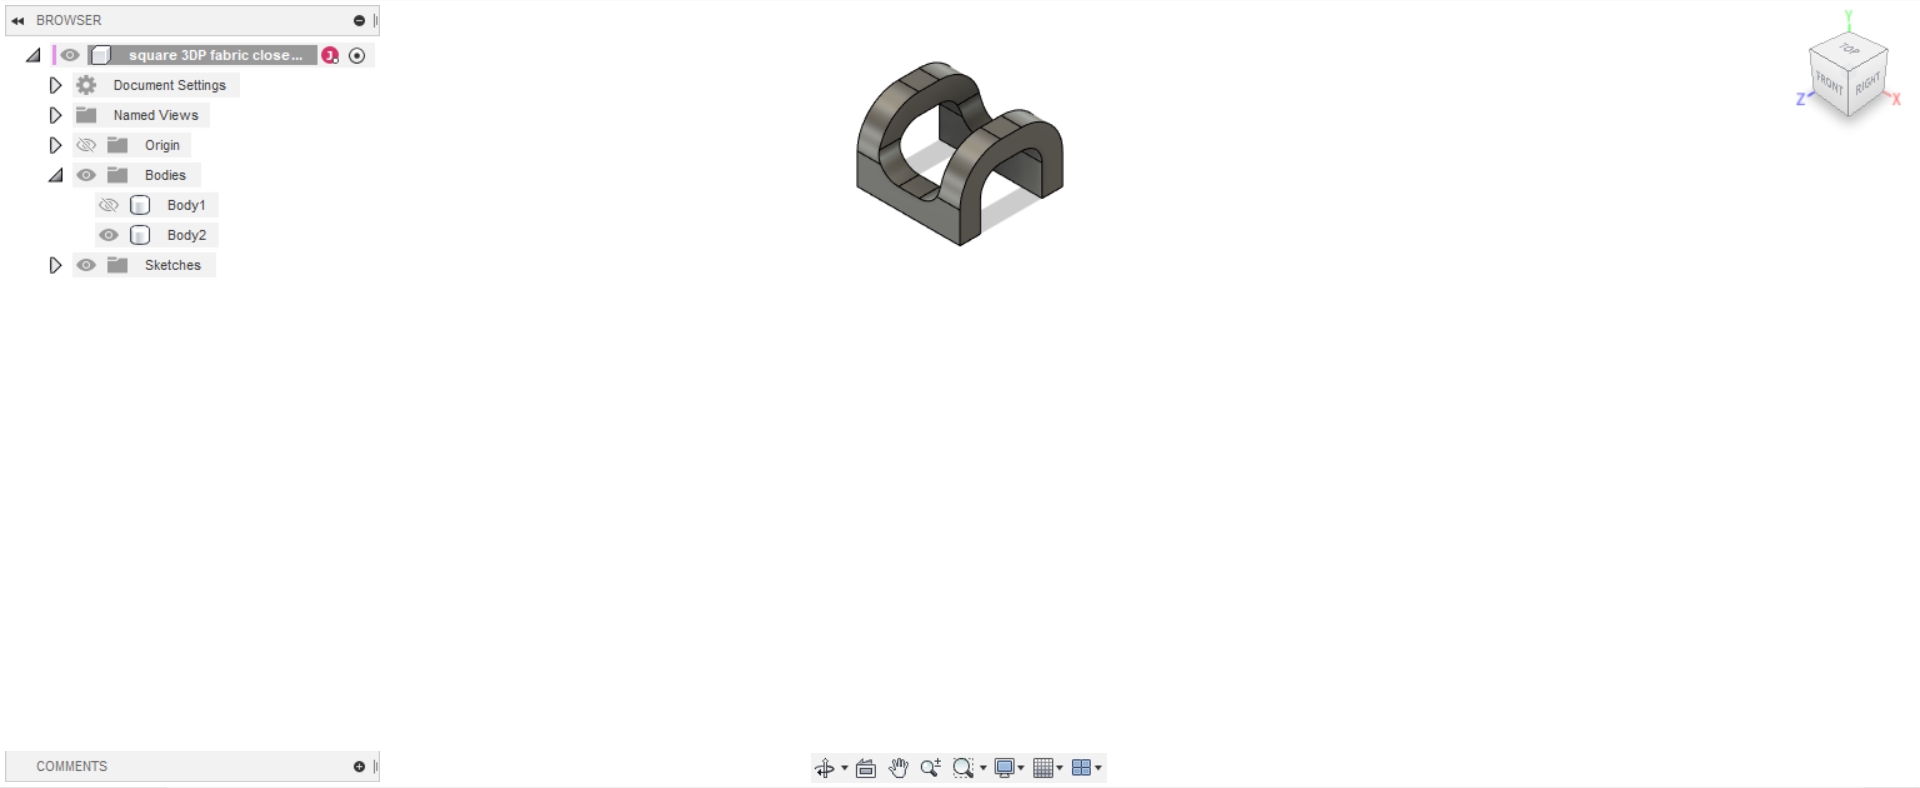
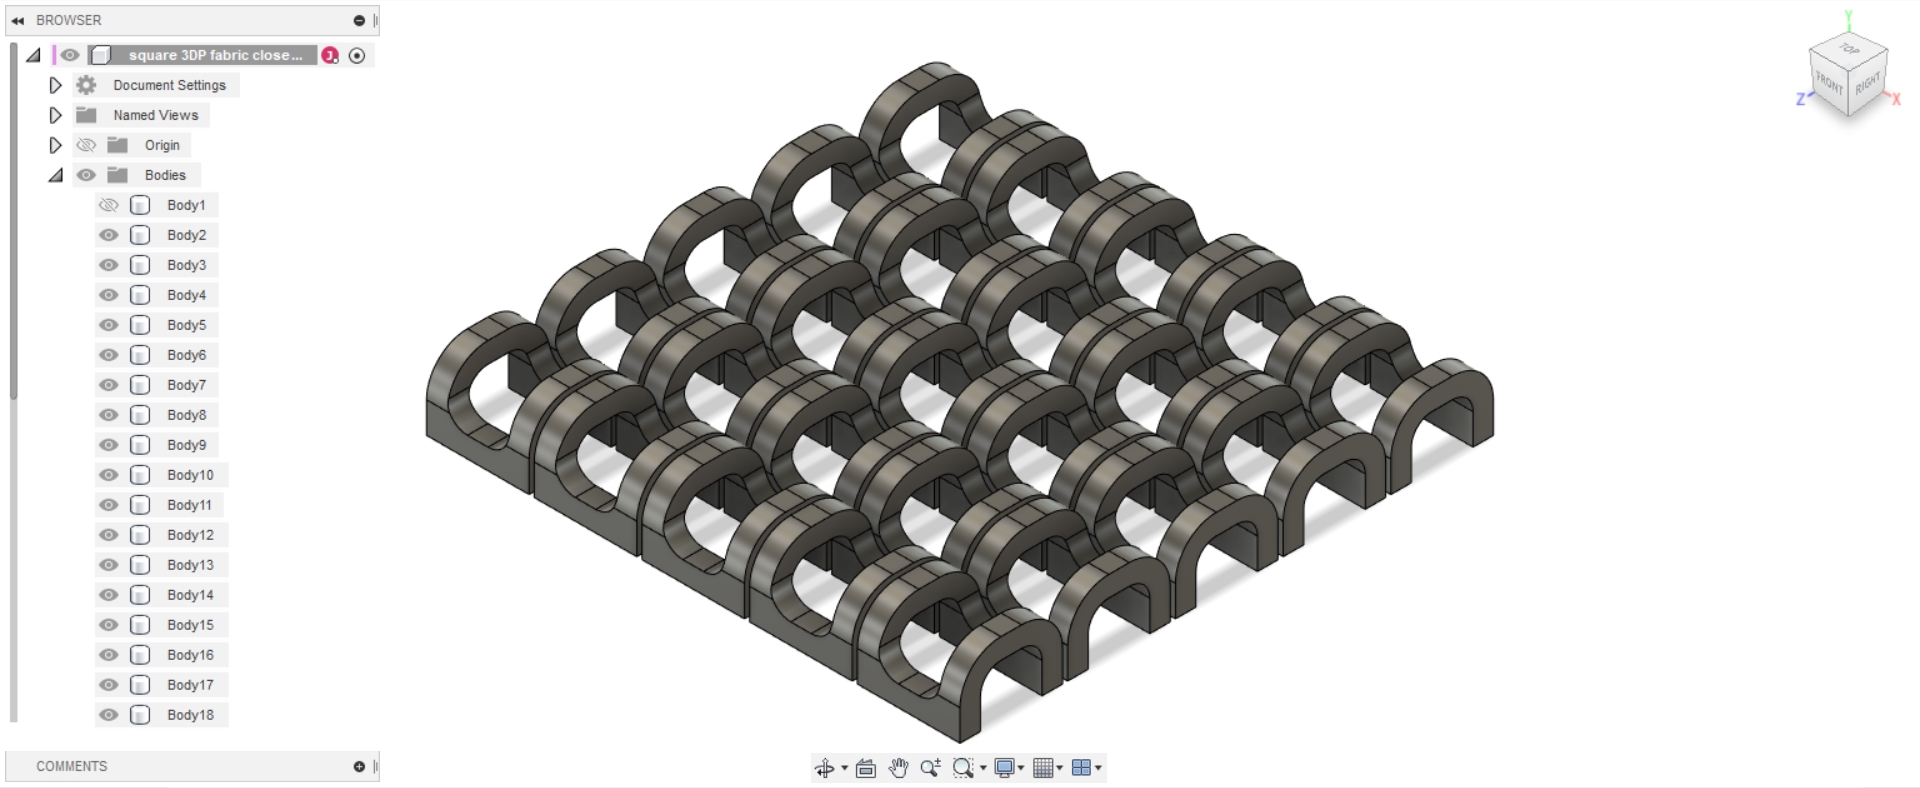
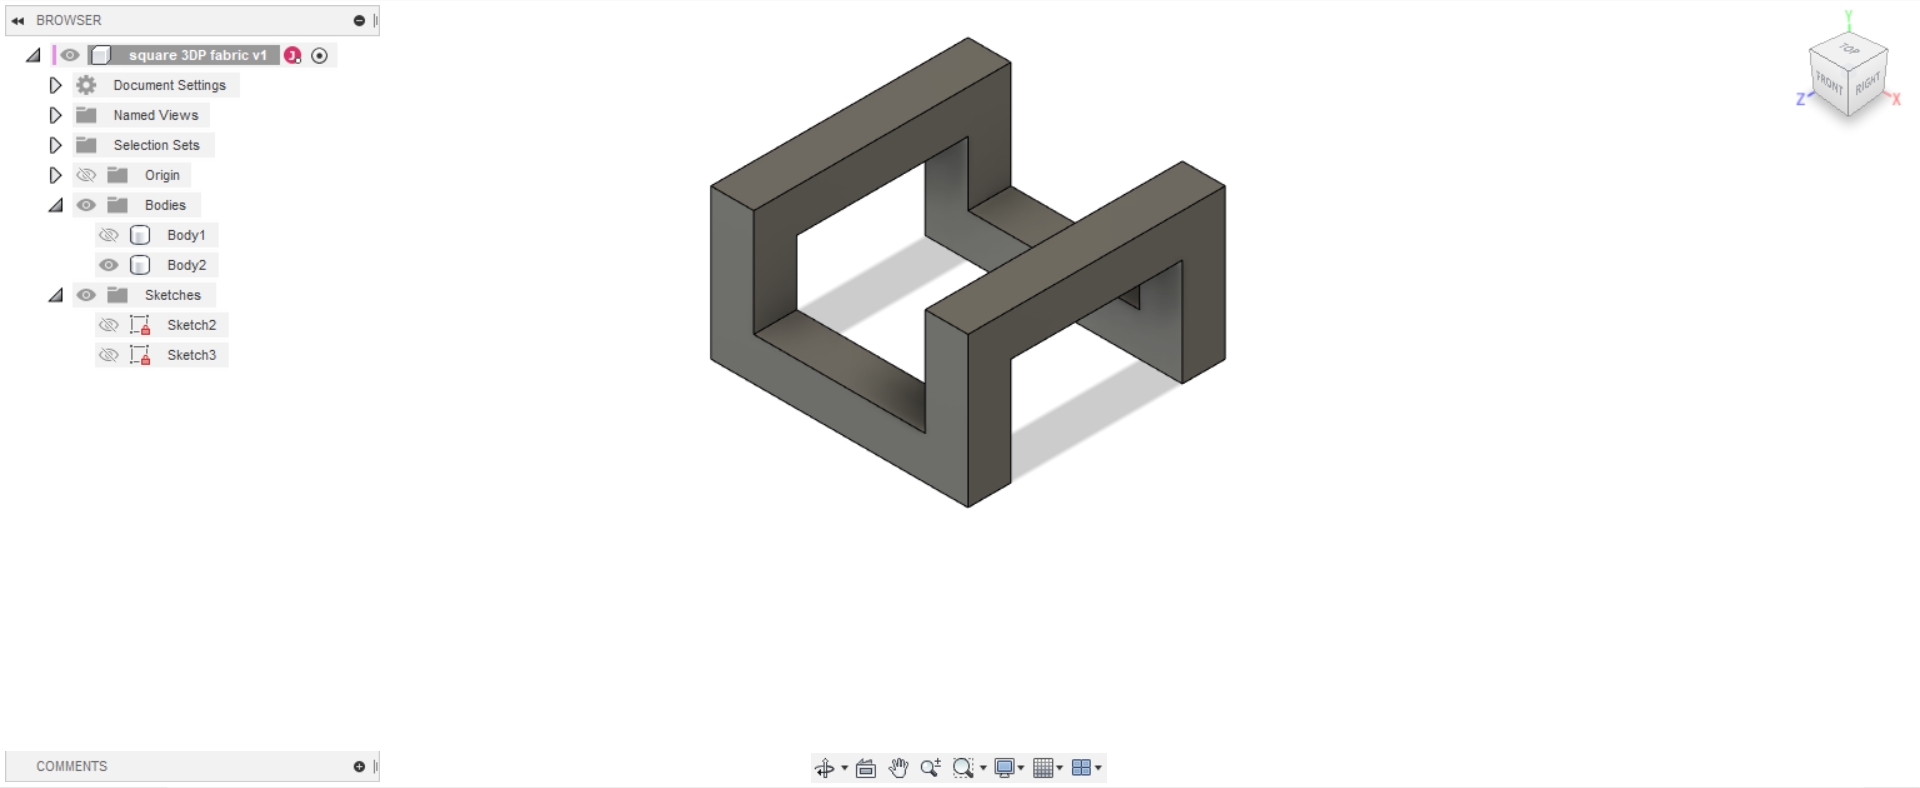
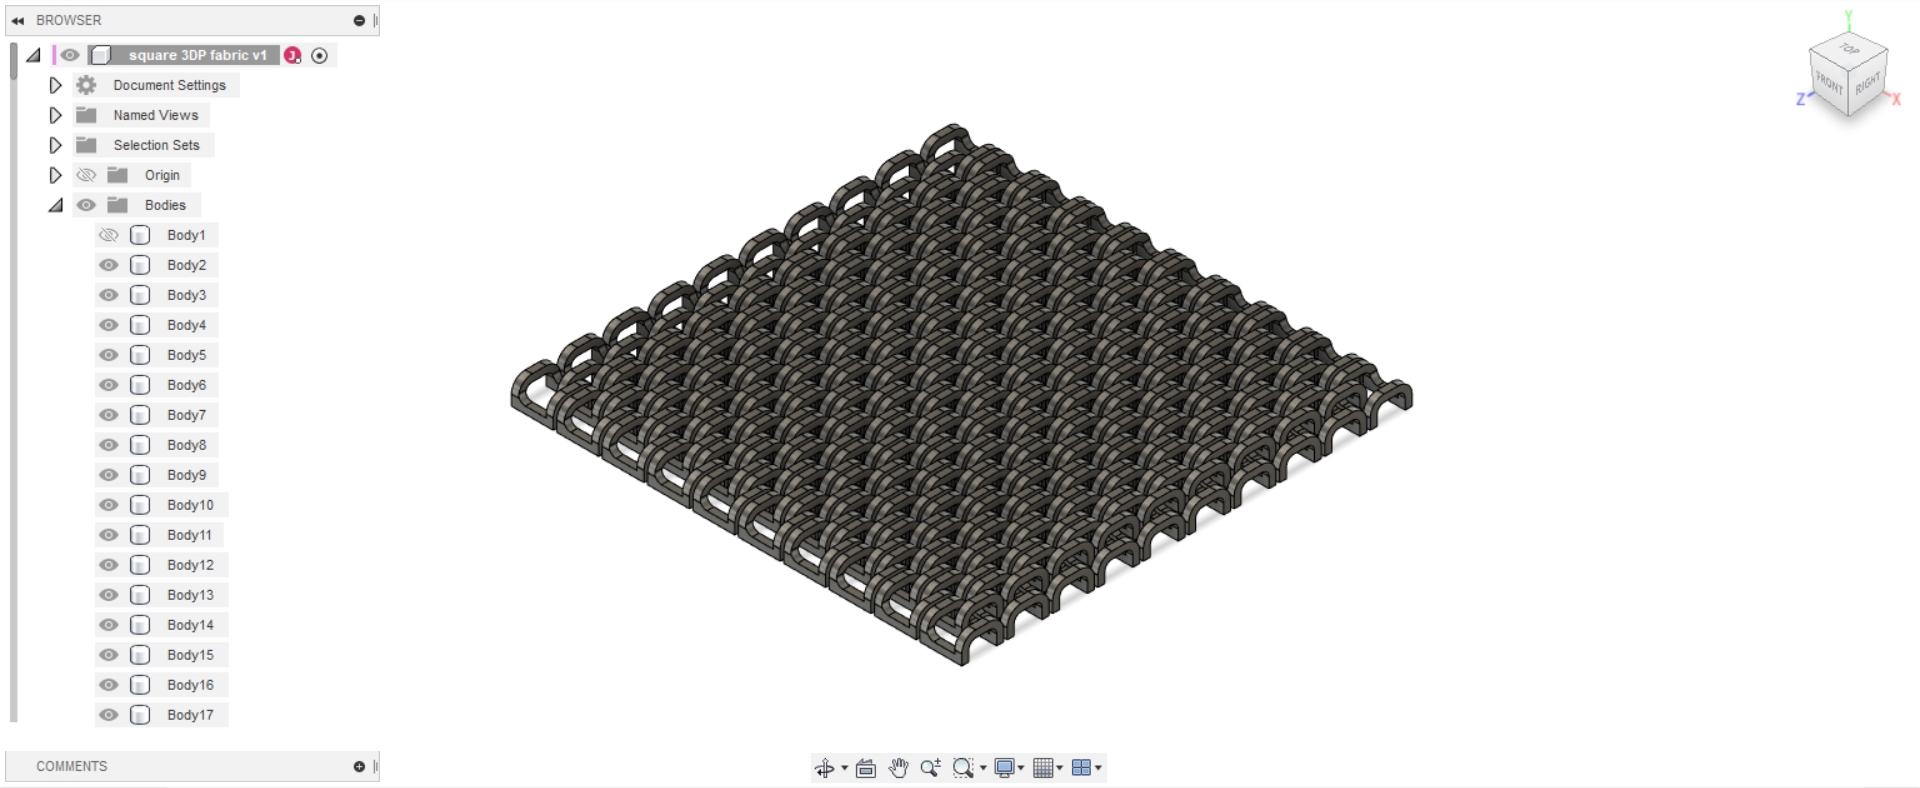
Chainmail version 1
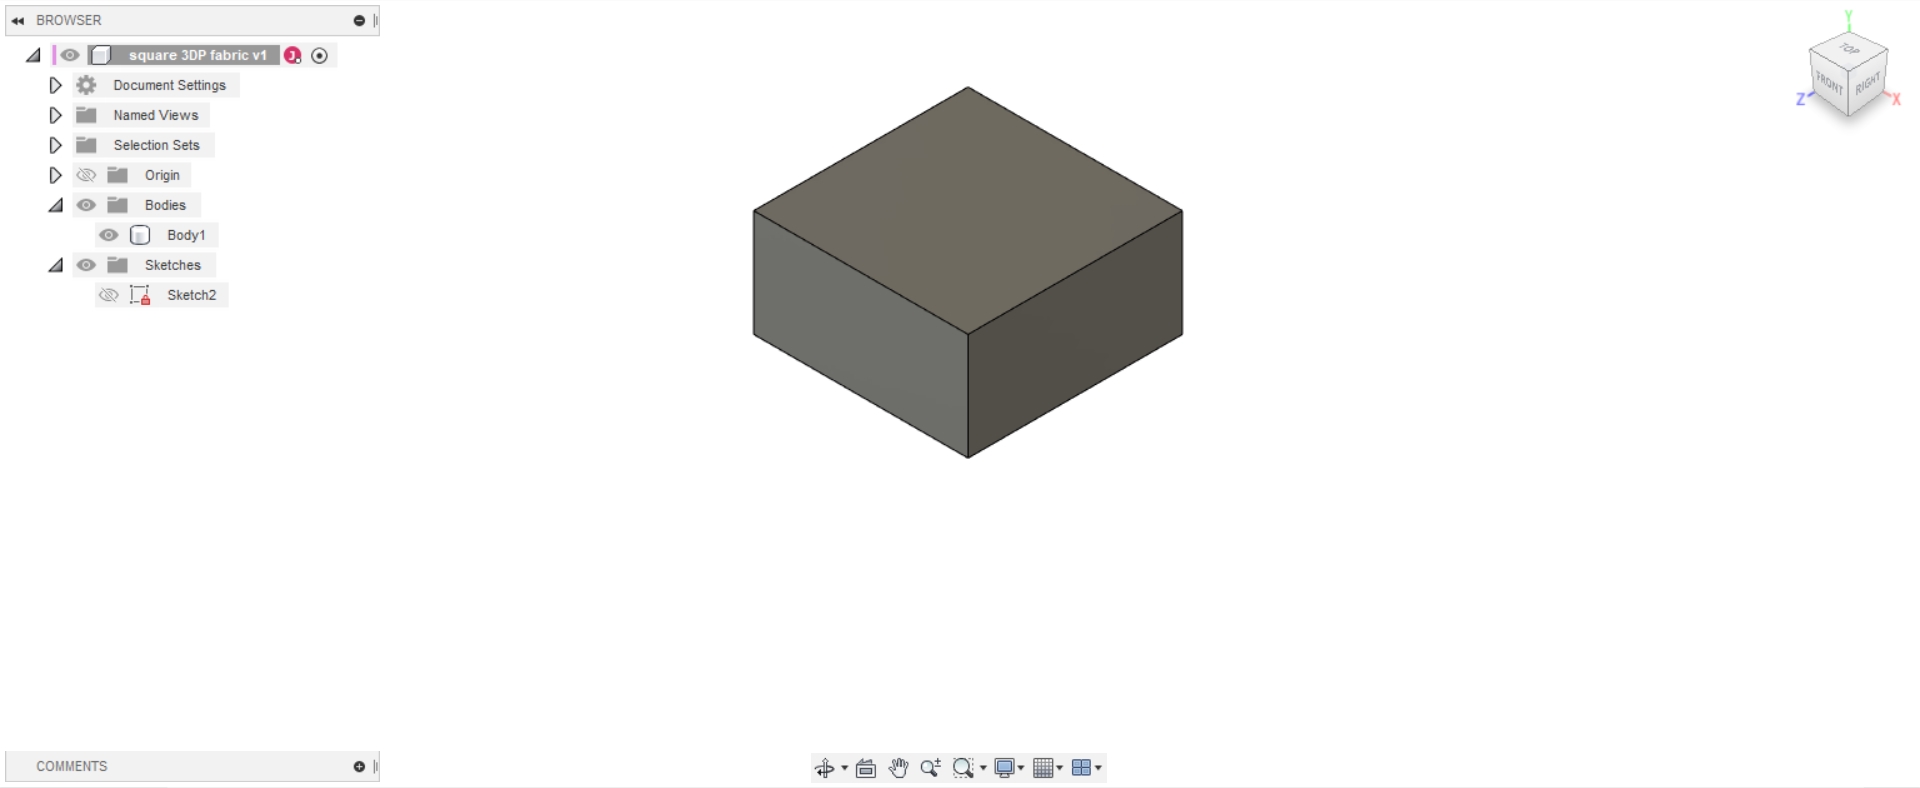
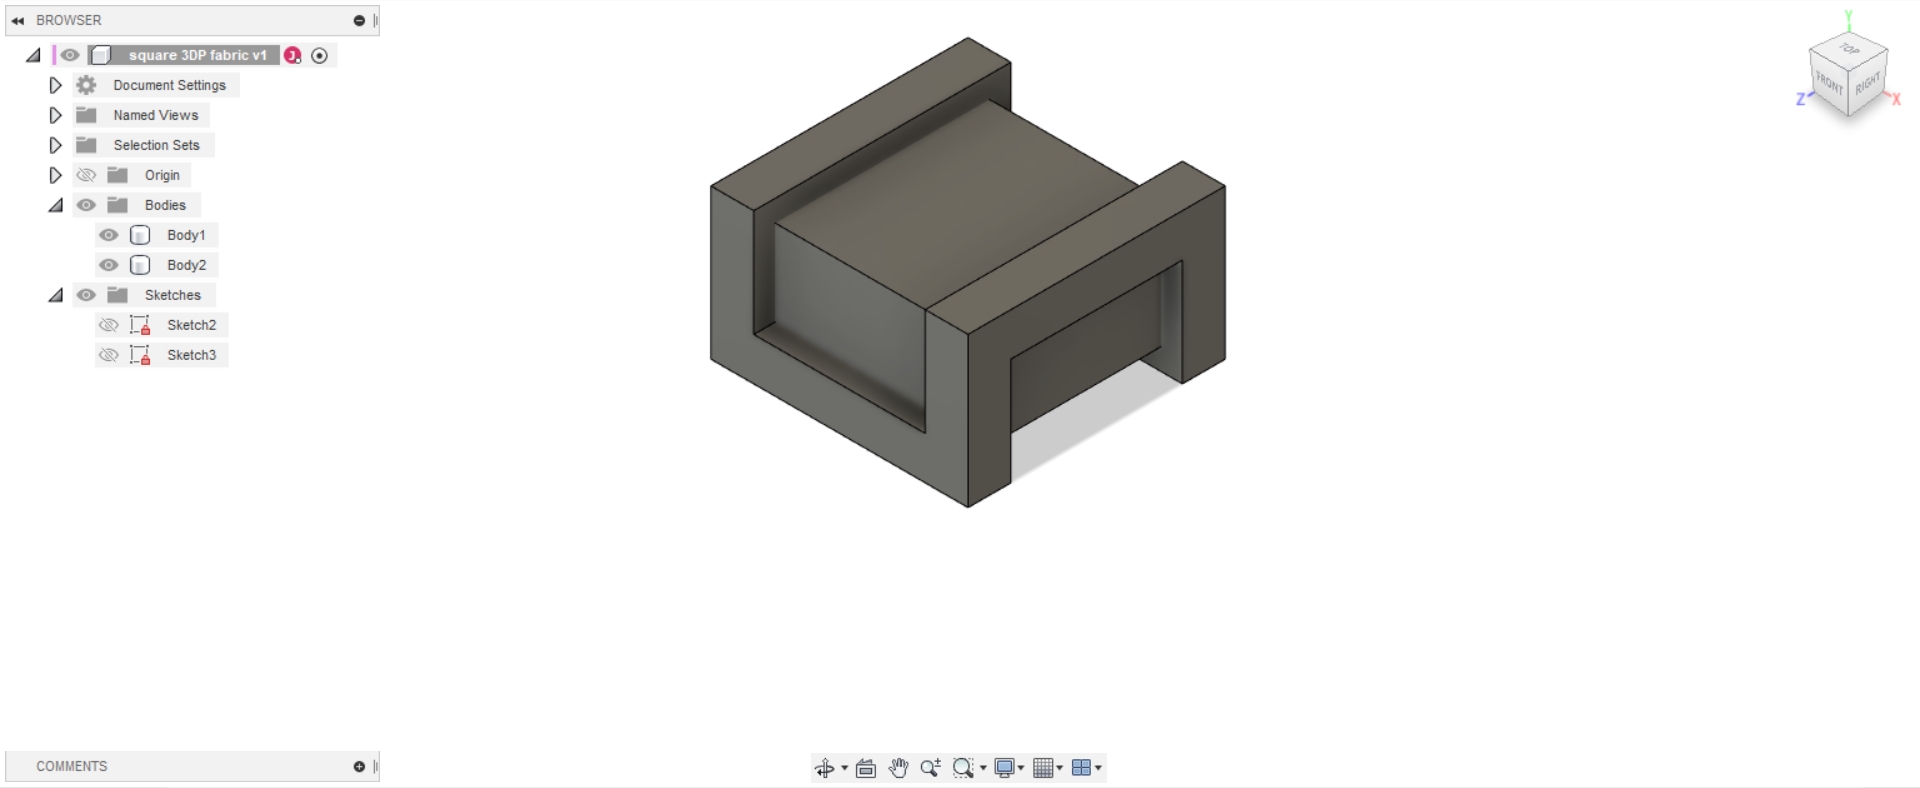
The chainmail model starts with modelling a good single link. I started off by Extruding a core cuboidal block, and then used it's edges as paths for Pipe commands to create the actual link. Then I added fillets at all the upper corners. Once the single link was done, I used the Rectangular Pattern command to create a grid of these a suitable distance apart but not overlapping. Finally the entire set was Move-Copied one diagonal step away so that the copies were all centered at the corners of the first set.
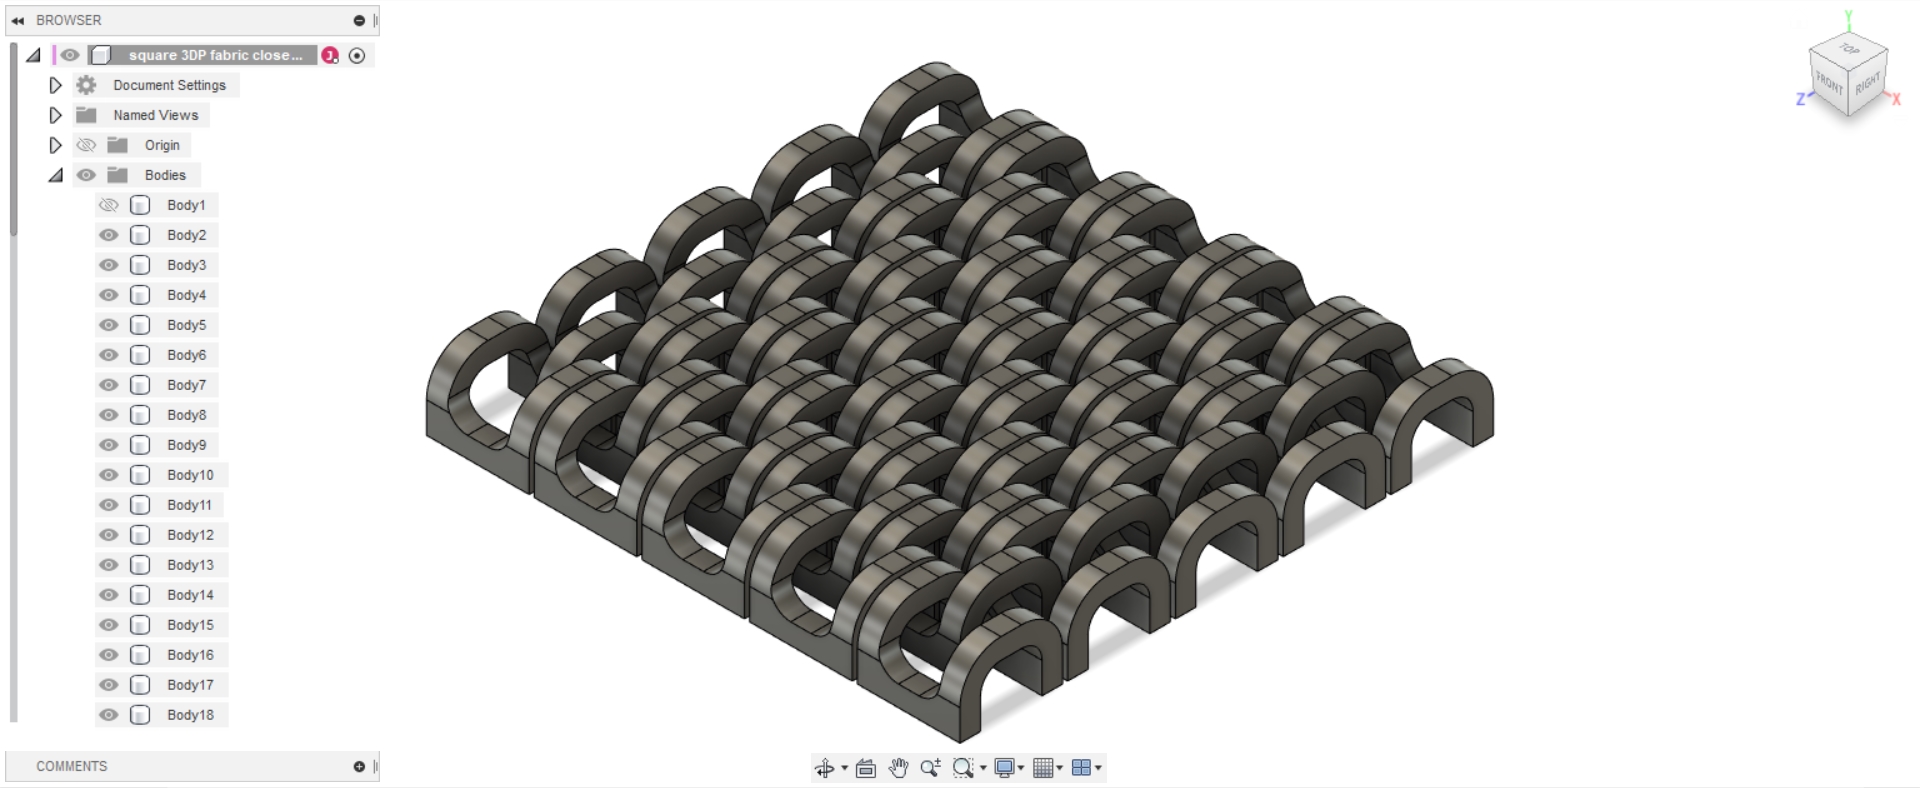
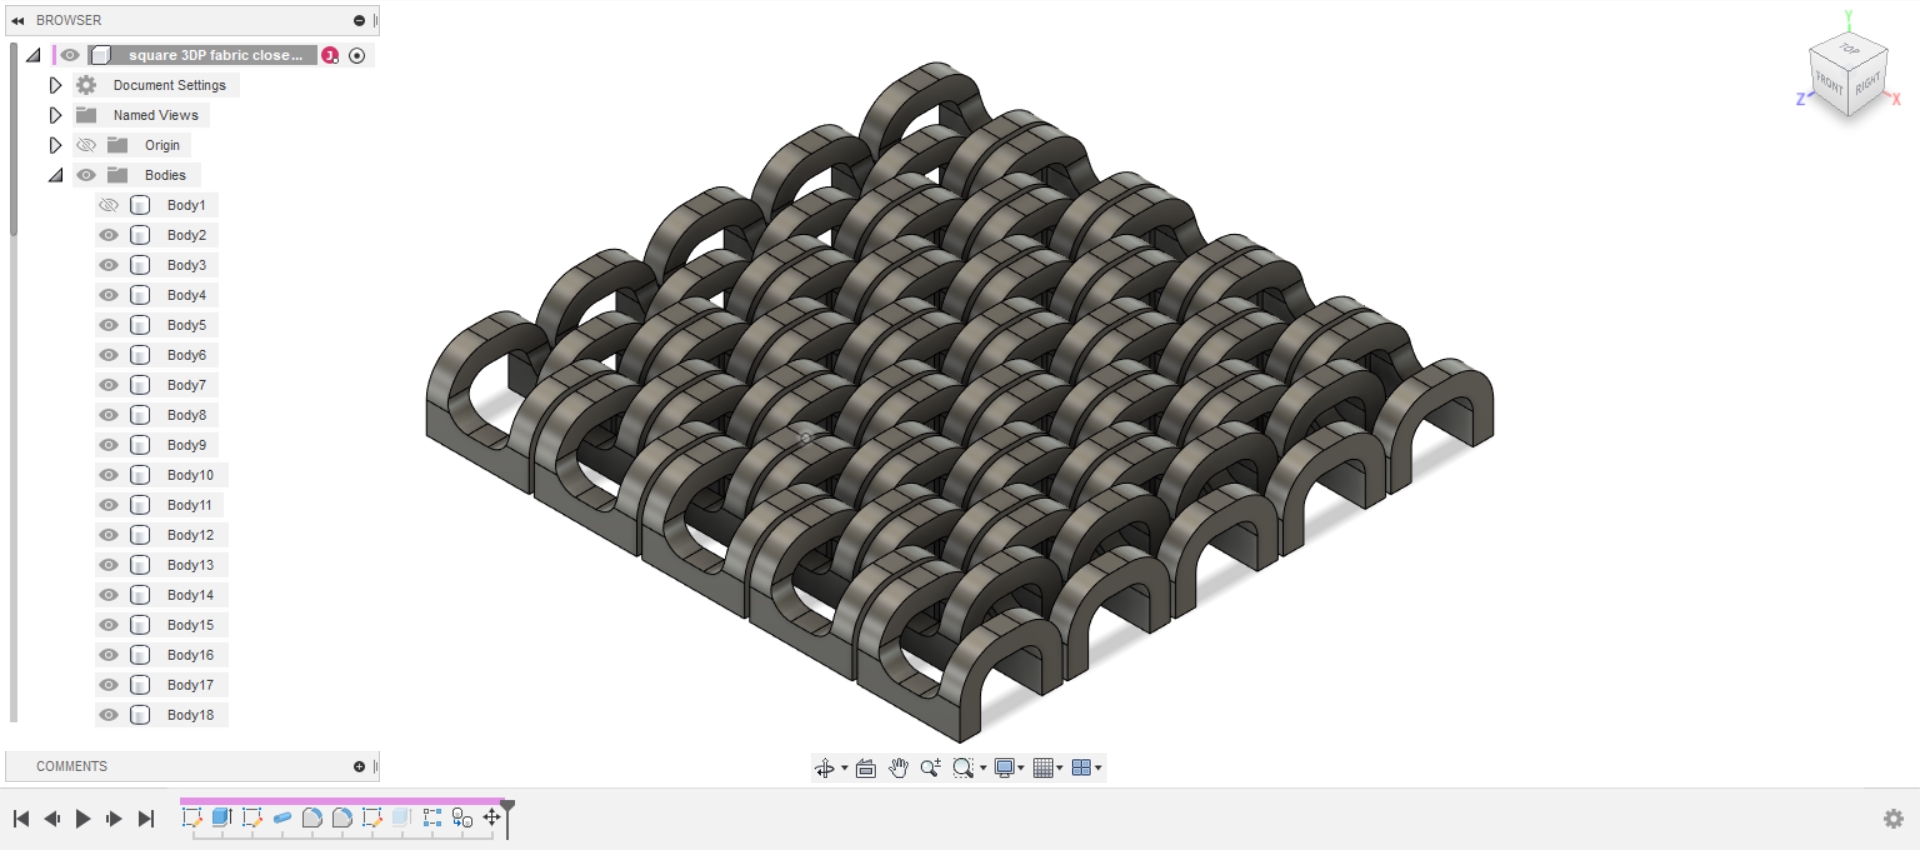
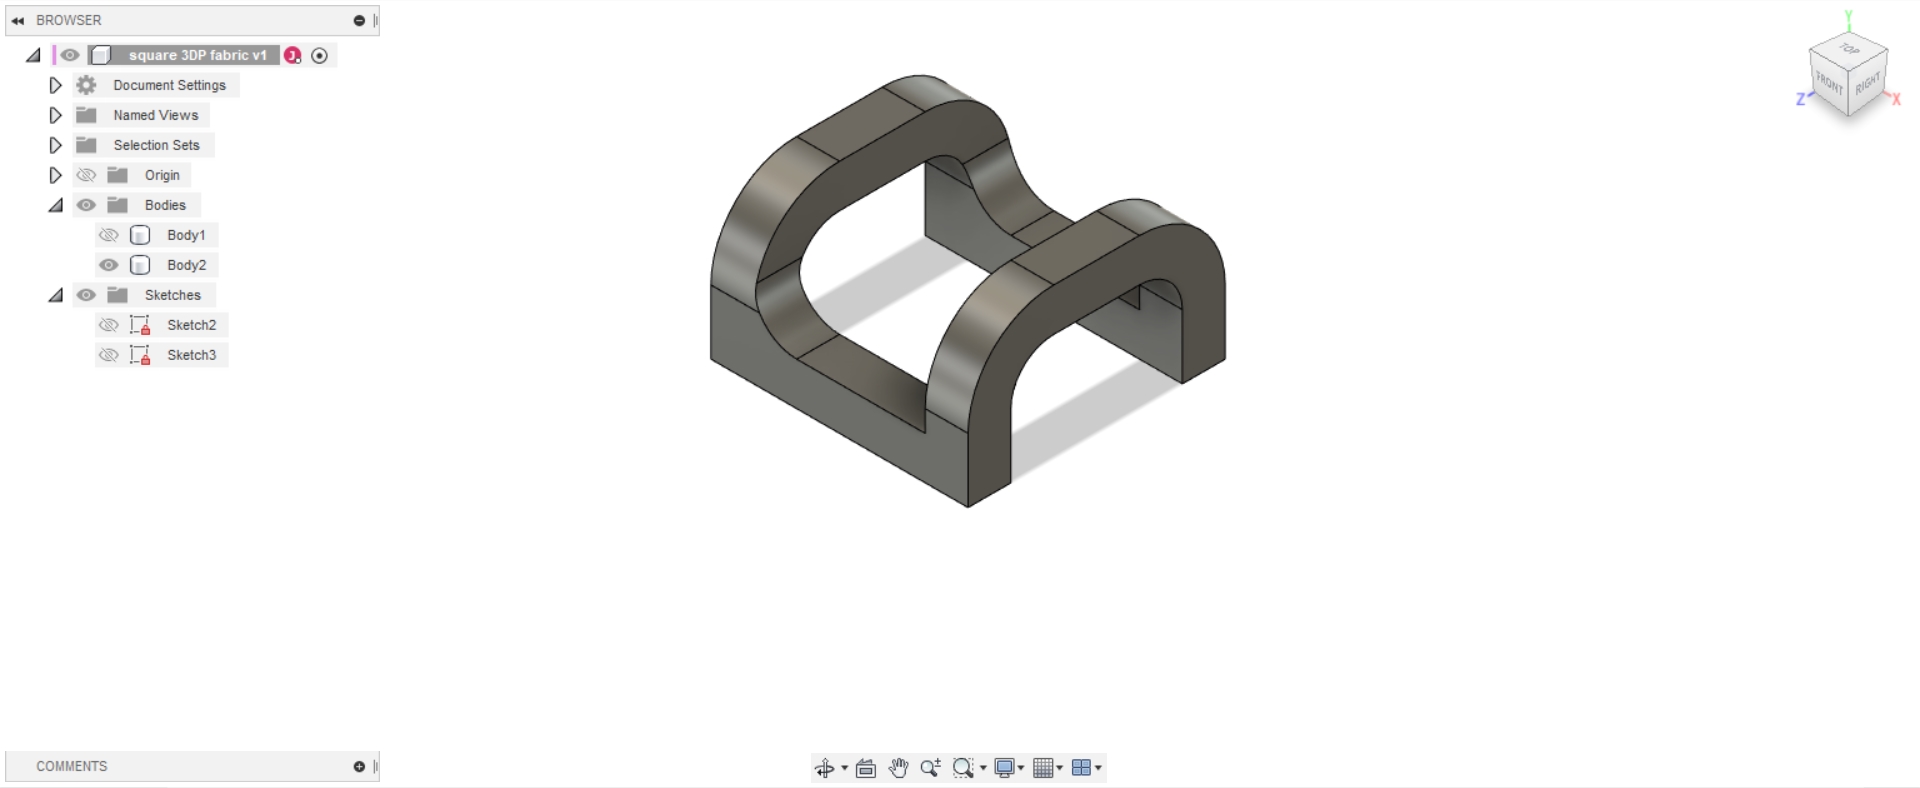
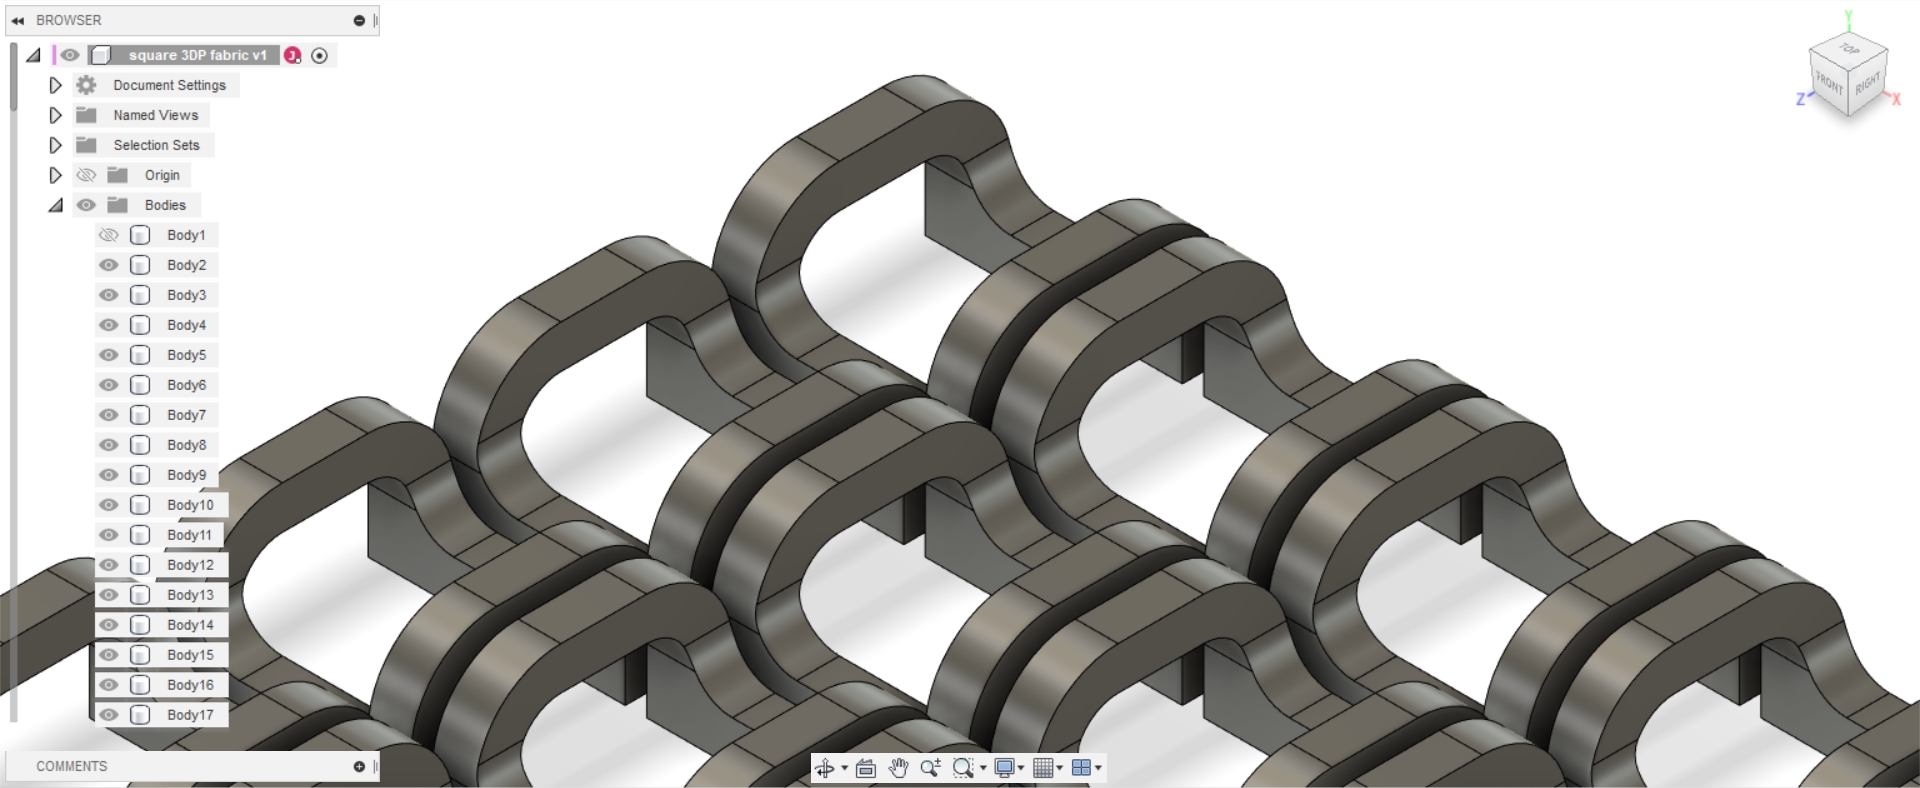
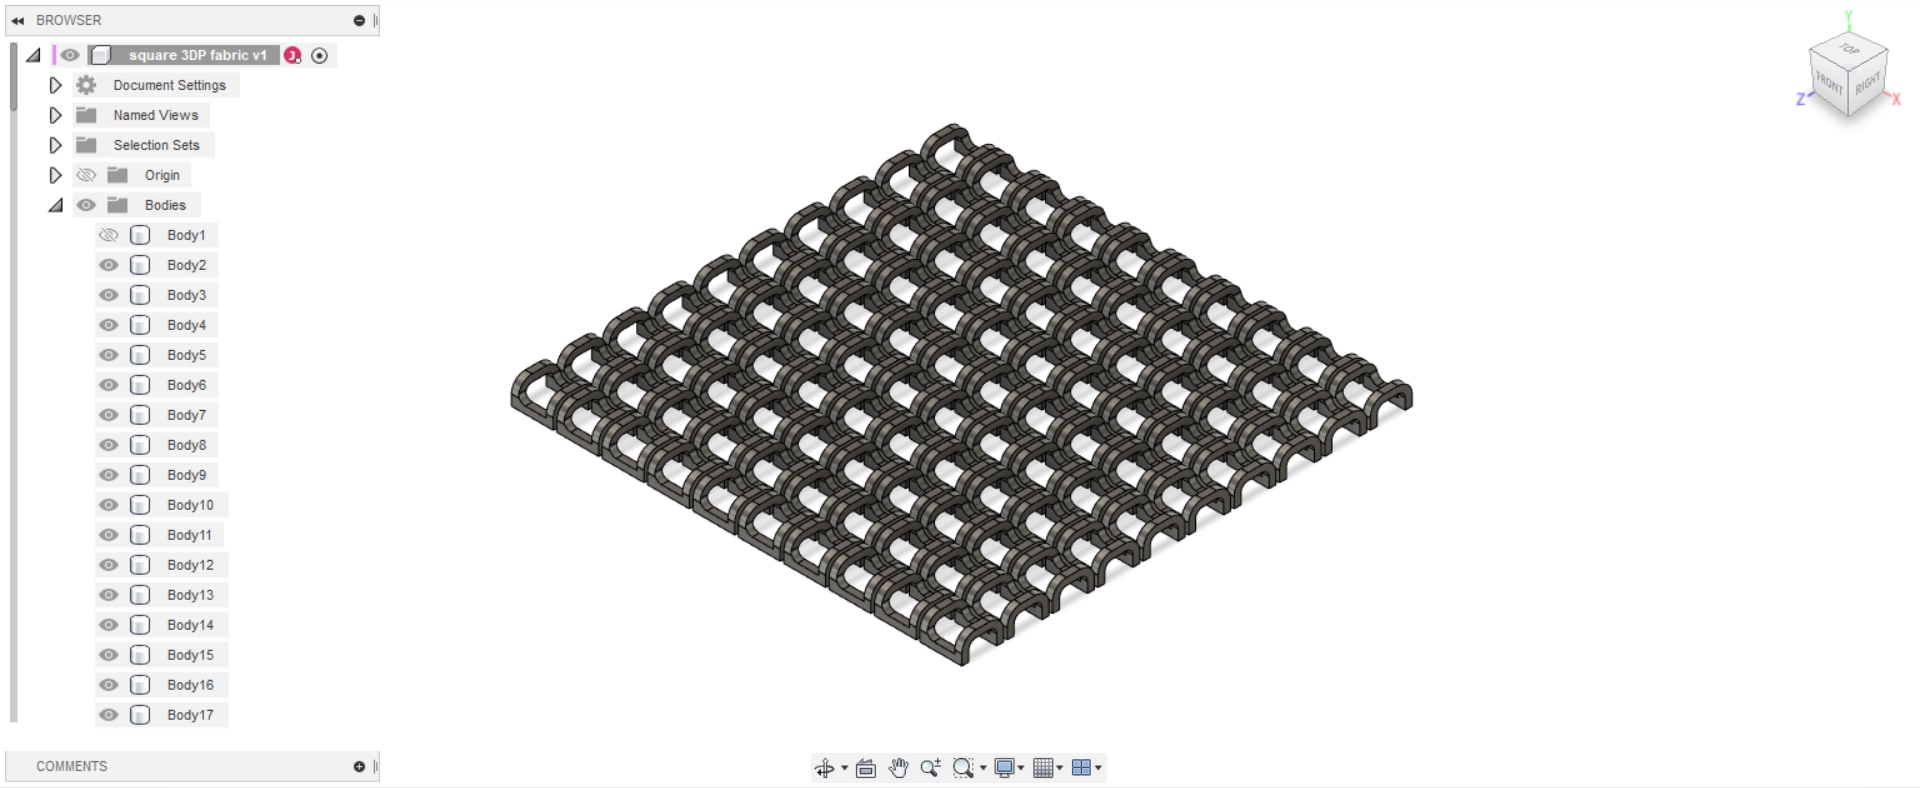
Chainmail version 2
A version where the links are closer, to better 3D print a larger segment.
Chainmail Fusion file v2
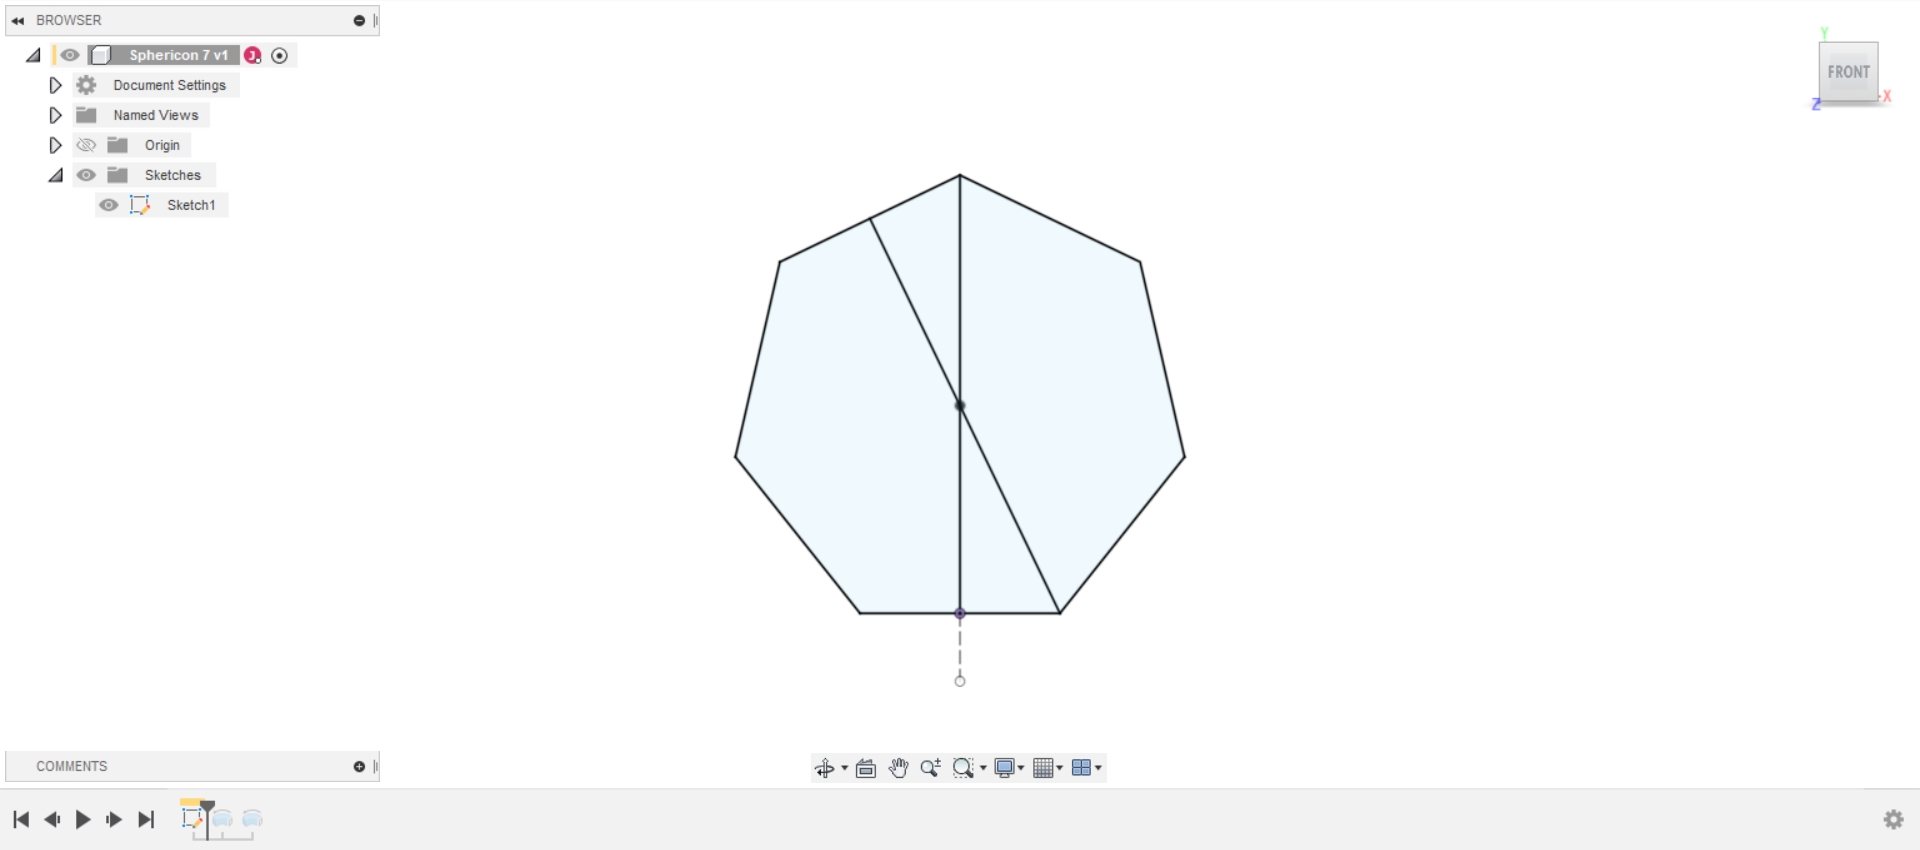
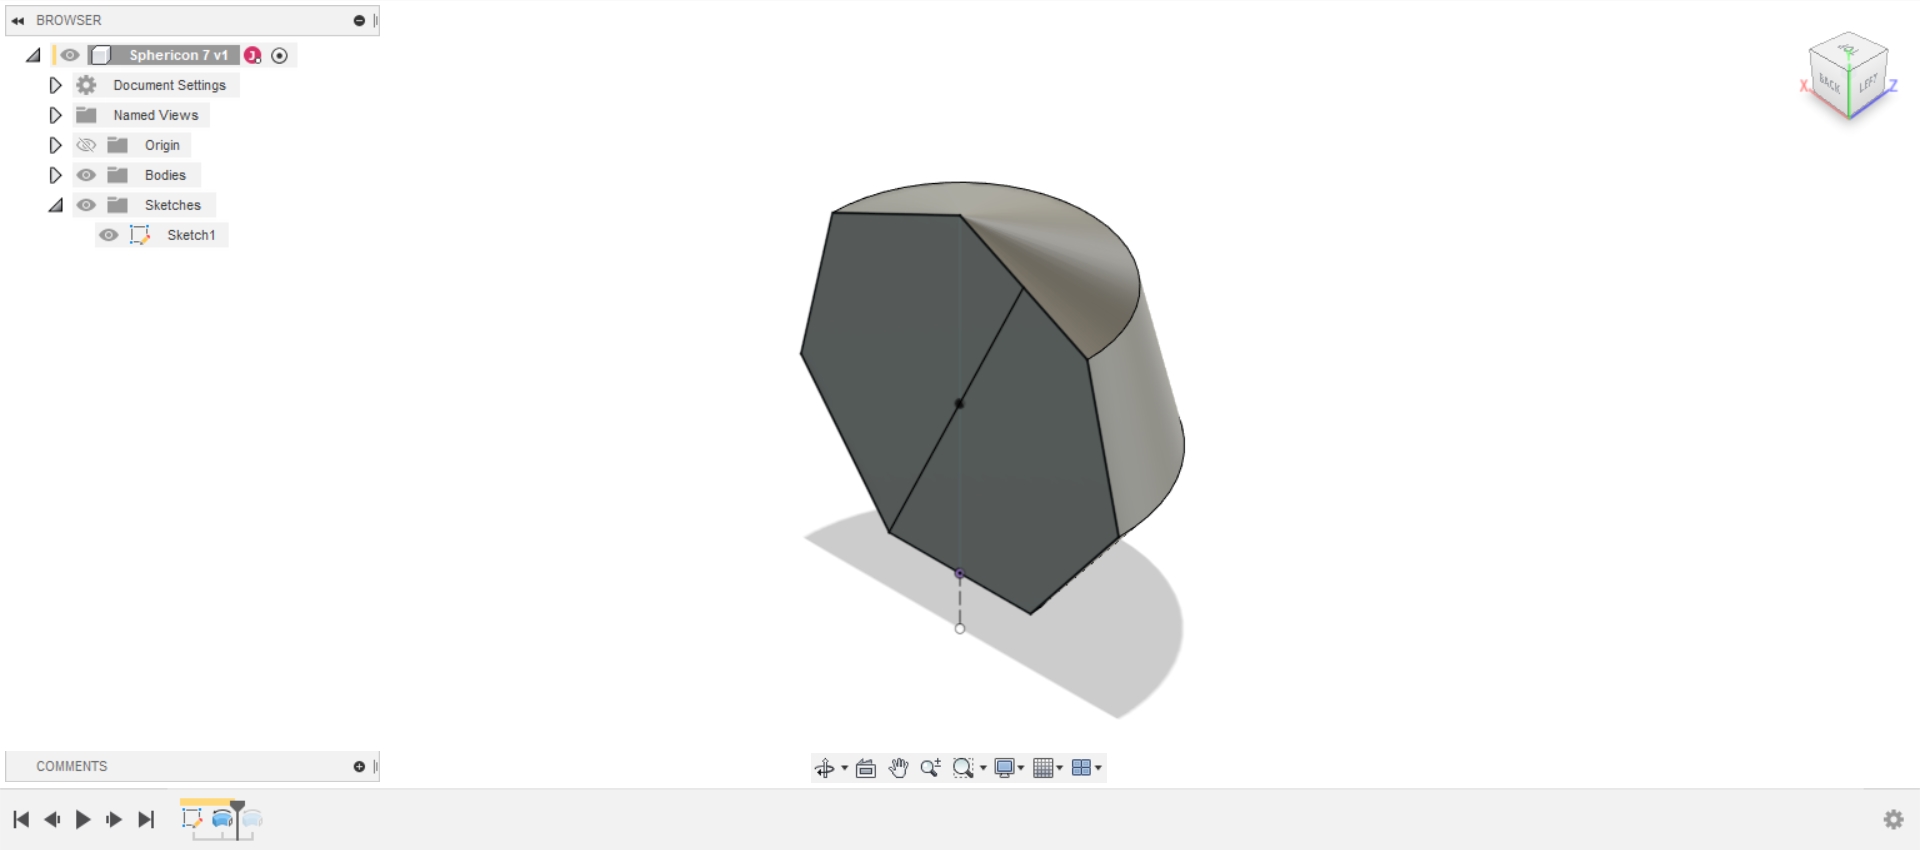
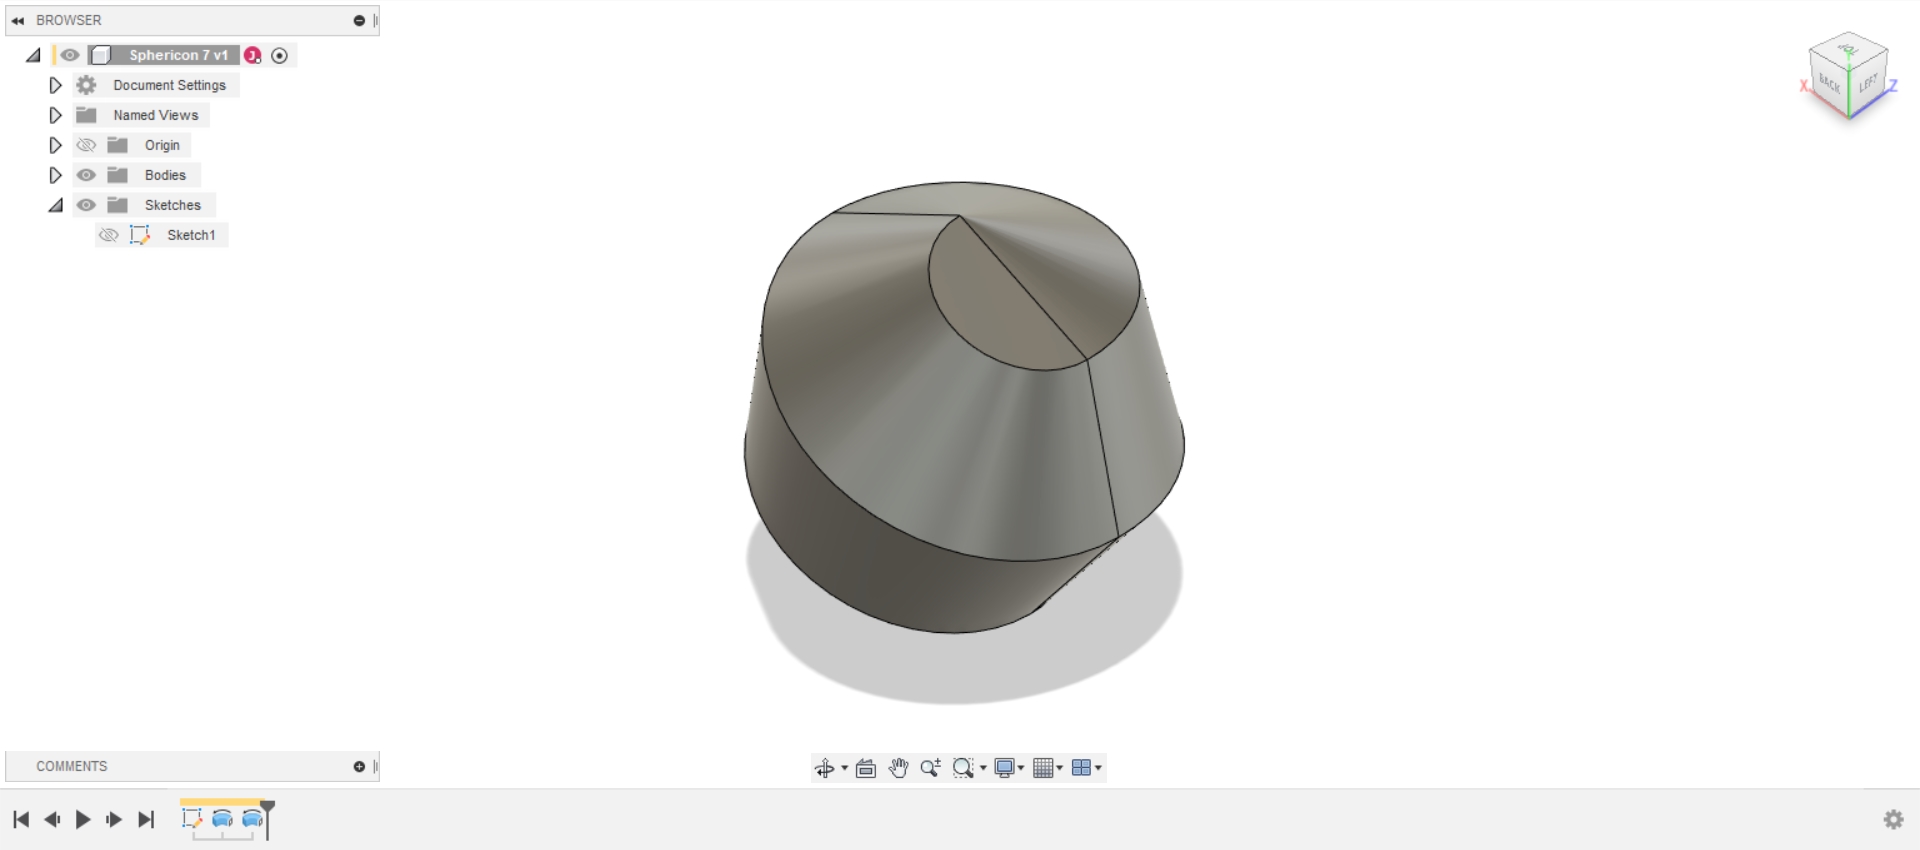
Sphericon
A sphericon is very easy to model, generally. First, draw a Polygon and 2 diagonals. Then, Revolve a solid 180 degrees around one diagonal, and 180 degrees in the other direction around the other diagonal.
Sphericon: Wikipedia entry
Sphericon n7 Fusion file
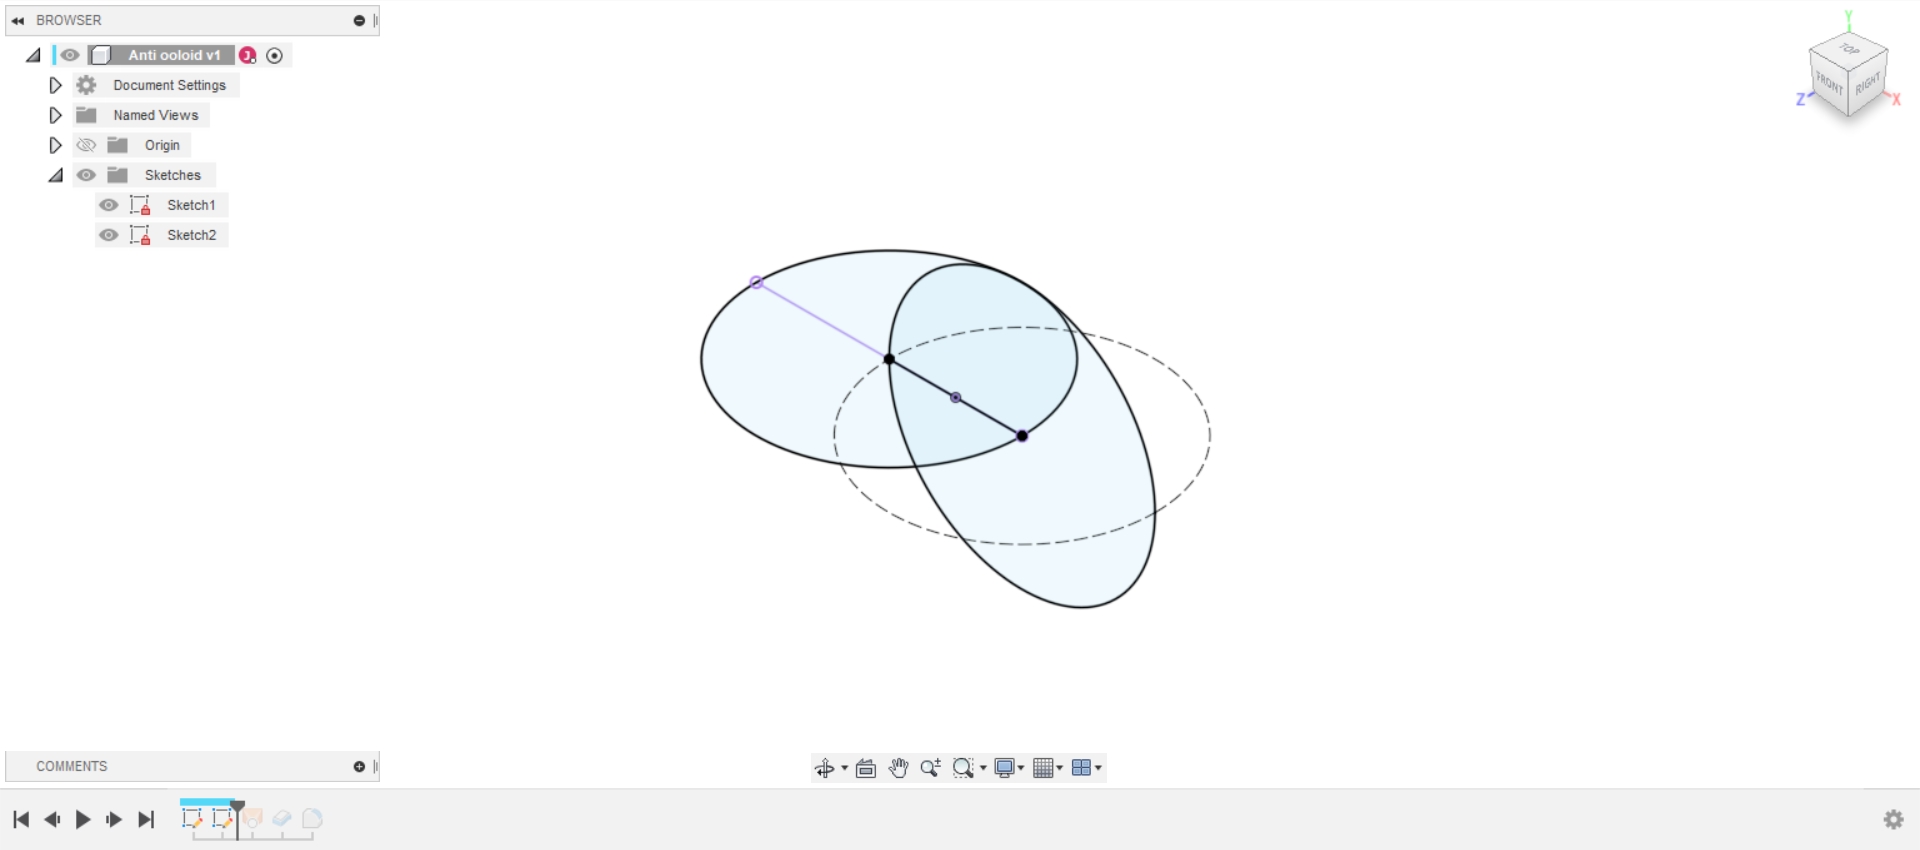
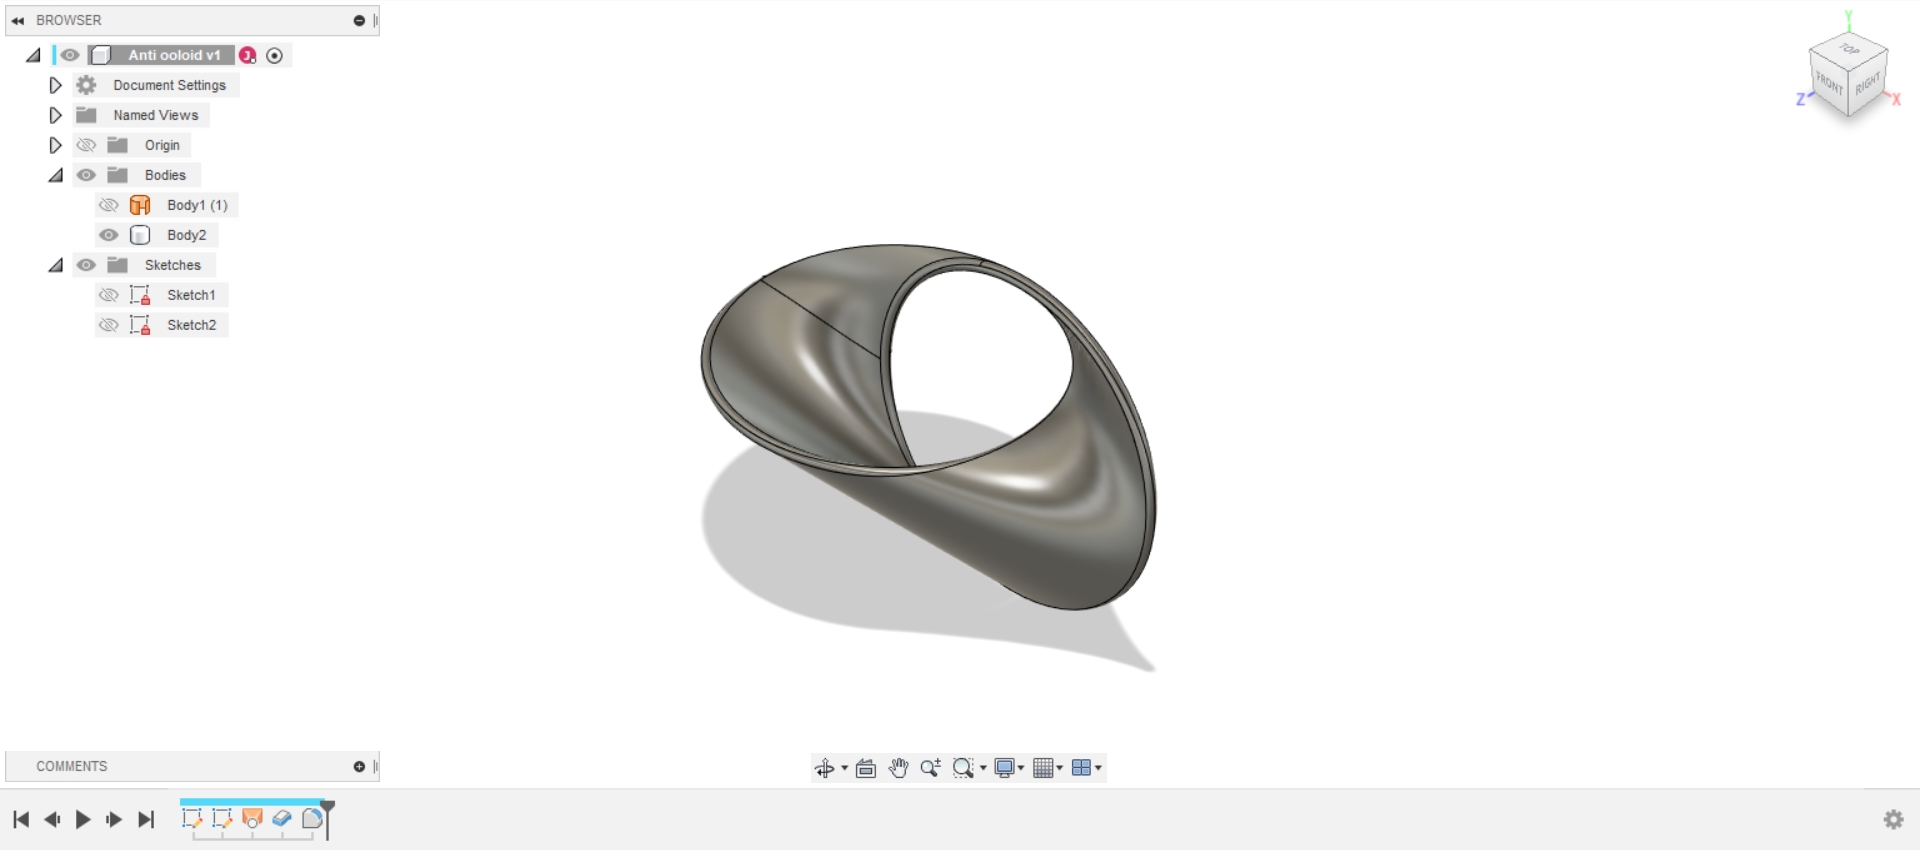
Anti Oloid
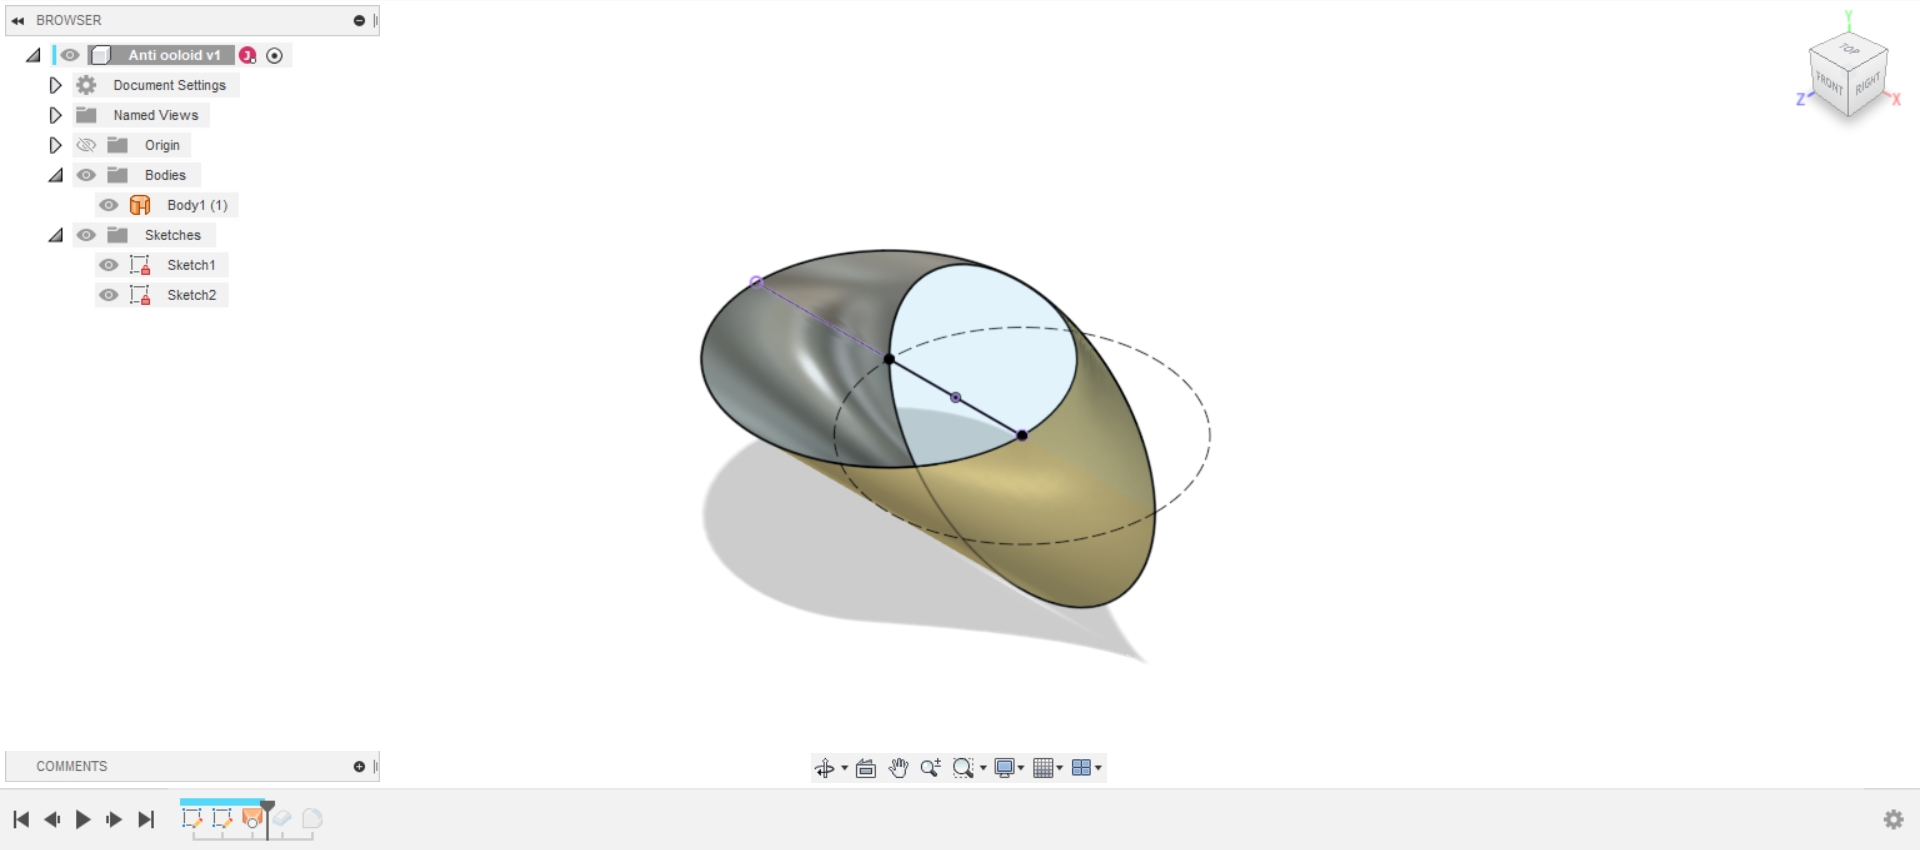
The Anti-Oloid is another curious rolling solid. By definition, it is a surface traced by a line as it moves over two circles, which are in planes perpendicular to each other, and have their centers on each other's circumference. With that definition, I first drew a circle in the XY plane, and then another of the same radius, on the XZ plane, with it's centre on the projected Intersection of the previous circle. Once these two circles were done, I simply Lofted a surface between them and adjusted the handles to be at the same corresponding points on each circle (i.e from the 3 o'clock point of one to the 3 o'clock point on the other, or the 270 degree point of one to the 270 degree point on the other). Once I obtained the surface, I thickened it, and filleted it's edges to be neatly rounded.
AntiOoloid Fusion file
The Anti-Oloid on the web
Einstein's Hat in CorelDraw
Einstein's Hat - single unit - dxf
Einstein's Hat - tiling - PDF
I've always been interested in tessellations, both regular as well as apriodic. I have played often with Penrose tiles and other such curiosities.
Here I am going to draw out the newly discovered aperiodic polykite monotile ("ein-stein") commonly called the Hat for it's appearance. It is a single unit tessellating shape that only fills the plane aperiodically, not as a repeatable grid pattern.
More information about this discovery in an article in Quantum Magazine, one of the first places to break the news.
I also referred to their original paper on arxiv.org
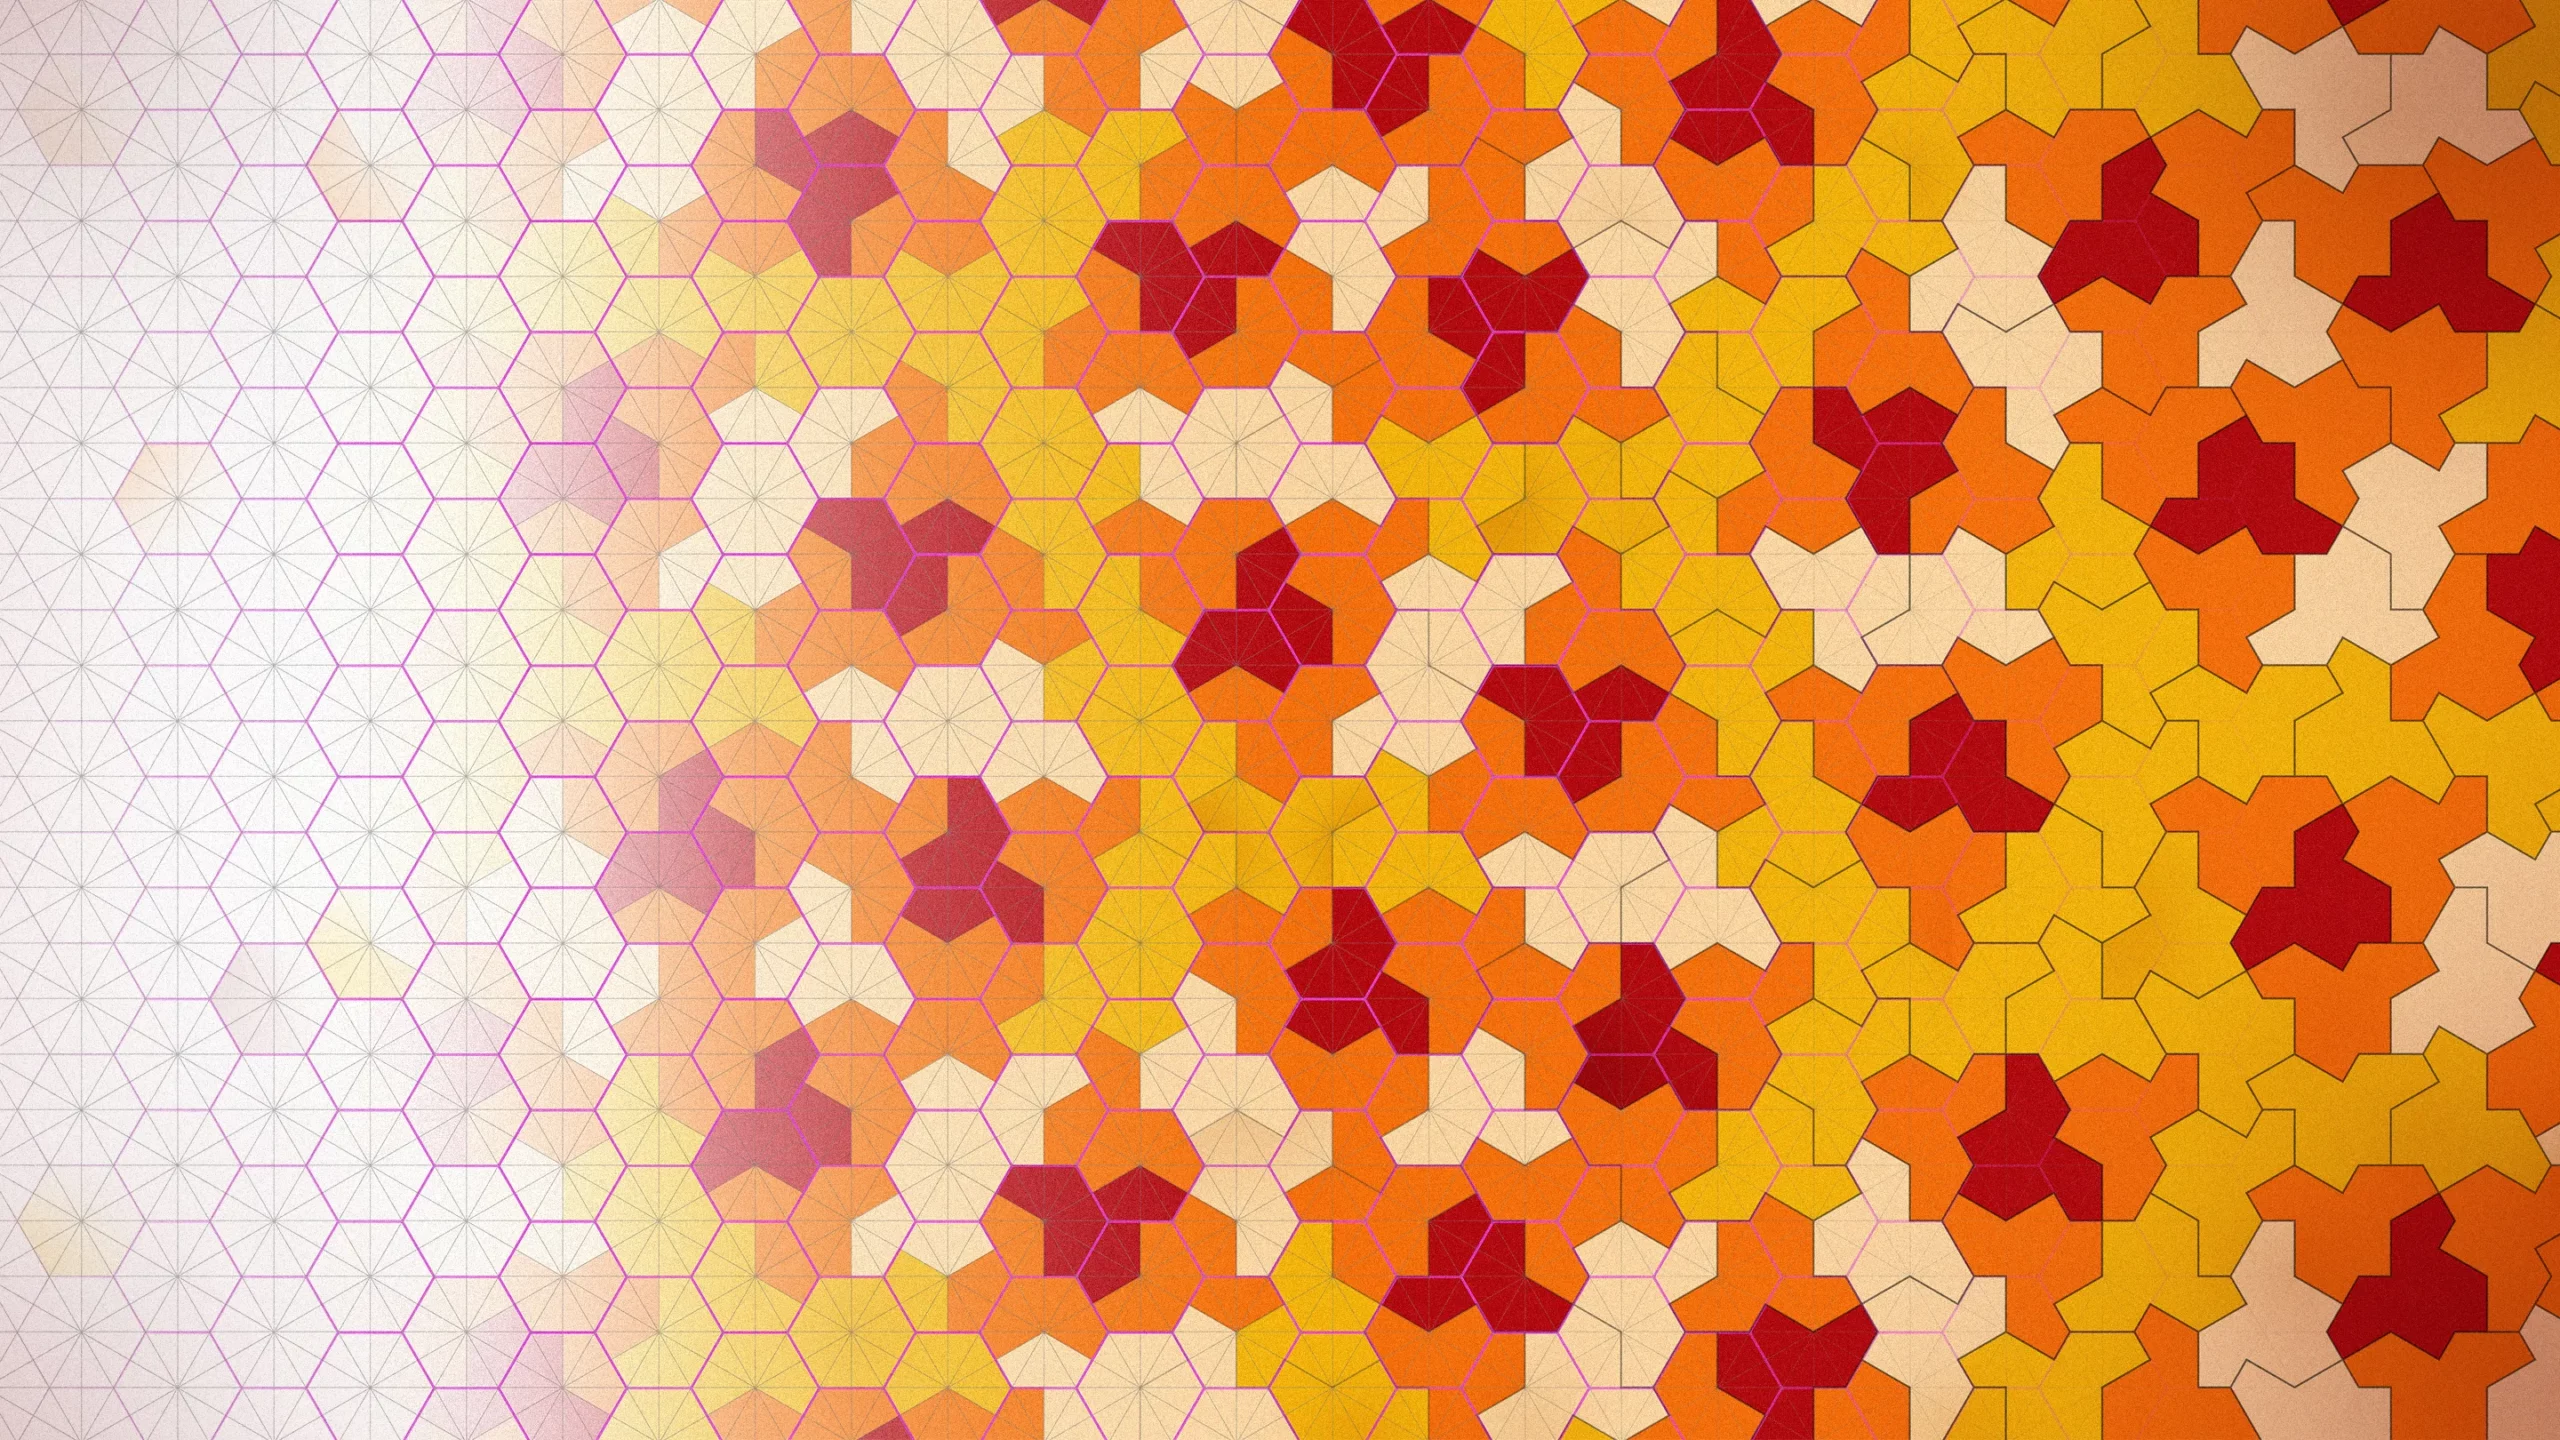
Image from the article I reference
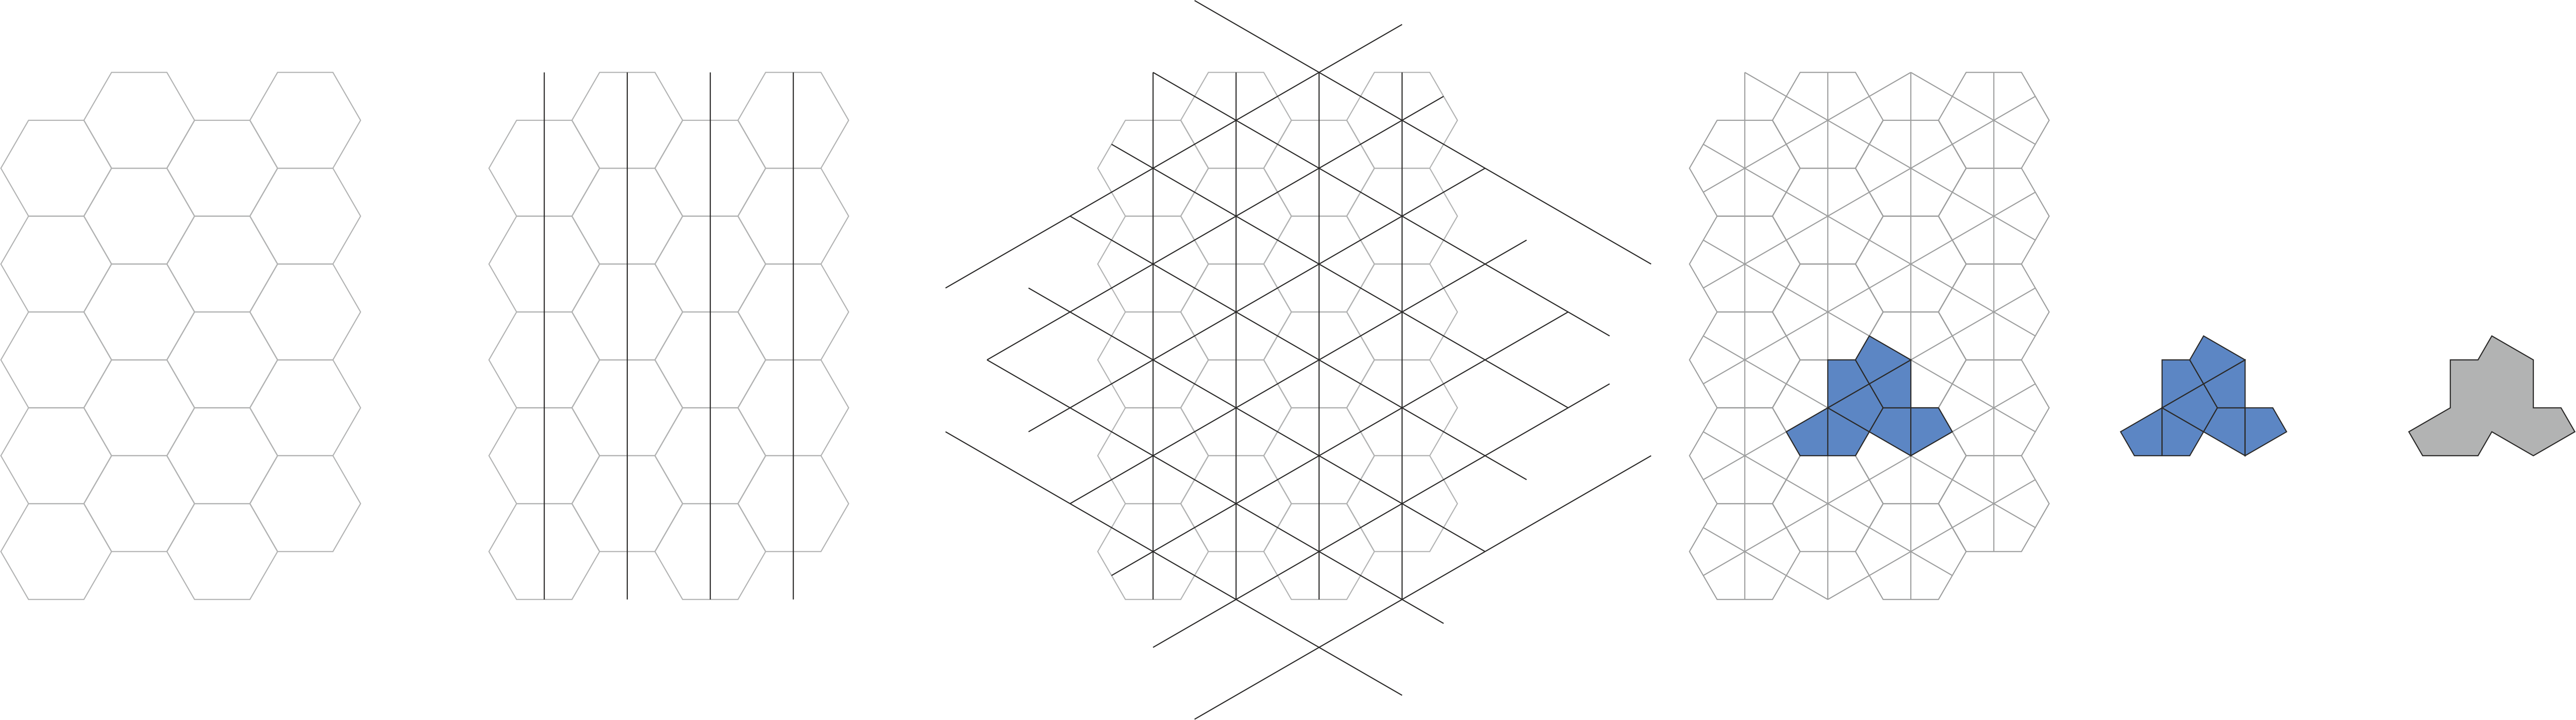
The sequence of development is evident in the image above. I started with a hexagonal grid, then drew it's dual with a series of straight lines then rotated by 120 and 240 degrees. This resulted in a tiling of kites, which are what the polykite shape is made up of. I kept grouping these sets of elements at every stage for easier management.
Once I had this, I used the Smart fill tool to fill in a selection of kites that would make the final shape. Using mouse drag + right click I duplicated the set of kites outside, then welded them into a single shape.
After this, I moved from the article to the paper to understand the tessellation movements better, and proceeded to drag, rotate and mirror the shape as needed to assemble larger sets.
I will eventually use this for some kind of object-making, most likely laser-cutting the tiles.
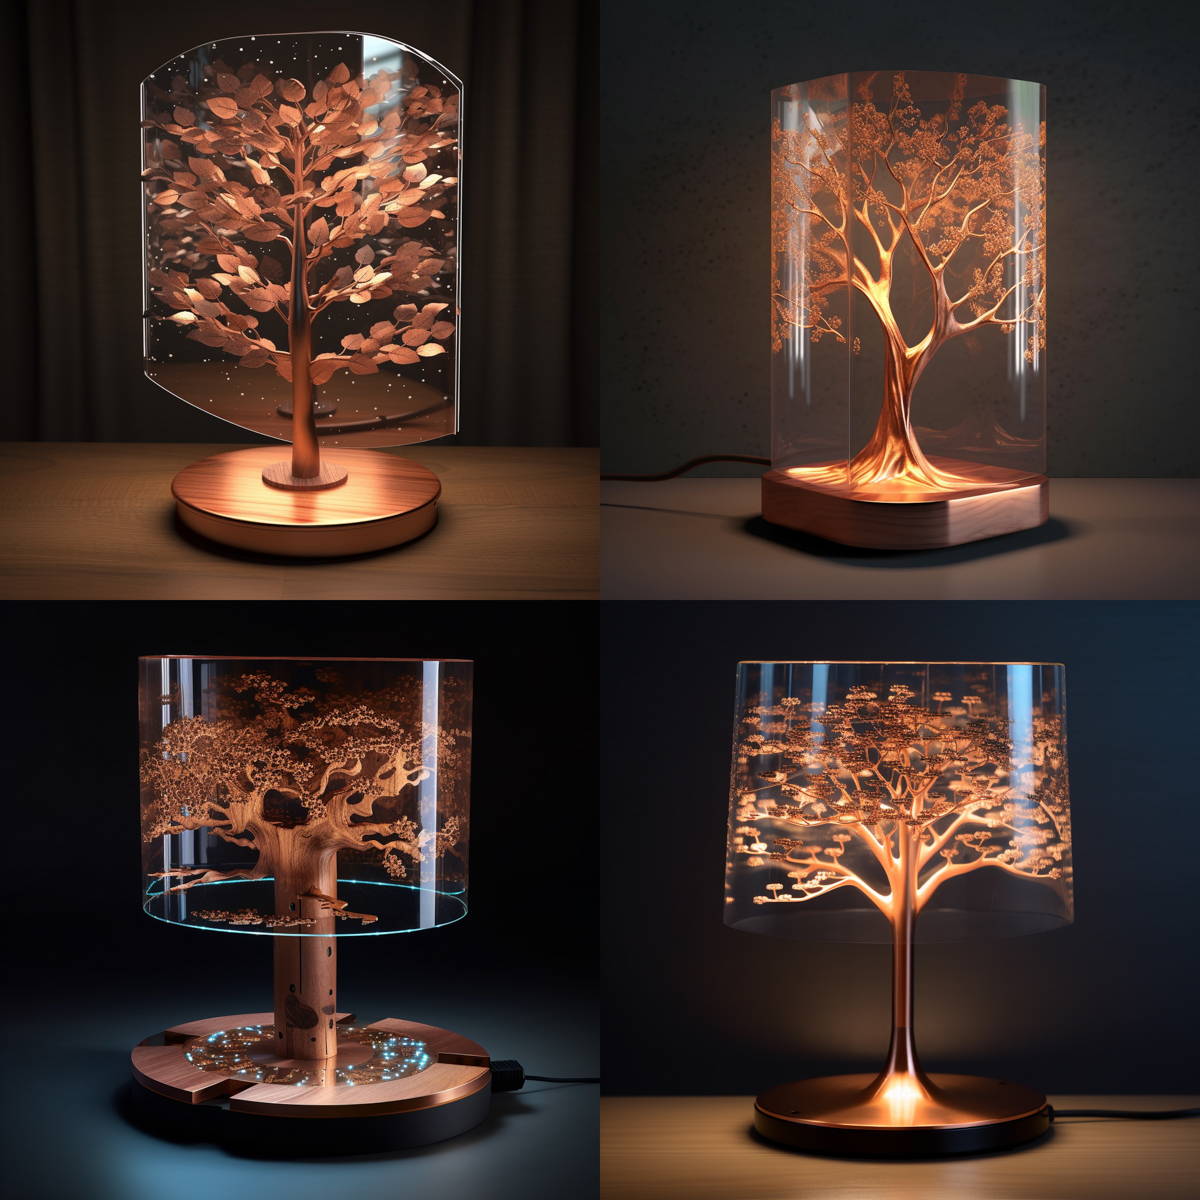
Project Prompt on MidJourney
Prompt 1 :
A table lamp shaped like a tree or a wing, made up of a copper board with electrical pathways and tiny square led lights. A clear diffuser with etched patterns is a layer above the LEDs. The base is dark and made up of slices of copper and glass forming an organic shape, with touch pads on the upper surface. Photorealistic.
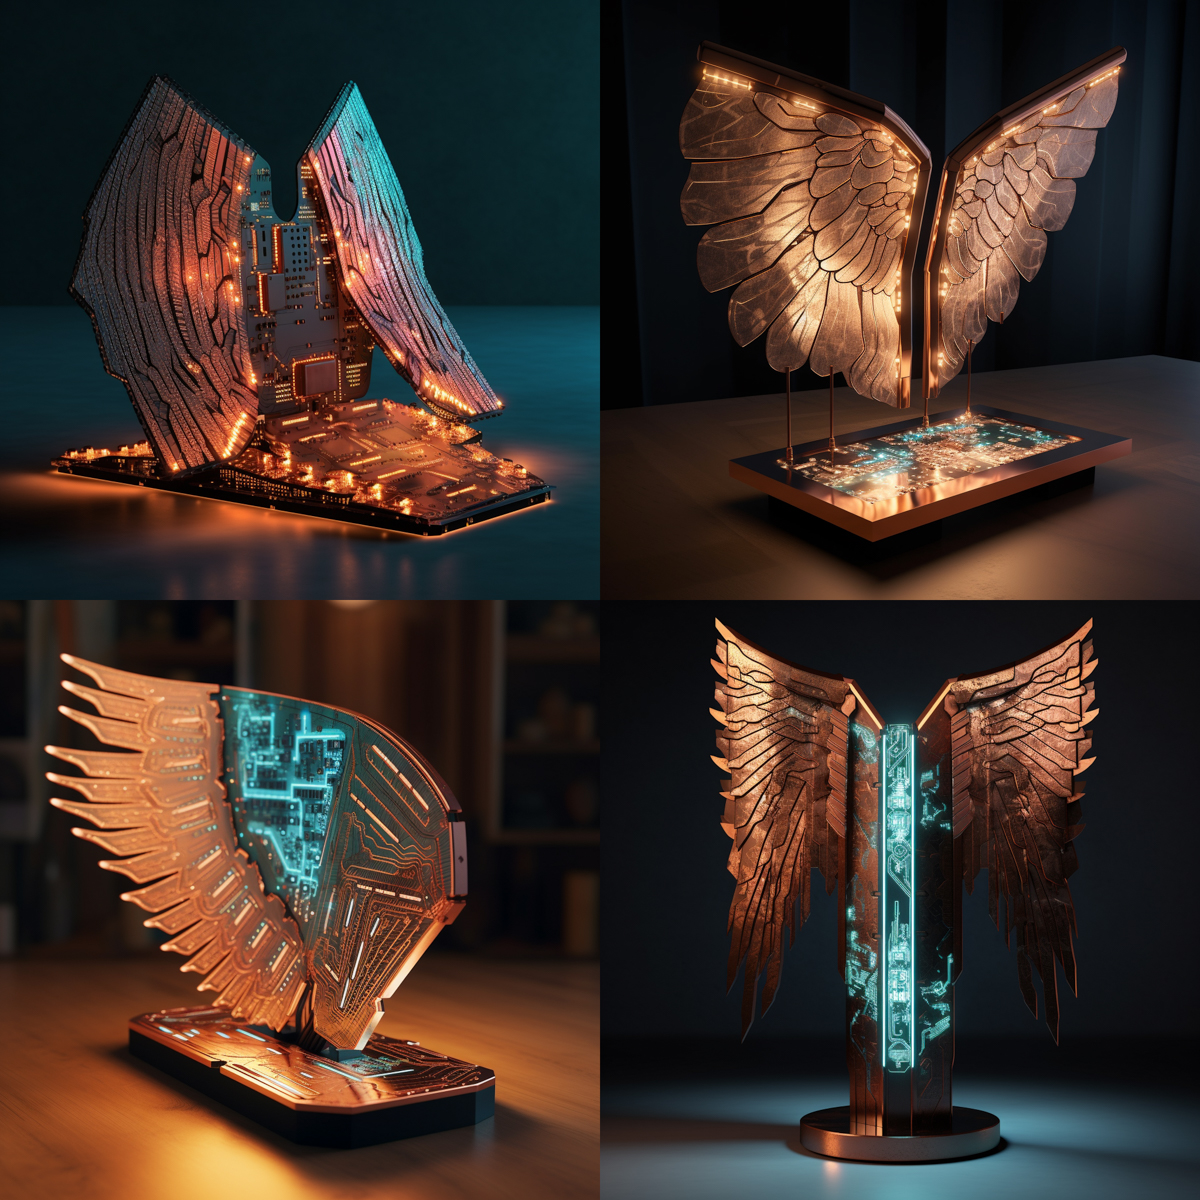
Prompt 2 :
A lamp shaped like a wing, made up of a flat copper circuit board with electrical pathways and tiny square led lights pointing forward and downward to the viewer. A frosted diffuser of the same shape is a little distance in front of it. The base is dark and made up of slices of copper and glass, with touch pads on the upper surface. Photorealistic.
Project CAD
At this stage I had a lot of initial ideas about the project, which you can find on my project and project thoughts pages.
The CAD I did for my final project can be found here