Project Management and Documentation
My Fab journey begins !
This is a rewrite of this week's tasks of Project management and setting up the documentation. The previous version had been written as an overly enthusiastic live journal that was rather chaotic. This version should help anyone following to ideally work out their own setup.
But first, credit where it is due.
Shoutouts and credits to everyone who helped, whether they knew it or not ! I have extensively followed Adam Stone's documentation on this, as well as Griffin Orsinger's. I was further helped by Jogin Francis and Deepu K, both of the SuperFabLab Kochi
Many Thanks !
Why Document ?
Based on a later discussion (during Week 6 reviews), Neil elaborated 4-5 reasons for documentation. This discussion was compelling enough for me to list them here.
- Judging the work
- Documentation as learning (doing the documentation reinforces things)
- Portfolio (a showcase of the work, process, thoughts, etc)
- Self re-learning (referring back to your work to understand what you had done in the past)
- Teaching (your work as a case study)
Keeping this in mind, I will describe my Project documentation setup further.
Part 1 : Hello ? World !
Initially, I used the Web IDE on GitLab to do the basic edits needed for Week 1. The tasks included
- Adding the student agreement to the repo
- A brief writeup of myself on the About Me page
- A brief writeup of a project I intend to do
The Web IDE functioned fine, and I was able to do the requisite tasks by editing the raw HTML, as well as using the GitLab website interface to upload files and manage the repo.
- I downloaded the student agreement, edited it to add my name, and uploaded it to the root of my repo.
- I uploaded images for the About Me page through the IDE.
- I linked to these images within the HTML code I wrote up for the About Me and Project pages.
- I sorely missed Makdown while editing this RAW HTML by hand. /tragedy/
Part 2 : Enter Markdown
I have used Markdown on my other webpages hosted on GitHub. I have a sandbox website as well as some repos there since a few years, and I keep playing with Generative Art and hosting sketches as well as material for my students there as needed. All in all, I am fairly comfortable with MD, and I know enough to understand that a workflow using MD would make life far simpler than editing raw html !
While it is limited on themes and customization, it's clean and fast otherwise, and good for this kind of documentation project.
The FabCloud GitLab setup also includes - what I much later understood to be - automation at the GitLab repo level that will take in the MD files and generate a static website based on those pages auto-magically.
My current setup is Atom, with a bunch of plugins thrown in to run local servers to deploy my pages, as well as help with various (processing and js centred) syntaxing.
I tried a few Markdown documents in Atom and then uploading them to GitLab through the Web IDE, as well as creating new files through the IDE and copy-pasting my MD content, just to poke things around and see what works. But it seems I'll have to figure MkDocs out, there's no getting around it.
Part 3 : The MkDocs workflow
I had never heard of MkDocs, but (in hindsight) it is exactly what I needed. I had come to the conclusion that for me to be able to focus on the content and not have to worry about formatting and management and deployment, I essentially needed something like MS Word with Themes and Styles and some other web-magic to be able to have web pages. Unfortunately for me, there was no one who I could turn to for guidance, and for almost a month I was hammering through the previous and the next steps all by myself. The following is a very distilled version of my rather more convoluted path that I had to take to figure this.
For the record, here's my take on MkDocs. It is essentially a software automation that allows you to define an organisational structure, add pages to it, write those pages as MD files, and serve that whole setup as a live website.
This is where the GitLab CI automation comes in. Whenever new or updated files are uploaded to the repo, the automation generates the static website and serves that on the project's web address.
So, ideally (and really, for the past 5 odd months) what one would do is
- writing the project documentation as MD files in Atom
- embedding images, videos, files, etc
- syncing them to the Gitlab repo with Git
- letting the GitLab CI automation generate and deploy the pages as a website
It's not the smoothest workflow (some of it is due to my own preferences of media organisation and manual safeguards) but it works out very well and is quick and robust once you get it setup.
Part 4 : MkDocs Setup
In order to figure out how to do this, I referred to the MkDocs website and documentation, but I made the most headway by also following along Griffin Orsinger and Adam Stone's pages. I had seen one of them in the Review session in a later week and realised that their documentation was comprehensive, and so I would follow it along.
My other bottleneck was that MkDocs and everything associated with it was Python based, and I'm not familiar with that at all. I'm generally not afraid of the CLI, since I remember a time when I used to use DOS, and continue to use some CLI tricks even now. However, I did not want to spend time and effort on figuring things to do things, instead of on doing the things.
However, I did not have a choice and I went CLI and got on with it. The steps, apart from being on both the above pages as well as the MKDocs documentation, are as follows.
-
Install Python.
Download it from their website and not from the MS App store or other such junk version. Boo.
Make sure to check off adding it to the Environment Variables
-
Install MkDocs
pip install mkdocs -
Following the Getting Started page, creating a new Project.
This generates a boilerplate project - a YML file, and docs folder with an index.md file - at the location the command was run.mkdocs new fabDocu -
I edited the YML file to add to the structure, as well as adding more MD files to play with (week1.md, week2.md, etc)
-
Running
mkdocs servefrom the project folder (wherever the .YML file is present) starts a local server with your page on it !
Navigating tohttp://127.0.0.1:8000/allows you to see it and work with editing it live.
-
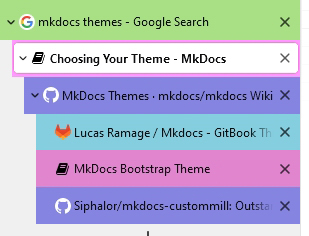
Choosing a Theme. Oh lord, so many options.
I installed and tried out several.- ReadTheDocs theme - good functions, looks generic though
- GitBook theme - nice but eventually boring, plus I am not hung up on Gitbook, no past experience
- Cinder theme looks like it has some non-standard aspects
- Ivory theme - Yes.
I looked at all of them and settled on Ivory. Eventually I changed to ReadTheDocs.
-
Like Adam, I looked at
curlto create pages, but decided against it, since right-click-duplicate was a far easier option in Atom !
-
Using
mkdocs buildgenerates the static site in your project folder, in case you want to inspect/upload/manually intervene in the generated pages

- MKDocs is working fine; it serves my MD pages on the internal server successfully, with my content and the selected theme. This is Good.
Part 5 : GIT - SSH Key
The first part of being able to communicate securely between the desktop and the Gitlab website is to have the SSH key generated and added to the right places.
Use SSH keys to communicate with GitLab is a good start. I followed this and did not have any issues.

Part 6 : GIT - cloning the repo
Once this was done, I cloned the repo from the GitLab site to my laptop using the Git CLI.
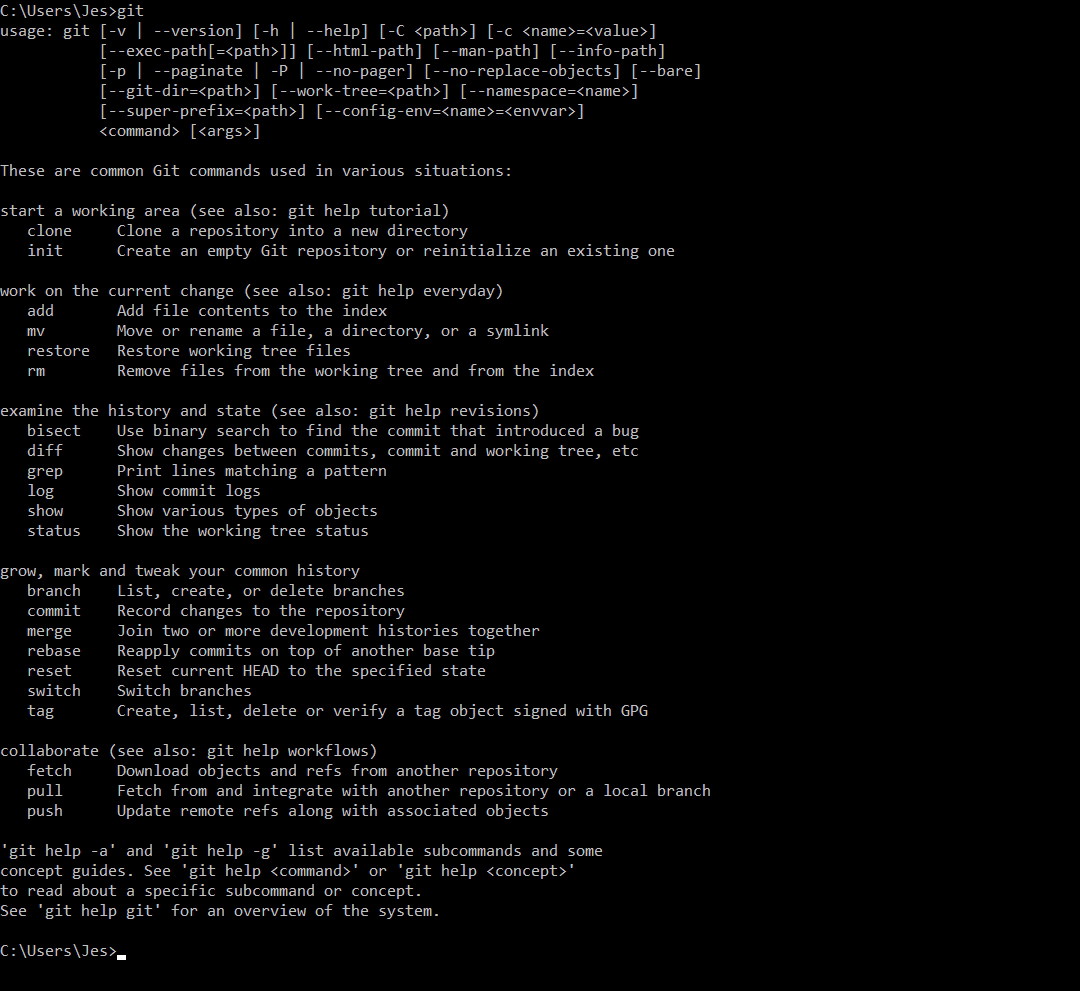


I have used the GitHub Desktop with my GitHub repos and sandbox site. So once again, I was caught between, "yeah CLI cool and I can do it", and "but GUI is convenient and less prone to error". Ultimately, while I tried out CLI for git, this time the GUI won out. I opted to use Git GUI for this, since I wasn't sure if the GitHub desktop would work with this. Besides, I did not want to mess with my existing setup of GitHub Desktop and my GitHub websites.
Part 7 - GIT GUI
GIT GUI is a minimal interface to GIT and does what it needs to without too many frills.
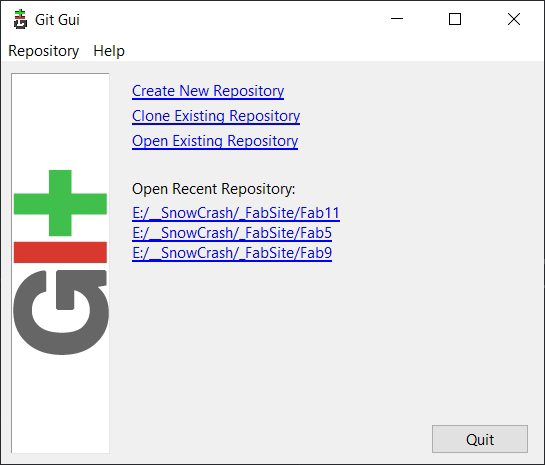
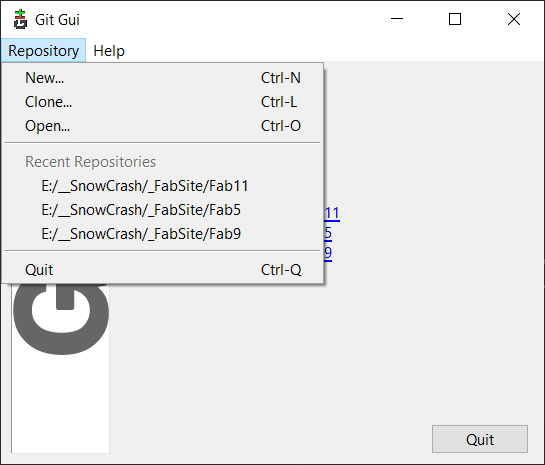
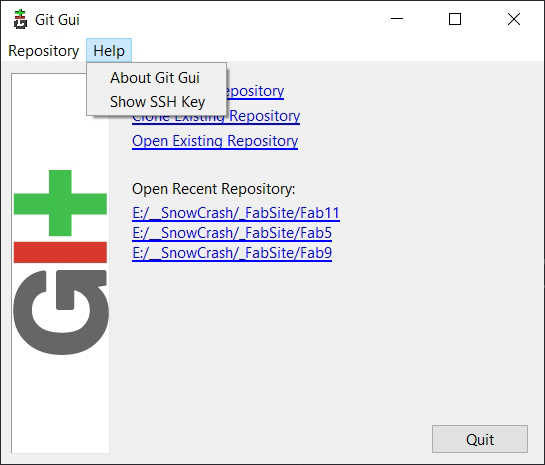
starting dialogs
You can clone an existing repository using the Clone with SSH option on the Repo on GitLab, or open an existing repo. I initially opened the repo I had cloned using the CLI earlier. A various points I needed to re-clone the repo afresh, which I then did directly from the GIT GUI interface.
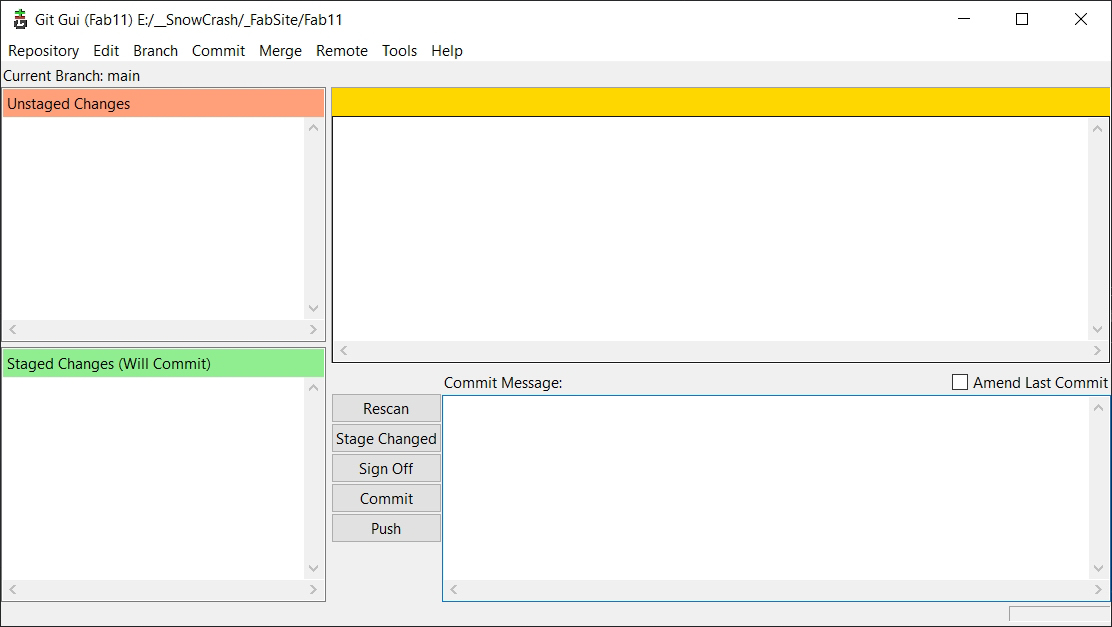 Basic window inside a repo
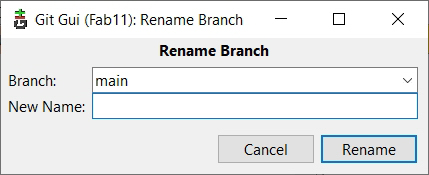
 GitLab has moved to Main instead of Master, but GIT GUI still creates a default Master branch, so be sure to rename it. I missed doing that once and pushed changes before I realised, and then had to work on merging the Master to the Main. Not fun if you need to do it once a week and aren't used to it.
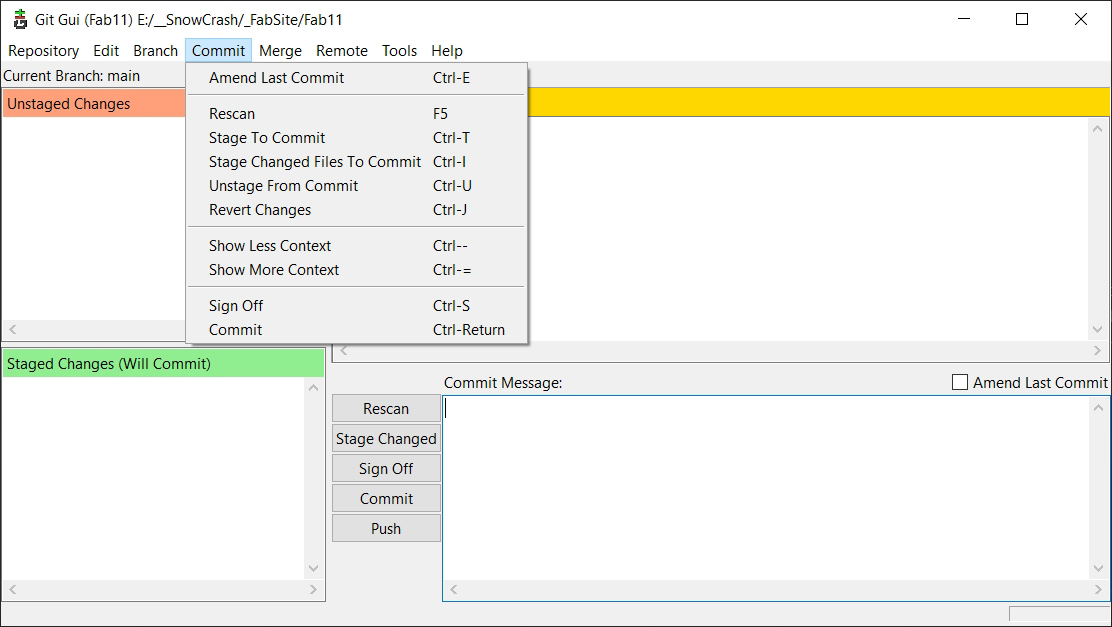 The GUI allows you to access most of the required GIT functions.
Eventually, later, I had GIT GUI setup properly, and it was syncing correctly and verifiably with my repo online.

Part 8 - Working, finally !
The website stubbornly refused to be created. The pipeline kept failing. This was a month-long tear-my-hair-out set of issues.
By this point it was already several weeks in (about Week 6), and I was reaching out to the regional group as well as Global Time. Editing though the Web IDE, uploading files manually one-by-one, or entire folders, nothing seemed to be helping. Changes to the YML file were ineffective, as was much of anything else. I was in unknown territory to begin with, and quickly losing any bearings I might have left. To say that I was frustrated beyond measure would only begin to cover it.
Jogin Francis from the Kochi SuperFabLab had earlier suggested cloning someone's already verifiably working repo and use that as a starting point. I had cloned Adam Stone's repo and tried to use a selected number of system files from it. However, that wasn't working.
Finally, I had a day off and I sat down to really tackle this.
- I downloaded a zip of my current hacky site for safekeeping. (Yes, a zip. No, I don't want to risk mucking around among branches. Been there.)
- I went back to Adam Stone's repo and cloned the entire thing. This was a few weeks in and he had already uploaded content.
- I went through his files and folder structure, with close attention to the .yml file contents.
- Then I stripped down AS's version to just have Week 1's stuff, and deleted the rest of the content - images, .md files, etc - from other weeks. This lightened the size of the entire folder set since I didn't want this initialization to be too big in terms of size. I was left with just the basics - index, about, project.
- I had earlier manually deleted and uploaded files into the repo using the web IDE. However, the 'upload' function does not upload folders, only files. Creating folders at every level before uploading their files was tedious. Knowing that I had to use Git directly, I finally switched over to GIT GUI to clone my latest repo to the harddisk.
- I overwrote my repo files with AS's minimal version, replicating the folder structure and only keeping my about.md and index.md files.
- On GitGUI, I scanned, staged and committed the changes.

Distress
De-stress
Lo-and-behold, the GitLab pipeline was successful and my website was suddenly taken over by Adam Stone !

You'd think that this was it and I was done, but HAH. I was only halfway there.
- Happily, I copied over and replicated the rest of my files into the repo, and committed. Unfortunately, the GitGUI default branch is not Main, like the website, but Master. This resulted in a second branch to be created, and now I had a Main and a Master. I tried renaming the branch in GitGUI but nothing worked. I had done this earlier in the same session but then I had gone and merged the two. However, I knew I did not want to be fielding merge requests every time I committed simply because of a naming error. (This is the source of my warning earlier.)
- So I deleted the entire folder, and cloned it again. This time I overwrote it with my entire folder structure and files, while editing the mkdocs.yml and generally keeping AS's "system" files. No dice. The Pipeline Failed. /tragedy/
- Delete. Re-clone. Now I was determined to make minimal changes. I overwrote my repo with AS's files, but only the .yml files and the requirements.txt. Things worked again, the pipeline was successful.
- Edited the mkdocs yml file manually and committed. Worked again. Some relief.
- Step by step, I kept changing the mkdocs yml from AS's original to my version. I was being very careful to isolate what was breaking the pipeline. However, everything seemed to work. I eventually got over my Weekly MD files and the rest of my structure.
- As a last set of steps, I played around with a few themes now that things were working and came back to the default readTheDocs theme from the Ivory theme that I had chosen.
- Finally, although I couldn't pinpoint where the issue had been, I managed to get a working, editable, sync-able website and workflow going.
This was a LOT of relief.
The pipeline is near instantaneous when dealing with non-YML files. When .yml files are edited, it takes a few minutes. I was at approximately 48-odd commits now, almost half of which had been today itself, from the multiple upload-delete-clone-update sequences. Thankfully, repo size was in the mid-20 MBs. I hadn't added any images yet though.
--
The above page is a rewrite, but in the interests of accurate record-keeping, and for those who may be interested, find links to the previous version below. However, I'll remove these pages from the navigational structure.
- The TL;DR version - Brief description and overall anchor for the previous version, previous iteration of this page.
- Teething Problems - Stream-of-consciousness jabber after Day 1
- Order from Chaos - Some Order from Chaos
- Jugaad - Getting SOME KIND OF SITE up and running
- Working, Finally - (Currently) final round that got things running