10. Mechanical Design, Machine Design
During this week, we worked in groups to build a machine. We built a sausage-cutting machine, and the documentation can be found at group project site in detail. In the first section, I shall describe how we come to this idea and the high-level detail of the machine. Then, in the second section, I shall describe my contribution to this week’s assignment.
Design Idea
Initially, we had two ideas:
-
Building a chess board for a hand-disabled person where we would have to make a robotic arm which moves the chess piece via voice command.
-
Sausage cutting machine
The idea of building sausage cutting machine was proposed by a fellow group member Akseli Uunila, and ultimately we decided to go ahead with this idea.
Key idea and usefulness of the Sausage cutting machine
The key of the machine is that it makes several small cuts to the sausage before it could be grilled.
-
Applying several small cuts to sausage ensures that they do not burst during grilling.
-
Doing it by machine ensures that there is very minimal hand touch (thus ideal from a hygiene perspective).
Components and operation in a nutshell
The operation of the machine was designed to rotate the sausage with one stepper motor. Next to the first stepper motor, we attached a second one, that had a spiral shaft which moved apart holding a servo that moved a cutting edge, so that it would move along the axis of the sausage. The cutting edge was connected to a servo that made periodic movement so that the cutting edge would touch the sausage periodically.
My Contribution
I assisted my teammates with sketching design ideas during building the setups for the machine in the secondary or tertiary role, but my own primary contribution was with setting up the blade to cut the sausage using a servo motor.
Initially, I chose the “Parallax Continous Rotation” servo motor shown in Figure 1.
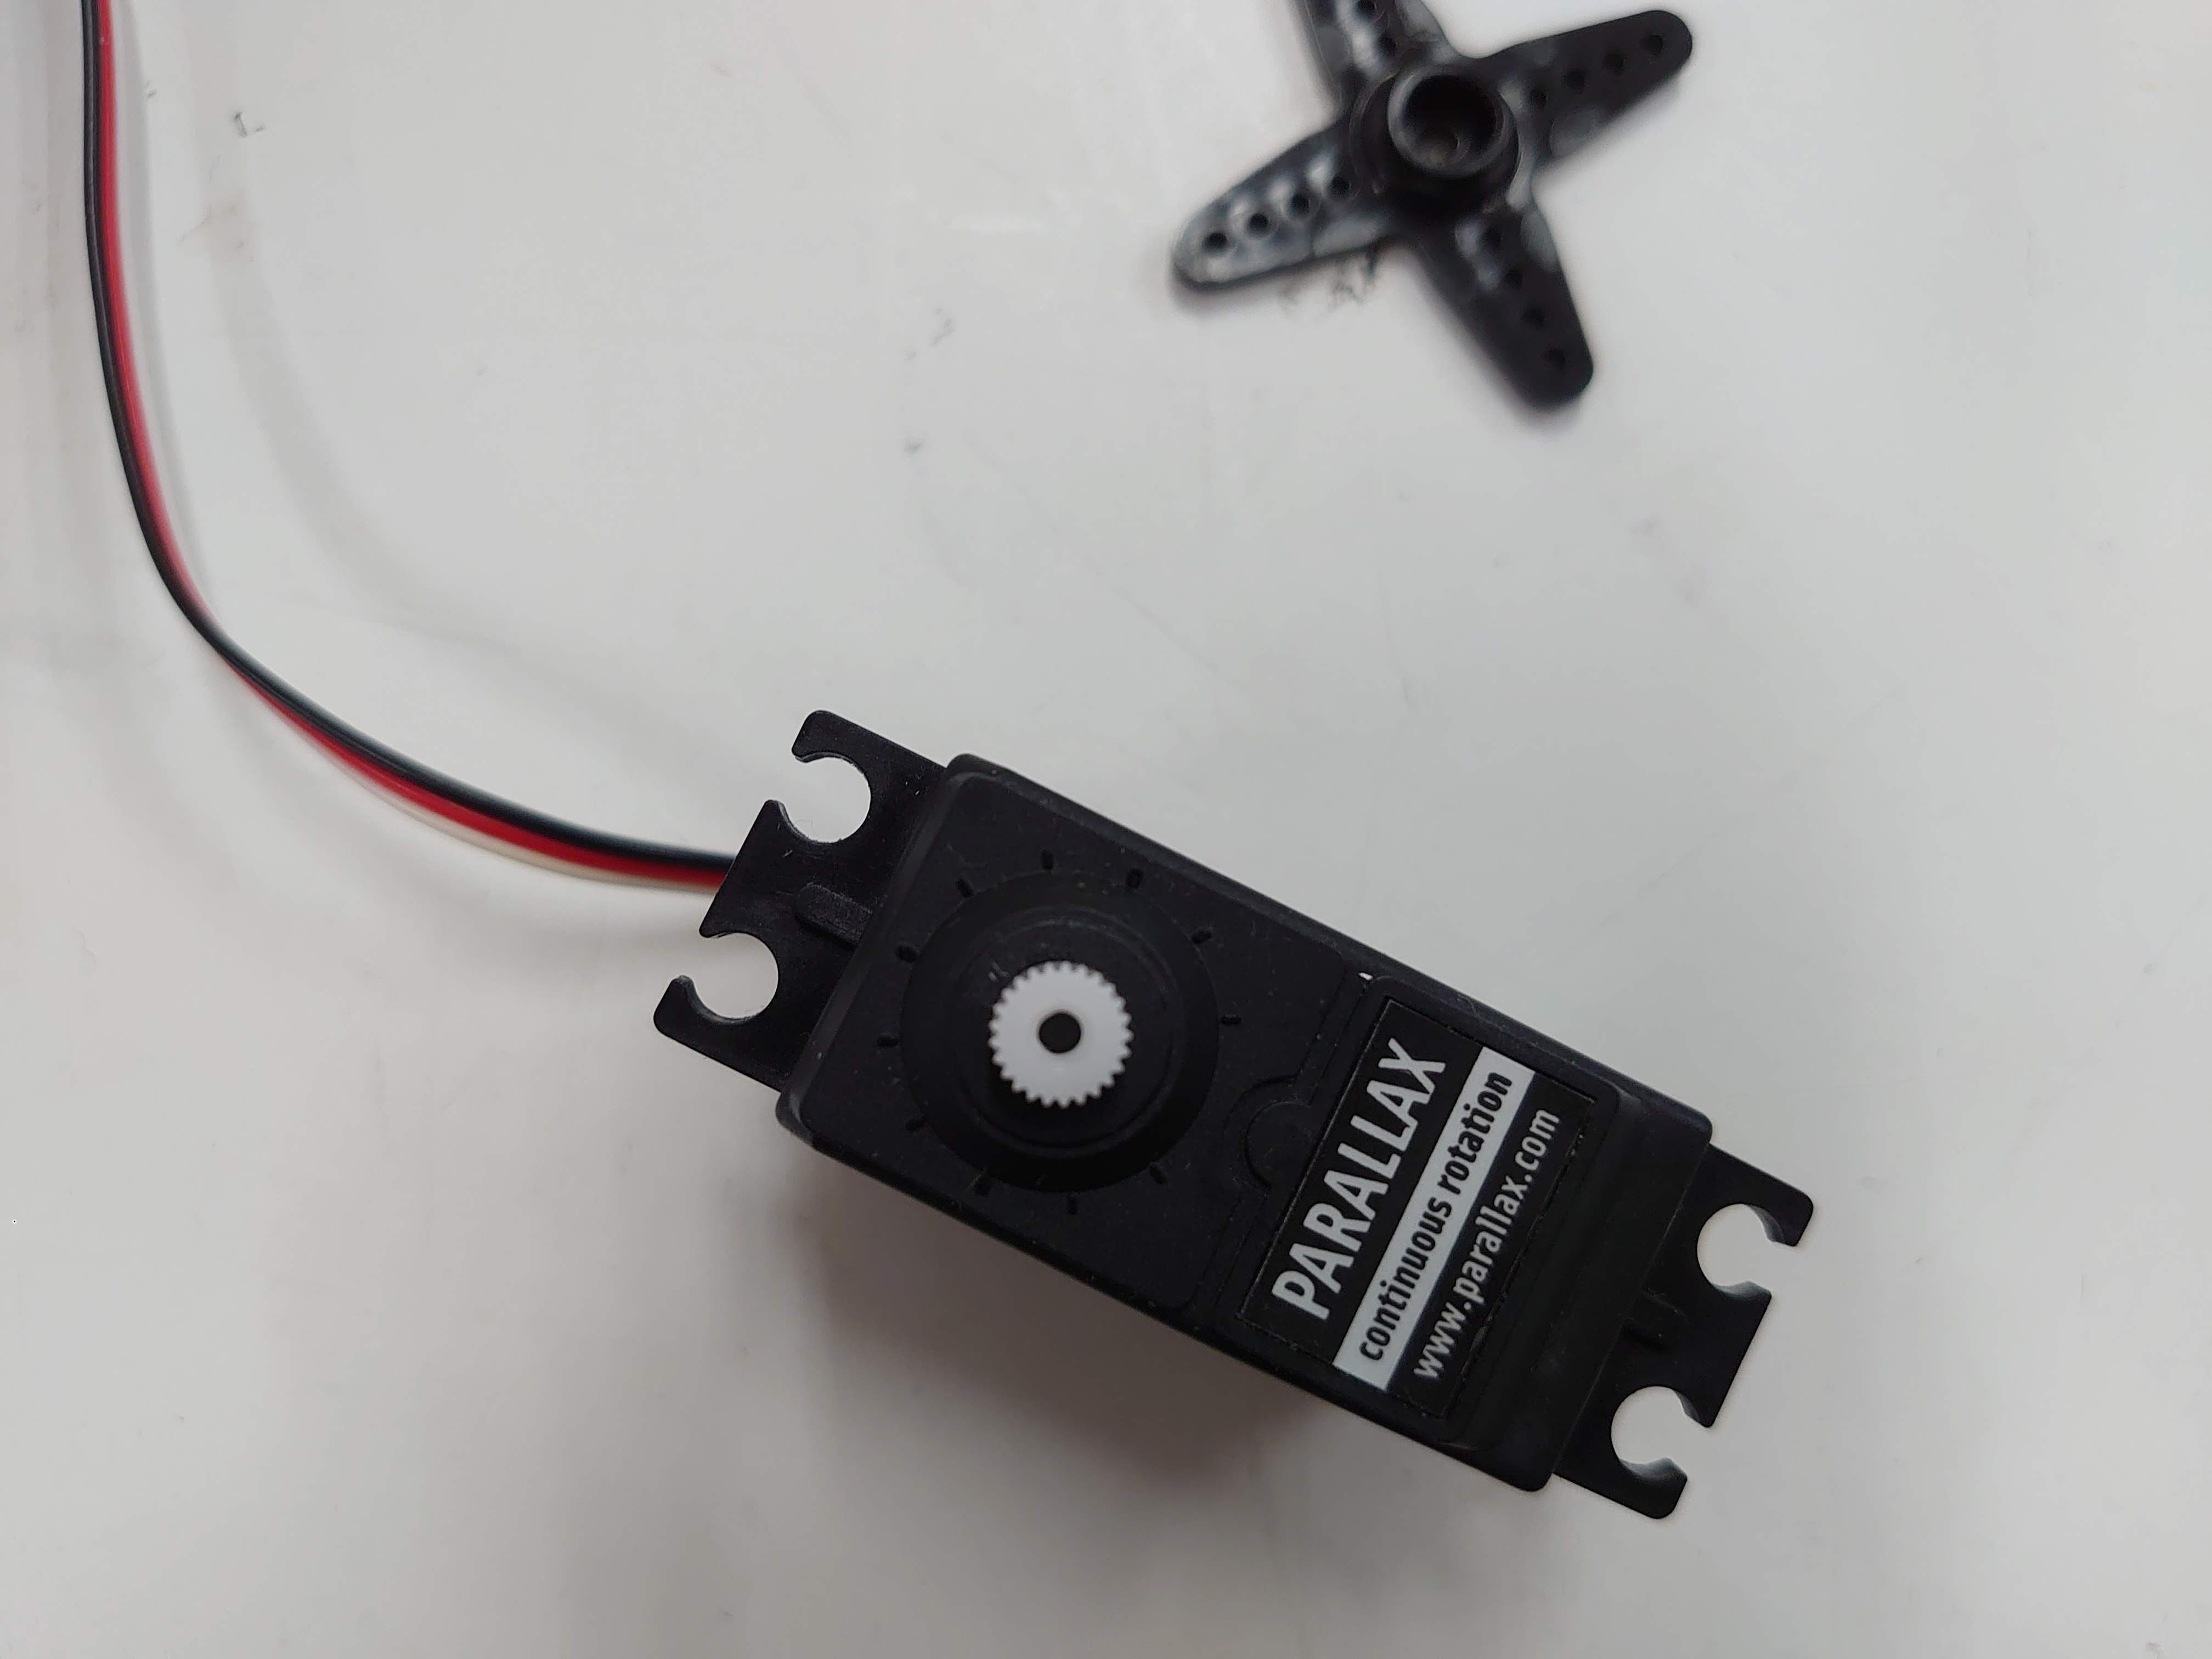 Figure 1: Our initial selection for Servo motor: Parallax Continous Rotation.
The knife blade was attached to the “Parallax Continous Rotation” servo motor as shown in Figure 2.
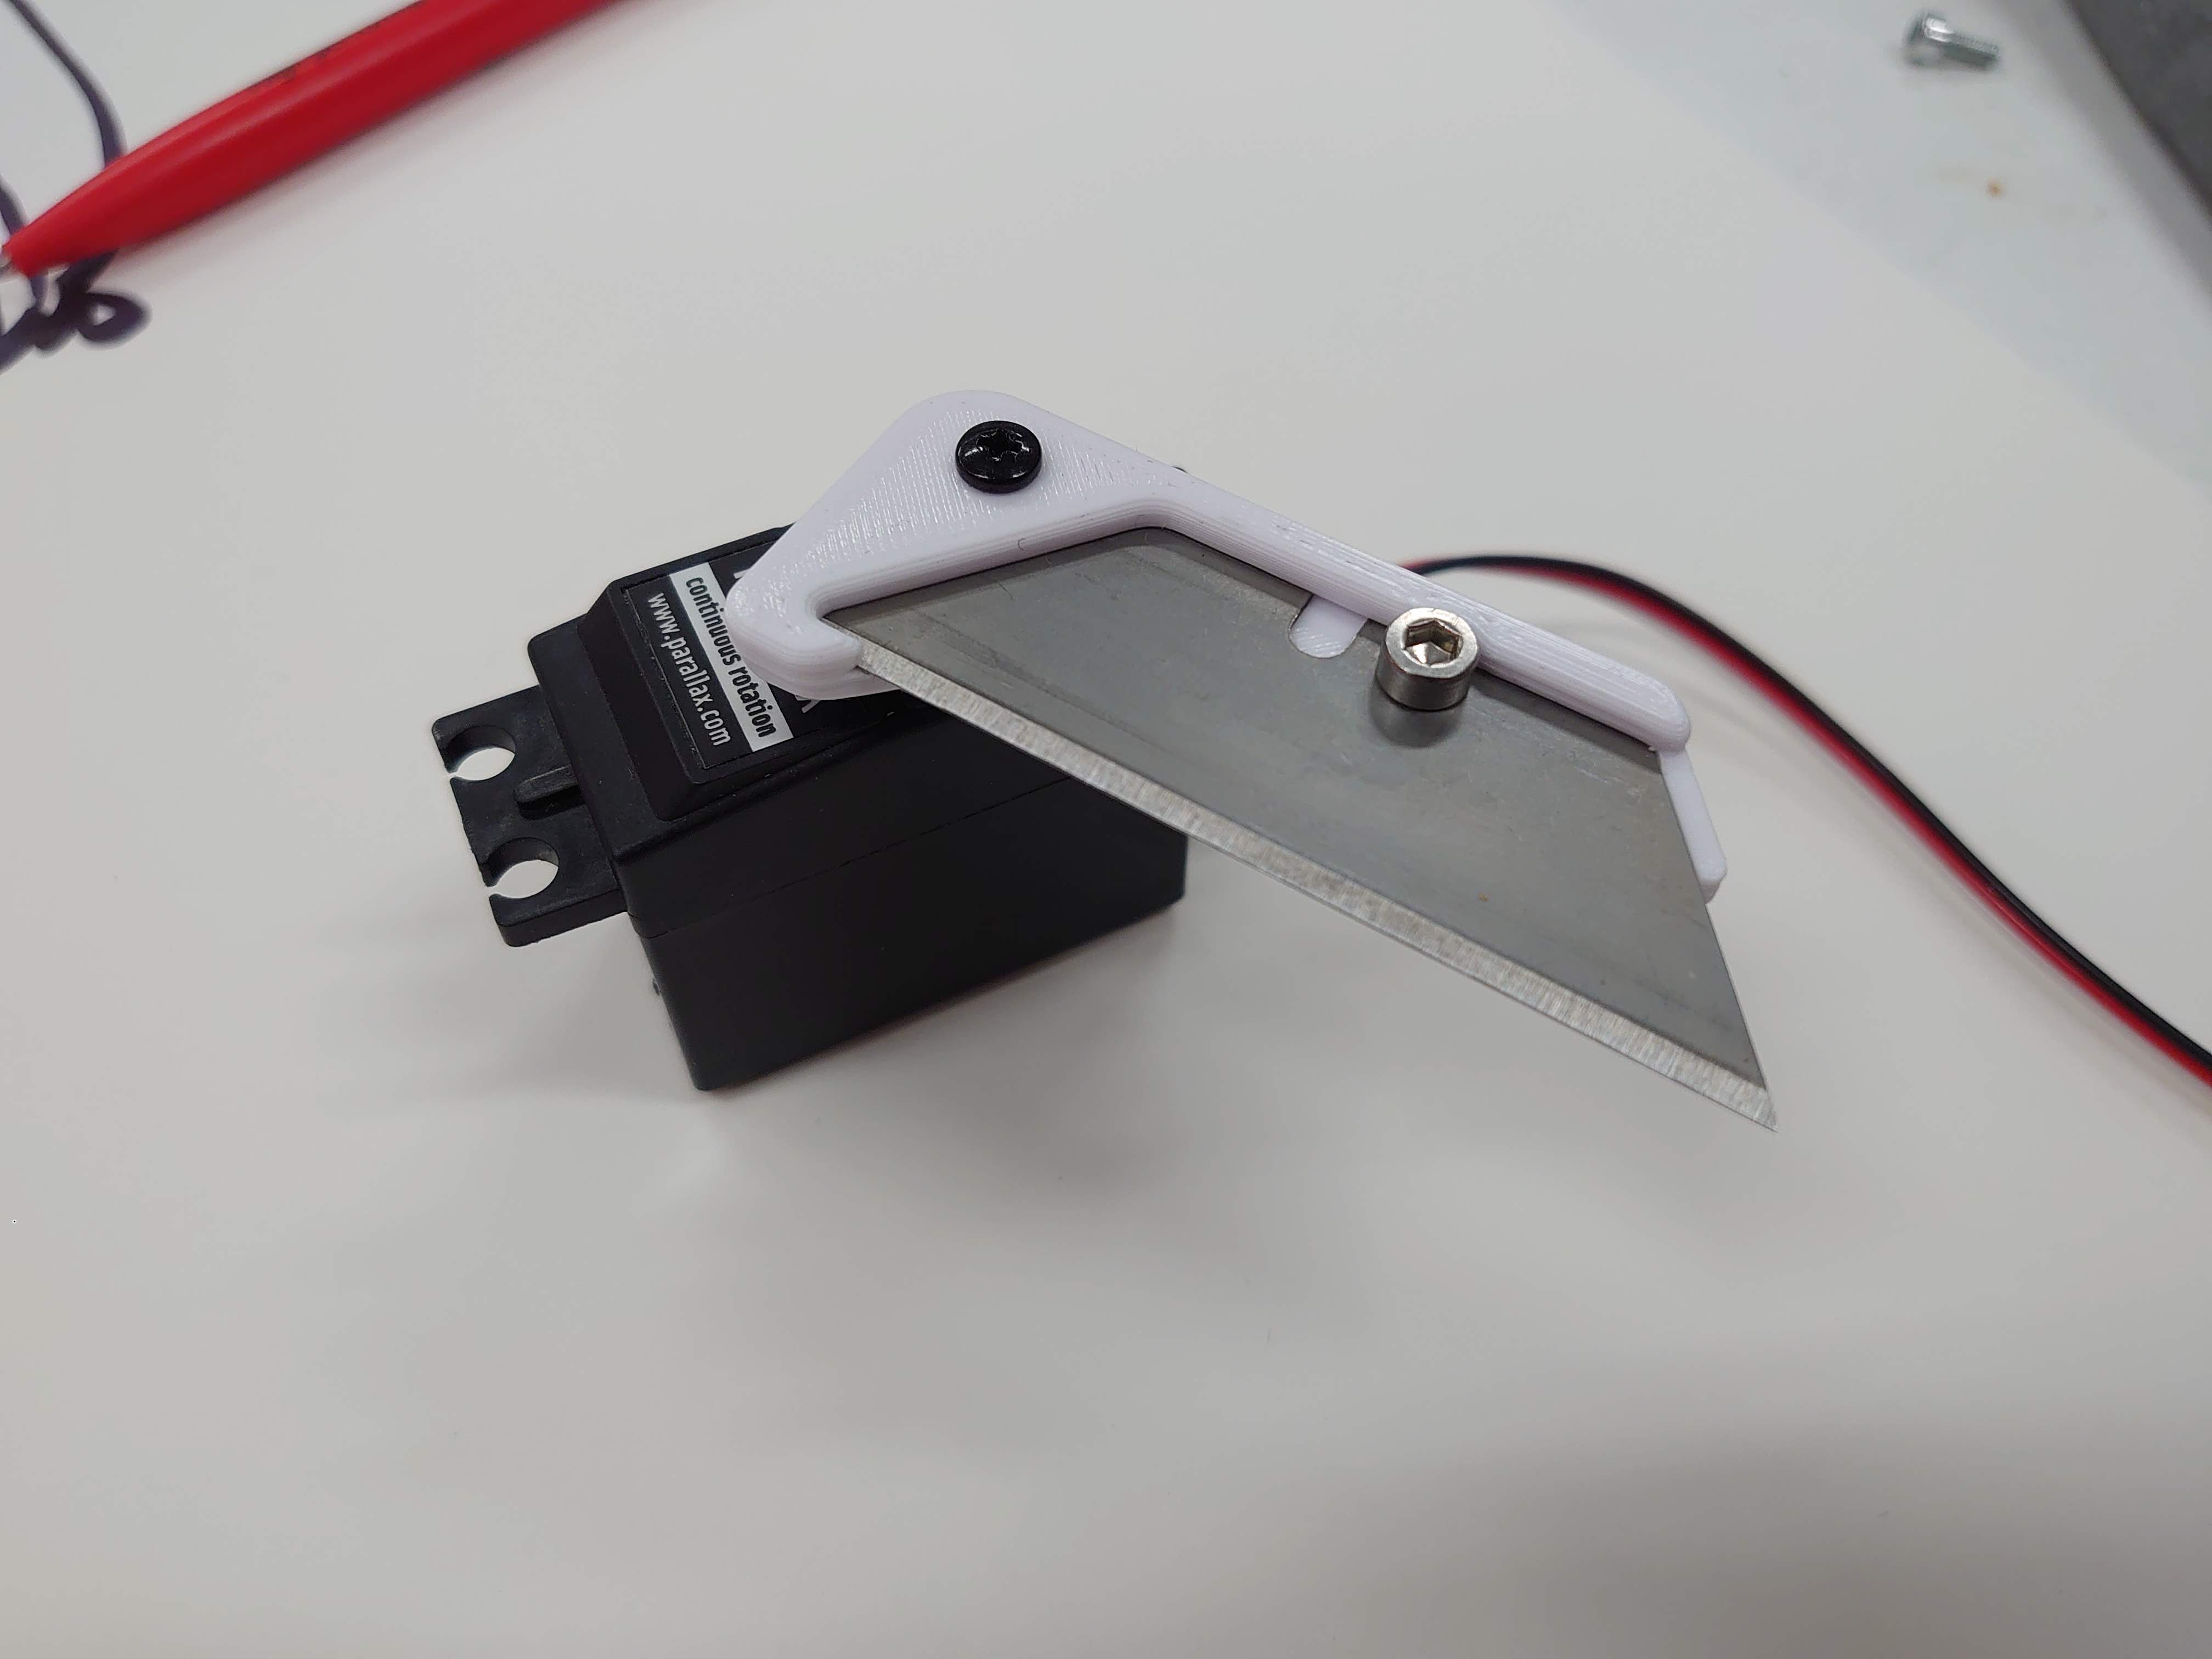 Figure 2: Knife blade attached to “Parallax Continous Rotation” servo motor.
The blade should move 60 degrees clockwise (towards the sausage) from its initial position. The cutting starts in the last 5 degrees.
However, the “Parallax Continous Rotation” servo motor did not work for our purpose. The Z axis along the point where the blade is attached to the motor was not firm, and it kept moving. i.e. both blade and axis were moving. I tried to fix it programmatically, but it didn’t work. Apparently “Parallax Continous Rotation” servo motor was not a better fit for our purpose to begin with as per our local instructor, since this motor has “continuous” movement/rotation.
So, I looked into different options for servo motors and found HobbyKing™ HK15338 Giant Digital Servo motor better fit for your purpose.
By trial and error, I converged on parameters for our program (in loop function below in code snippet). Parameters of the program depended on the initial orientation of the servo motor, the distance between two stepper motors, the sharpness of the knife blade, and also the softness of our sausage.
#include <Servo.h>

Servo myservo;  // create servo object to control servo

int pos = 0;    // variable to store the servo position

void setup() {
  myservo.attach(D0);  // attaches the servo's DATA pin to pin D0 on Seeed Xiao ESP32C3 module
}

void loop() {
  myservo.write(0); //paramater 1
  delay(500); //paramater 2
  myservo.write(180); //paramater 3
  delay(500); //paramater 4

}
Servo was programmed with Xiao ESP32C3 MCU. Servo library needs to be installed for this program to work, and instruction for this can be found in my week 4 assignment.
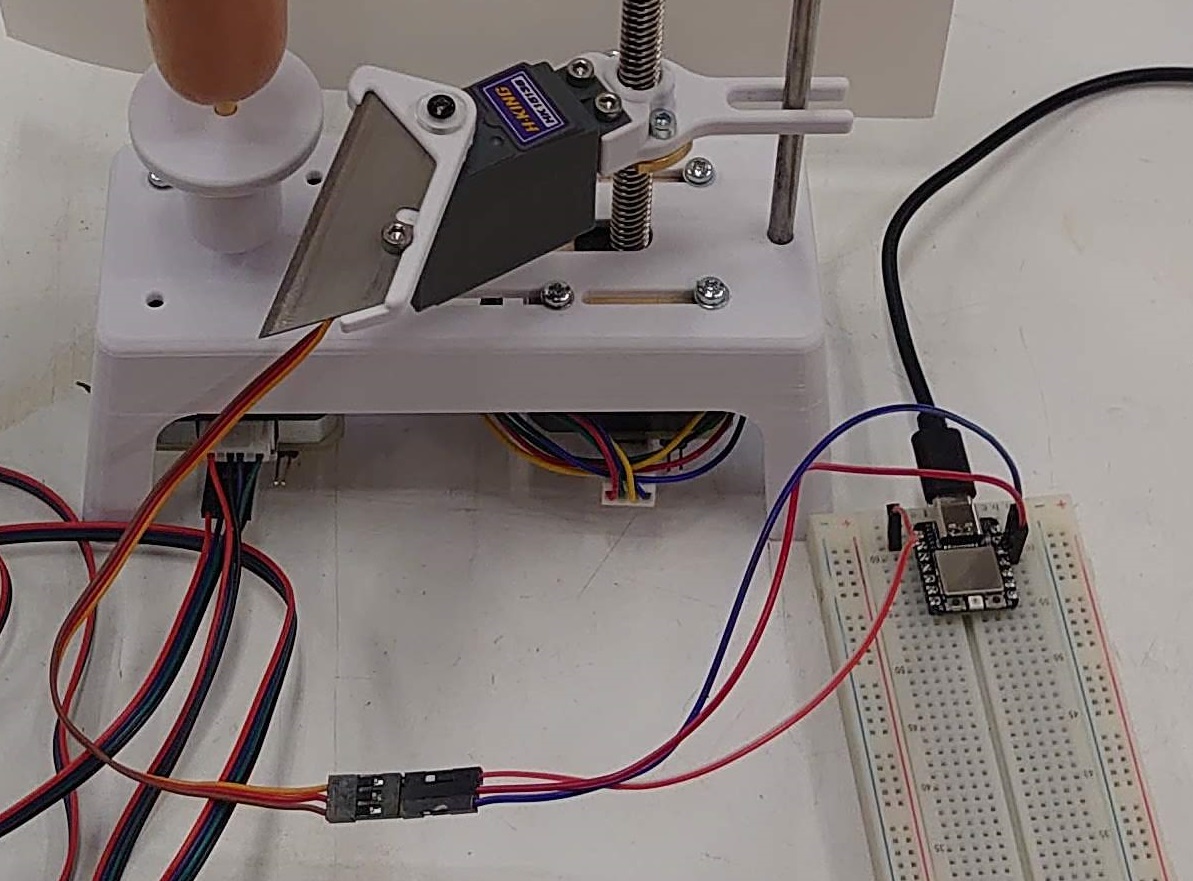 Figure 3: Schematics of Servo motor’s connection with Seeed Xiao ESP32C3 module.
Schematics. HobbyKing™ HK15338 Giant Digital Servo motor has three pins: black coloured (GND), red coloured (5V), and orange coloured (DATA), and these three pints respectively were connected to GND, 5V, and D0 pins on Seeed Xiao ESP32C3 module (shown in Figure 3).
Final Design
The following video segment shows the movement of the servo motor after being programmed.