7. Computer-controlled machining
This week I worked on “making something big” via CNC machine.
Group Work
During the group work, we looked at safety instructions and our local instructors demonstrated the working of the CNC machine by making a cloth hanger. Afterwards, we performed measurements of the hangers and performed the compare and contrast analysis between the final fabricated version and the original design version, and these measurements could be found on our group assignment page. It was my first time working with the CNC machine.
Making a bookshelf in Fusion 360
This week, I decided to make a bookshelf since I needed one anyway in my office. Usually, I use OpenSCAD for 3D modelling but it didn’t have good support for this week’s assignment (like post processor library), so I had to switch to Fusion. I was not well acquainted with Fusion, so I heavily relied on a tutorial by Patrick Rainsberry. Final 3D model in Fusion:
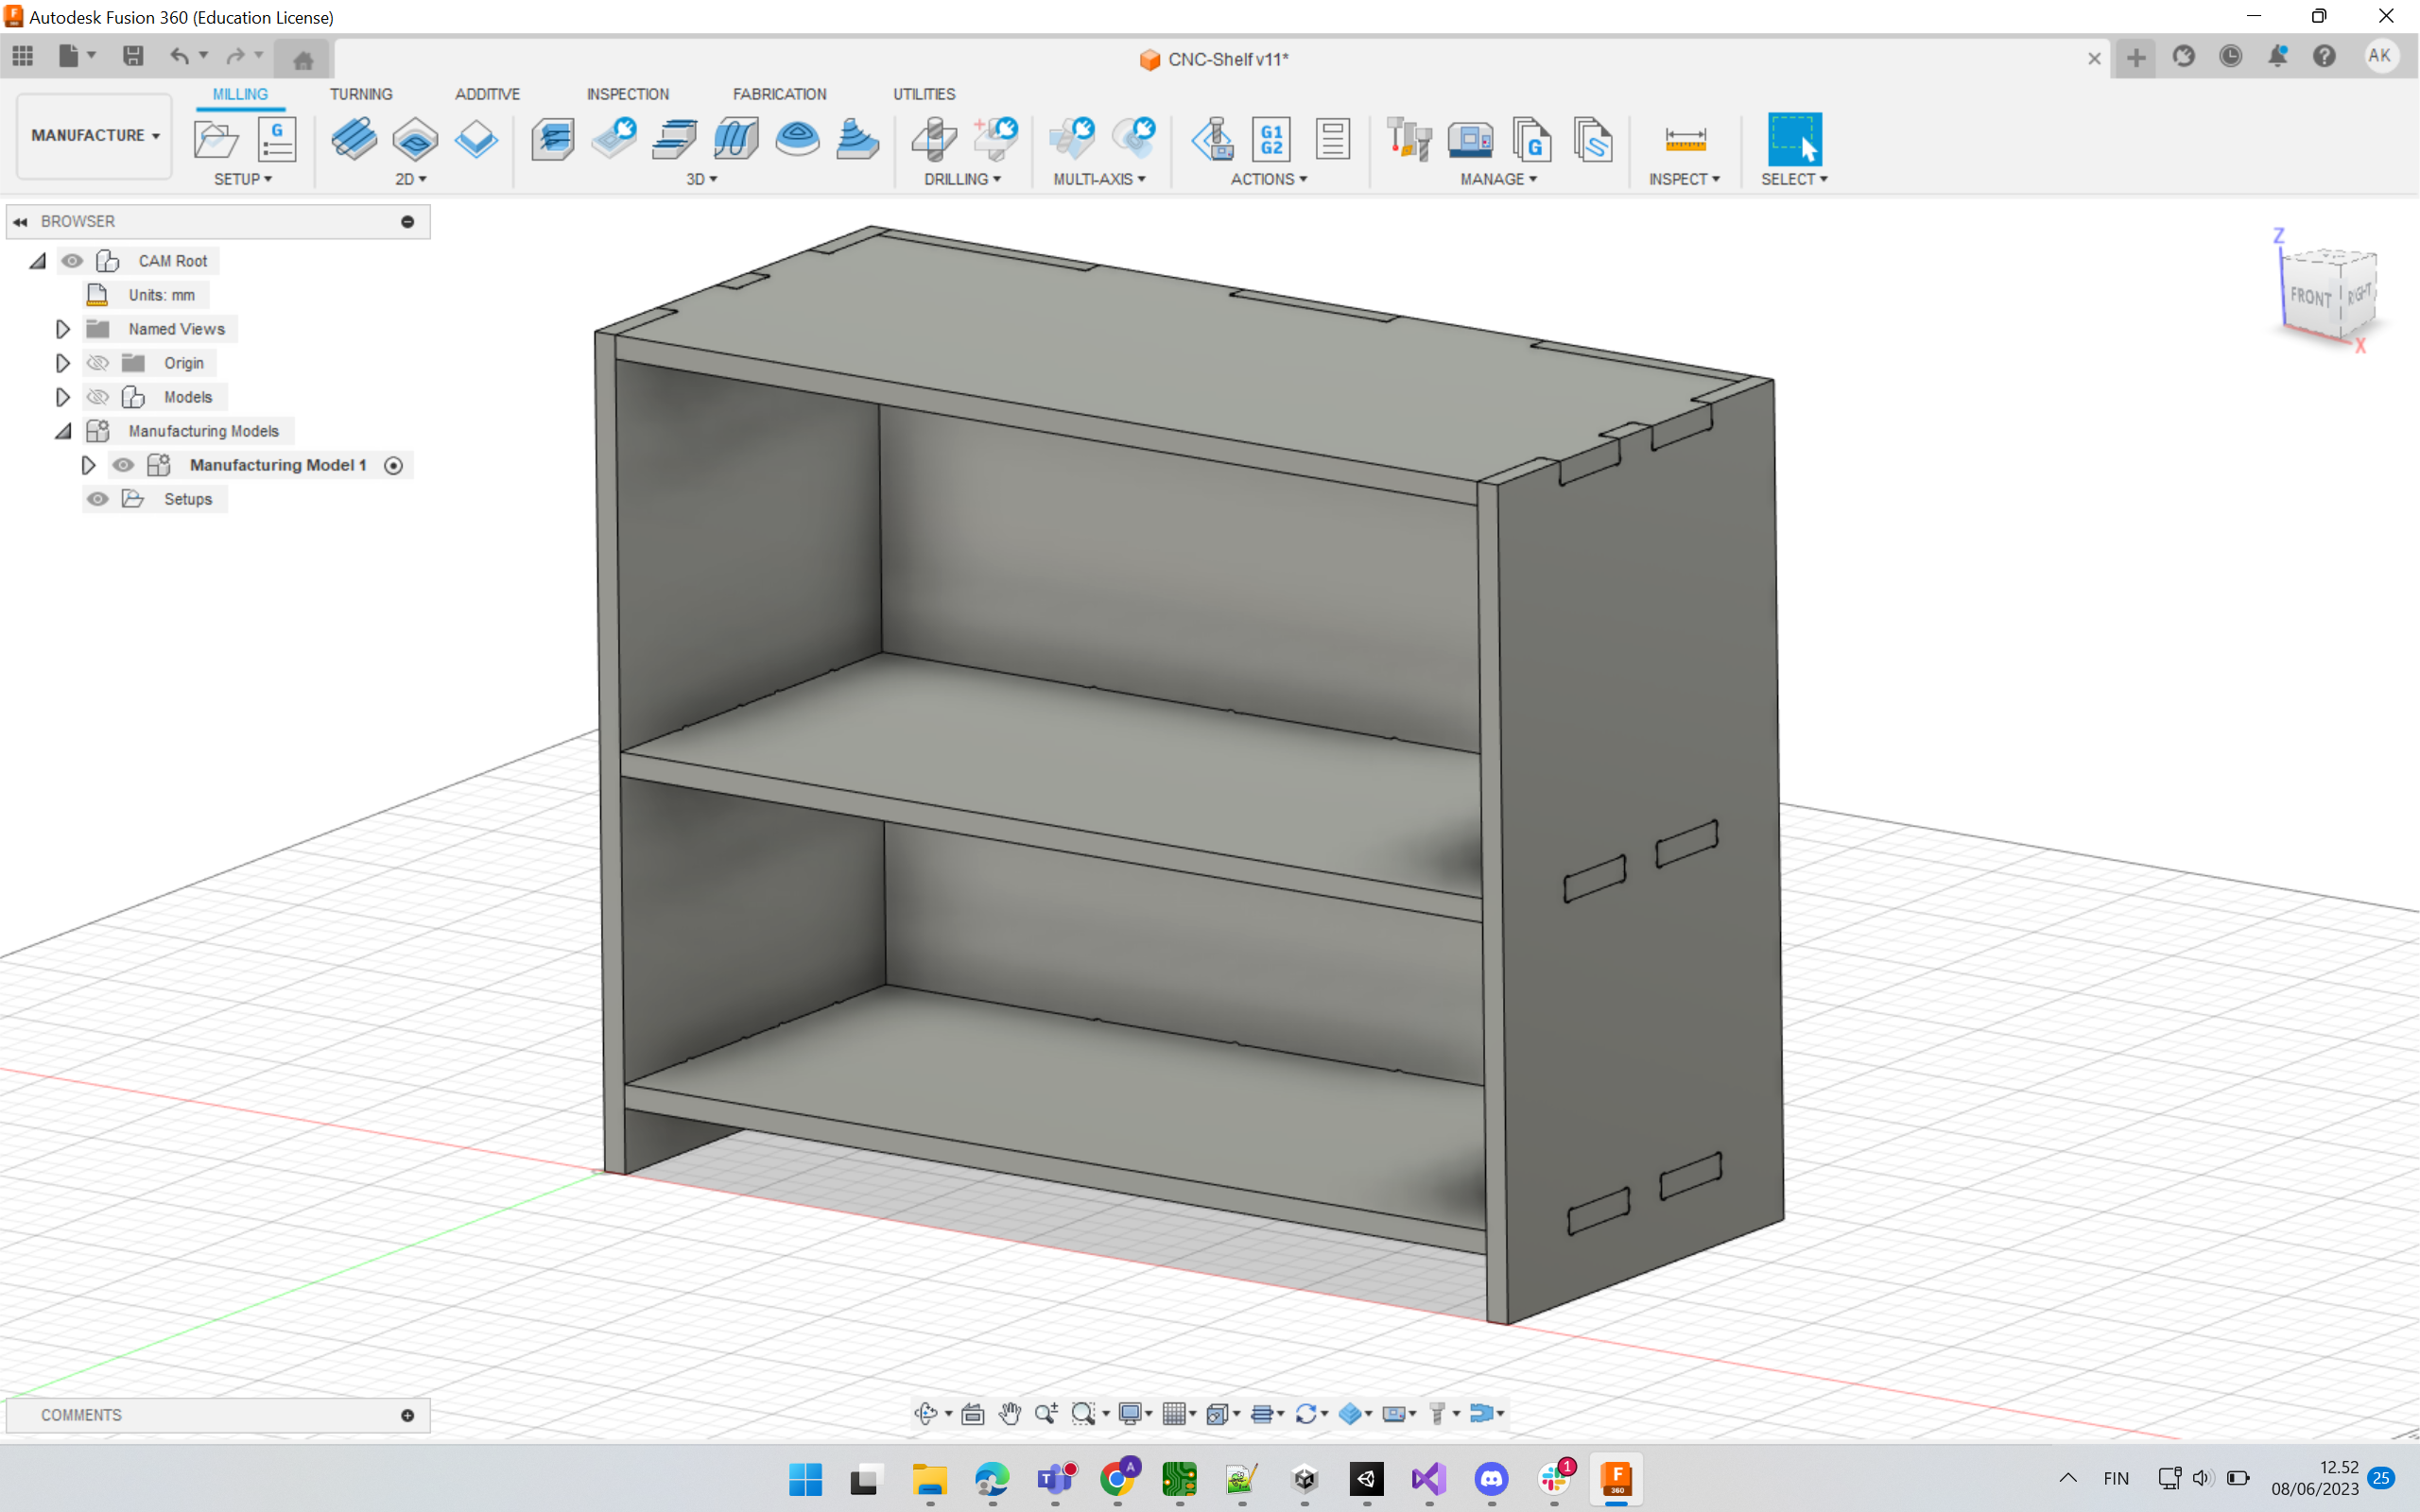 3D Model of BookShelf made in Fusion 360.
Flatten the parts
Now we need to arrange all parts of the bookshelf in a flat way so that it matches the flatness of the OSB sheet which will be used as a material.
For this first make sure everybody is its own separate component.
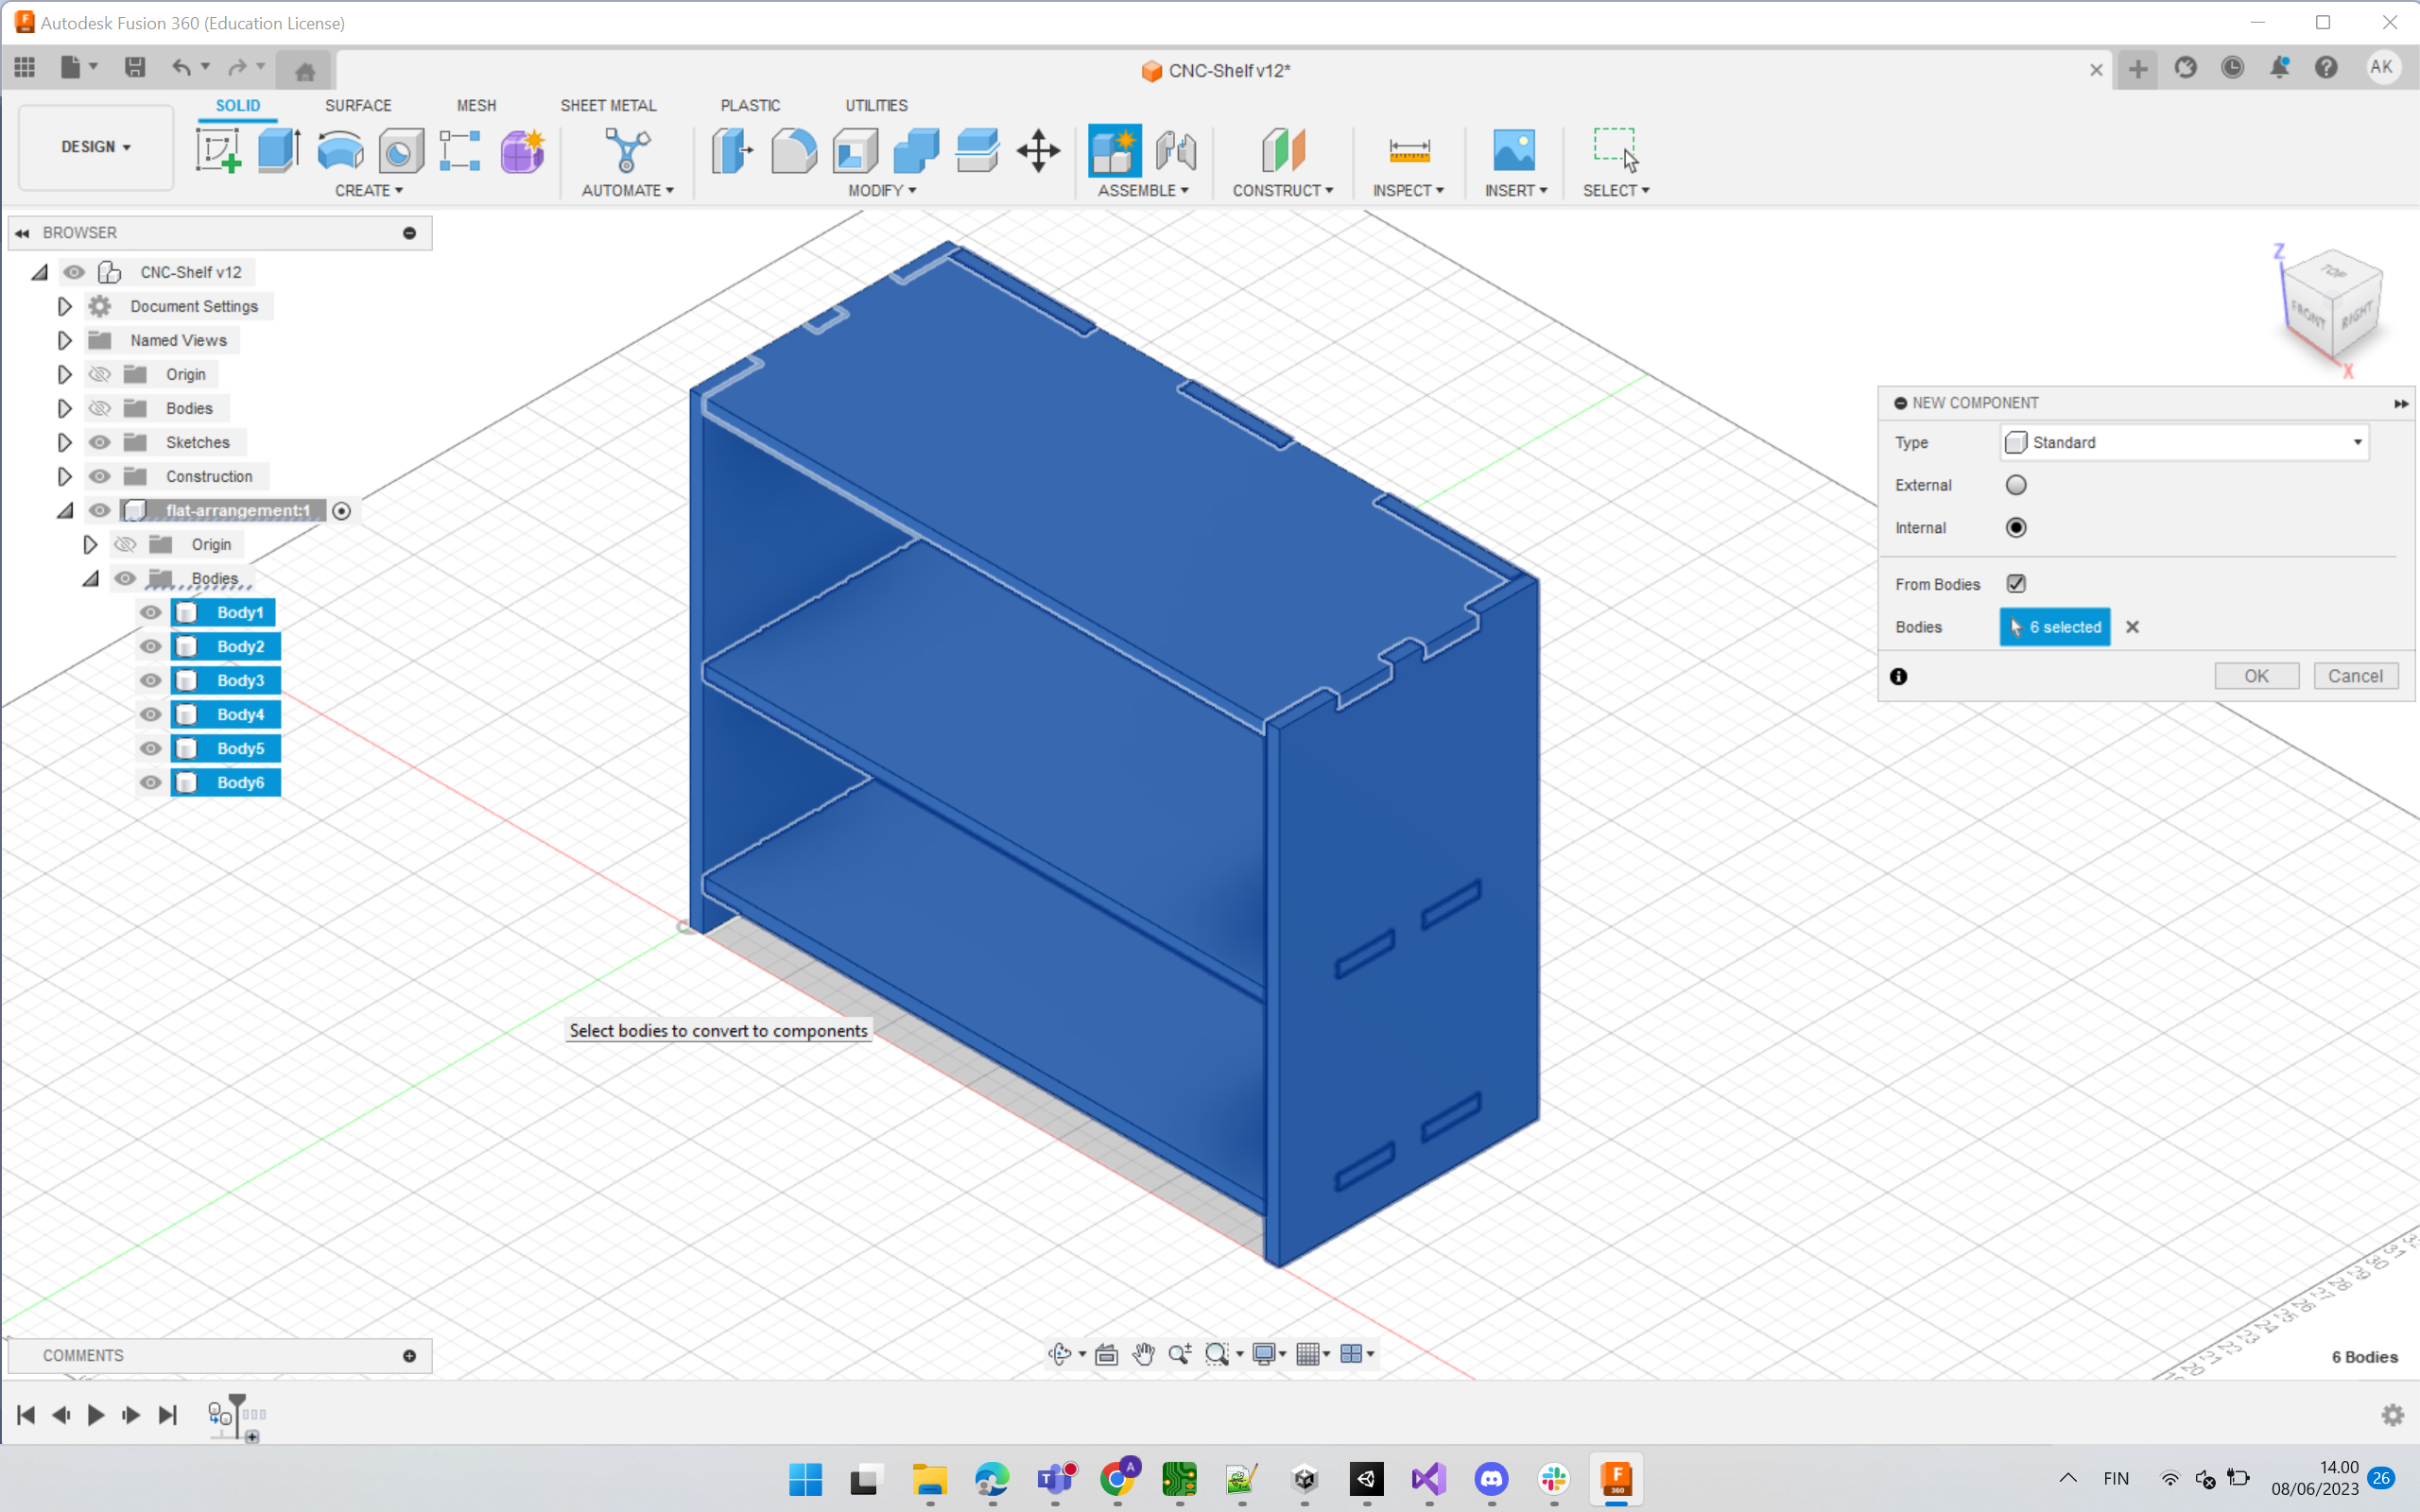 Mapping each body to its separate component.
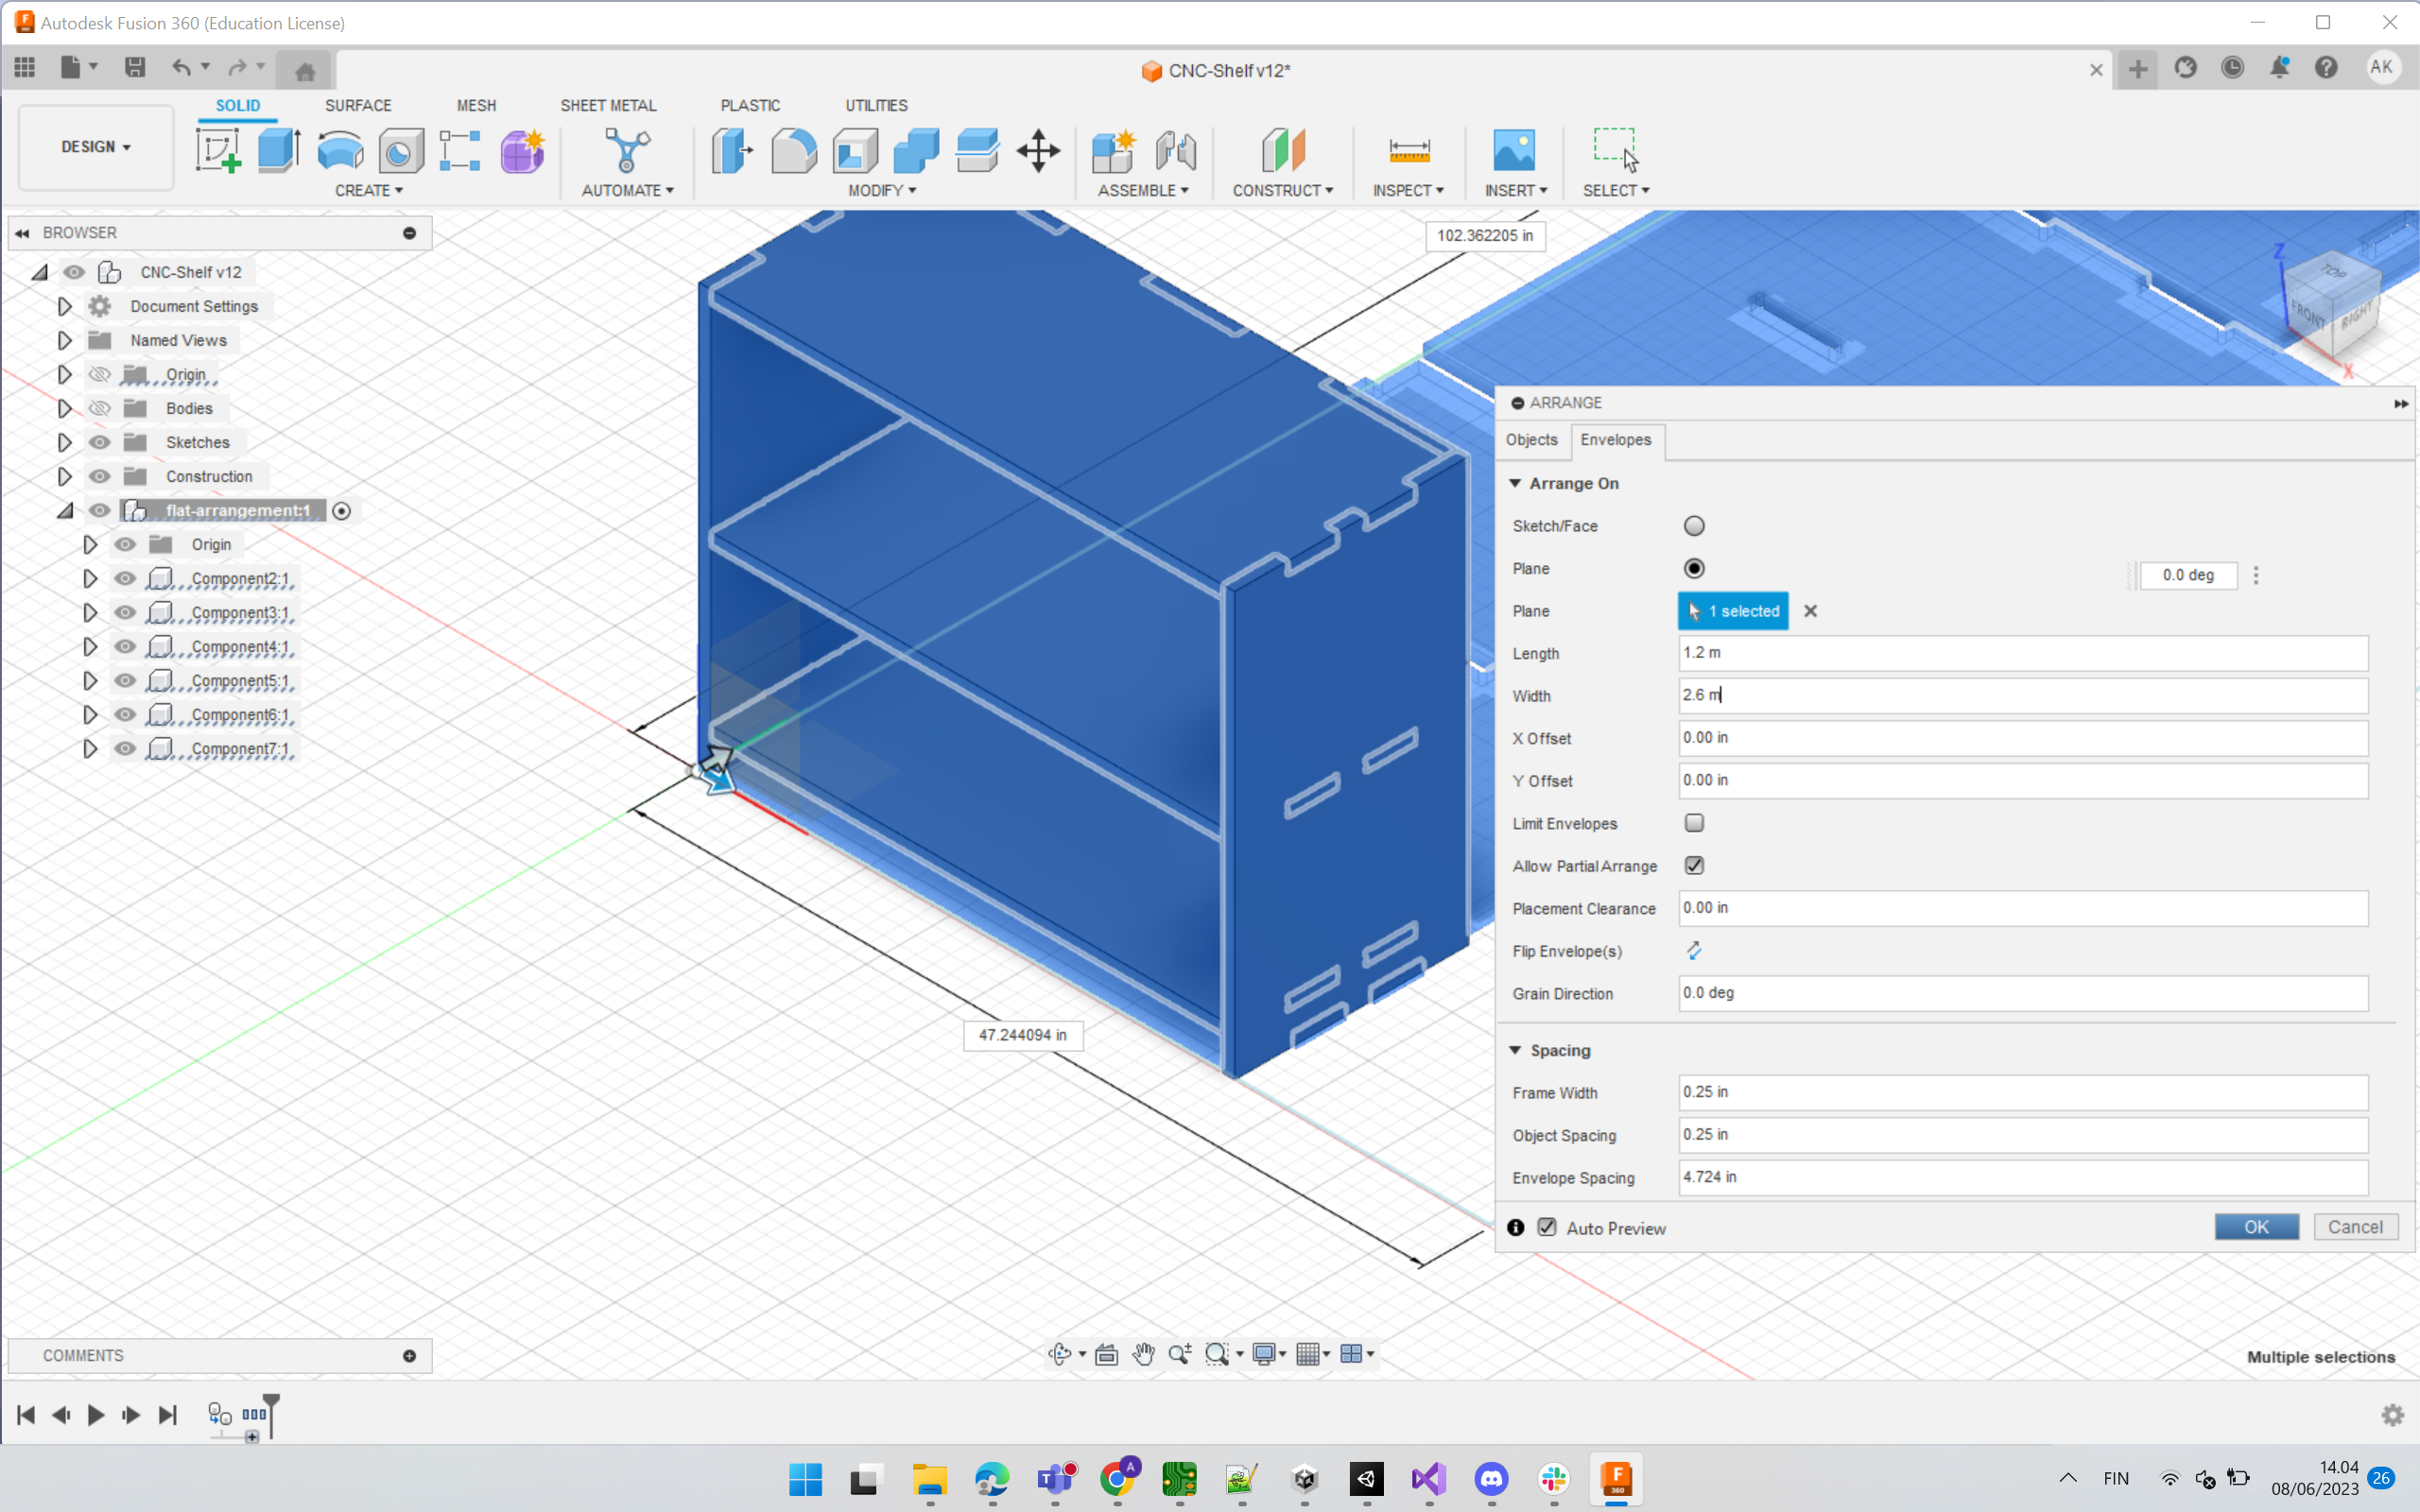
Afterwards, we use arrange too to flatten all parts in the X-Y plane.
In Modify Tab - > Select Arrange tool. Select all components.
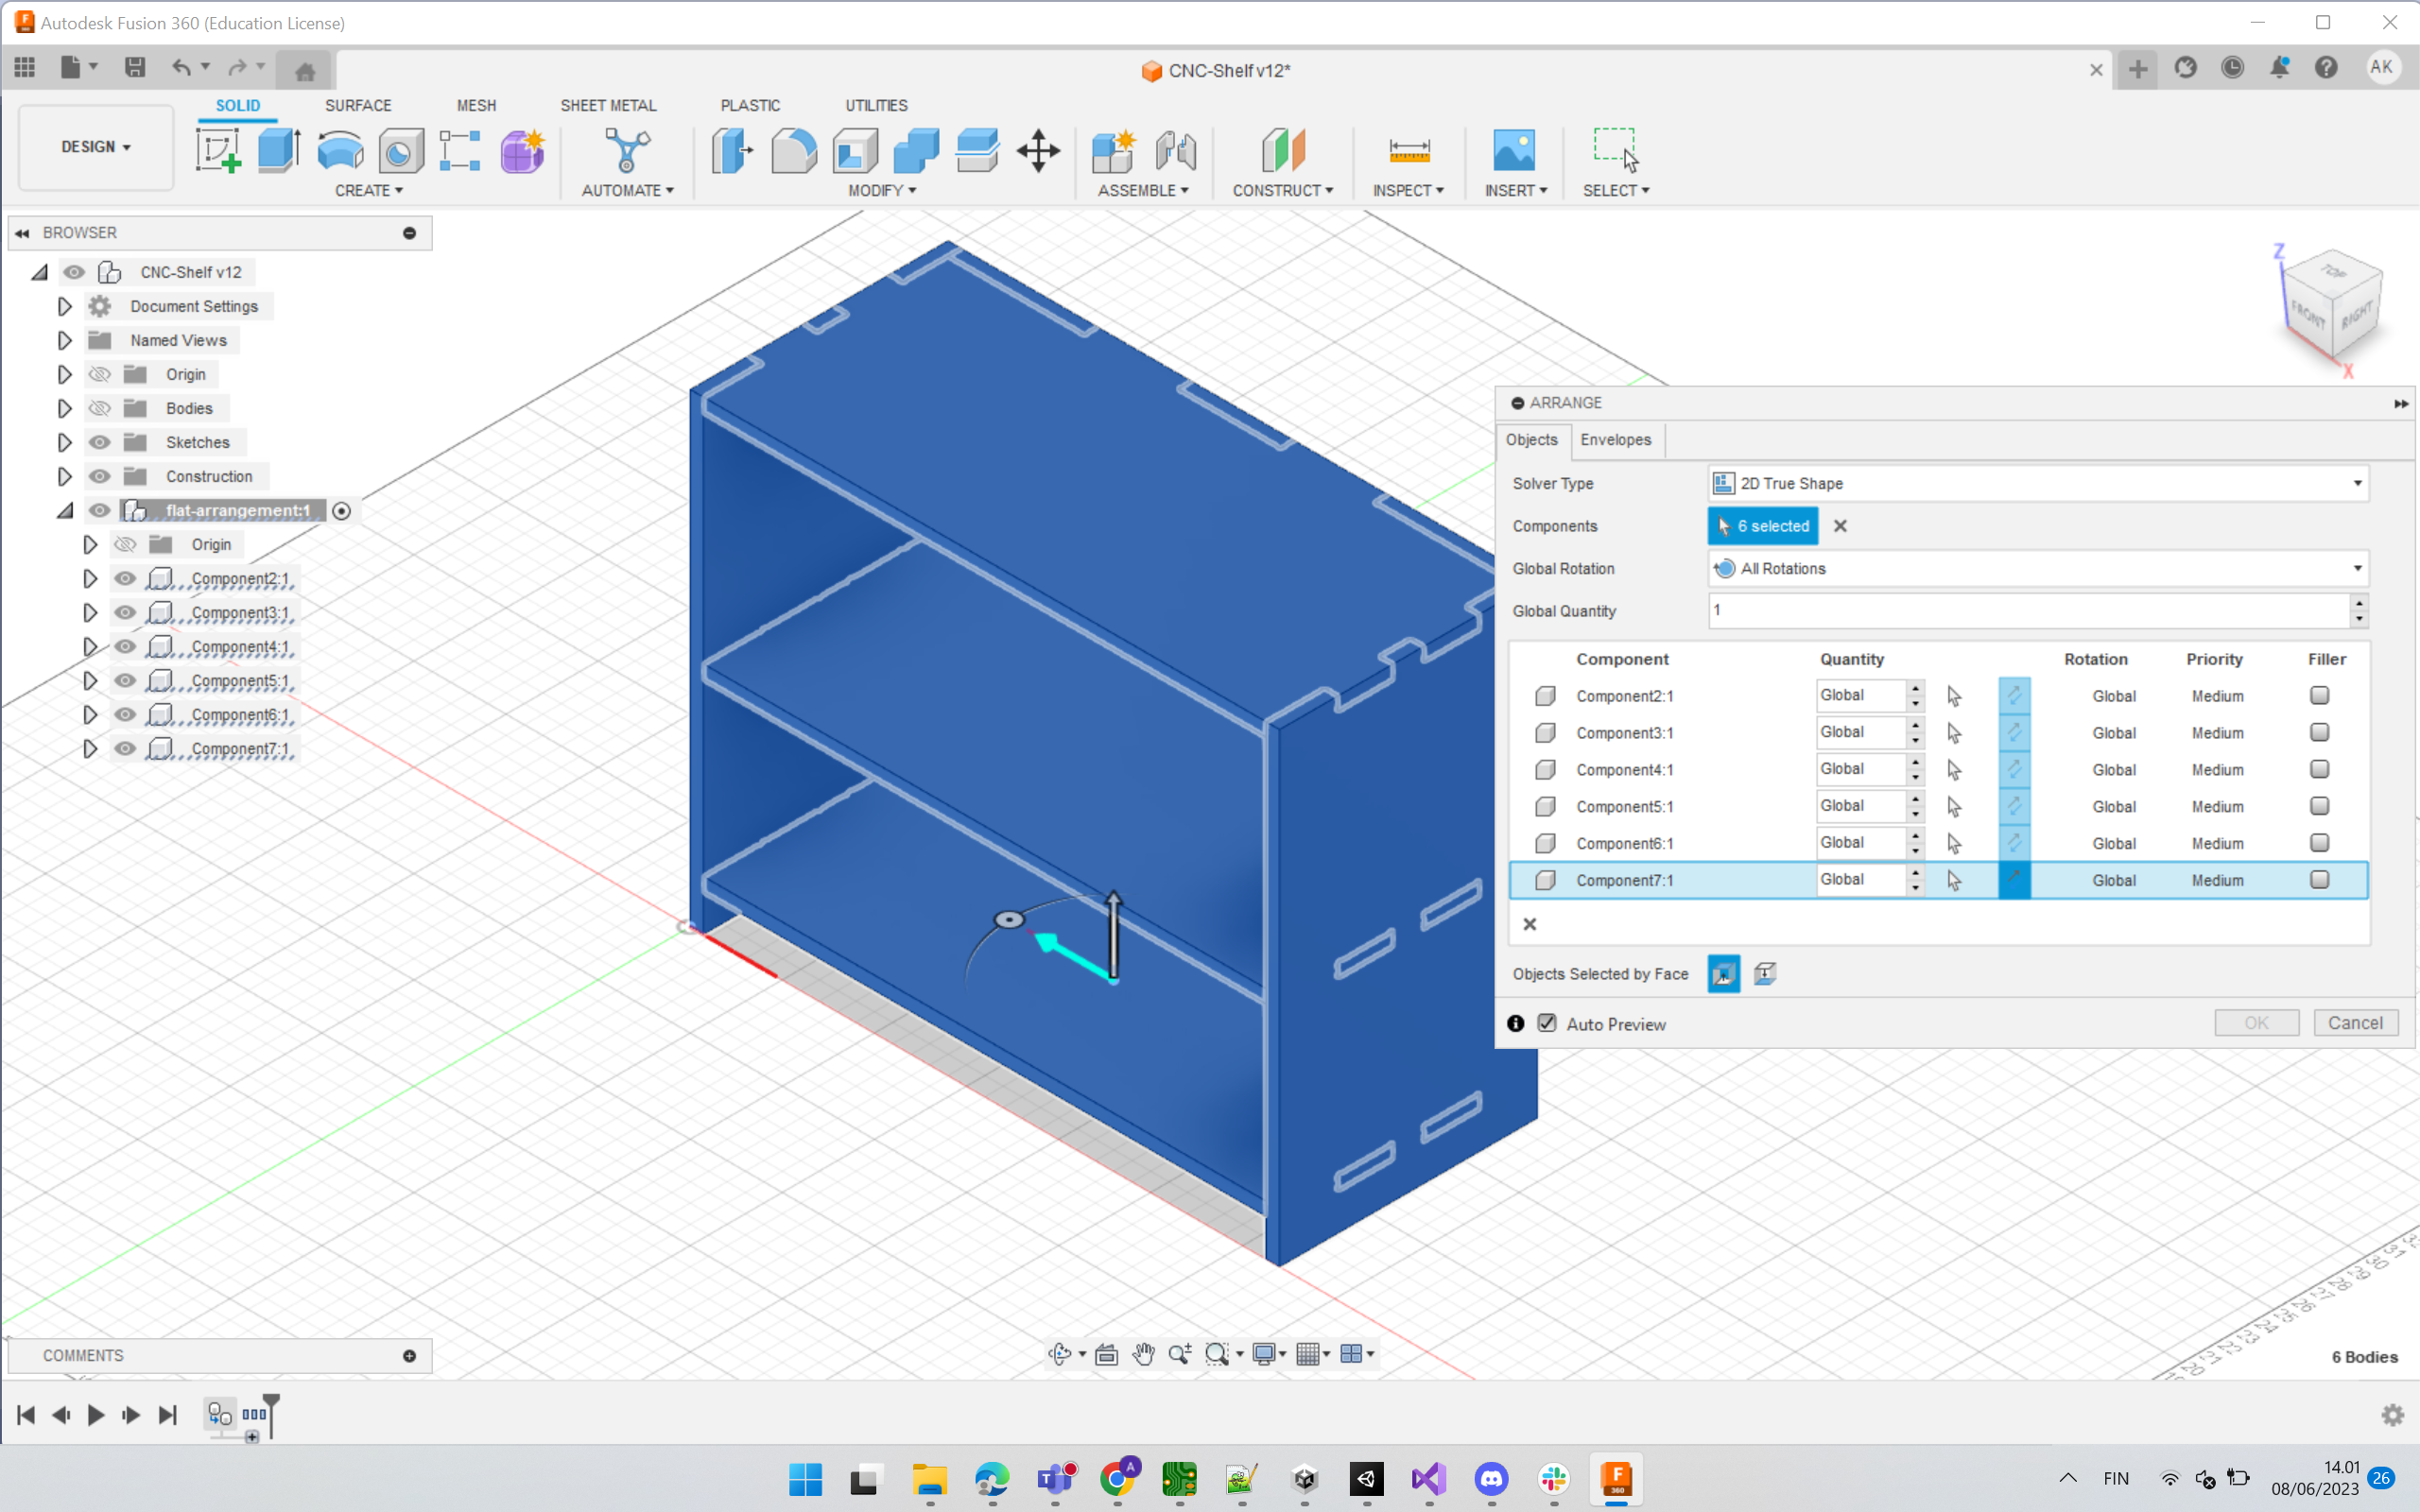
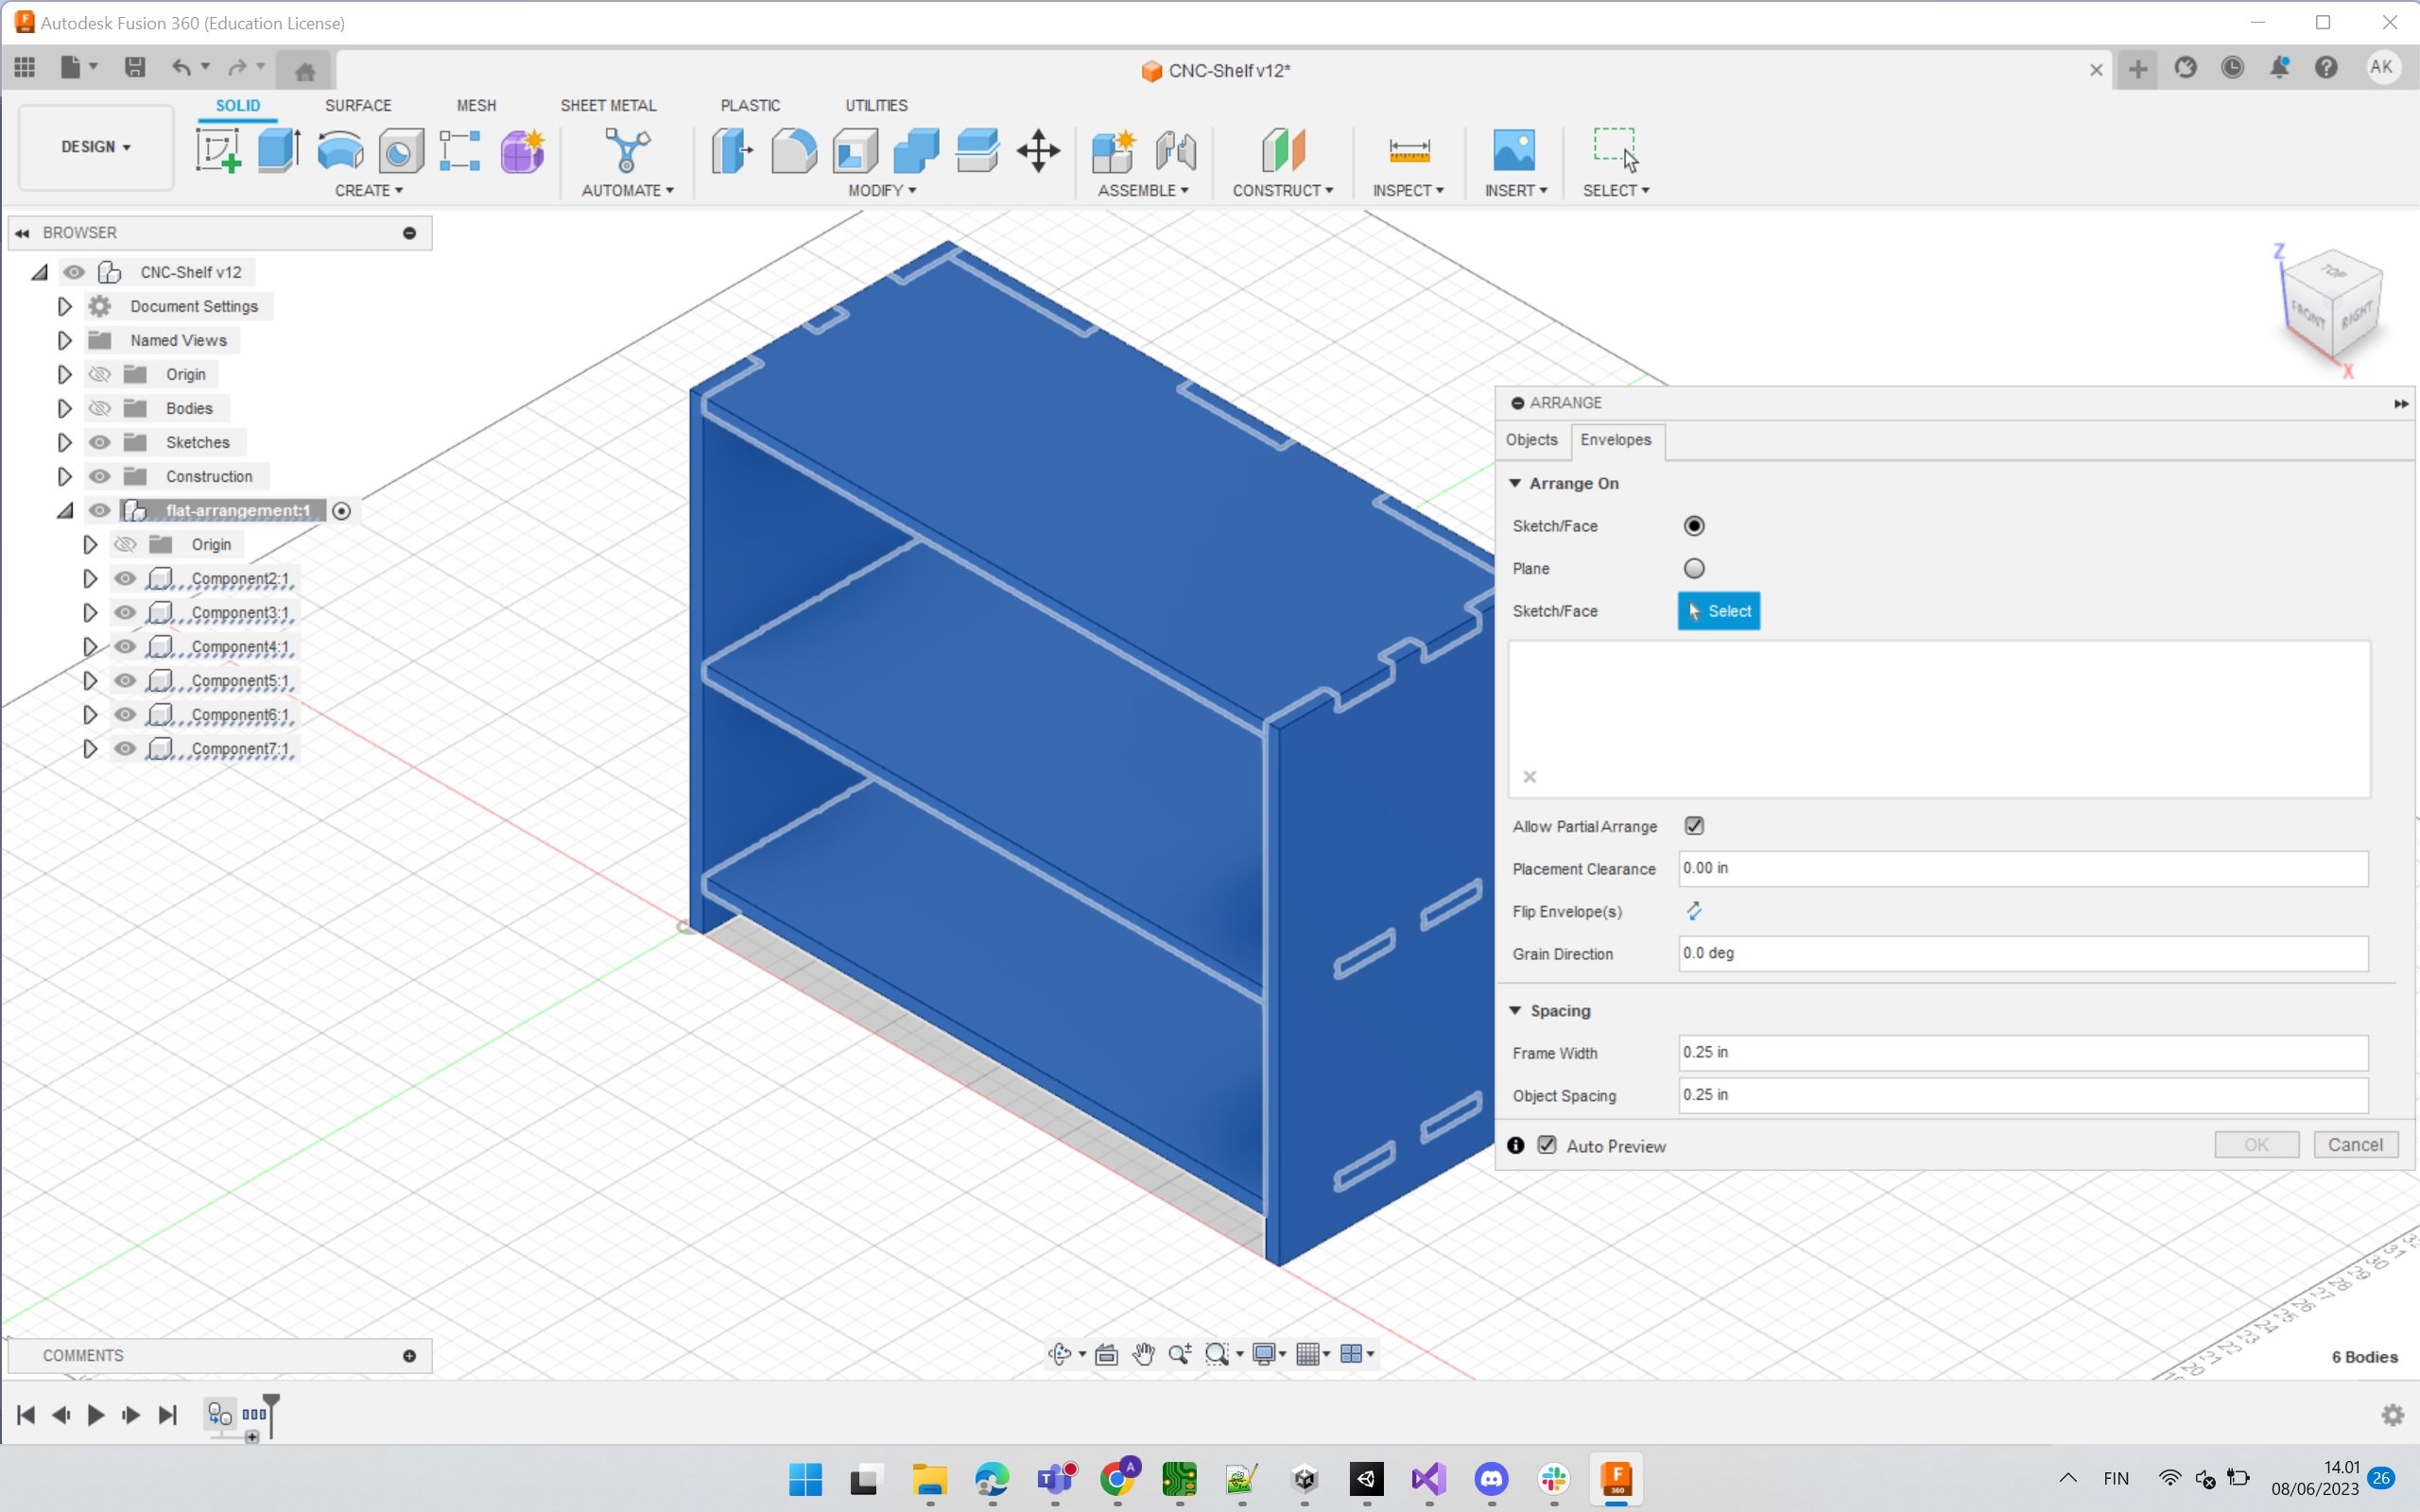
Ensure that the object spacing is more than the tool width to be used later for cutting.
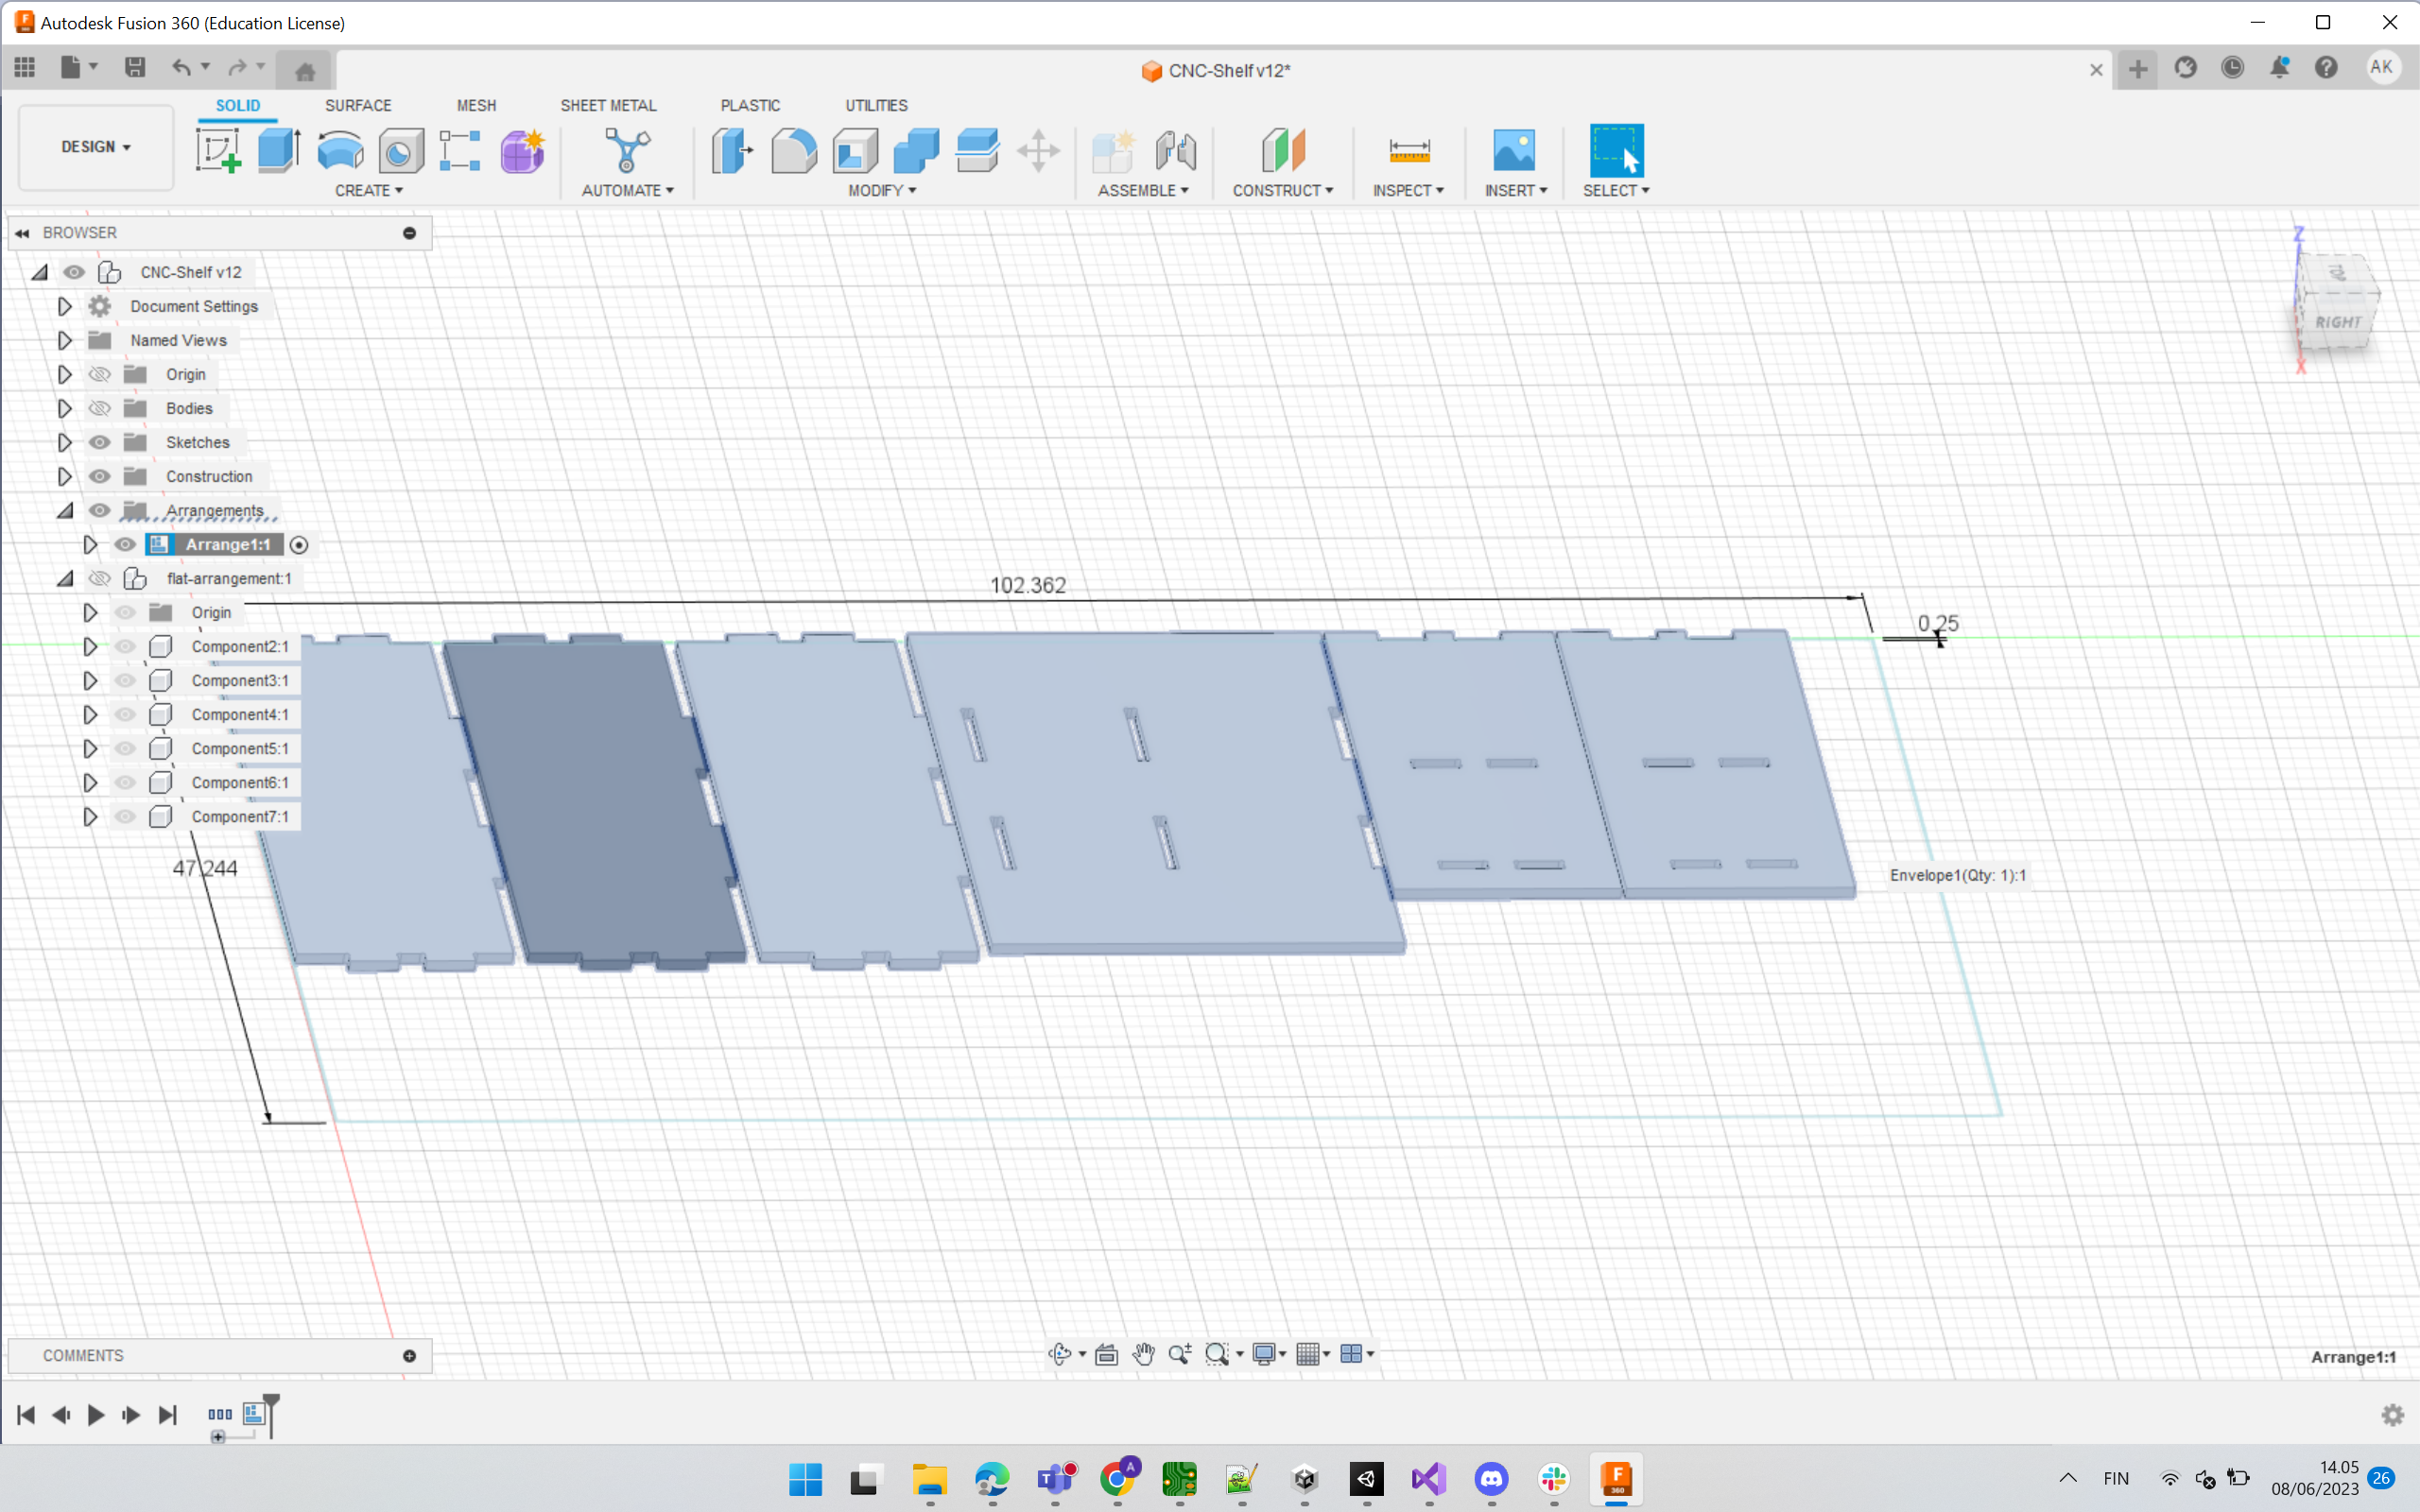
After flattening,
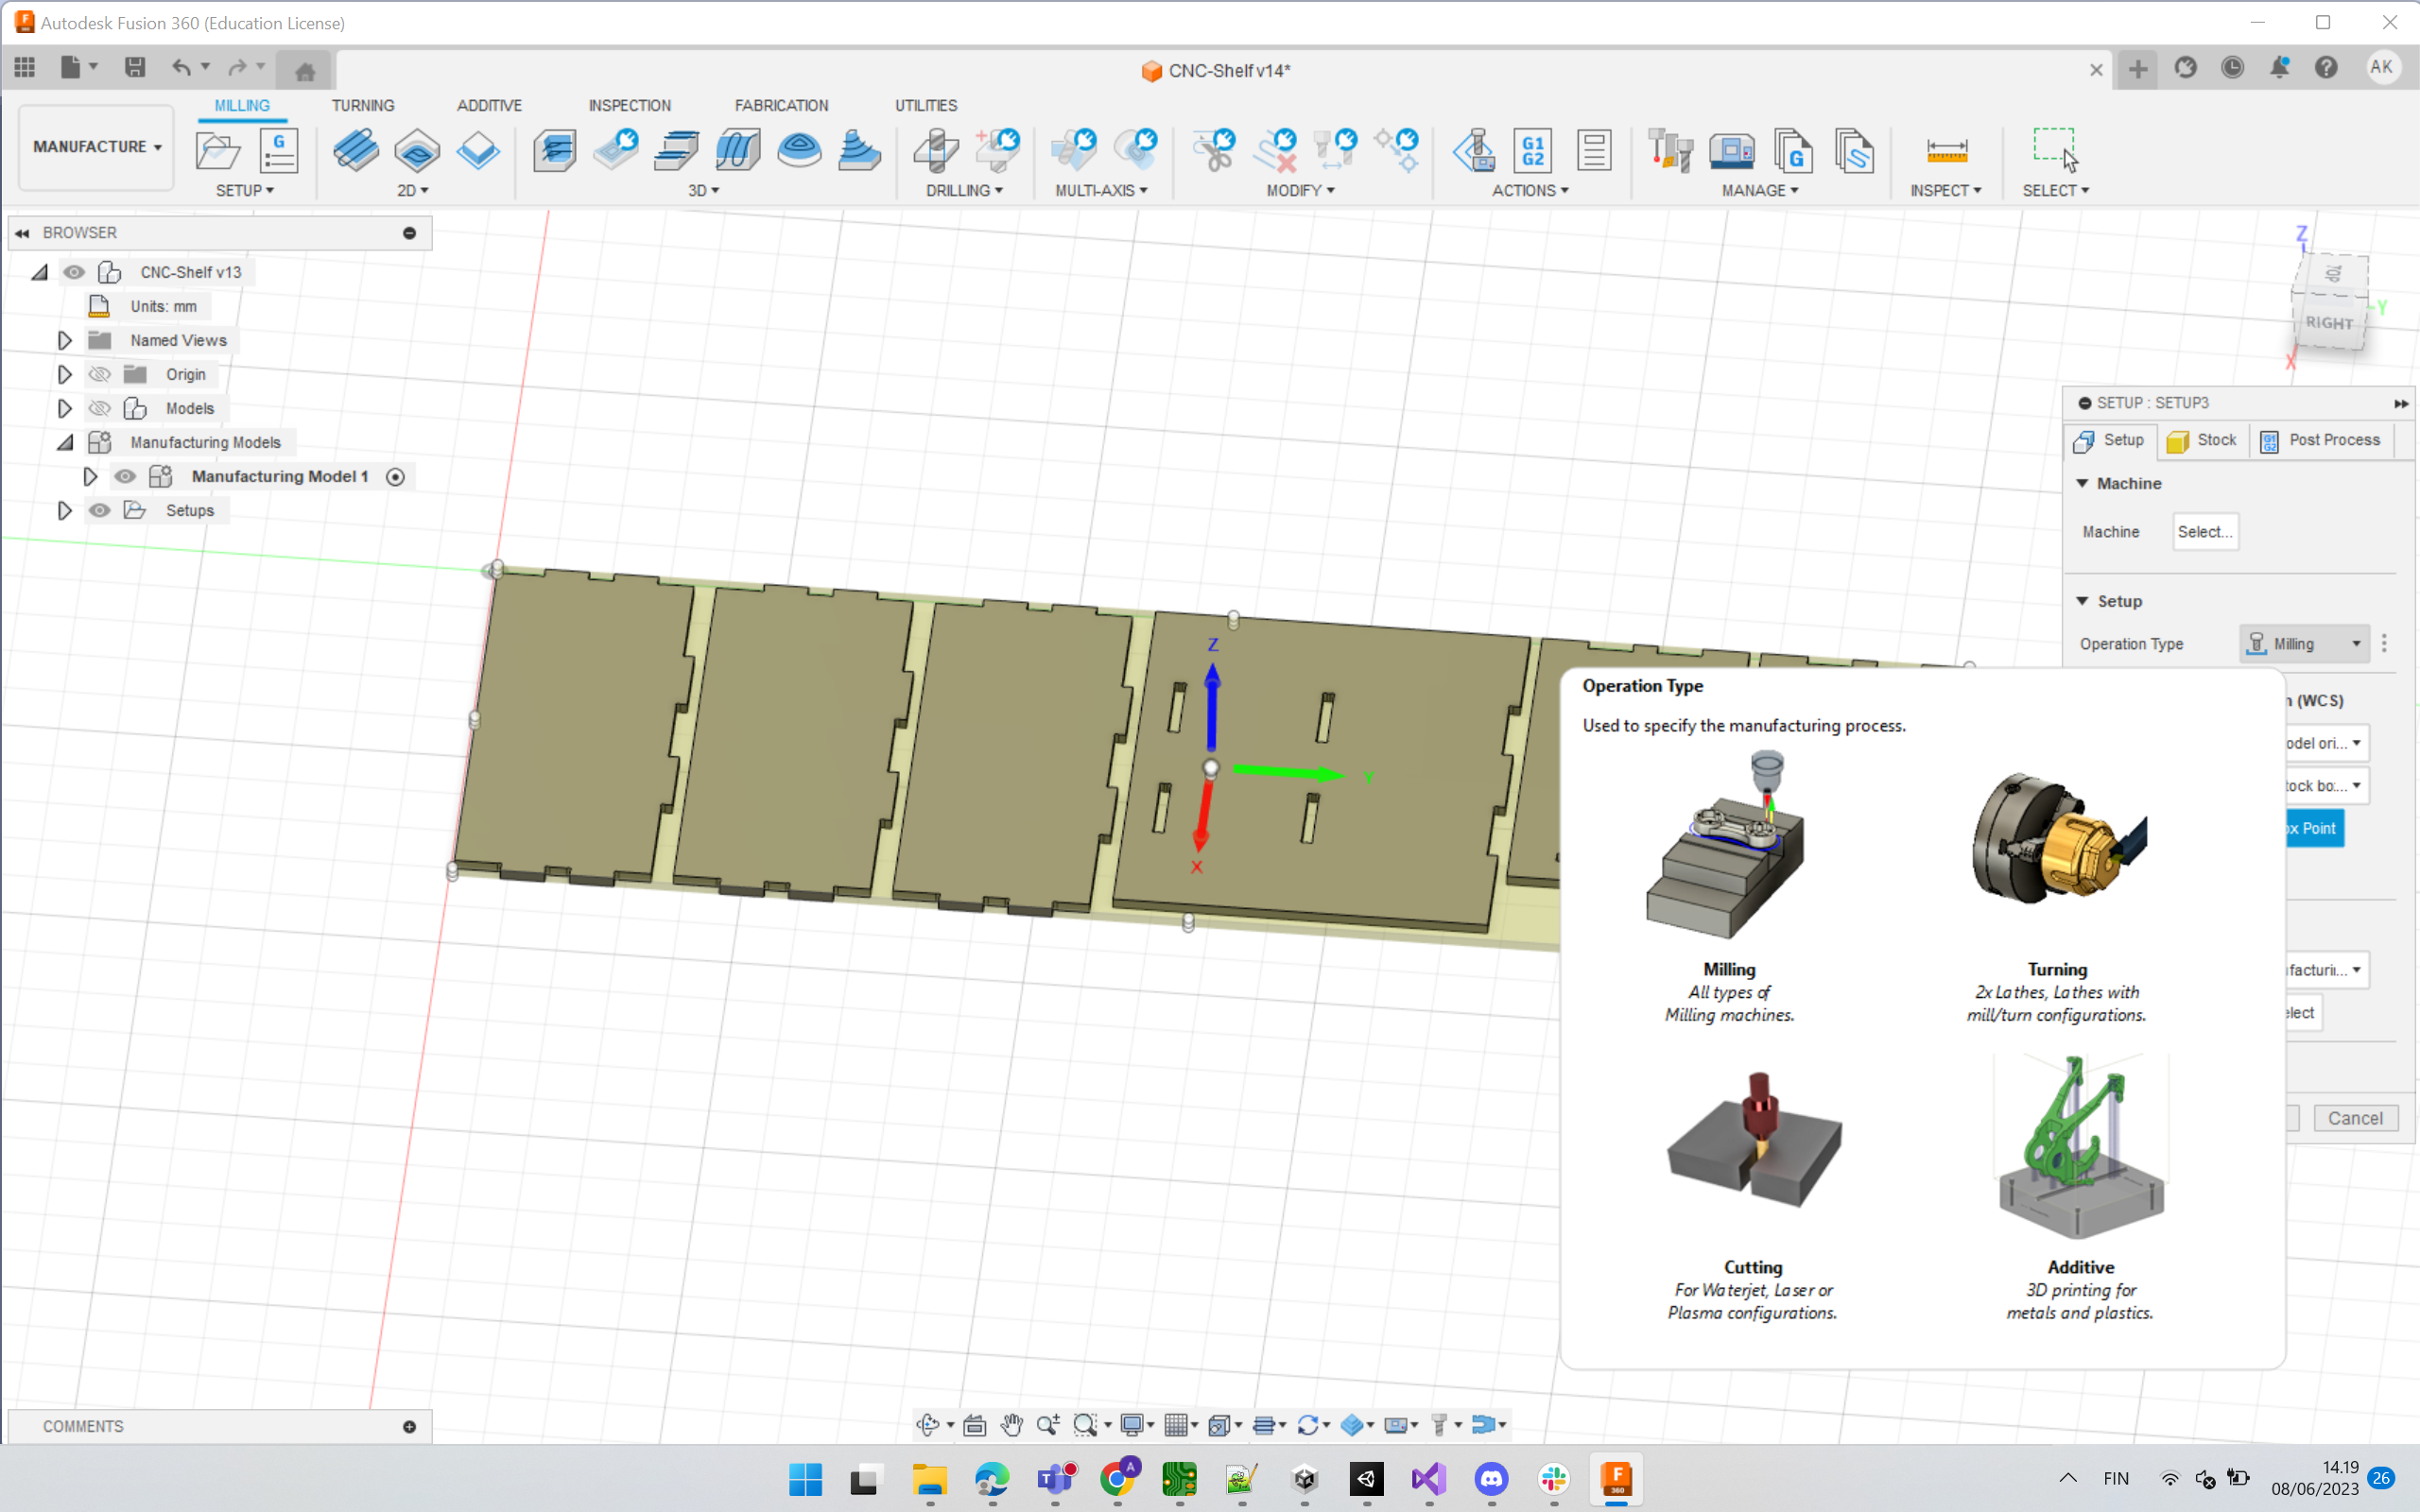
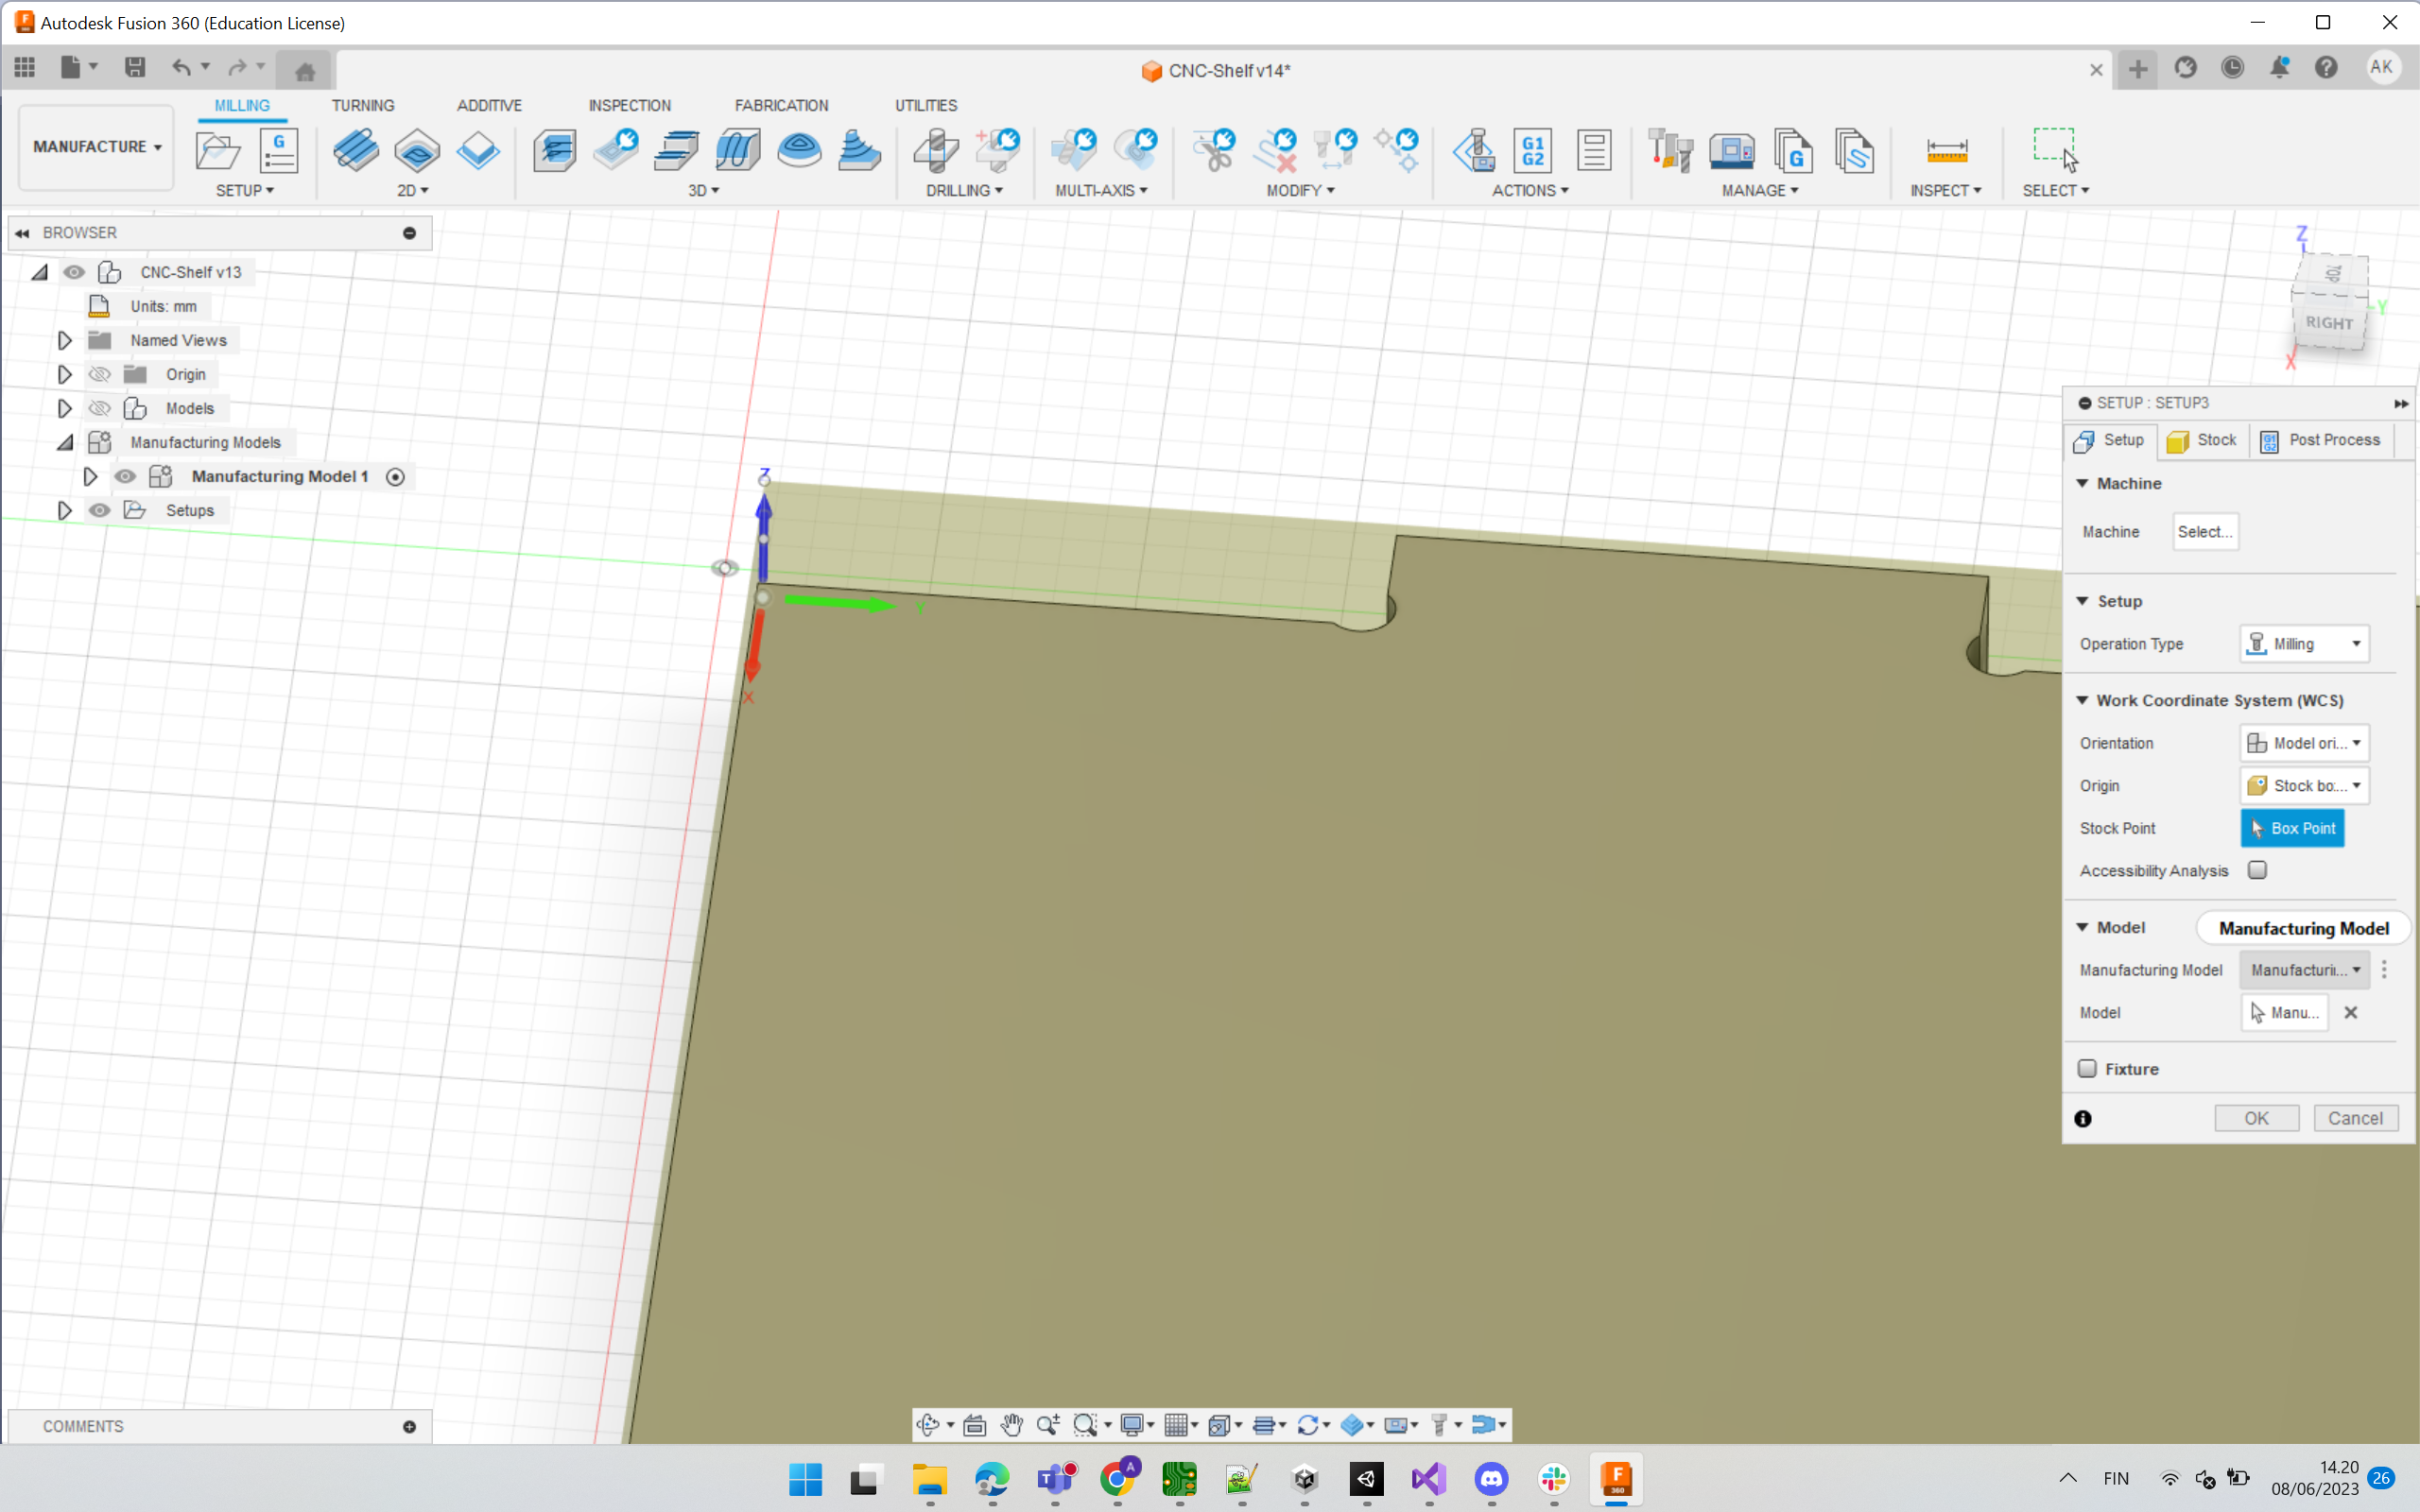
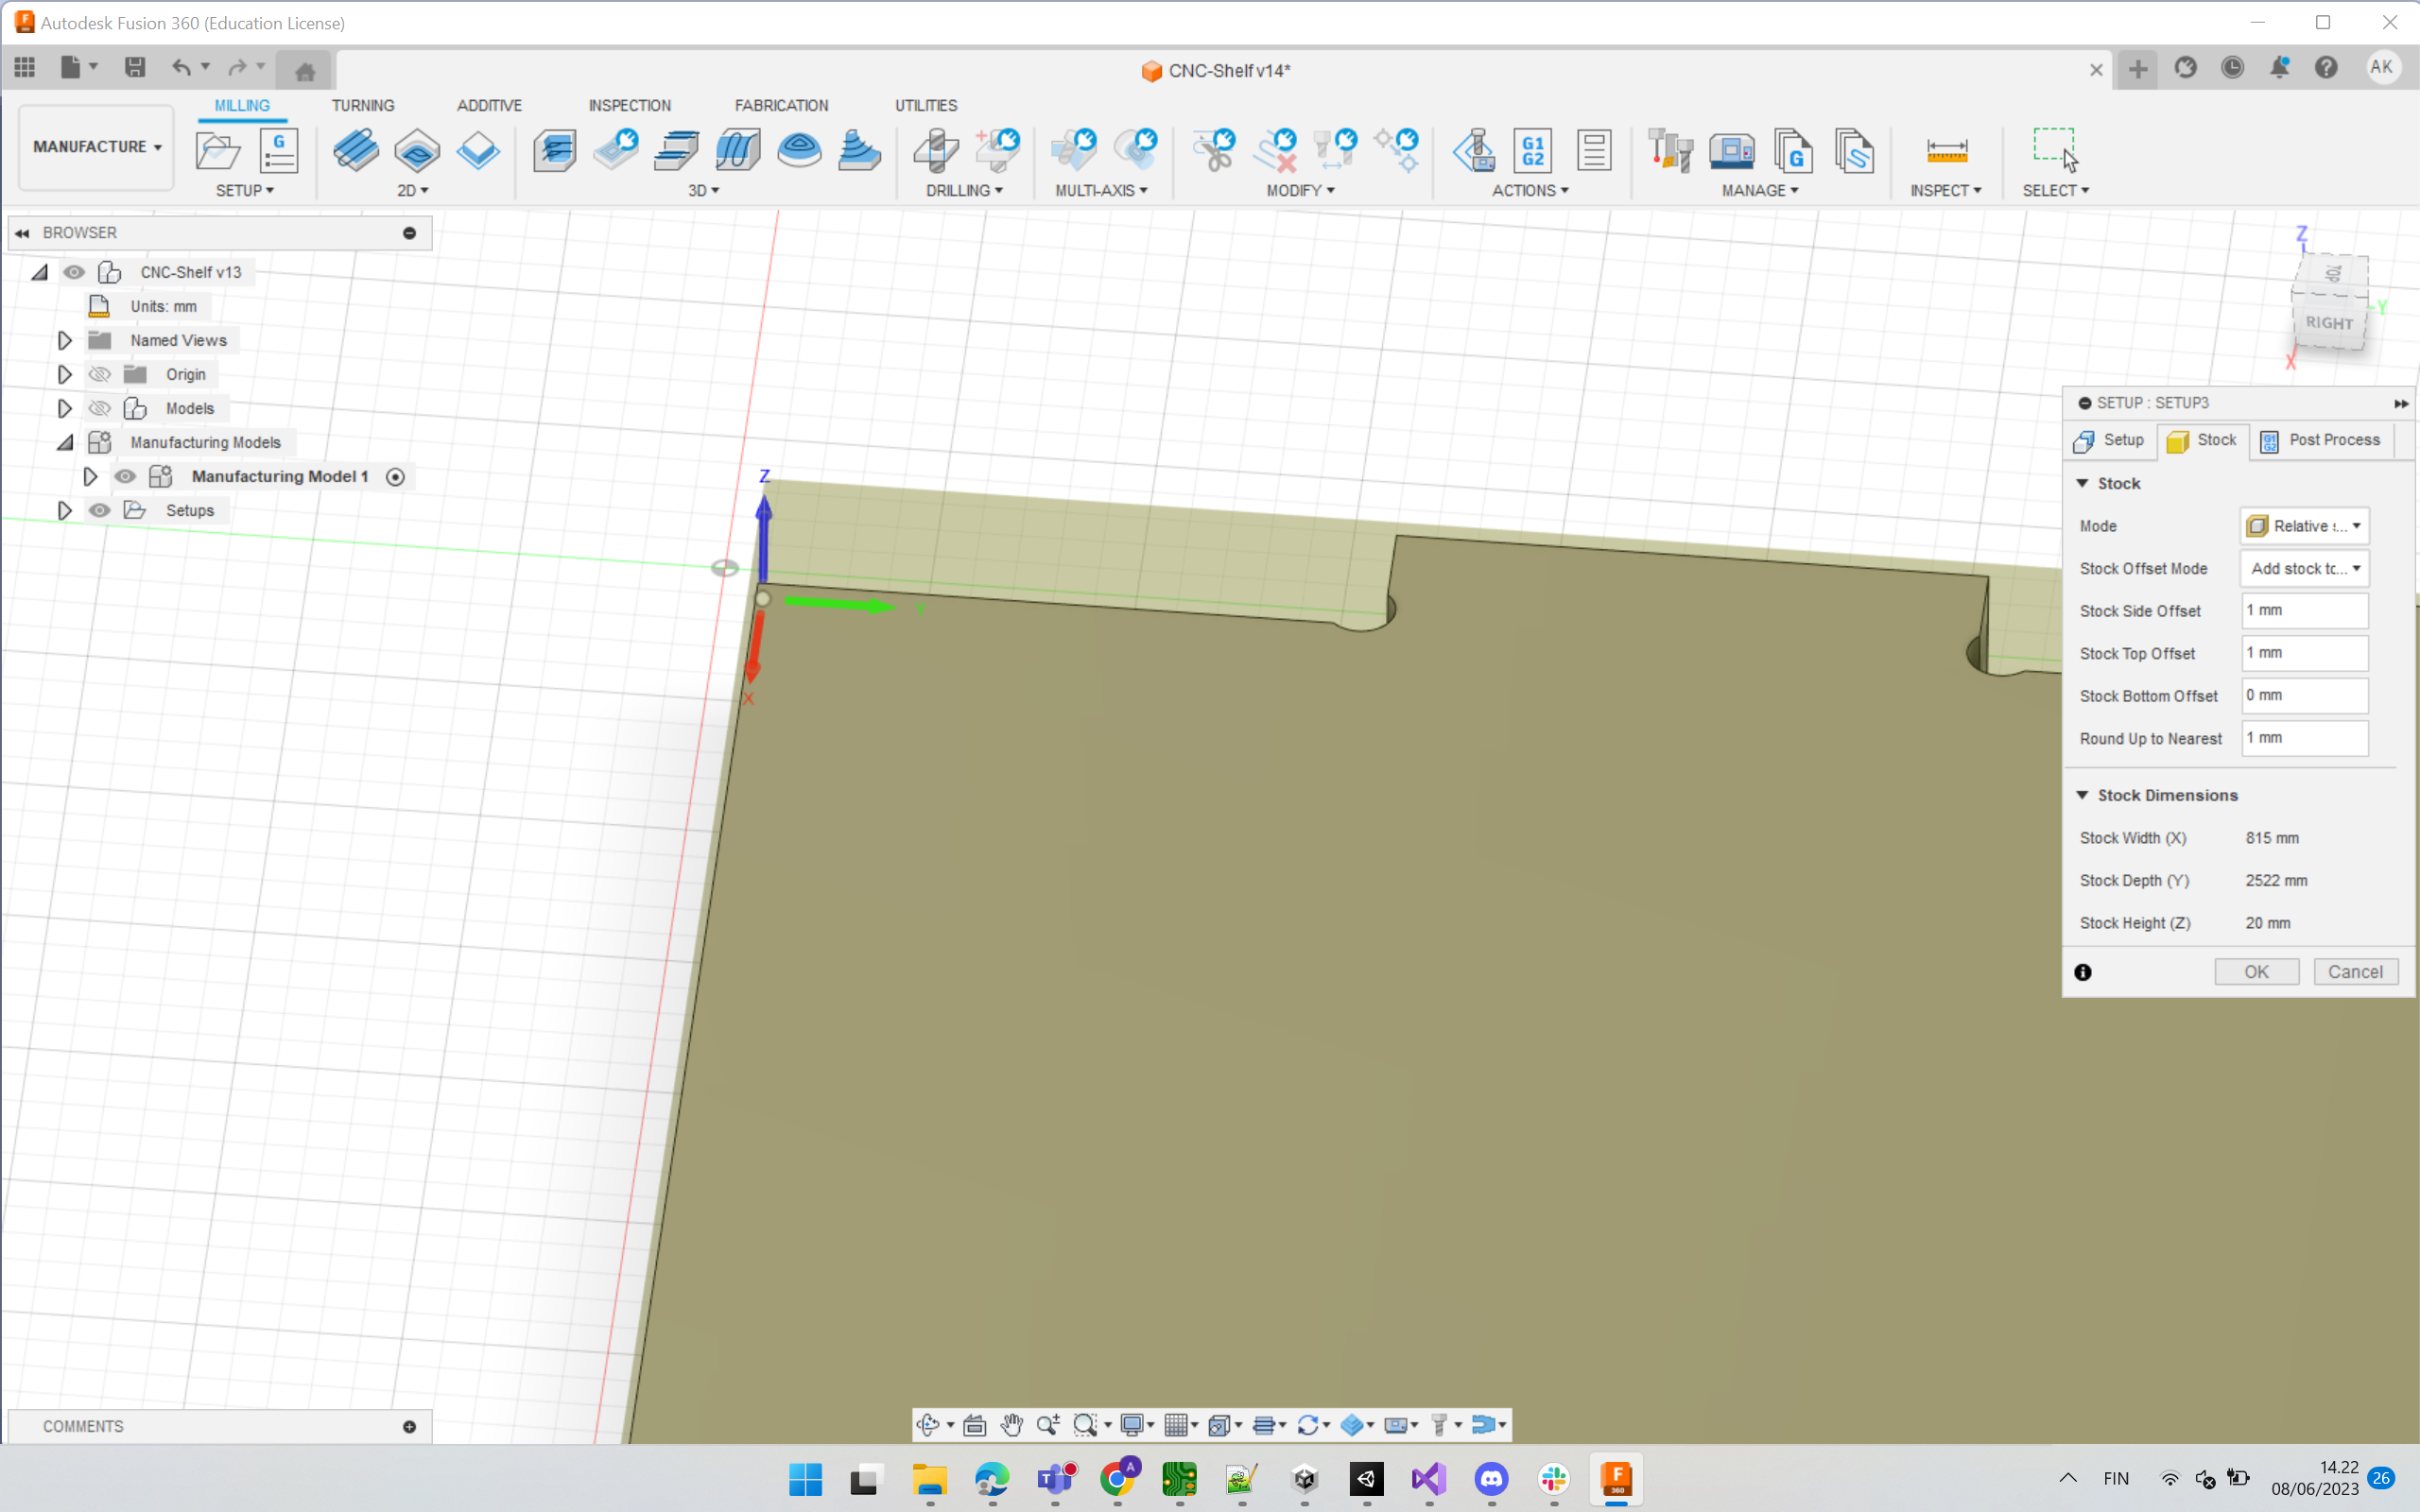
Setup
Now we create a Setup to define the workpiece/stock, orientation and operation type. Steps are shown in sequential order of the images below.


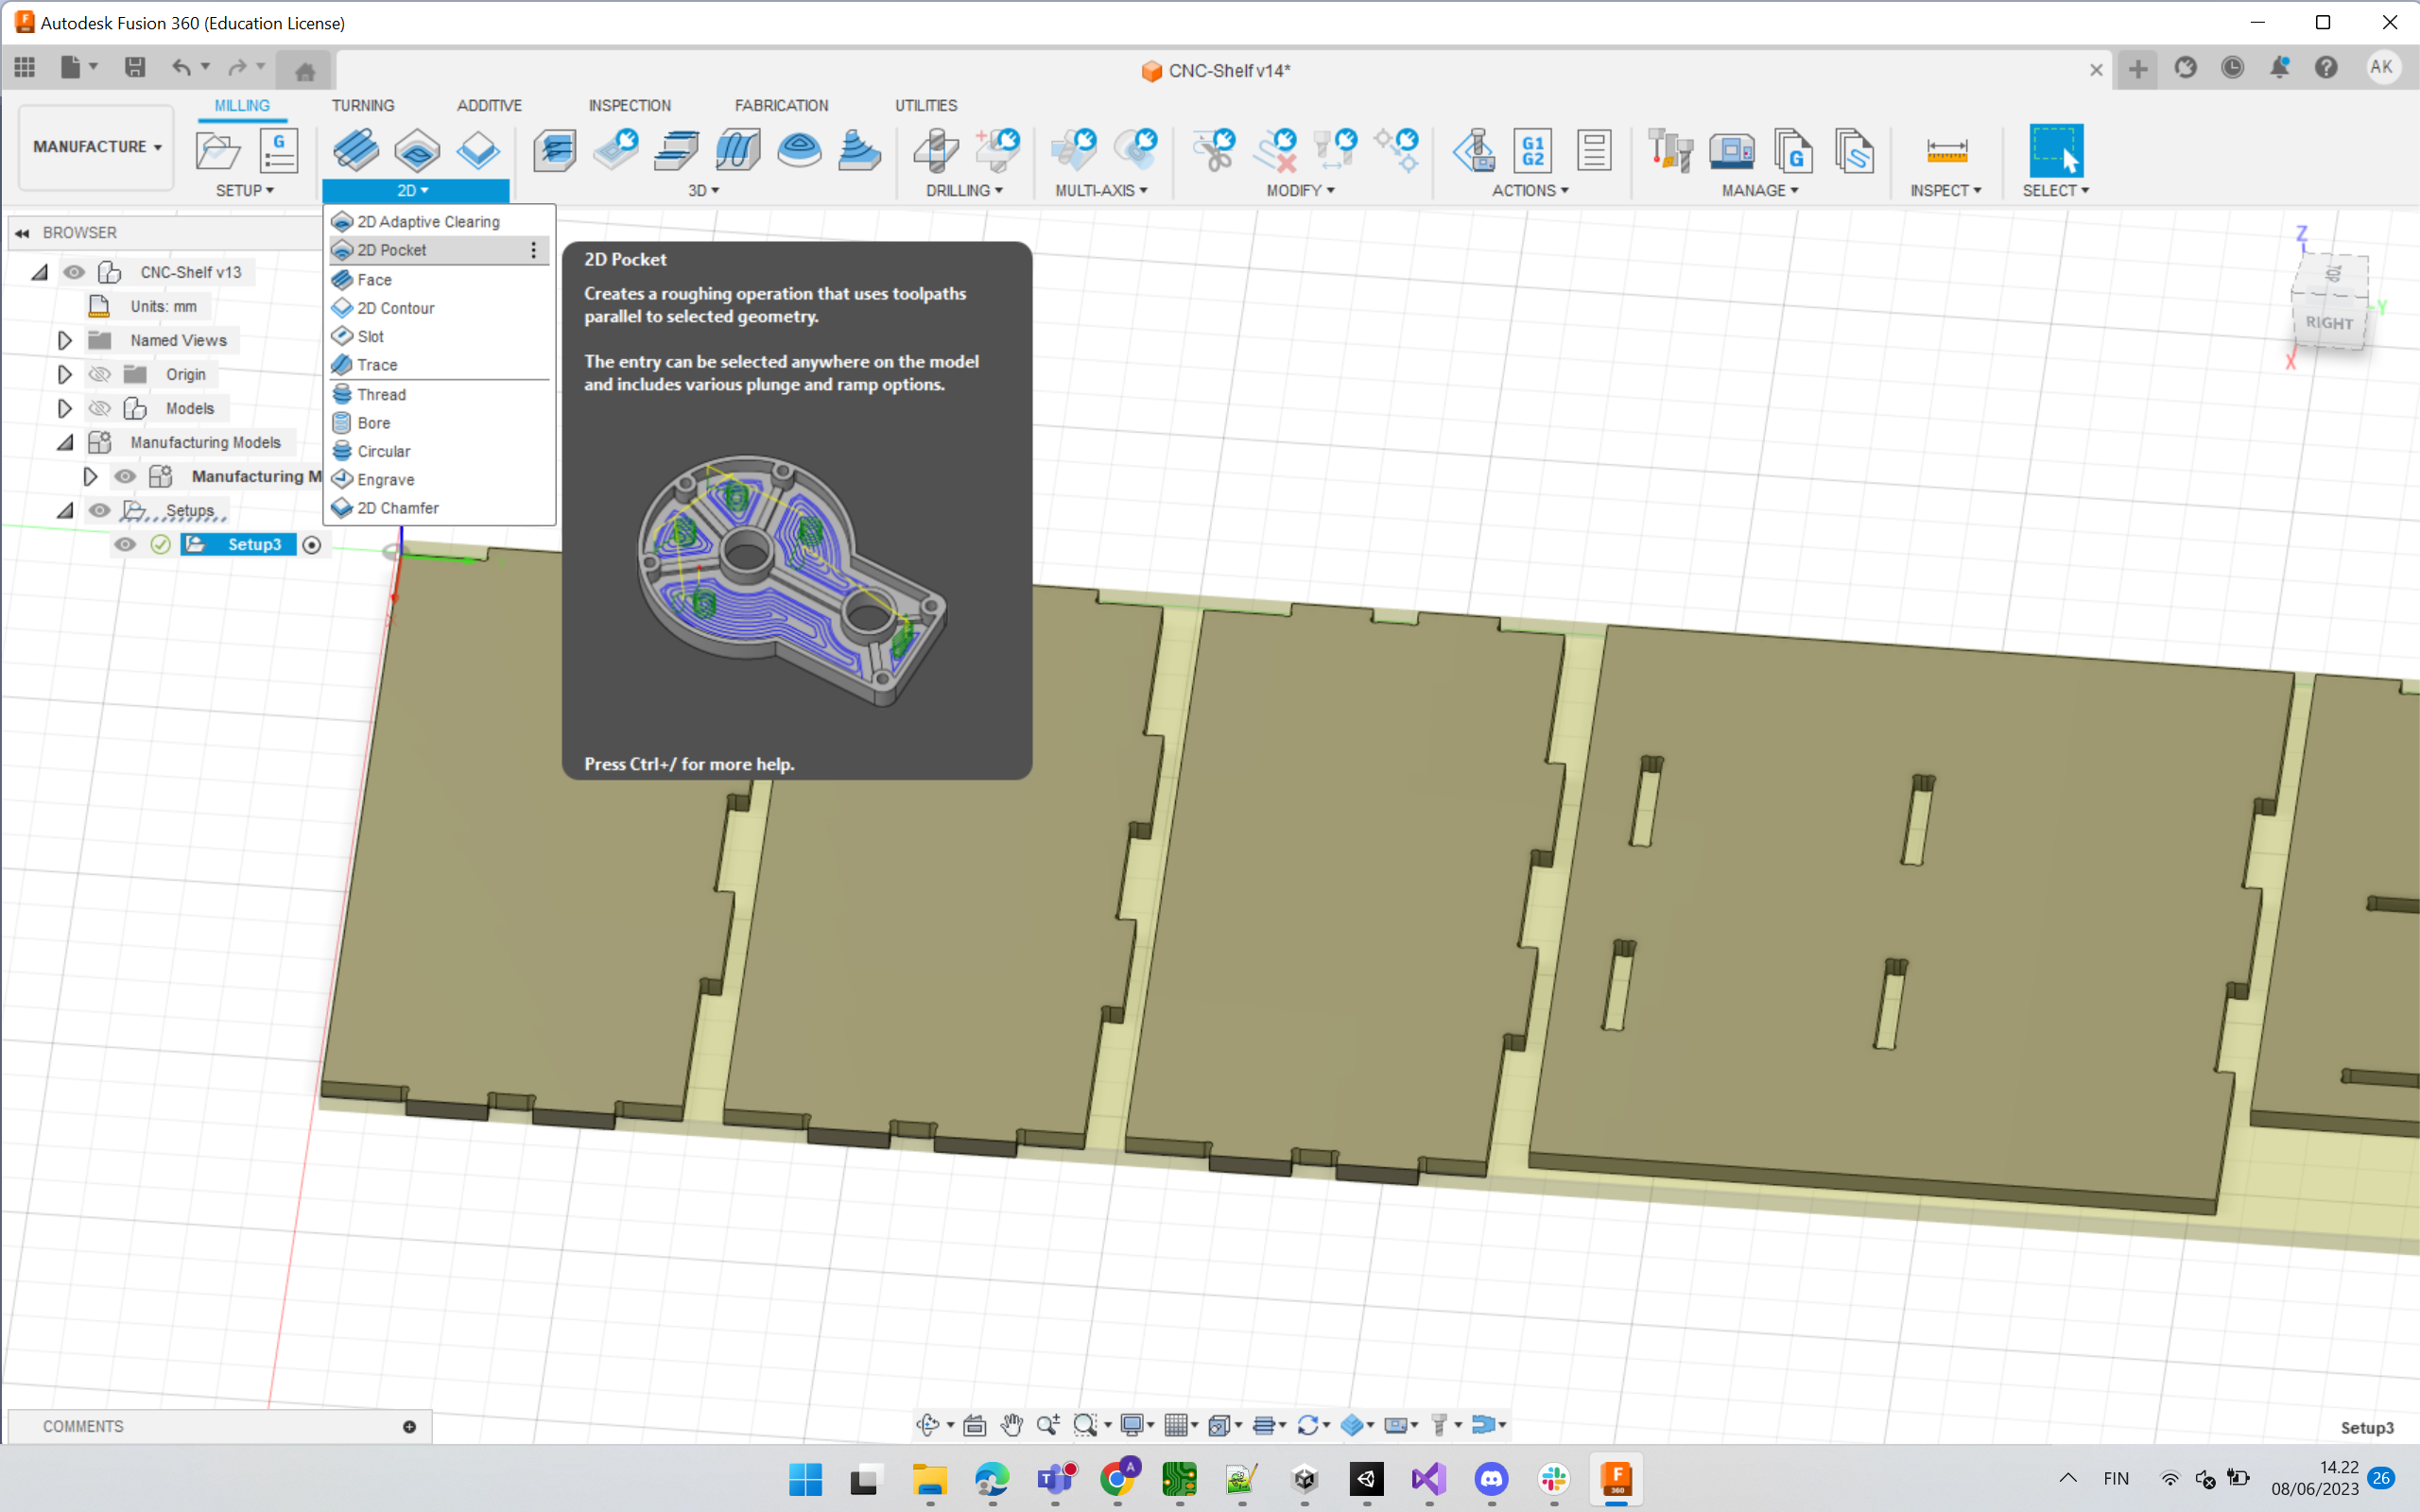
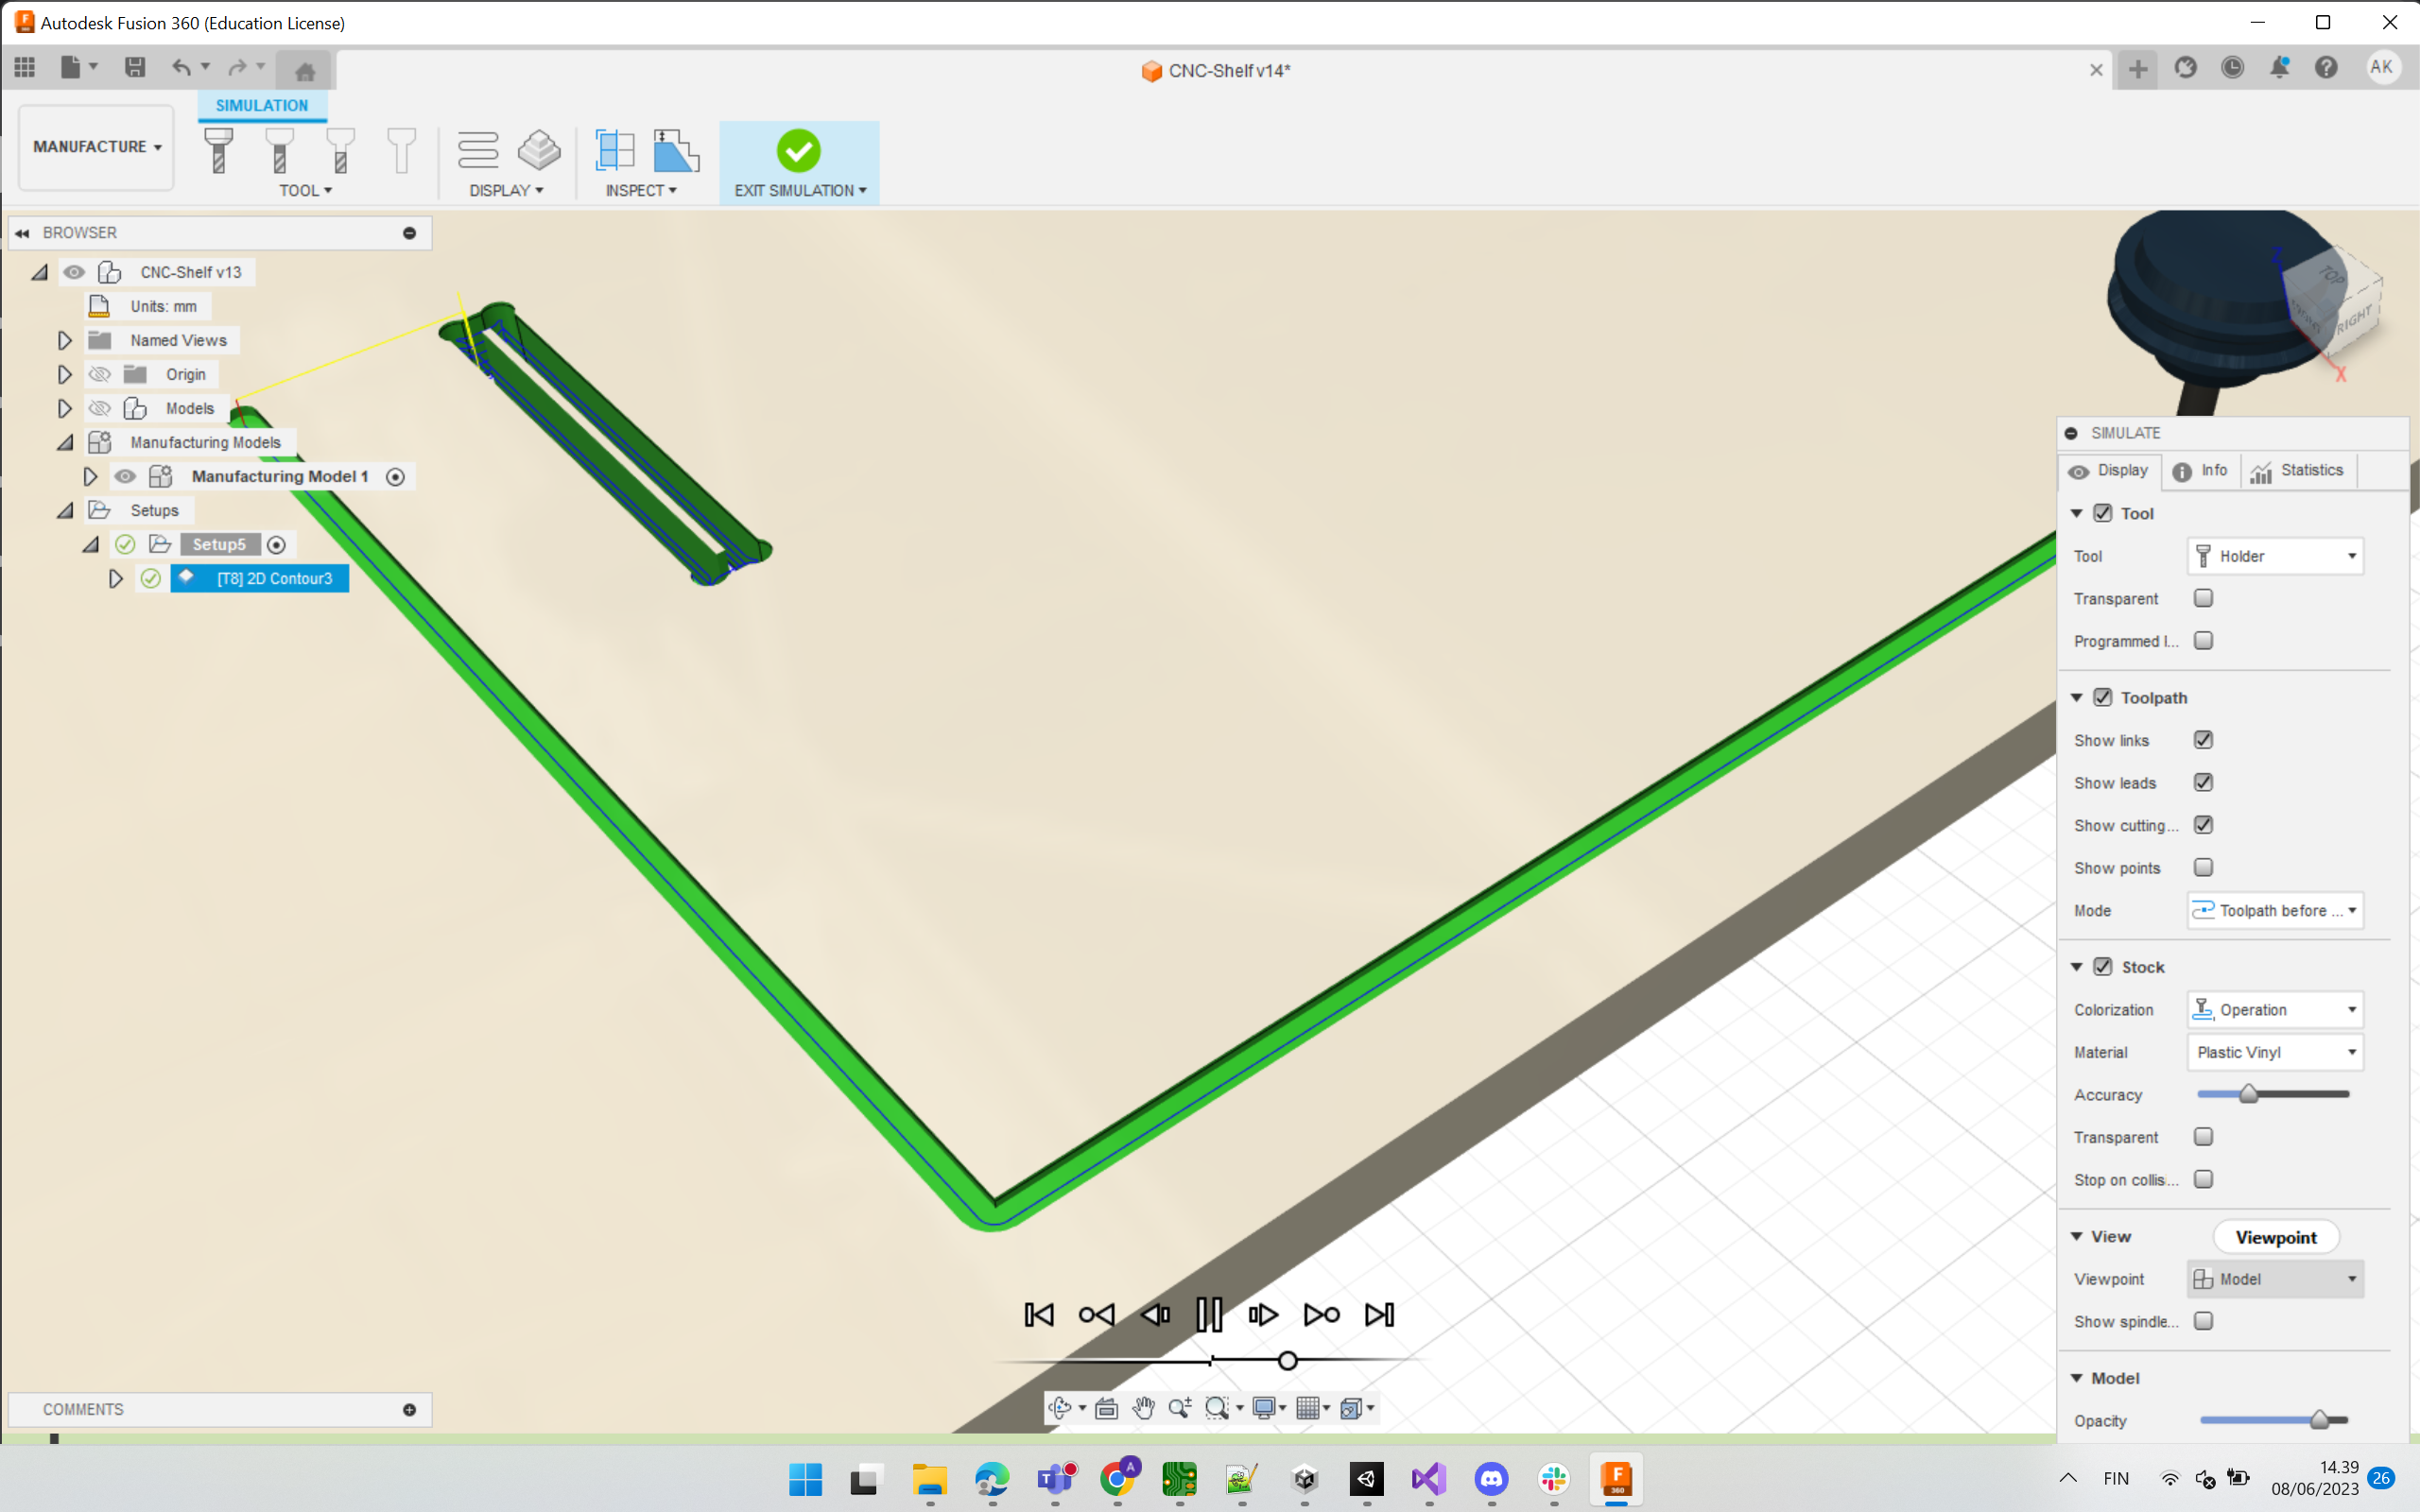
Toolpath
Different milling strategies work for different objects. My mode does not have any 3D features, it needs only 2D Contour.
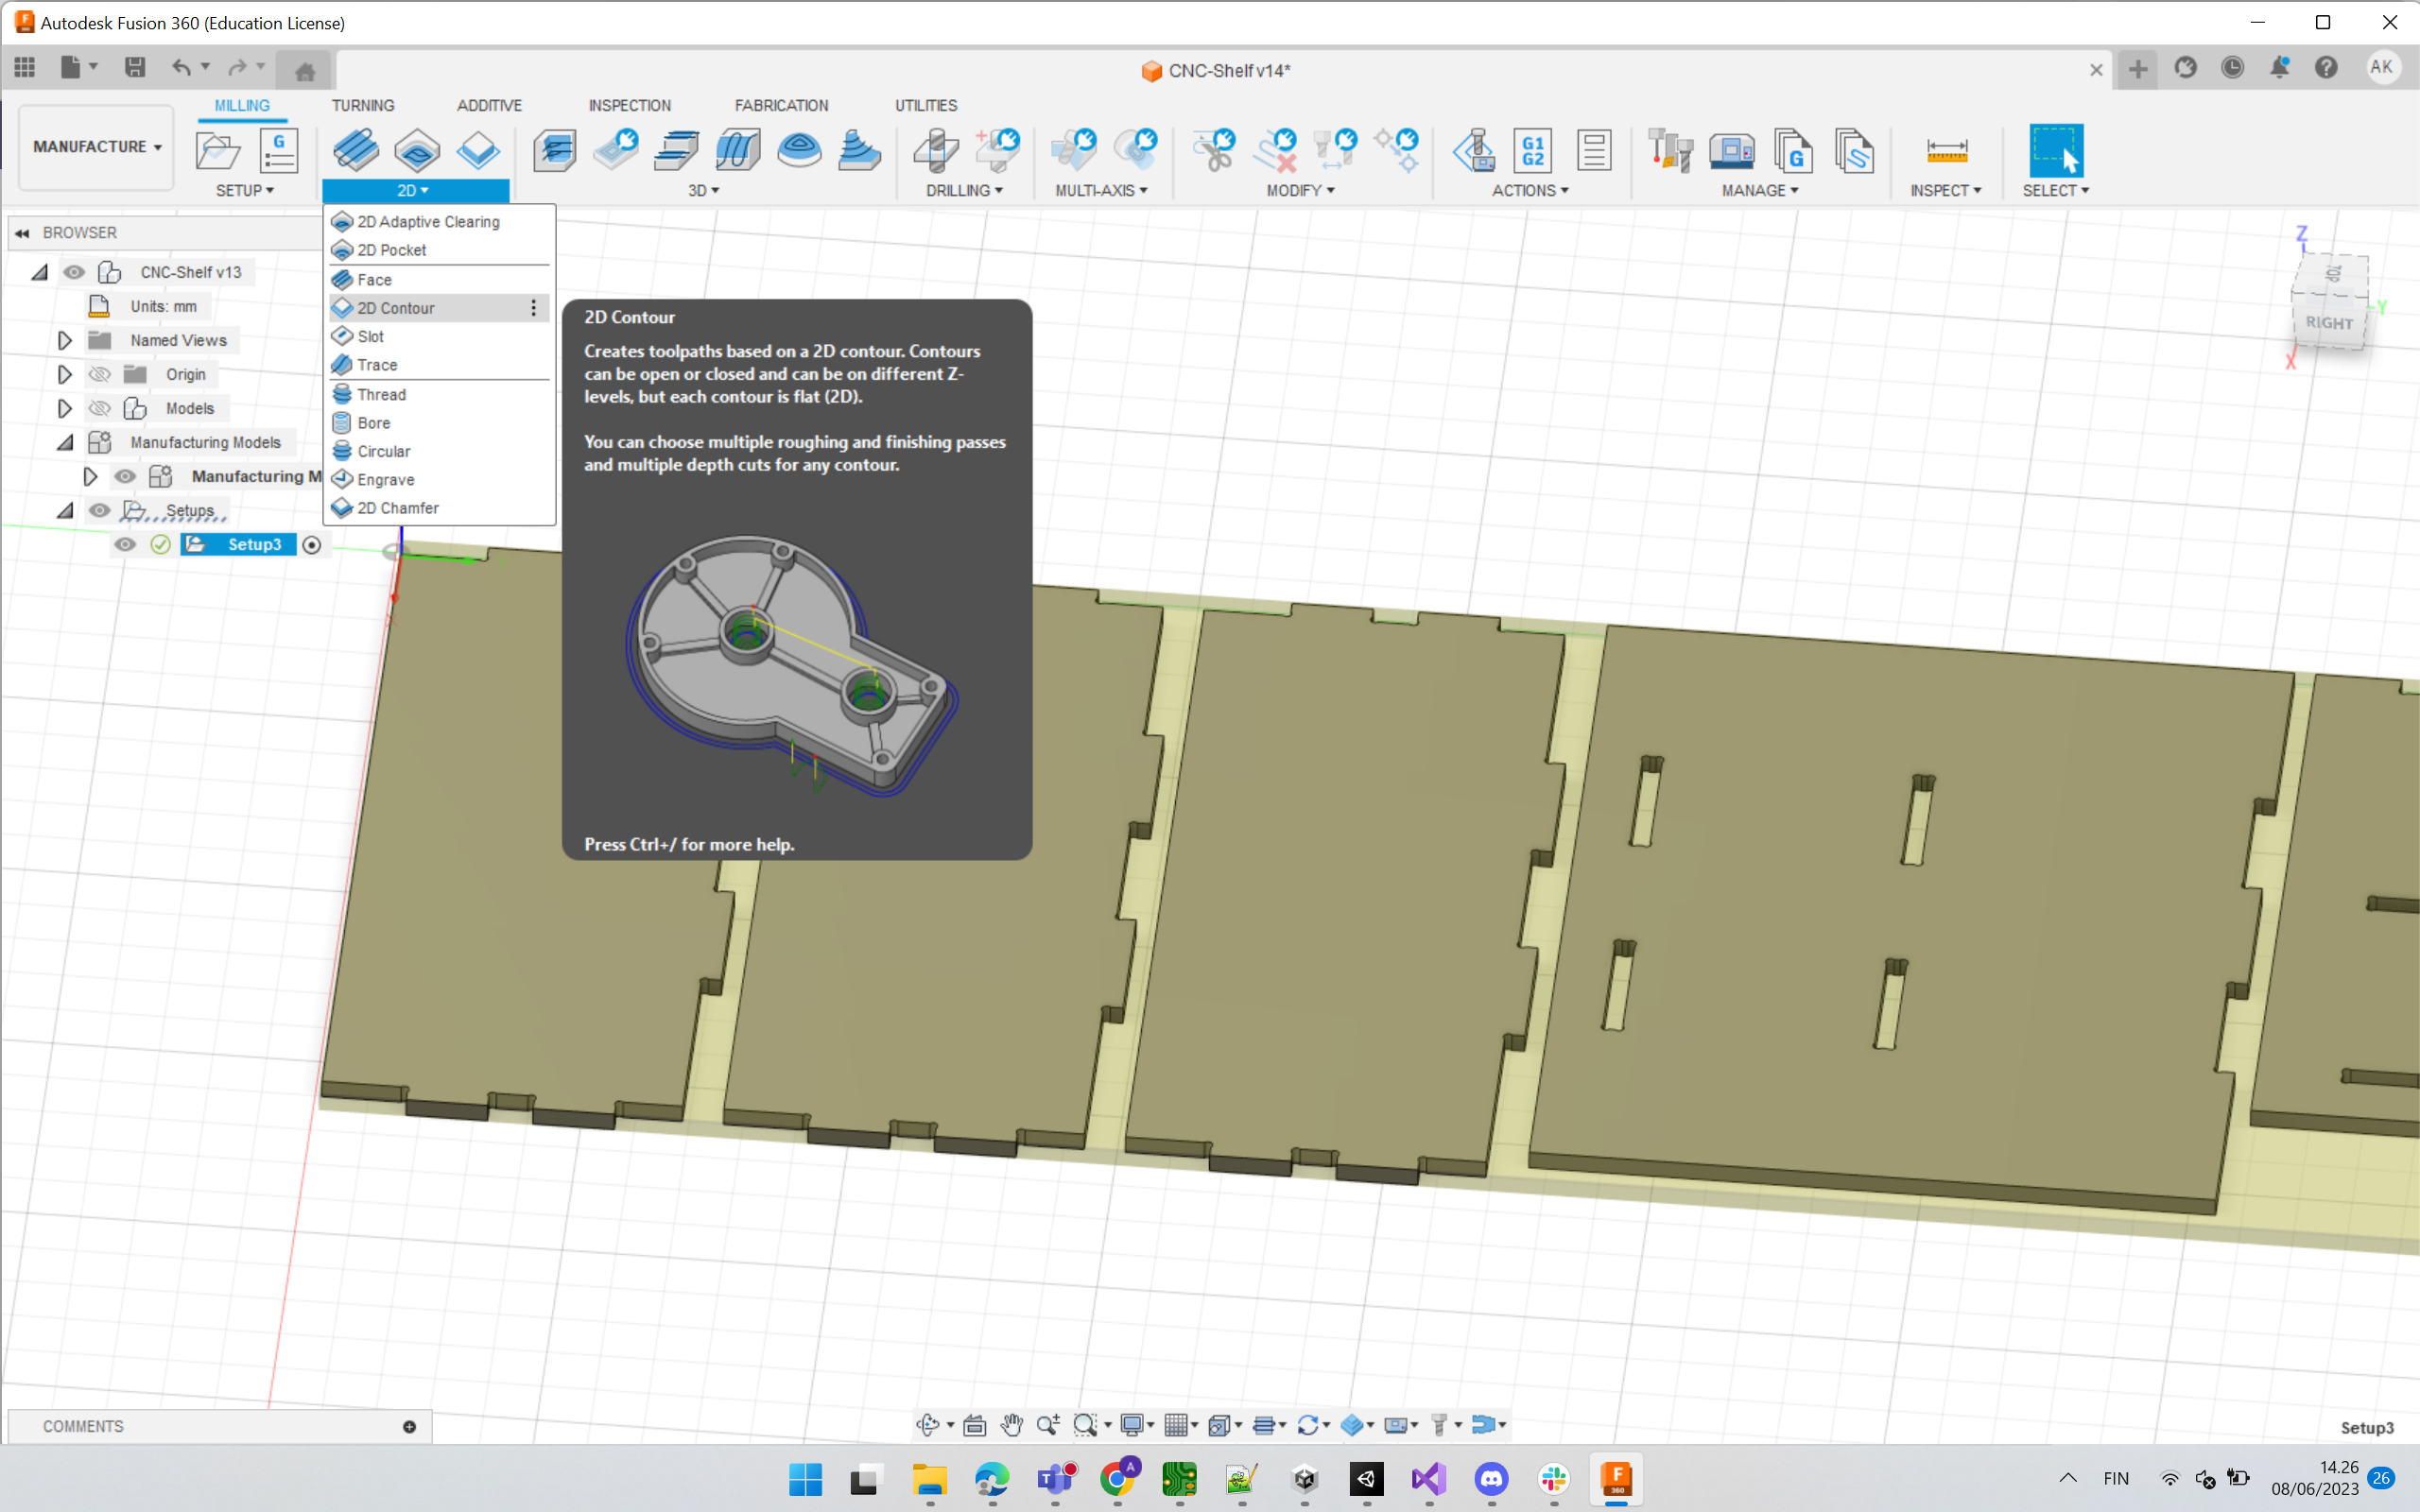

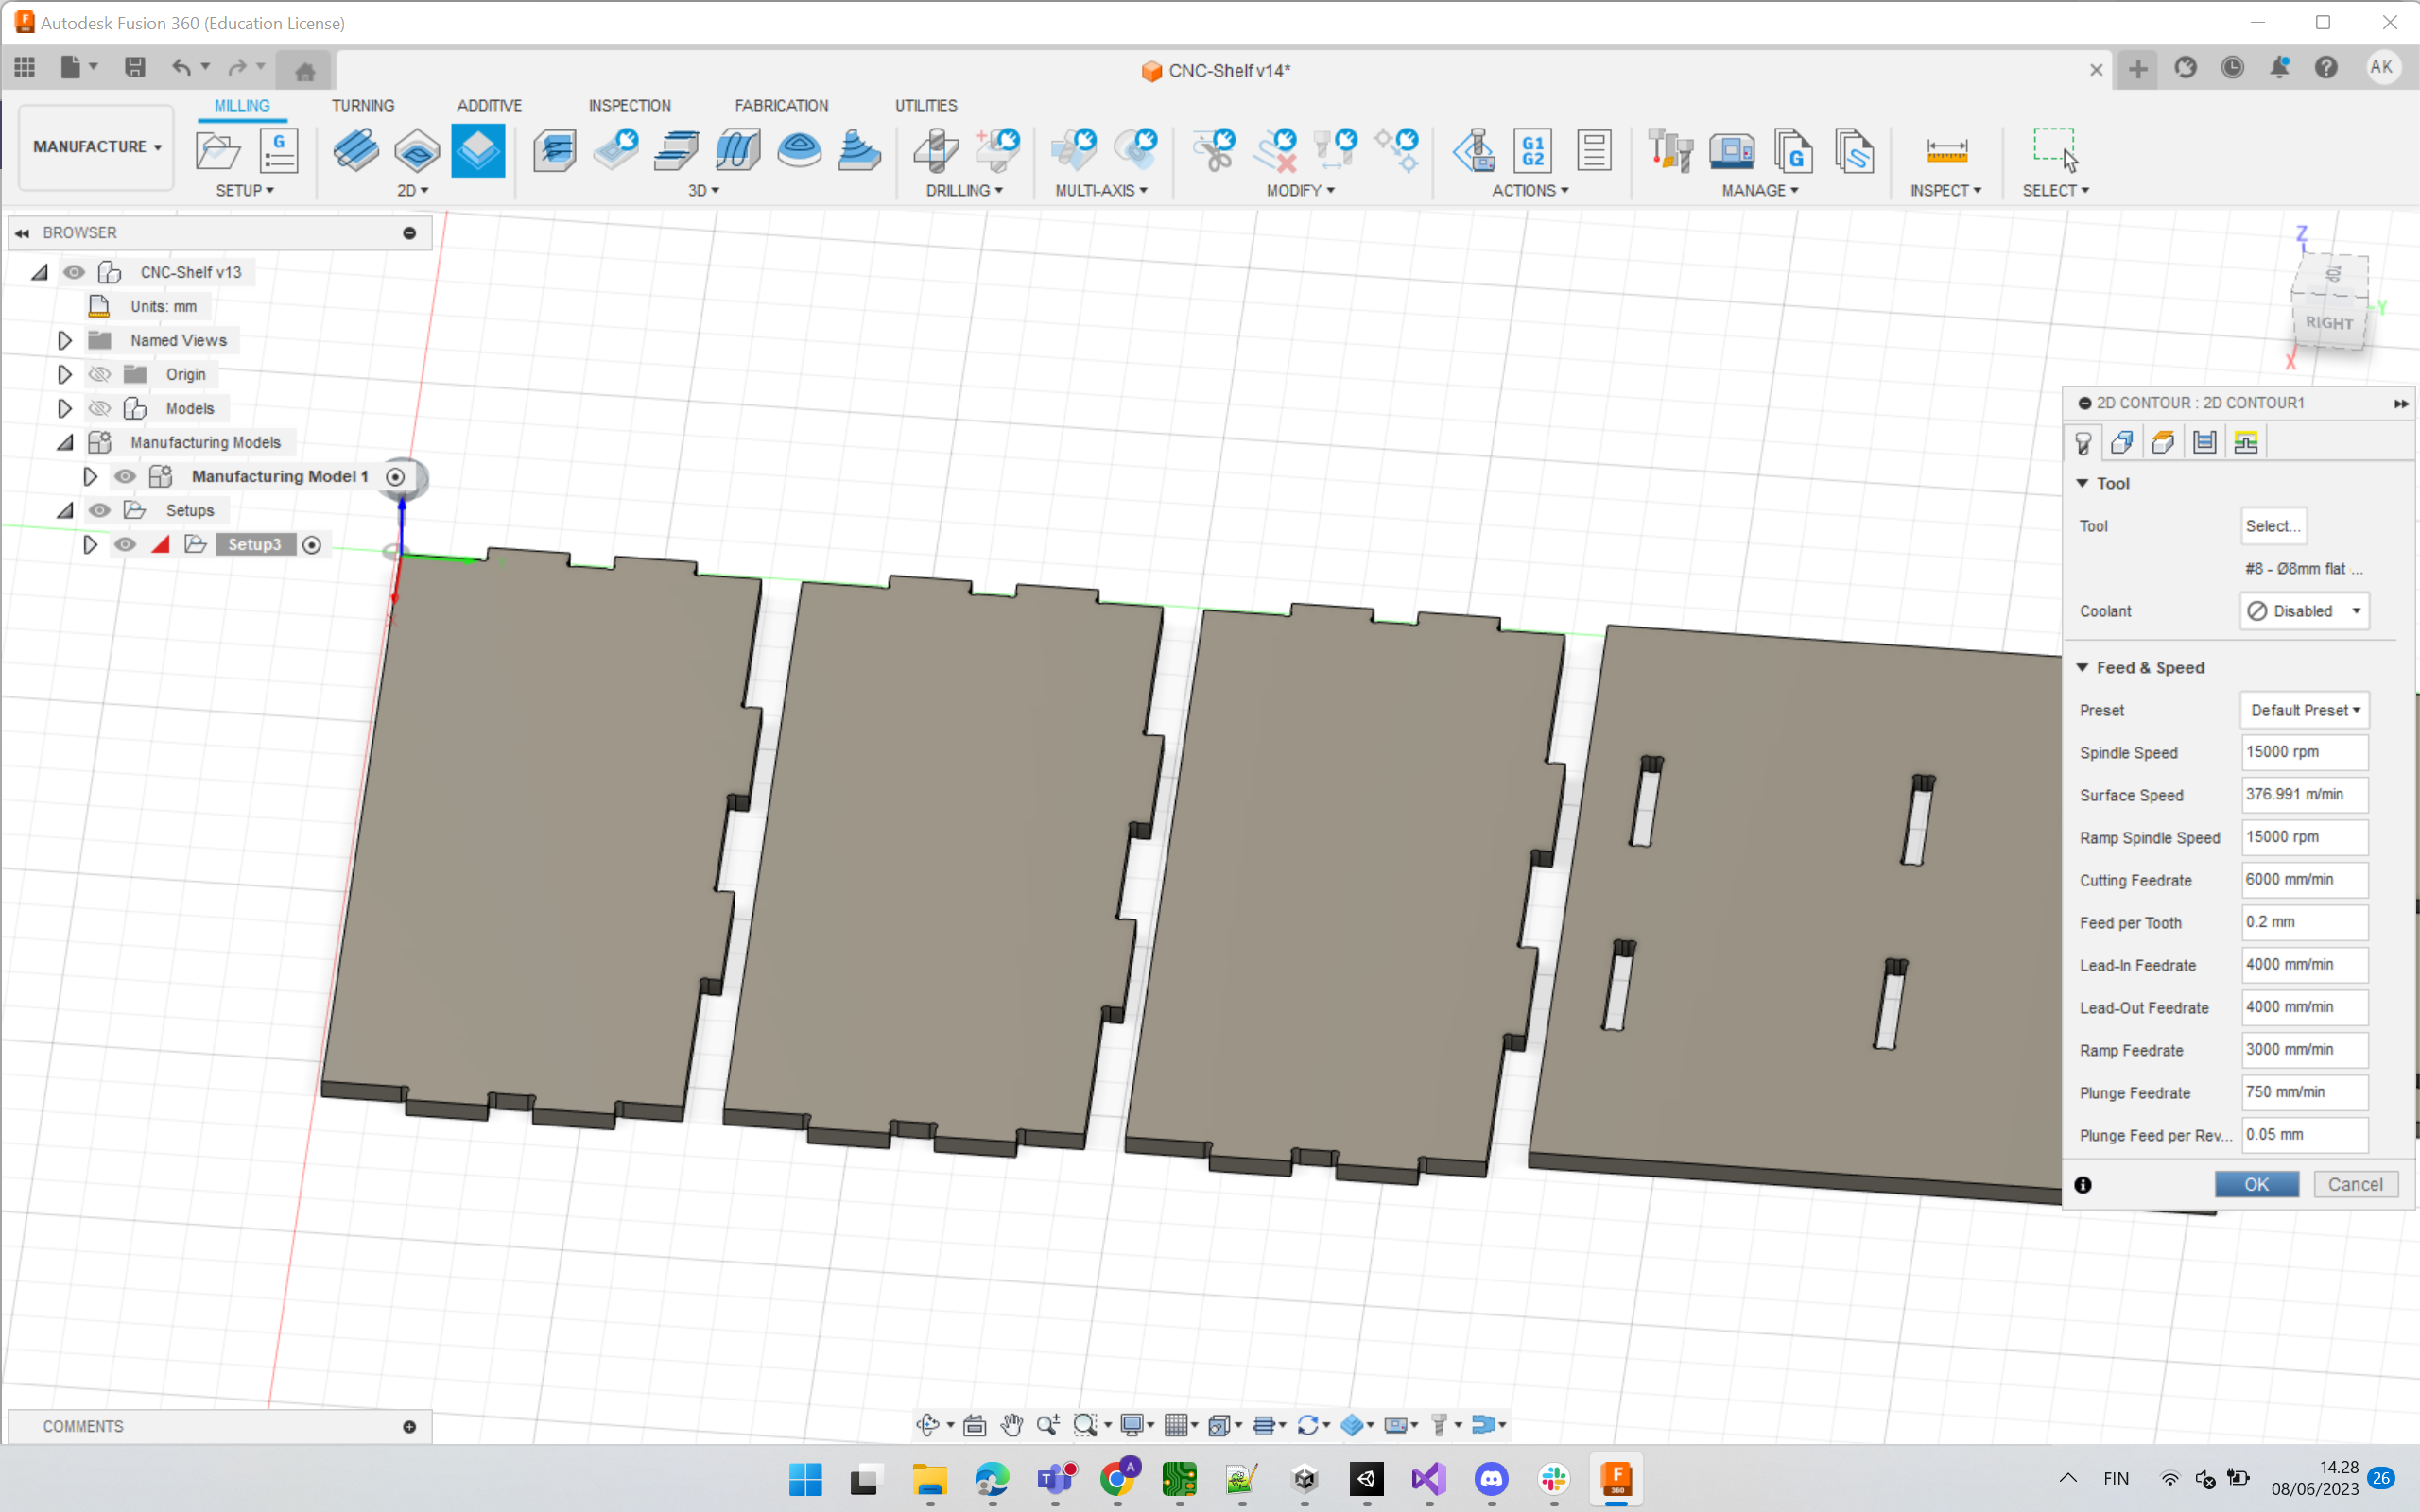
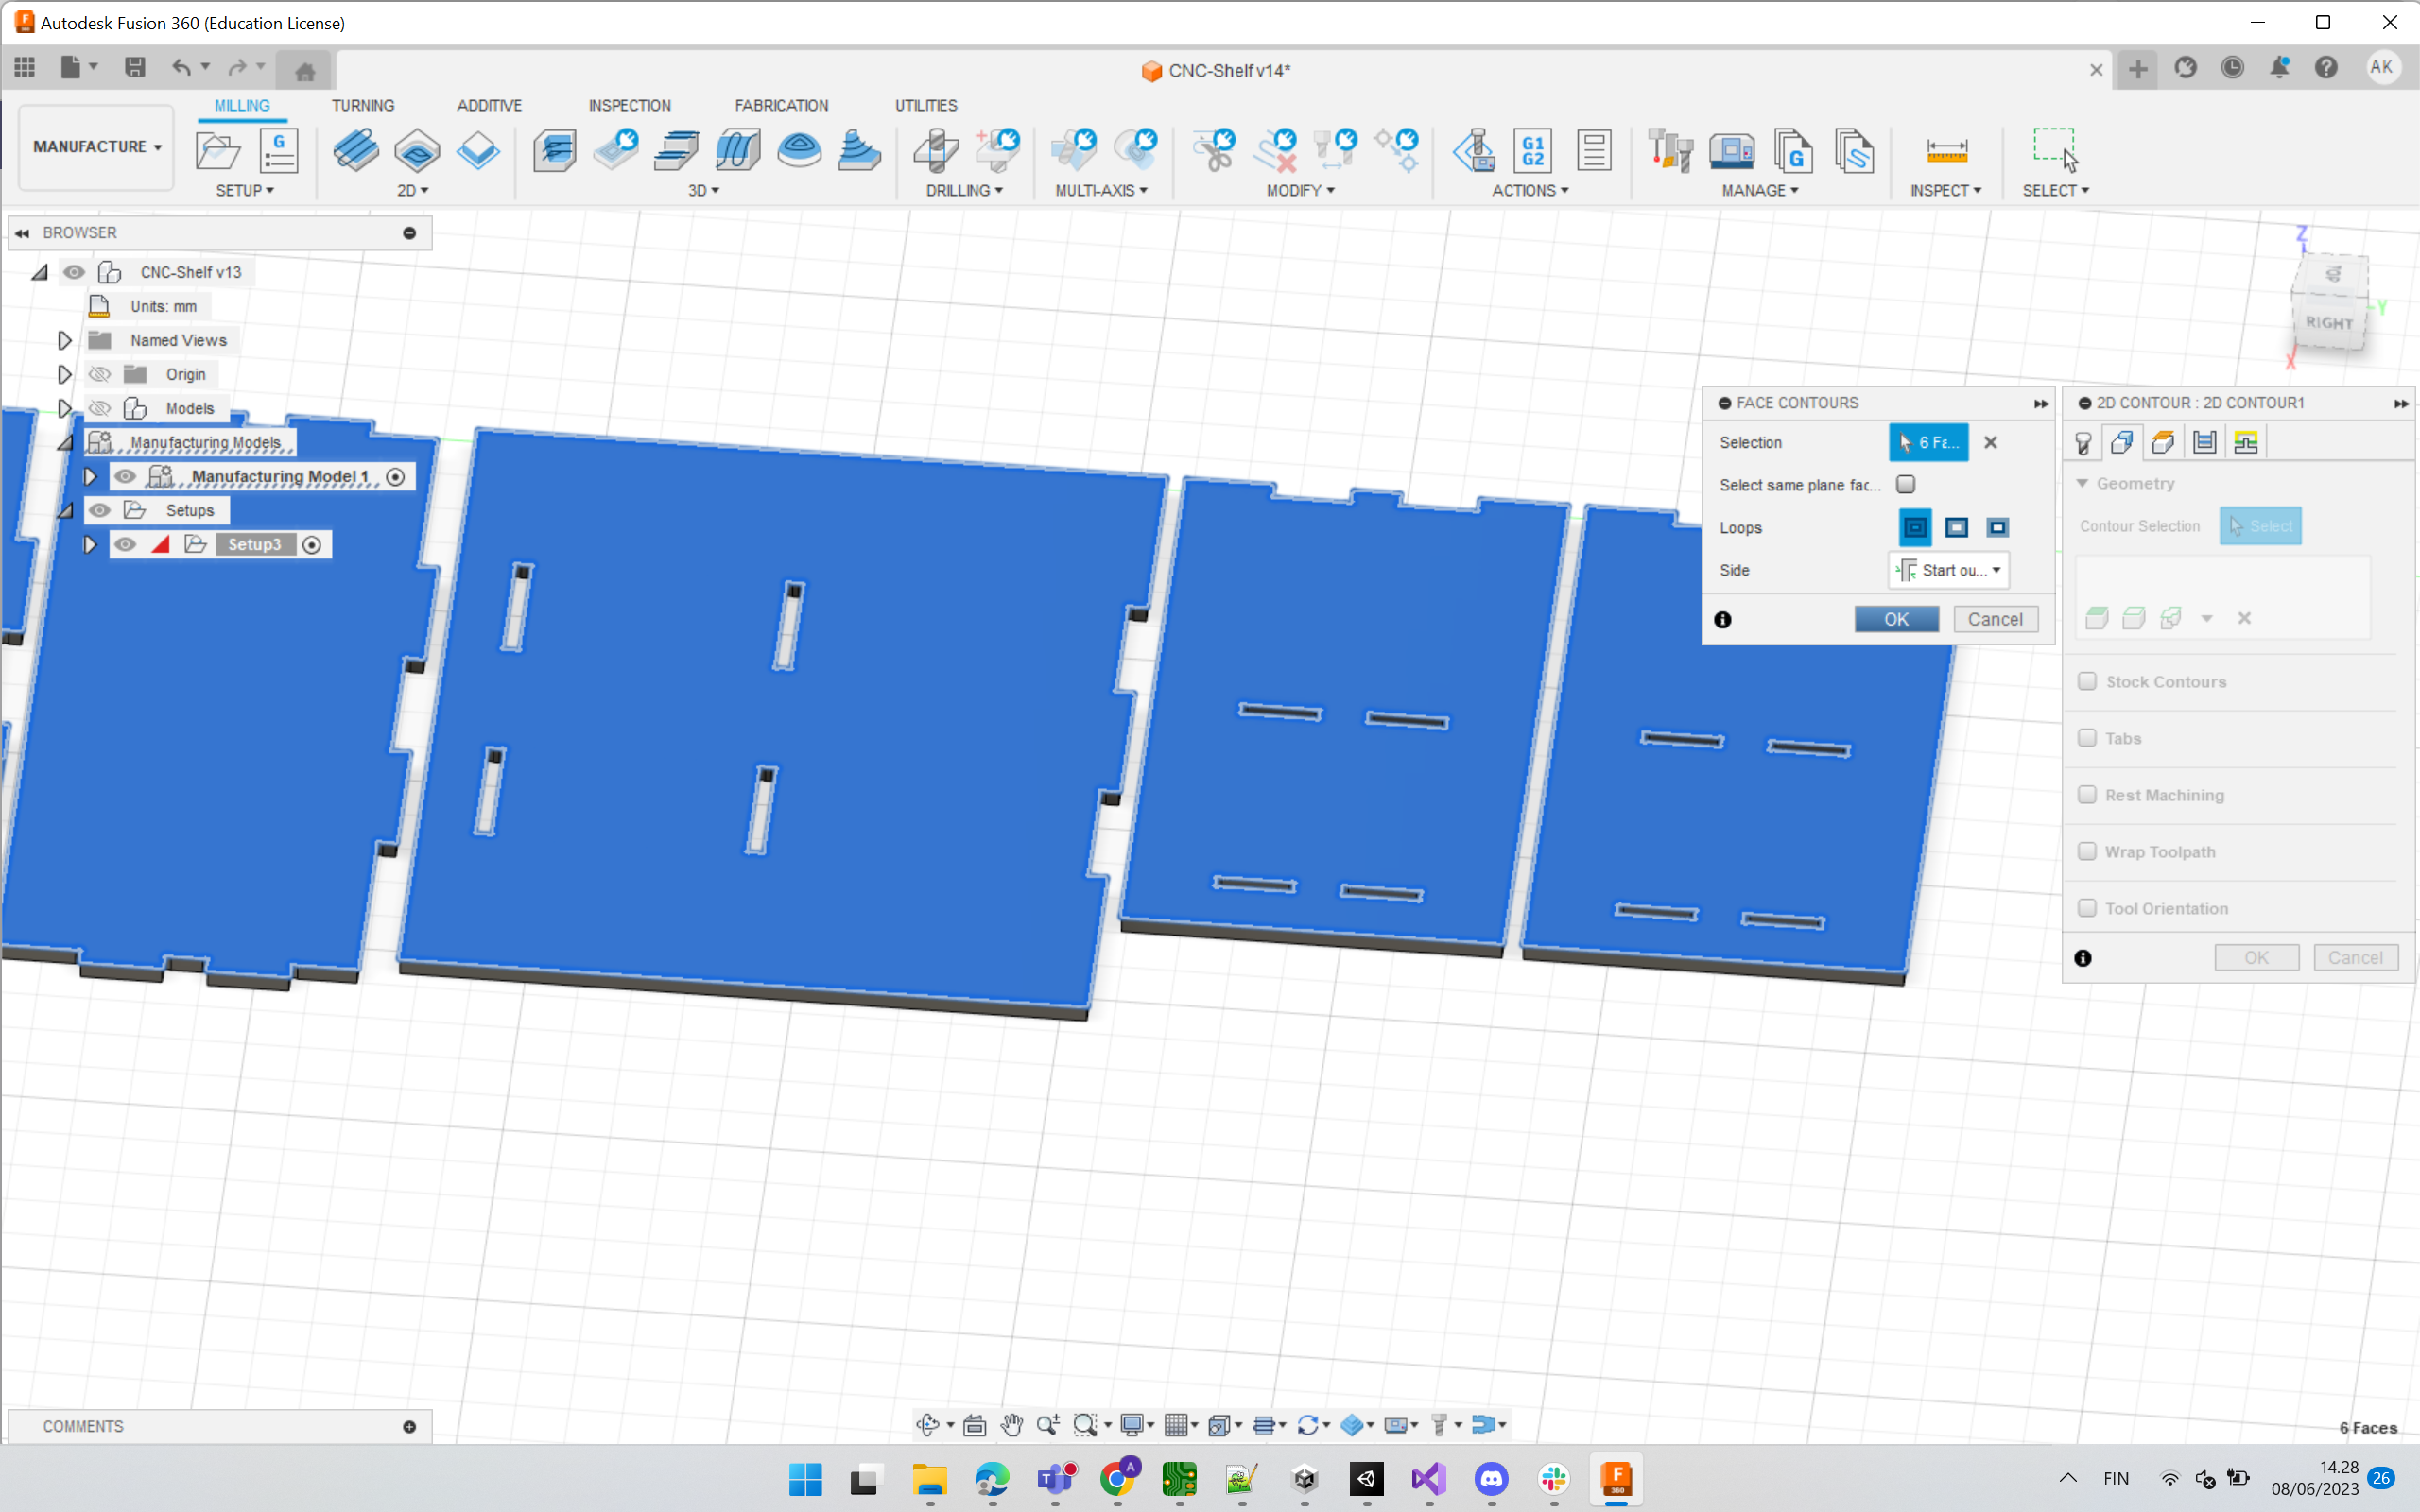
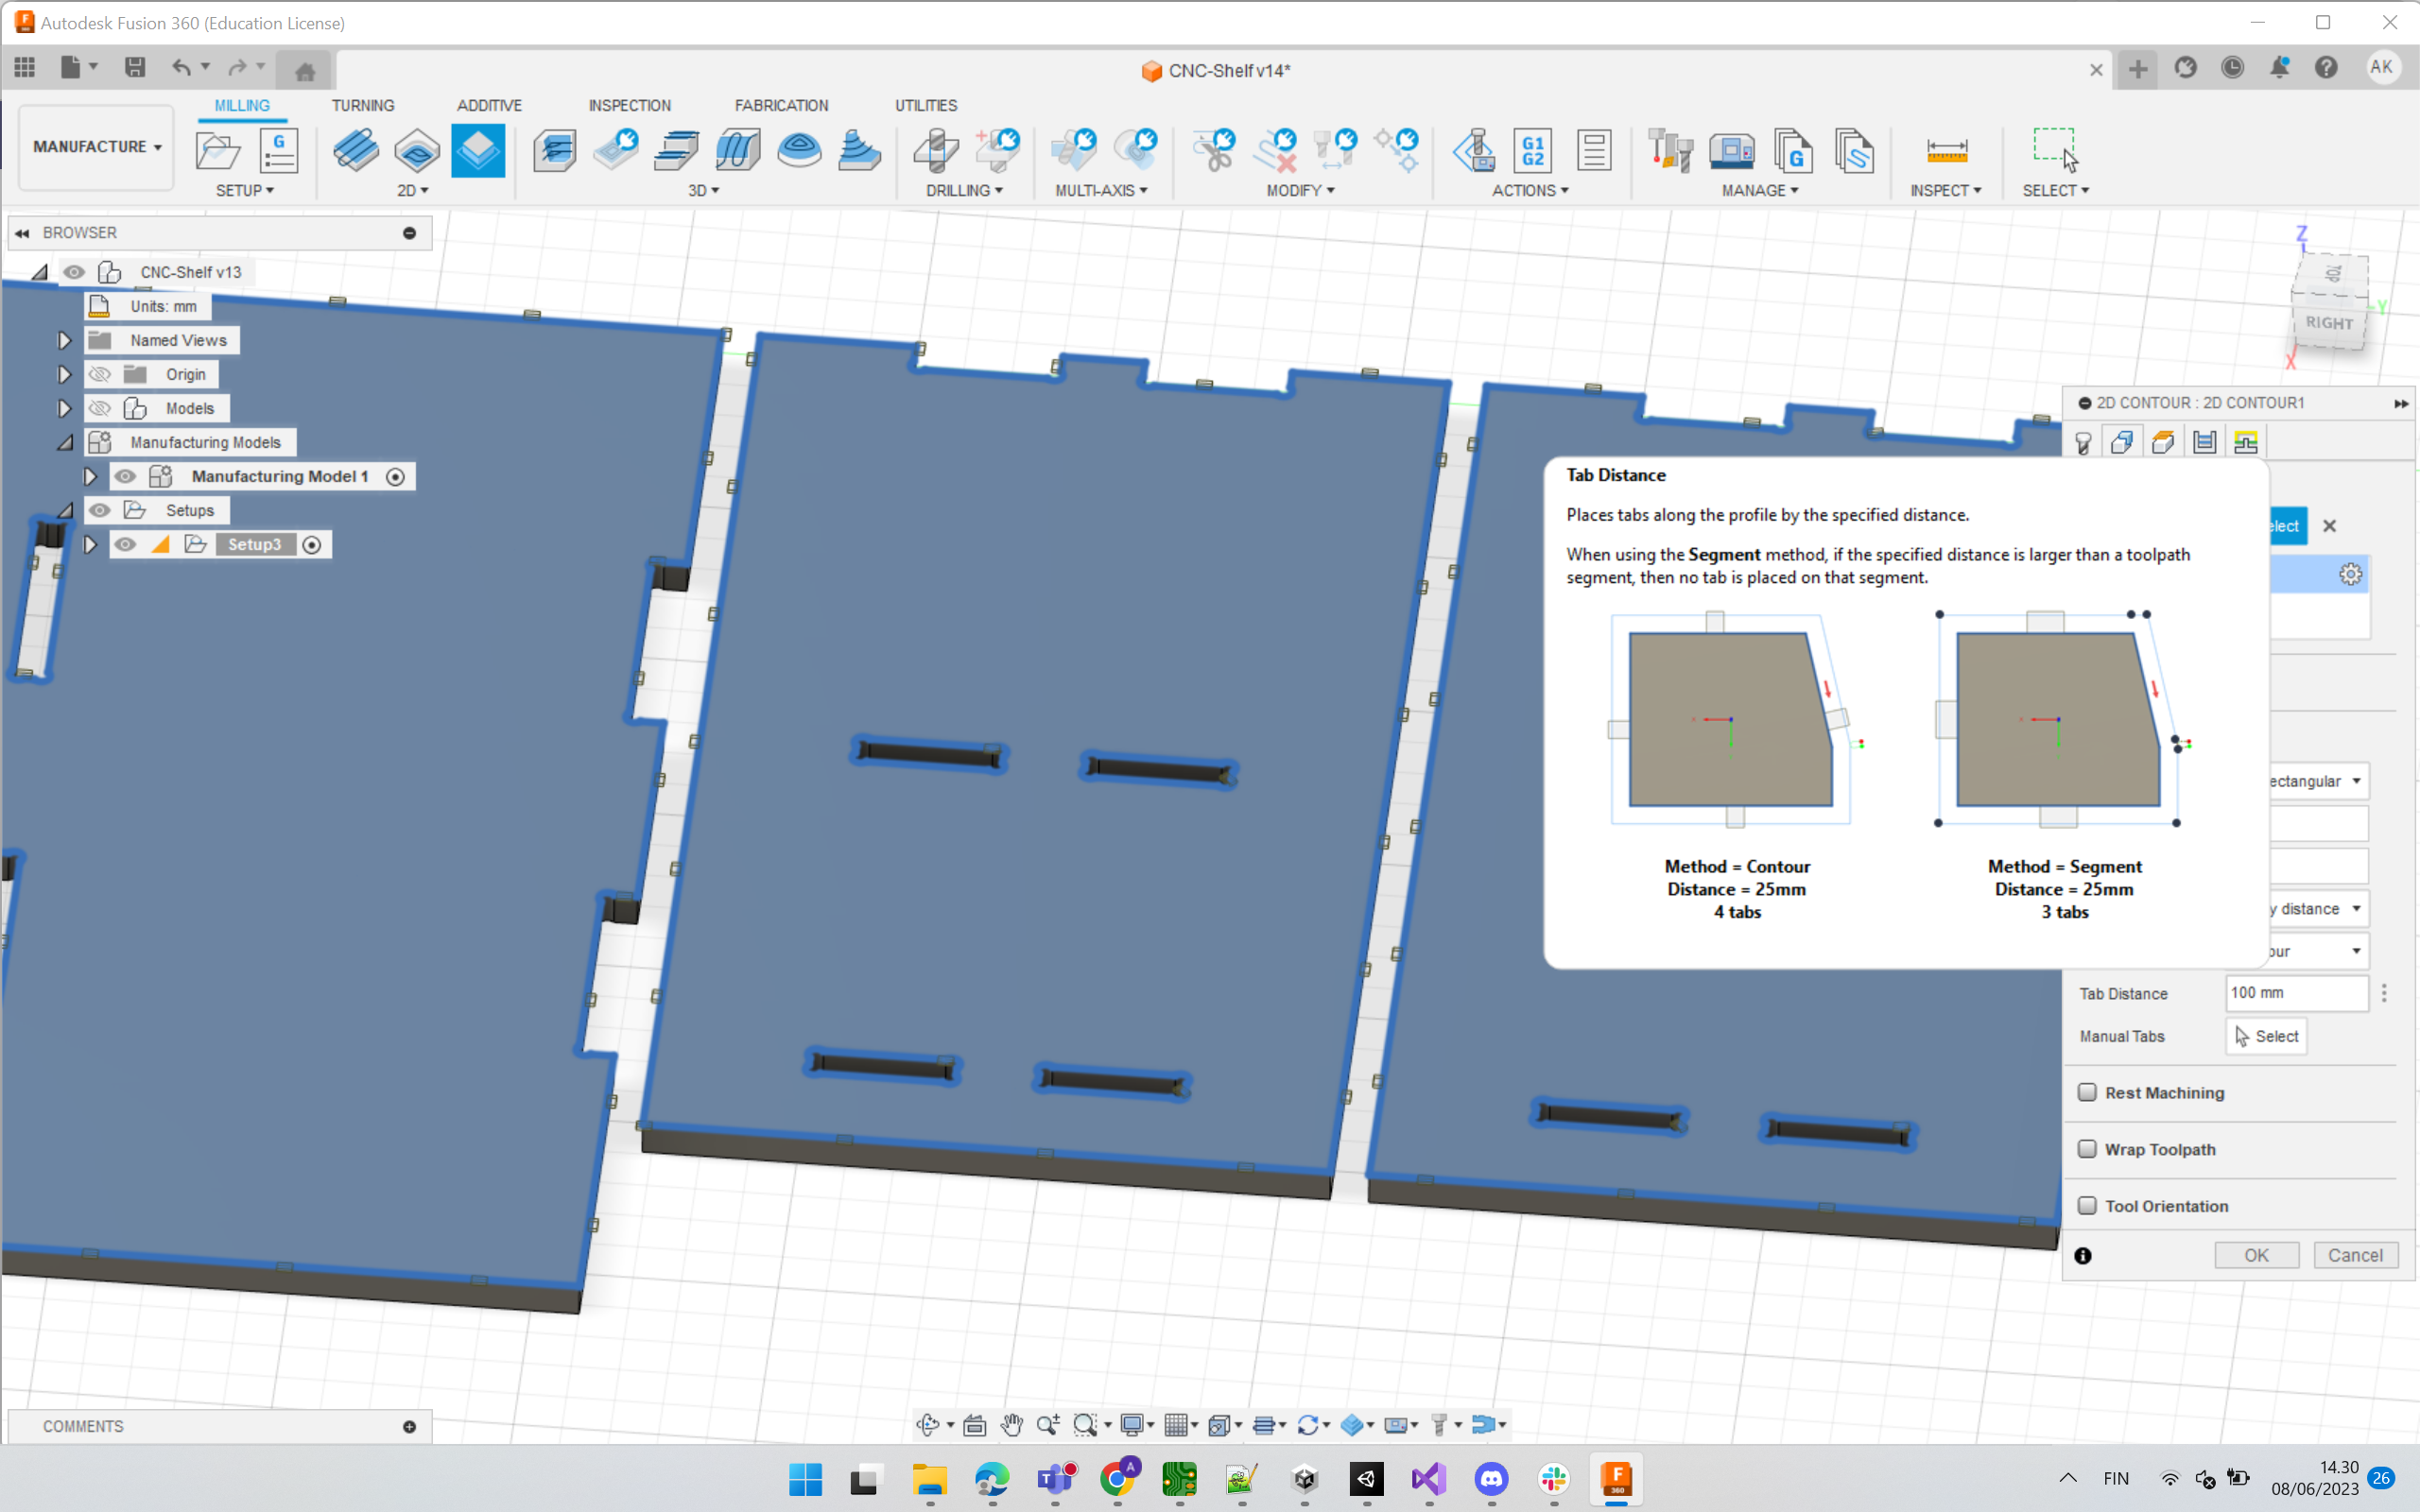
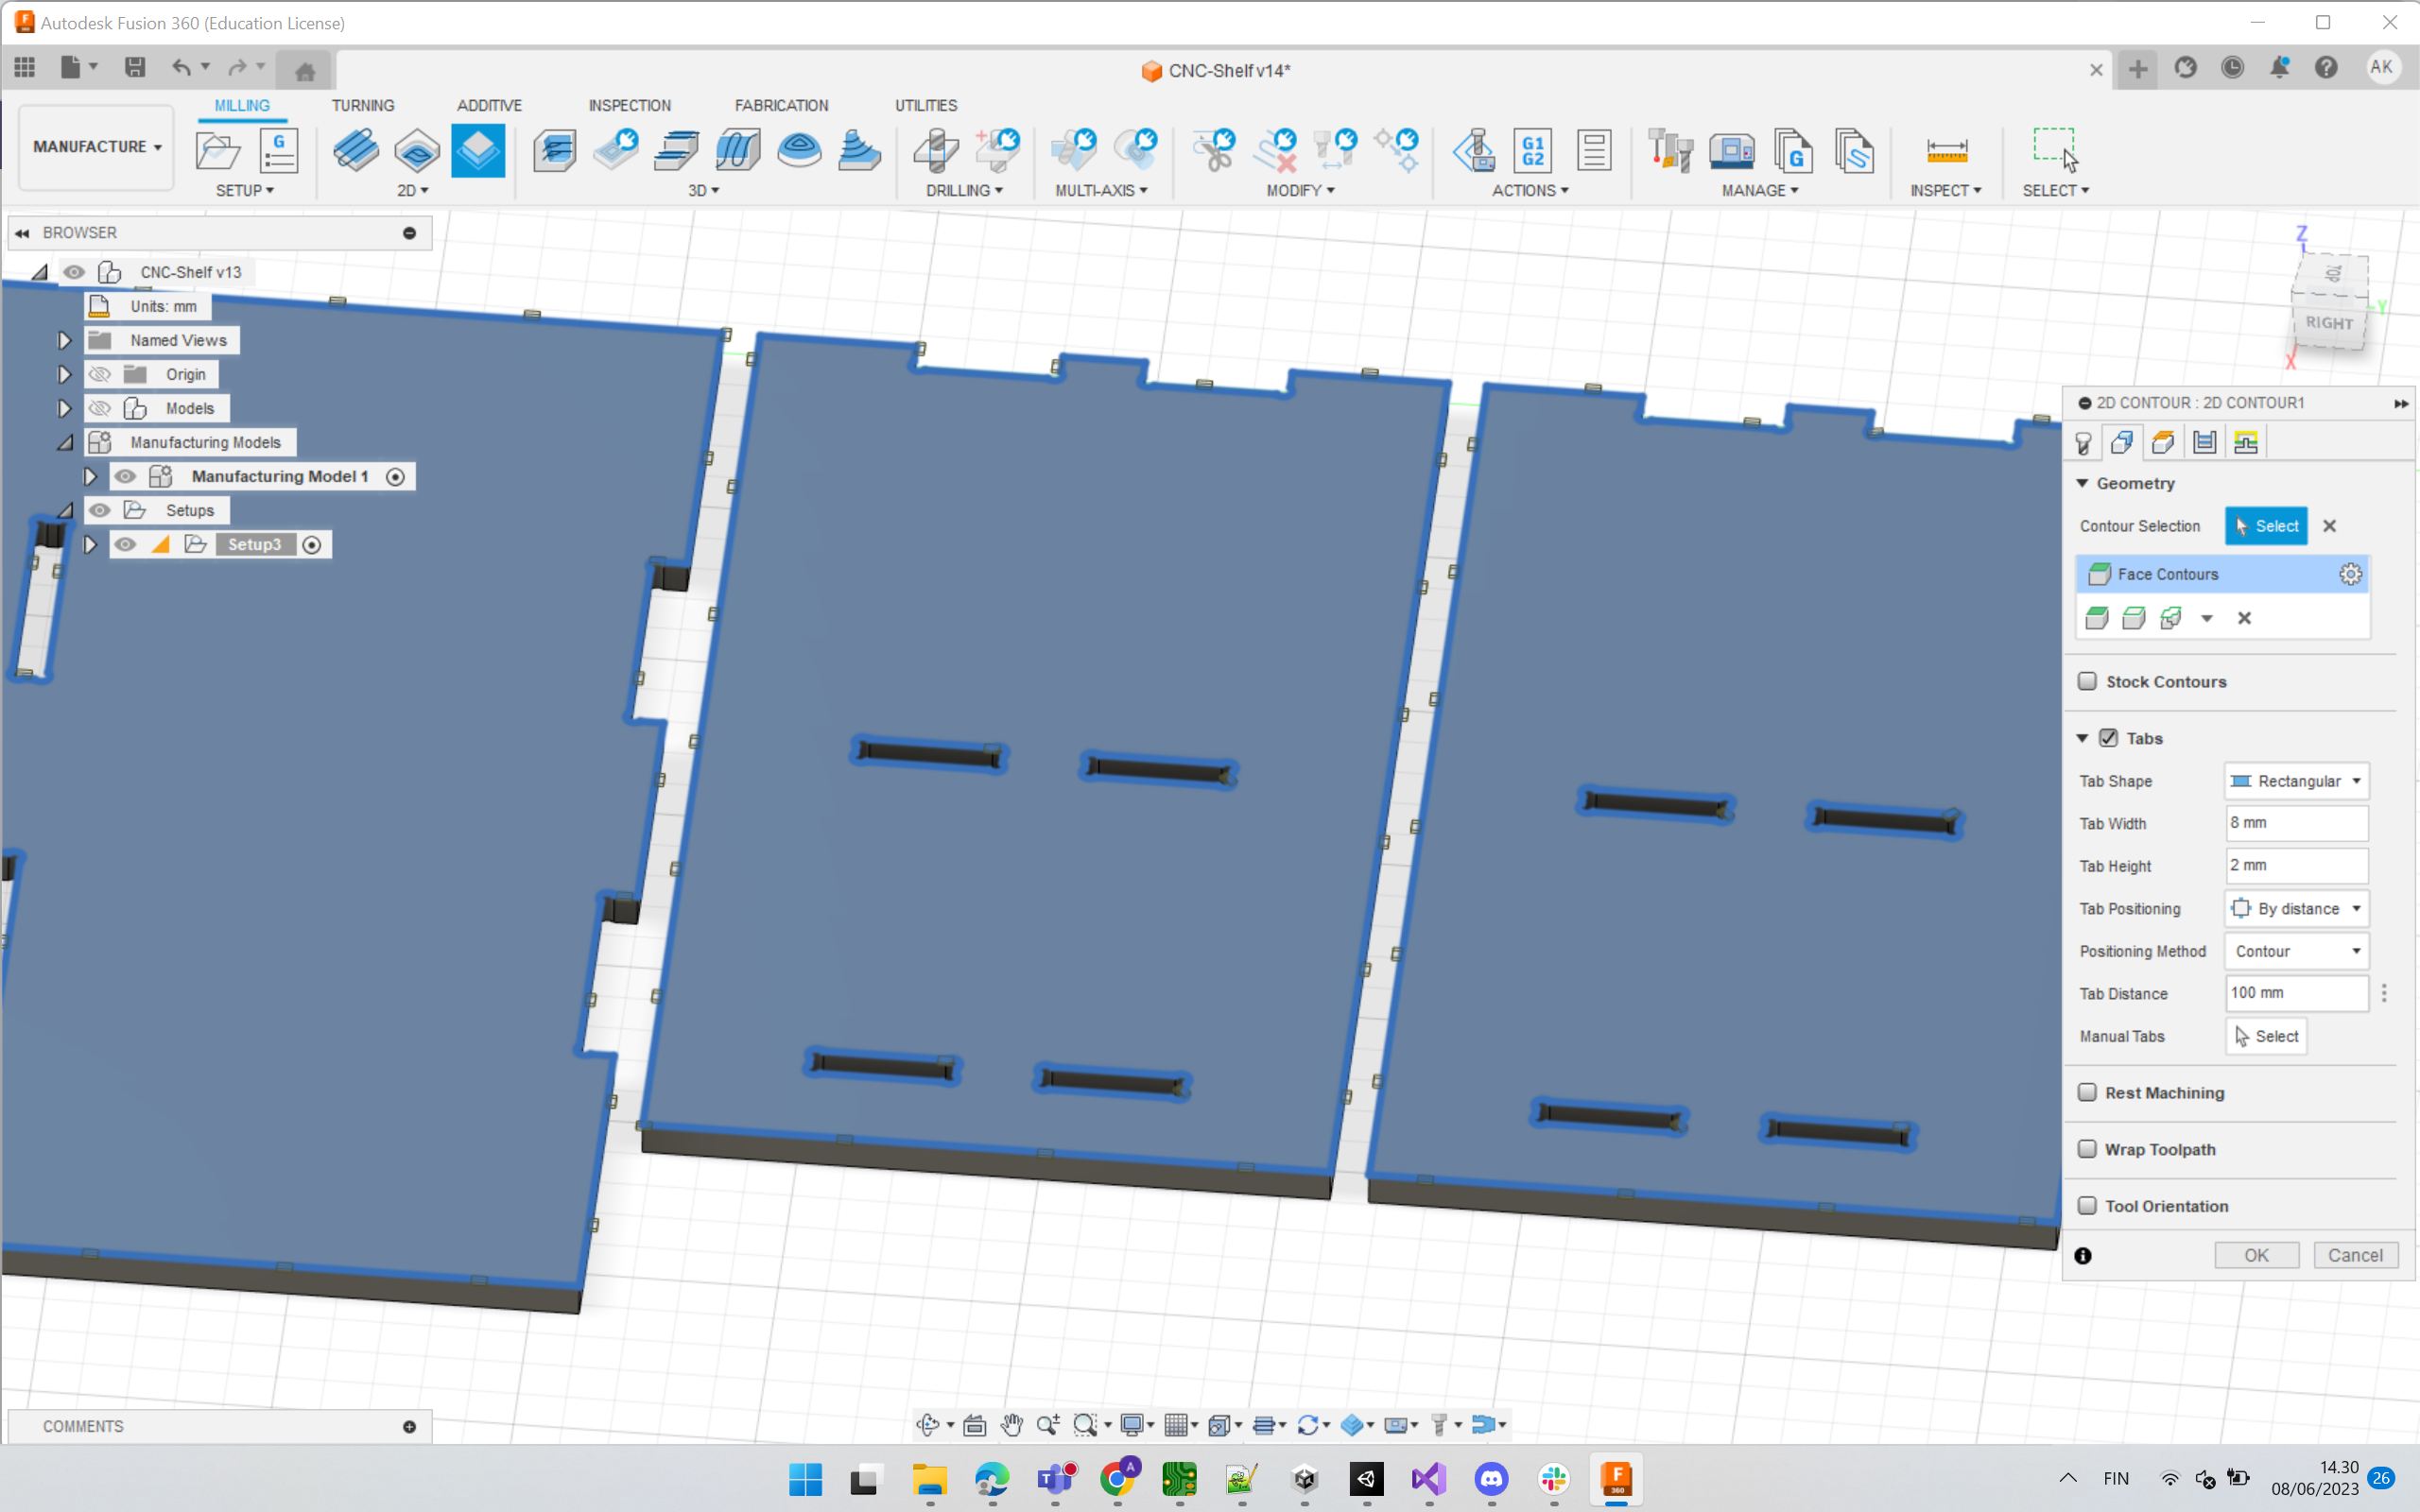
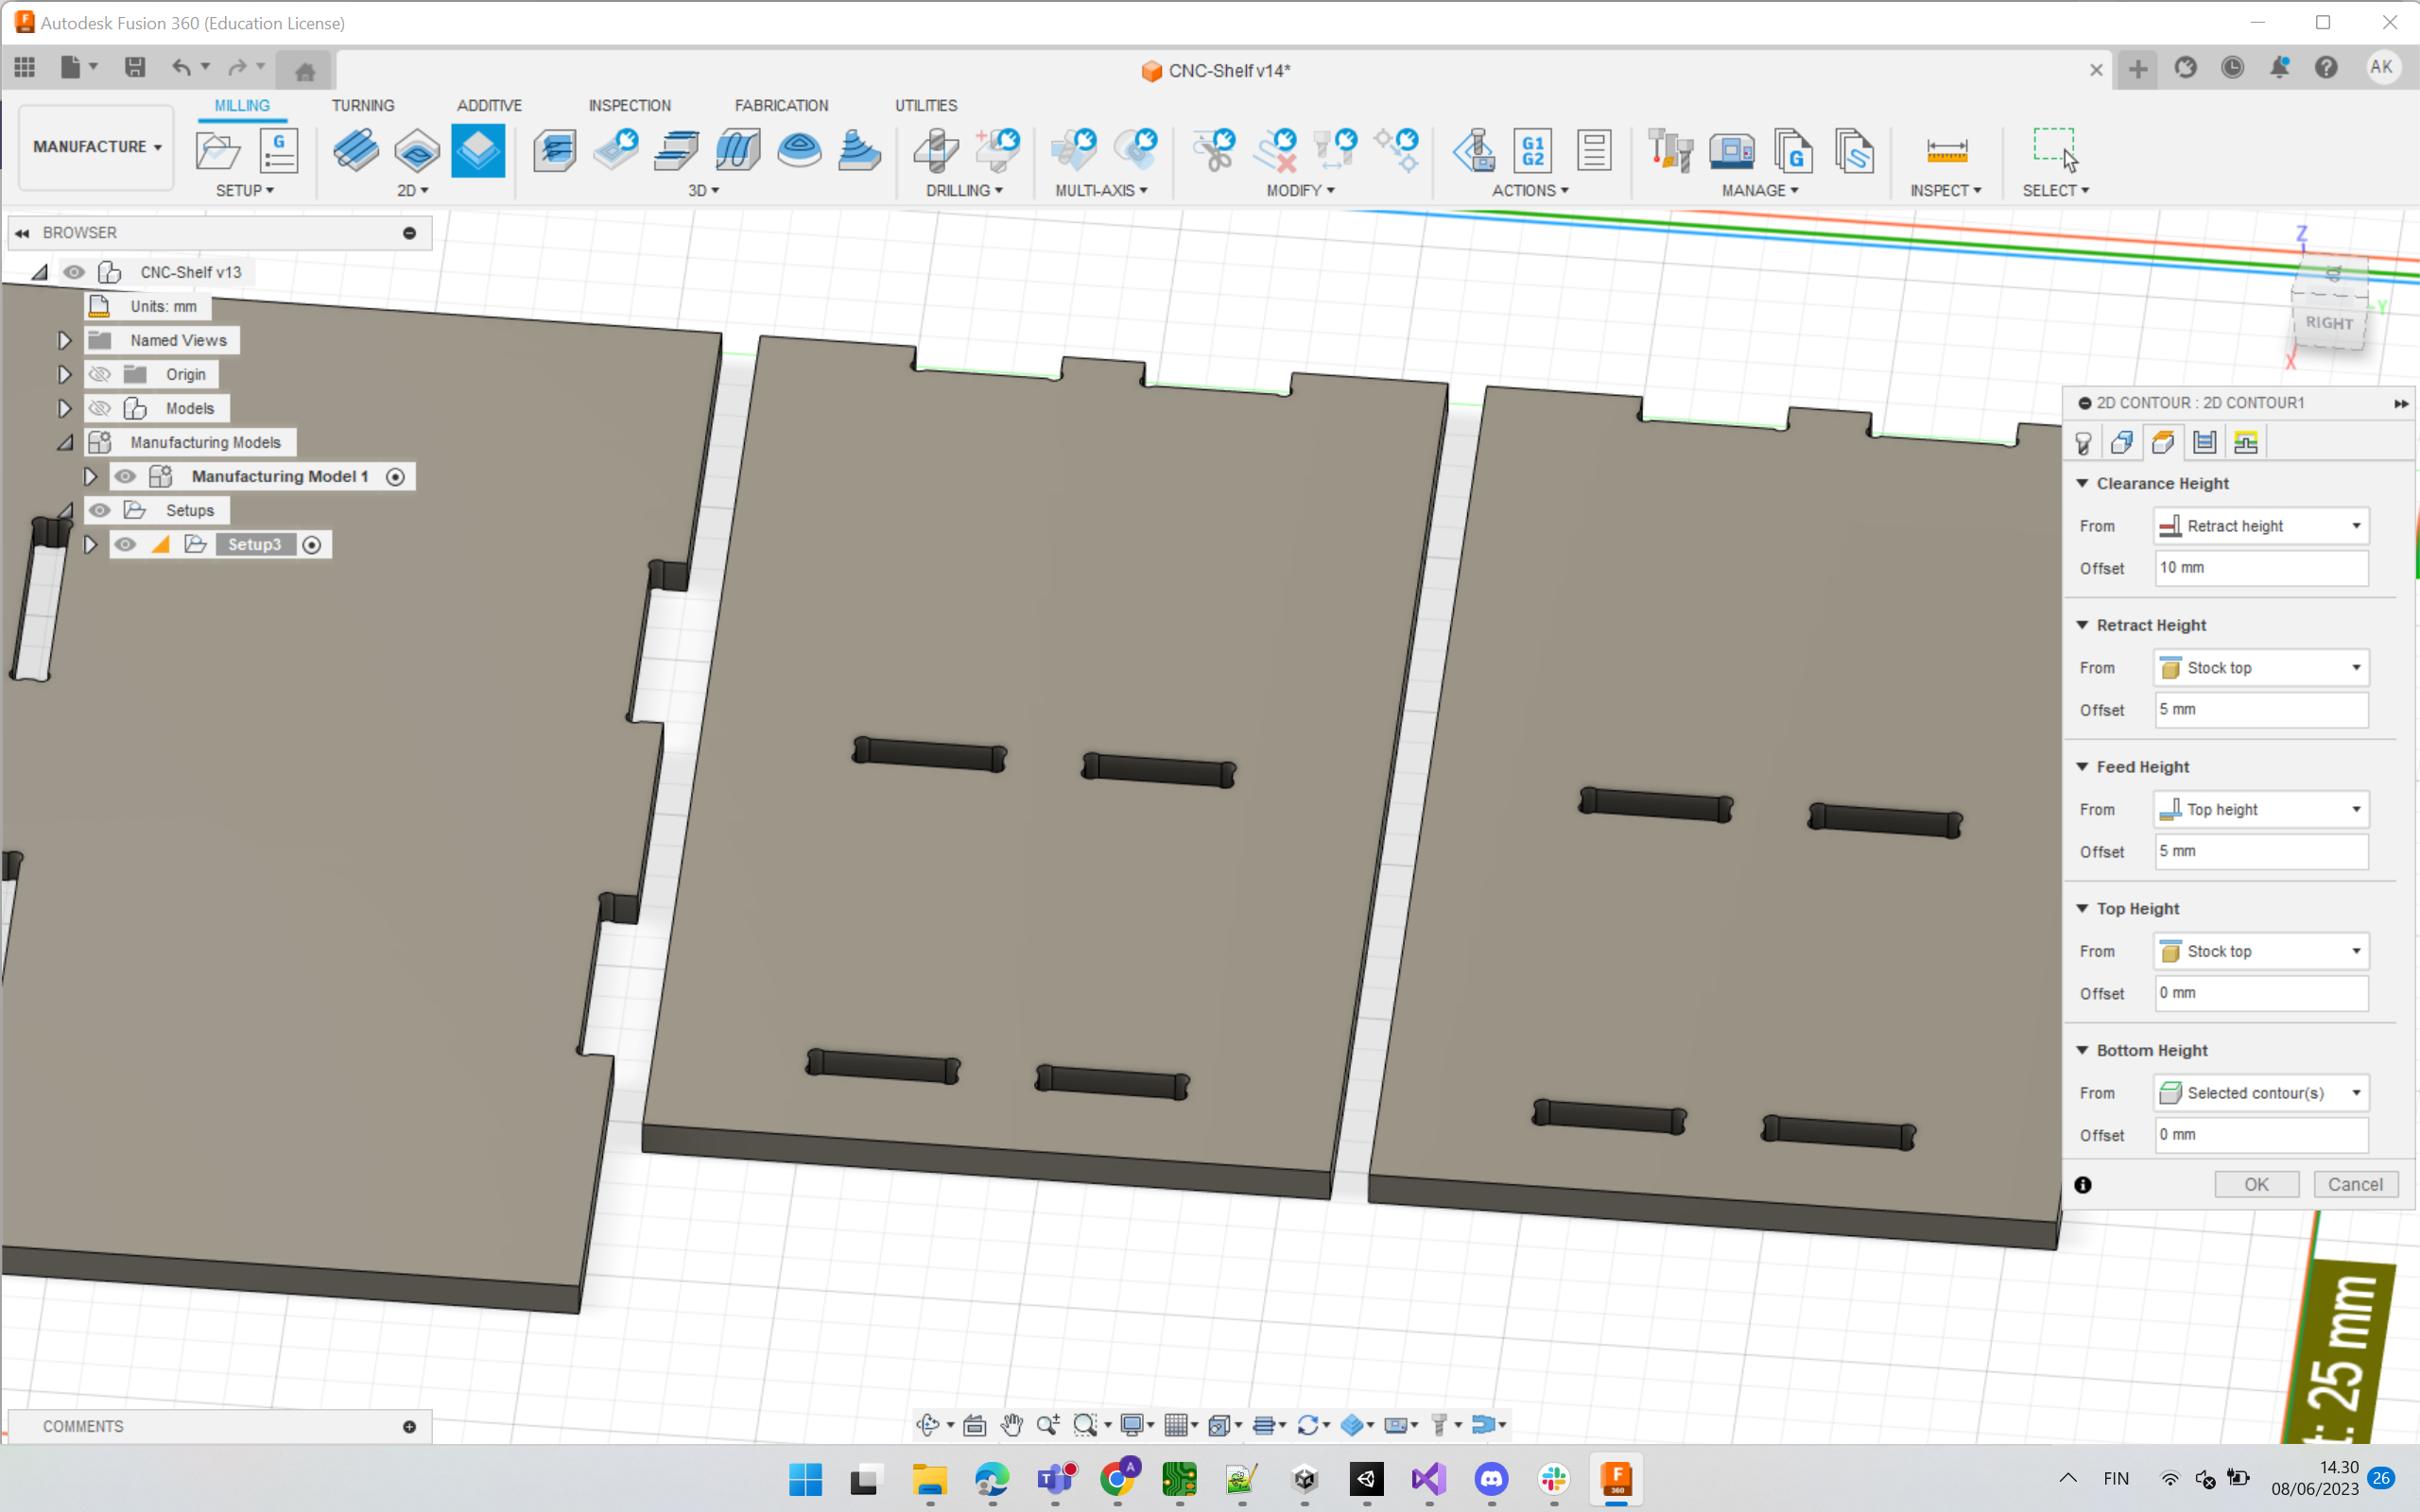
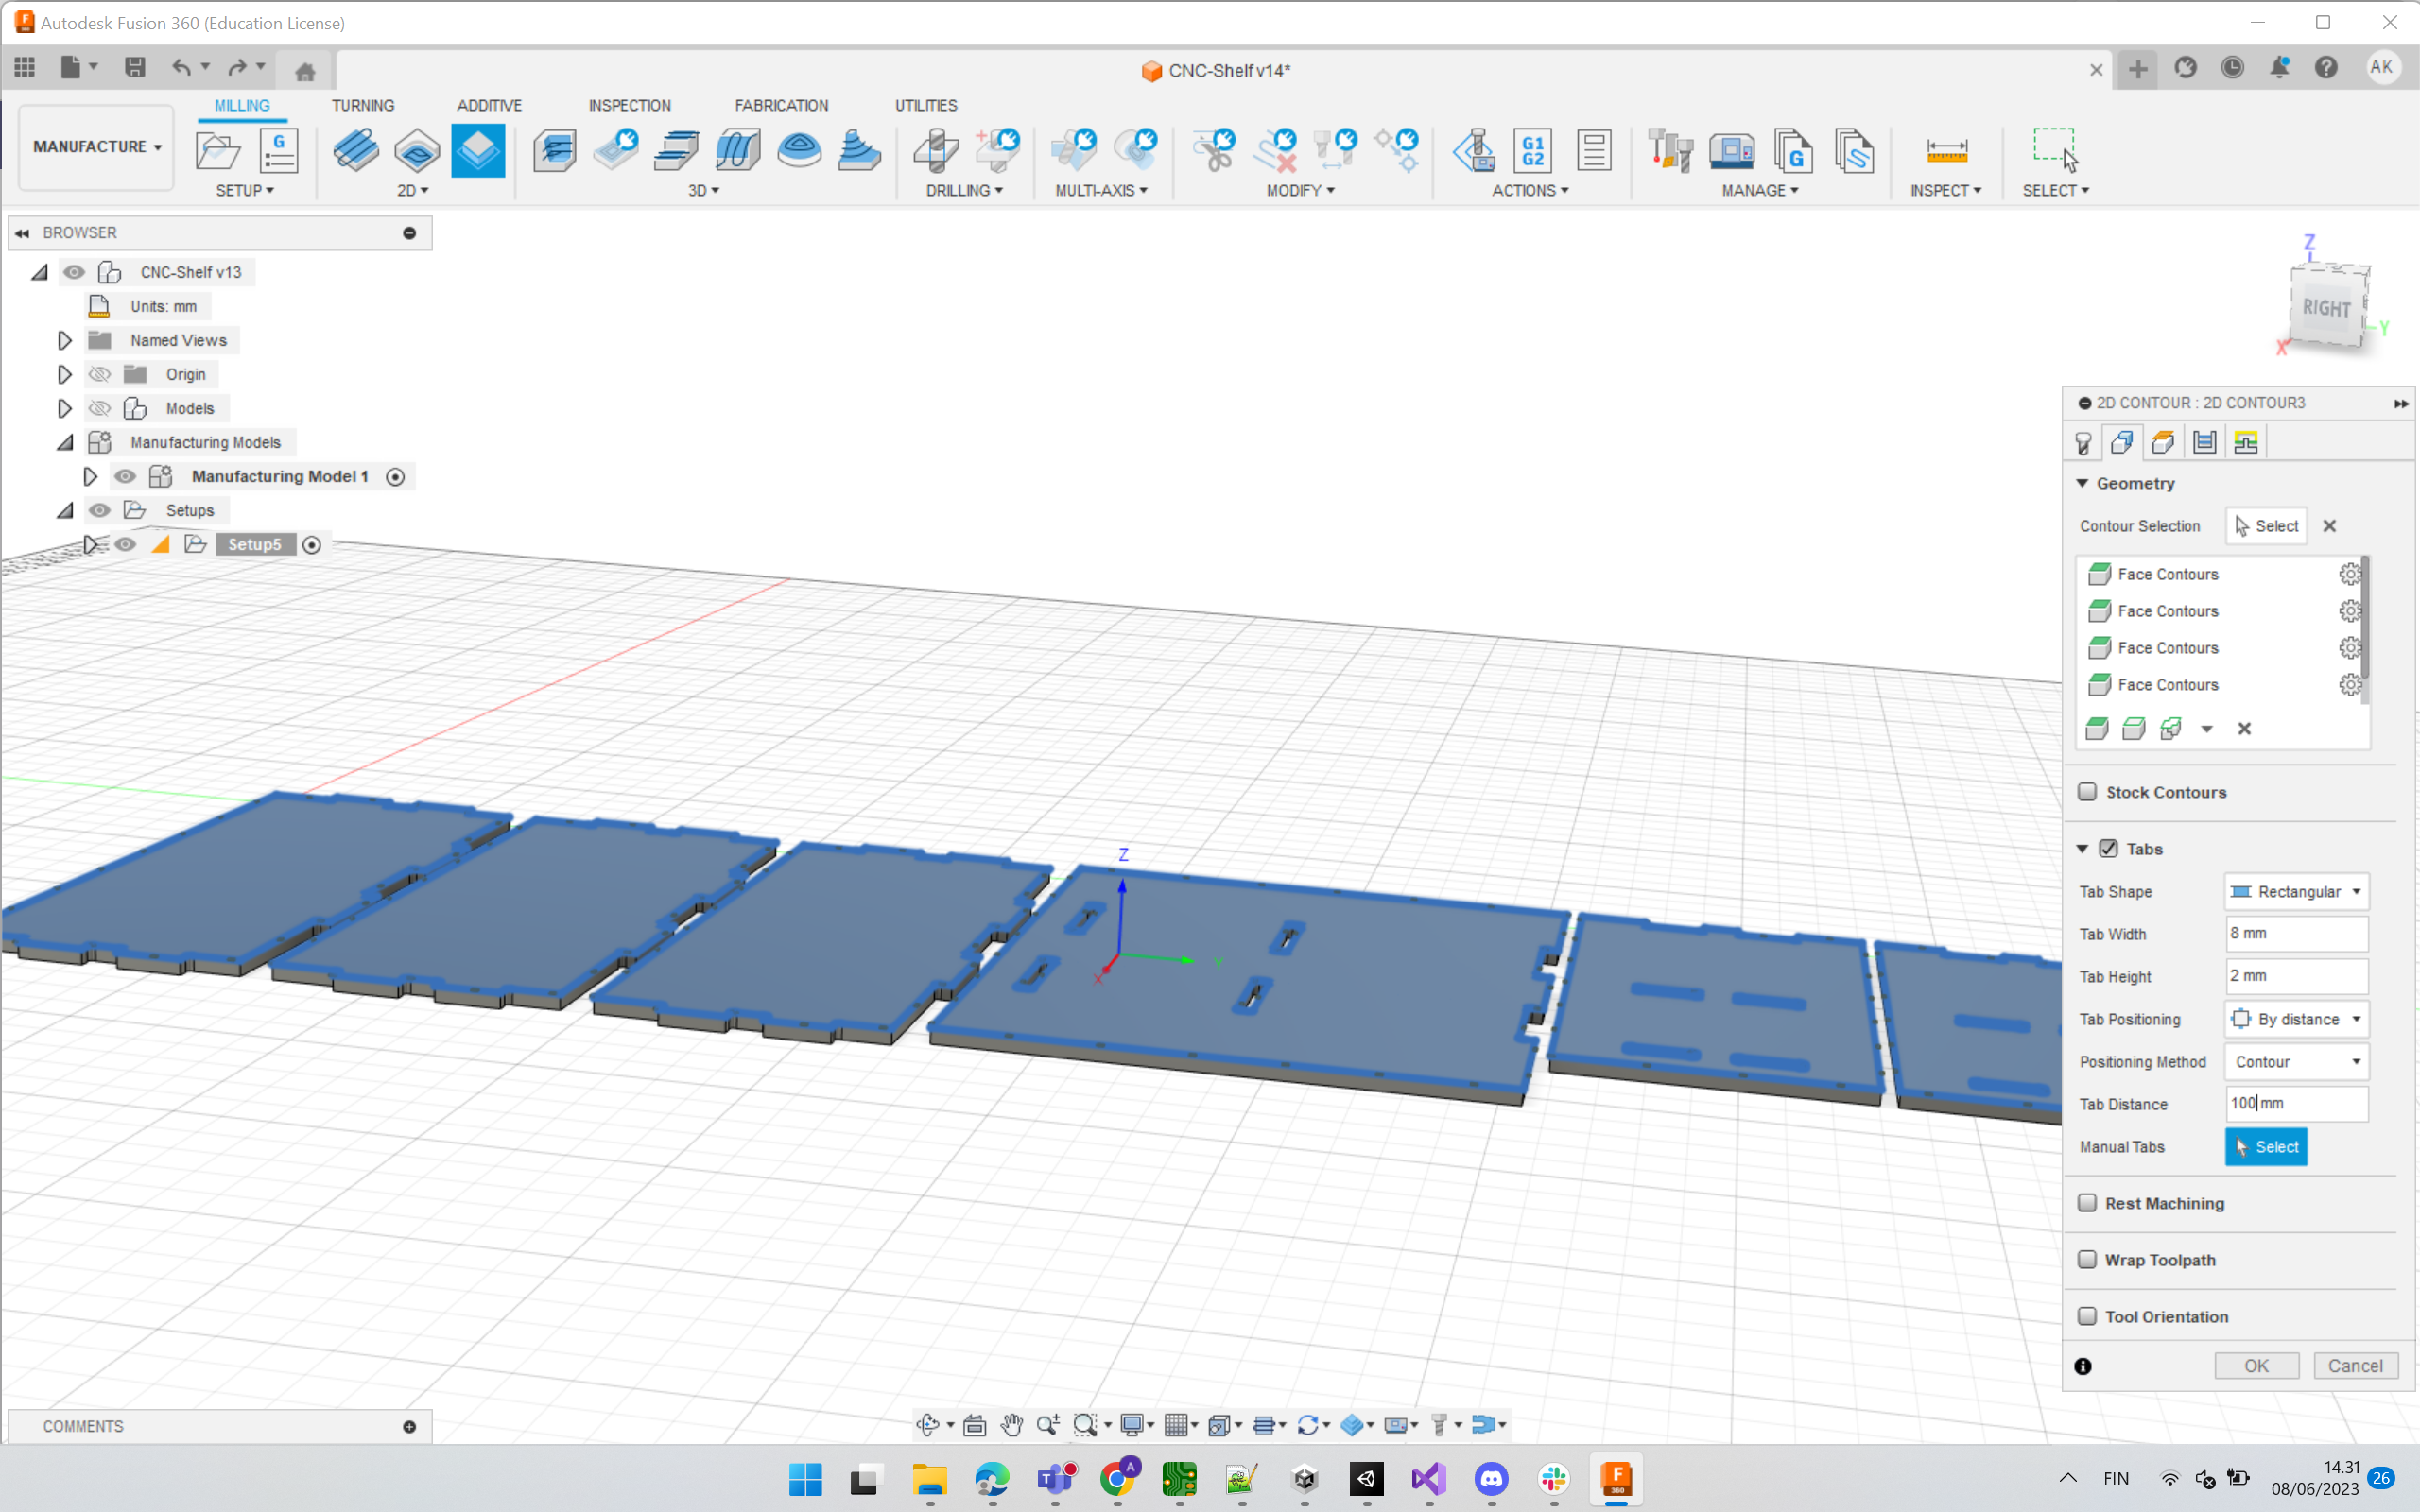

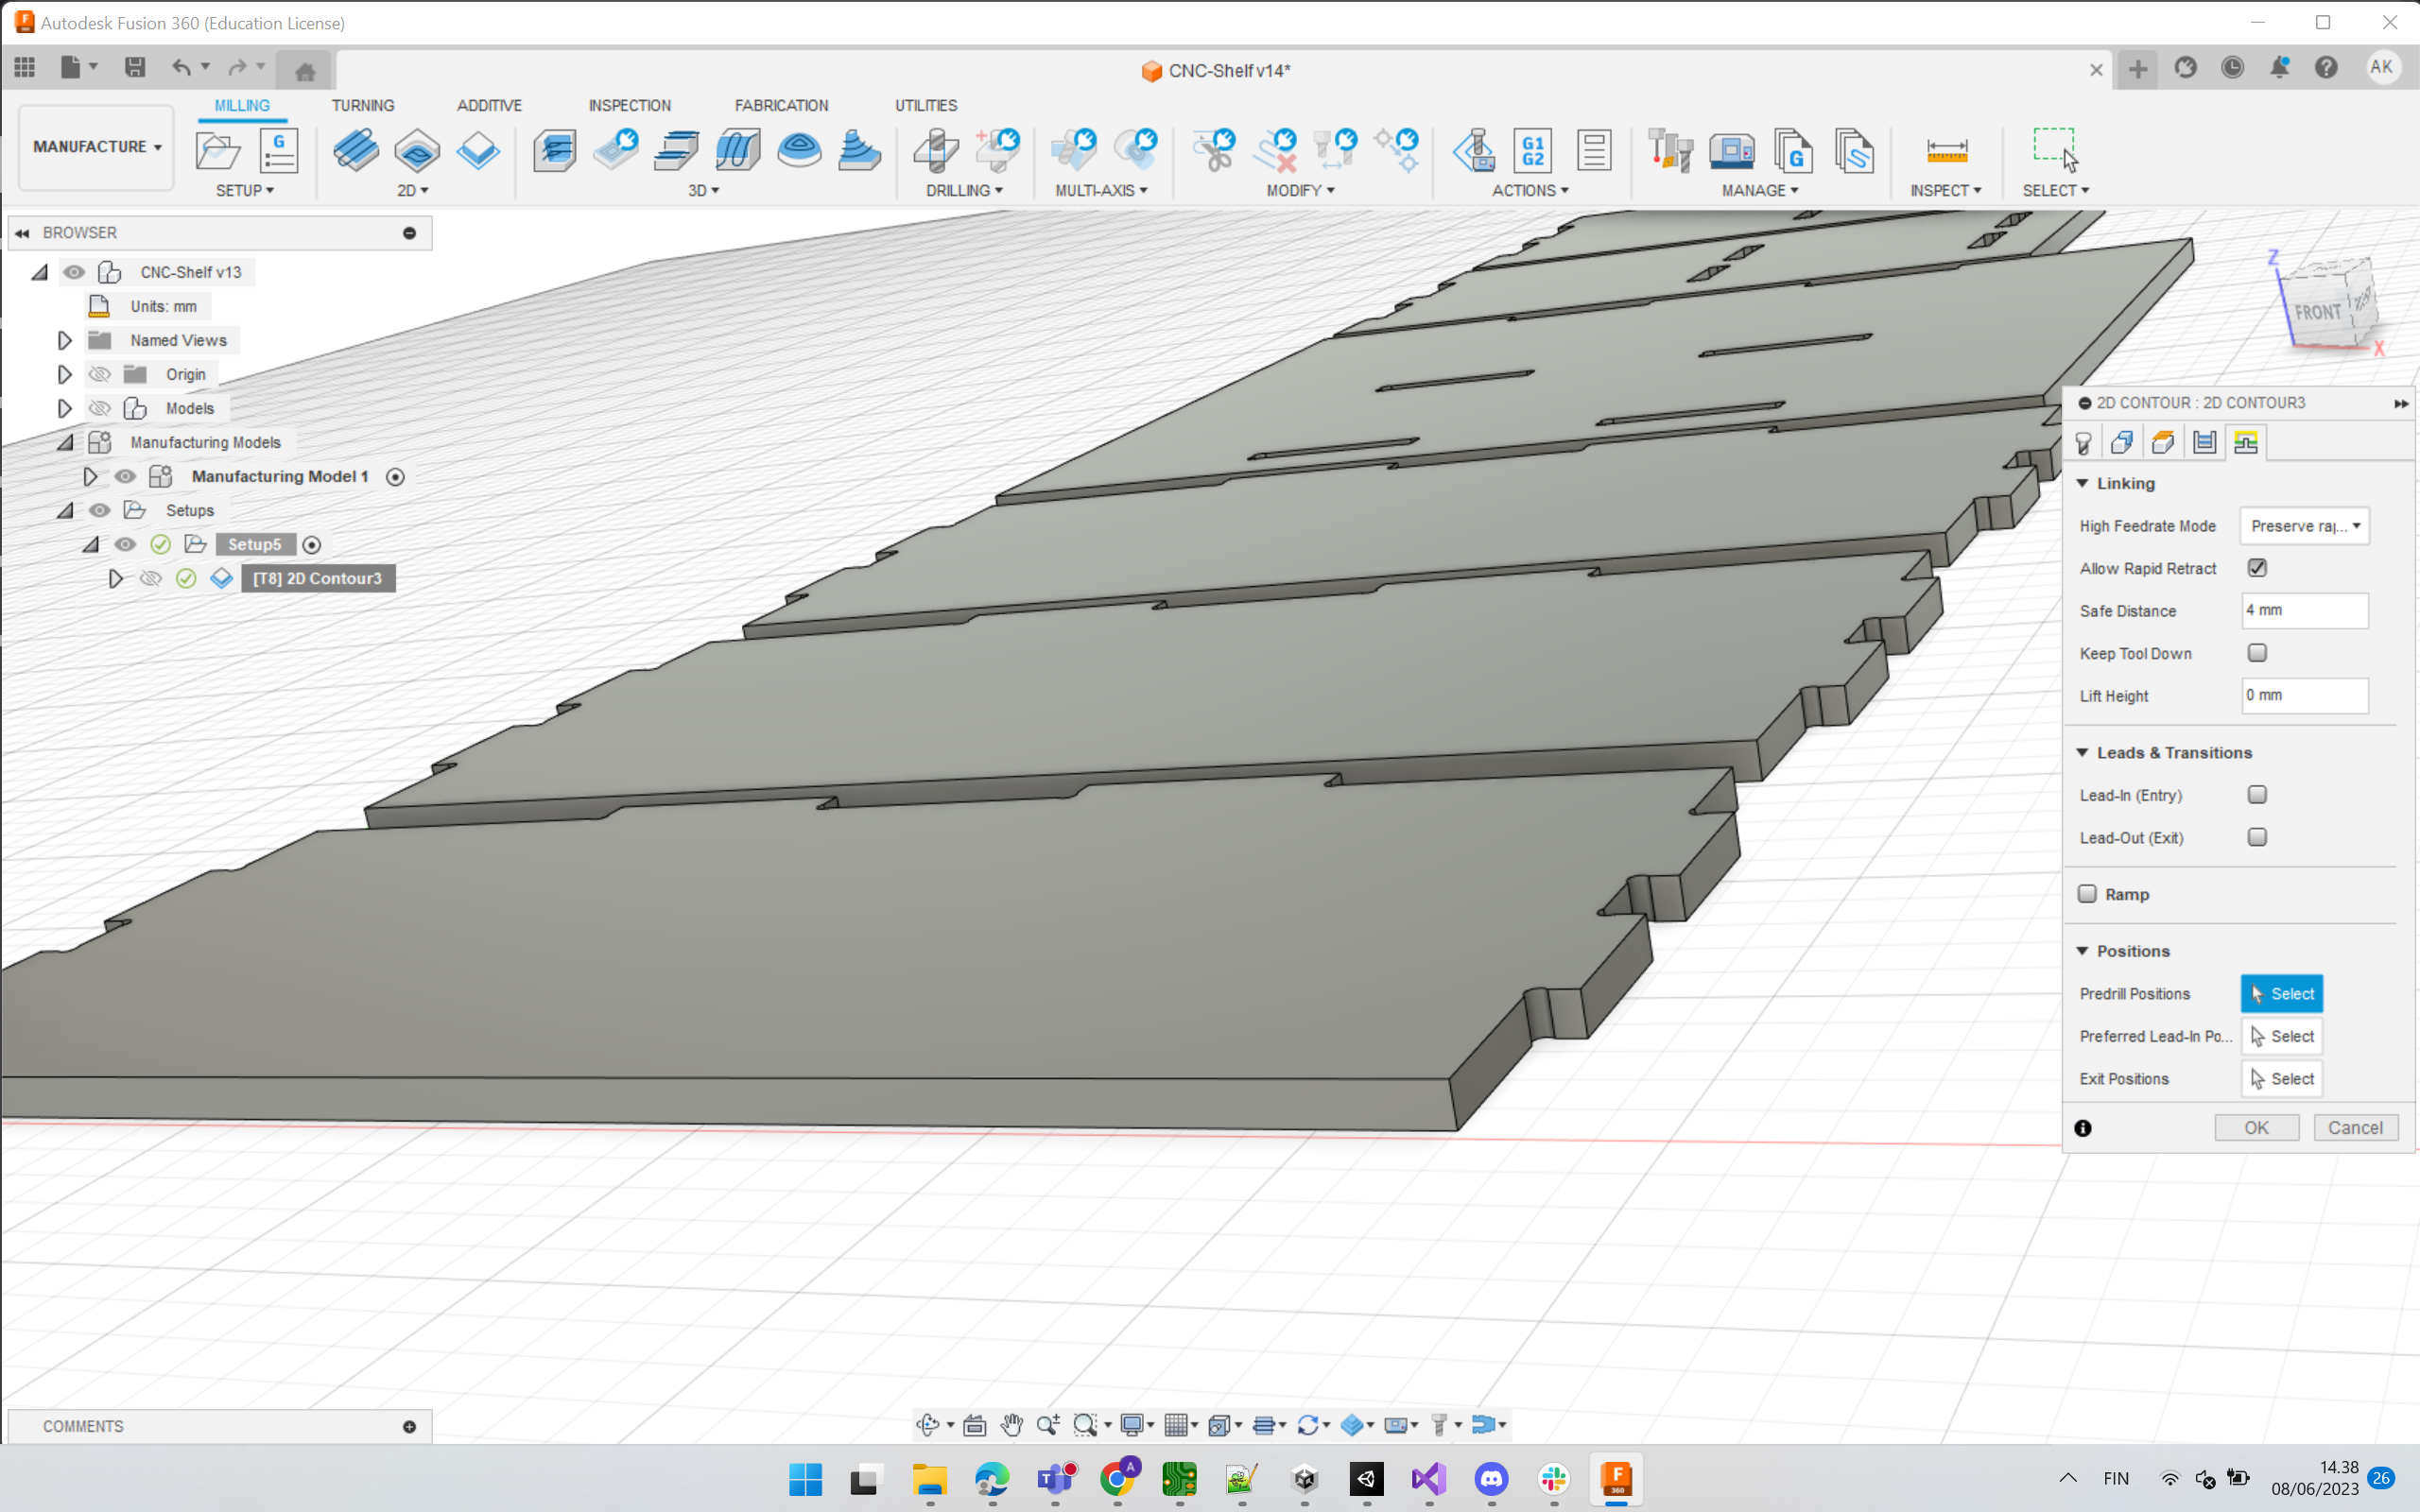
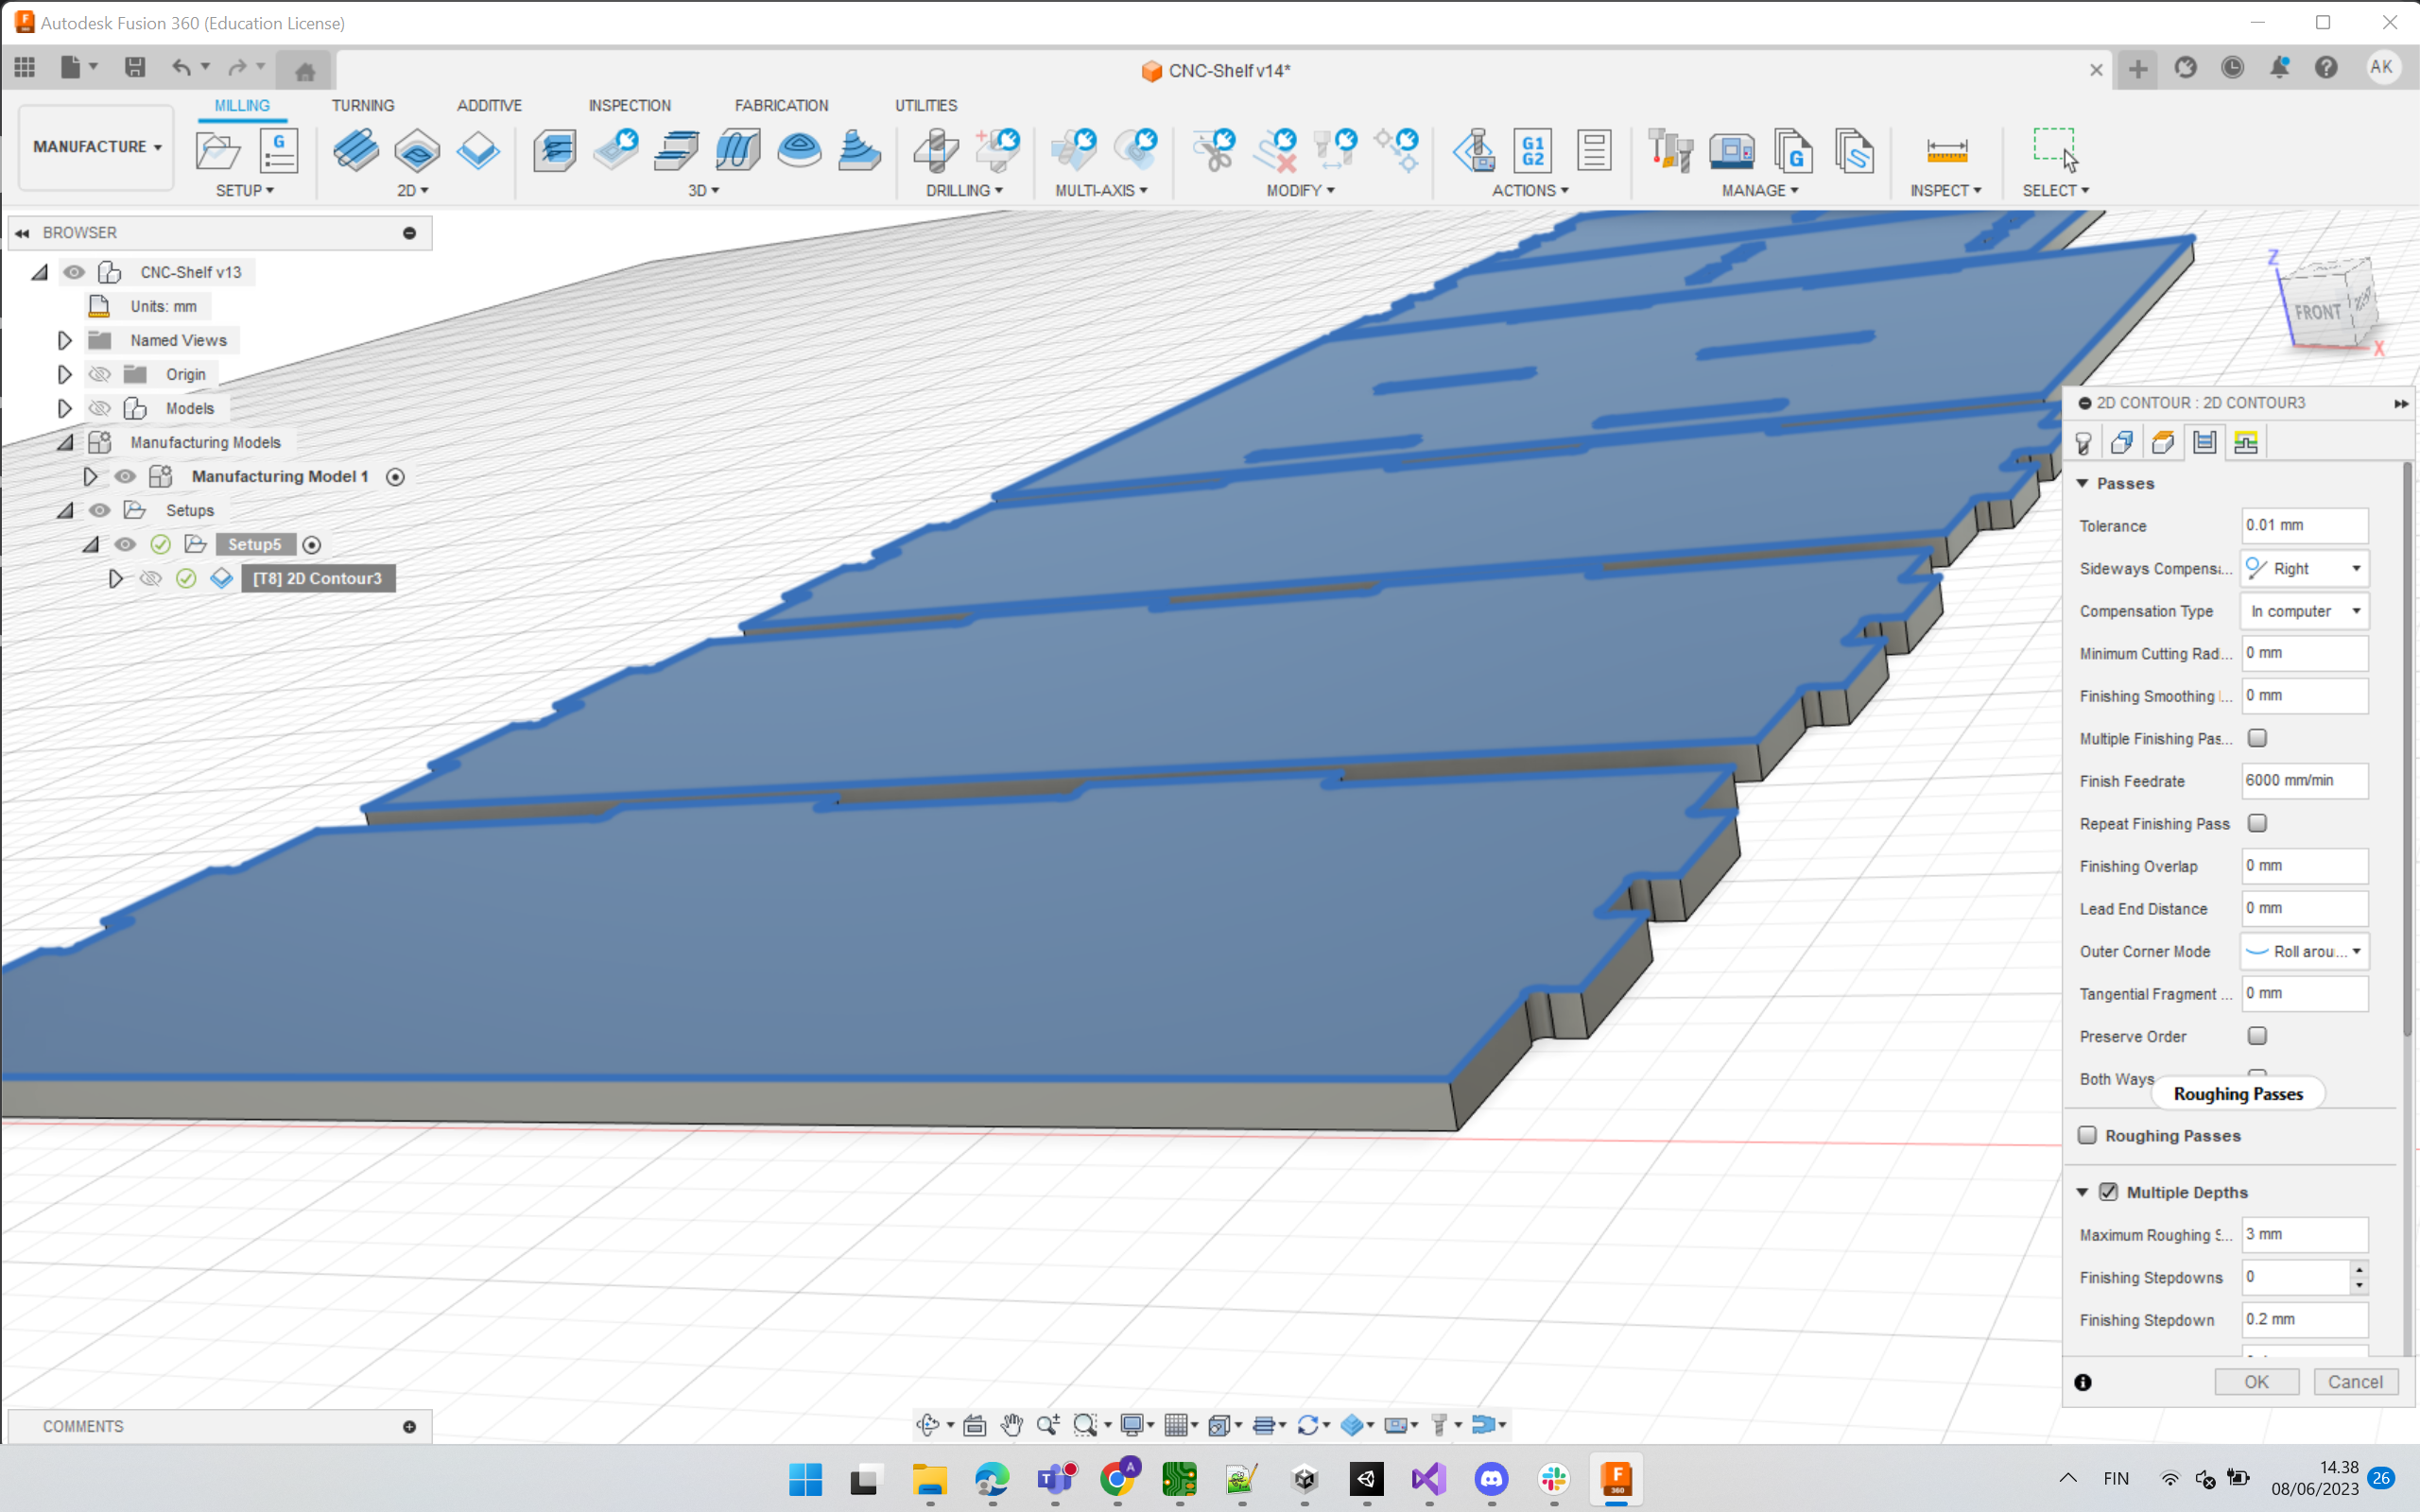
After finishing 2D Contour, Fusion generates the toolpath and shows a simulation purview.
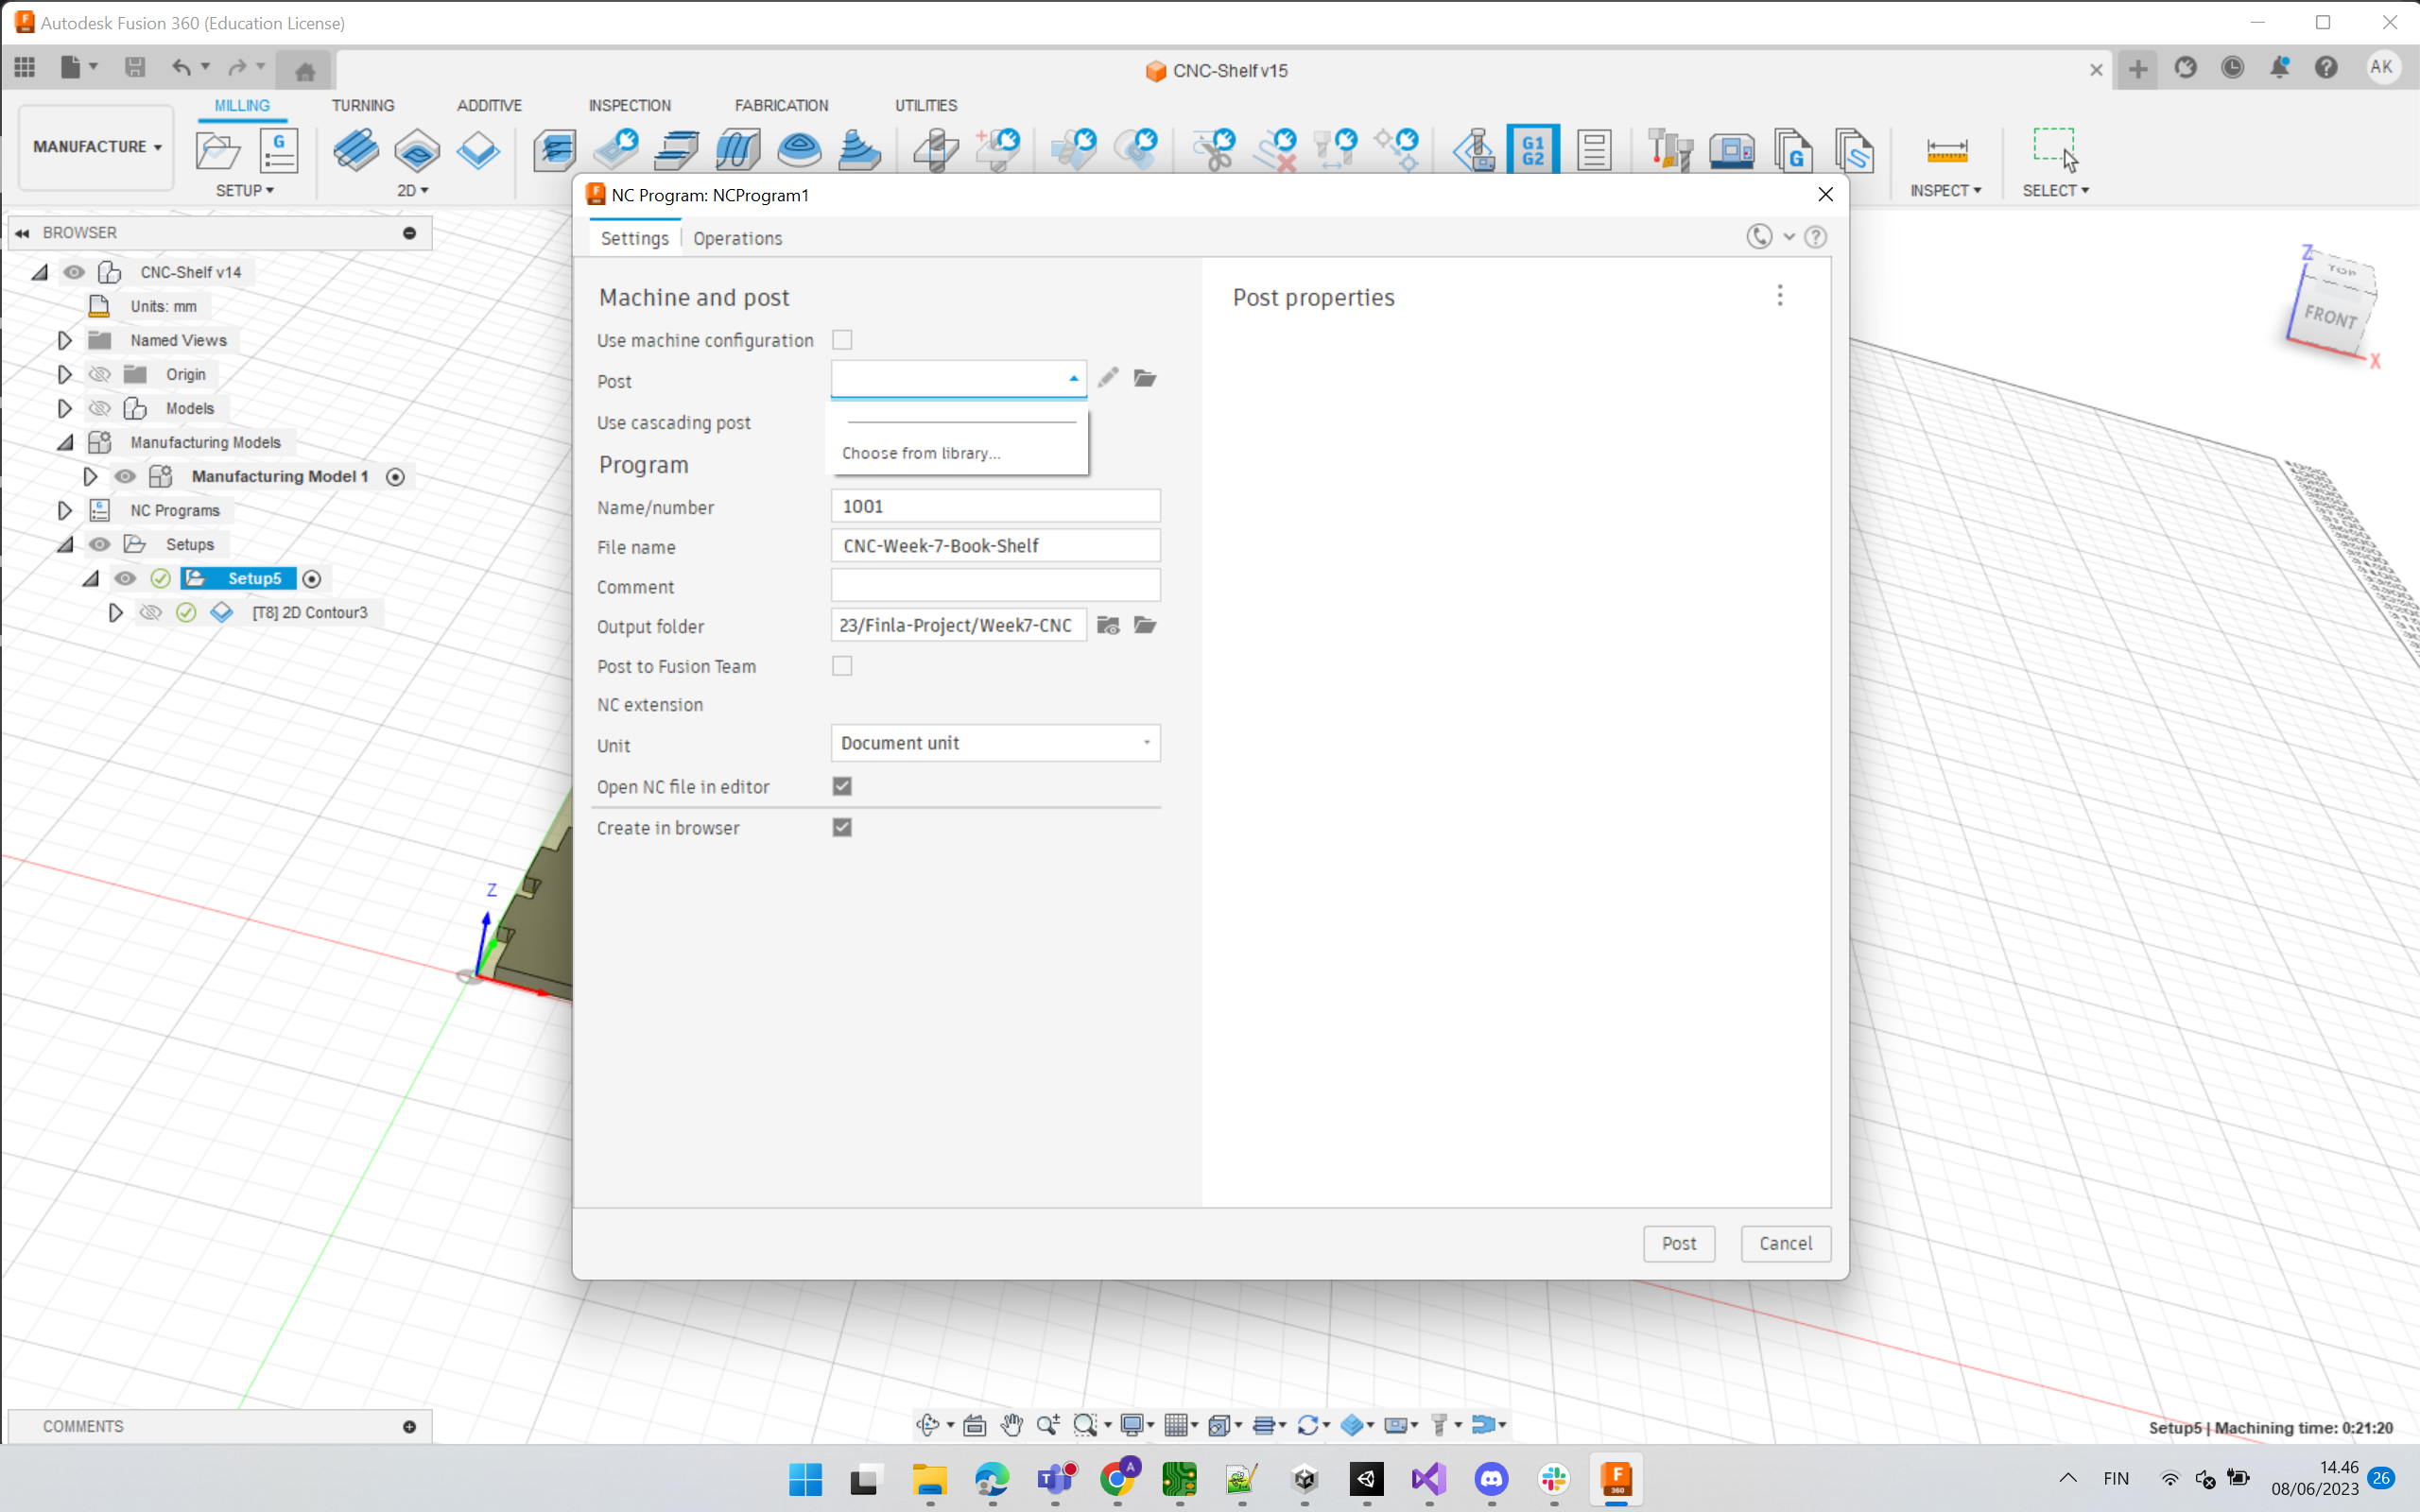
Export
To export the NC code, we need the post processor which was provided by our instructor. - Post processor for our CNC - Tool Library
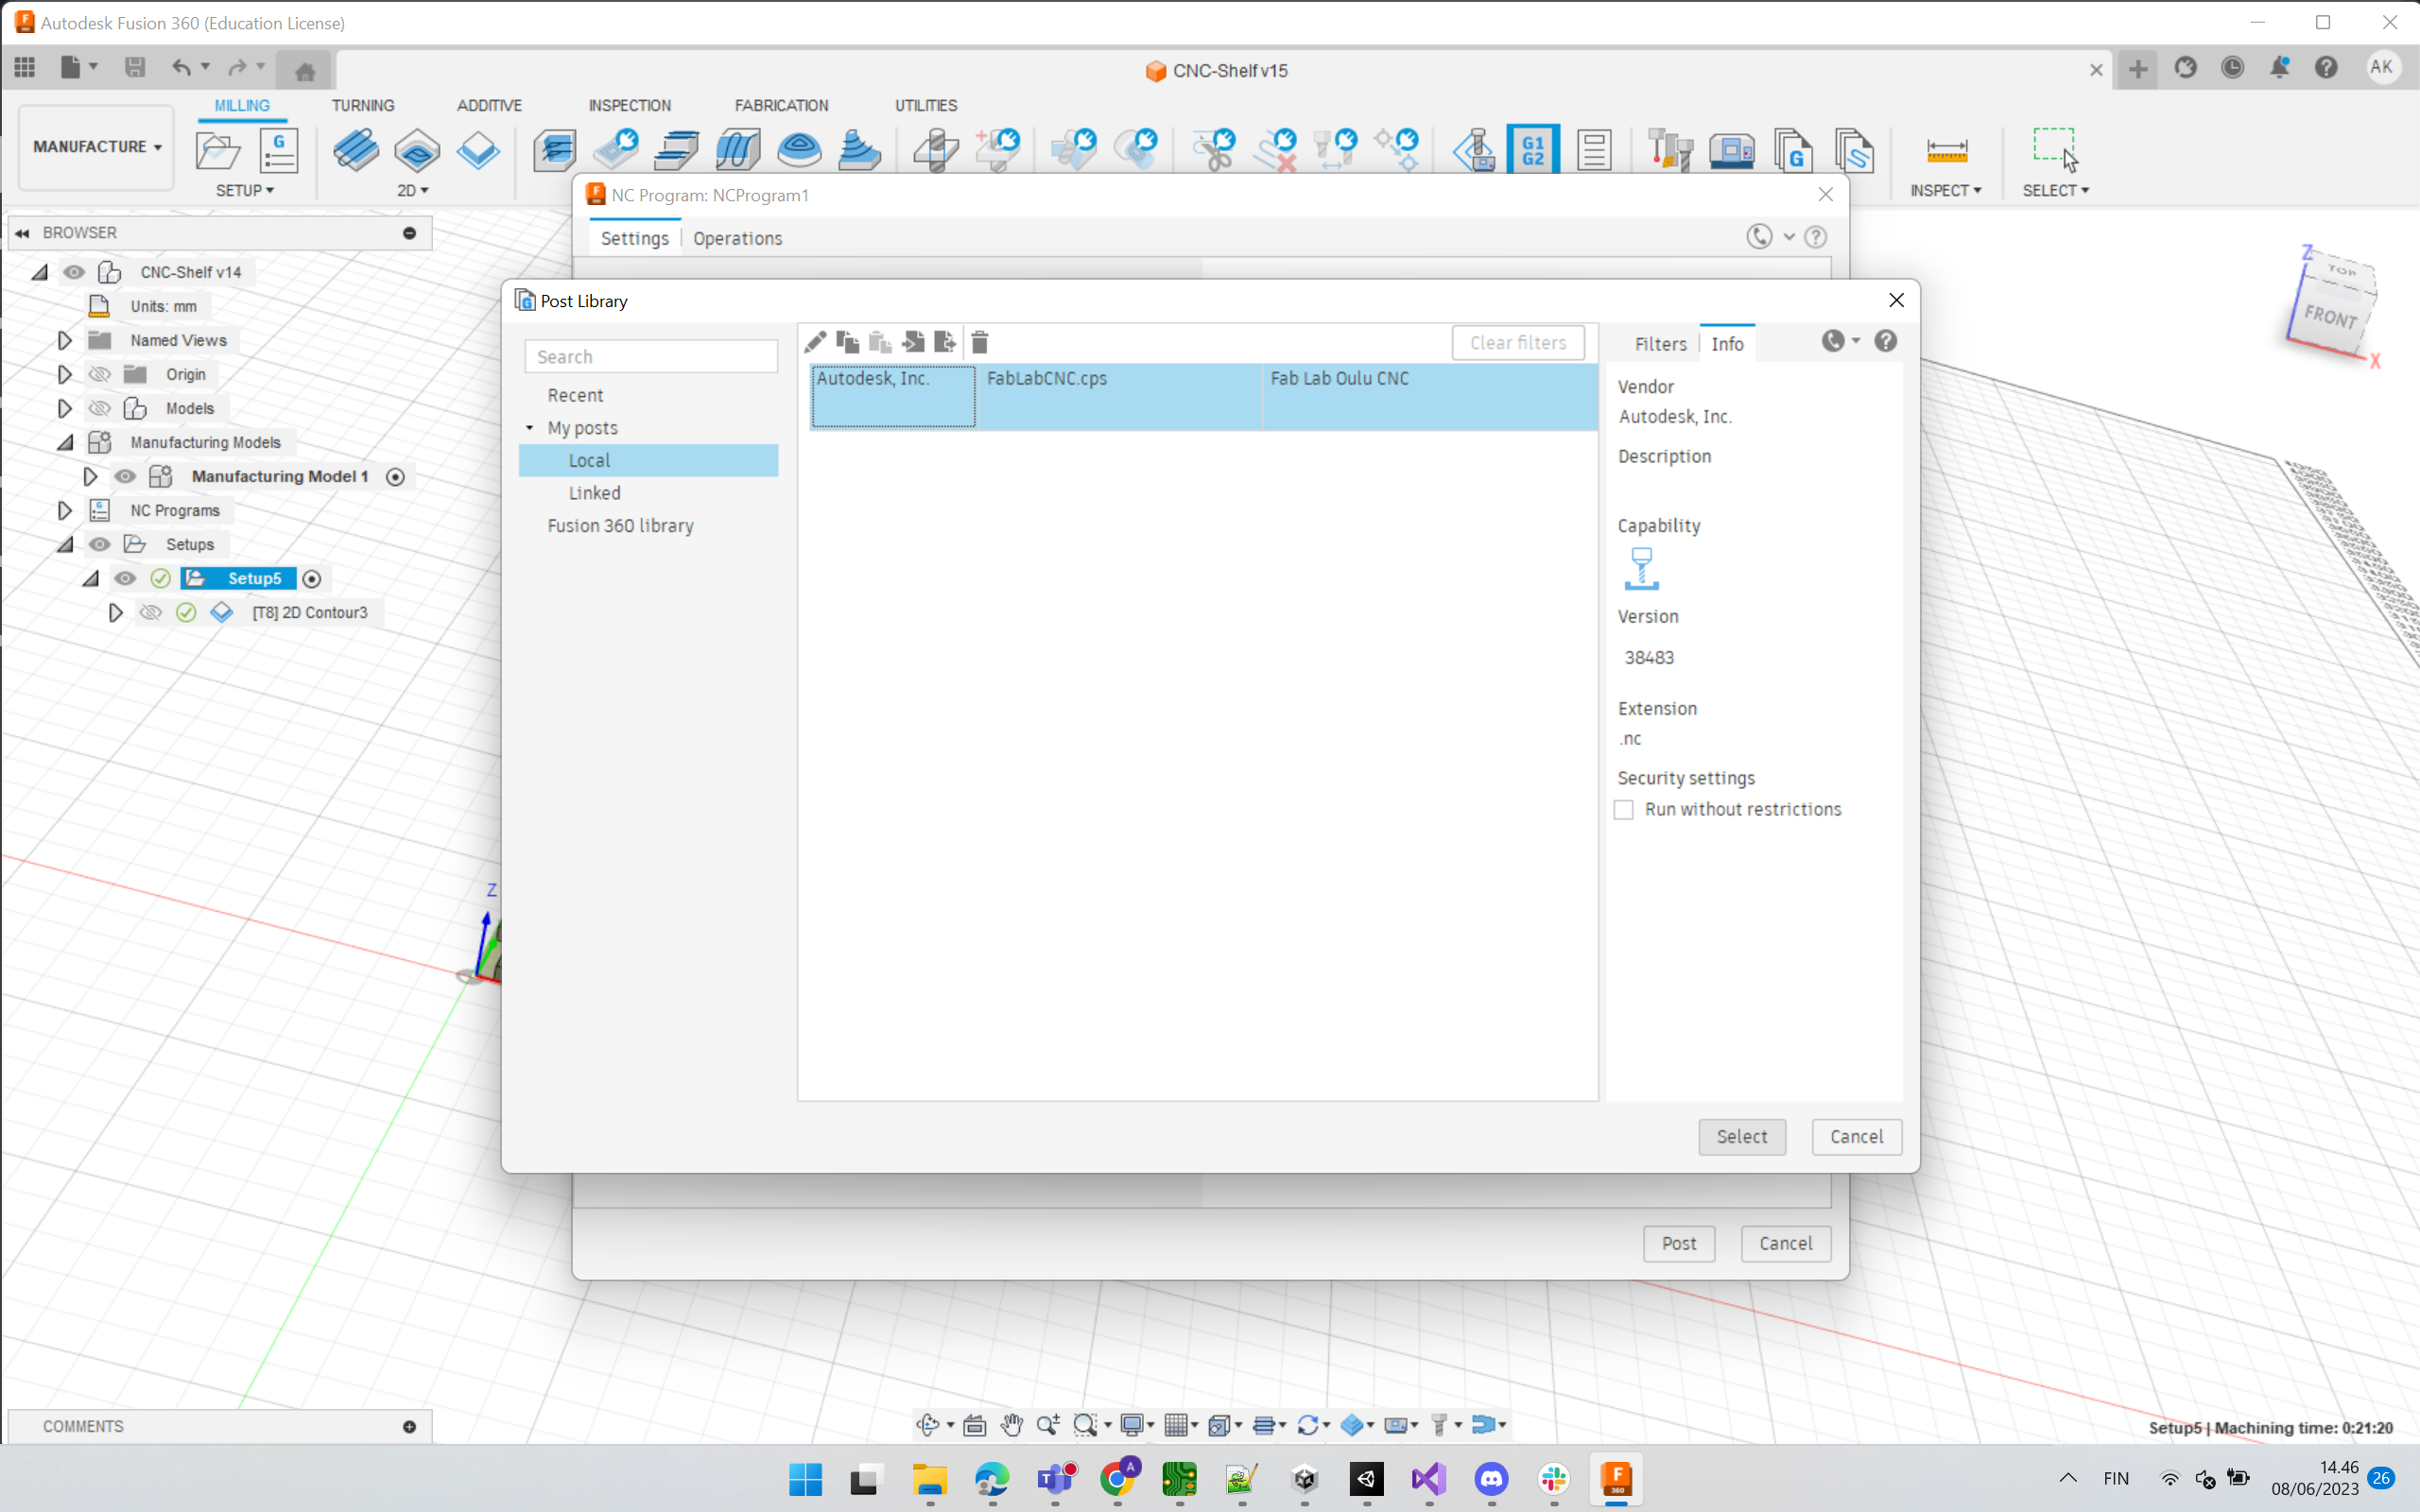
We include this via Manage -> Post Library.

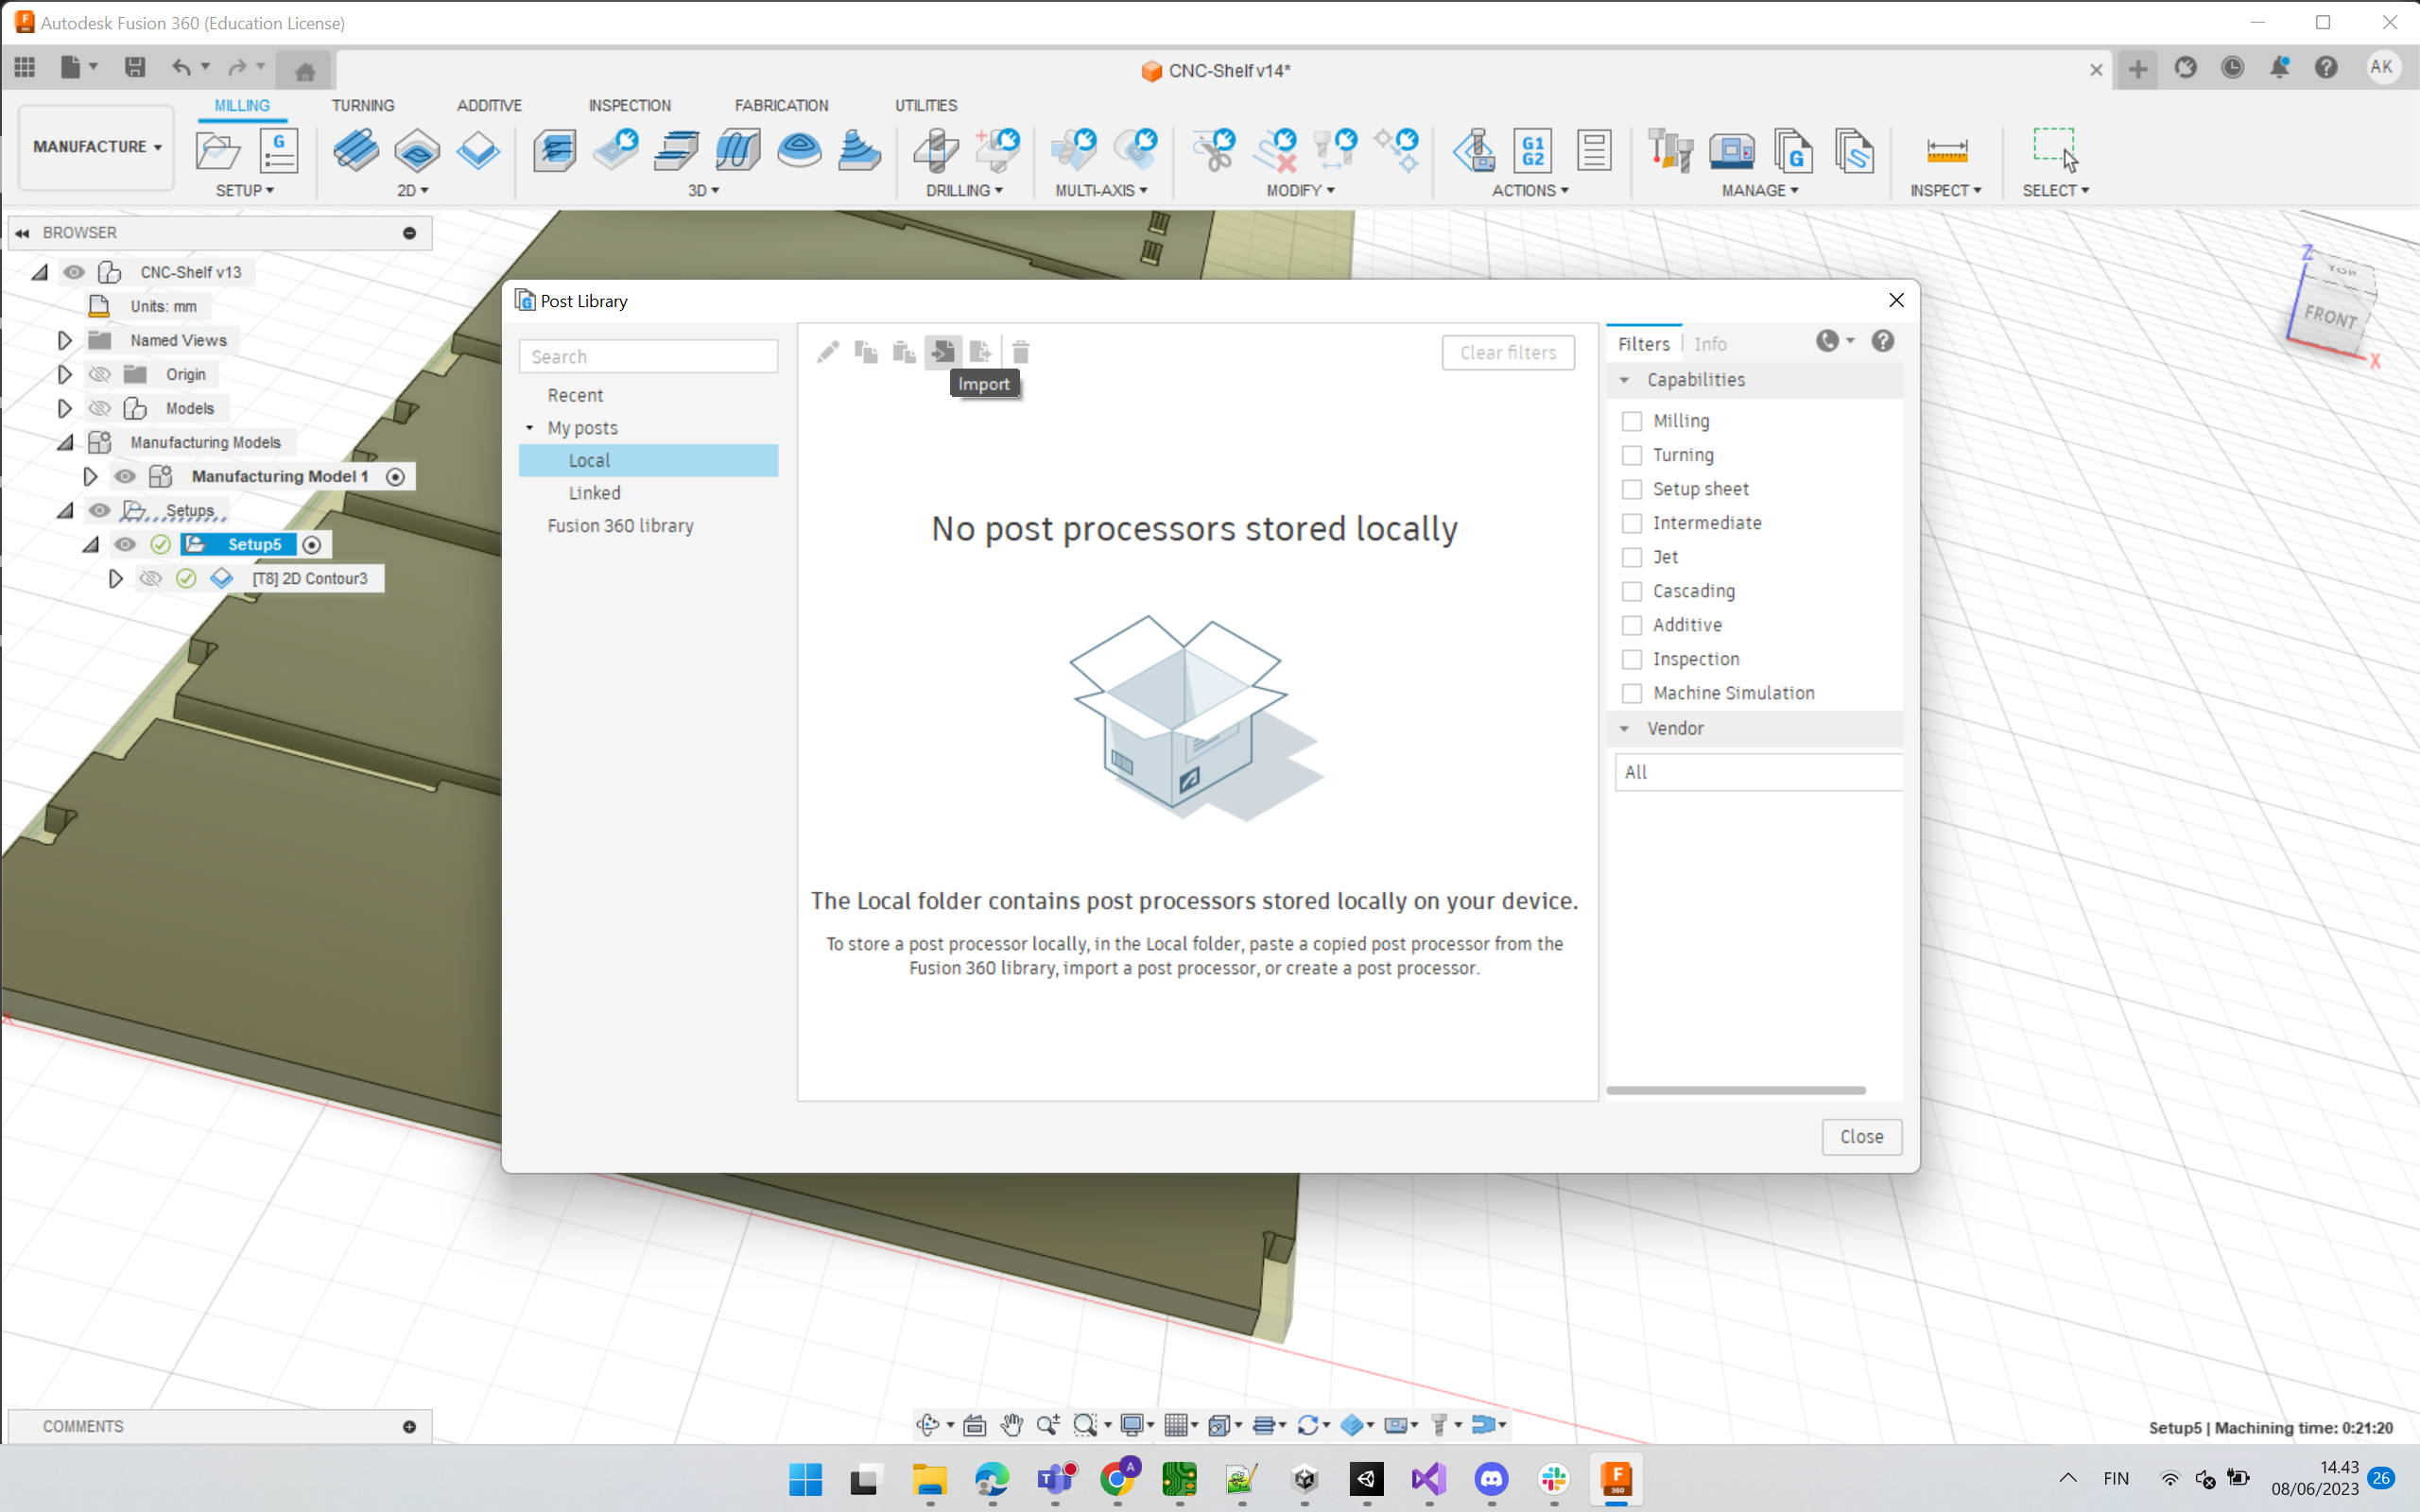
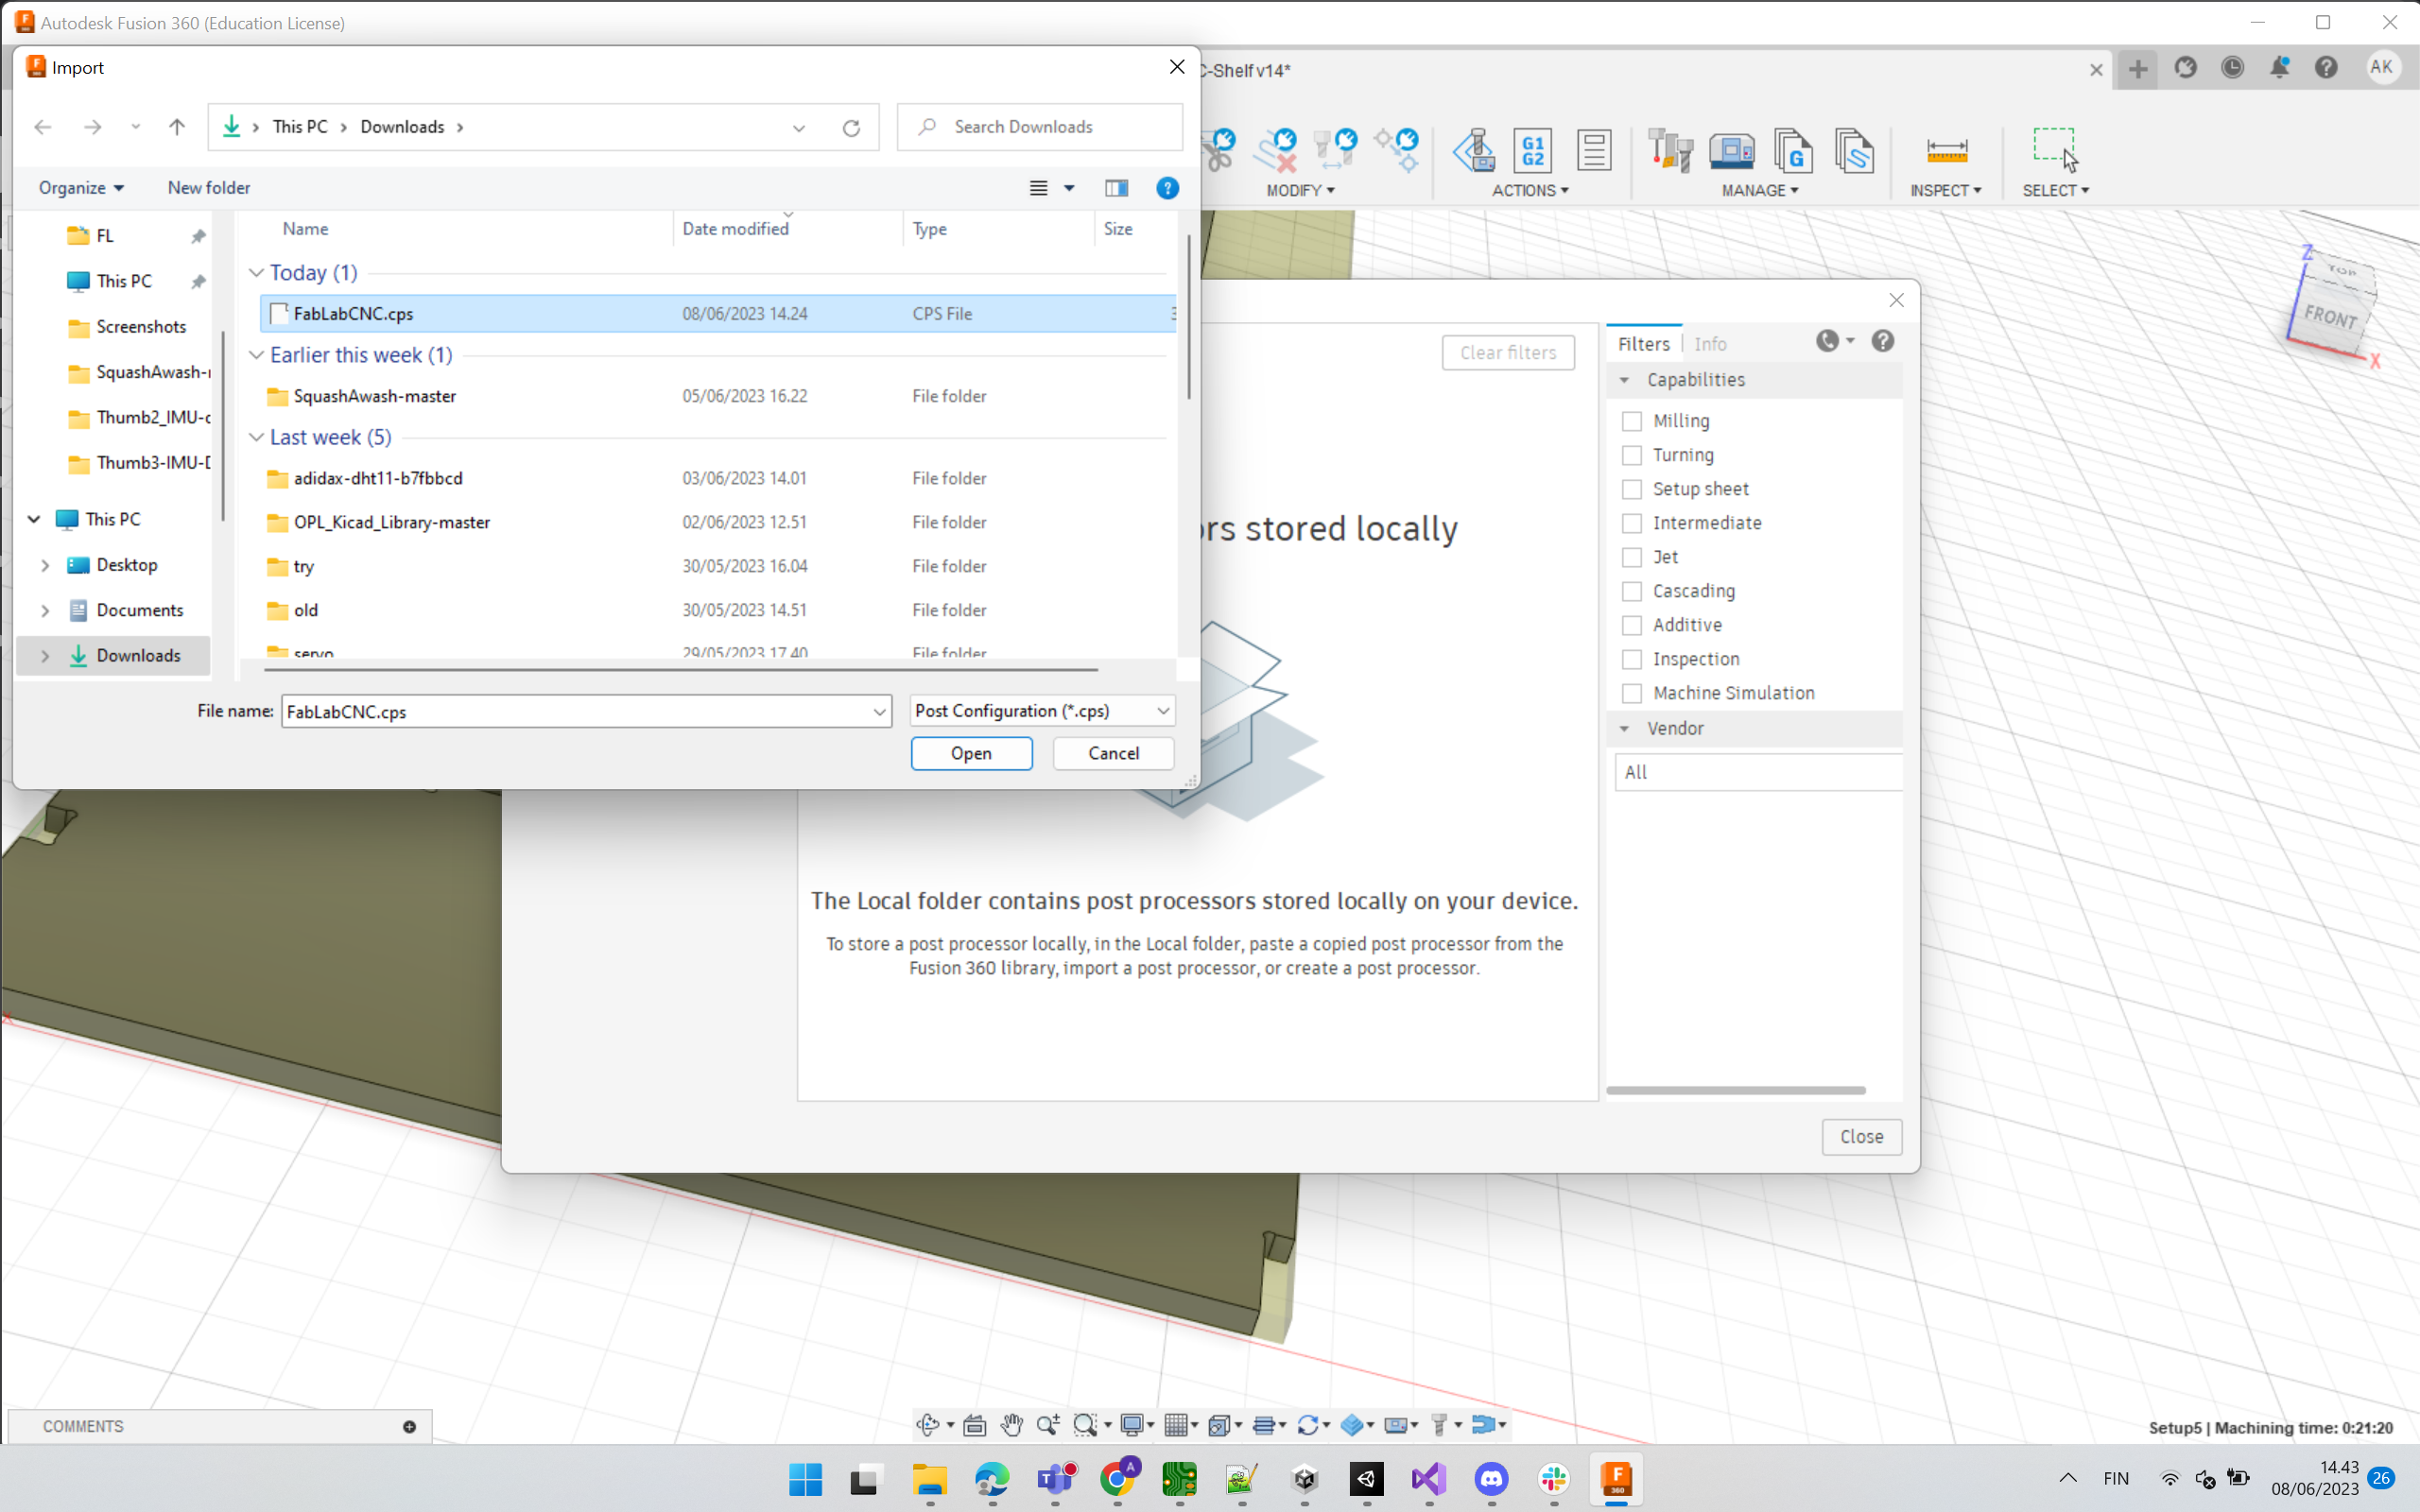
Then we select the setup or toolpath(s) that we want to export. We select default options in the next pop-ups after ensuring that we have the correct post-processor.
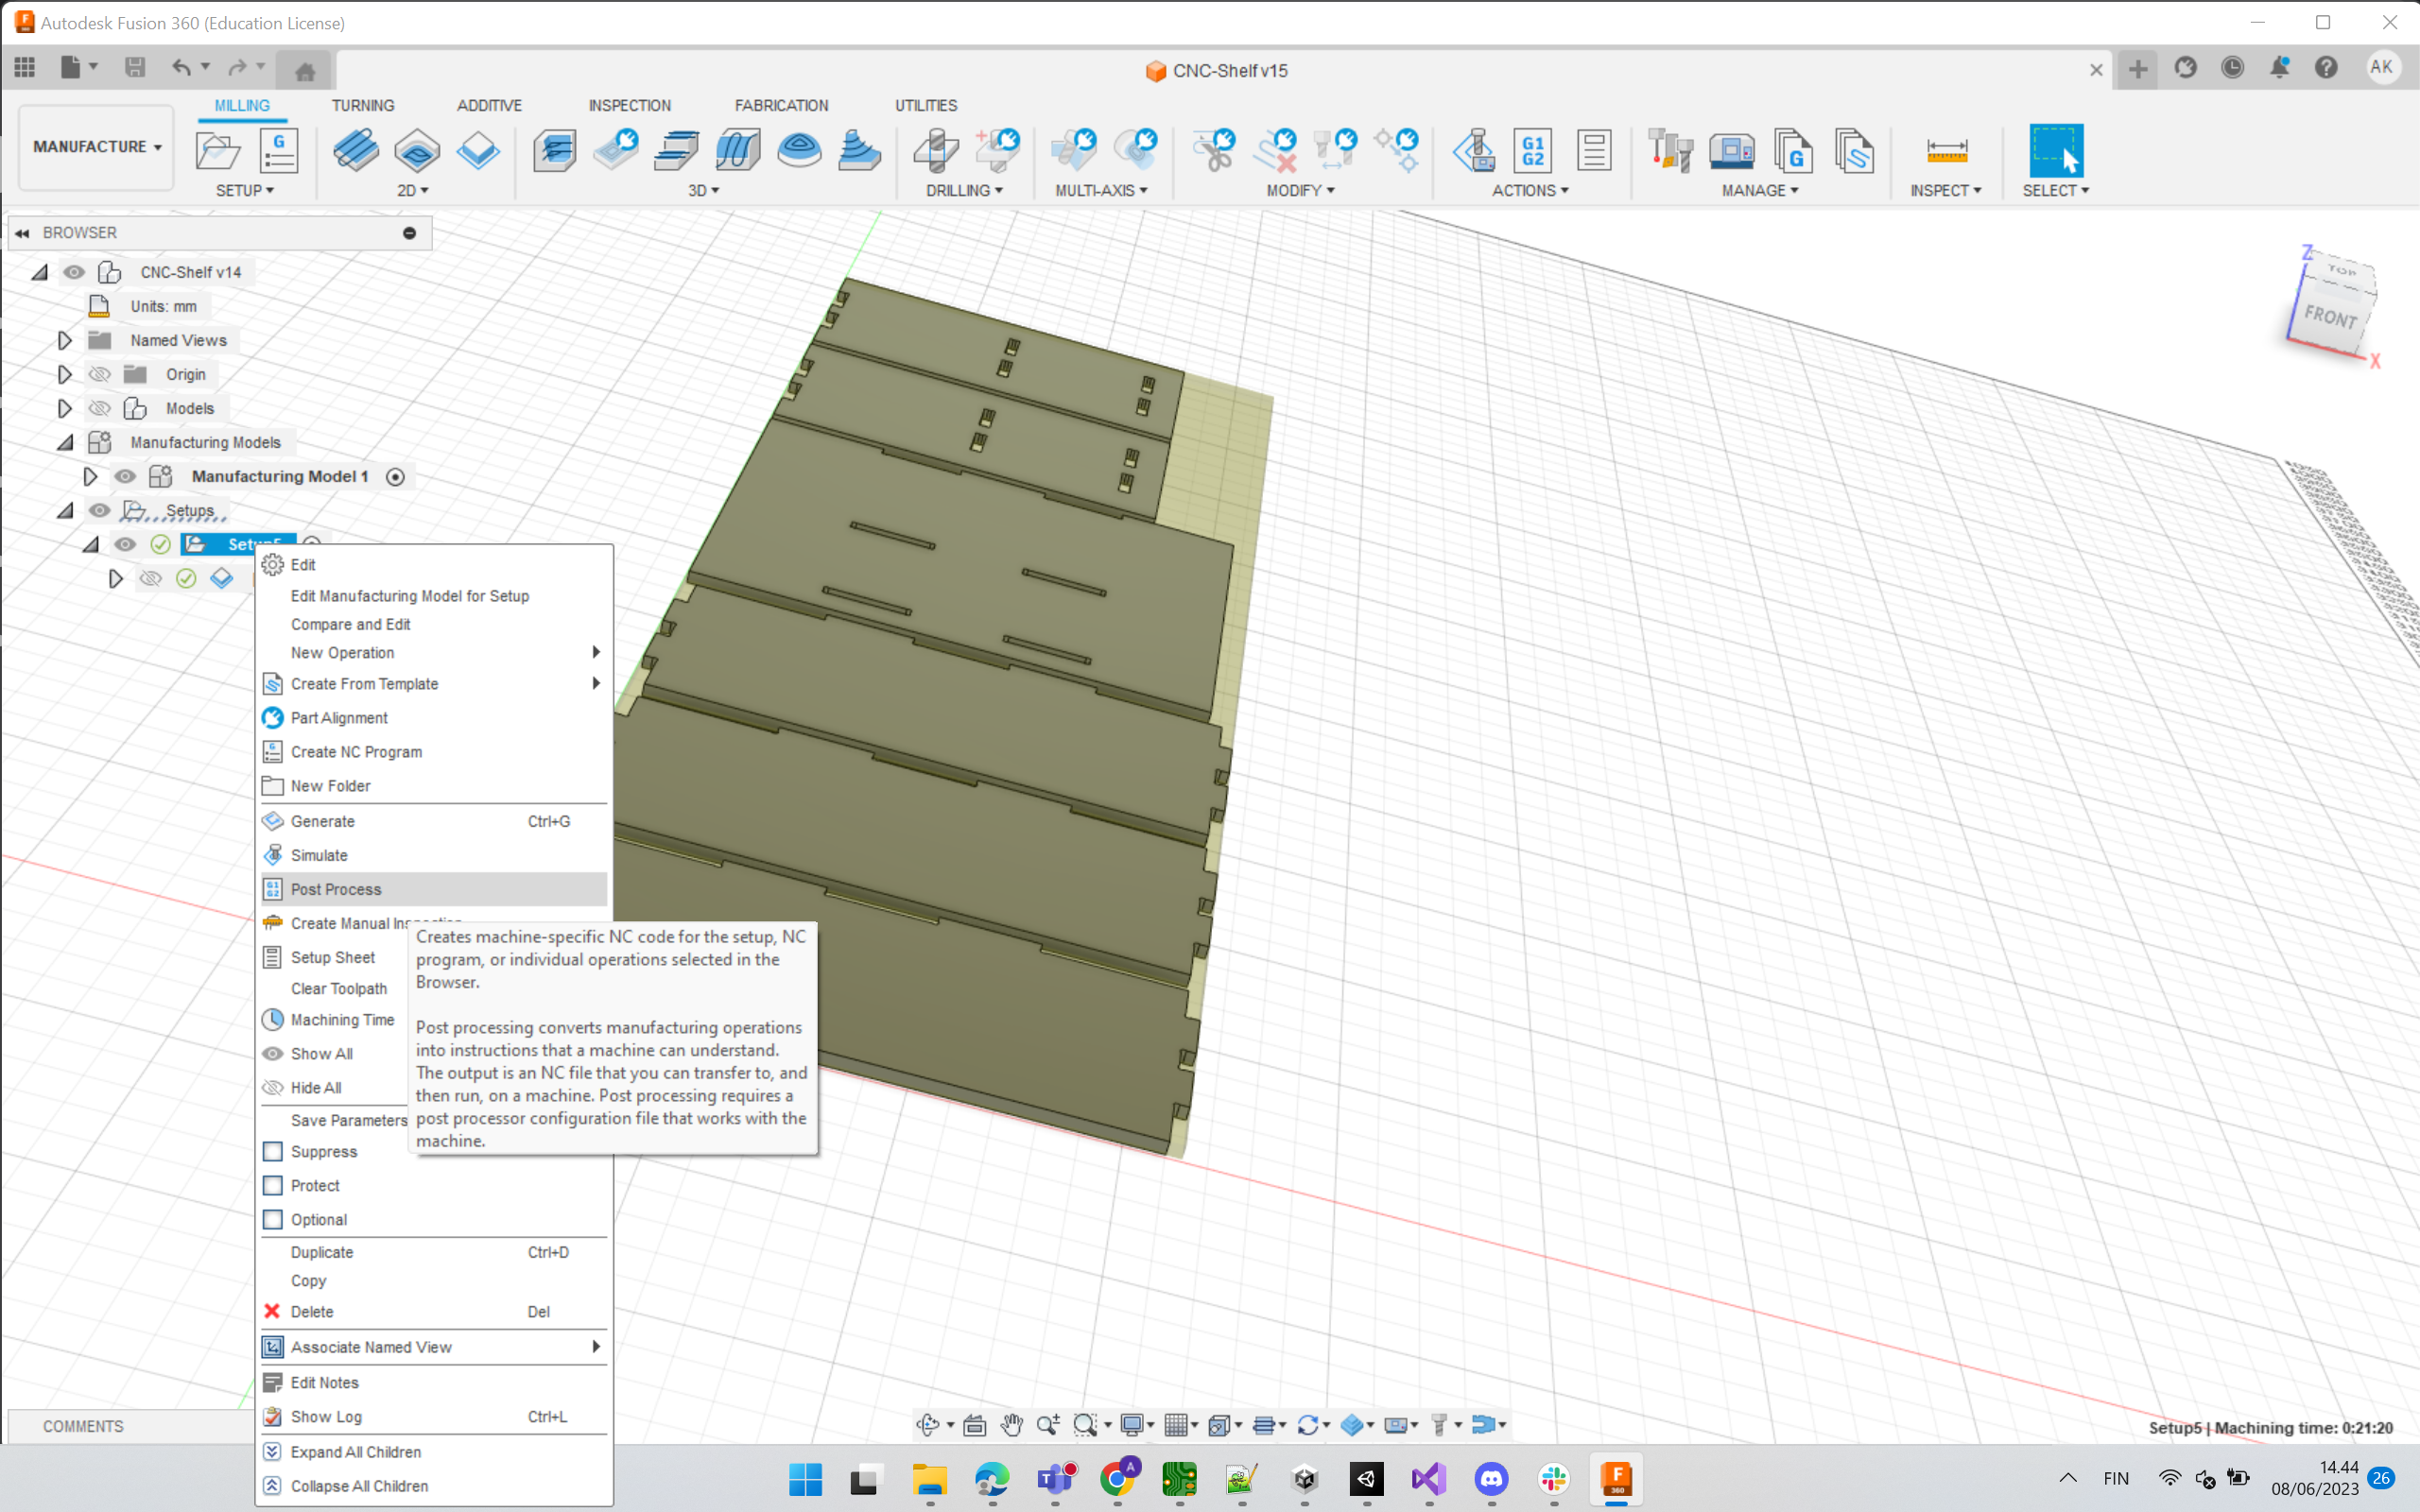
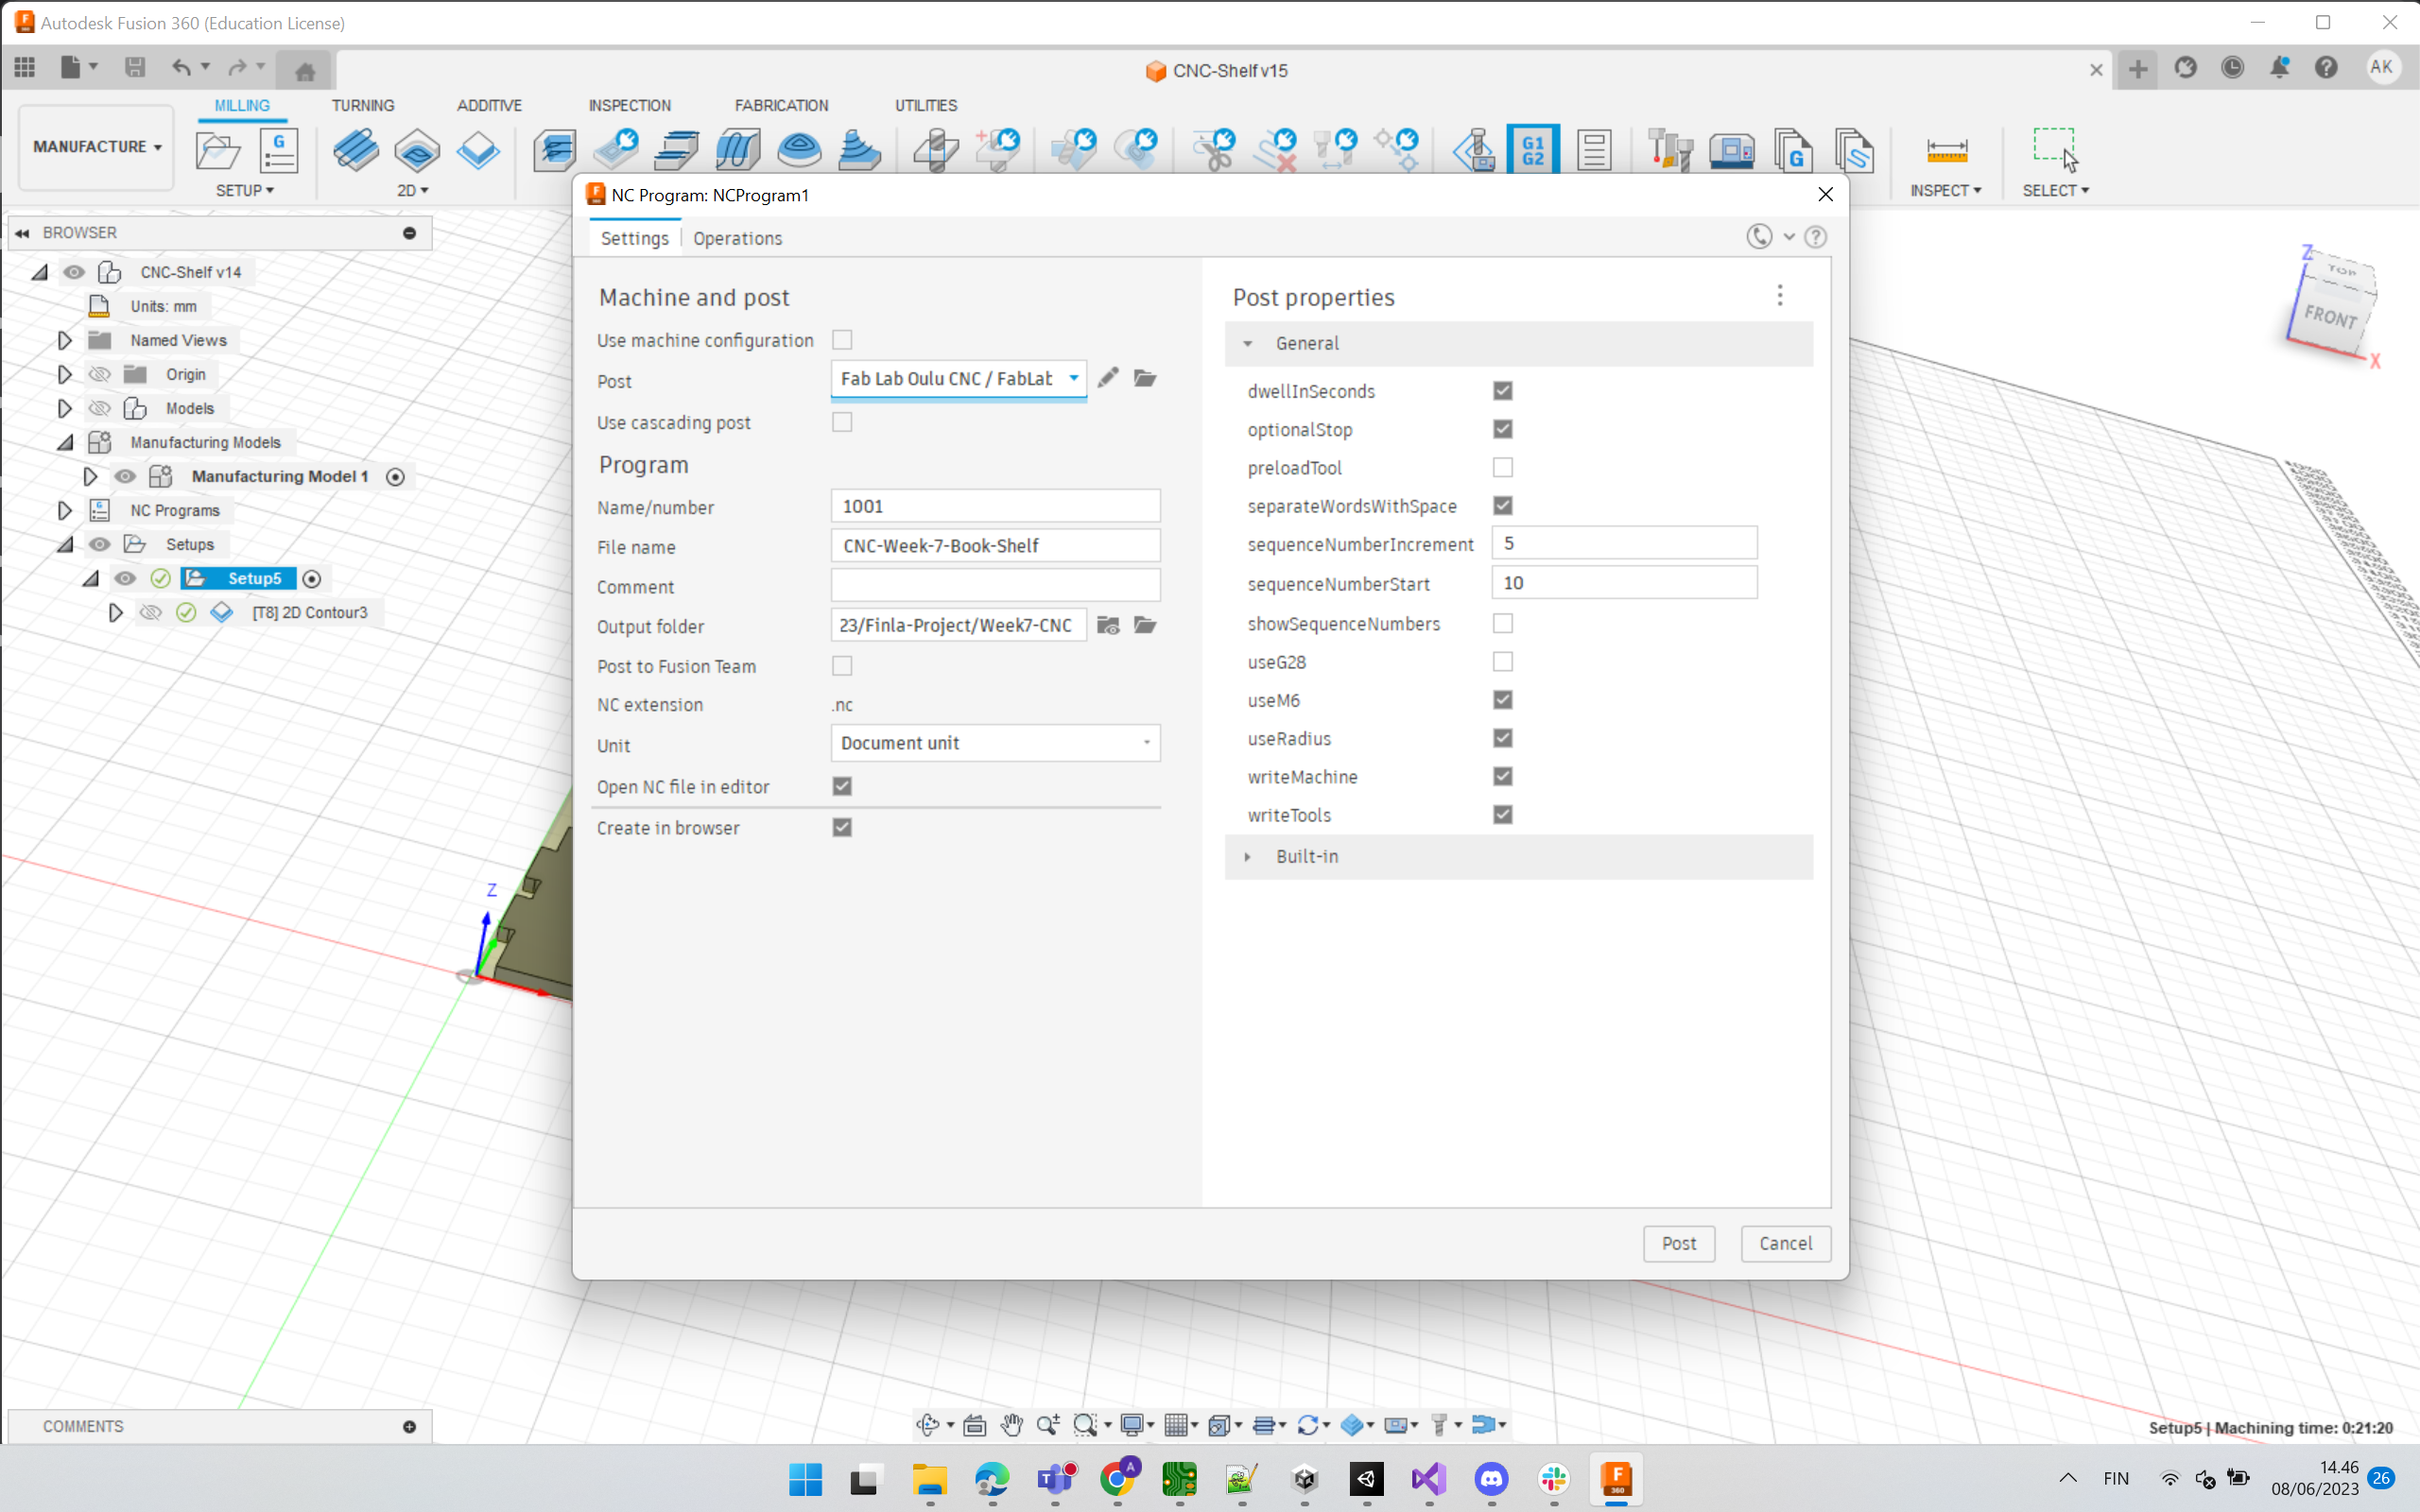
It generates an NC file which we need to do cutting with the Rensi E2-1325 CNC milling machine. NC source file is included below on this page.
Machining
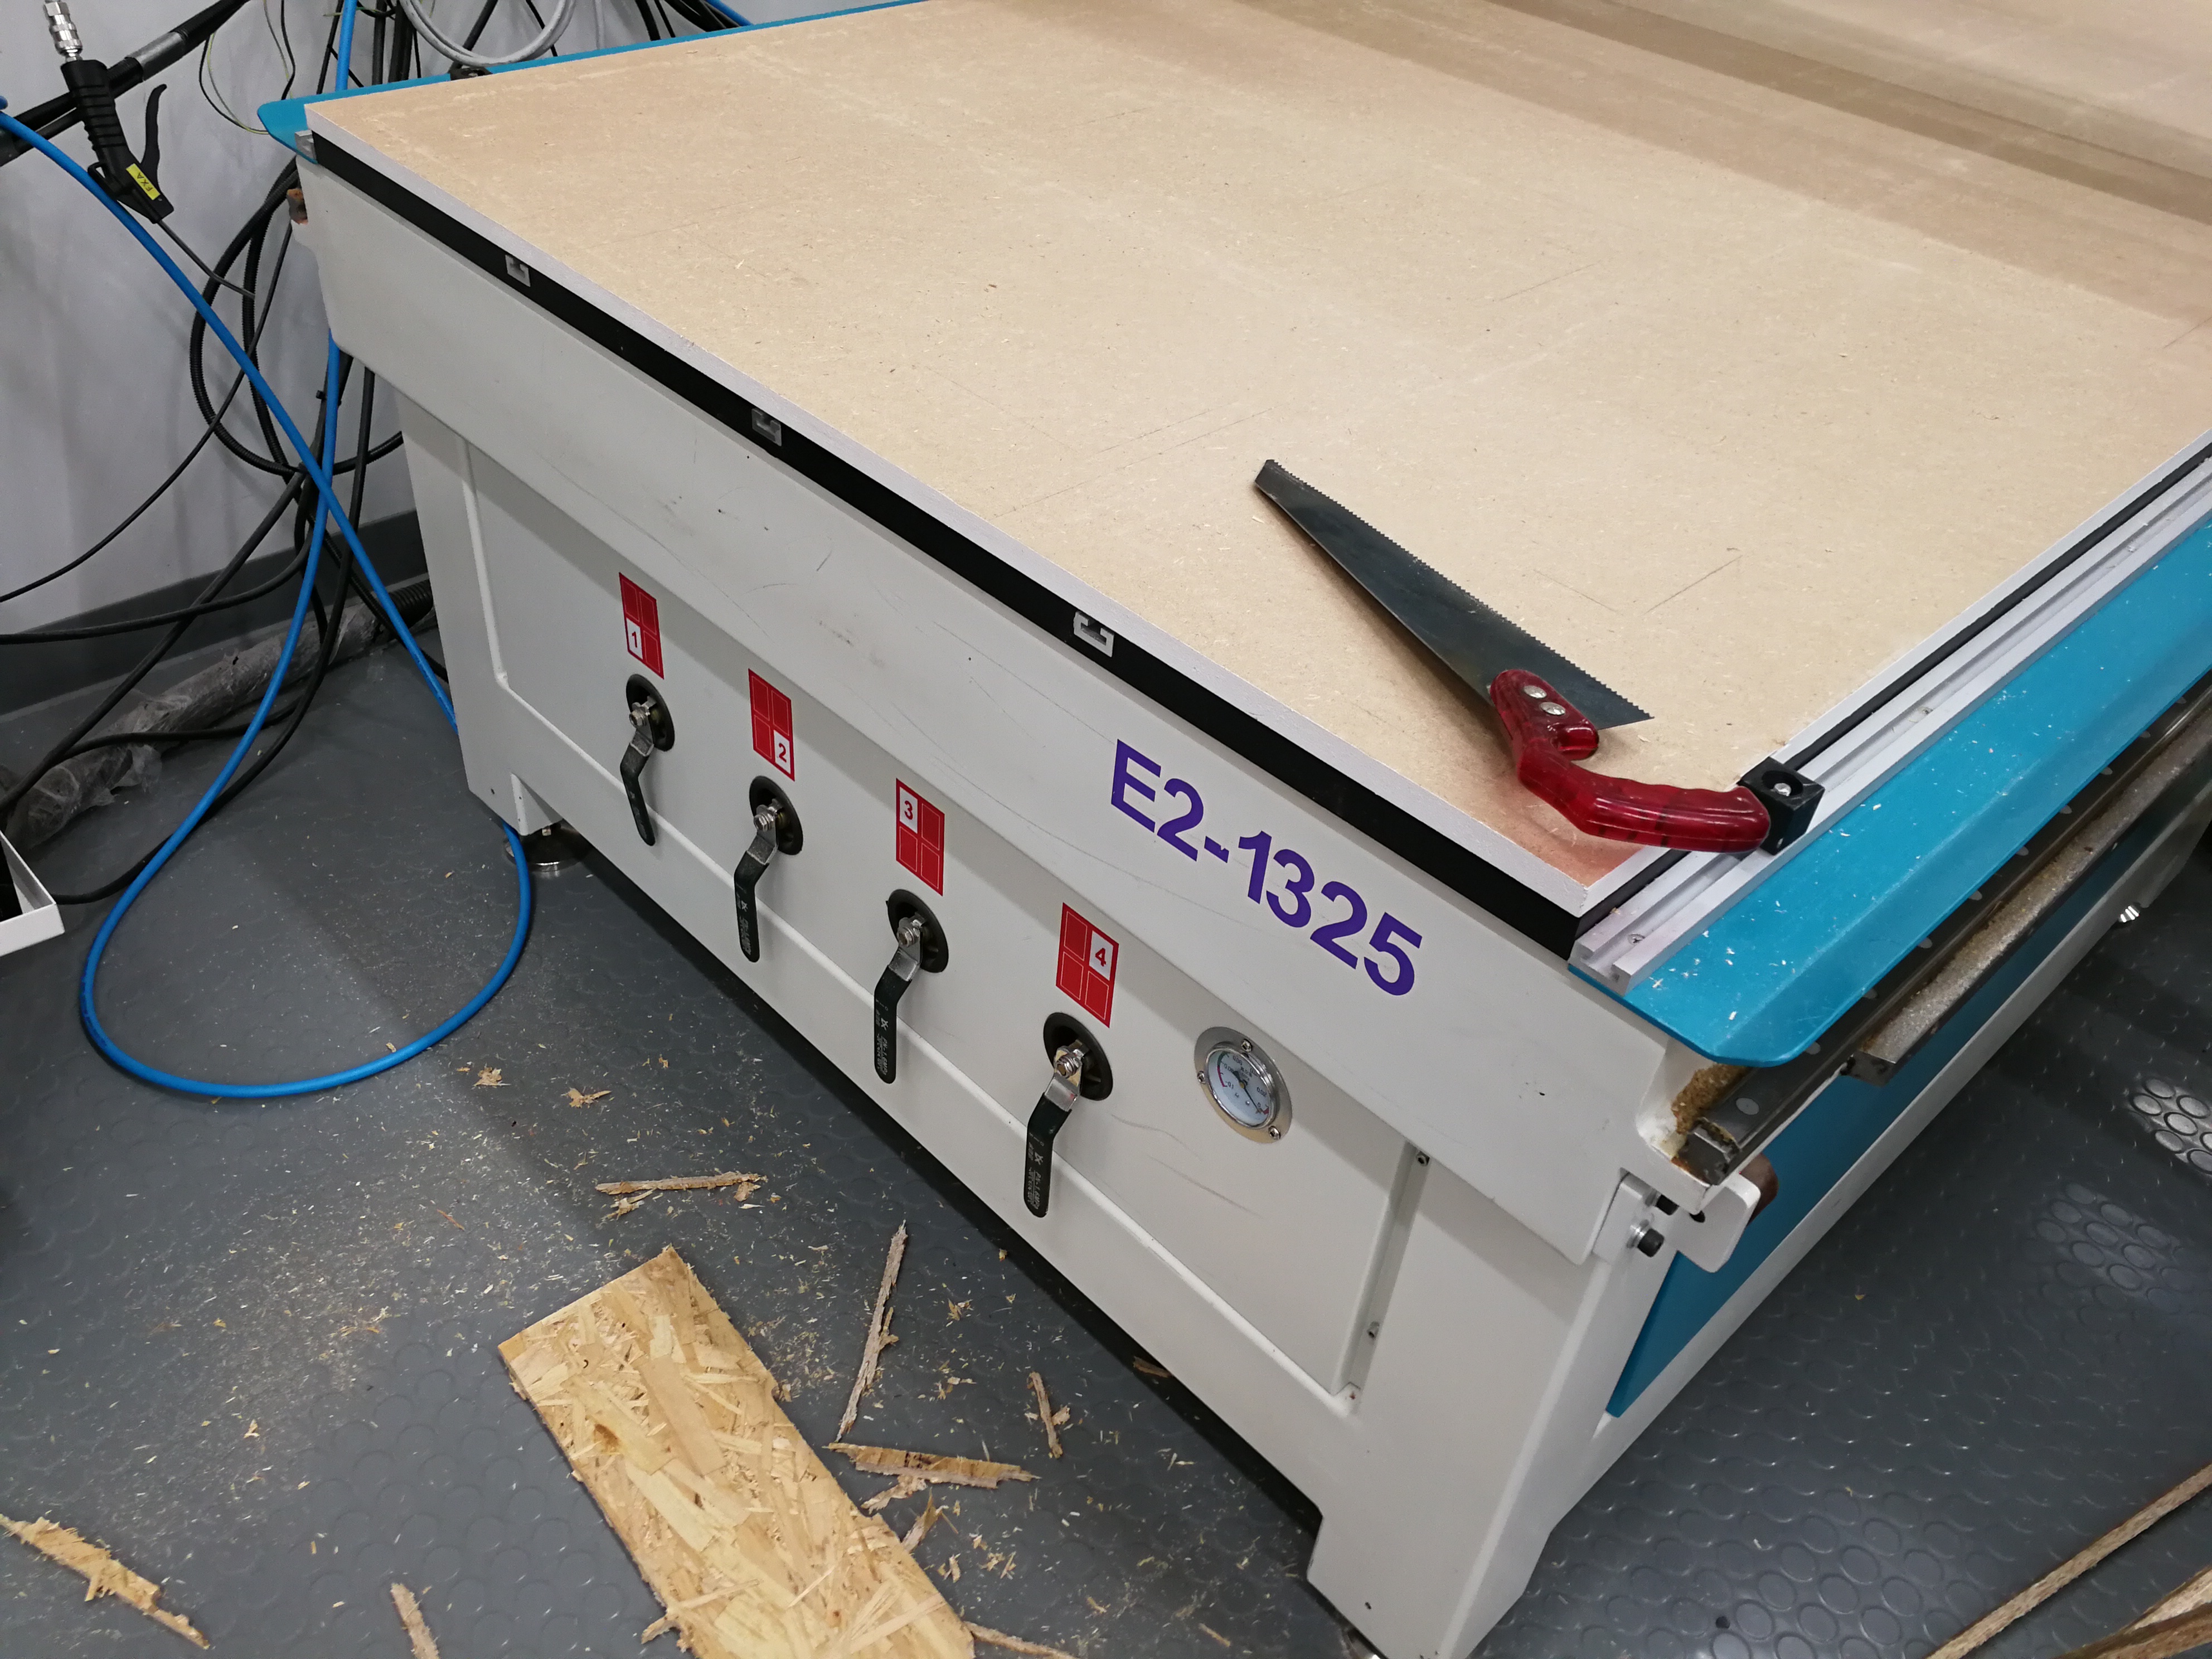
I used the Rensi E2-1325 CNC milling machine available in our lab. It has a vacuum table. There is a big ventilation for airflow.
The following figures show the Rensi E2-1325 CNC milling machine available in our lab.
 Picture of our CNC machine connected with a computer
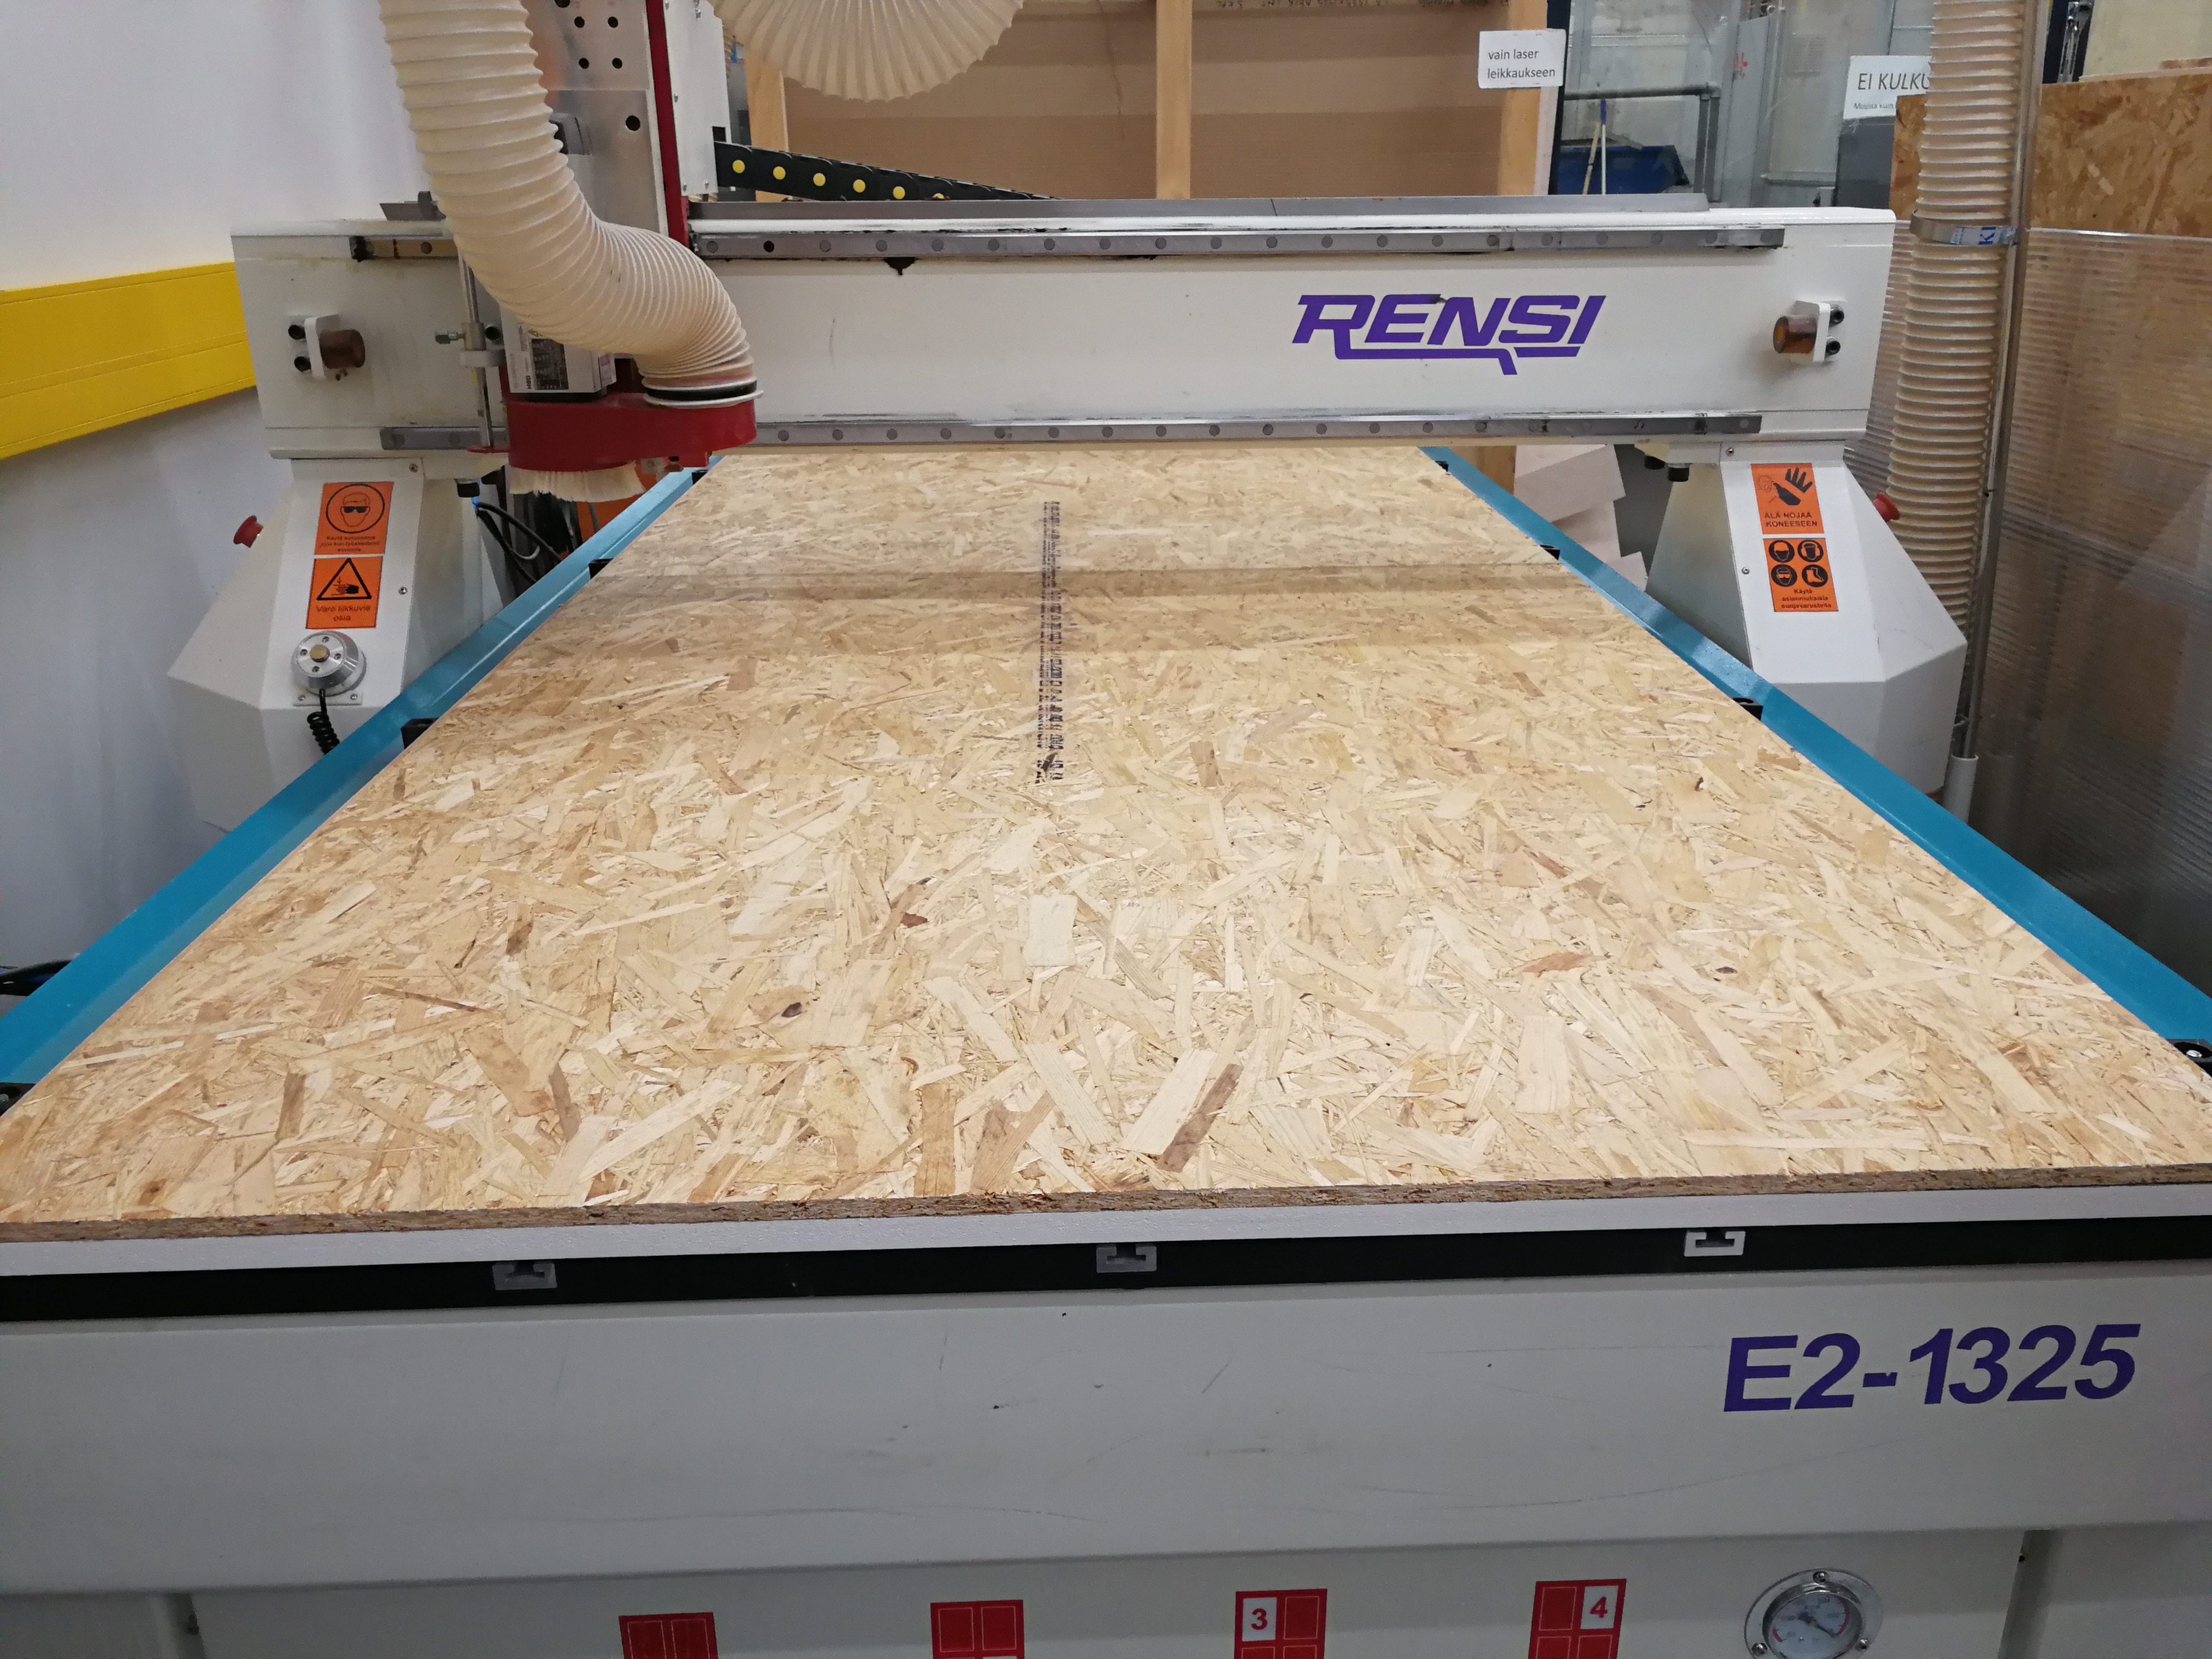 CNC machine
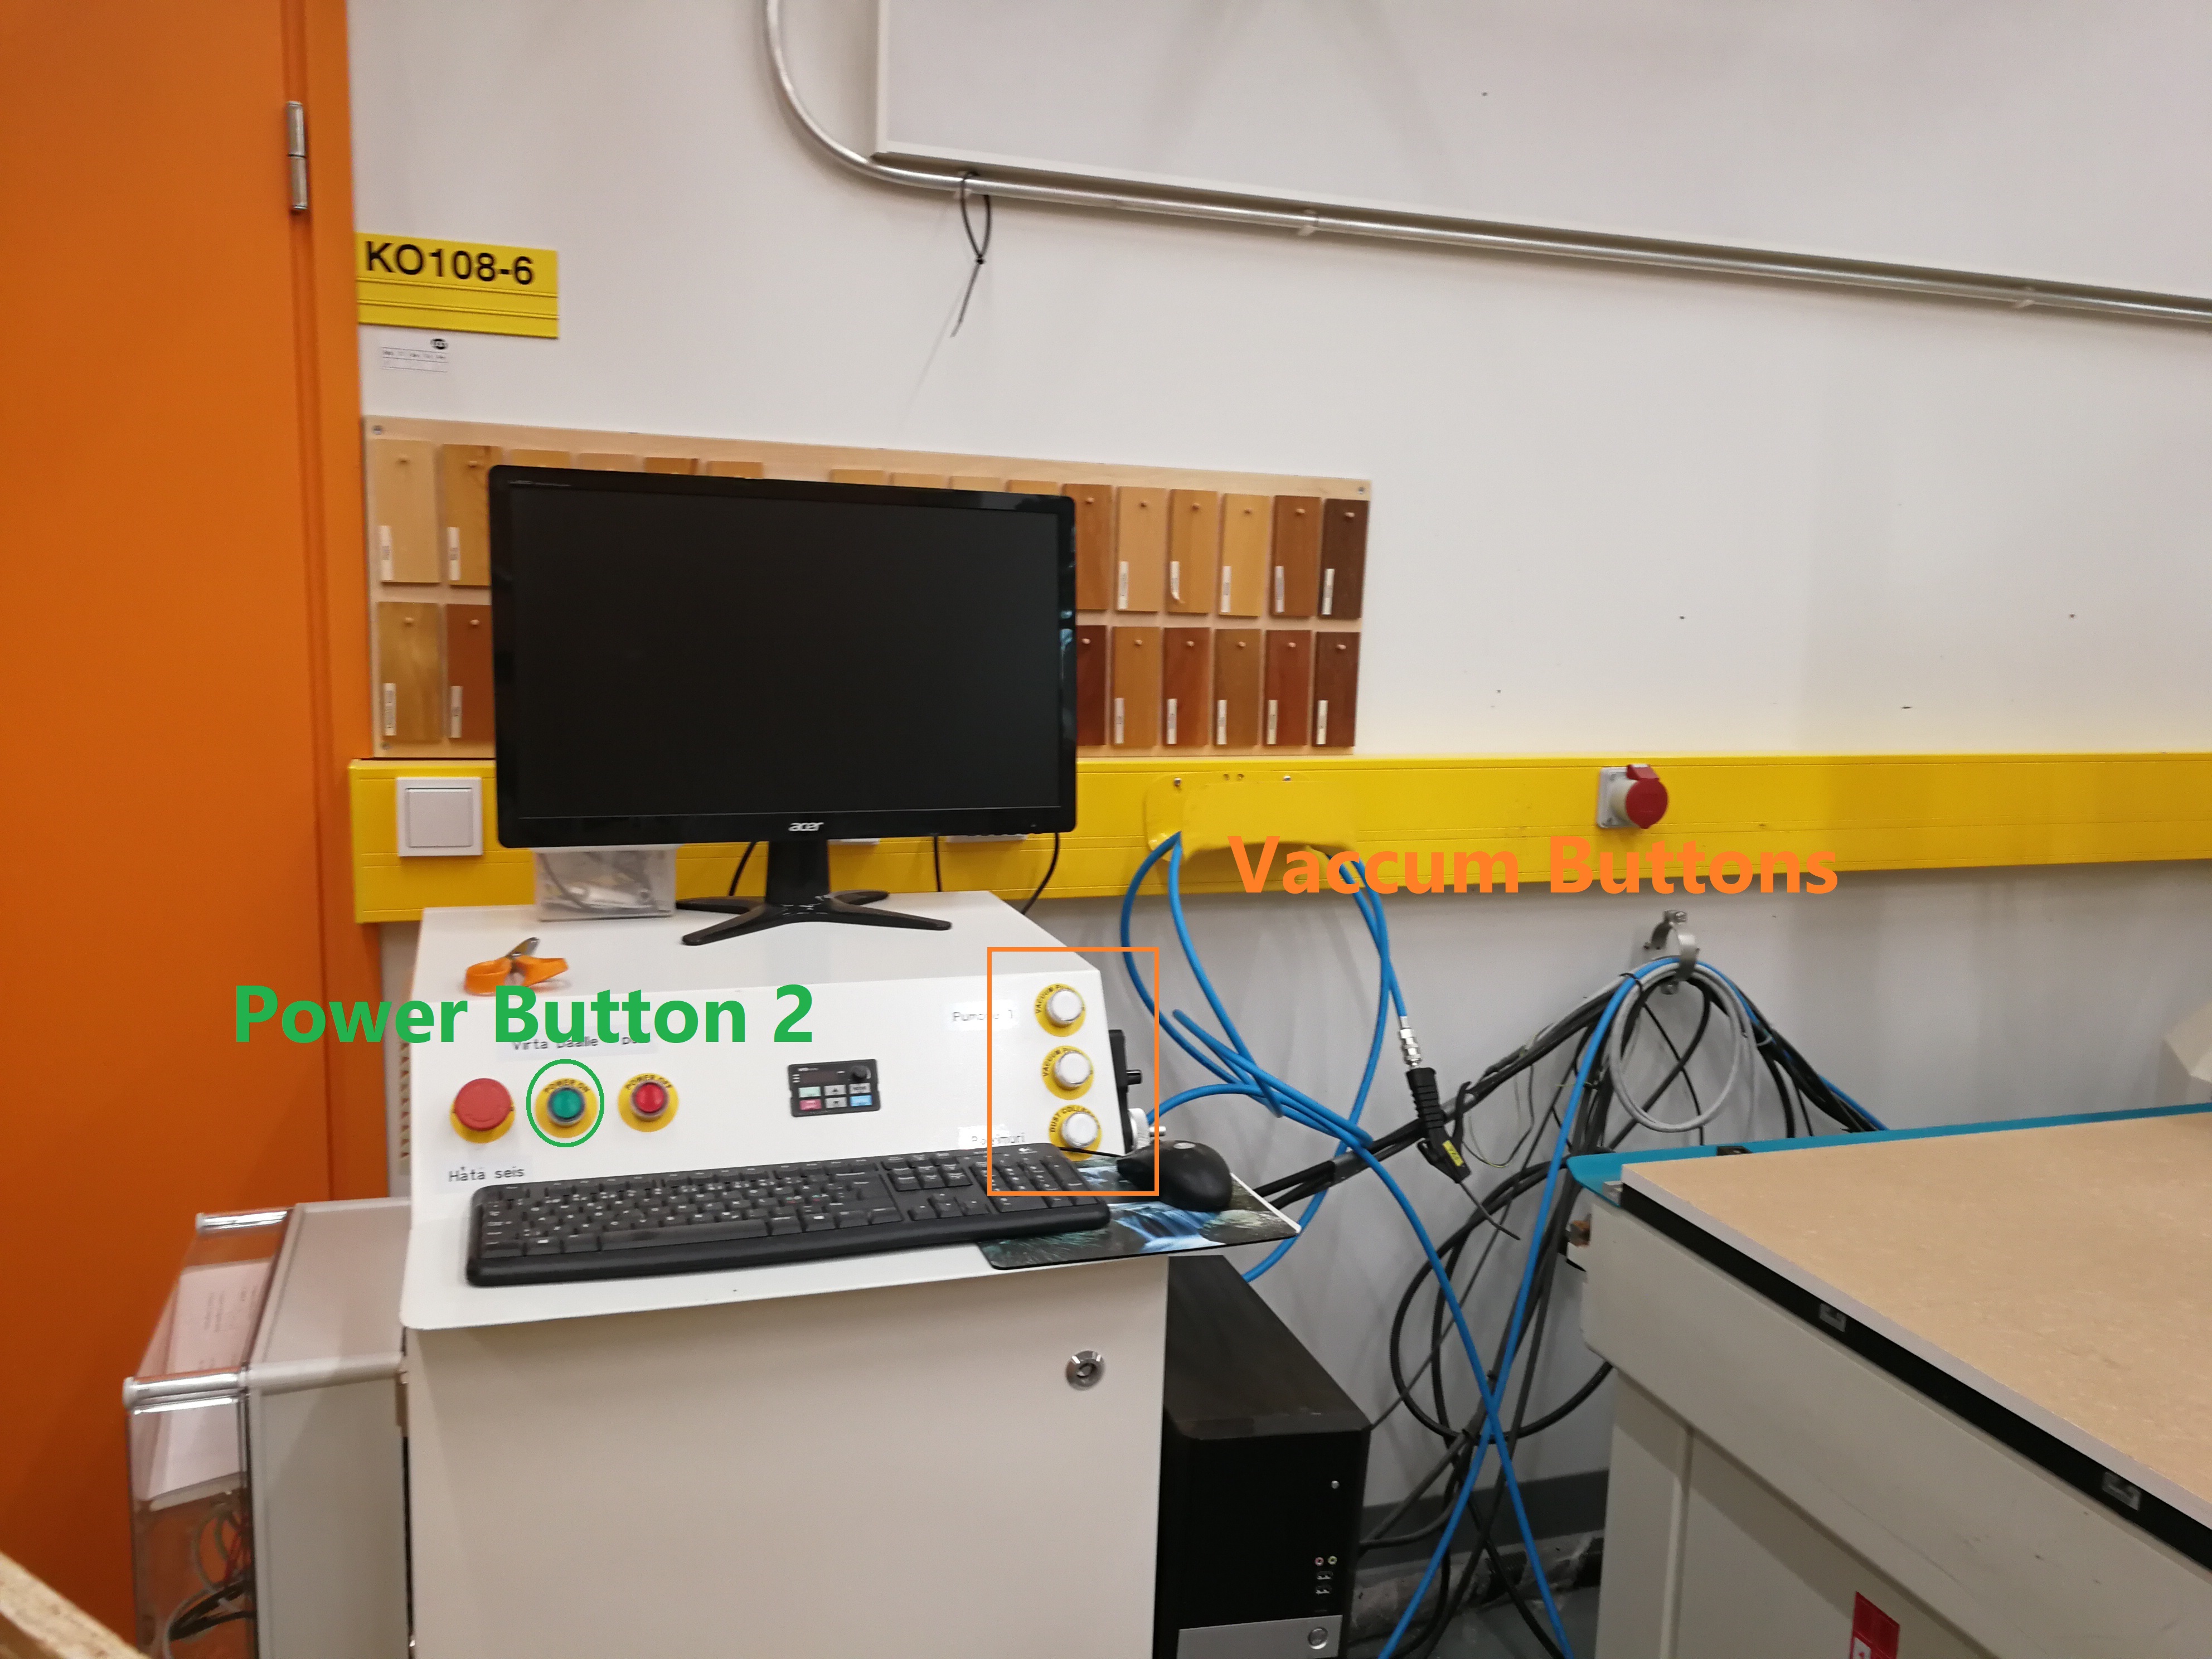
 Main power supply button of the CNC machine, located at the surface below the keyboard of the computer that controls CNC machine.
Next, I describe my steps to do machining (aka. cutting) with images and captions in sequential order as they were done during the lab work.
-
Step 1. Power on the machine by pressing main power button 1 (shown above in red circle) and power button 2 (shown above encircled in the green circle).
-
Step 2. Start the PC, and start the NcStudio program on it (already installed on PC). Now, the NC file should be loaded to NcStudio from the USB disk drive.
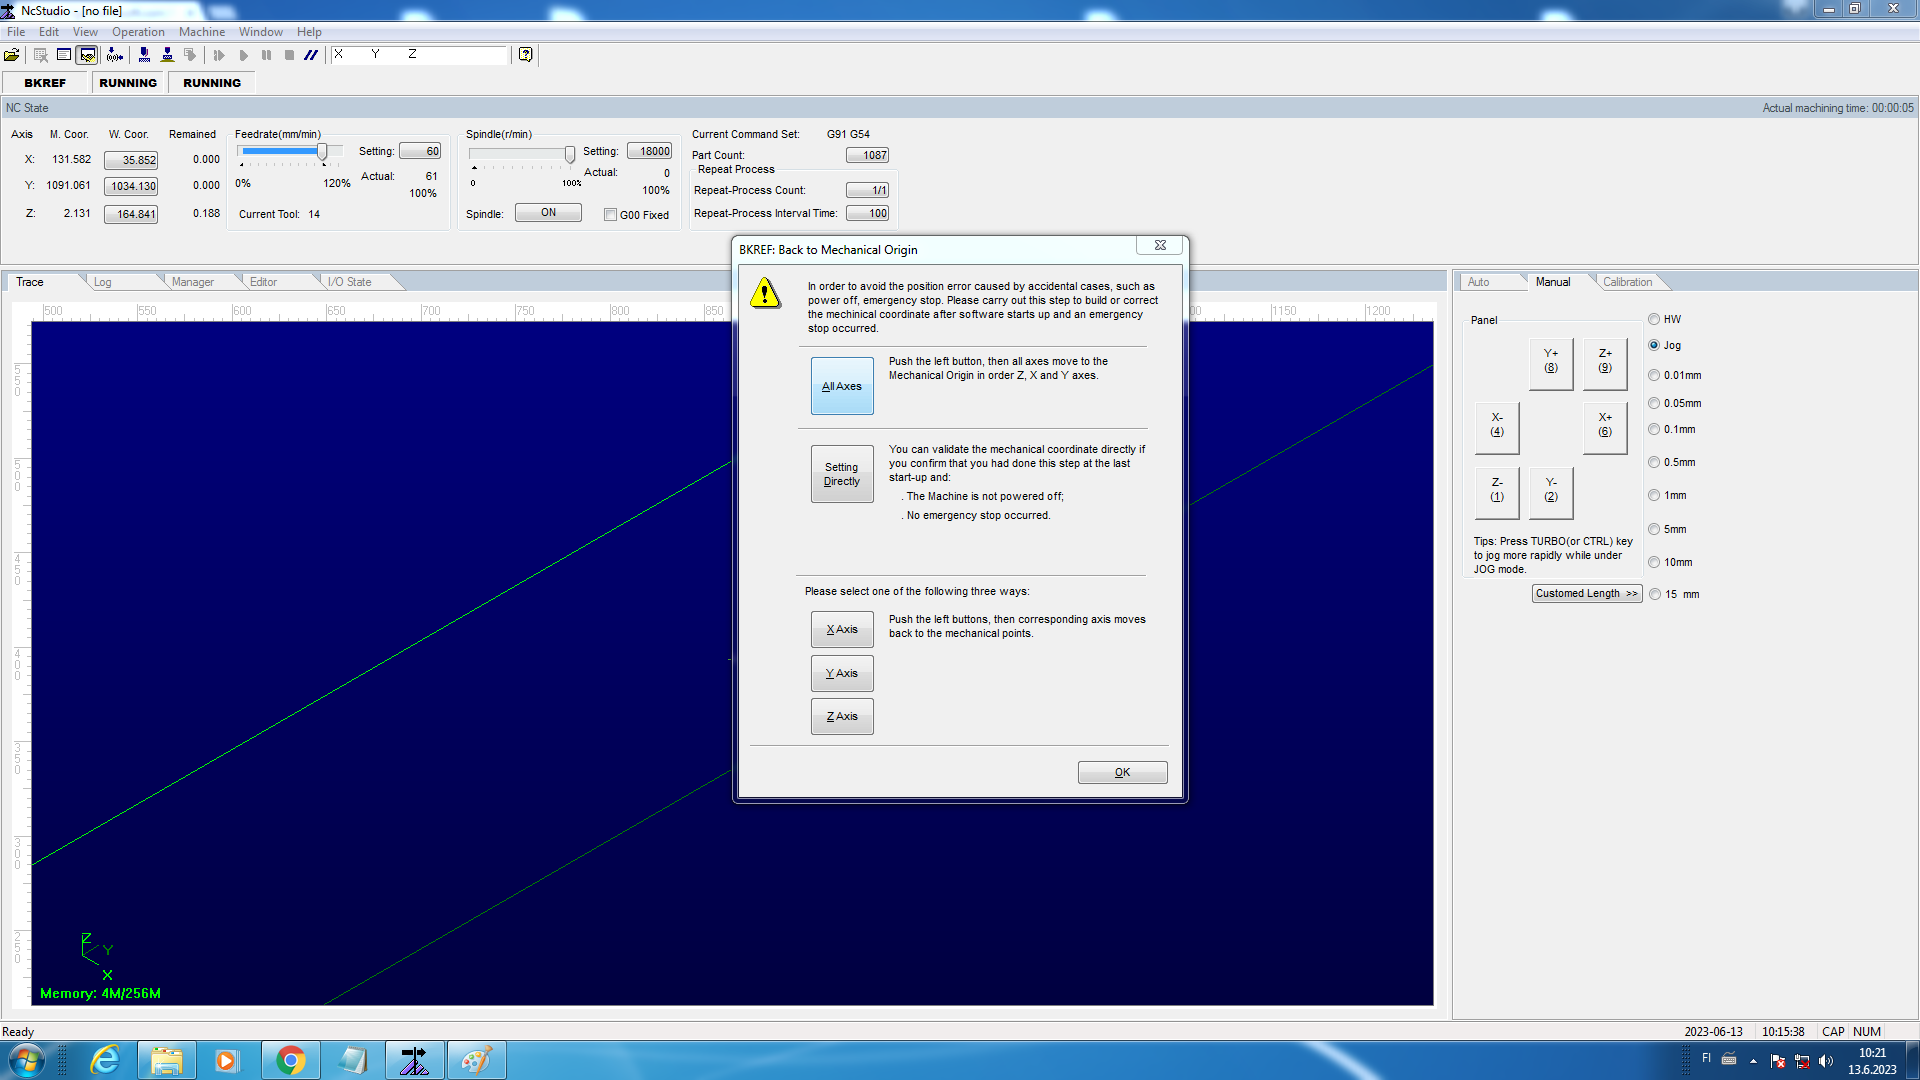 NcStudio program interface after starting it.
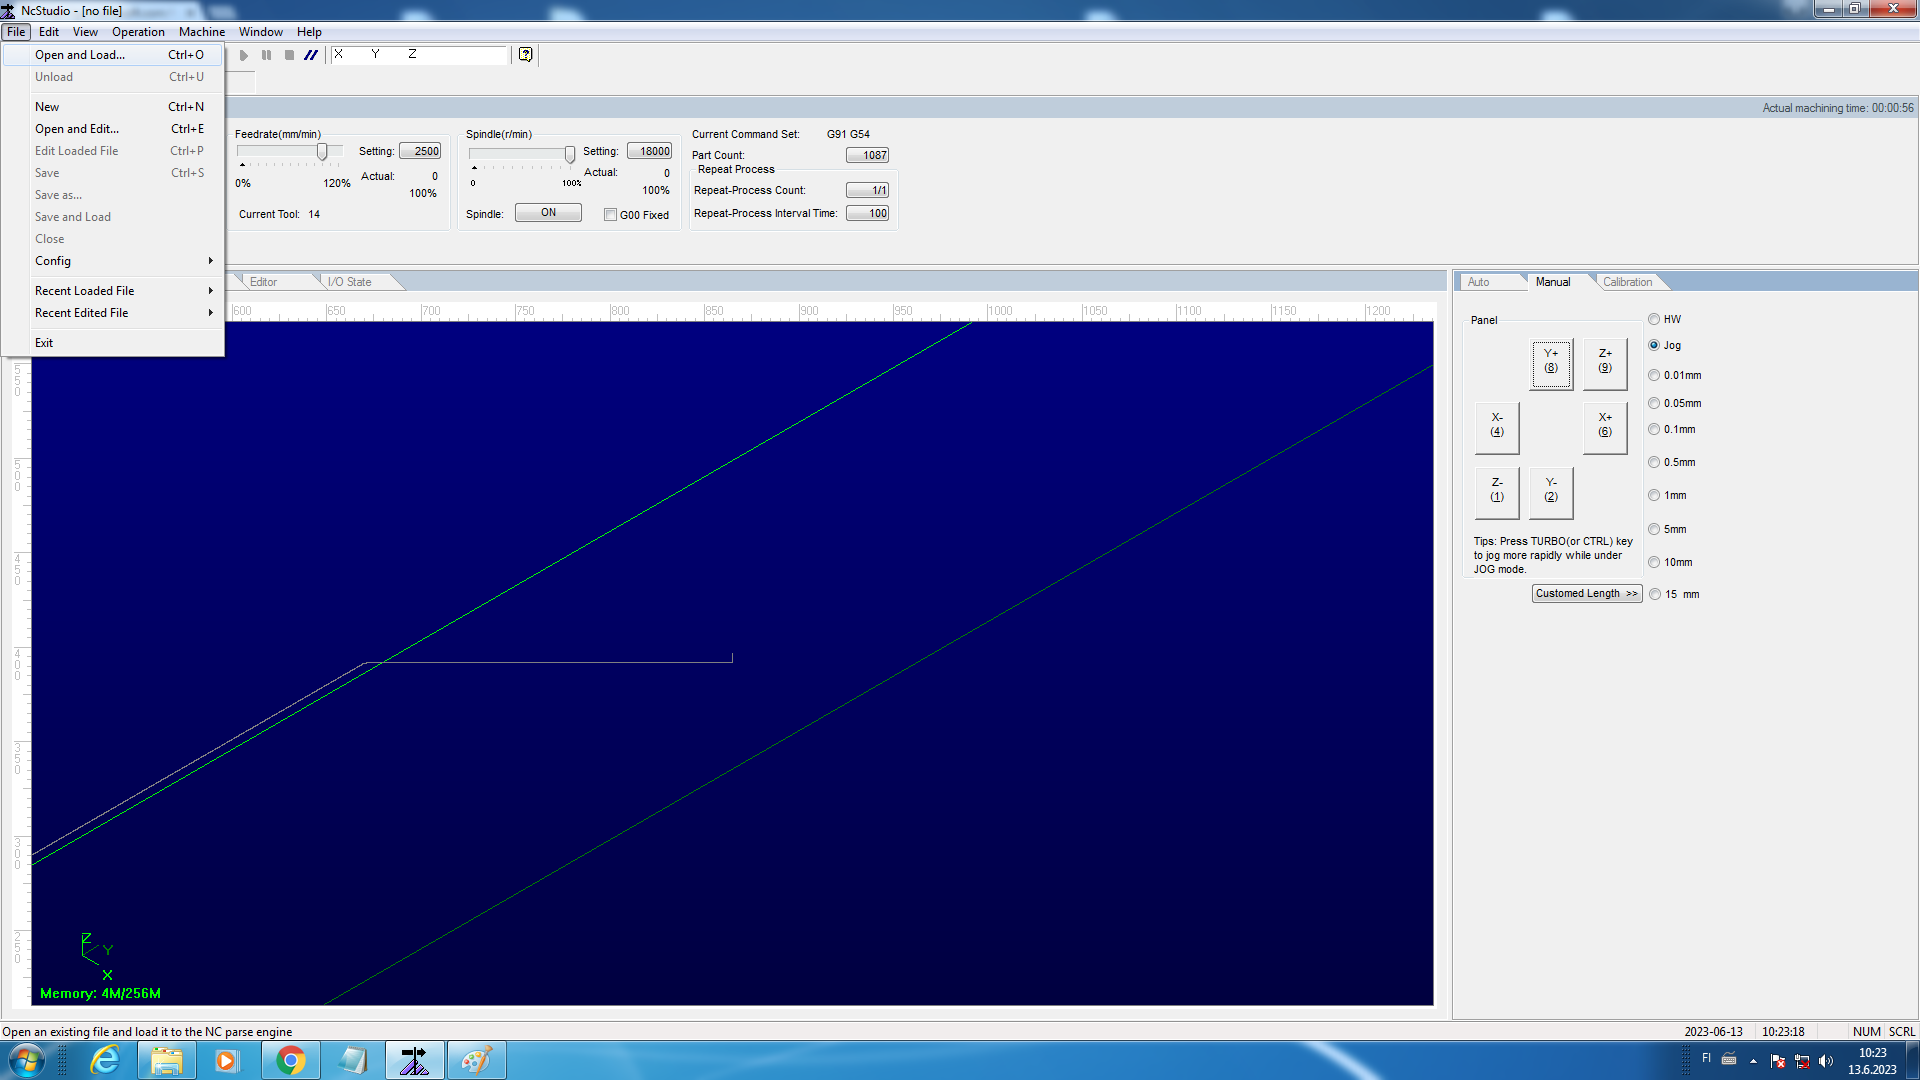 Step to load the NC file to NcStudio. Click File -> Open and Load… option
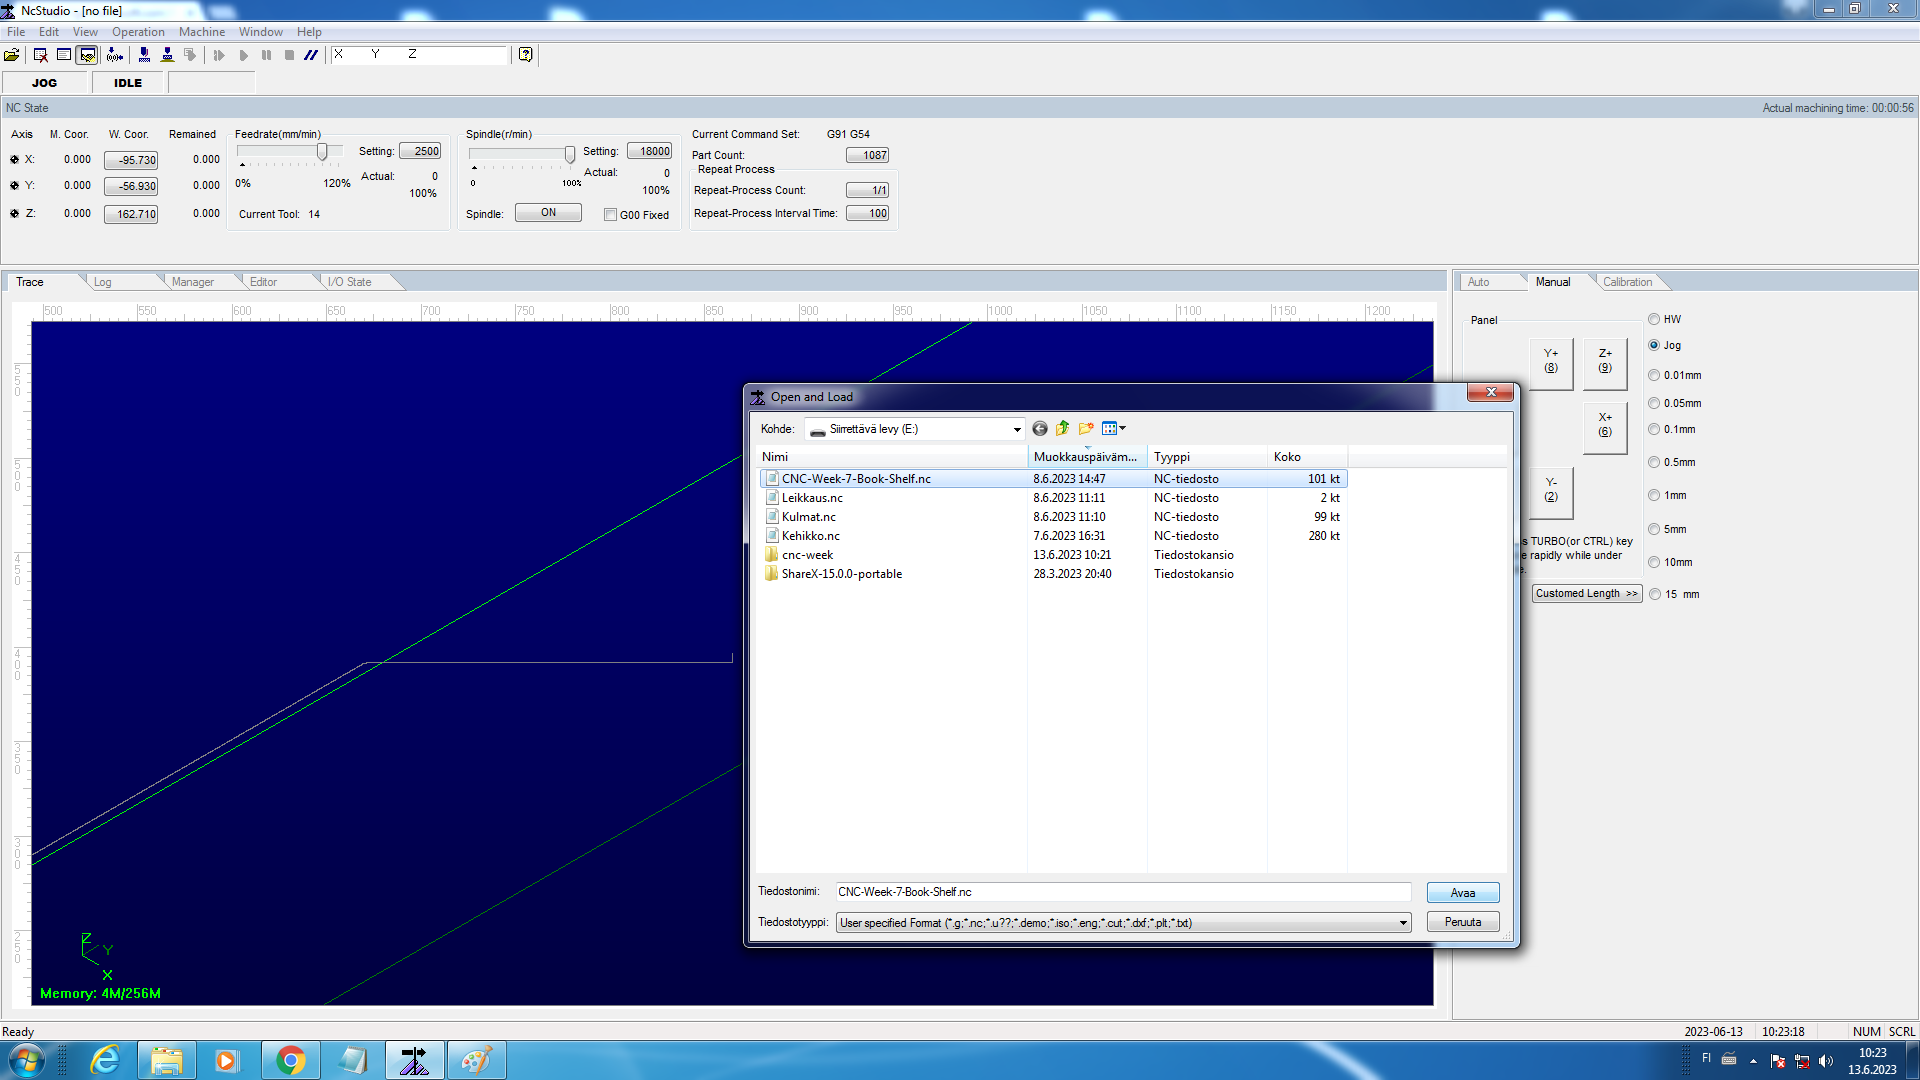 Selecting relevant NC file.
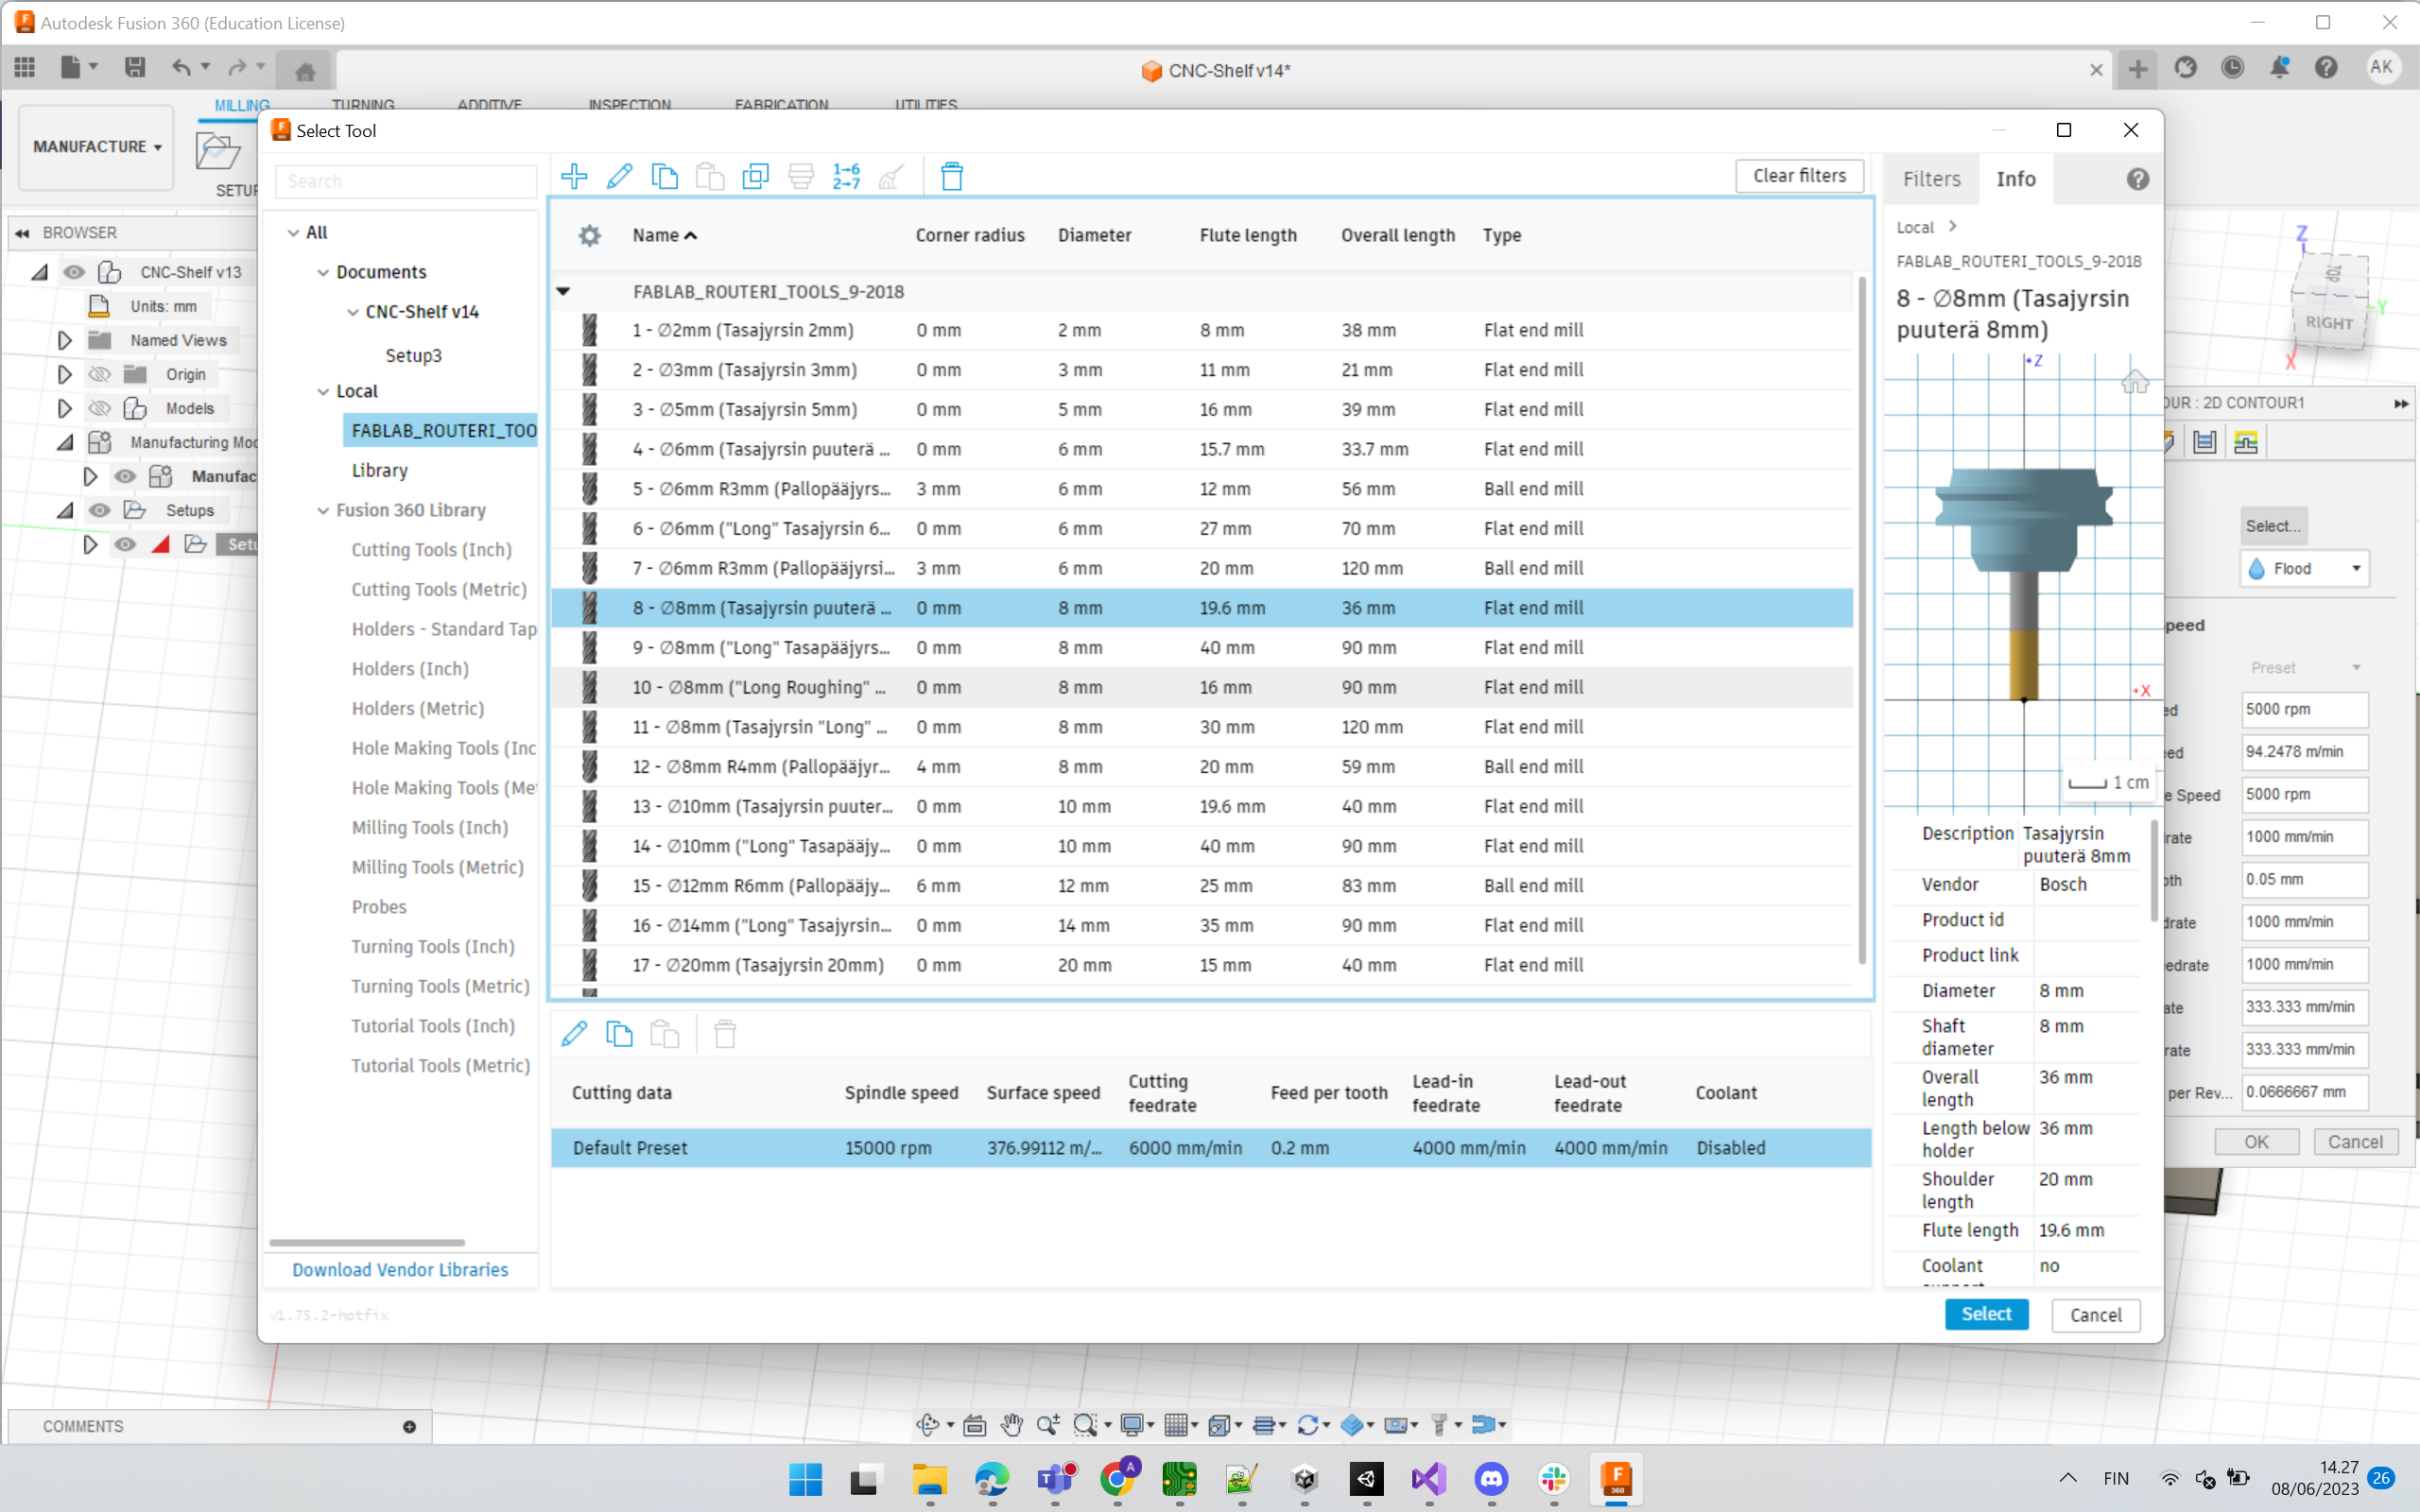
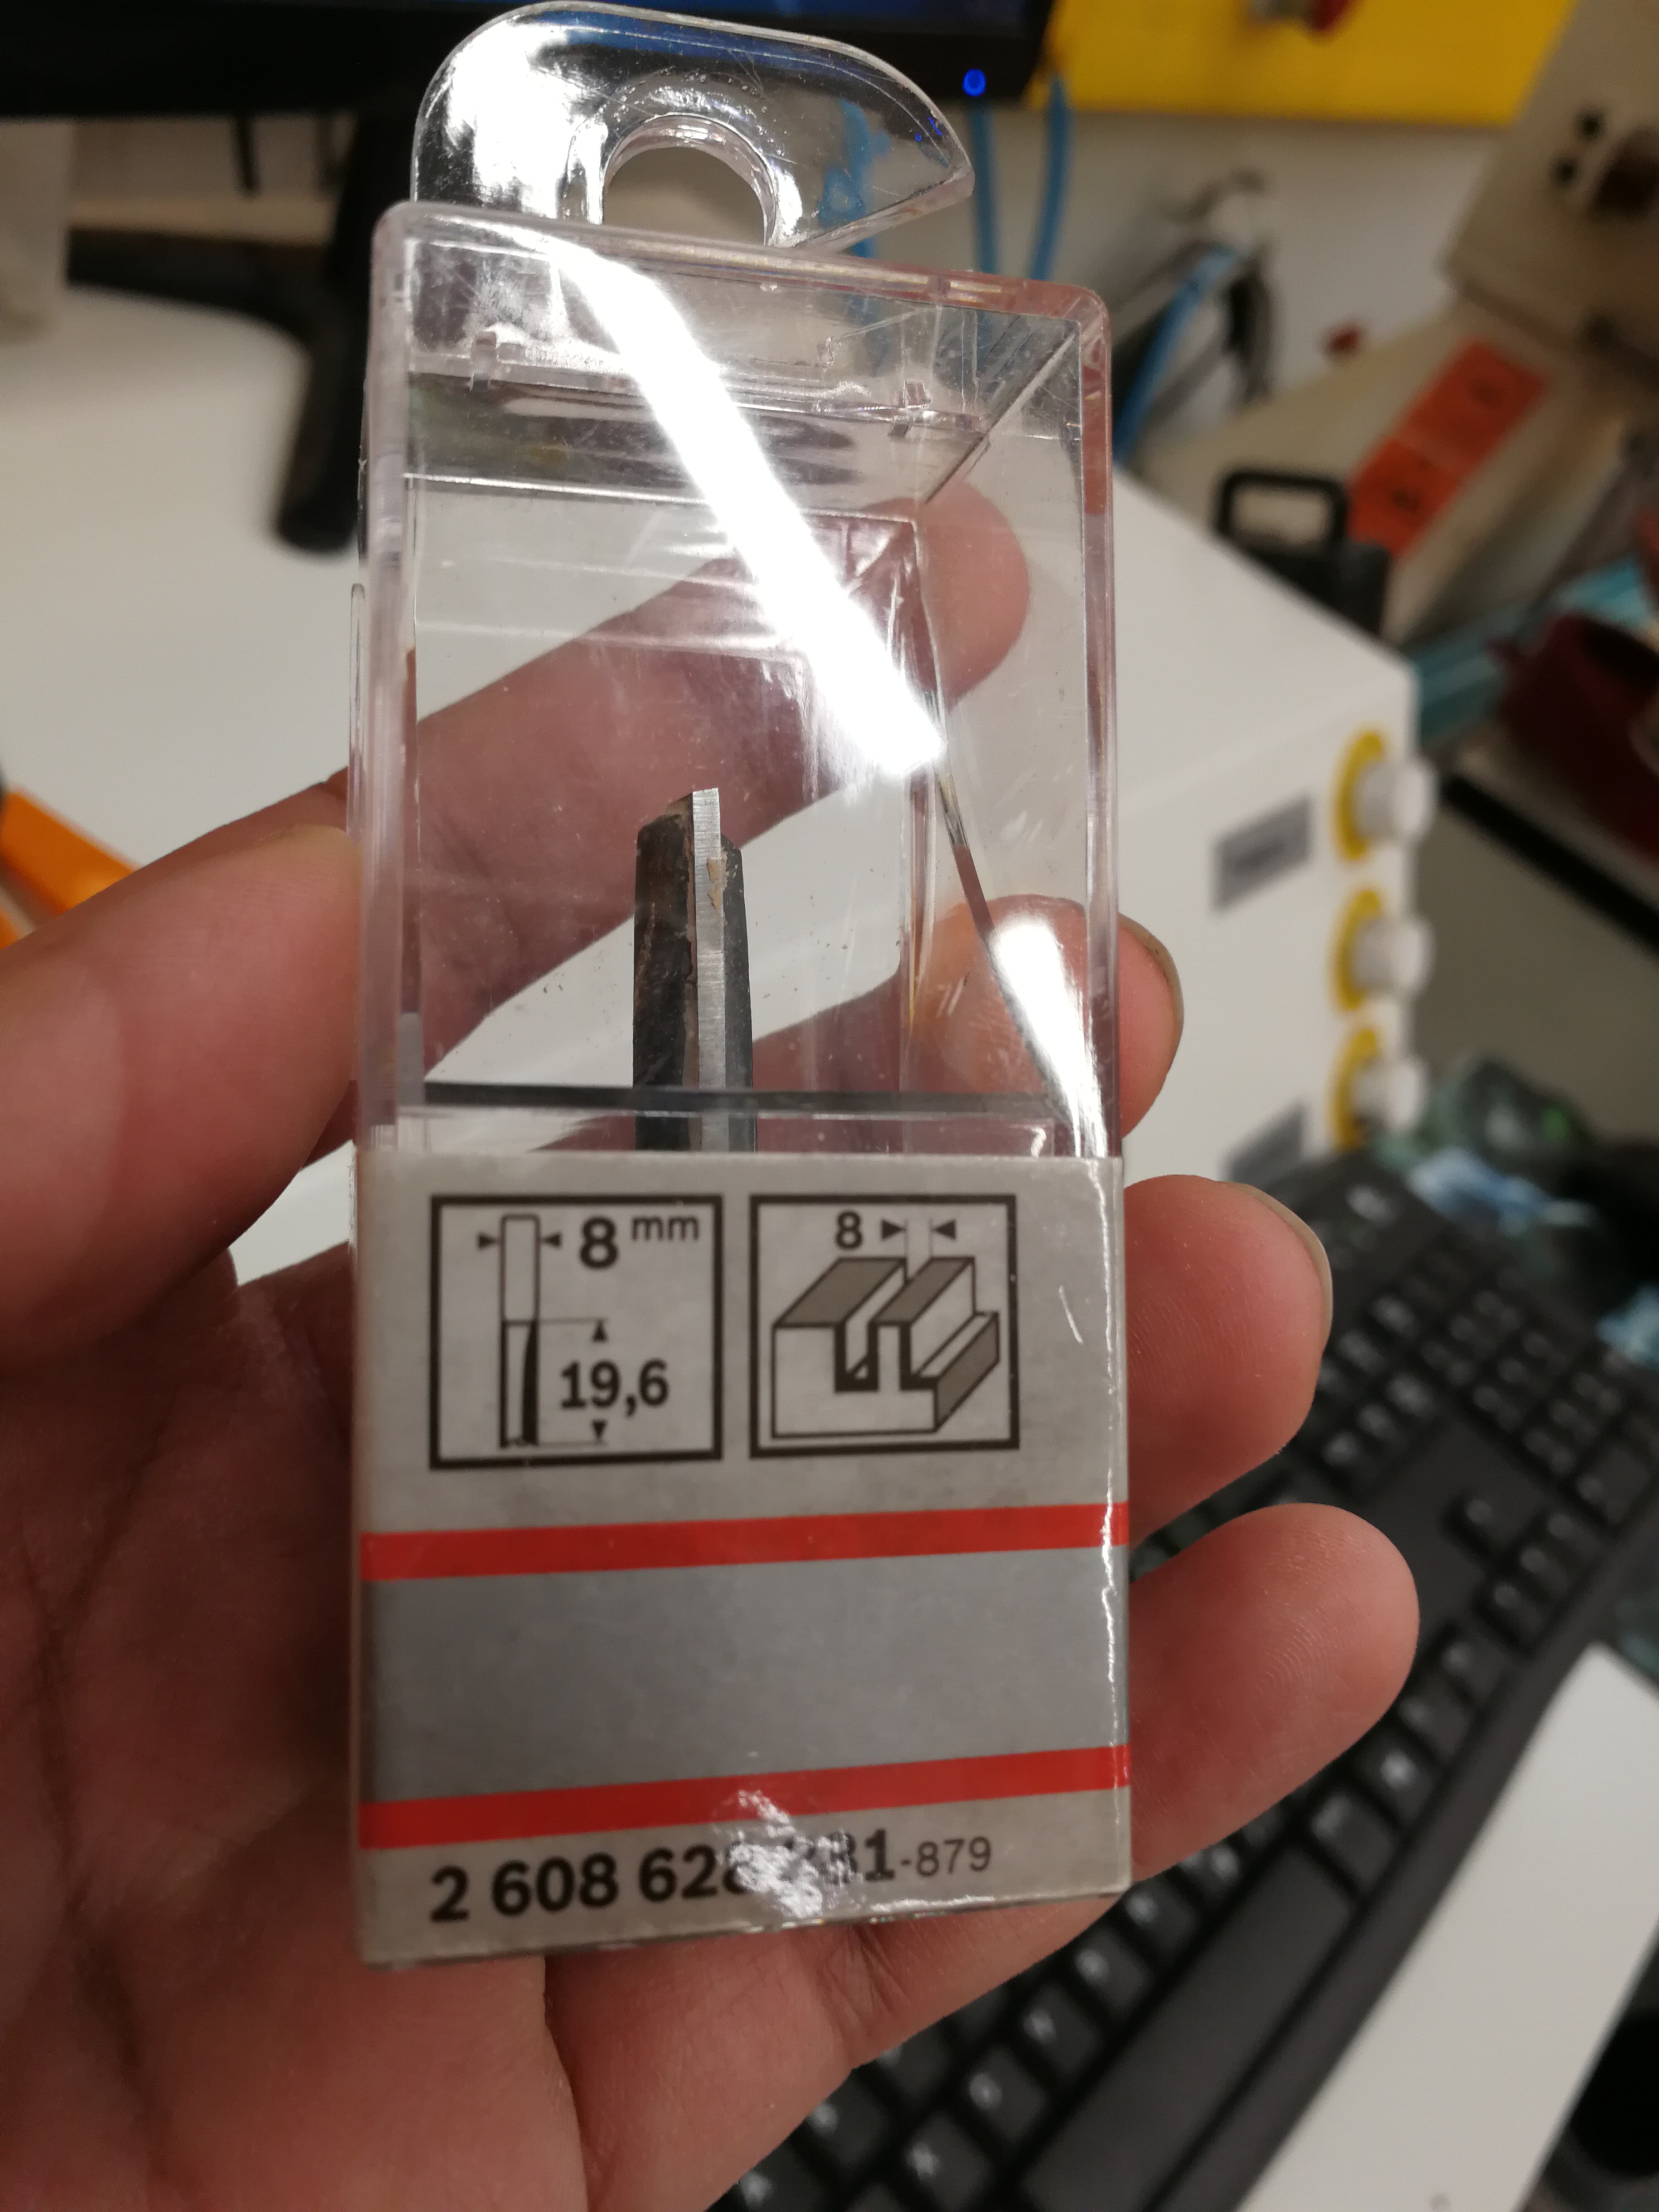
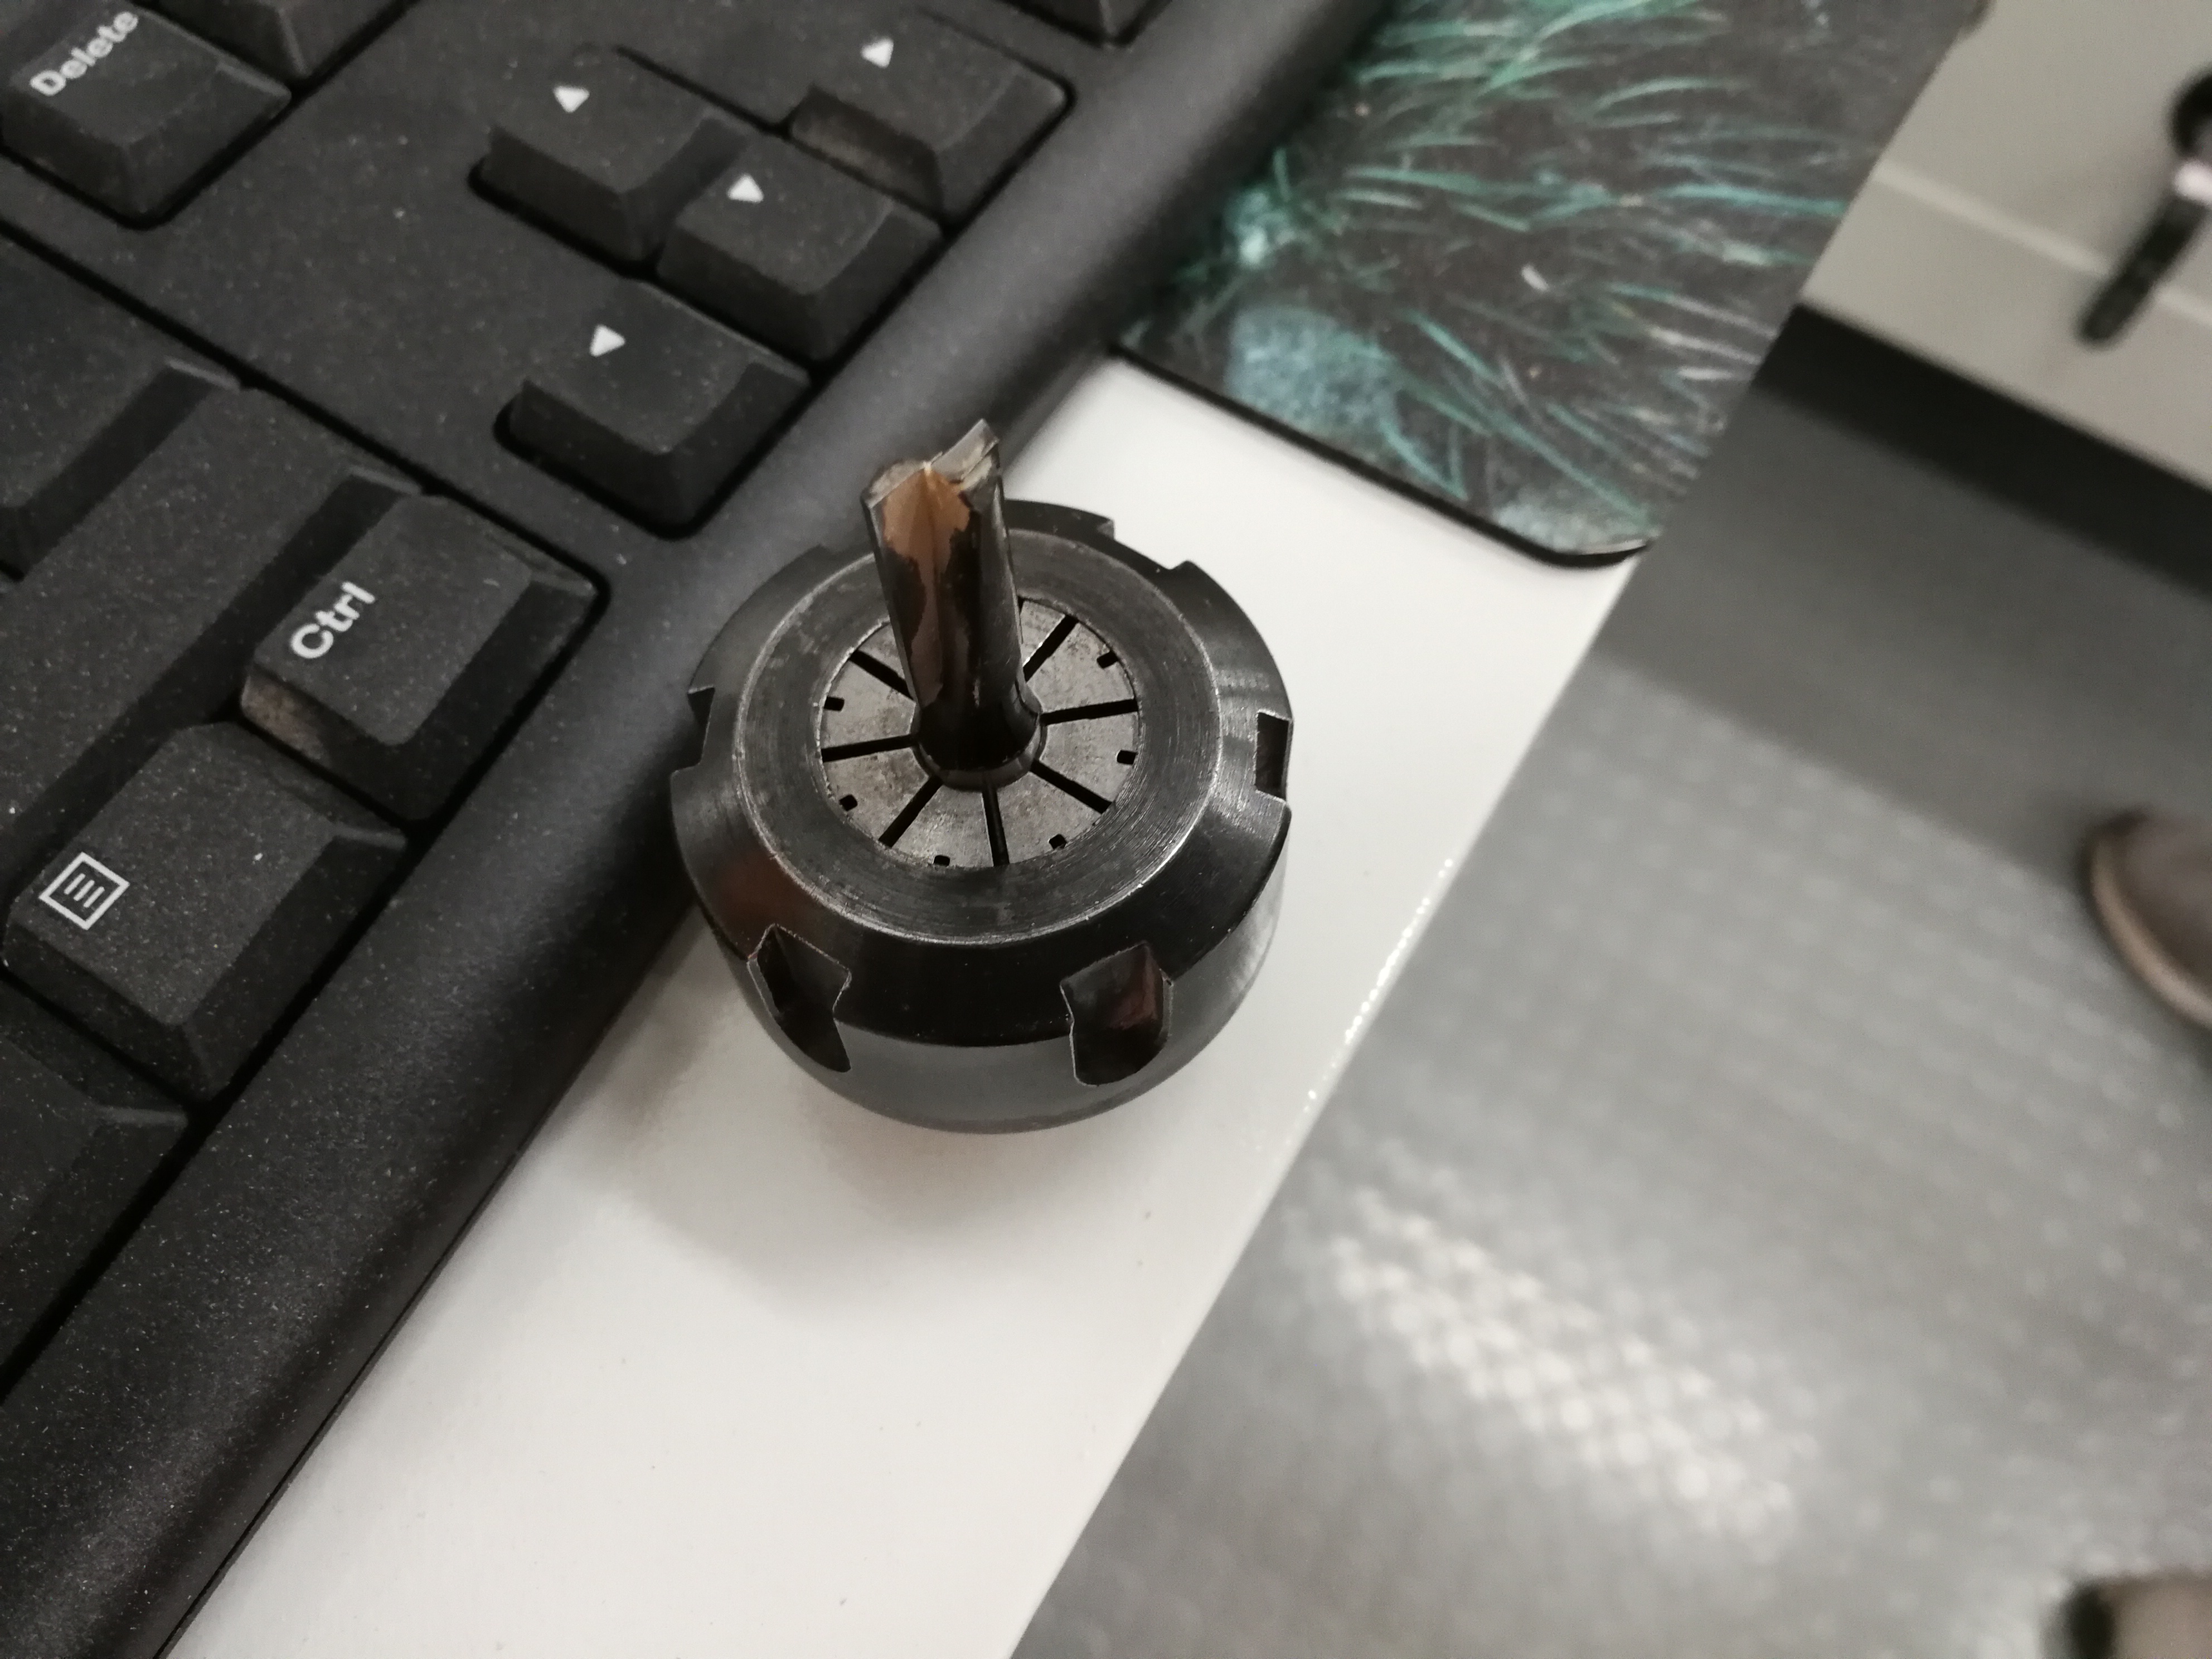
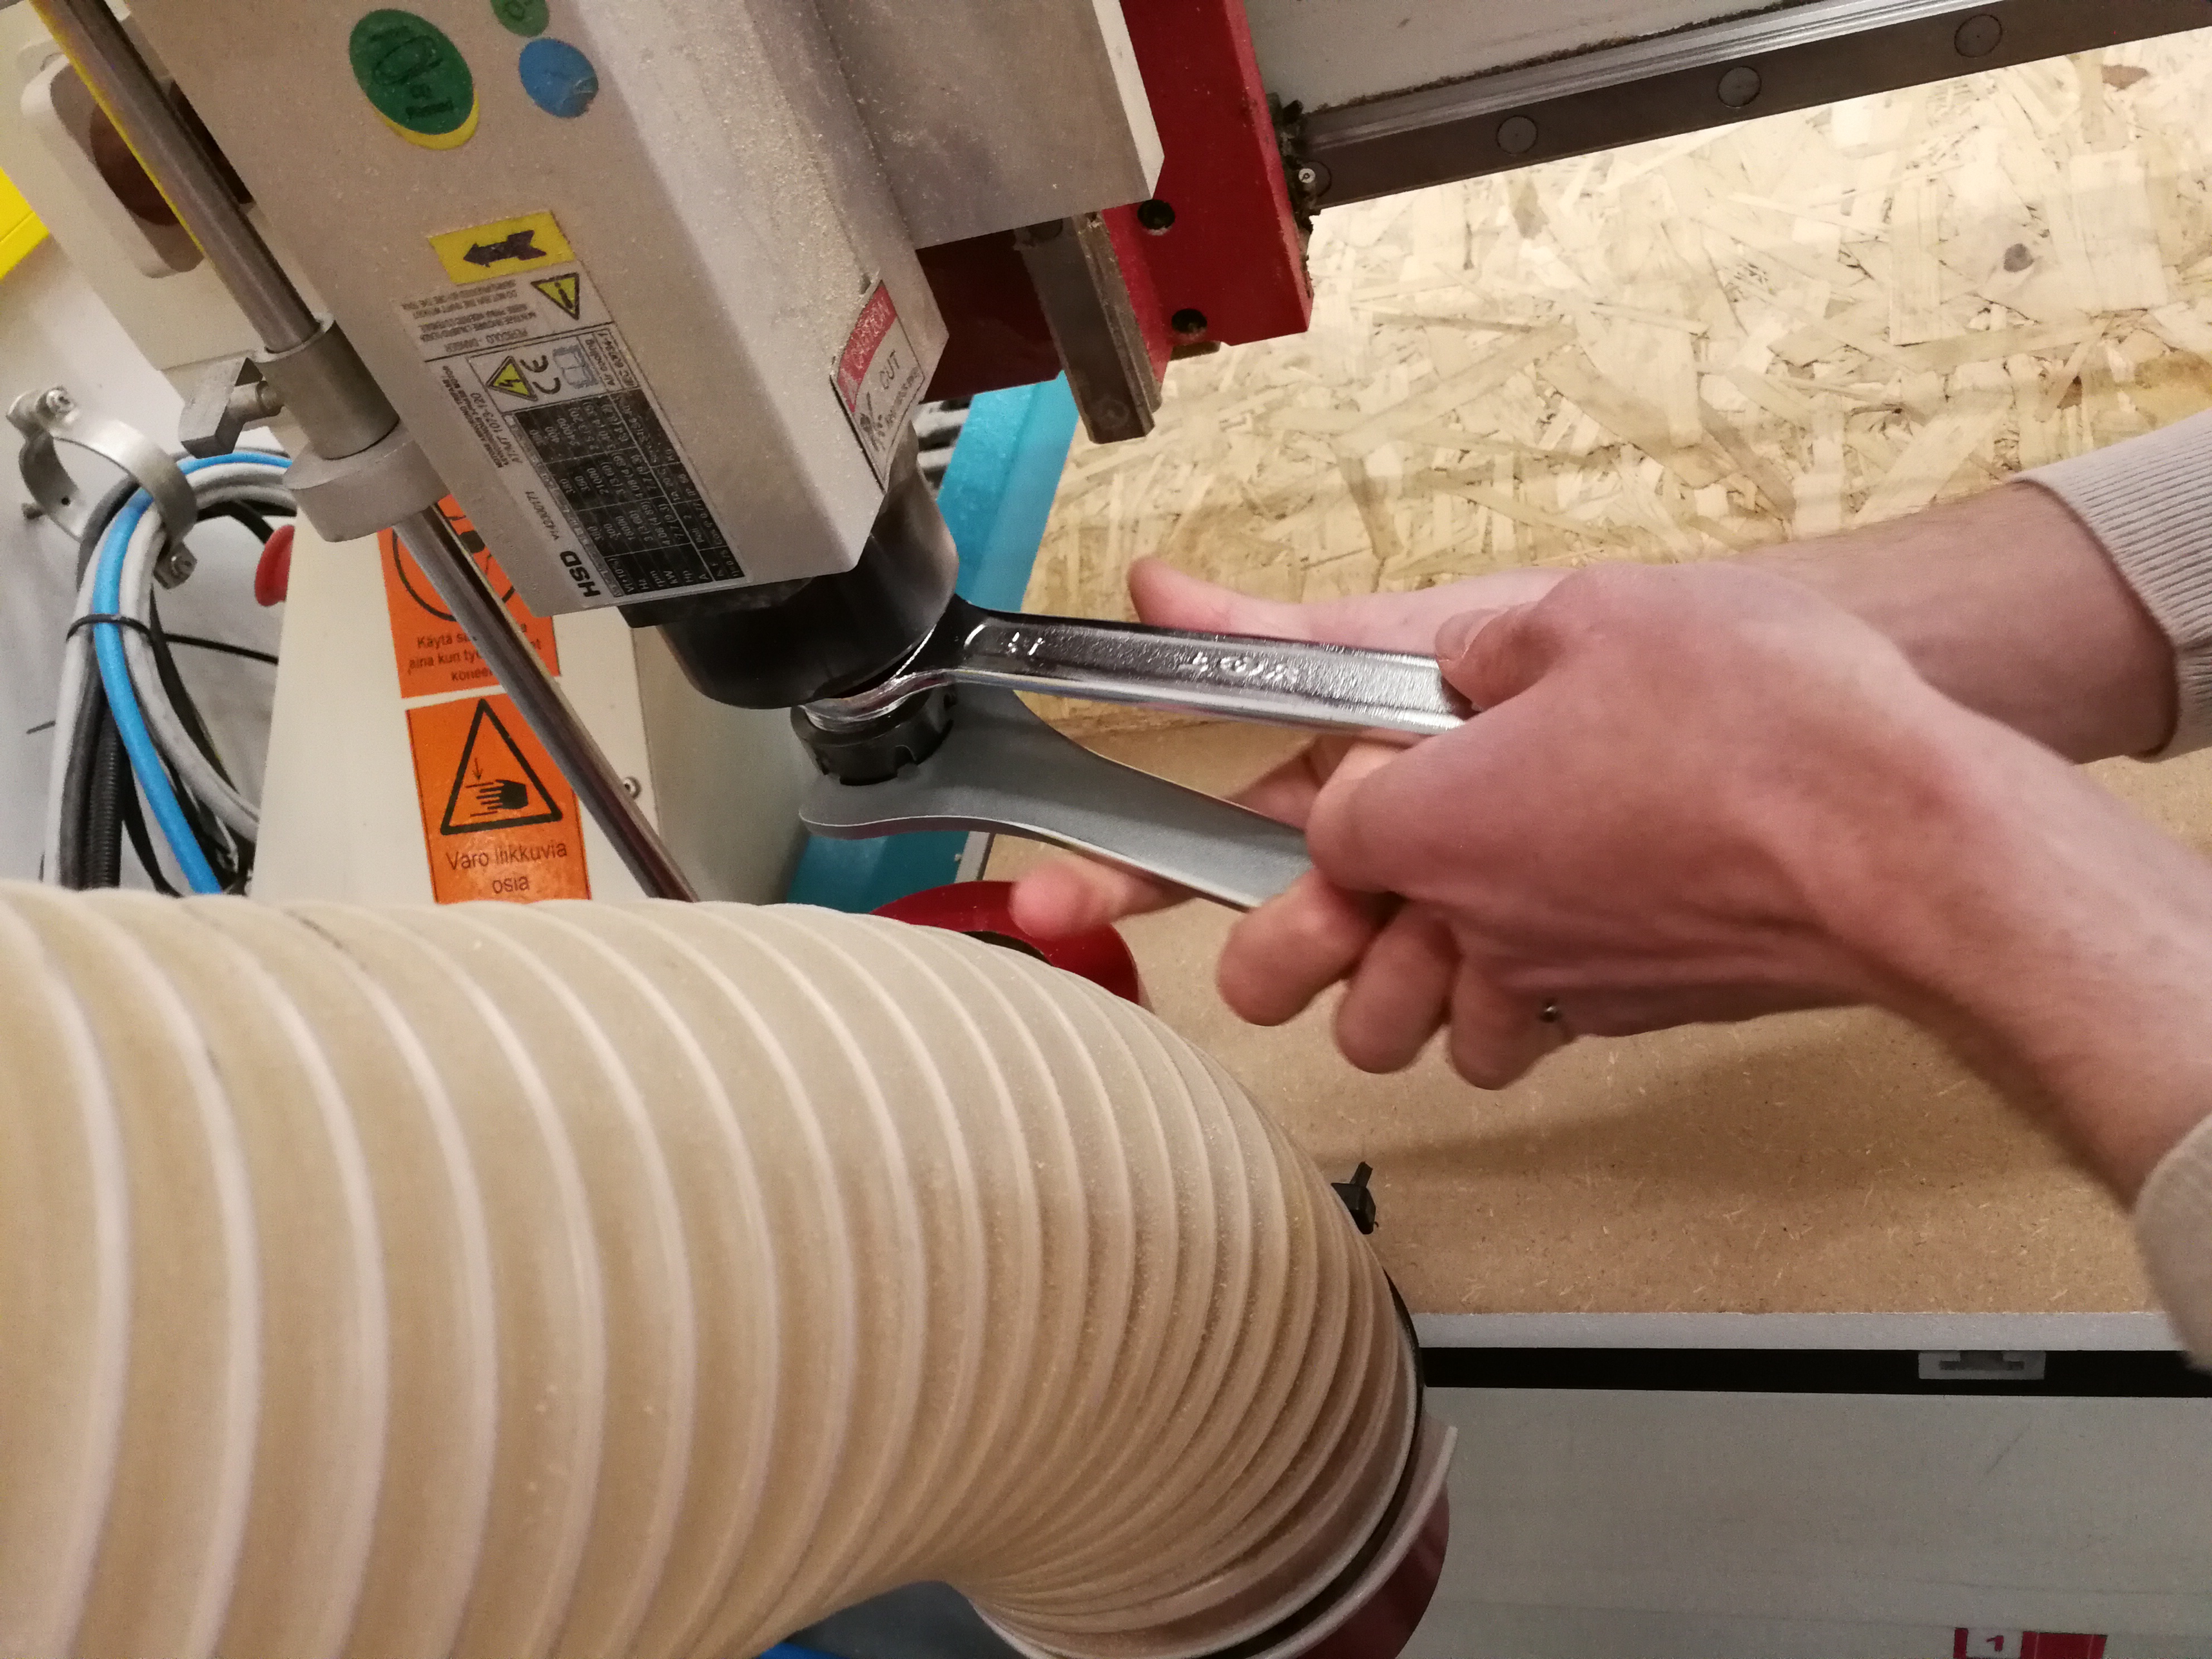
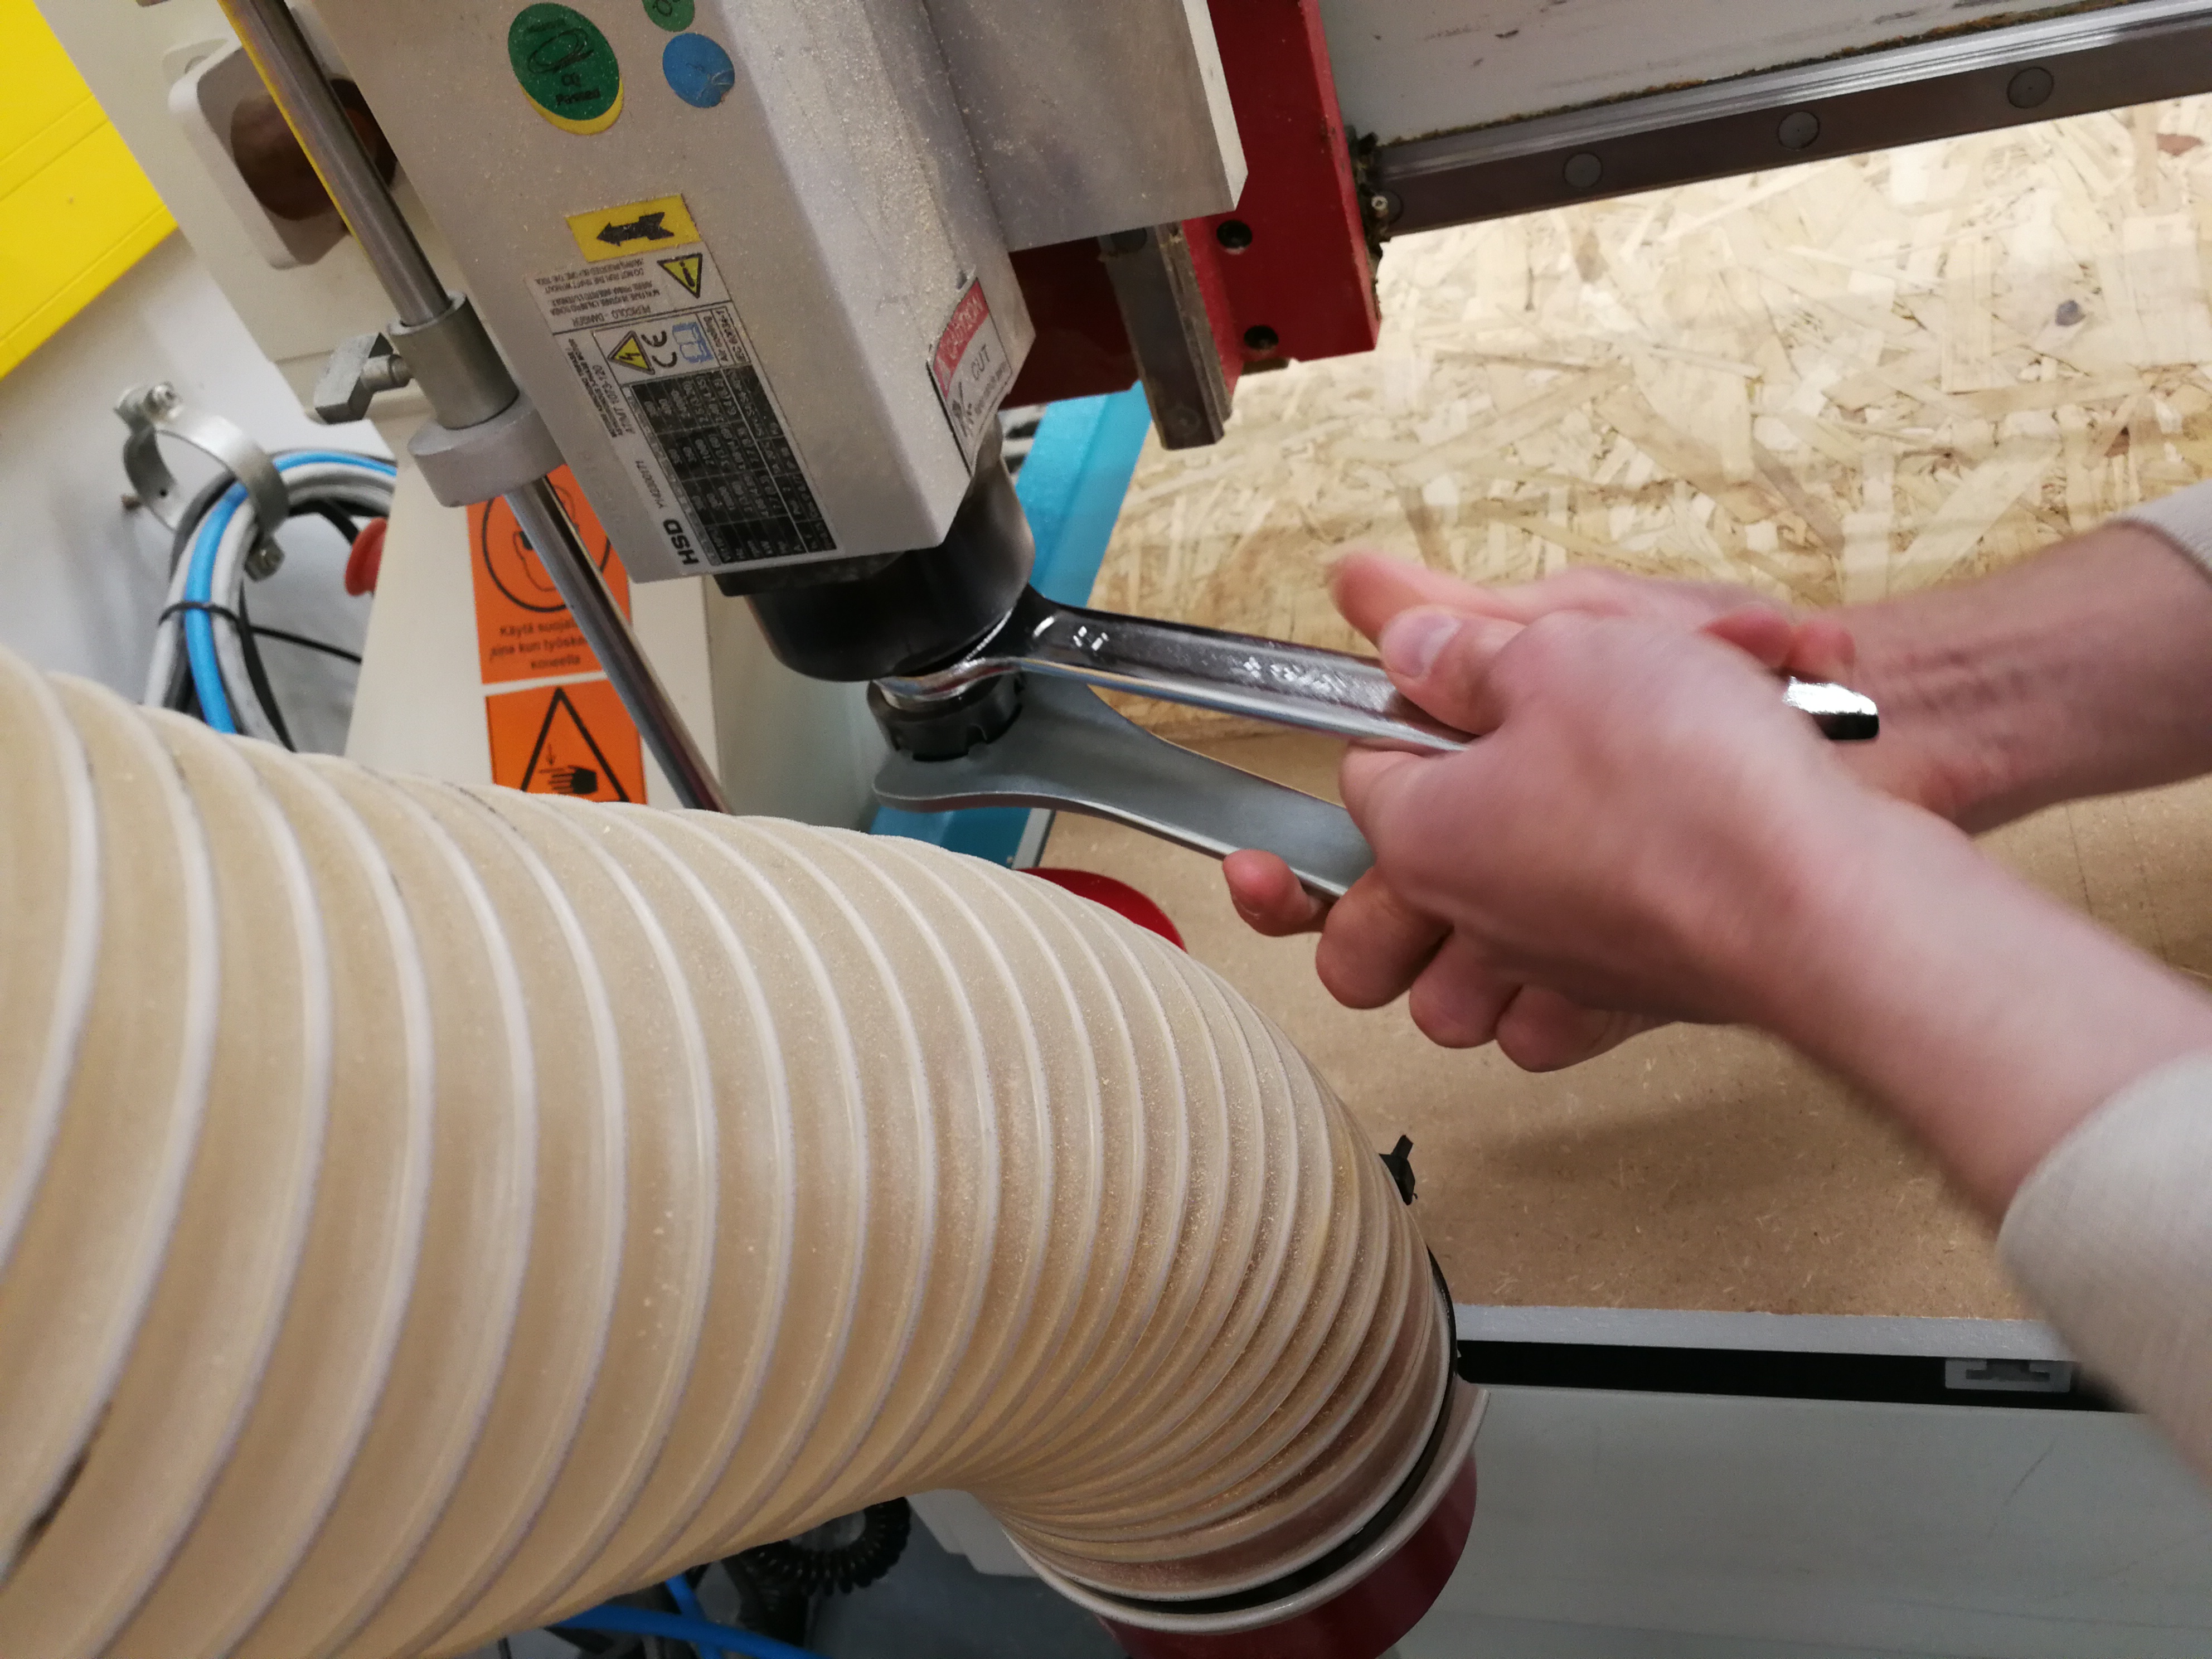
- Step 3. Change to the correct tool for cutting. I will use the 8 mm flat endmill which I used when creating the toolpaths..
- Step 4. Position the OSB sheet on the vacuum table, and start the vacuum table. It is important to ensure that the workpiece is firmly placed onto the CNC table.
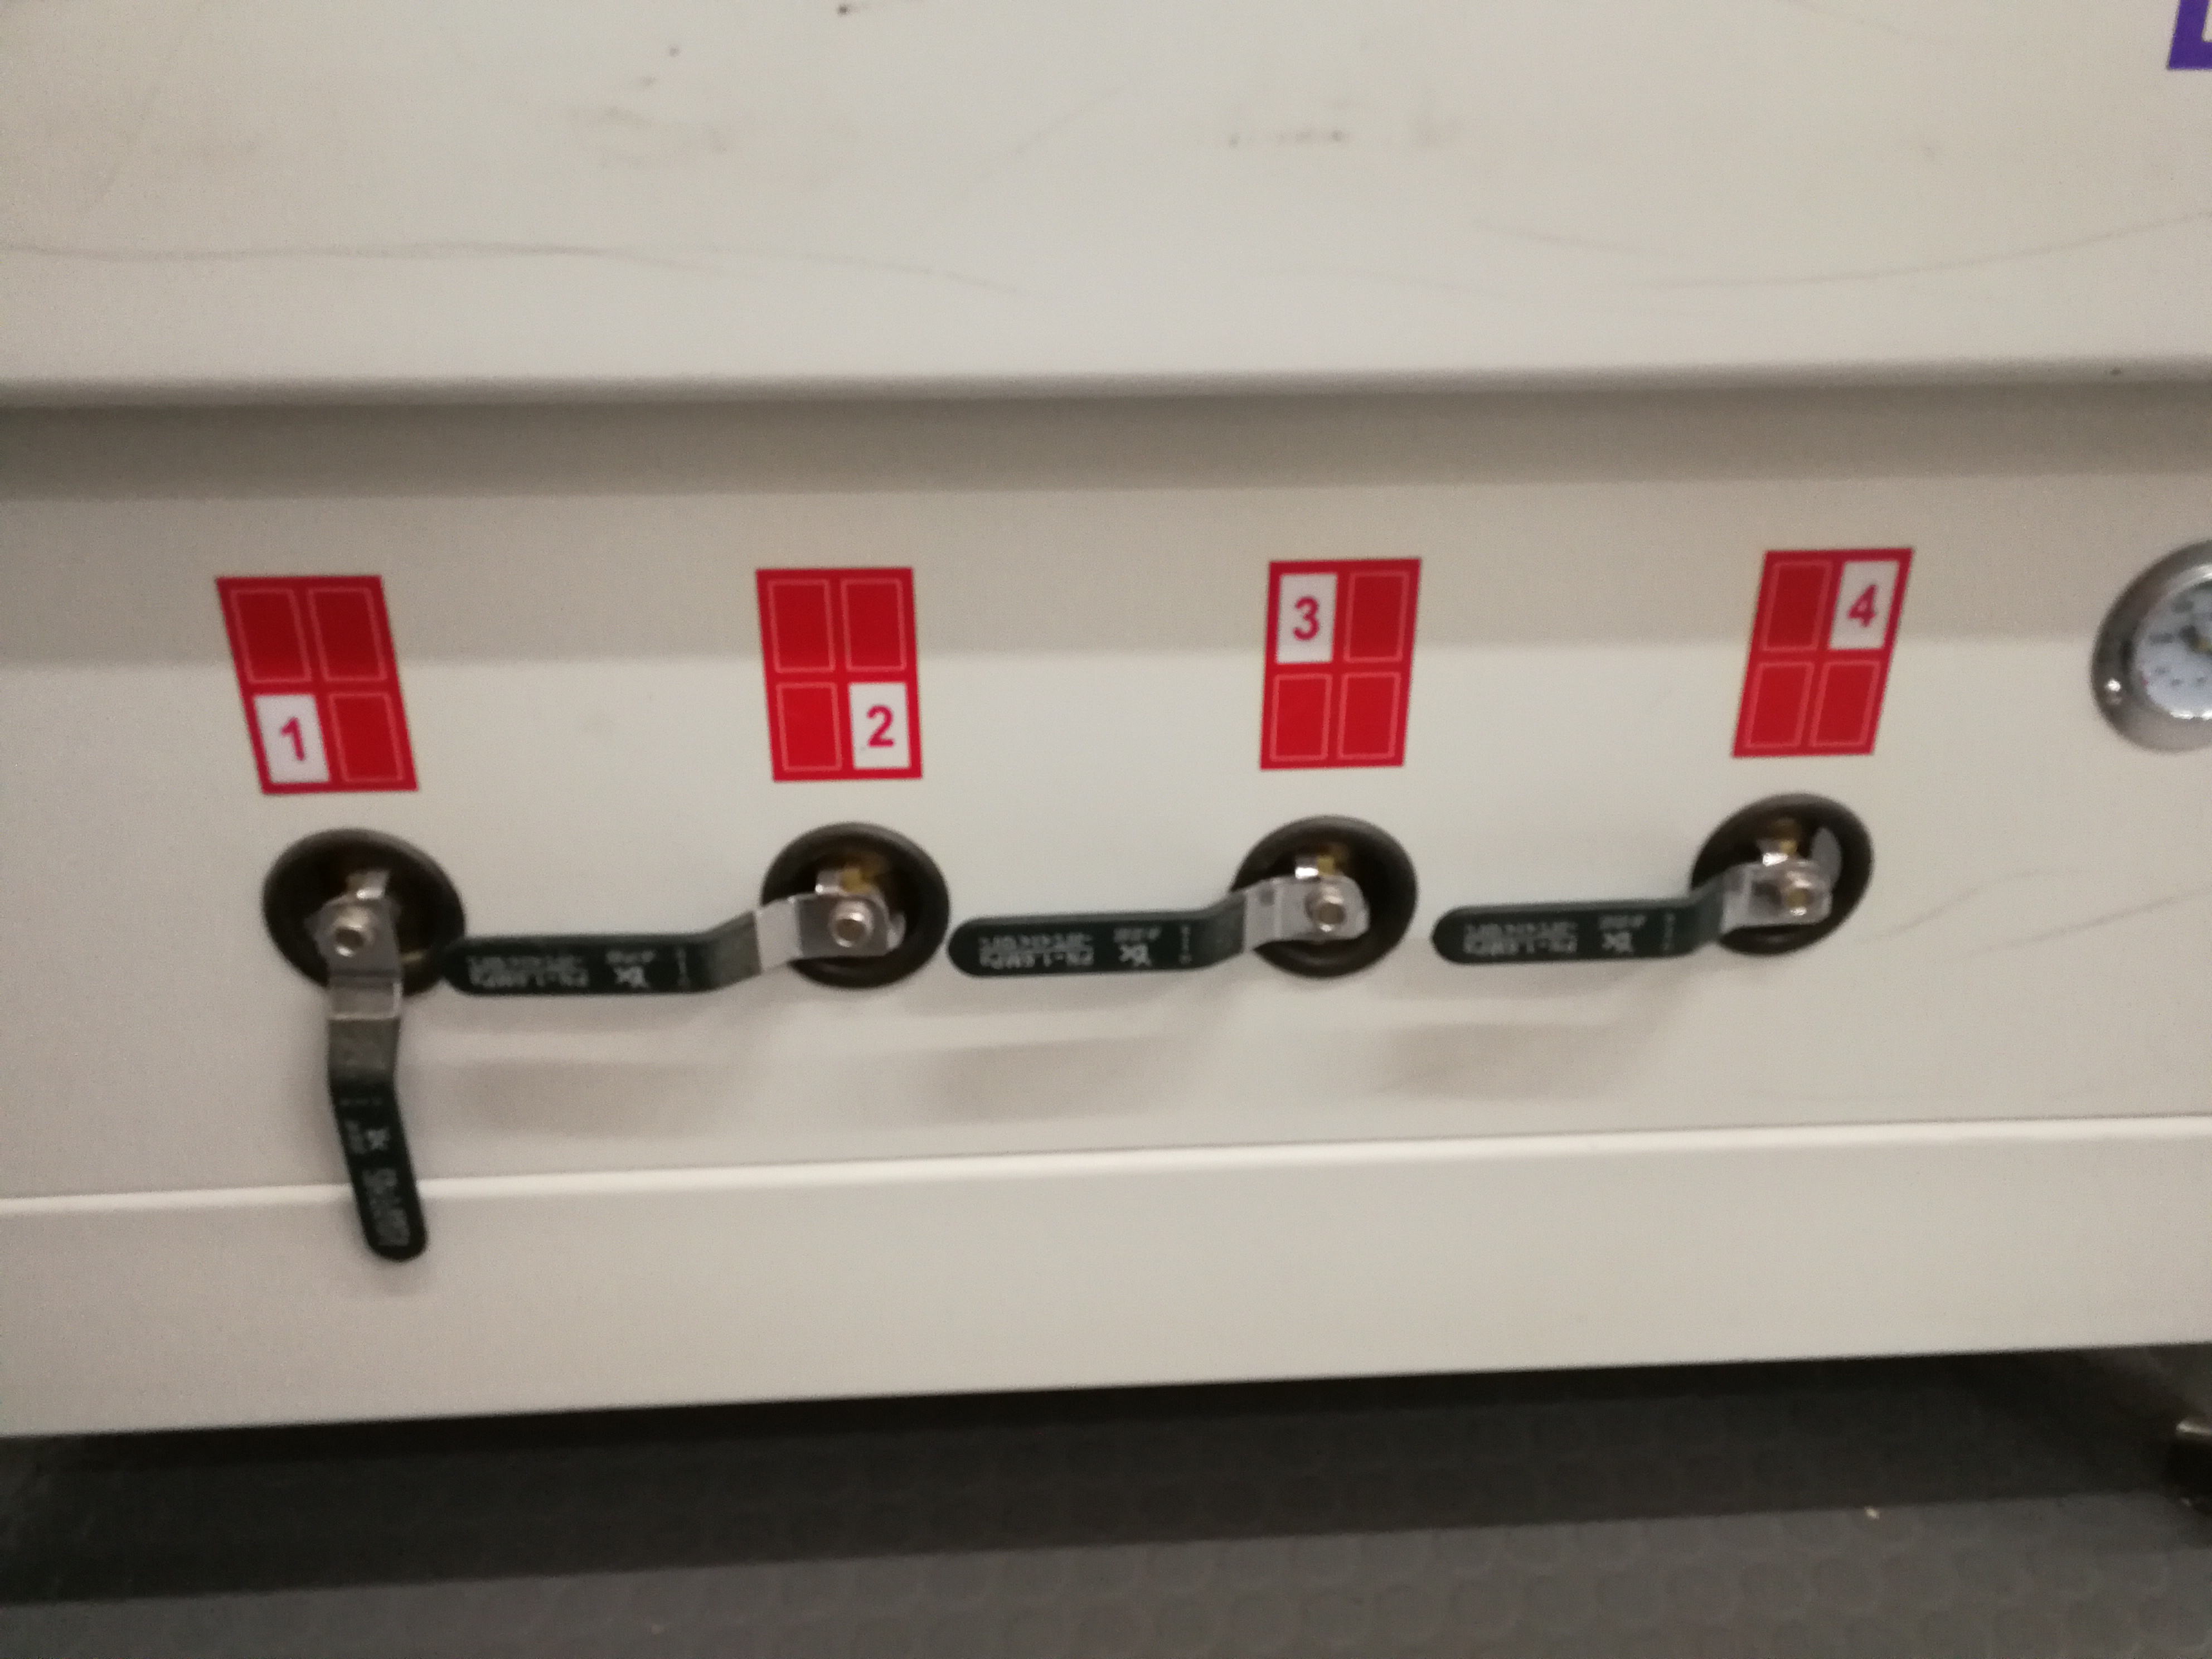 Control for Vaccum
 Vaccum started ON now.
- Step 5. Calibrate the Z axis, and Zero the X and Y axes to position the job.
We zero the Z axis (height) to the top of the vacuum table (bottom of the workpiece) So when done correctly the tool shouldn’t cut into the table and it won’t have to be milled flat that often. To do this the machine has this thing called “Mobile calibrator”. The machine will lower the tool head until it hits the metal top of the puck.
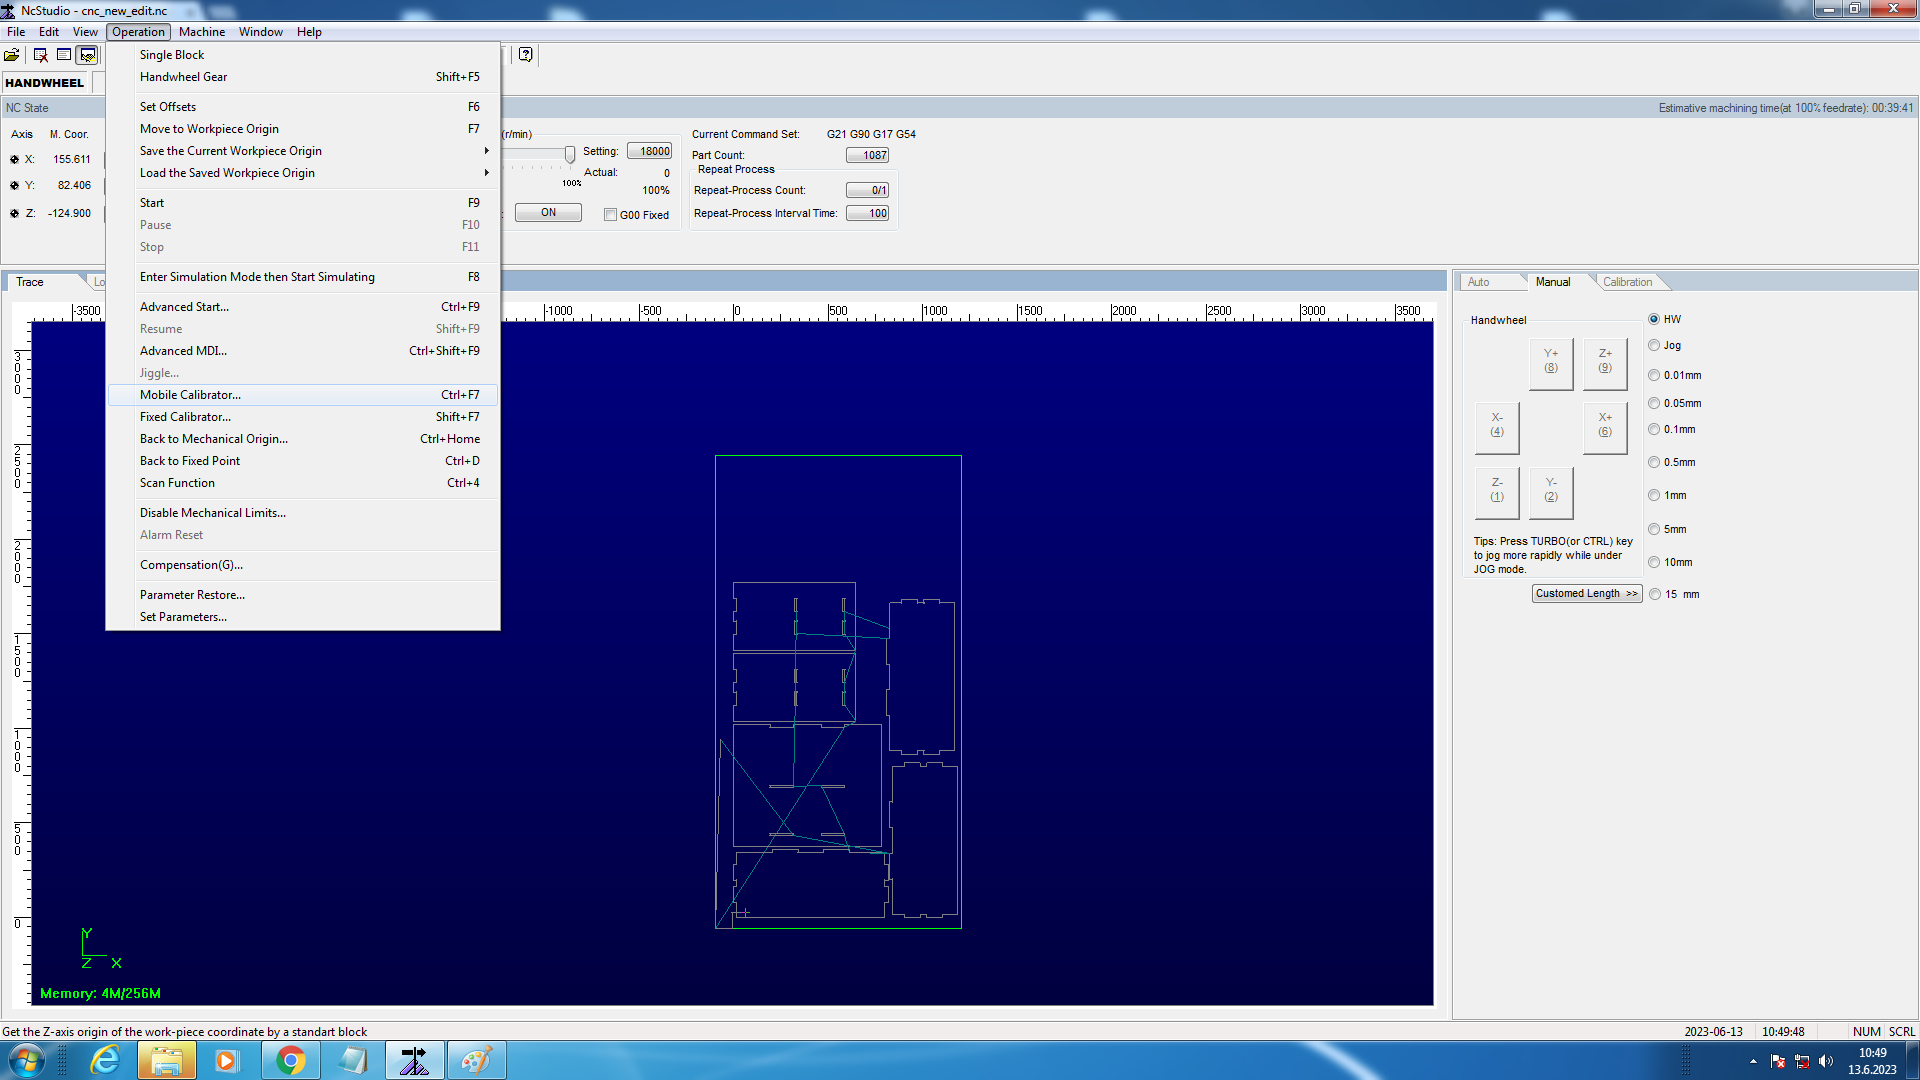 Select Operation -> Mobile Calibrator… -> Yes in NC Studio.
The X and Y axes are zeroed manually from the NcStudio. This is done by eyeballing the position of the cutting tool to the edges of the workpiece. (Or where ever the origin in the file is).
Each axis can be zeroed separately. Click on the corresponding “W. Coor.” button. Click “Yes” to the next confirmation prompt.
-
Step 6. Start the machine to do the cutting. One may perform a simulation to ensure that everything works correctly, as such a tool does not go outside the OSB sheet to perform the cutting.
-
Step 7. Observing the cutting operation. I recorded the video of the entire cutting session.
- Step 8. Cleaning up with a vacuum machine.
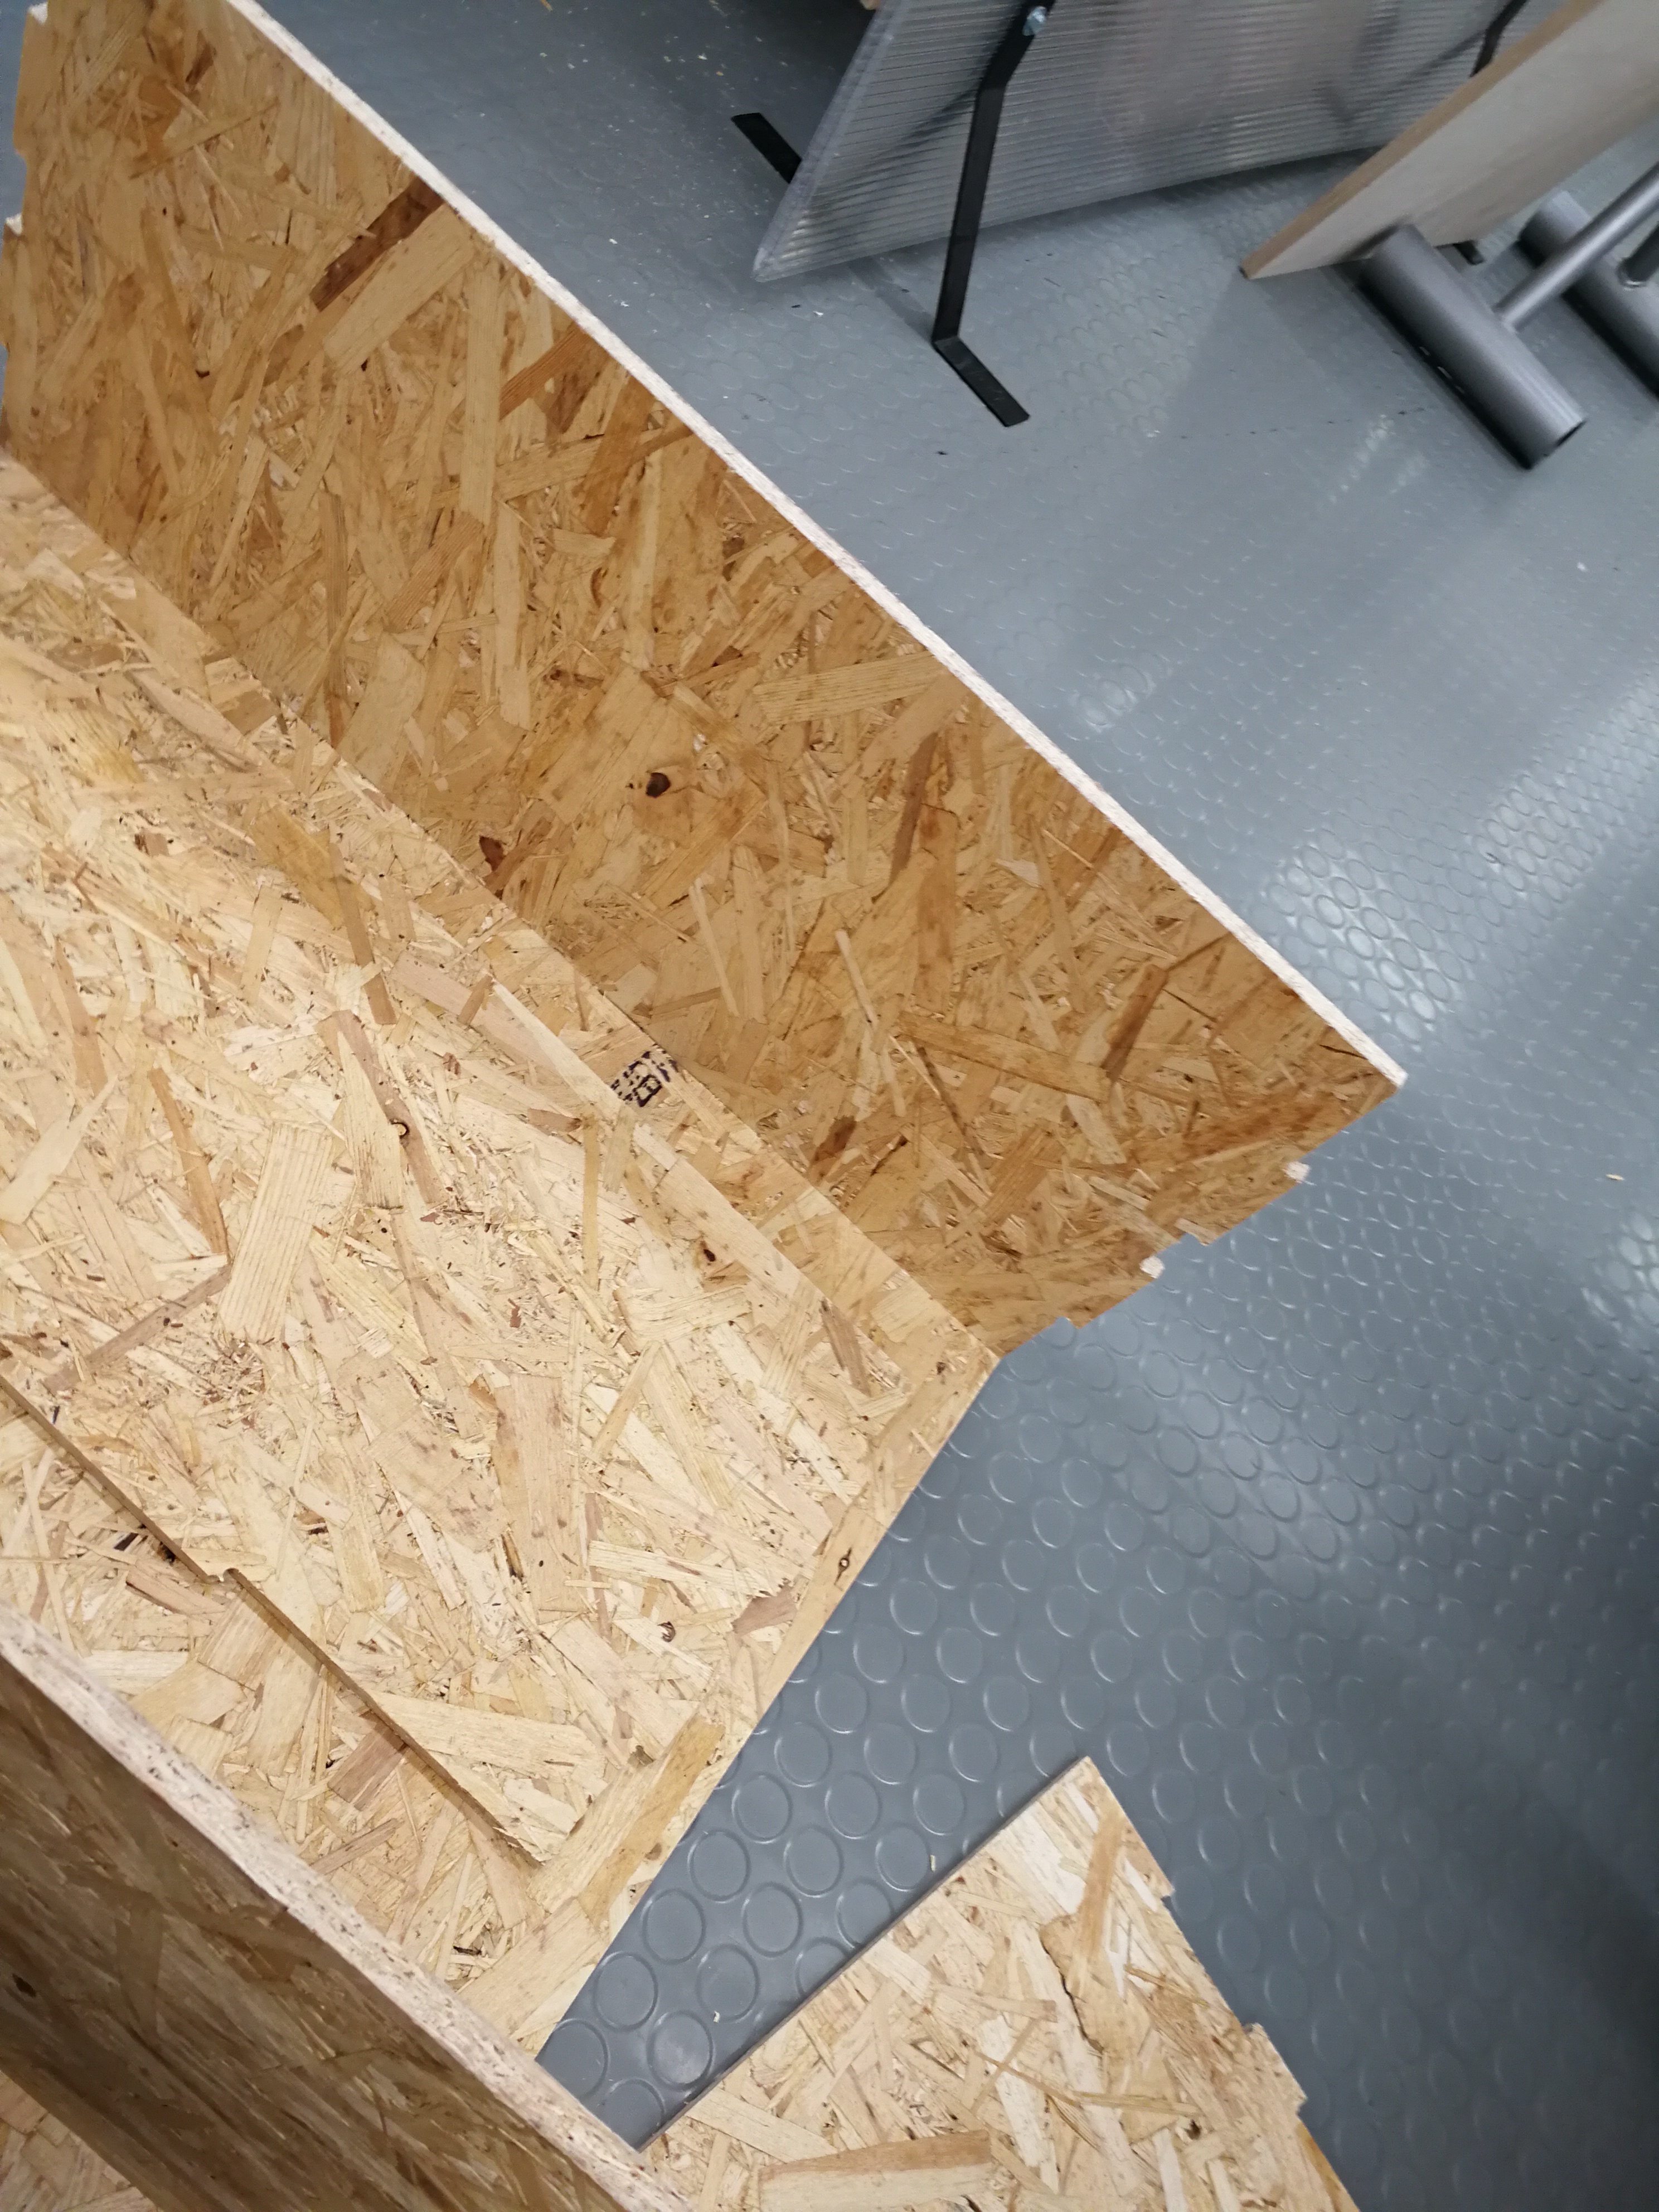
Assembly
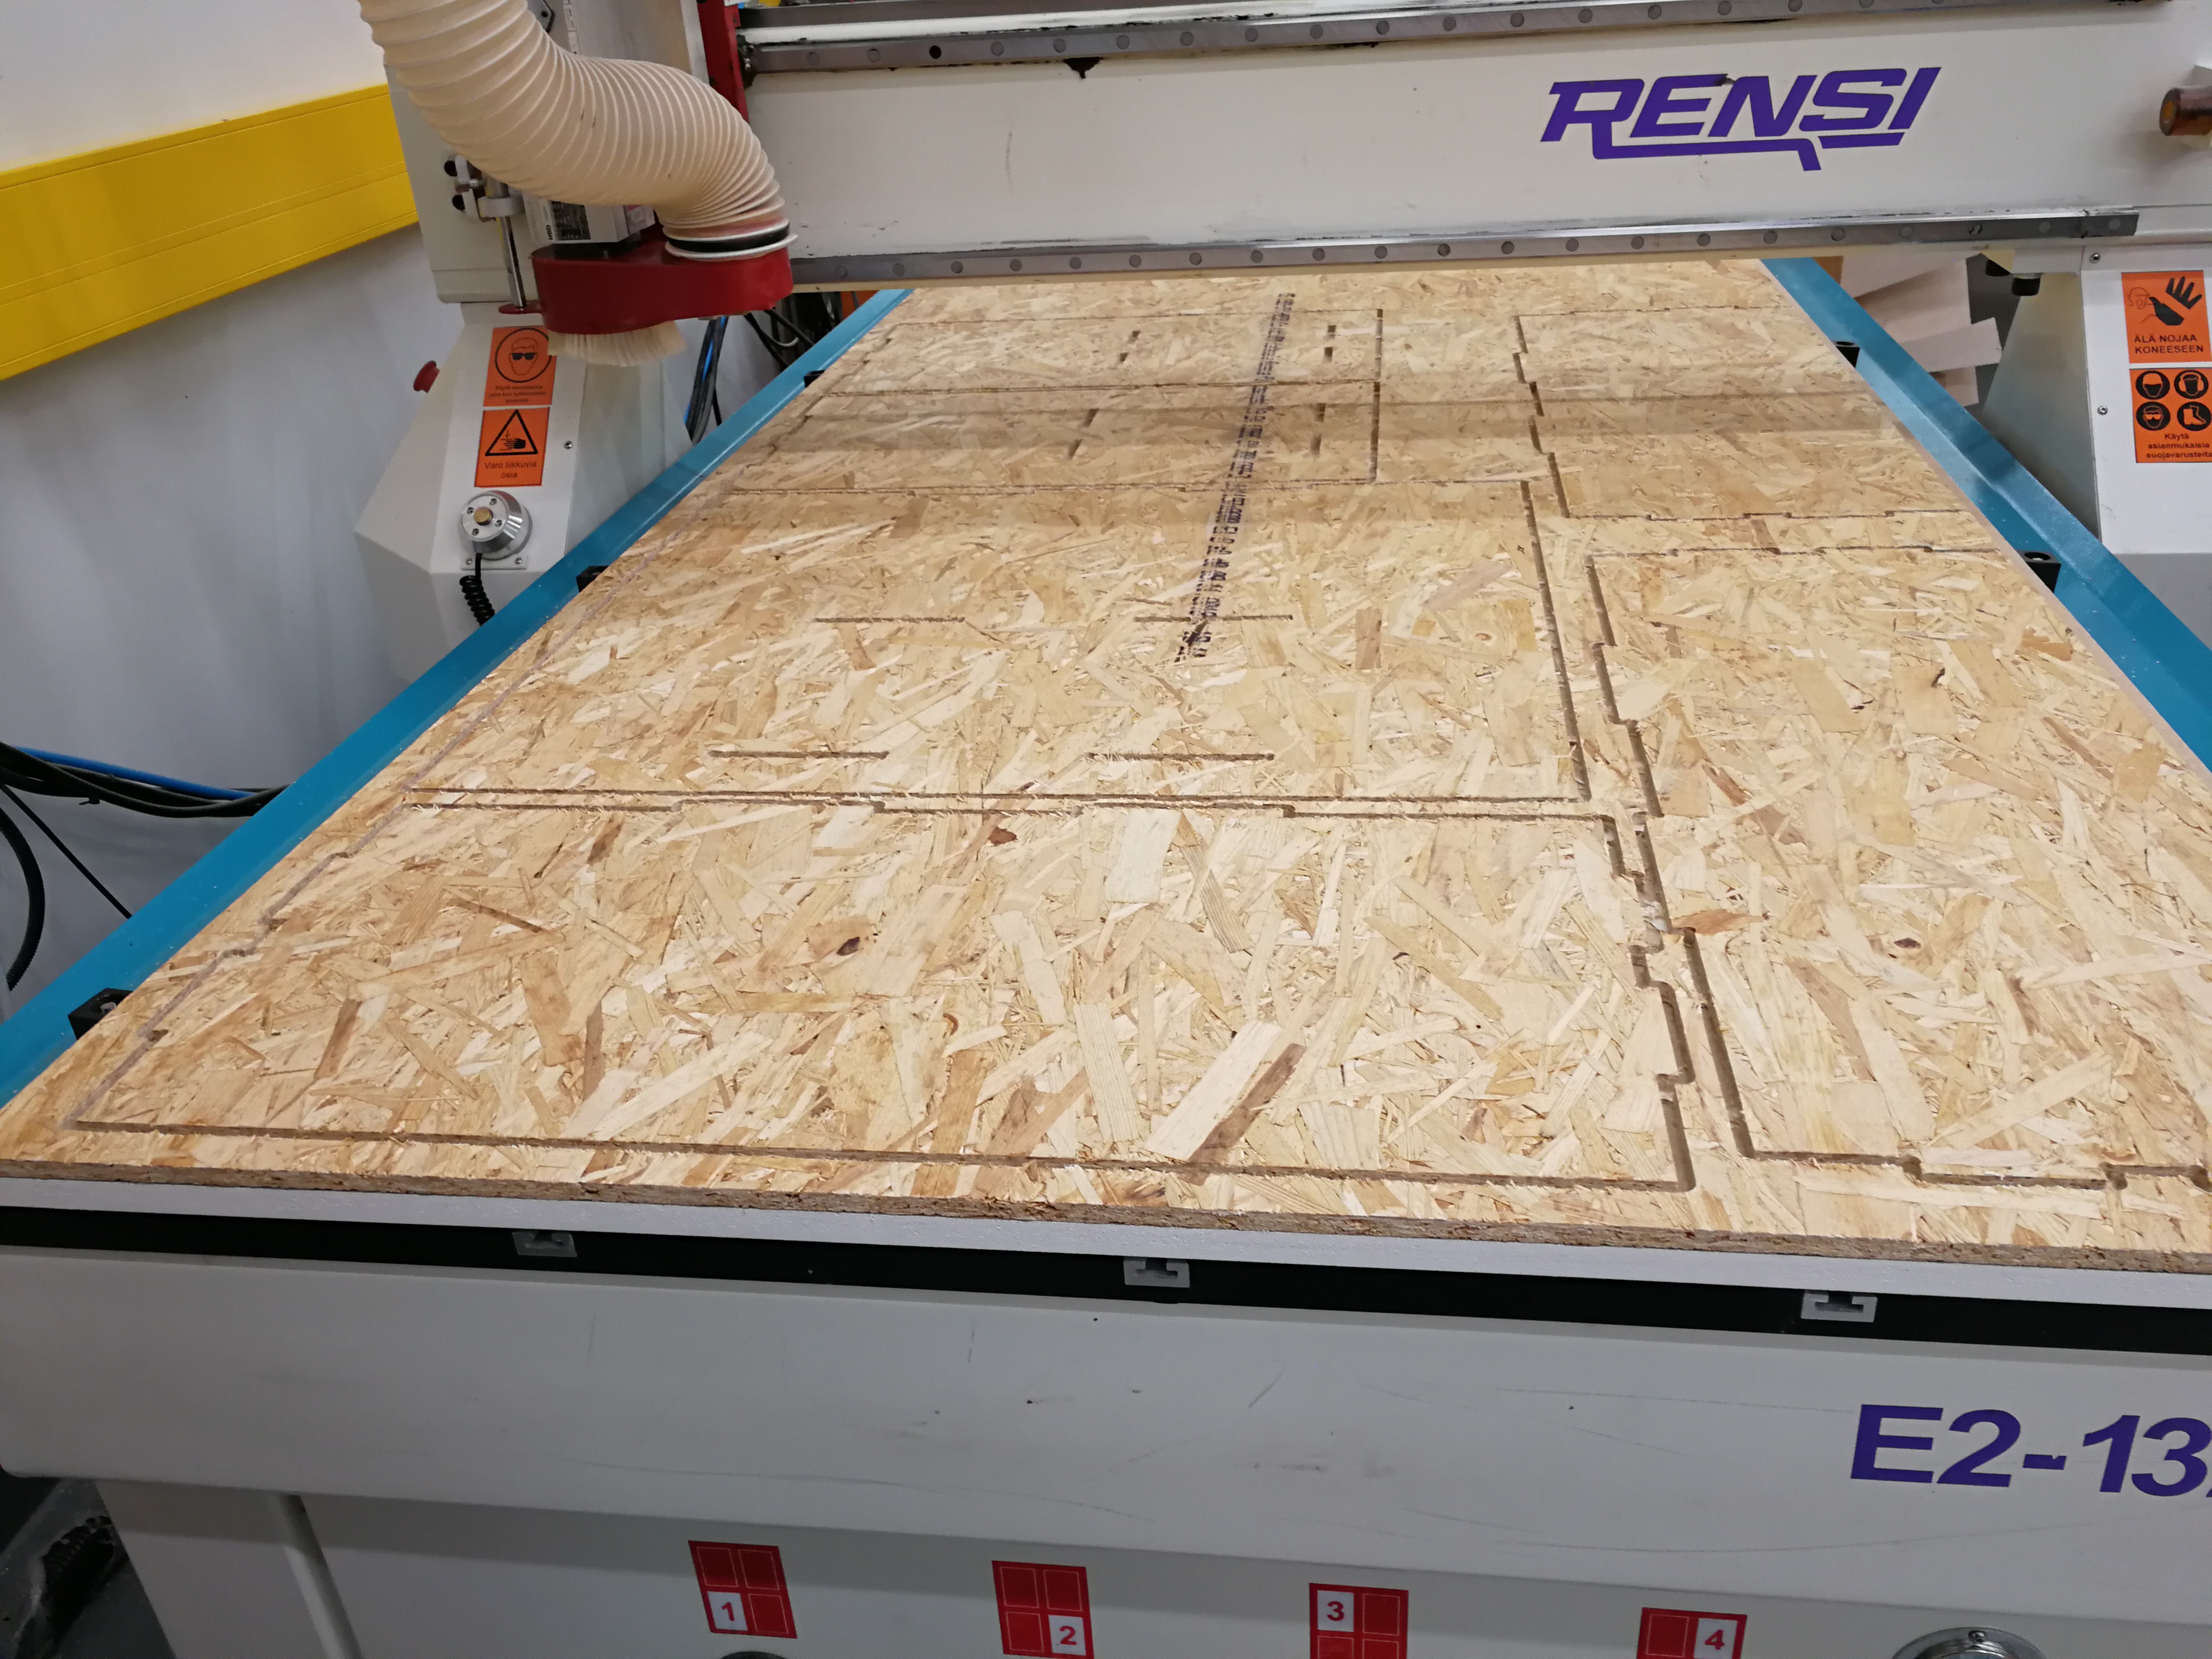 OSB sheet after cutting with CNC machine has finished.
After CNC machining, all pieces are 100% detached. I still needed to use Hackshow to detach them apart
 Hackshow which I used to detach pieces of my bookshelf apart.
 Starting the assembly.
I needed to use a hammer and support to fit tabs into pockets. I applied hammer pressure to my bookshelf pieces during assembly indirectly via support.
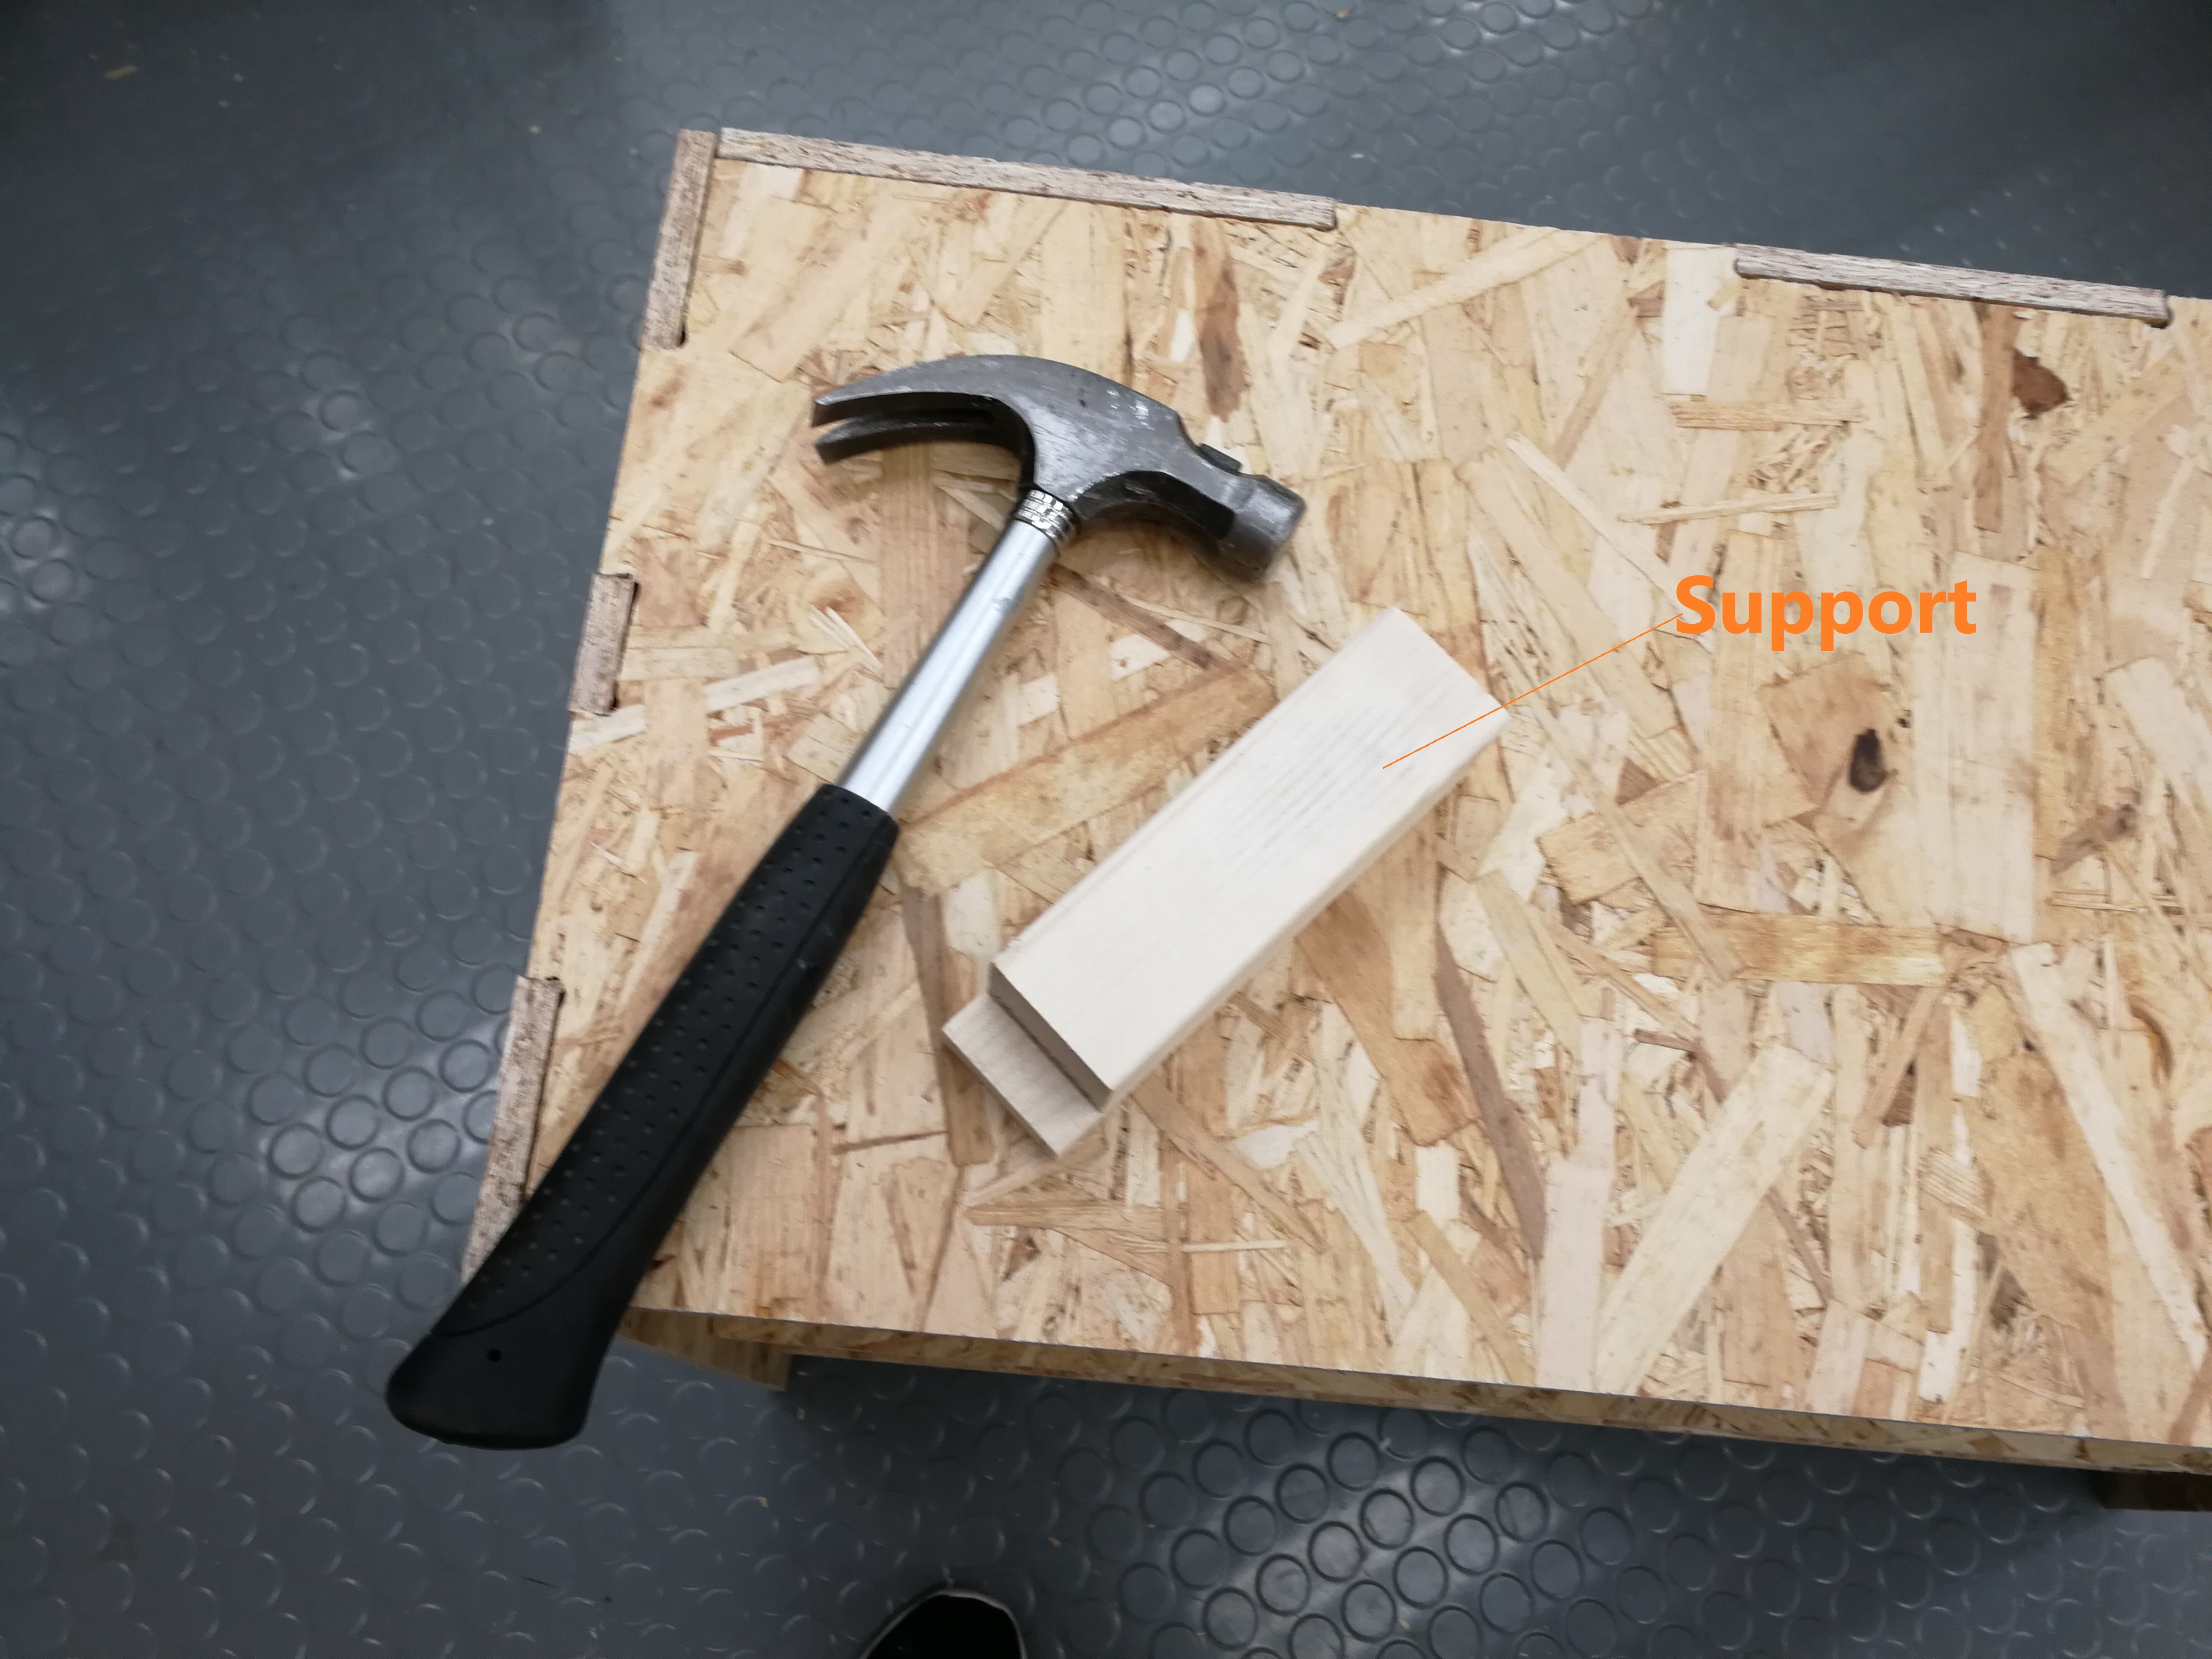 Hammer and Support used to aid the final assembly.
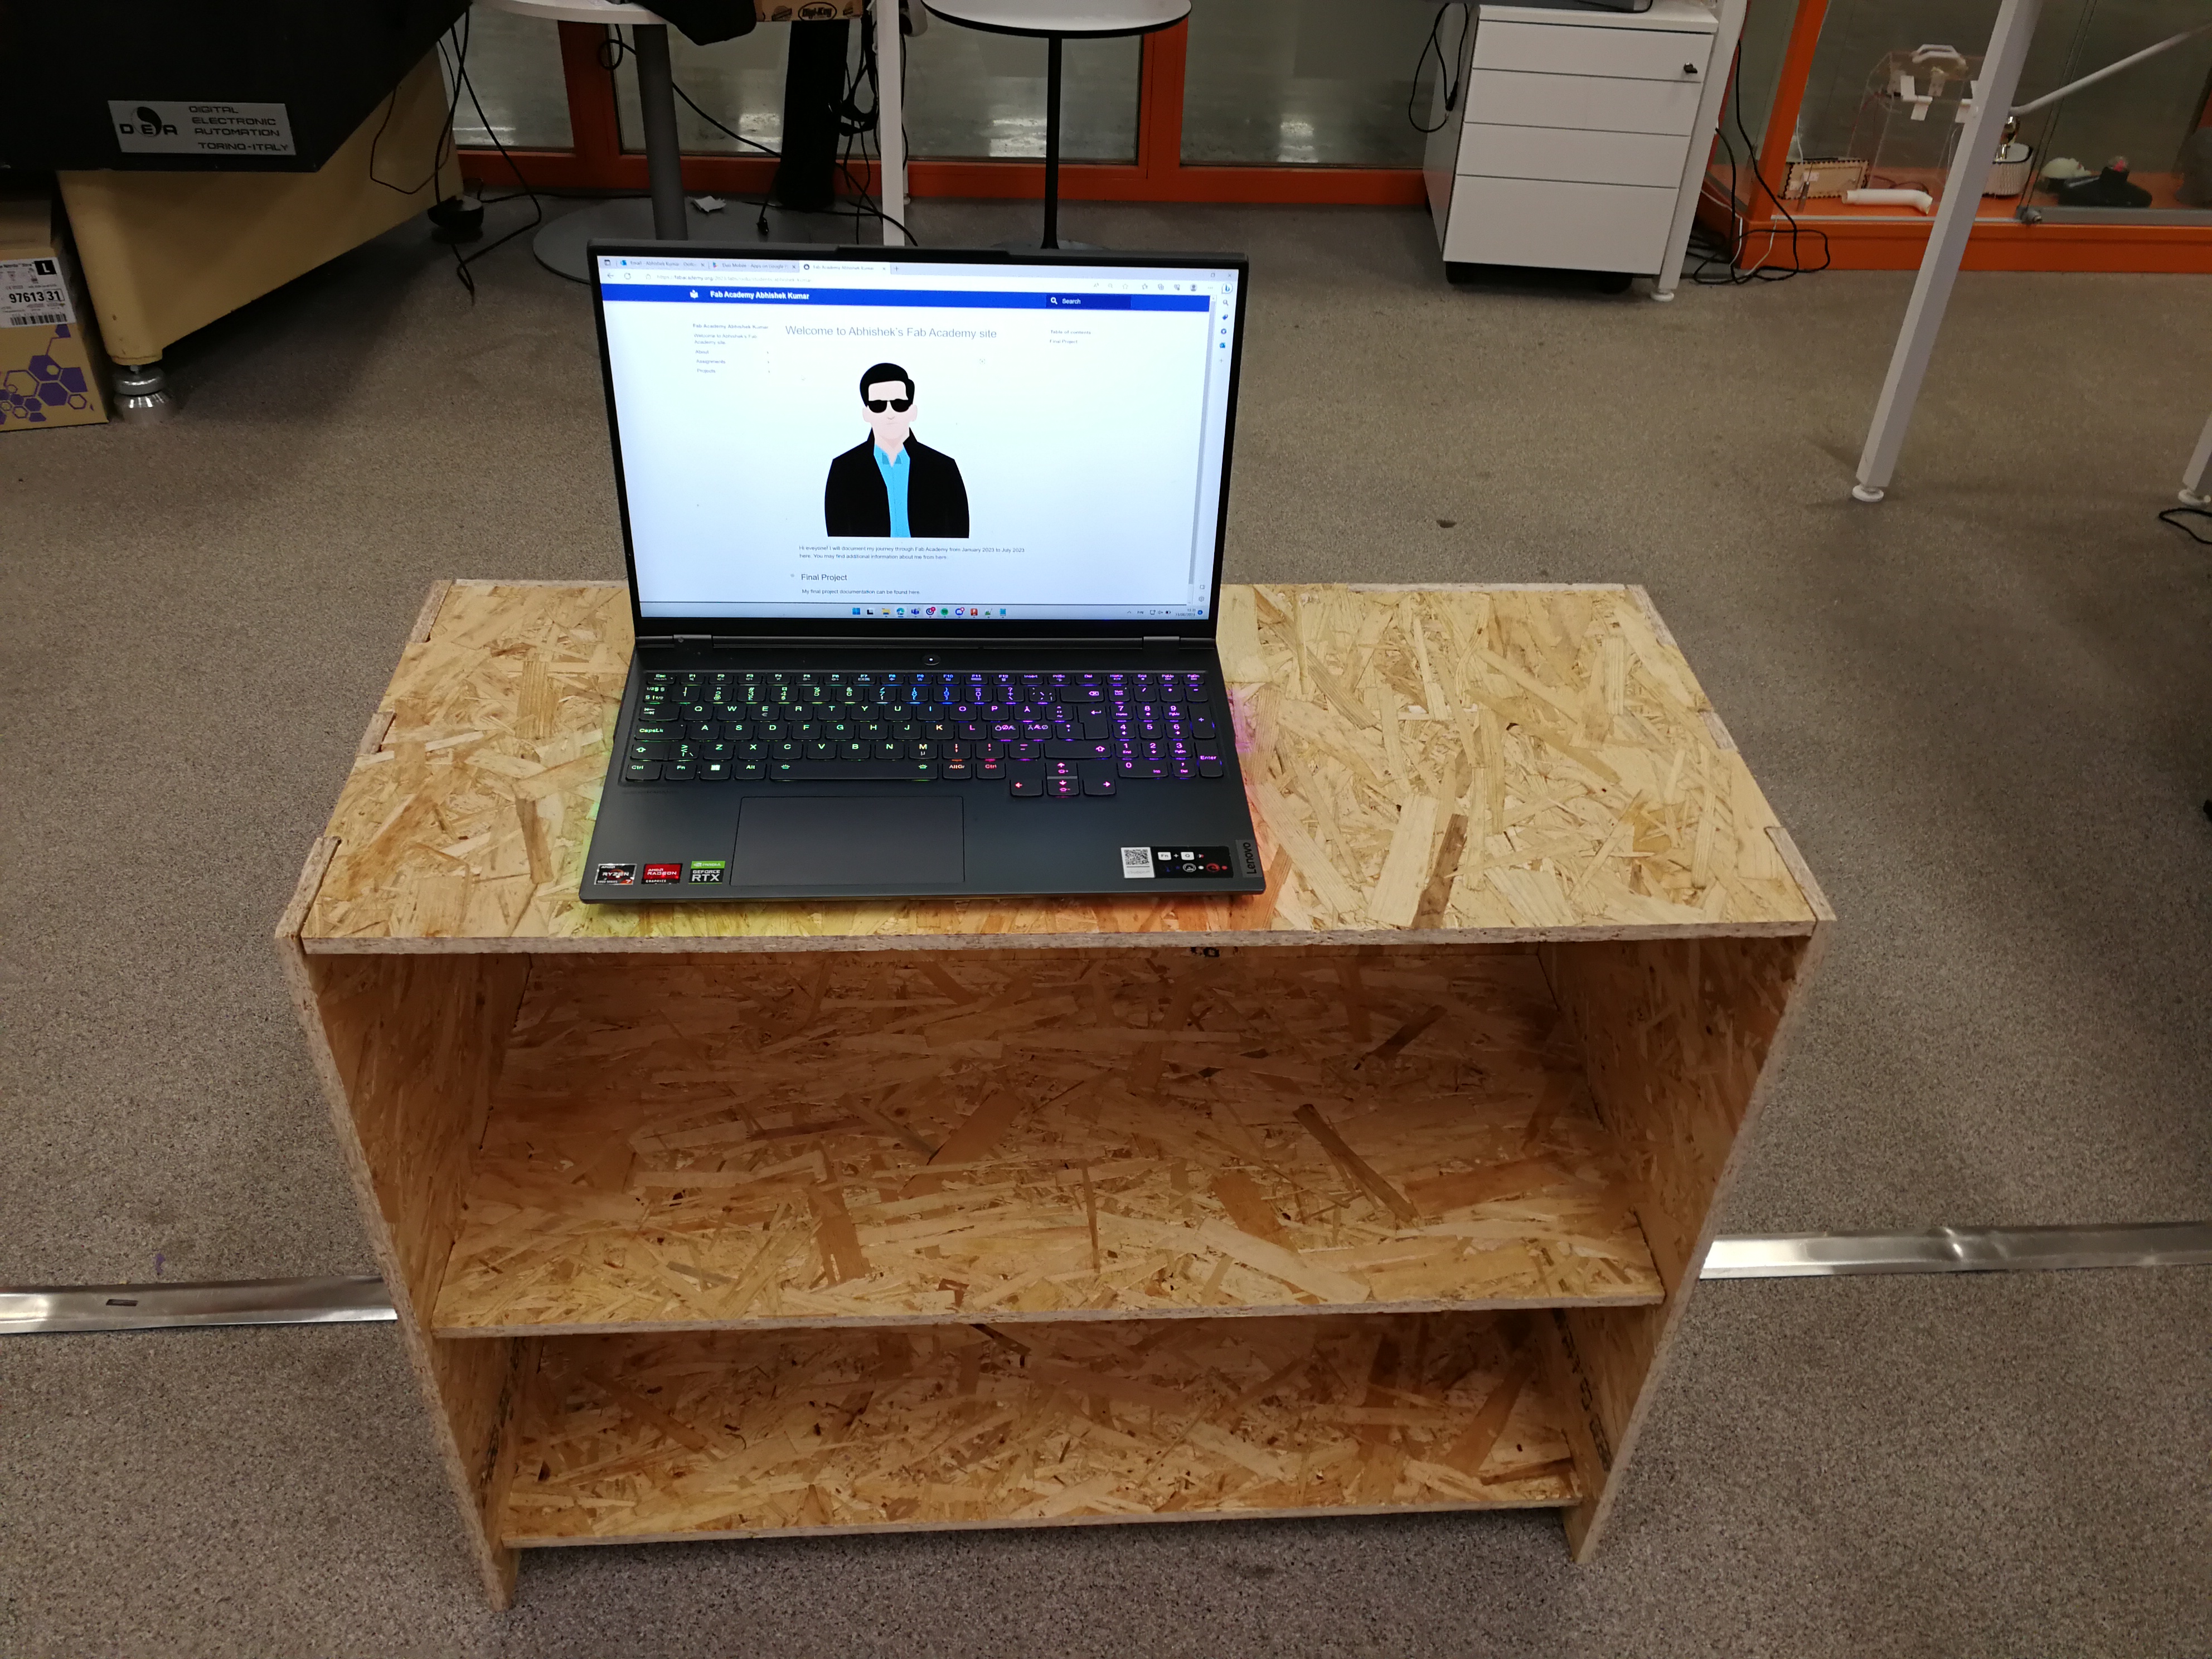 Final assembled bookshelf with my work PC on top of it.
Source files
The fusion file be found here.
NC file can be found here.