Wildcard Week
One day on a trip to a Recycling Center (Finnish equivalent of a donation-based thrift store), I saw a stained glass turtle lamp. It was expensive for a lamp and I didn't really need another lamp. But as soon as I saw it, I knew it would go home with me, regardelss of anything. And so it did.
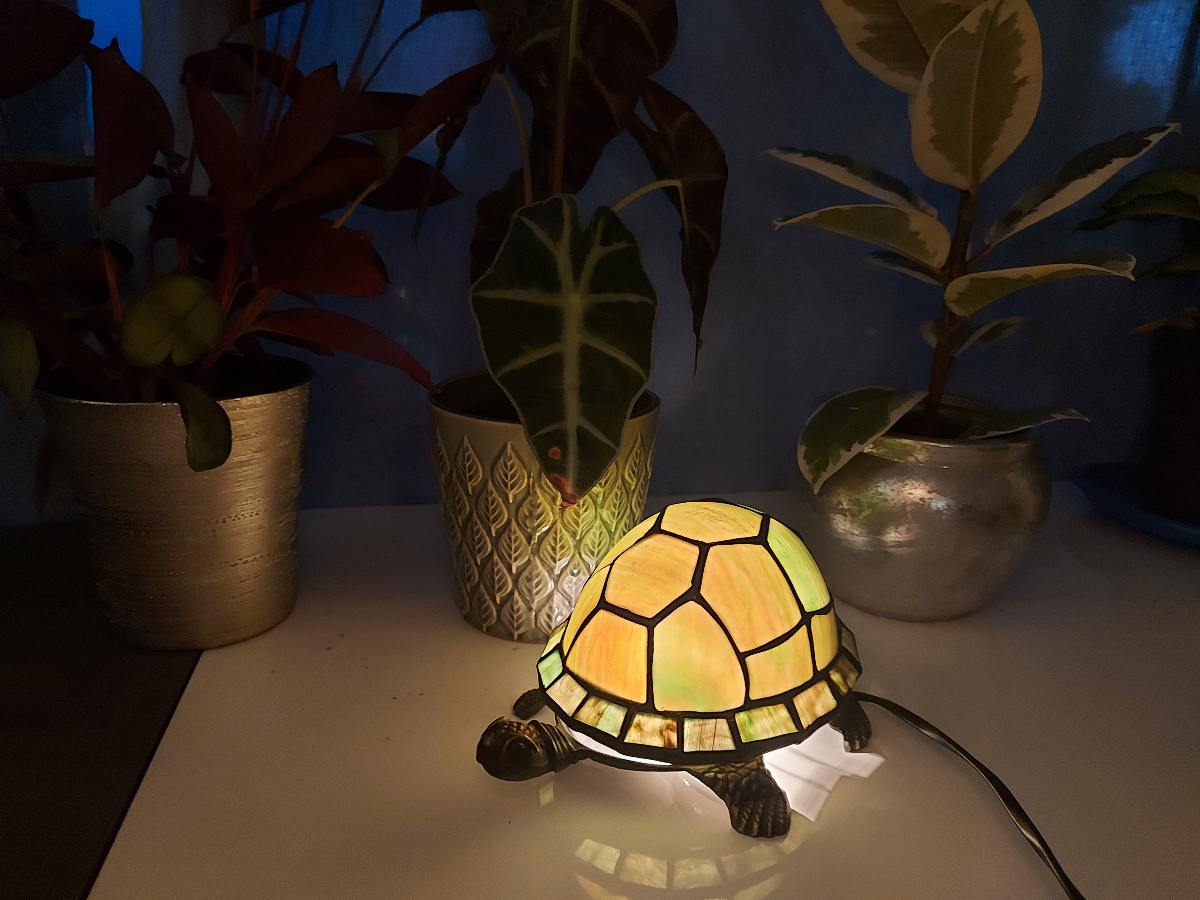
I had great luck to be accepted into a Metal Casting course at Aalto. The course teachers gave us freedom to choose whatever we wanted to do, as long as we would make some casting in bronze. I decided to make a companion for the turtle.
Bronze is a rather expensive material. It also is very heavy. It is a common practice to cast hollowed out statues rather than solid ones. In the course we were prompted to sculpt our molds in wax and most students succeeded with it, as they opted for solid parts. I had quite a lot of trouble trying to get even the draft shape in wax alone. The minimum thickness for a cavity in a mold for bronze casting is 4mm. Wax pieces this thin were just unmanageable, as the wax was melting and deforming in my hands when handled.
Doing Fab Academy at the same time, there was a solution at hand. It is possible to make molds out of 3D-printed parts.They should be made of PLA filament, SLA resins do not work, unless it is castable wax. However, even with the thinnest layer height, the PLA prints are still showing the layers clearly. I didn't want my fancy higher-end bronze material to look cheap Metal casting may have fidelity so high that even fingerprints are visible. Following the teacher suggestion, I decided to 3D print a base and then cover the outer surface of it with wax.
Design
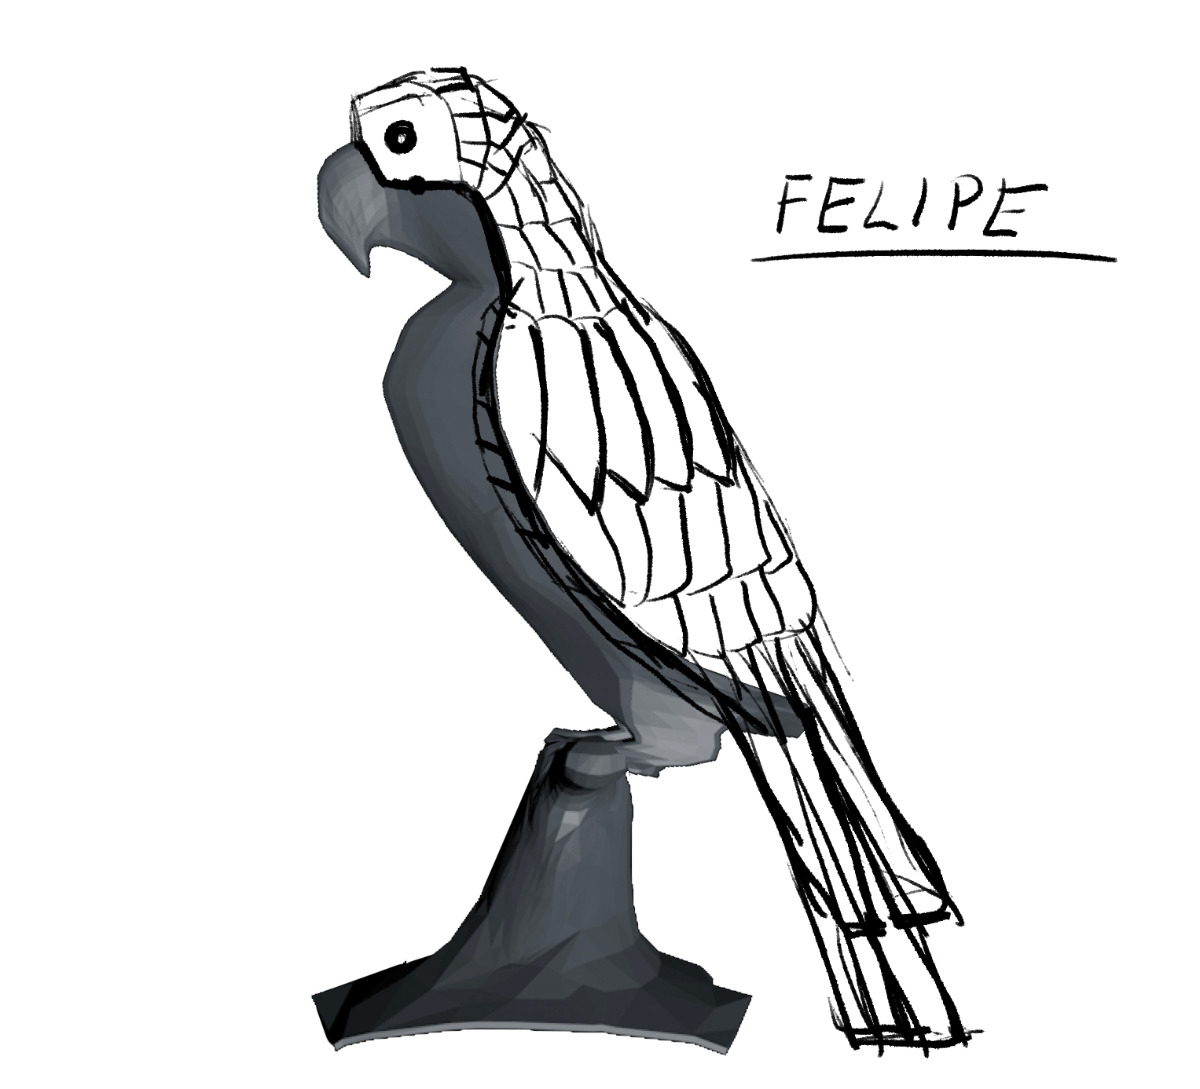
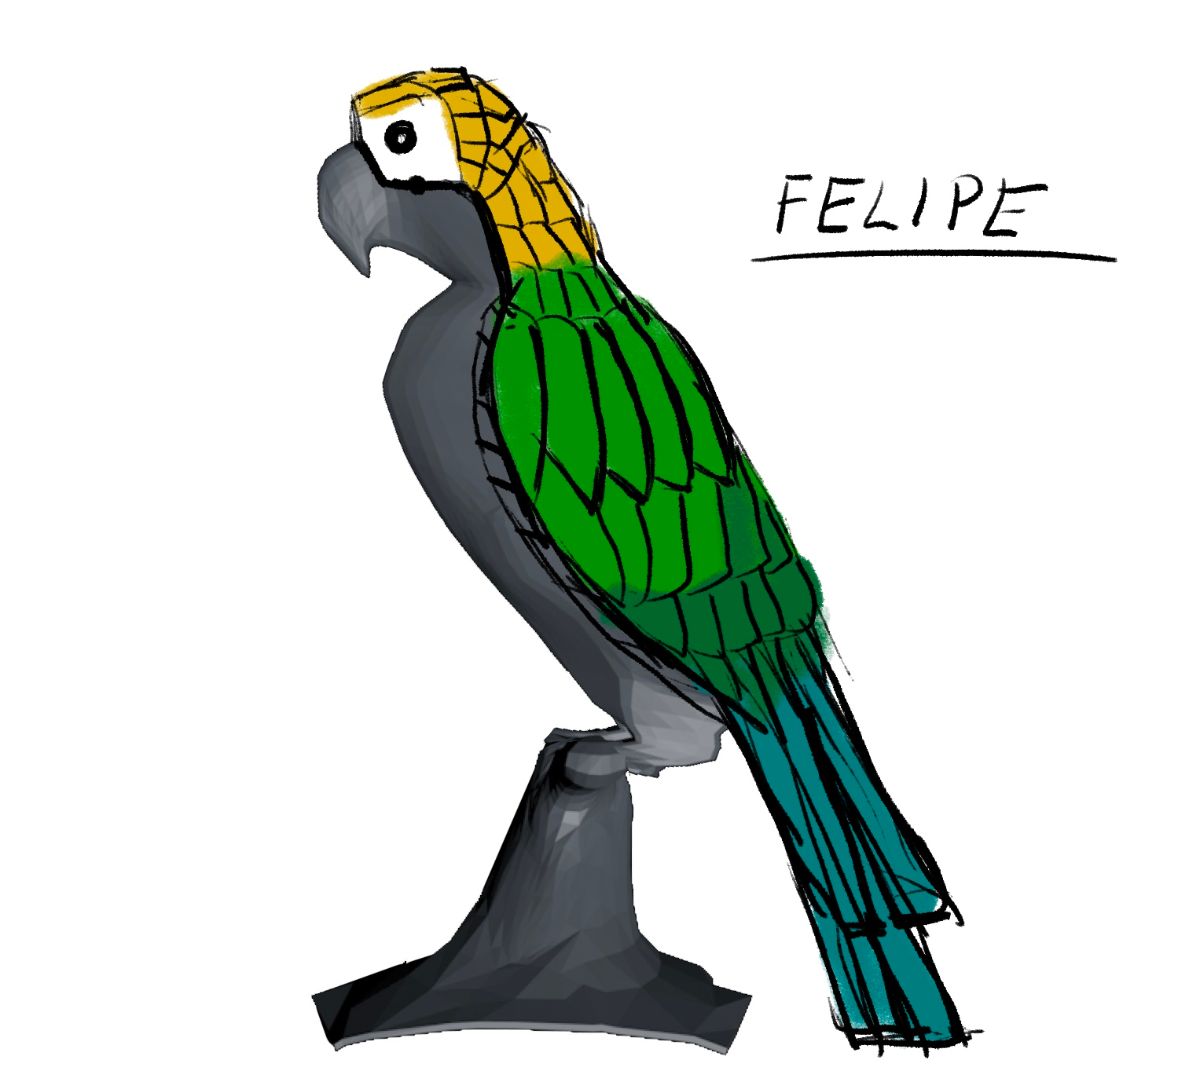
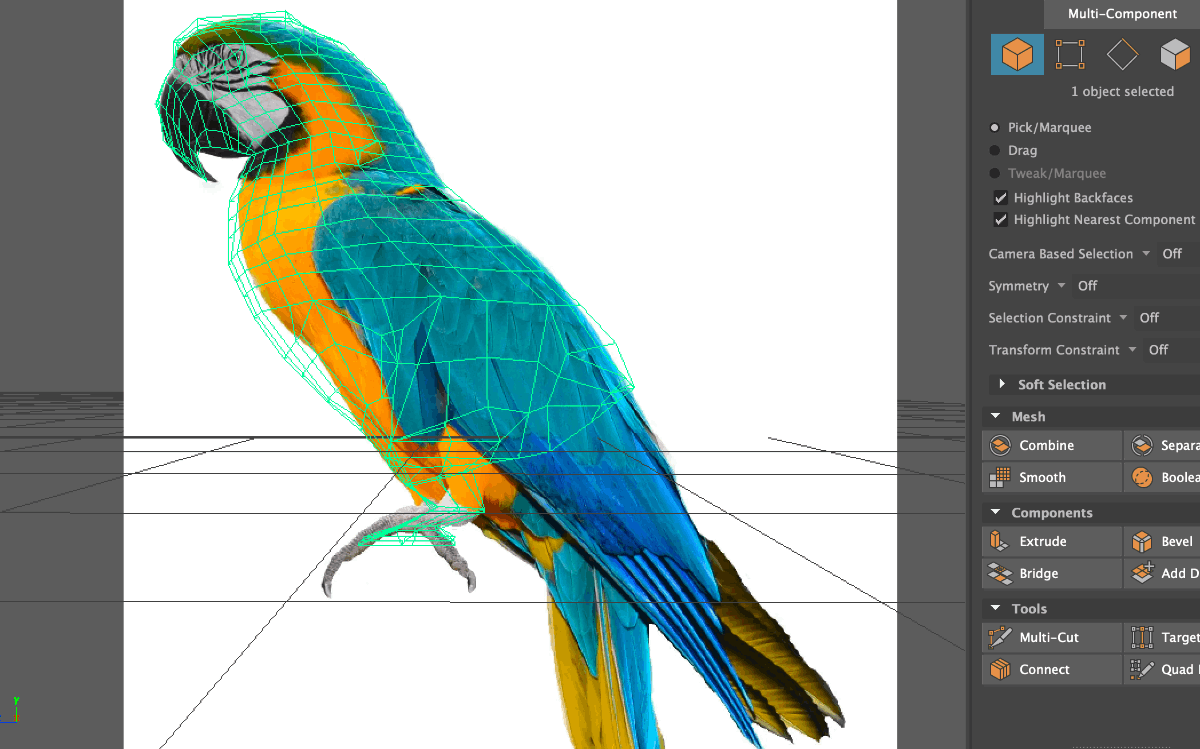
I modelled a macaw parrot following photo reference. Then I cut off the part that would be made of stained glass and extruded the walls to around 3mm (with wax layer it would exceed 4mm minimum thickness). I did teh same with the lamp post shape as a tree trunk. I measured the volume of the whole as I was limited with the available volume of bronze - 400ml.
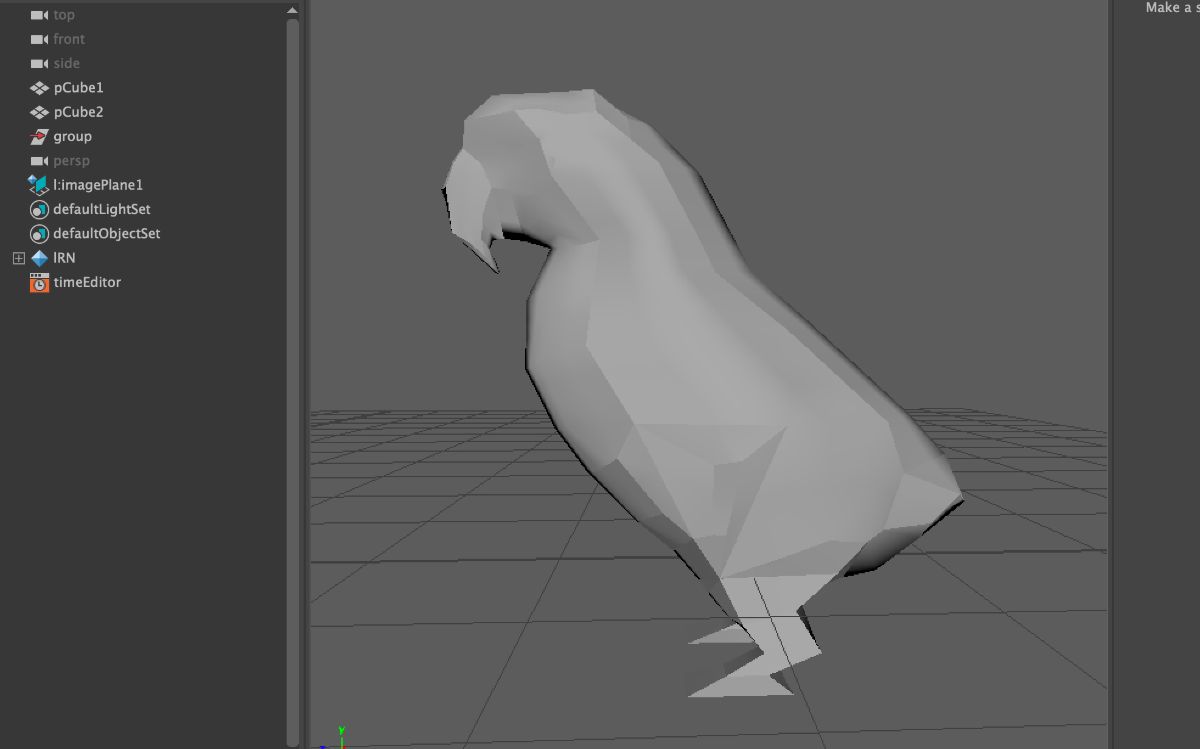
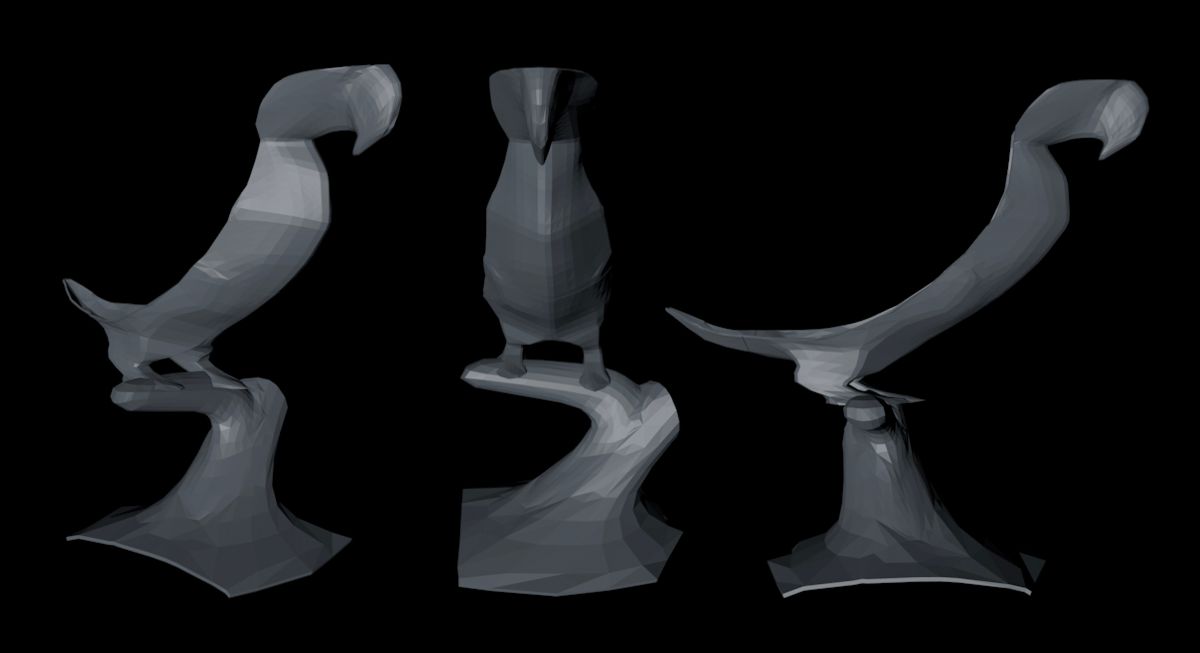
Model

In order to fit the print on the limited space of the printer bed, I had to cut off a piece. It turned out to be easier to replicate it with wax than combine separate printed pieces
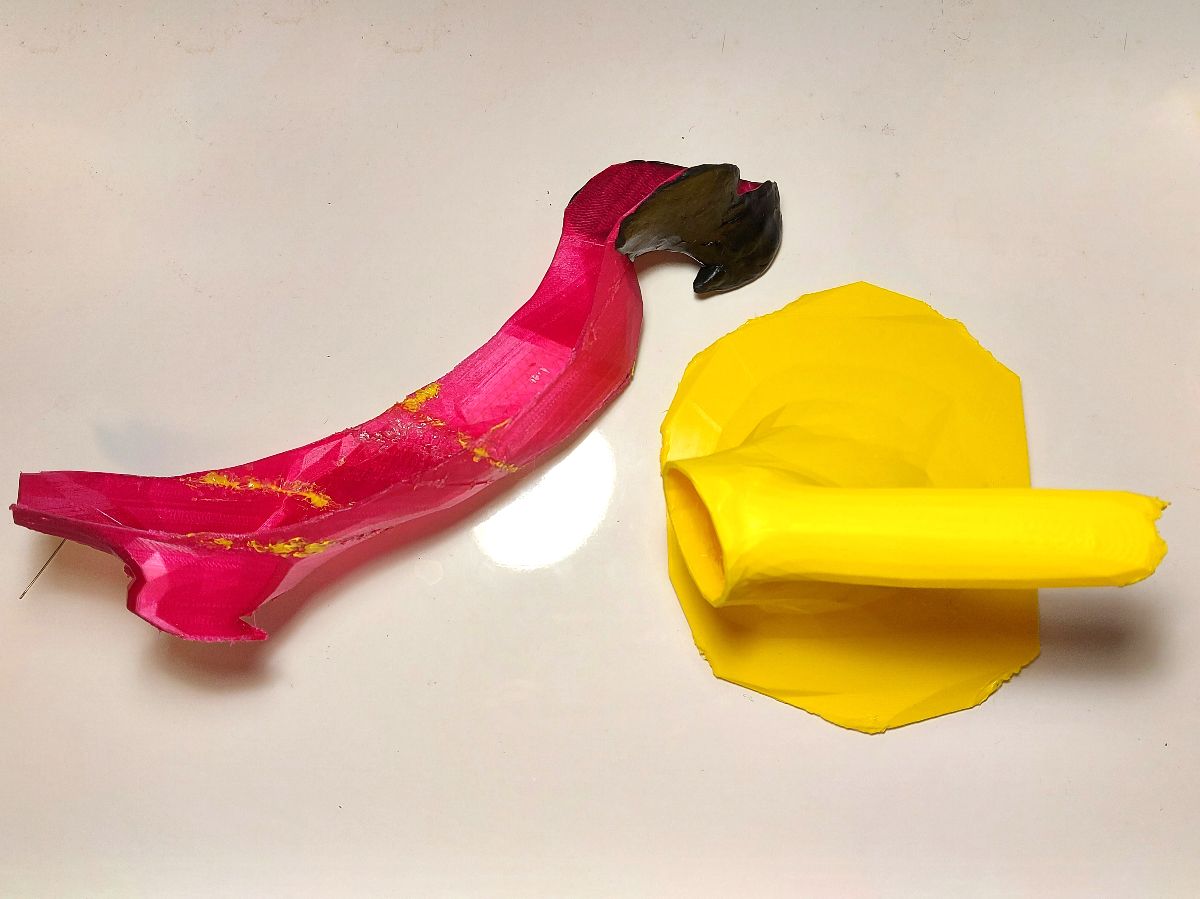
Covering the rigid 3D print with wax was much easier than the previous attempt. Wax is still a specific material to work with and it takes some time to learn how to deal with it and how to achieve specific effects. Living in cold Finland made it easier to keep the wax harder.
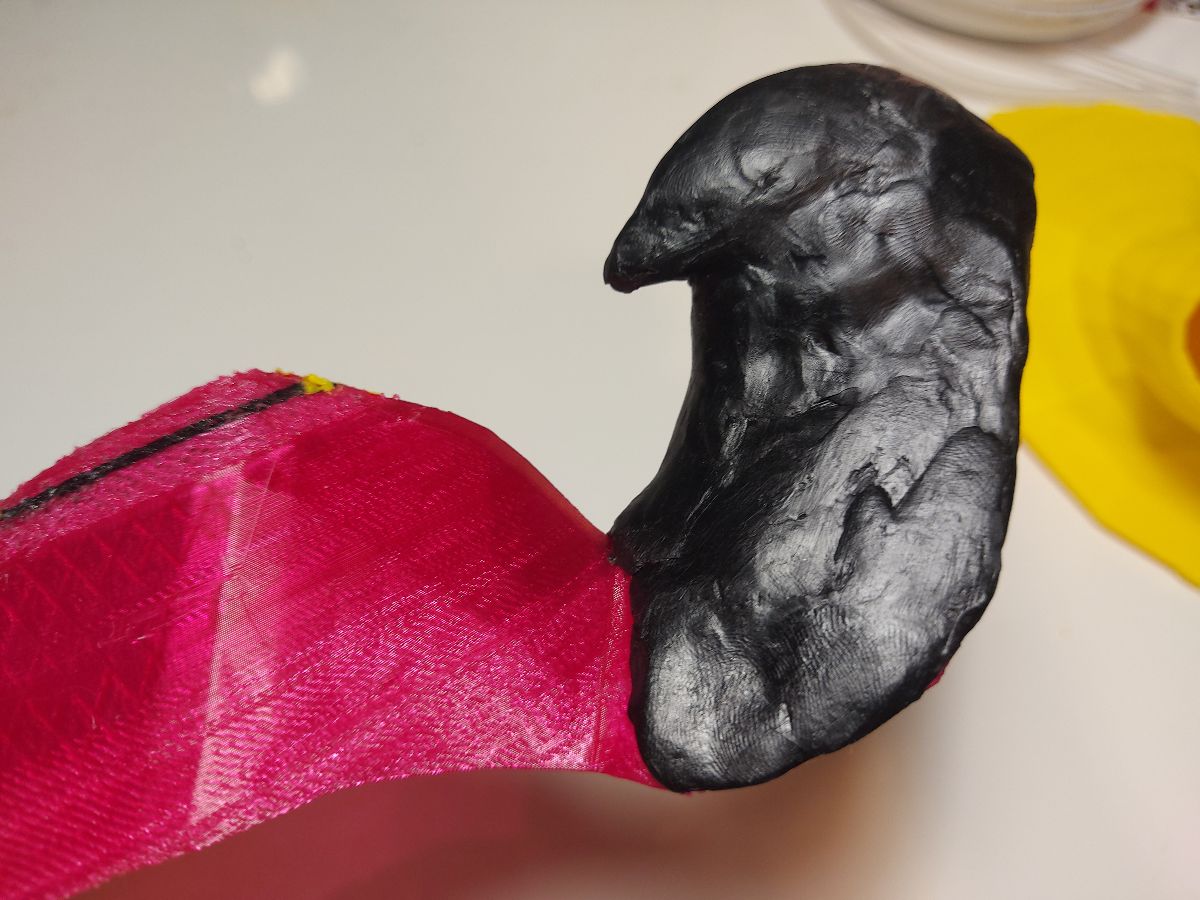
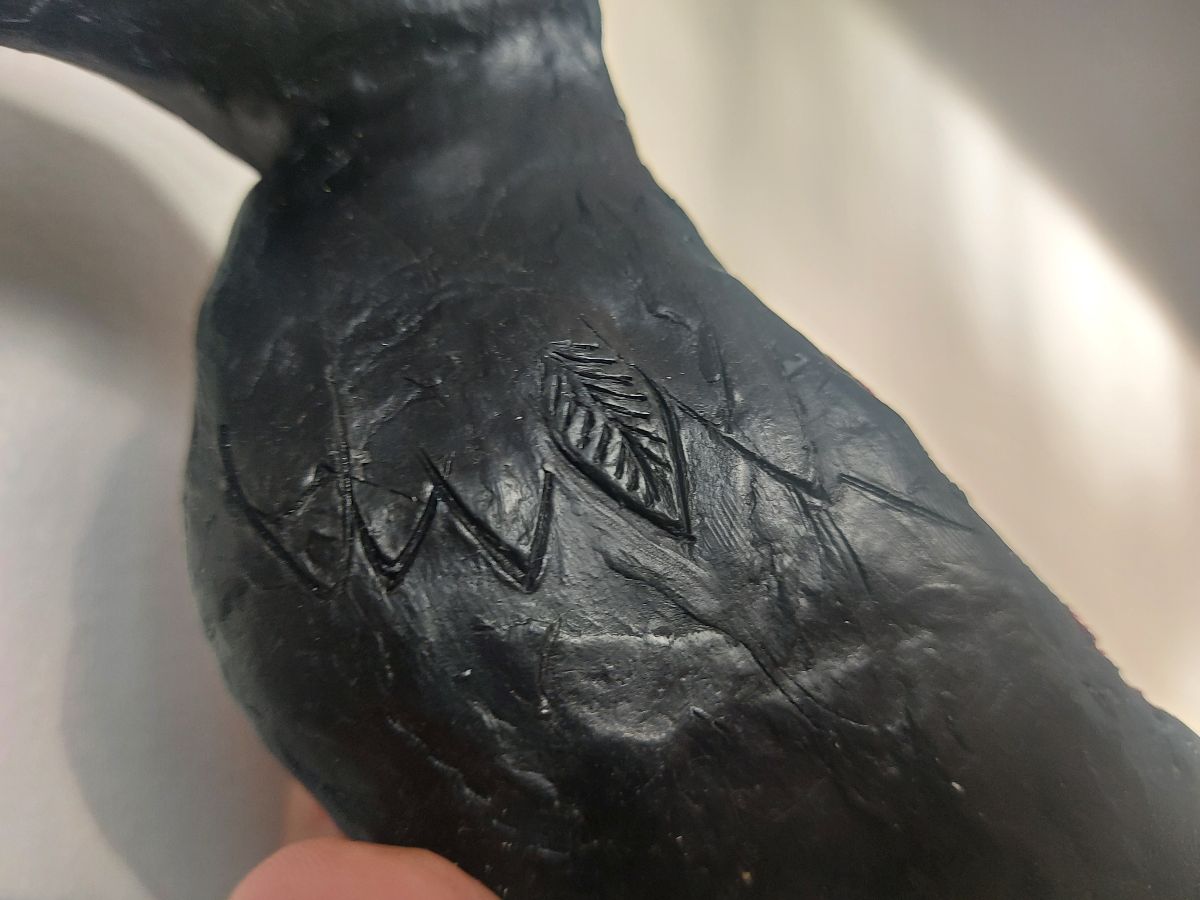
Initial attempt to give the parrot feather texture. I was not satisfied.
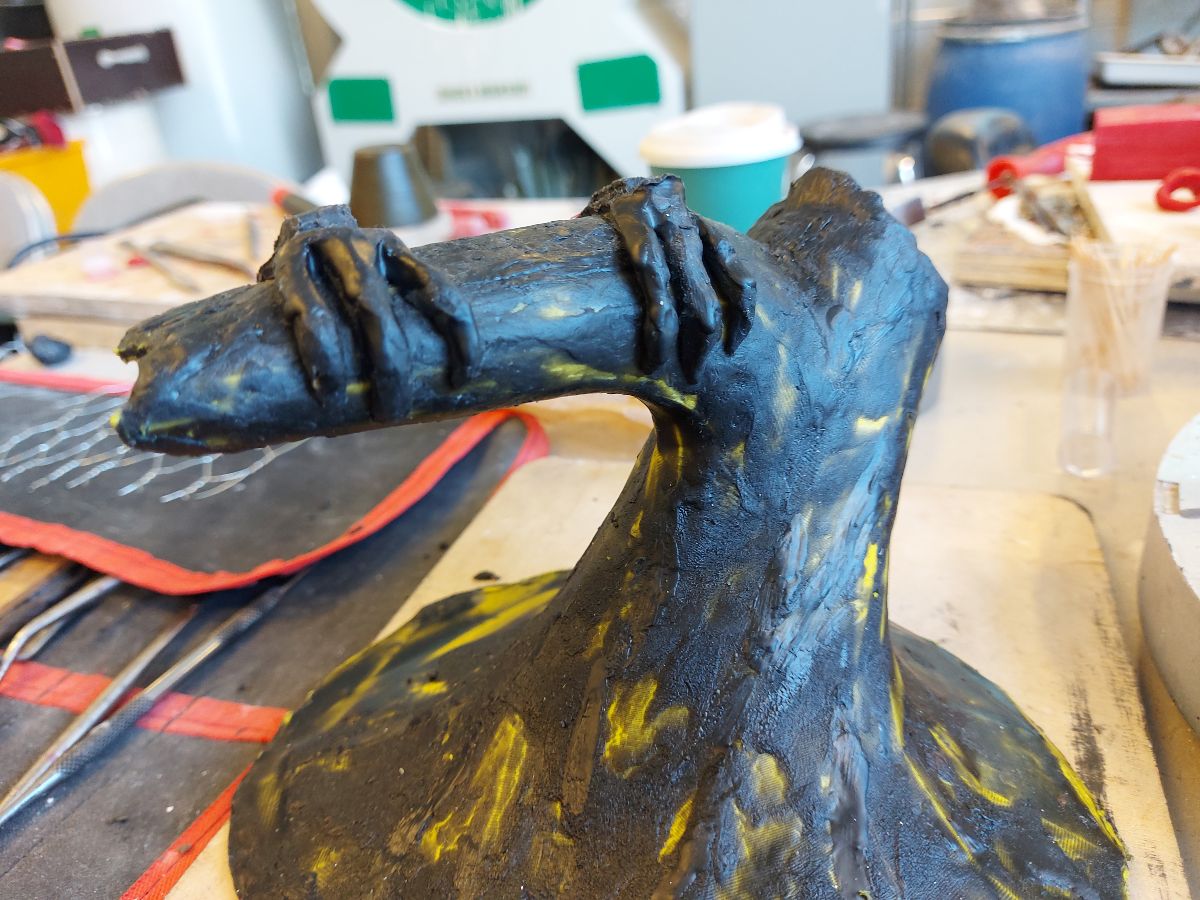
The tree part I covered with molten wax. The layer was looking about right for a tree bark texture, but was too thin, so I needed to add another wax layer to the inner side, to reach the 4mm thickness.
The casting expert suggested to cut off the tip of the protruding smaller branch of the trunk as that would make the next steps much easier. I didn't really get why, but as it didn't really matter for me, I did as told
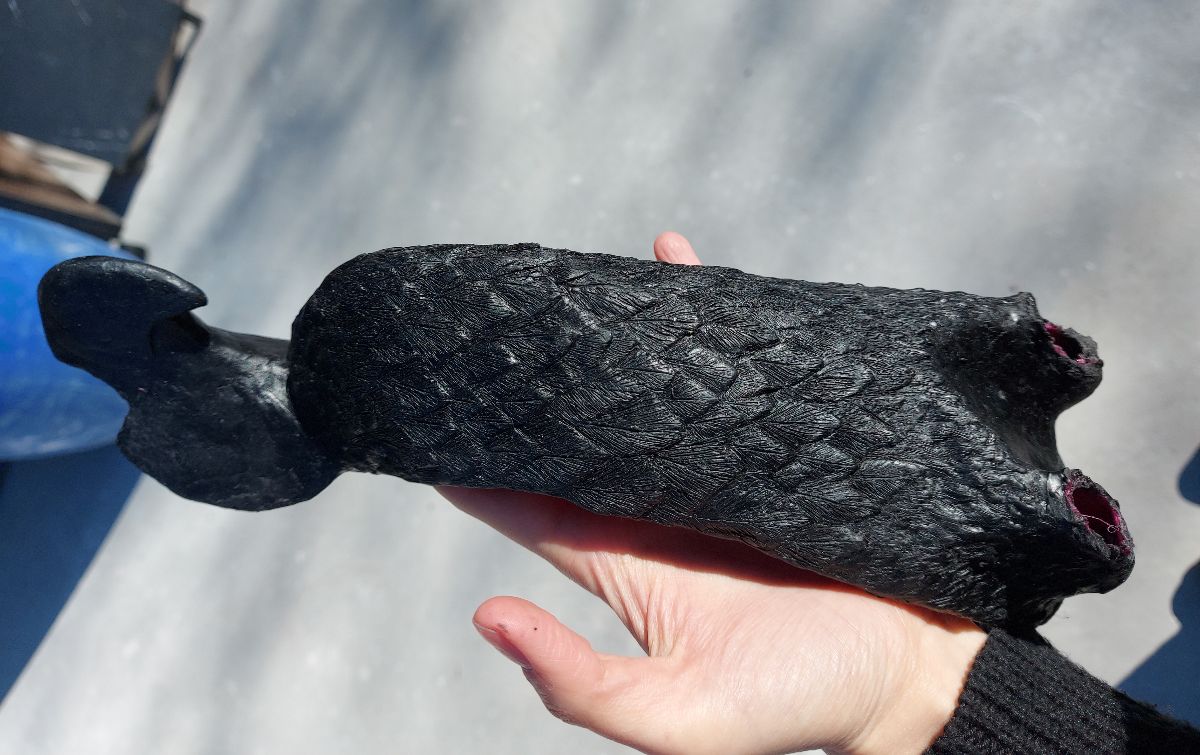
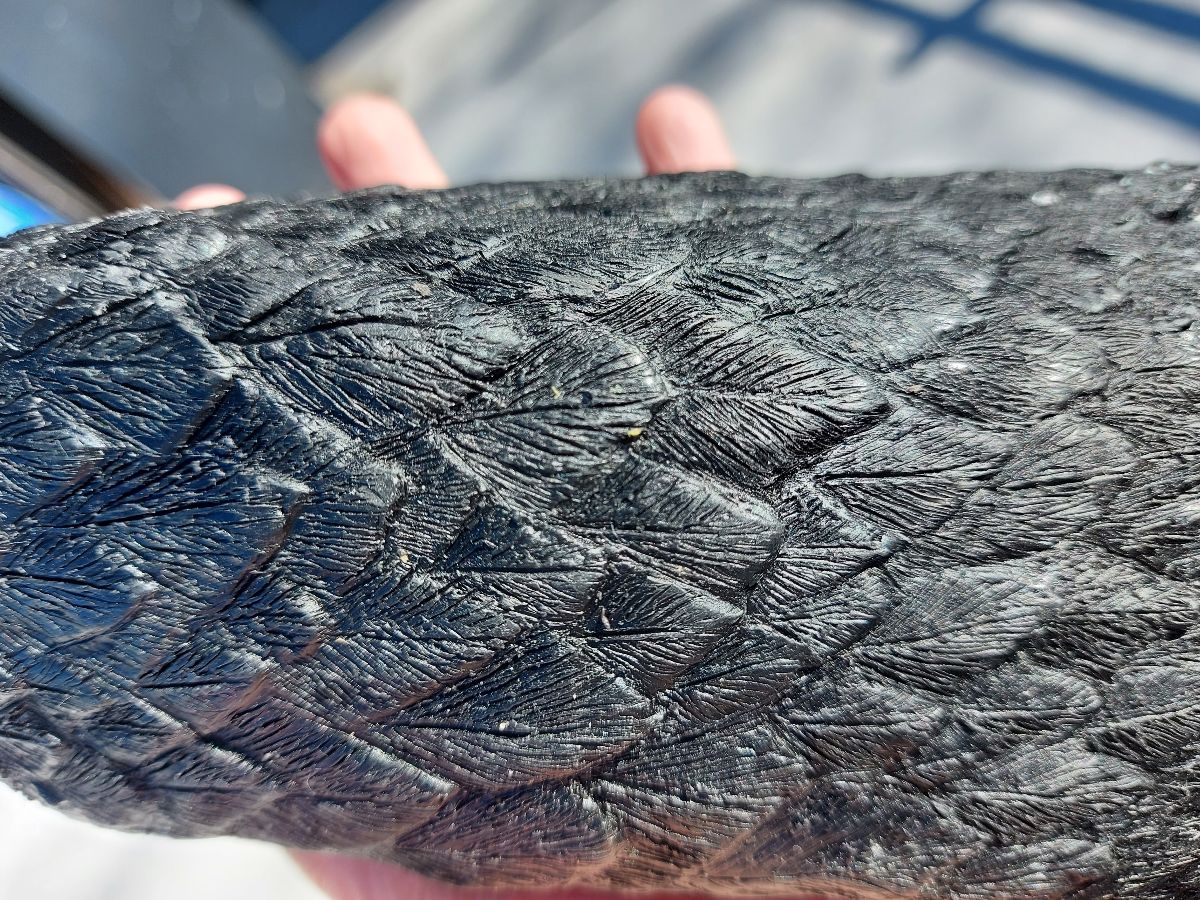
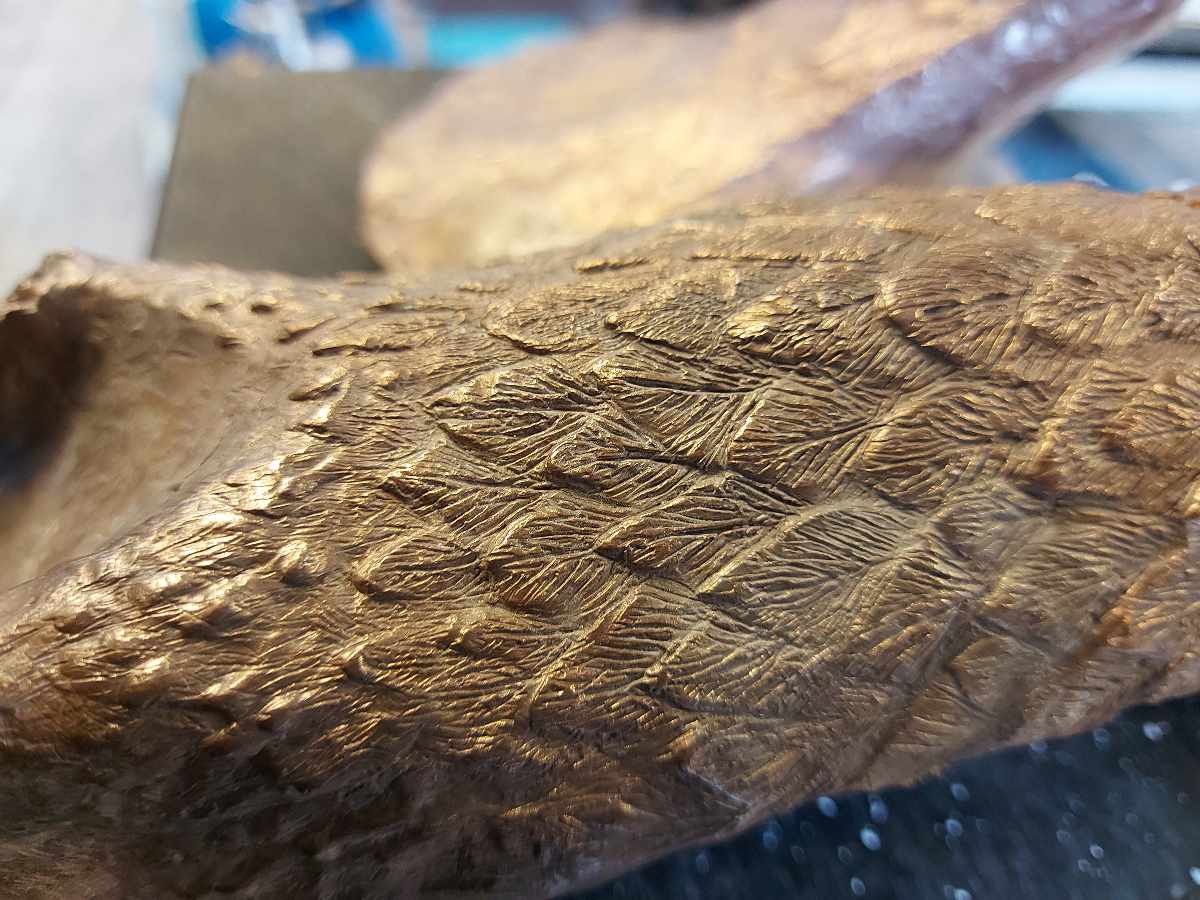
It took A LOT of time to get high-resolution feather texture. I have no idea if it would actually be replicated in the casting and final part
Ceramic Mold
Channels
I needed to prepare the tree with channels for the metal to be able to flow into the mold. Channels were made with another kind of wax, which was harder. The main channel was a wax covered threaded rod. The other essential part was the casting cup - wider part on the very top that the molten metal is poured into. The metal rod makes handling easier and it will fall out as the wax melts, leaving the mold hollow.
The remaining channels should be placed at a light upward angle (just slight). There should always be an air vent - the thinner channel the air would escape the mold as it is being filled with metal. It was made with plastic straw. As the hard green wax doesn't melt in hands, all the gaps, holes and sharp elements on the chanels had to be filled with yet another kind of wax - very soft and easy to apply.Smoothing out the edges would make it easier for the metal too flow
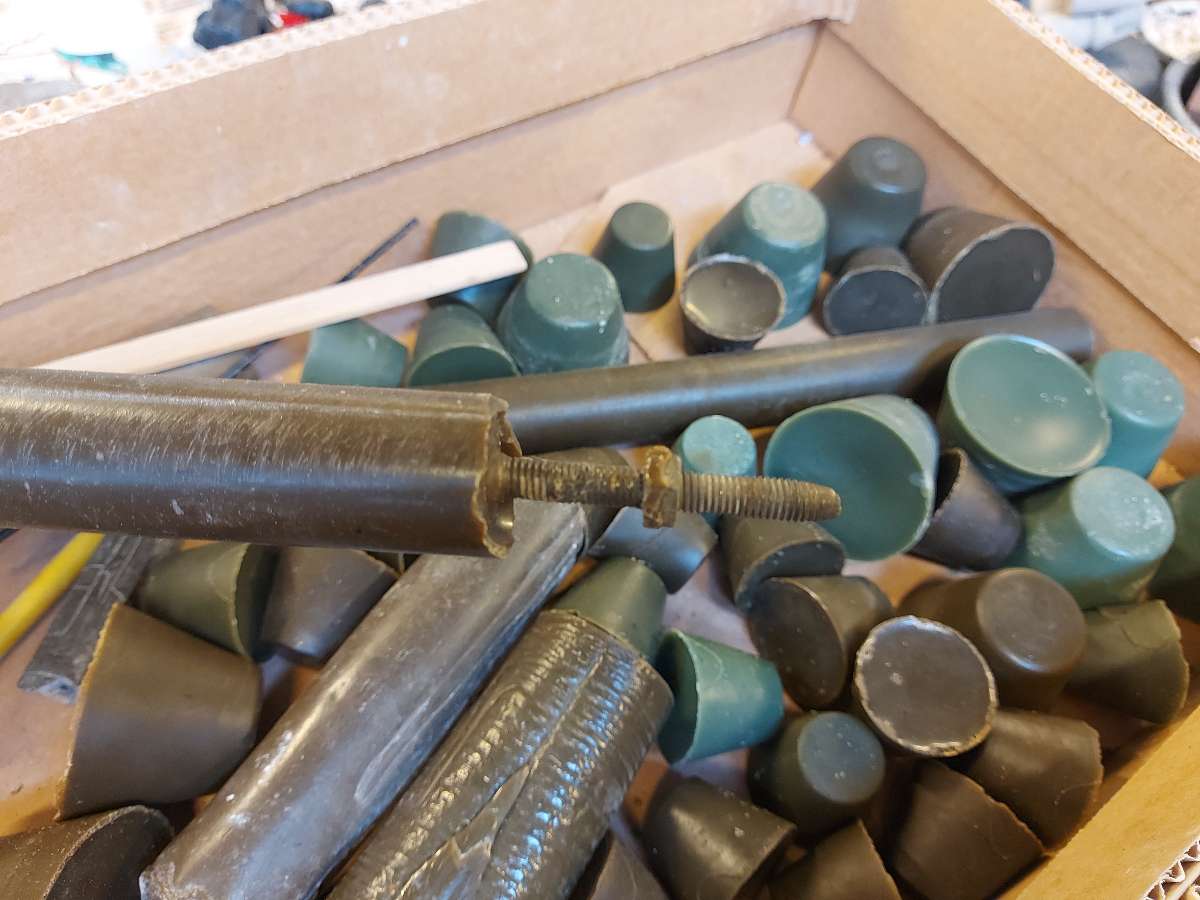
Rods and wax pouring cups, hard wax
Soft wax used for fixing the holes and finishing

Ceramic and sand mold
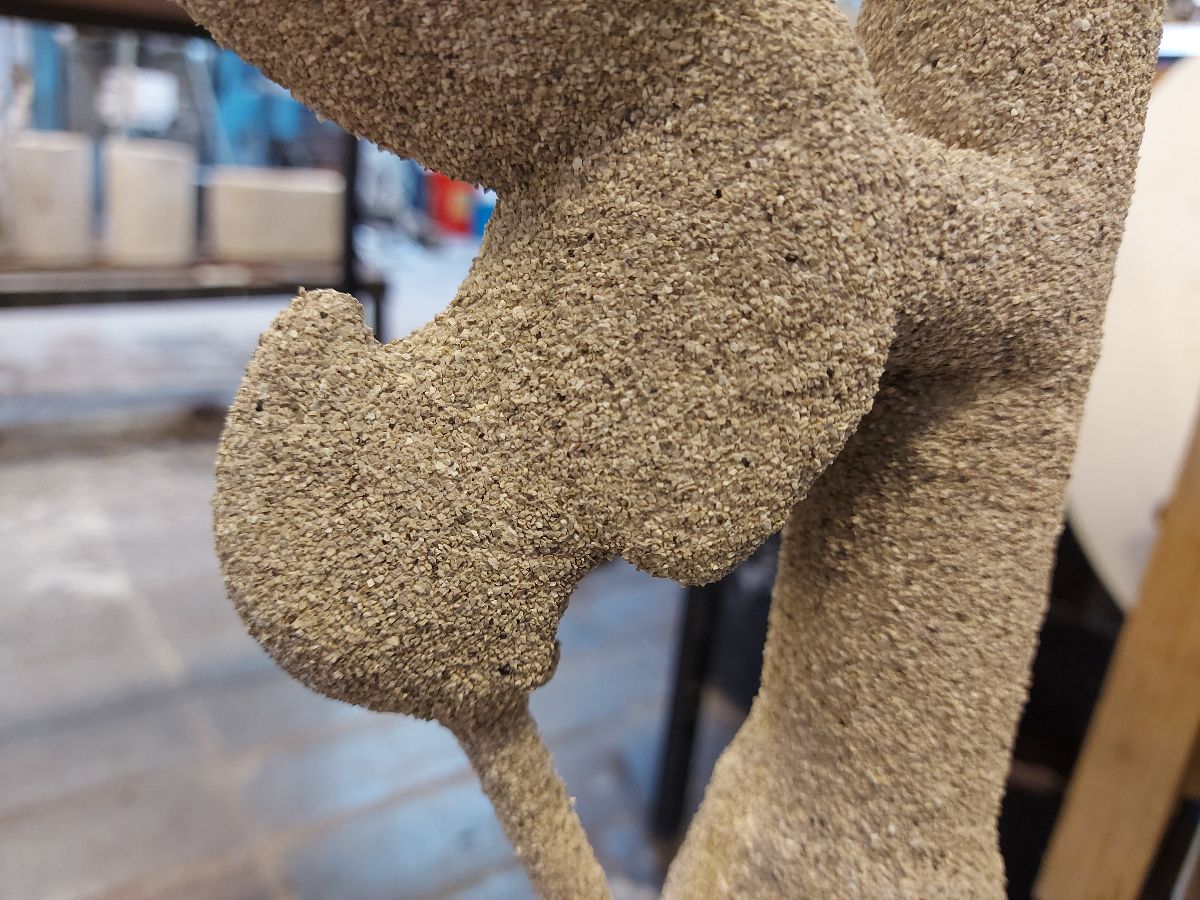
Ceramic slurry used to cover the wax mold and create solid layers around it. The mold has to be covered entirely, except for the very top surface of the pouring cup. There should be no bubbles preventing the slurry from covering the mold.
Each layer of ceramic was then covered in sand in a specialized machine and left to dry. It takes about 1 hour for each layer to dry. It took 7 layers of ceramic + sand to get the mold of right thickness for my purpose. I needed 2 layers of fine sand for initial layers, then 2 layers of medium grain sand and finally 3 layers of rough sand on top
Now it made a lot of sense to have the tip of the branch cut off as I was asked, creating a hole. It would have been very difficult to create a mold with just one opening.
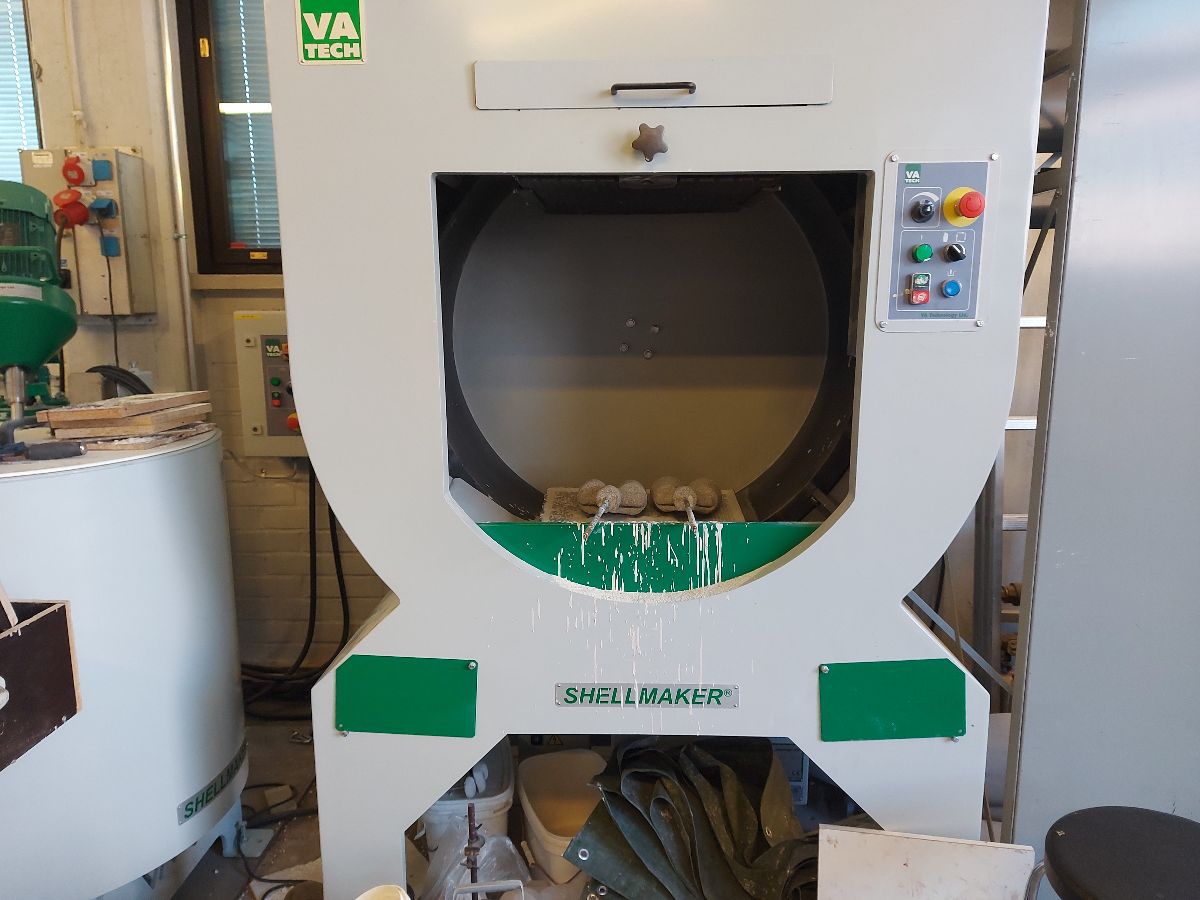
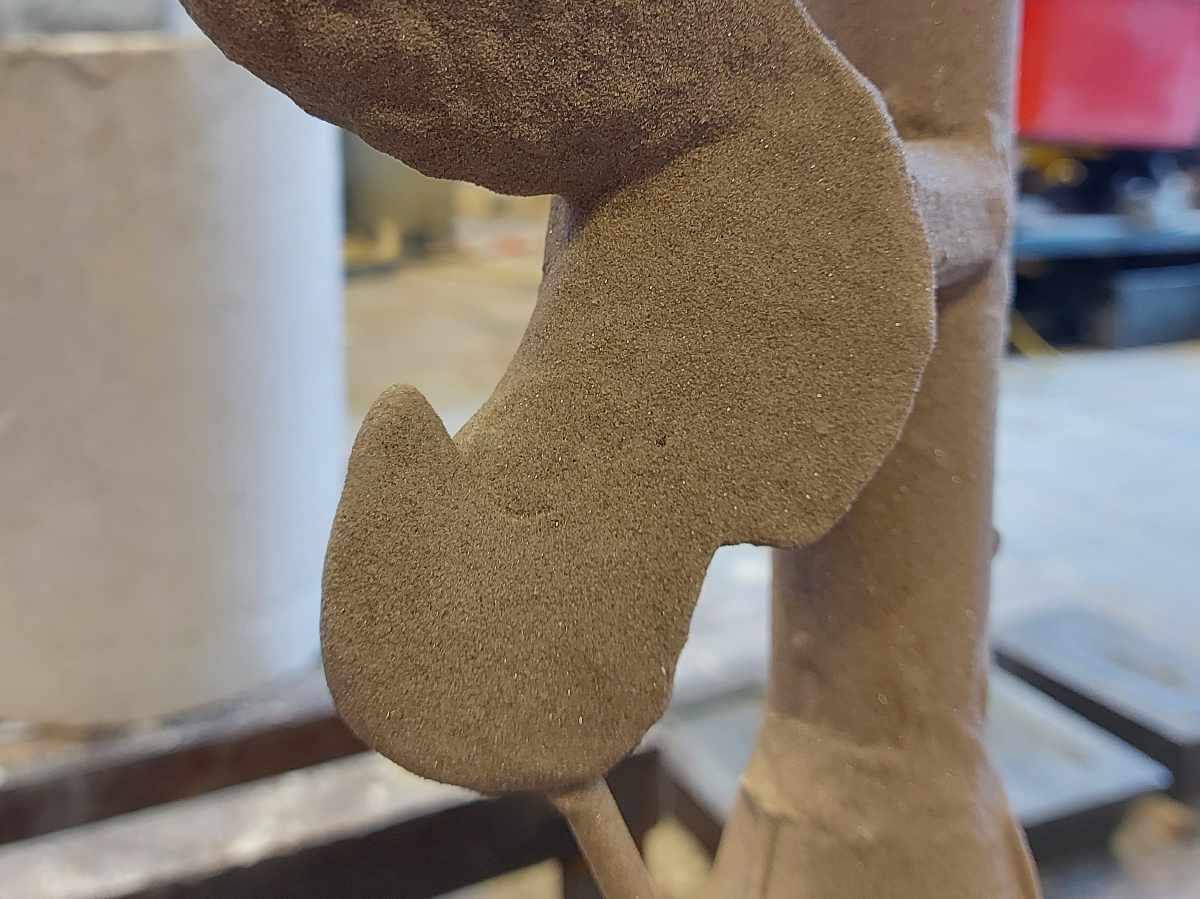
Sanding process - the ceramic layer should be covered entirely in sand. The metal rod makes it possible to operate the mold and rotate and orient to get the sand to cover the interior side as well. Also, the slurry dries up quite fast and requires fast actions to get the sand to stick to it when still wet enough
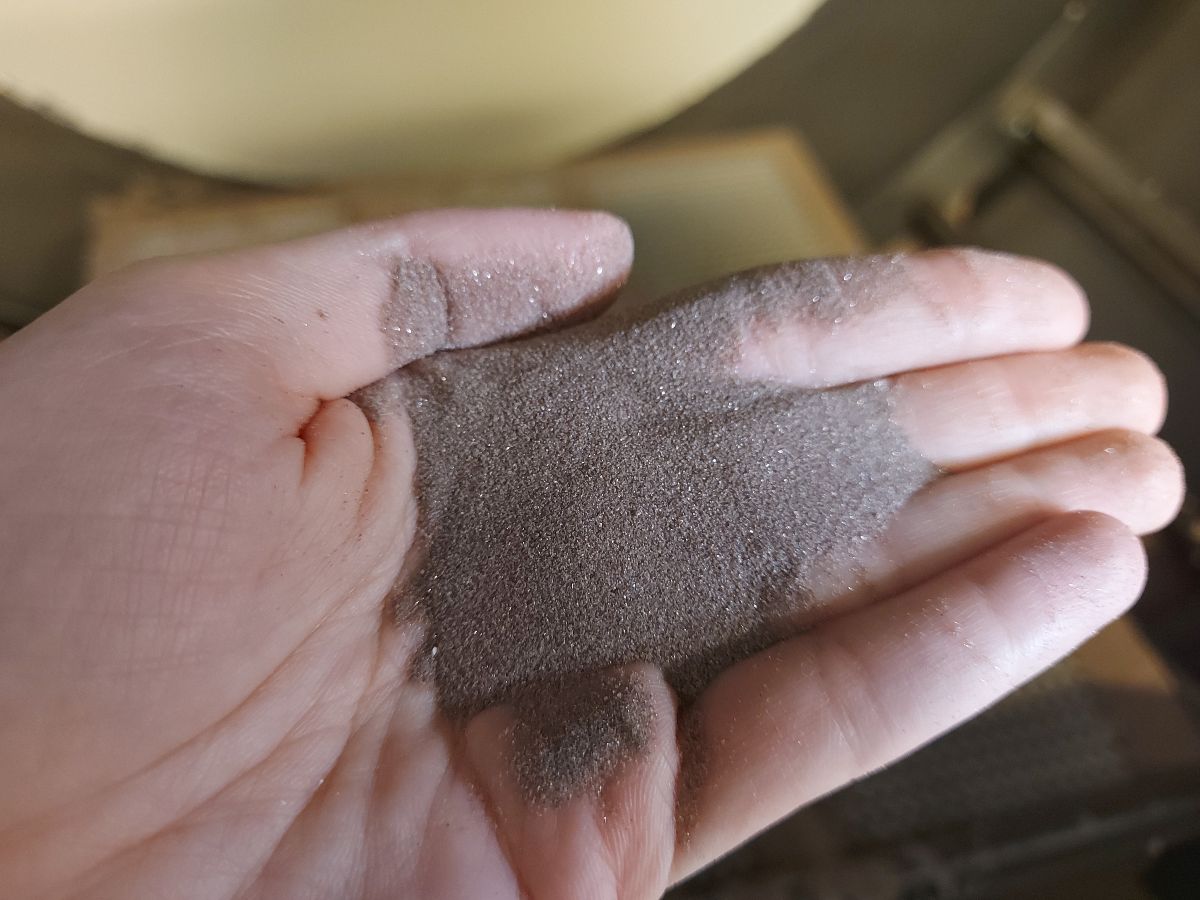
Fine grain sand - 2 layers
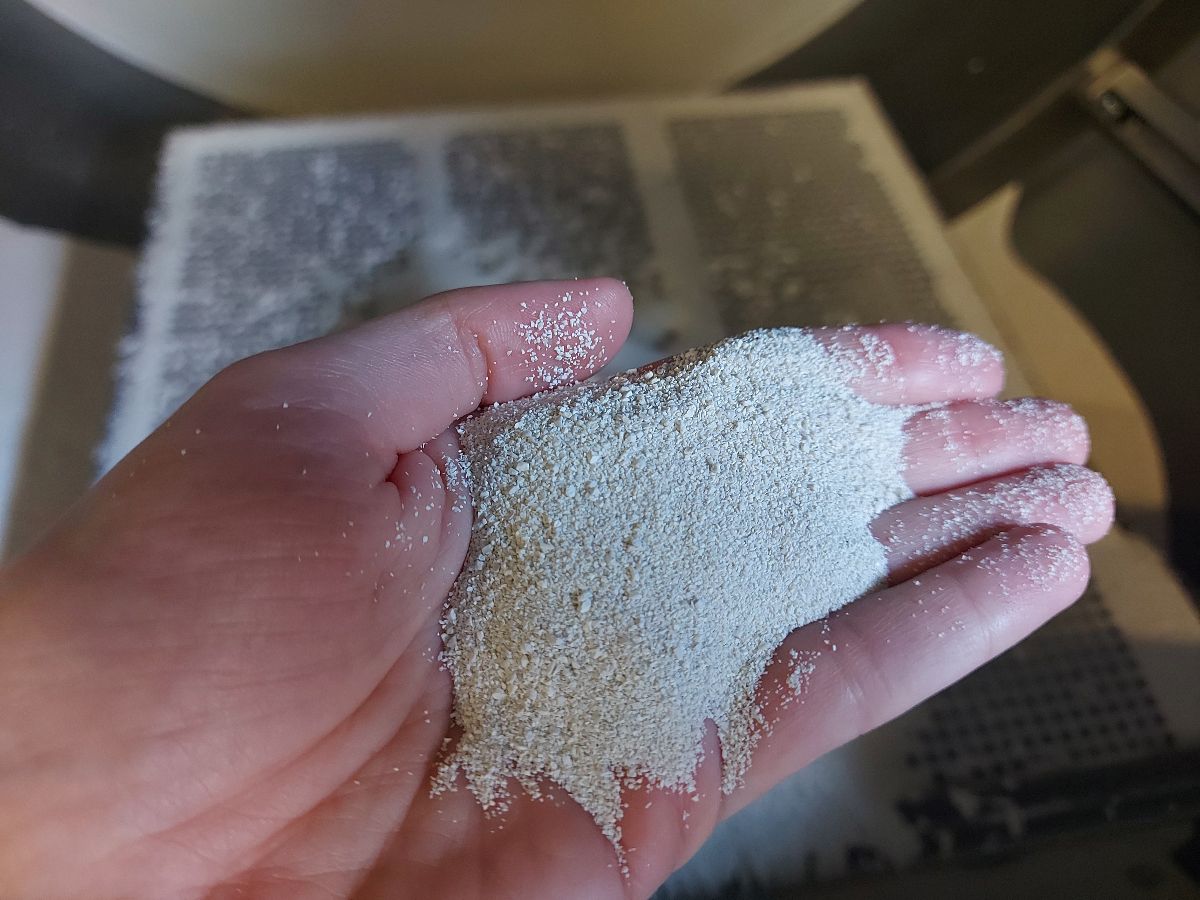
Medium grain sand - 2 layers
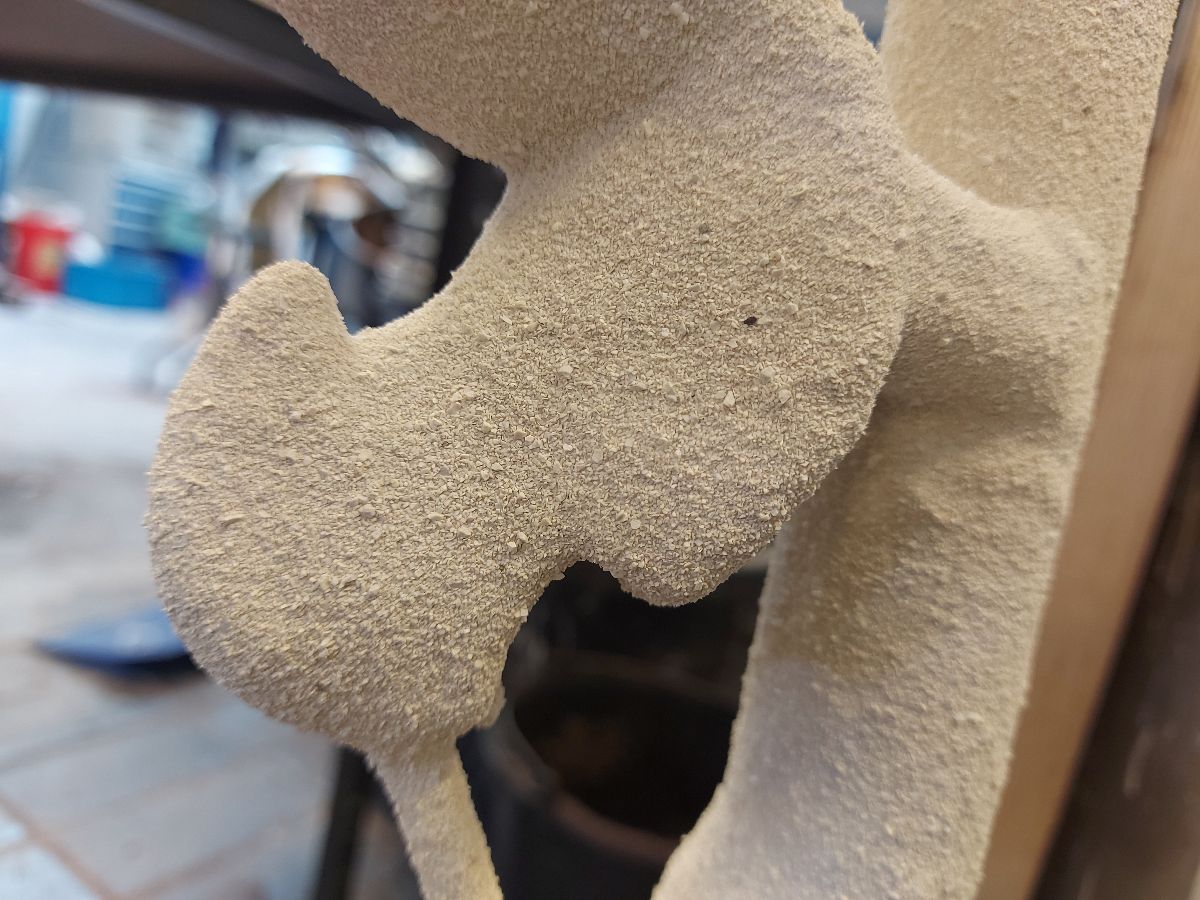
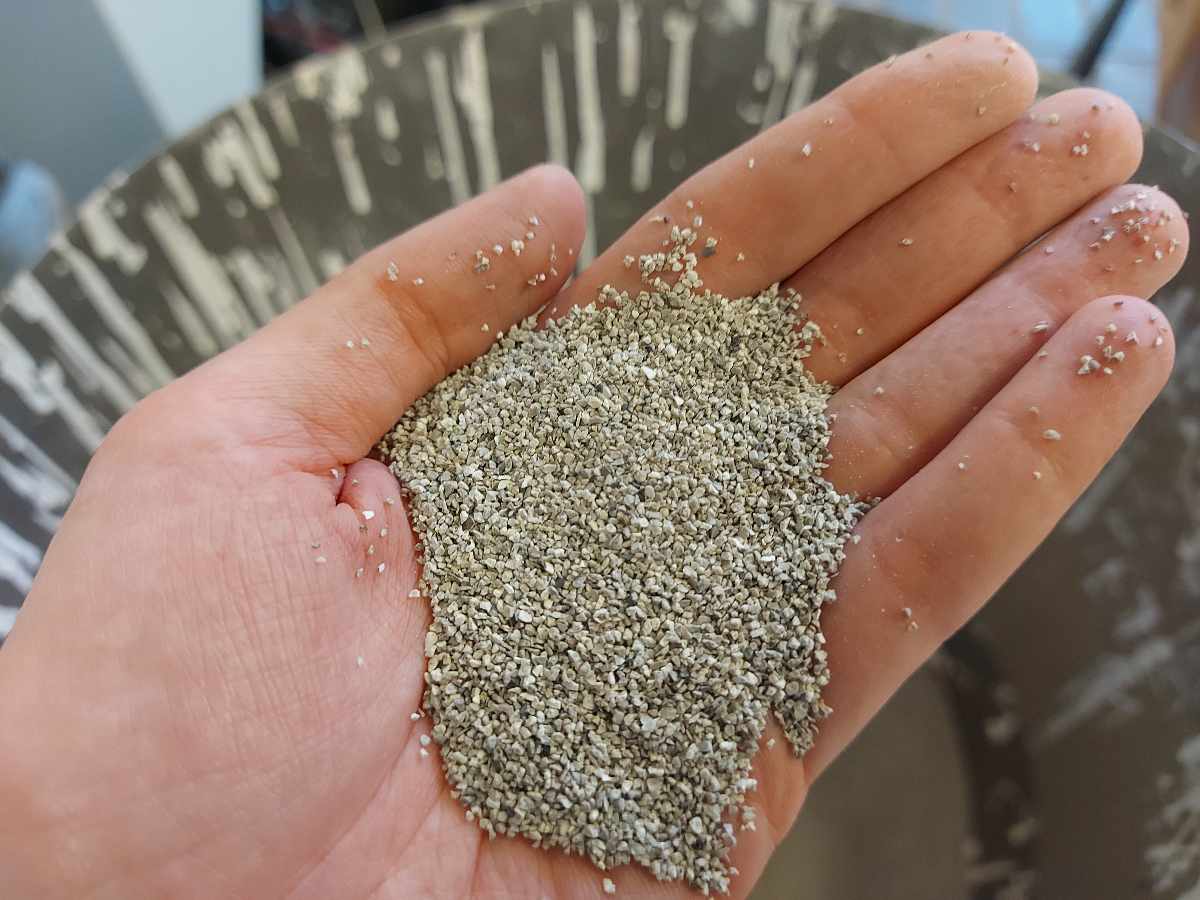
Rough grain sand - 3 layers
Burnout and slinthering
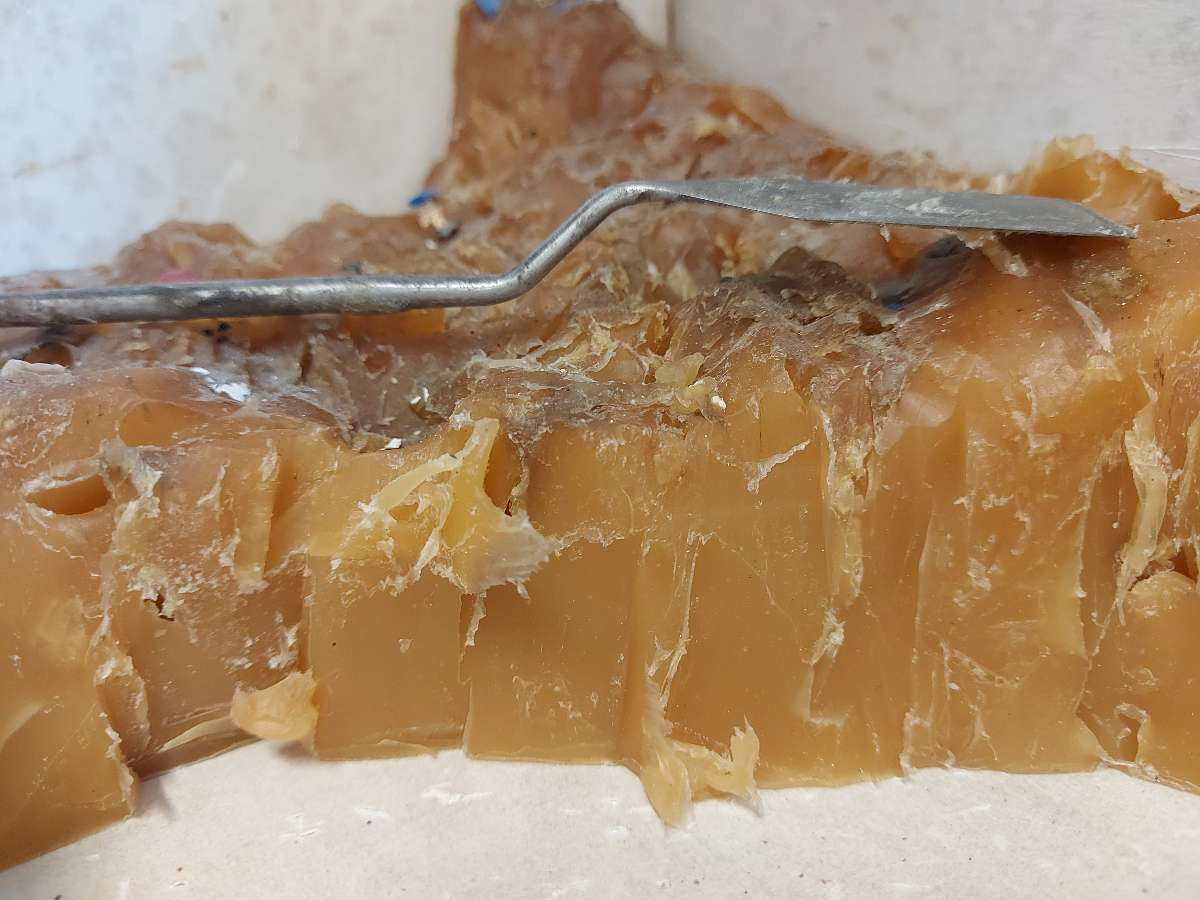
The next step was heating up the molds to around 750 C degrees to melt the wax and let it leak out of the mold, leaving cavities the metal could flow into. The initial stage took around 15 minutes, the wax and PLA were flowing out quite rapidly. The wax should flow out as fast as possible - otherwise it would expand in the high temperature and could destroy the mold from within. Normally, it would have been possible to reuse the wax, but in my case it was mixed with PLA, so wasted. The fluids were catching on fire, as soon as the flow stopped, we covered the pot to stop the fire. Then The molds were left in the furnice for around an hour with the temperature increased to 900 C degrees to slinther them.
The molds need to be mounted vertically in a metal holder that iis then placed in the furnice. The bottom should be aligned in a way that would allow the rod to fall out smoothly, otherwise it could crack the mold if hitting. The molds were attached with wires to the holder to prevent excessive movement, but were not tied too tightly
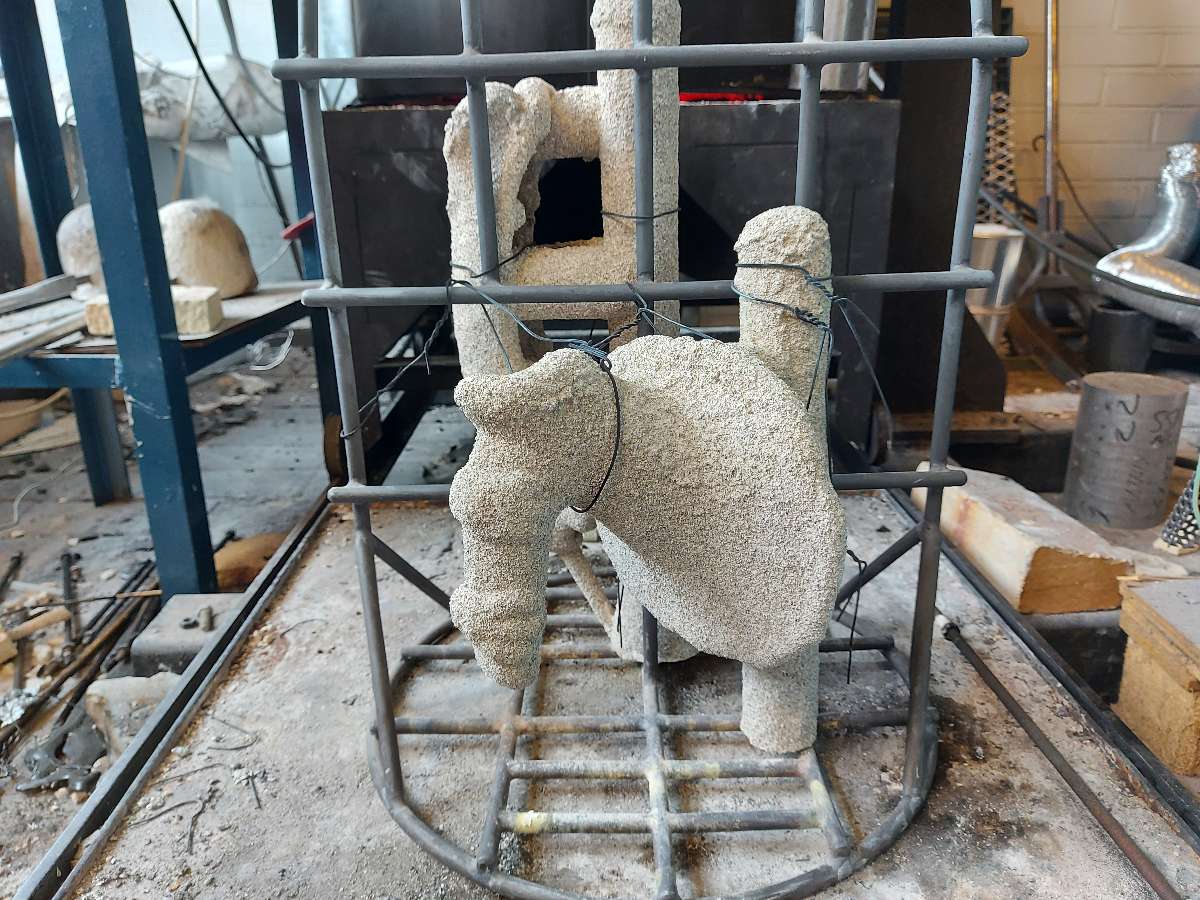
The wiring to keep pieces vertical and still in the burnout process
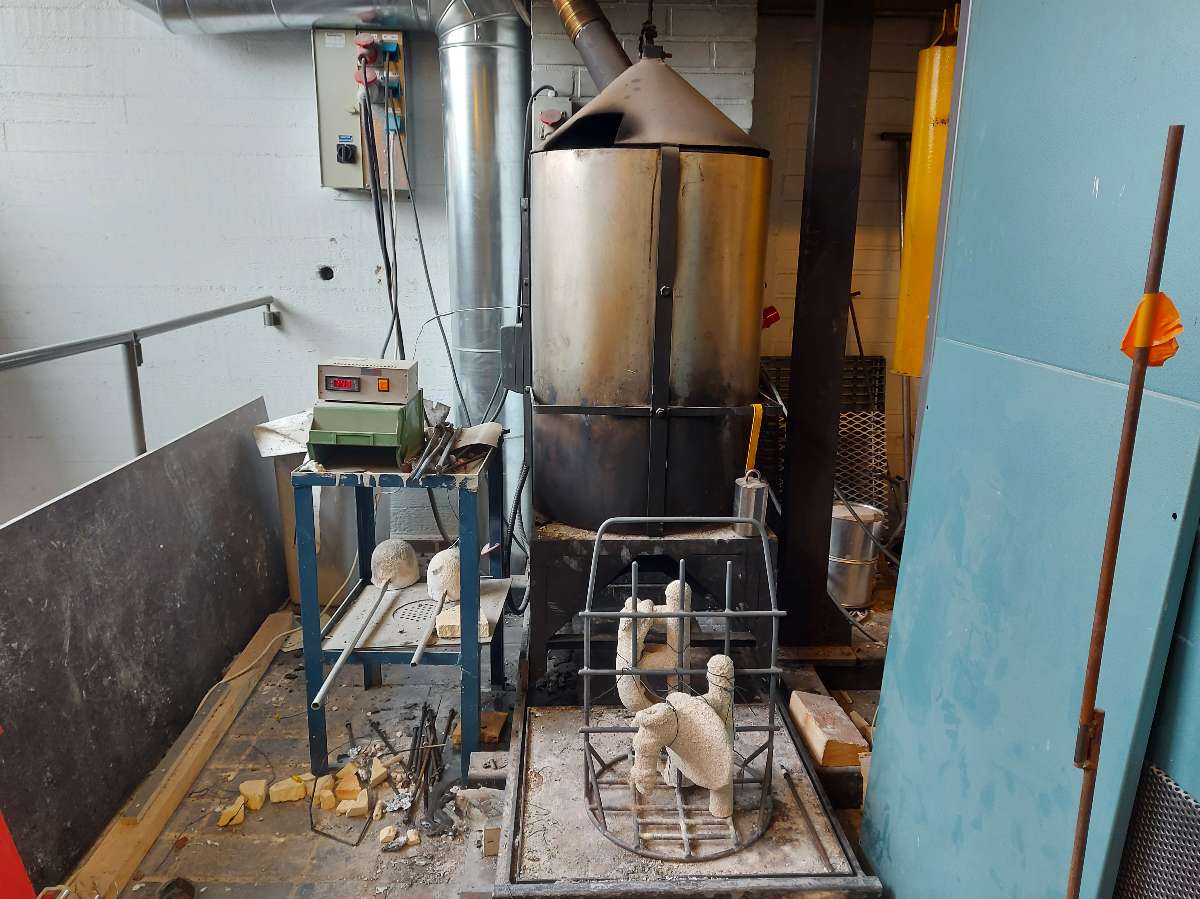
The burnout furnice
Unfortunately, some parts of the molds cracked during the process. Also, one air vent made of plastic straw broke off. Luckily, those elements were not the actual parts of the end result casting, they were parts specifically for the casting process alone. It was possible to fix the broken features, replace the straw with a ceramic tube and place a ceramic pouring cup
Casting
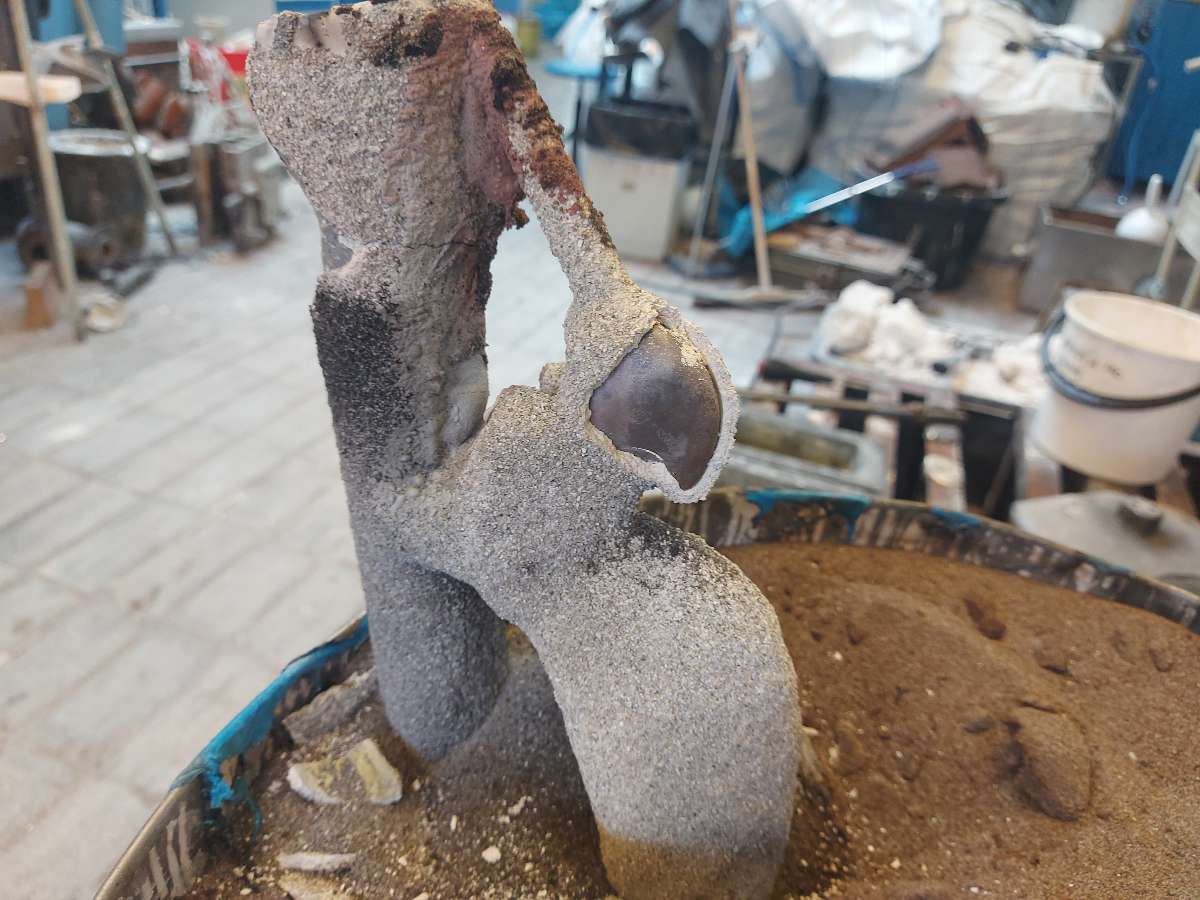
Since some parts of the molds were damaged and cracked, it was safer to prepare additional support to keep them in place and prevent possible expansion and further cracking. This was done by placing them in a metal barrel that was filled with sand. The weight of the sand alone was enough to keep the mold vertical and stable.
Repairs of the broken parts
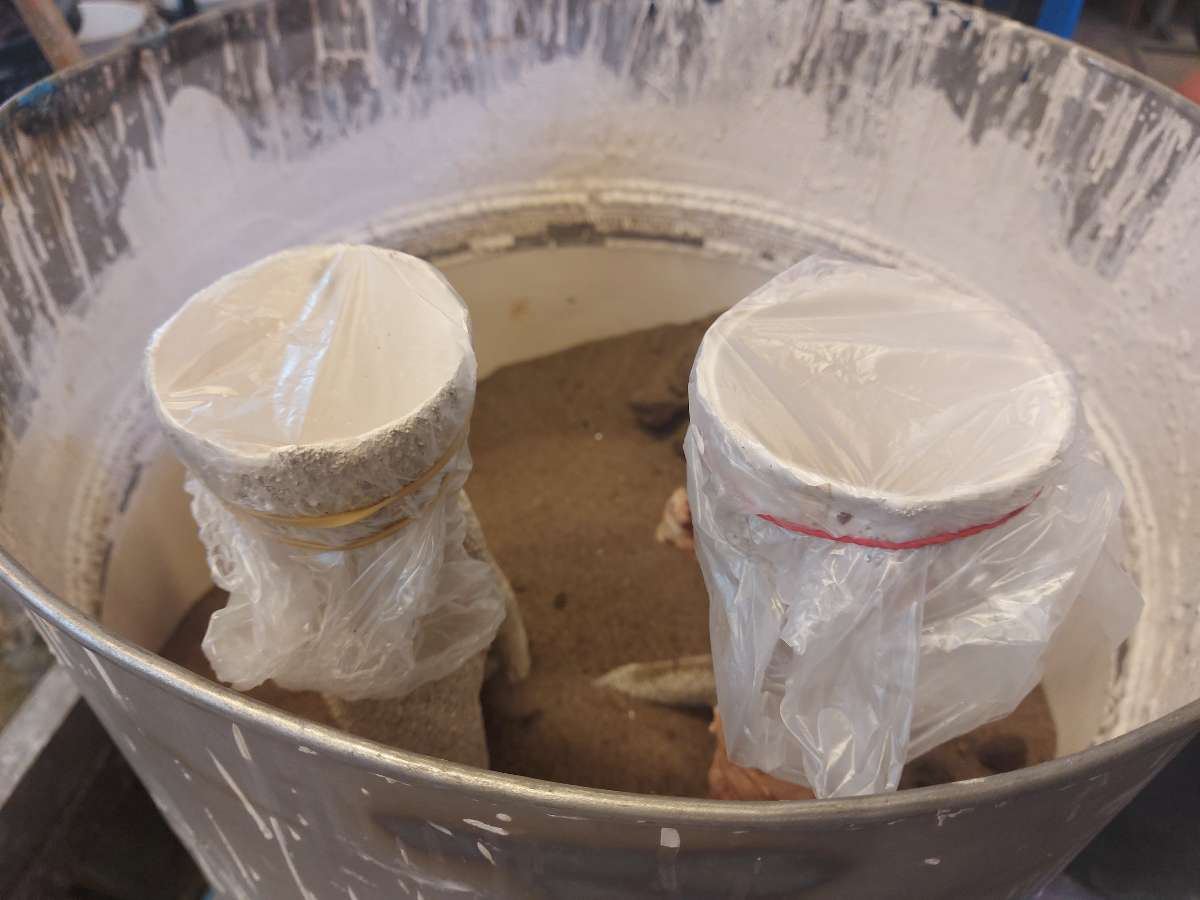
The plastic bags placed on top of the mold opening prevented sand from falling in, when the barrel was being filled
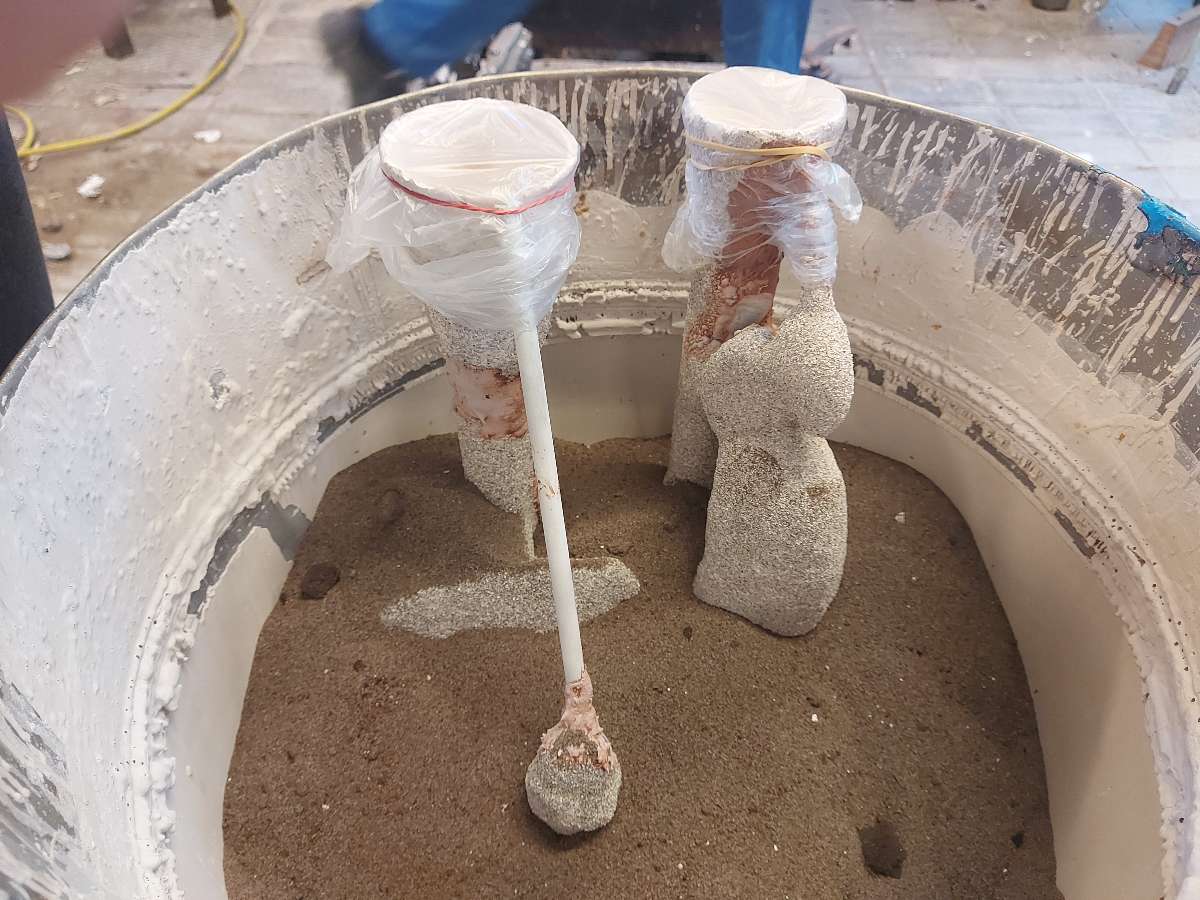
Ceramic tube replacing the broken part of the mold
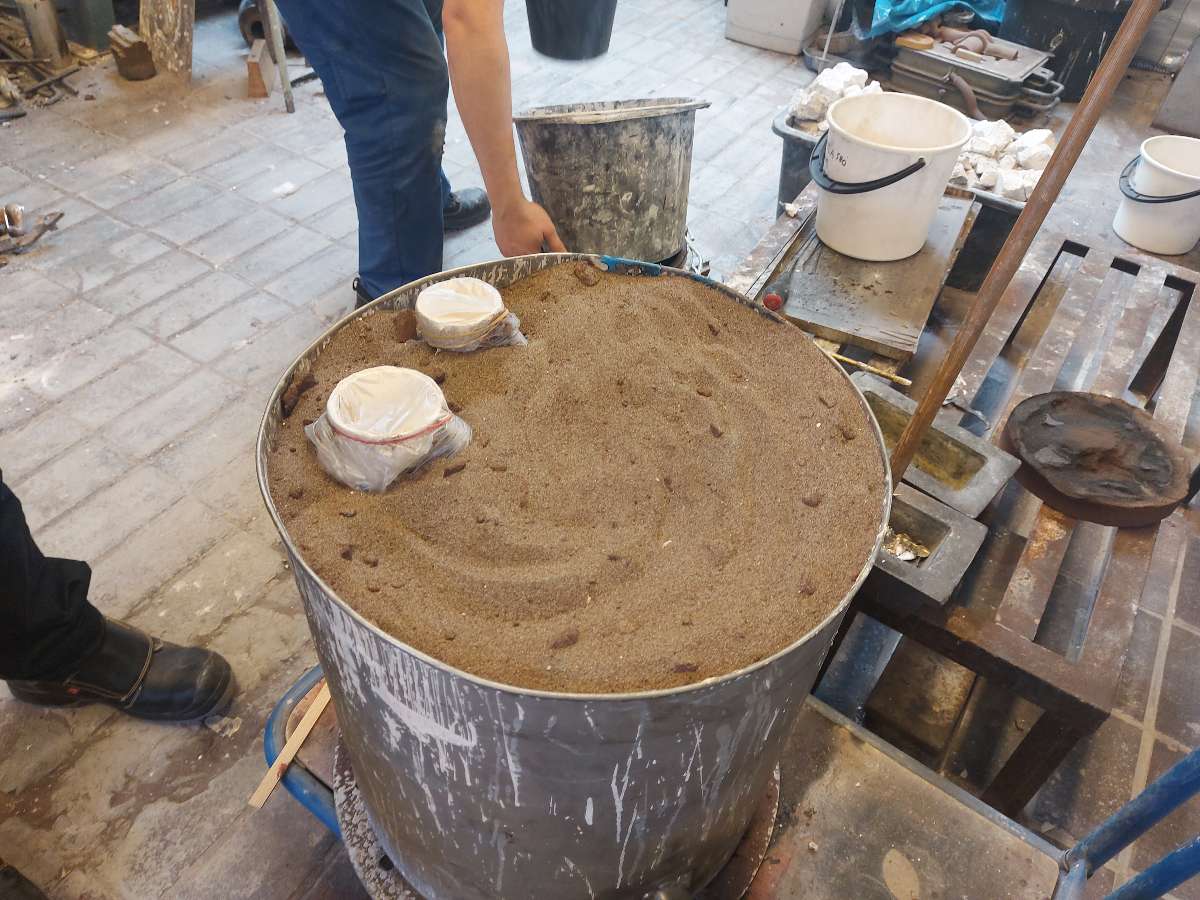
There are many methods of hardening the sand to keep the shape of the mold. The most popular one is use of chemical binders that keep sand particles together. As the Workshop Master mentioned, in some places, mostly Eastern Europe, vaccuum method is still in use. We followed this technique and placed thick trash bag over the barrel, which had an outlet opening in the bottom. Industrial power vaccuum was used to suck out the air and create vaccuum inside the barrel that would harden the sand, right before pouring. The vacuum cleaner was on during the molten metal pouring to keep the shape. The hot metal pierced the bag but sealed it immediately by melting the opened edges to the pouring cup edges.
The vacuum method of hardening the sand wih molds buried in during the casting
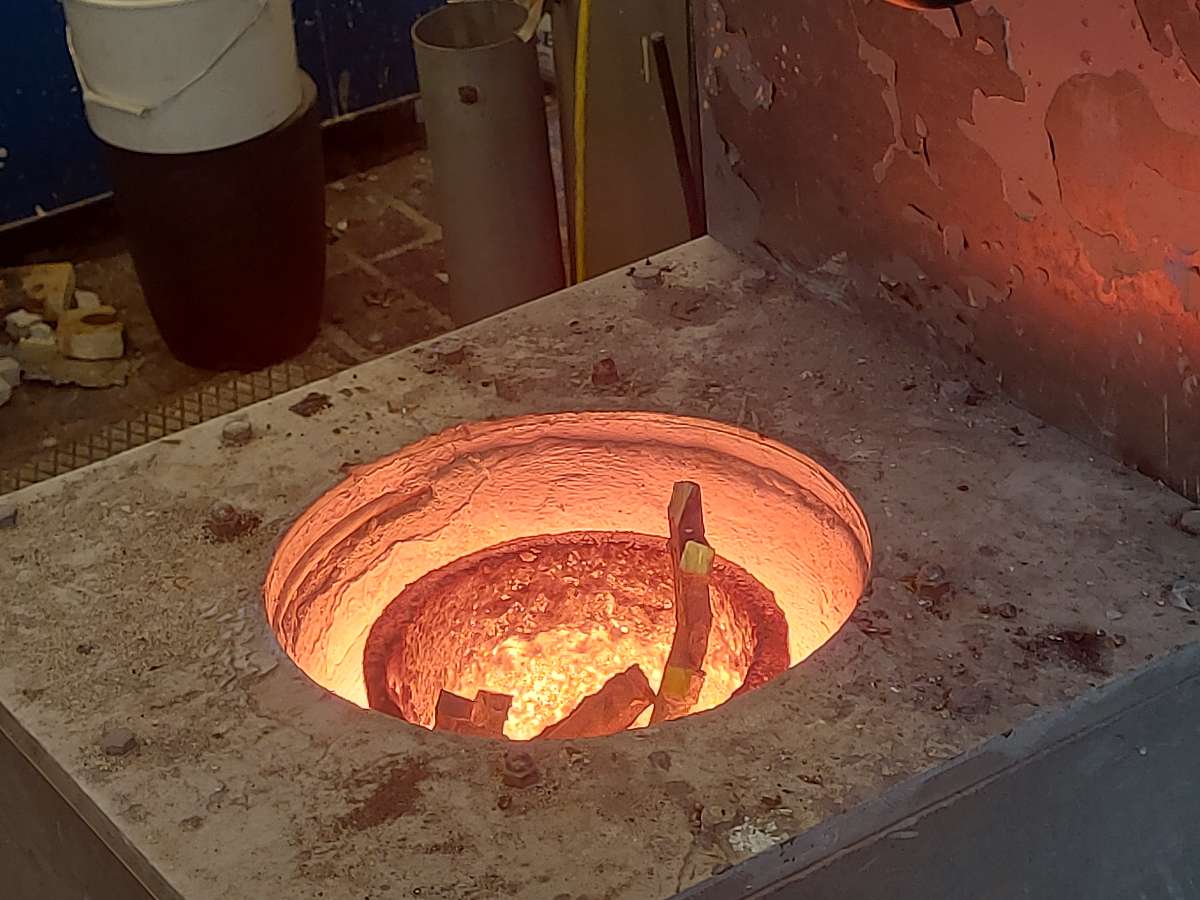
The bronze used for this casting was heated up to 1160-1200°C inside the kiln for optimal flow inside the mold.
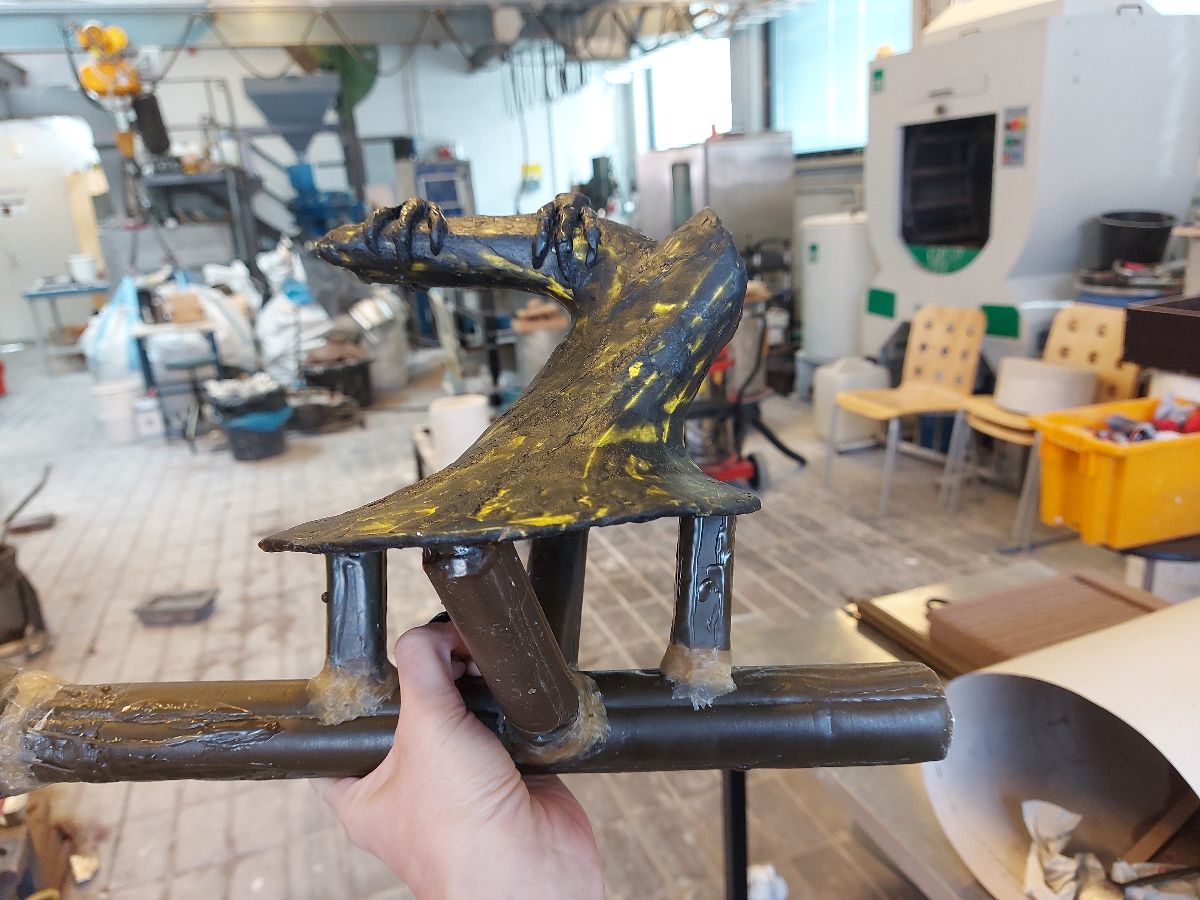
Casting results
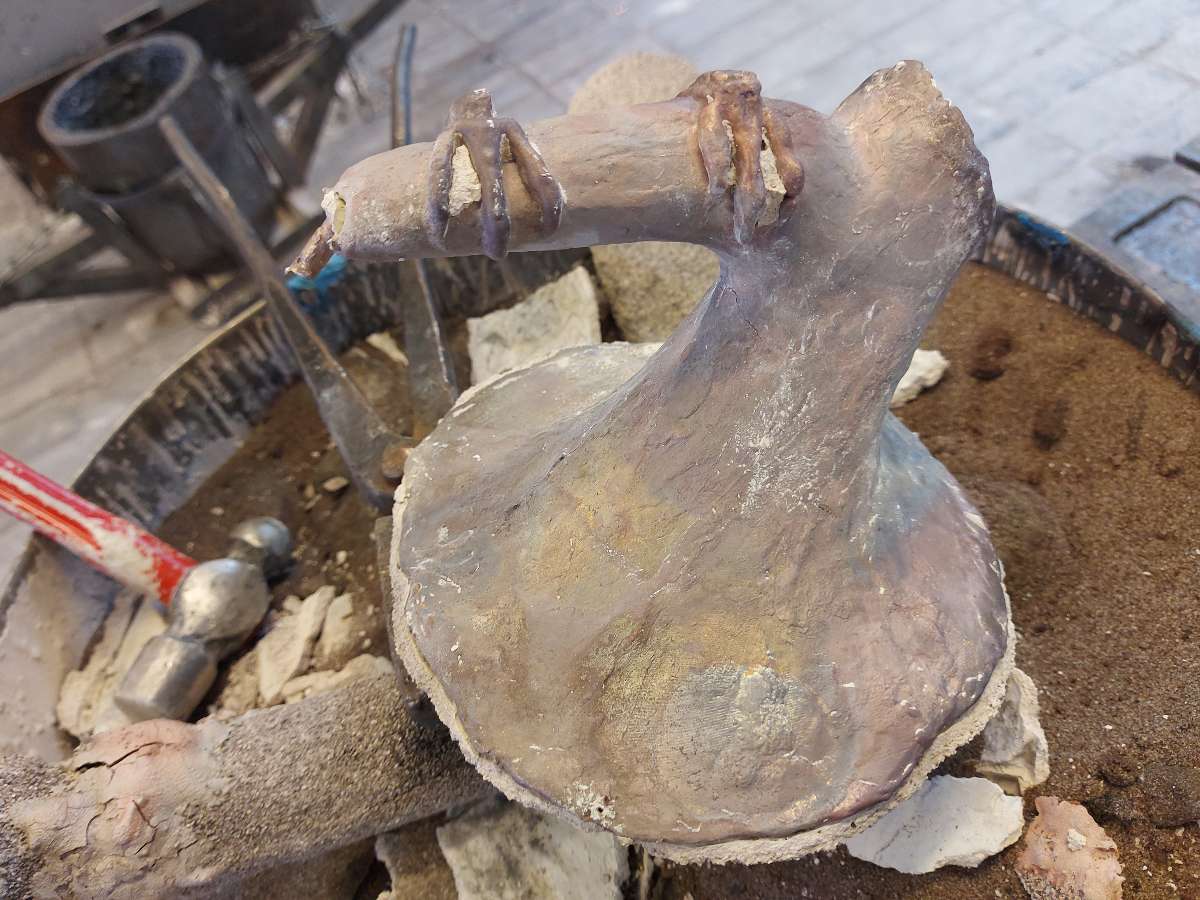
 Felipe hatching out of his shell and becoming
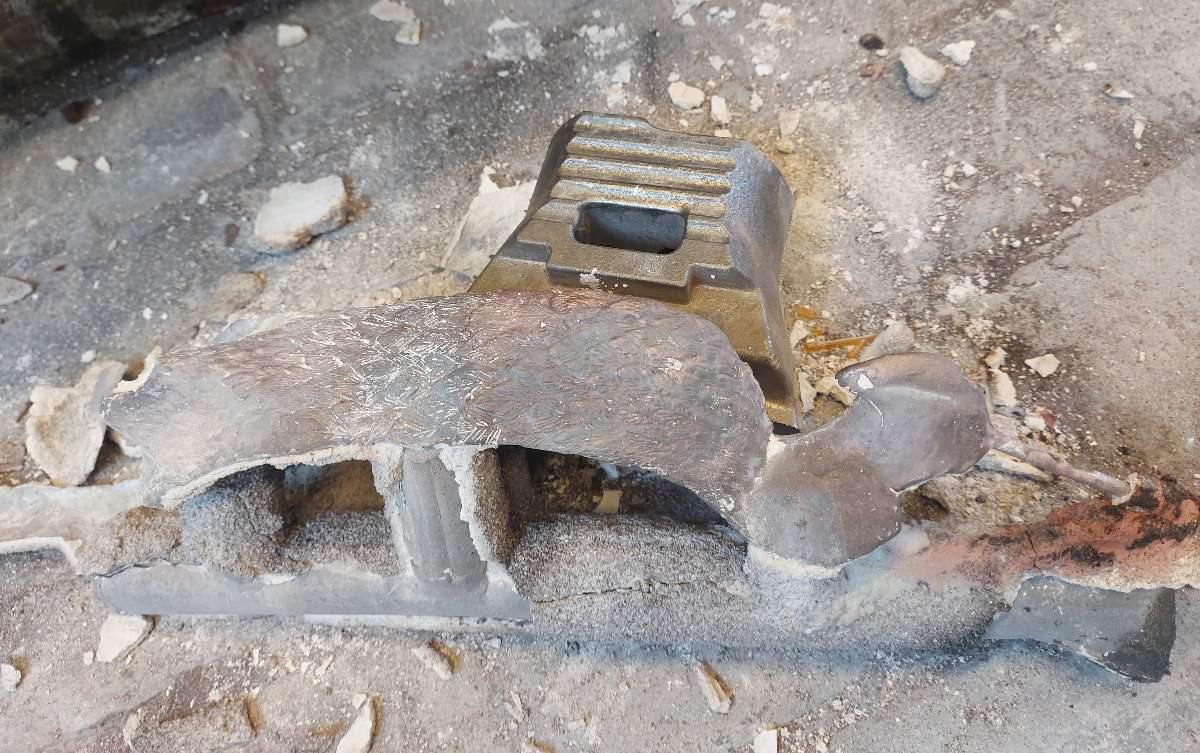
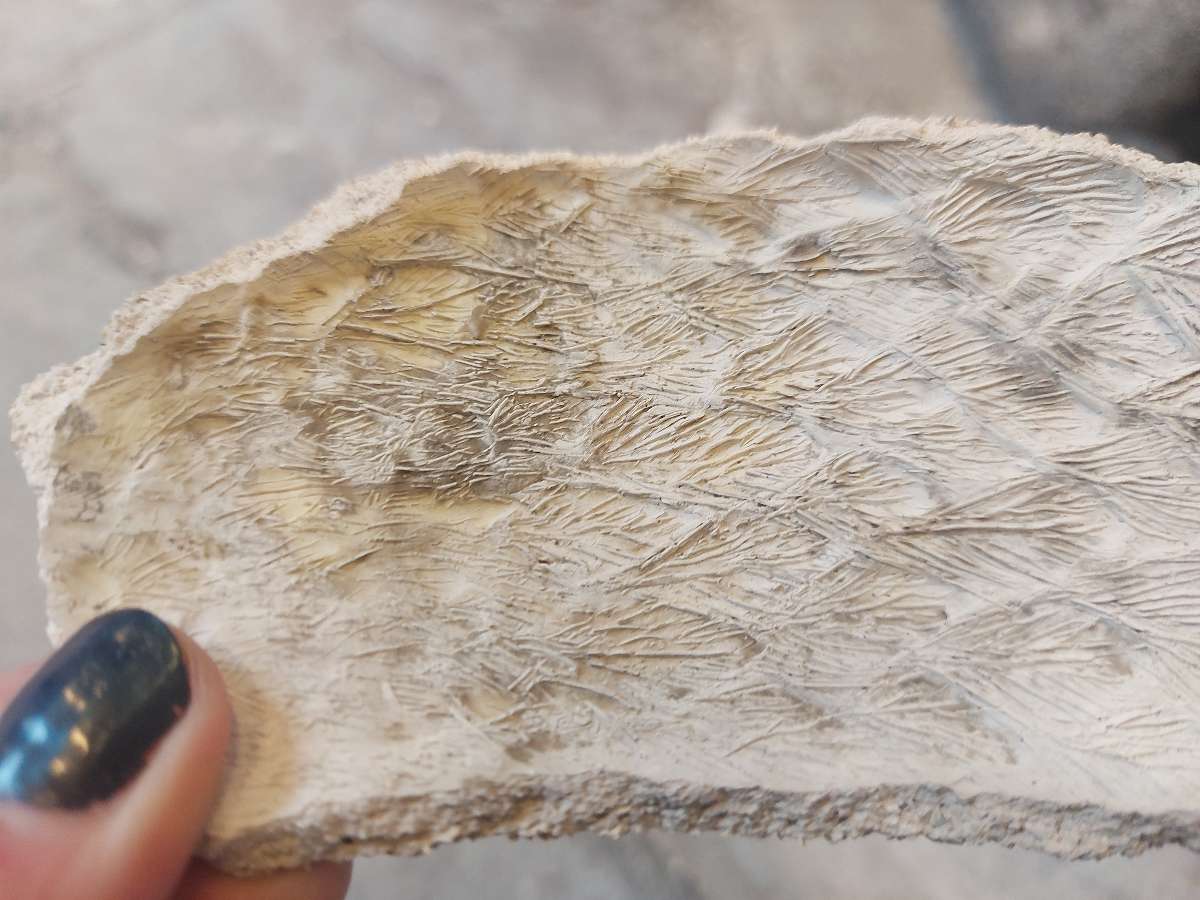
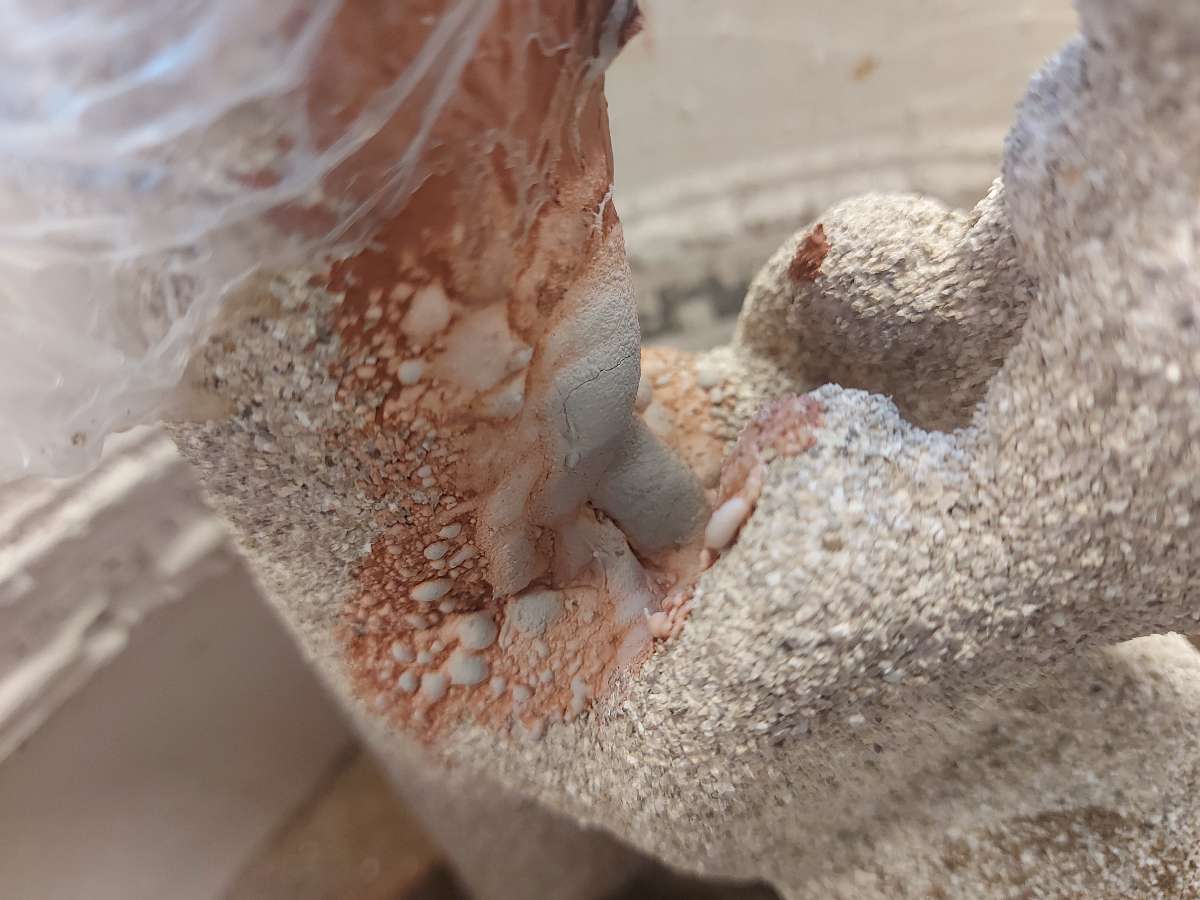
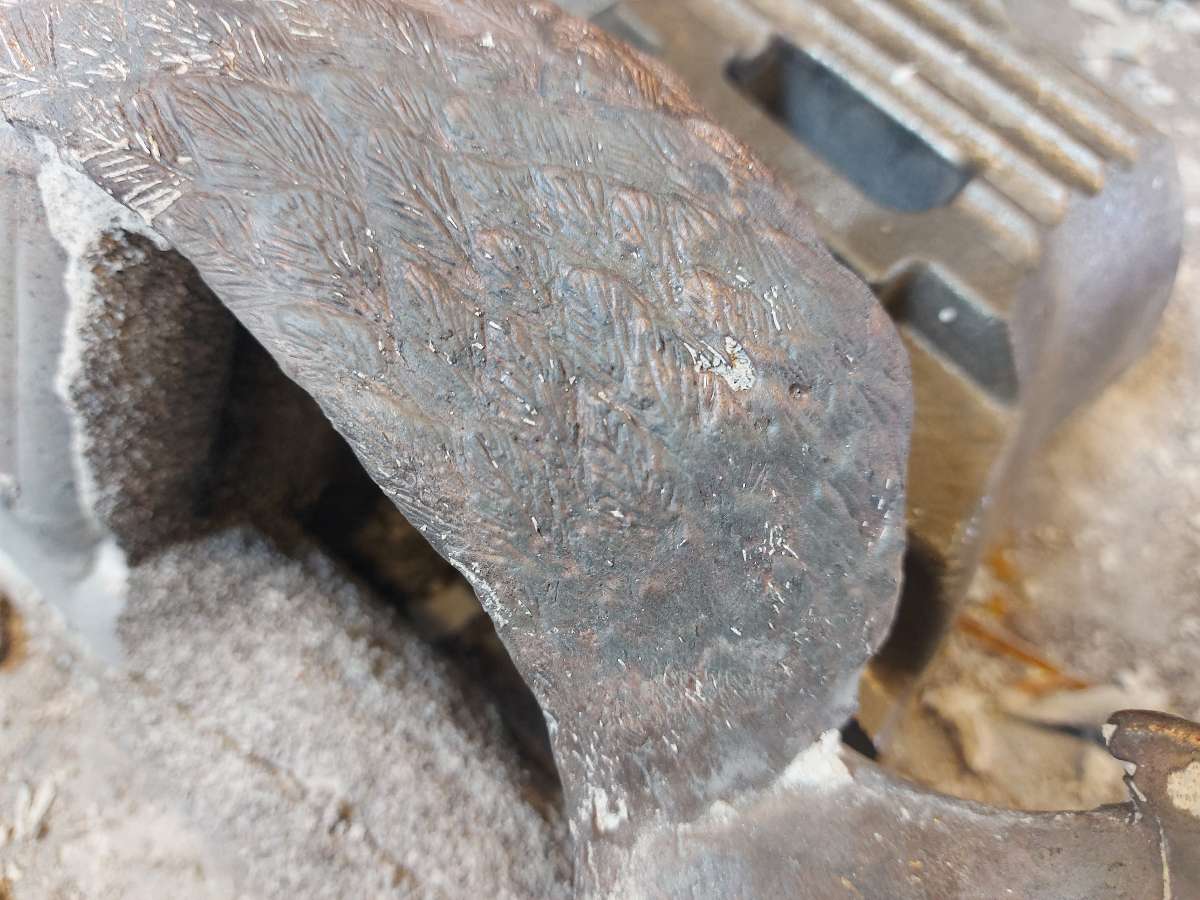
Piece of the broken shell with levels of detail visible
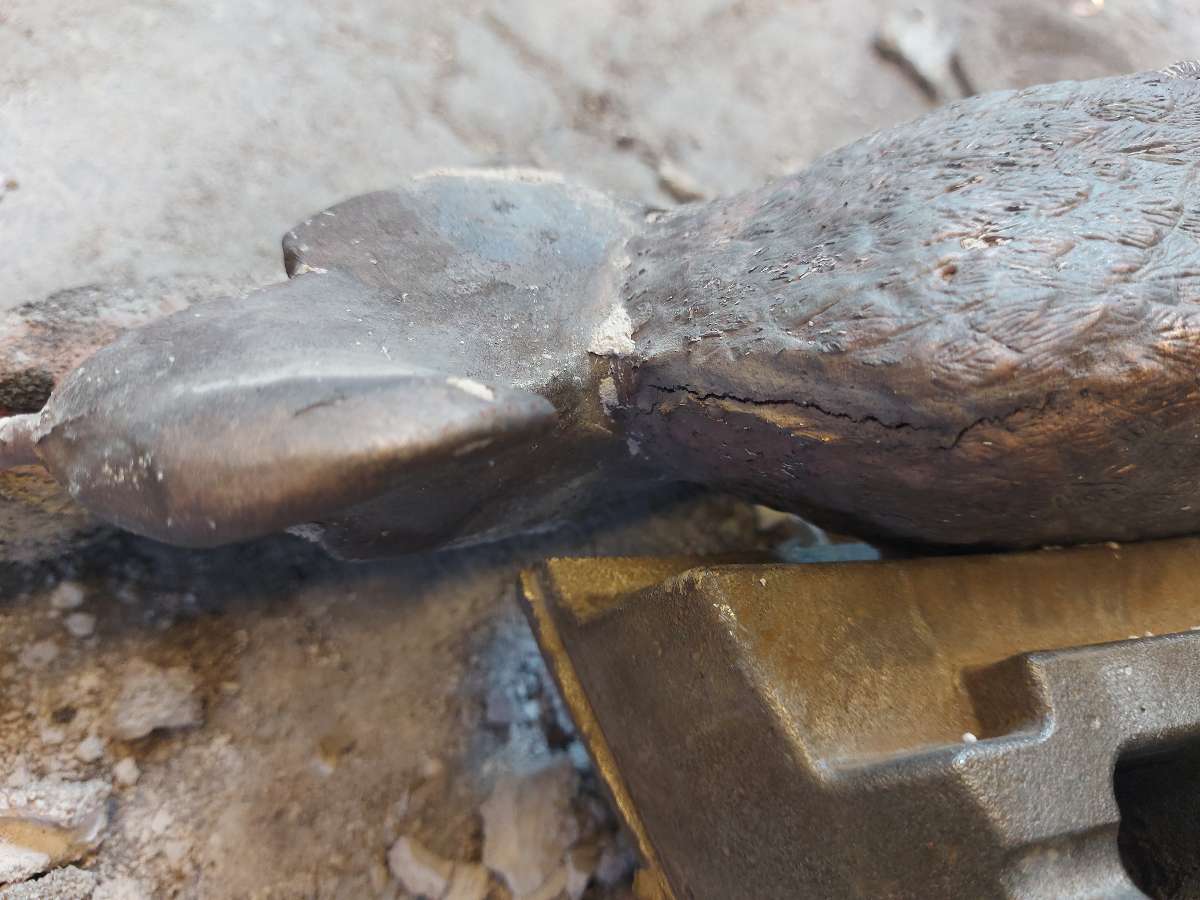
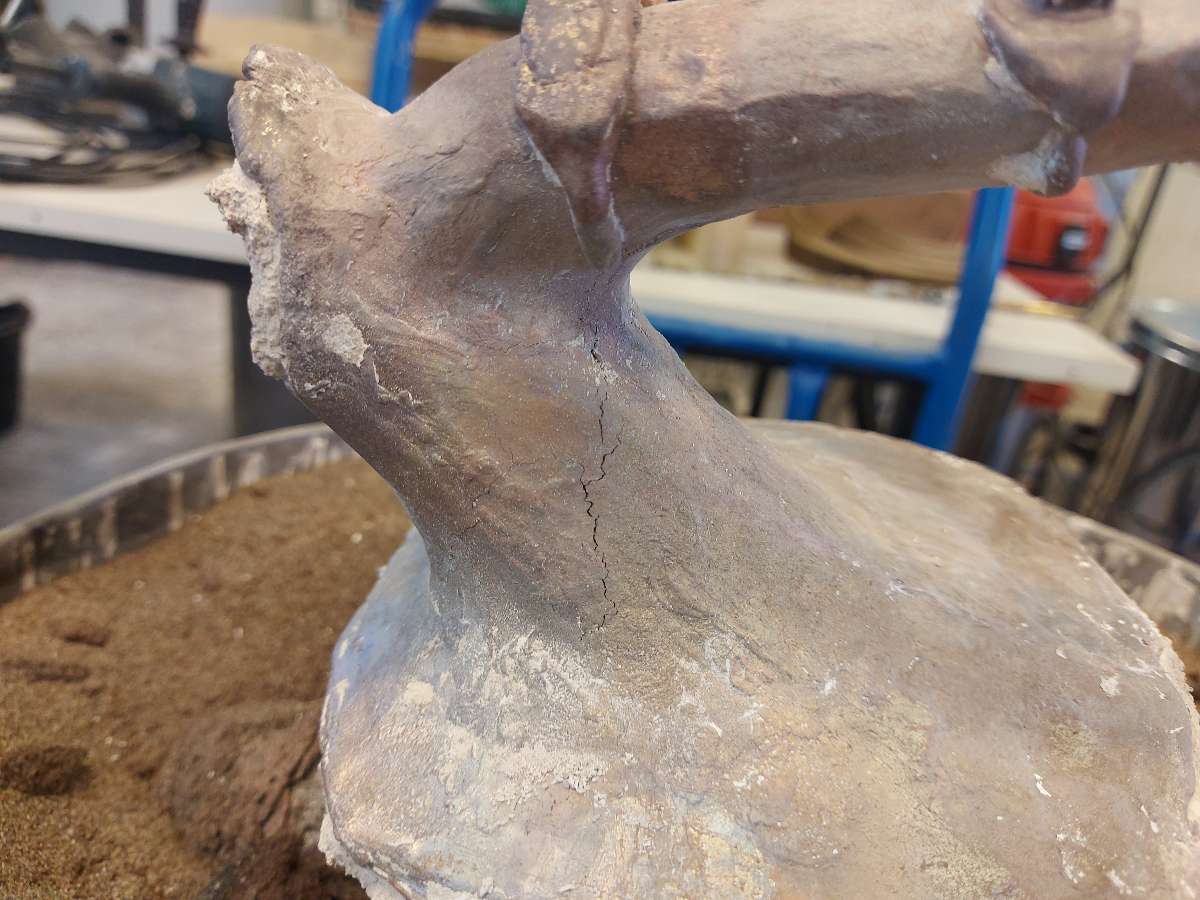
Unfortunately, there are some holes and cracks

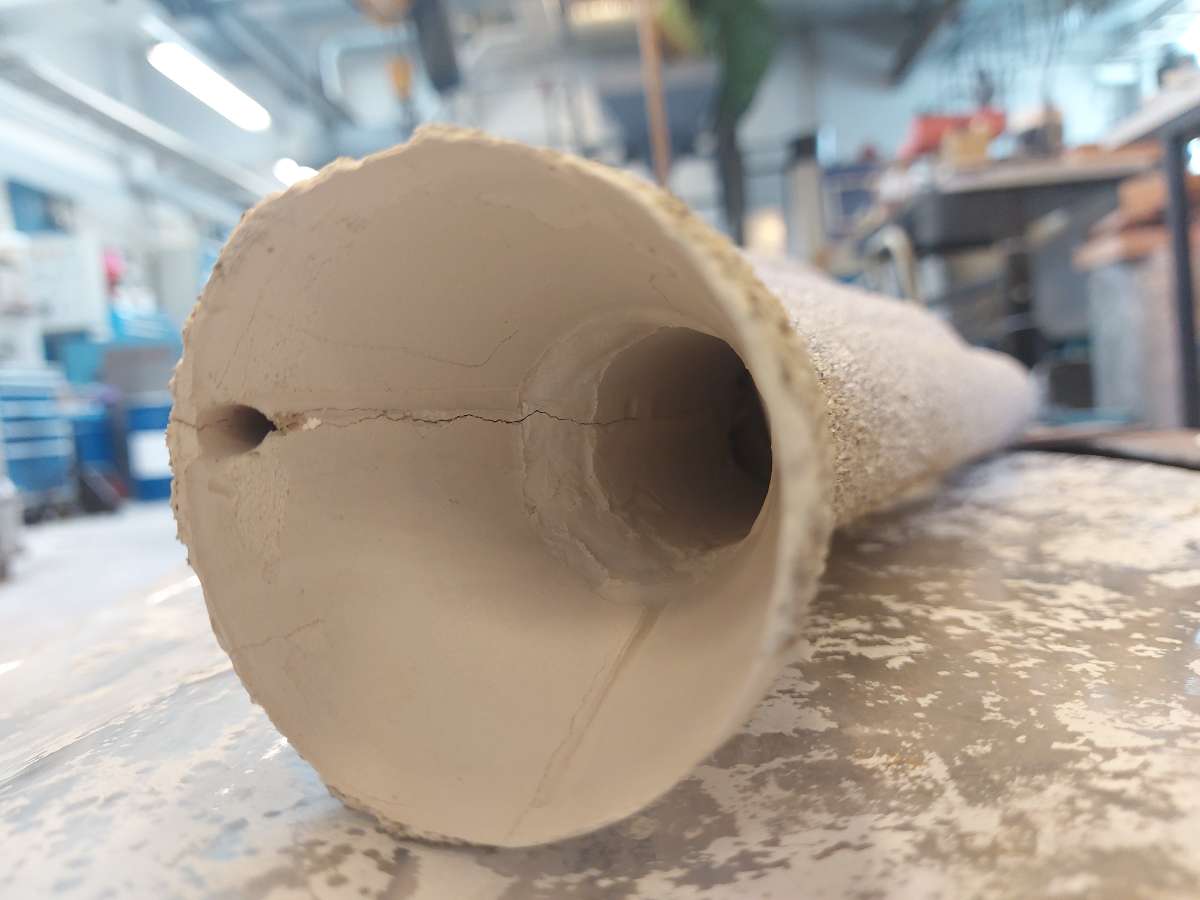
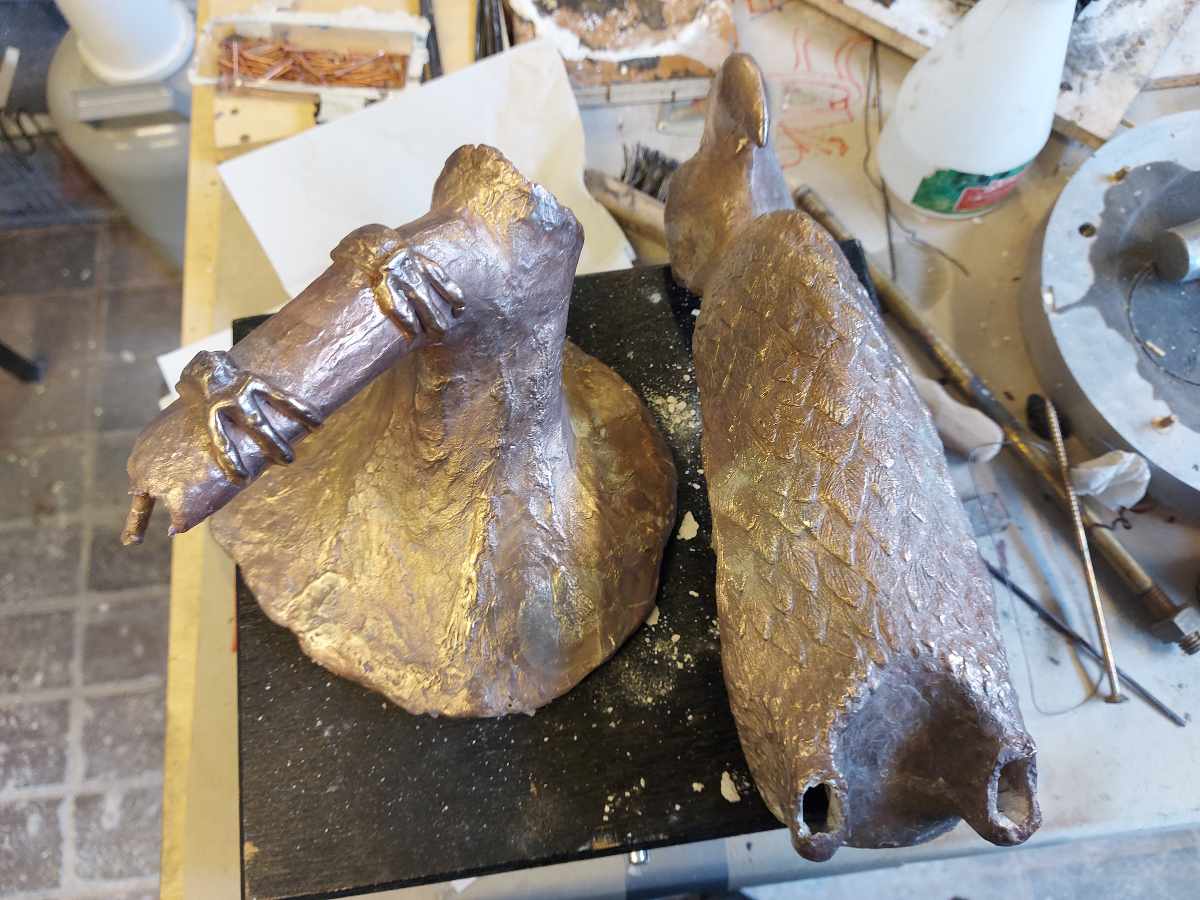
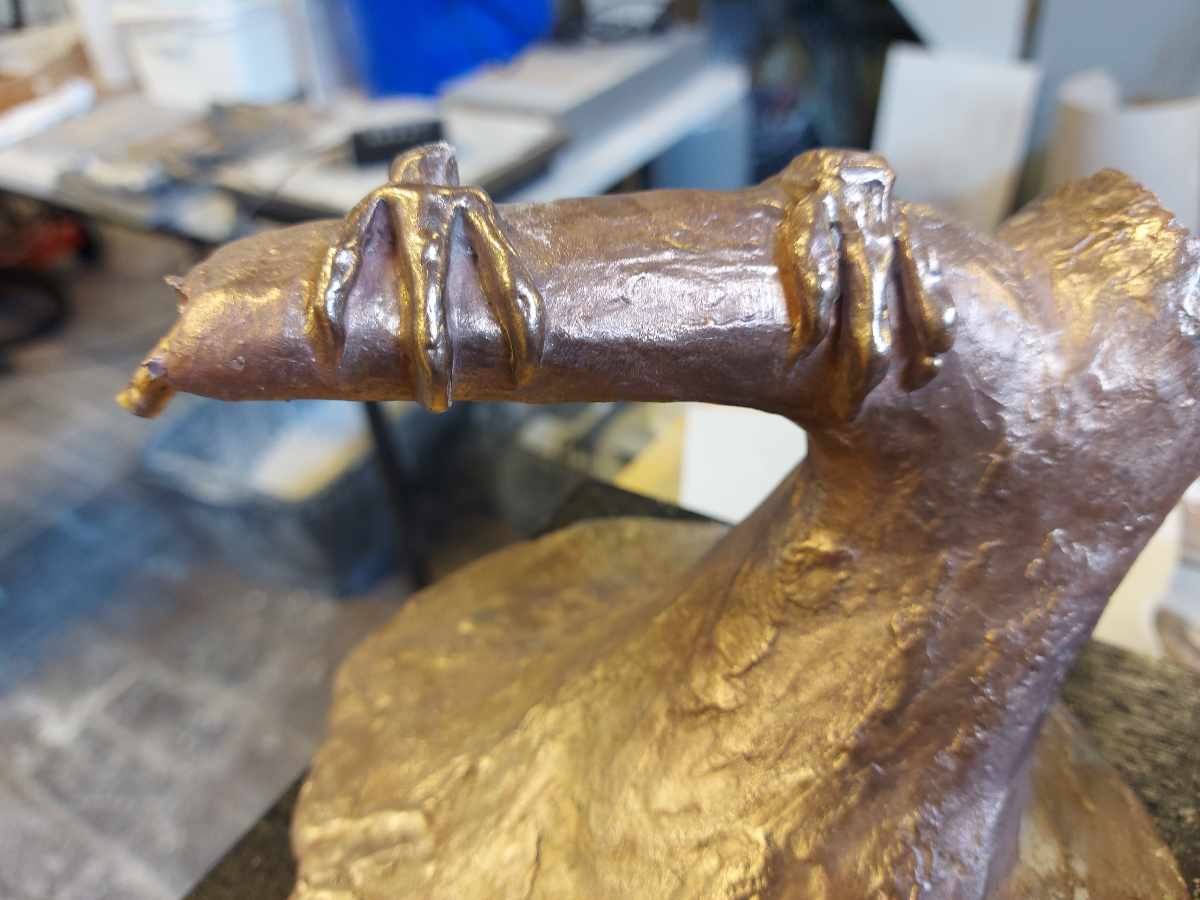
The tree casting gave a viisibly better result than the parrot. Most likely it is due to thickness of the positive part. Beside one big crack and parrot missing one bone in his foot, there are no other issues.
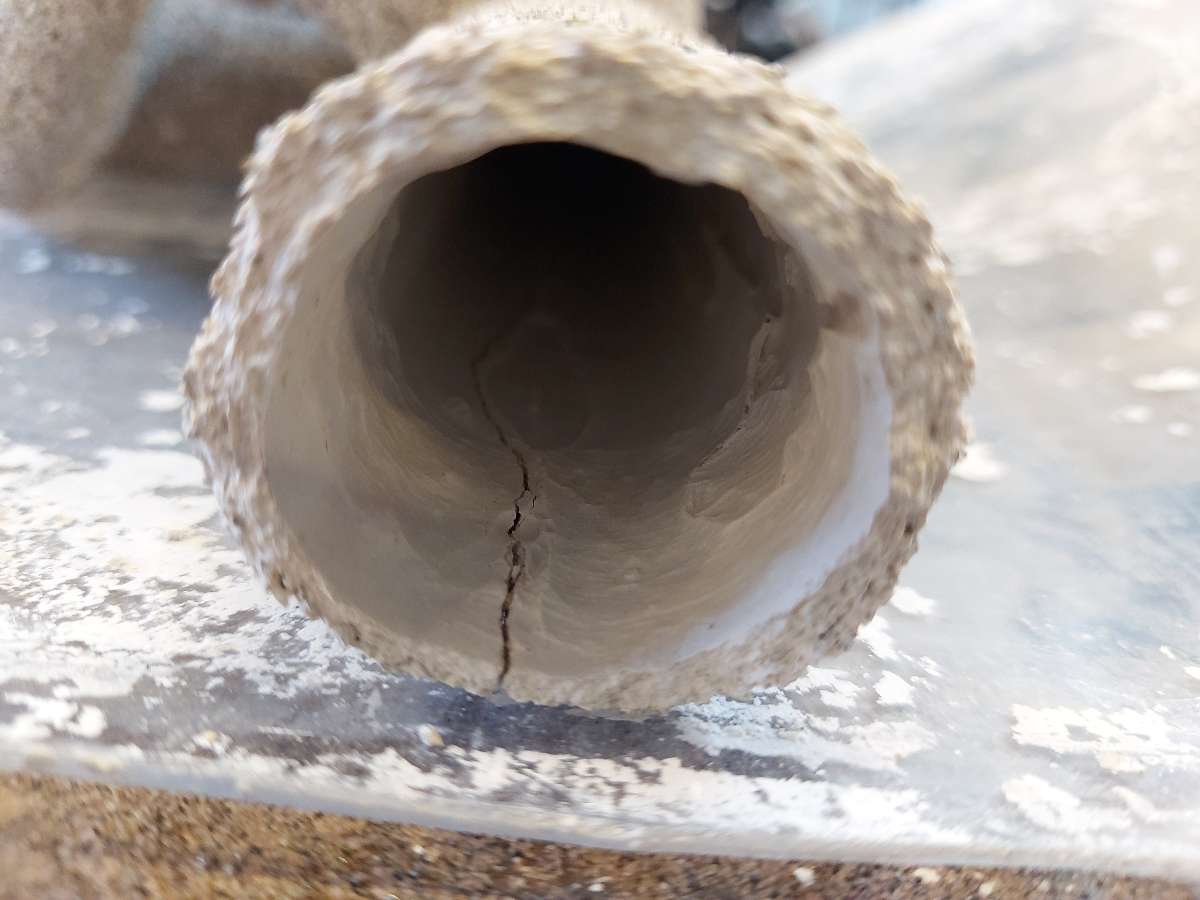
The bird part however has some defects. The parrot's chest is cracked in half right in the middle, the crack goes all the way, so it will be a problem, when light is placed inside. Or it will be a feature - I may need to make up some story, like Felipe's heart shining through, giving the light across darkness. Or something.
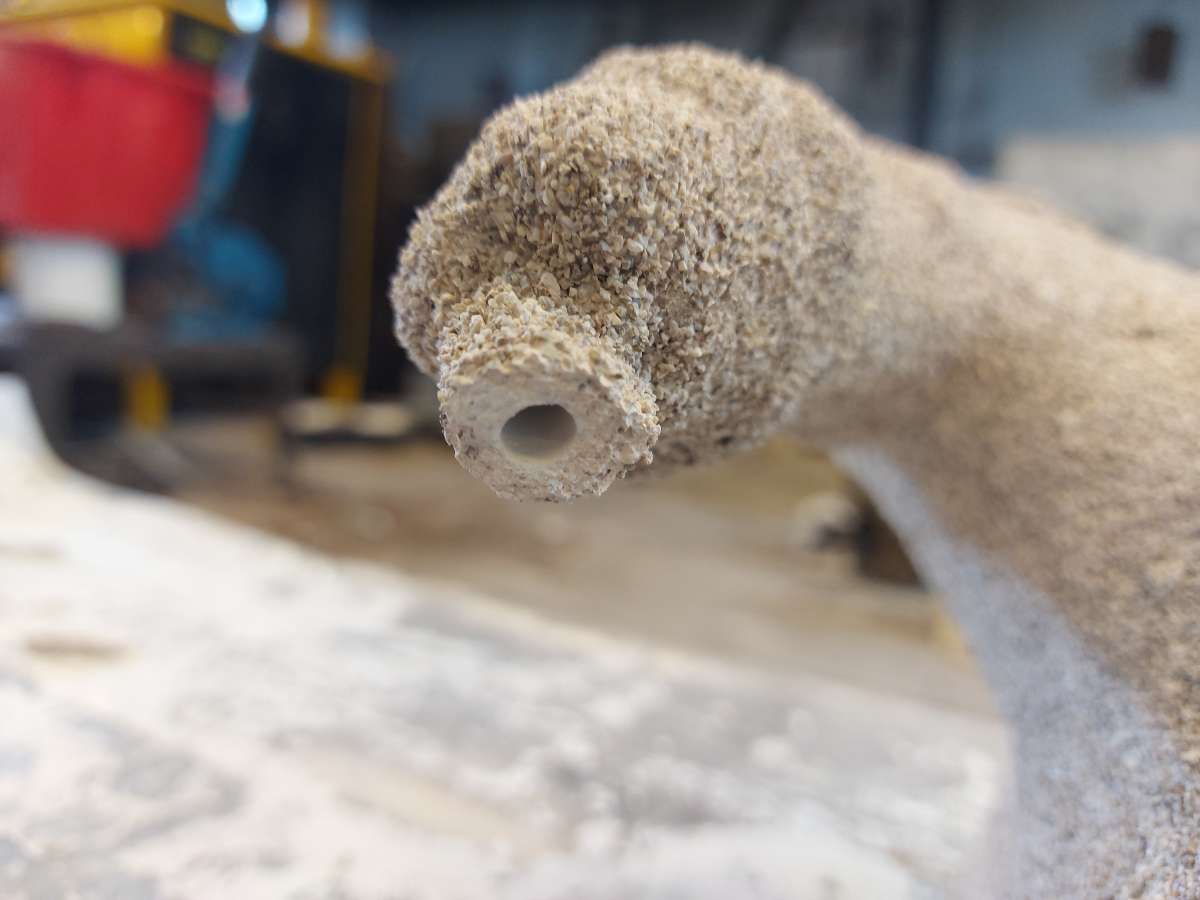
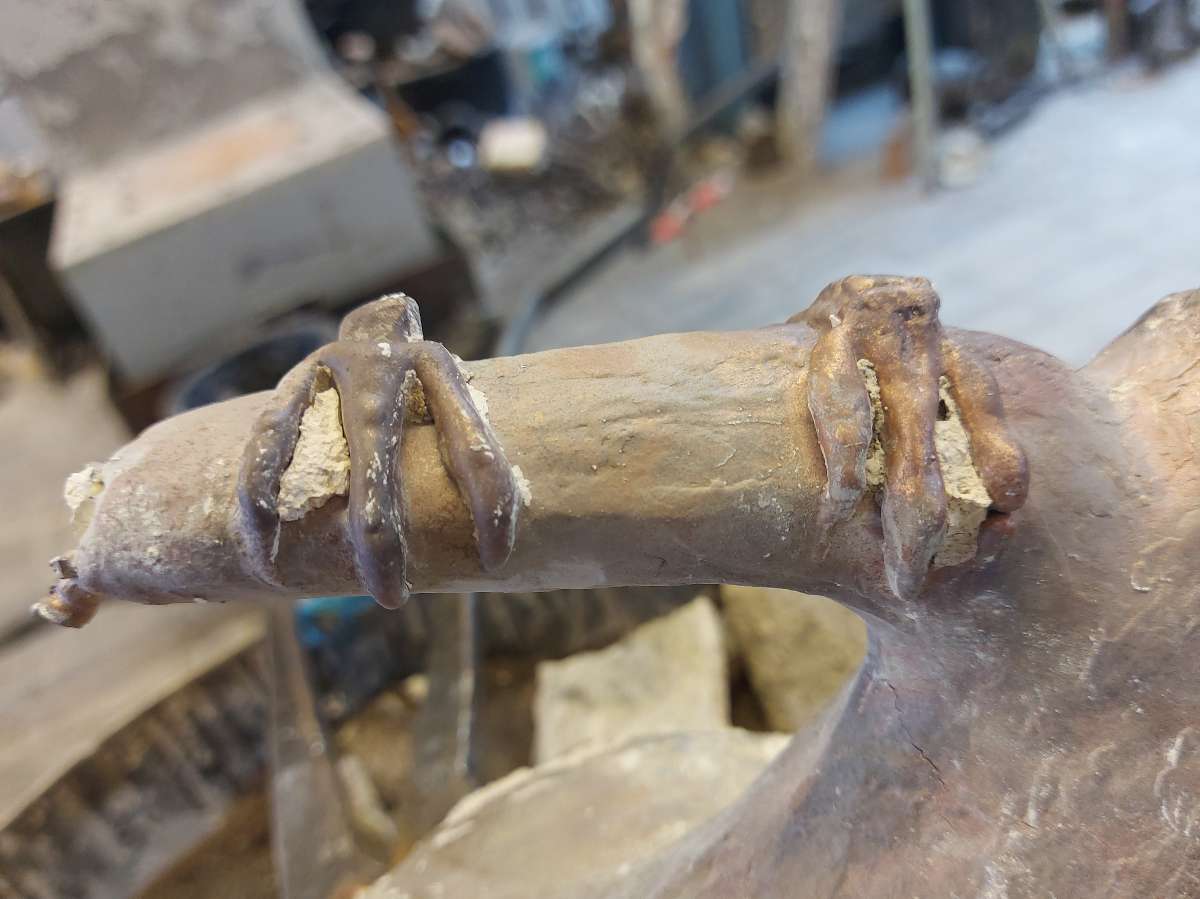
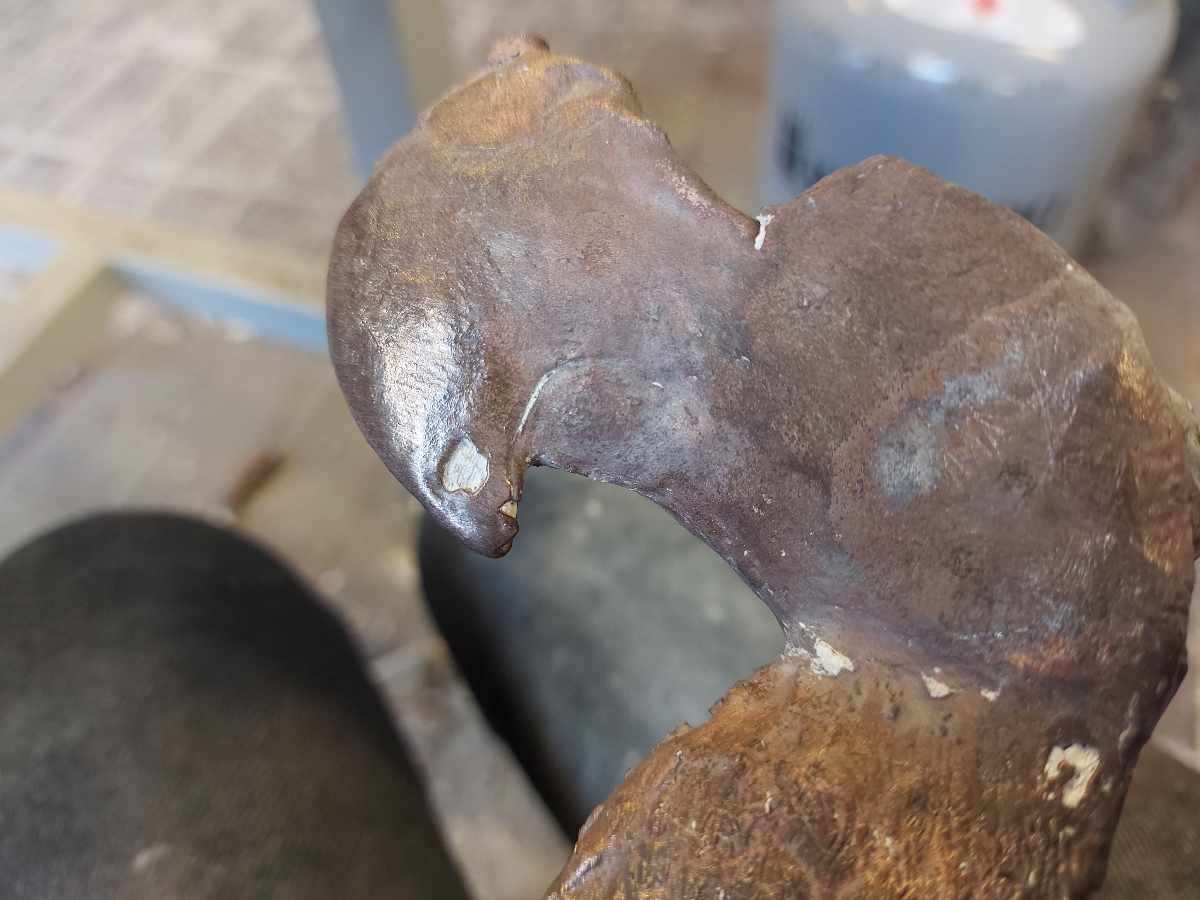
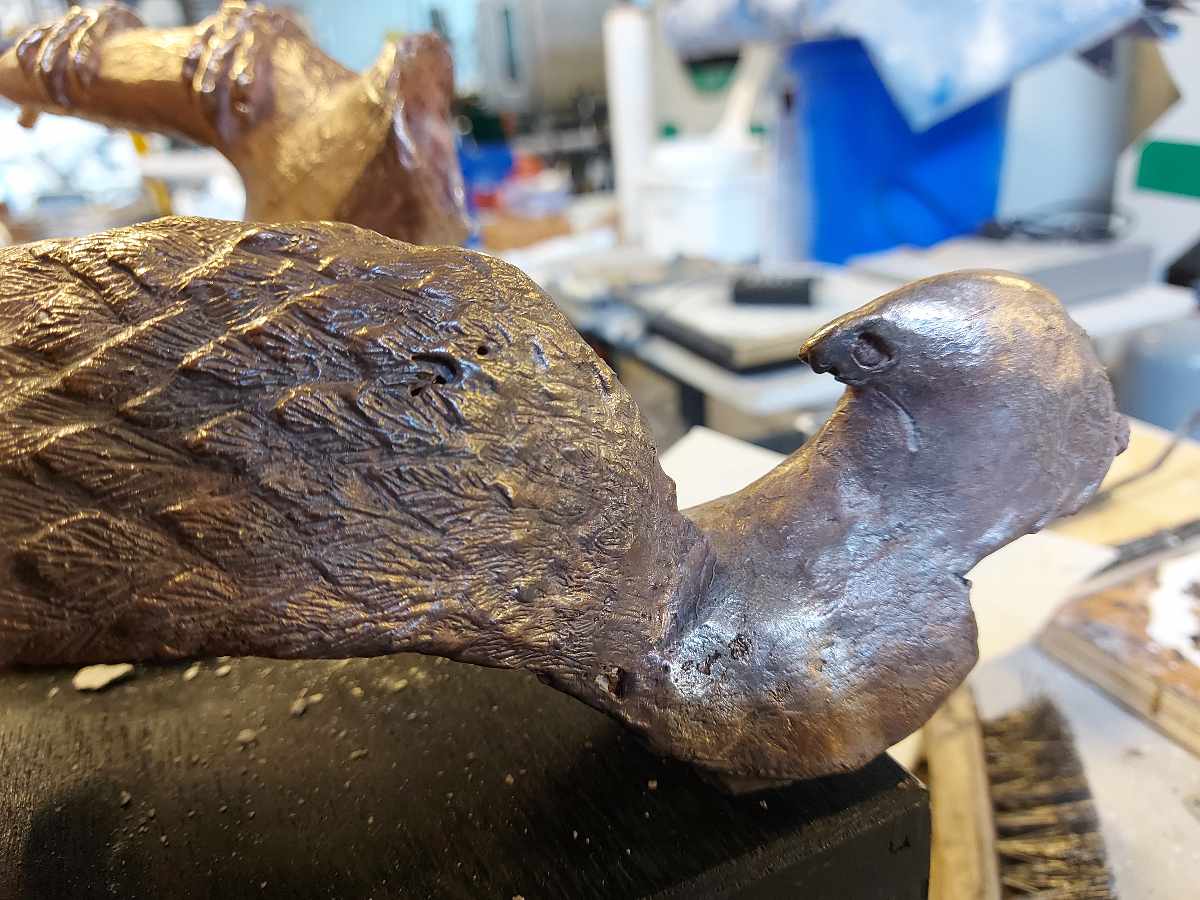
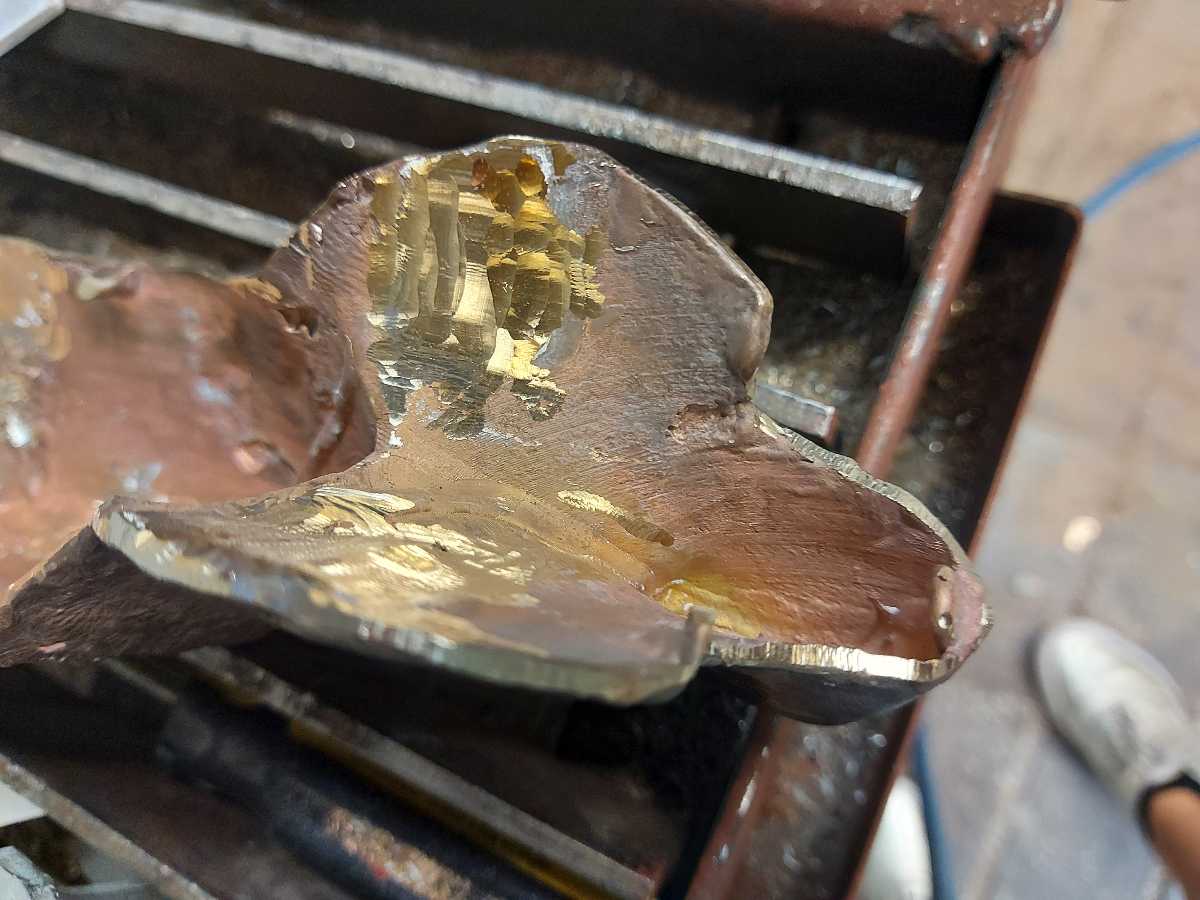
There are more cracks, but not this serious. There is also quite a few holes, some of them through, one can be seen on the parrot's beak for example. The issues presented are a result of the positive shelled part being too thin. The minimum thickness of the shell should have been 4mm, but I think the layer of wax that I applied might have been to thin and less than 4mm. The fact that Felipe has a beak is almost a mircacle - inspecting the cast from the inside I found out that the metal layer in some part of it is most likely just 1mm thin. It was SO close to Felipe mssing his nose, the most visible and distinctive feature of a macaw parrot. Would have been a real shame.
Another note is that the top part of the parrot cast is visibly lower quality than the bottom of it. Most likely it was caused by the weight of bronze pressing the molten metal against the shell harder in the lower parts. The feather texture is very well visible in the bottom, with resolution and quality degrading gradually to the top. It is much less visible in the tree part, so It may also me a matter of the positive part thickness.
Post-processing
The channels were cut off and the outer shell parts removed
Removing the inner parts of the ceramic shells was tedious, ceramic is surpisingly hard
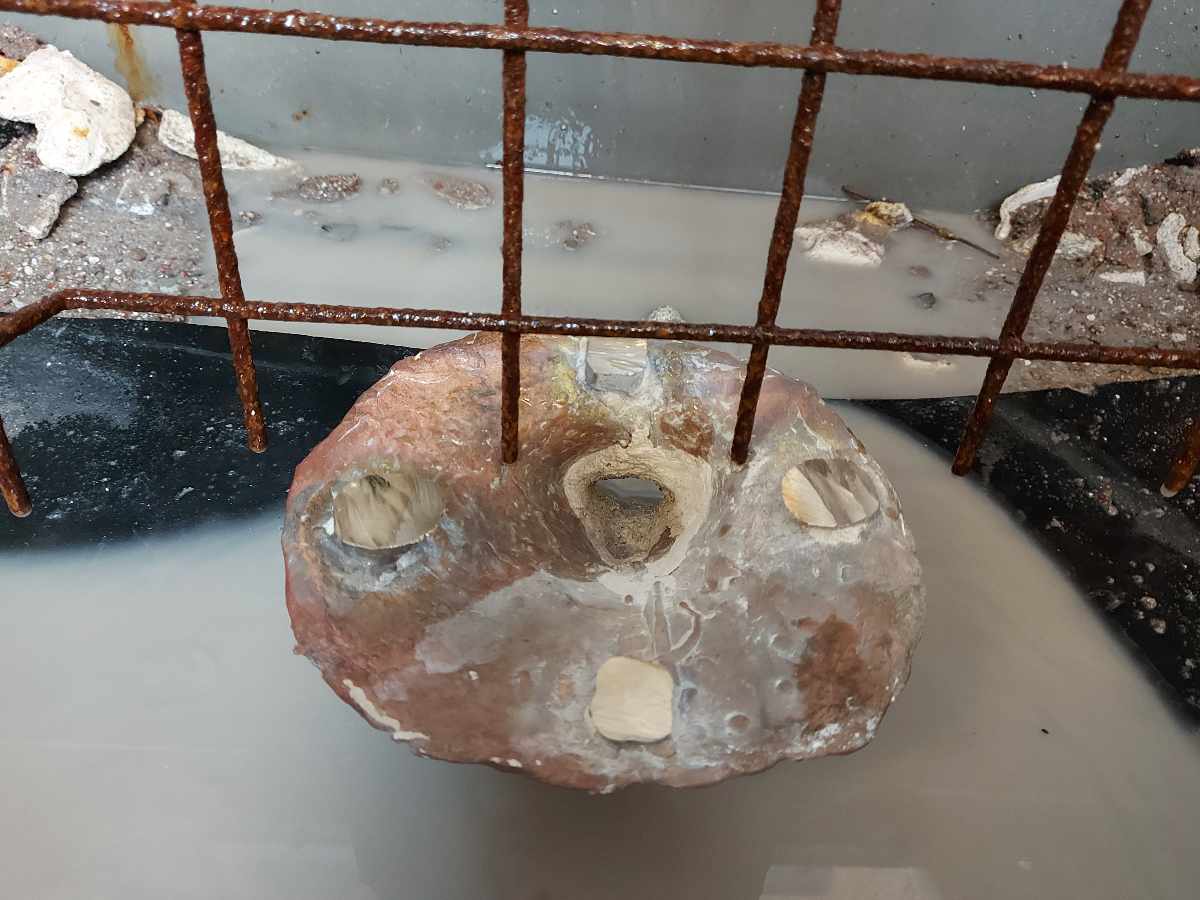
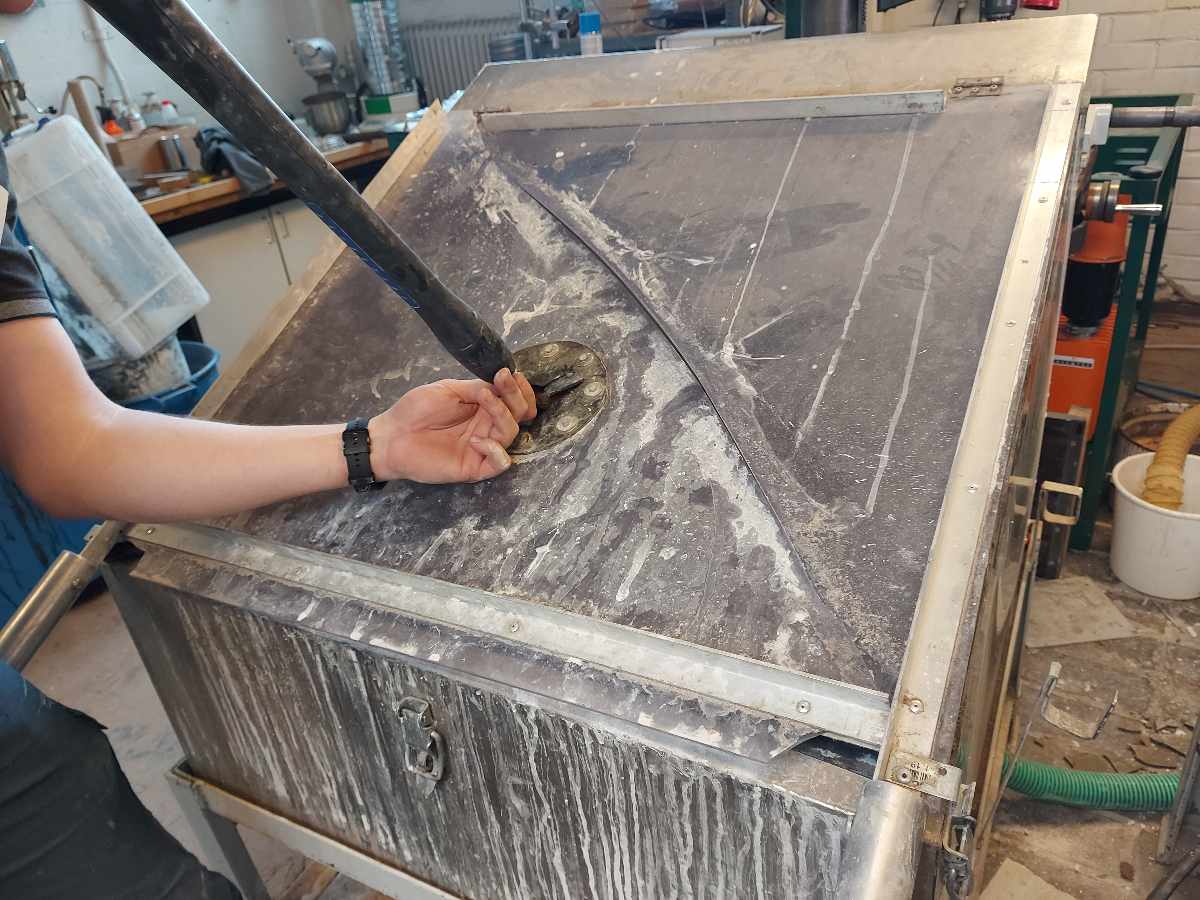
The remains of shells were removed using high power water jet cleaner
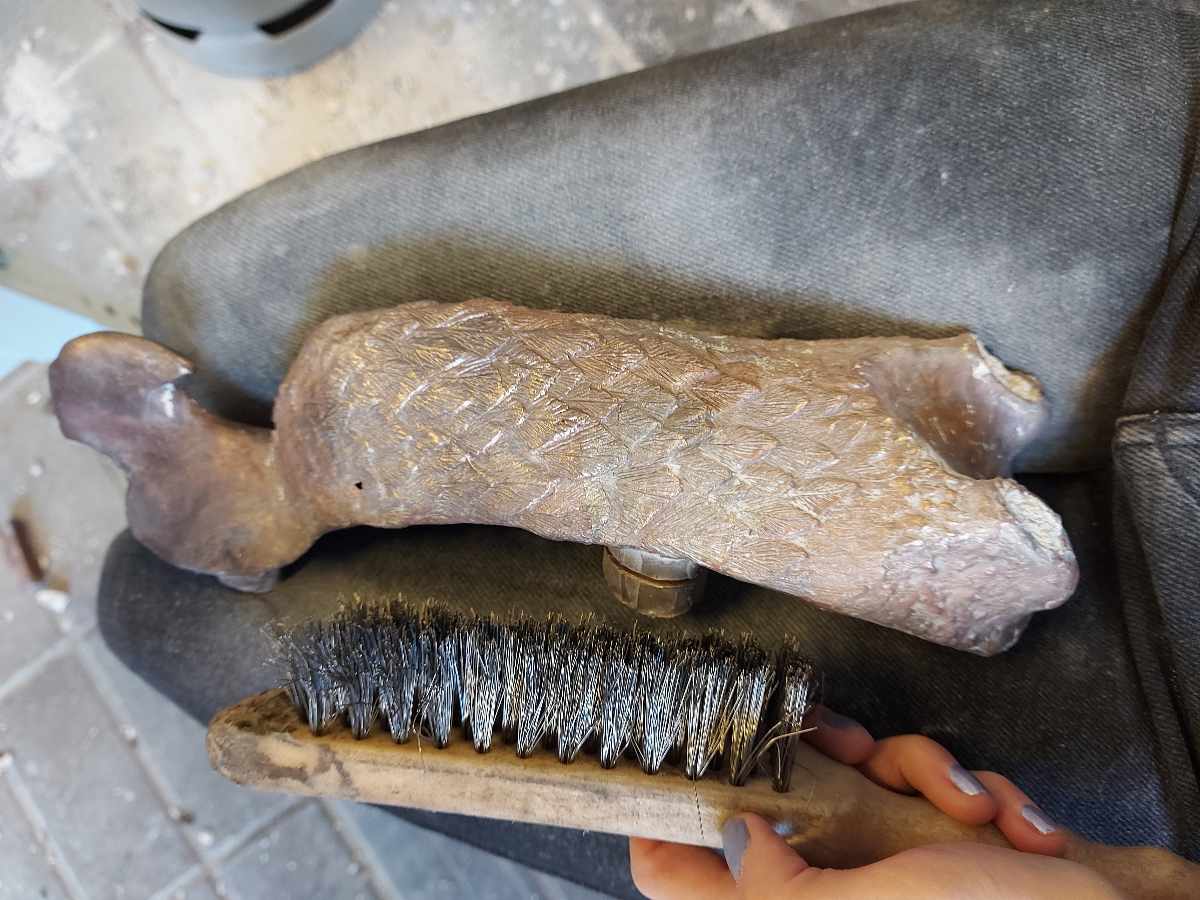
Metal brush helped clean the cast surfaces
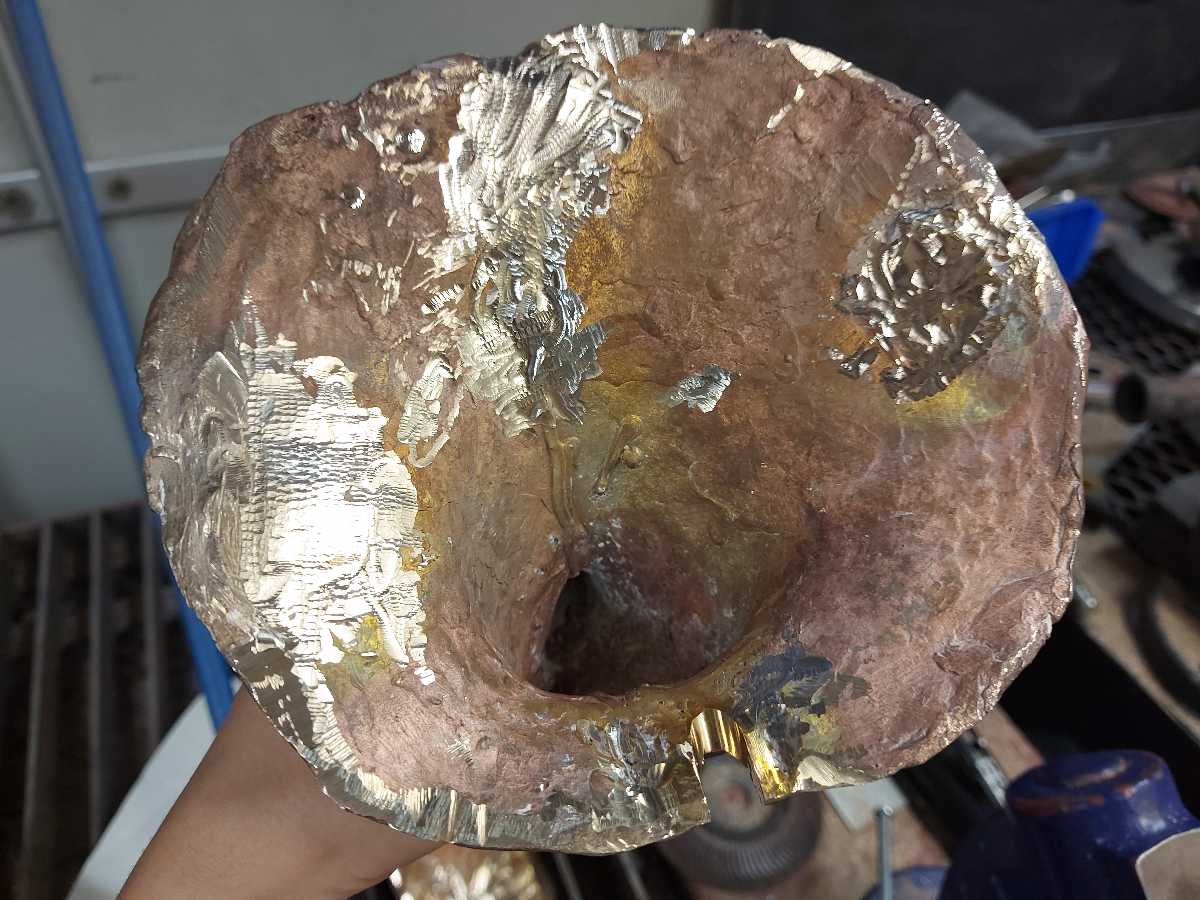
Bottom of the part - high quality surface finish
Higher area of the part - quality visibly degrading
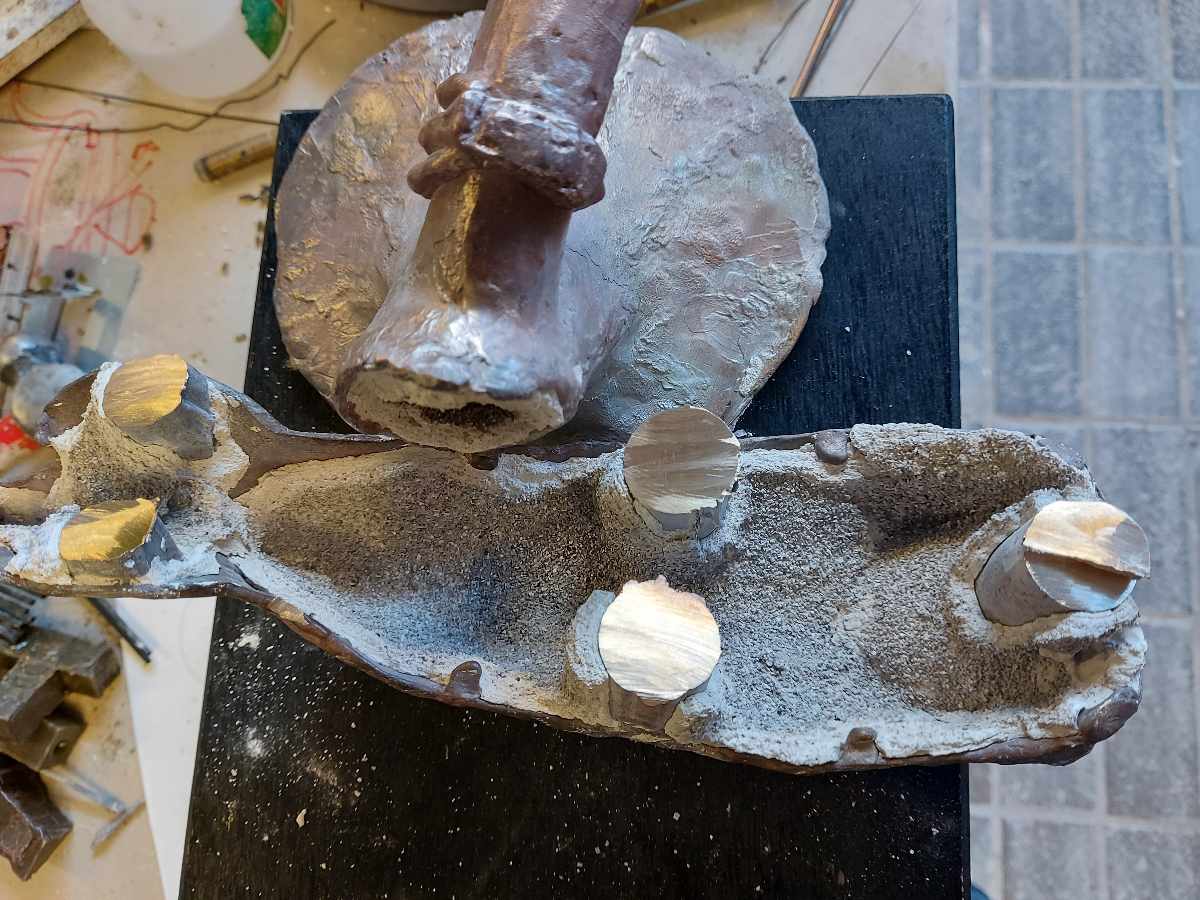
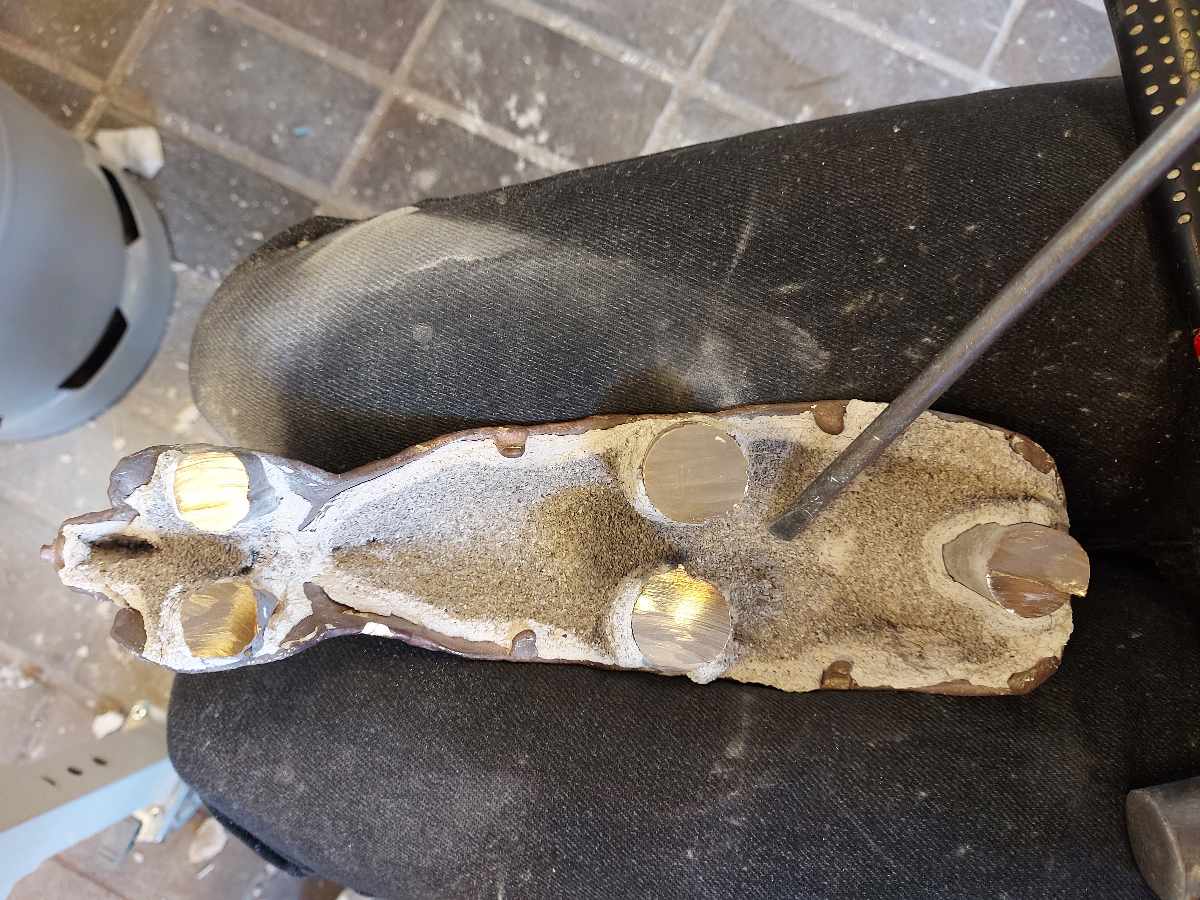
Grinding
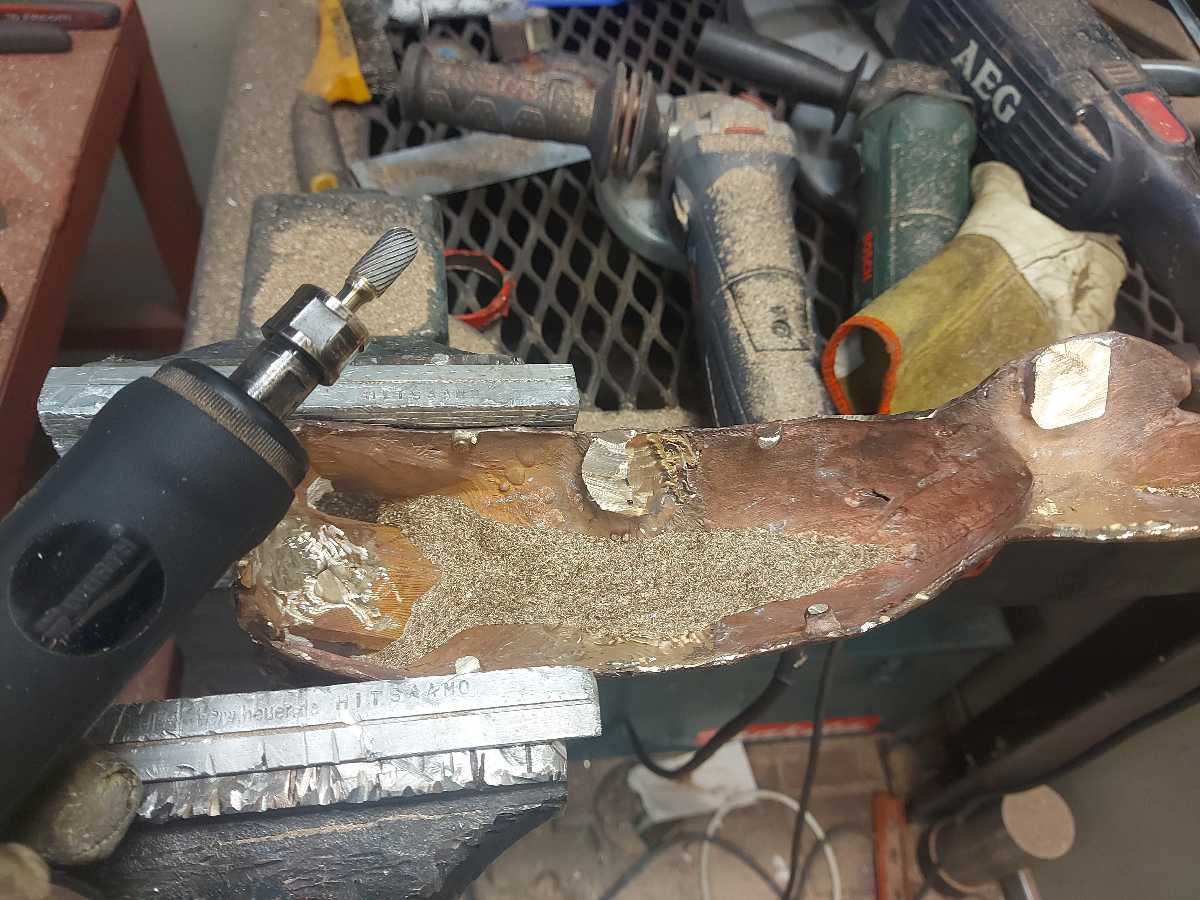
The next step was to remove the remainign parts of the channels ued to pur the molten metal in. Normally they may be cut off close to the part surface, but my casts were shaped in a tricky way that did not allow the tool to get close enough without causing accidental damage. So, I had to grind away 1-3 cm long pieces of bronze. Even though bronze is relatively soft, this was a very tedious and physically demanding process. The tool tip was also sliding on the surface and causing some flaws, but they were luckily on the inner side. Metal work is not easy at all

Welding
Polishing
Patina
Stained Glass
Waterjet cutting
Unfortunately, the wokshop equipped with waterjet cutter has been closed for the summer break :( Second part of Felipe to be continued in September, stay tuned