3D Scanning and Printing
design of the part
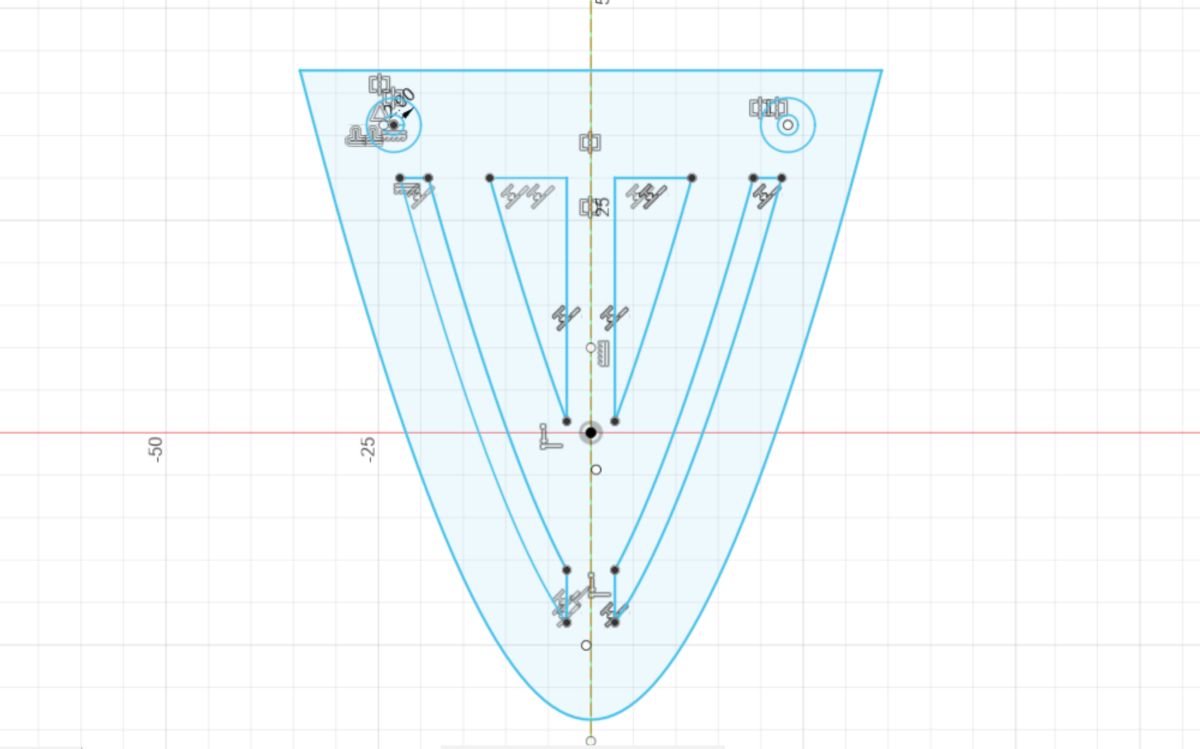
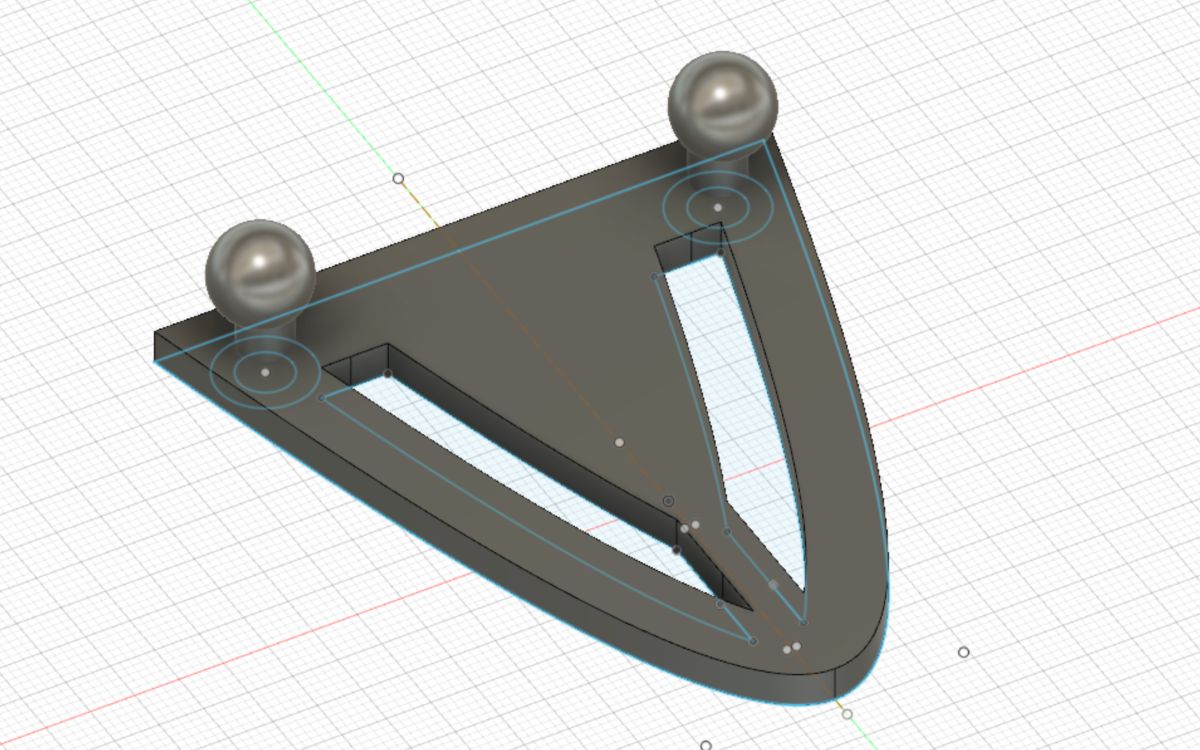
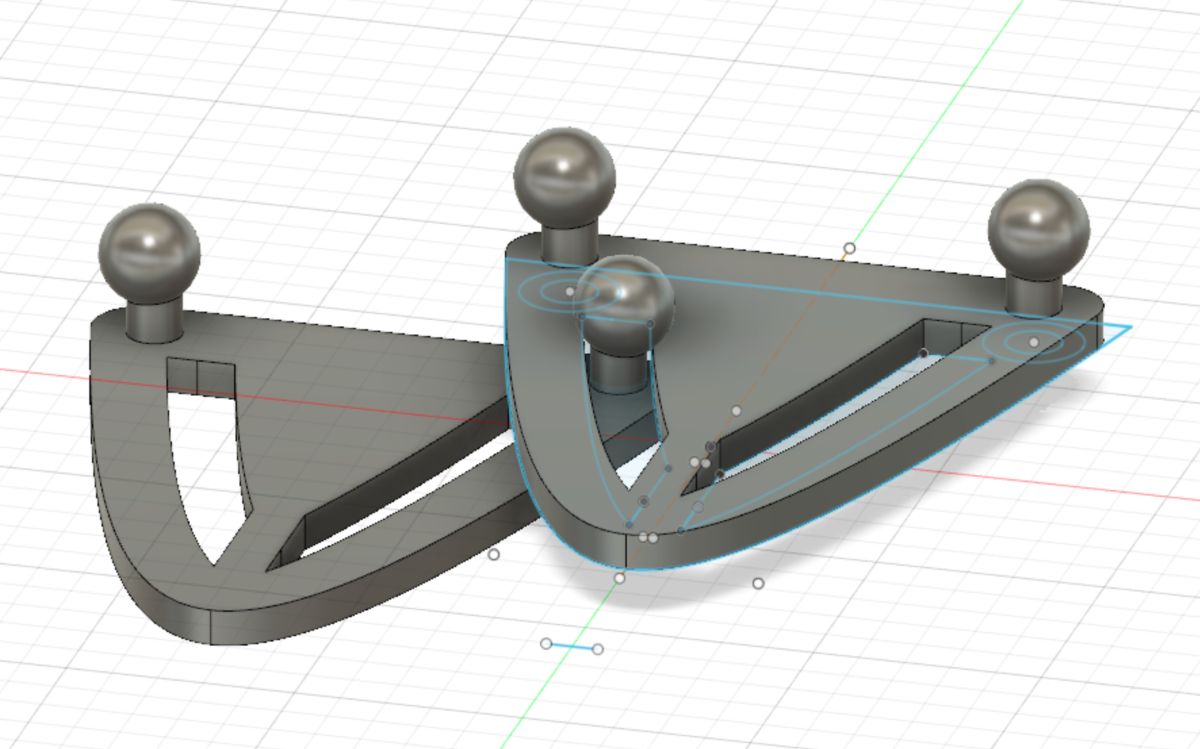
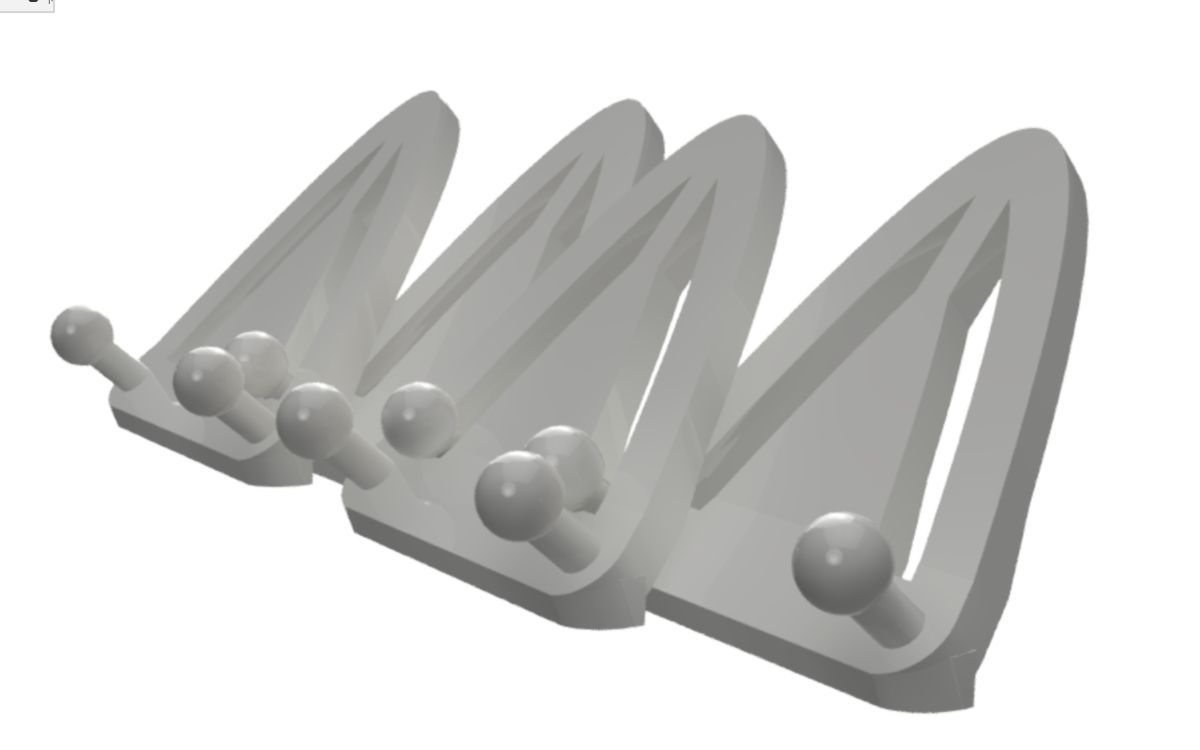
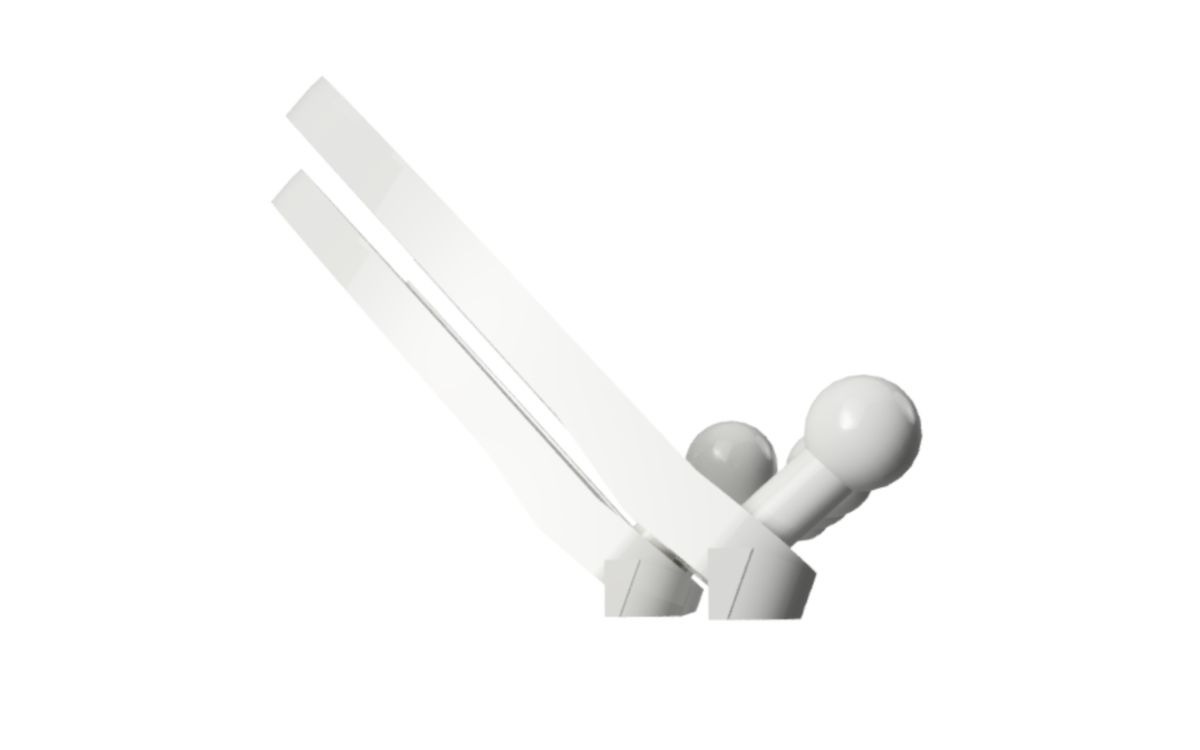
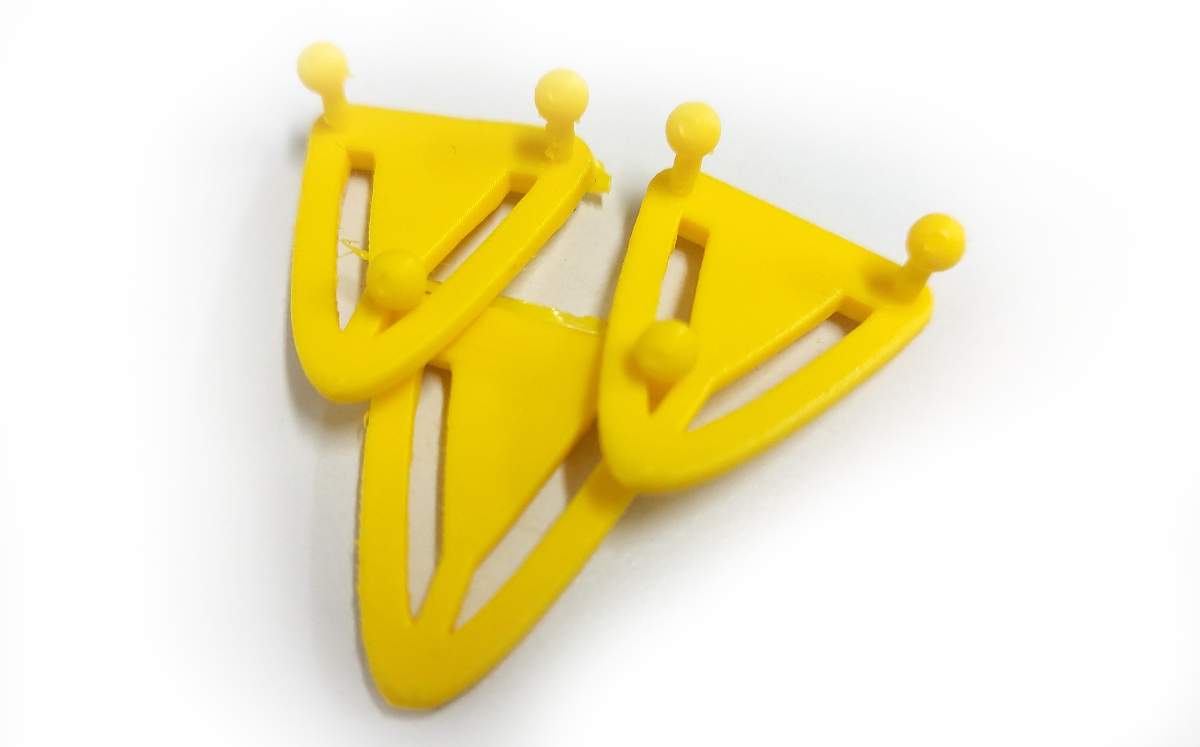
I wanted to give a try to designing a textile-like, scale-like structure made of intertwined modules that would have connections loose enough to allow certain level of mobility
3d printing
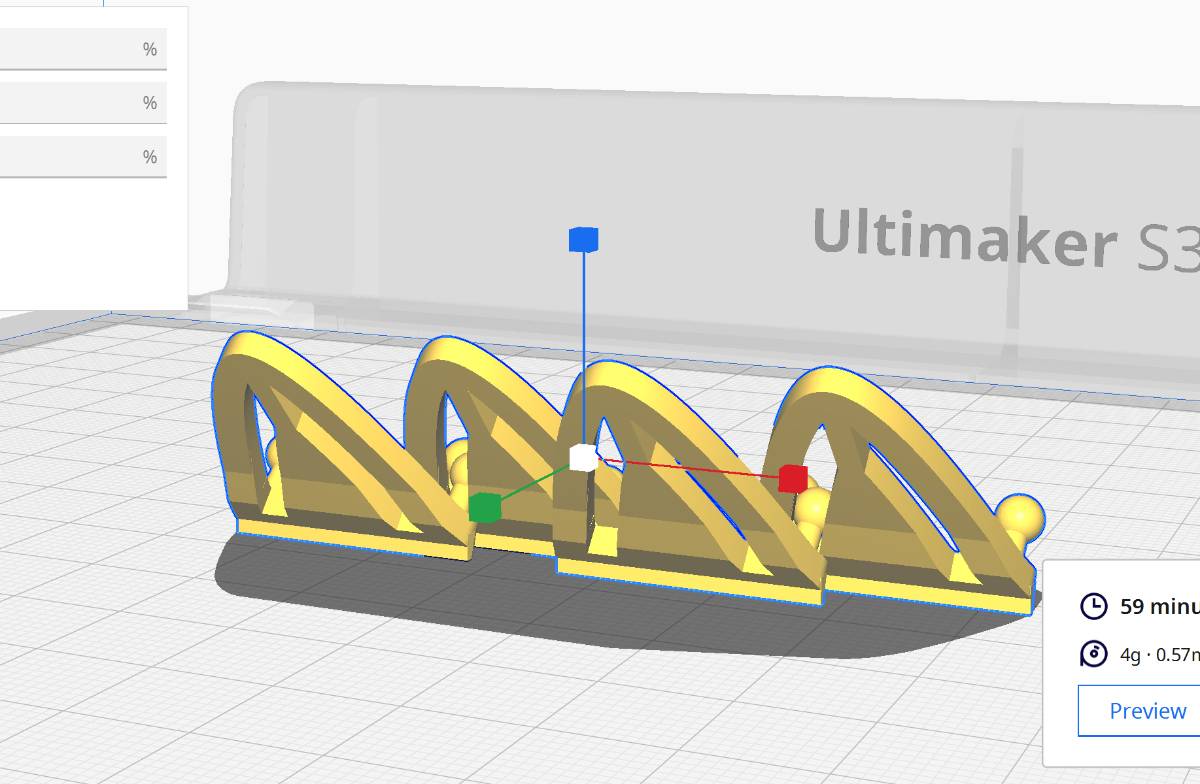
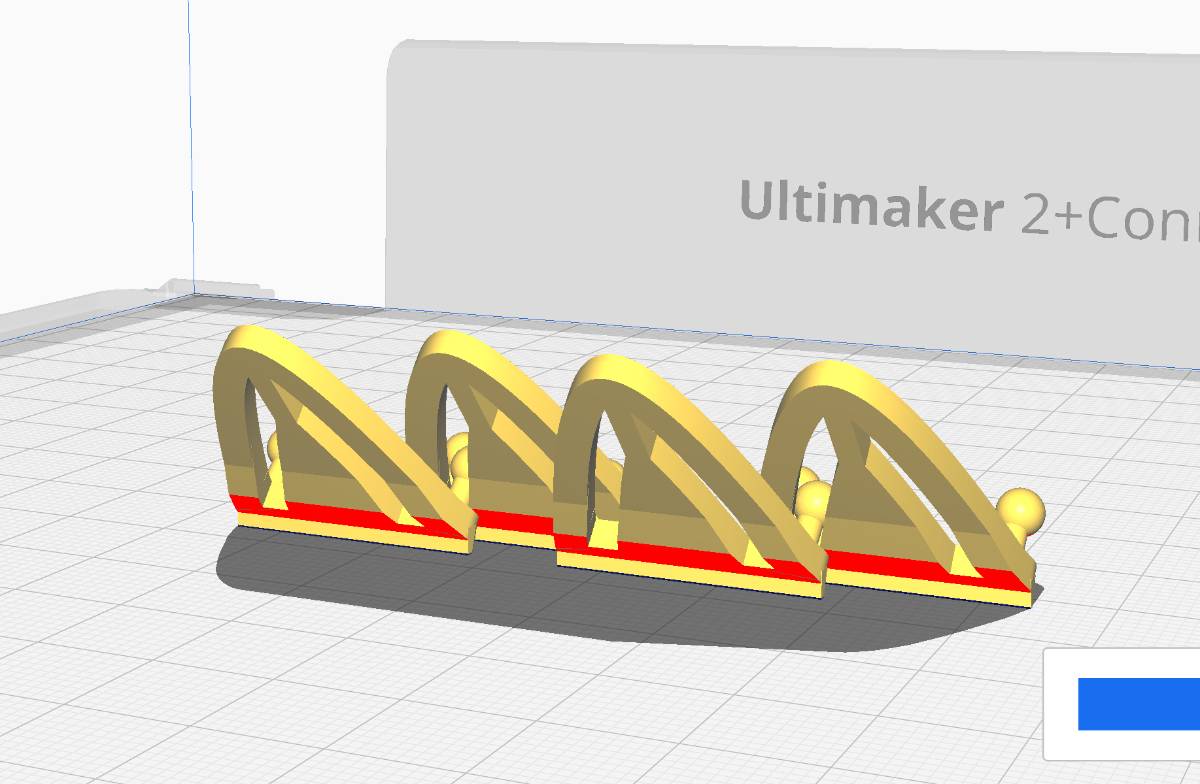
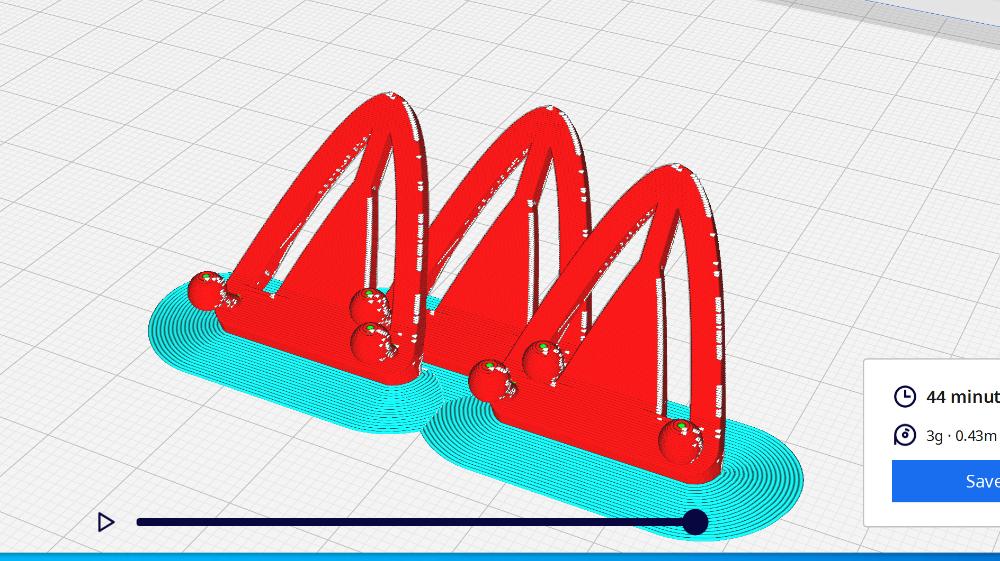
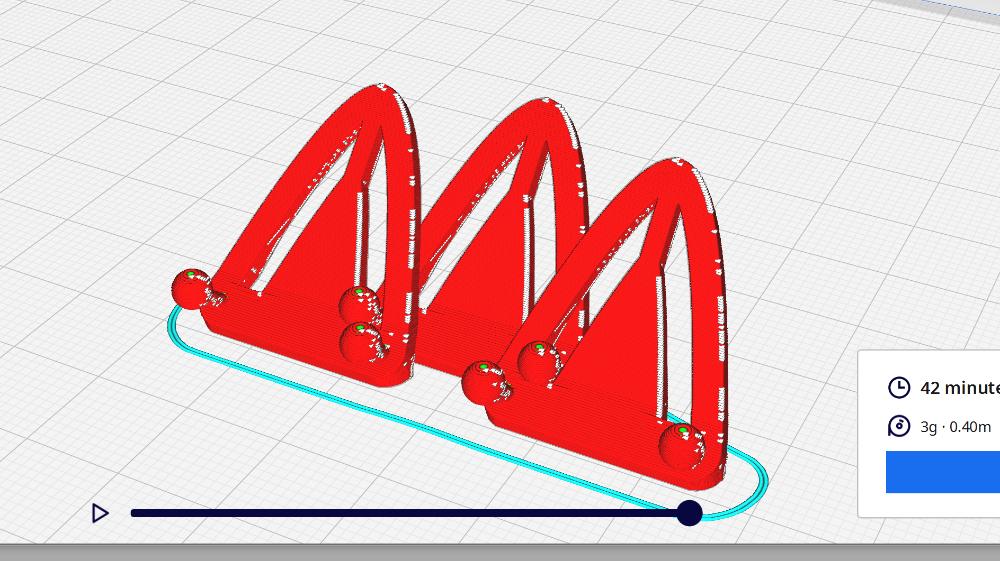
At Aalto Fablab we have Ultimaker FDM 3d printers available: Ultimaker S3, Ultimaker 2+ Connect and Ultimaker 2+ Extended. The 2+ Connect should be the generally better one, but surprisingly in this case the prints turned out worse and teh Ultimaker S3 definitely won. Even the slicing process in Cura, done on the exact same model already indicated possible problems withe the overhang due to the angle and orientation of the parts the Connect 2+ may have, shown here in red.
Settings, mostly defult from Cura for the printer type
- Generic PLA
- 0.4mm extruder
- 0.15mm layer height
- temperature 200 degrees
- infill 100%
- bed heating to 60 degrees
Ultimaker s3
Ultimaker 2+
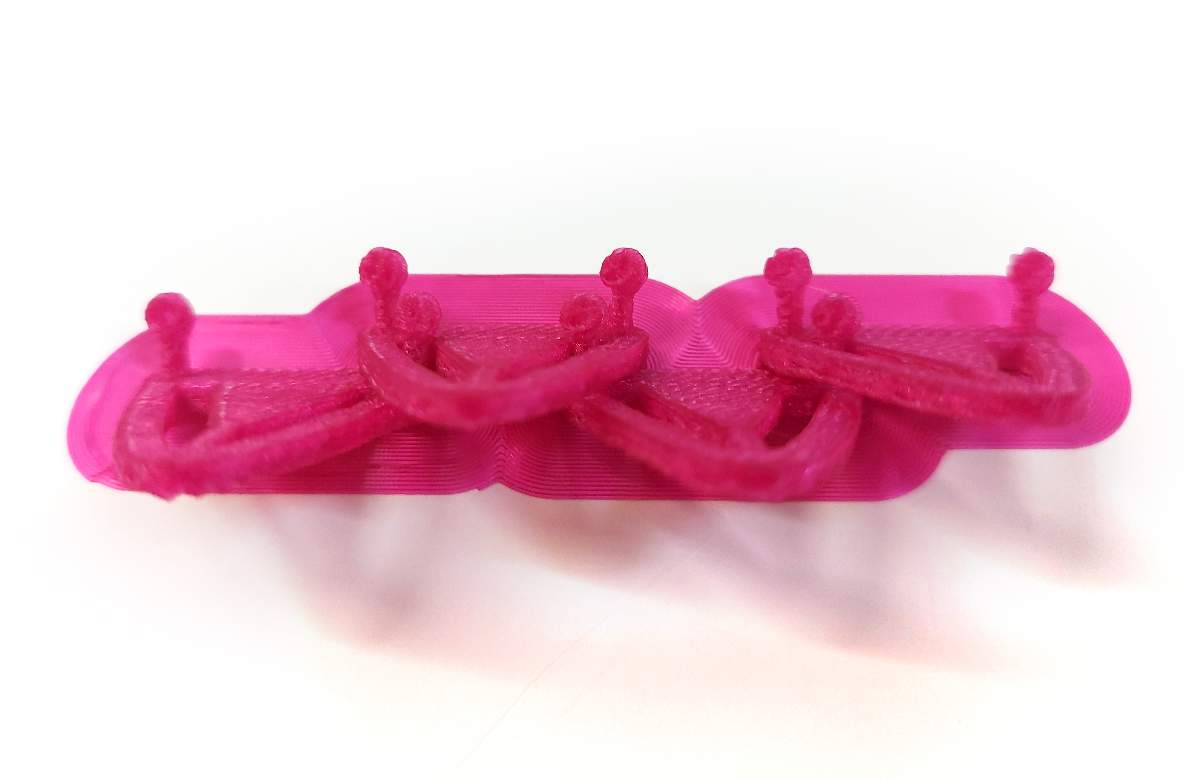
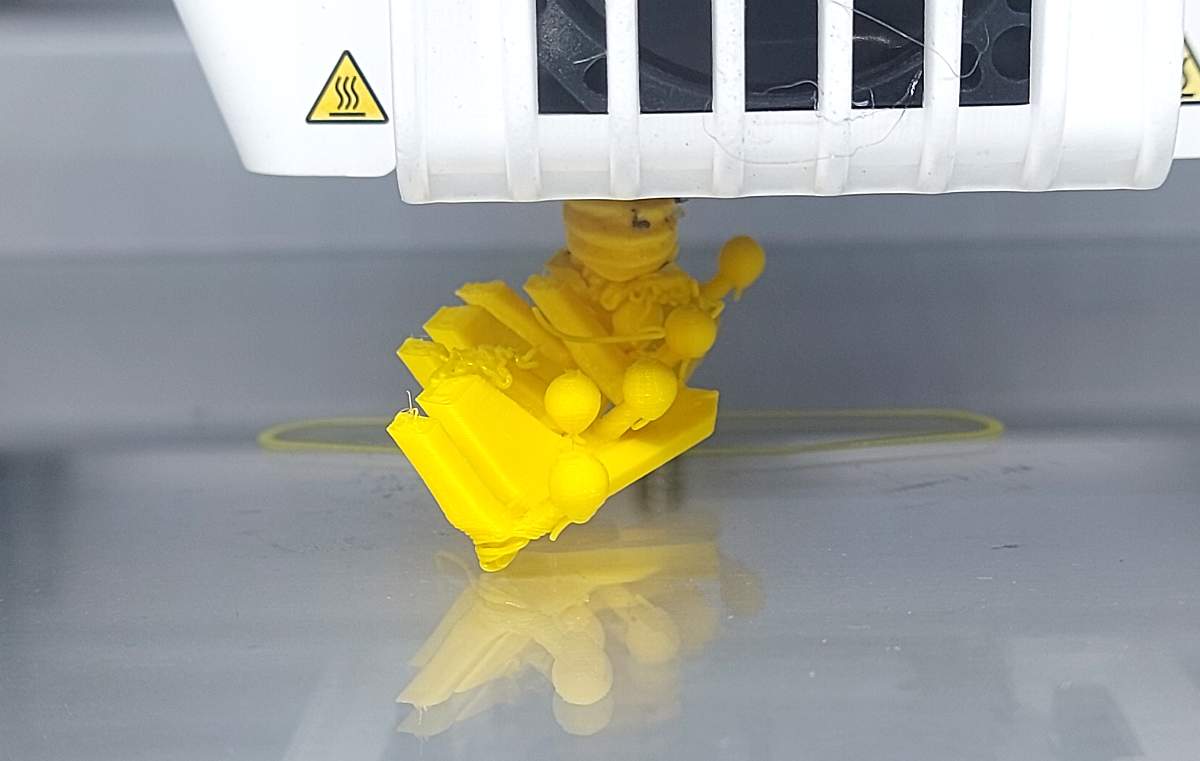
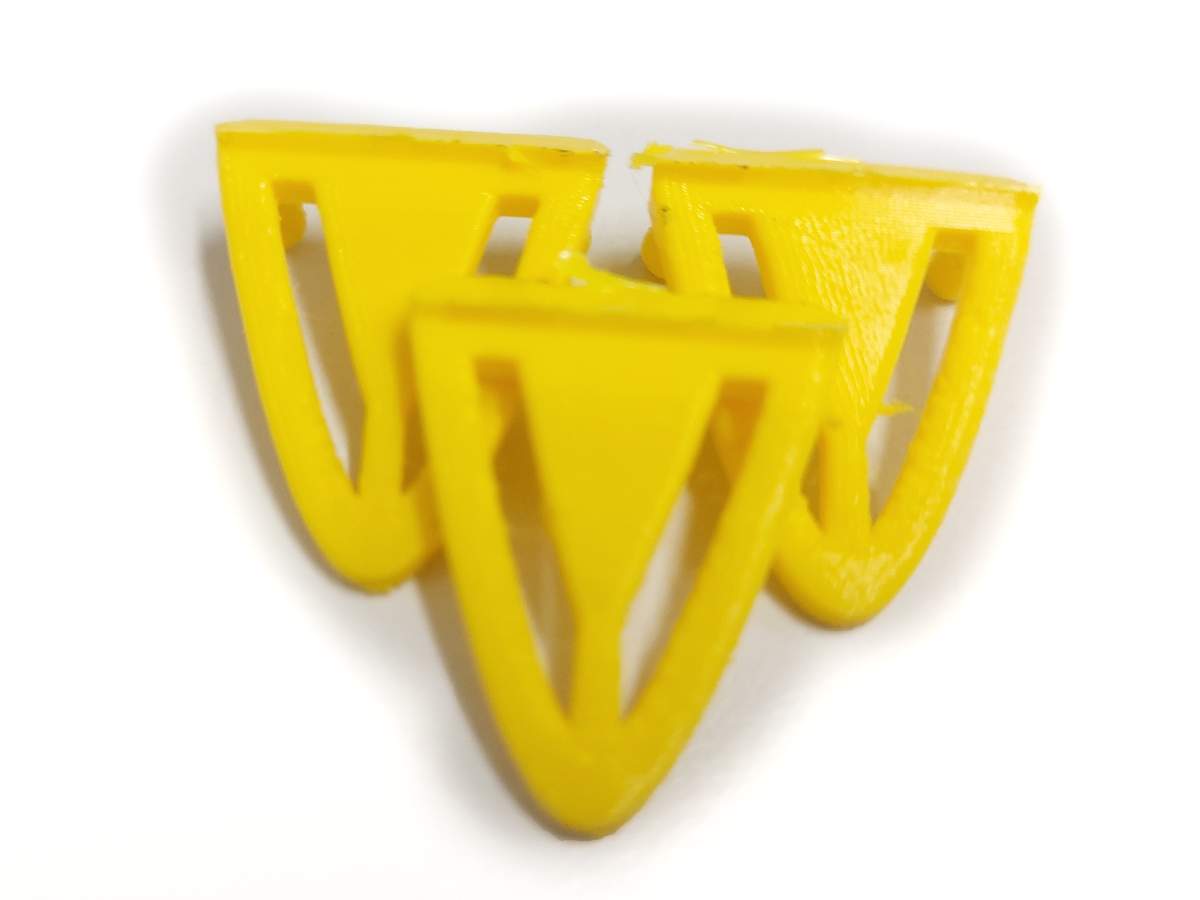
The printer was underextruding, therefore the effect pictured below. Probably the extruder was partially clogged and the filament was not flowing at the optimal rate, causing thin lines that would not form a solid object.
failing and iterating
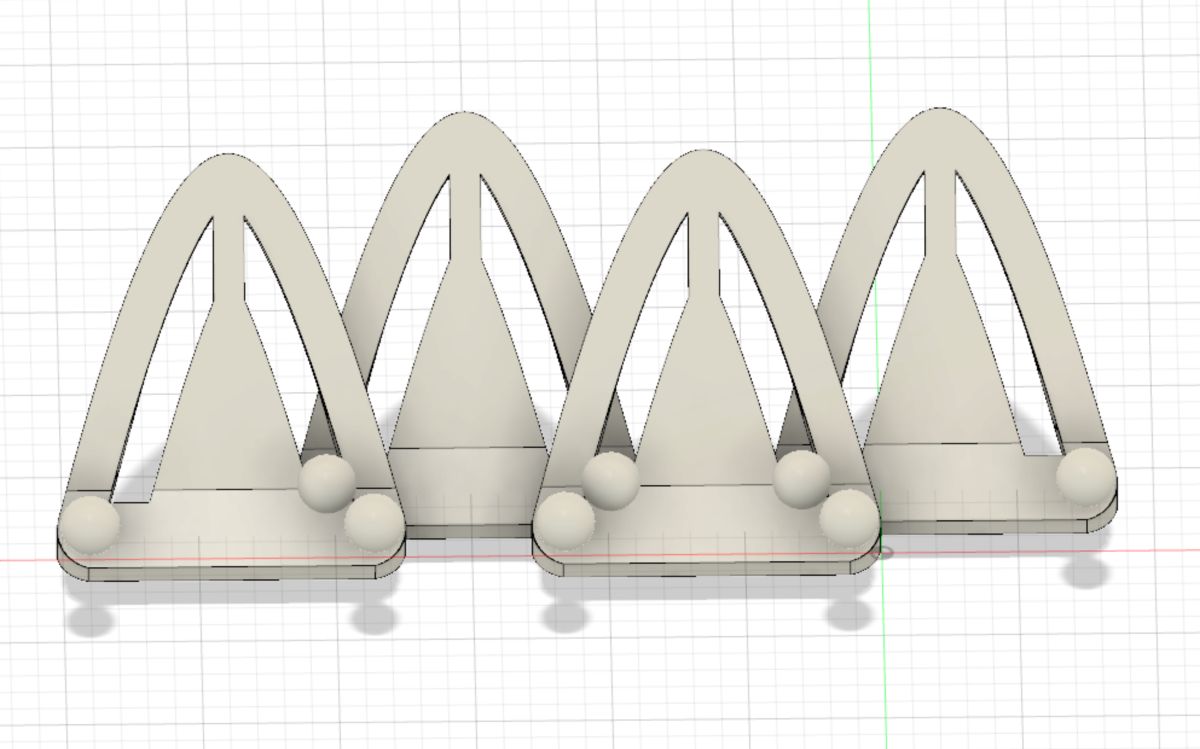
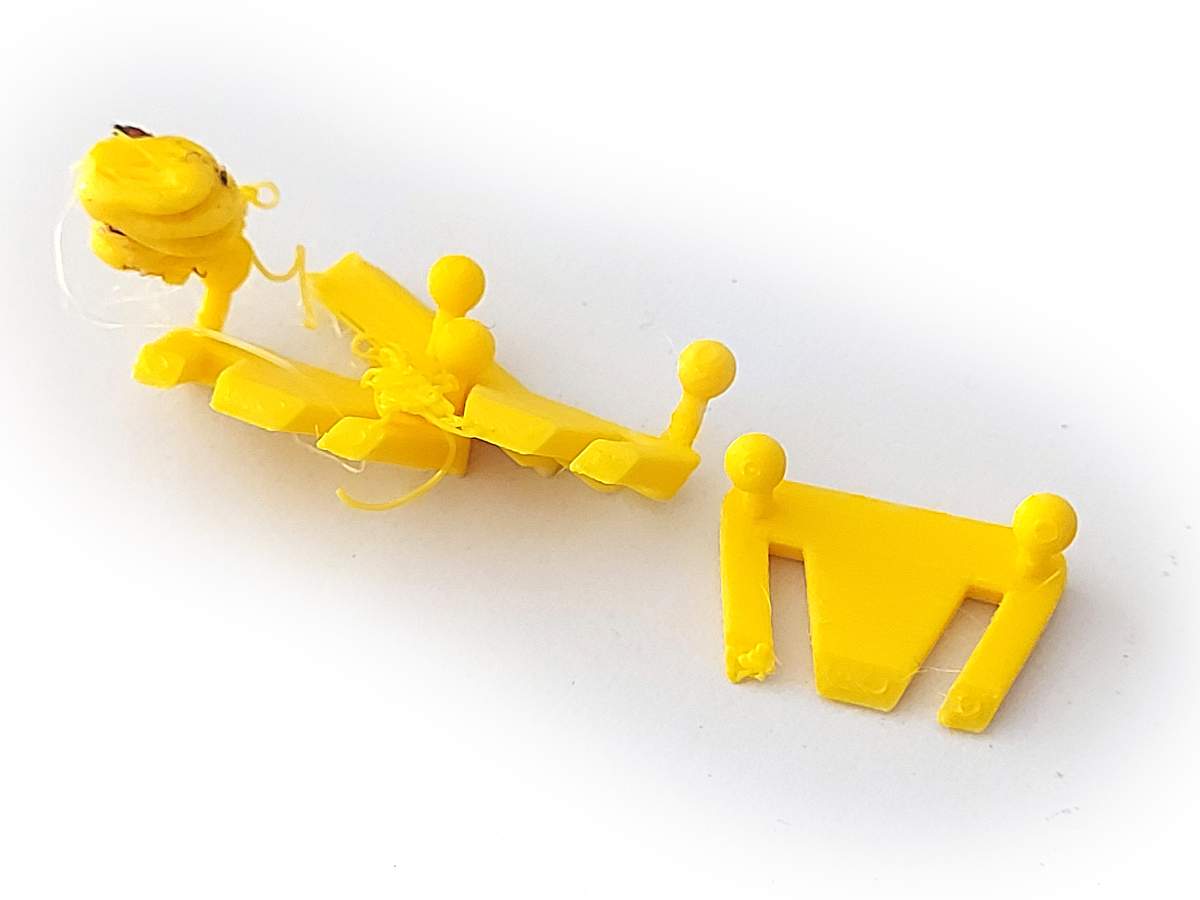
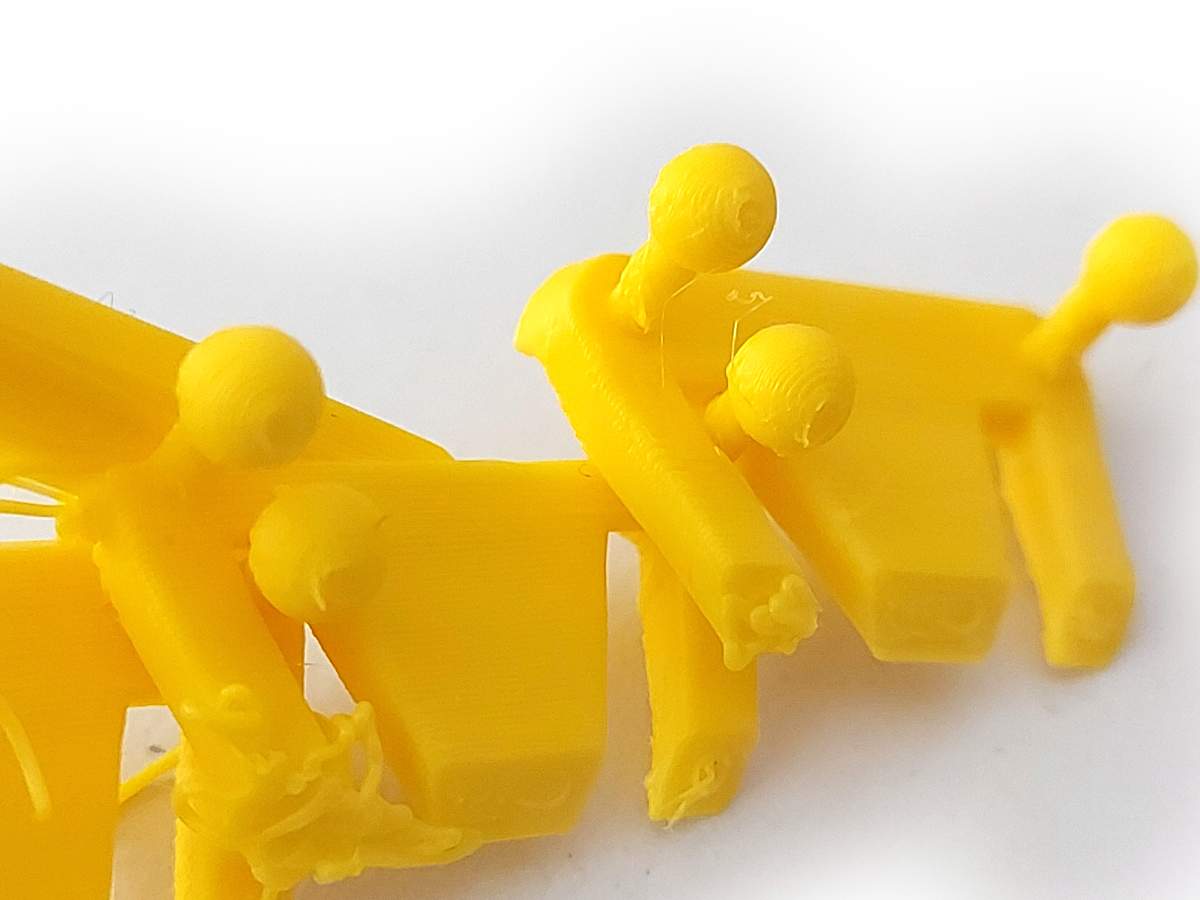
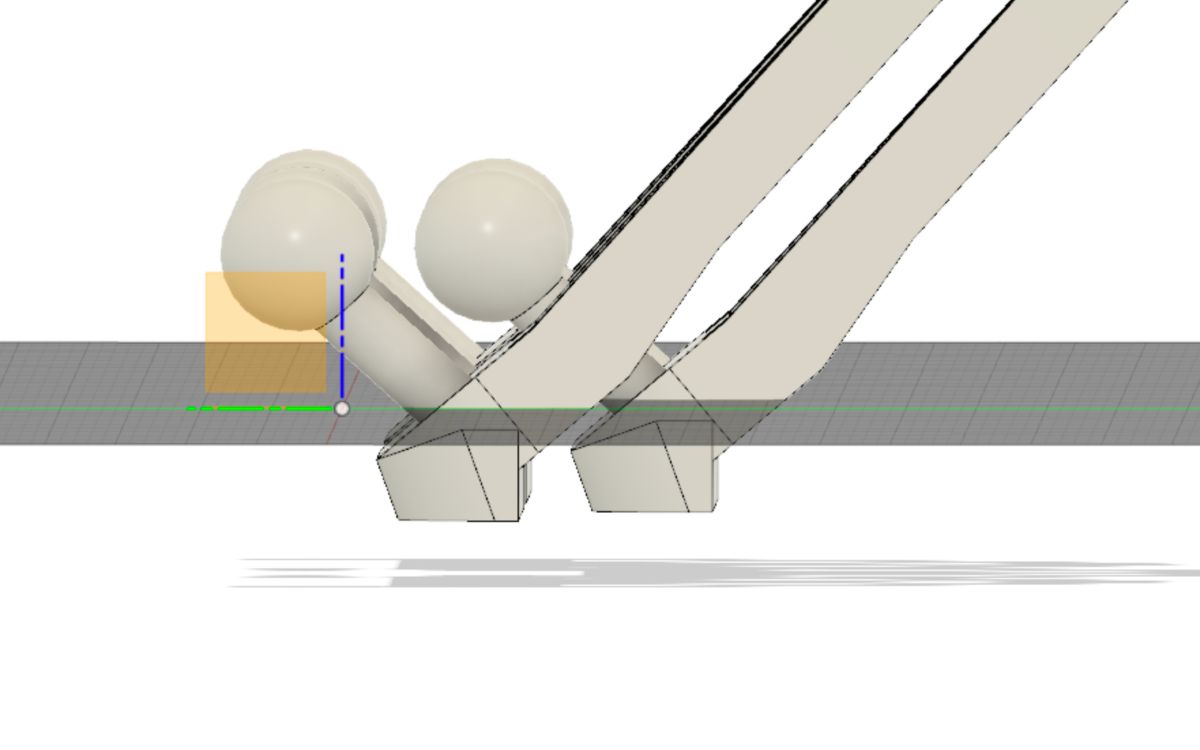
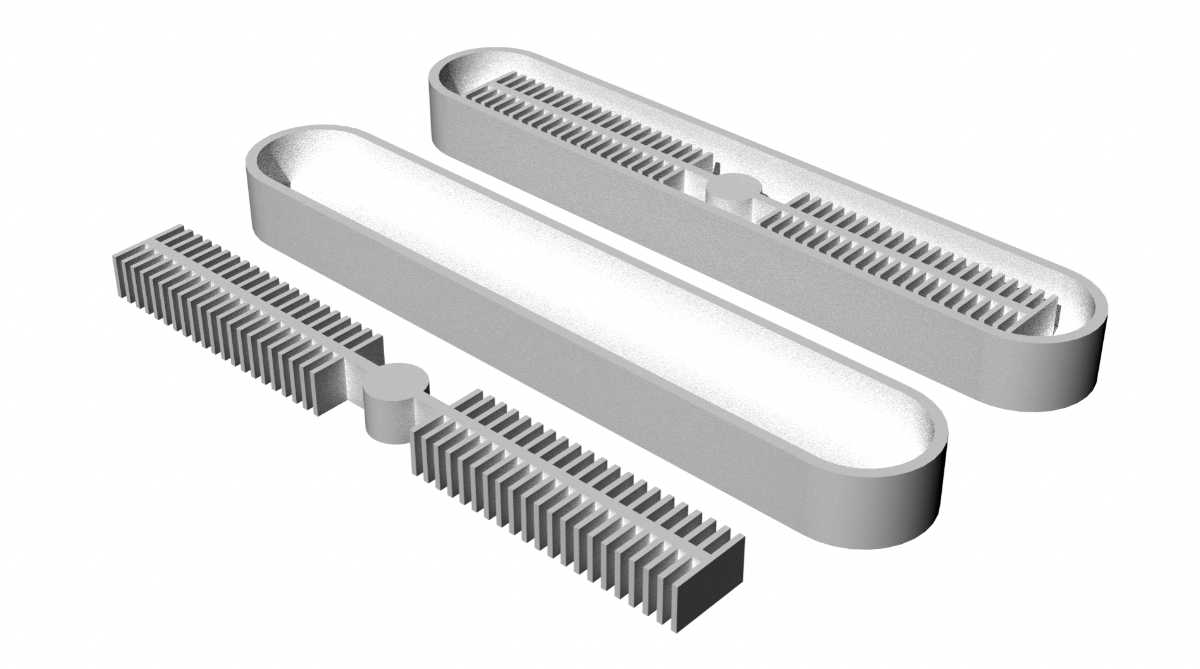
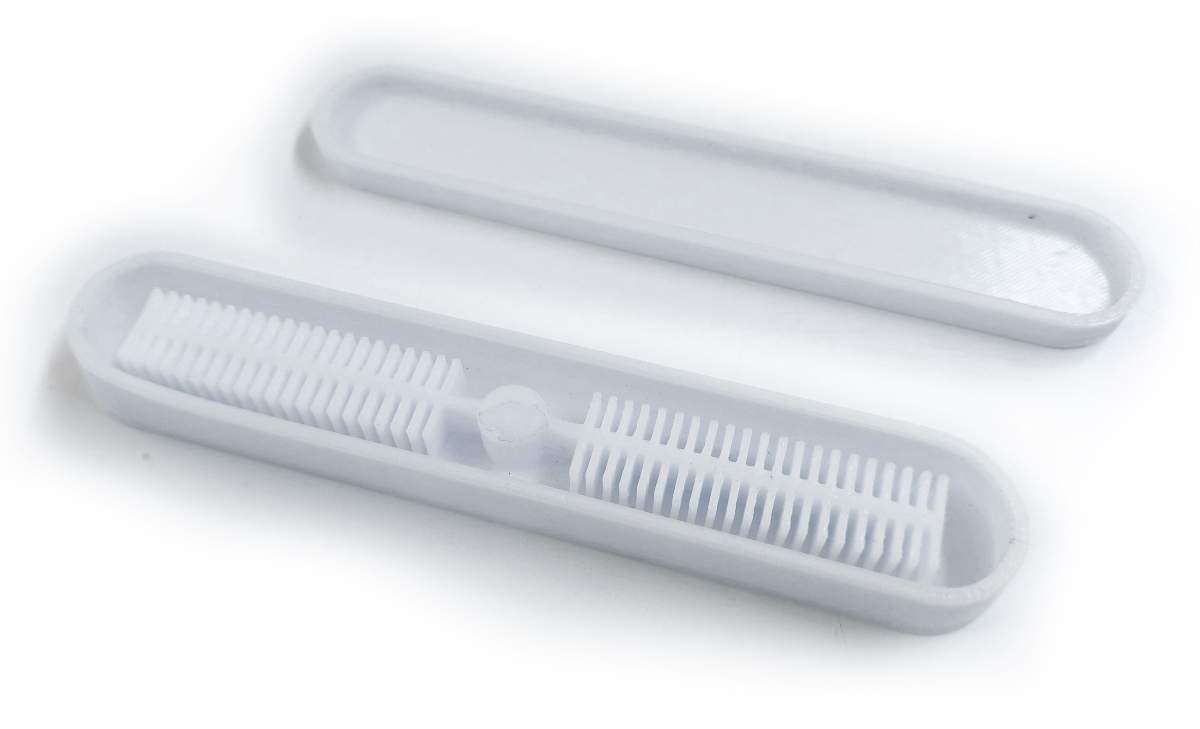
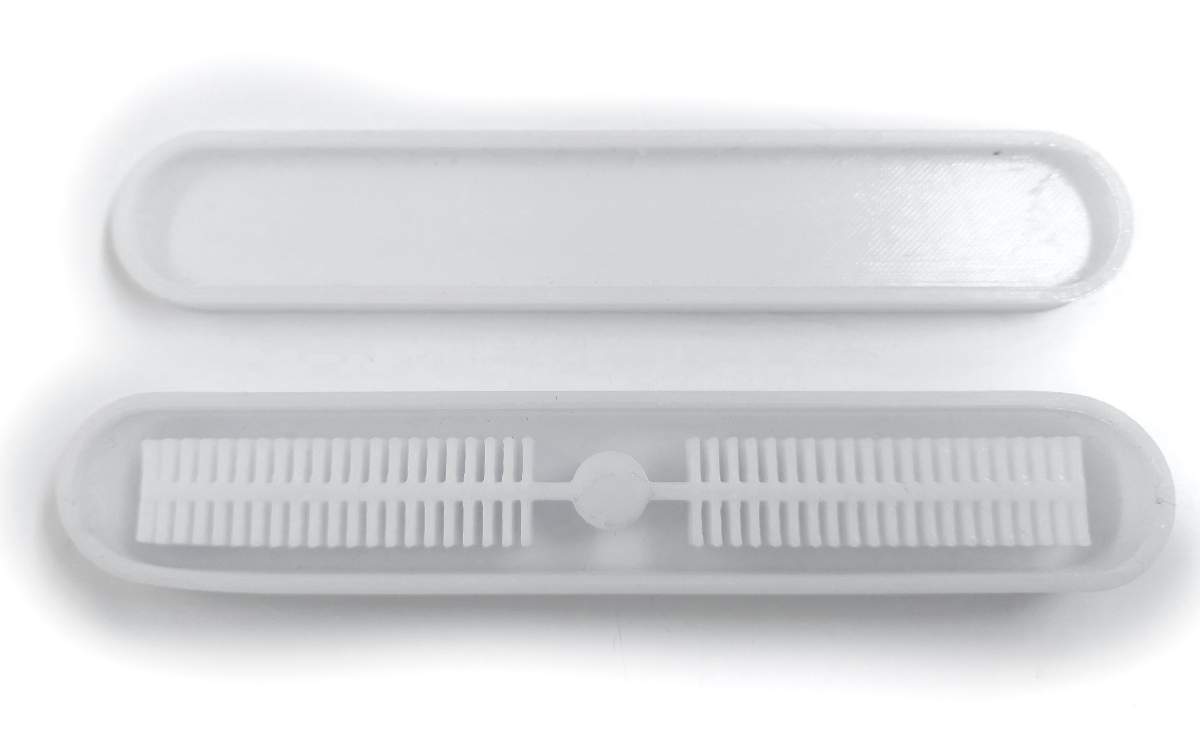
clearance
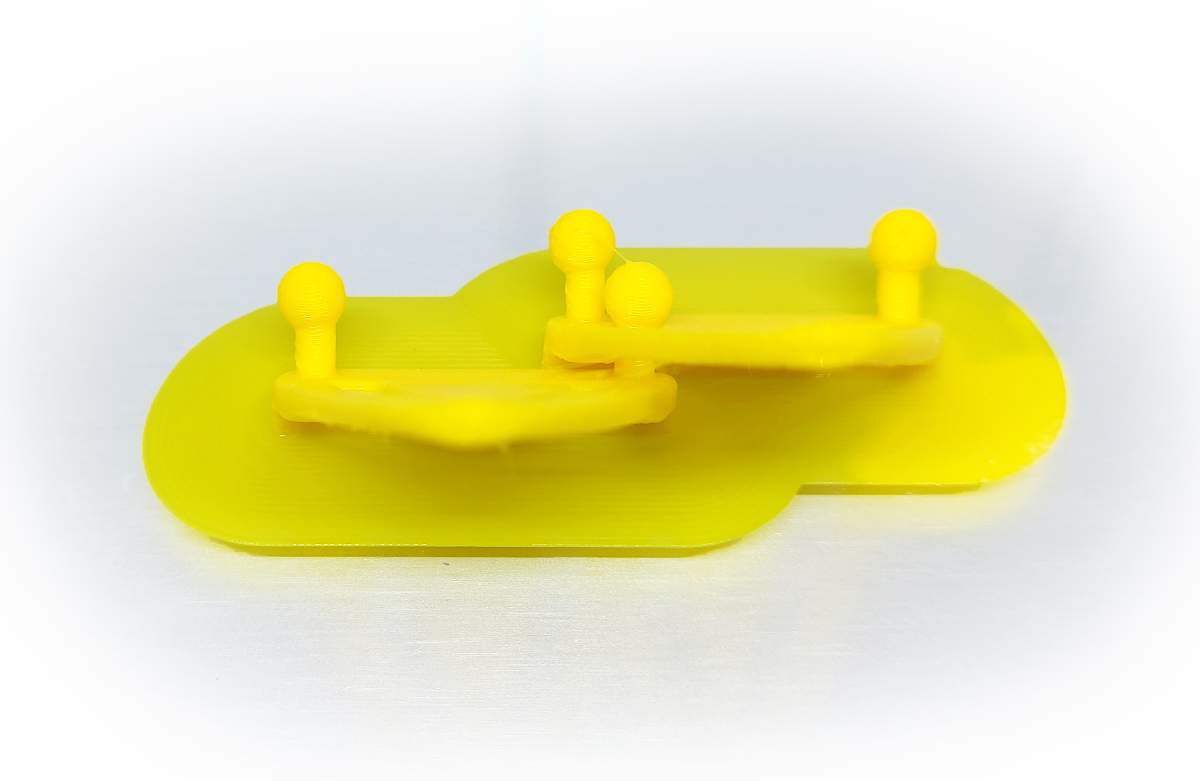
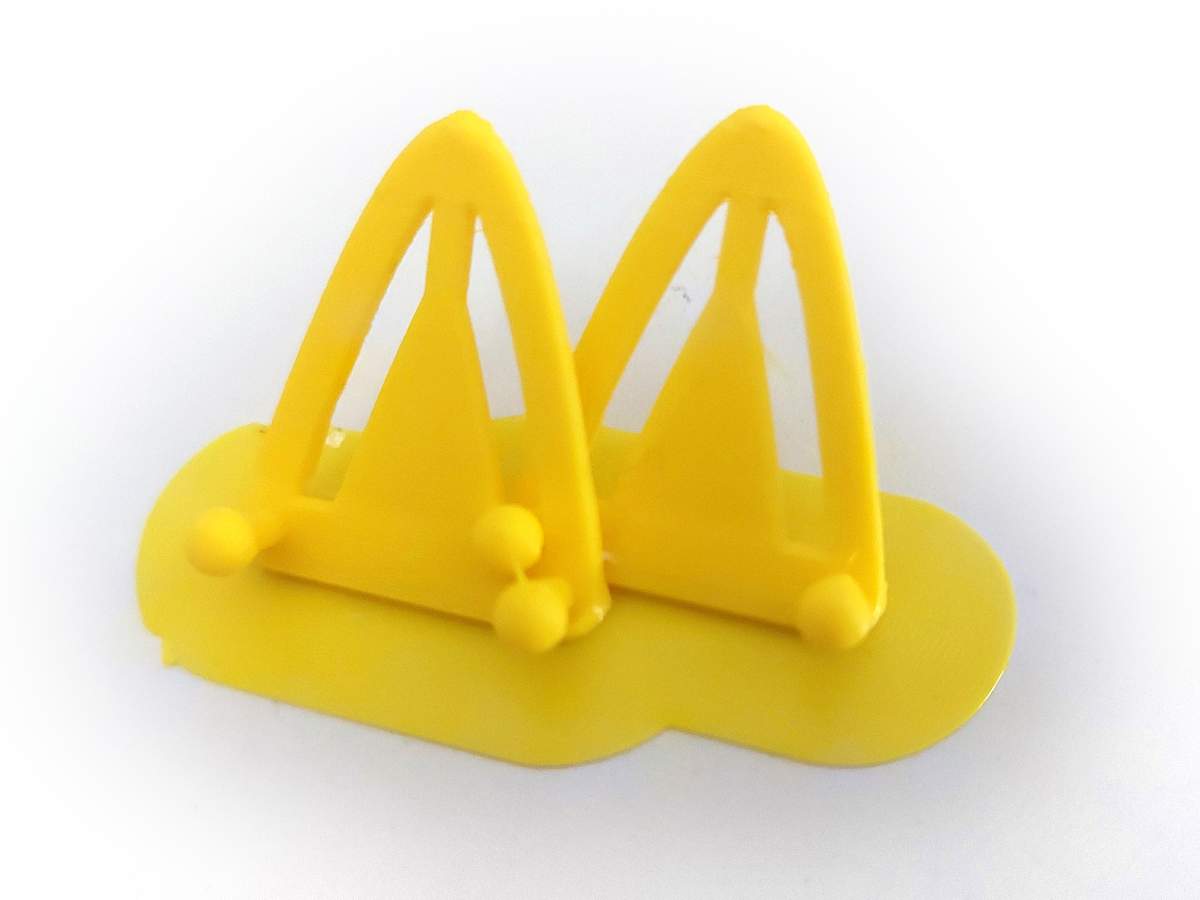
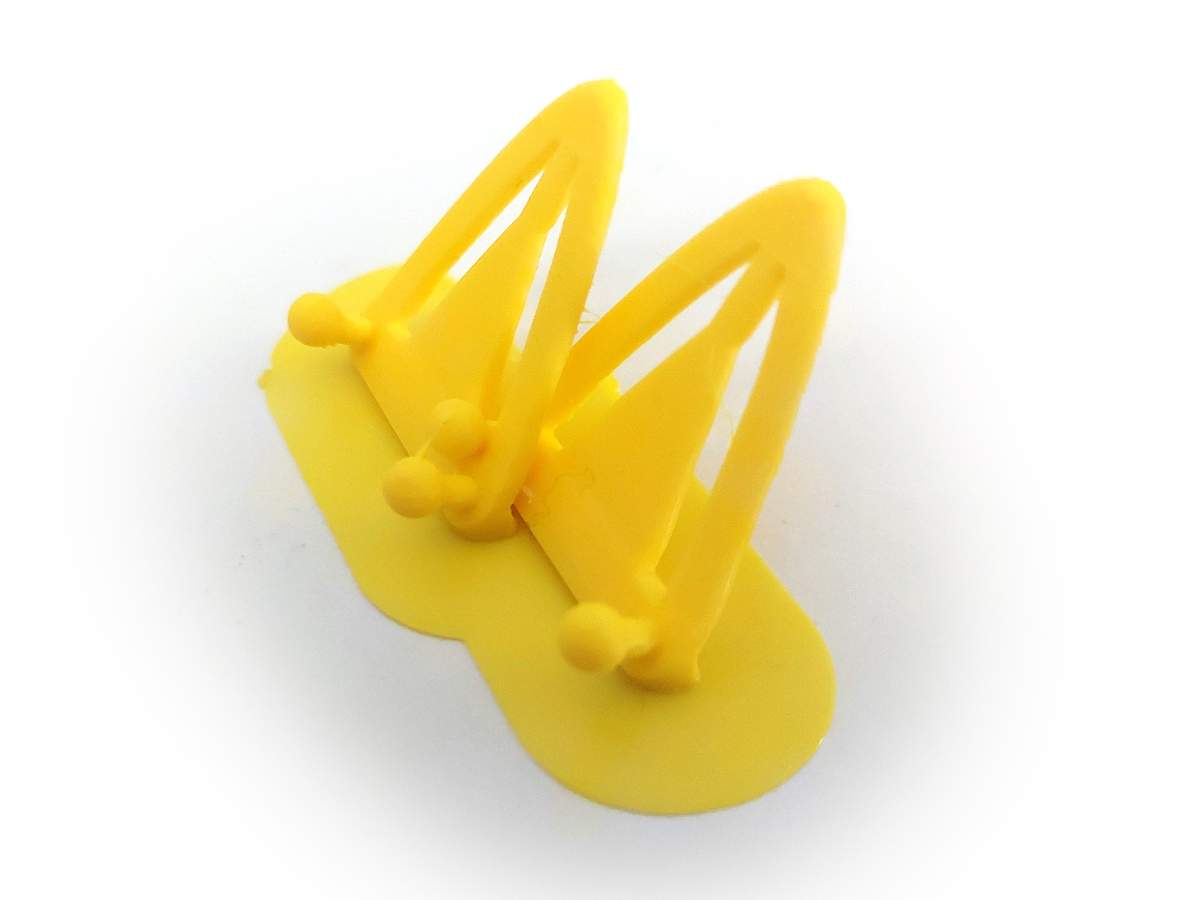
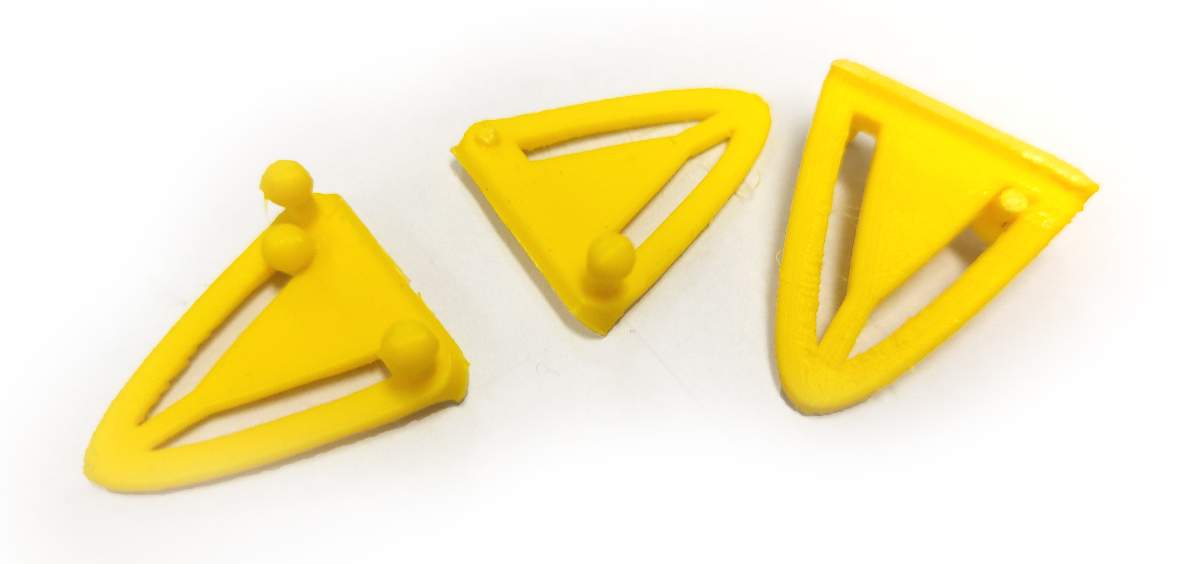
Turns out the spcaing between the parts that should be able to move that I initially applied was not sufficient enough. The parts fused together and taking them apart required some force and that unfortunately caused the thin ball attachements to break rather than the unintended fusing
brim vs. skirt
Cura slicer allow to select what kind of build plate adhesion should be applied. At Aalto Fablab we mainly use skirt as the Ultimakers are rather realiable and it usually is just enough to have the filament flow and print the initial layer directly on the build plate.
Brim
Skirt
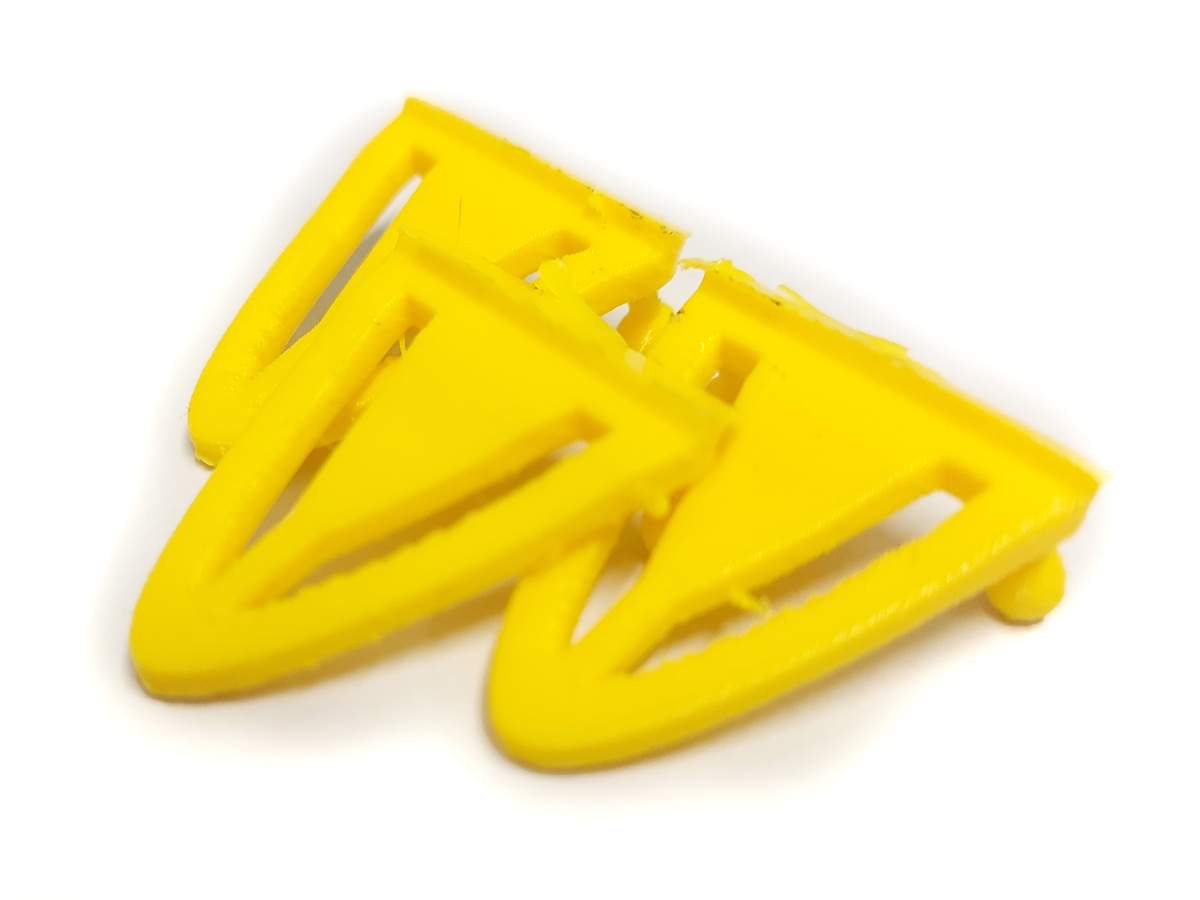
However due to small initial layer surface area of my part in relation to its vertical dimension and angle, the parts did noto have enough adhesion to stay in place during printing and got detached from the build plate and lifted by the extruder that caused failure you can see here
clearance + brim
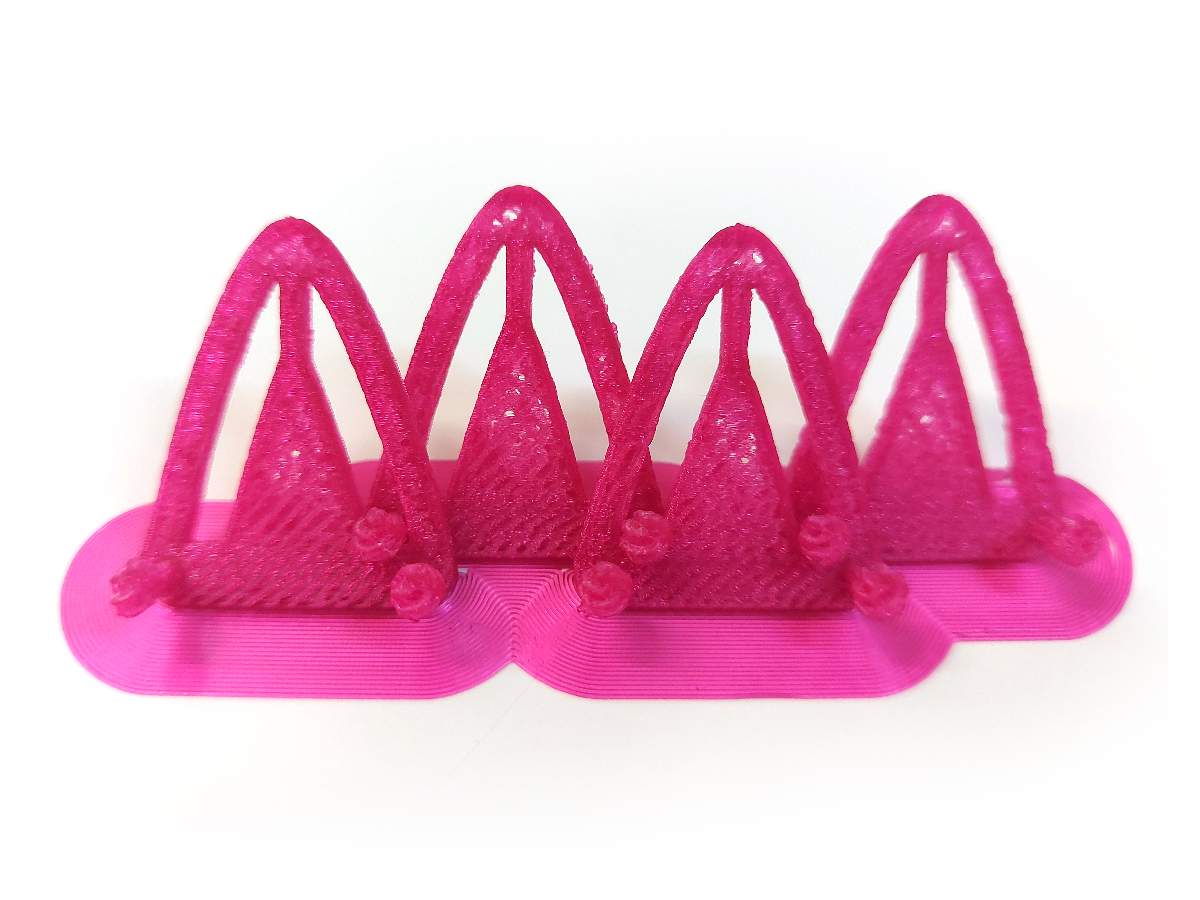
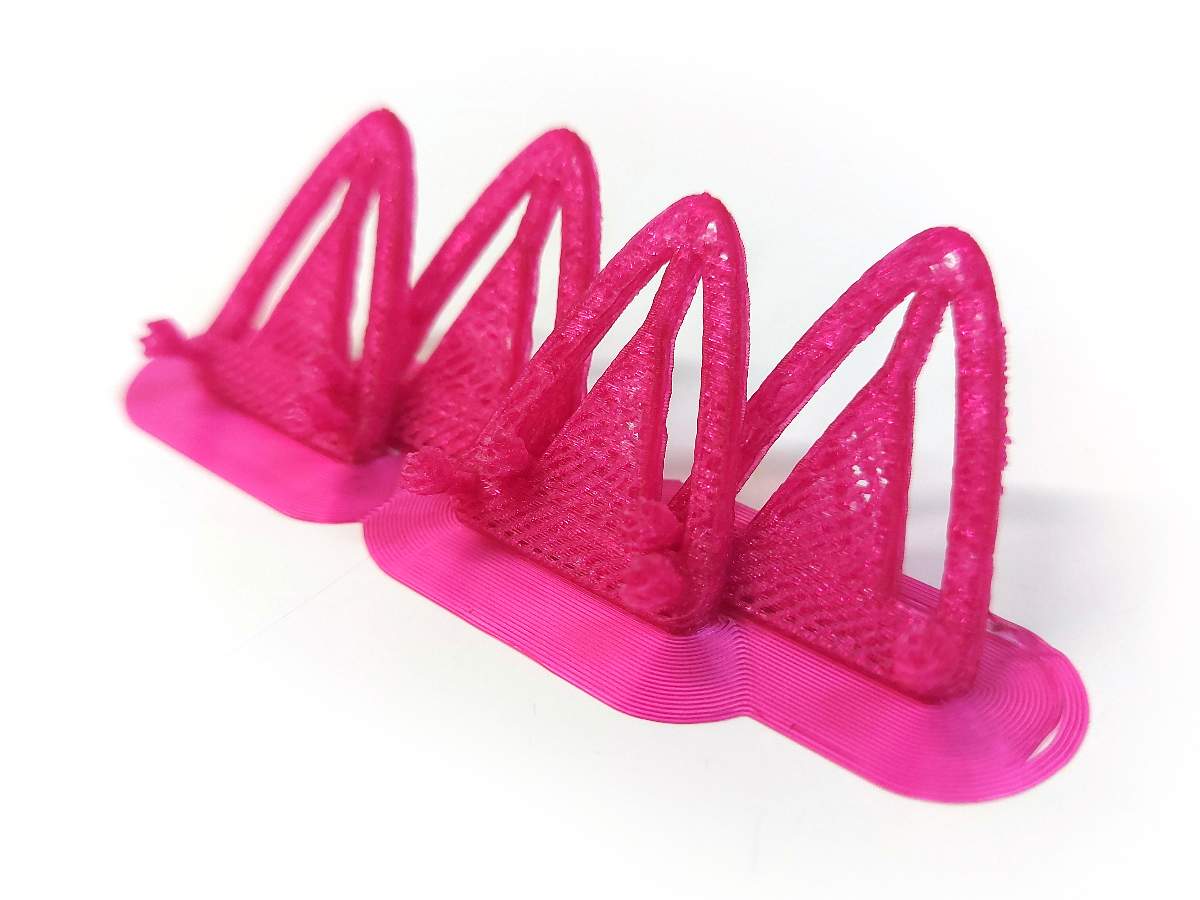
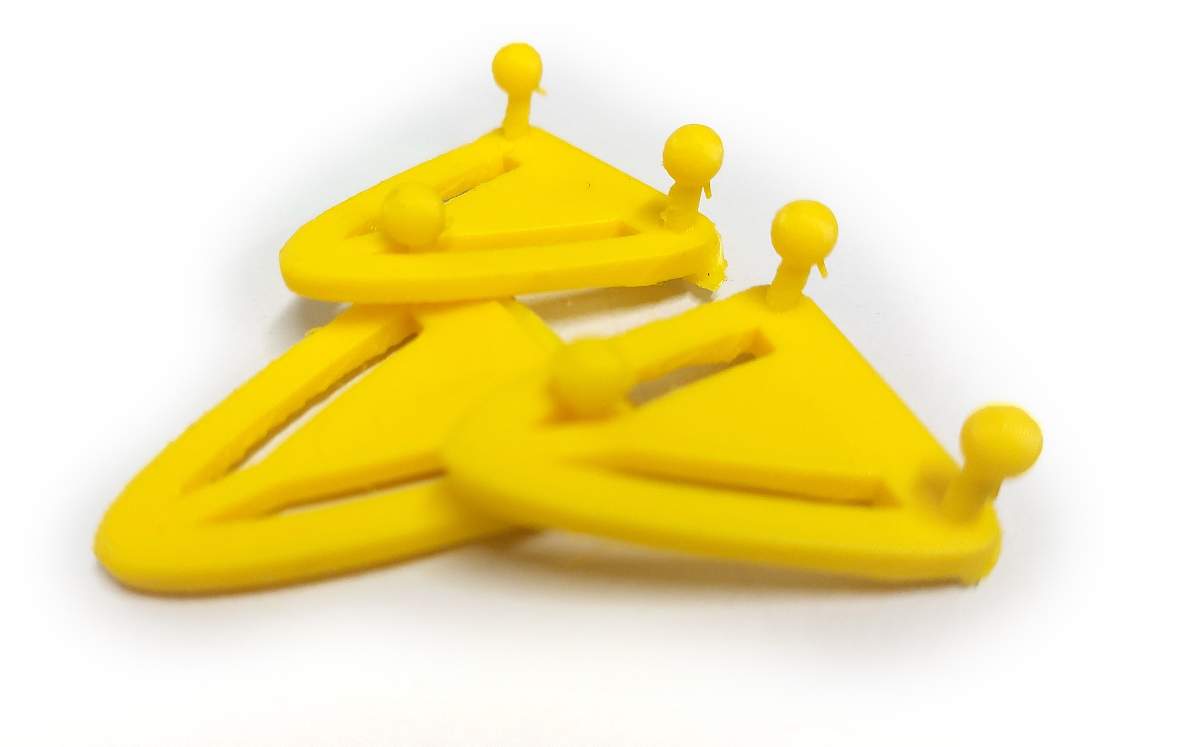
Based on the previous trials, I applied both the brim build plate adhesion and larger clearance to acommodate the printer's limitations when it comes to differences in dimensions between the design and the outcome prints. It finally worked as expected, the parts still fused a little bit, but applying just slight pressure on them was just enough to separate them.
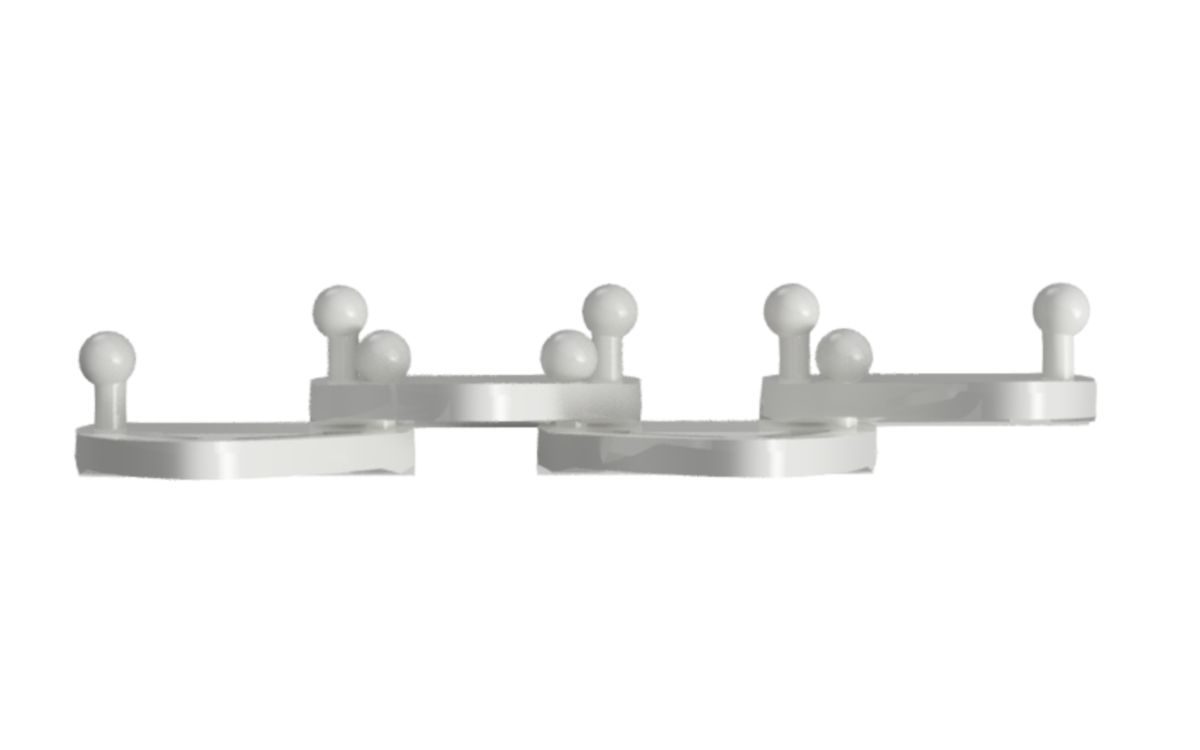
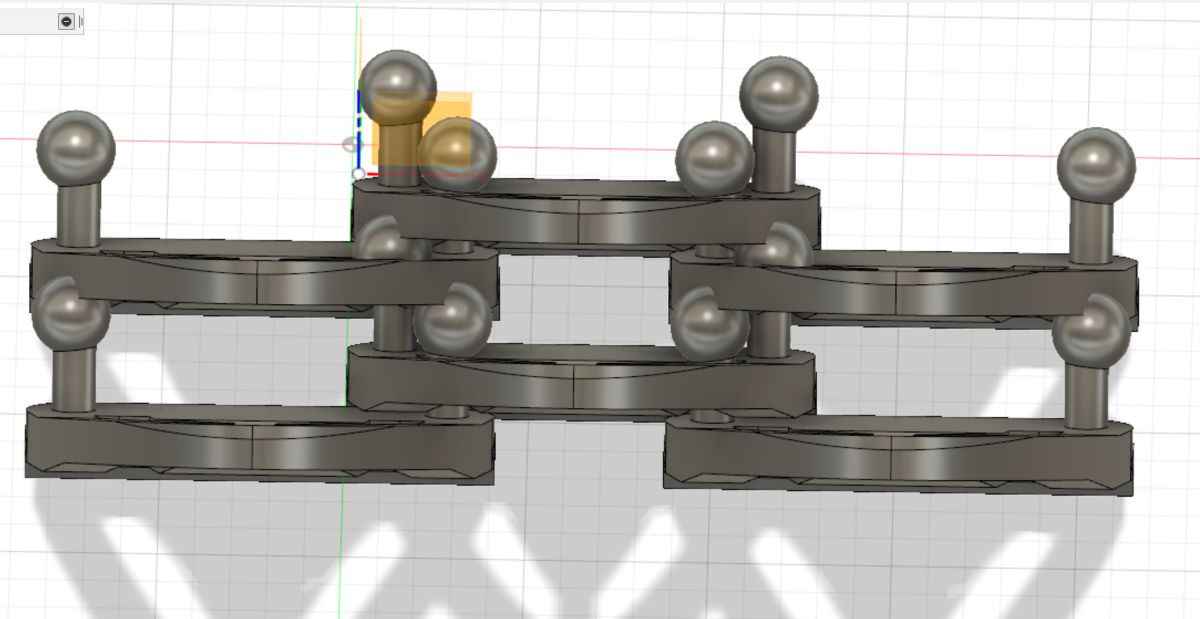
redesign to allow multi-row array print
At this point the design of the module does not allow multi-row array printing as the ball from row 1 would fuse with the main part of row 3. I know it is possible to get it right, it just requires further iterating on the spacing and sizing of these parts. However I think I would rather use double loop connections rather that ball and loop.
I'm hoping to get the design nice enough to print using the SLA Formlabs 3D printer that we have available at the lab. At this point however, there is the design part to be prioritized. The aesthetically pleasing resolution and finnish surface and more freedom with the placement of parts in the space, I will reserve for the final iteration.
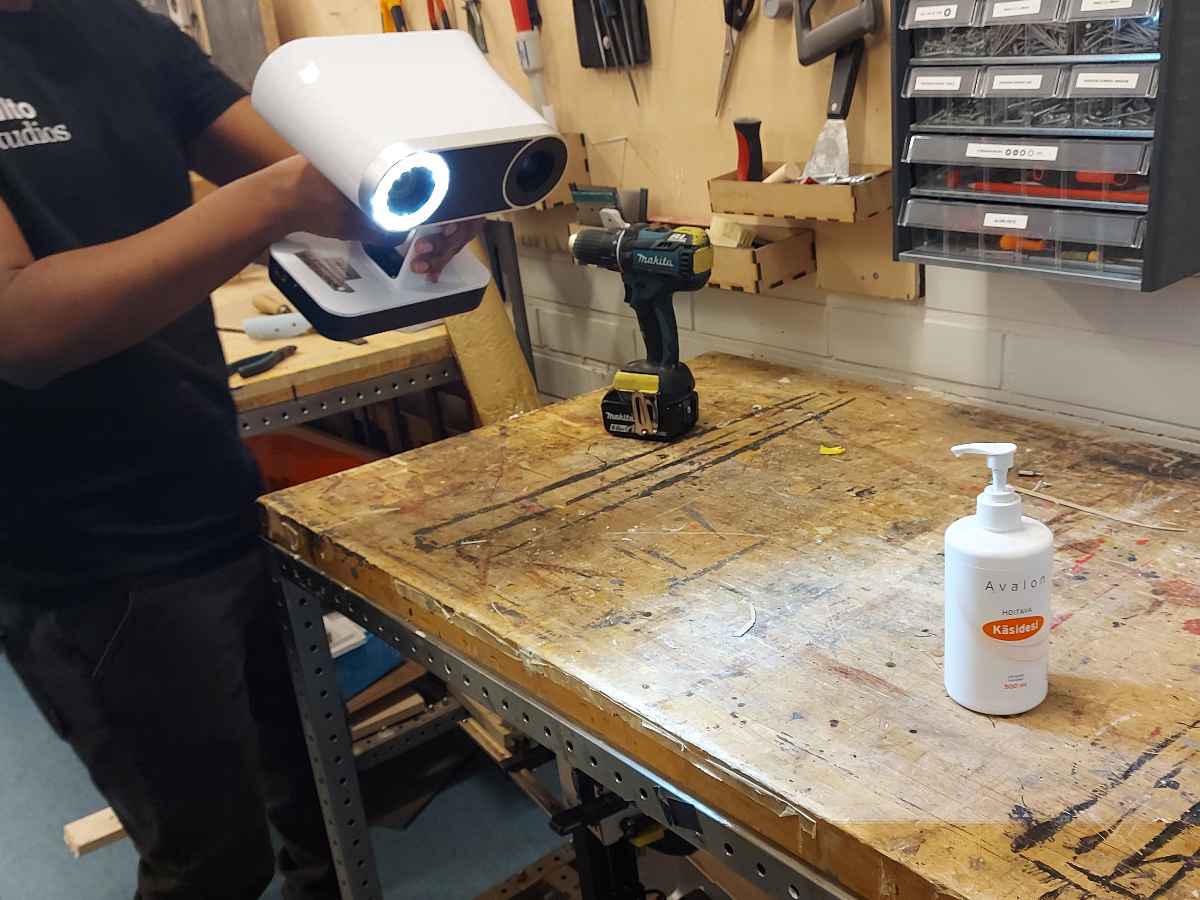
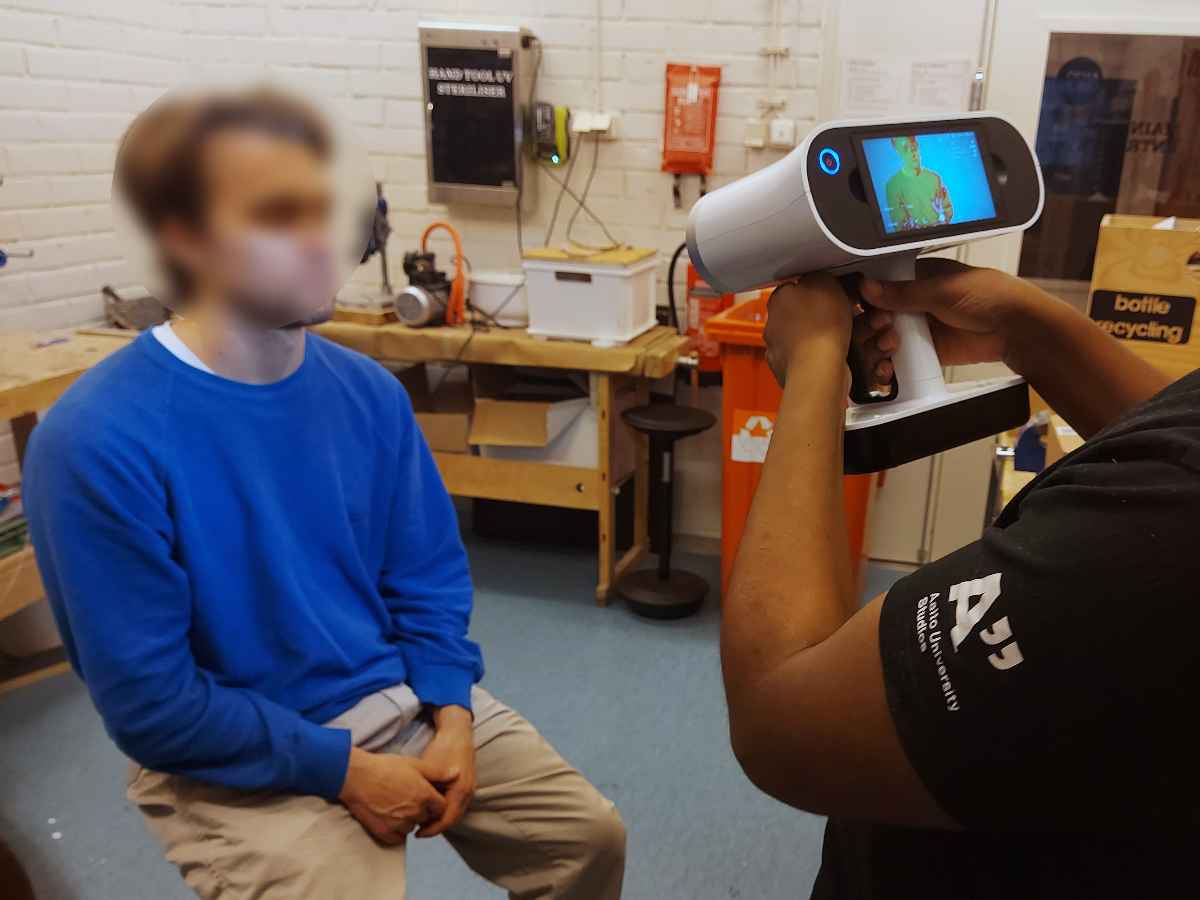
3D scanning with artec leo
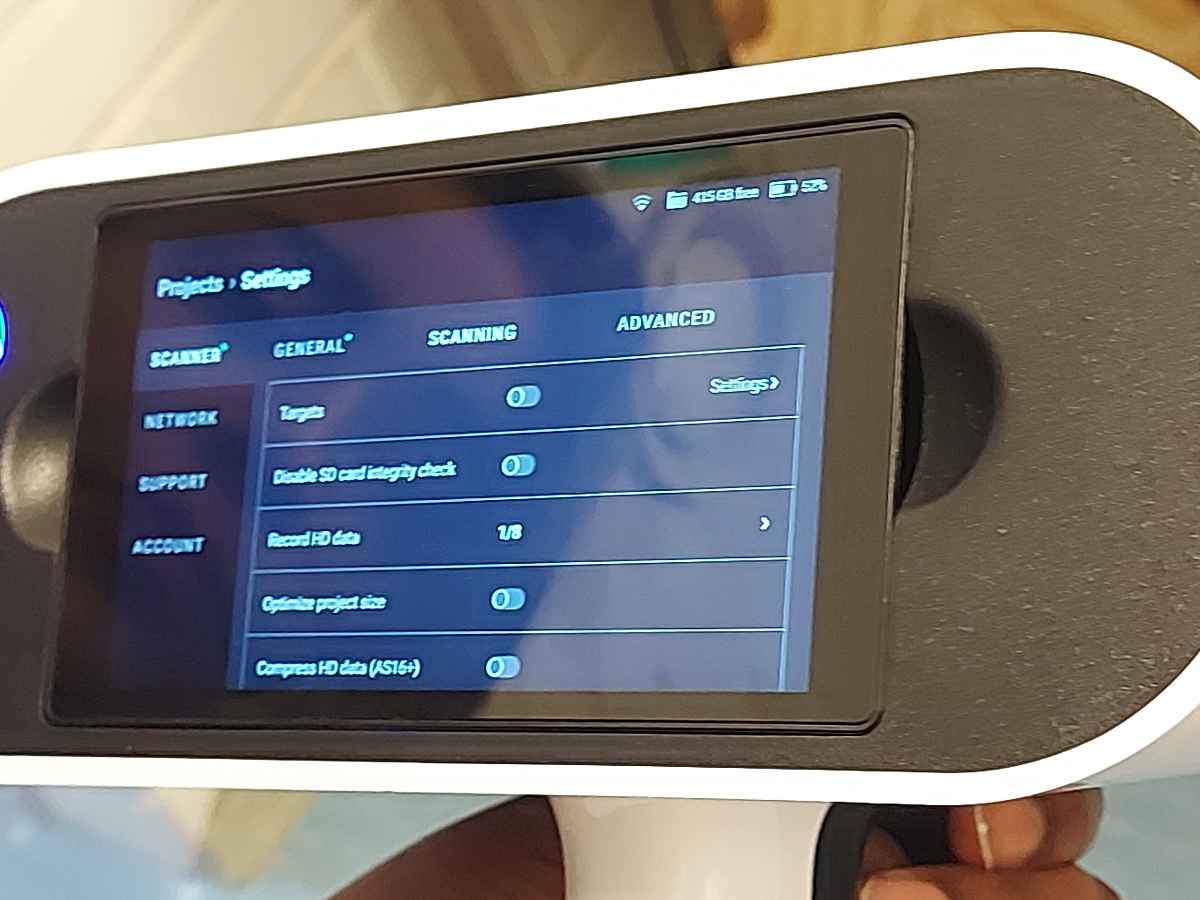
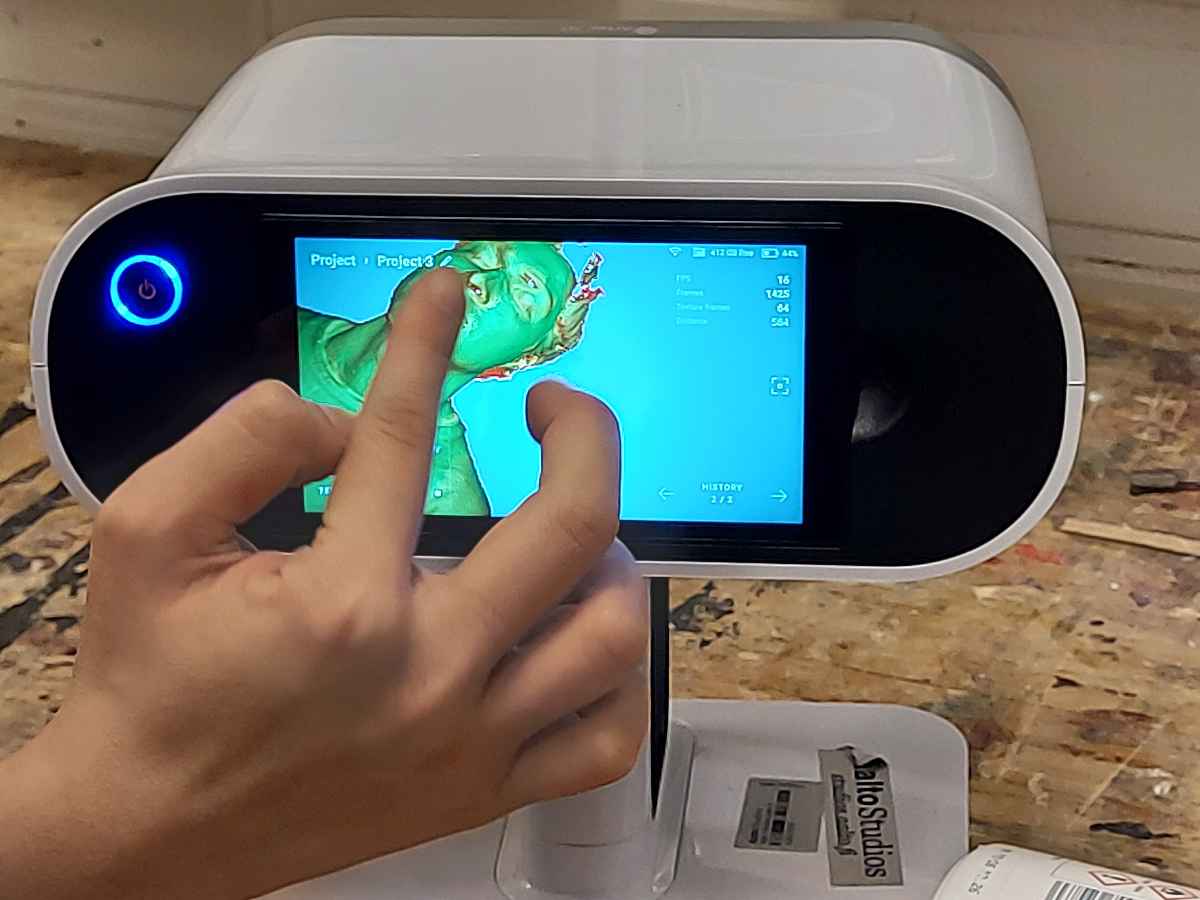
At Aalto Fablab we have a very fancy 3D scanner avialable - Artec Leo. This particular scanner works the best woth objects around human size, bigger and smaller objects may not be as accurate. The workflow of working with the machine is surprisingly simple when it comes to the scanning part. The scanner has a touch screen that guides the user through the necessary steps in a rather intuitive way. It's necessary to start a new project and within that project there's an option to scan multiple views. User should also define the resolution of the scan, the bigger resolution - the bigger the end file would be and the longer would the processing time be.
It's a common pratice to, in order to obtain a full 360 degree 3D model woth bottom surface, to place registration marks in forms of small dots, around 5mm opn the object, perform scan in one position and then rotate the object physically and scan again. The software would later allow to align these views according to the registration marks to compute a full form.
The scanner offers an option to scan the colors of objects and saves them as separate texture layer in the outcome file. It is possible to scan reflective surfaces, but it requires use of a special spray on the surfaces. This substances makes the surfaces of the object matte during the scanning process and wears off on its own in 24 hours.
software
The software Artec Studio Professional 15 dedicated to the Artec Leo scanner is available at the lab. Interestingly, the software may only encode files generated with the particular scanner serial number and the owner manages the permissions. The files genrated by 3D scanner may be huge depending on the resolution and it requires drive space and computing power to work with them. It may take time.
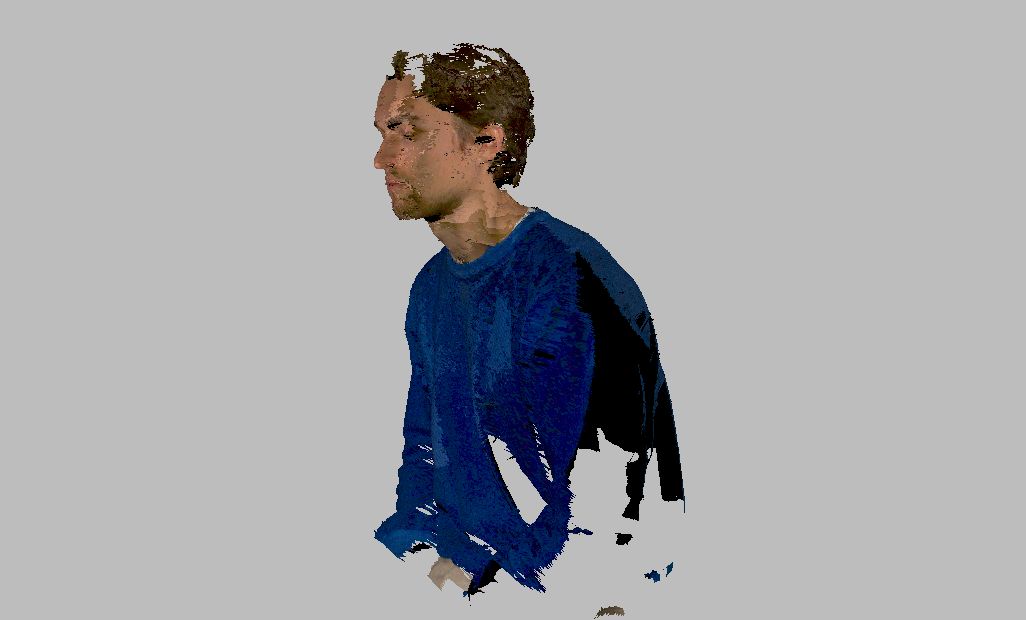
This is the initial version of the file generated by the scanner. There are holes and missing parts visible, where the scanner was not able to scan properly. This usually happens with hair as it is reflective
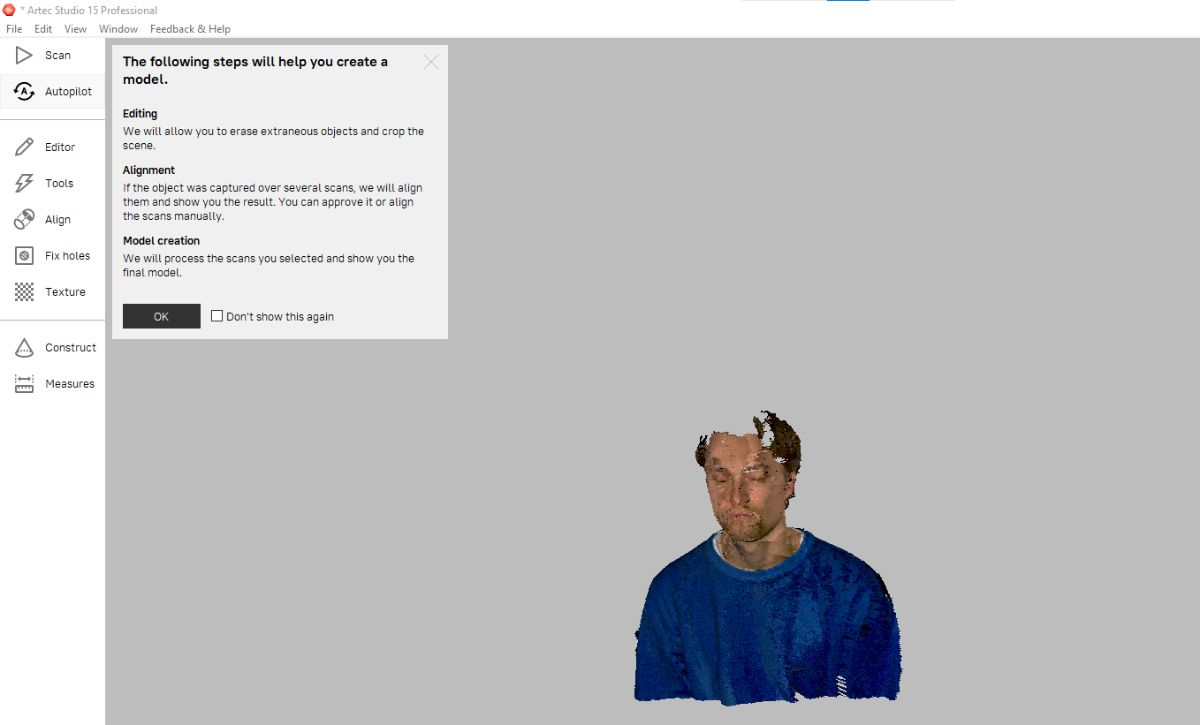
The program has an Autopilot option that basically analyses and performs all the fixing steps on the mesh according to preset settings. It is extremely powerful and usually returns good results, saving a lot of time.
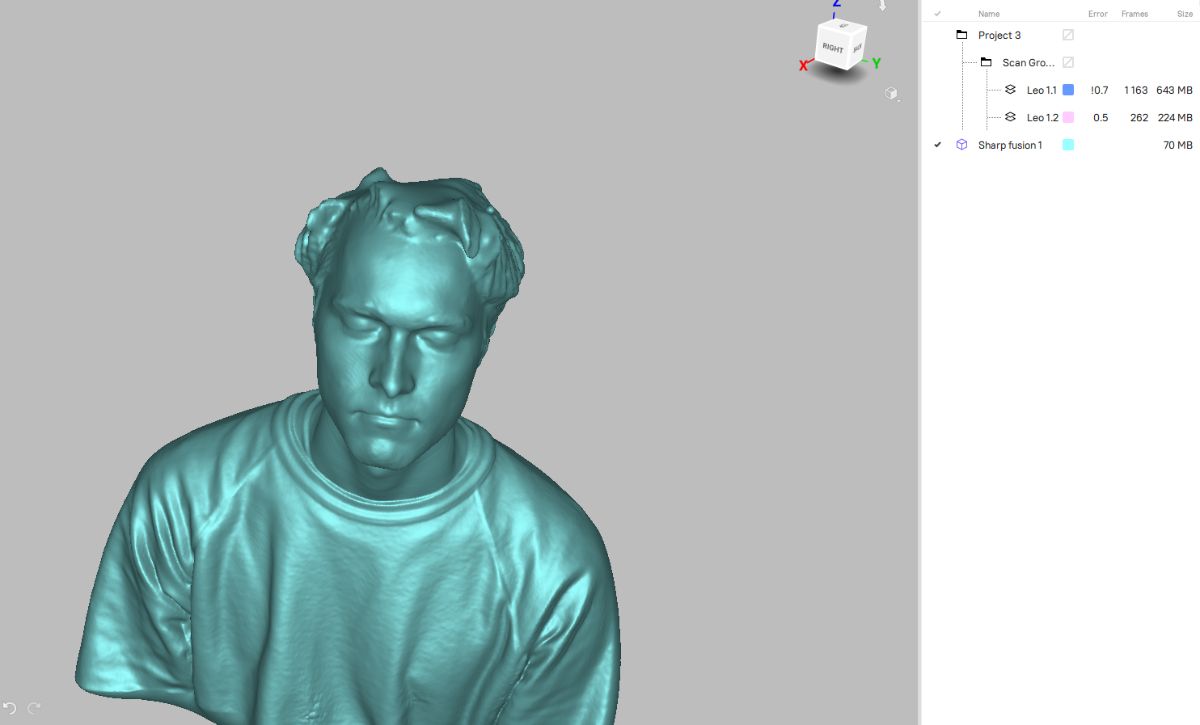
The preview of the two layers of the mesh - the form and the texture woth Sharp Fusion applied
For more customized results, it is possible to process the mesh according to one's needs and preferences. This may be tedious process, as even previewing the outcomes and edits takes a lot of time. It is quite complex task as well as the Artec Studio Professional user manual is around 400 pages long
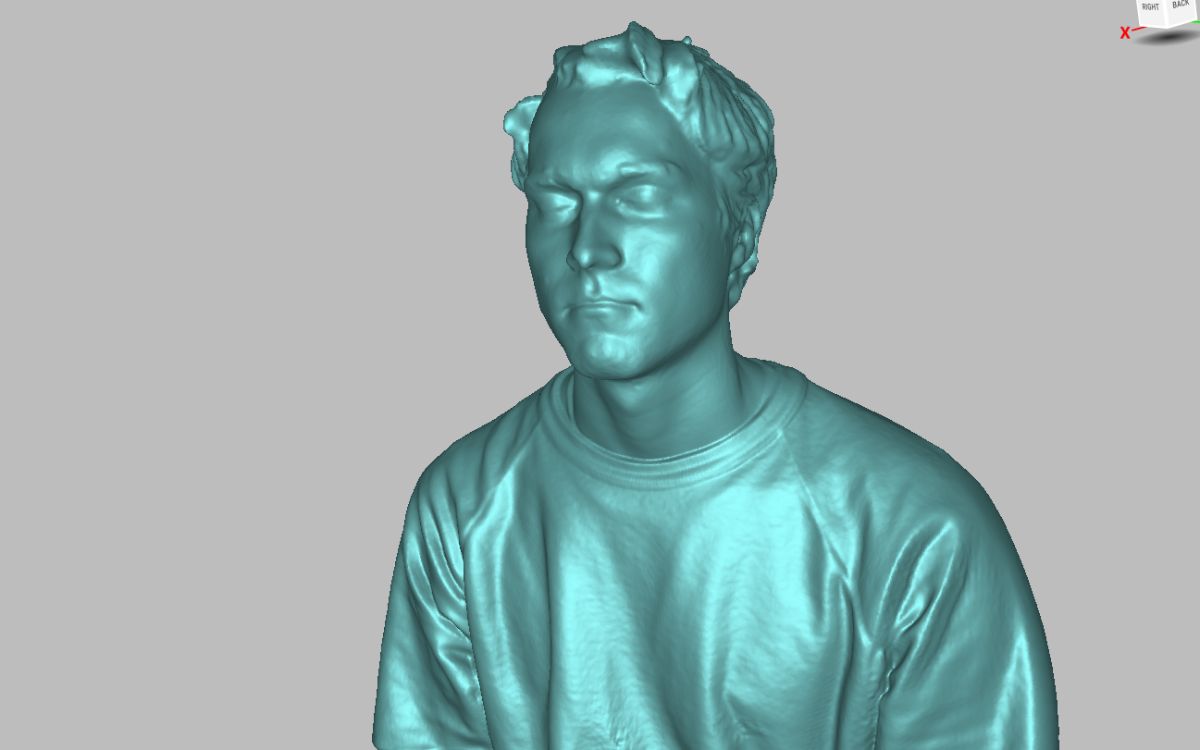
The final file. Not perfect, but good enough given it's the first one. The holes were fixed and the hair looks quite okay comparing to the initial version.
3d printing mold for inflatables
I also 3D printed the mold taht I have designed during the Computer-Aided Design week assignment, that I will later use to cast silicone. This actually is also a challenging design to fabricate using the subtractive fabrication methods (at least that I know of) as the walls of the mold are 1mm thin and lasercutting parts this small is not possible with the lasercutter. For molding an inflatable, the precision of the dimensions is important and lasercutter would bend and melt part this thin in acrylic
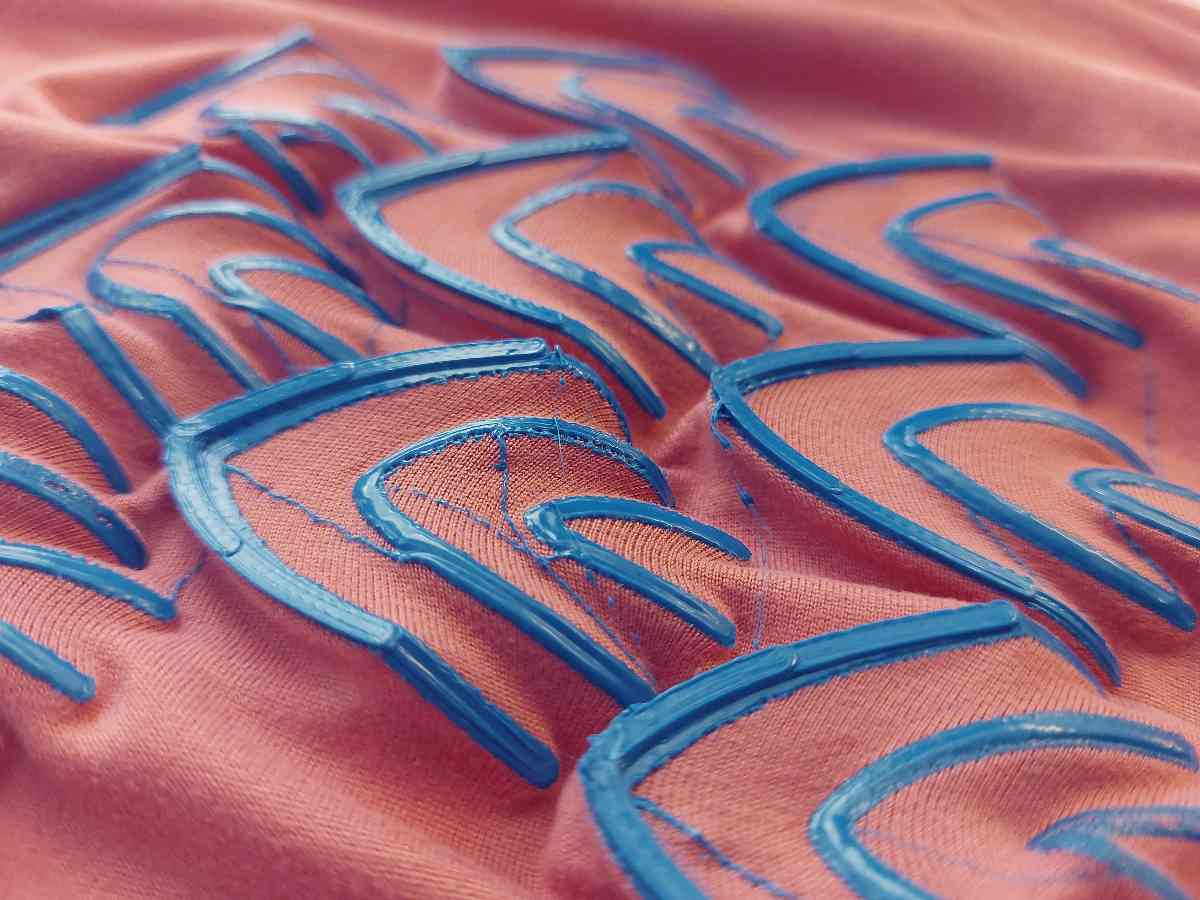
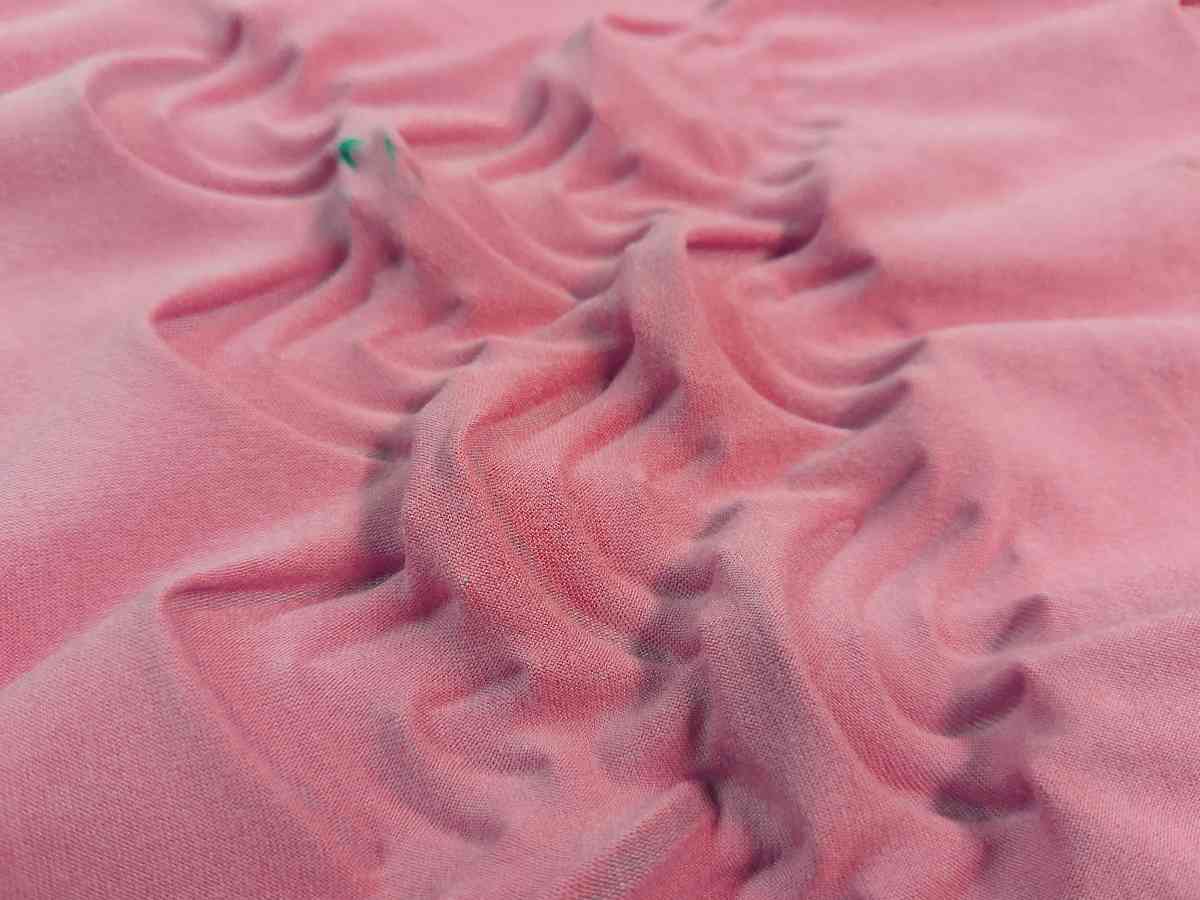
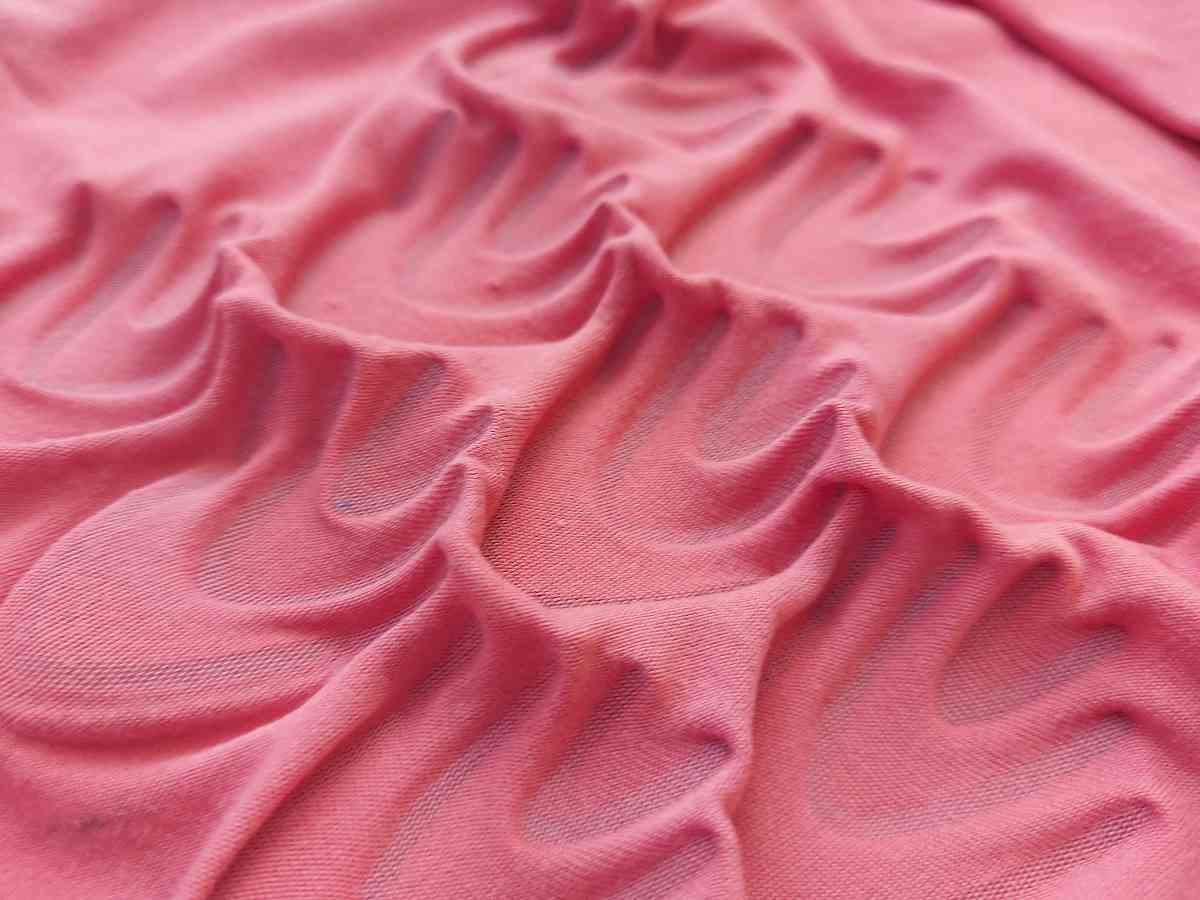
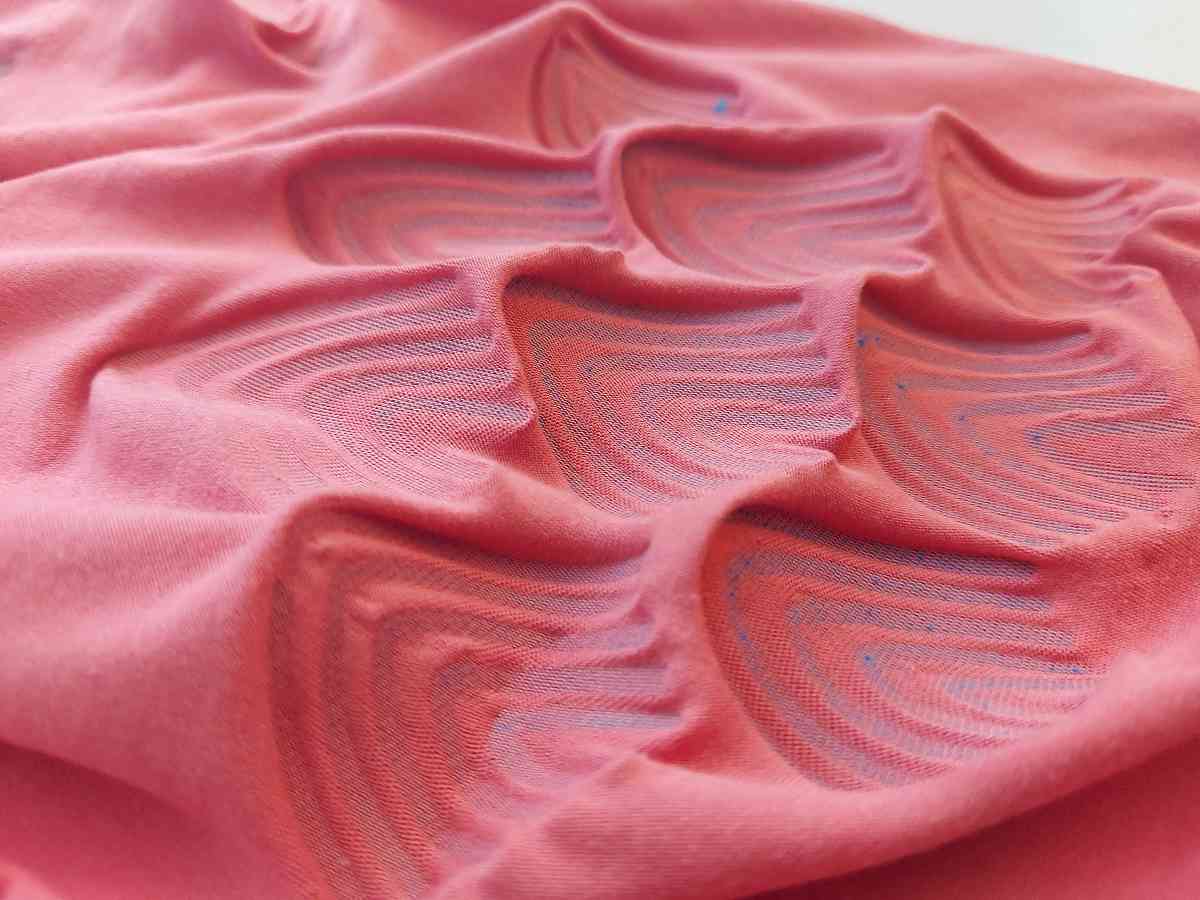
3D printing on textile
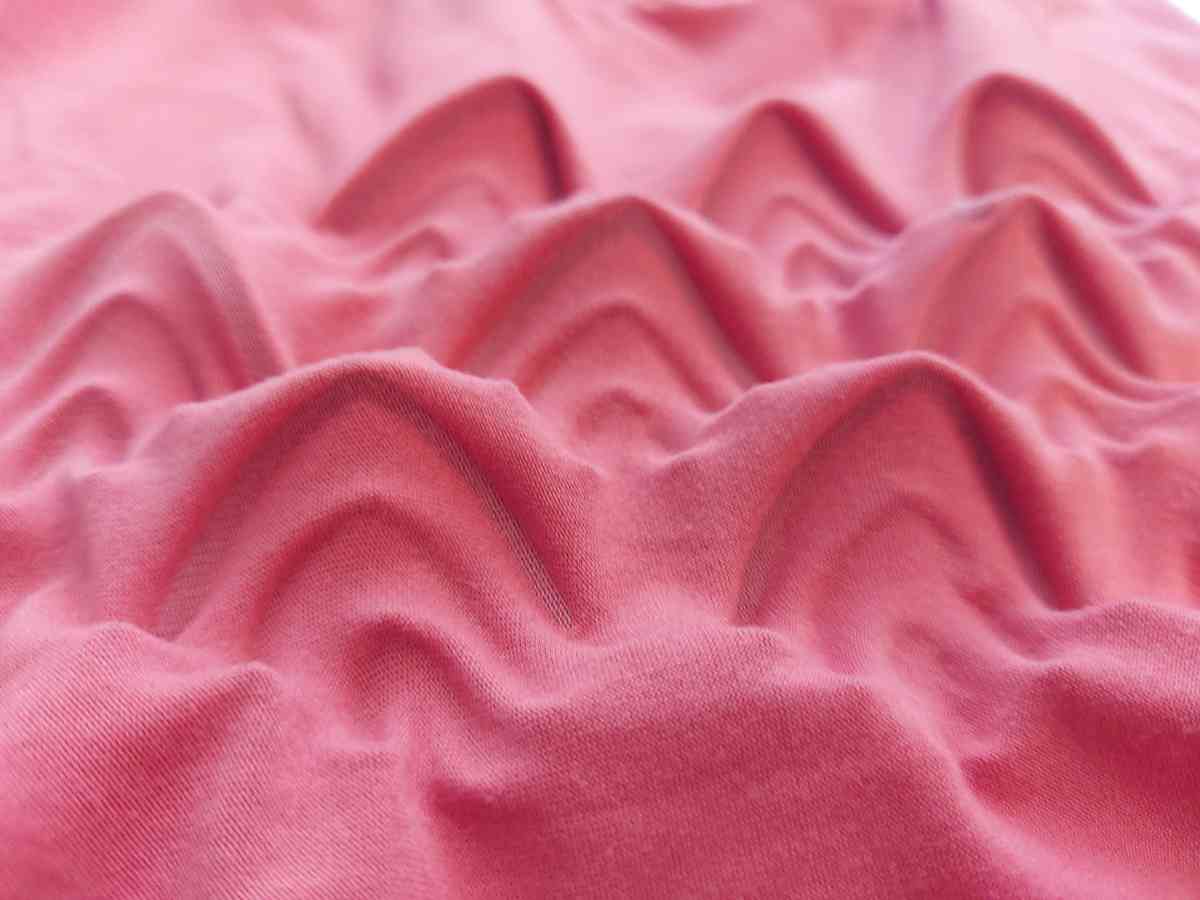
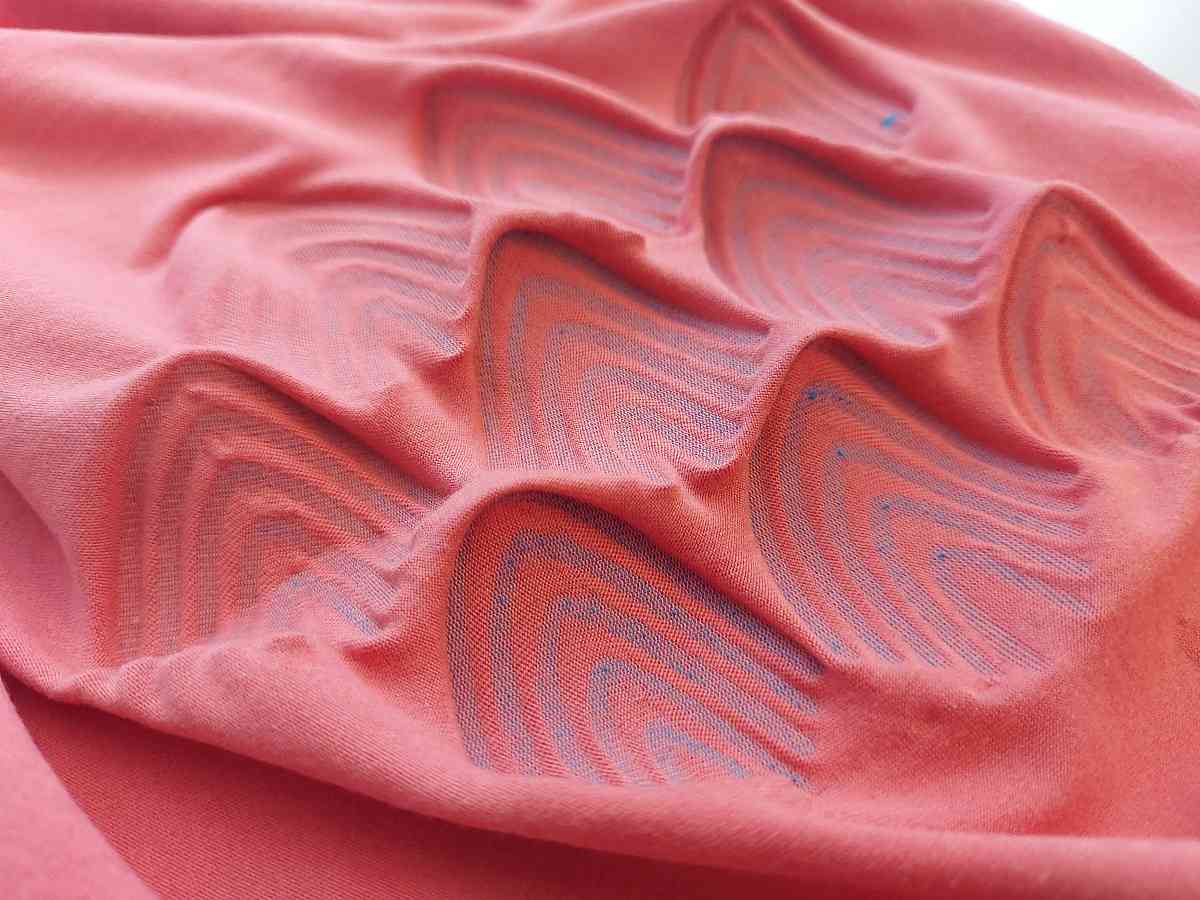
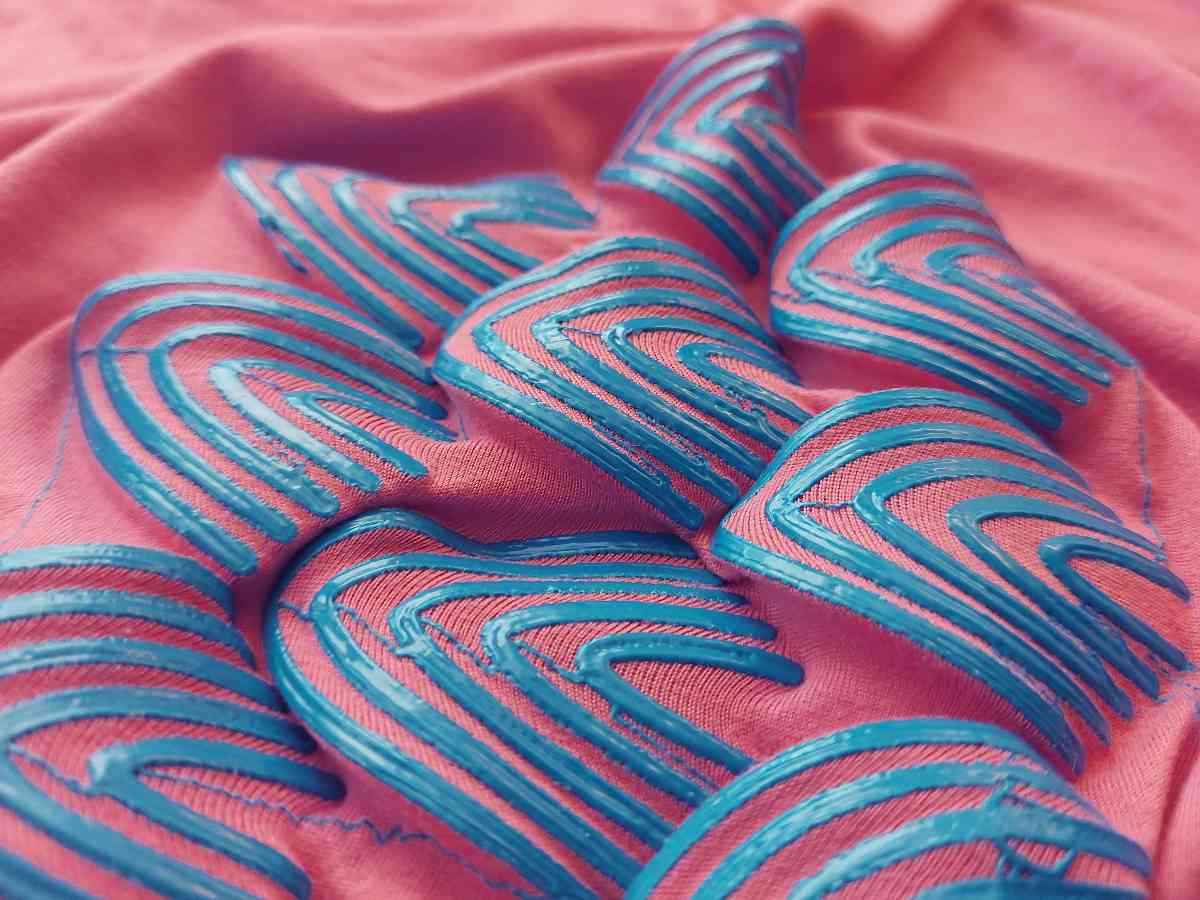
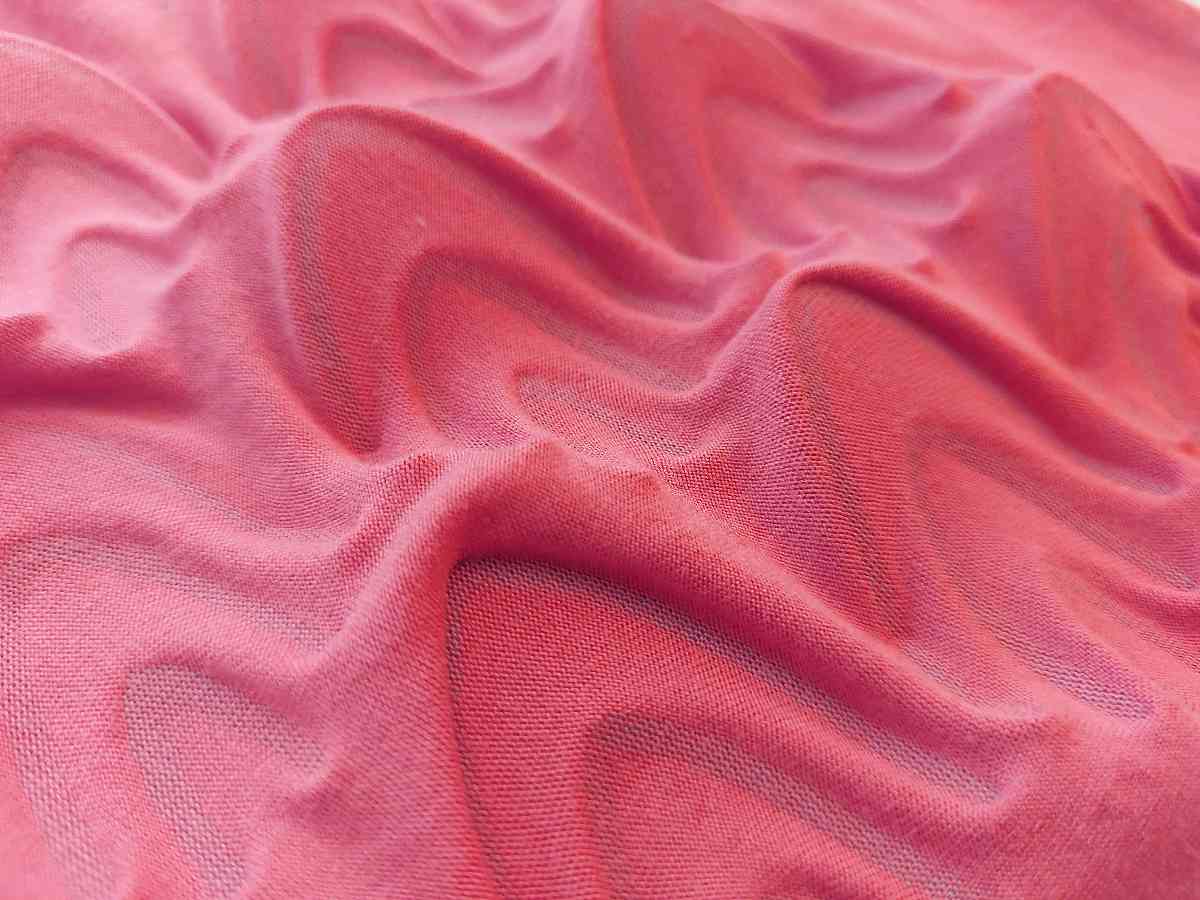
As a Fabricademy alumna I had a whole week assignment dedicated to 3D printing on textiles which I also wanted to further work on now. Once again, I'm working with scale-like structure, trying to achieve the overlap effect. It's not yet visible enough, but I'm slowly getting there, adjusting the model's curve thicknesess, spacing between particular elements, different heights withing the same curves, reinforcing and stretching some areas of the fabric and leaving the other's flexible and loose. I'm interesd in how I can make flat 2D piece of textile deform into a 3D shape and achieveing as dramatic height changes as I can, creating 'valleys' and 'mountains'
willowflex filament
There was one kind of flexible filament available - WillowFLex. It is biodegradable, but it unfortunately started biodegrading way too soon - before even being unpacked. It caught moisture somehow, even though it was not expired, brand new and kept in the original package with higroscopic bag. It was sticky and breaking badly, but that only caused problems in the beggining of the printing process, when the extruder was moving fast and abruptly causing the filament to break. I overcame this by letting the printer calibrate itself with the filament unloaded, pausing once it finished and loading the filament right before the actual printing would start. Removing the calibration part movements form the G-Code should also work, I'm yet to try that.
Settings
- WillowFlex
- Lulzbot and dedicated Cura version for LulzBots
- 0.4mm extruder
- temperature range of the filament was 180-200 degree, I set 190 degrees
- infill 100%
- initial layer height should reflect the textile thickness, I set 0.5mm
- no skirt, brim or raft
- default speed, but may be adjusted according to results