Molding and CATing
Molding and casting is an underrated and underutiilised in fablabs digital fabrication process that allows to produce multiple copies of the same part in a short time and cost-efficiently.
The results of the following process gave results with finer level of detail, resolution and smooth surfaces that casting from plain 3D printed did not. However, the process of milling the 3D machinable wax mold was quite time-consuming.
I set off to design an Escher style tile and designed the pattern below with help of math-based software GeoGebra

Designing the mold
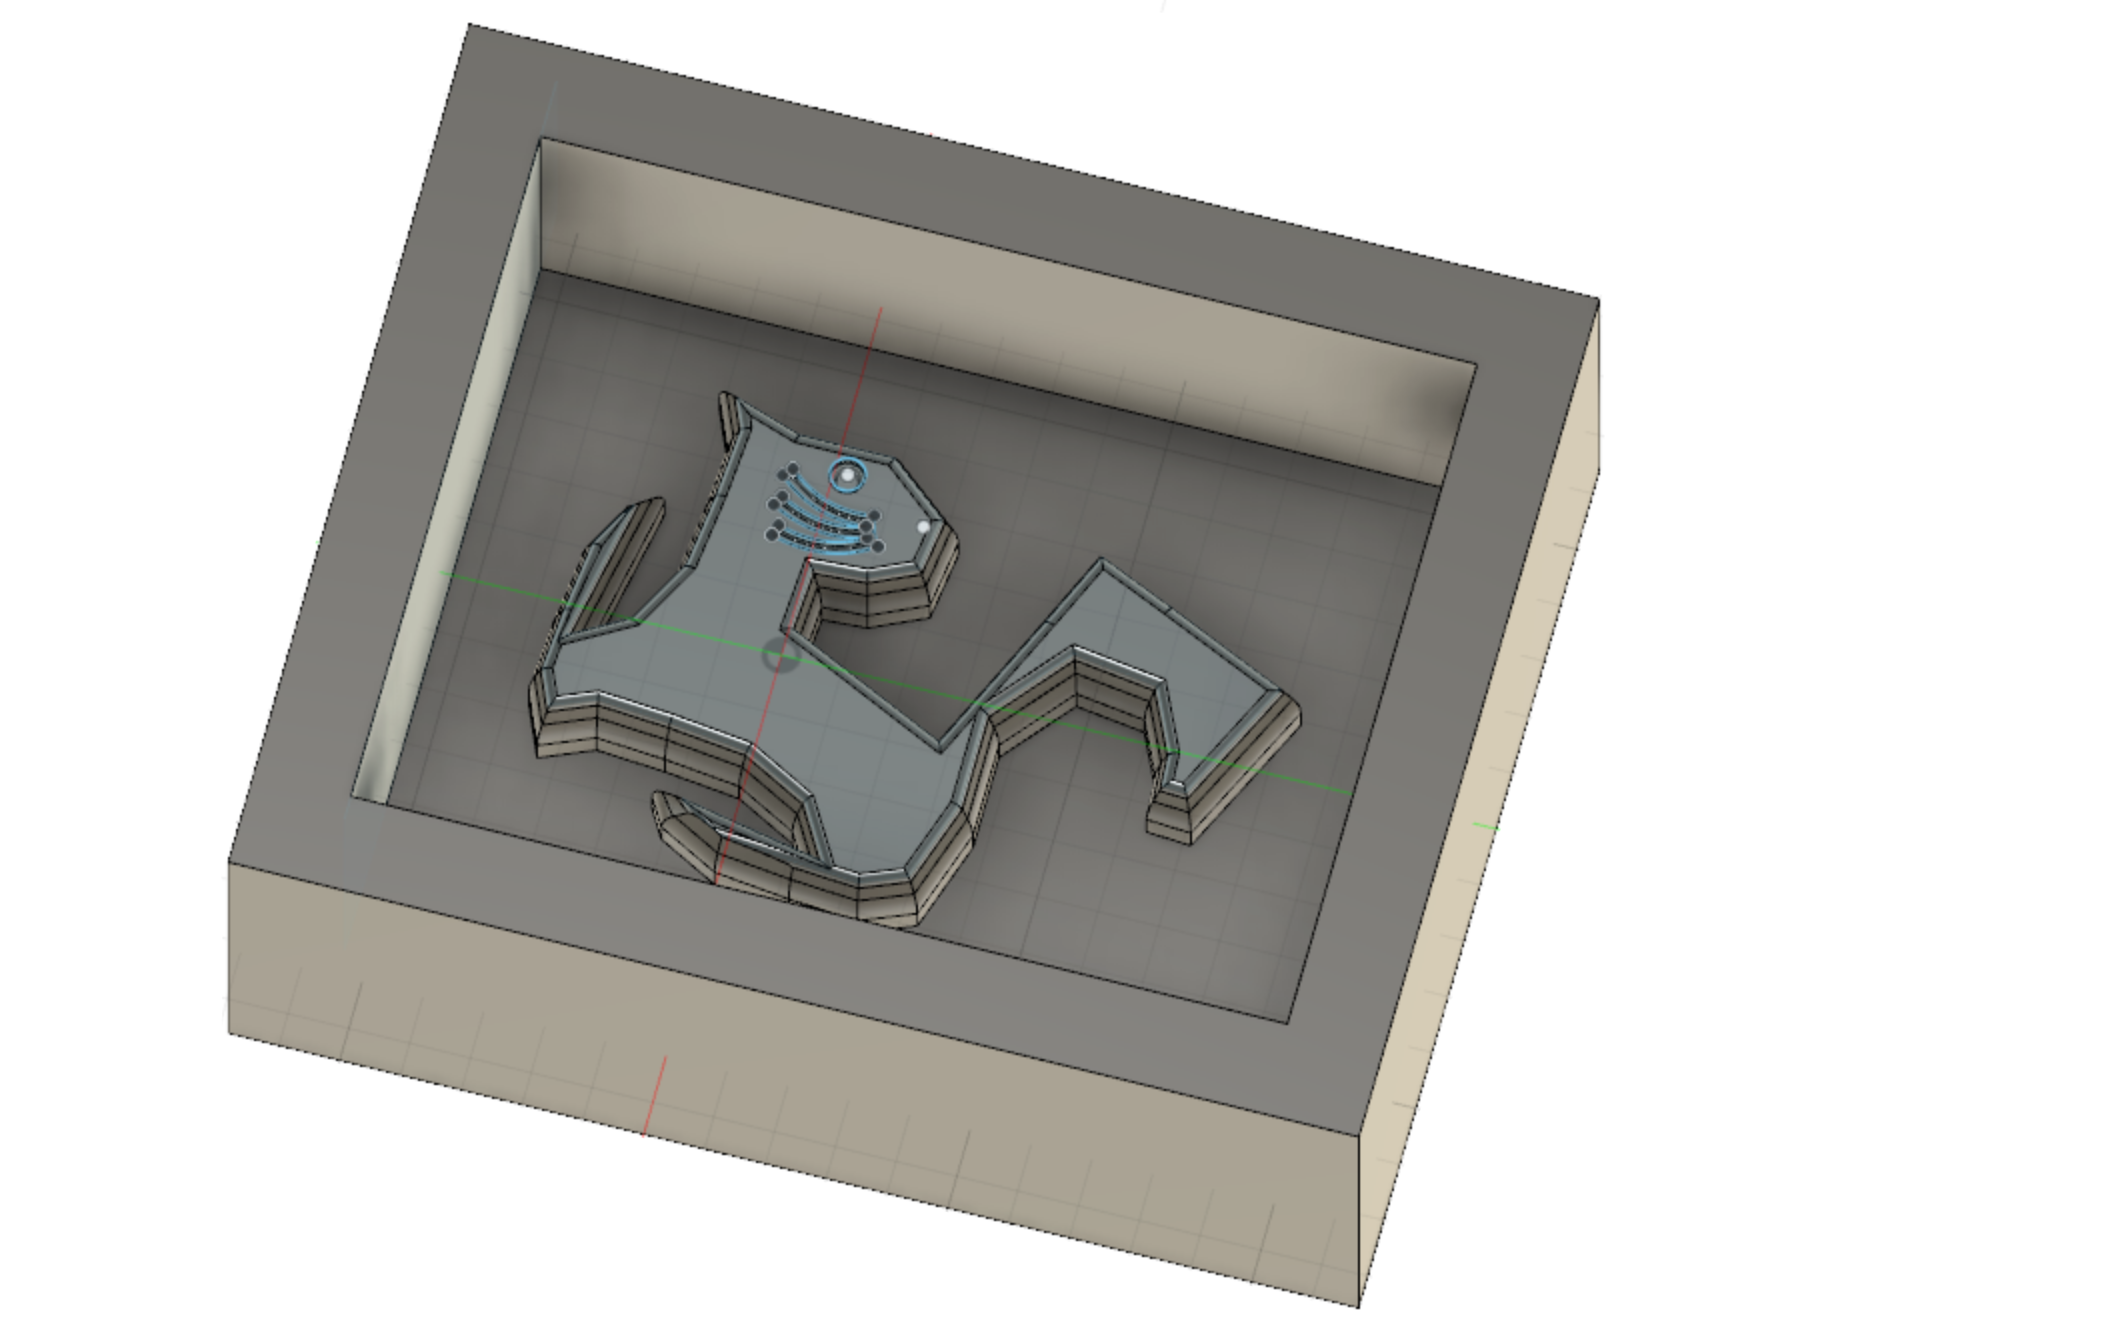
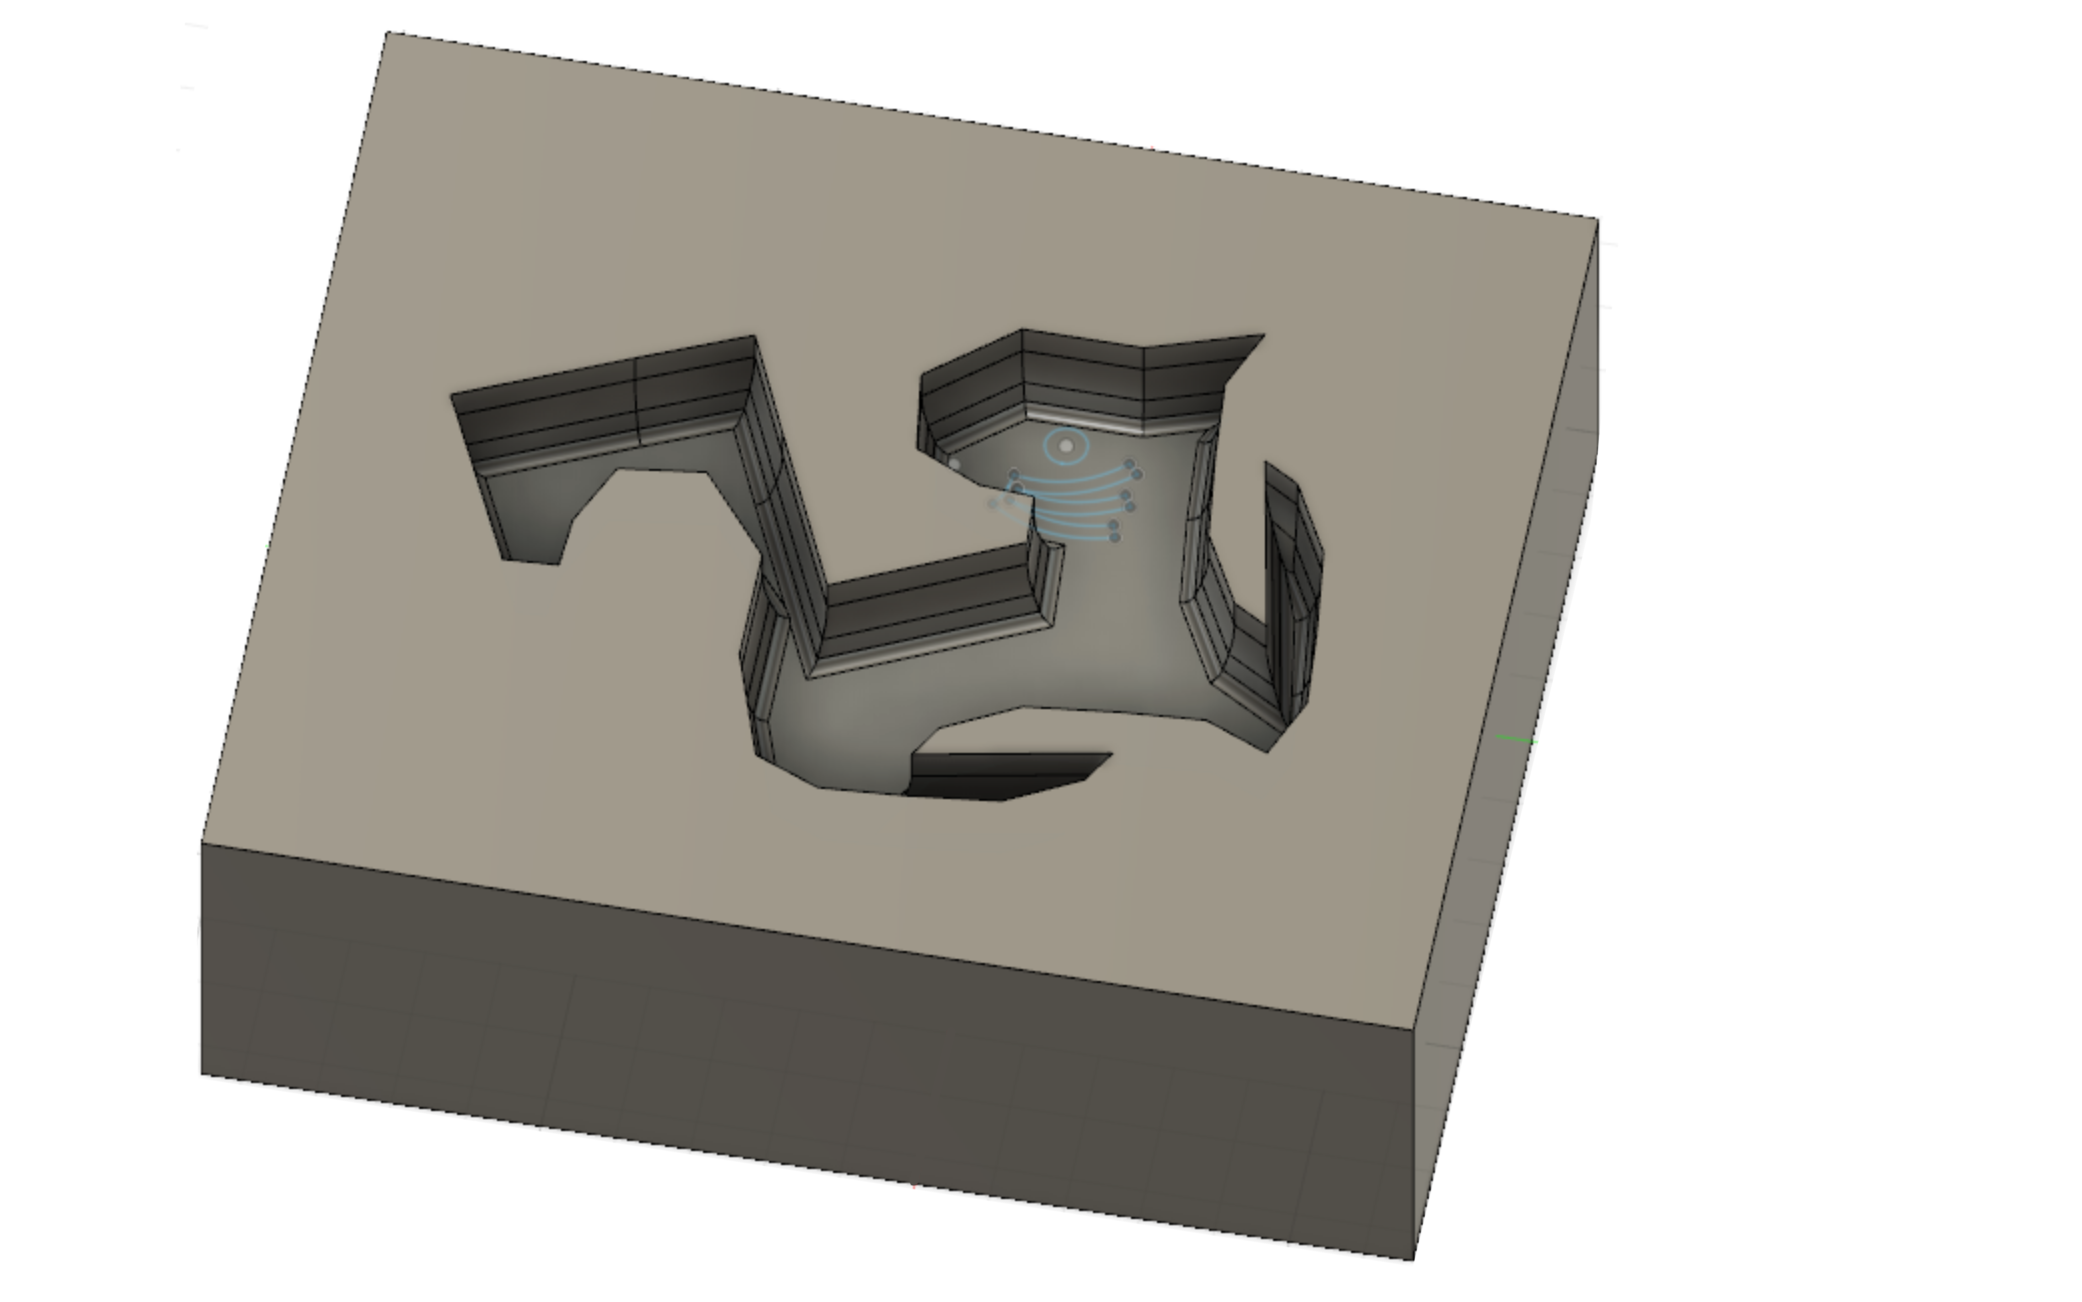
I extruded the cat shape and slightly beveled the walls towards the top. I also added small fillet to the top surface. This is the preview of the part I would like to obtain
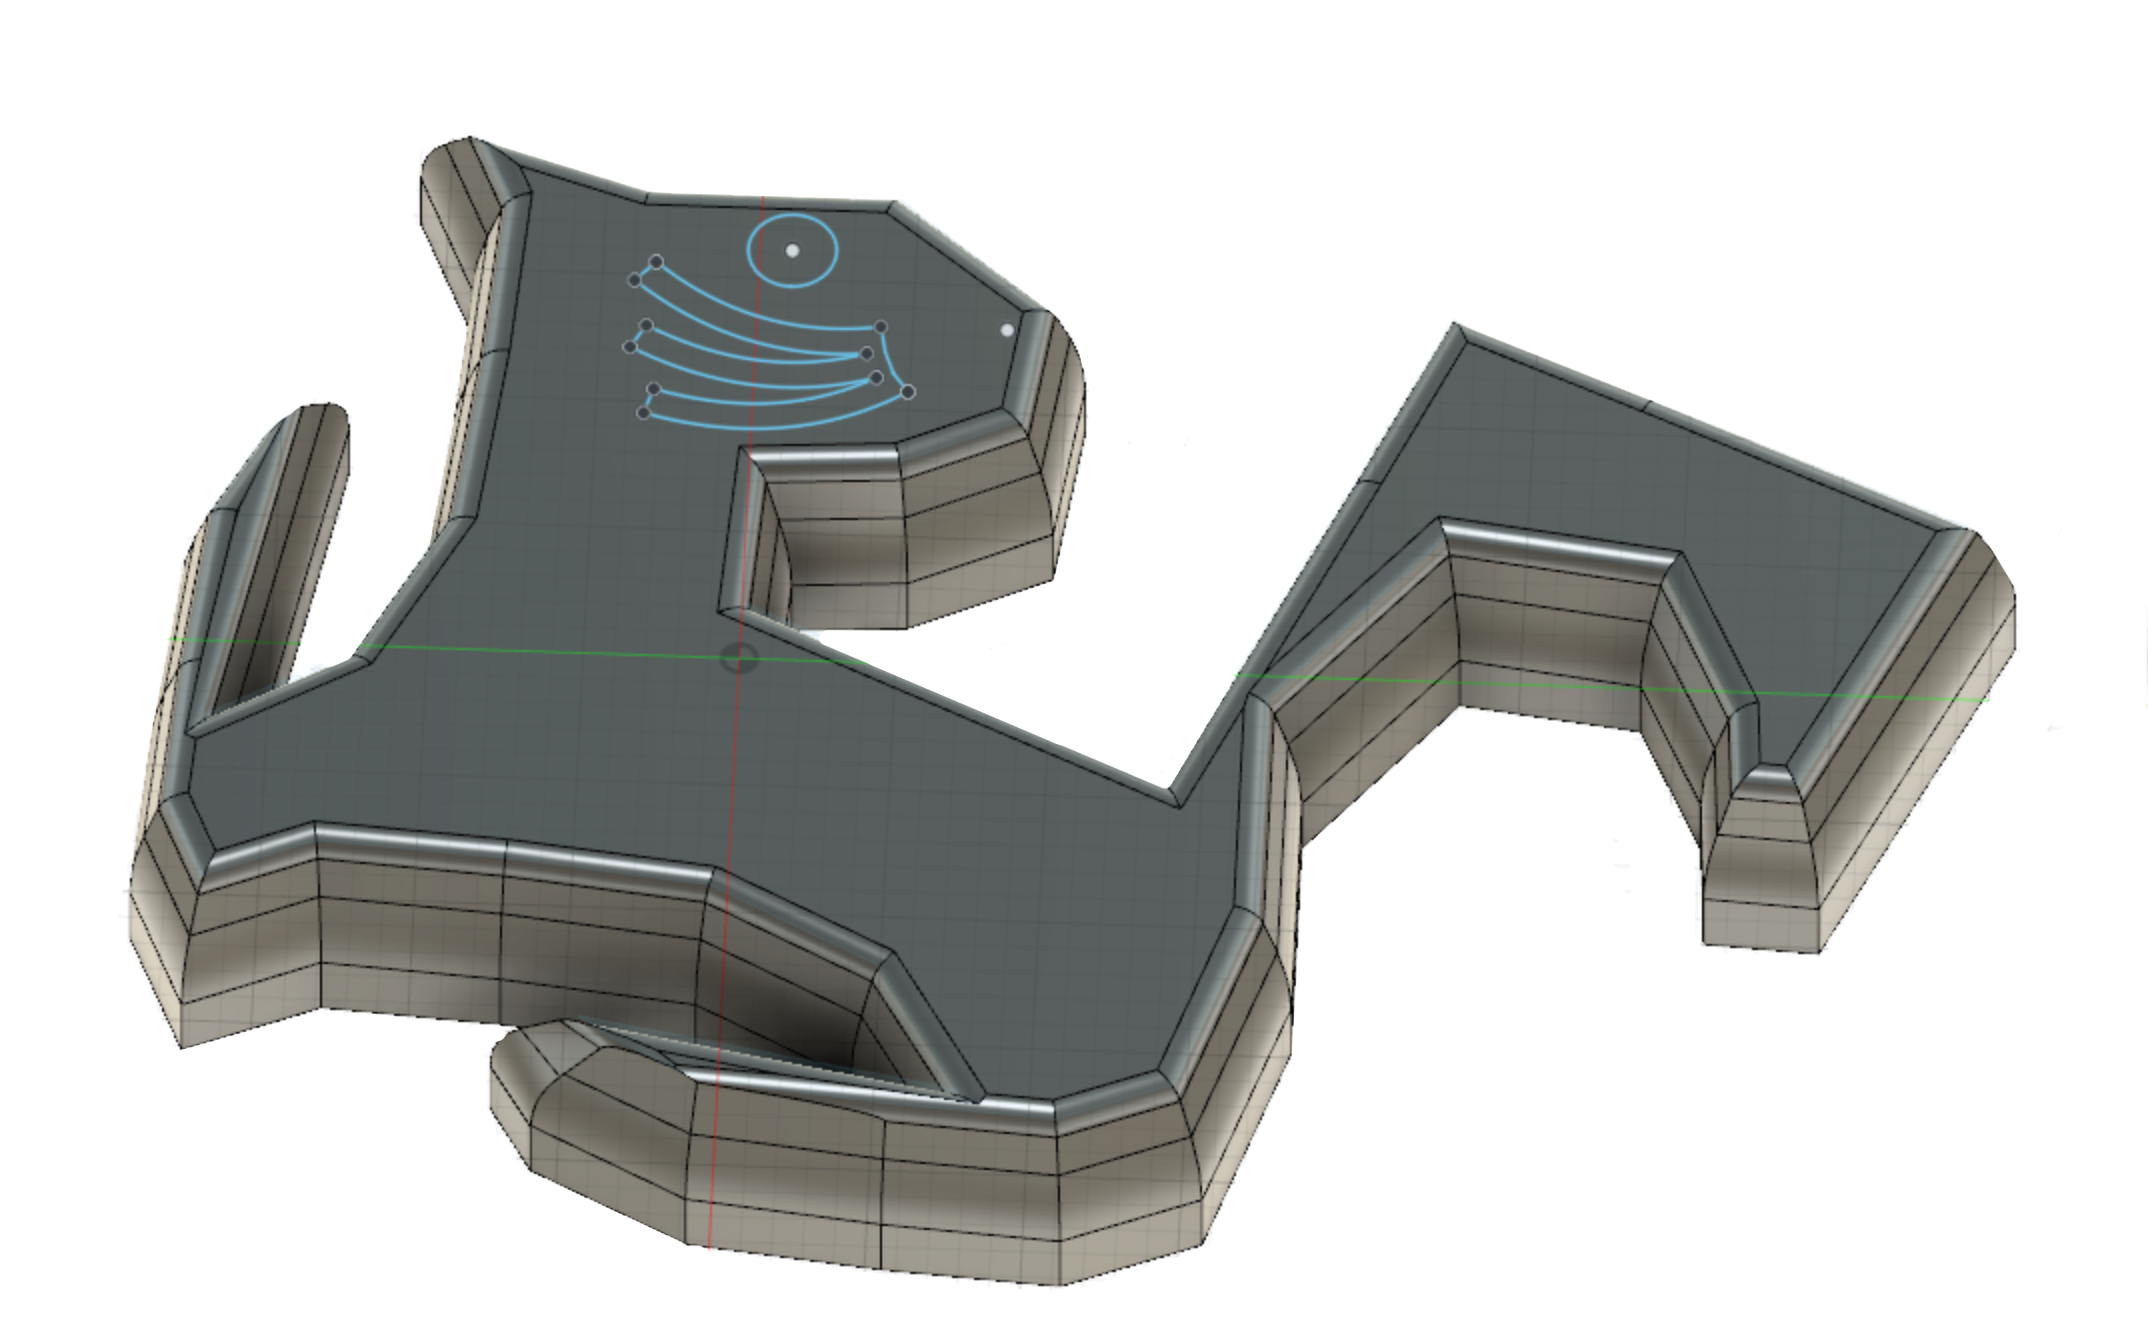
I performed a boolean subtract operation to get a negative mold I would need the 2nd step silicone mold to take shape of

I performed one more boolean subtract operation to get the shape of the intended wax mold.
Milling process
3D toolpaths for milling in Fusion360
Setup
Setup Menu
- I opened the MANUFACTURE workspace in Fusion360.
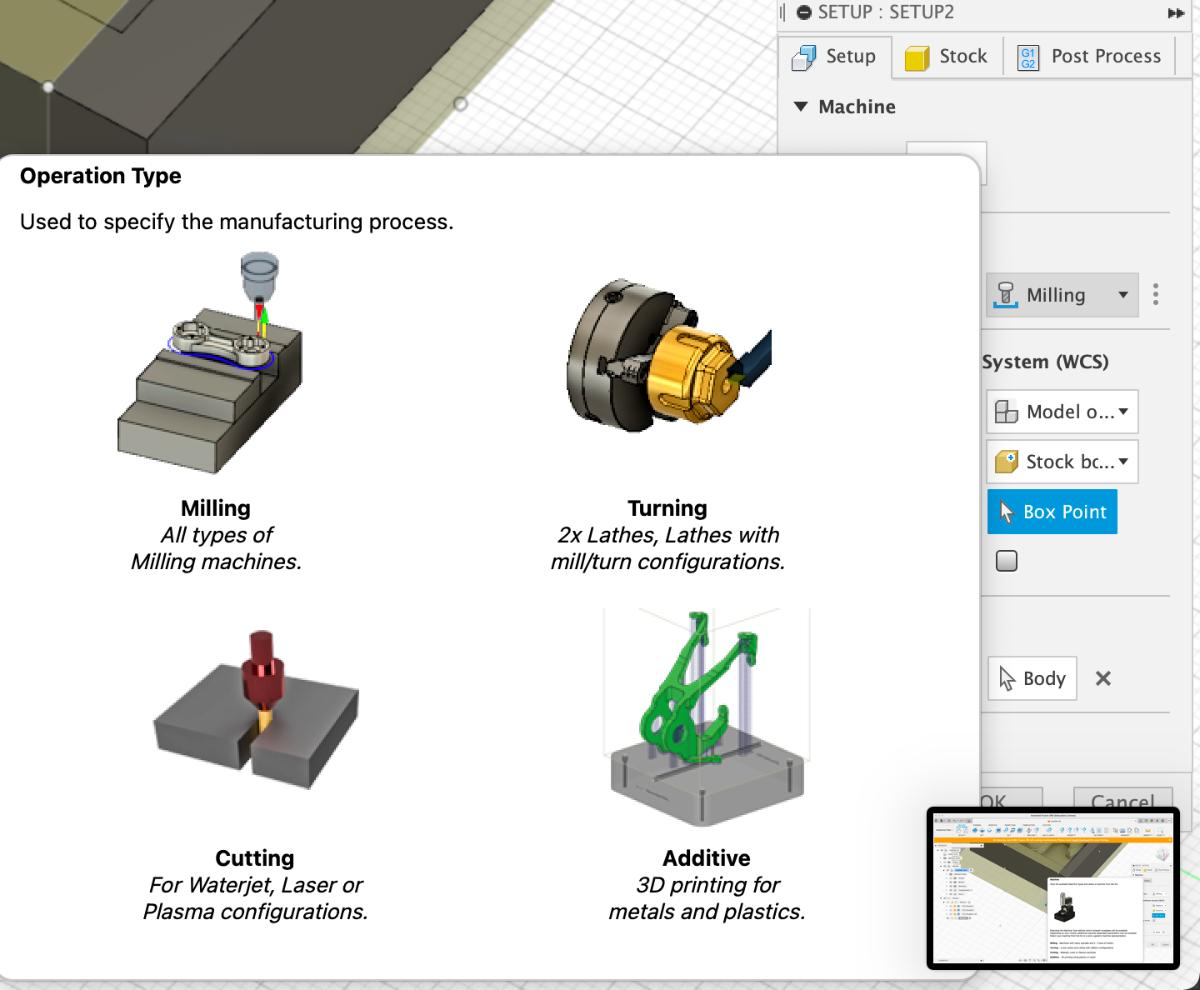
- In the Setup dropdown menu, I selected New setup, which opened a new pop up window
- I selected the Operation type as Milling
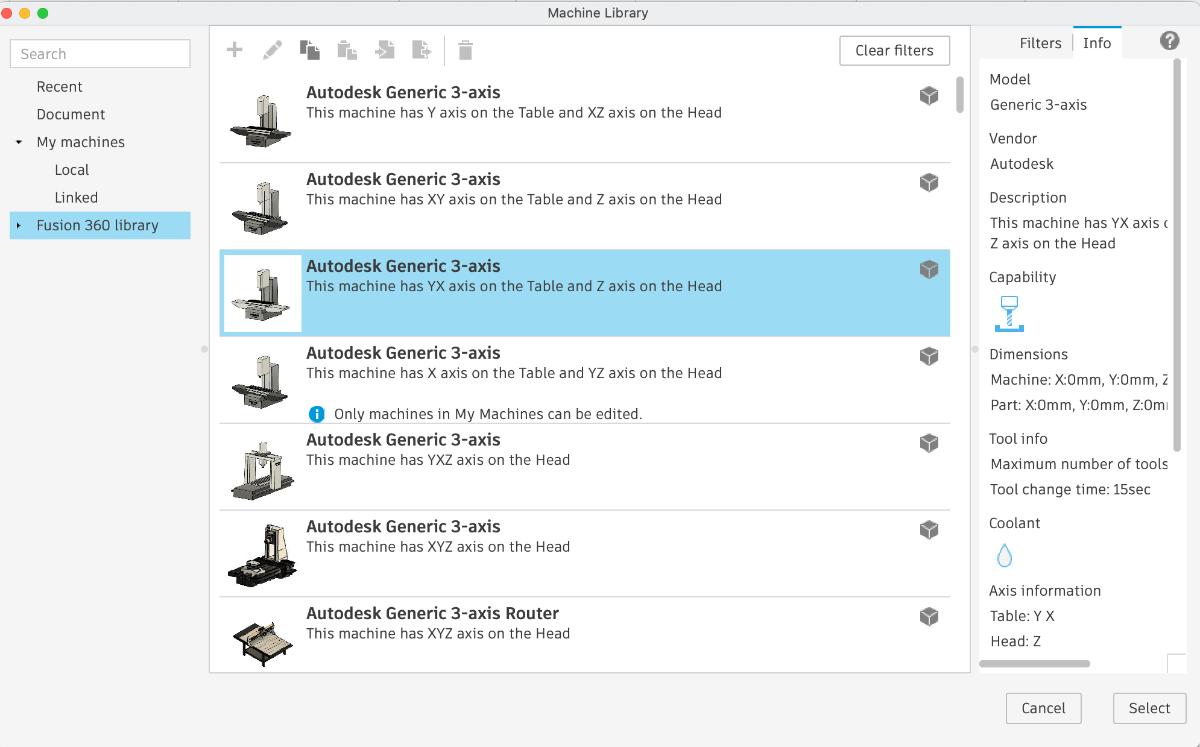
- I selected the Machine as Autodesk Genereic 3-axis
- I adjusted the coordinate system to reflect the one I had in my model
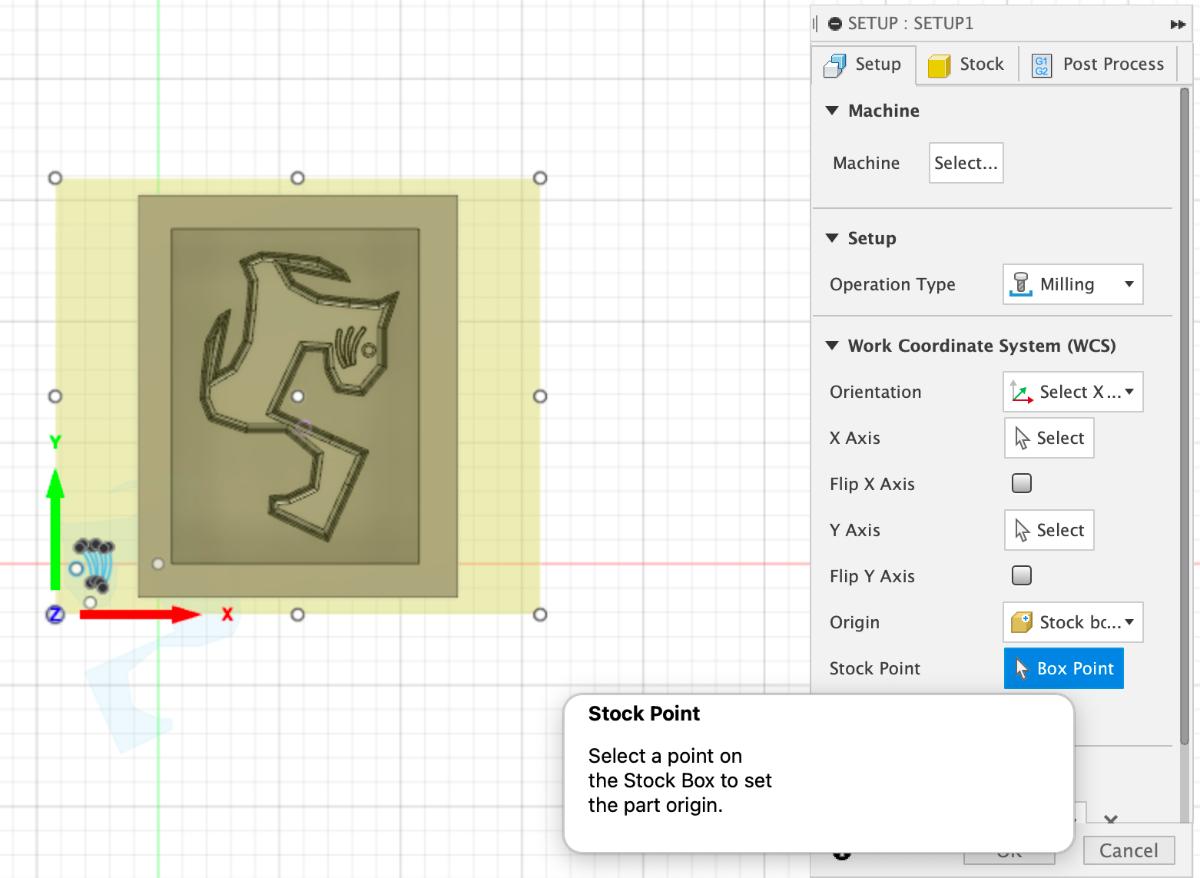
- I set the origin as stock box point and picked the south-west topcorner of the stock
- And selected the model I wanted to mill
Stock menu
- I picked the Mode to be fixed size box>
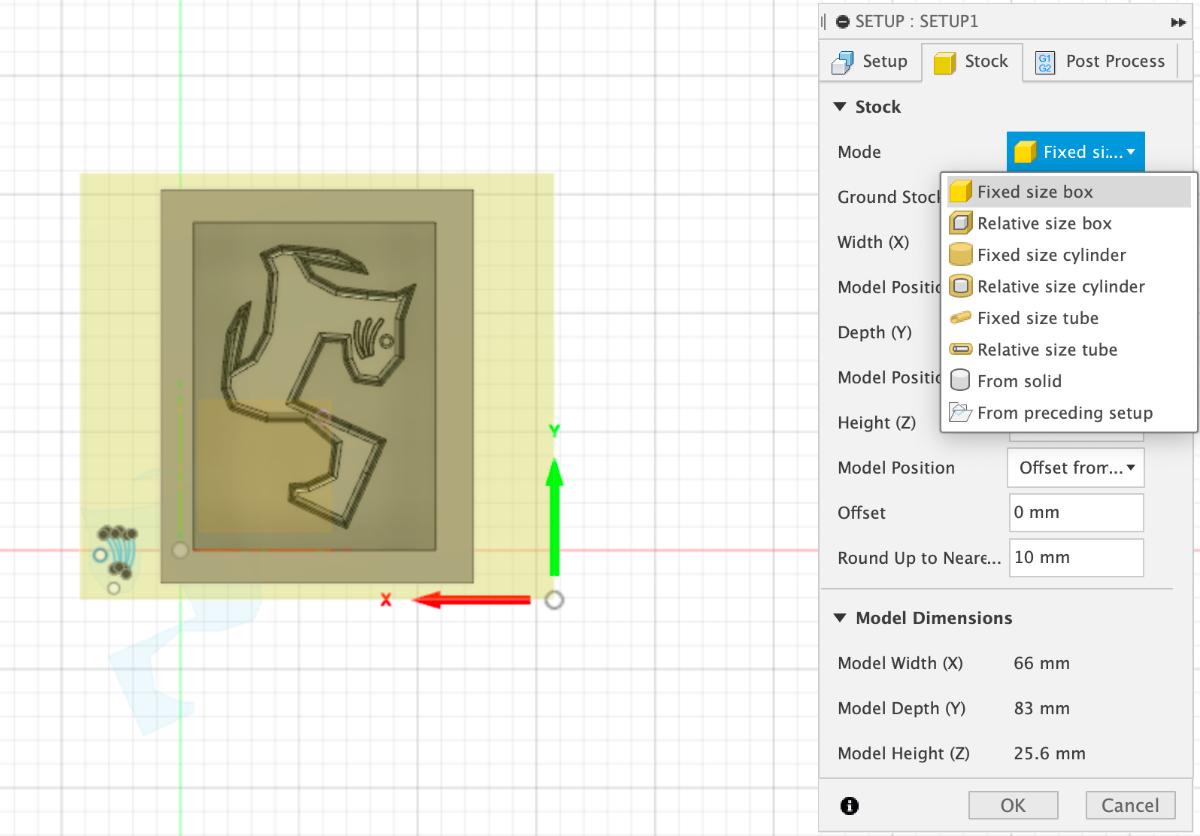
- I measured my wax piece and entered the dimensions

- In the Model position field, I chose Offset from top (+Z)

Roughing
Roughing is the first draft milling operation with a bigger tool, aimed at fast removal most of the volume of the material to be subtracted
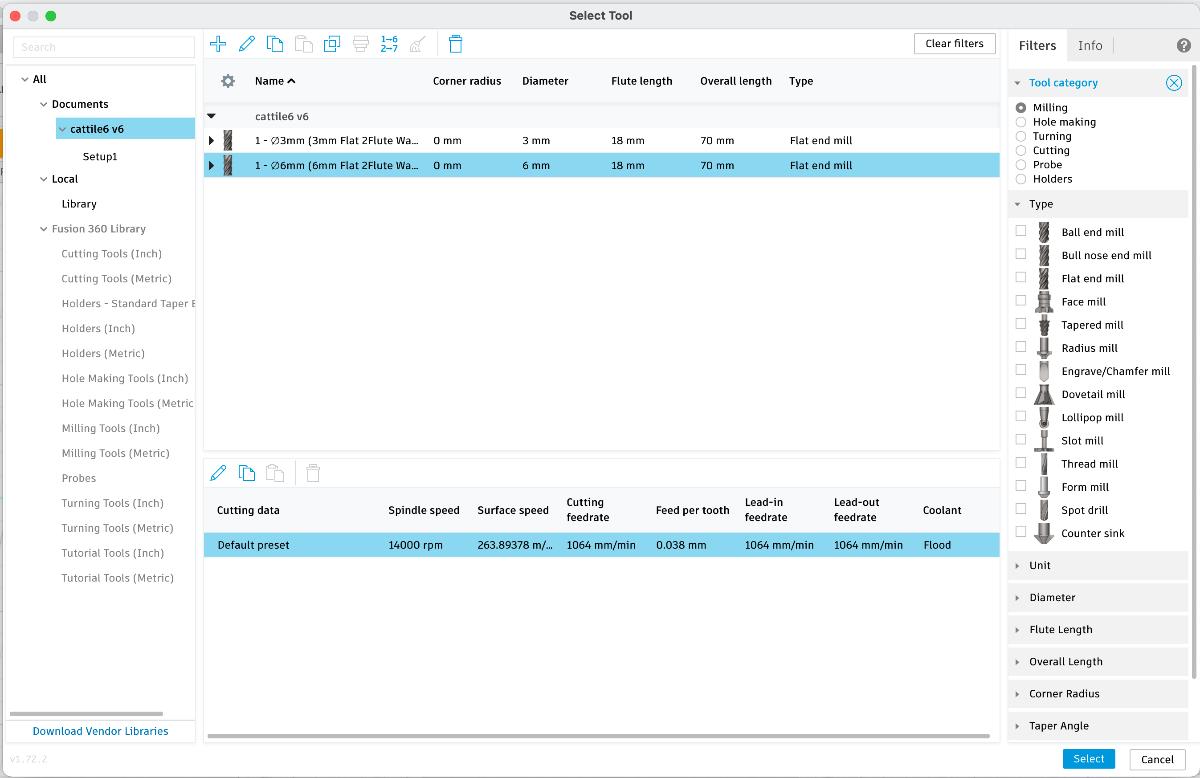
- From the 3Ddropdown menu, I selected Pocket clearing

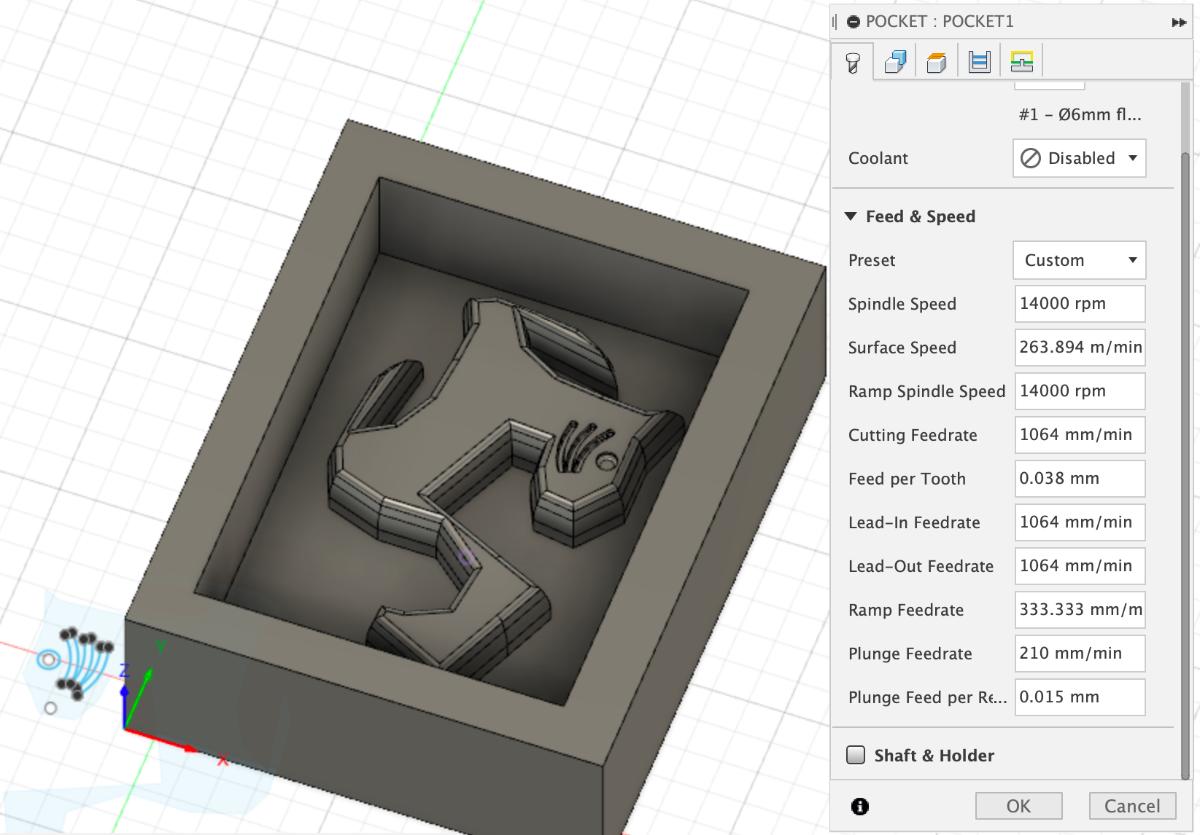
- I picked the 6mm flat end tool, that I have defined earlier on in the Select tool field. No coolant was needed.
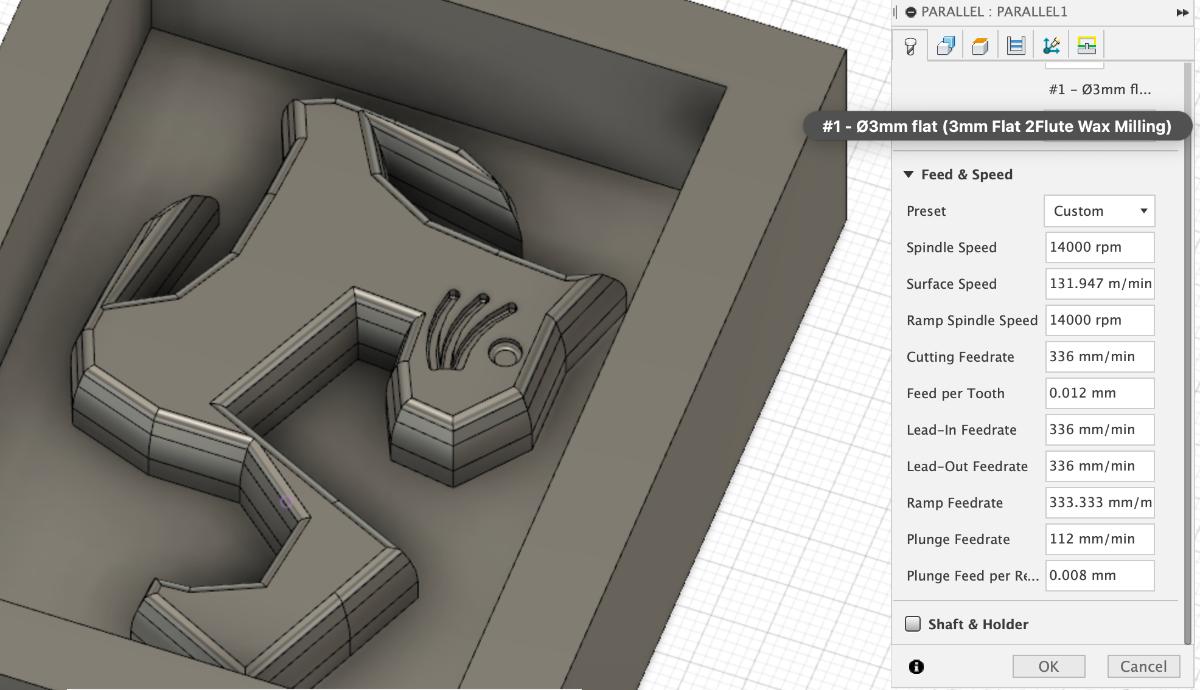
- The Feed & Speed settings are crucial. I set the spindle speed to 14 000 rpm.
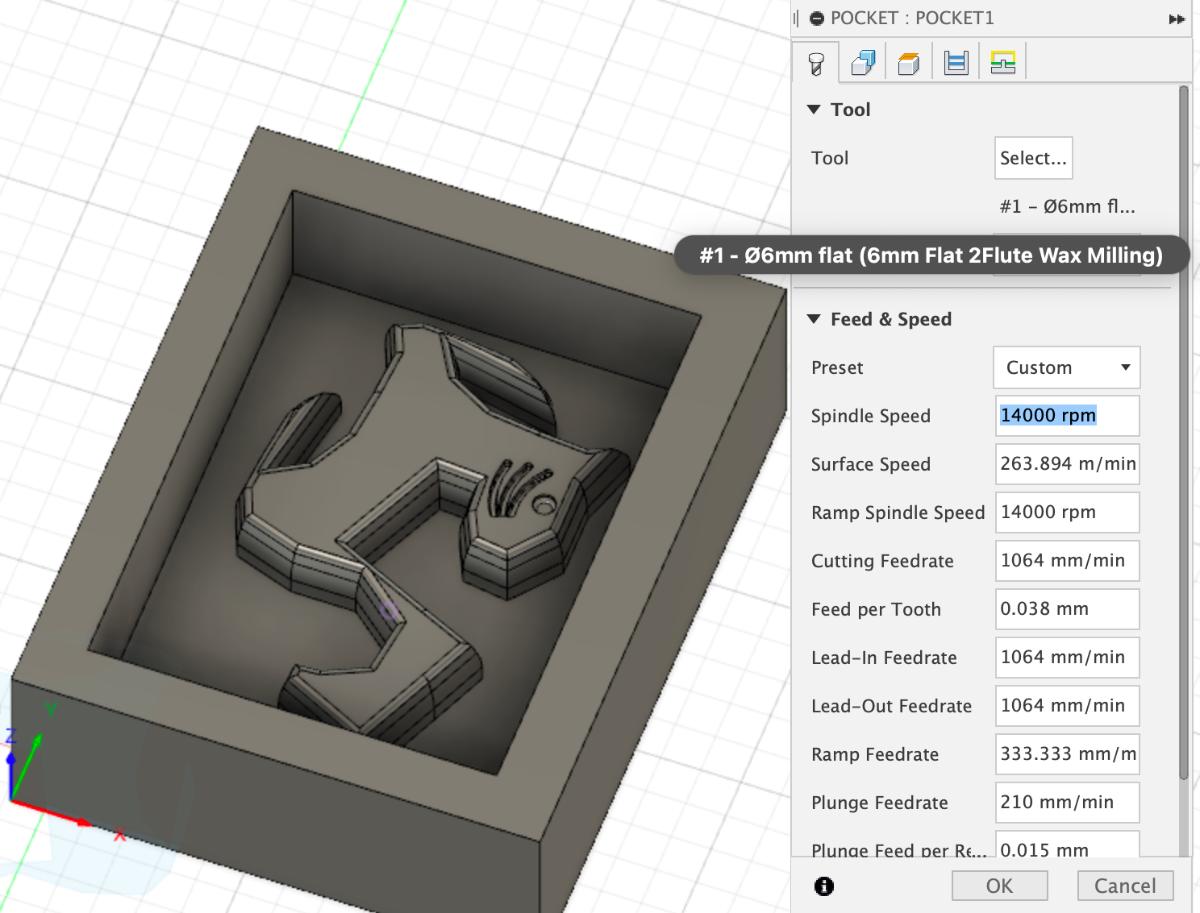
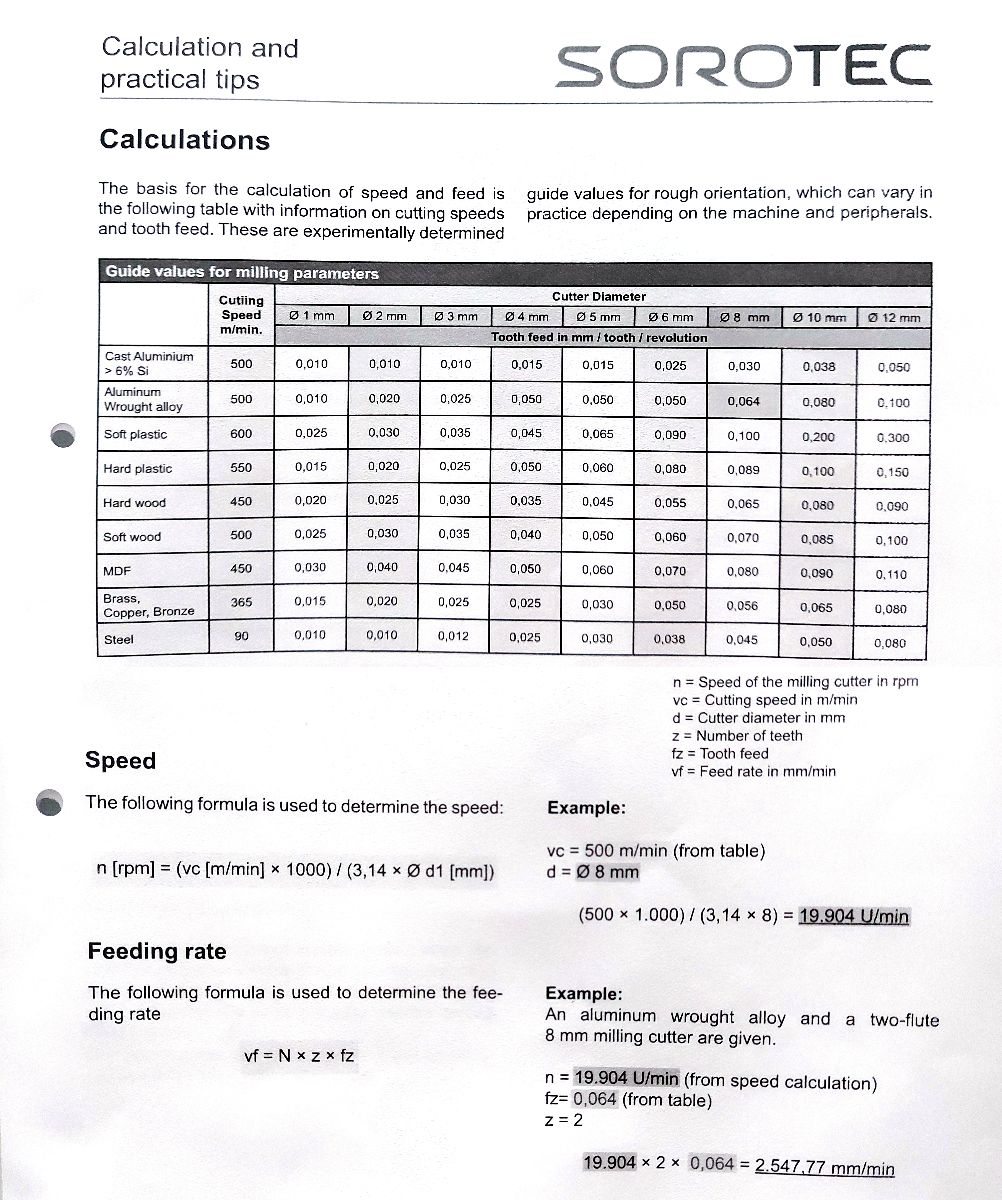
- I filled the setting according to the recommendation given by the tool manufacturer I looked up the Chip load table for this specific mill given by the manufacturer (this property values among different manufacturers). For wax milling I used the Chip load (Feed per tooth) value for steel
- The Plunge rate should be around 1/4 of feed rate
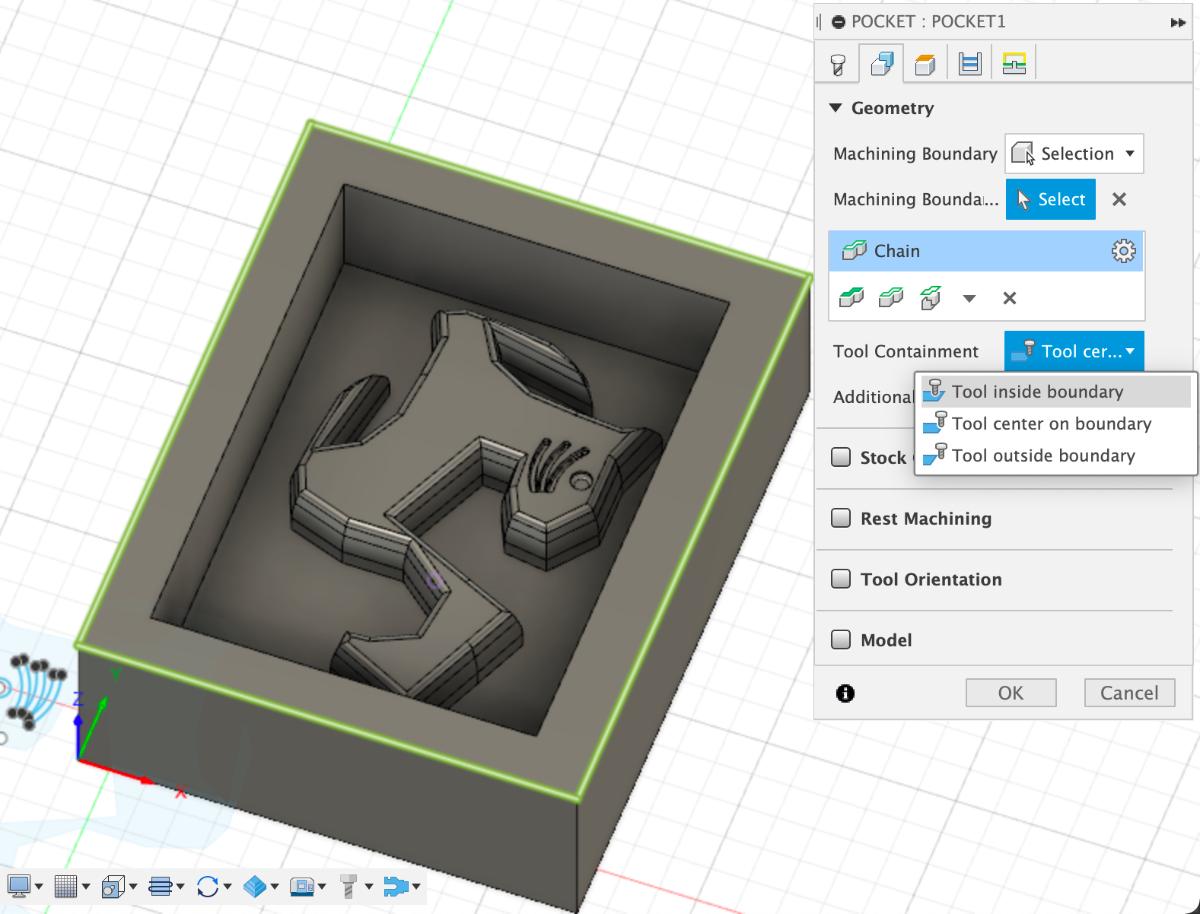
- In Geometry tab I picked the Selection option as the Machining boundary and then selected the outer edge of the stock box (green line below)
- In Tool containment I chose the Tool center on boundary option
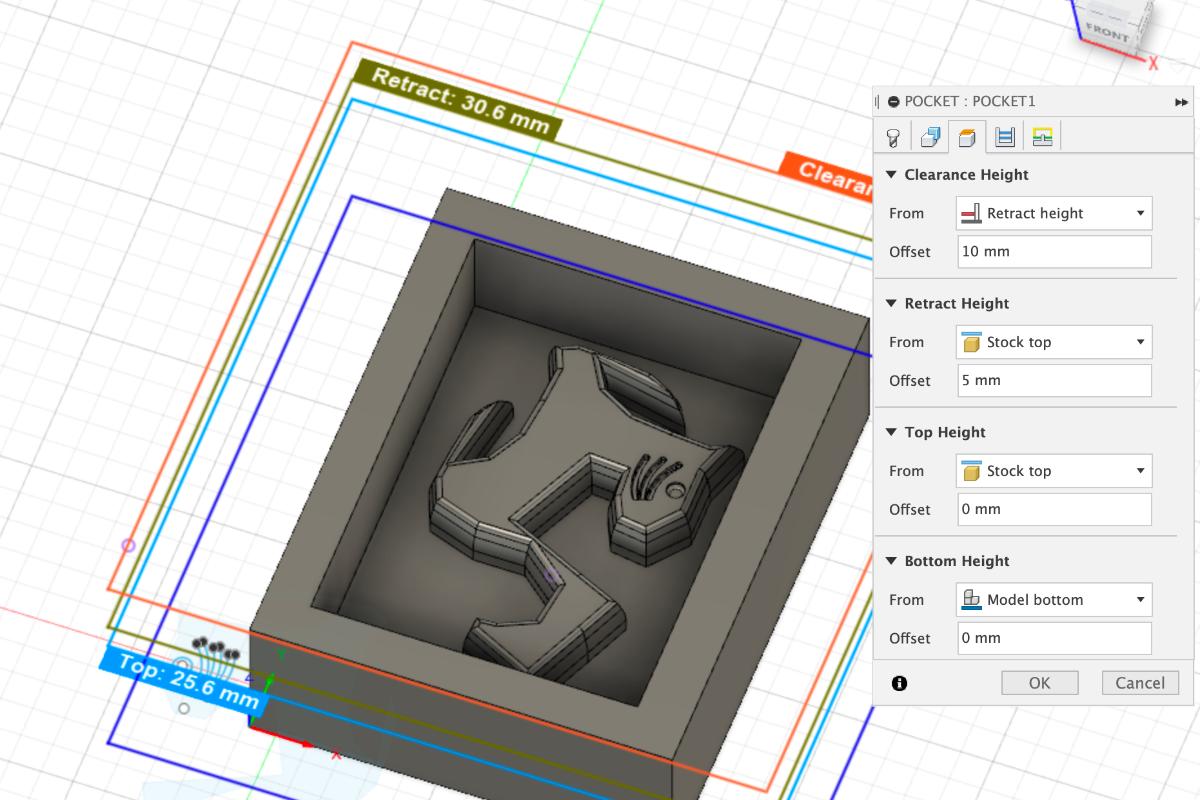
- In the Clearance tab, I filled the fields as follows
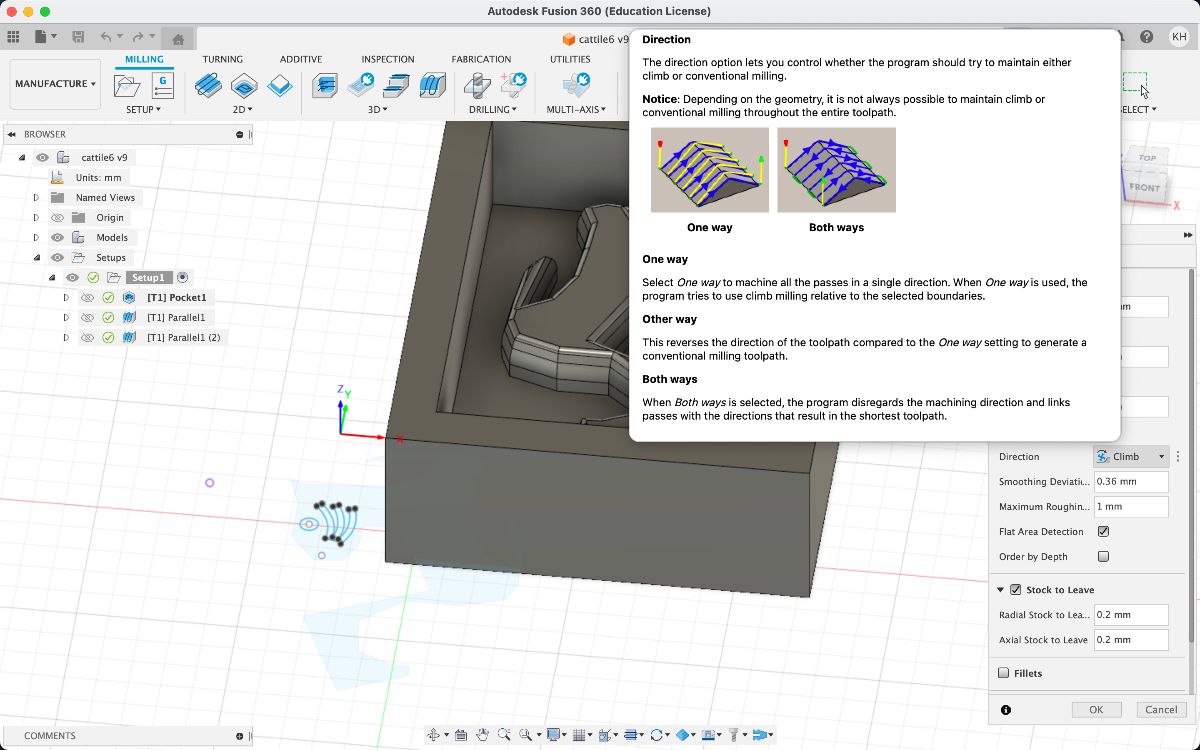
- In the Passes tab, I chose the Conventional as the Direction (ignore the climb in the picture)
- In the same tab, I chose the Maximum Roughing Stepdown to 1mm for milling wax (for plywood it should be 1/2 of the diameter)
-
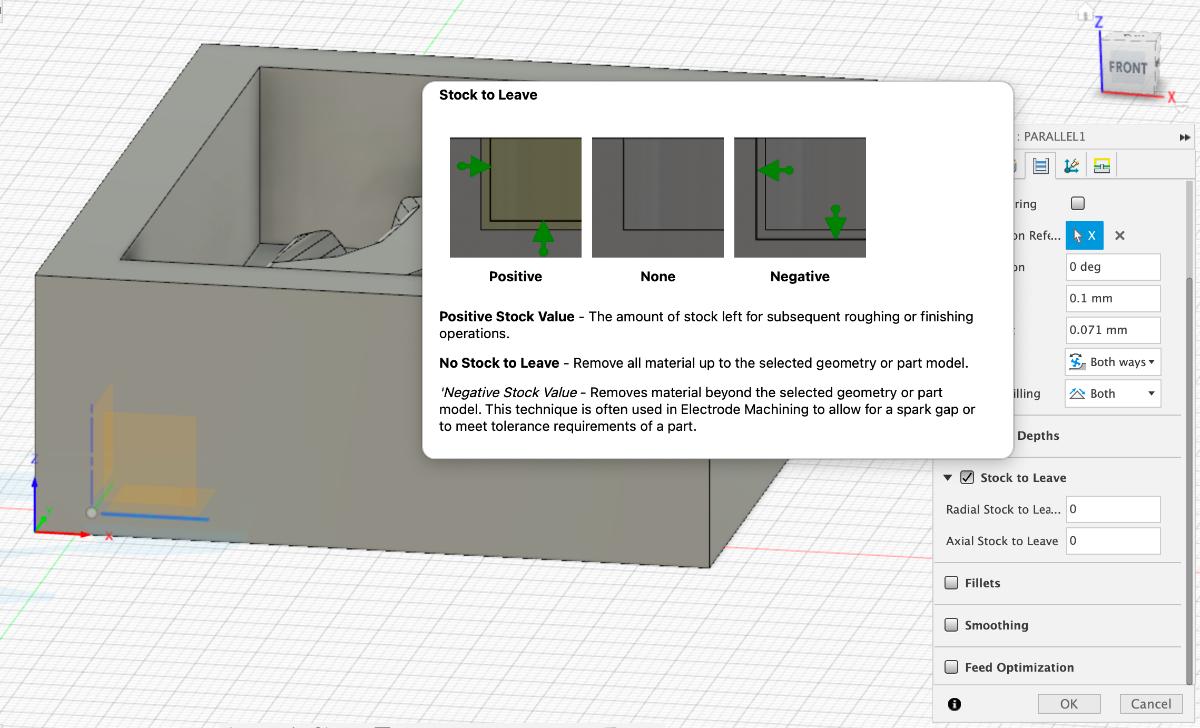
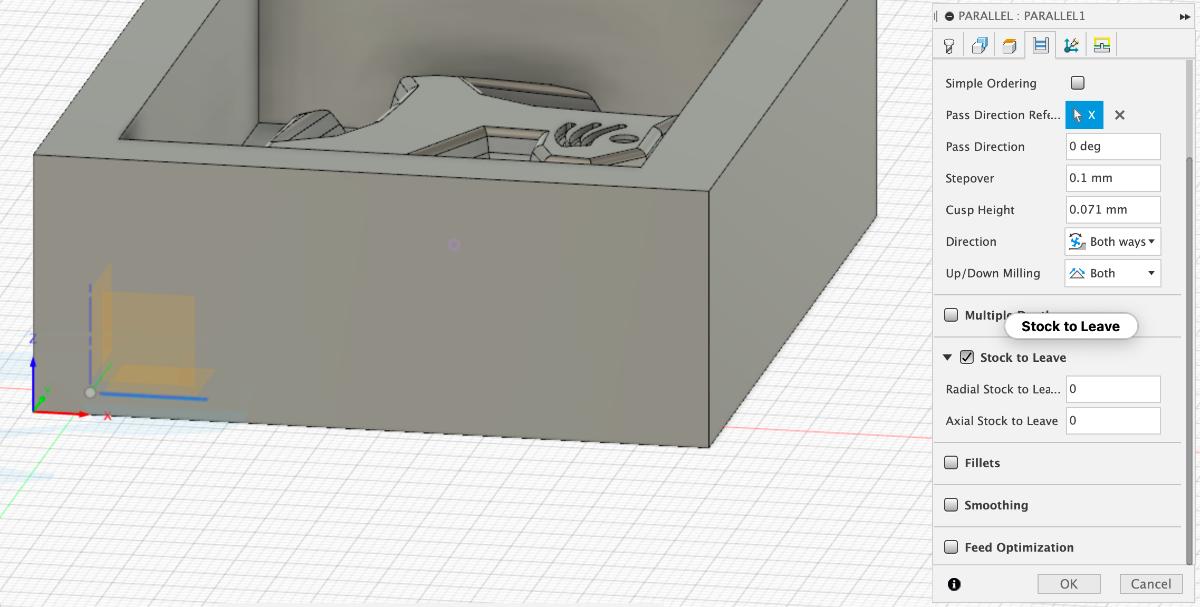
Stock to leave I set to 0.2mm, leaving enough material there to be removed during the Finishing process for a smoother result
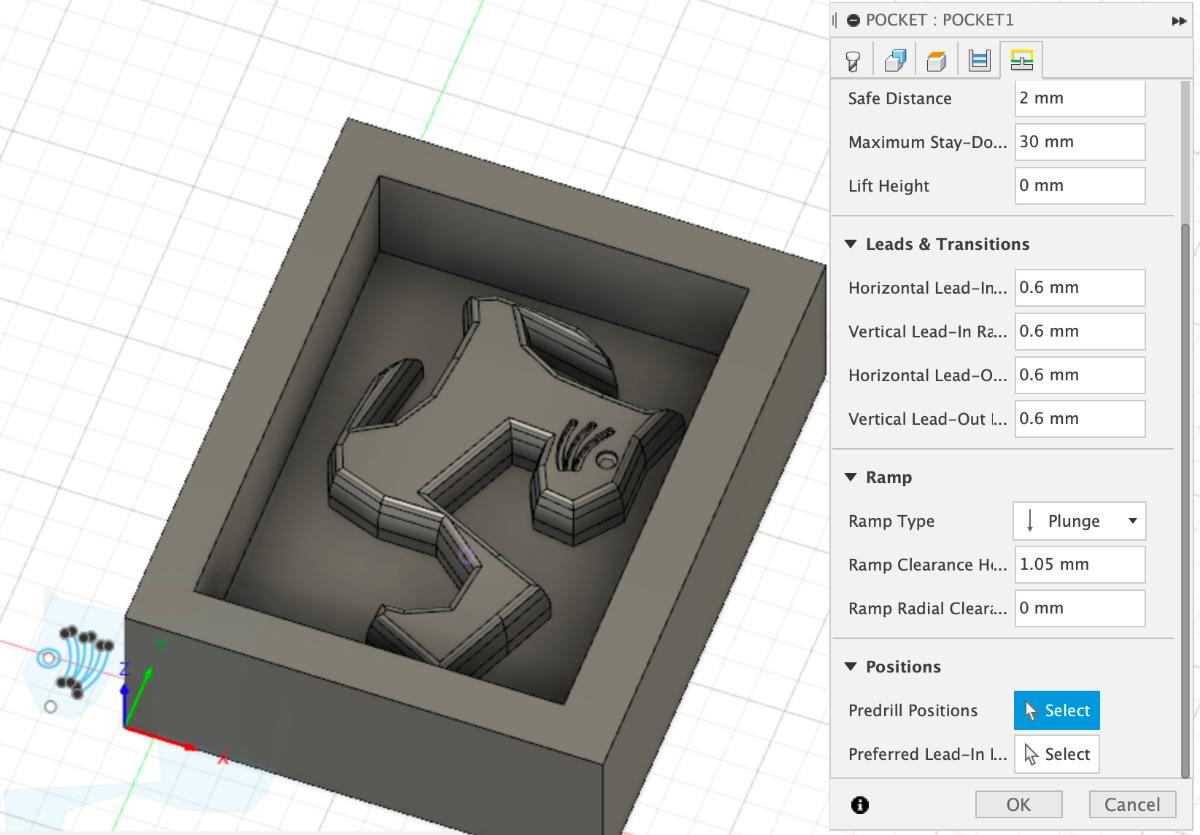
- In the last tab, I chose the Ramp Type to the Plunge option
Finishing
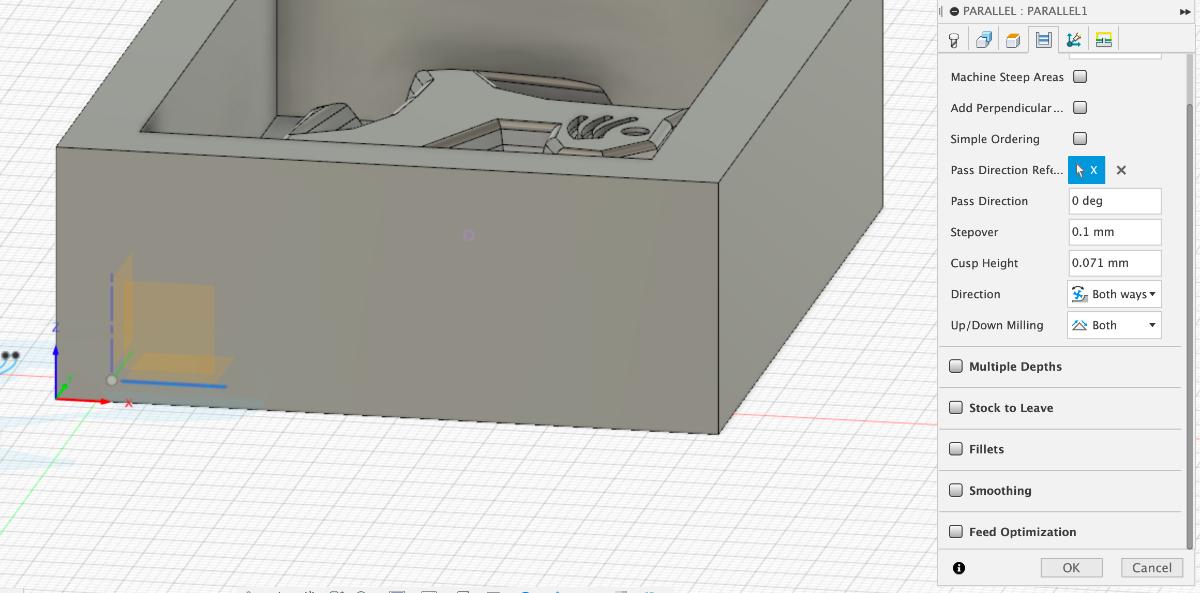
Most of the settings for the Finishing operations were similar to the Roughing ones, so below I list the ones that should be changed only.

Simulating and exporting the toolpaths
- In order to simulate the toolpaths I selected the Simulate option from the Actions dropdown menu


- Saving/exporting the toolpaths is not an intuitive process here. By right-clicking the toolpath I accessed the Post proocess option
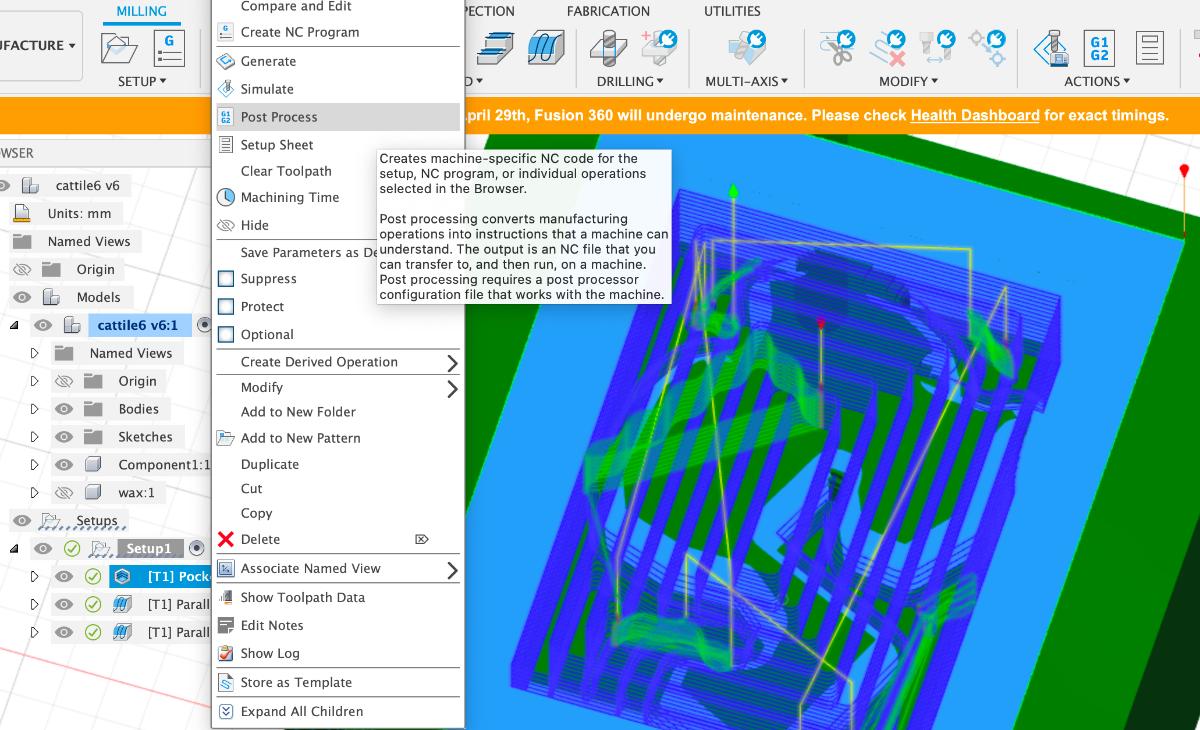
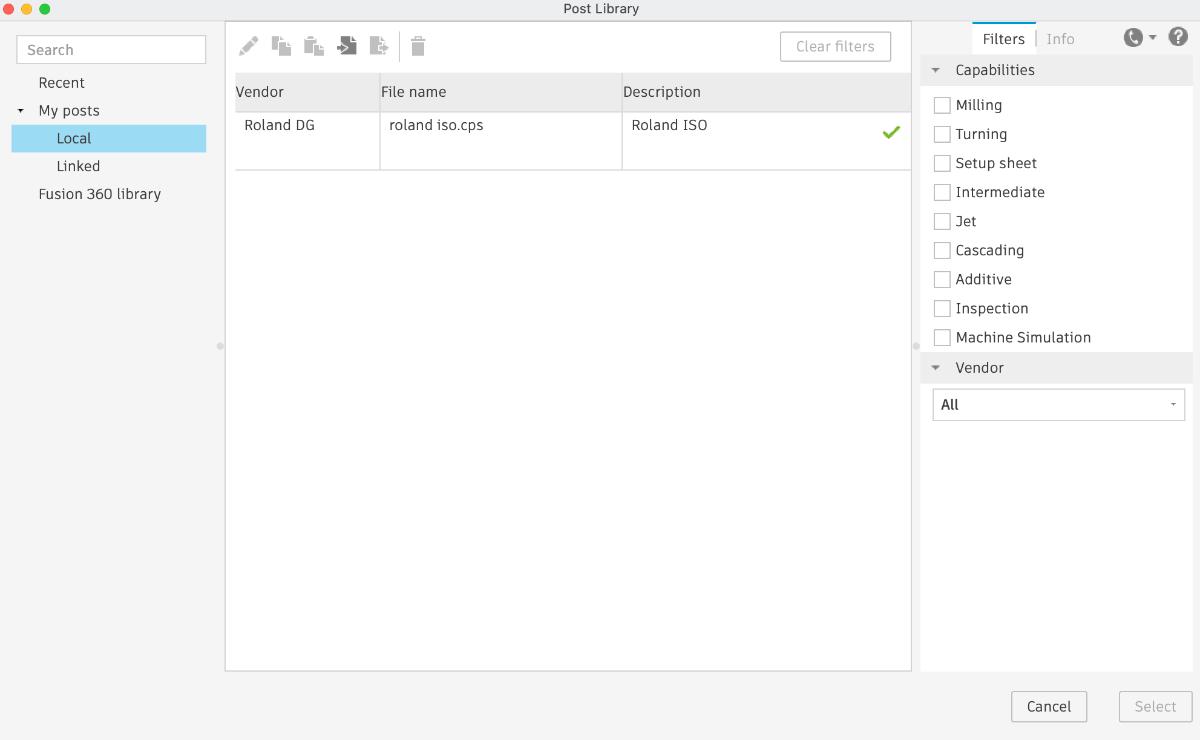
- In the newly opened window, I opened the Post option to pick the milling machine. In the Fusion360 library I searched for the Roland ISO one and added it to my local library. Then I saved the .nc toolpath file to a local folder. The toolpaths should be exported separately for each tool, so one for roughing and one for both of the finishing operations.
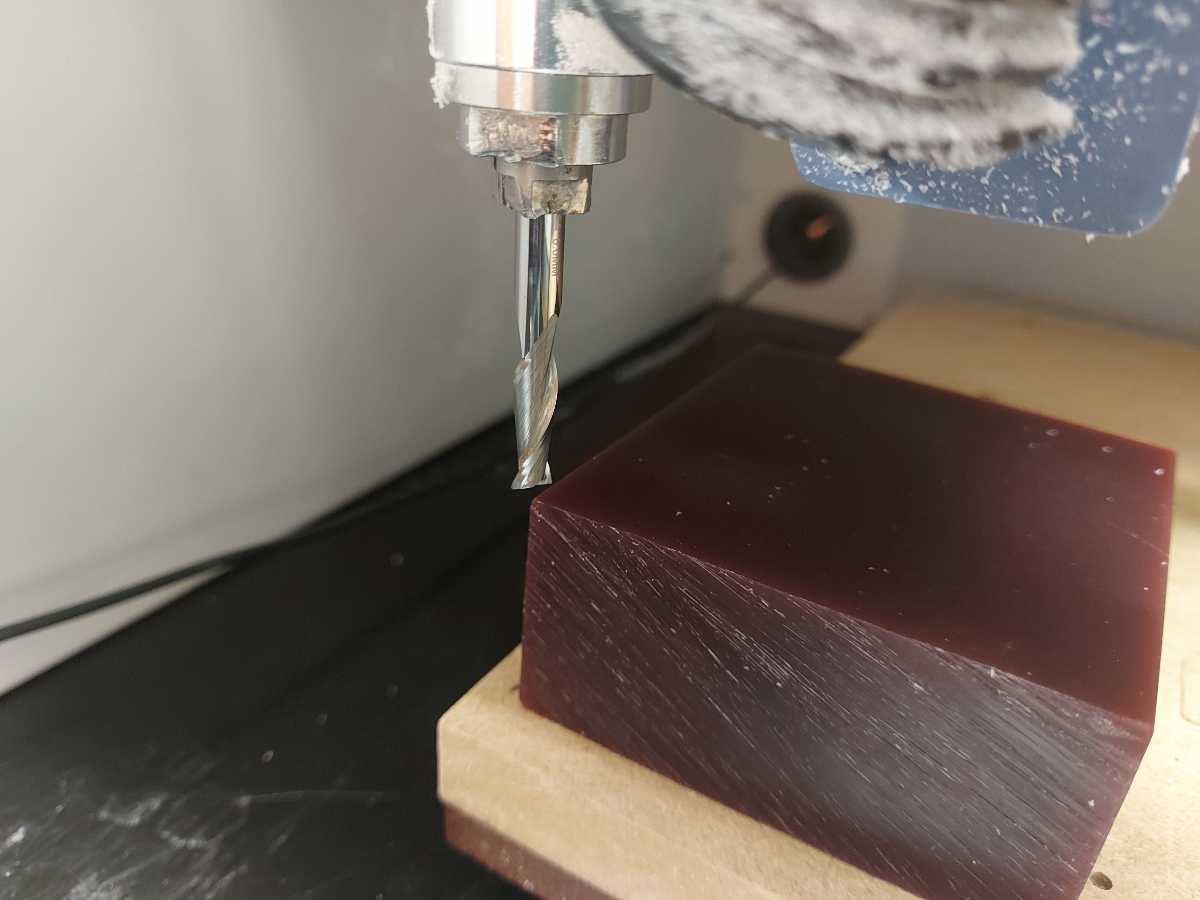
Wax milling with Roland MDX-40 CNC machine
Setup
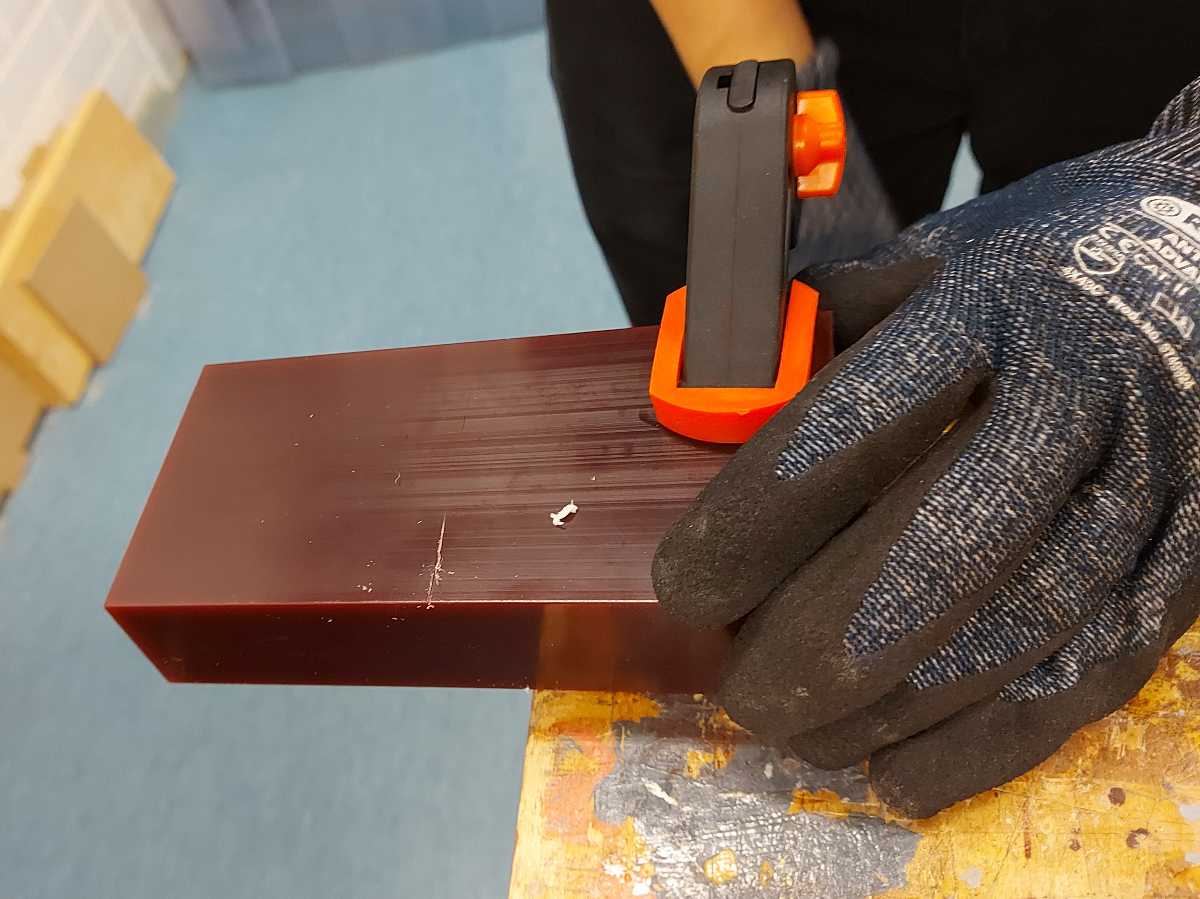
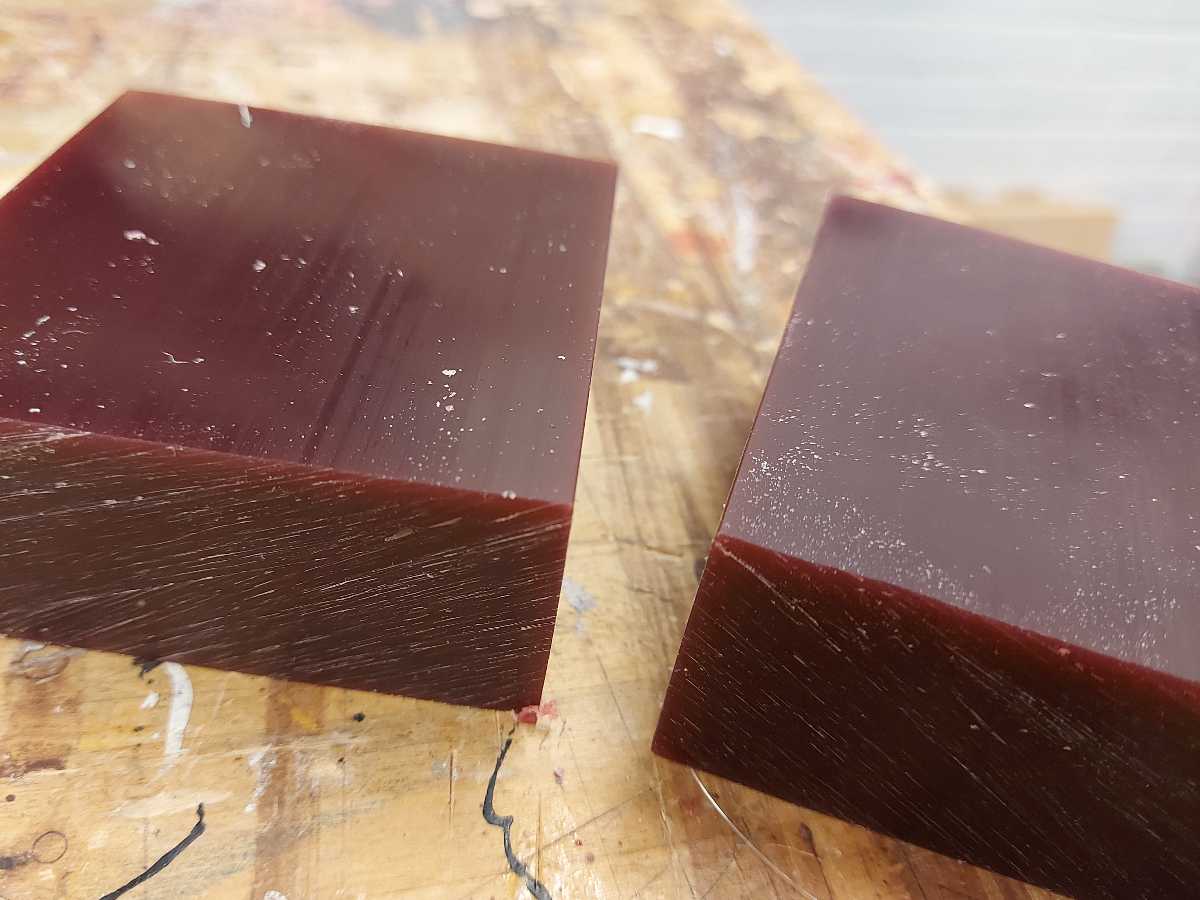
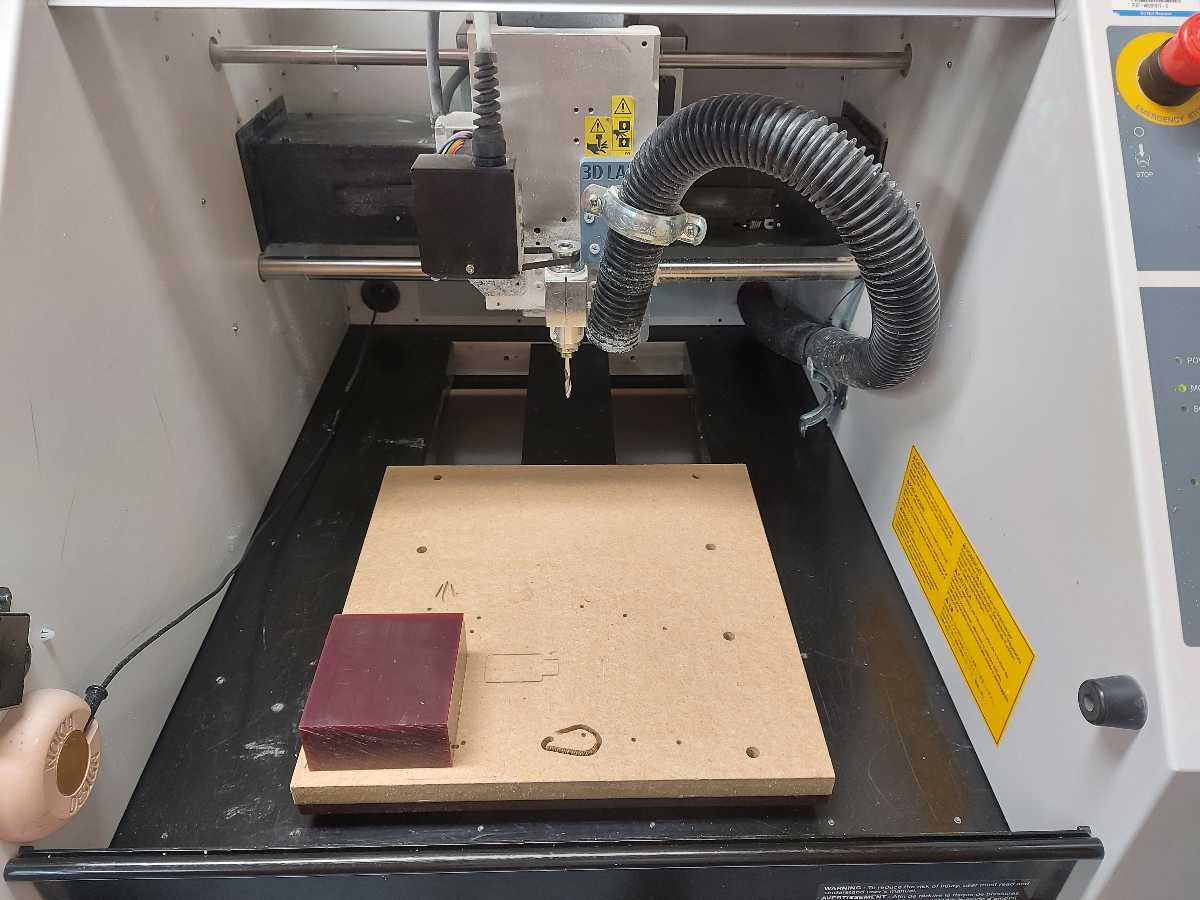
- I prepared the wax stock. The wax may be sawn with a regular wood saw
- I used a double-sided tape to fix the wax stock on the machine bed, aligning to the bottom left corner
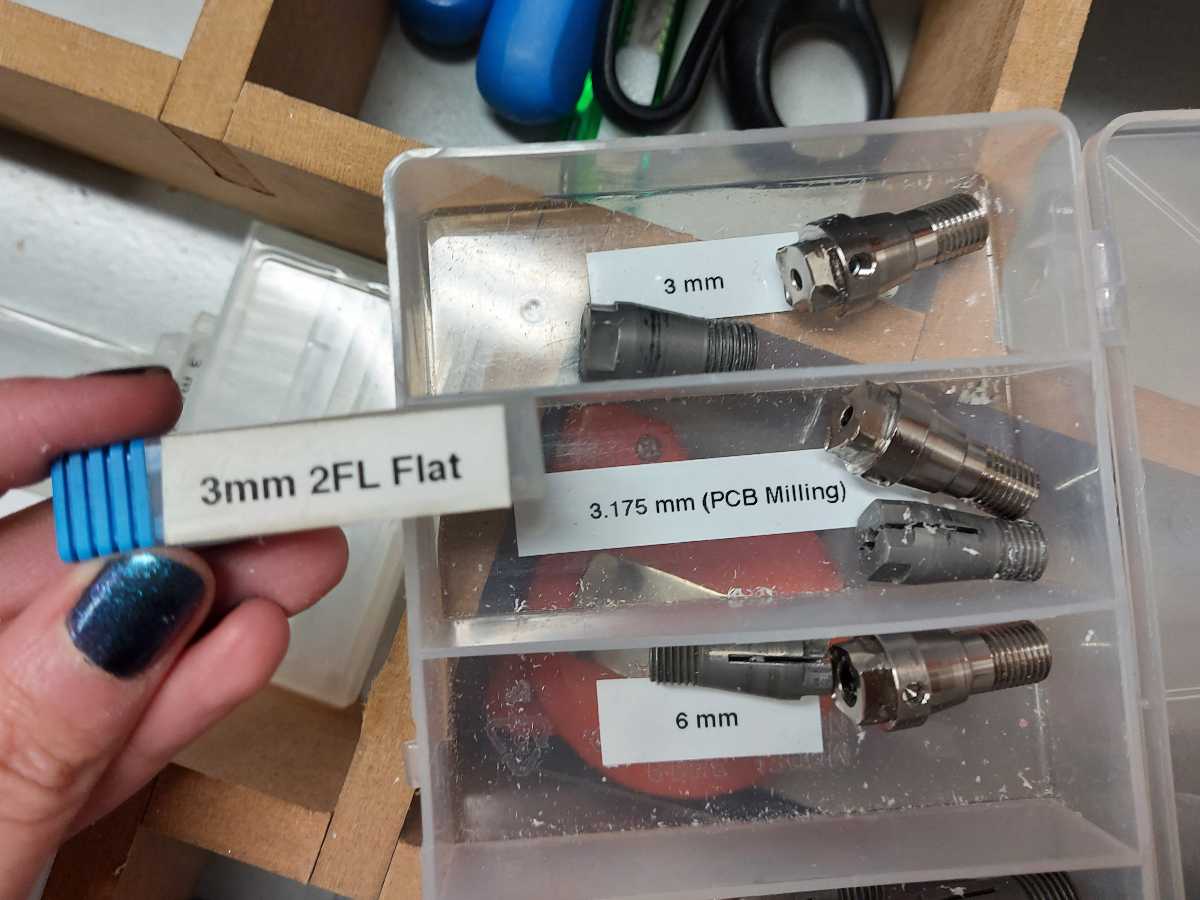
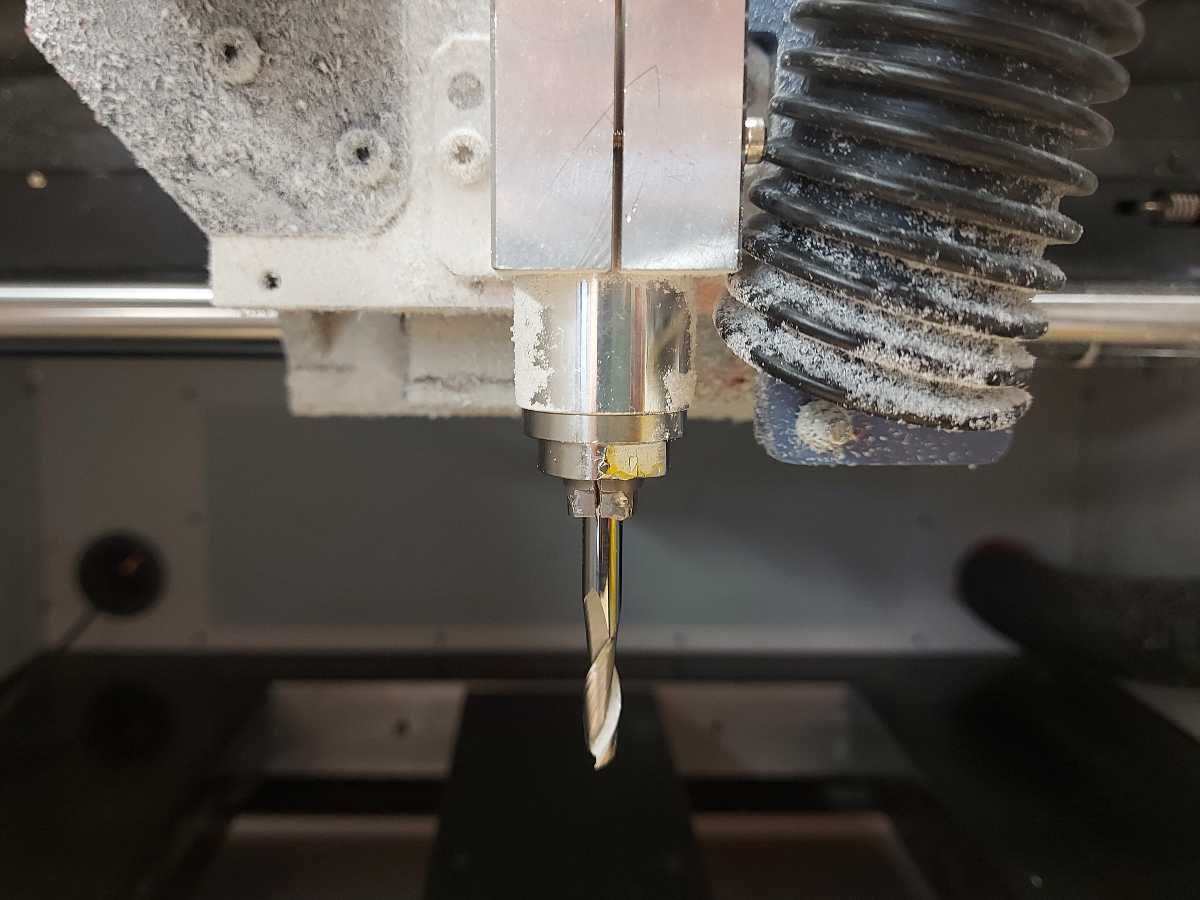
- I selected the right tool for the job (3mm flat end, 2 flute, upcut, universal), the fitting colette (the 3.175 was better in this case than the damaged 3mm) and installed them in the machine spindle using the designated tools
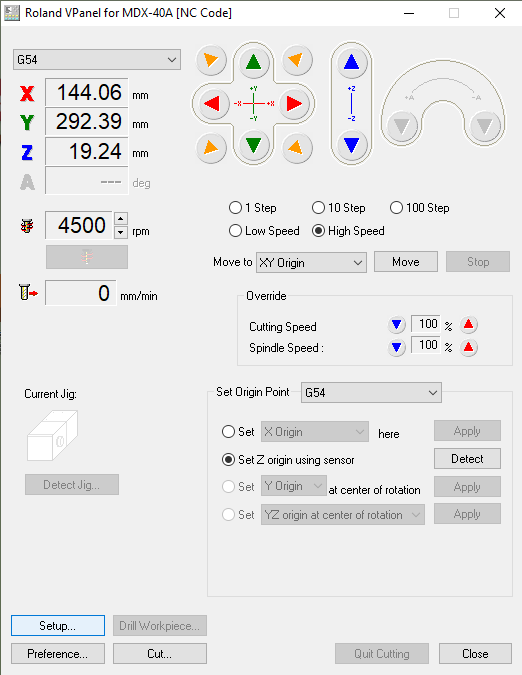
- I opened the designated software to use with this particular machine - Roland VPanel
- I made sure the Set origin field was set to G-54
- Using the arrows, I moved the spindle over the intended origin point (adjusting the speed of motion) - south-west and used the Set origin X and Set origin Y command to set them as home positions
- In order to set the z origin, I used a fittign sensor. I made sure the plug was connected properly and clicked the Set z origin using sensor DETECT button
- I left the spindle speed to be read from the toolpath file, according to what I set in Fusion360 earlier on - 14 000 rpm
- IMPORTANT - I reduced the cutting speed to 10% as the wax is a hard material to start with. The speed may then be adjusted while the milling process is on-going, if the machine doesn't sound alarming and the mdoel and tool shape allow for full speed cutting
- Via Setup I uploaded the roughing tool toolpath and clicked Output to start milling
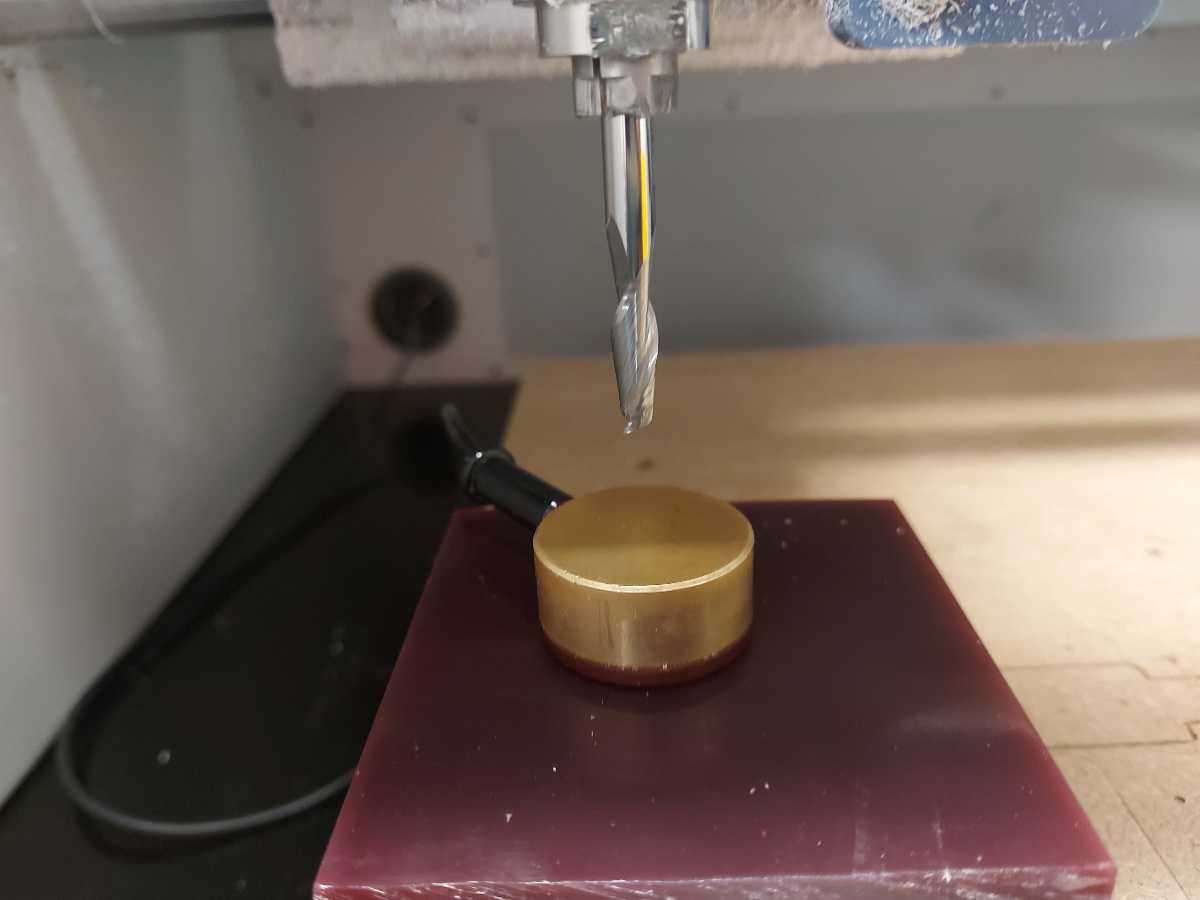
Roughing

6mm tool for roughing
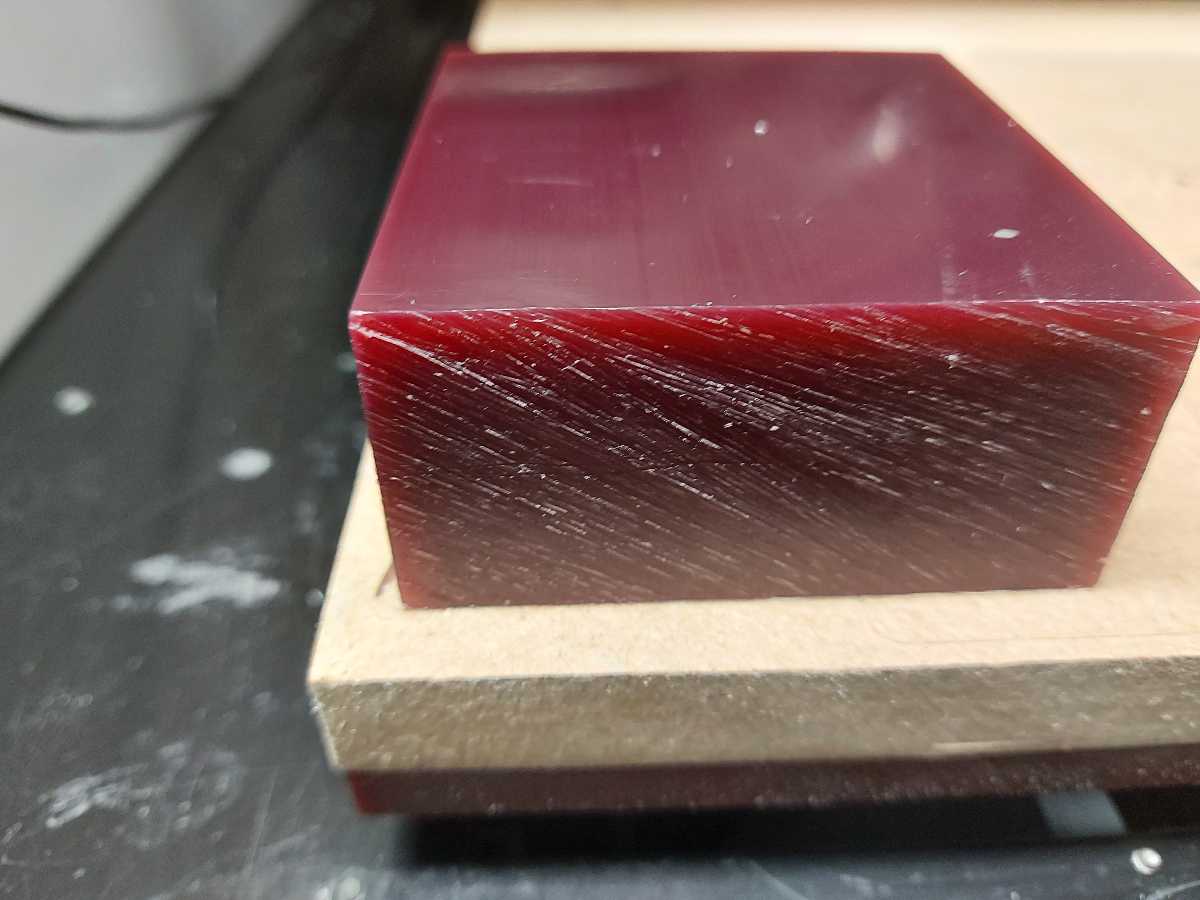
Roughing results
Finishing
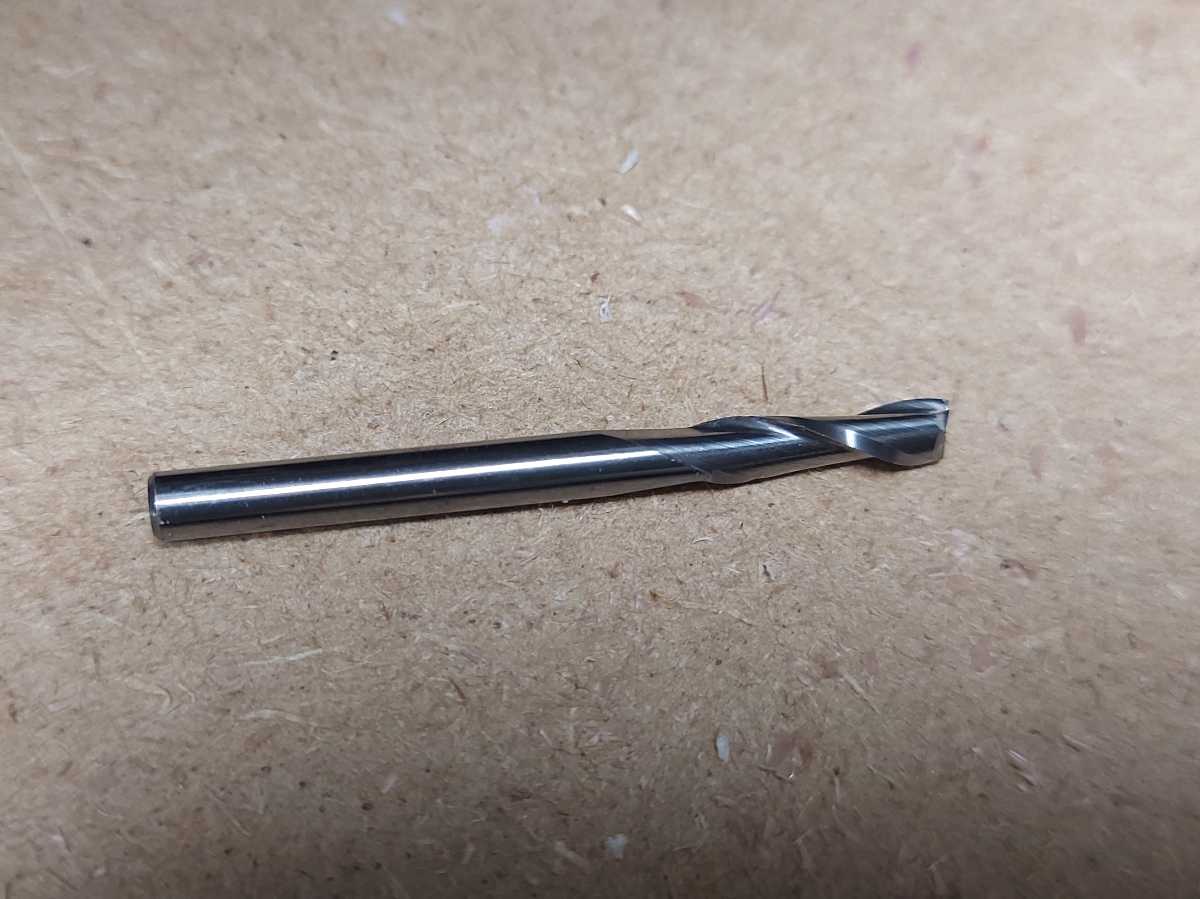
3mm tool for finishing
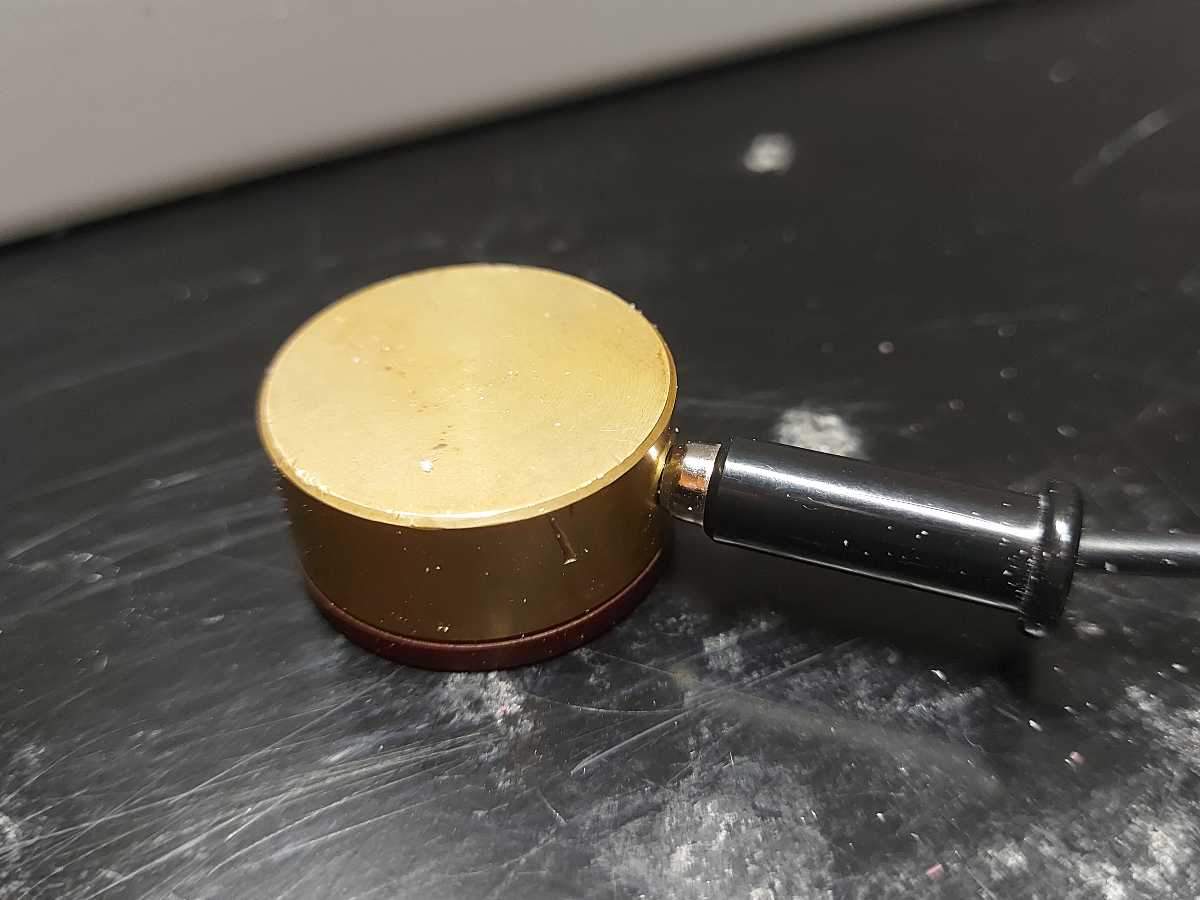
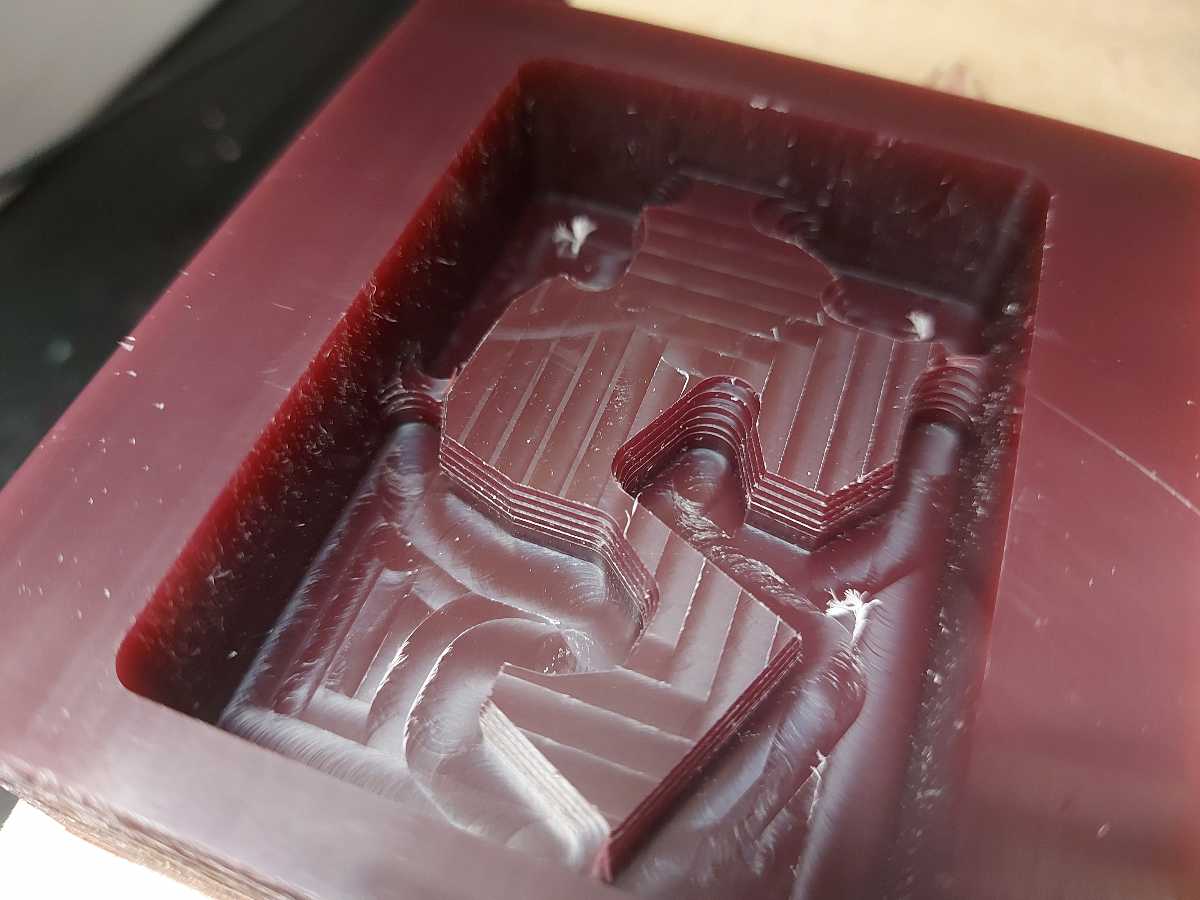
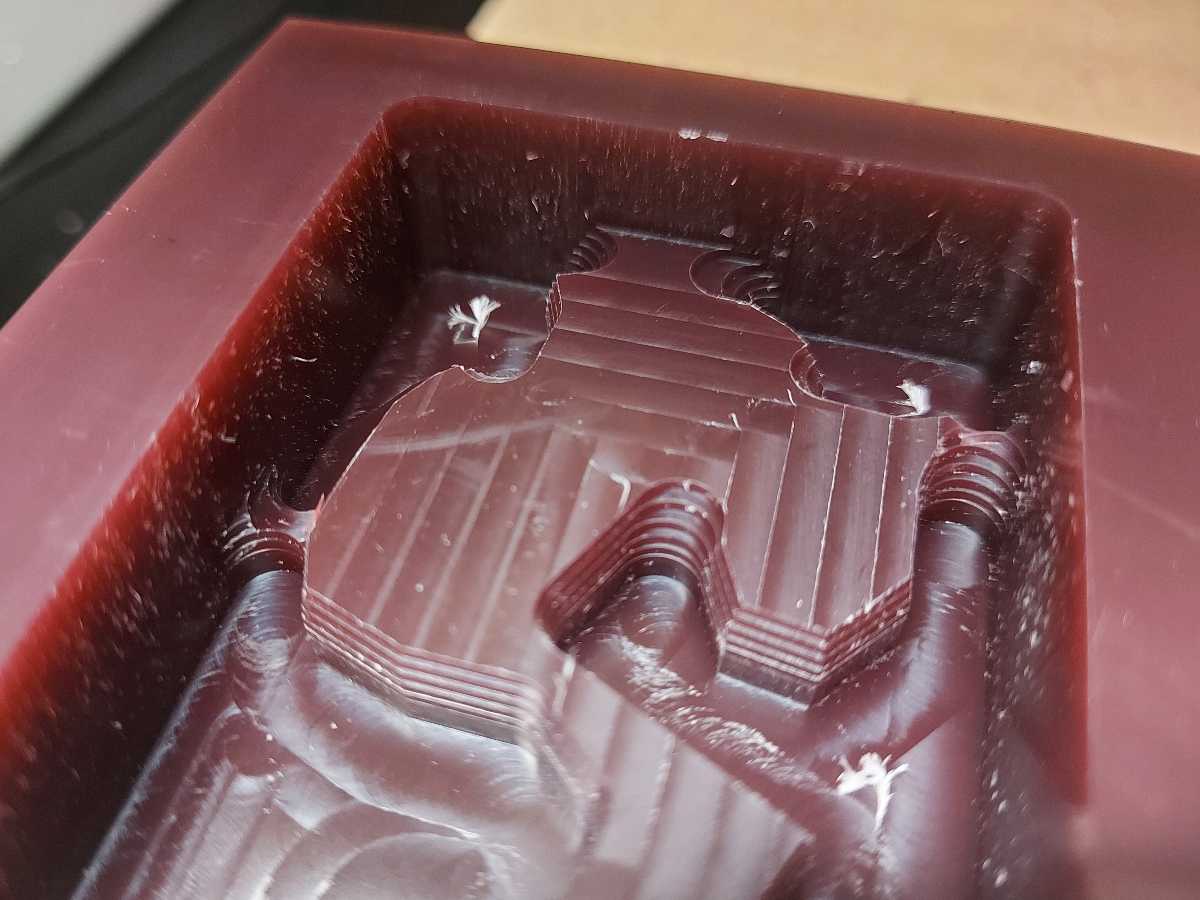
FInishing results
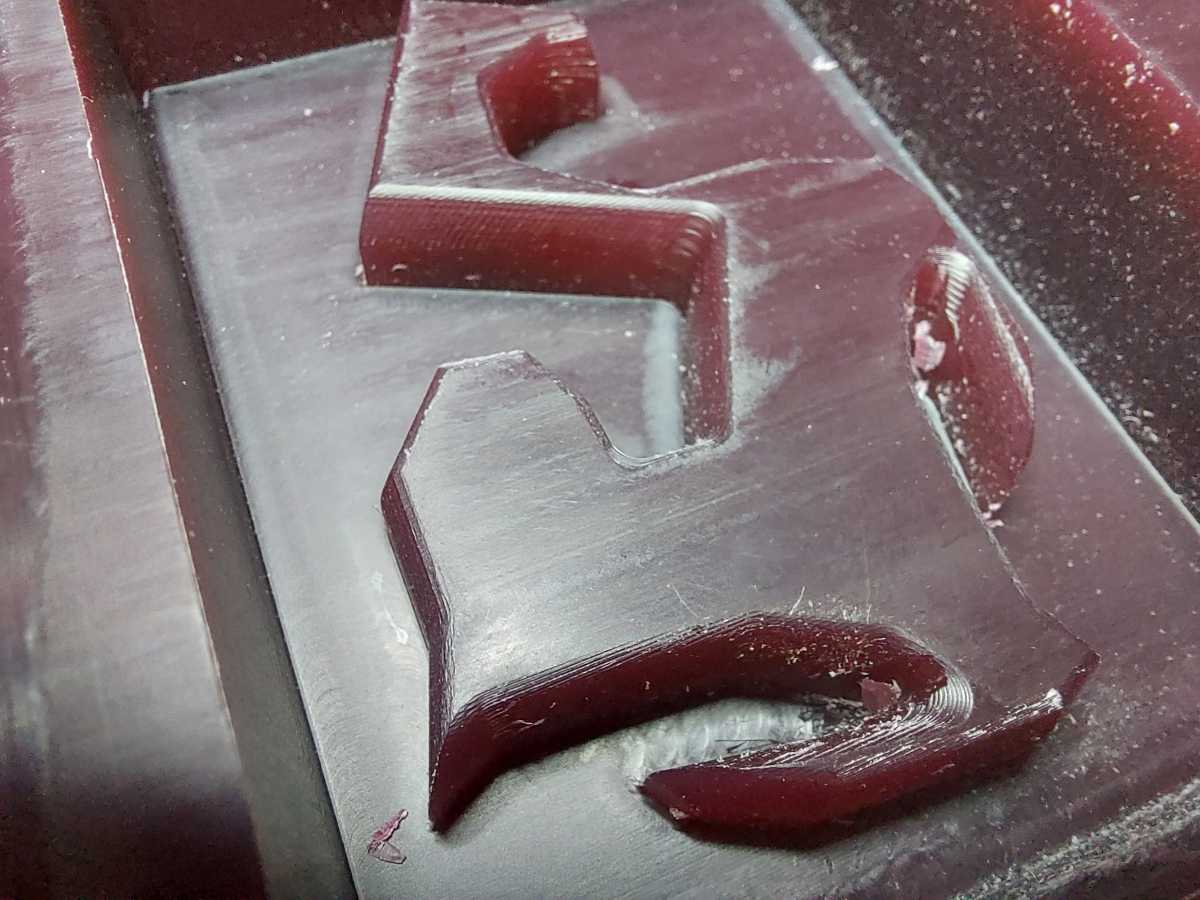
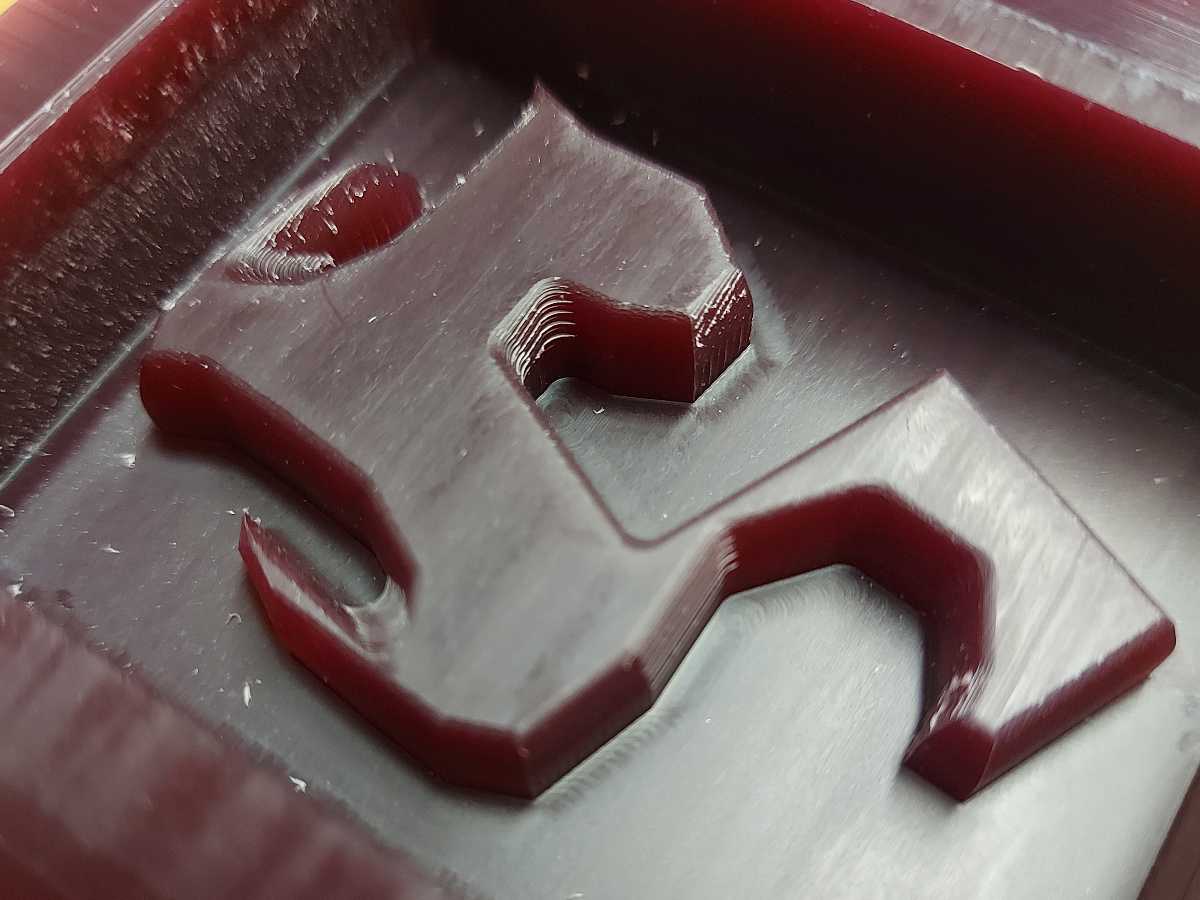
I decided to mill only one finishing toolpath, skipping the second rotated by 90 degrees. The milling process was taking over 4 hours and the surface finish was good enough after one pass. The edges of the cat model were showing the stepdown though.
I should have designed this mold a bit differently to make the milling process easier and faster - I should have beveled the outer walls . Wall at 90 degrees were more difficult for the milling bit to plunge in and were too high for the cutting part, so part of the tool shaft was hitting the walls when the tool was moving, so I had to reduce the speed. Setting the walls at an angle would have solved this and also made the cast easier to remove
My model was designed to fit together with other pieces in a pattern. The details were much finer than the 3mm tool could mill properly. Milling with 1mm tool would take forever, so I decided to carve the sharpest inward corners by hand using a scalpel tool and I worked out fairly well
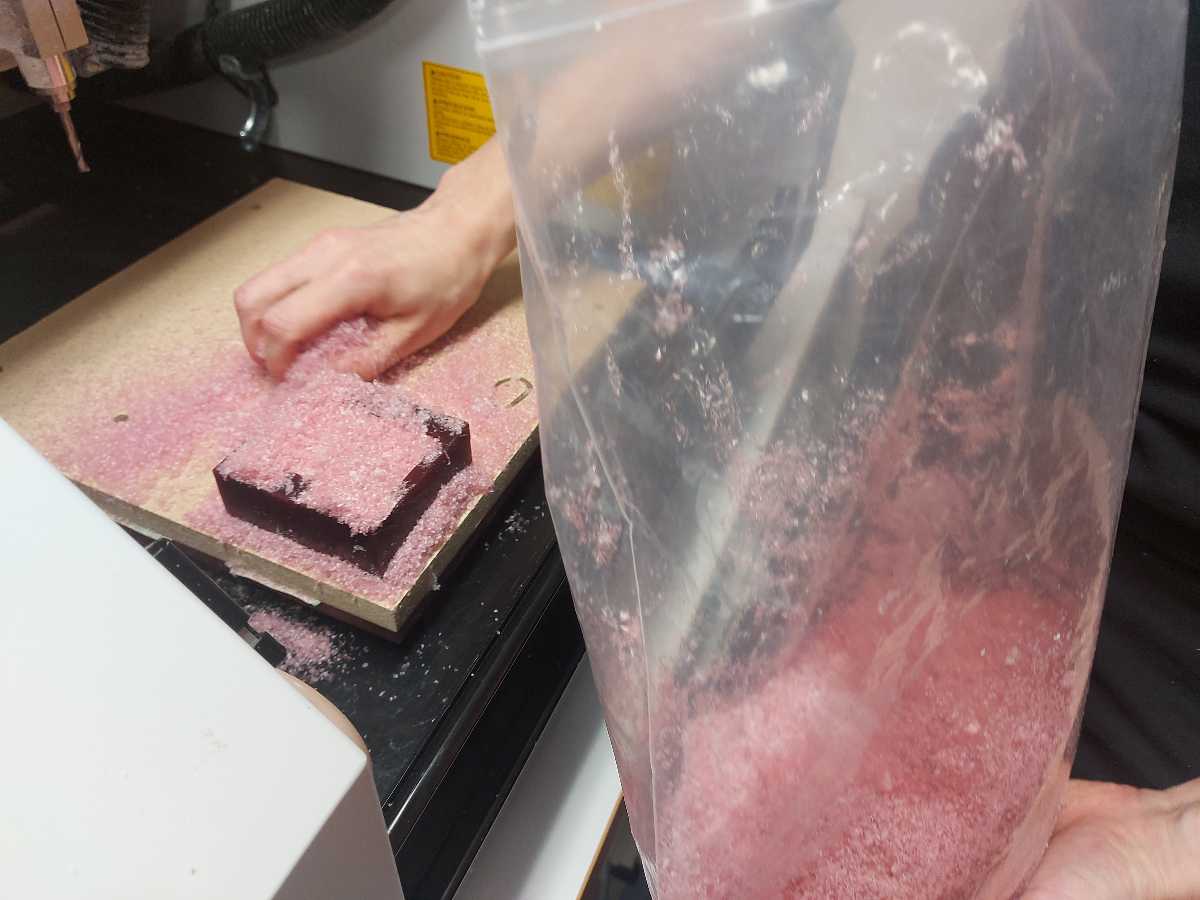
I collected all the wax chips from the machine and placed them in a collection bag, so they may be recycled and melted into new stock pieces in the future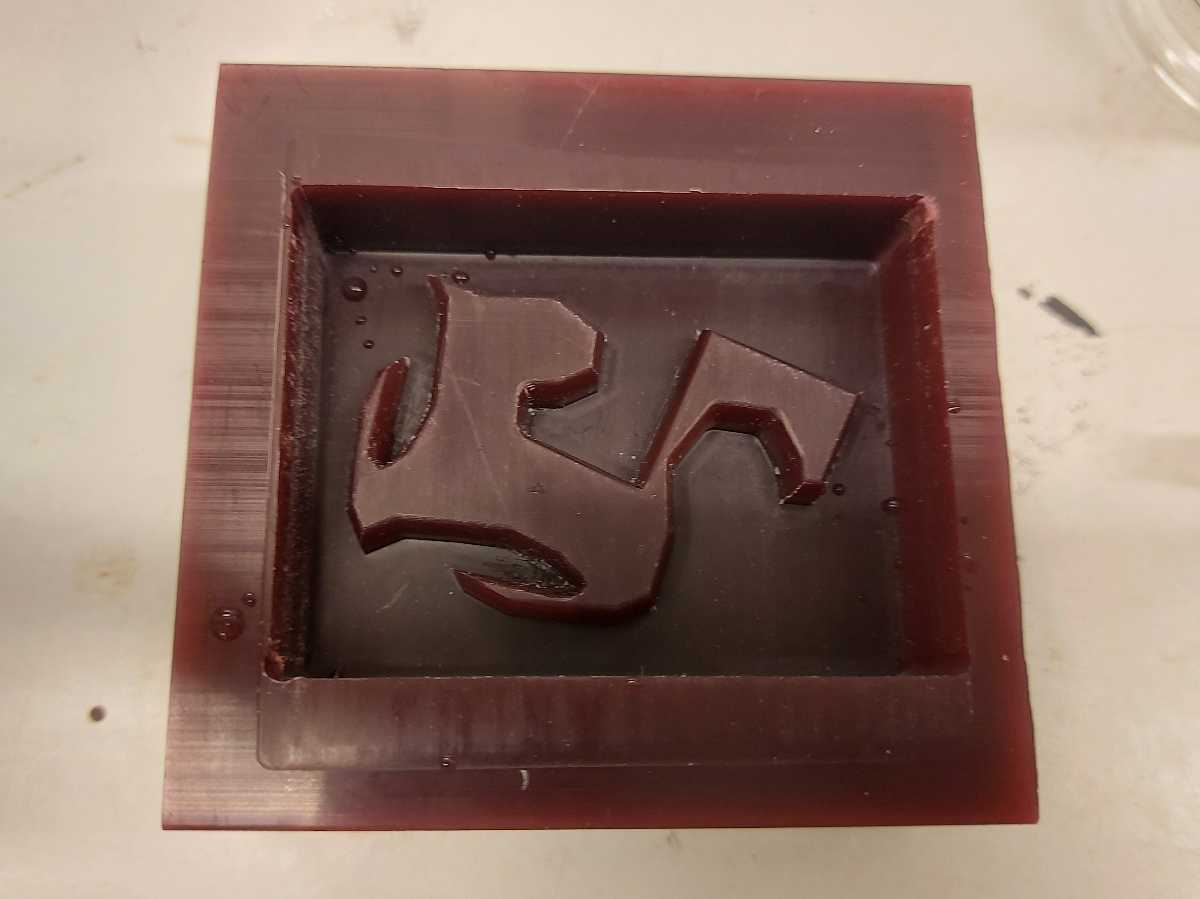
Casting process
Preparation
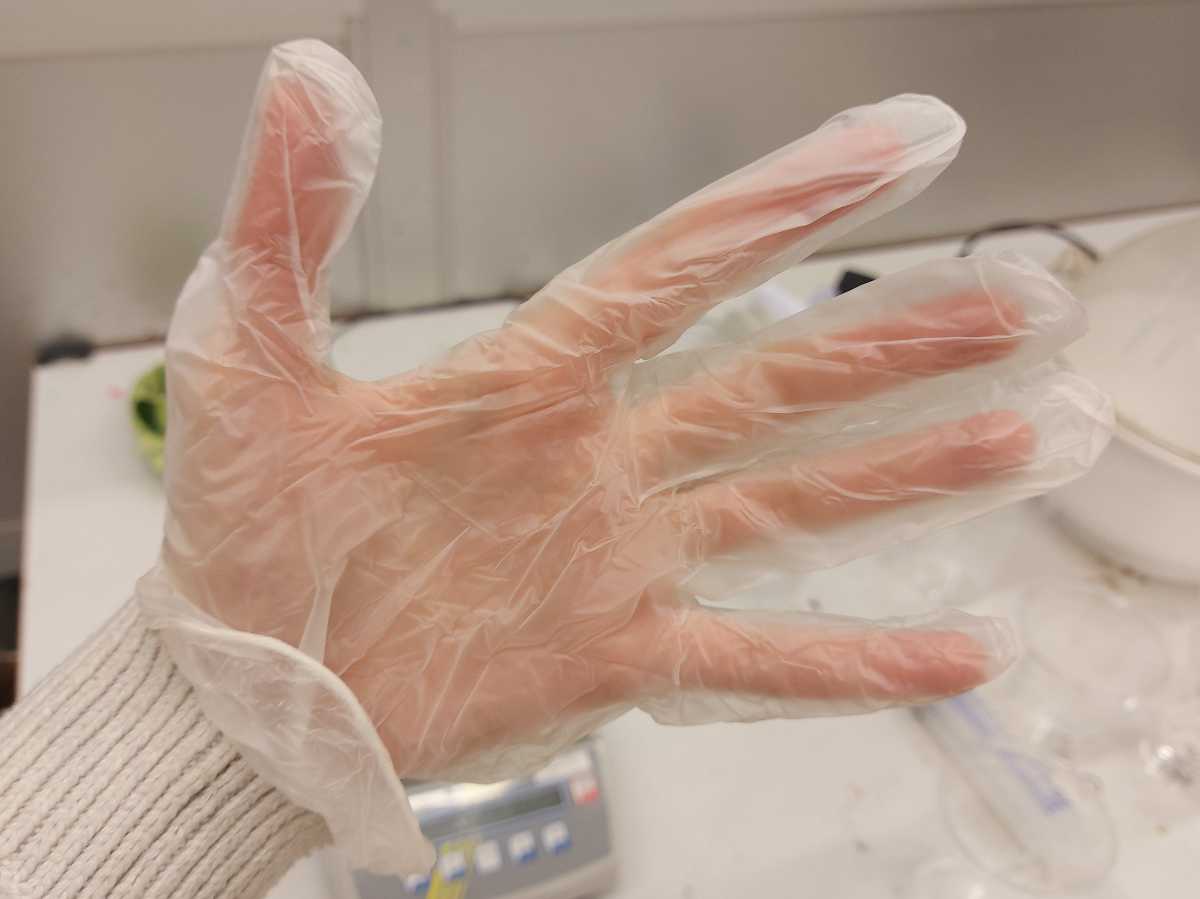
Casting is a messy process. It's better to be prepared with foil covering surfaces, paper towels, cups, mixing sticks etc. Vinyl goves should be used at all times
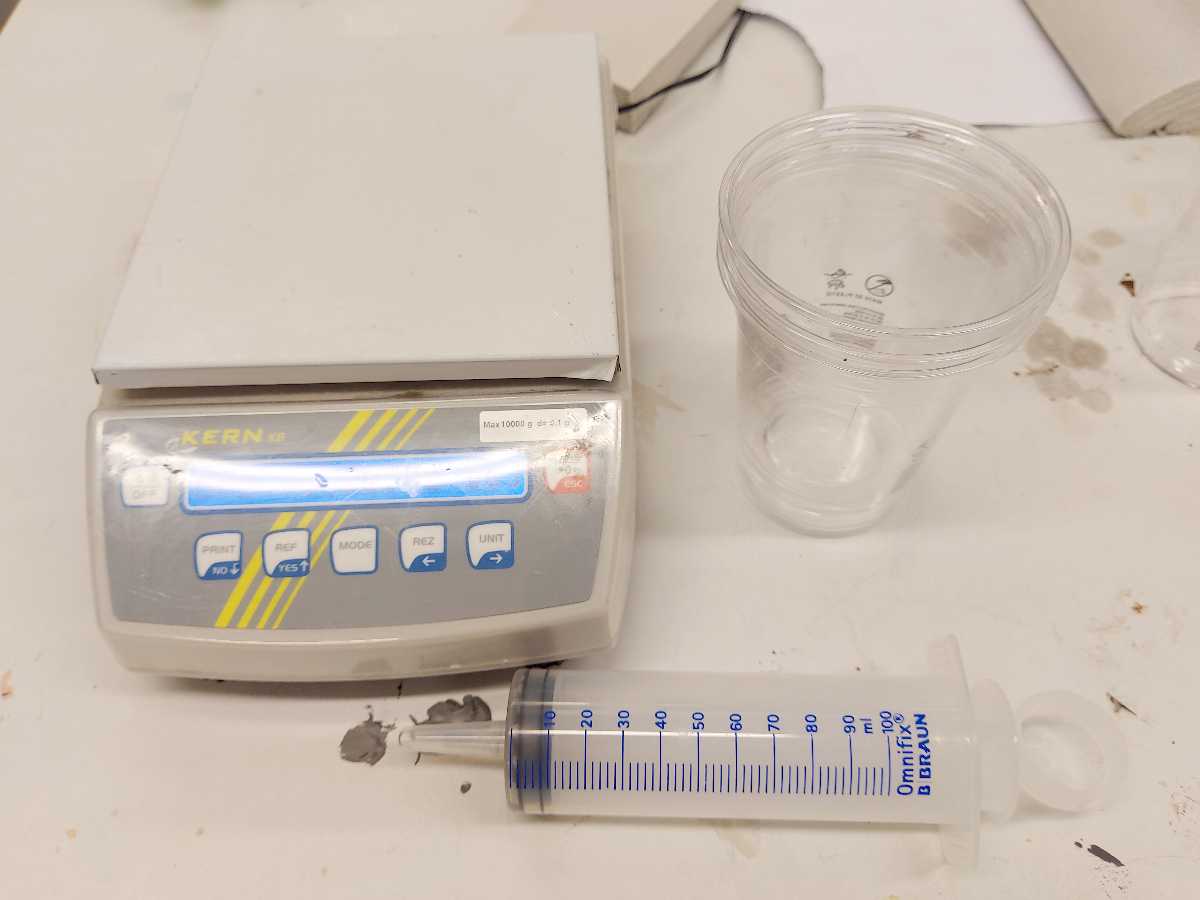
I prepared electronic scales with 0.1g resolution and a big syringe with which I could meaaure volumes too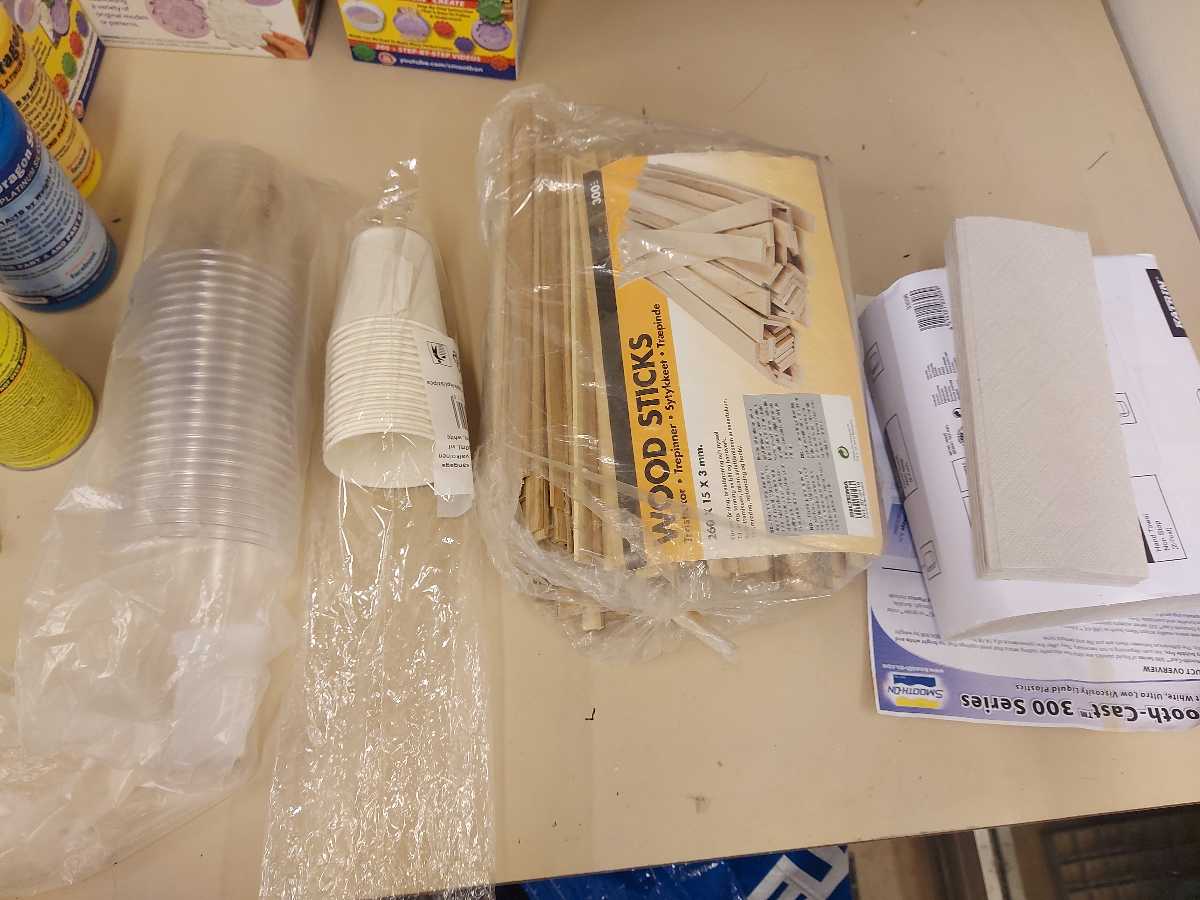
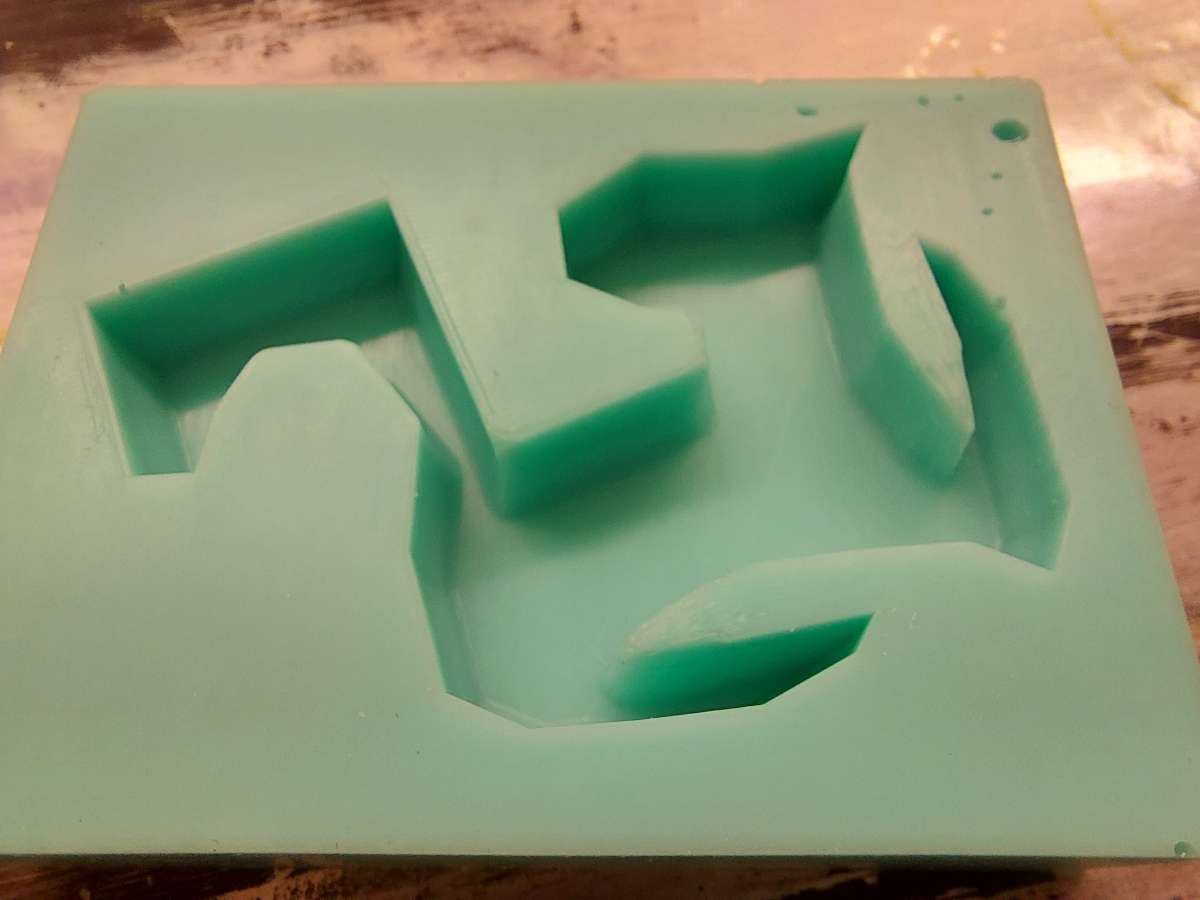
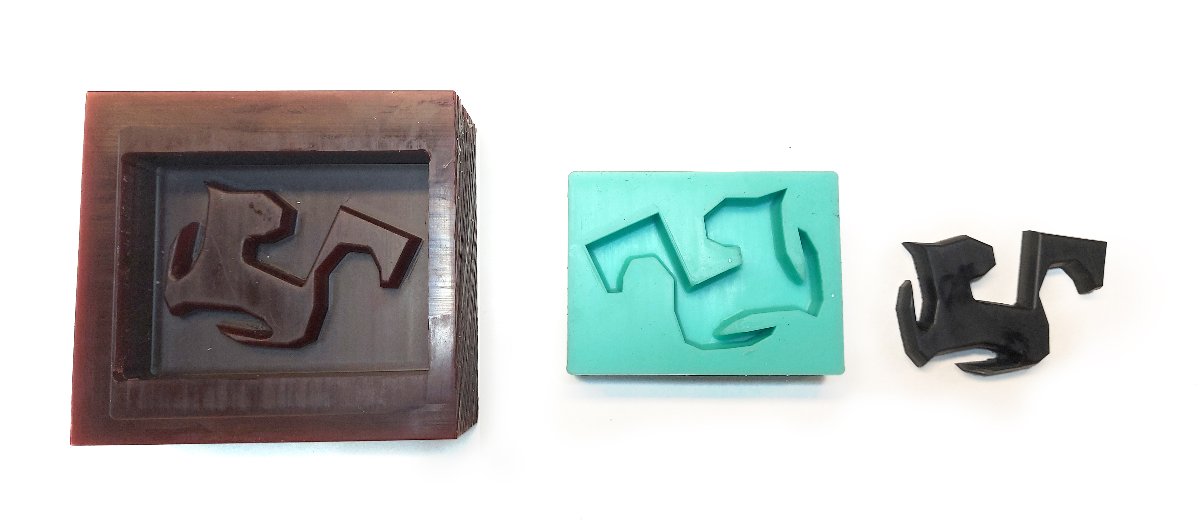
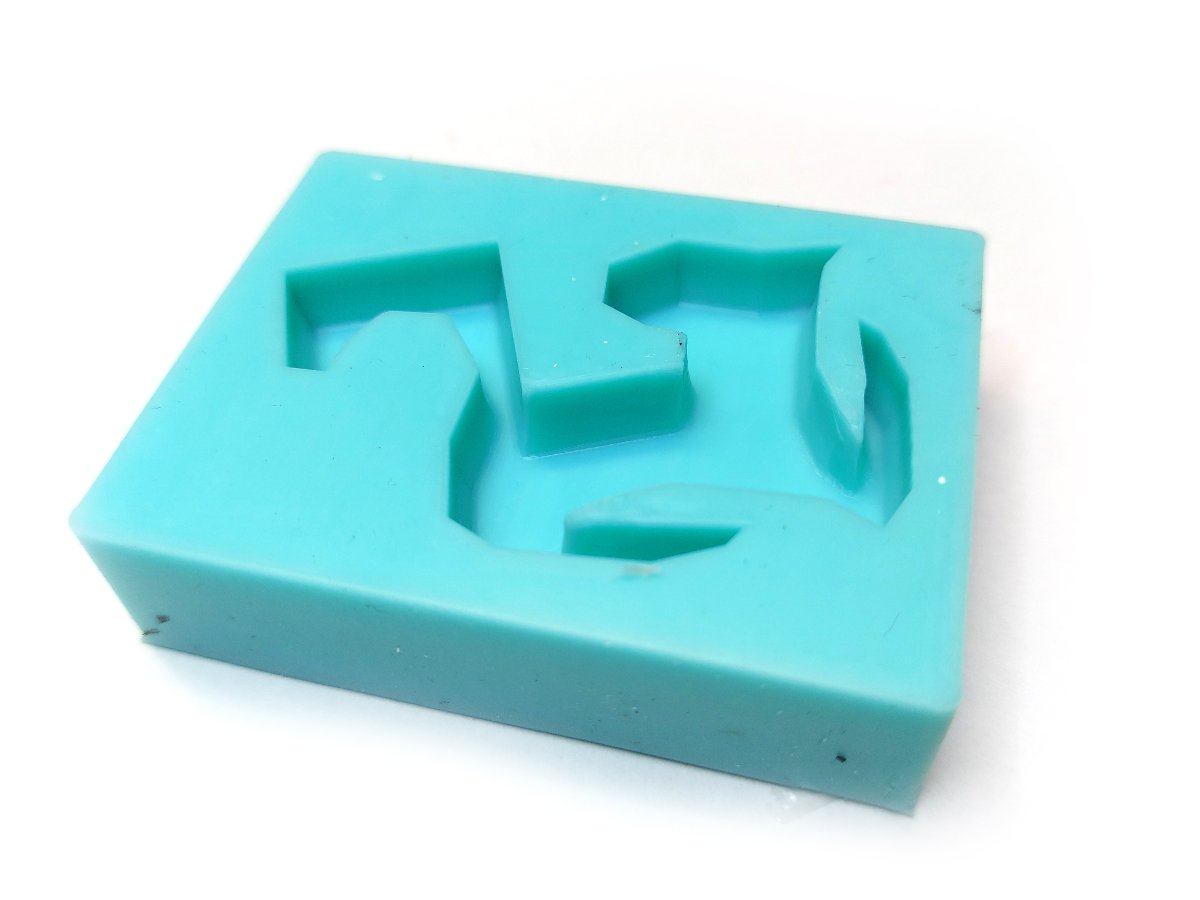
Silicone rubber negative mold
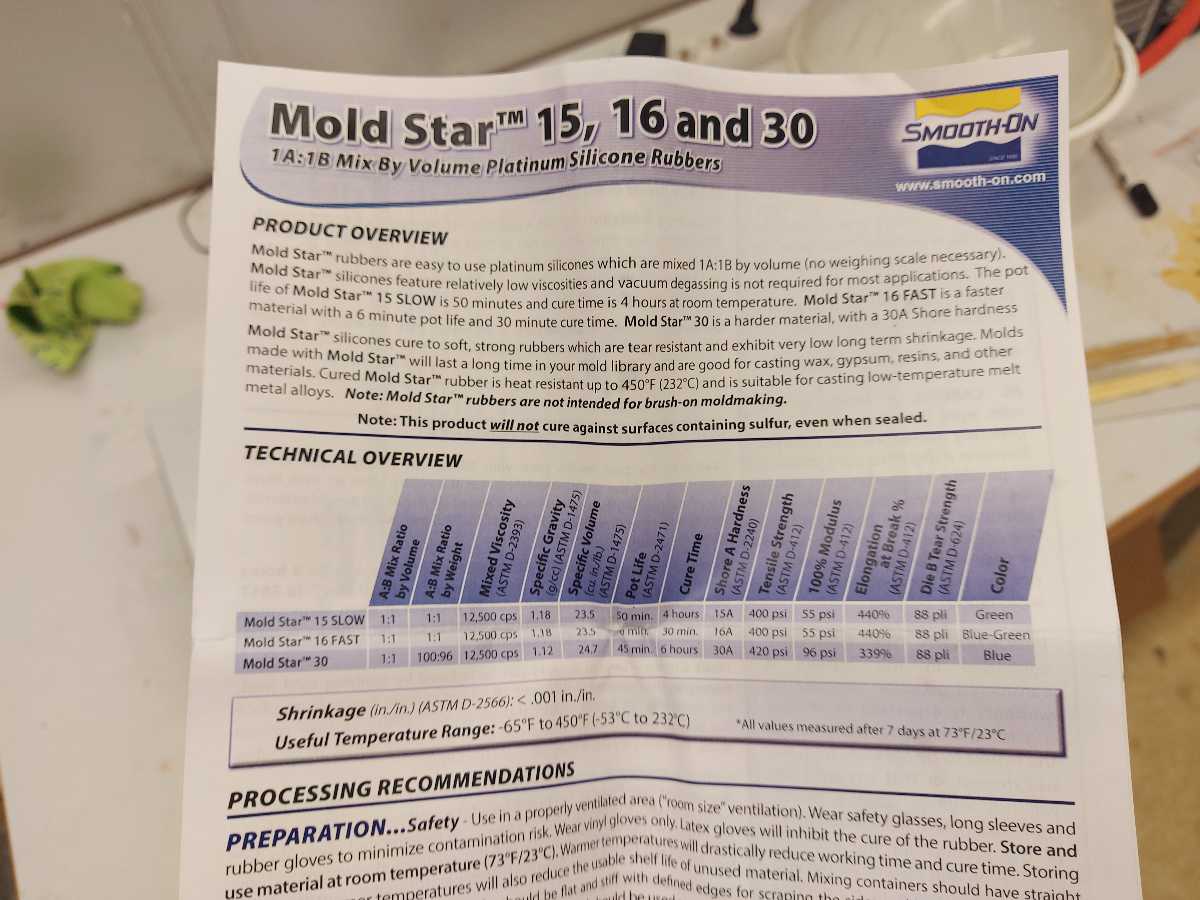
I read the SmoothOn MoldStar mold-making silicone documentation, safety warnings and instructions carefully. The Pot life> and proportions are the essential information. All the following actions should not exceed the given pot life time as the mixture may start curing then.
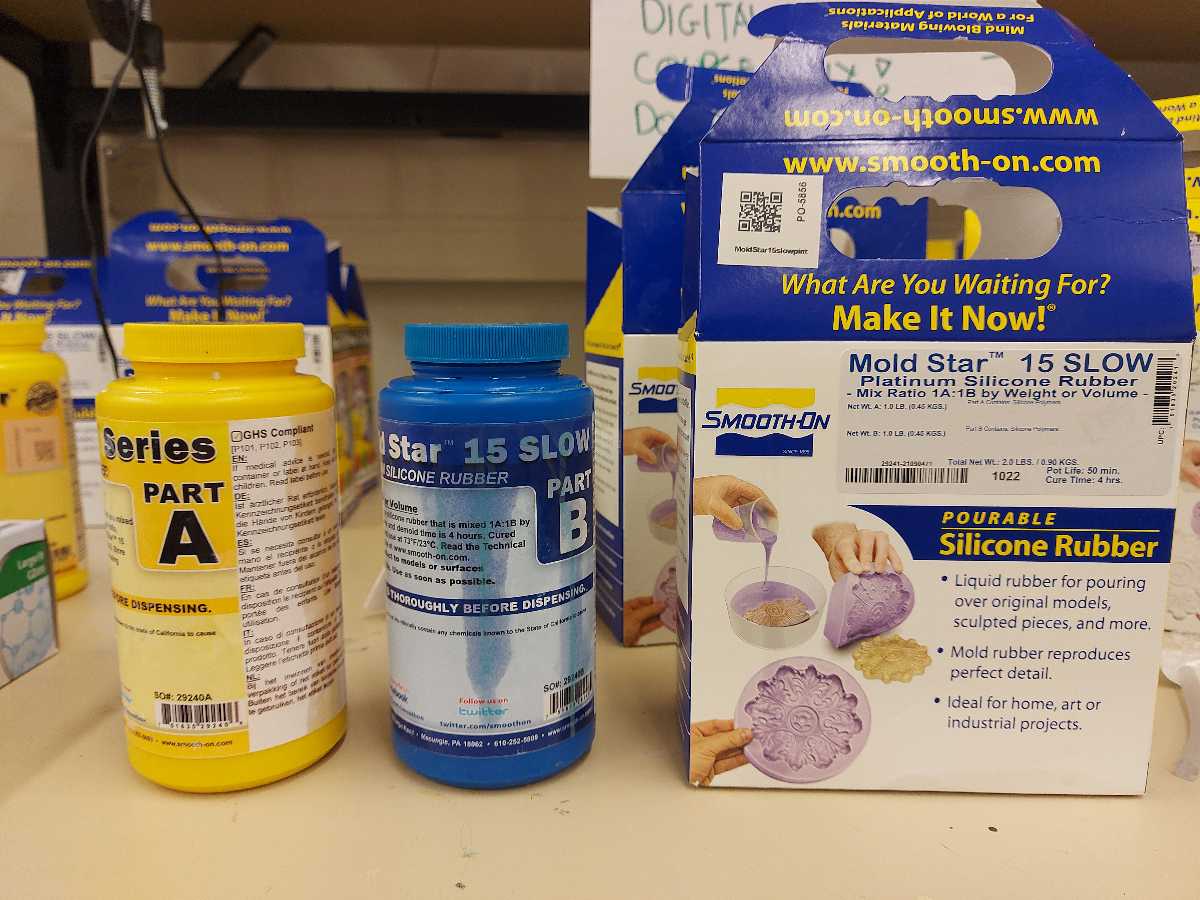
I stirred the silicone parts well with separate clean mixing sticks before proceeding, trying not to produce excessive air bubbles. I poured the parts (50% to 50% by weight according to the instructions) into a cup and mixed them thoroughly. It was crucial to mix the parts well together, otherwise it might not cure
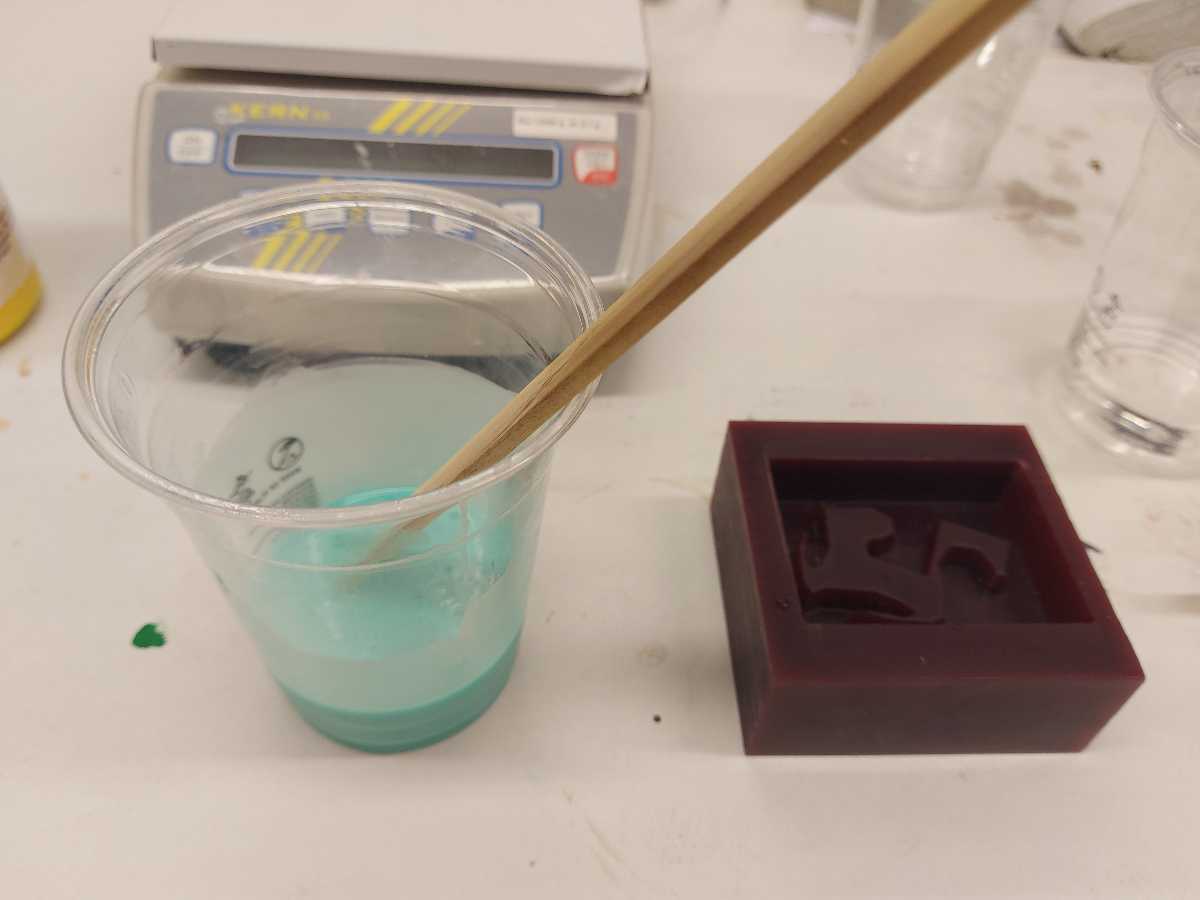
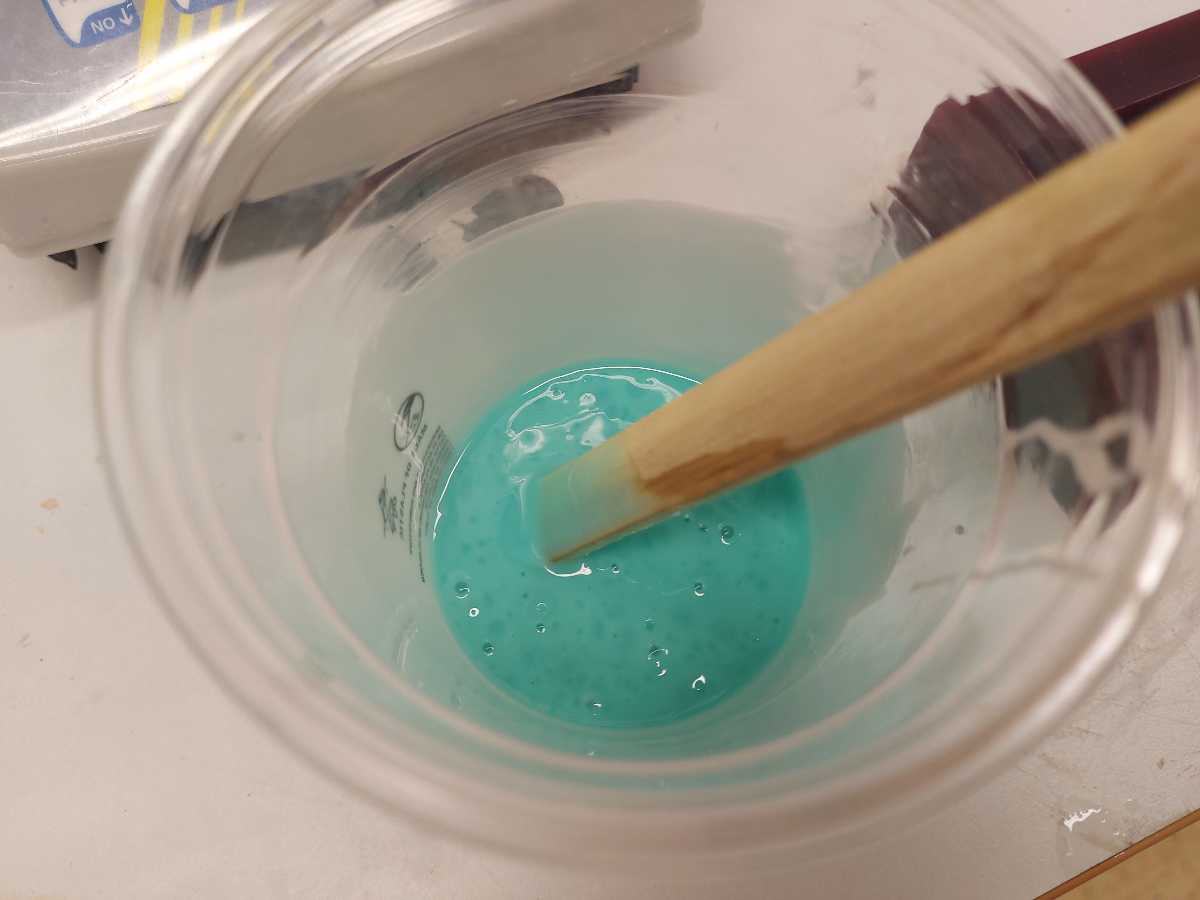
I placed the cup in a vaccum chamber andn proceeded to rise and lower the pressure repeatedly in order to force the air bubbles to the surface. Then I poured the mixture slowly into the mold using beak as thin a spossible and rising the cup high

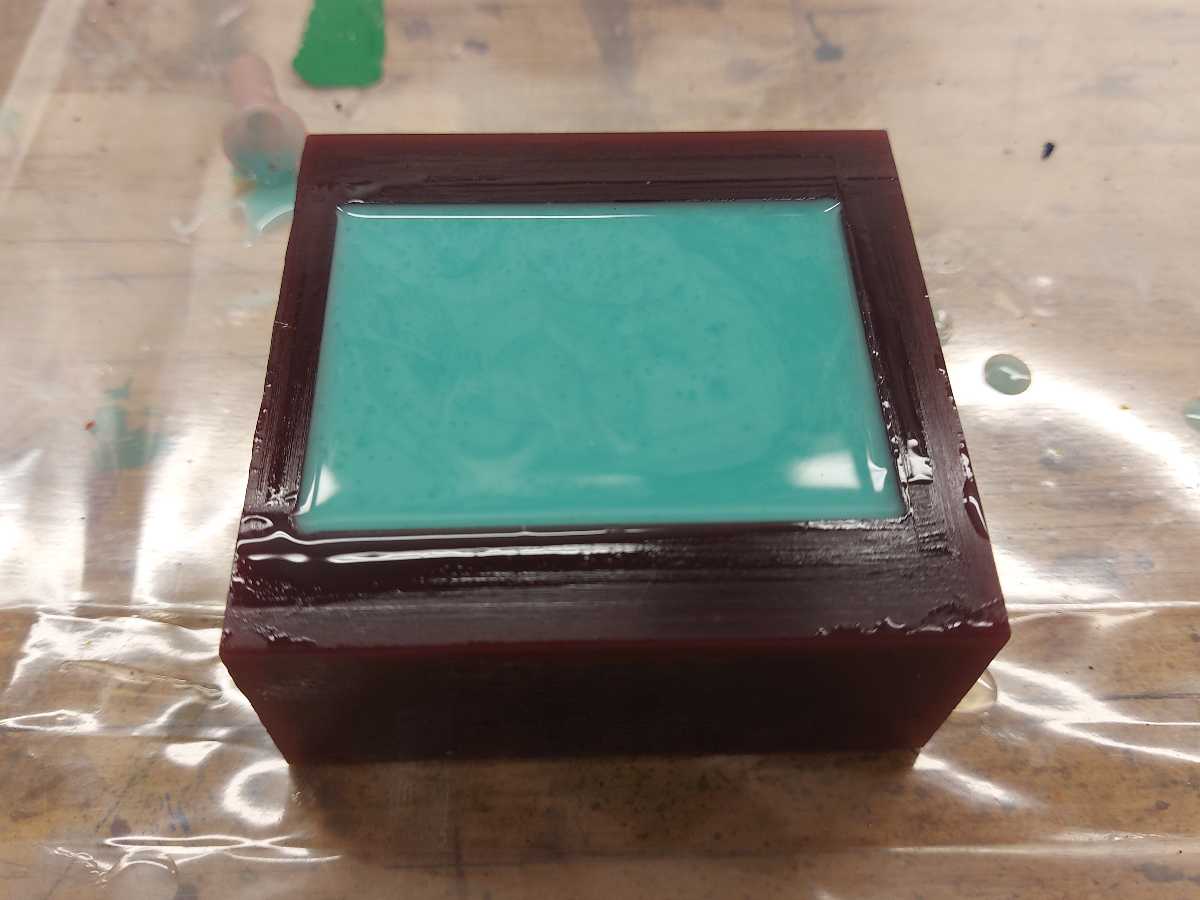
The curing time was 4 hours, after that time I could remove the silicone negative from the wax mold

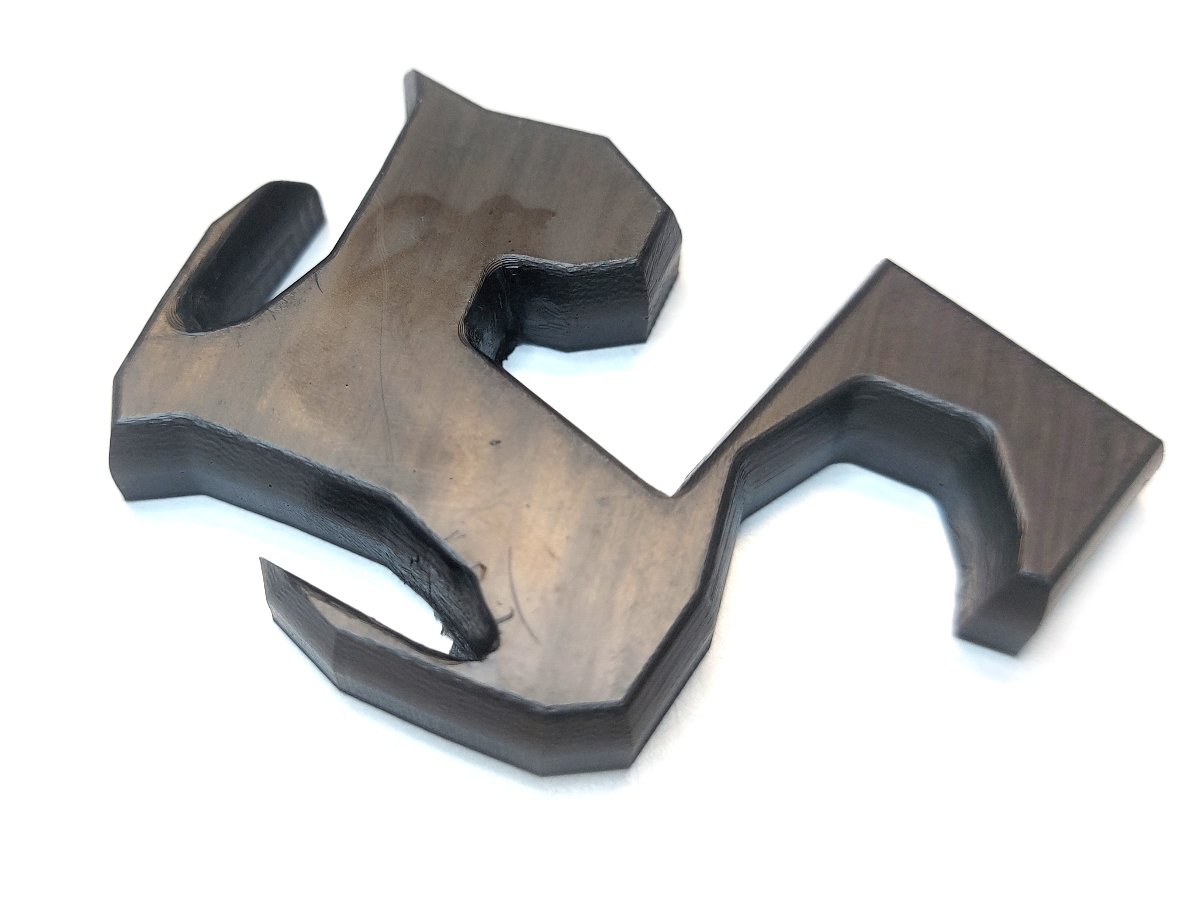
Liquid plastic urethane final part
Again, I started by reading the safety warnings and instructions given by the material manufacturer. The material was Smooth-Cast 305 by SmoothOn. The pot life was 7 minutes, curing 30 minutes.

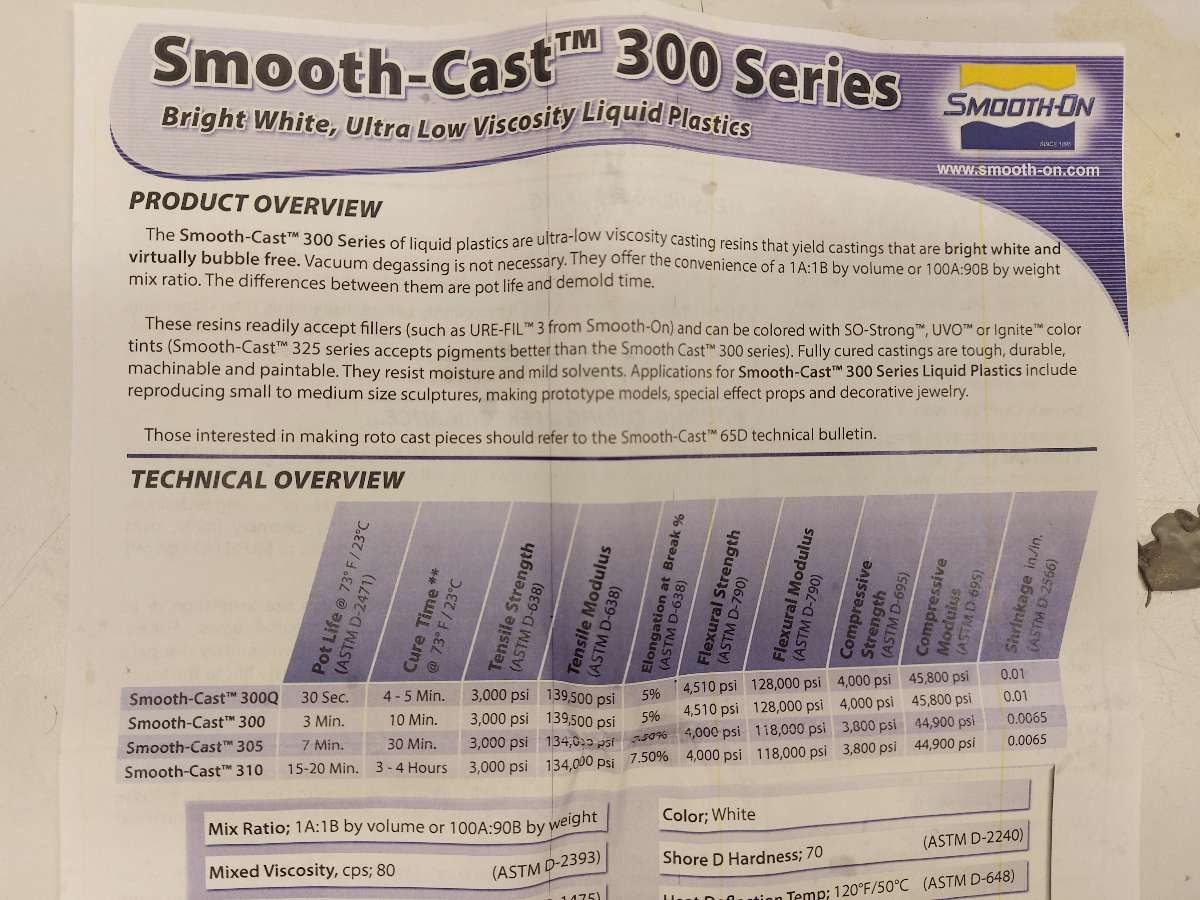
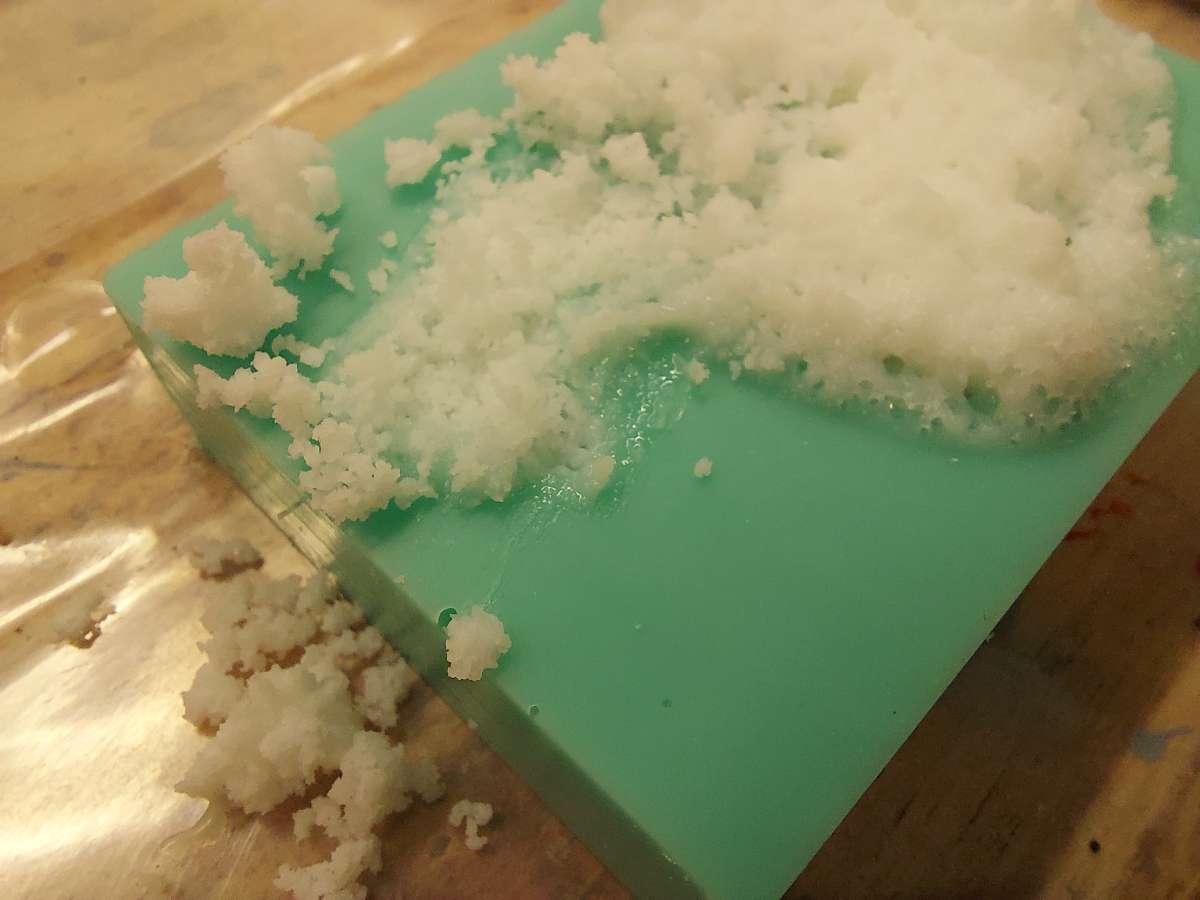
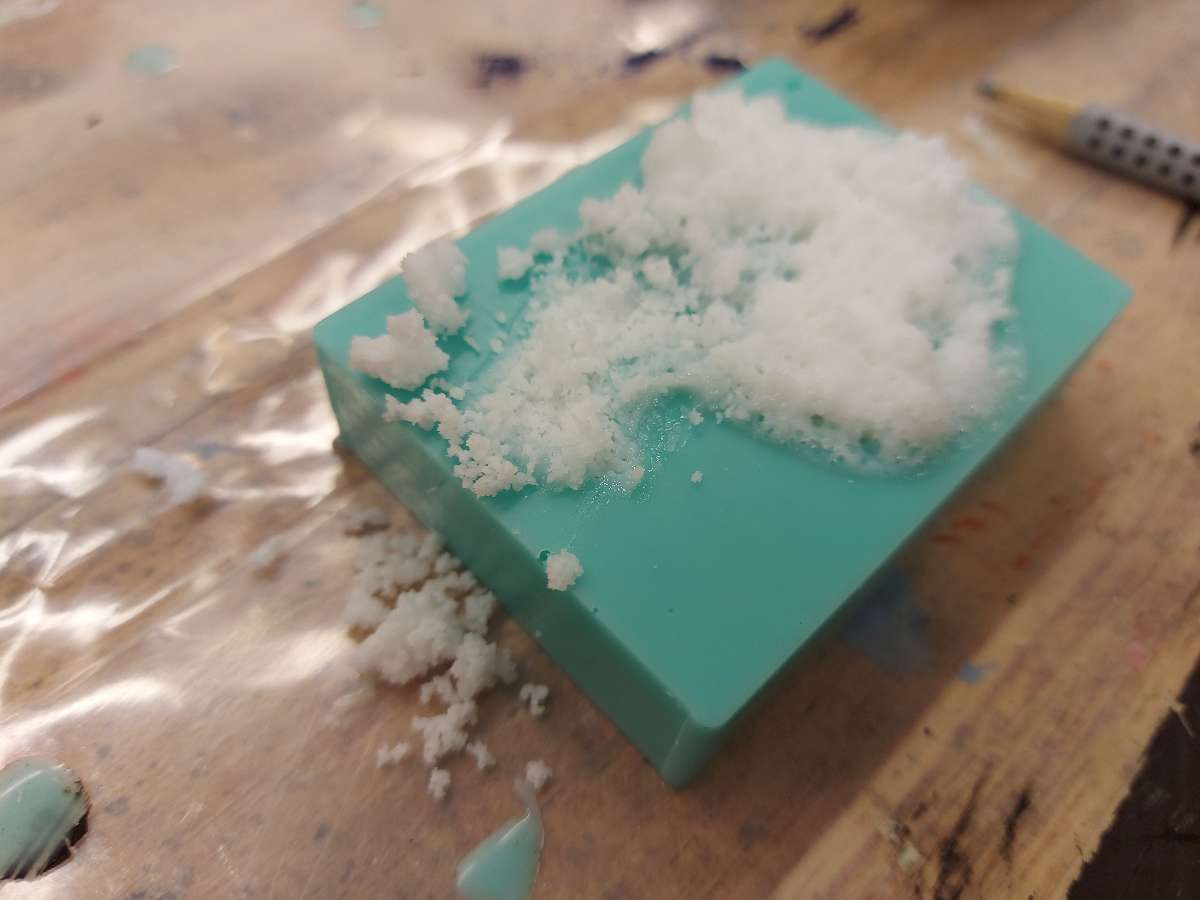
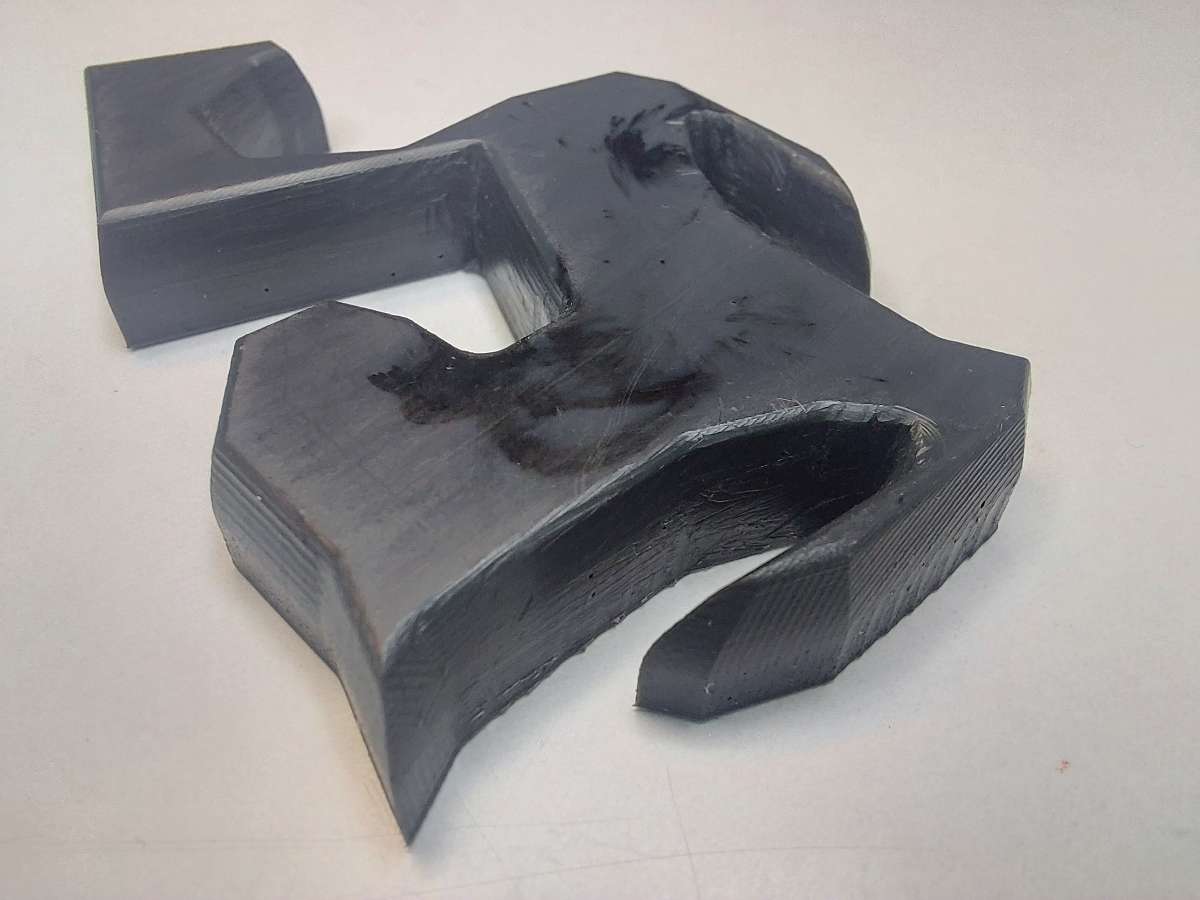
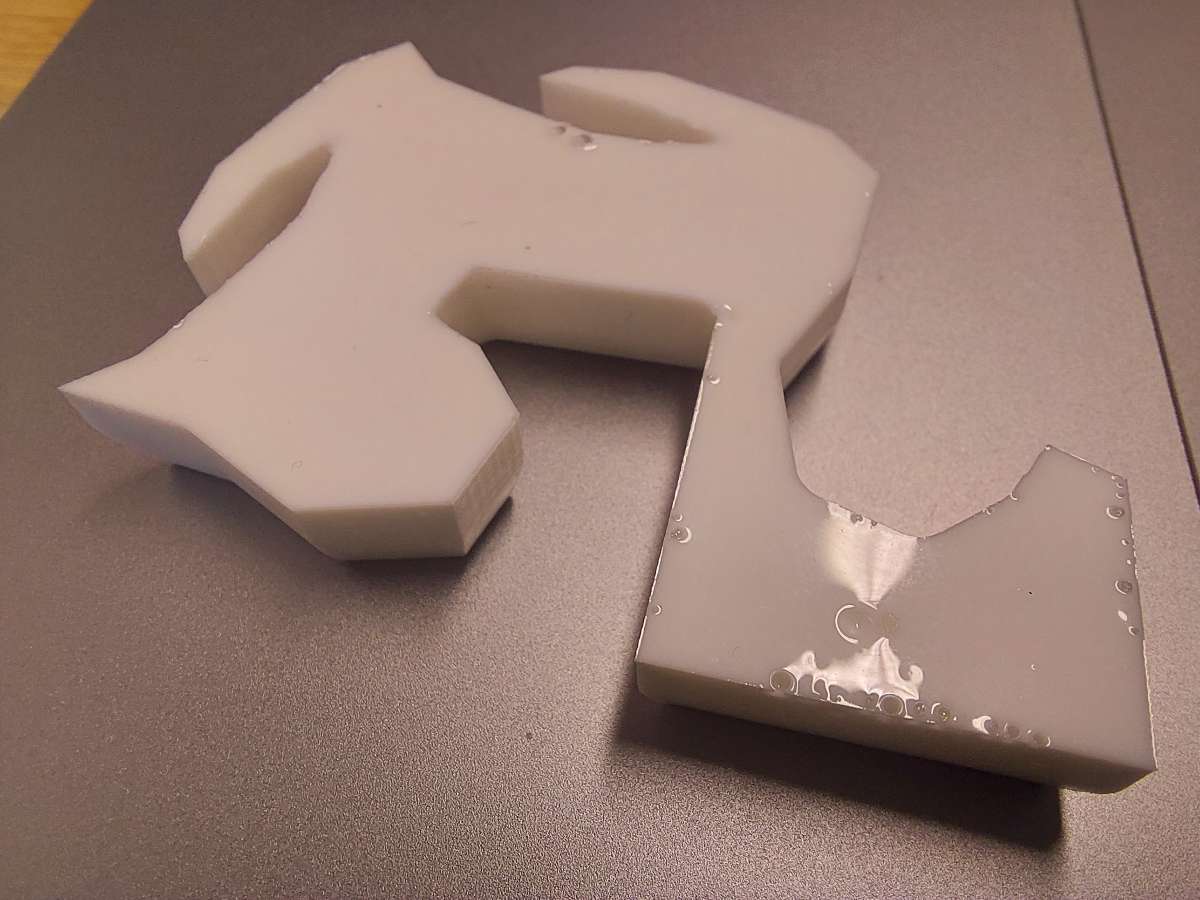
I mixed the parts according to the recommended proprotions (50:50 by volume or 100(A):90(B) by weight. I mixed them and poured to the silicone mold. For reasons unknown, the mixture started foaming badly in the mold and cured as a foamy dust. It was not supposed to happen.
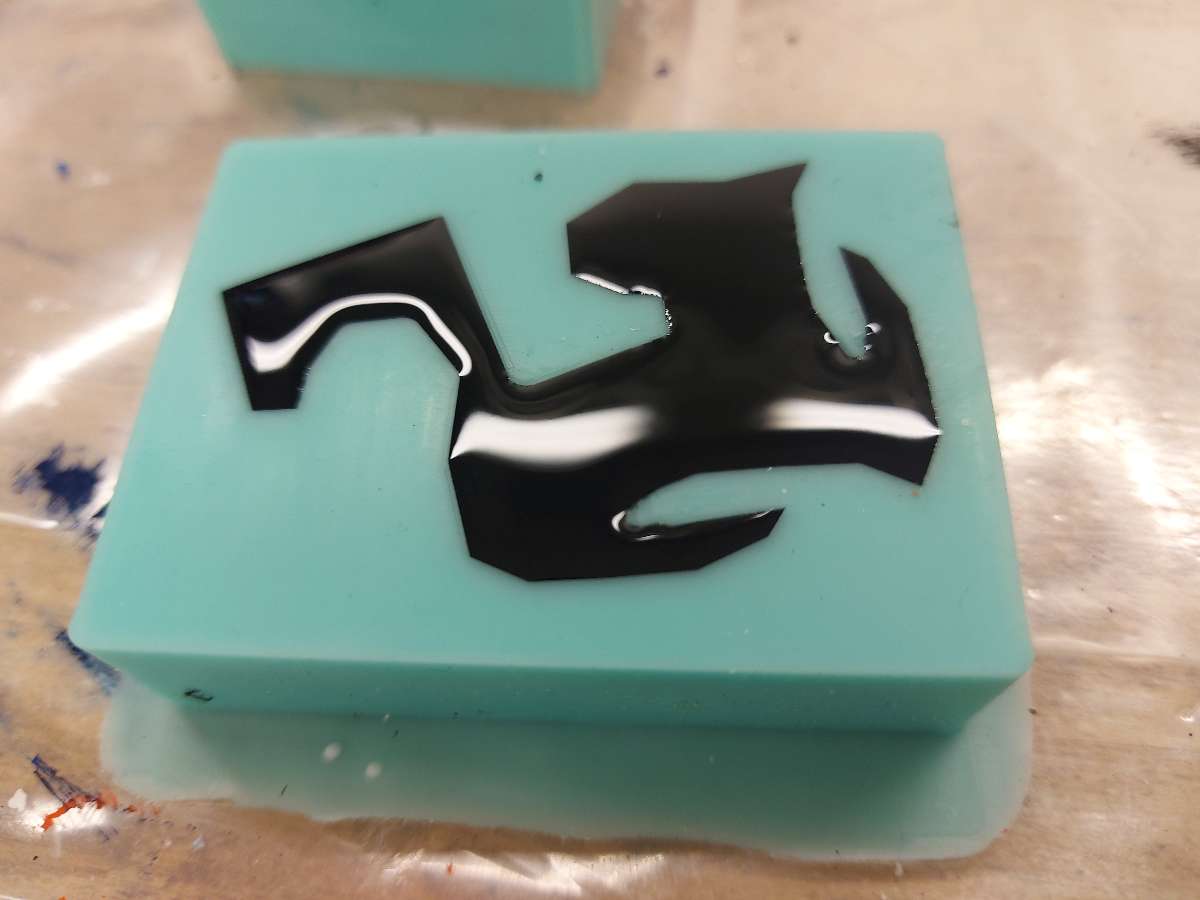
I had to make another silicone mold and repeated the process. This time I added some pigment to the plastic mix - So-Strong black pigment also by SmoothOn, It was compatible and intended to use the Smooth-Cast. The pigment addition should not exceed 0.7-3% of the mixture weight. However the pigment was so thick and the volume and weight of my piece so small that I could not really measure. The curing time was 30 minutes.

Final results

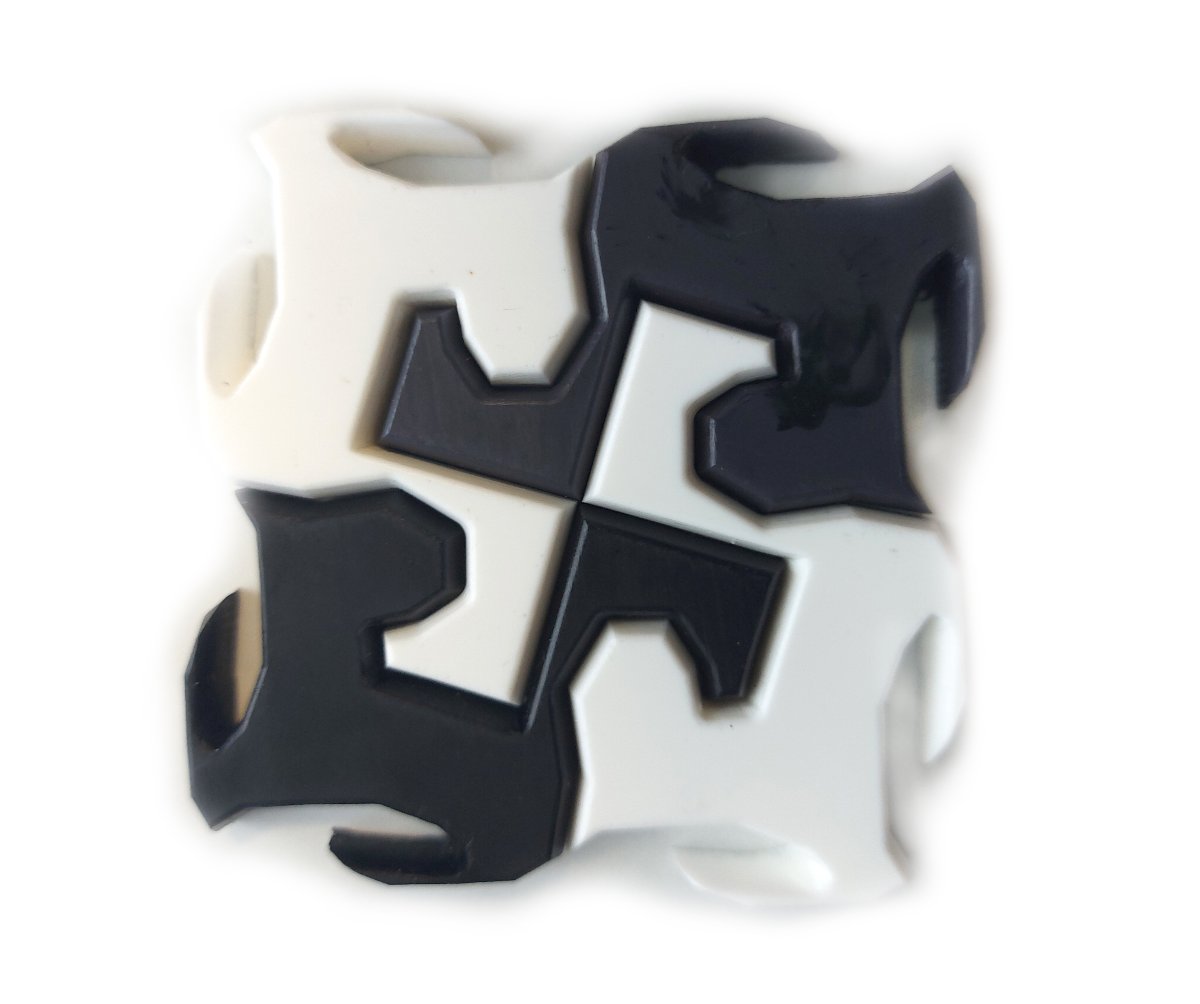
Cats, cats everywhere, Saskia Helinska, 2023

Kitten madness, Saskia Helinska, 2023
Files Download
Group Assignment page
- In the newly opened window, I opened the Post option to pick the milling machine. In the Fusion360 library I searched for the Roland ISO one and added it to my local library. Then I saved the .nc toolpath file to a local folder. The toolpaths should be exported separately for each tool, so one for roughing and one for both of the finishing operations.