Computer Controlled Cutting
Computer controlled cutting is a method of subtractive fabrication and this week was about manufacturing techniques using lasercutters and vinyl cutters
Group assignment page
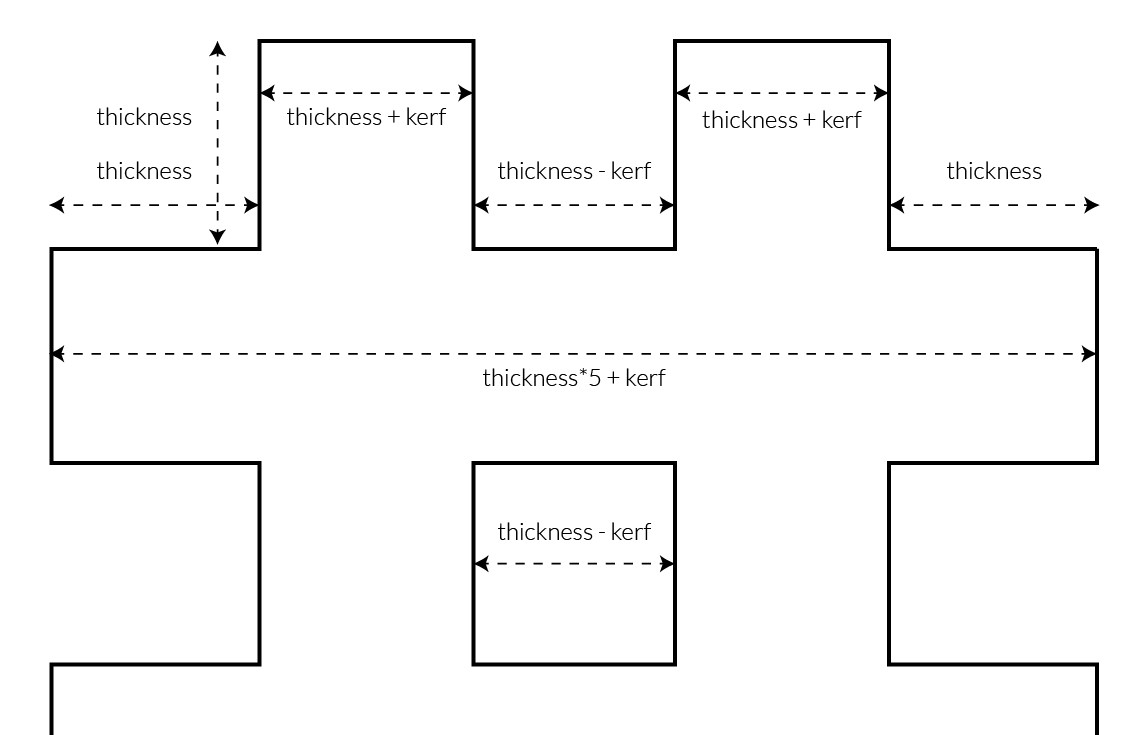
It covers the machine usage and details setting the parameters of Speed, Power and Frequency. There is also the process of calculating the KERF value described
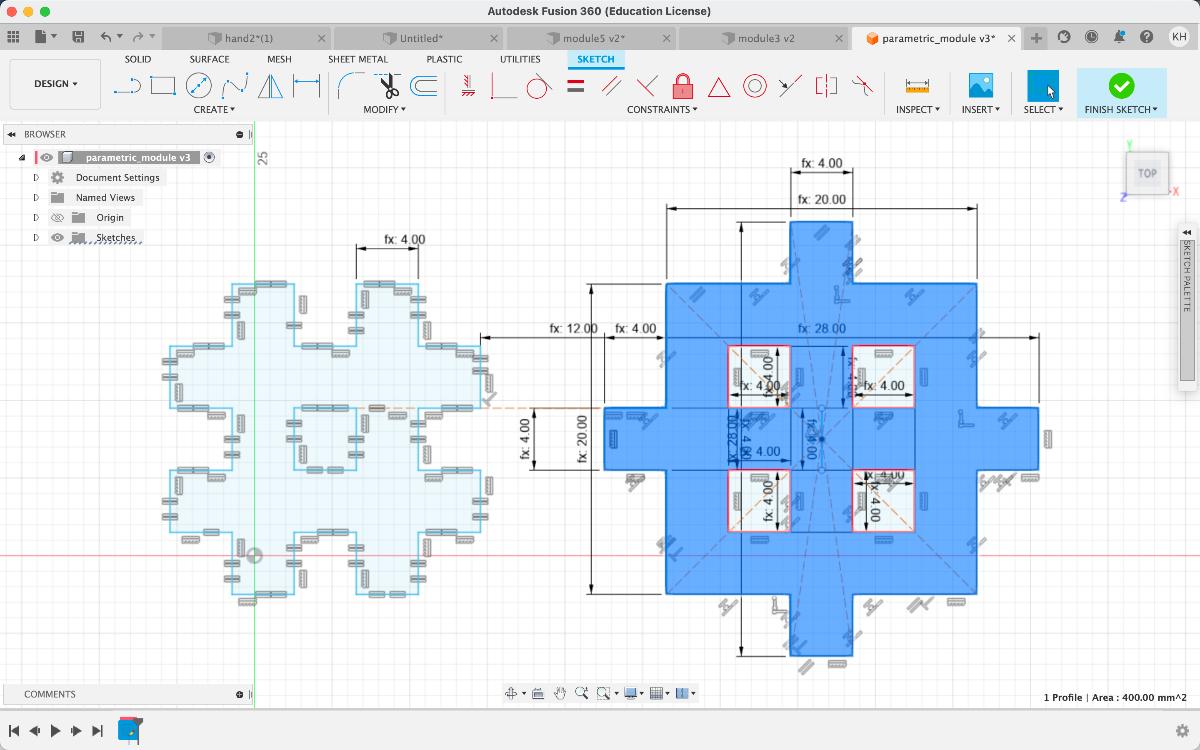
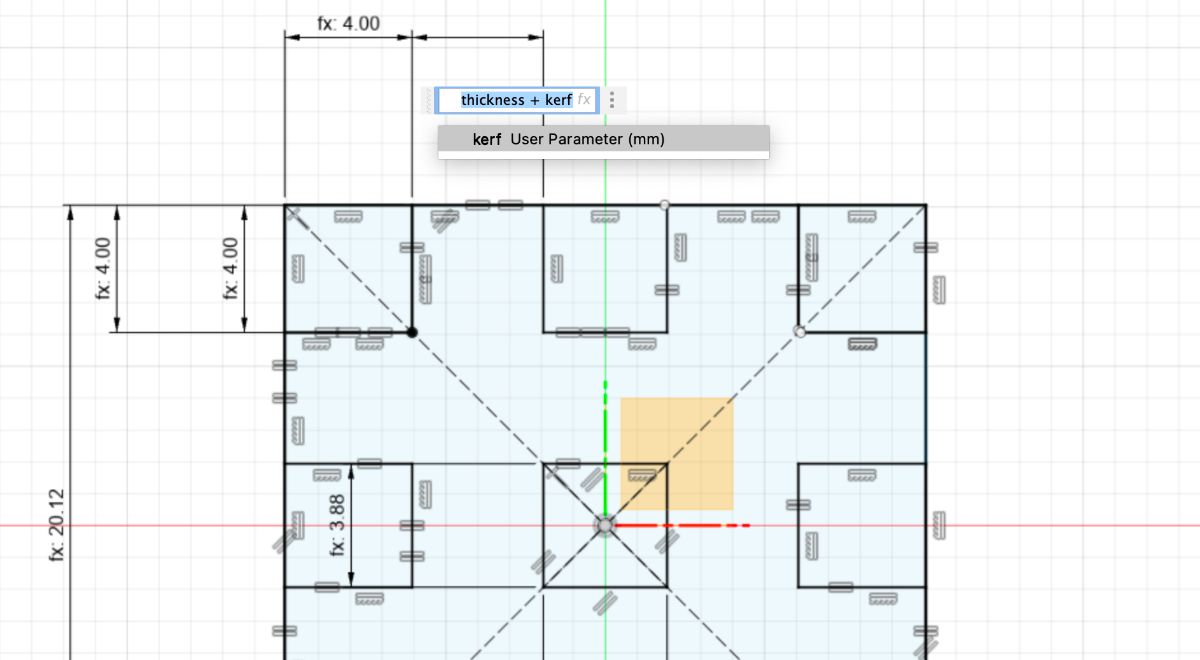
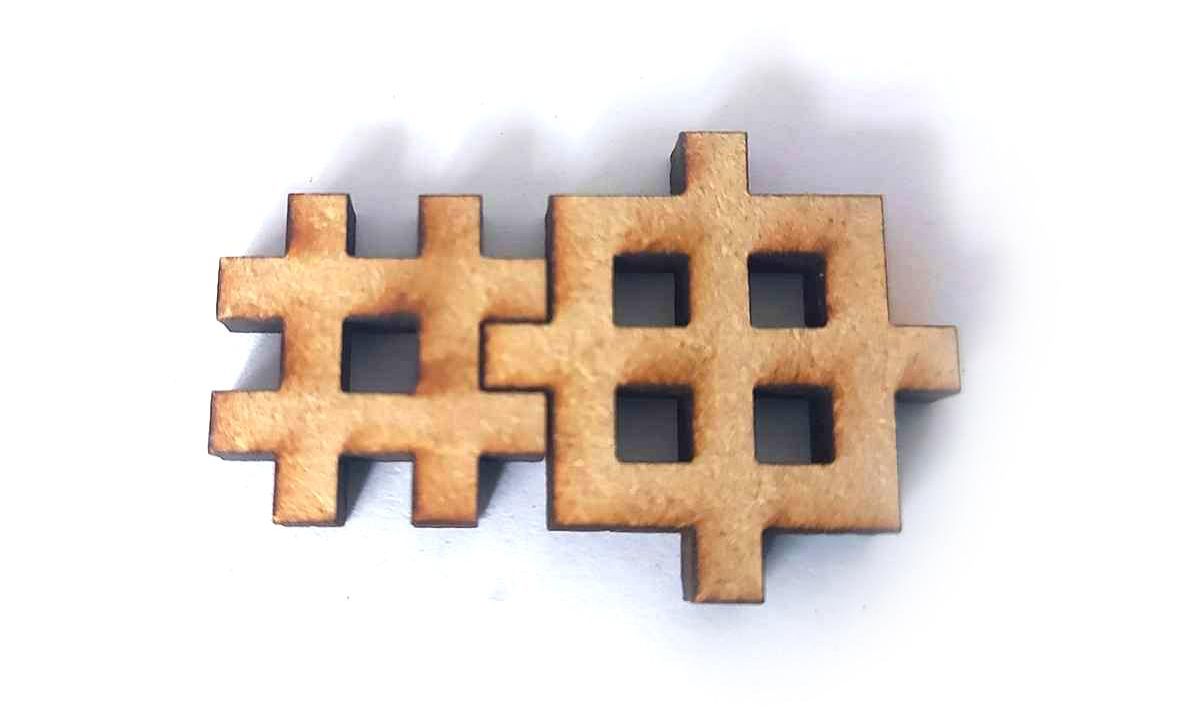
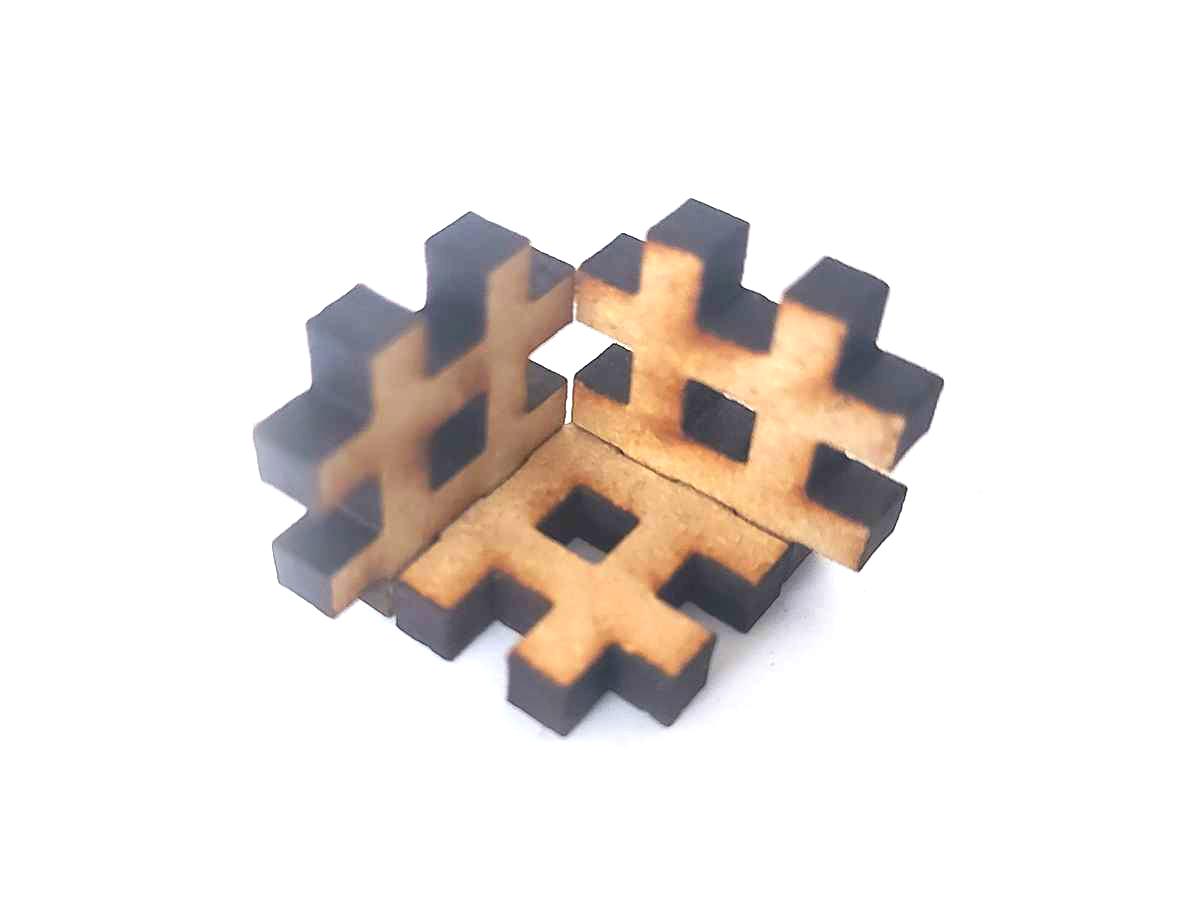
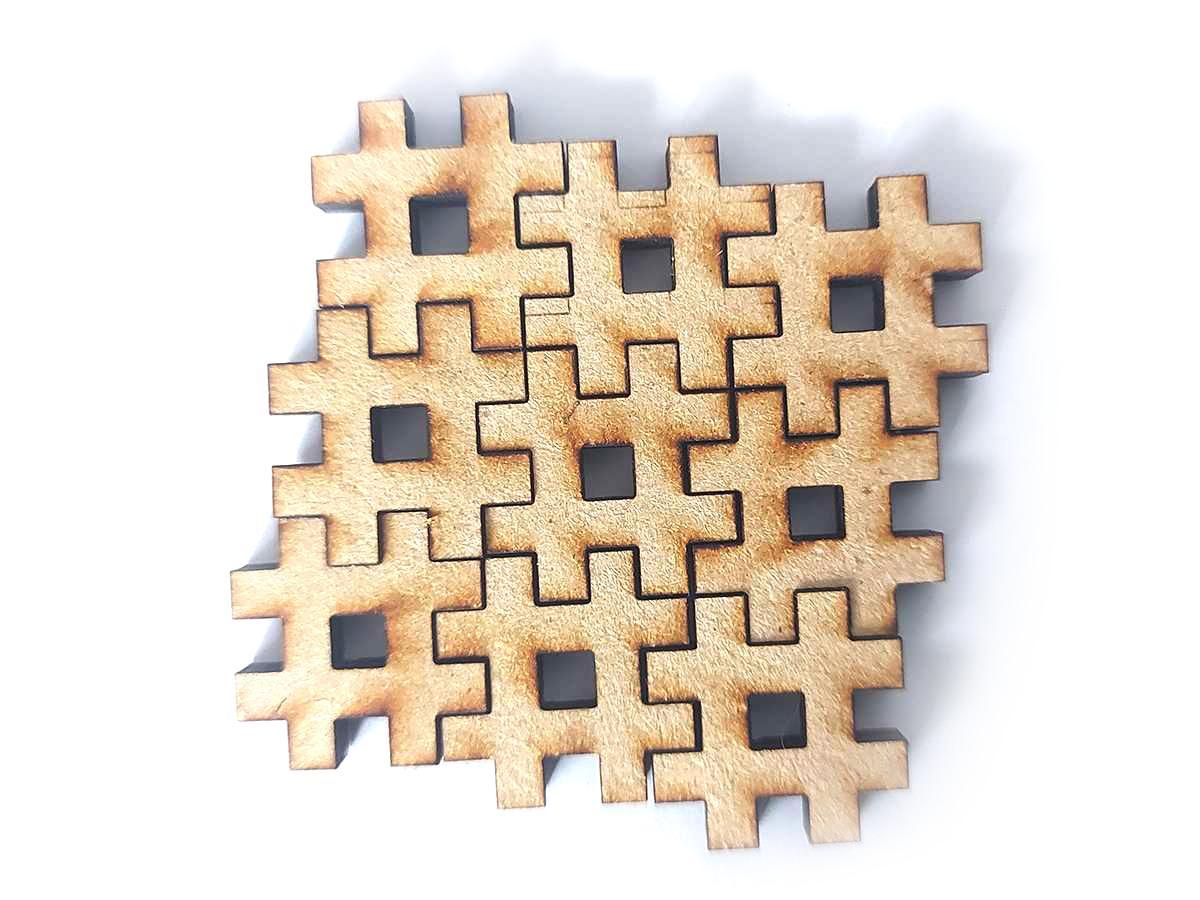
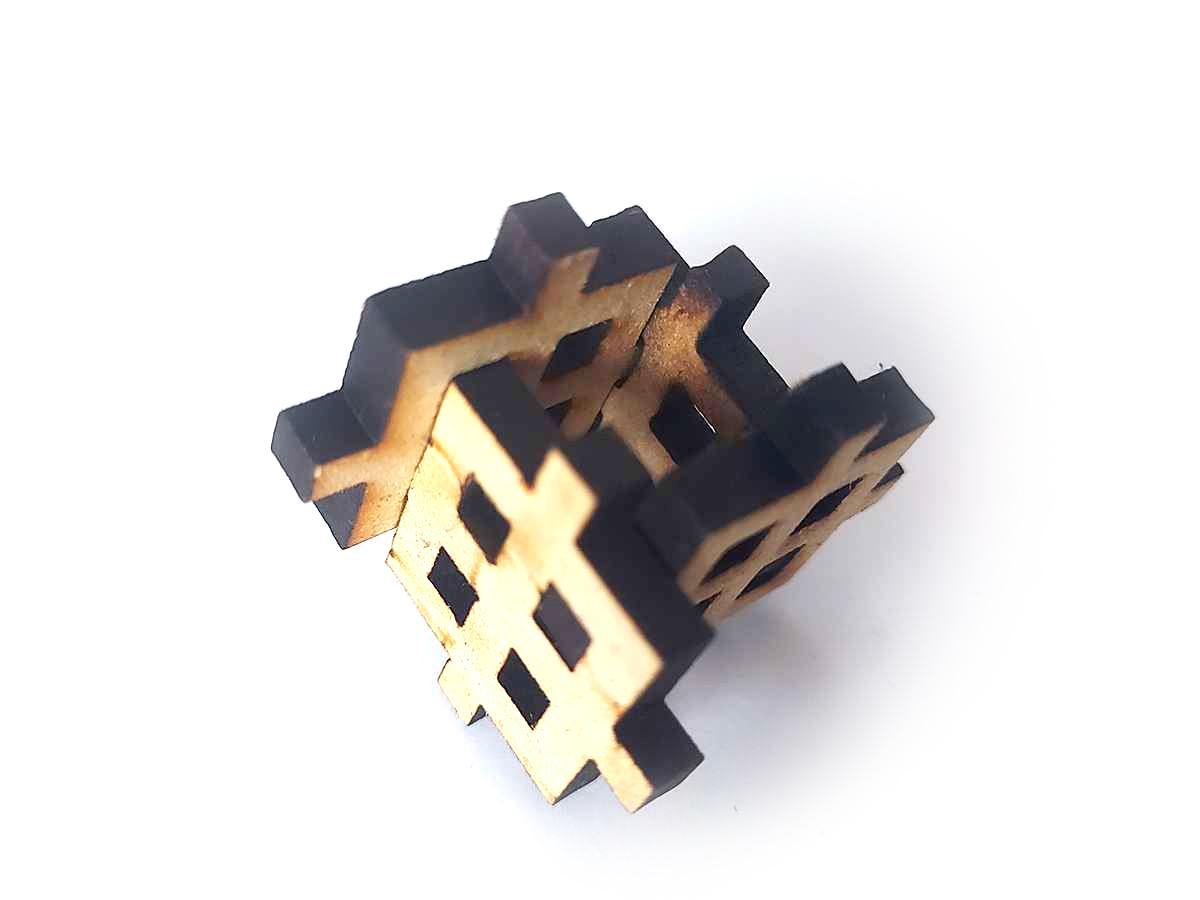
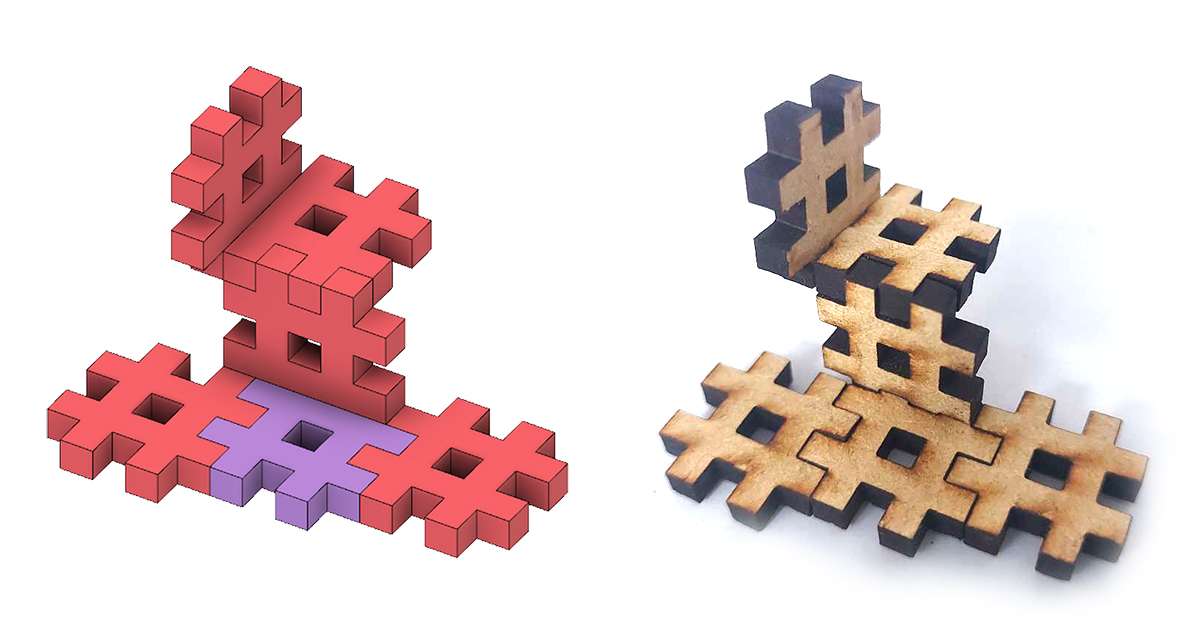
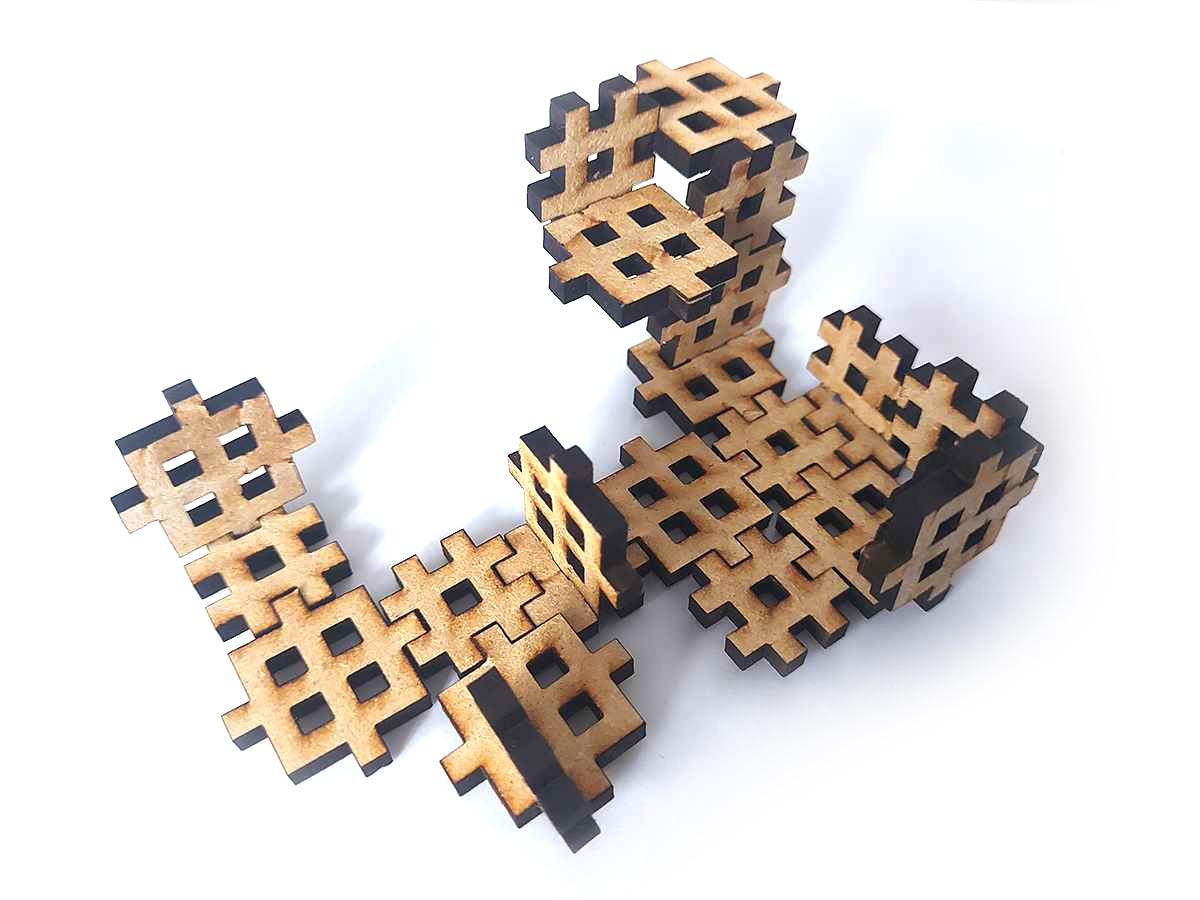
Modelling a parametric module
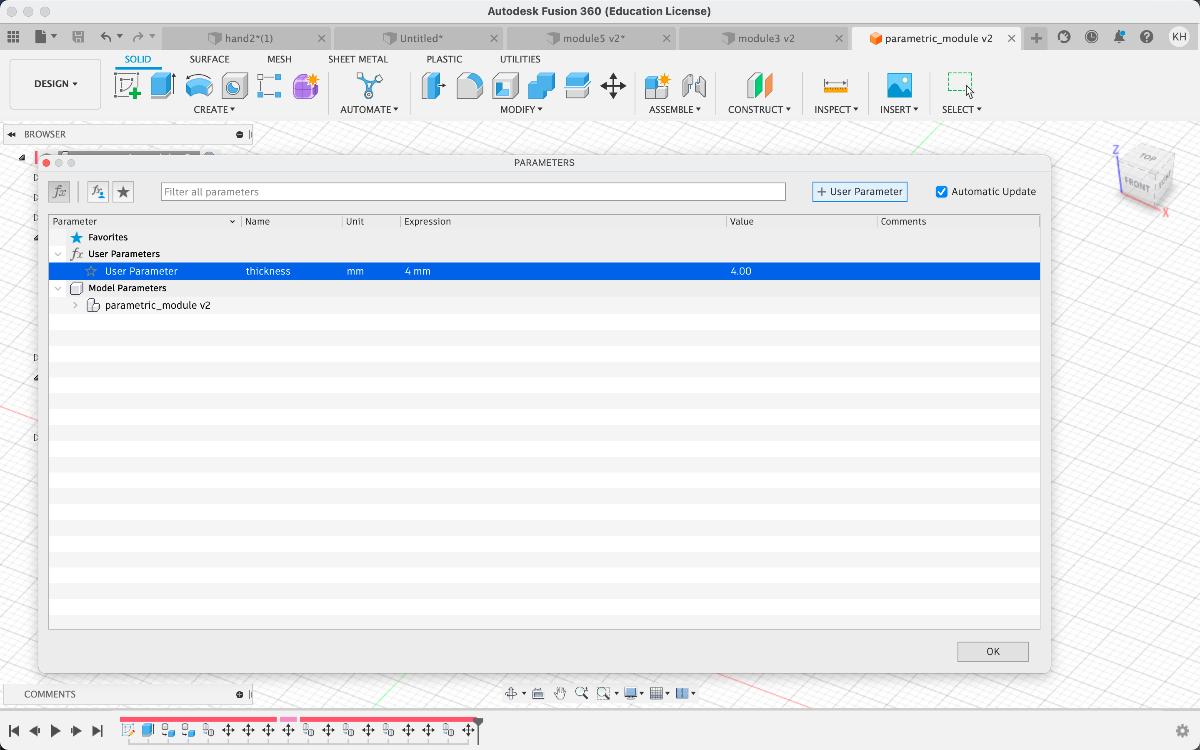
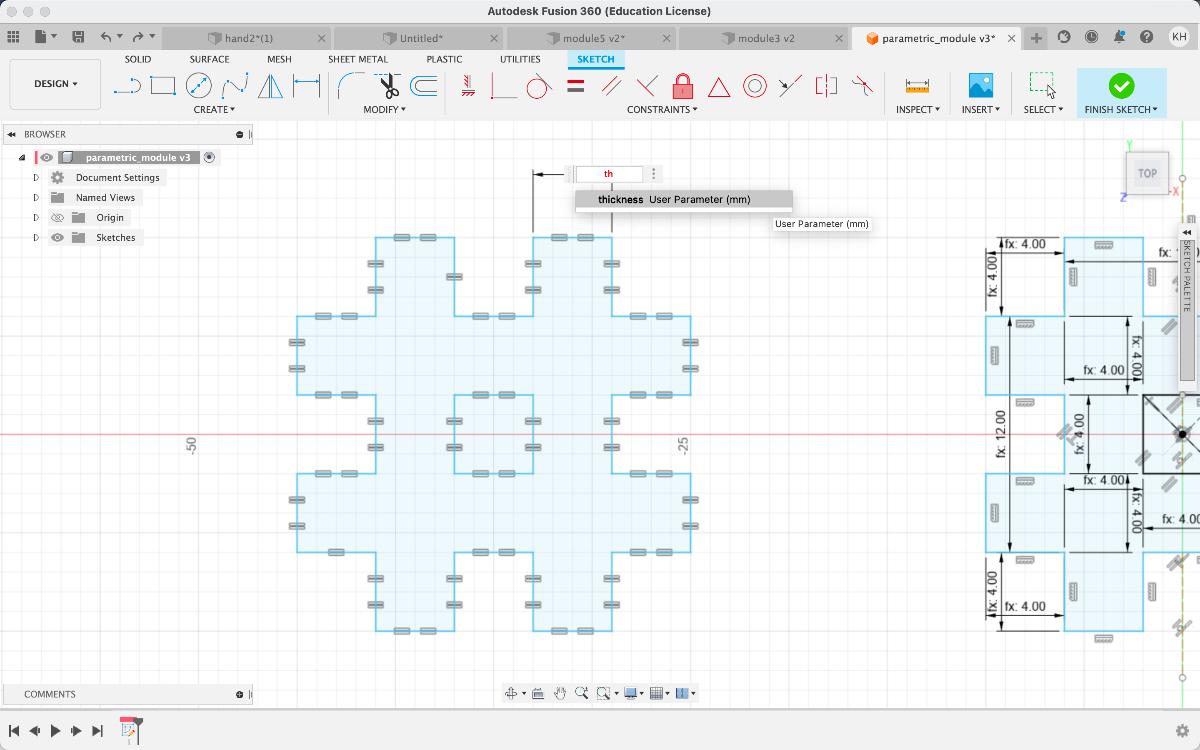
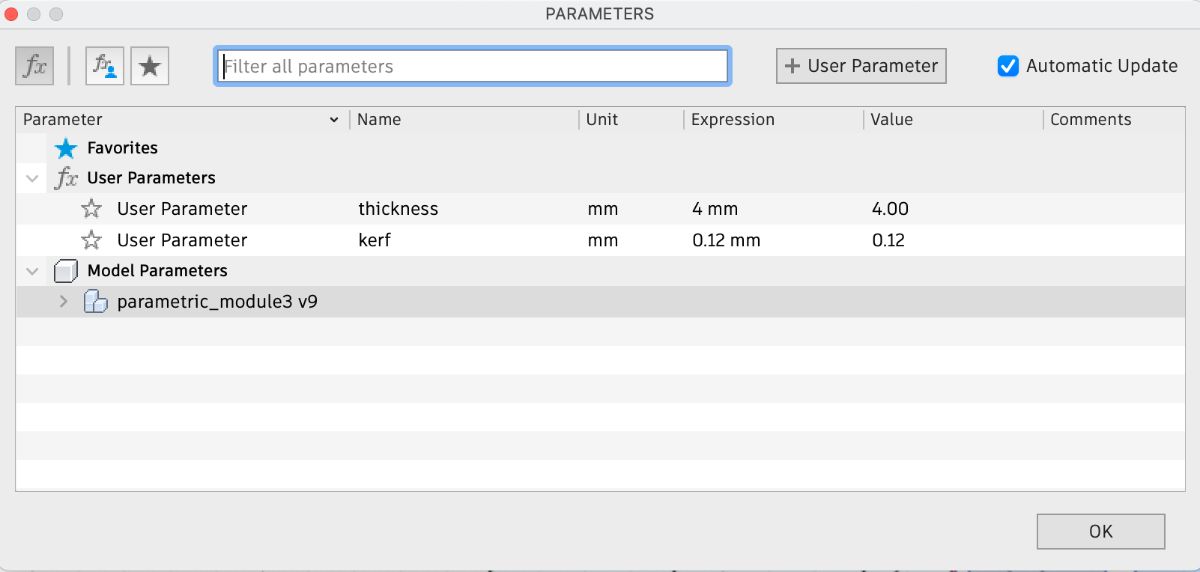
I set up a user-defined parameter "thickness" with the material thickness in mm. I initially set 4 mm with the possibility to change later with the use of the parameter option
I drew a rectangle. In the width and height field I typed "thickness" instead of a value and selected the user-defined parameter from the drop-down menu

The value should automatically set to 4mm, with the 'fx' prefix that indicates an expression or parameter
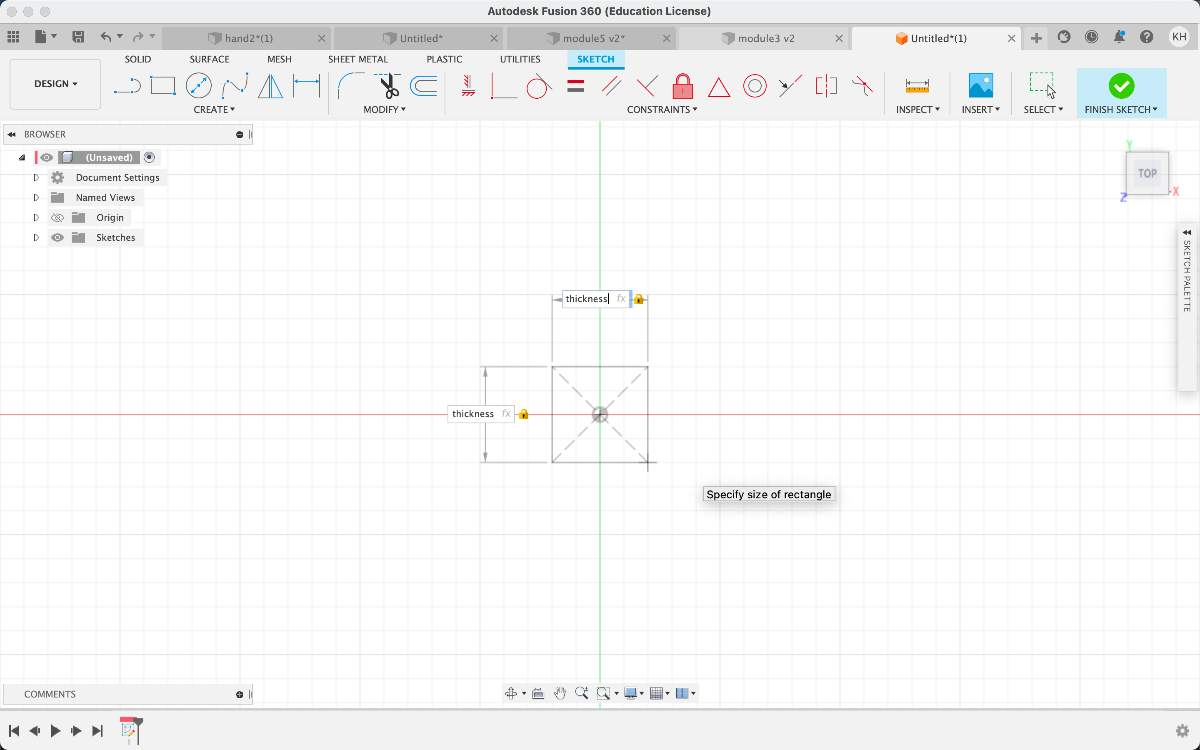
I drew another rectangle. This time typing "thickness*3" to multiply the material thickness value
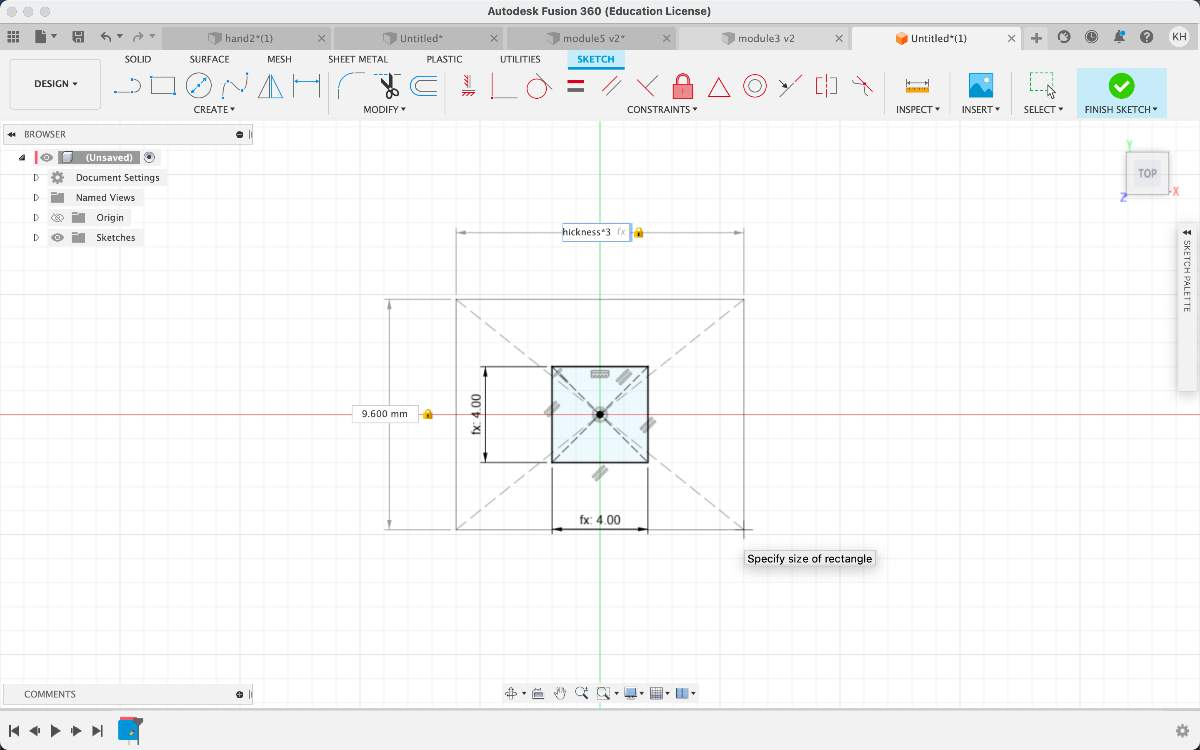
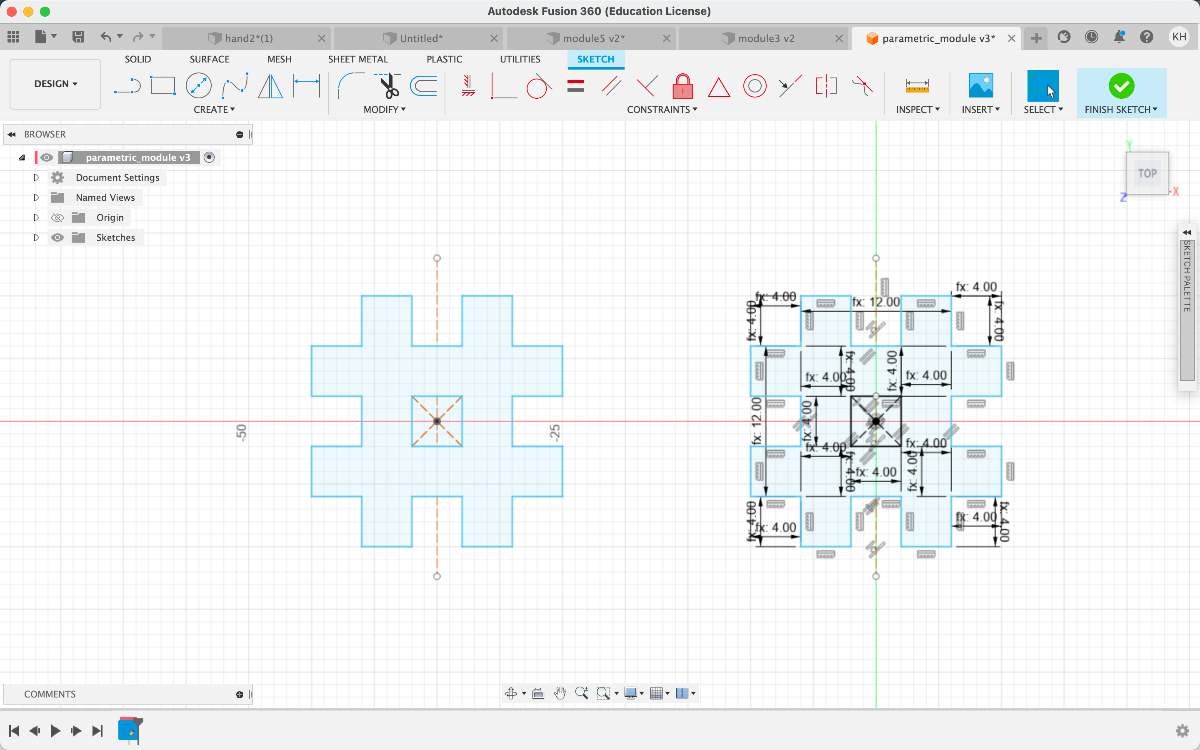
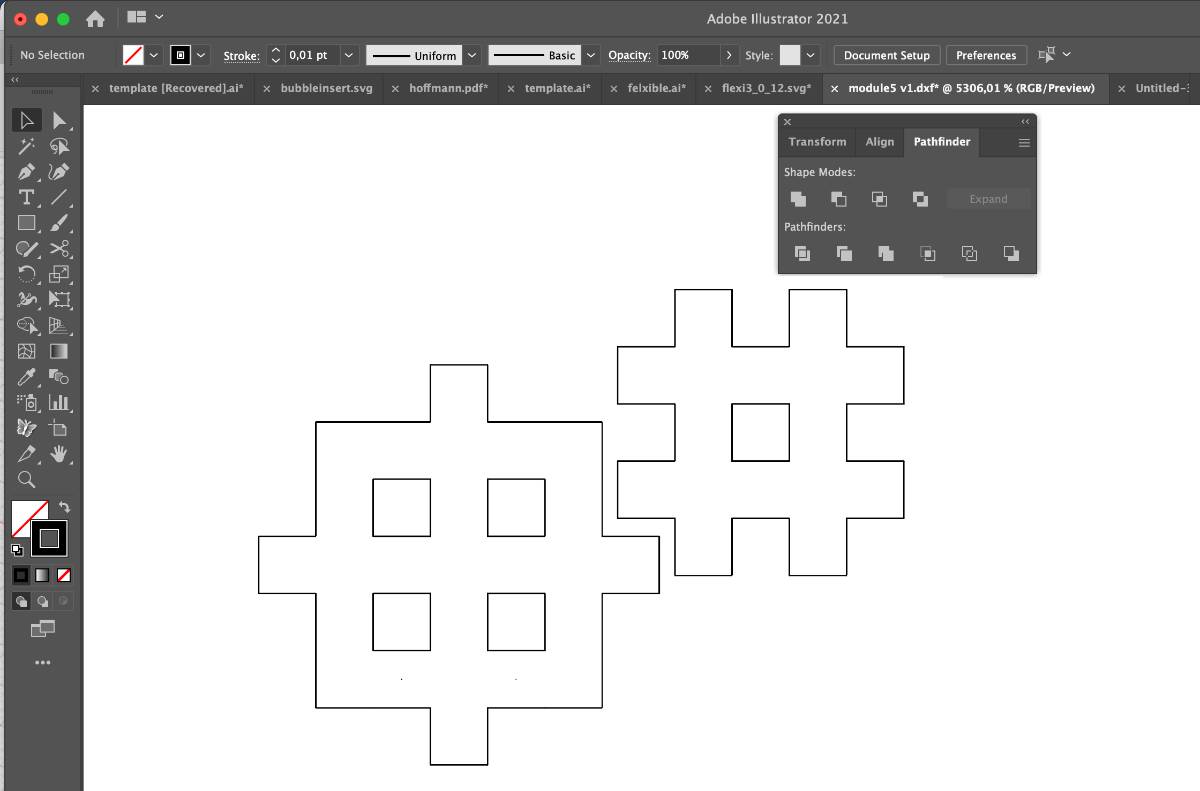
I drew the intended shape always using the parameters
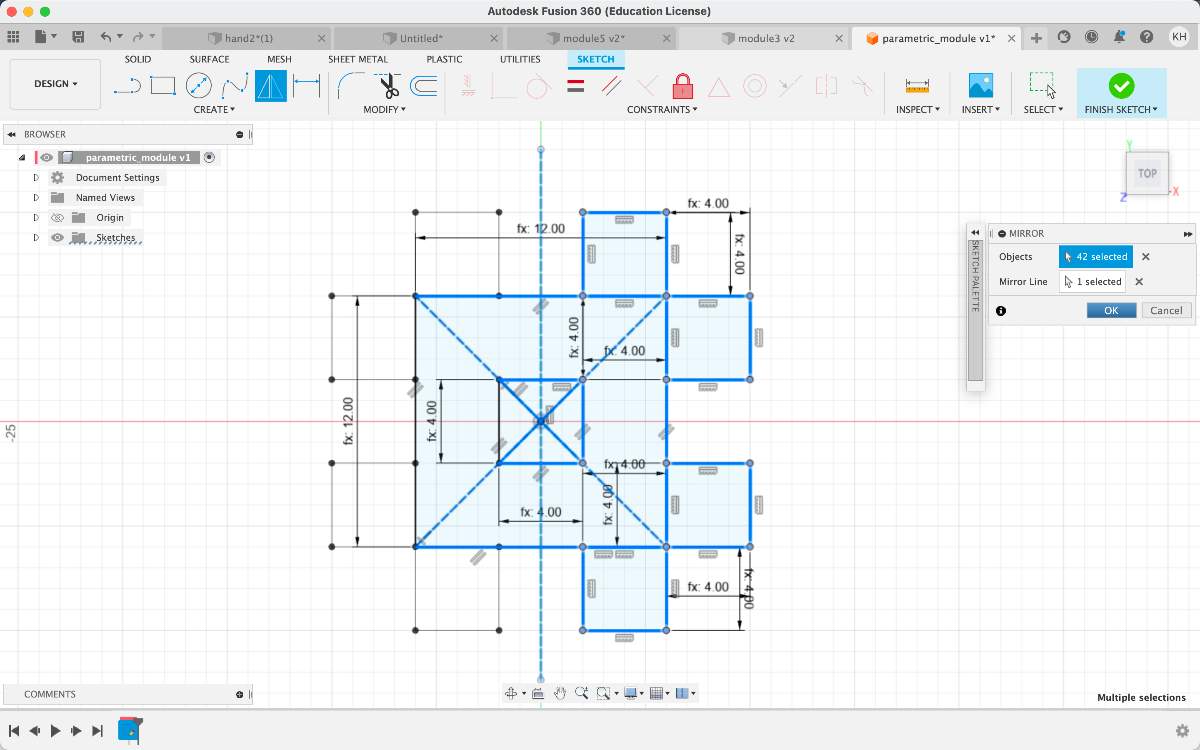
I drew a vertical line in the middle. I set it up to construction
I used the mirror option to symmetrically copy the geometry across the construction line
I used Trim to remove the unnecessary curves
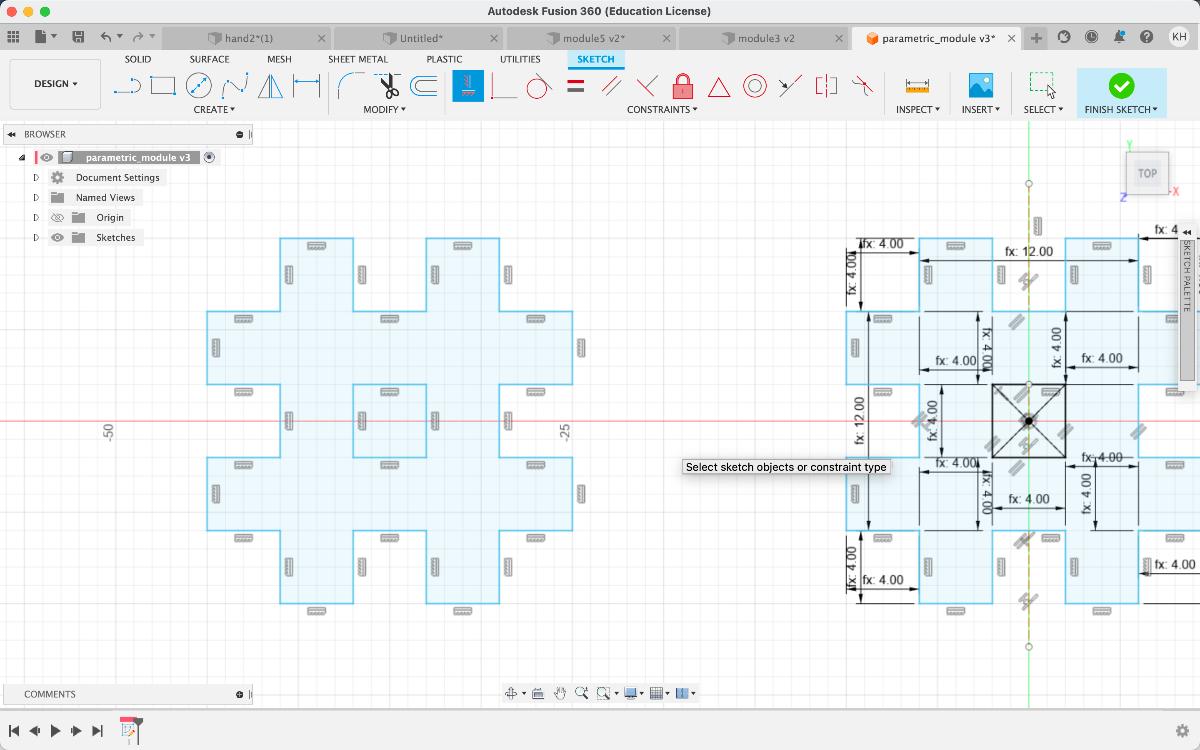
I must have accidentally removed some of the constraints defining the shape in the trimming process and it was no longer fully parametrically-controlled
I deleted all the dimensions and constraints to start over
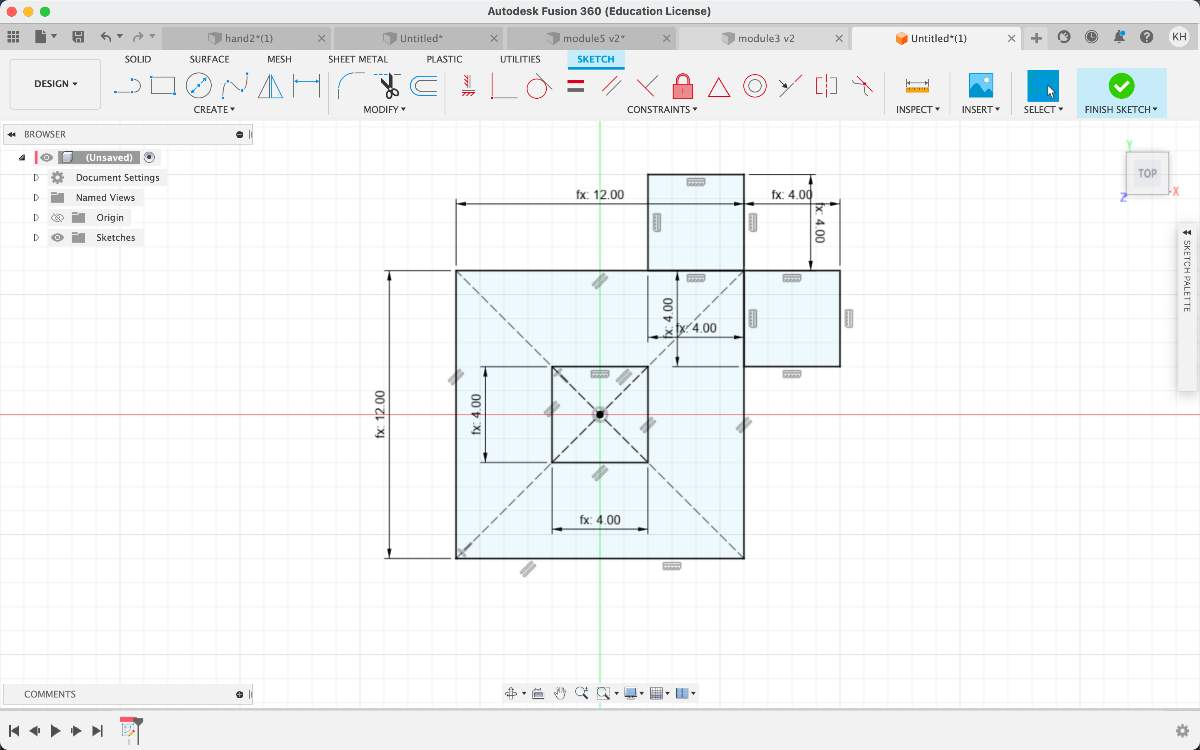
I selected all the curves and applied equal constraint
I applied dimension (D) typing "thickness" in the field to one of the curves. With the equal constraints applied, the other curves should inherit this value
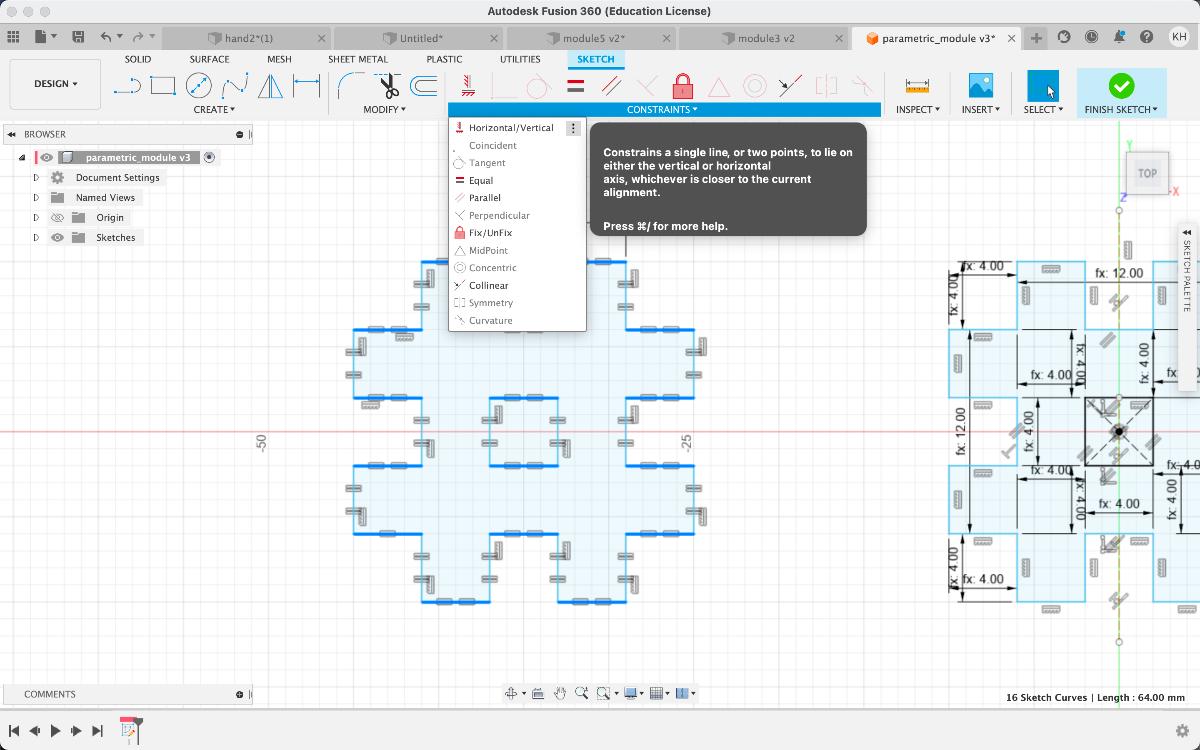
I applied vertical/horizontal constraint to all the curves
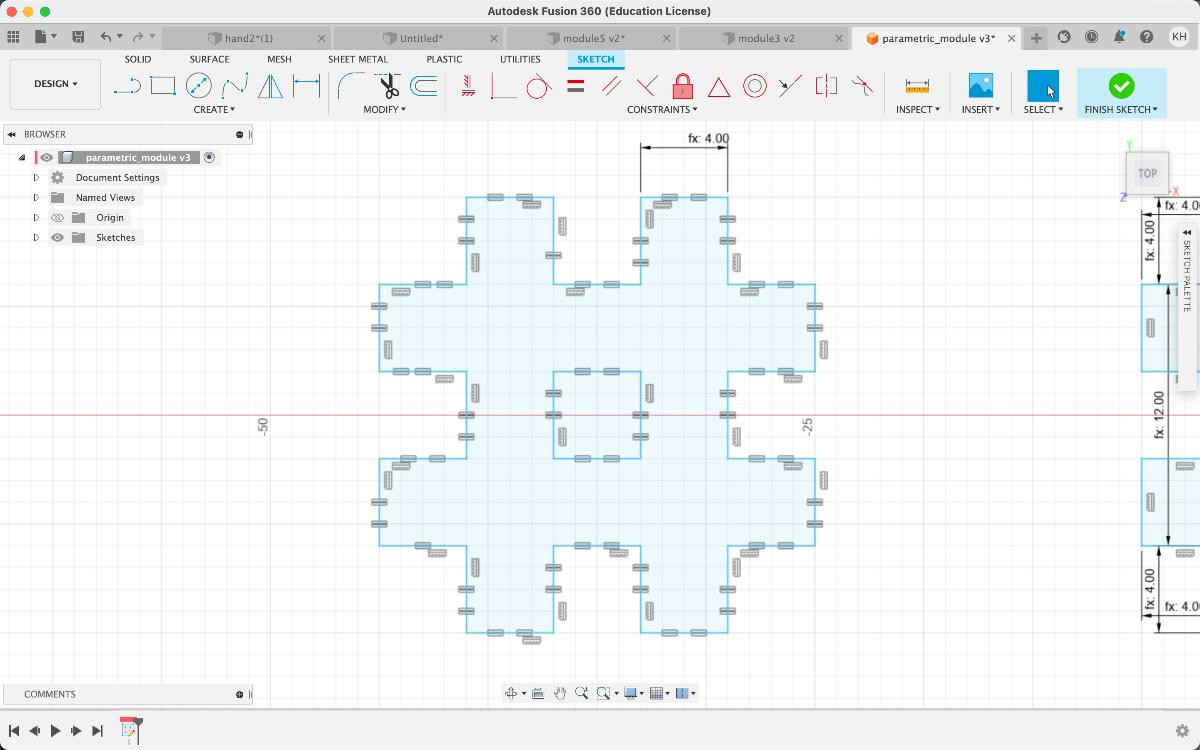
Now it should work and scale all the curves uniform
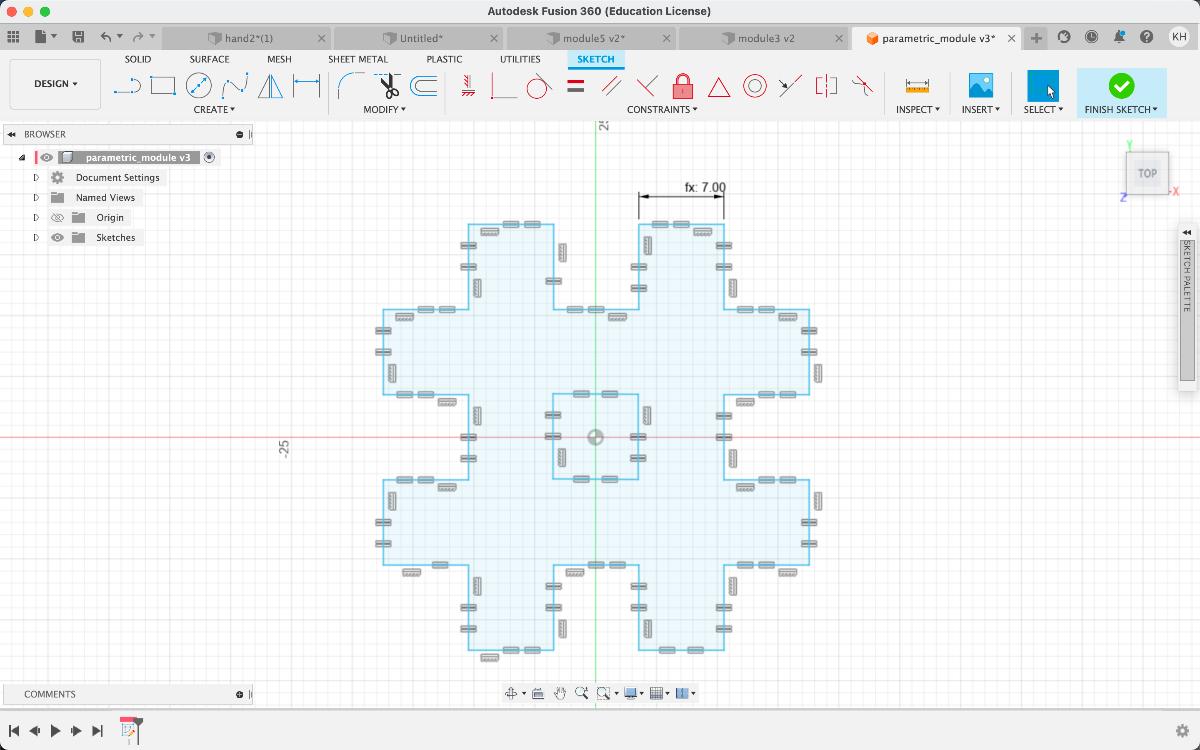
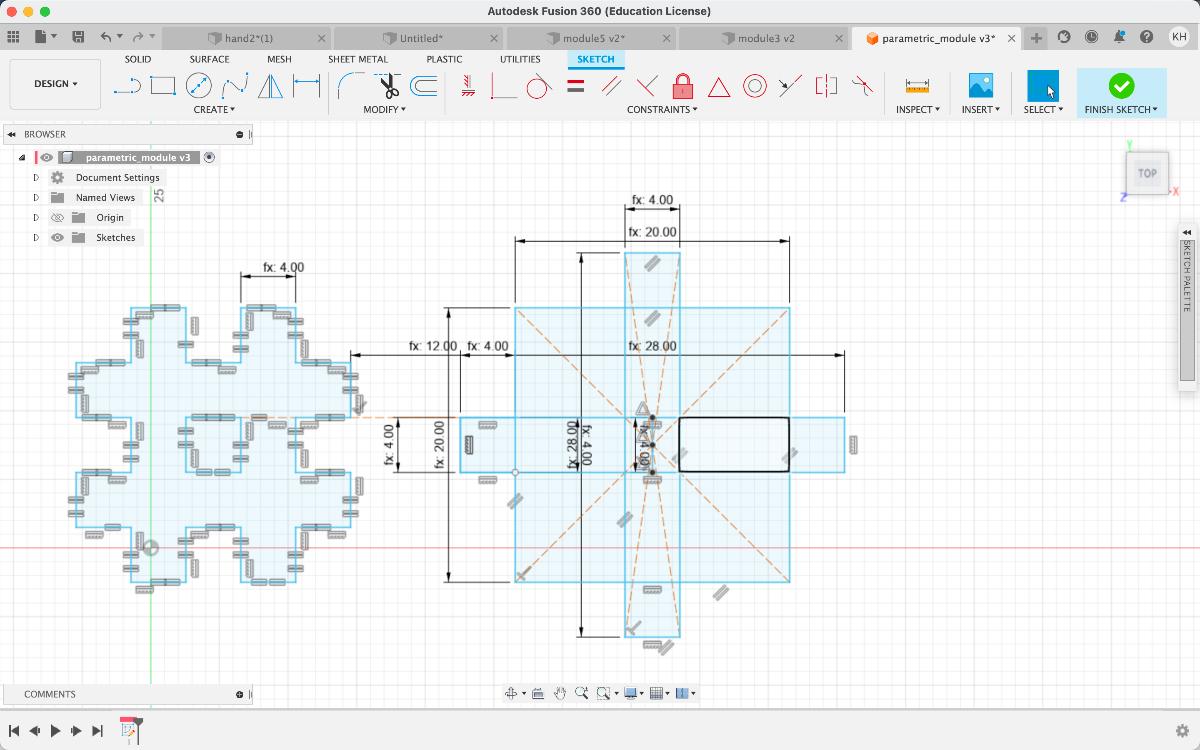
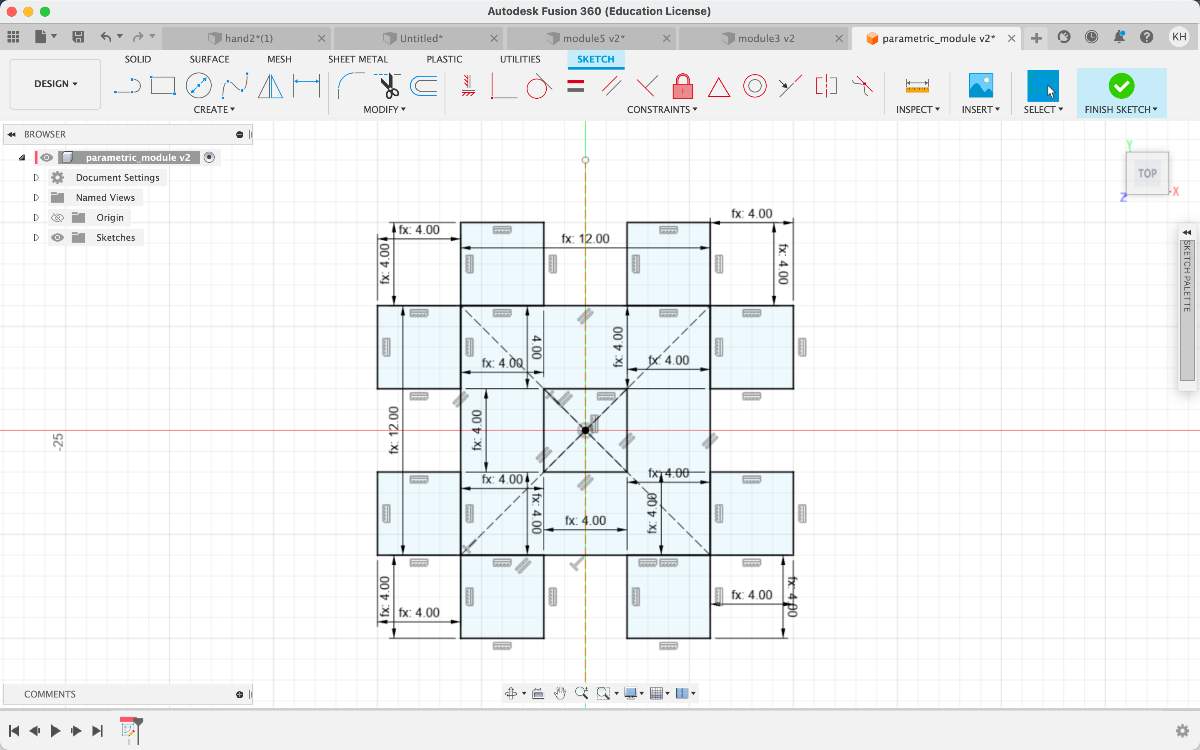
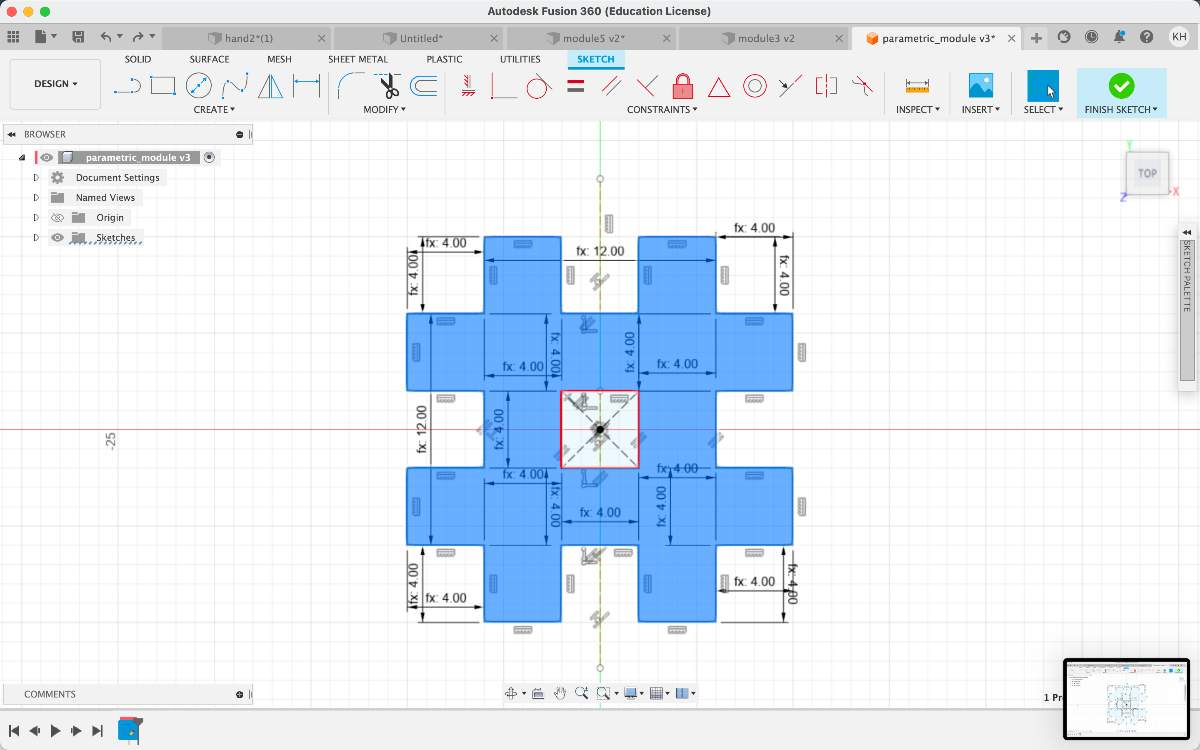
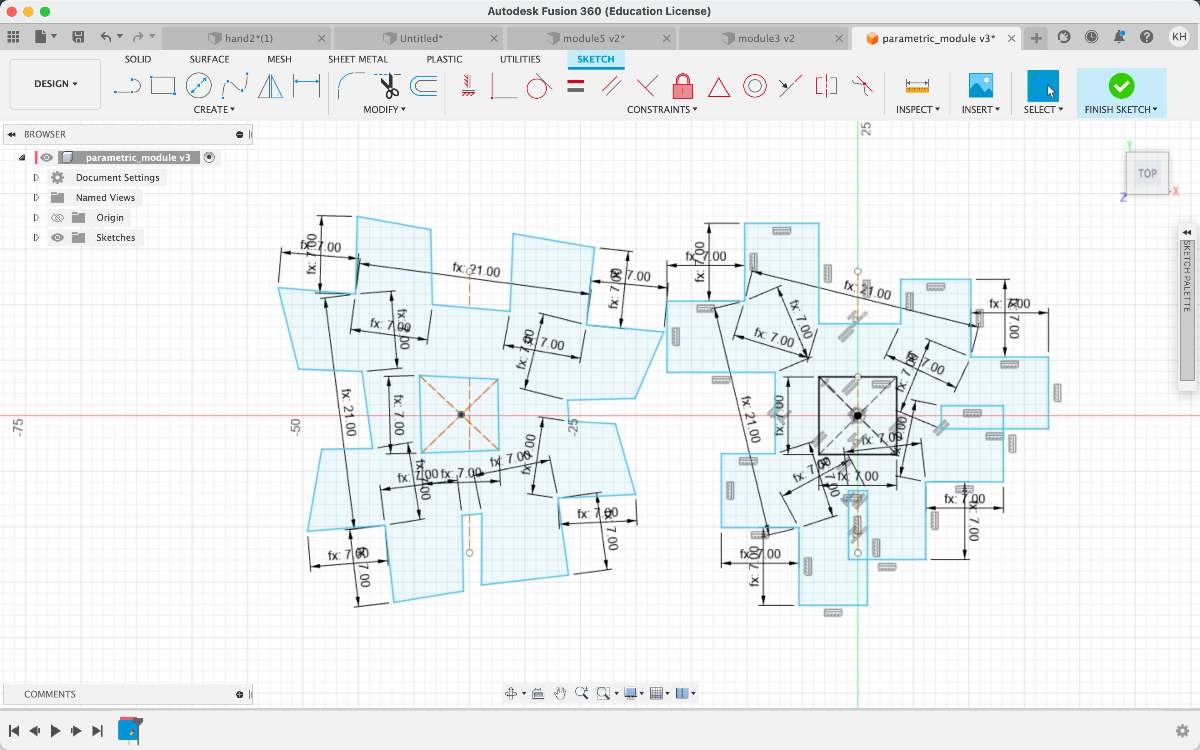
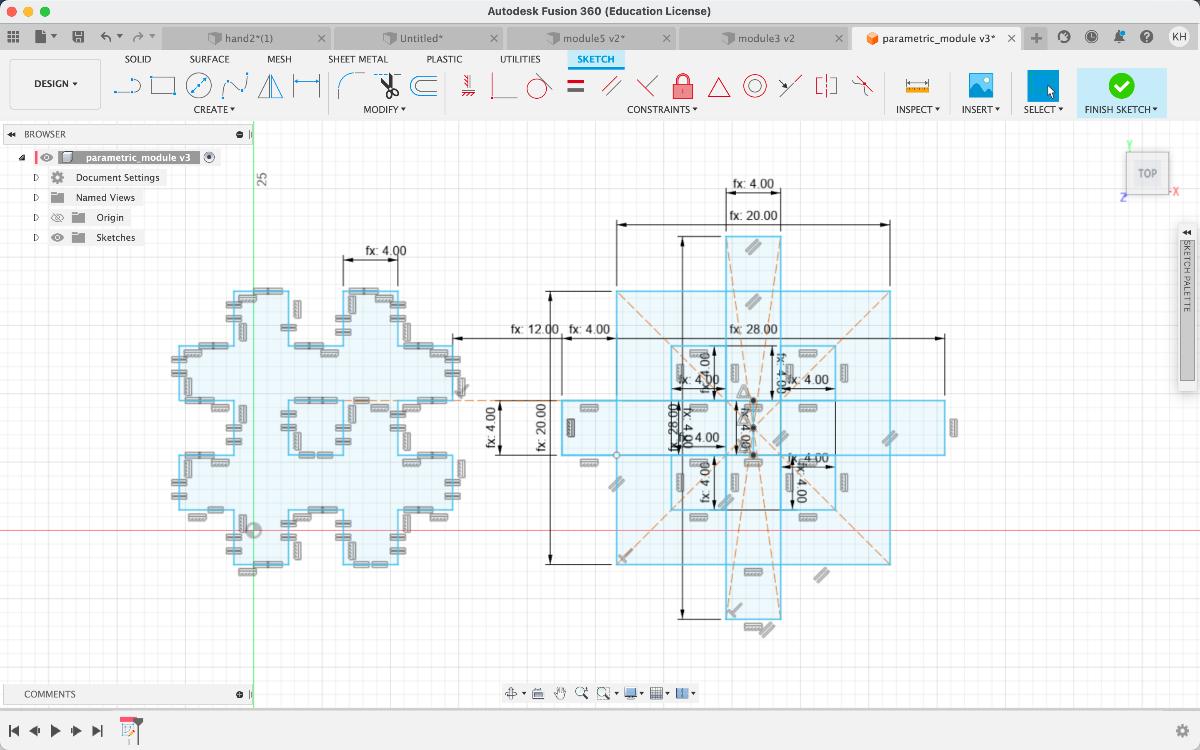
Following the same process I created another module
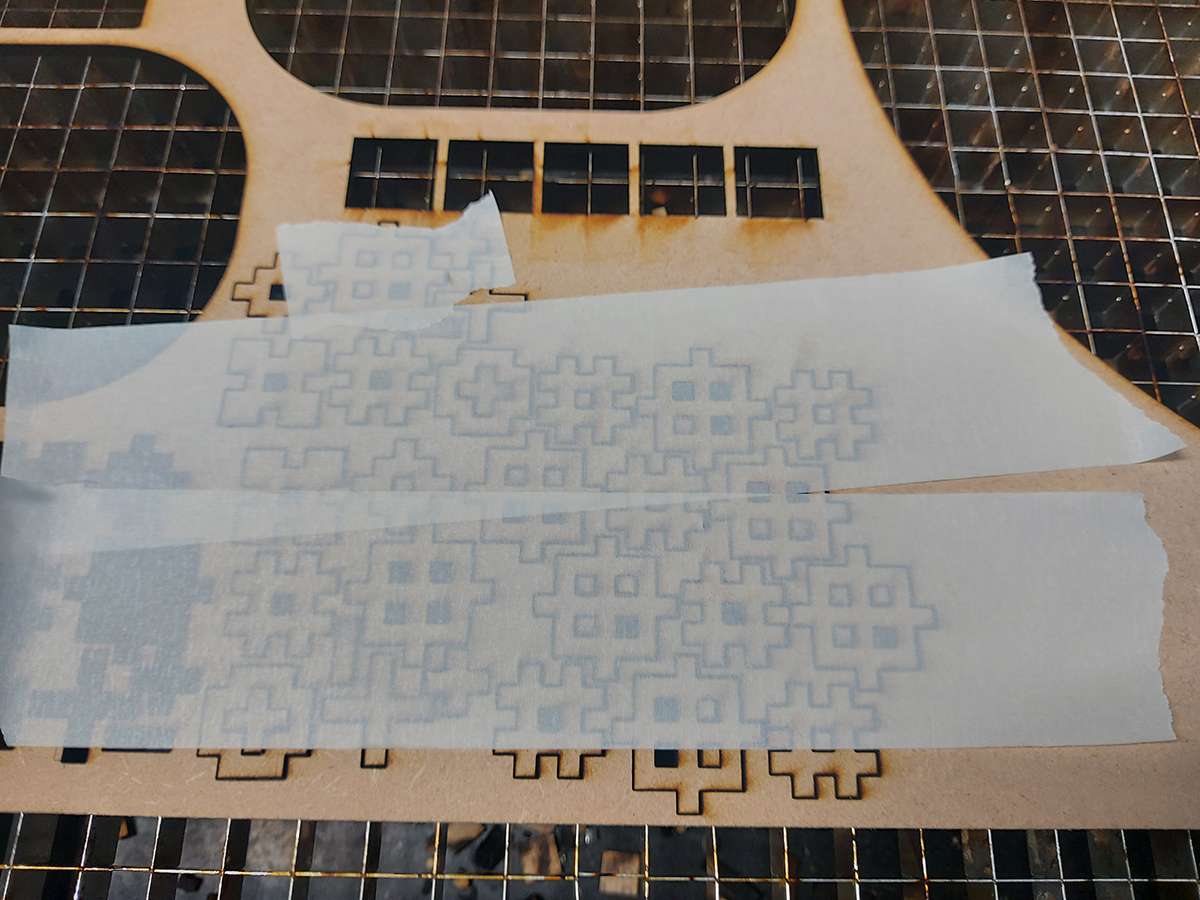
KERF
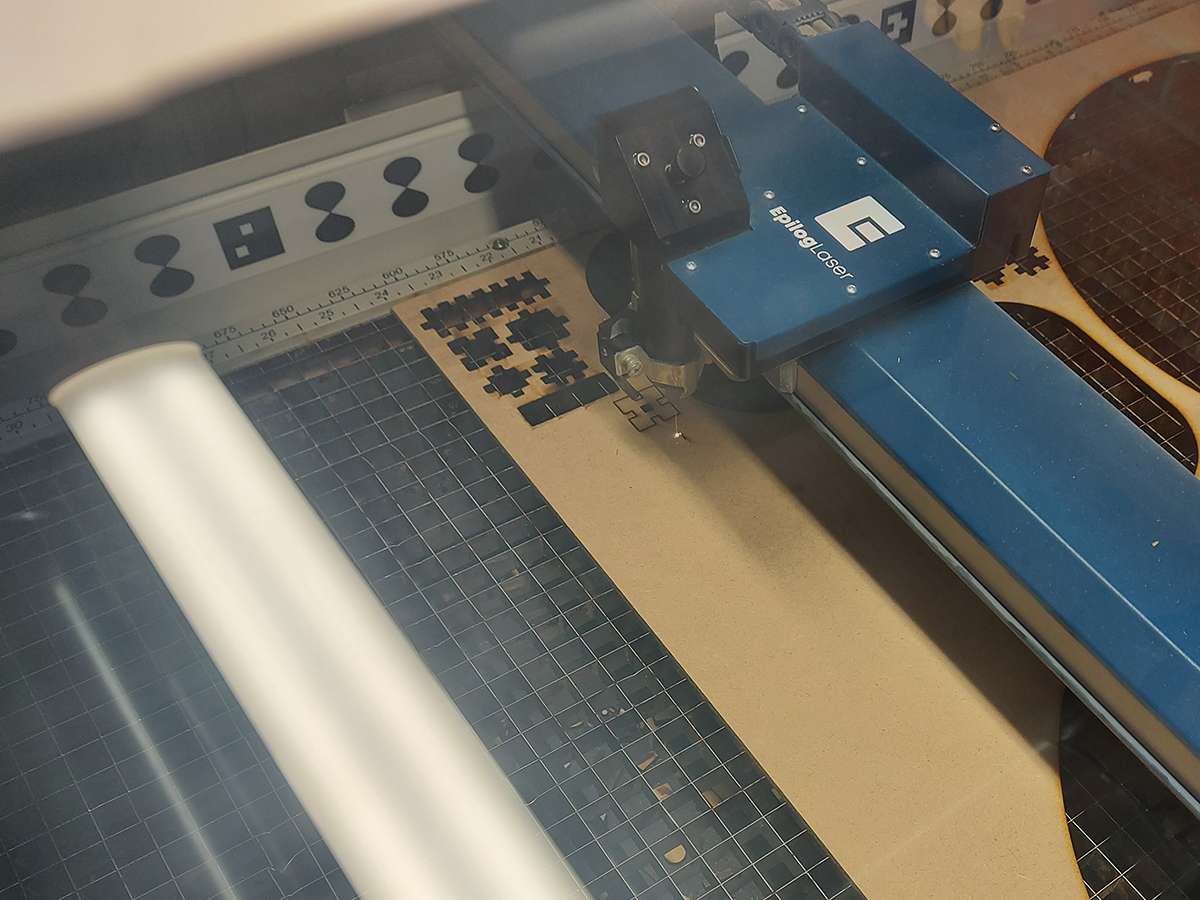
Lasercutting the module
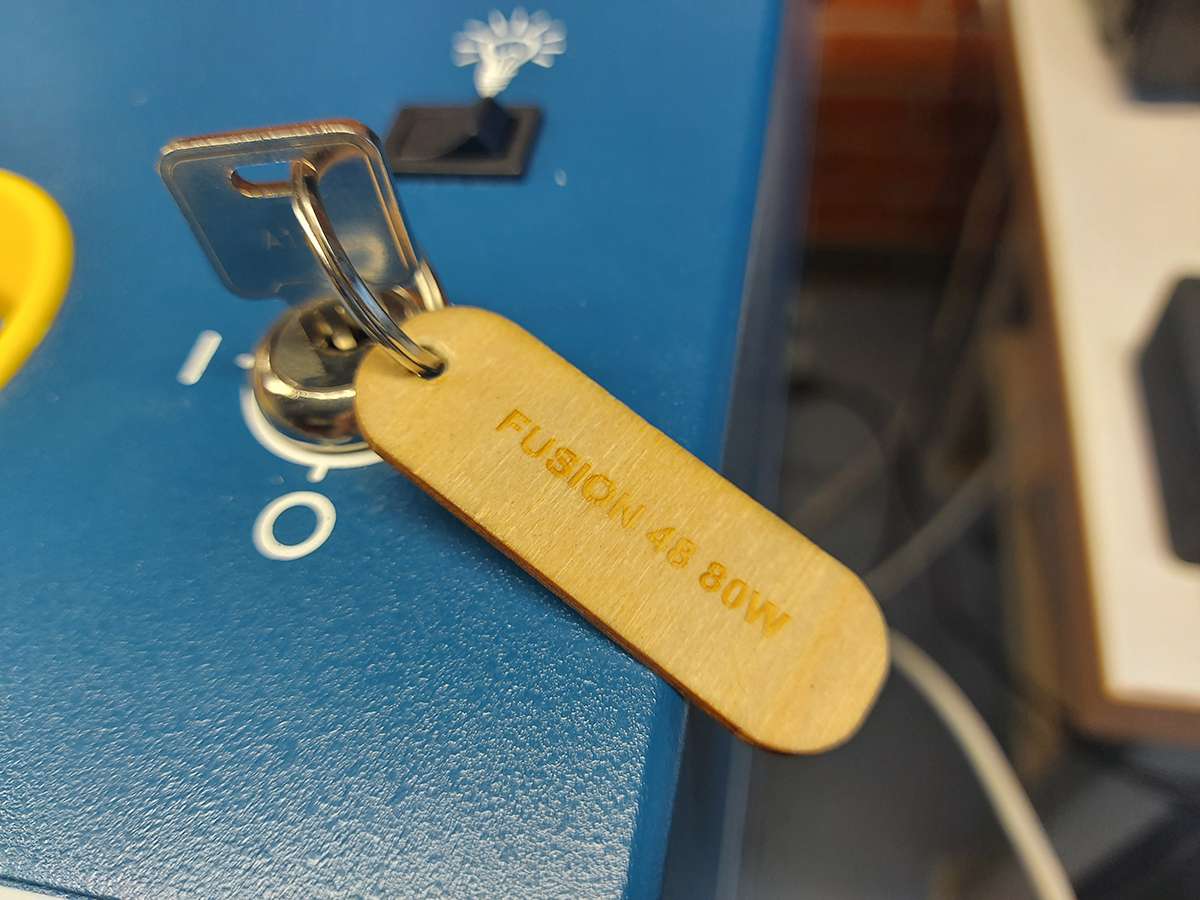
I turn the machine on and turned the ventillation system on
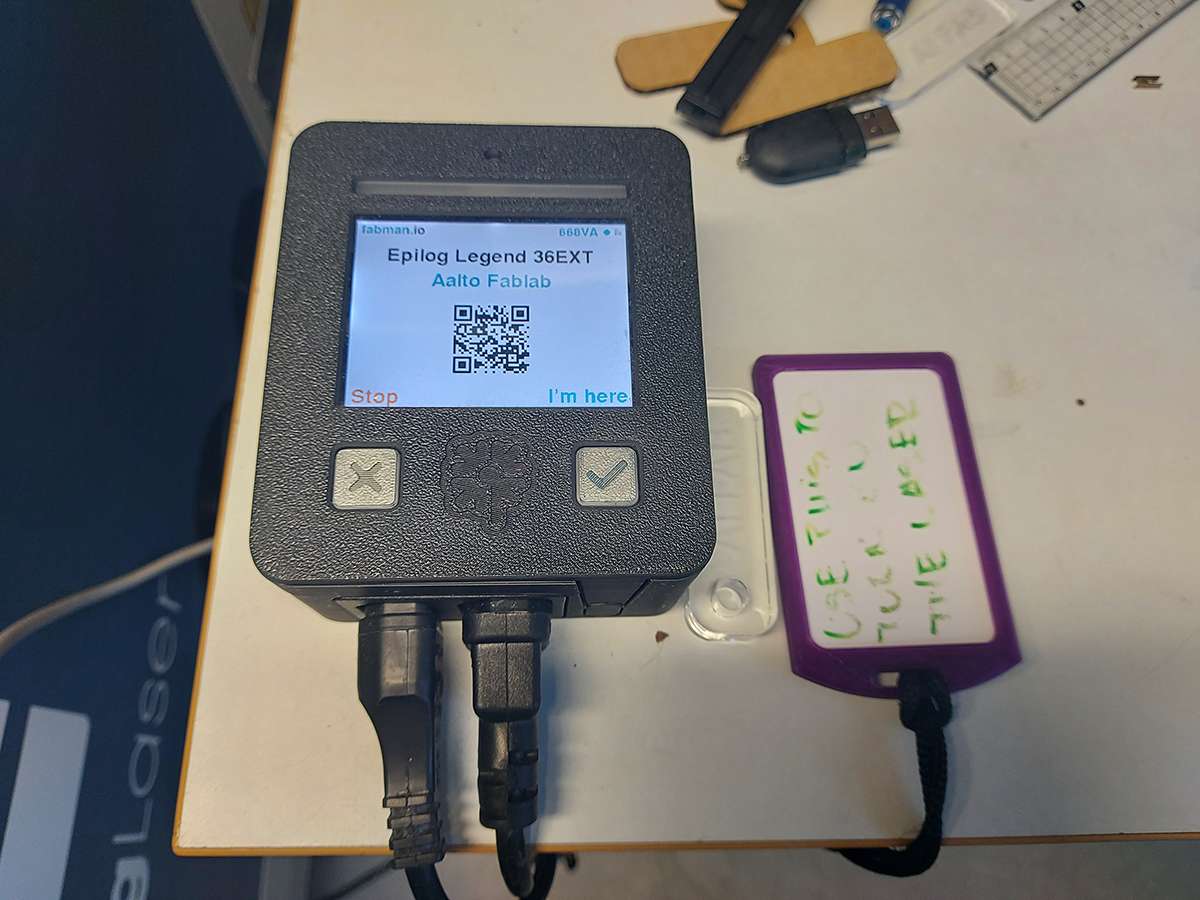
Security measures at Aalto Fablab preventing unsupervised usage
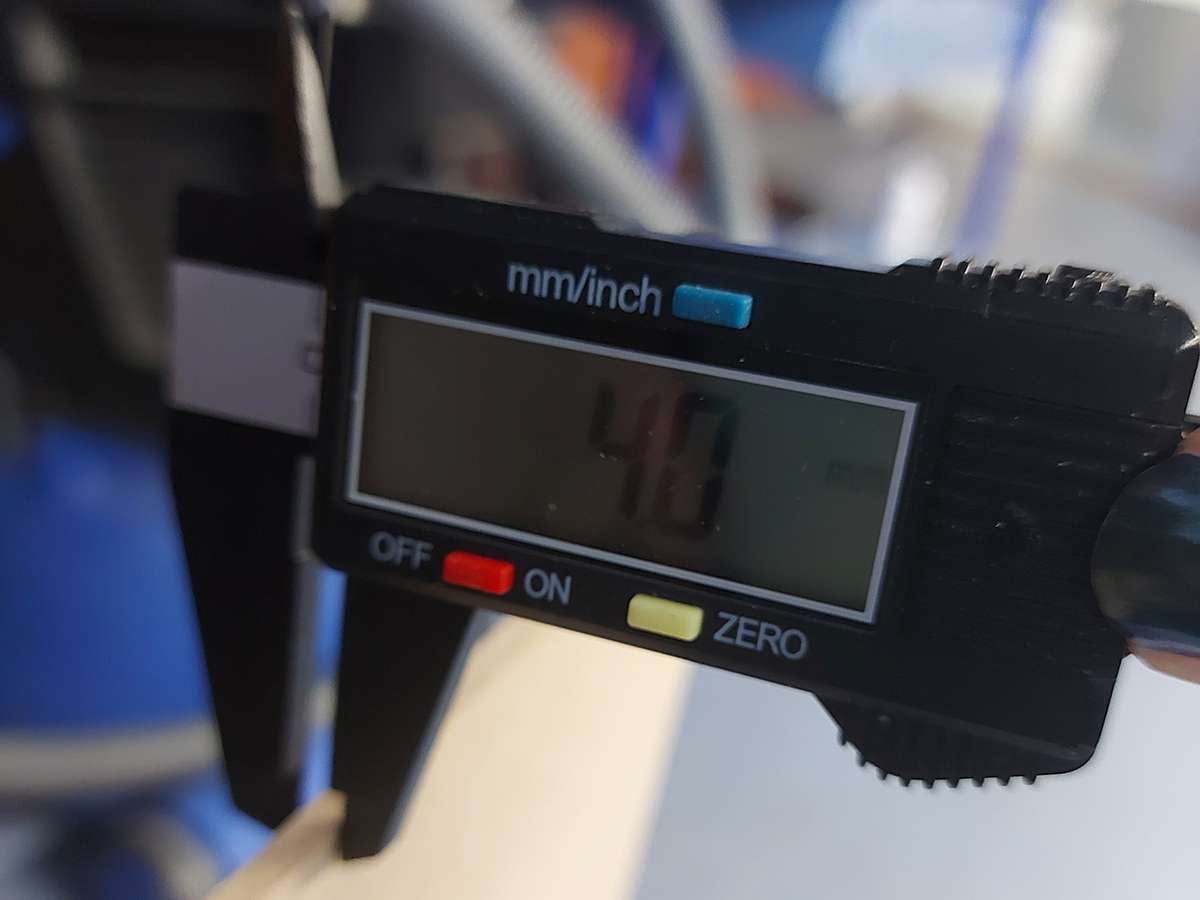
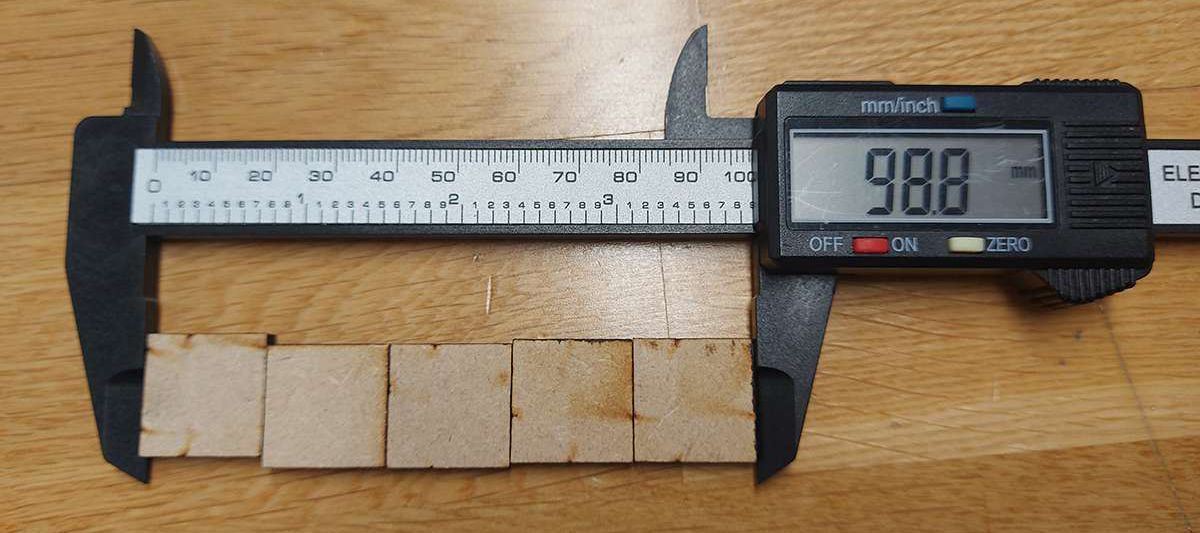
I measured my material thickness with a digital caliper
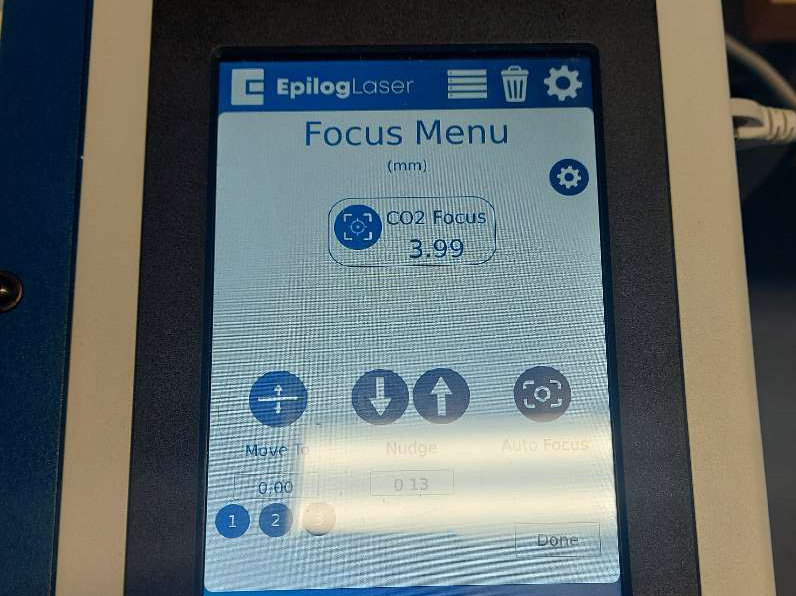
I focused the laser cutter by moving the bed up and down
I used the designated focusing device on the laser cutter head (there should be just slight friction between the tool tip and the material surface)
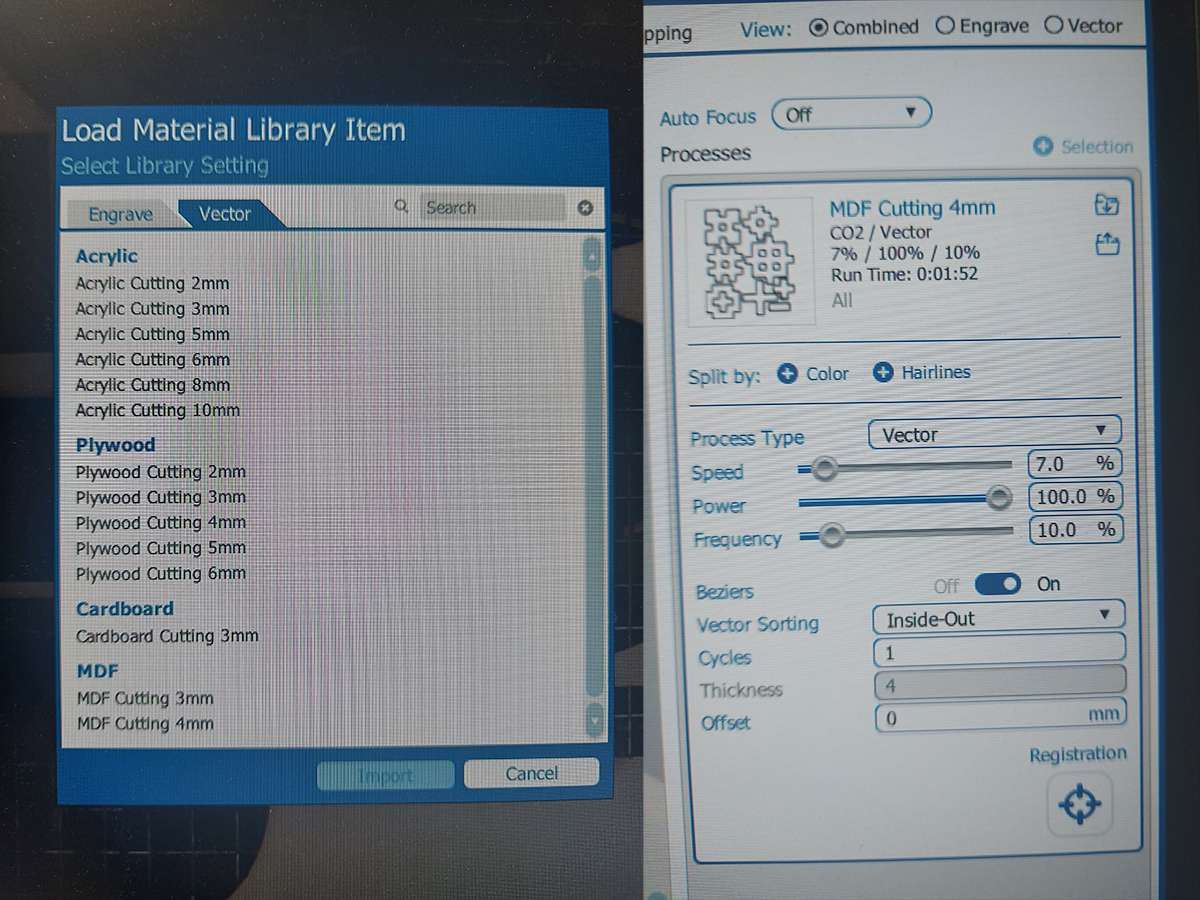
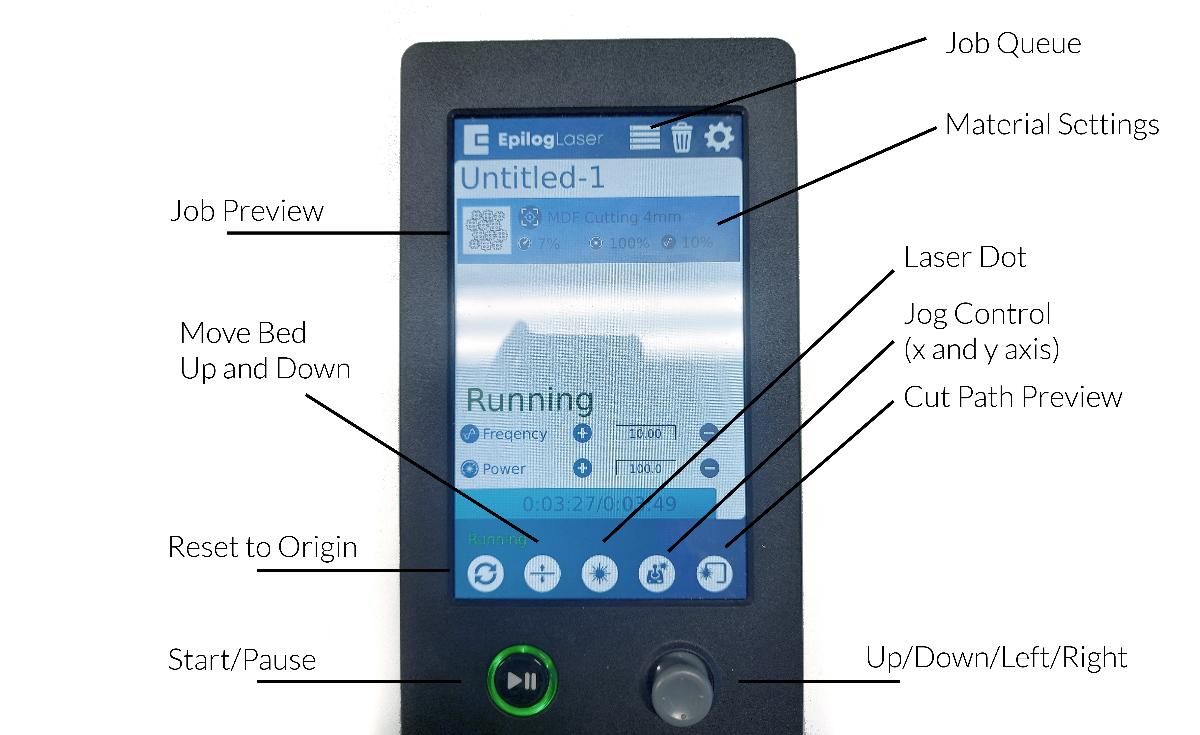
I set the default pre-defined power, speed and frequency for my material from the Imported Settings menu. For my 4mm thick MDF it was Speed 7%, Power 100%, Frequency 10%.
I tested the settings with a small square first rather than the full job. The default settings worked just fine, so no adjustment was necessary in this case
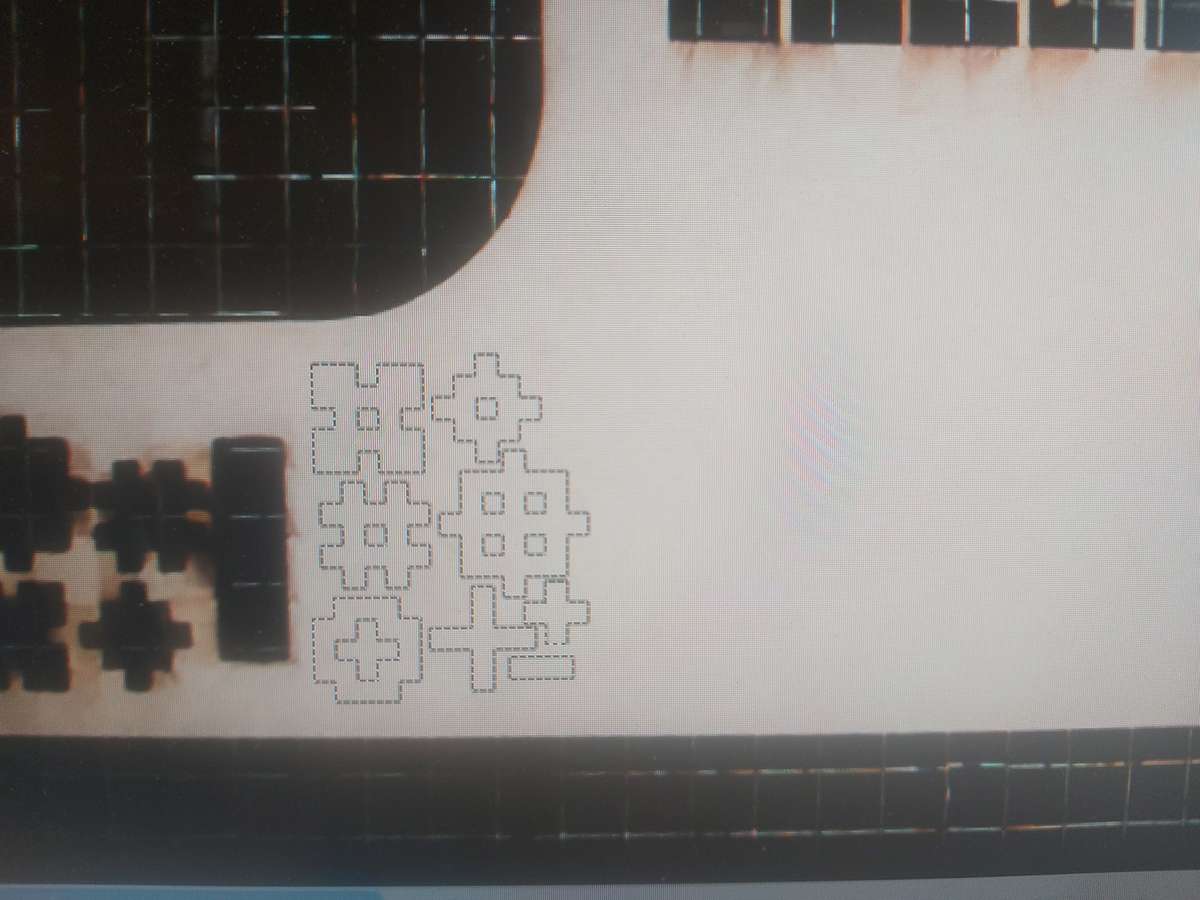
I exported the design from Fusion 360 as a DXF file. That file I opened in Illustrator and changed the cut lines width to 0.01. I clicked Print, placed the design on my material sheet in the Trotec camera preview and sent it to Job Manager. Then clicked Quick Print to send the job to the laser cutter

Vinyl cutting a sticker with Roland GX-24

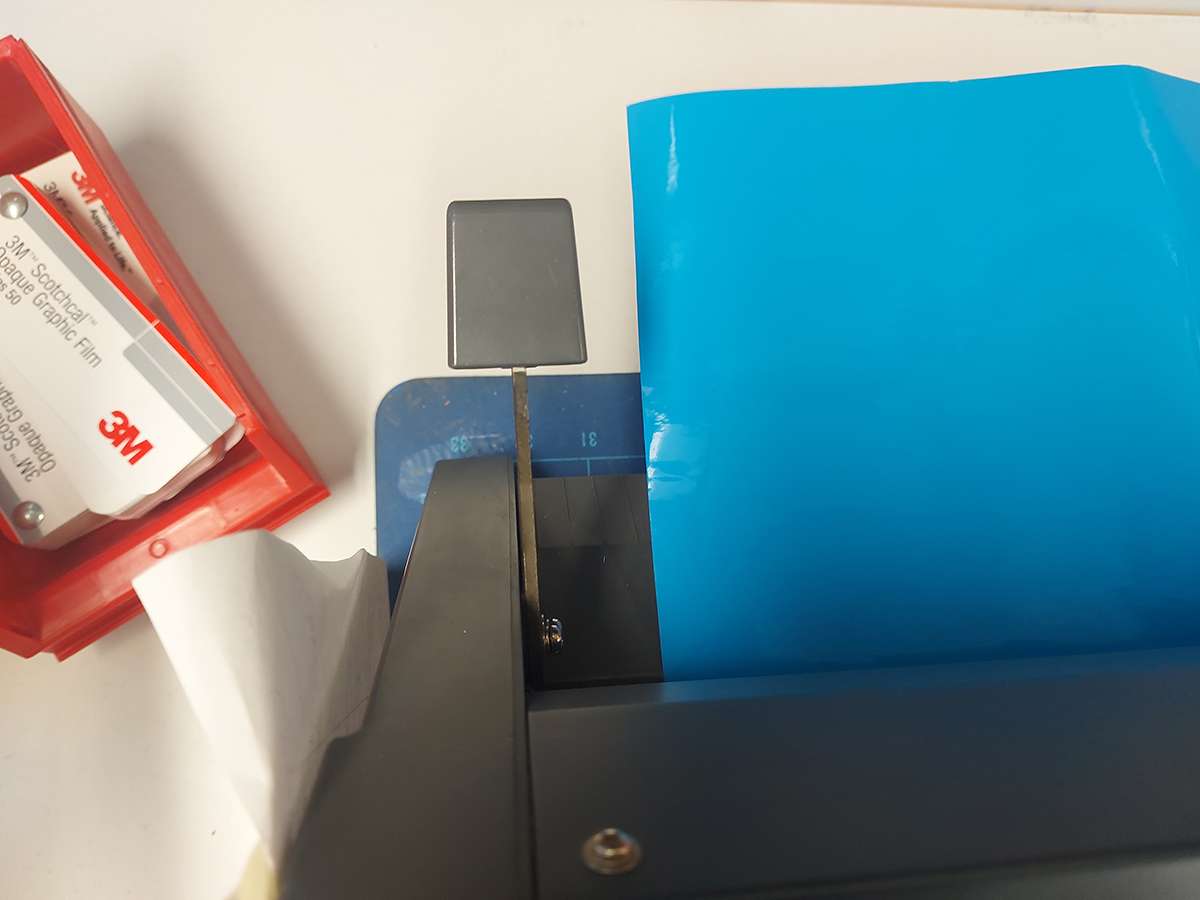
I selected the right blade for my purpose - it was a regular sticker vinyl blade that was already mounted in the machine. All materials should have their own documentation from their manufacturer that should note the optimal settings necessary to cut the particular material
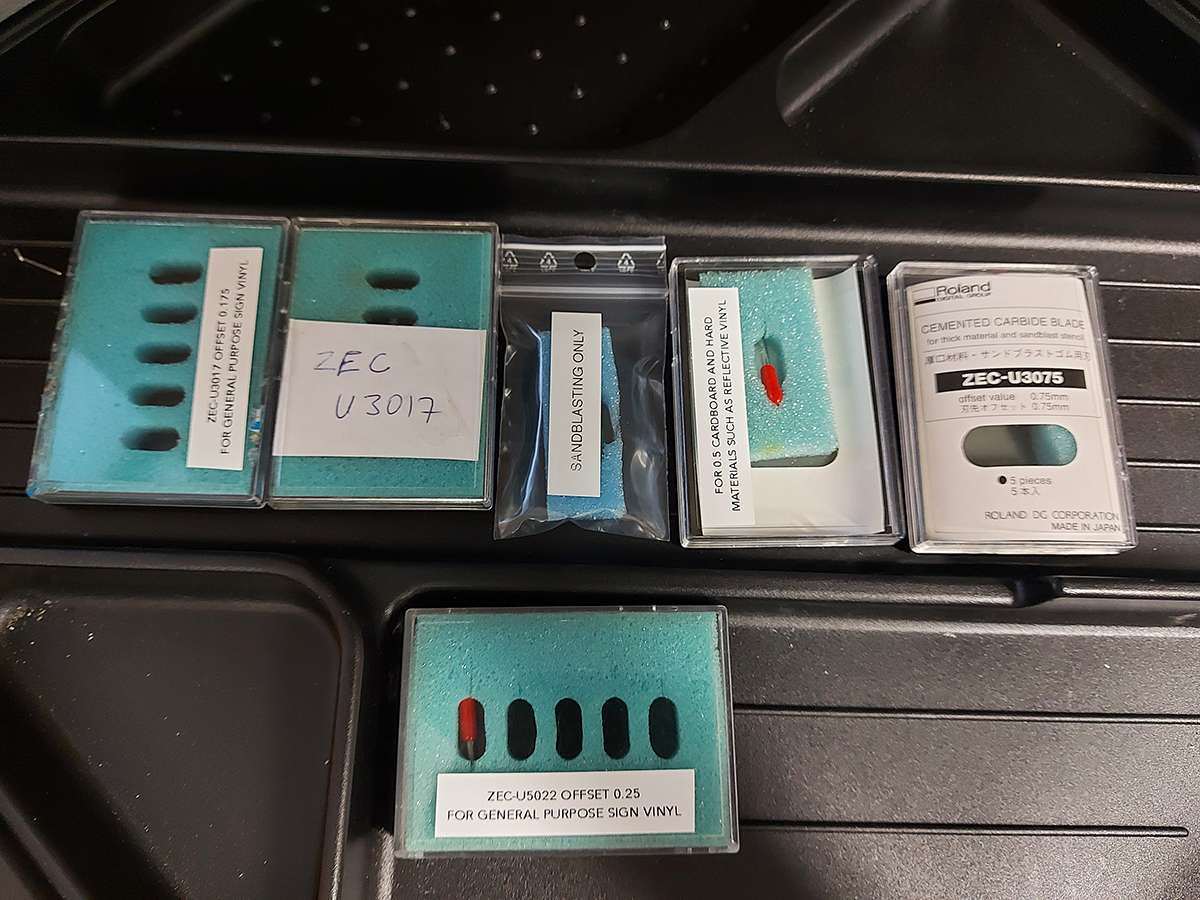
I selected the right blade for my purpose - it was a regular sticker vinyl blade that was already mounted in the machine. All materials should have their own documentation from their manufacturer that should note the optimal settings necessary to cut the particular material
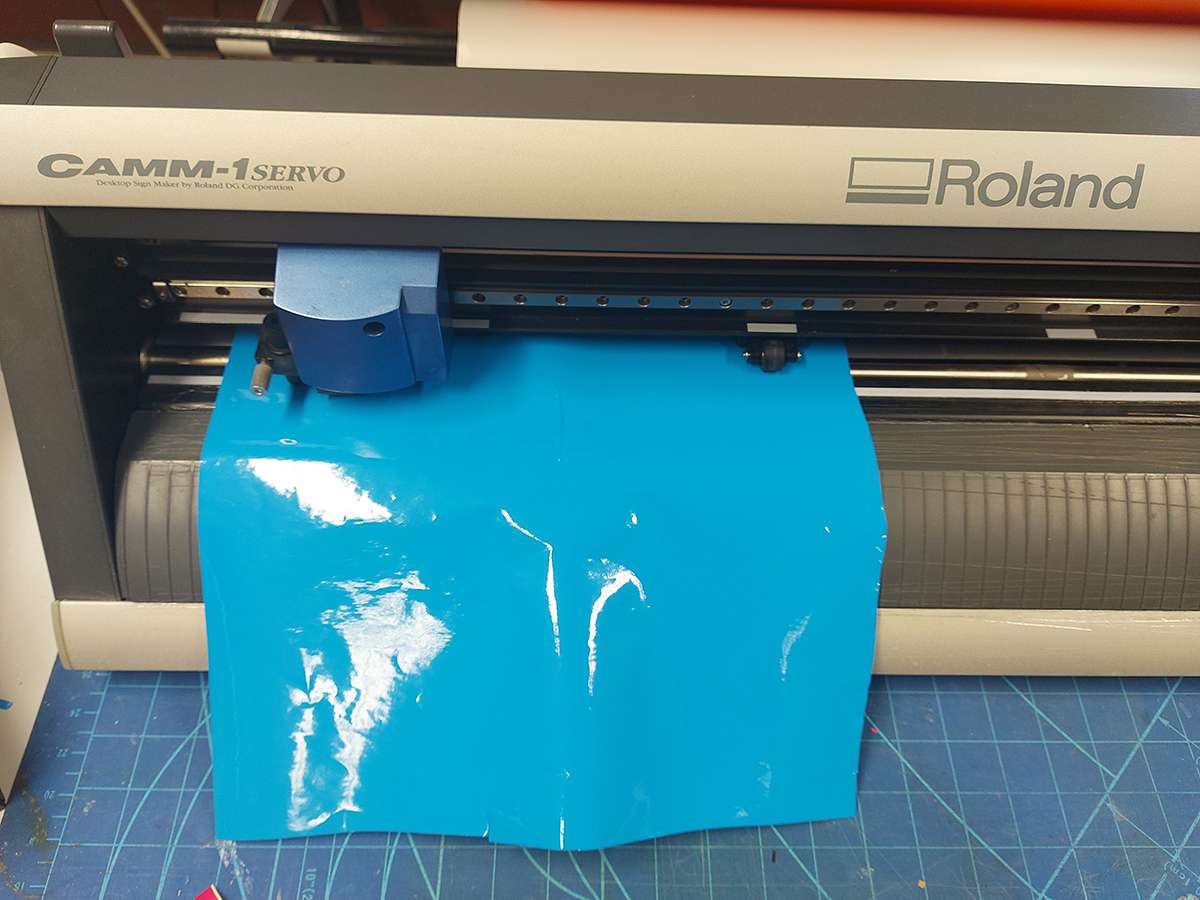
I inserted the vinyl into the designated space in the machine. I noted to put the piece where the textured parts of the rollers are located to create more friction while moving
I used the hinge hidden in the back of the machine to secure the vinyl in place
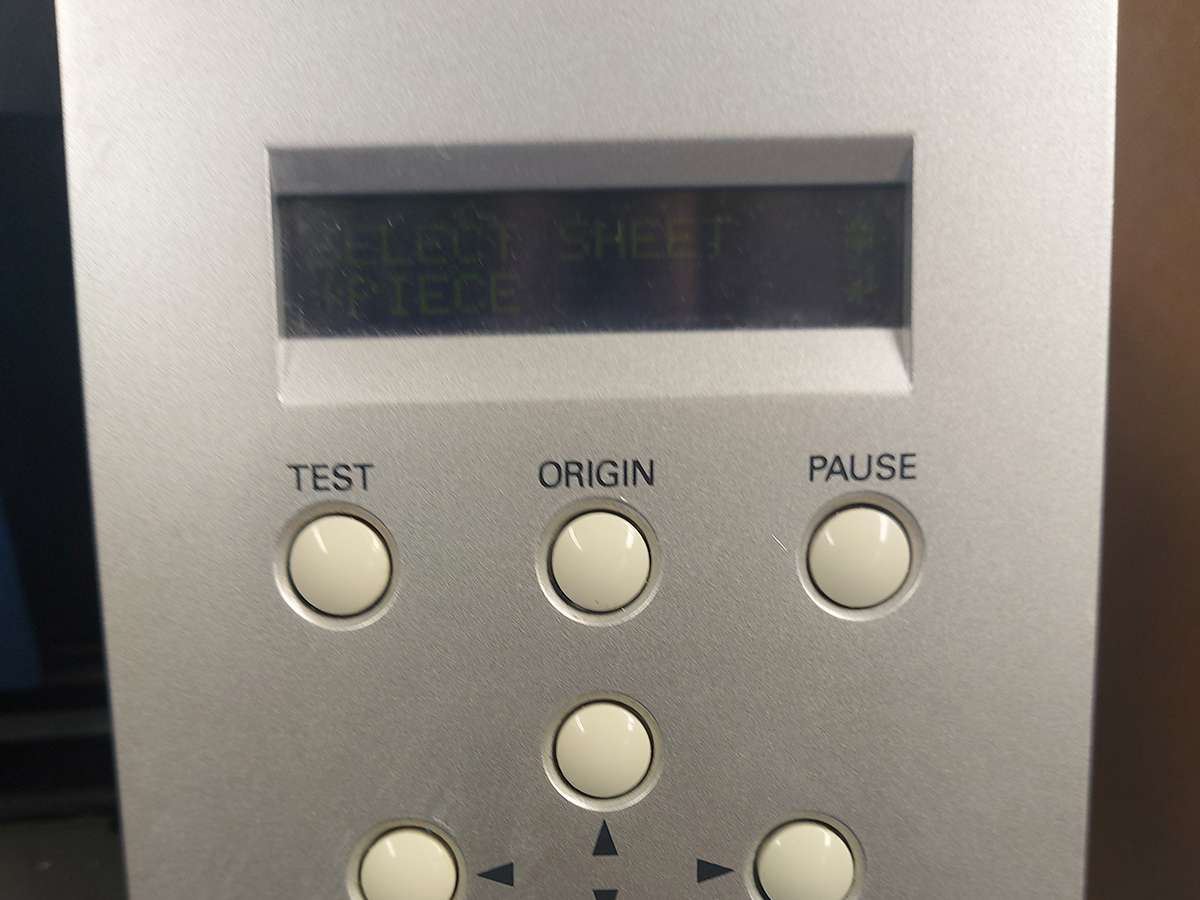
I selected the right mode in the machine. In this case it is a piece of vinyl, so 'piece'. Pther options are 'roll' and 'edge'
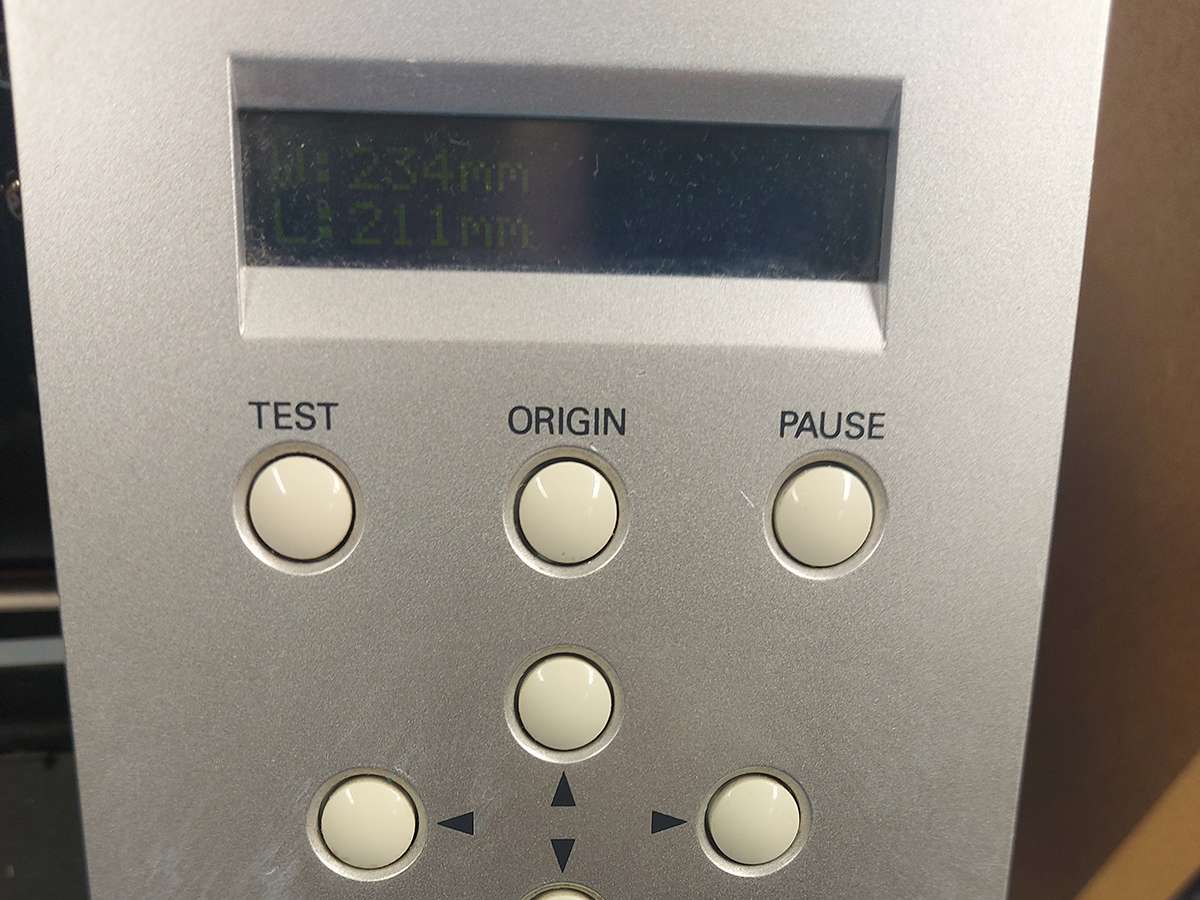
I let the machine measure the working area of the loaded piece of vinyl
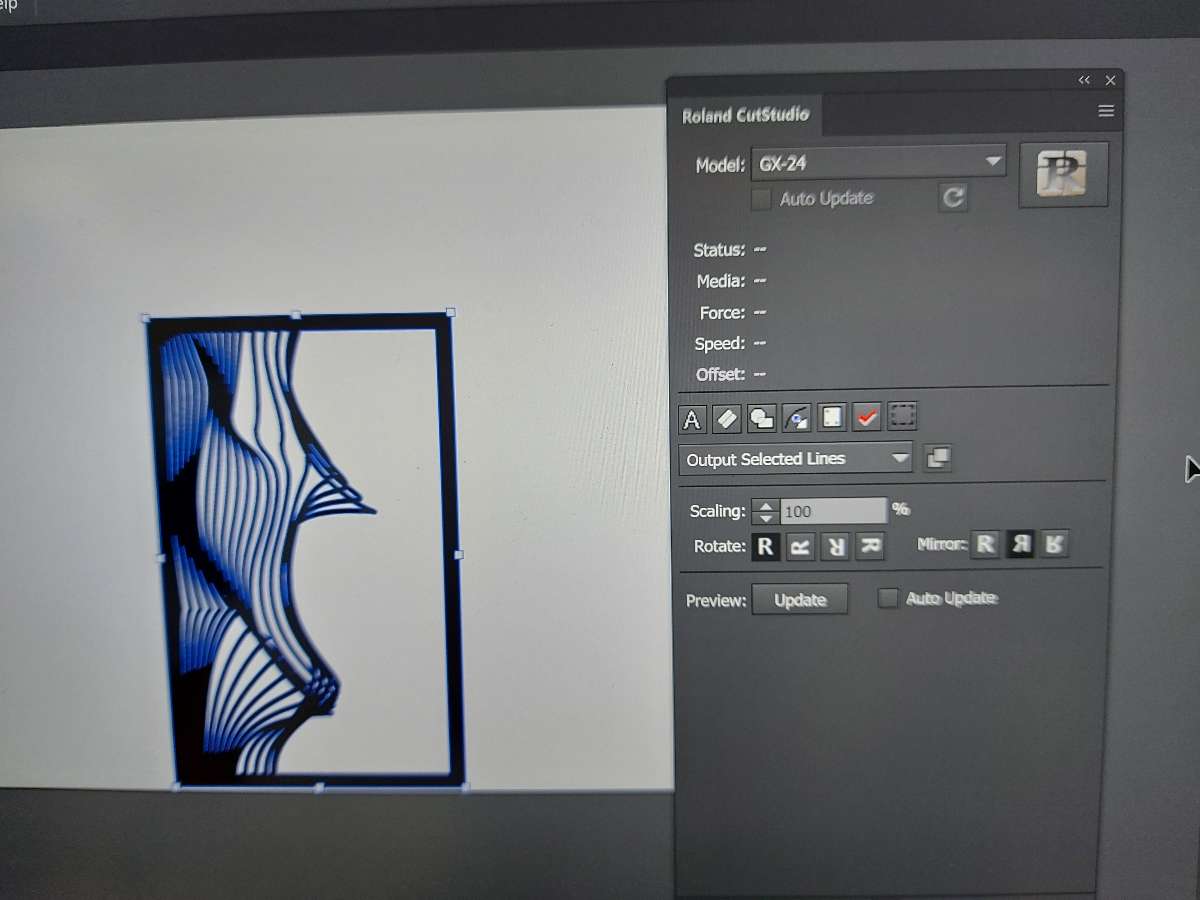
I open my file in Illustartor, where I could adjust the design size according to the working area and then opened the Roland CutStudio plugin
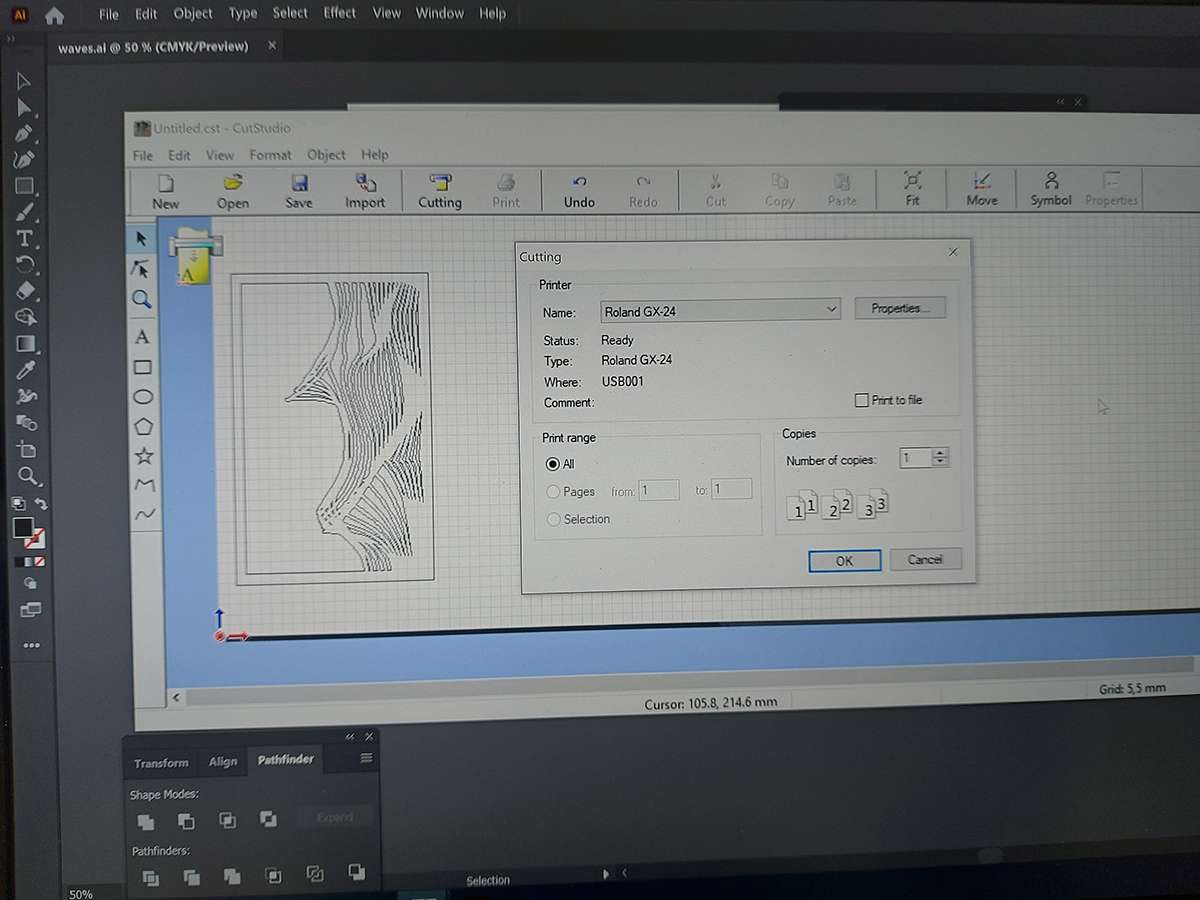
I selected the machine model (ROland GX-24 and let it cut by clicking "Cutting"
Once finished, I set the machien to return to the origin, released the hinge holding the material and removed the piece
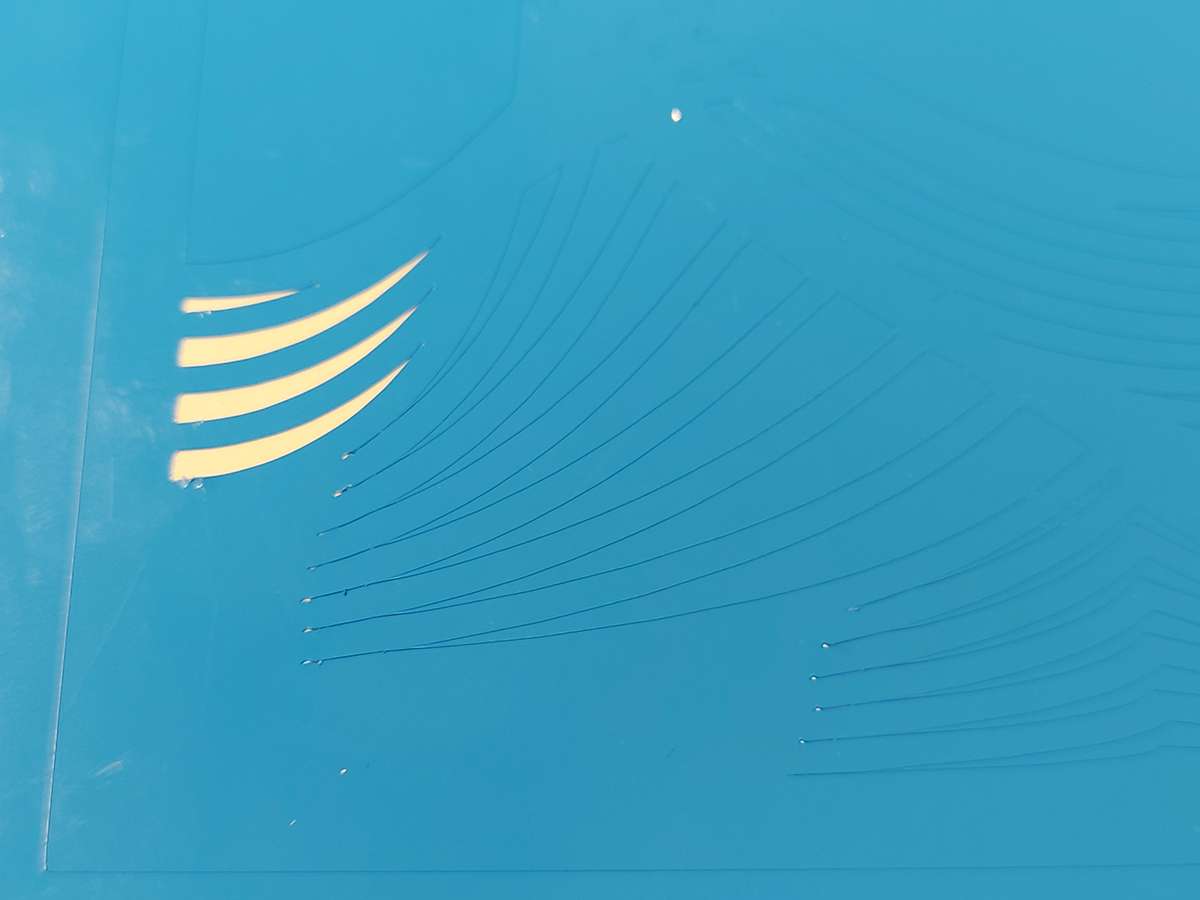
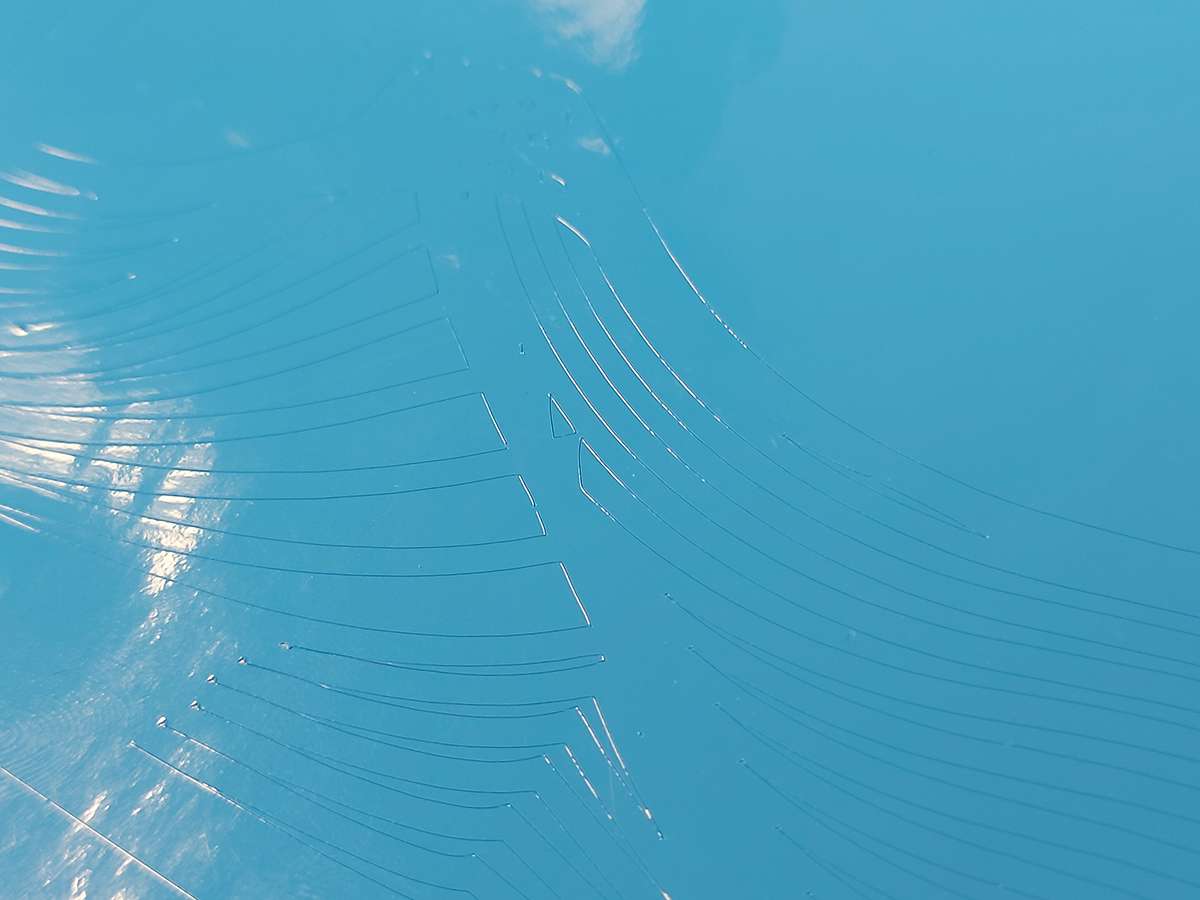
After cutting, I removed the unnecessary parts (weeded)
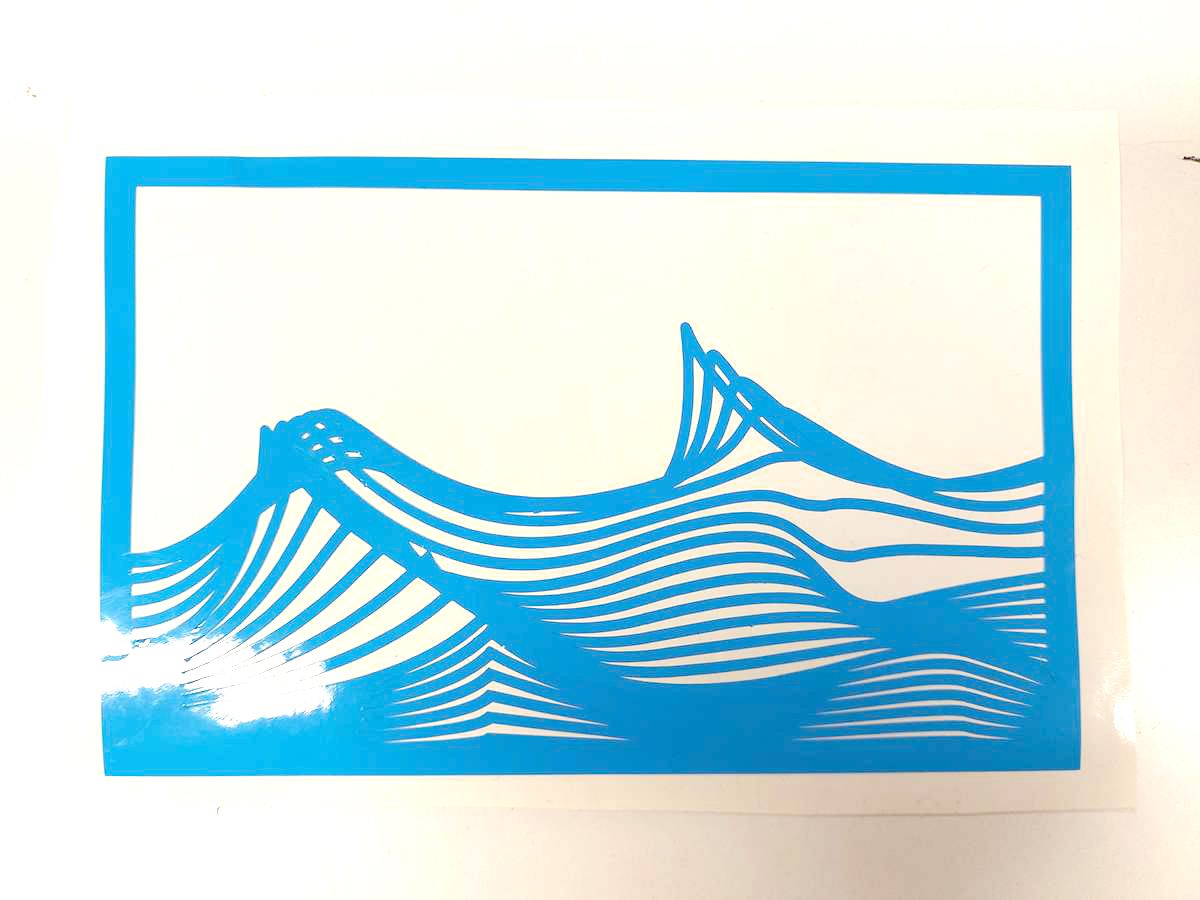 Weeded sticker
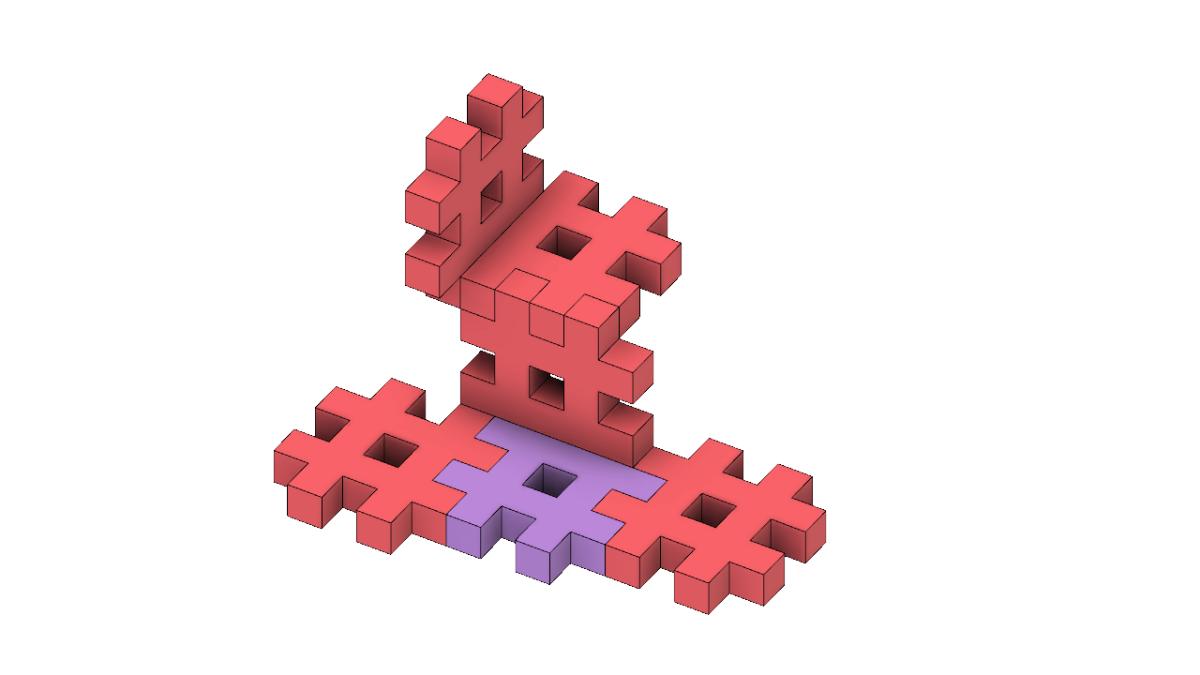
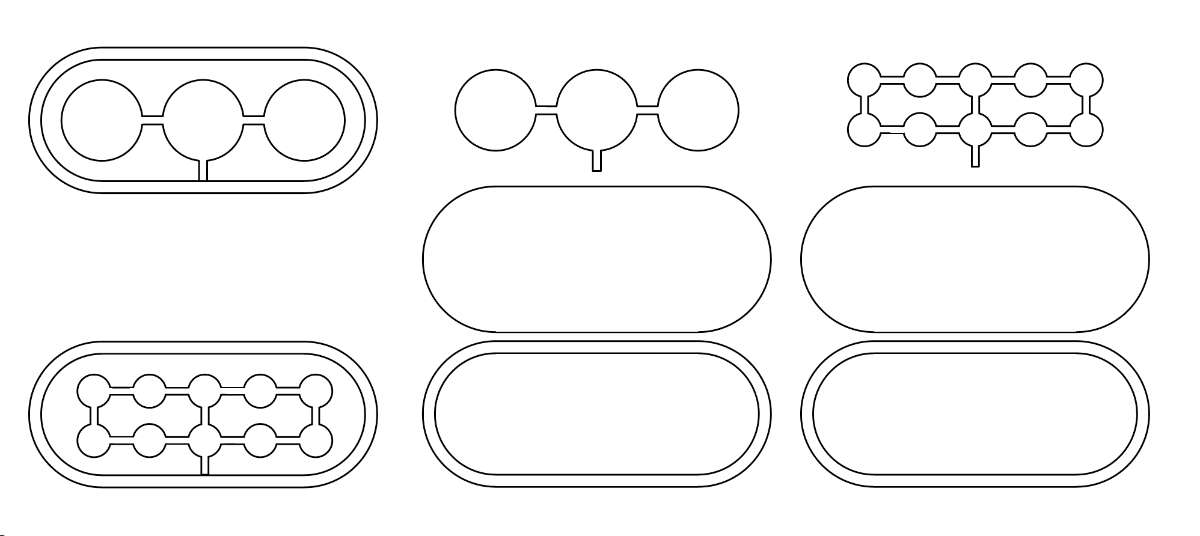
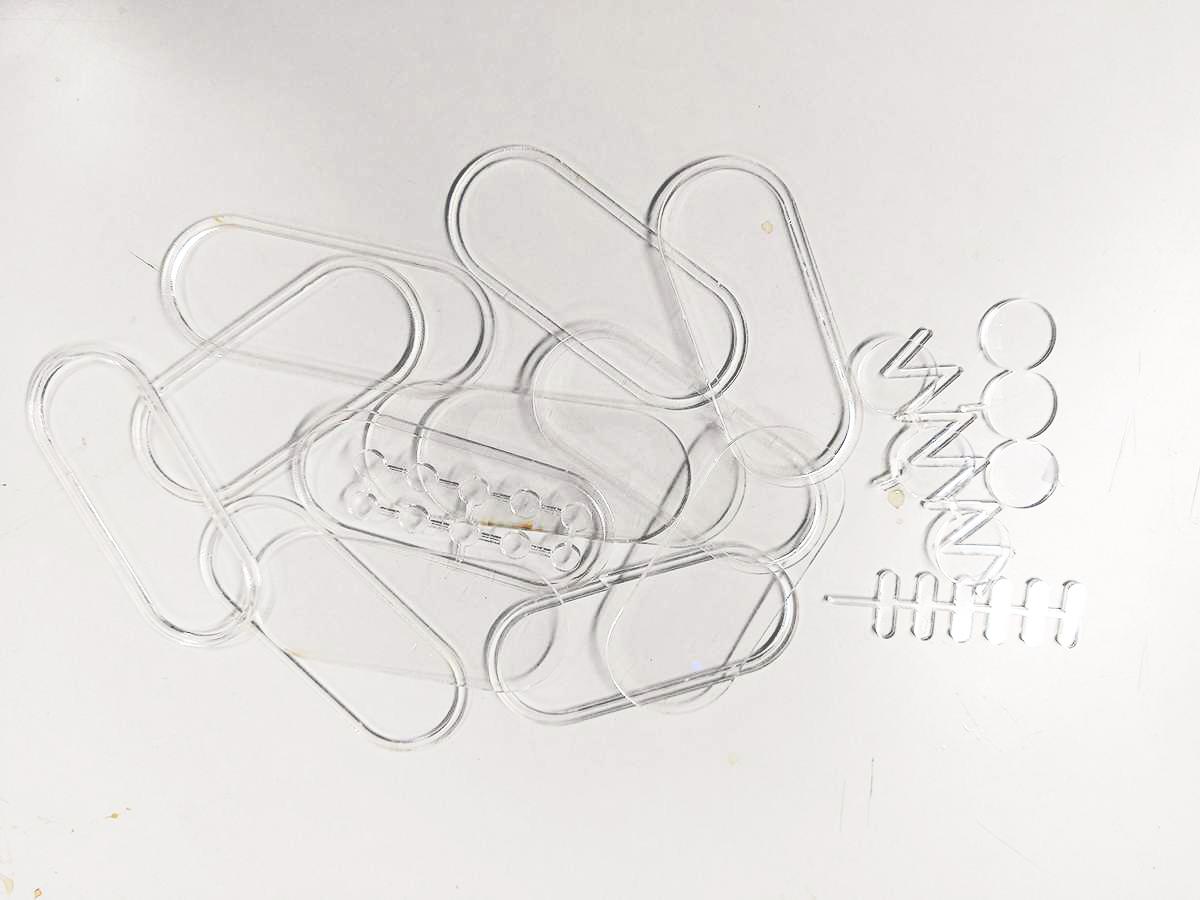
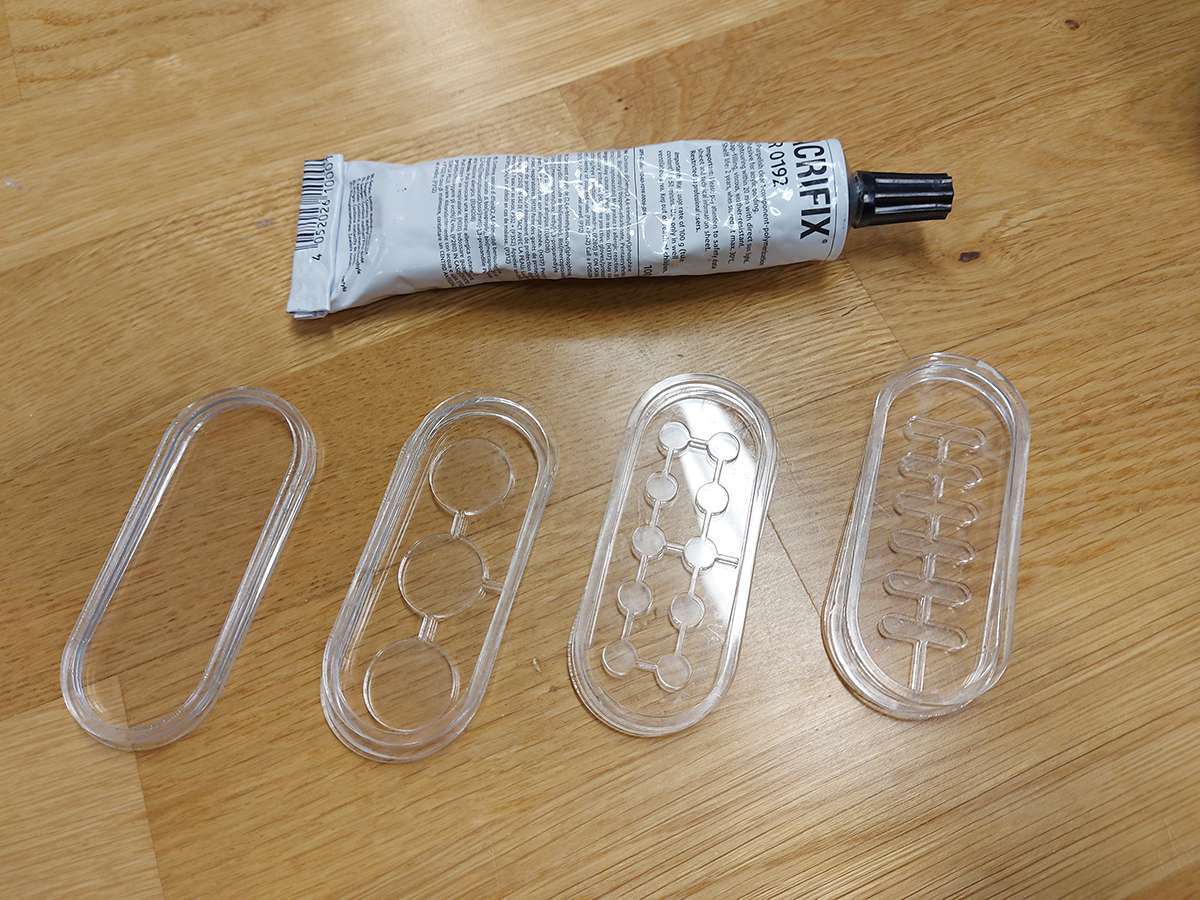
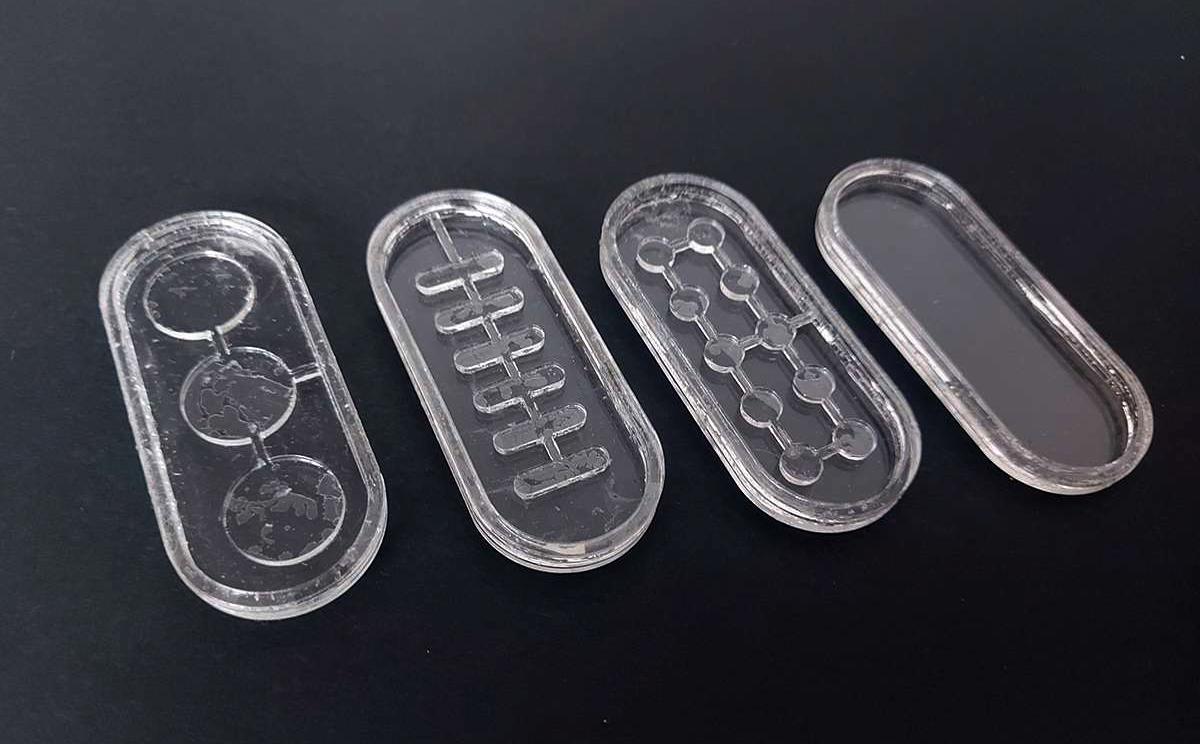
Lasercutting an acrylic mold for inflatables
I also decided to lasercut the molds that I have designed during the Computer Aided Design week . They are cut in clear acrylic of 3 and 4 mm and glued togetehr to form solid molds for silicone casting for inflatables for my final project
Making an inflatable with heat-transfer vinyl
This is a fabrication technique I've learnt during Fabricademy and documented the whole process here:

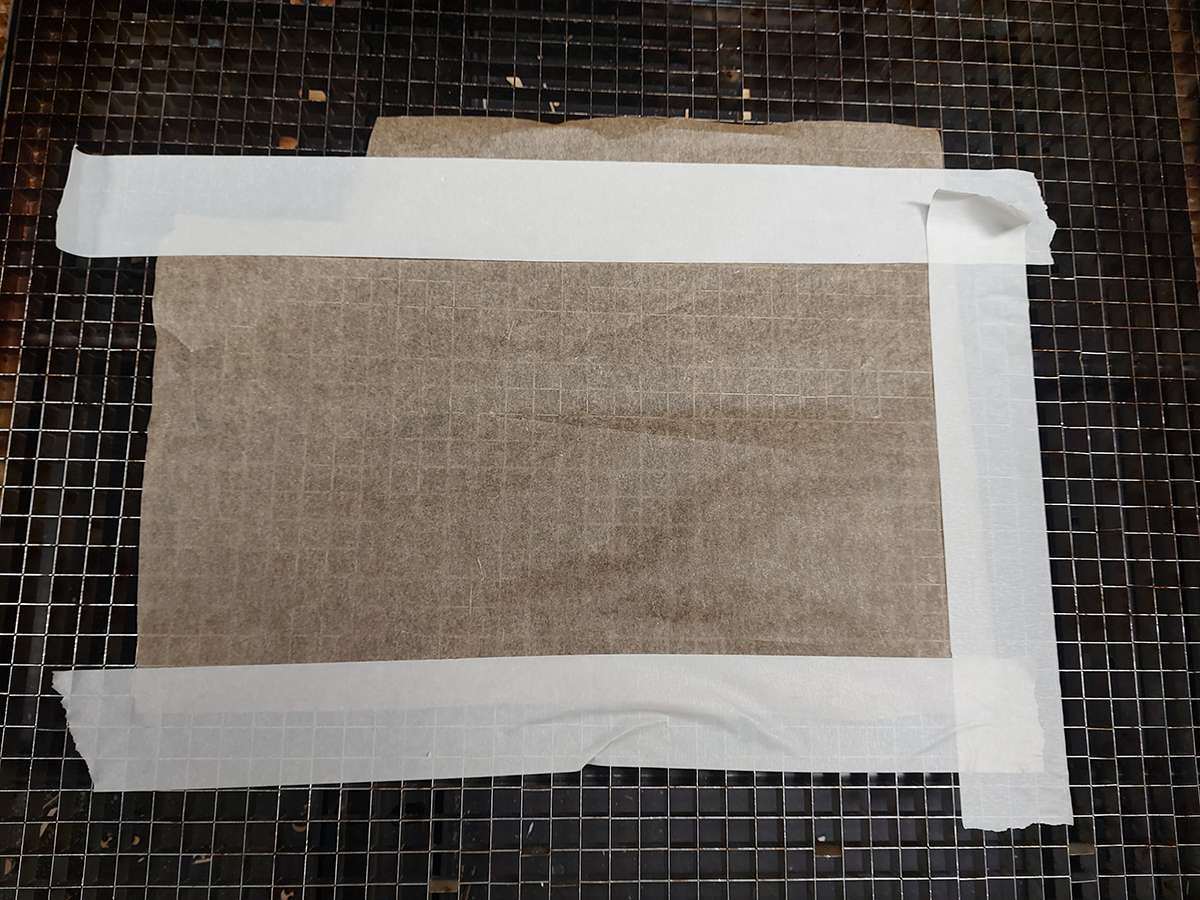
The baking paper has a feature of not sticking to anything. Which is a problem when it should stay flat in place where there is an air flow lifting it up. To prevent it, I used paper tape
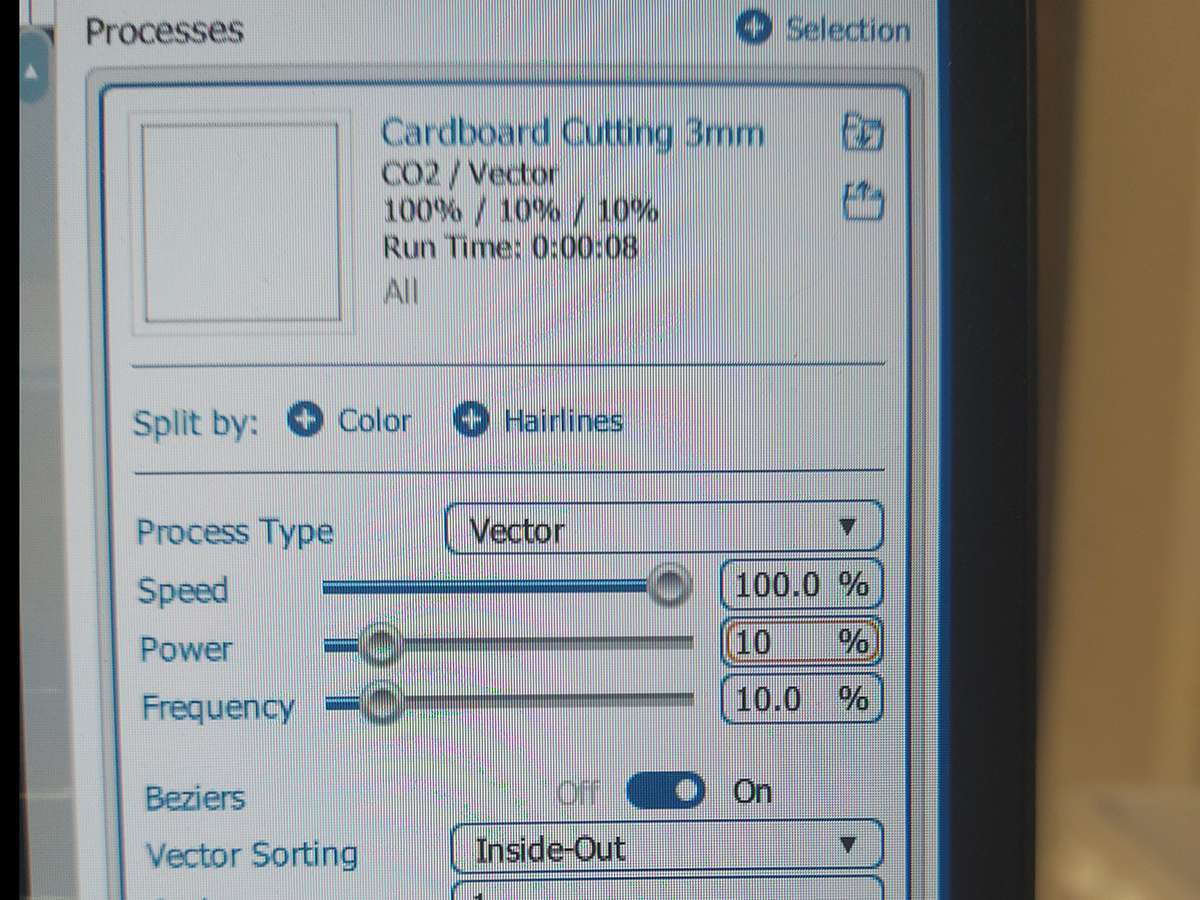
Baking paper is thin and easy to cut, so low settings of power 10%, speed 100% and frequency of 10% were just fine. However the baking paper surface was not flat enough, so I increased the power to 20% finally to make sure it cuts even in the areas slightly out of focus
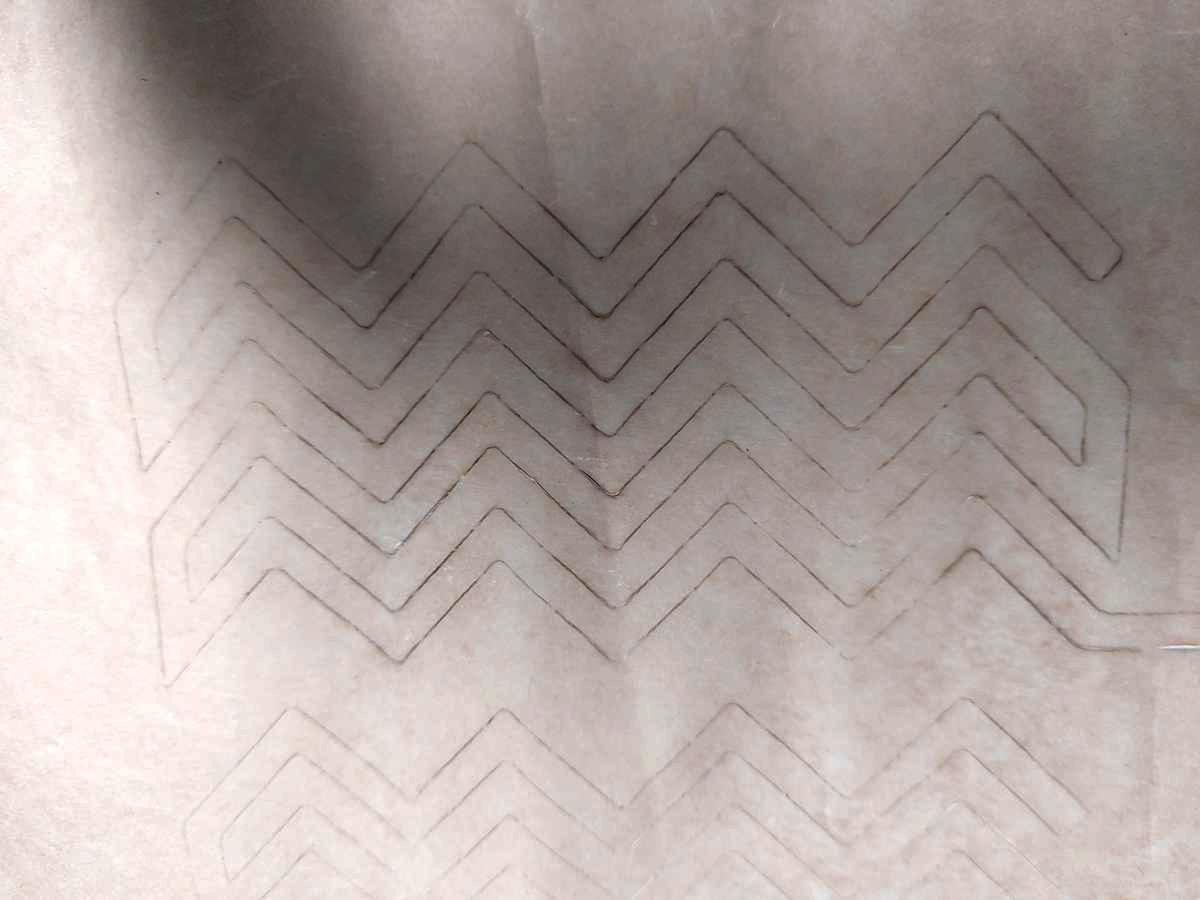
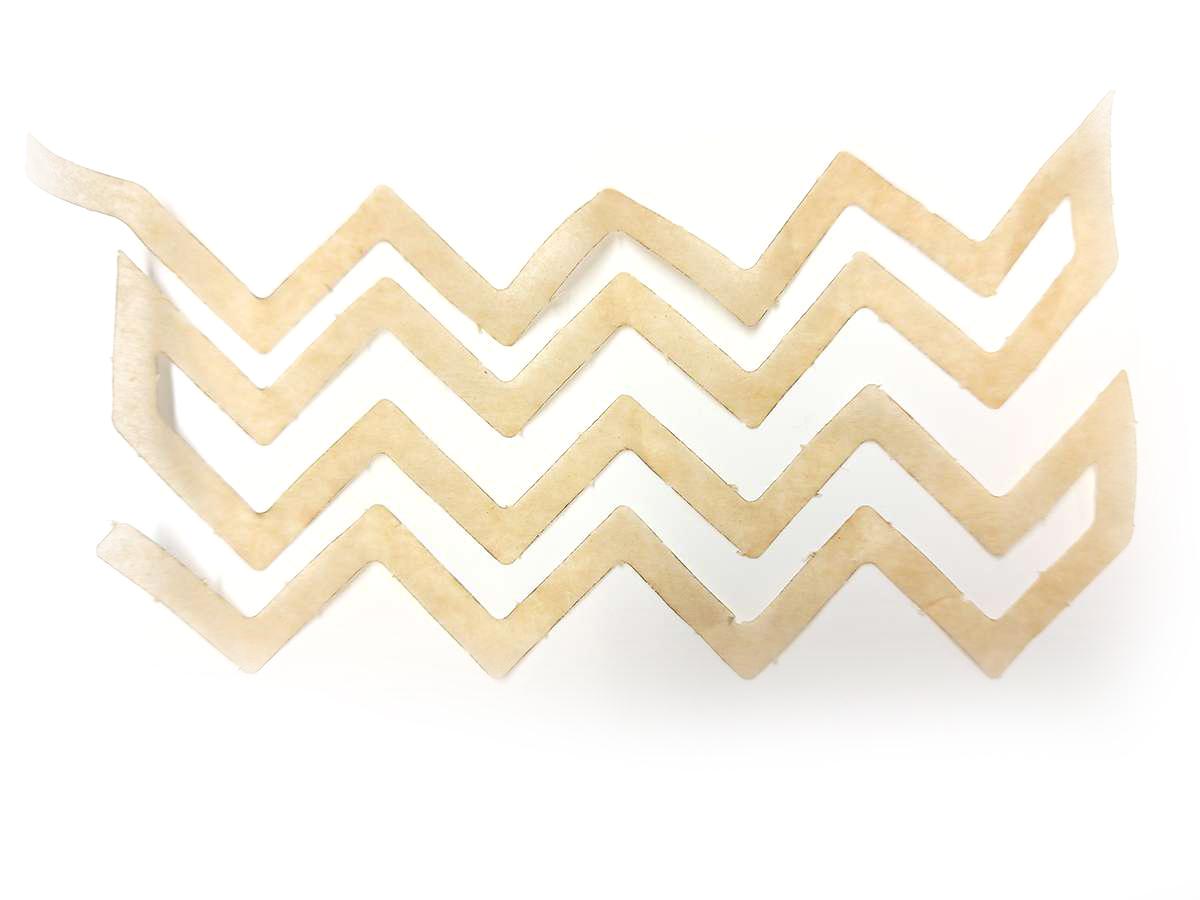
I placed the baking paper insert between two sheets of heat-transfer vinyl (glue side facing inwards)
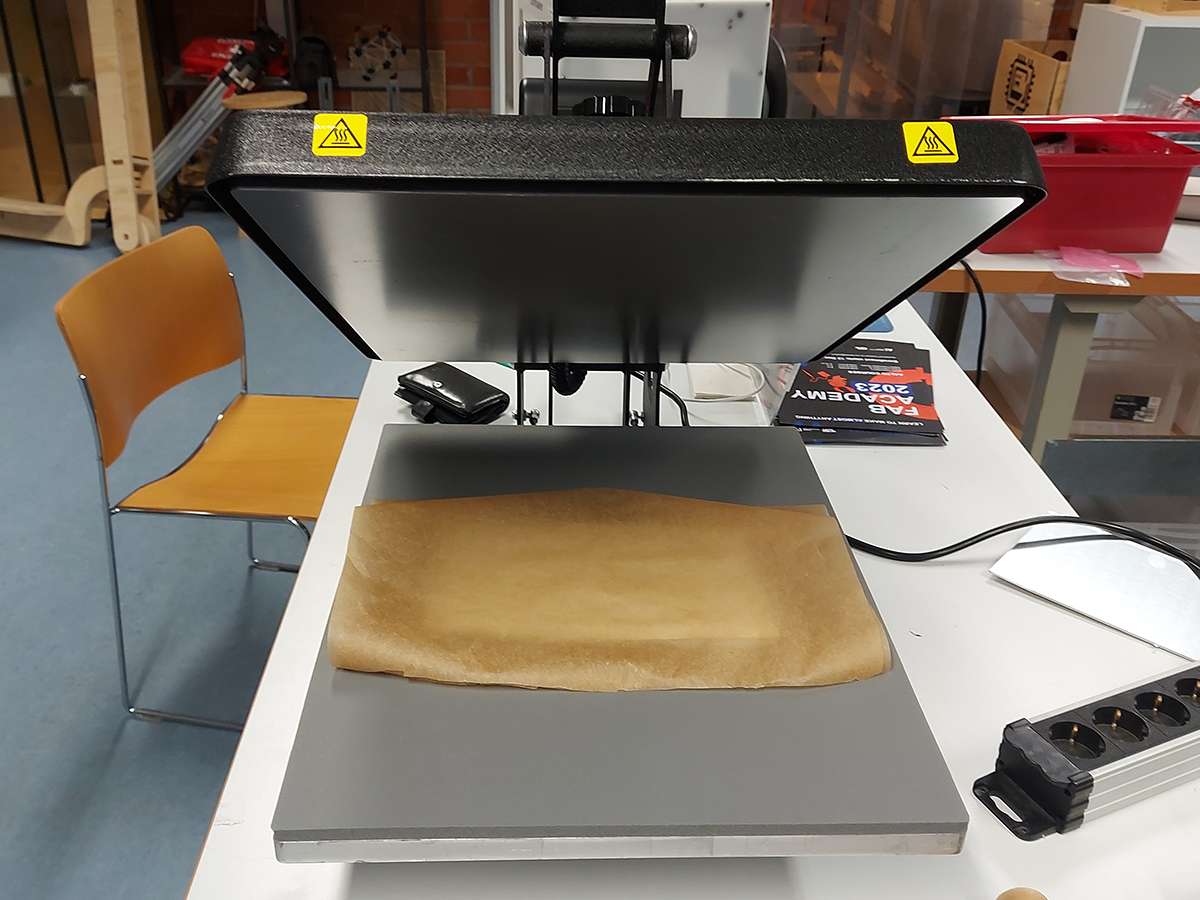
I used a heat-press to activate the glue/fusing of the vinyl sheets. Just like with the cutting, the vinyl manufacturer should provide the optimal settings
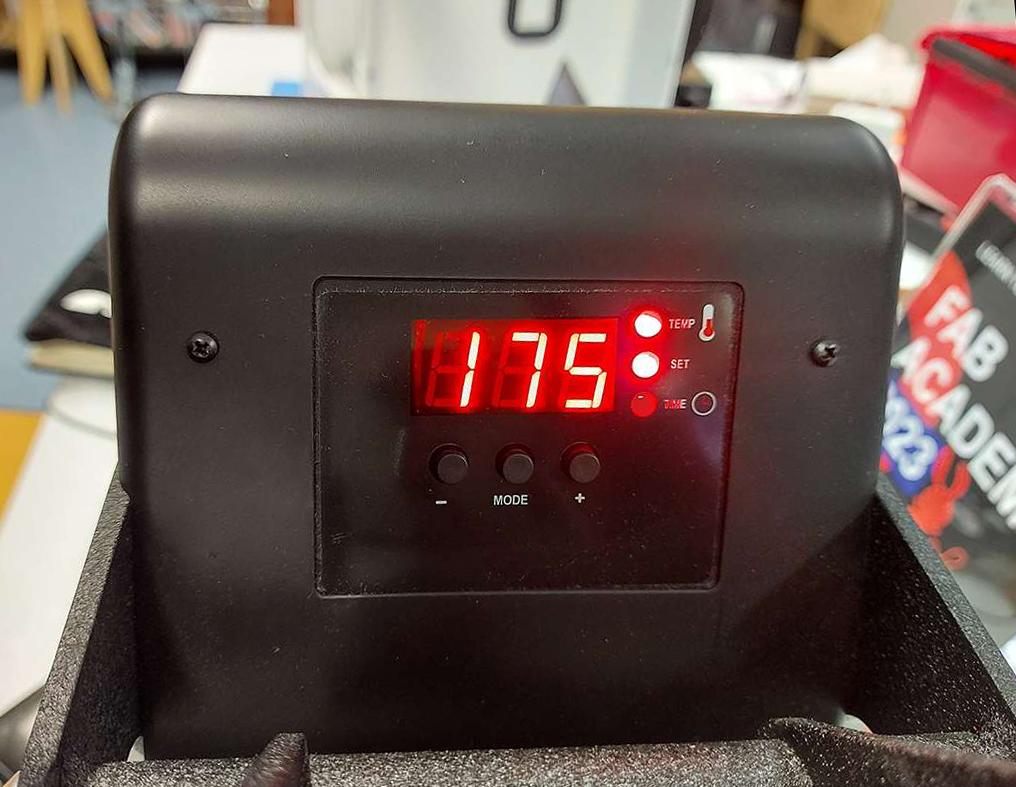
Heat-press settings: 175 C degress and 10 seconds duration
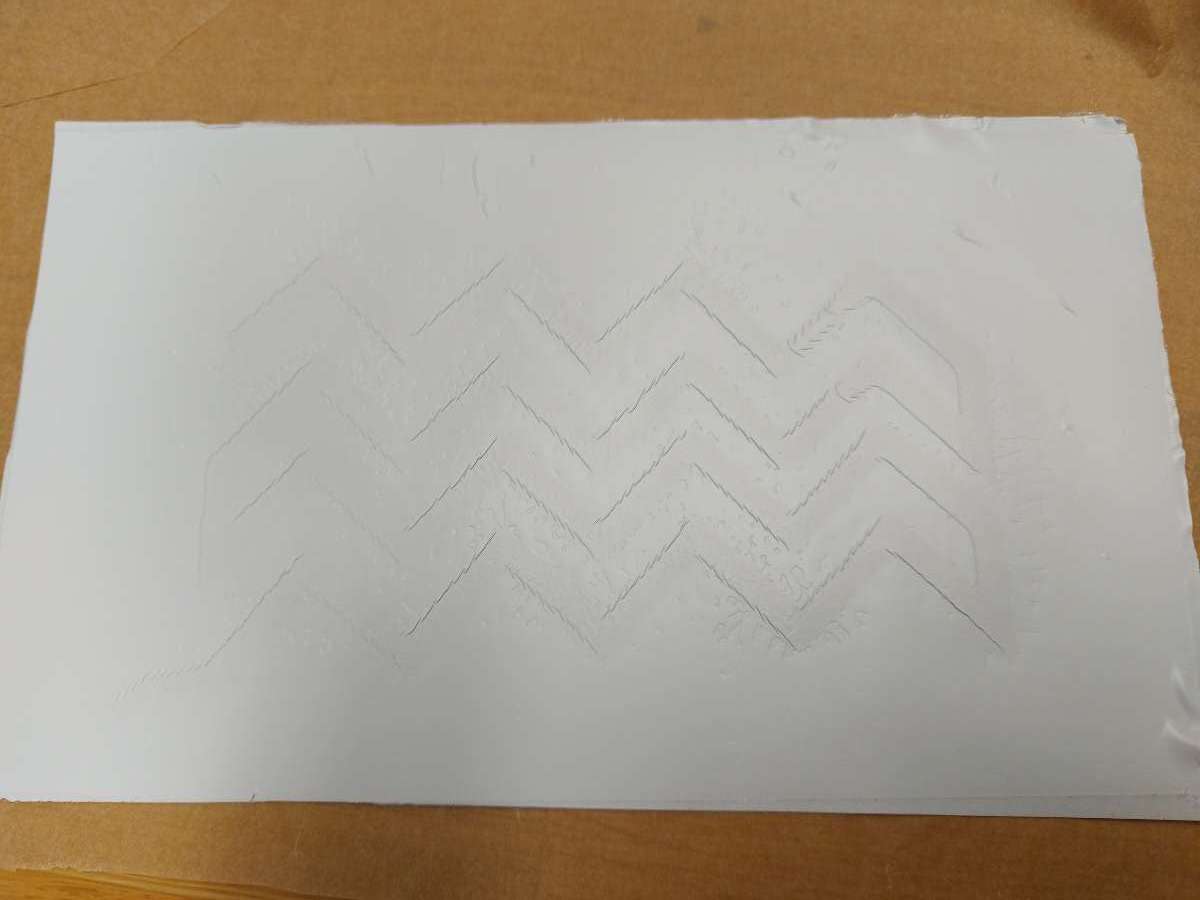
The ready inflatable. Turned out the vinyl had a very good quality glue layers that sticked even to the baking paper (shout-out to Lammtekno!) and it was difficult to separate them by pushing air inside. But possible with some dedication