5. 3D Scanning and printing
Individual assignment
- Design and 3D print an object (small, few cm3, limited by printer time) that could not be easily made subtractively.
- 3D scan an object, try to prepare it for printing (and optionally print it).
Learning outcomes
- Identify the advantages and limitations of 3D printing
- Apply design methods and production processes to show your understanding of 3D printing.
- Demonstrate how scanning technology can be used to digitize object(s)
Link to the group assignment page
https://fabacademy.org/2021/labs/vancouver/students/terrence-carew/assignments/week05g.html
Designing of a lampshade using fusion360
PROCEDURE
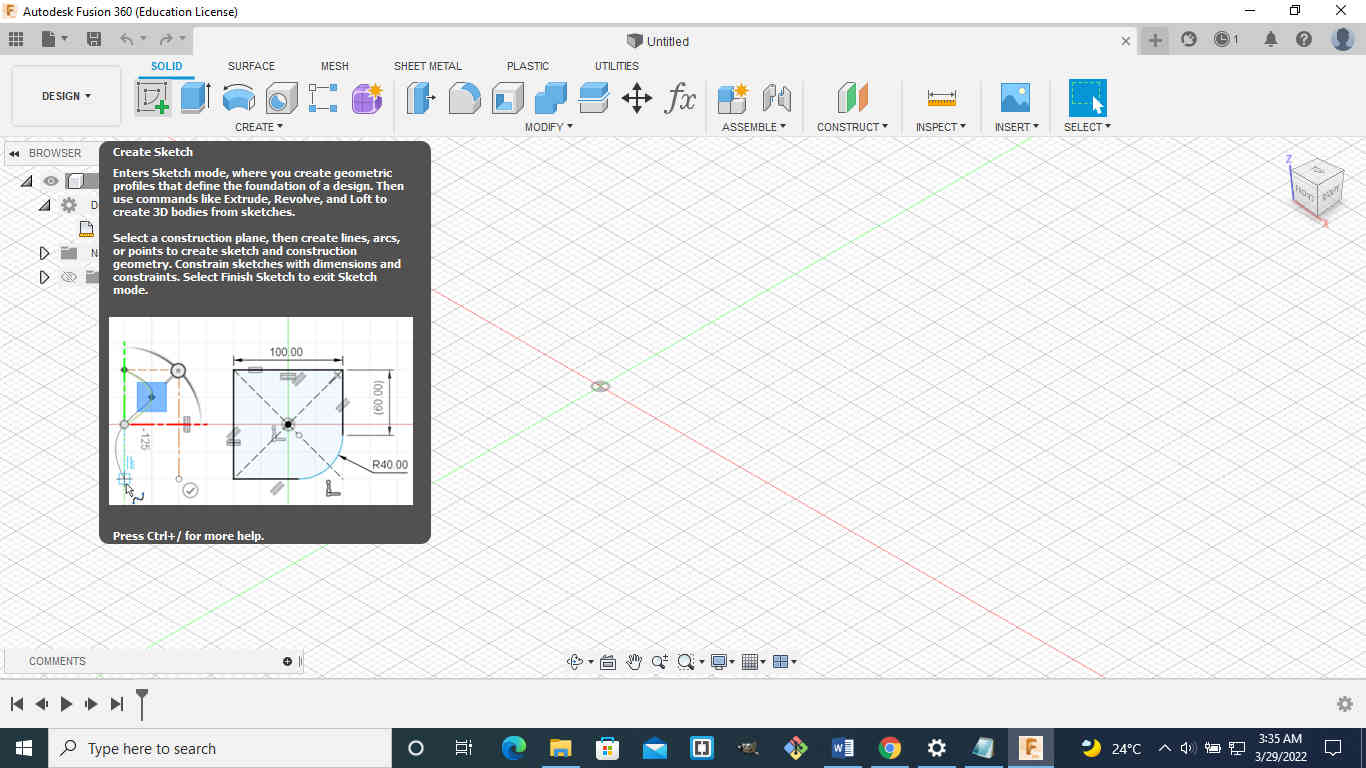
Step 1. Creating a Sketch
Use the sketch menu to create a new sketch. Select a plane to start the design. Draw a line from the origin 140mm in length. Draw another line 90 degrees at the base 50mm in length. Draw another line 90 degrees at the top of the first line 20mm in length.
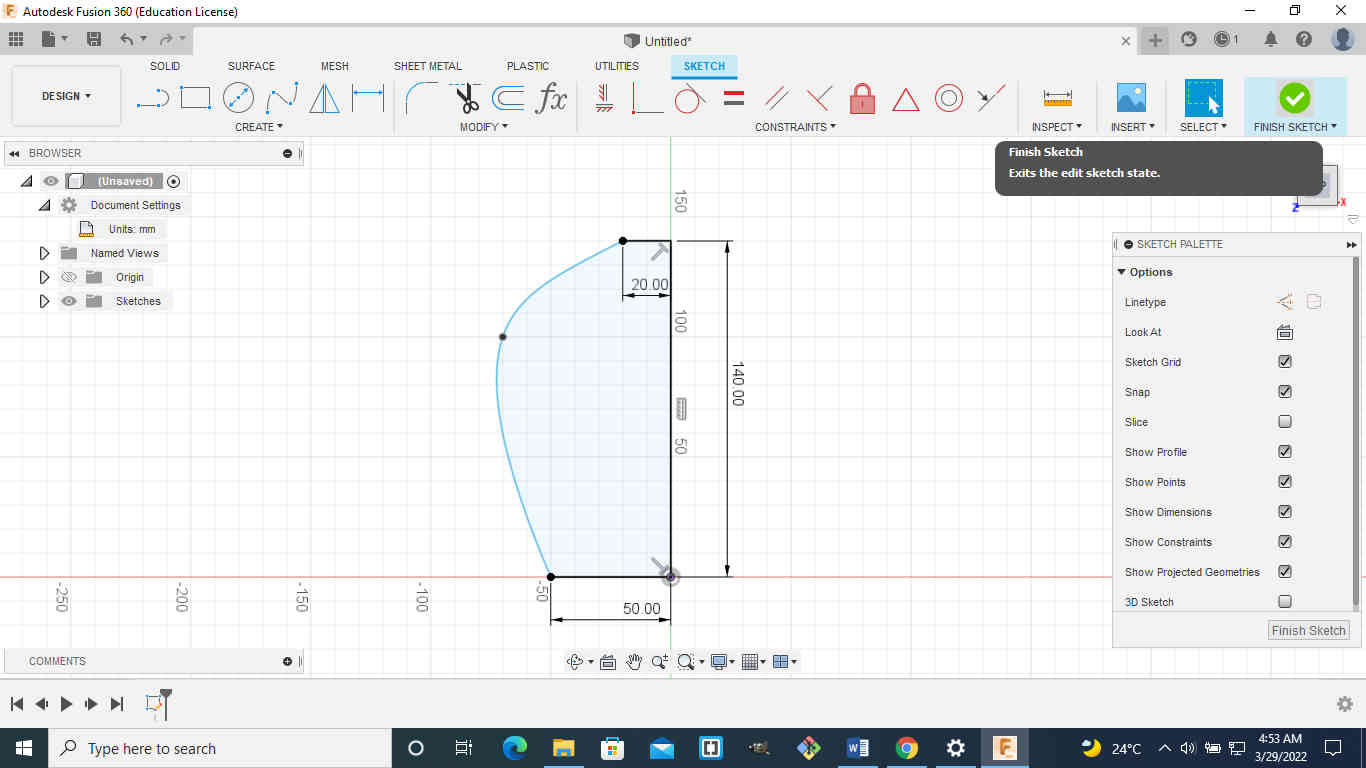
Step 2. Using the spline tool
Now I am going to use the spline tool to connect the bottom left corner to the top left corner. Select the spline tool in the drawing menu and connect the points stated above with one control point to move about the spline. The control point can be used to change the shape of the curve and by clicking on it tangent handles appear that can also alter the shape of the curve. Click on finish sketch and use the home button to view the design.
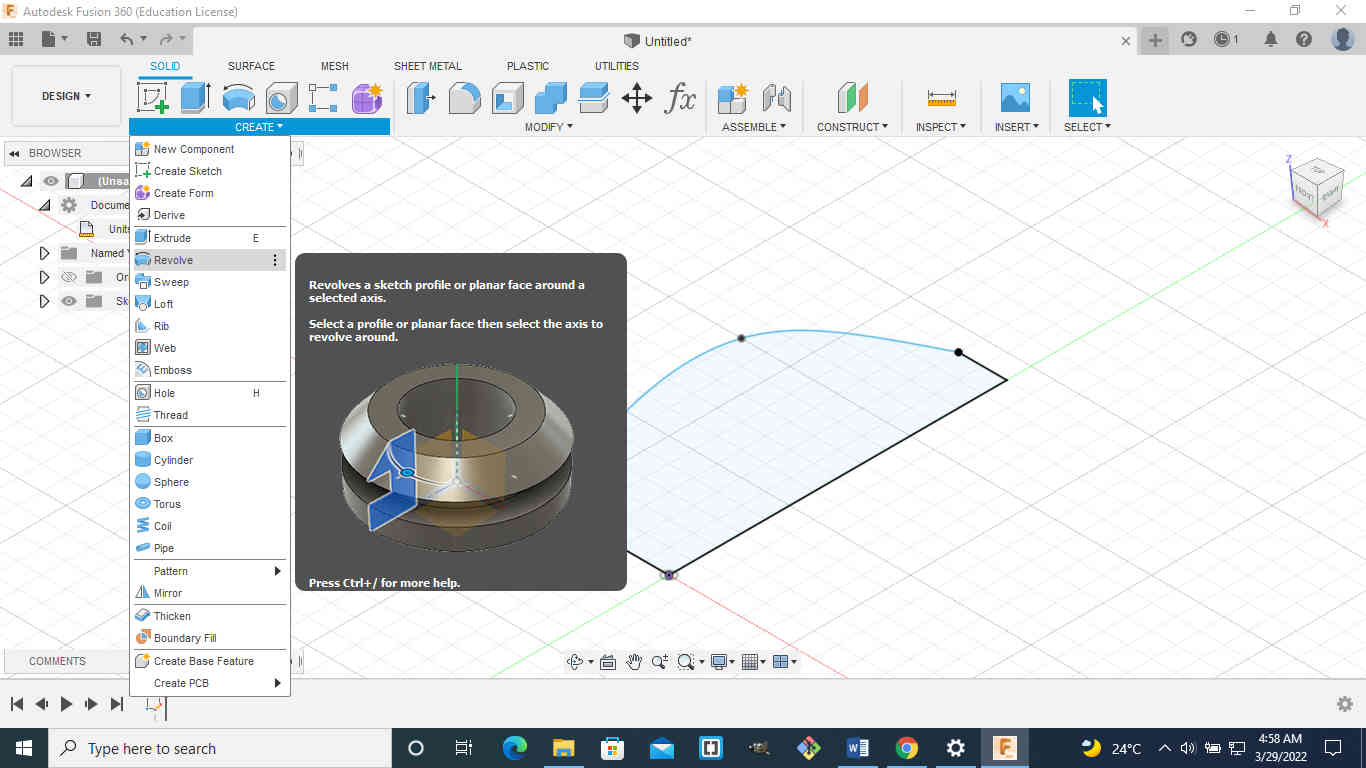
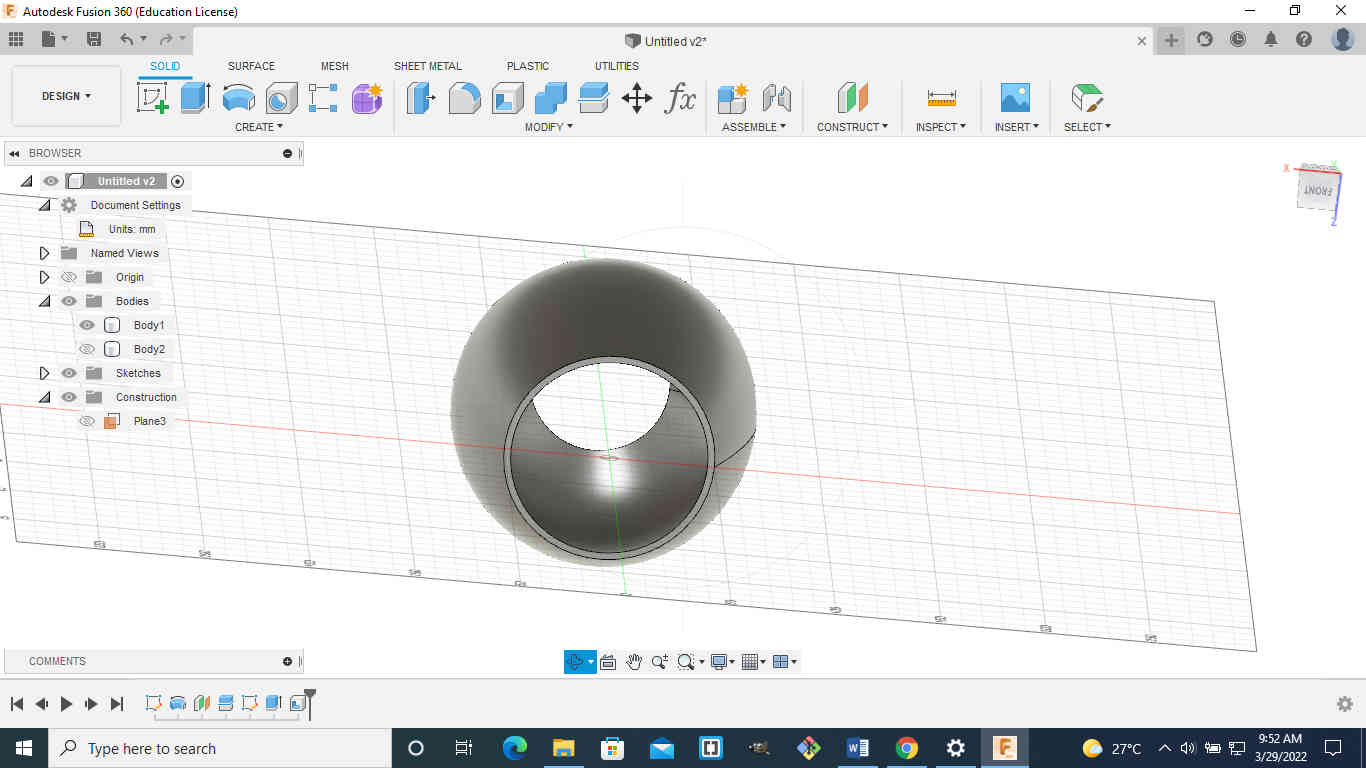
Step 3. Appling the revolve command
Now we are going to revolve the shape to create a solid body. From the create menu click revolve and select the profile sketch. Select the vertical straight line to create the solid. Be sure to have the object selected one side 360 degrees and a new body.
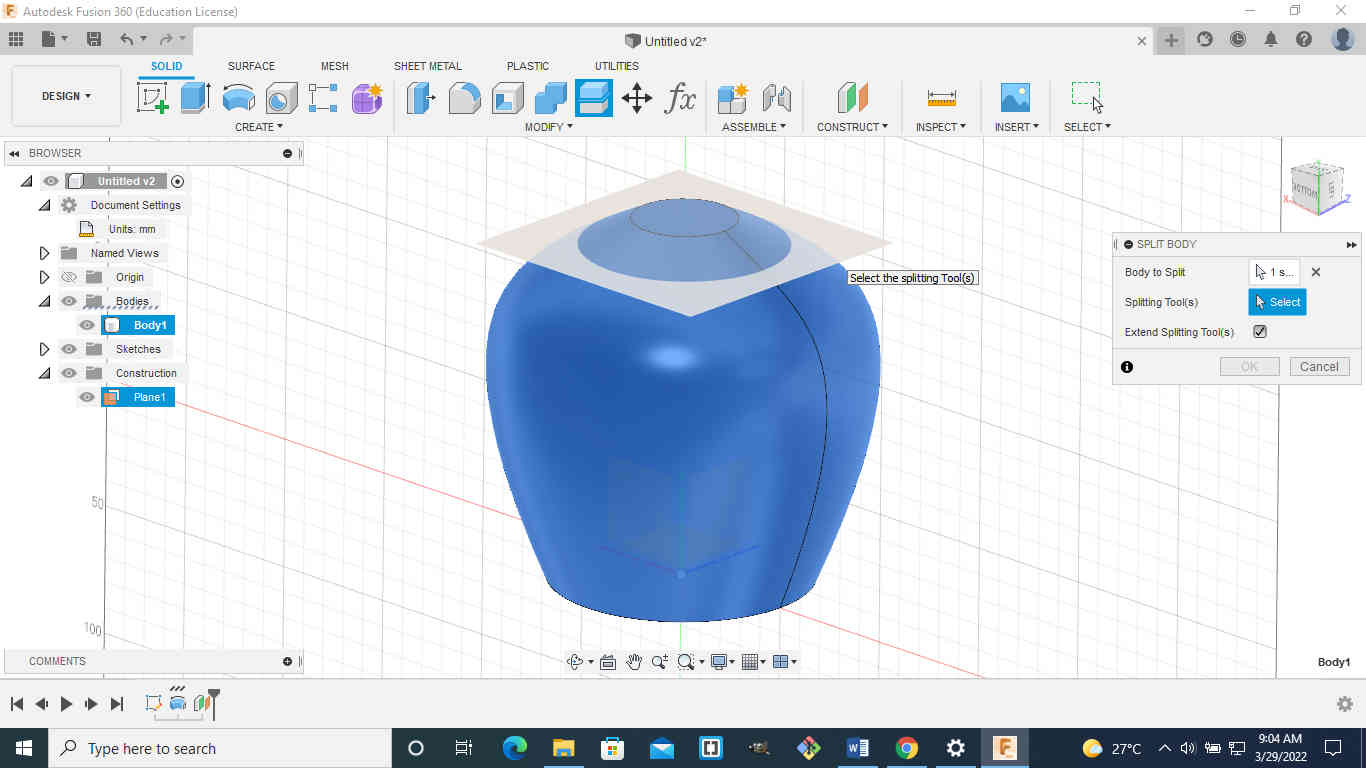
Step 4. Splitting the body
Go to the construct menu and choose offset plane. I am going to select the top plane and offset it by -10mm. Now I am going to split the body since we still only have one present. Go to the modify tab and choose split body. Select the body to split and then select the splitting tool which is the previous plane created.
Step 5. Creating a hole
I am going to create a hole for the top of the lampshade. First I am going to hide body 1. From the sketch menu create a sketch and select the top face. Choose the center diameter circle and draw a circle 38mm in diameter. Click on finish sketch.
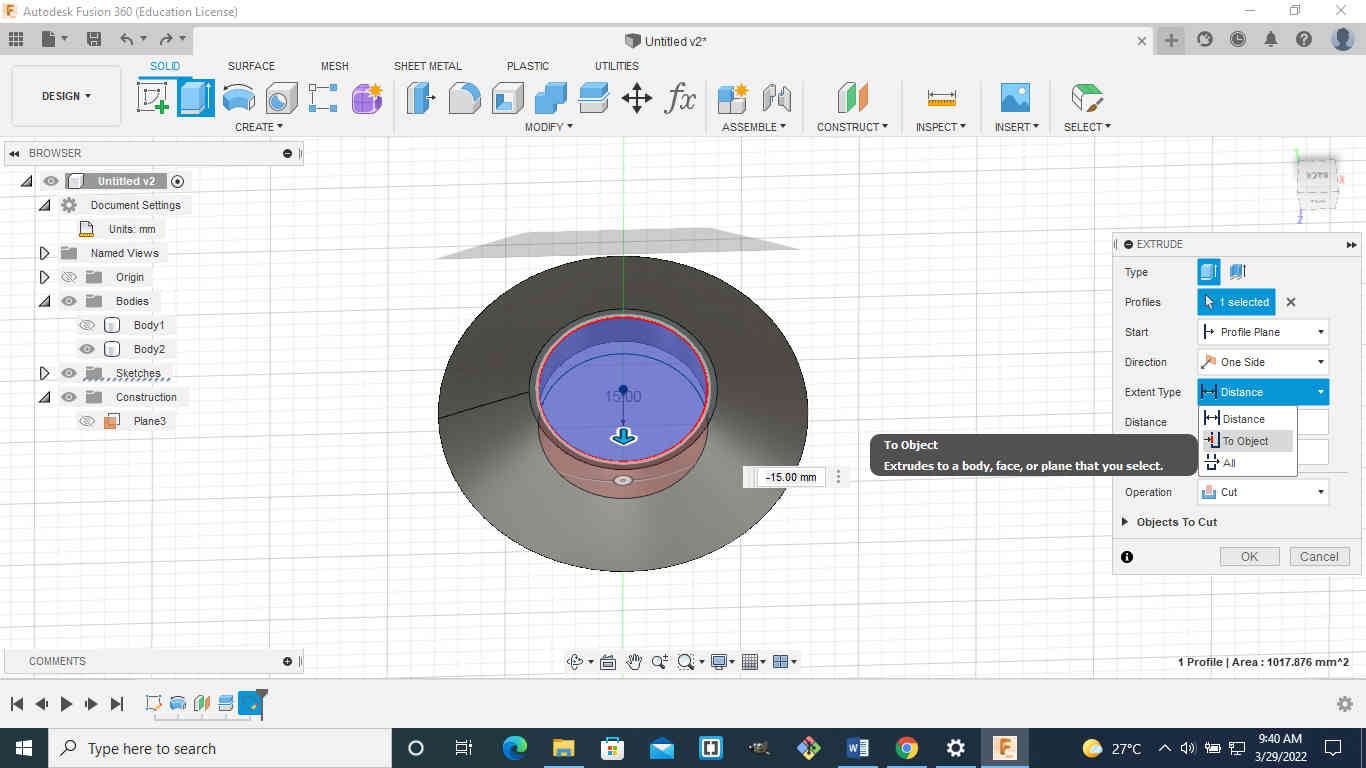
Step 6. Extruding the profile
From the create menu select extrude and select the inner profile. Now I am going to extrude to another surface. Change the extent from distance to object and select the surface to extrude to.
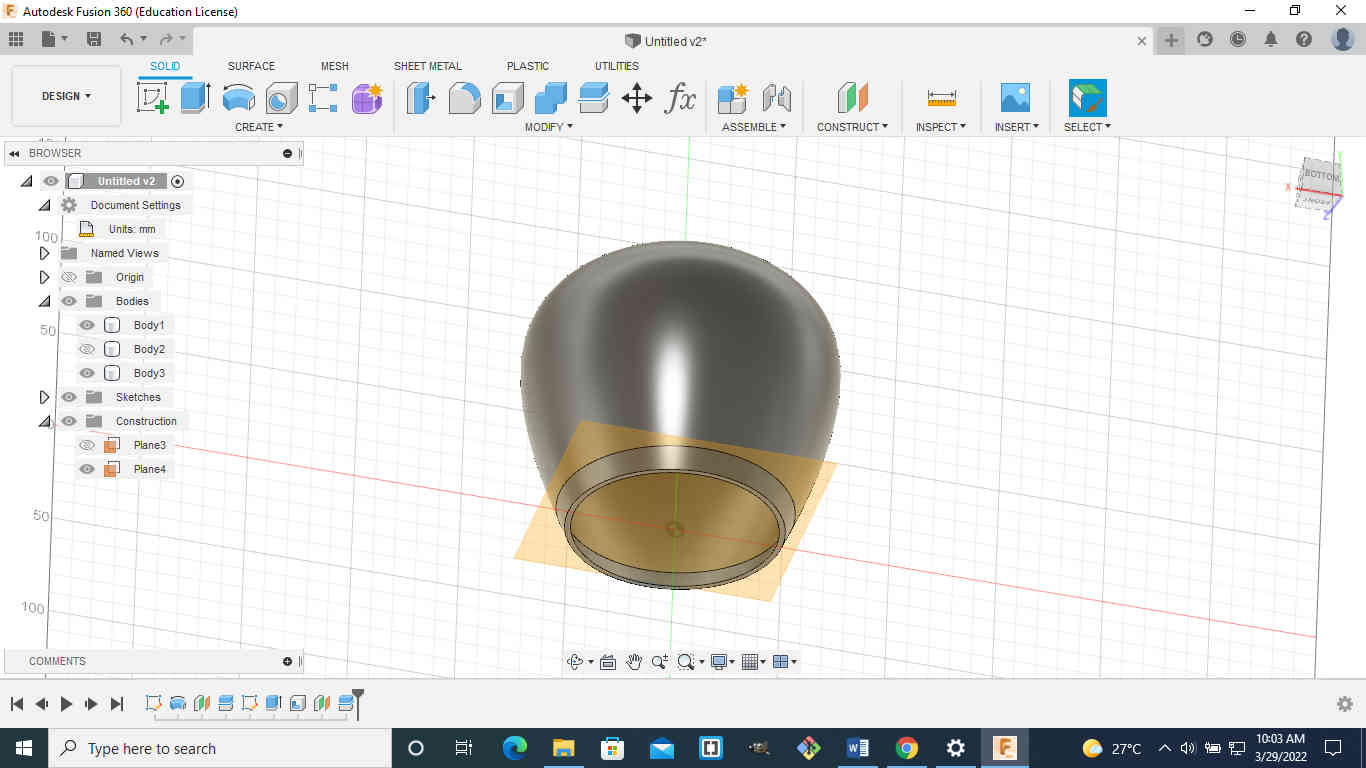
Step 7. Uniform wall thickness
Hide body1 and select body2. I am going to shell the object to uniform wall thickness. Select the entire object then go to modify and click on shell. Select both the top and bottom face then specify the thickness (2.5).
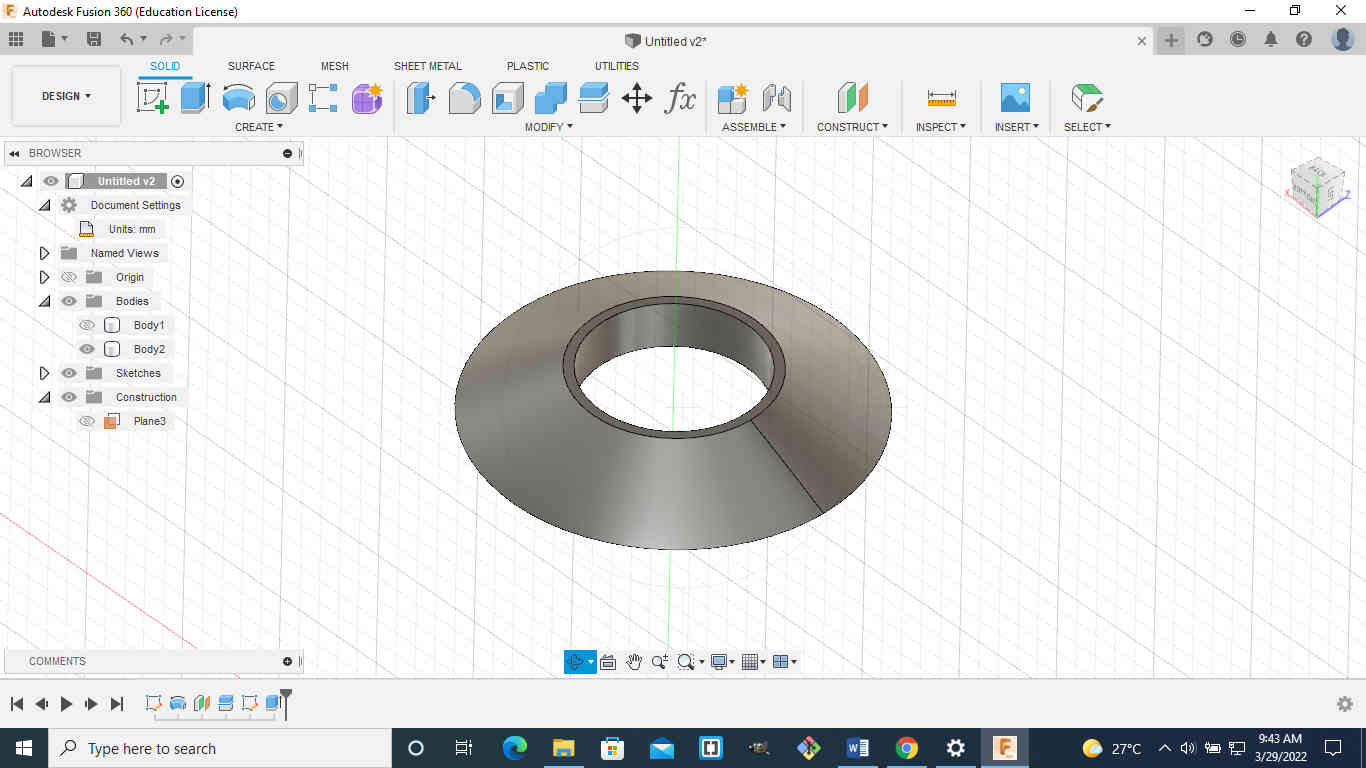
Step 8. Creating the bottom circle
Create a ring for the bottom circle follow the previous step from body1. Then repeat the previous steps to perform the split as I body1.
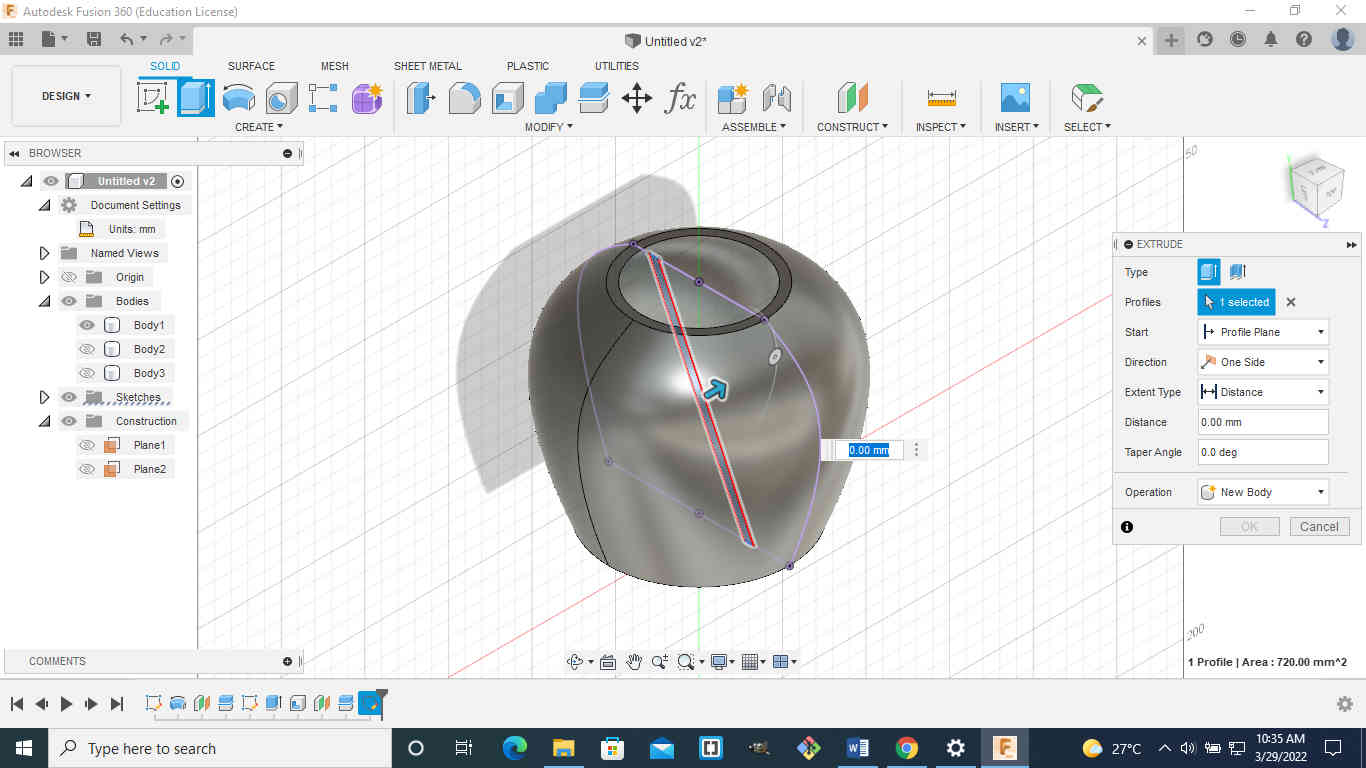
Step 9. Creating the pattern
Now I am going to create the pattern for the lampshade. Hide the top and bottom which is body2 and body3. Create a new sketch and select one of the plane that run through the middle of the body. To project in the existing geometry. Set the selection filters to body and click on body to highlight. Hide body1 to access the projected geometry. Choose the line tool and draw a line from top to bottom across the geometry, draw another line next to the previous one drawn. Set the distance between the lines to be 6mm and make sure they are parallel. Turn back on body1.
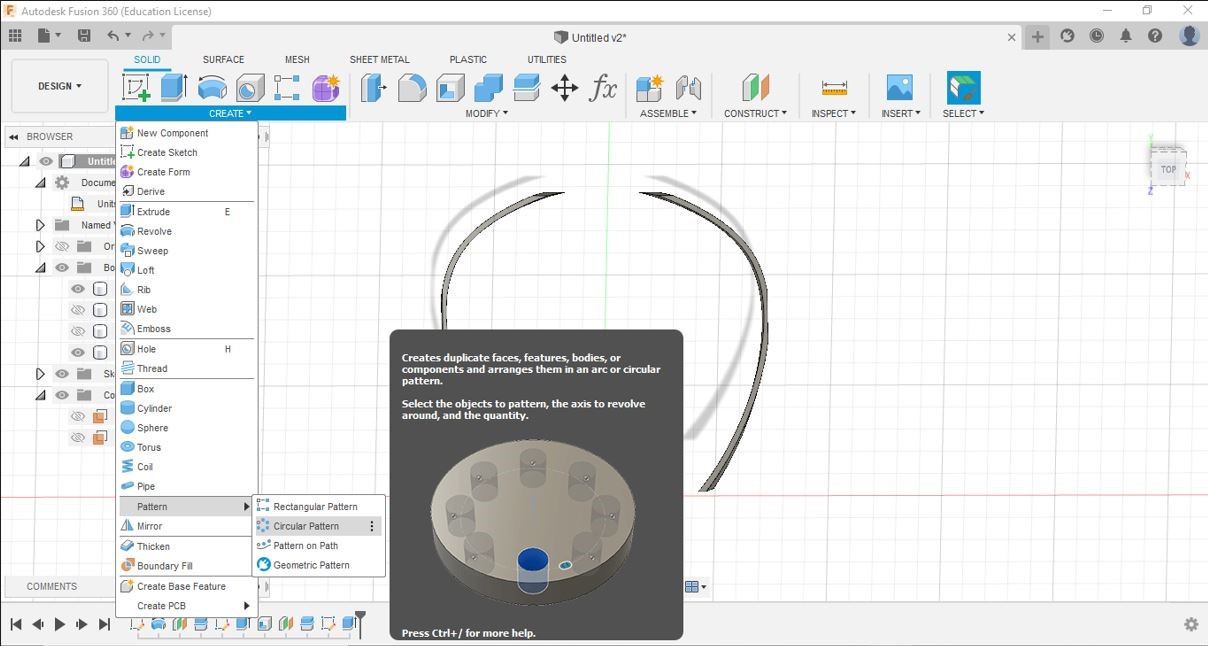
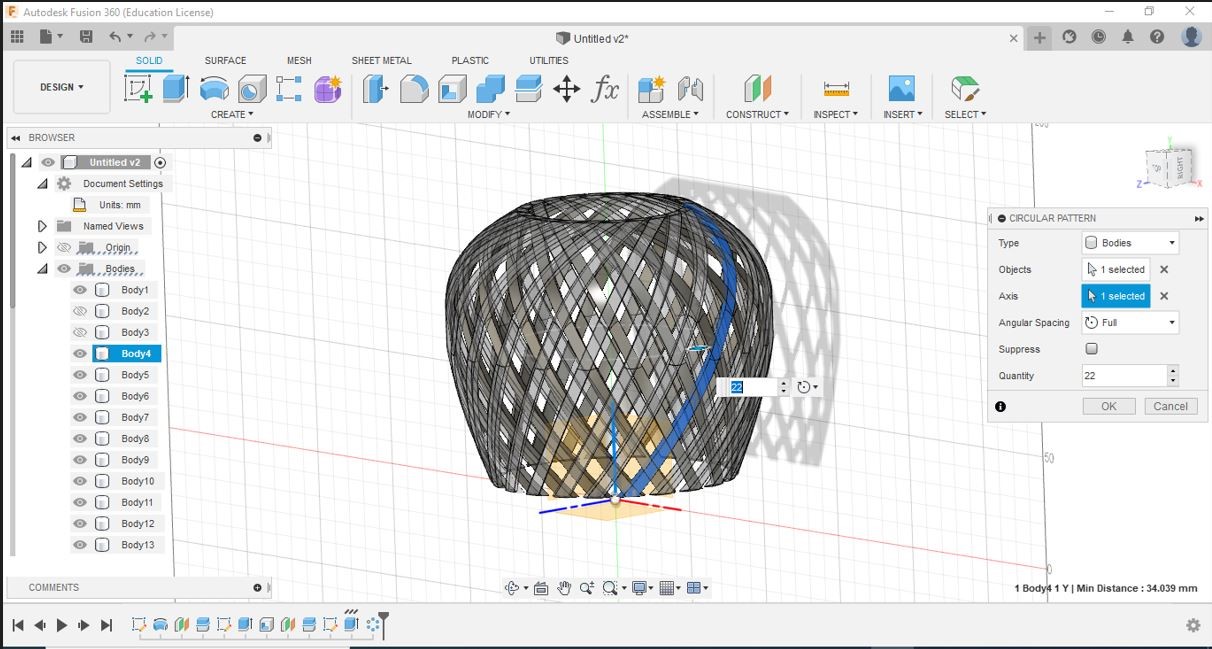
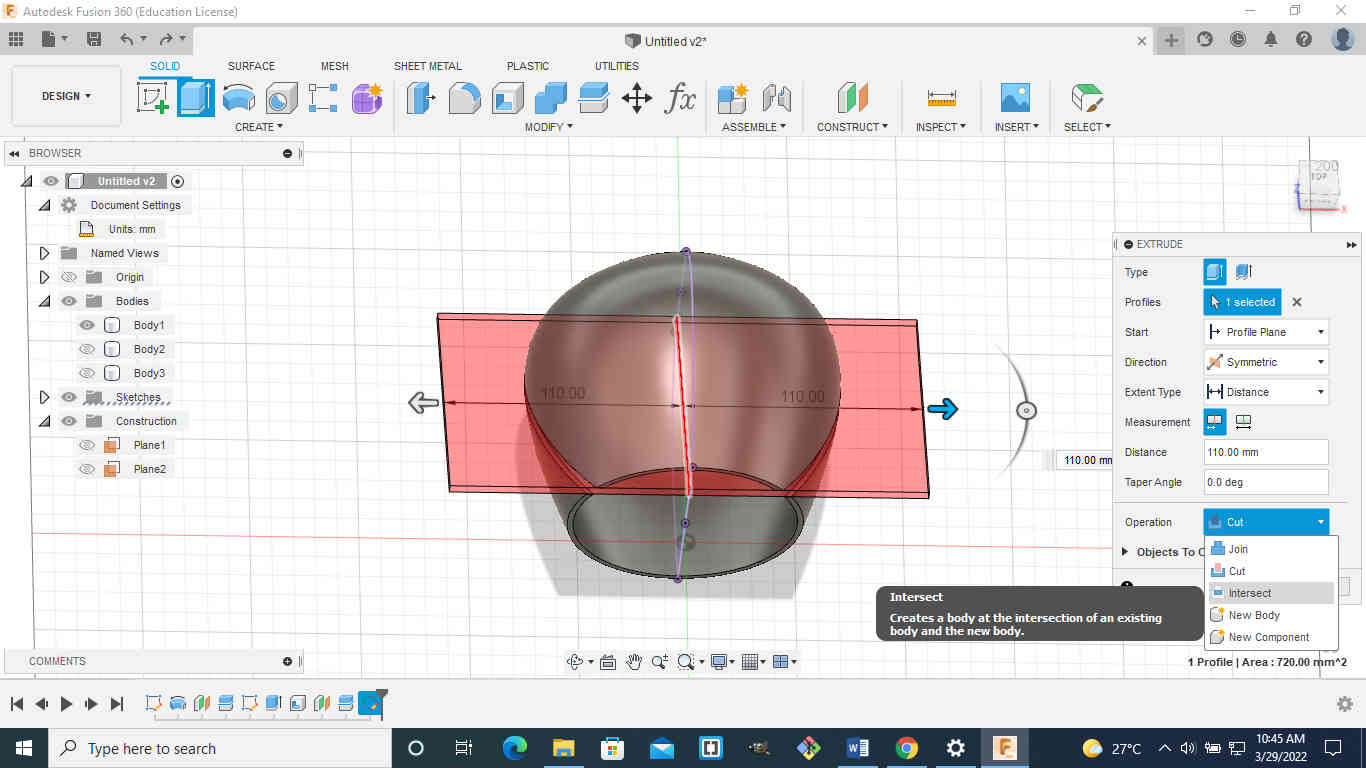
Step 10. Intersect and circular pattern
Choose extrude from the create menu and select the profile just sketched and drag it all the way through by changing the direction from one side to symmetric. Now I am going to perform an intersect in the existing body. From the create menu select pattern and then circular pattern. Change the circular pattern type to bodies. Then select the body and select the RZ axis which goes up and down and specify the amount and press ok. Now I am going to pattern the mirrored feature all the way around. Go to create and select pattern then circular pattern with the pattern type set to bodies. and select the body facing the opposite direction, select the same vertical axis as before Turn on the top and bottom strips by showing all the bodies.

3D Scanning
For the 3d scanning aspect of this assignment i decided to use Qlone
What is Qlone
Qlone is an app used for 3D scanning.It is used to 3D models from physical objects and has built in tools that can be used to edit the scanned object.It also has a feature that allows you to animate your modls in AR.It is available for use with both IOS and ANDROID.
Note A recent upgrade also stated that IOS version of the app may be more advanced features and also has the option of scanning without using the Qlone mat.
I downloaded the Qlone app from the app store and also with it comes a Qlone mat which i printed out.
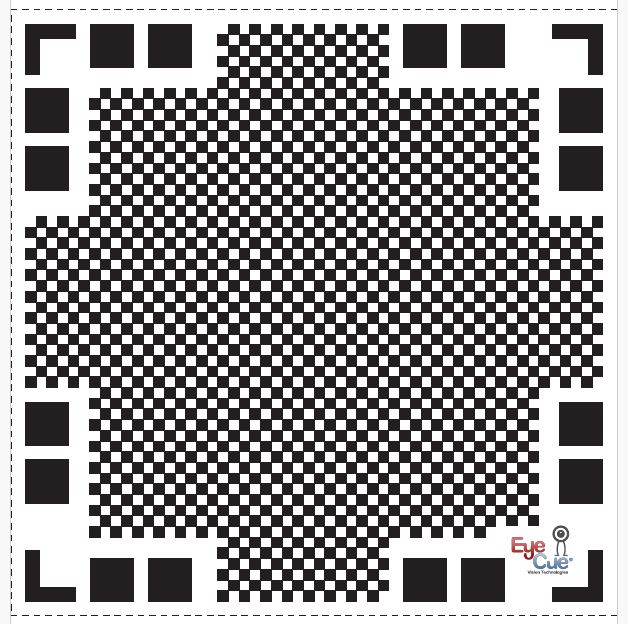
The Qlone mat is shown in the photo below.
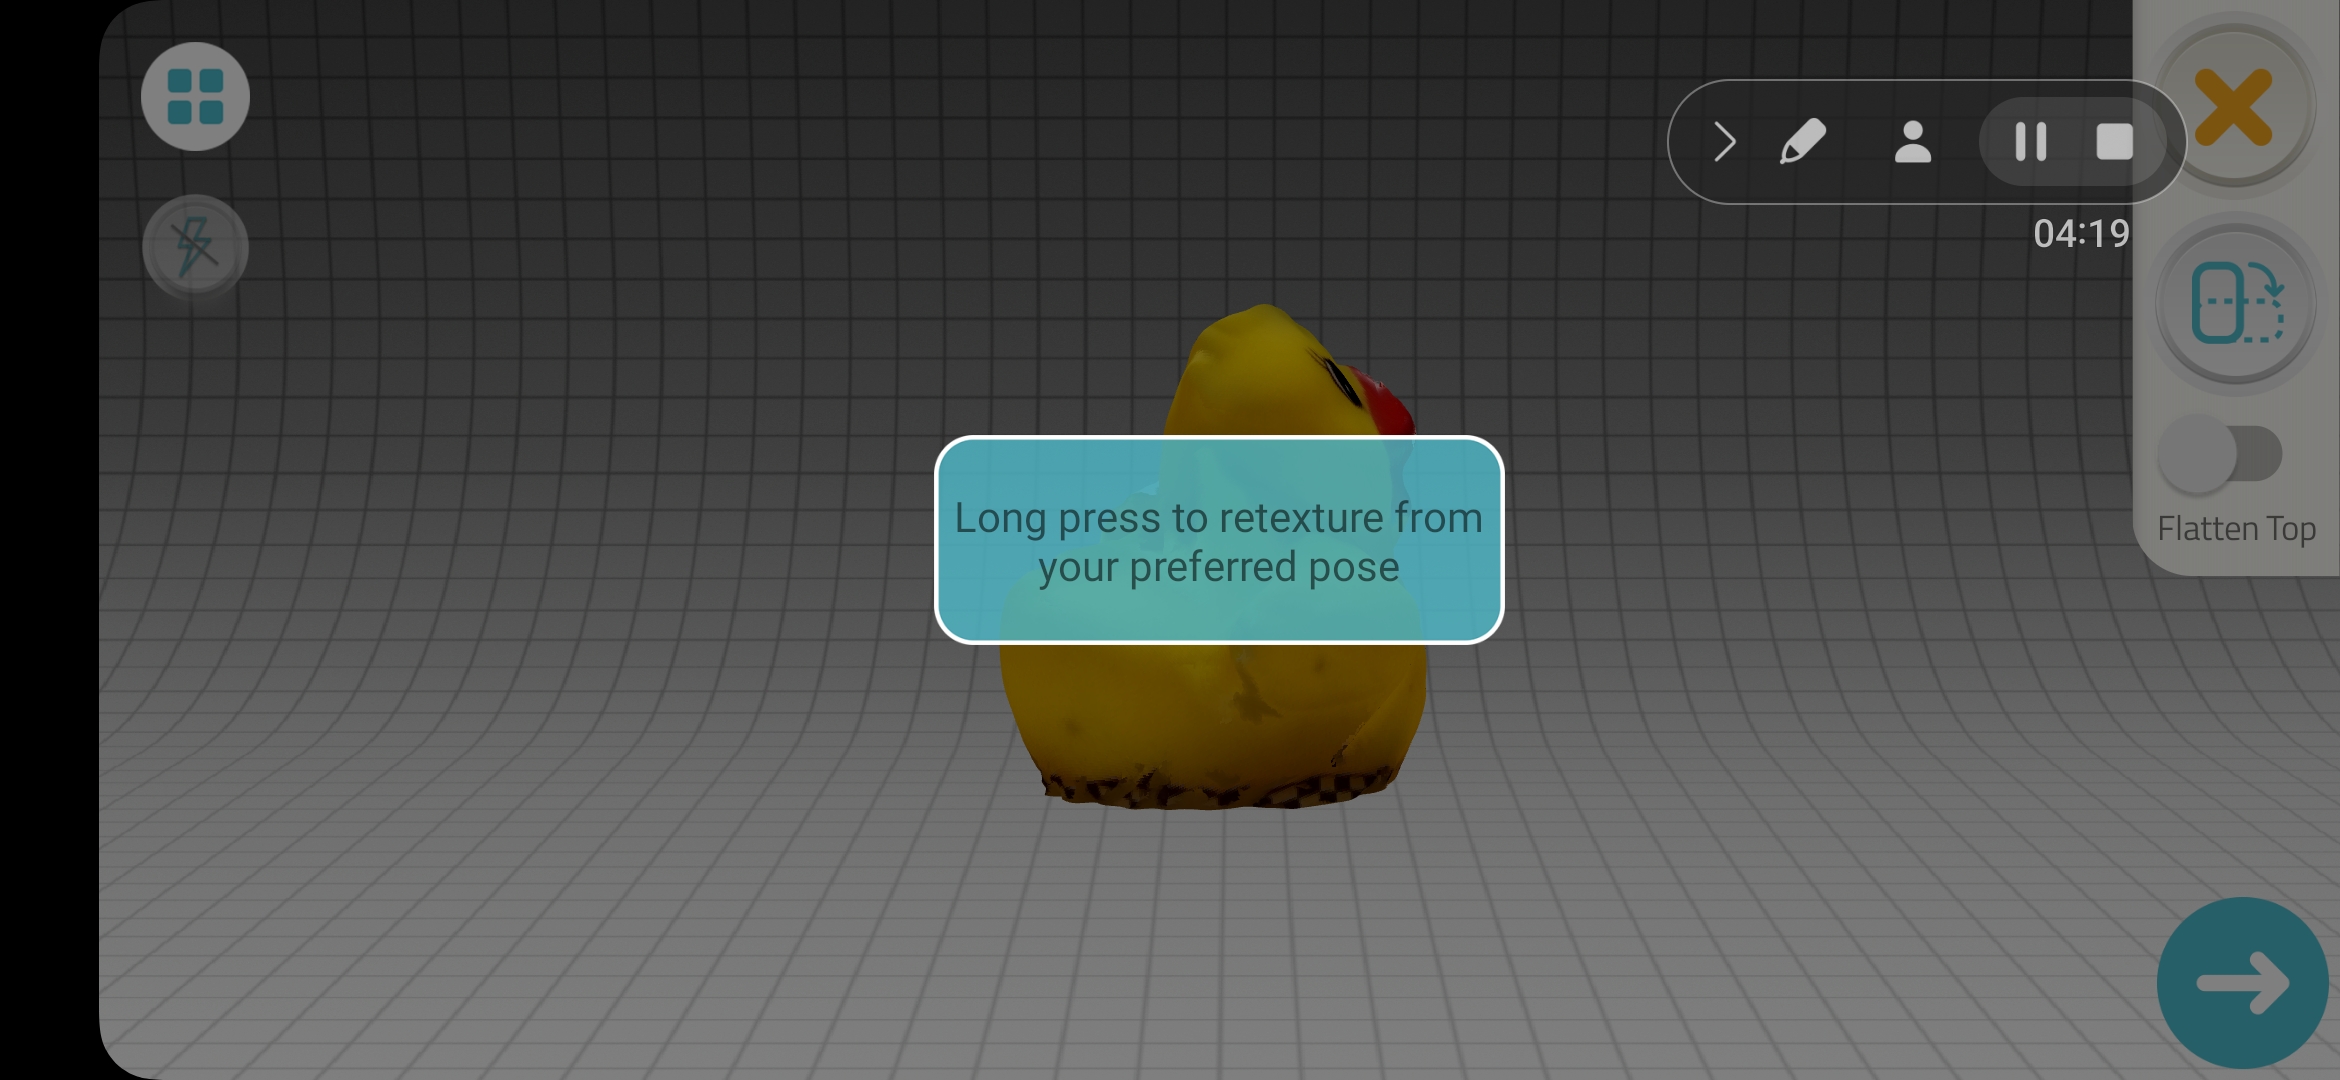
I used a rubber ducky to do my 3D scan.

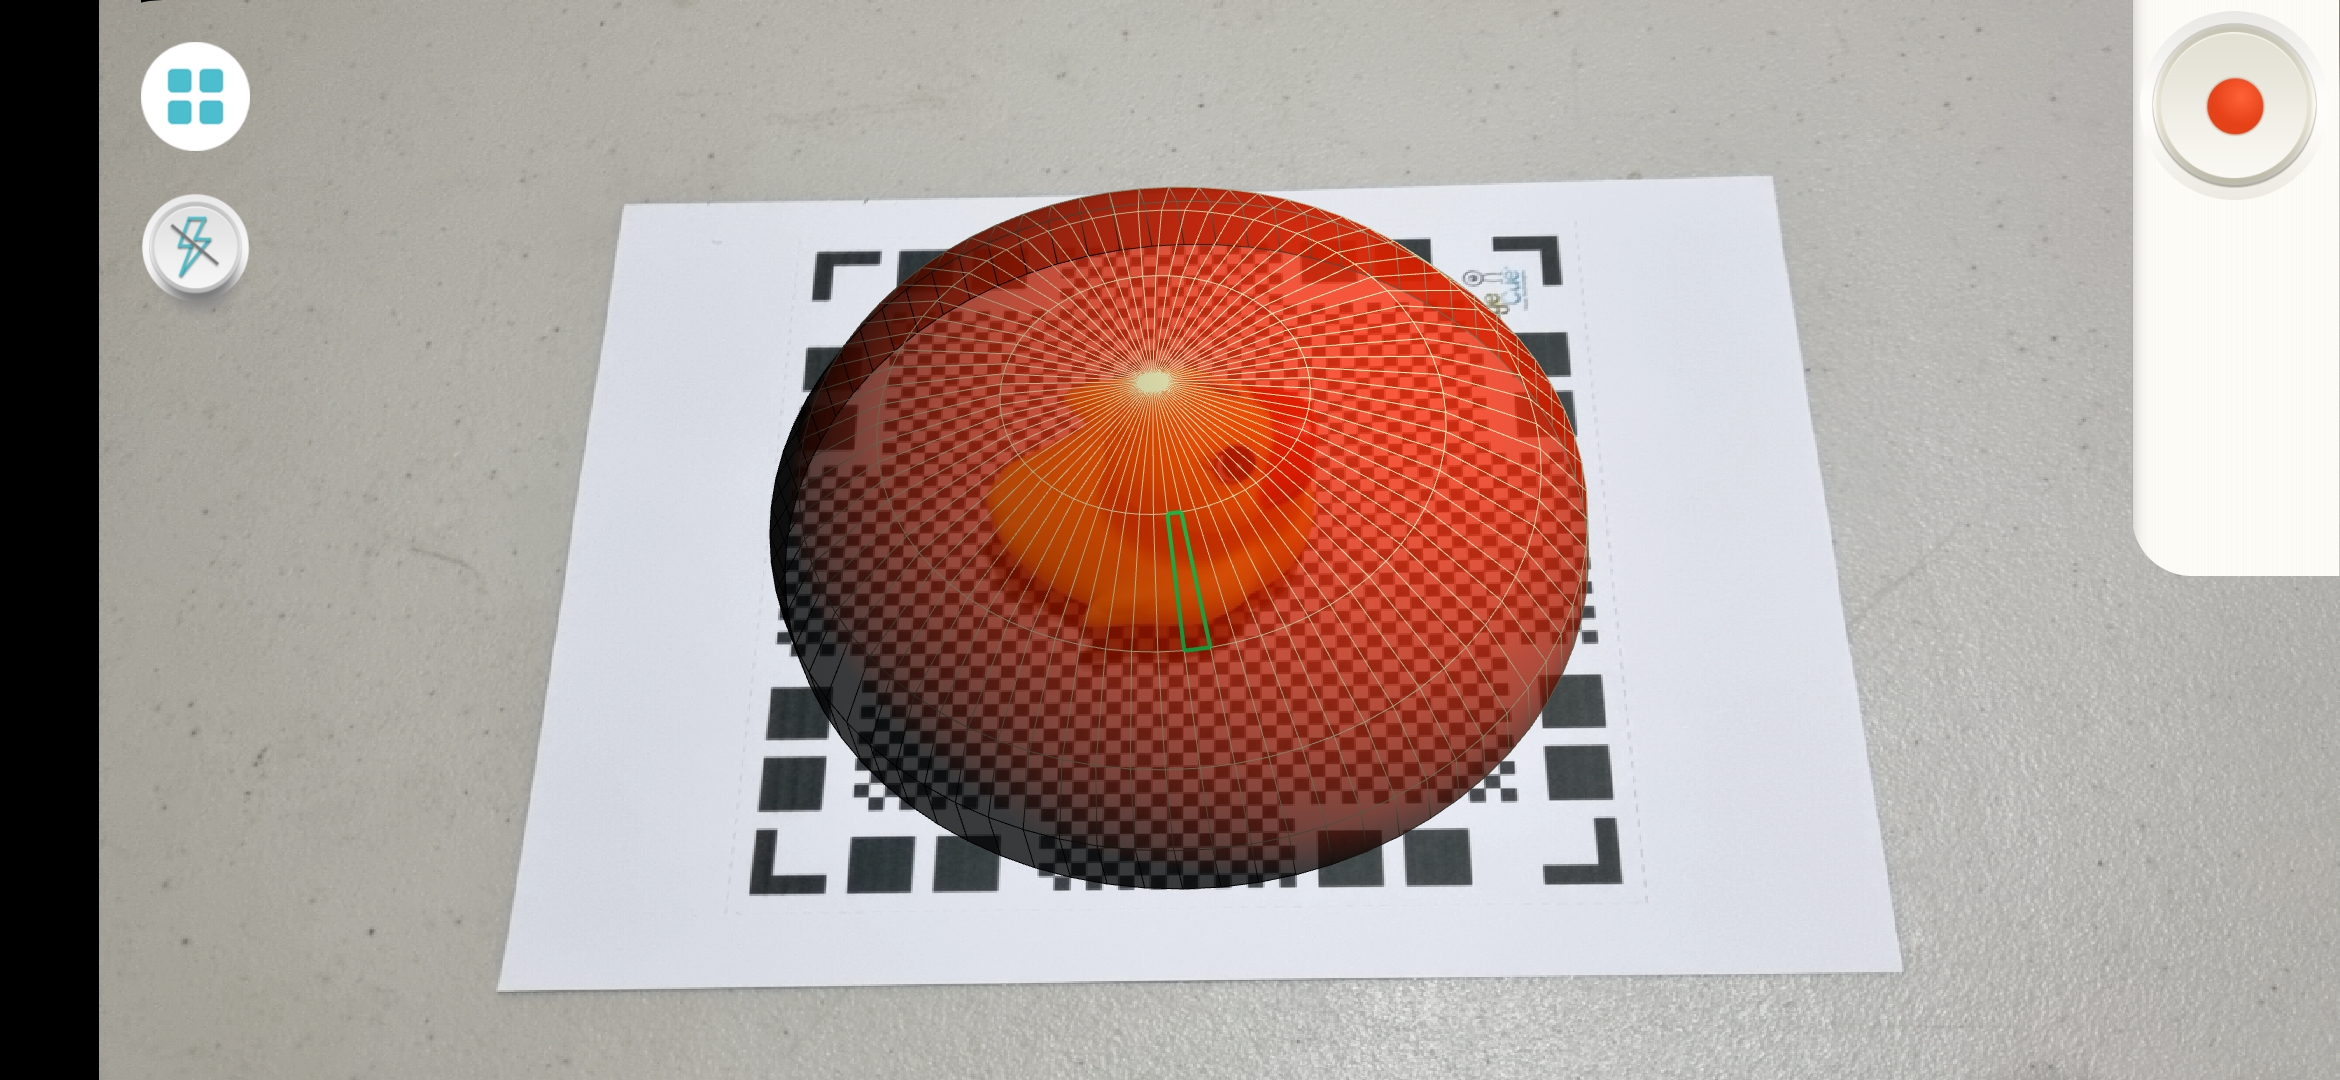
I placed the rubber ducky in the middle of the mat and using the app the AR dome guided me through the scanning process.
It can be seen in the photo below that if the phone is too far from the mat the dome would appear to be red.
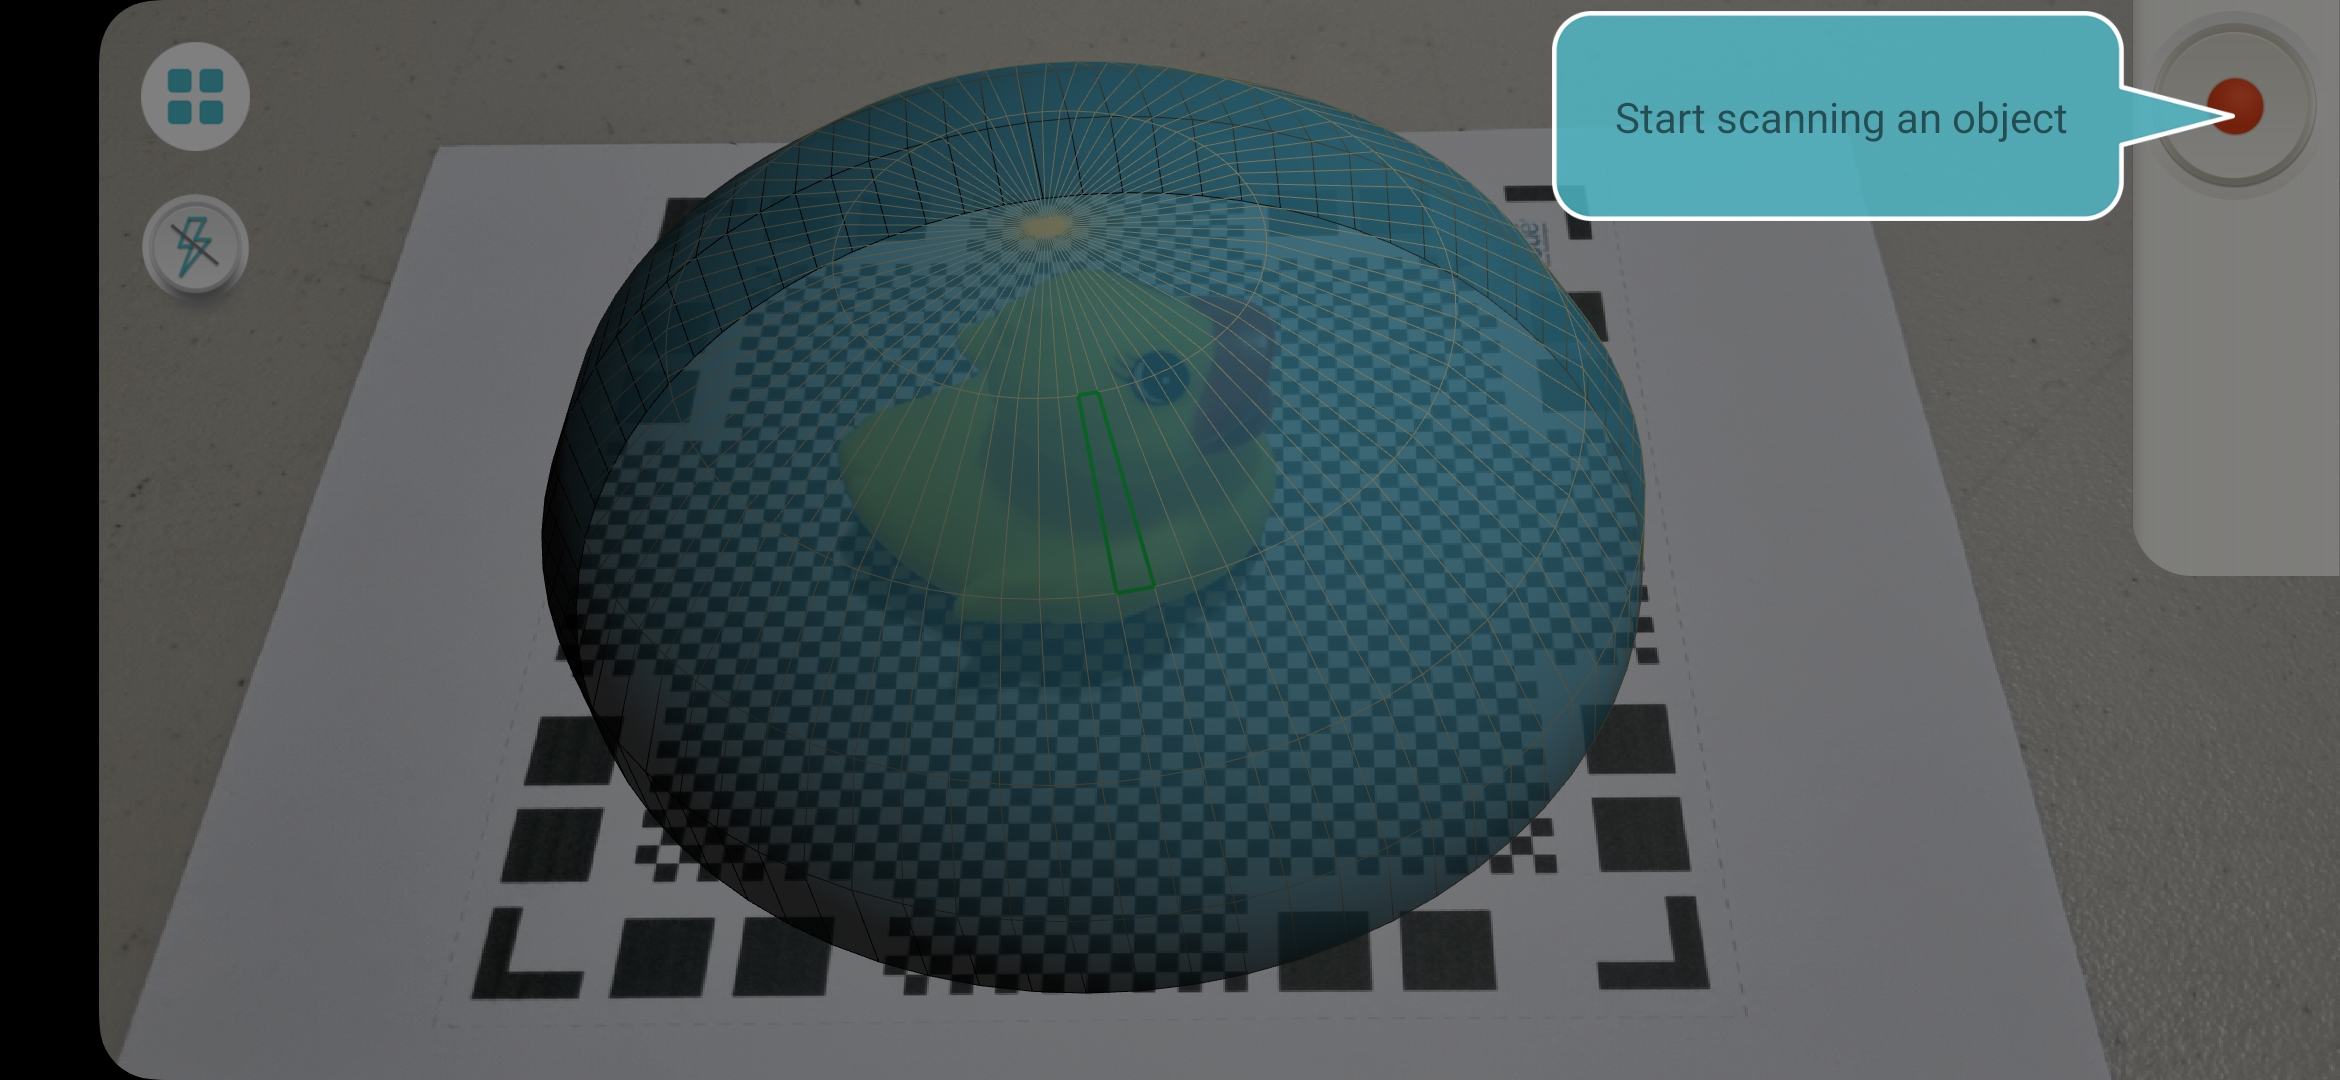
When it was at the correct distance the dome turned sort of green and one of the segments was highlighted prompting me to start scanning the object at the top right hand corner.
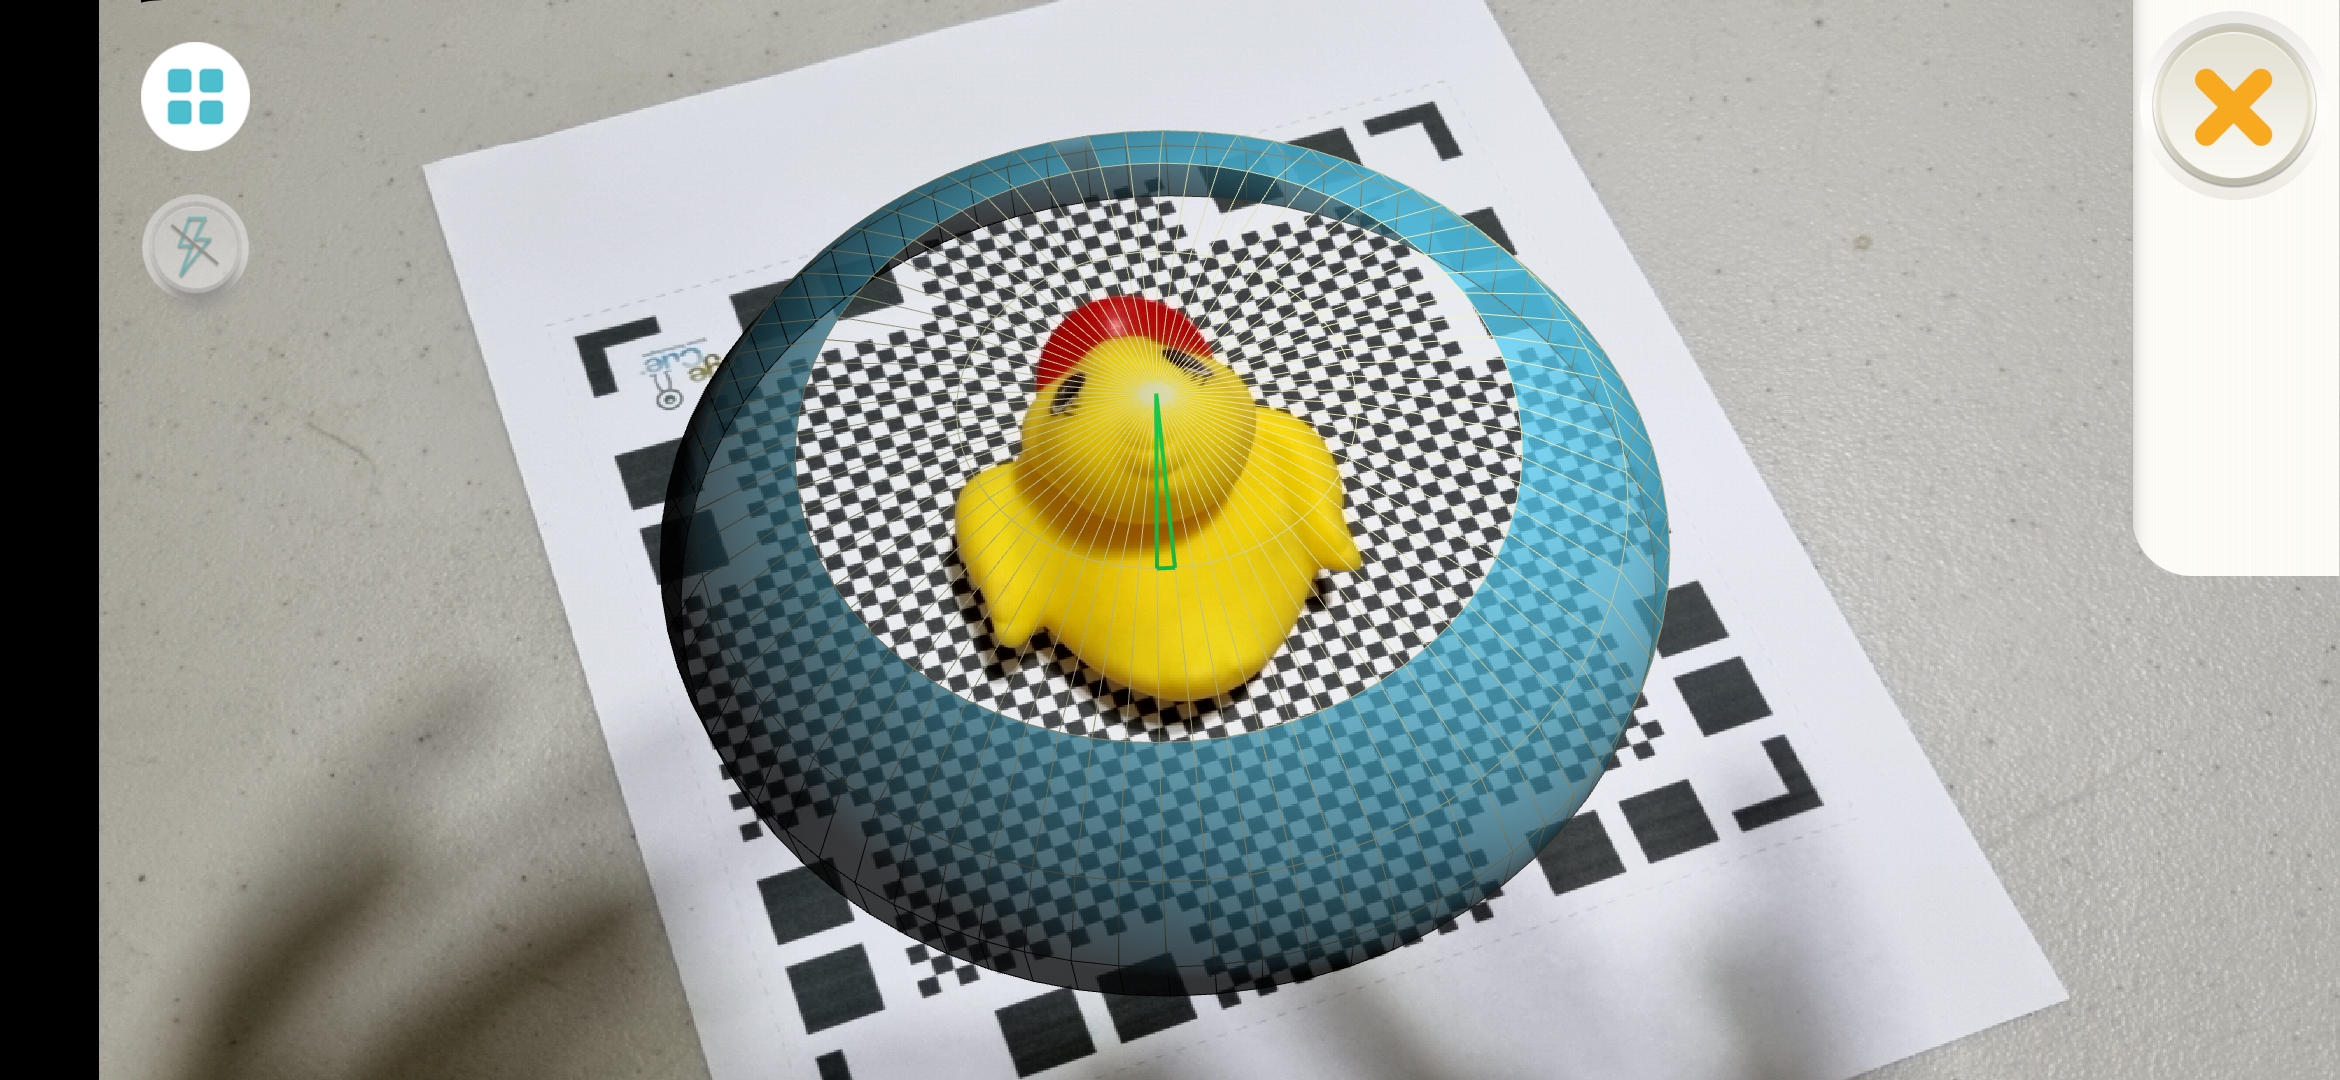
The photo below shows scanning at the top with part of the dome removed.
The final image shows the finished scan with an option to redo the scan from another position
Hero Shots
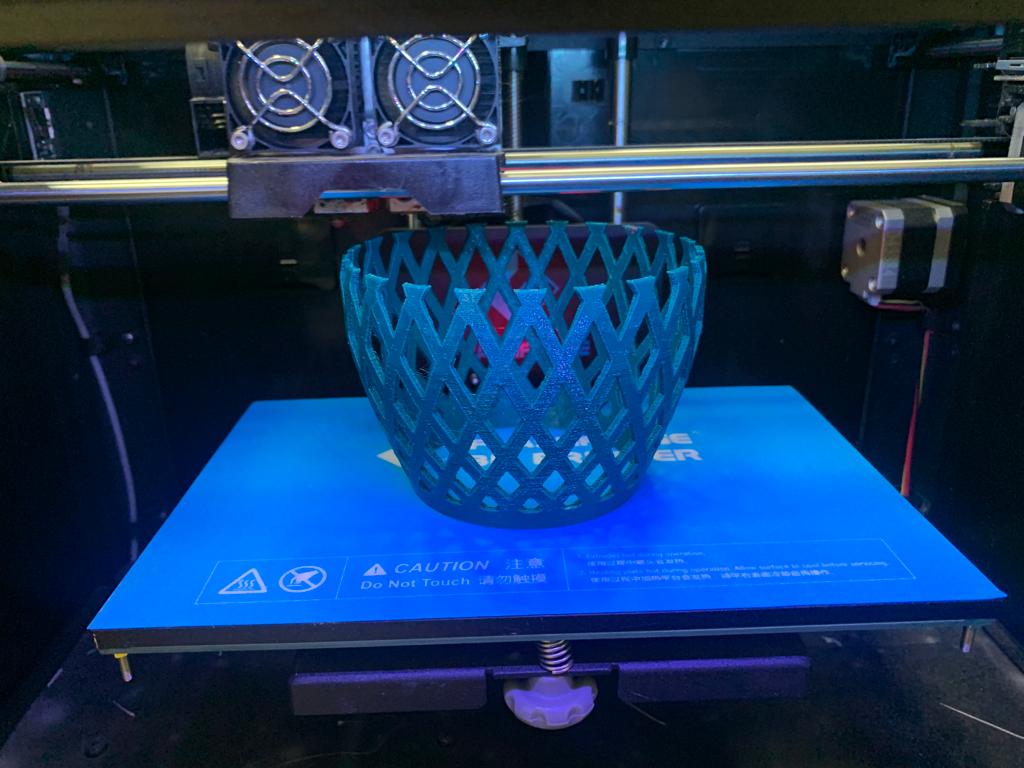
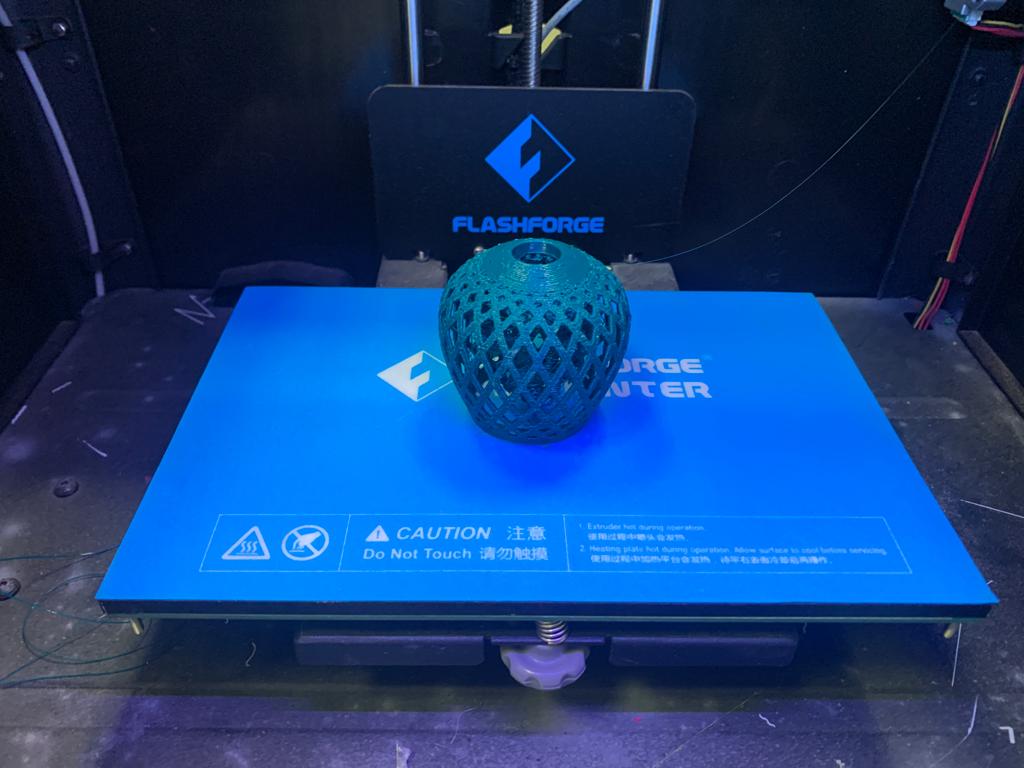
Machines and software used and settings
For the 3D printing the machine used was the Flash Forge Creator Pro.The material used was PLA(polyactic acid) from matterhackers.The nozzle temperature used to melt the filament was 215 degrees and the bed was heated at 60degrees.