Final Project
This week I worked on defining my final project idea and started to getting used to the documentation process.
Automatic System for Watering of Plants
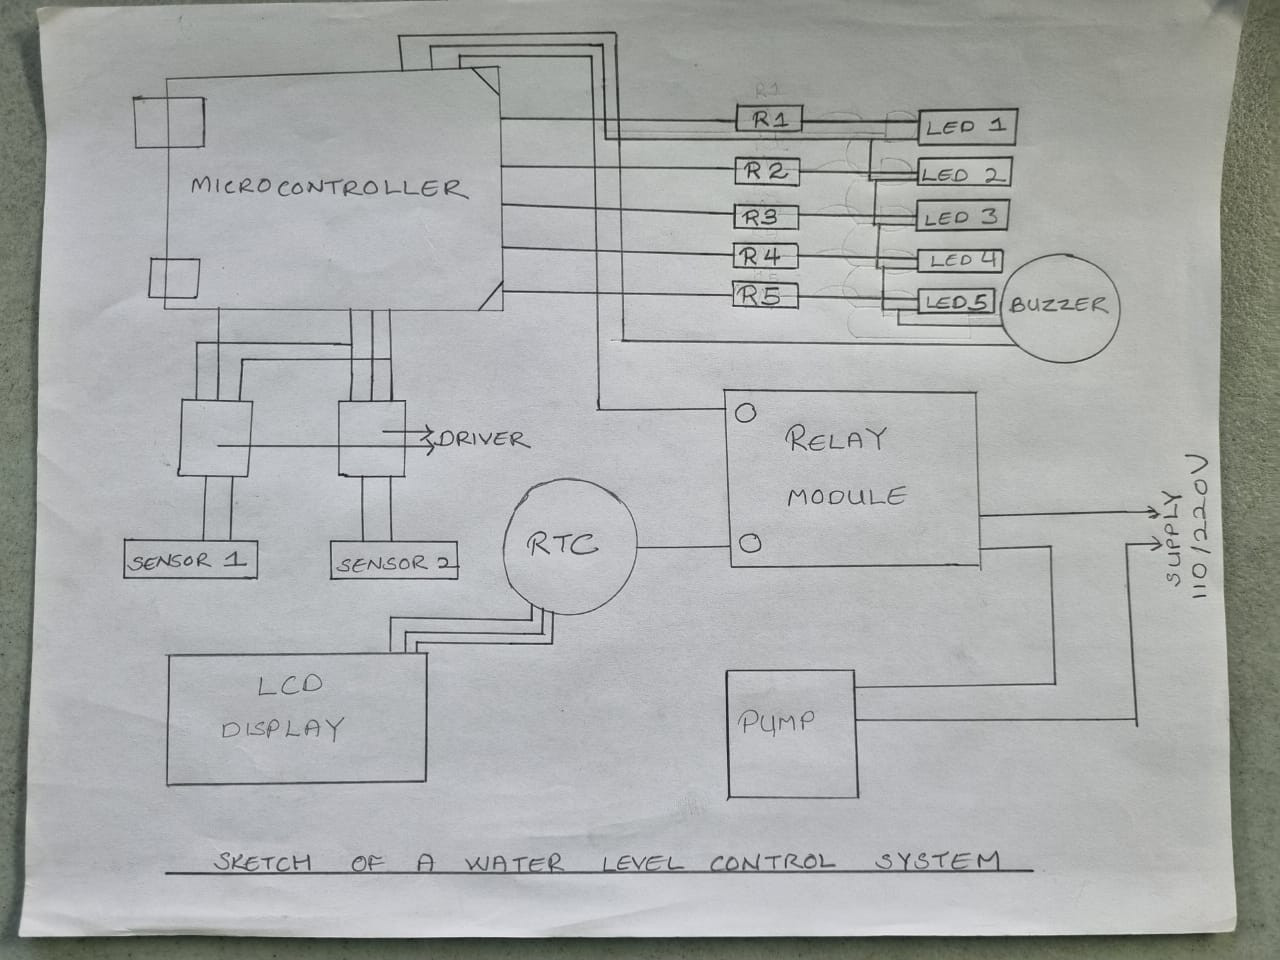
The use of a water level control system using a microcontroller. The system can be used for the automation of either domestic use or a small-scale farm system. This will control soil moisture, provide indications via LEDs, and emit an alarm when the soil is dry. In cases of dry soil, it will control the release of water to ensure plants are placed in a suitable environment. The system will utilize an LCD display to notify all actions that are taking place.
Final project slide

Final project video
What does it do?
The system will be used to automate the watering of crops in a greenhouse or small scale farm system using a microcontroller board designed using the attiny 1614.The system will be used to control soil moisture and when the soil is dry a buzzer will be trigerred to notify and a pump will be turned on.A secondary system will also be incorporated to control the temperature and humidity in the system.
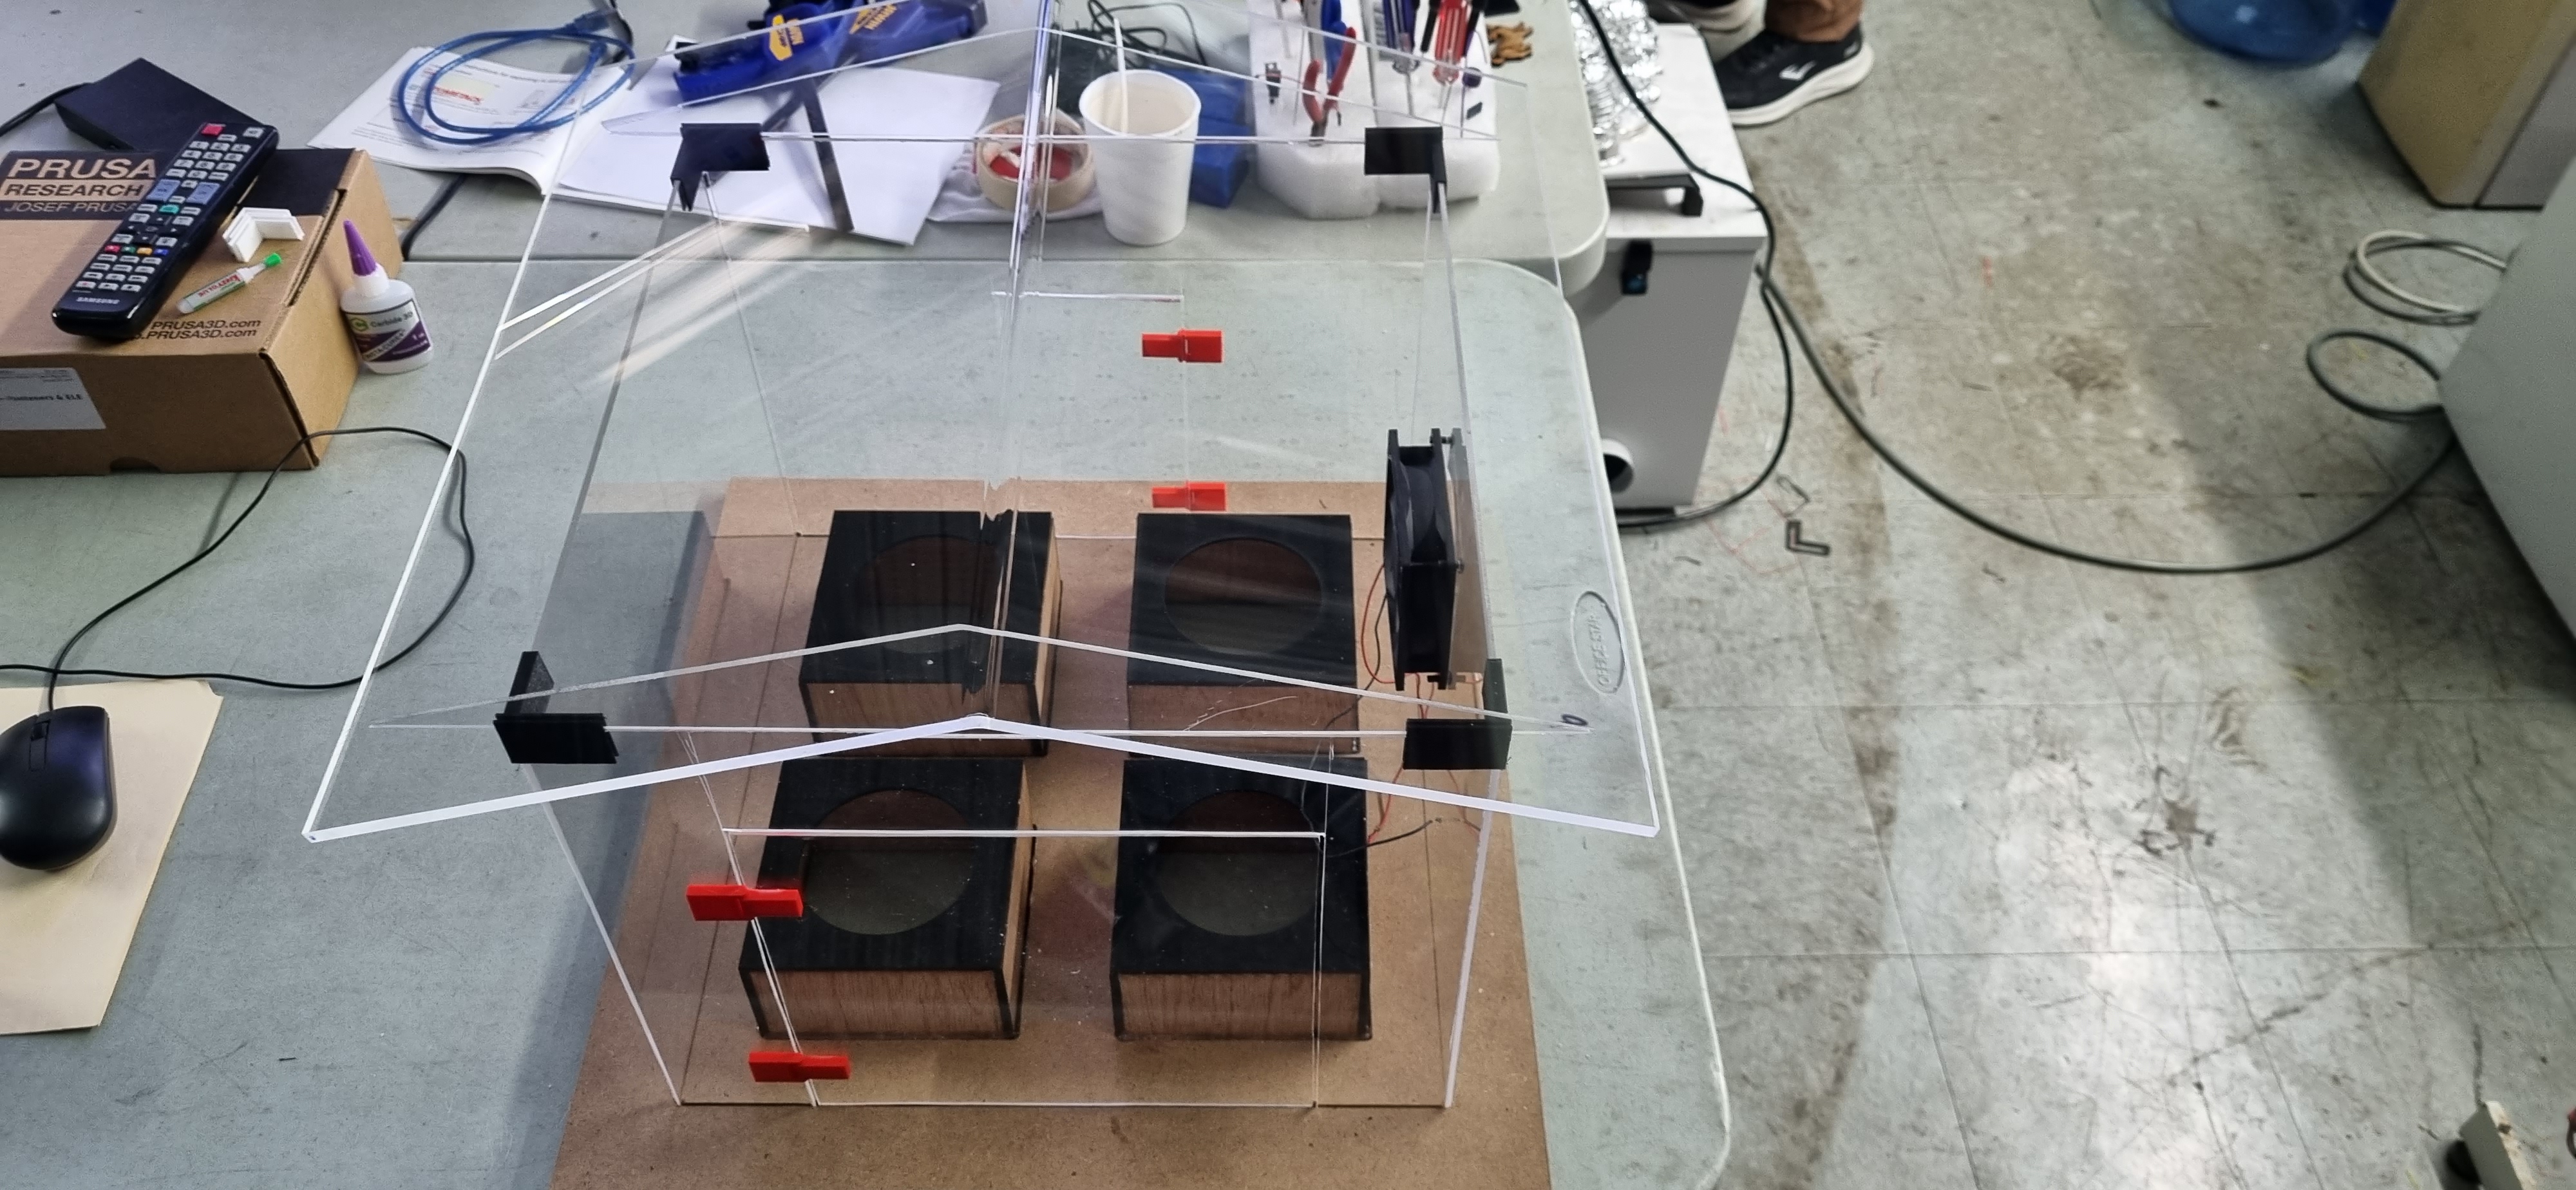
What did you design?
I have designed the model of a small greenhouse which incorporates a small system to hold plants.I have also designed a microcontroller board to control the operations of the system and also some 3D printed mounts and boxes to house components and electronics.
What materials and components were used?
To create the greenhouse:
- Plexi
- MDF
PLA filament was used to create the following :
- connectors
- door hinges
- electronic housing
- LCD mount
For the electronics:
- 1 attiny1614
- capacitor 1uf
- 2 resistors
- LED
- pin headers
- button
- 9V power supply
- 5V power supply
Where did they come from?
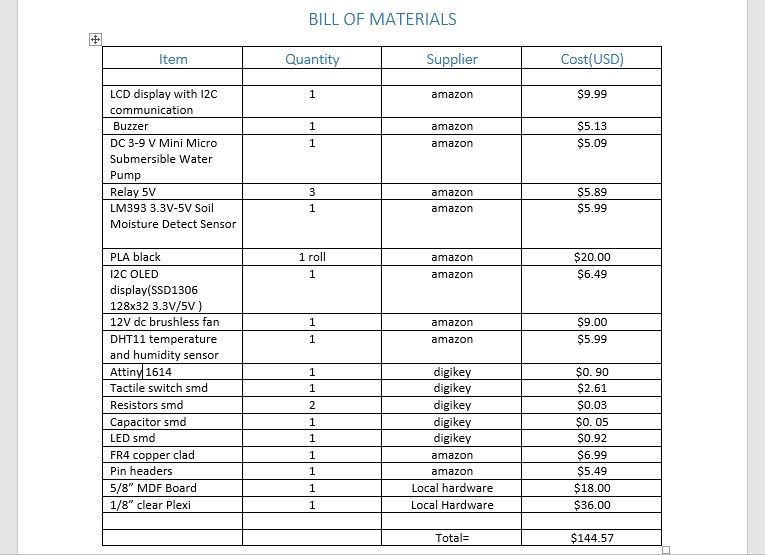
The plexi and mdf was purchased from a local hardware,where as the electronic components was sourced online from digikey and amazon.
How much did they cost?
What parts and systems were made?
- greenhouse structure(base,walls,doors.etc)
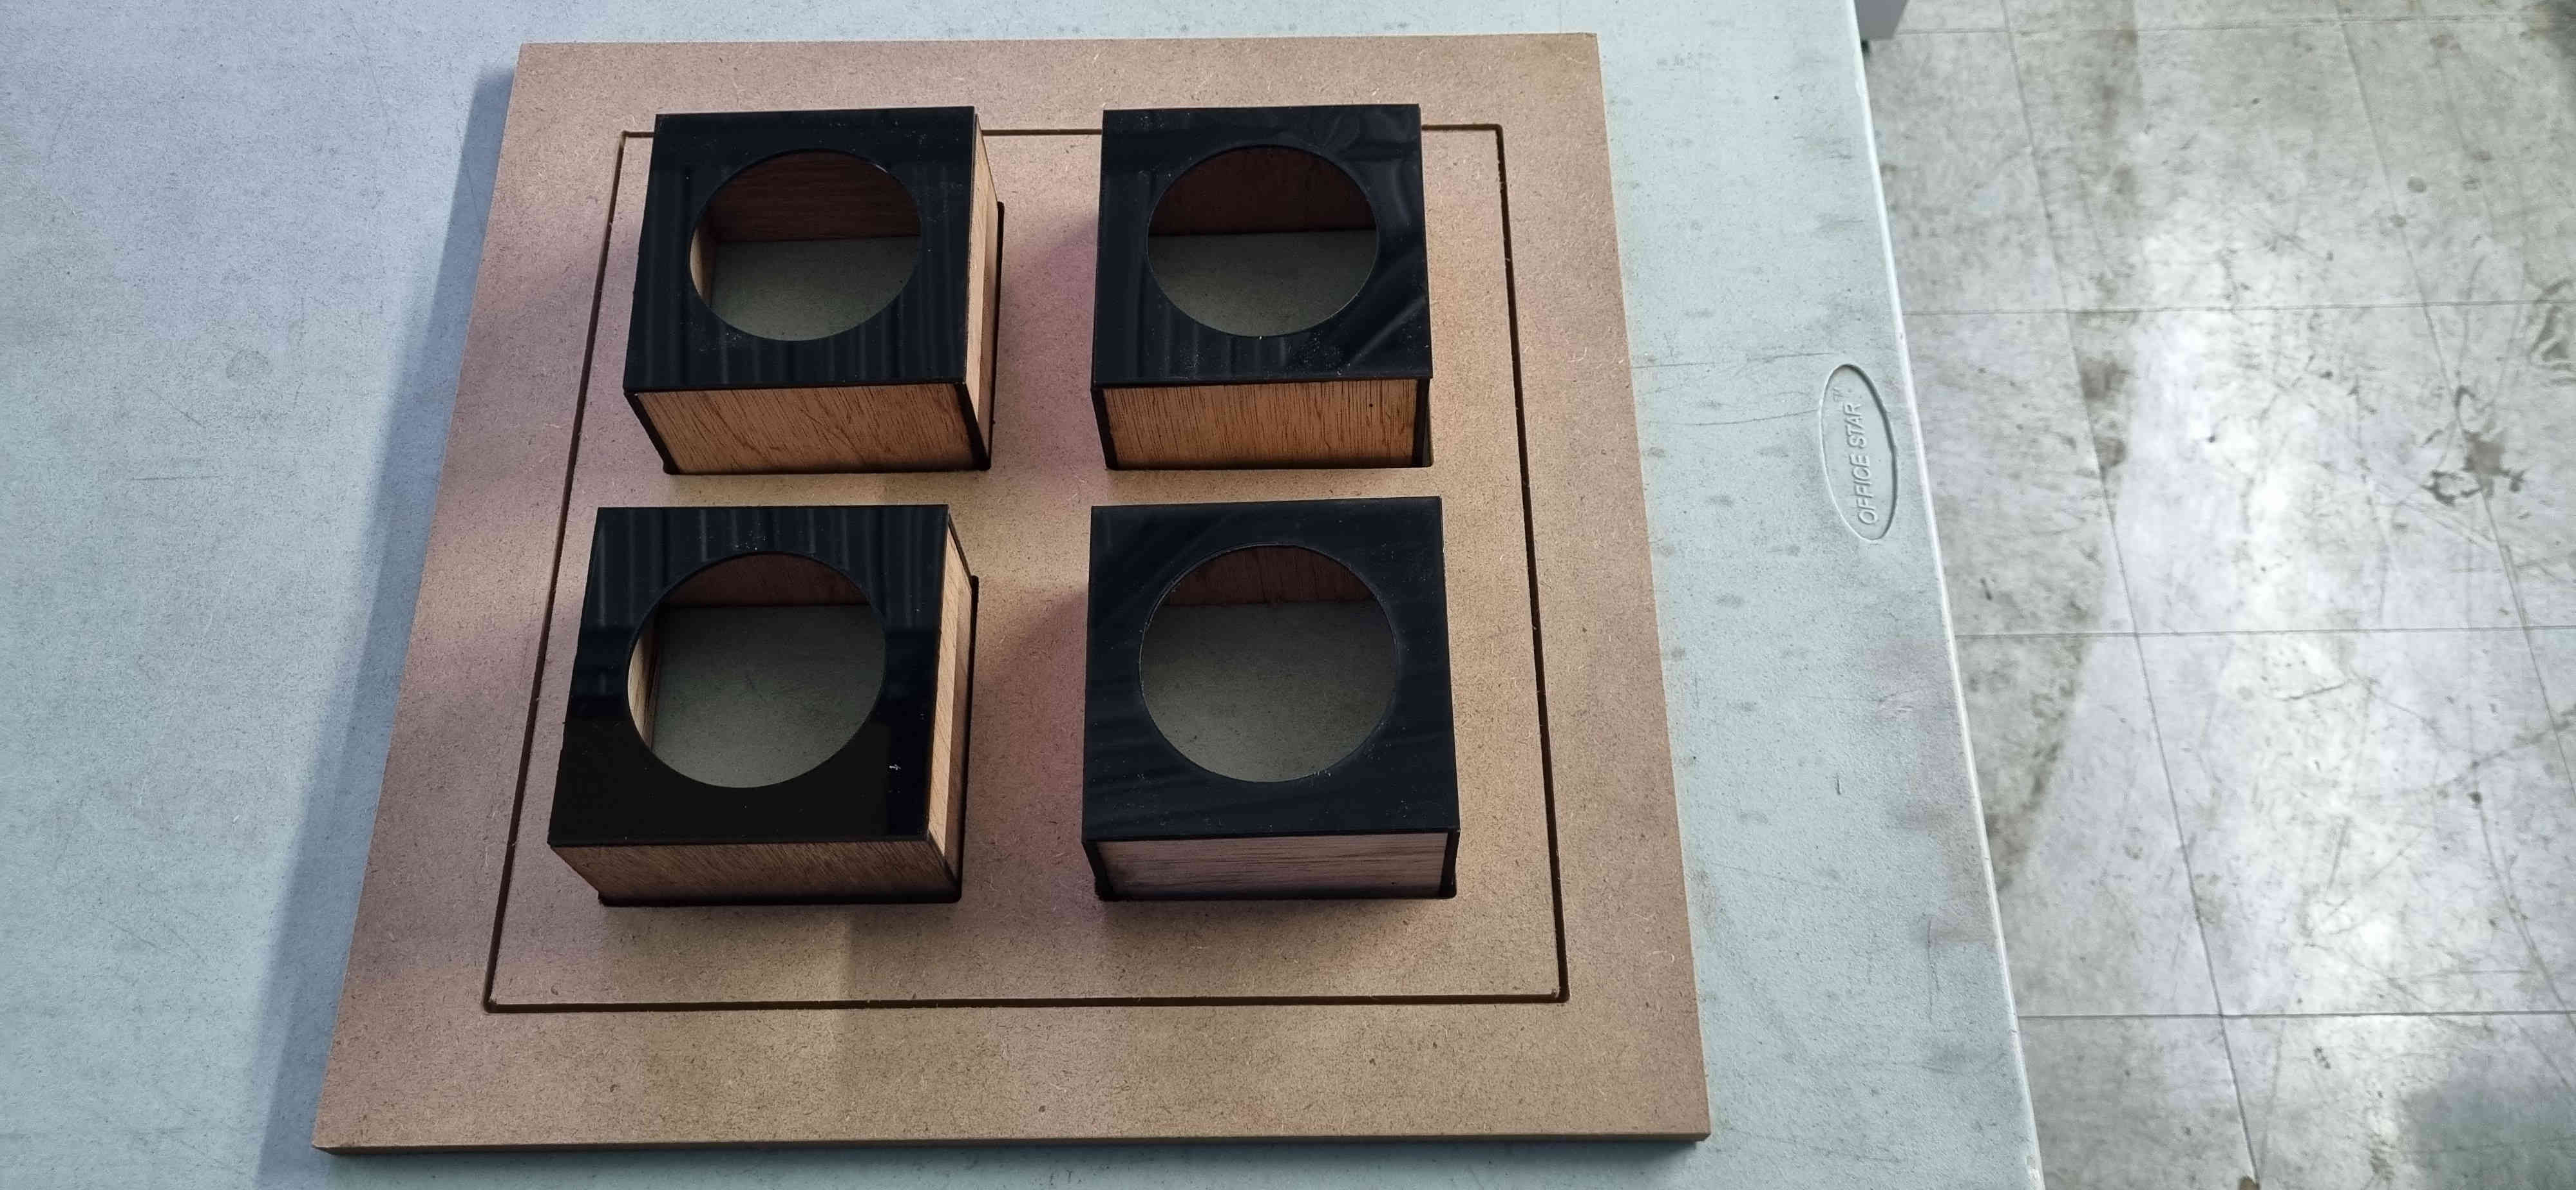
- system to hold plants in place
- electronics and electronic housing
What processes were used?
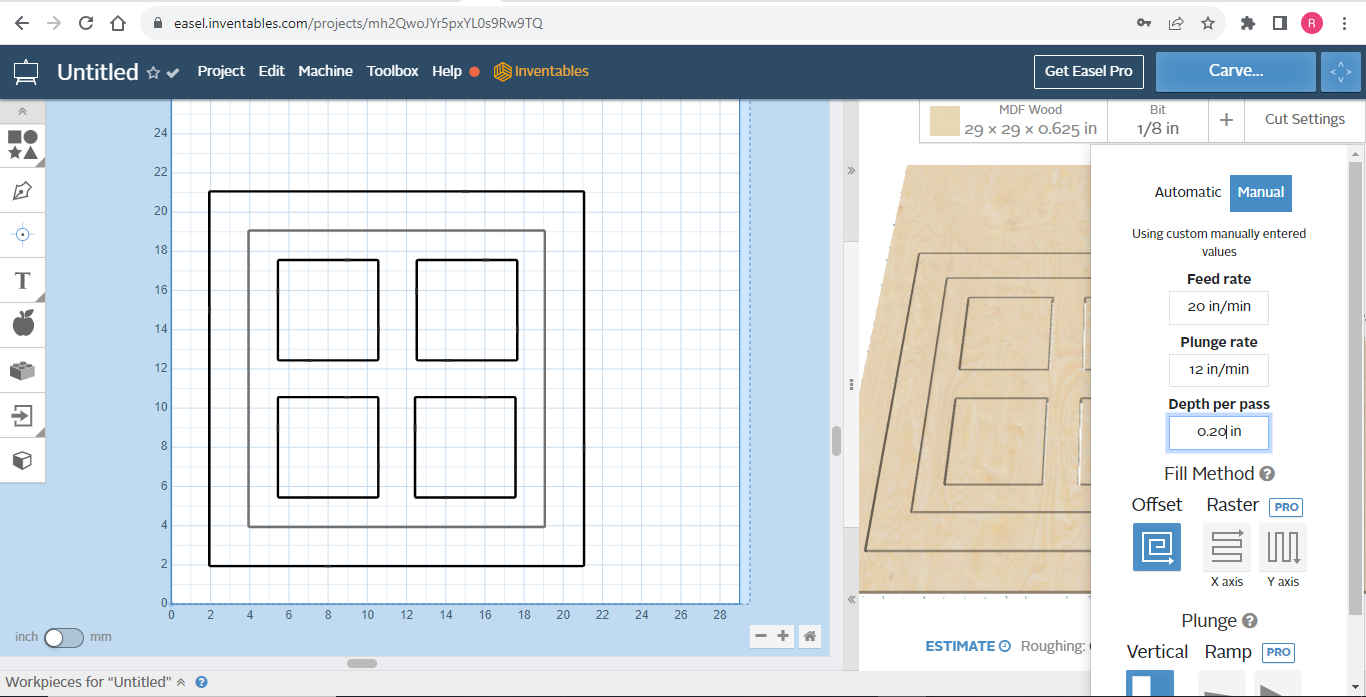
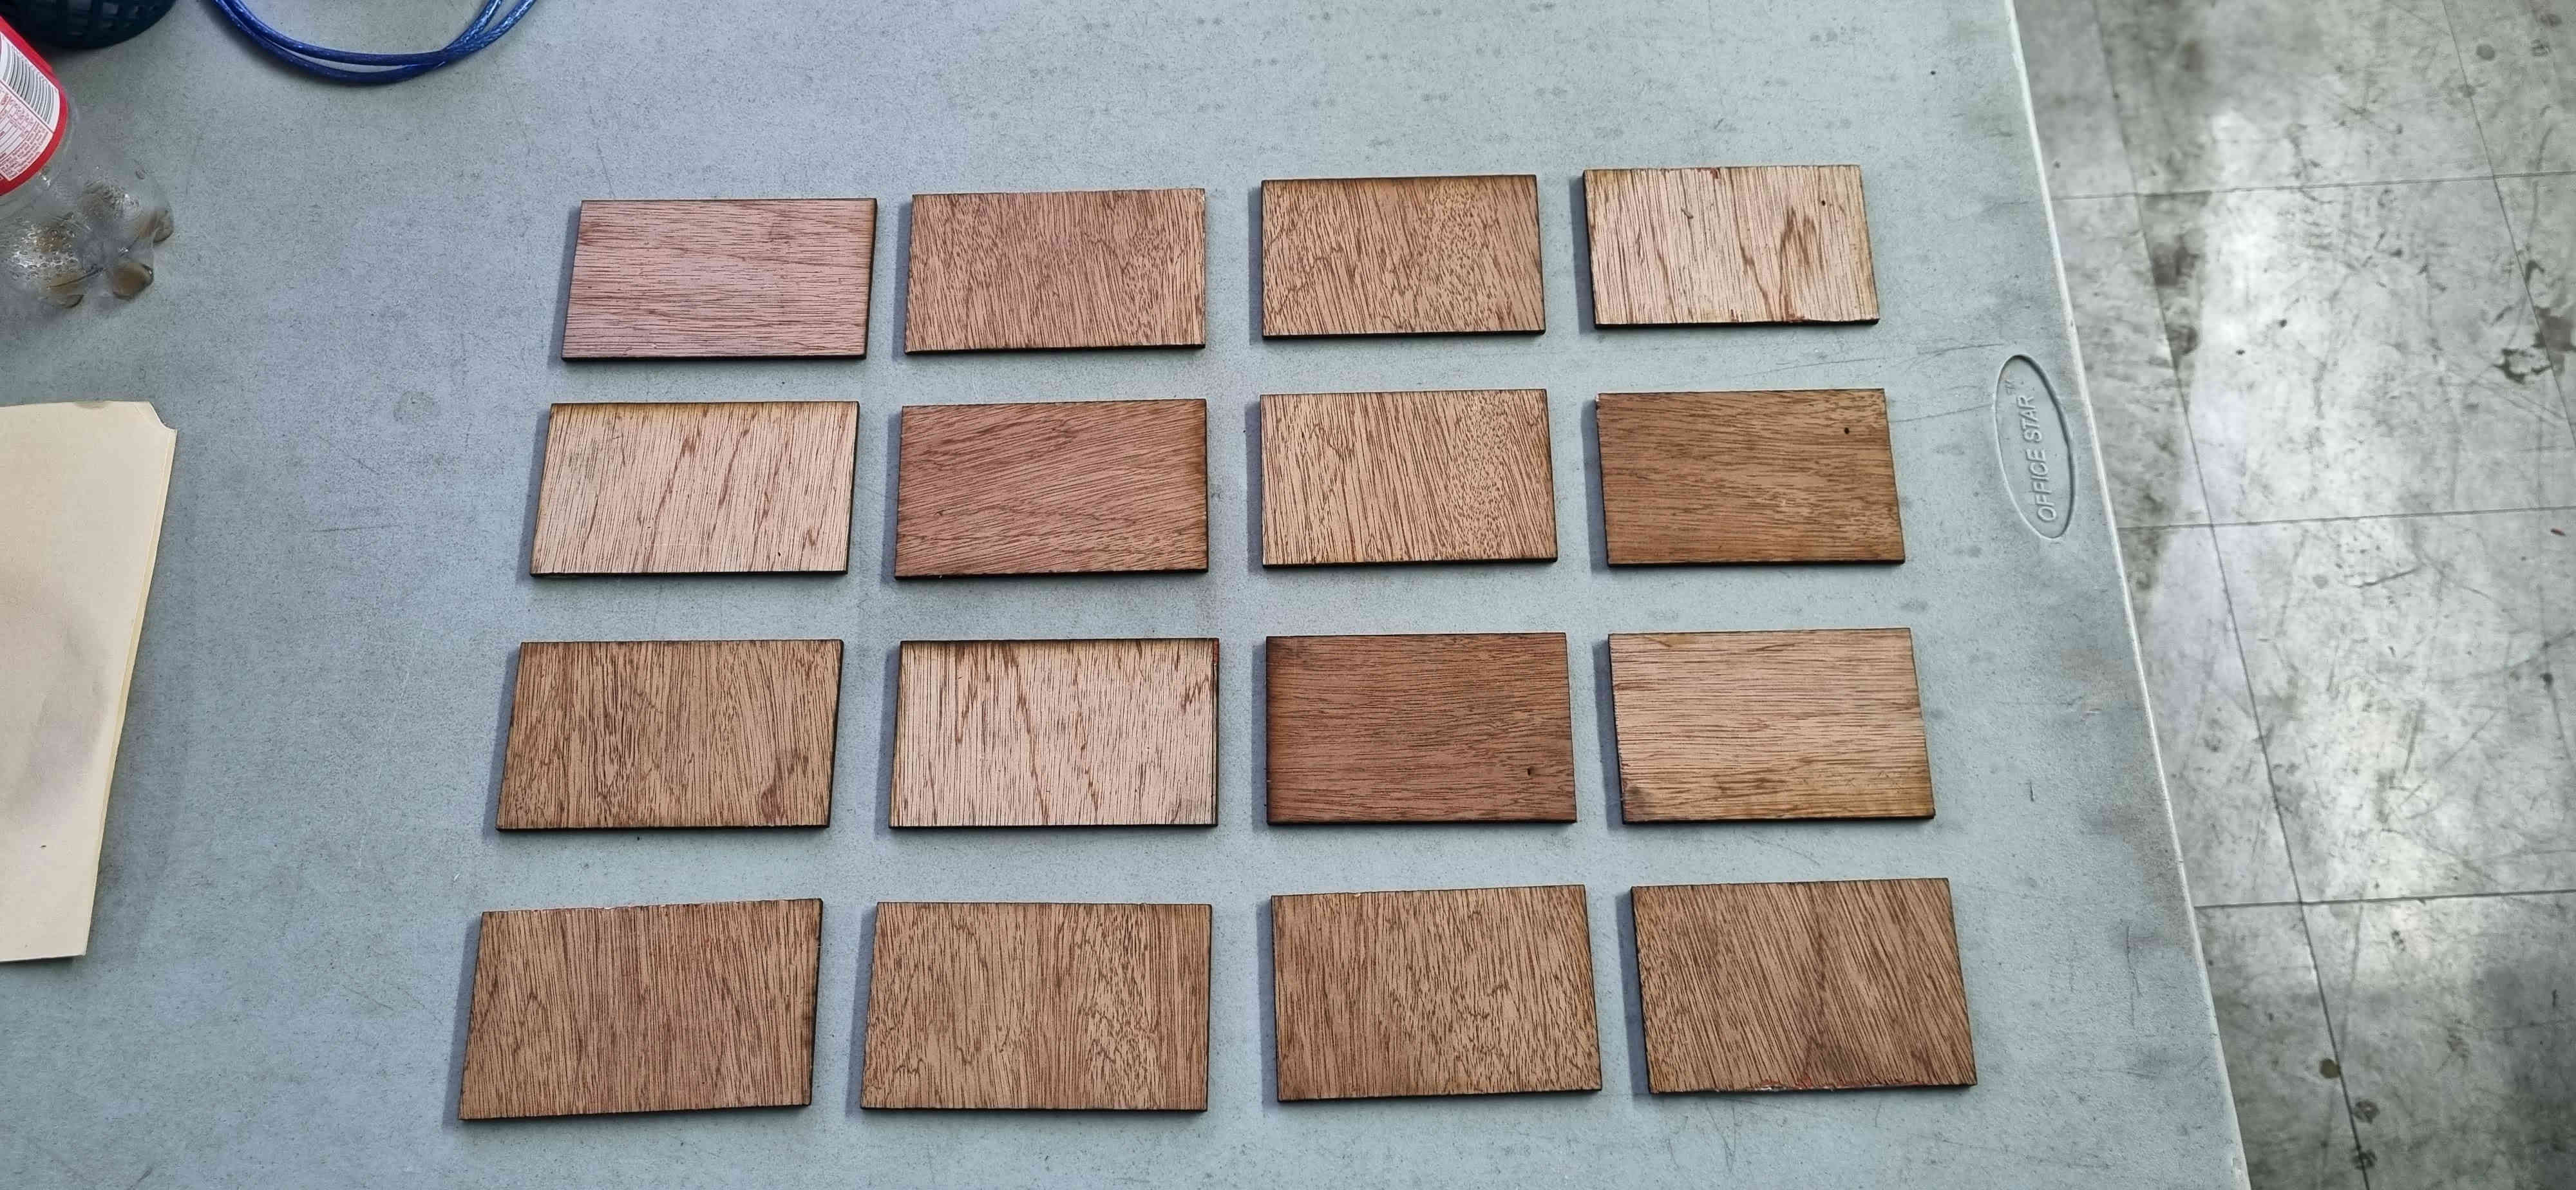
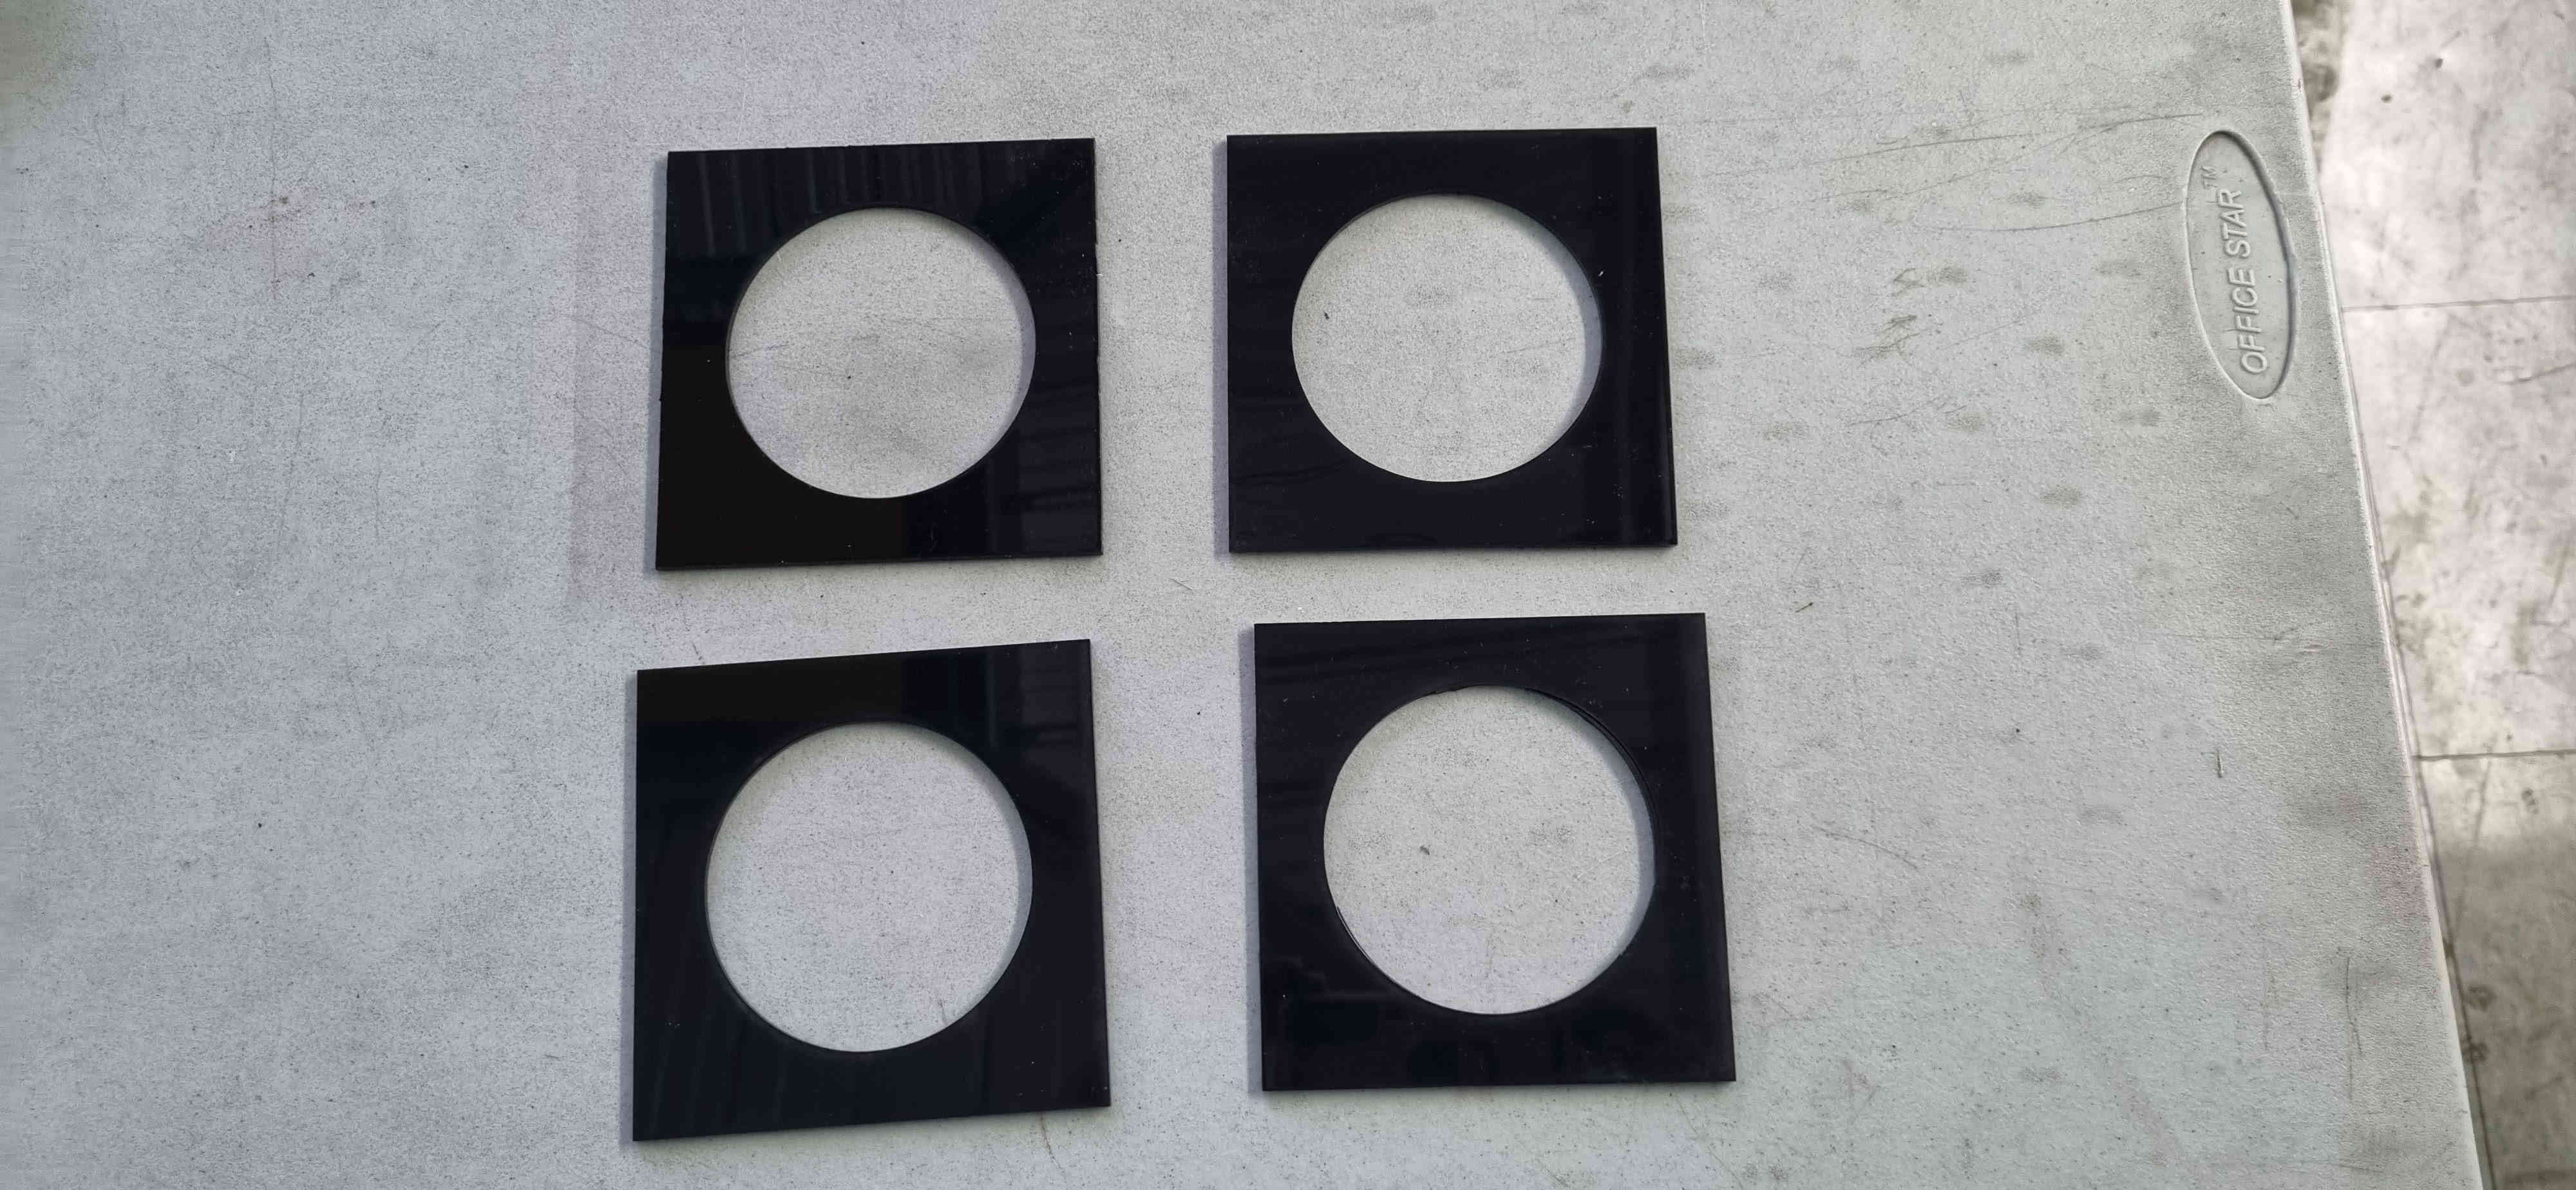
The base of the system was designed in easel and produced using the X-Carve CNC machine. The structure of the greenhouse was also cut using the X-Carve.The system to house the plants was done using the ATOMSTACK X7 PRO diode laser.The design and manufacture of the electronic boards was done using Fusion360 and the Nomad3 Desktop CNC mill.The Arduino software was used to programm the microcontroller board.
What questions were answered?
It is possible to use the soil moisture sensor to control the water content in the soil of a given area.
What worked? What didn’t?
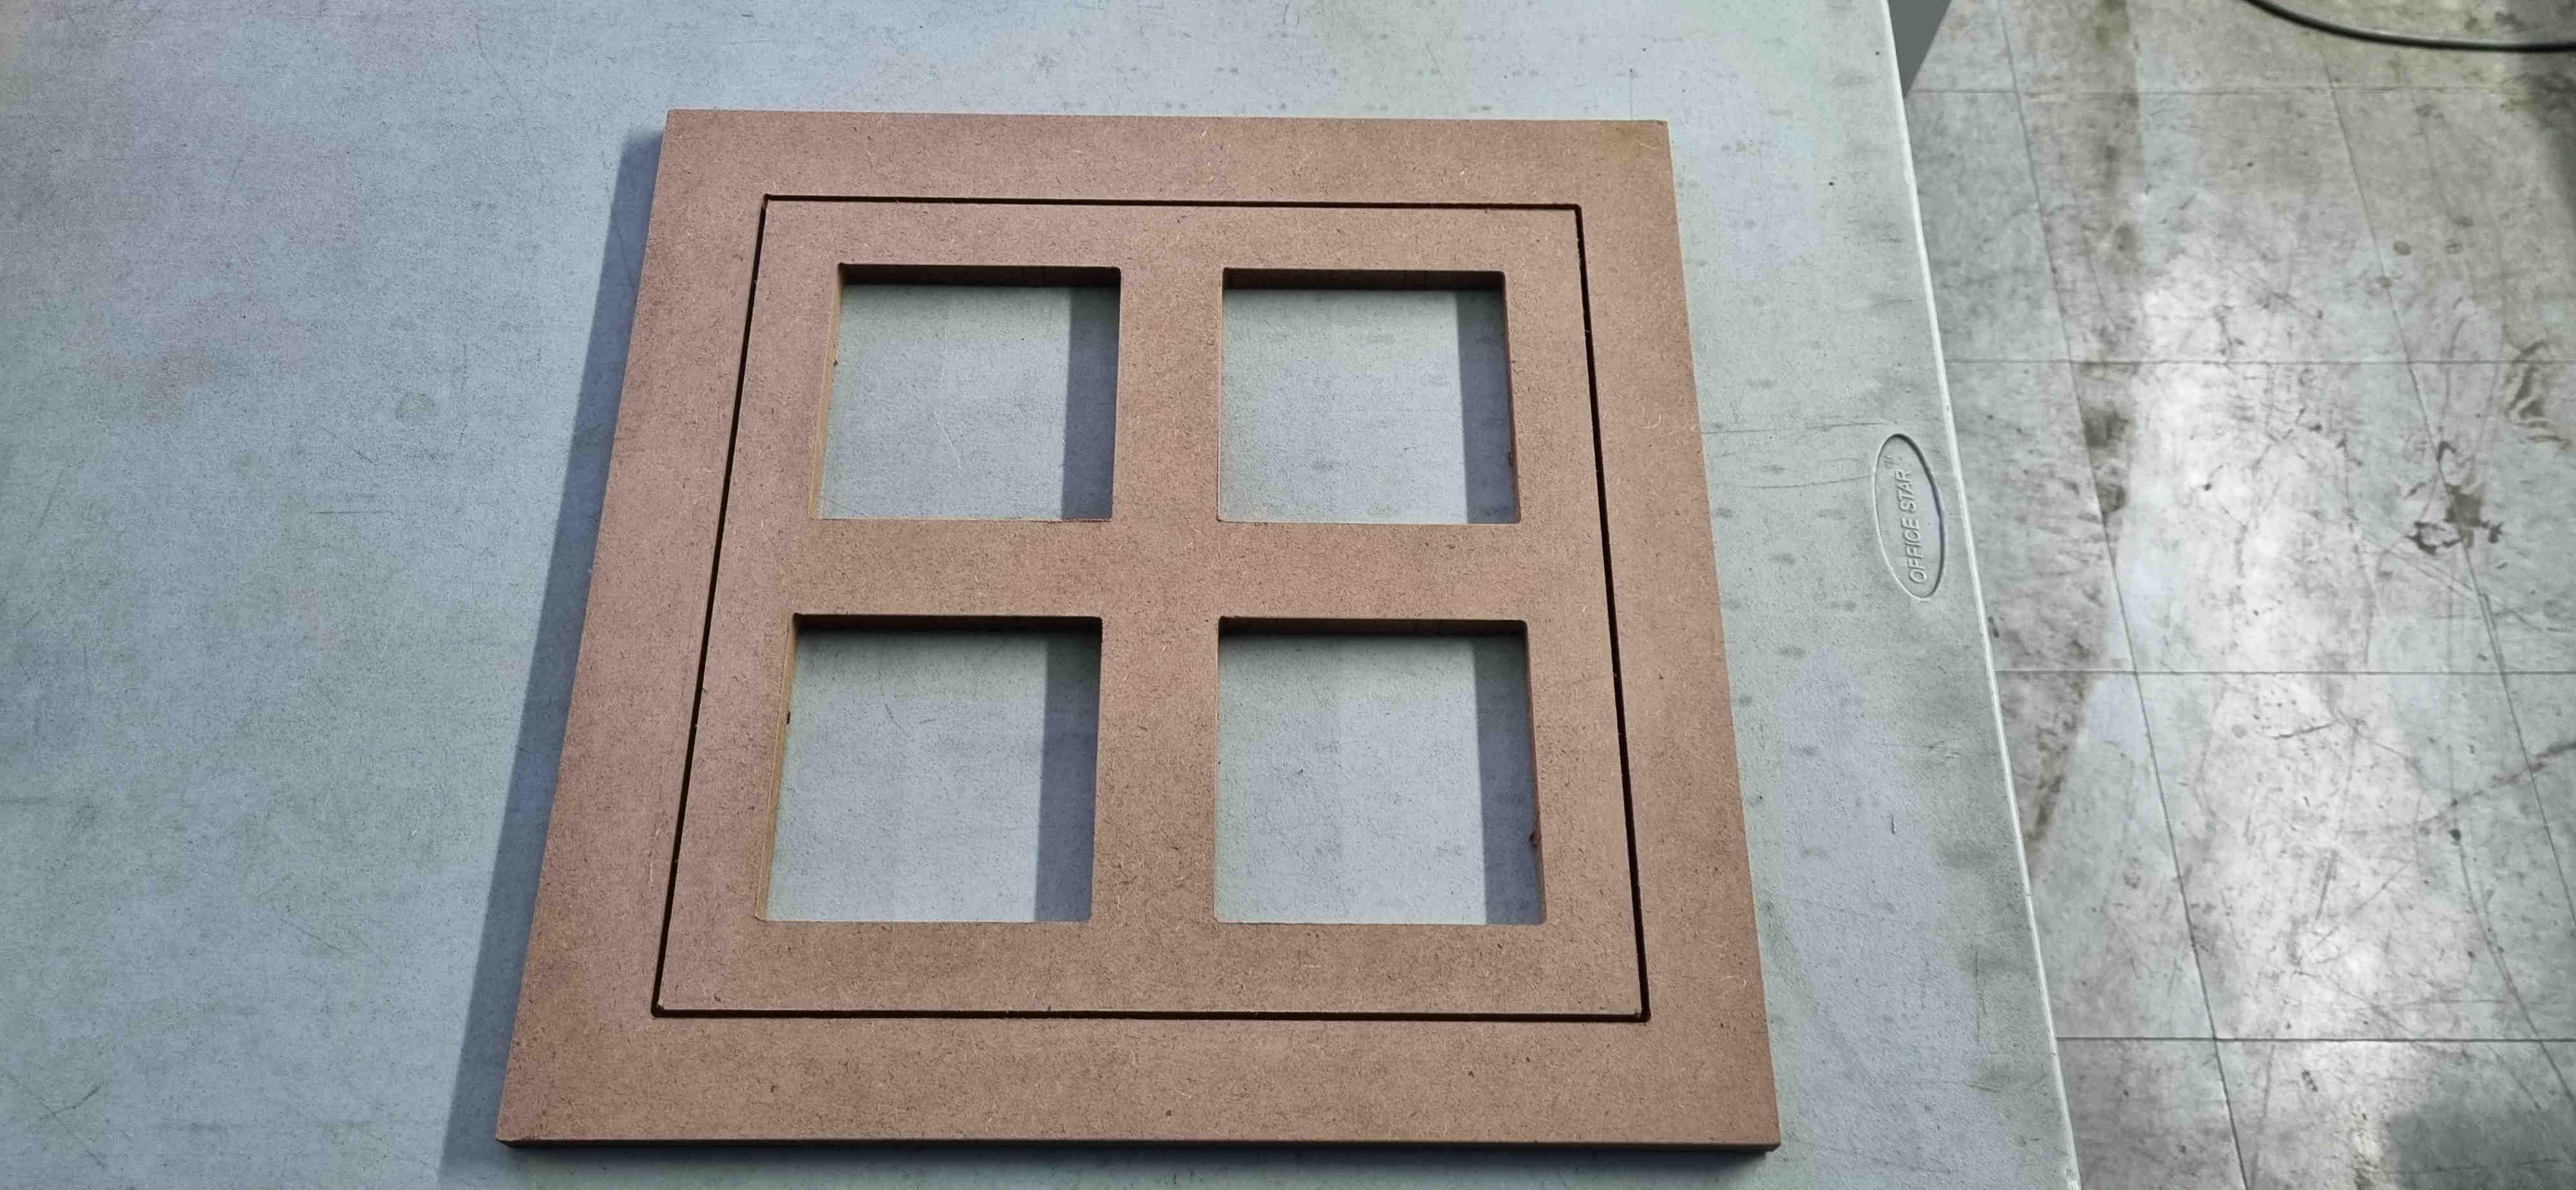
There was a problem with the CNC machine used for cutting the base and the walls for the greenhouse design.
The parts when sent to cut was cutting smaller than in the drawing hence the machine needed to be re-calibrated.The following link proved to be very useful in this process.
https://discuss.inventables.com/t/steps-mm-calibration/10705
How was it evaluated?
In the case of dry soil and alarm will be emitted in the form of a buzzer and a pump will be triggered.
In the case of automatic plant watering using the power of the microcontroller board and the precision of the soil moisture sensor to ensure plant are watered on time.
All the data will be displayed on a LCD screen regarding the soil moisture level so the user is always informed of the watering process.
Also the temperature and humidity of the system will be seen on an OLED screen.
Fabrication Processes used in creating the design
I used easel for the design of the base and the walls of the system.This was fabricated using the X-carve

The walls and parts for the roof was also cut using the X-carve.


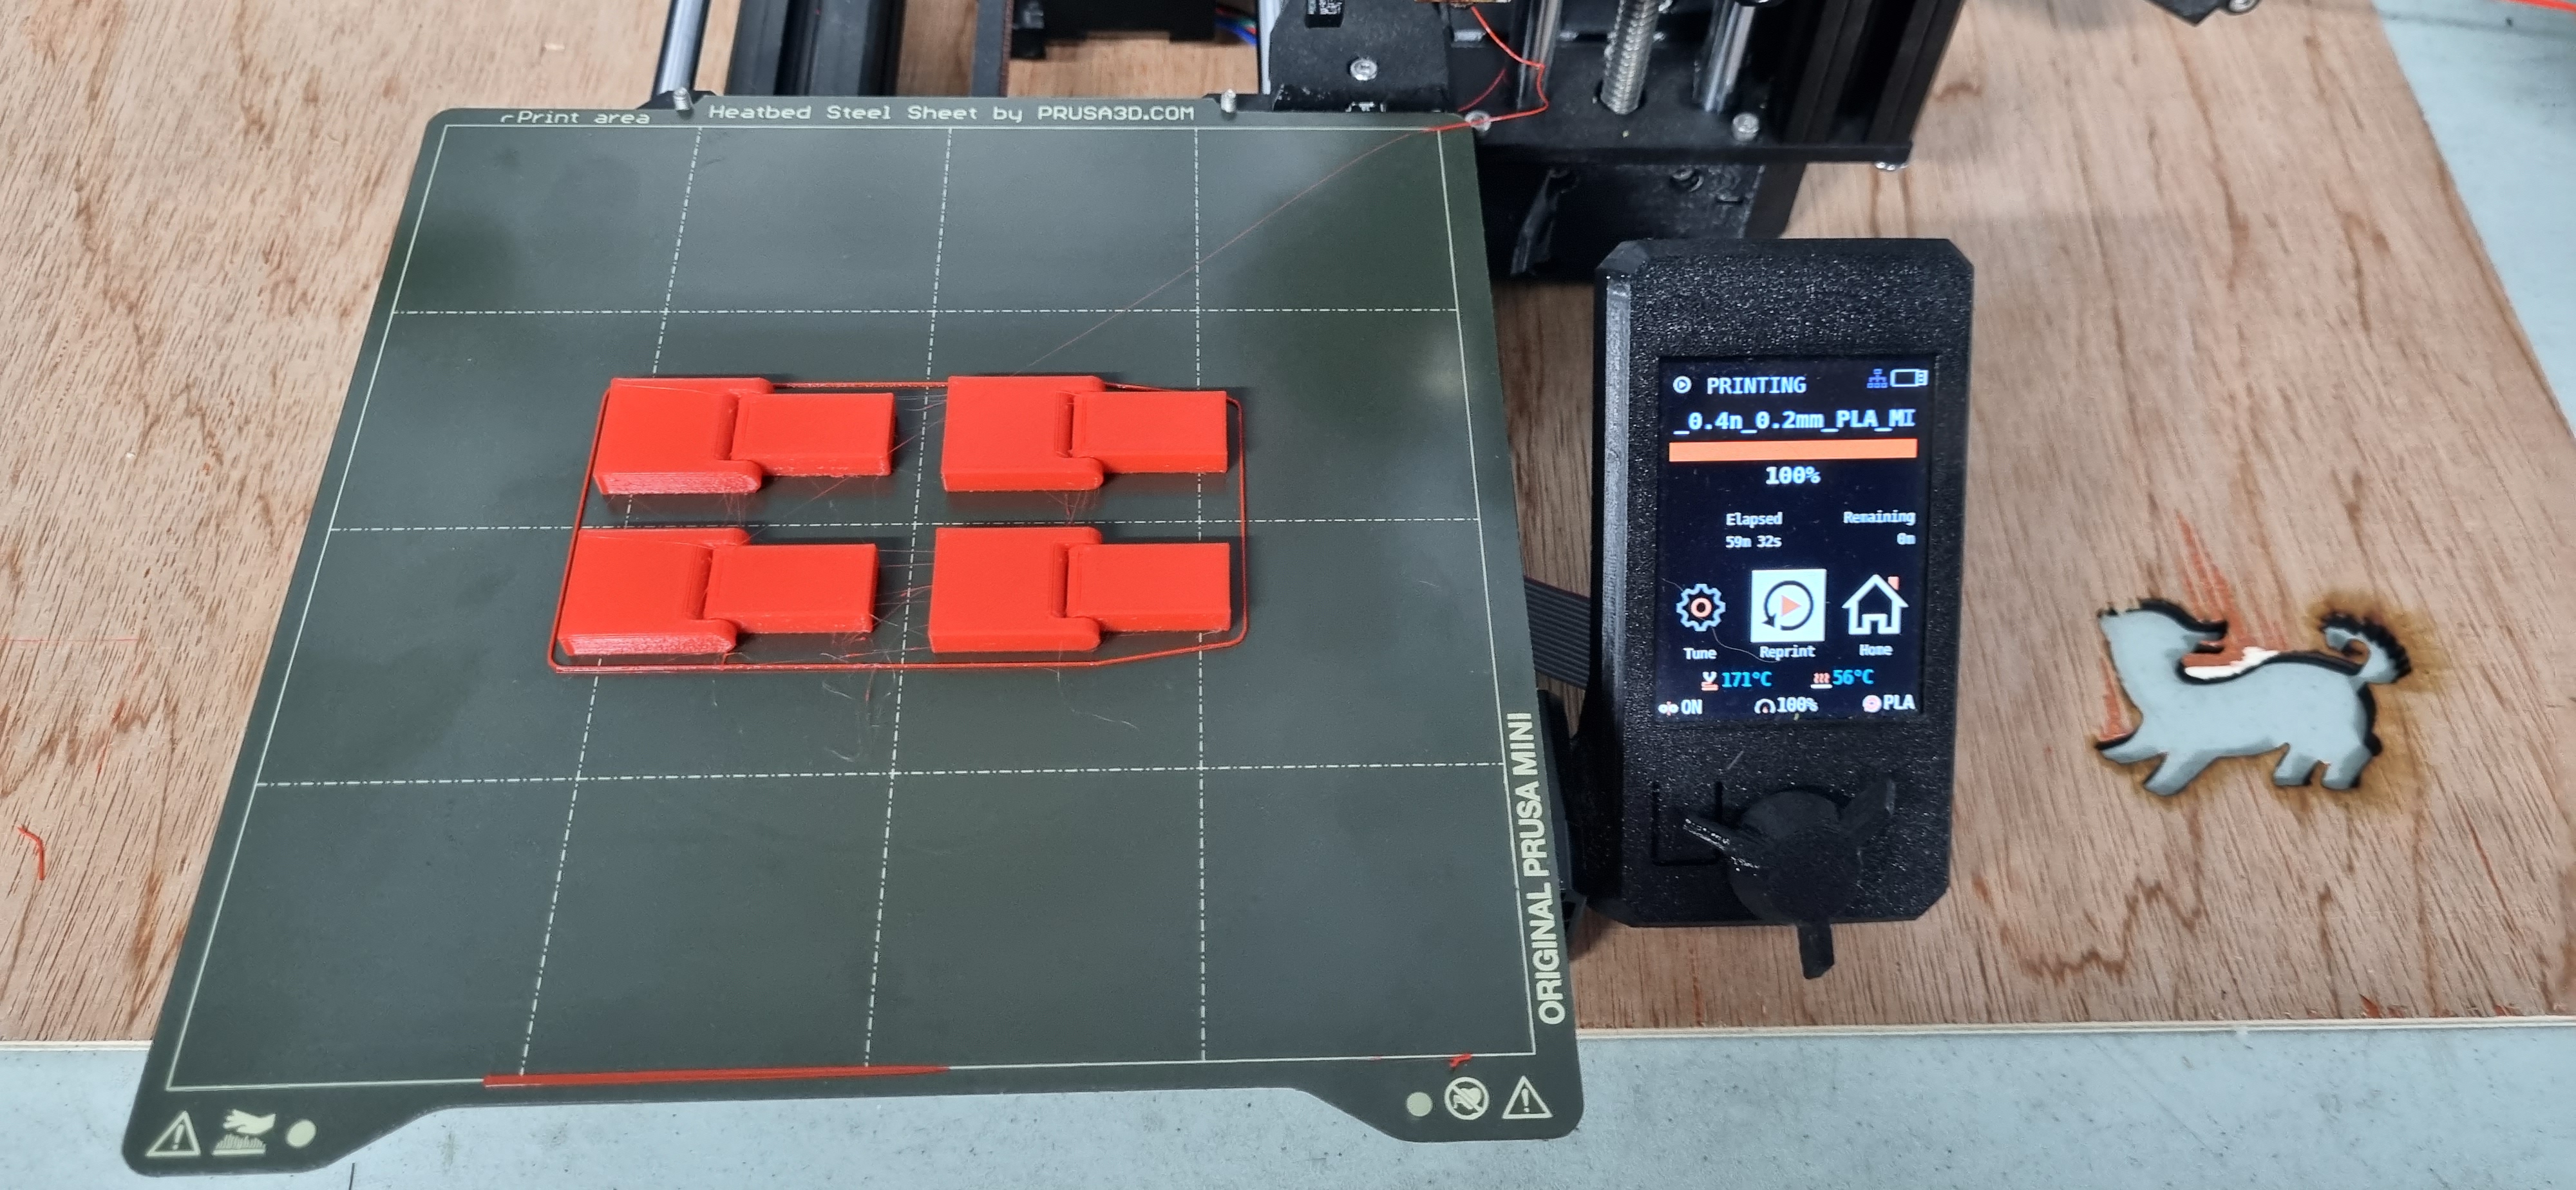
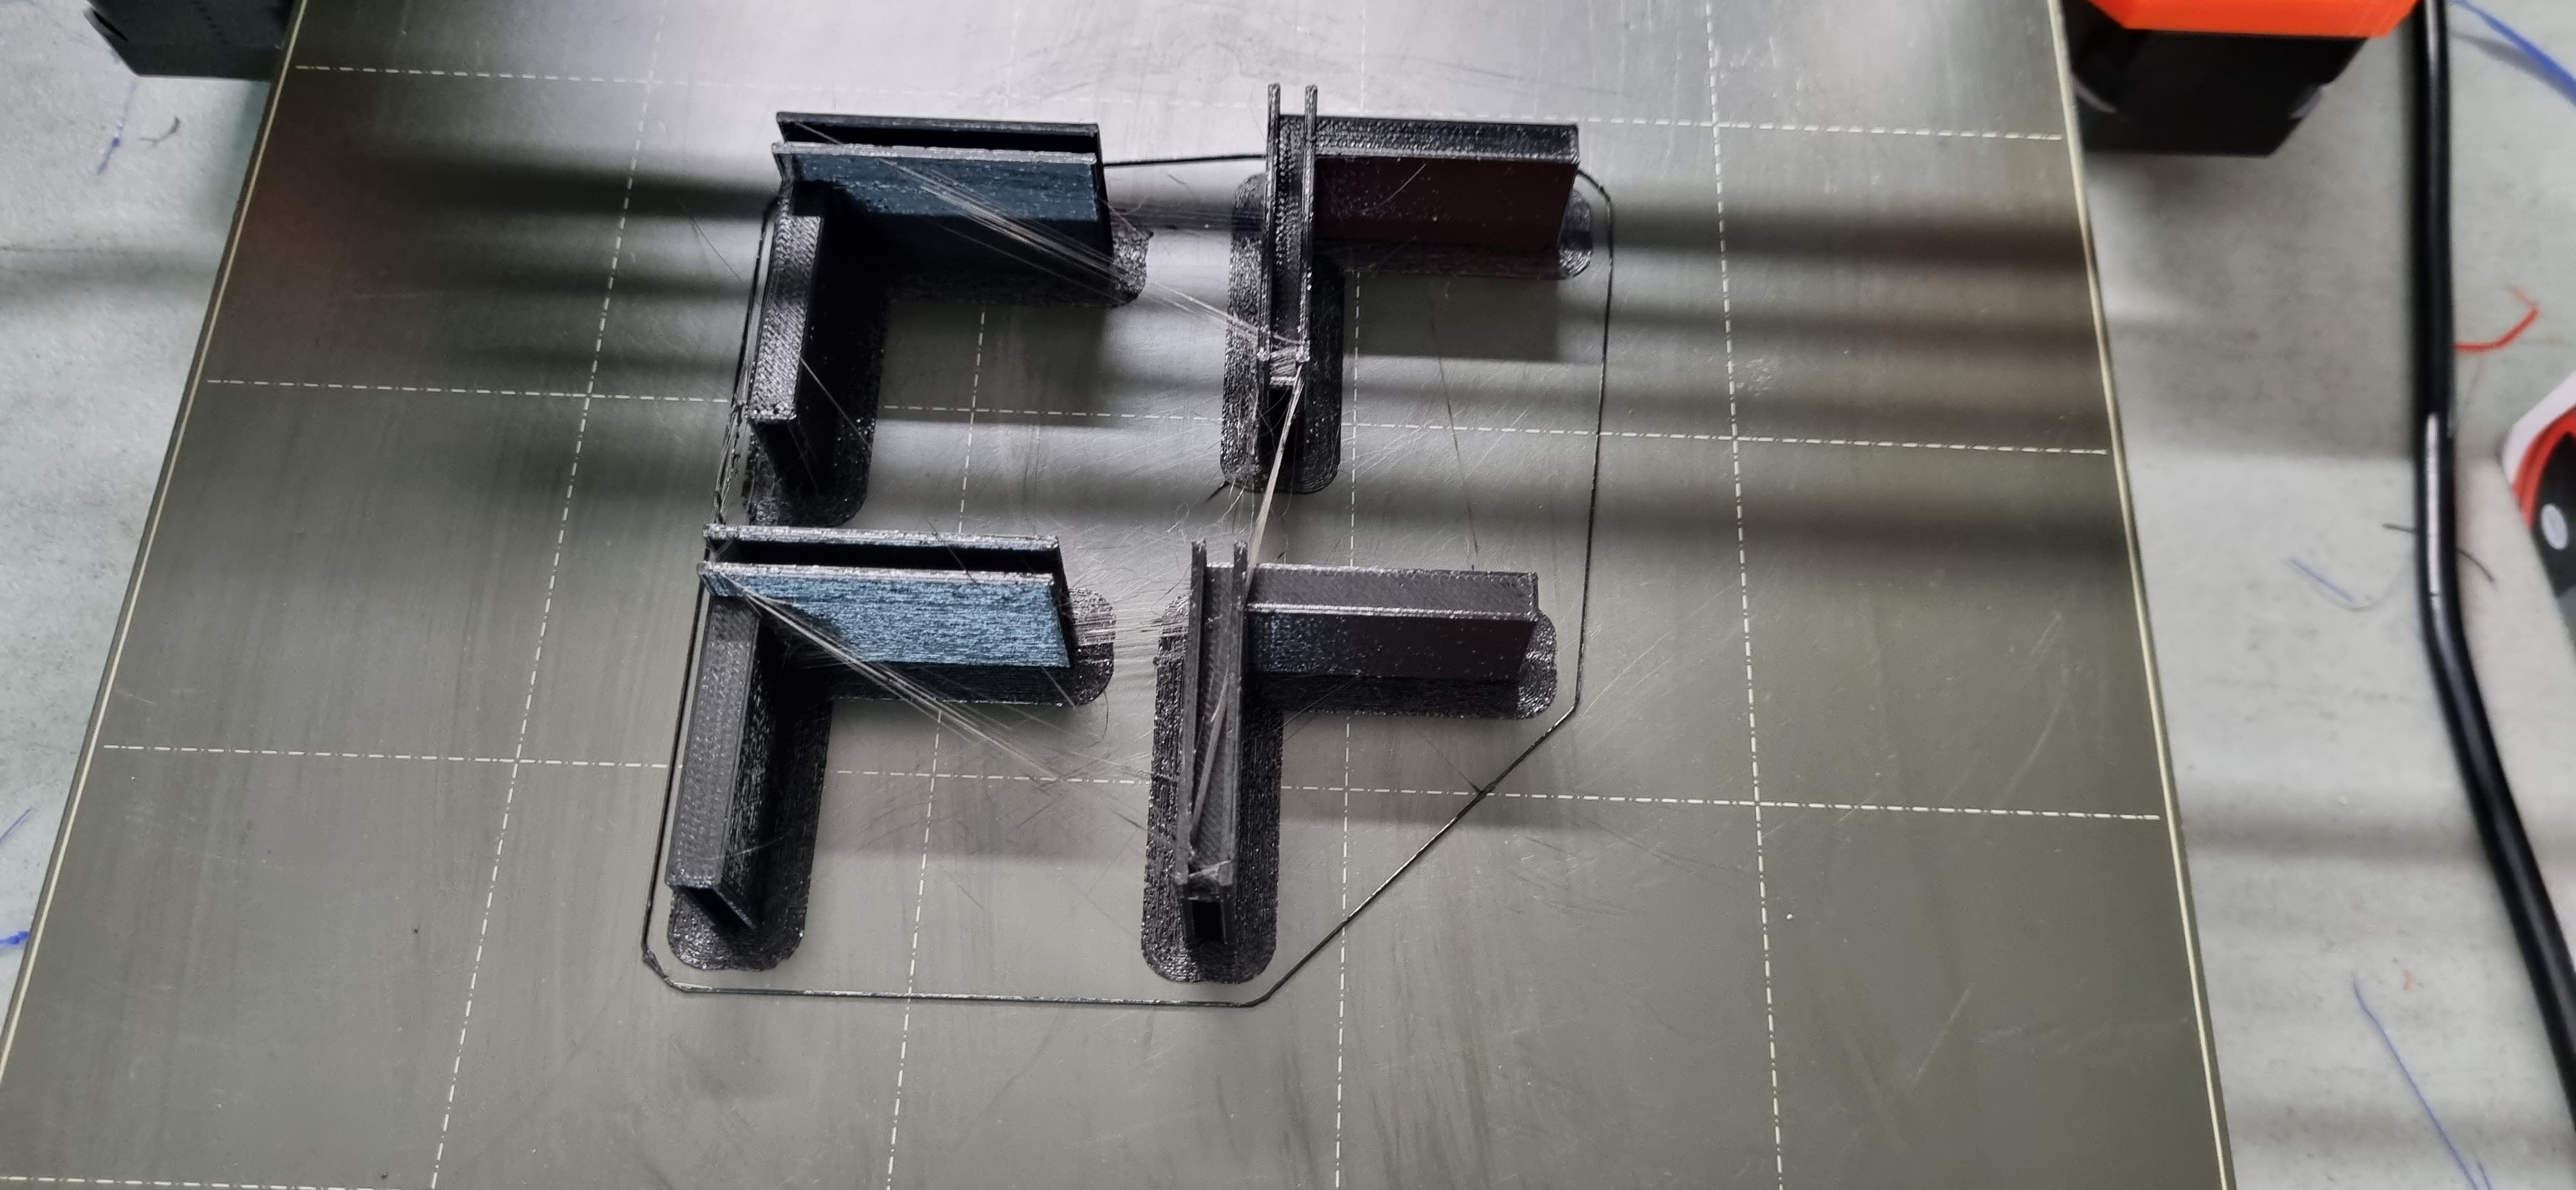
3D Printing
Assembly of the sides,doors and roof panel. The hinges was 3d printed using pla filament using the Original prusai3 MK3S. The connectors was also 3d printed.

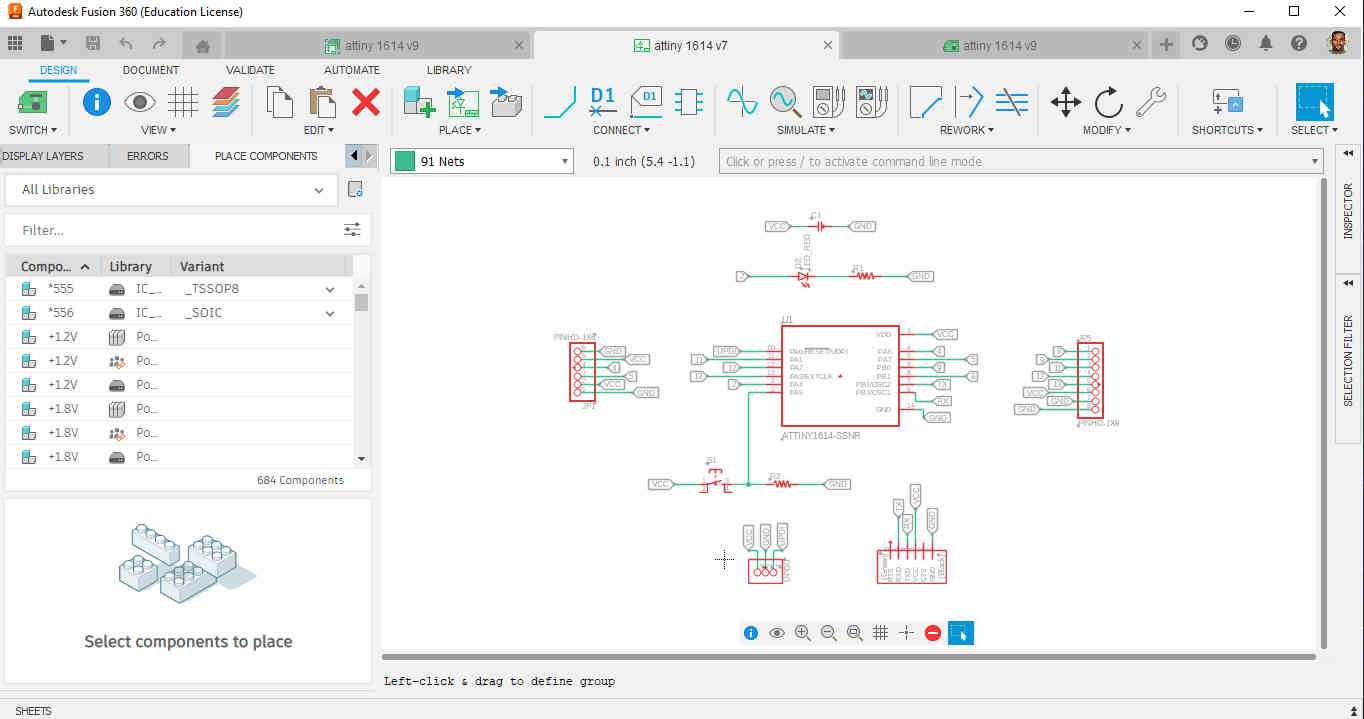
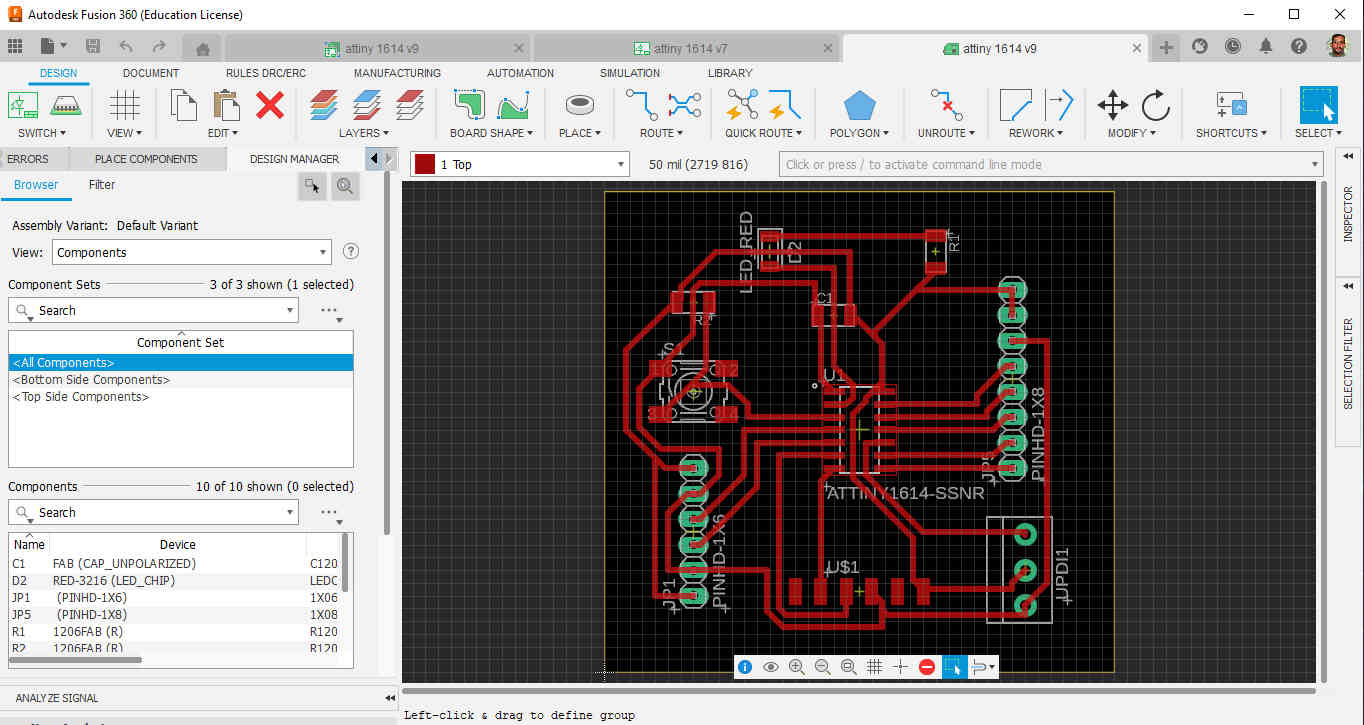
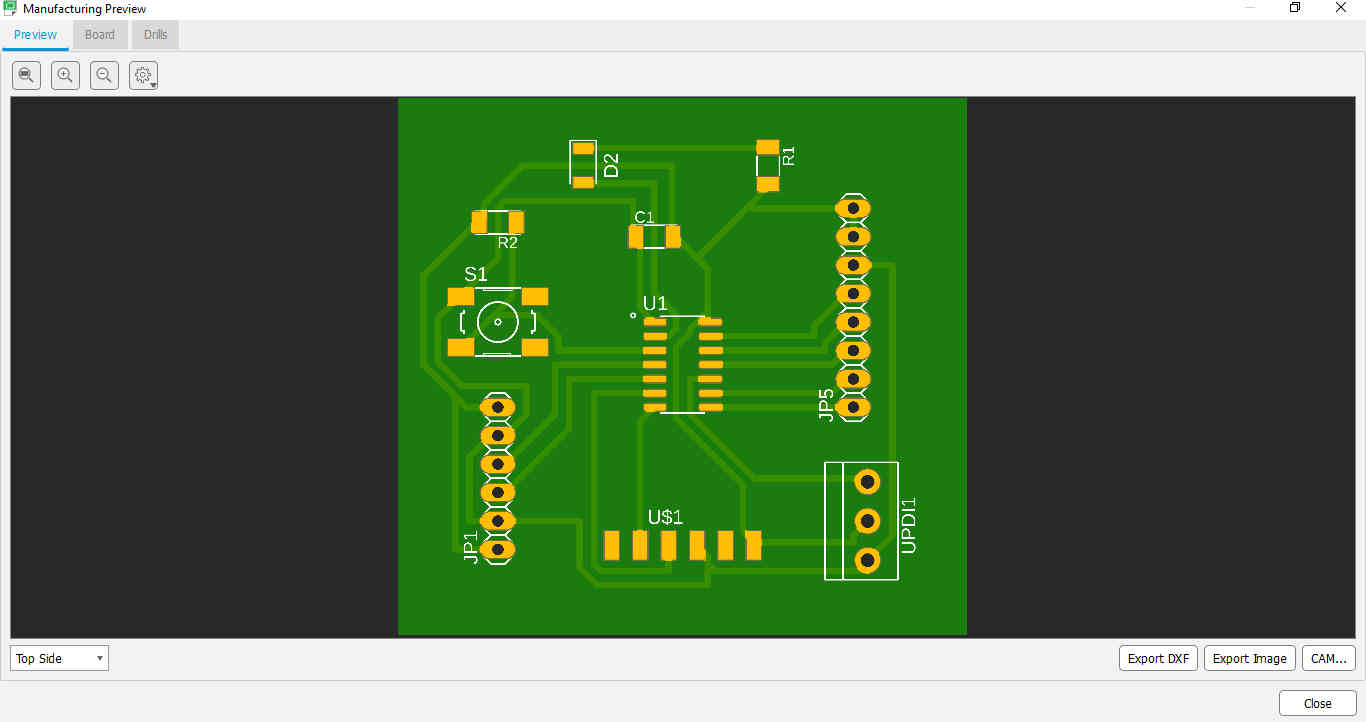
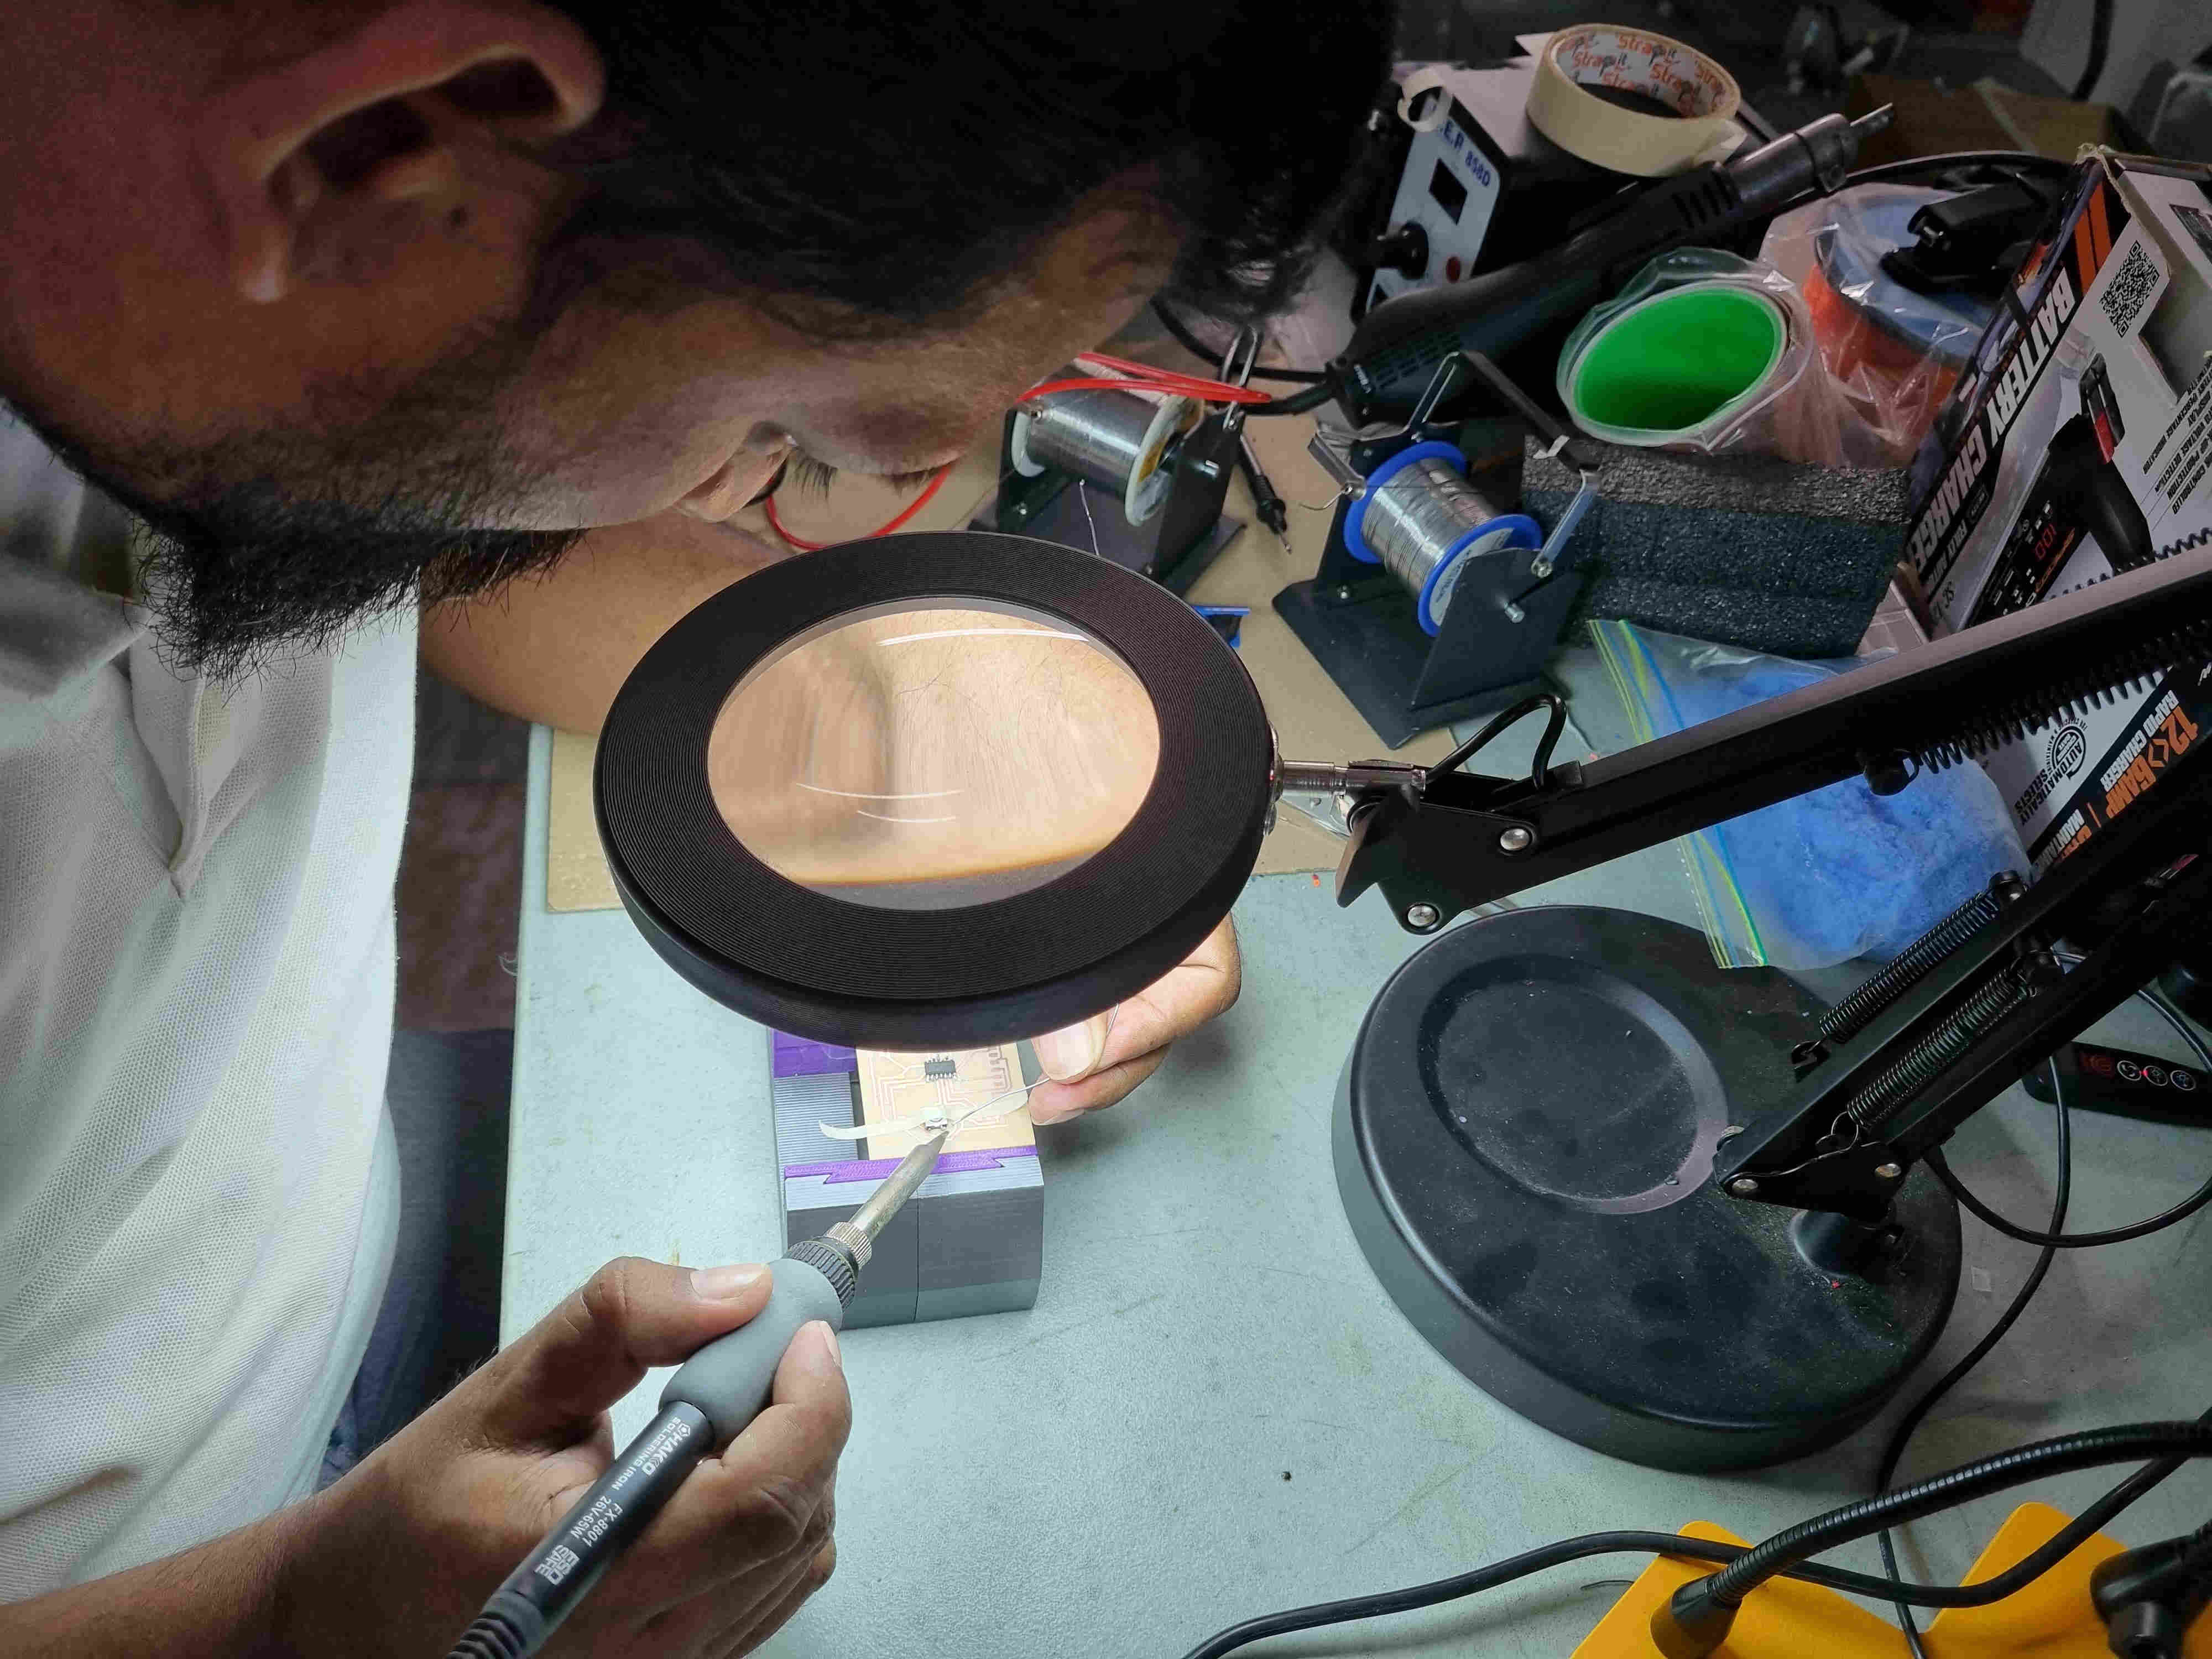
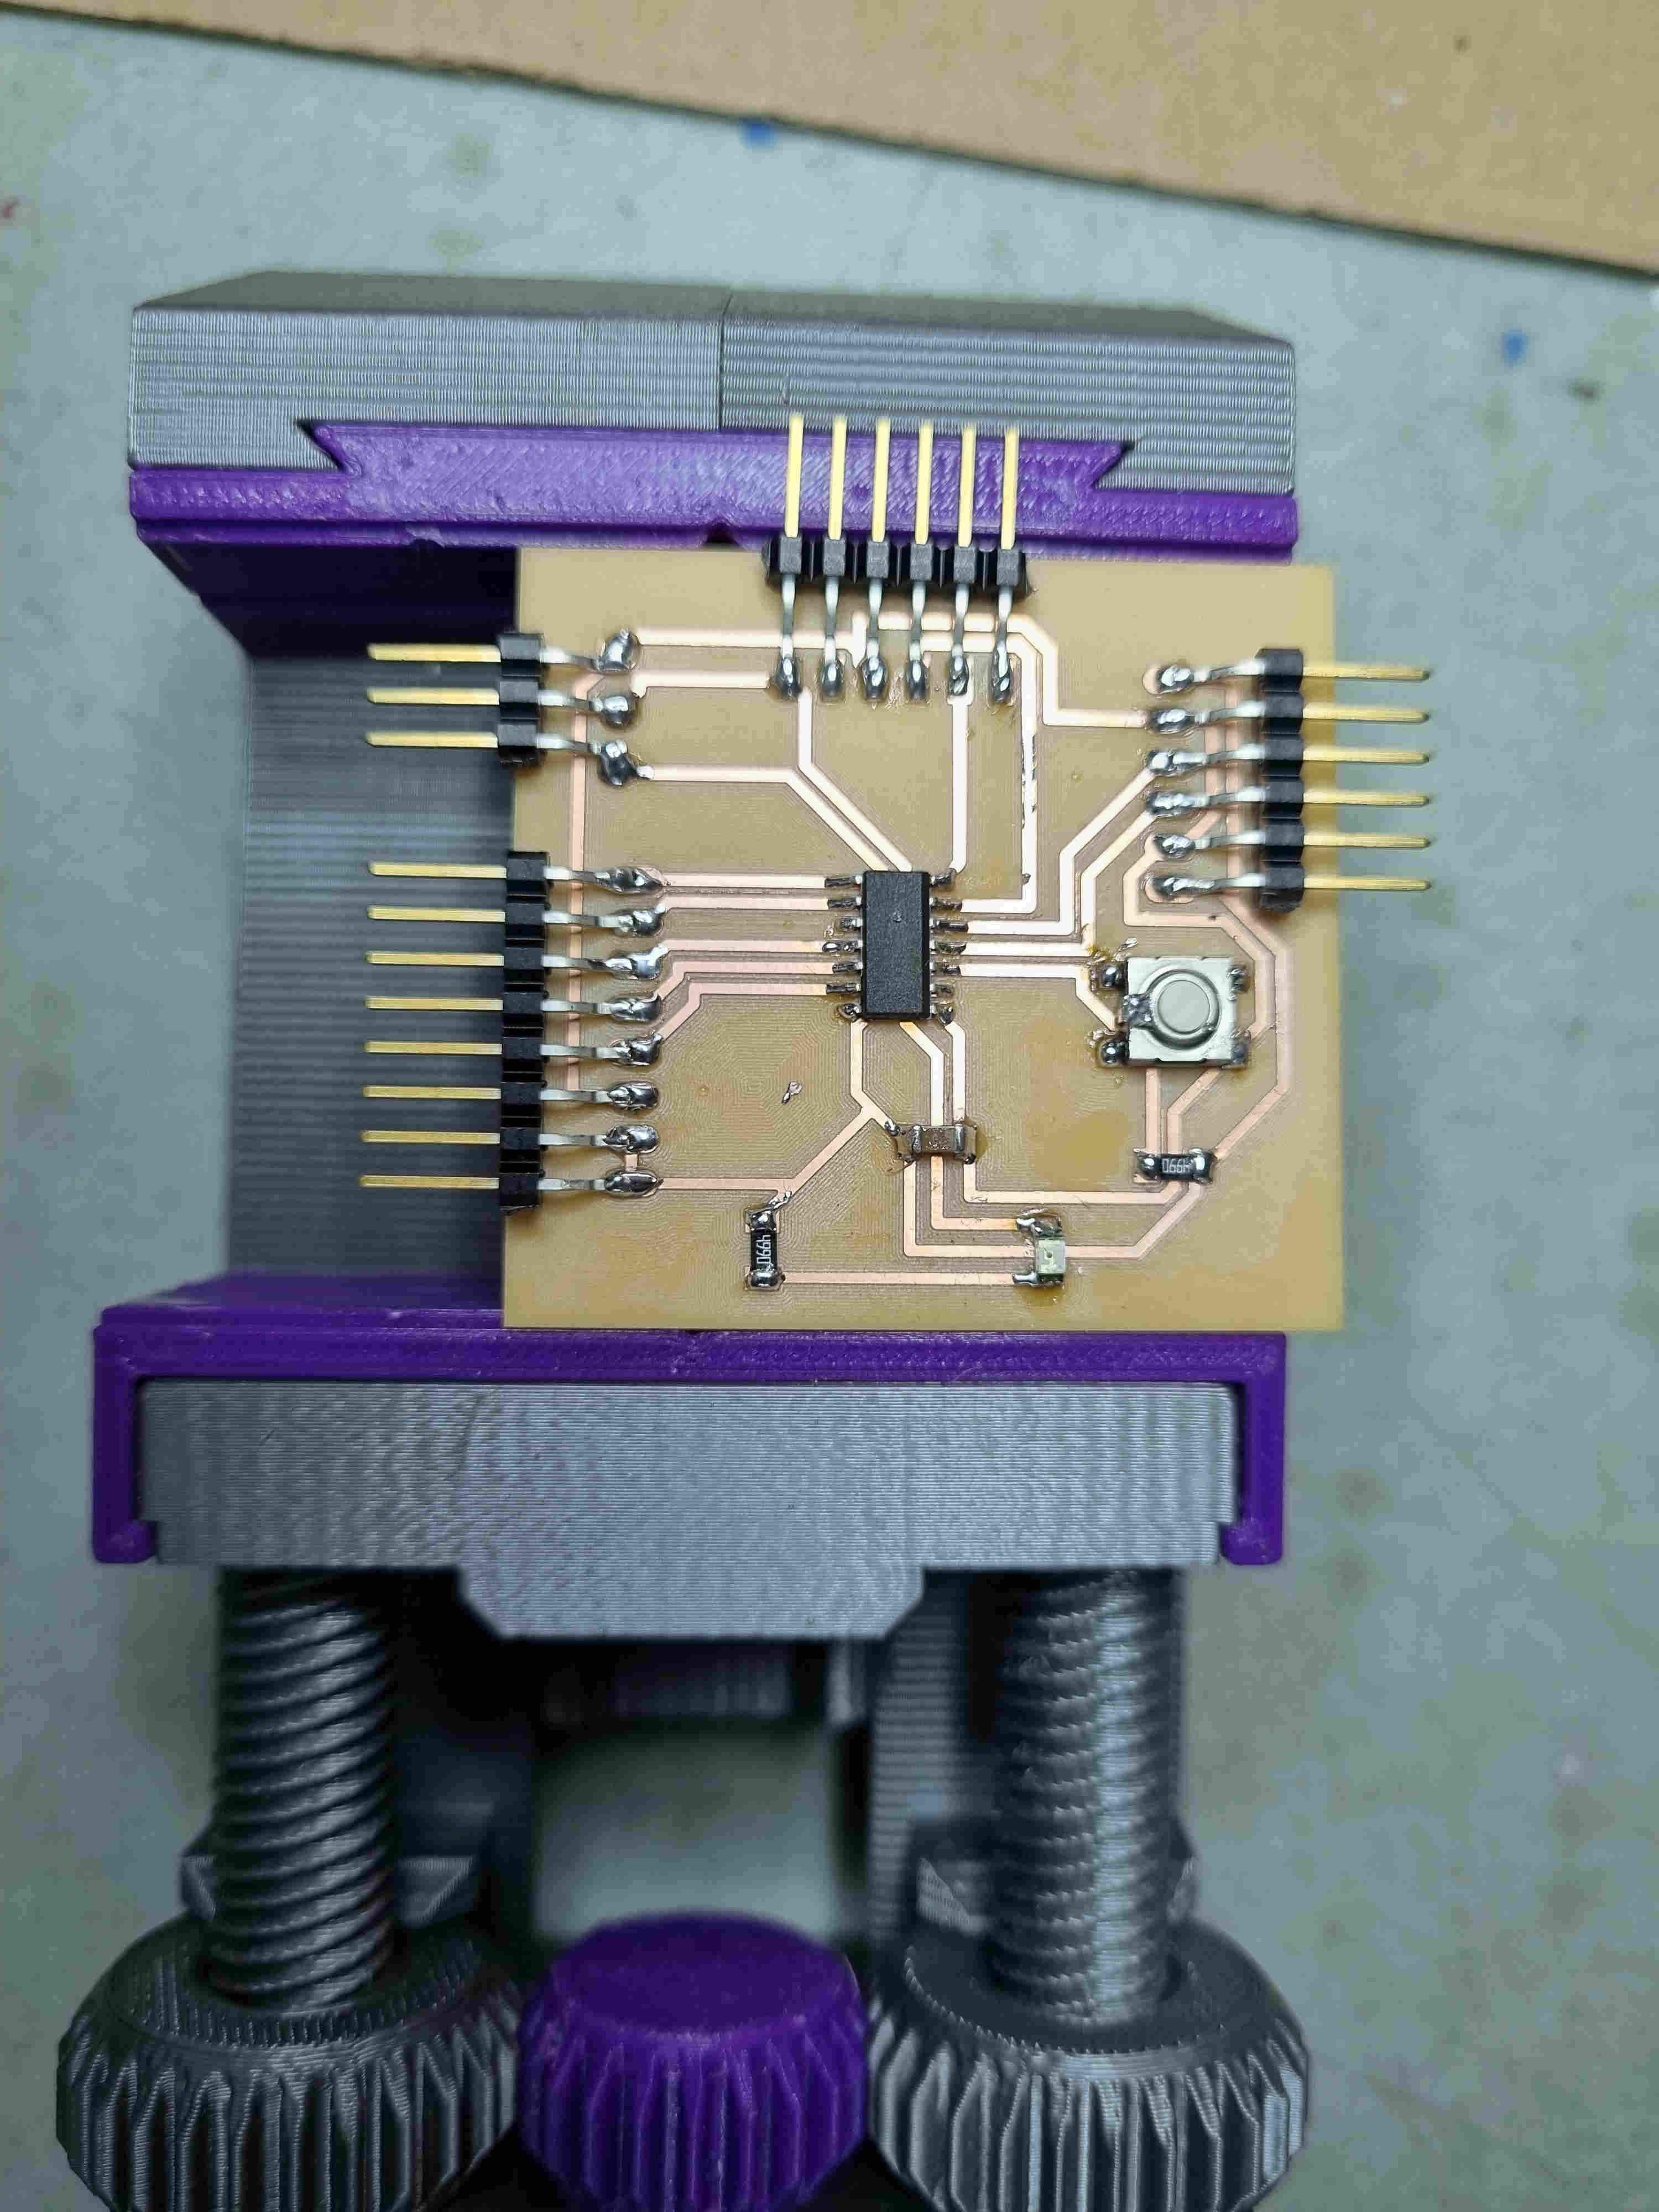
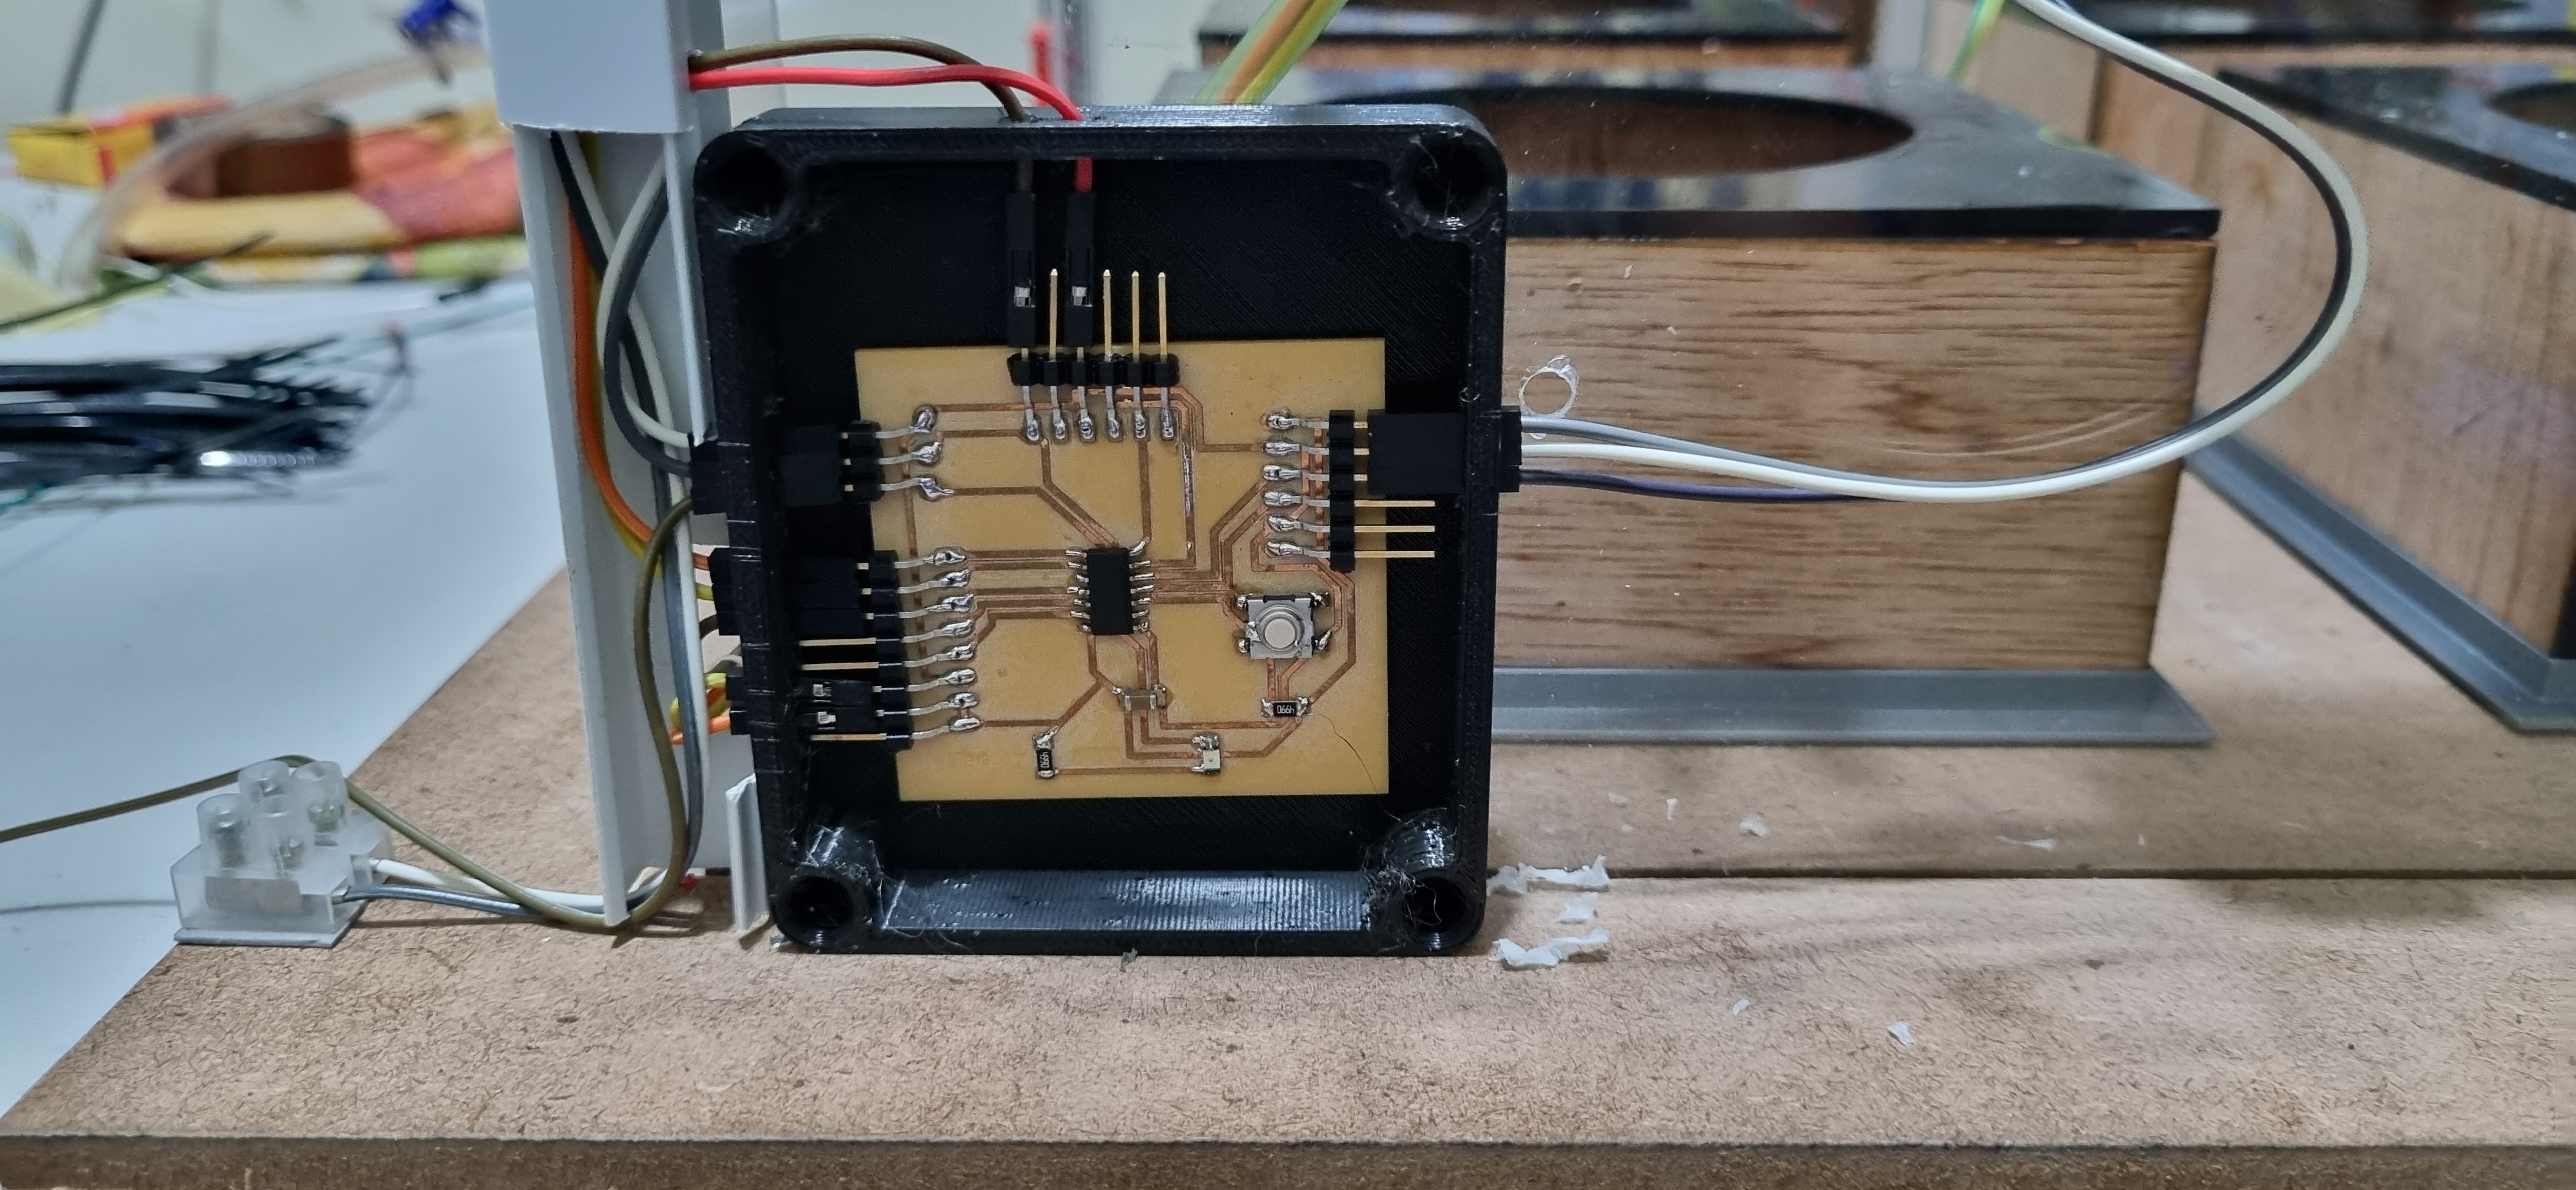
Electronics Design and Production
During the week of input devices and the week of output devices i produced the boards i used for my final project.
Programming the microcontroller boards
Programming for soil moisture
#include<LiquidCrystal_I2C.h>
#include <Wire.h>


LiquidCrystal_I2C lcd(0x27,16,2);

int sensor_pin = 2;       //Sensor Pin
int relay_pin = 8;        //Relay Pin
int relay_pin1 = 9;


void setup()
{
  Serial.begin(9600);
  lcd.init();
  lcd.backlight();
  lcd.setBacklight(HIGH);
  pinMode(sensor_pin, INPUT);
  pinMode(relay_pin, OUTPUT);
  pinMode(relay_pin1, OUTPUT);
}

void loop()
{
  int sensor_data = analogRead(sensor_pin);
  Serial.print("Sensor_data:");
  Serial.print(sensor_data);
  Serial.print("\t | ");

  if(sensor_data > 950)
  {
    Serial.println("No moisture, Soil is dry");
    digitalWrite(relay_pin, LOW);
    digitalWrite(relay_pin1, LOW);
    lcd.clear();                 // clear display
    lcd.setCursor(0,0);
    lcd.print("Soil Dry   ");
    lcd.setCursor(0,1);
    lcd.print("Motor ON buzon ");
  }
  else if(sensor_data >= 400 && sensor_data <= 950)
  {
    Serial.println("There is some moisture, Soil is medium");
    digitalWrite(relay_pin, HIGH);
    digitalWrite(relay_pin1, LOW);
    lcd.clear();                 // clear display
    lcd.setCursor(0,0);
    lcd.print("Soil Medium");
    lcd.setCursor(0,1);
    lcd.print("Motor OFF");
  }
  else if(sensor_data < 400)
  {
    Serial.println("Soil is wet");
    digitalWrite(relay_pin, HIGH);
    digitalWrite(relay_pin1, HIGH);
    lcd.clear();                 // clear display
    lcd.setCursor(0,0);
    lcd.print("Soil Wet   ");
    lcd.setCursor(0,1);
    lcd.print("Motor OFF buzof");
  }

  delay(100);
}
Programming for temperature and humidity
#include <SPI.h>
#include <Wire.h>

// For OLED LCD
#include <Adafruit_GFX.h>
#include <Adafruit_SSD1306.h>

// For DHT temp and humidity sensor
#include "dht.h"

#define OLED_RESET 4
Adafruit_SSD1306 display(OLED_RESET);

#if (SSD1306_LCDHEIGHT != 32)

#endif

#define DHT11_PIN 8       // DHT 11  (AM2302) - what pin we're connected to
#define TEMP_THRESHOLD 30 // defines at which temperature should we trigger the fan
#define TEXT_SIZE 2       // define text size

// DHT constant
dht DHT;
// Relay pin
constexpr uint8_t relay = 3;


// Variables
int16_t humidity; //Stores humidity value
int16_t temp;     //Stores temperature value

void setup()
{
  // Relay Pin Configuration
  pinMode(relay, OUTPUT);
  // Make sure the fan is off
  digitalWrite(relay, LOW);

  Serial.begin(9600);
  Serial.println("Automatic Fan Control");

  // by default, we'll generate the high voltage from the 3.3v line internally! (neat!)
  display.begin(SSD1306_SWITCHCAPVCC, 0x3C); // initialize with the I2C addr 0x3C (for the 128x32)

  // Show image buffer on the display hardware.
  // Since the buffer is intialized with an Adafruit splashscreen
  // internally, this will display the splashscreen.
  display.display();
  delay(3000);
}


void loop()
{
  // Read data and store it to variables hum and temp
  int chk = DHT.read11(DHT11_PIN);
  humidity = DHT.humidity;
  temp = DHT.temperature;

  // Print temp and humidity values to display
  displayTempAndHumidity(temp, humidity);
  if (temp >= TEMP_THRESHOLD)
  {
    digitalWrite(relay, HIGH);
    displayFanOnIndicator(true);
  }
  else
  {
    digitalWrite(relay, LOW);
    // displayFanOnIndicator(false);
  }
  delay(2000);
}

void displayTempAndHumidity(int16_t t, int16_t h)
{
  display.clearDisplay();

  display.setTextSize(TEXT_SIZE);
  display.setTextColor(WHITE);
  display.setCursor(5, 15);
  display.print("TEM: ");
  display.print(t,DEC);
  display.print("C");
  display.setCursor(10, 0);
  display.print("HUM: ");
  display.print(h,DEC);
  display.print("%");
  display.display();
}


void displayFanOnIndicator(bool on)
{
  if (on)
  {
    display.drawLine(0, 63, 128, 63, WHITE);
    display.display();
  }
  else
  {
    display.drawLine(0, 63, 128, 63, BLACK);
    display.display();
  }
}
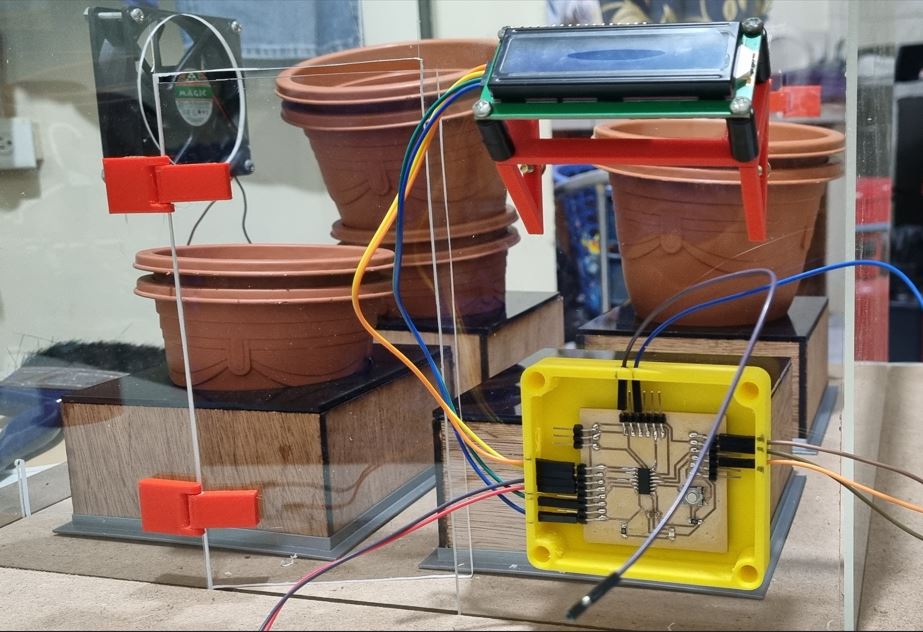
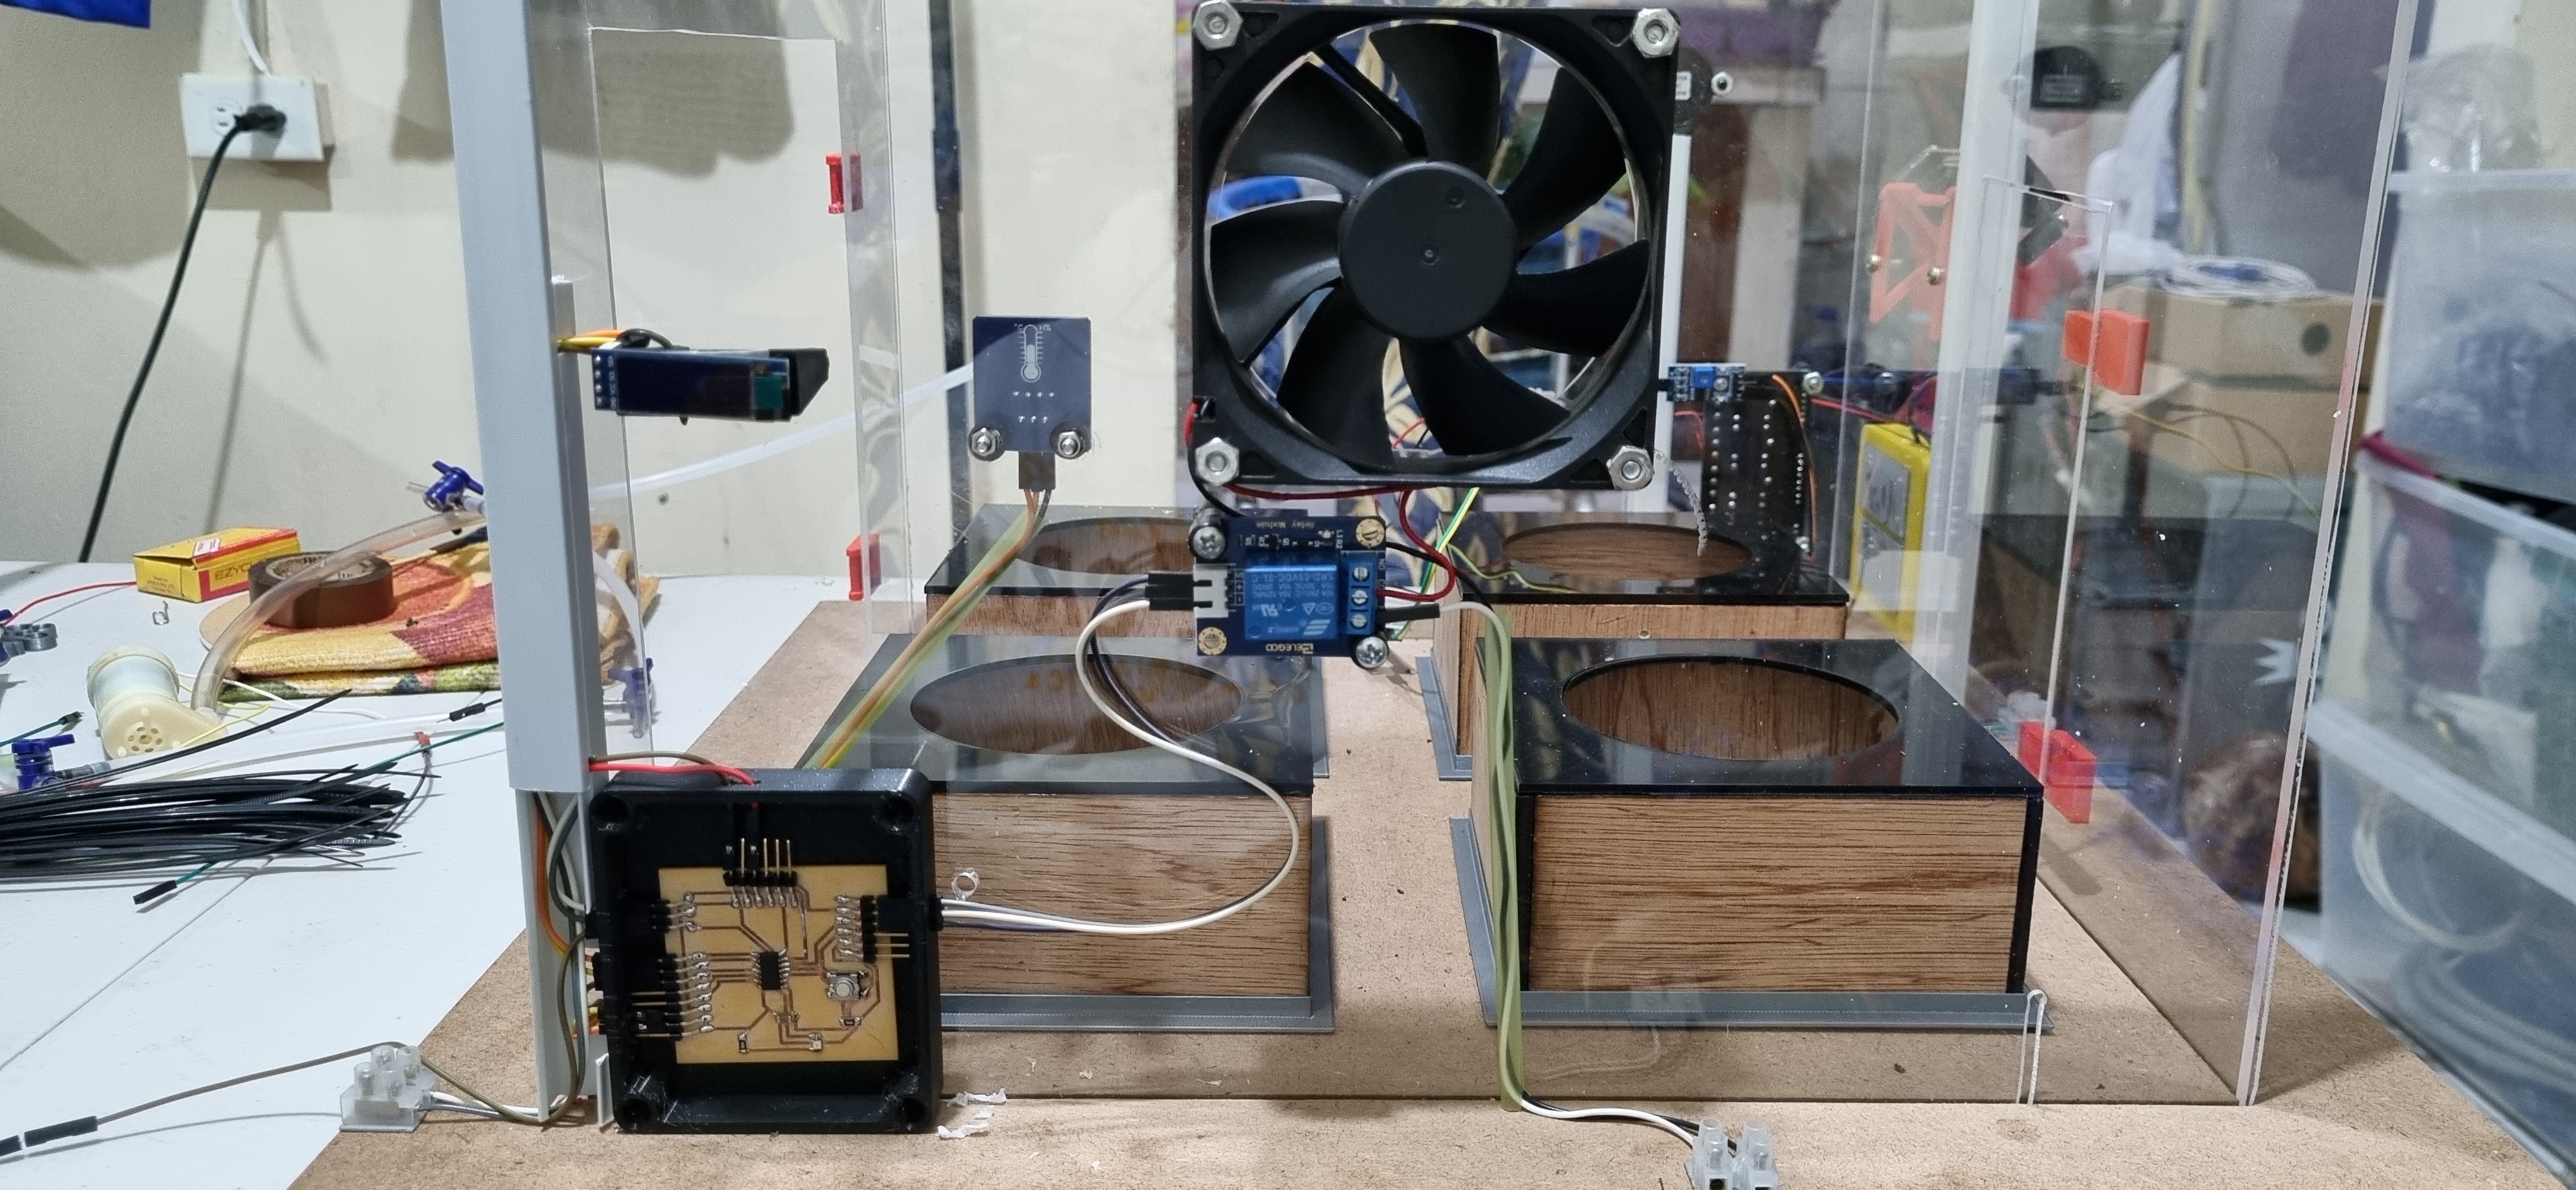
System Testing
Original Design files and source code
References
https://www.bbc.co.uk/bitesize/guides/zk37hyc/revision/7
https://www.youtube.com/watch?app=desktop&v=EFvbS6XzTVo
https://arduinogetstarted.com/tutorials/arduino-dht11-oled