12. Output devices
Learning outcomes
Demonstrate workflows used in controlling an output device(s) with MCU board you have designed.
Link to the group assignment page
https://fabacademy.org/2022/labs/vancouver/students/marvin-holloway/assignments/week21/
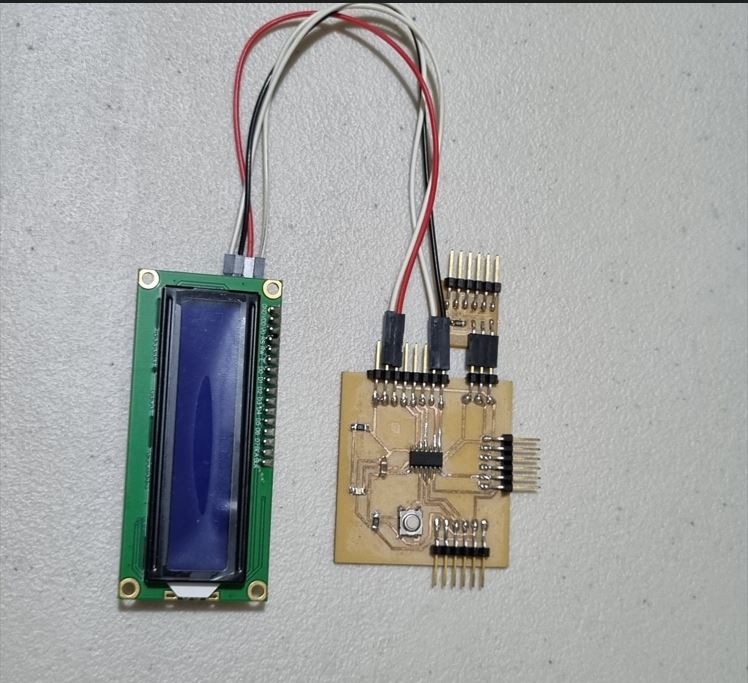
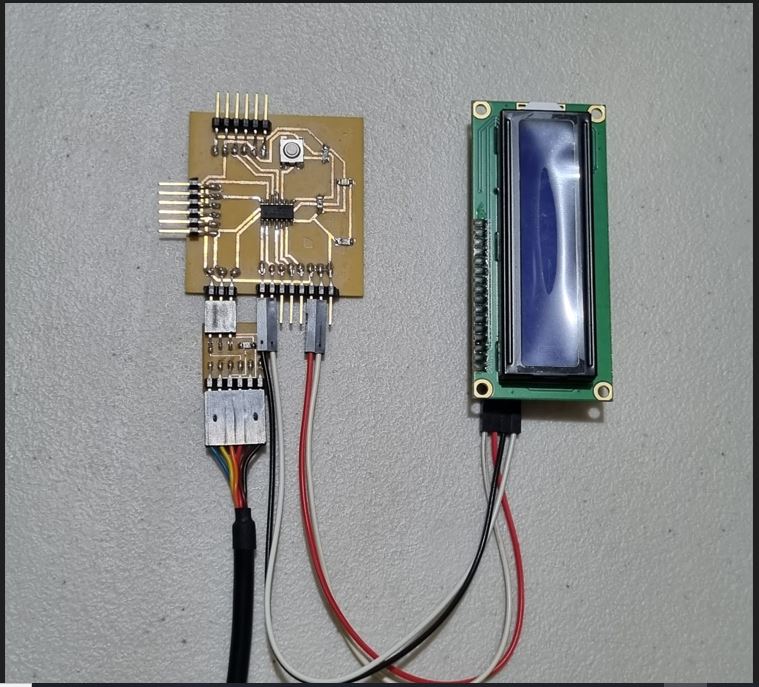
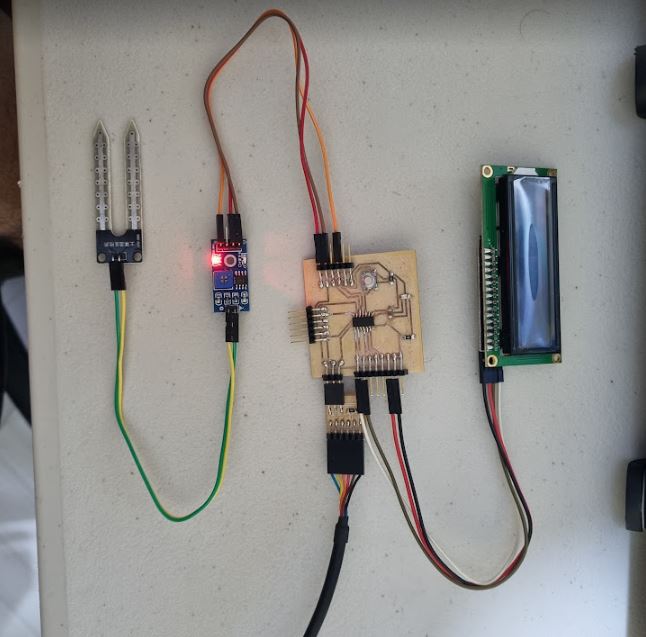
This week i decided to use a device i will be using for my final project which is a 16 x 2 I2C LCD display.
I will be using the display with a soil moisture sensor to display the percentage or the amount of of water present in the soil.
Connecting the LCD
1) I Connected LCD GND to GND on my microcontroller board.
2) I Connected LCD SCL to pin8 on my microcontroller board.
3) I Connected LCD SDA to pin9 on my microcontroller board.
4) I connected LCD VCC to my microcontroller 5V pinout.
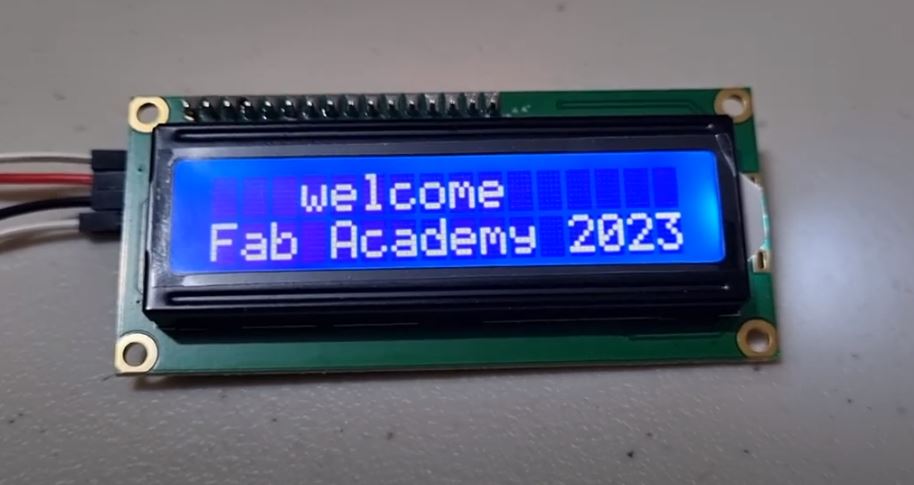
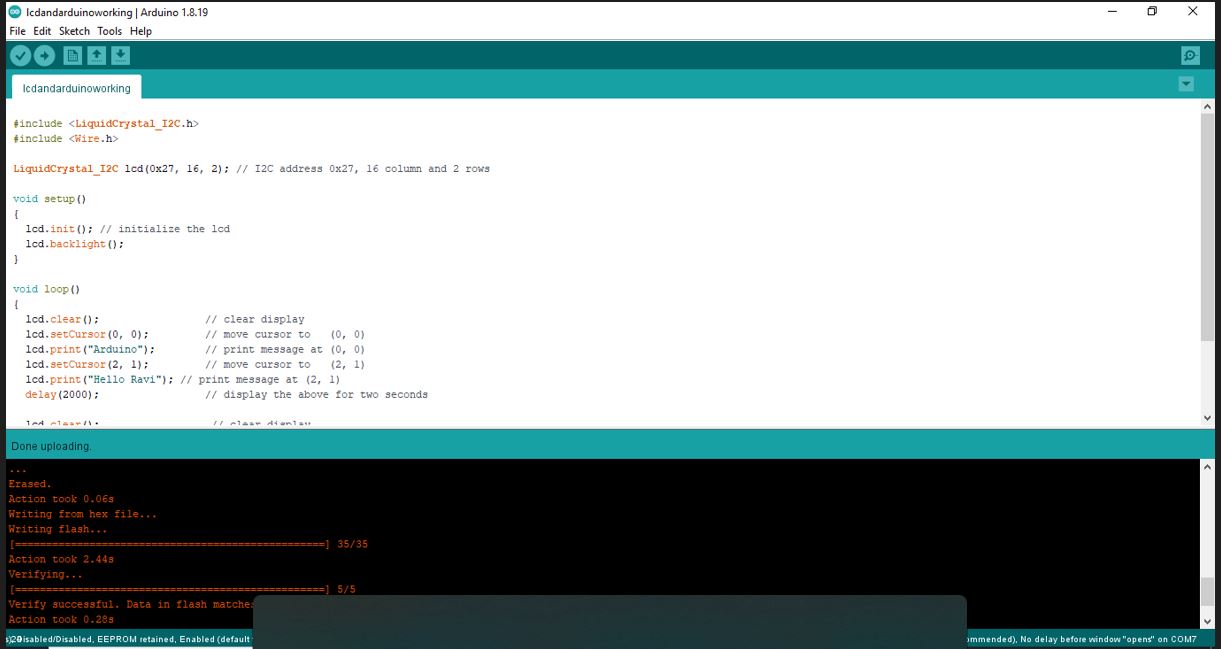
Code used for LCD and microntroller board
#include <LiquidCrystal_I2C.h>
#include <Wire.h>

LiquidCrystal_I2C lcd(0x27, 16, 2); // I2C address 0x27, 16 column and 2 rows

void setup()
{
  lcd.init(); // initialize the lcd
  lcd.backlight();
}

void loop()
{
  lcd.clear();                 // clear display
  lcd.setCursor(0, 0);         // move cursor to   (0, 0)
  lcd.print("Arduino");        // print message at (0, 0)
  lcd.setCursor(2, 1);         // move cursor to   (2, 1)
  lcd.print("Hello Ravi"); // print message at (2, 1)
  delay(2000);                 // display the above for two seconds

  lcd.clear();                  // clear display
  lcd.setCursor(3, 0);          // move cursor to   (3, 0)
  lcd.print("welcome");        // print message at (3, 0)
  lcd.setCursor(0, 1);          // move cursor to   (0, 1)
  lcd.print("Fab Academy 2023"); // print message at (0, 1)
  delay(2000);                  // display the above for two seconds
}
Video of LCD
Connecting the soil moisture sensor
1) I Connected Soil Moisture sensor pin 0 to GND.
2) I Connected Soil Moisture Signal pin to attiny1614 pin4.
3) I Connected Soil Moisture Vin to attiny1614 5v.


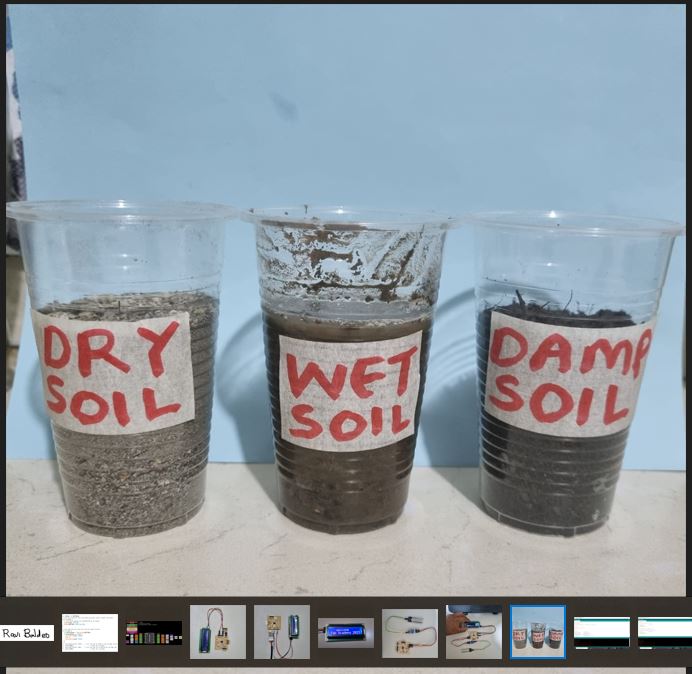
The image below shows the soil samples used for the testing of water content.
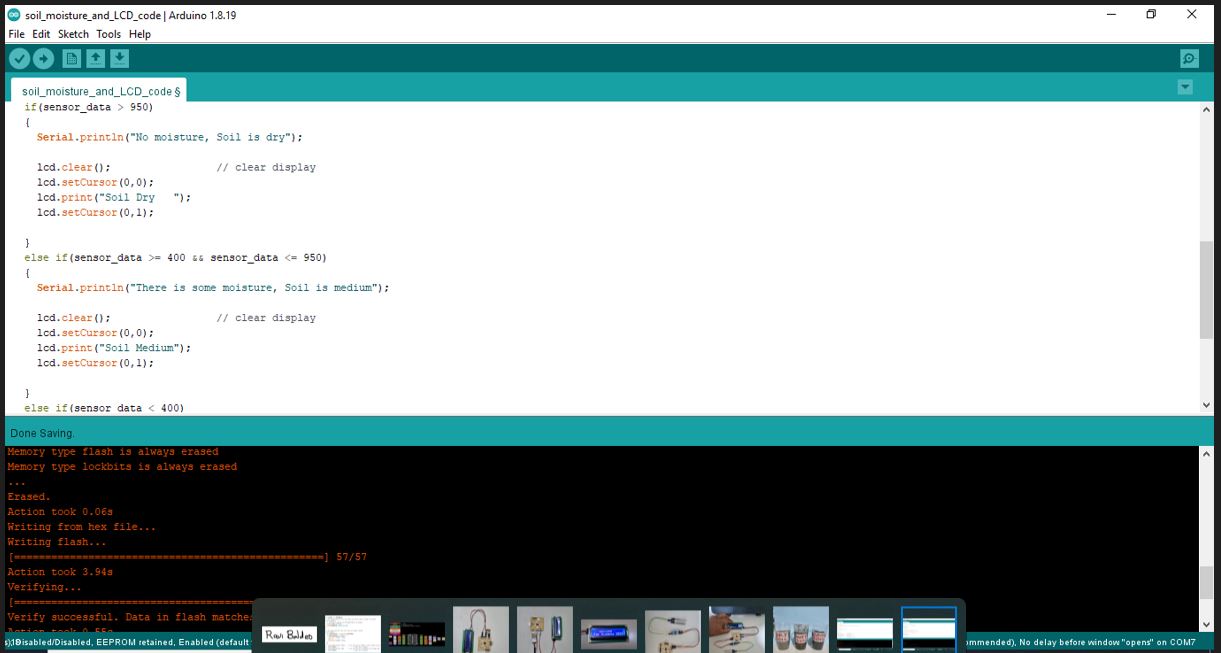
Code used for soil moisture sensor and LCD
// the setup function runs once when you press reset or power the board
void setup() {
  // initialize digital pin LED_BUILTIN as an output.
  pinMode(LED_BUILTIN, OUTPUT);
}

// the loop function runs over and over again forever
void loop() {
  digitalWrite(LED_BUILTIN, HIGH);   // turn the LED on (HIGH is the voltage level)
  delay(1000);                       // wait for a second
  digitalWrite(LED_BUILTIN, LOW);    // turn the LED off by making the voltage LOW
  delay(1000);                       // wait for a second
}
Video of soil moisture and LCD test
References
https://www.youtube.com/watch?app=desktop&v=EFvbS6XzTVo