4. Computer controlled cutting
This week I worked on defining my final project idea and started to getting used to the documentation process.
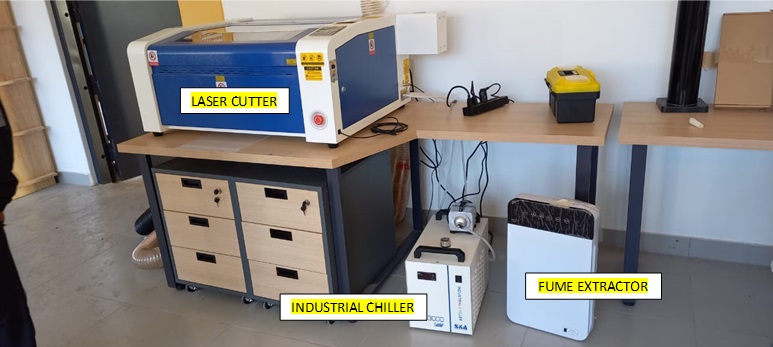
LASER CUTTER
High precision CO2 laser cutting machine, used for engraving and cutting wood, acrylics, plastics, stone, among other materials, with the highest quality. Used to make high-speed cuts with personalized designs, cuts to make personalized accessories in different materials: Leather, fabrics, wood, acrylic, plastic and the possibility of generating prototype machines.
LASER ENGRAVING
Laser engraving is a process that vaporizes materials in the form of rays to engrave deep, permanent marks. The laser beam acts like a chisel, etching marks by removing layers from the surface of the material.

DEFINITION OF VECTORIZED
Vectorization consists of converting images that are made up of pixels into images made up of vectors. The vector composite image, compared to a pixel composite image, maintains quality and definition unchanged even when resized.
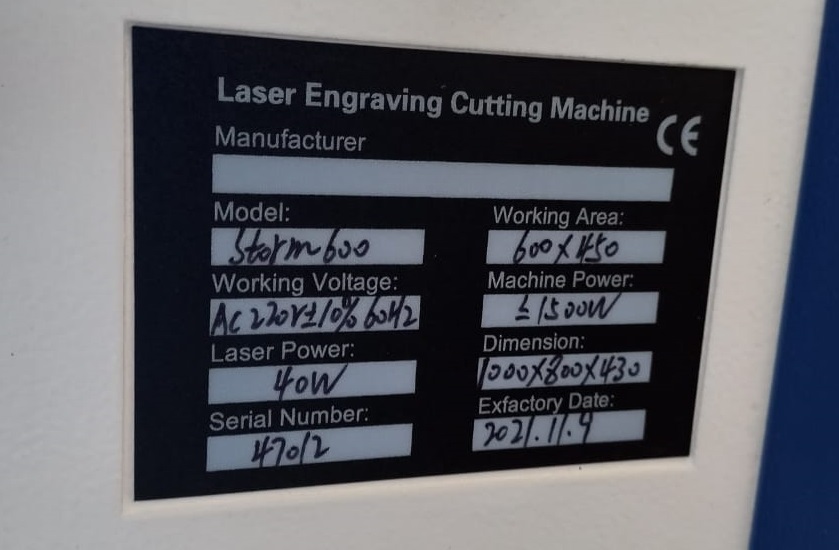
TECHNICAL DESCRIPTION OF THE LASER CUTTER
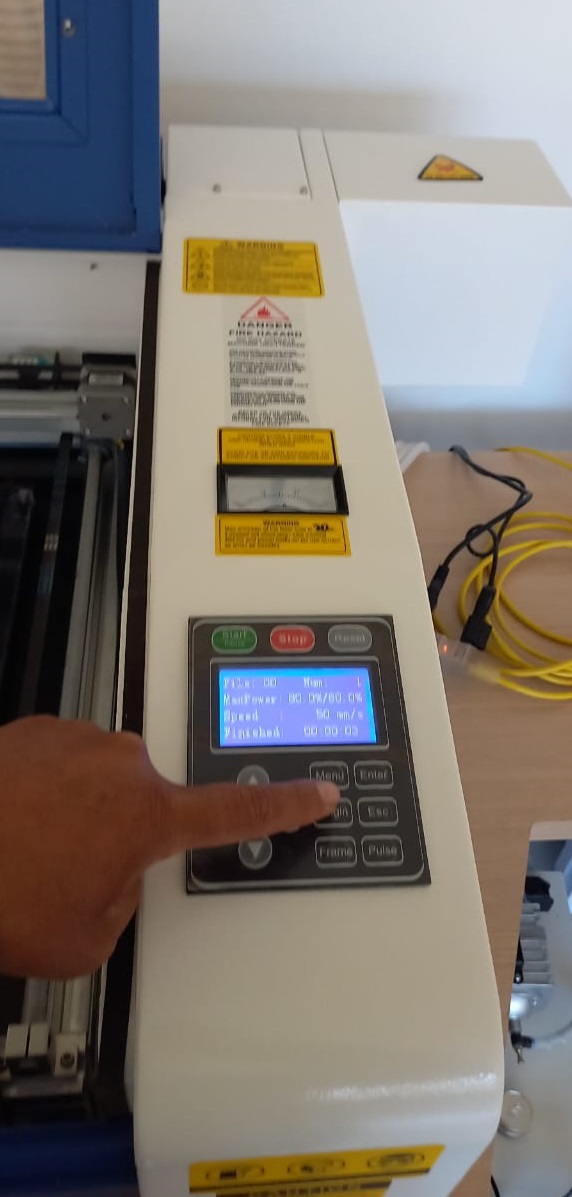
LET’S START! This time we will work with a laser cutter that was implemented in the IESTPH model STORMBOO SERIES 47012.
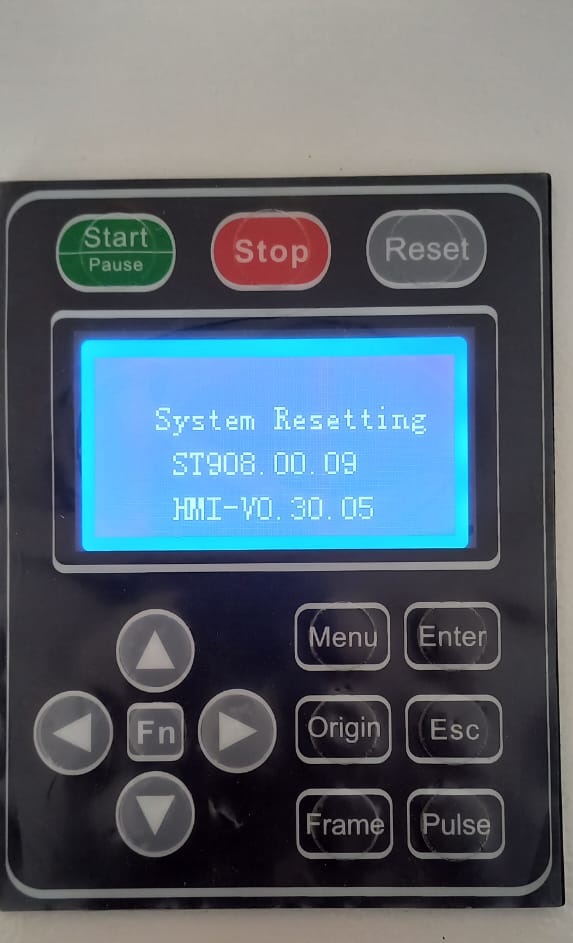
CD LASER SOFTWARE
After starting the software, the interface is shown in the following figure. The main features of this software can be used through the menu bar. Running menu commands is the most basic way to do it. The menu bar includes Documentation, Editing, Drawing, Configuration, Rendering, Viewing, and Help.
Laser Cutter Model STORMBOO SERIES 47012.
The first thing is to get to know the team with which we are going to work in the development of our projects.
WORK AREA
Approximate dimensions (width x height x depth) 730 x 562 x 298 mm. Minimum work area 406 x 305 mm. min height of the workpiece 114 mm.
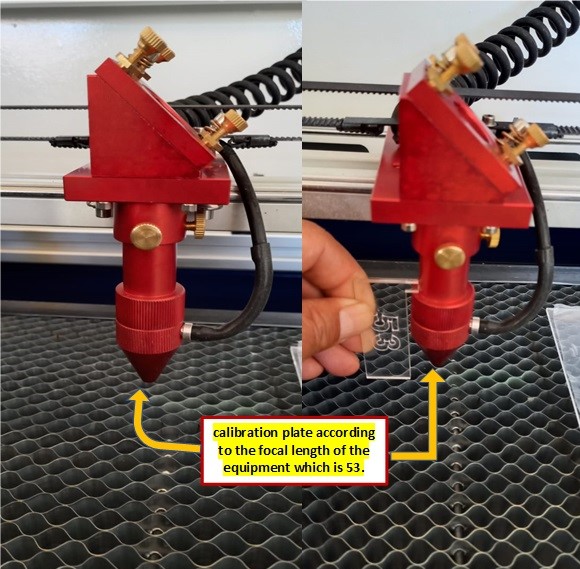
WORK FOCUS
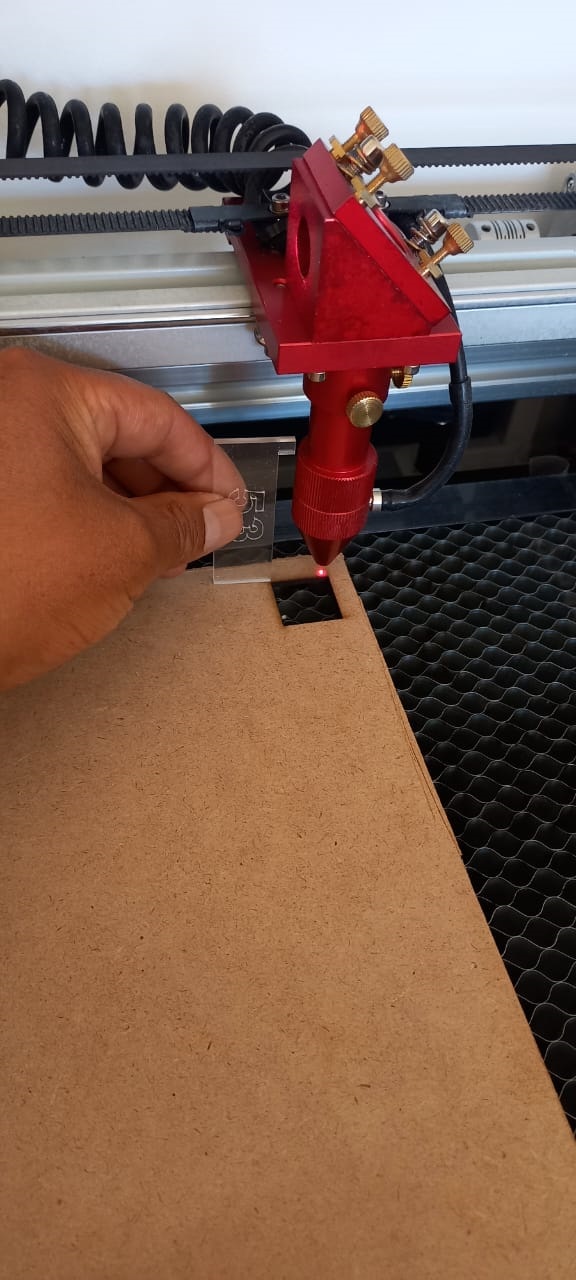
Finally, I must mention the focal length, this parameter influences the result of the work, it consists of finding the correct distance between the material and the work lens, which must be considered to the extent of 53, which is the appropriate distance, if the lens is Very far from the material, the laser will open and lose focus, giving poor quality to the work. If it is too close, the laser opening will be high and we will not have good power control
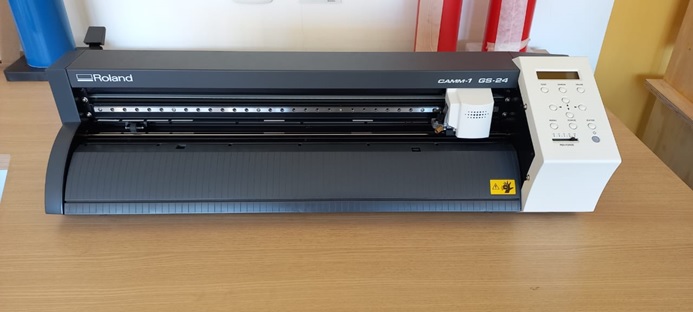
VINYL PLOTTER
Vinyl cutter, machine used to cut vinyl material, foils at high speed for the application of said material in the personalized printing of textile garments and other materials, with designs for stickers, packaging, lettering and labels developed in a printer and later used for sublimation in textile garments or other materials.
MODEL
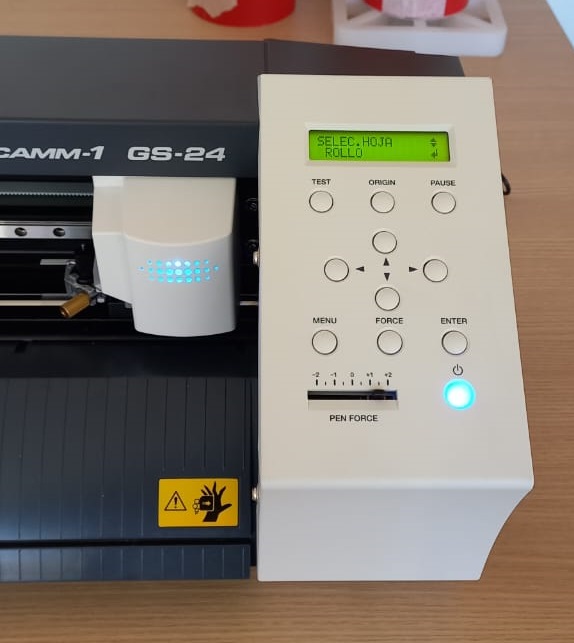
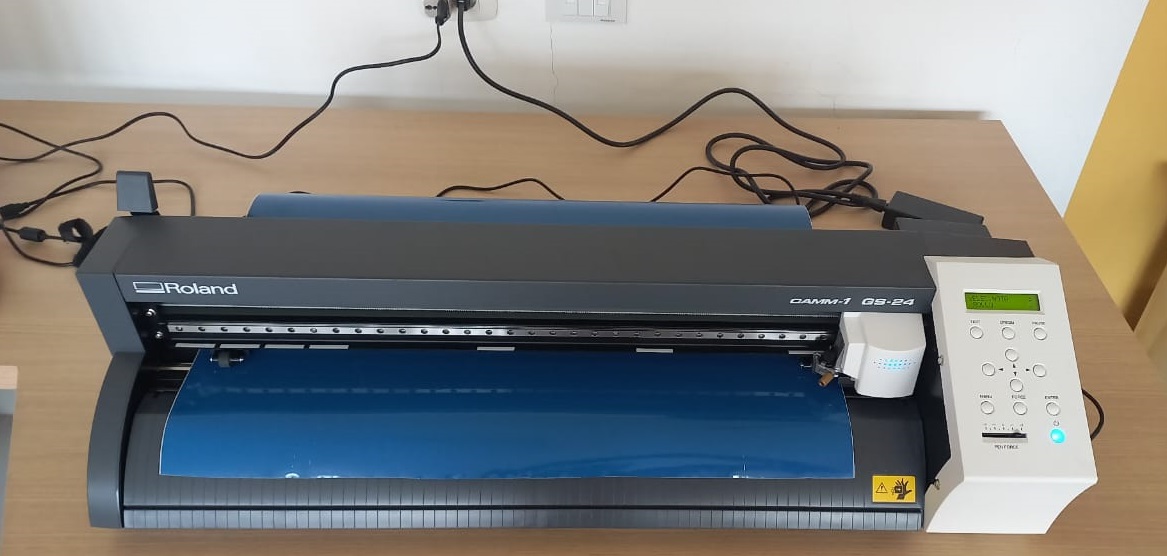
The vinyl cutter model is as follows: GS-24 Serial N° NEW2594
BRAND
ROLAND
WORK AREA
Maximum cutting area of 584mm (22-15/16 inches) wide and 24998mm (984-1/8 inches) long Dimensions of 855(width)x315(depth)x240(height)mm

SOFTWARE
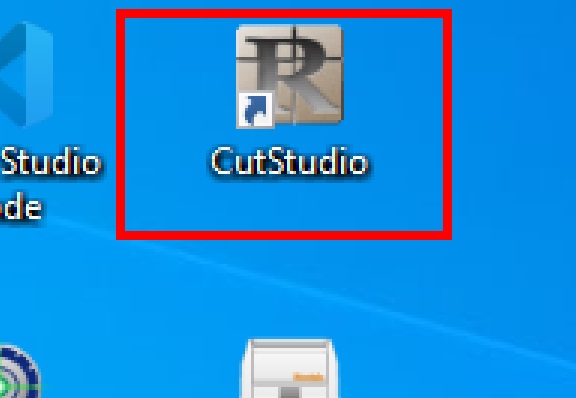
Manual for the bundled software “CutStudio” The manual for this software used to create output data for the machine, “CutStudio” is included in the Help files.
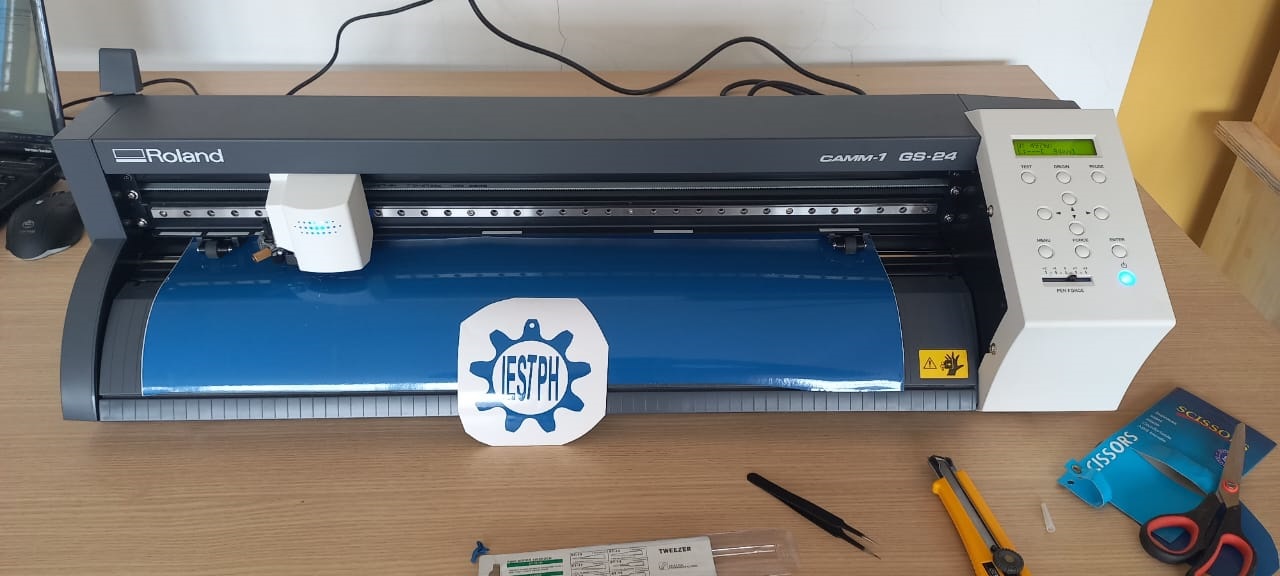
VINYL CUTTER:
Roland’s CAMM-1 GS-24 tabletop cutter is precision and efficiency at its best. With a completely redesigned cutting carriage and blade holder, the GS-24 offers great stability, up to 10x overlap cutting, and up to 350 grams of cutting force for cutting jobs. MODEL: CAMM - 1GS - 24 BRAND: ROLAND
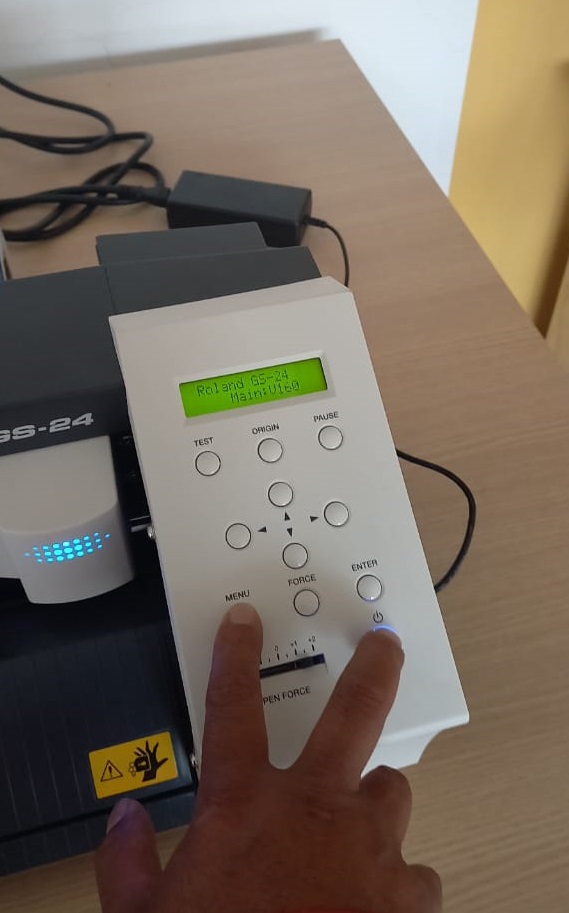
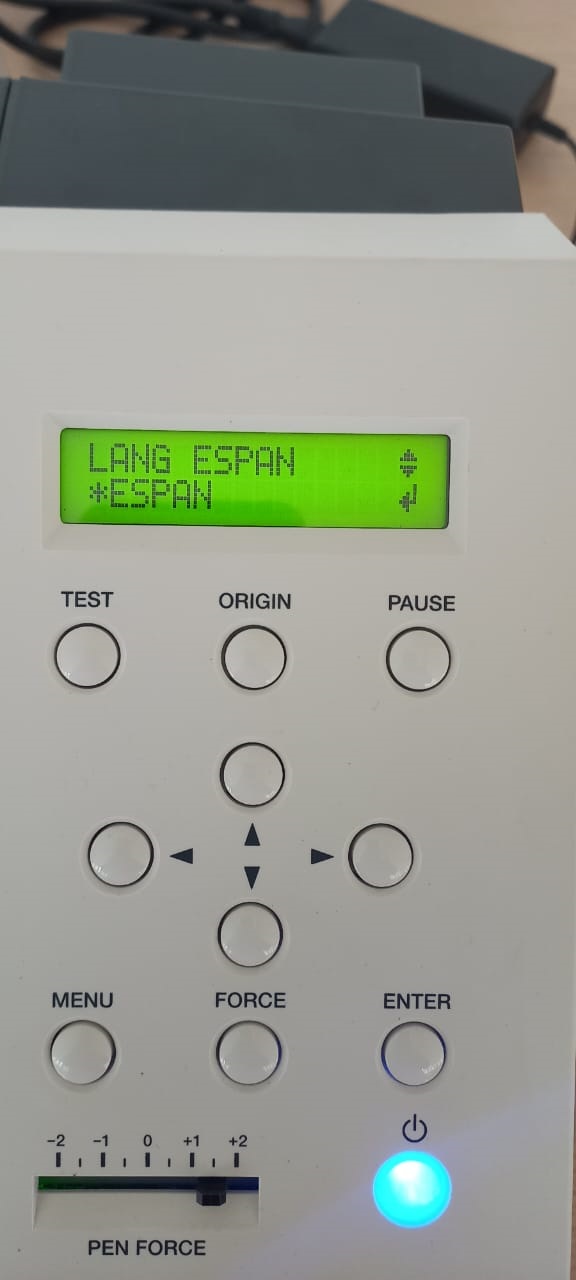
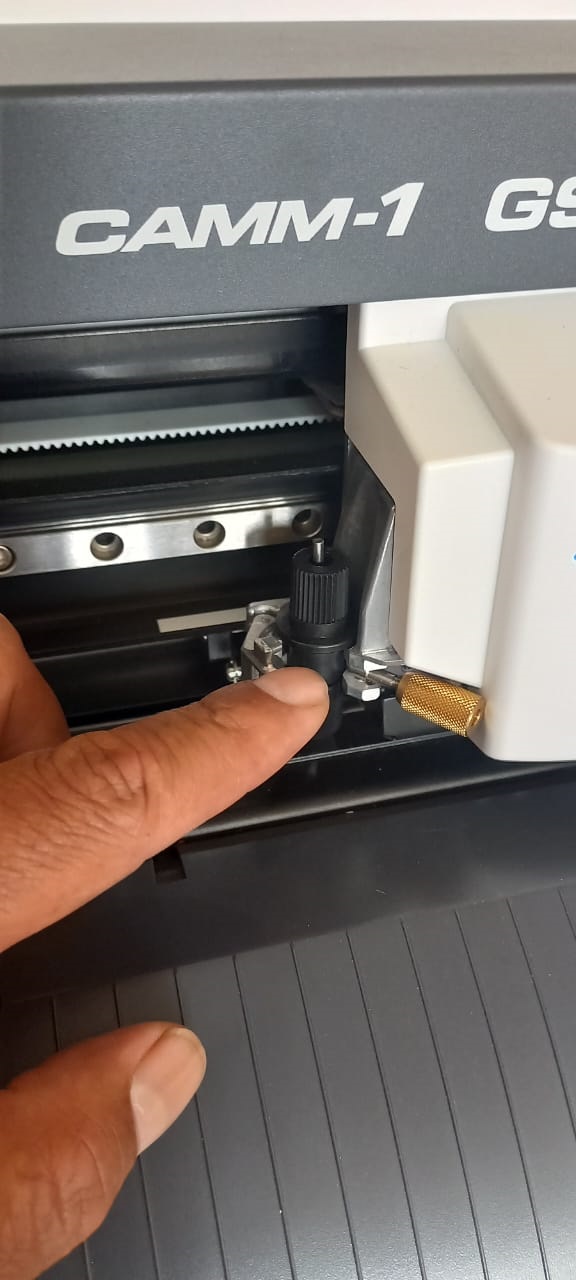
SET UP THE VINYL CUTTER:
FIRST:
The machine is configured in Spanish

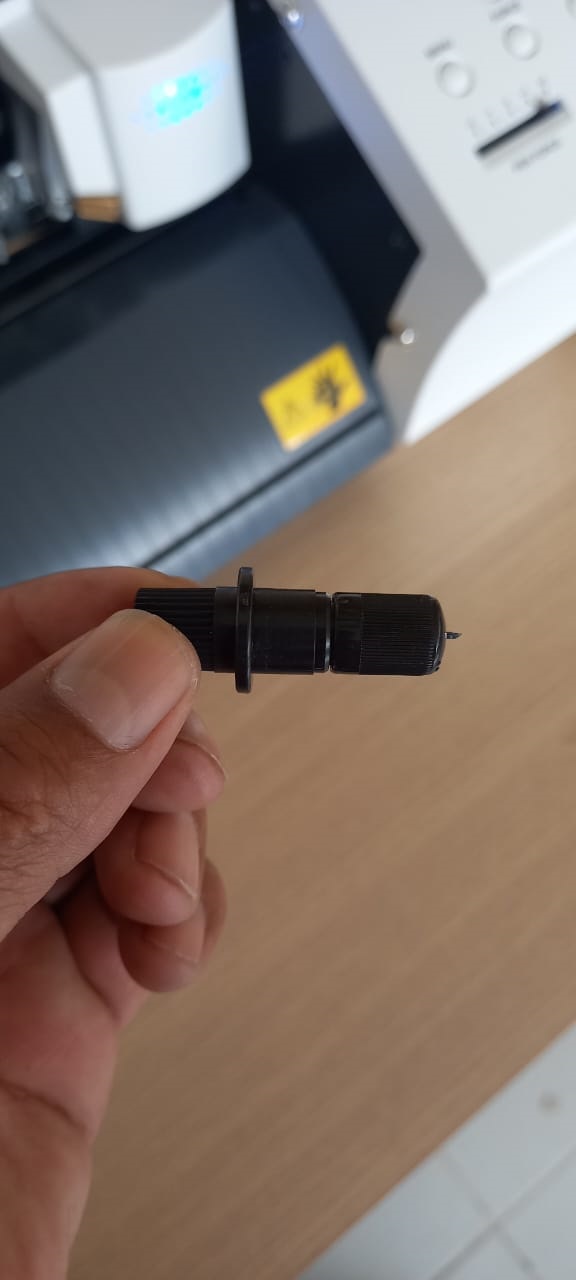
SECOND:
We install the knife to cut the developed images
THIRD.
It is observed in the front part of the equipment there is a sensor where the material will be detected, then the vinyl is inserted and graduated to make the cut.
FOURTH.
Placing the vinyl roll.
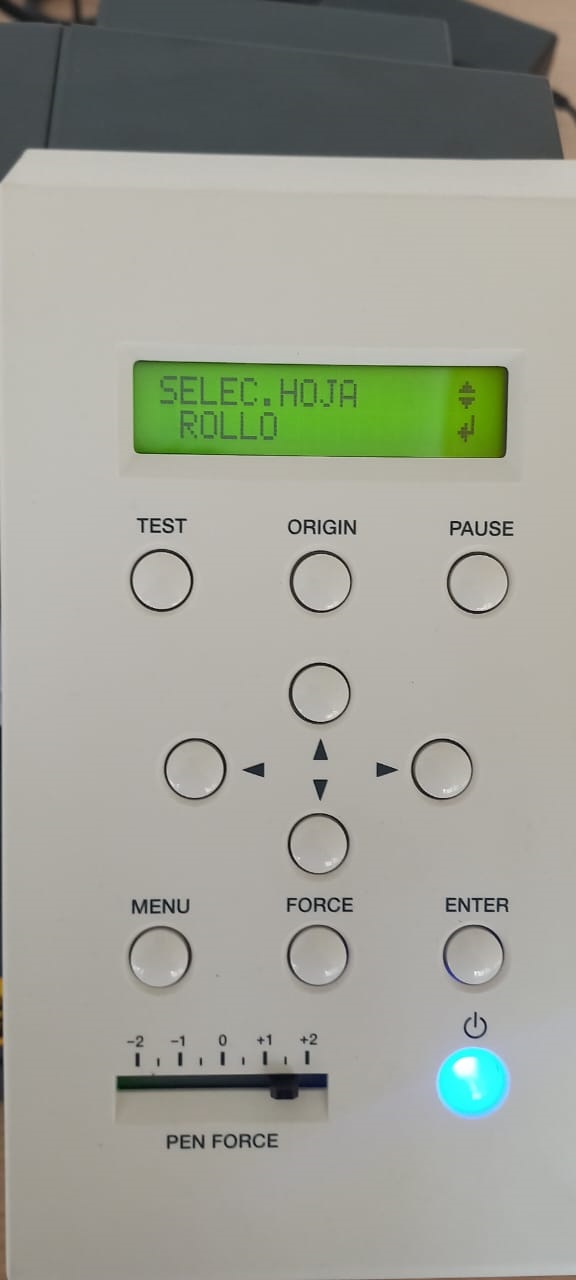
FIFTH:
We select roll and then enter.
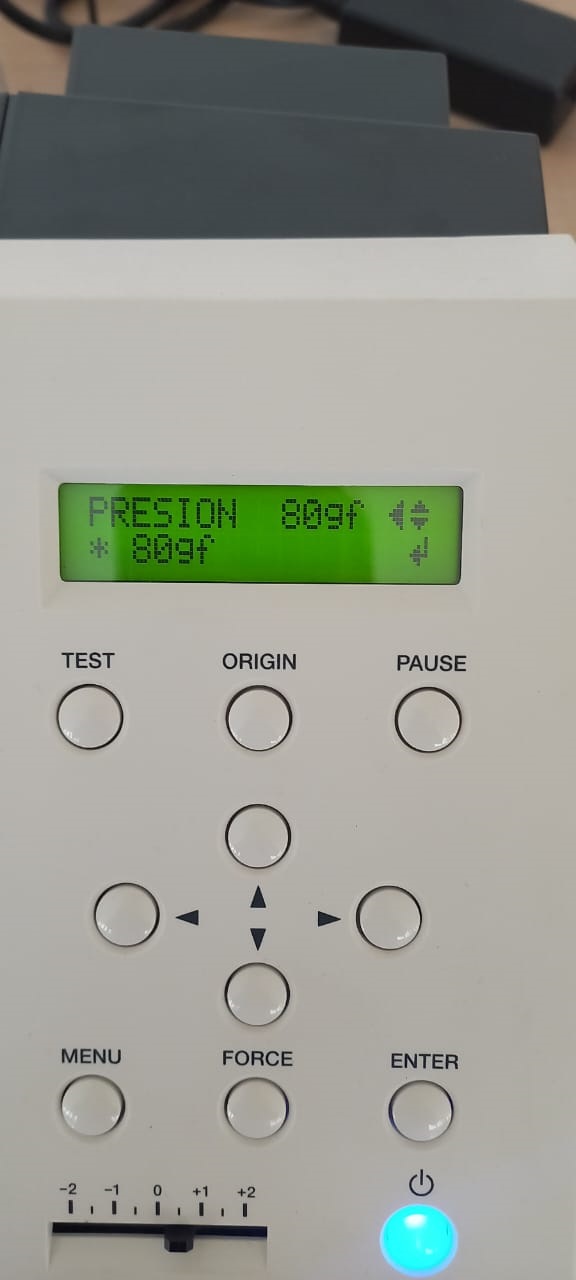
SIXTH:
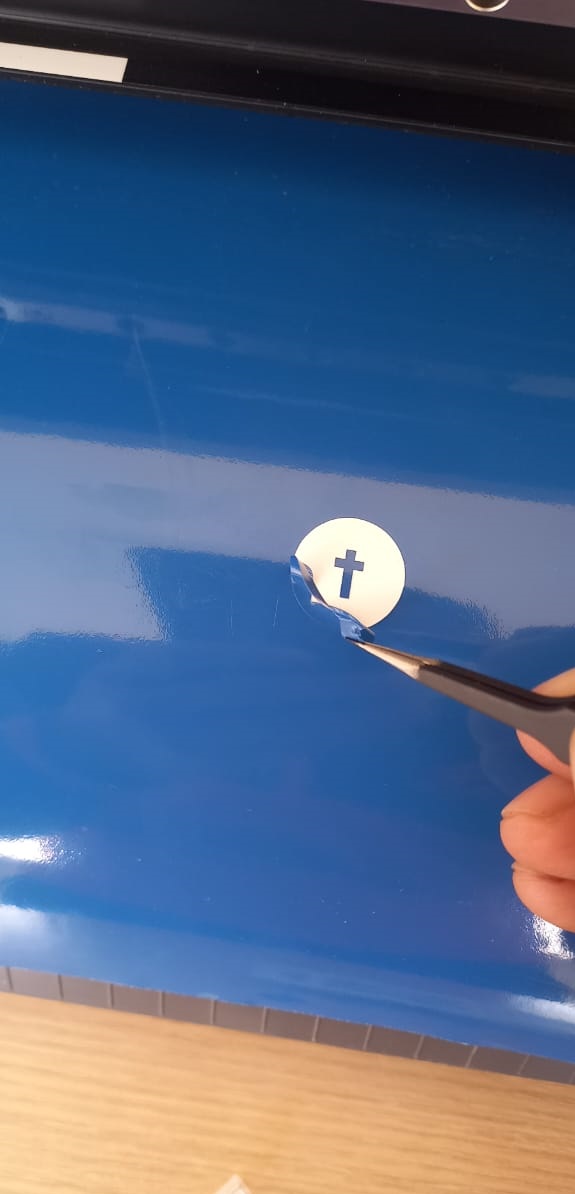
When performing the calibration of the vinyl cutter, it is observed that the precision at 60gf does not cut the vinyl in the first test, at 70 gf in the same way the cut is superficial, third test at 80gf the cut is made correctly as observed in the image.

DESIGN PROGRAM
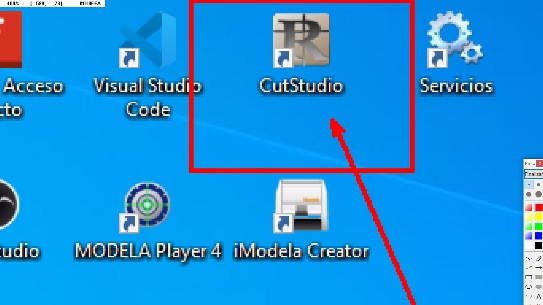
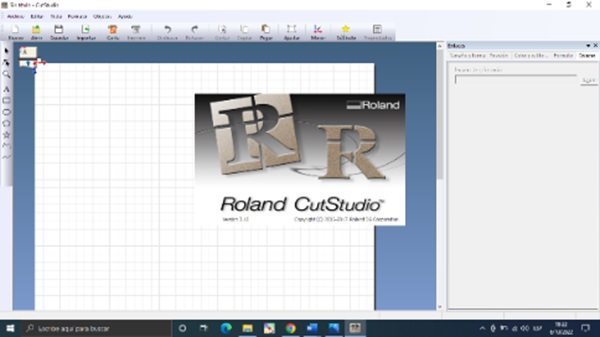
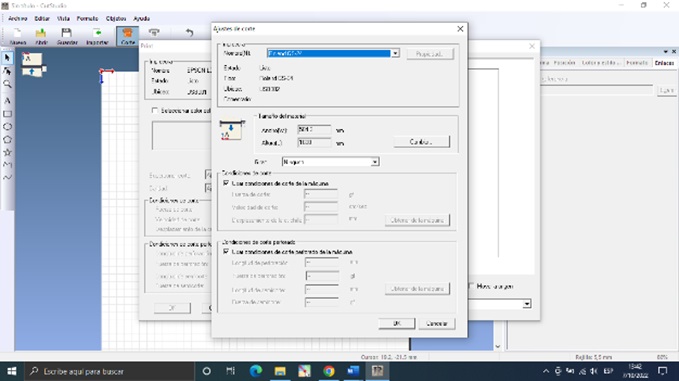
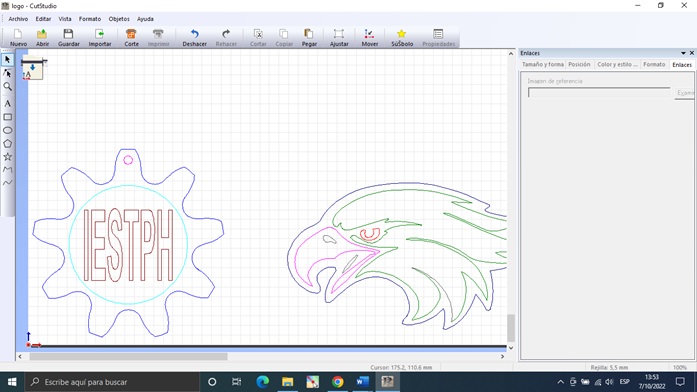
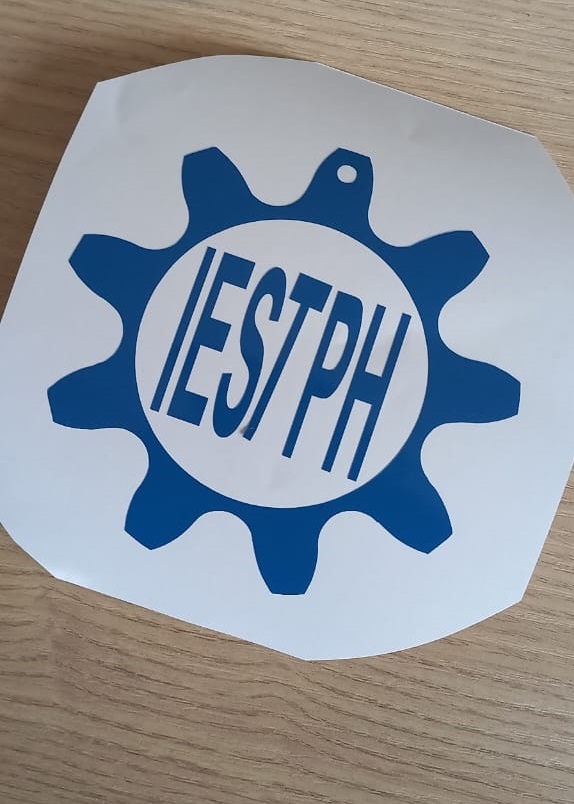
For the vinyl cutter, the Roland CutStudio program is used, where it allows us to make and modify the images in png format. First enter the program: second we enter the program to then import the image that we must work on by modifying the lines of the object and encoding the cutter and making the cut.
Set up the program for Roland CutStudio to do the logo design and do the cutting. We enter the program to configure

file links
DESIGN IN Auto CAD FOR LASER CUTTER.
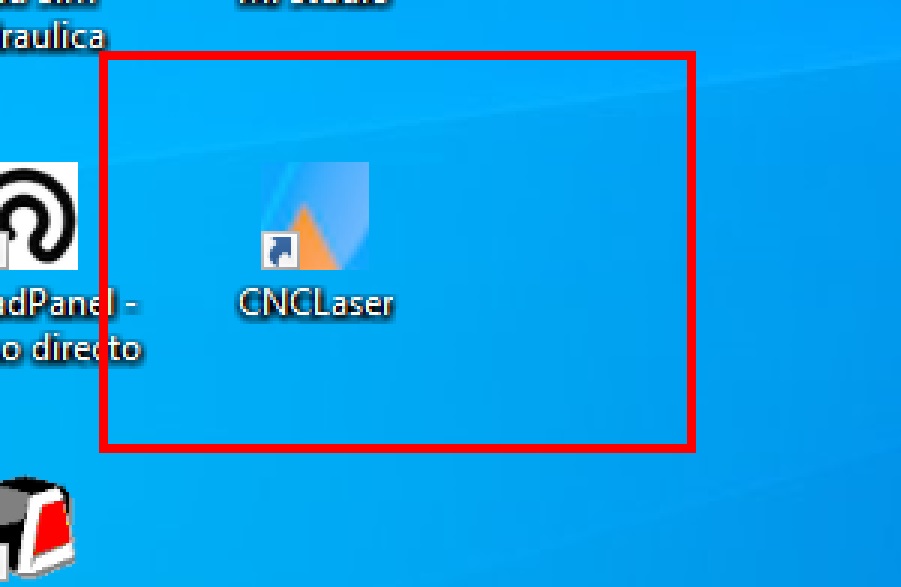
For the work, the cutting and engraving elements have been designed in the Auto CAD software, taking the measurements of the objects and later saving and importing them in DXF format to then work with the CNCLaser program.

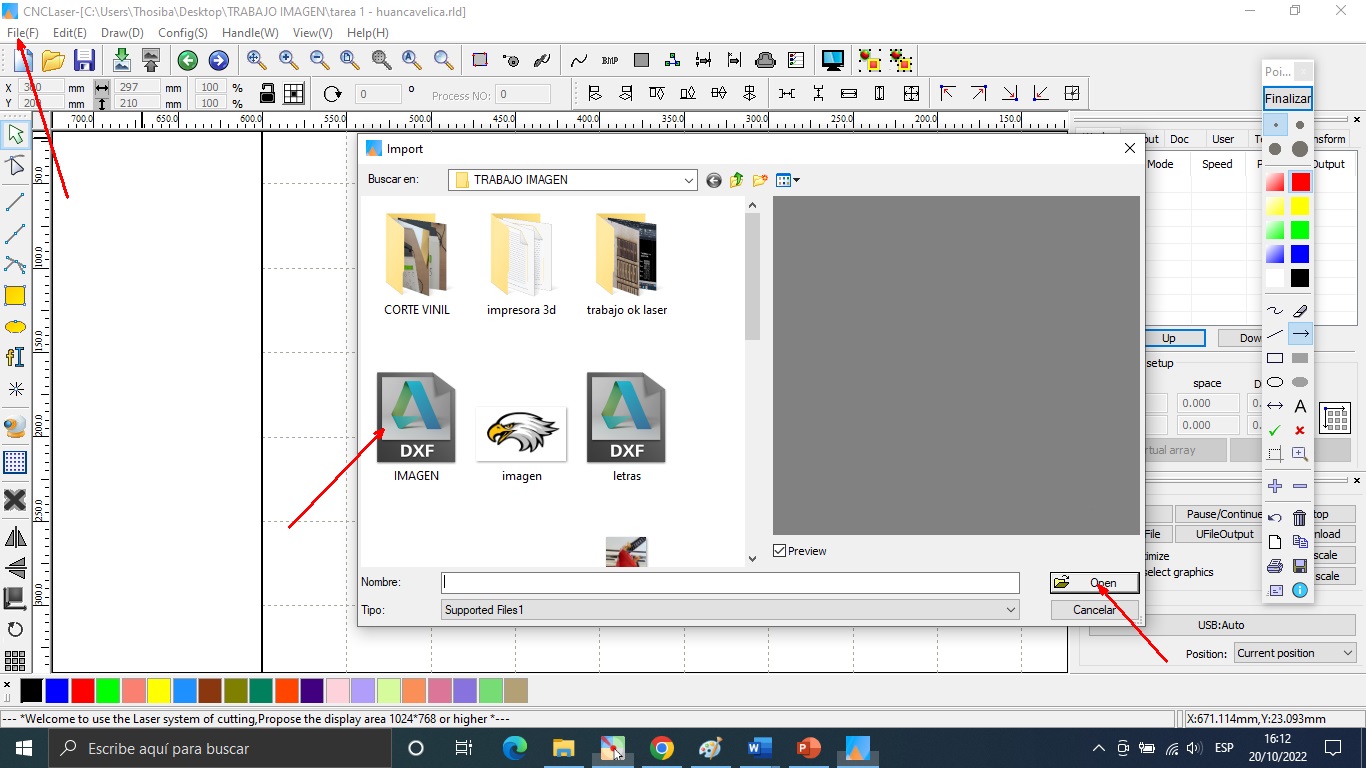
I WORK IN THE PROGRAM CNCLAser.
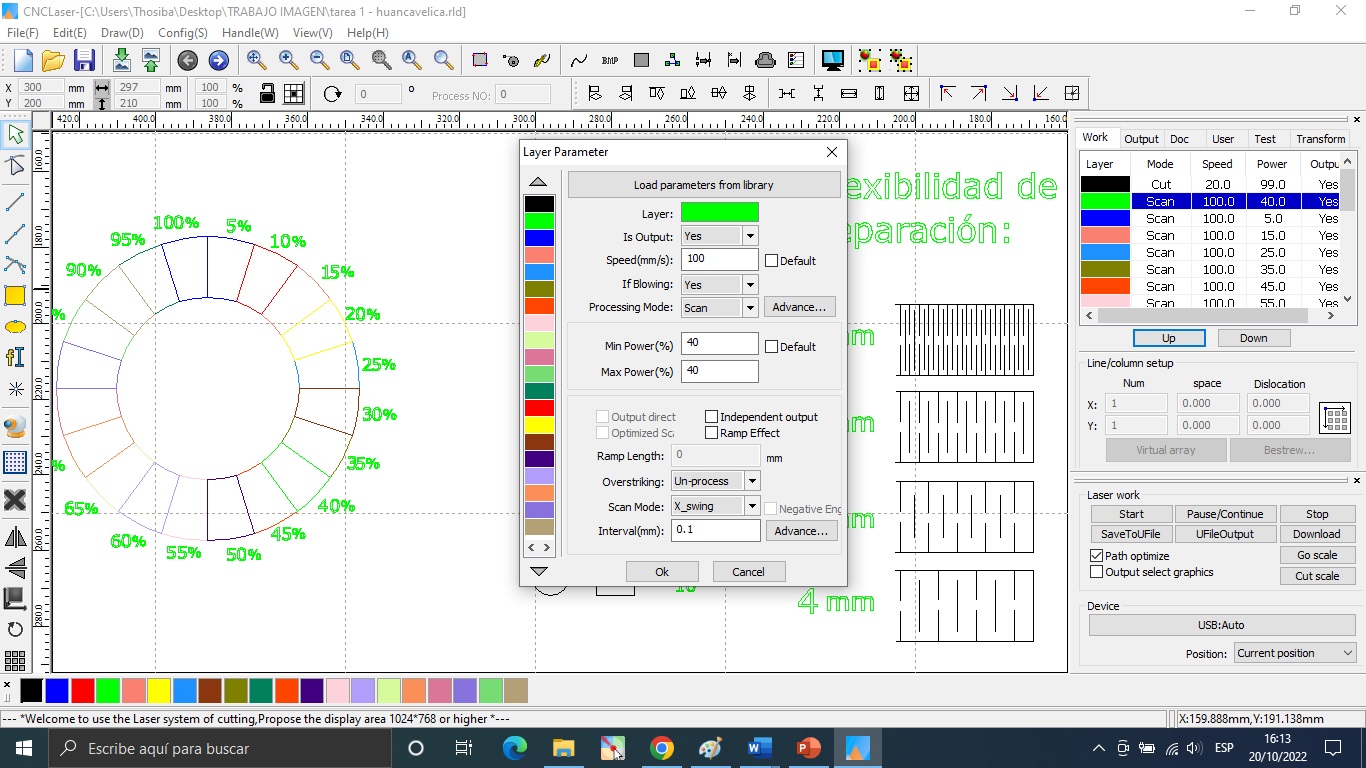
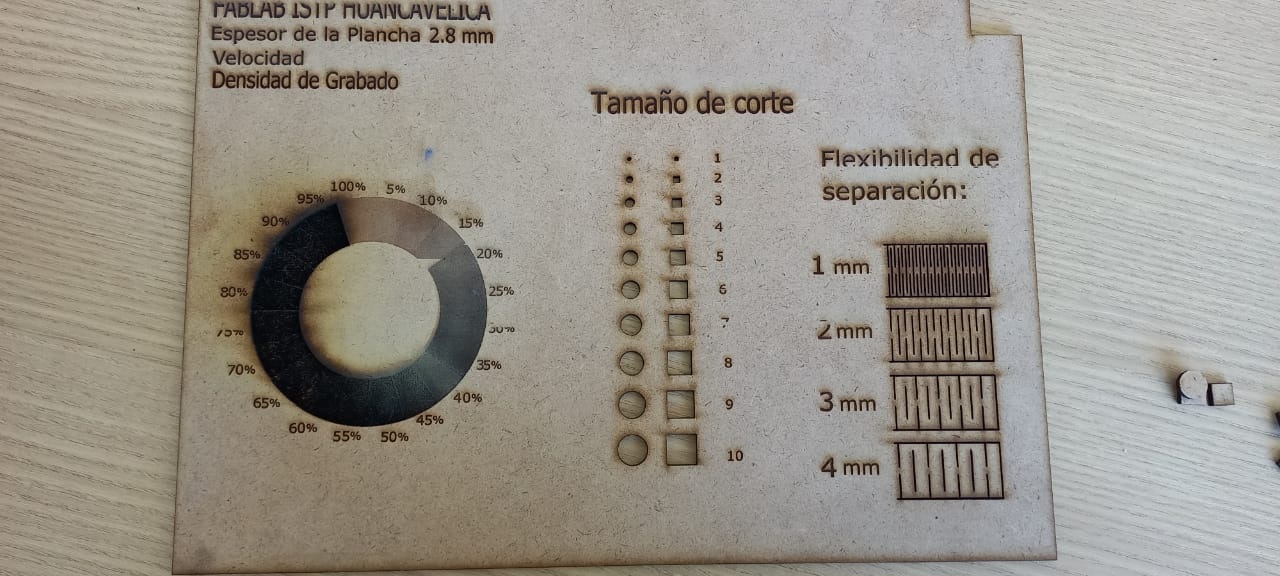
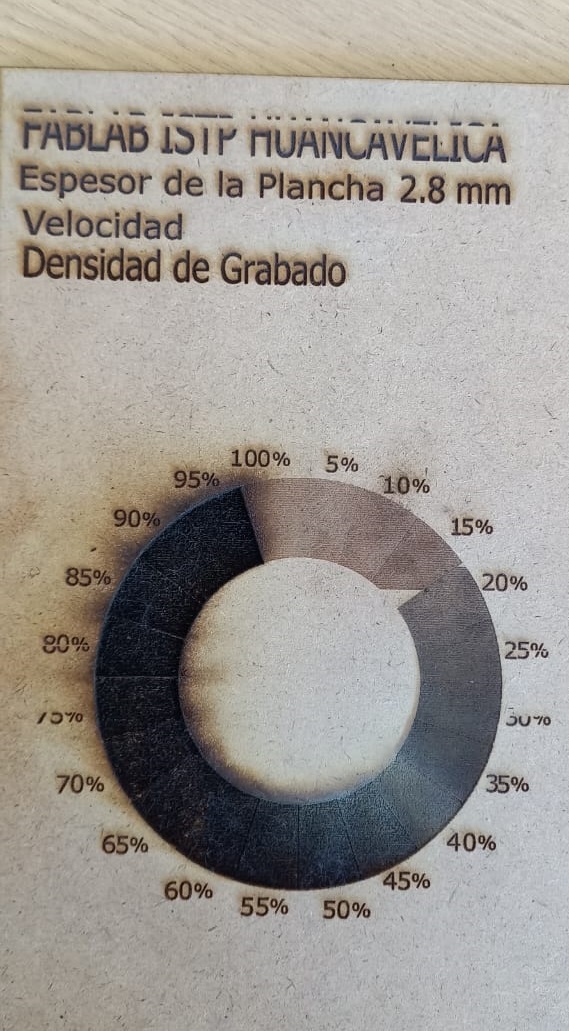
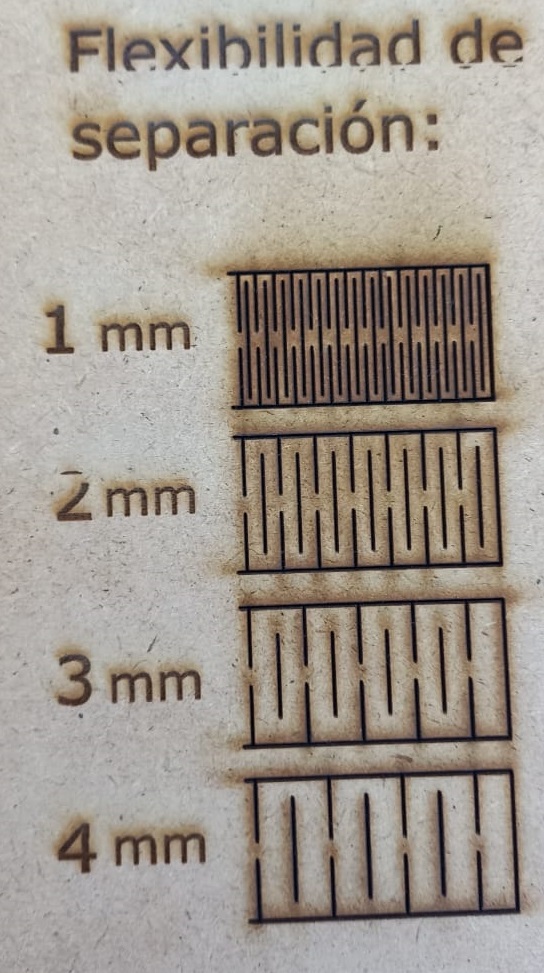
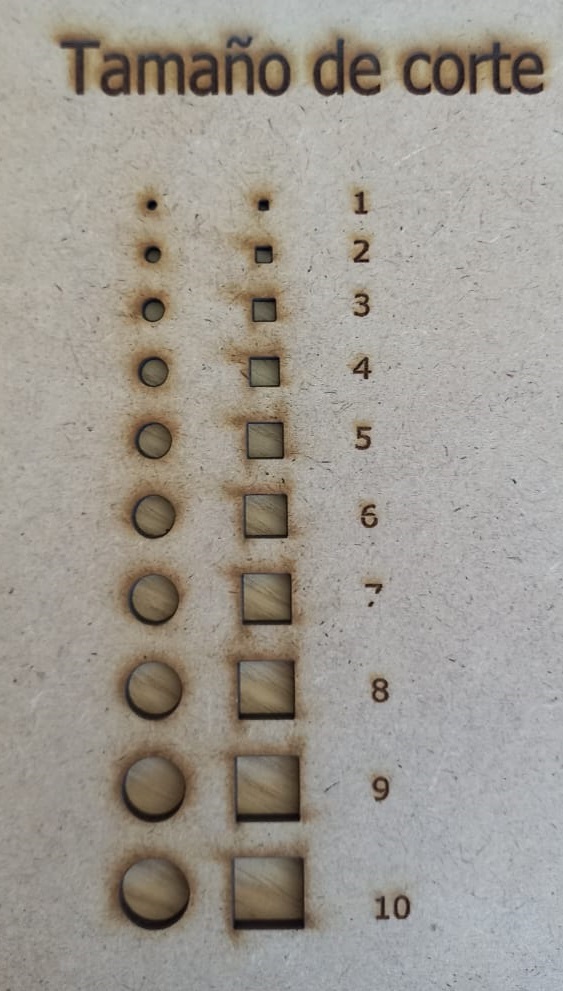
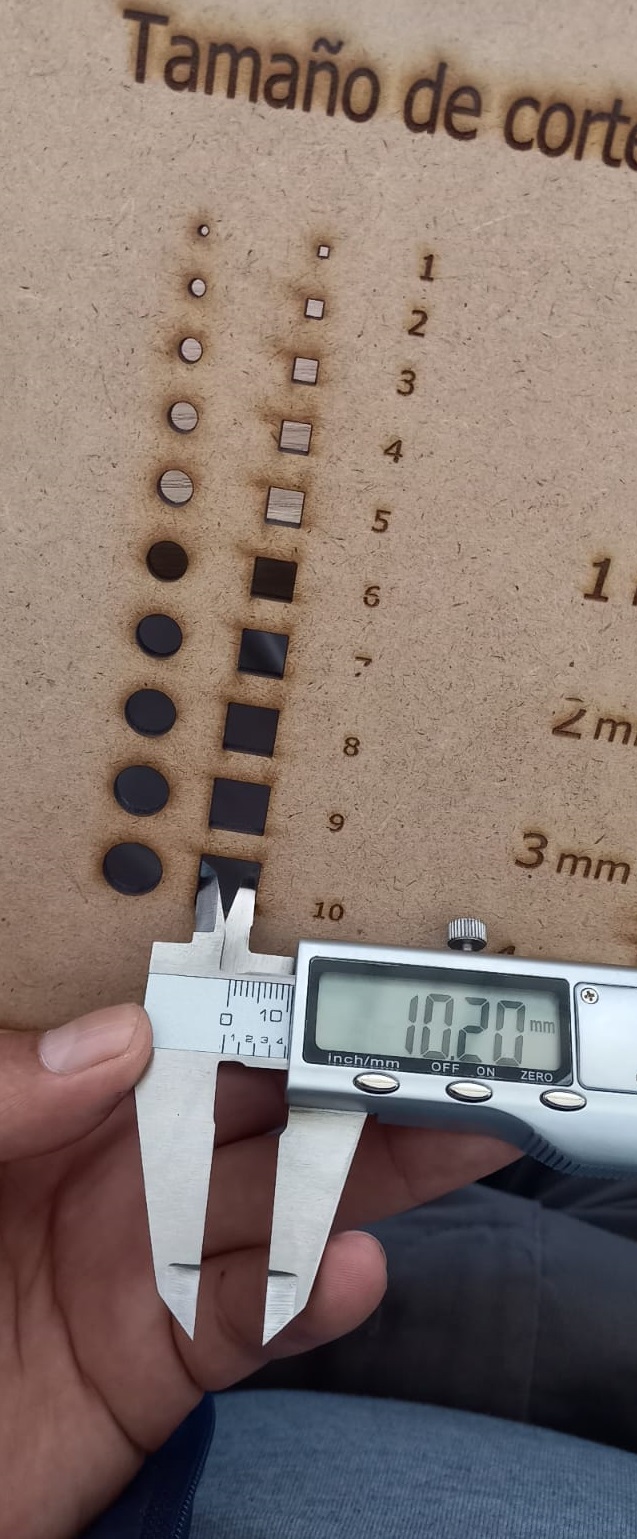
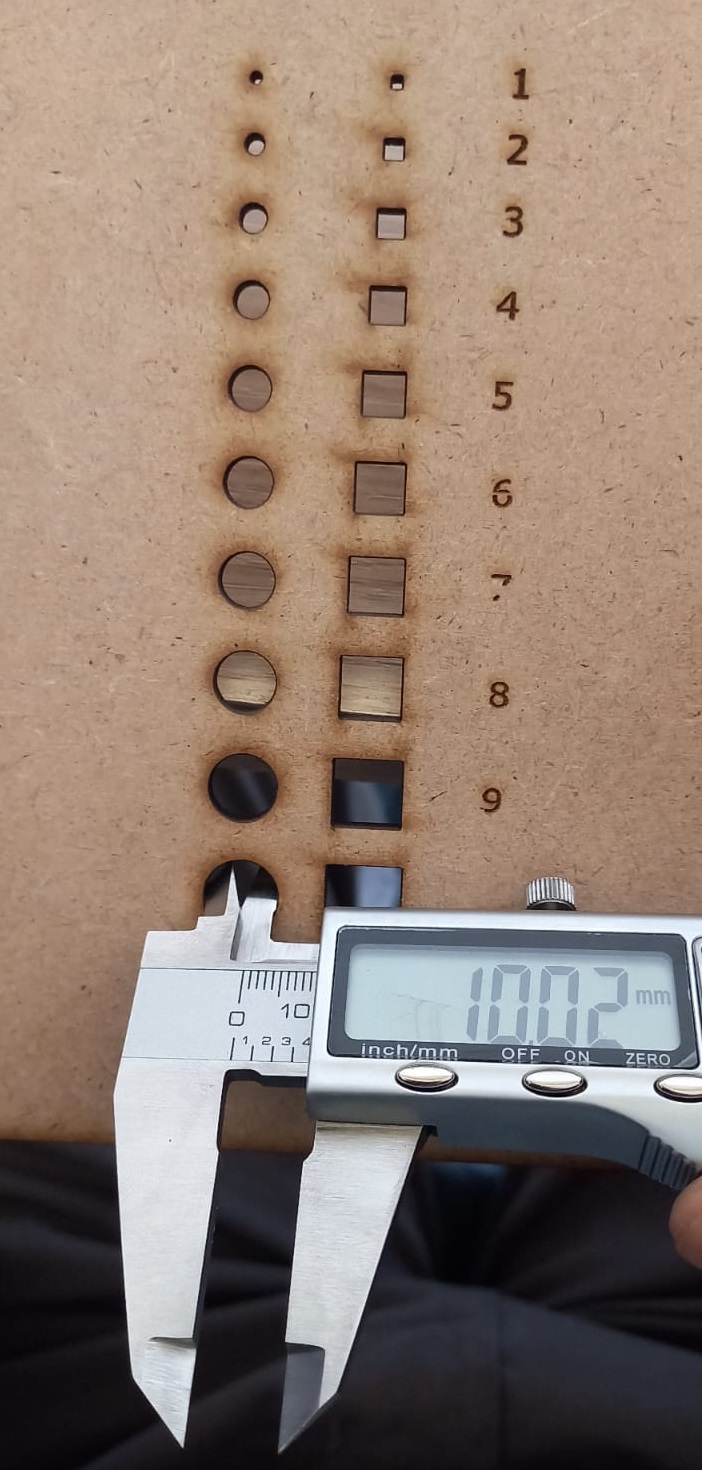
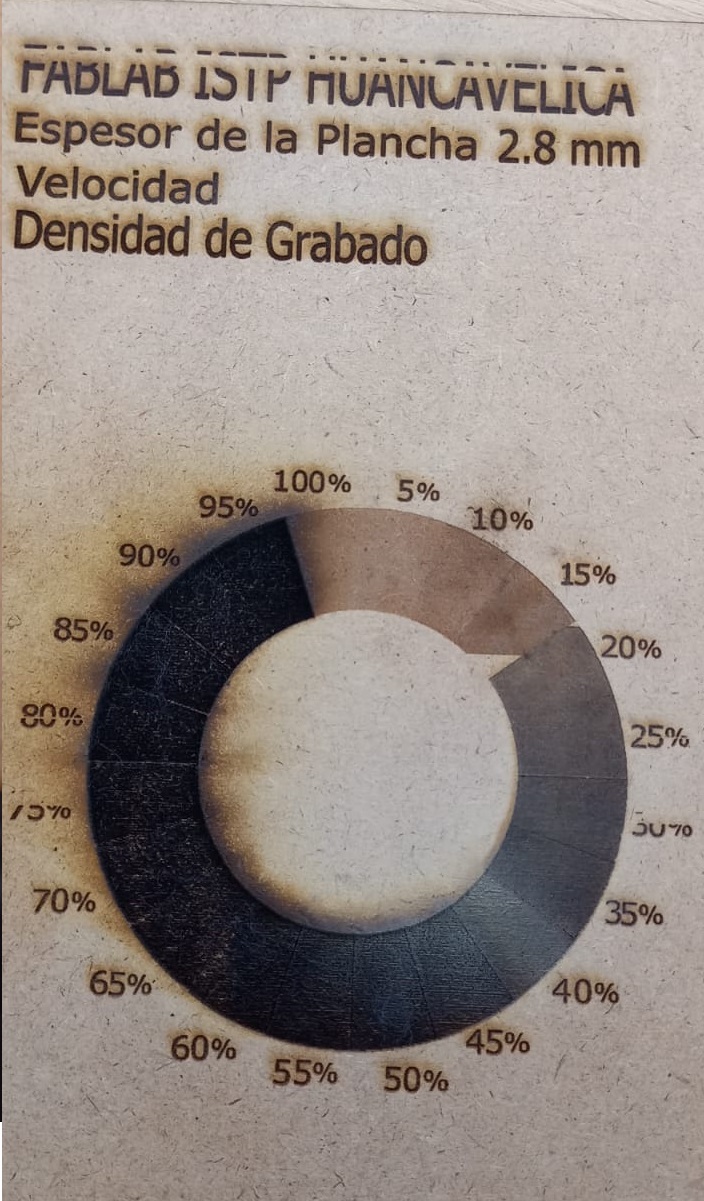
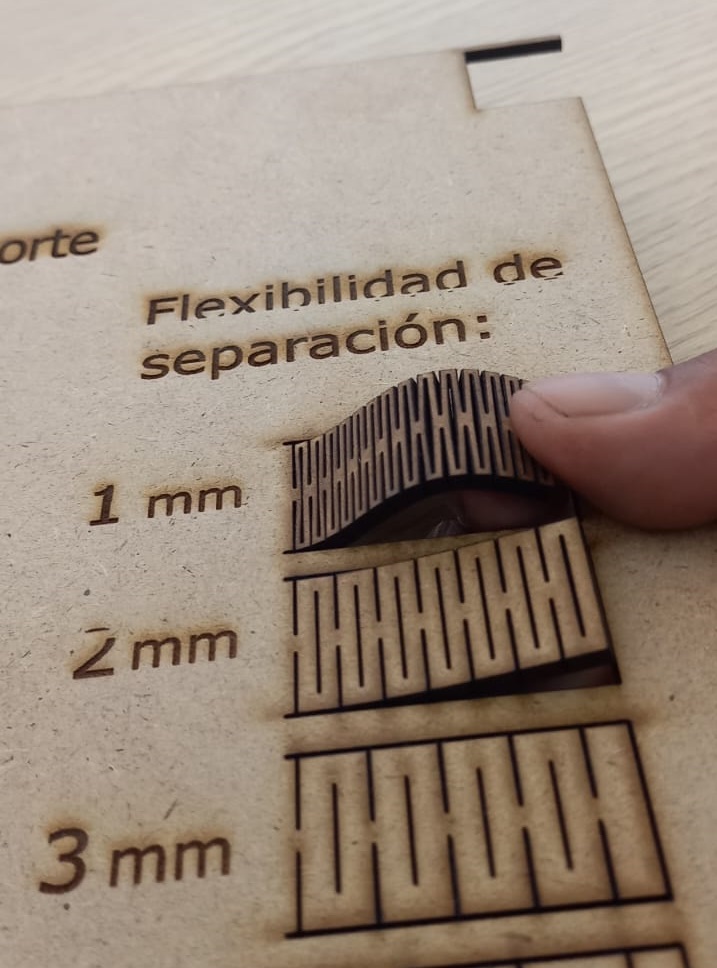
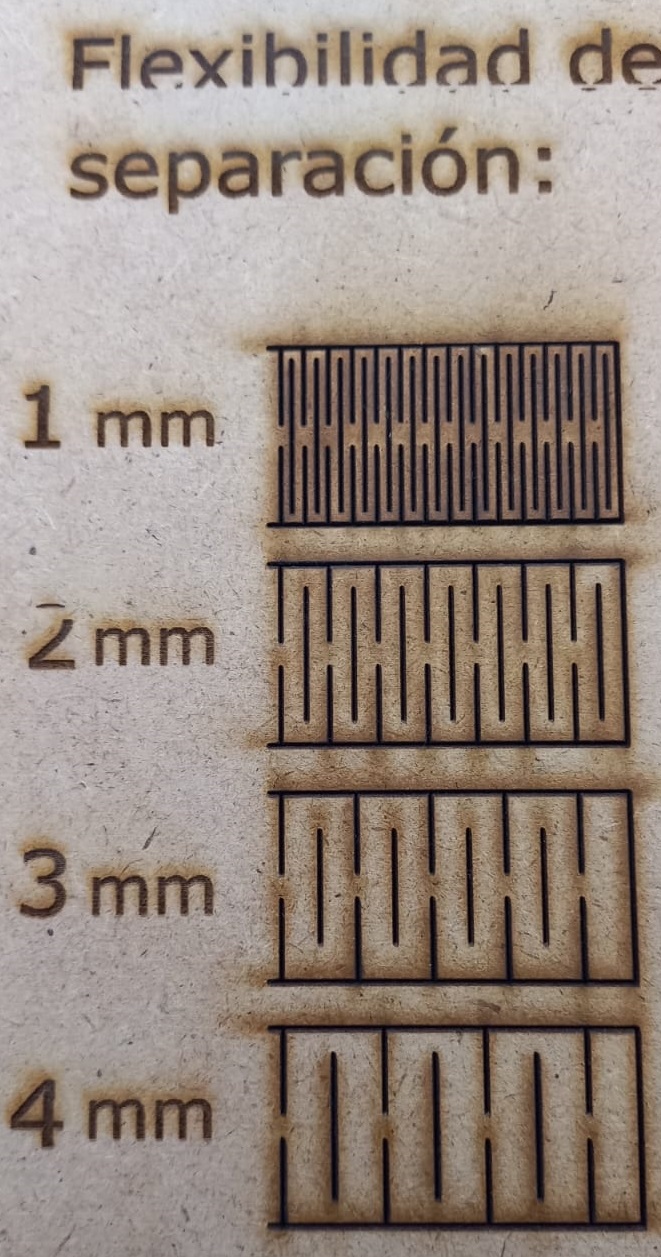
We open the program then import the converted document in DXF format to adjust the cutting and engraving parameters. Inside the circle we have parameters of 5%, 10%, 15%, 20%, 25%…. up to 100% are the ones to be scanned or recorded. In the cut we have squares from 1 mm to 10 mm, circles from 1 mm in diameter to 10 mm in diameter. We have another cutting job that is separation flexibility from 1 mm to 4 mm.
file links
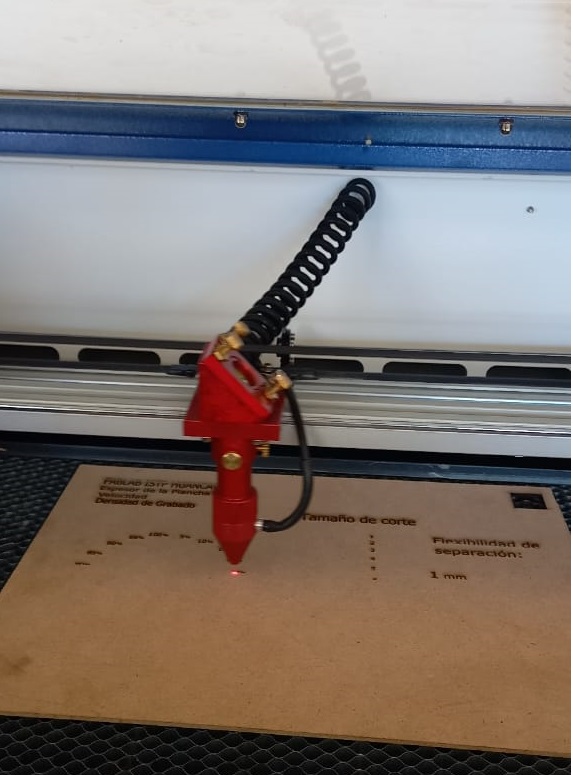
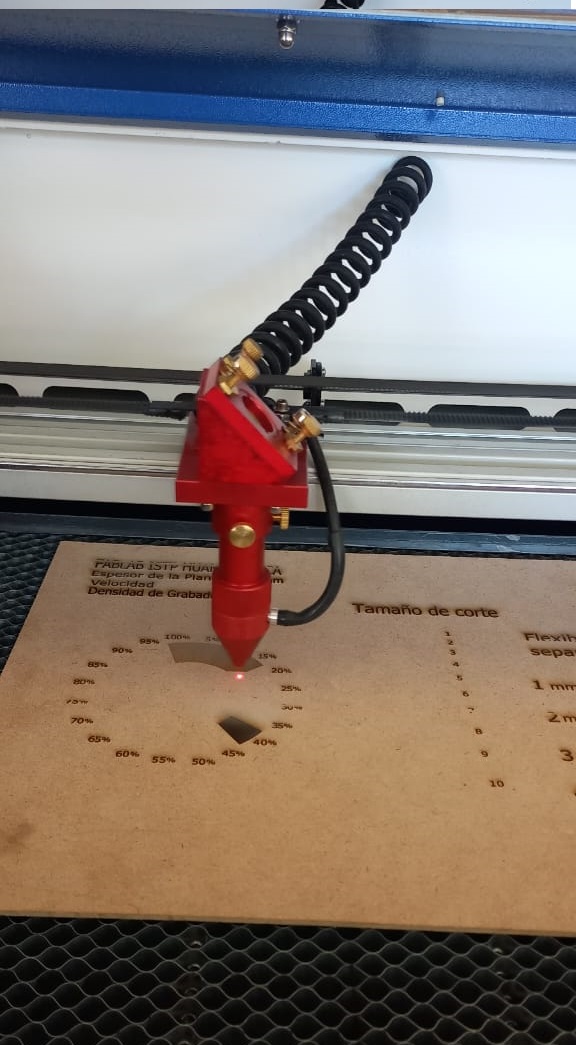
WORK ON THE LASER CUTTER OF THE DESIGN DONE.
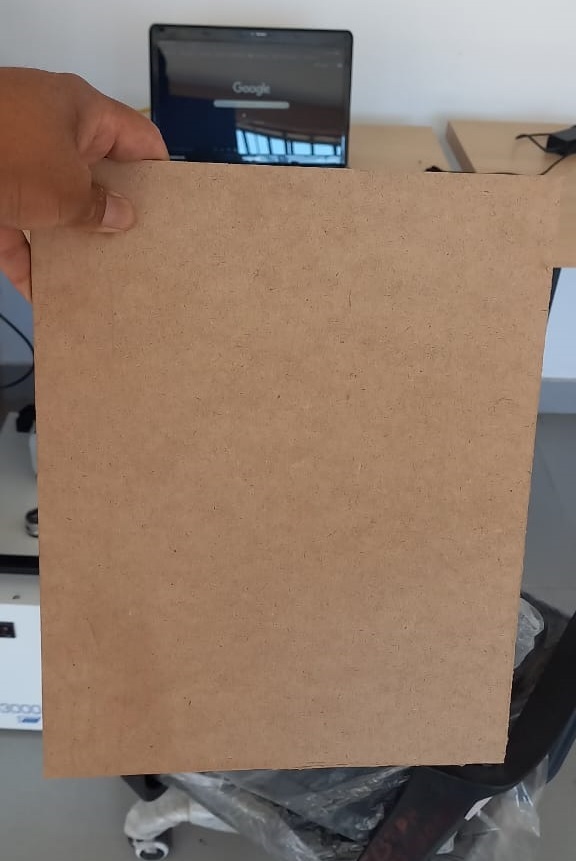
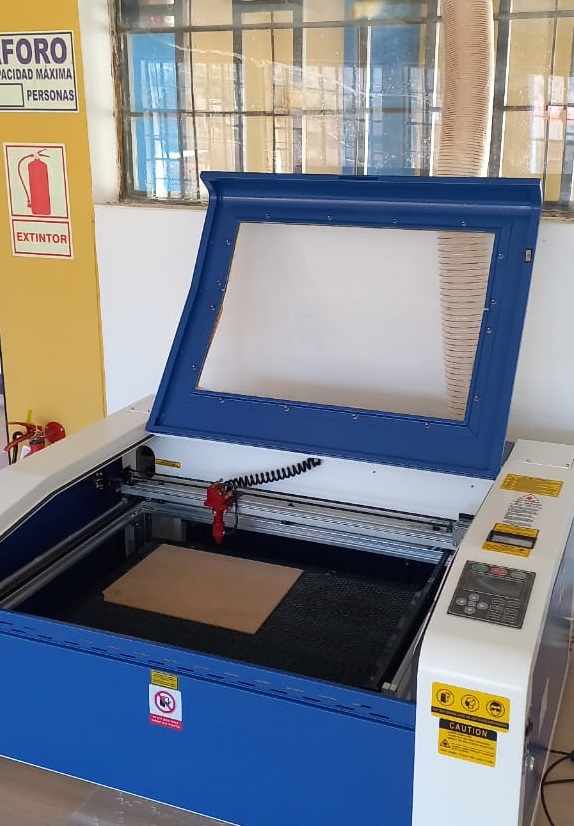
The equipment is turned on to then calibrate the focal point of the LED. The material that is MDF is accommodated (MDF are made of wood fibers joined by synthetic resin and compressed by pressure and heat, resulting in solid and very uniform boards, with a good finish and durability). To carry out the cutting and engraving in the MDF material, the CNCLaser program is activated so that it can carry out the work.

RESULTS OF THE WORK CARRIED OUT IN THE LASER CUTTER.
- ENGRAVING WORK IN MDF THICKNESS 2.mm When starting the work according to what is programmed, it is observed in the engraving when we program at a speed of 100 mm/sec. At a minimum power of 40% and a maximum power of 40, the entire engraving process as seen in the images. The engraving in the larger circle where it is observed 5%, 10%, 15%, ……. Up to 100%, it can be defined that each power is determined by the thickness of the material or the work that can be performed.
- When looking at 5% to 15% it is not very deep, from 20% to 40% it changes color, it is a little darker and the depth is noticeable. From 45% to 100% it can be seen in the engraving that it is deeper and burns in the engraving, it can be deduced that from 50% or more the engraving would be on thicker materials, there would be a better engraving quality.
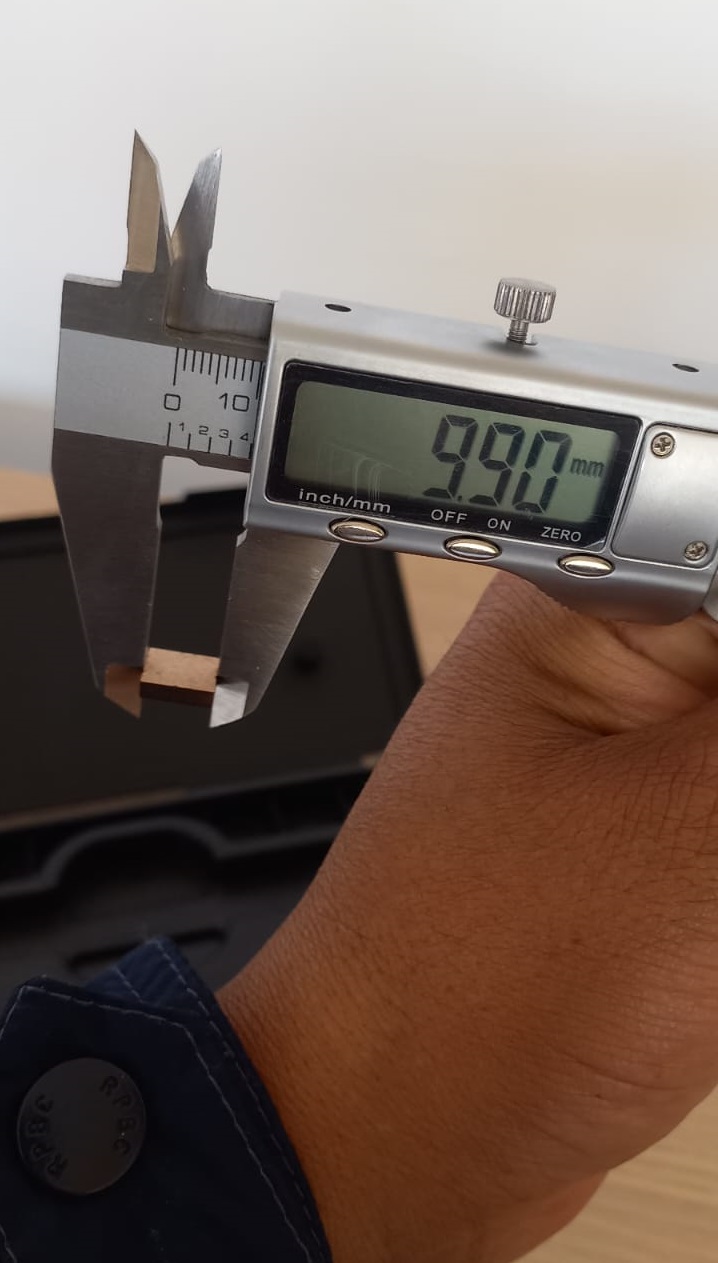
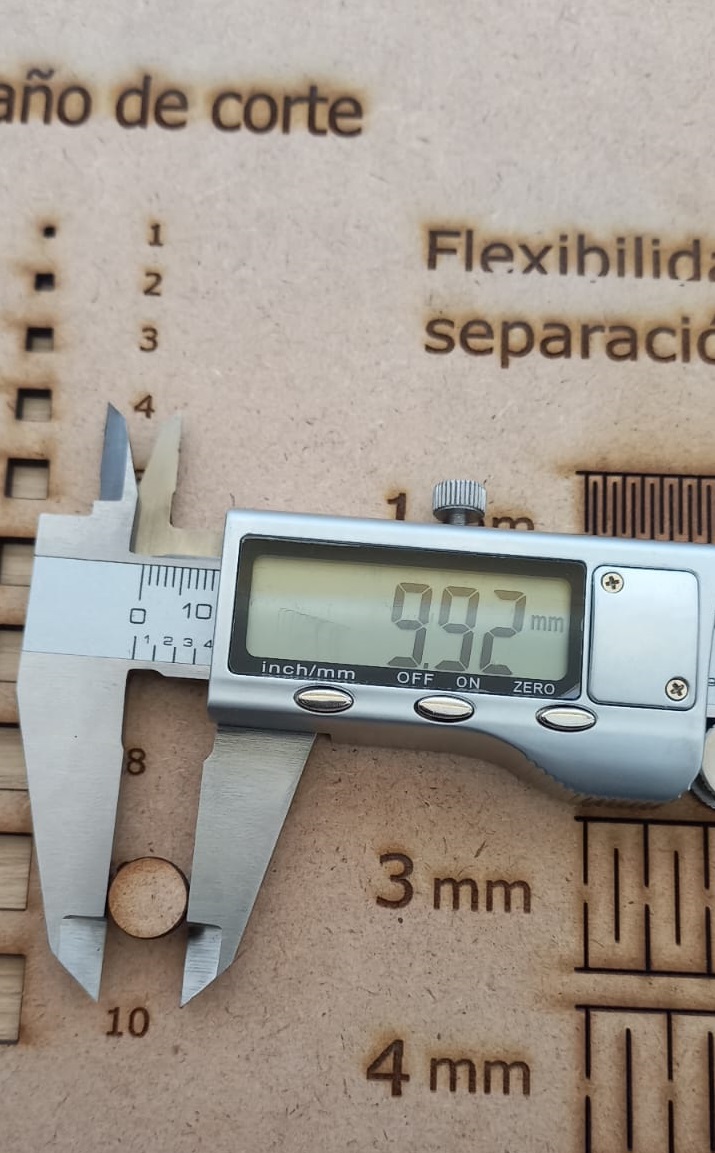
- CUT WORK IN MDF THICKNESS 2.8 mm In the same material of MDF thickness of 2.8 mm, the cut is made according to the parameters made as follows: speed of 20mm/sec., minimum power of 90% and maximum power of 90%.
- Having these parameters, the cuts made from 1mm to 10mm in diameter and in the square are observed. It is observed when verifying with the vernier the cut material does not have the indicated measure, it can be deduced that at the moment of making the cut the material decreases from Tamayo and length is by laser.
- SPREADING FLEXIBILITY CUTTING WORK In the same material of MDF thickness of 2.8 mm, the cut is made according to the parameters made as follows: speed of 20mm/sec., minimum power of 90% and maximum power of 90%. The cut 1mm apart is observed, the material is more flexible and manageable. The cut 2mm apart is observed, the material is a little harder. The cut 3mm apart is observed, the material is hard and not very flexible. It is observed that the cut 4 mm apart is more resistant to flexibility. Each cut or engraving indicates what work we can do with the laser cutting machine.
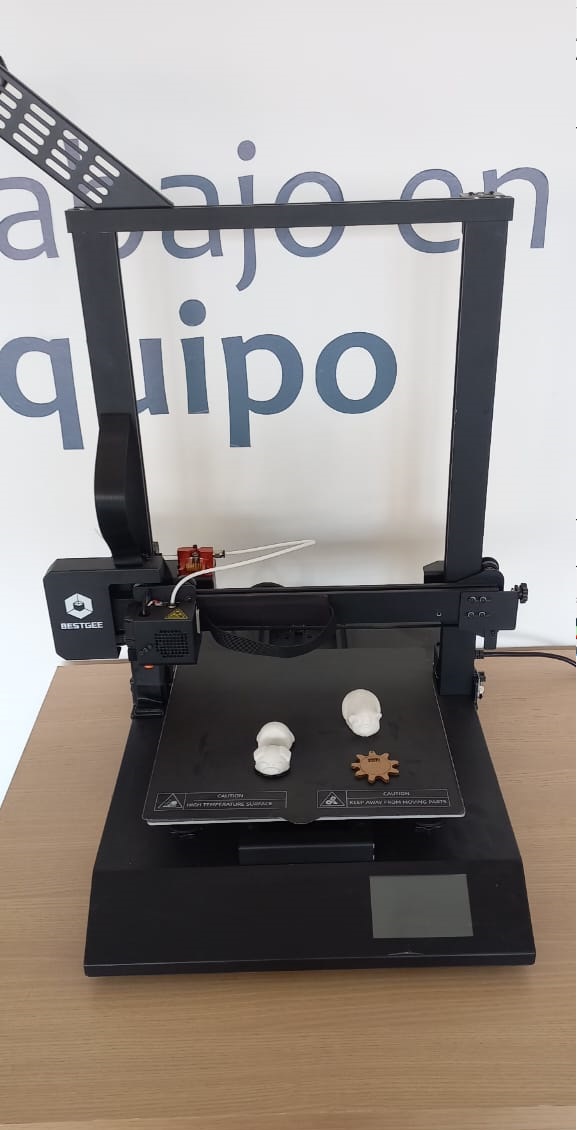
3D PRINTER
A 3D printer is a machine capable of replicating 3D designs, creating volumetric parts or models from a computer-made design. They arise with the idea of converting 2D files into real or 3D prototypes.
- BRAND: leon3D
- MODEL: C3030sPro / T300