This week I did the group work with Toni Kyllönen, Joonas Patana and Eemil Tryyki. We didn't have an instructor in the group work this week.
We started by just trying to find everything we would need, safety glasses, gloves, molds and wax blocks for individual assignments. They all were kinda scatter all over Fab Lab. Since we didn't have an instructor present we looked what the Fab Academy students Mona Peyvasteh, Antti Rytilahti and Kenichi Komatsu had done. Their group work was at Mona's page. This group work and it's documentation is heavily based on that. The color of the pictures are off because we were working in a dark room meant for PCB etching.
Safety
- Adequate ventilation
- Safety glasses
- Any liquid-tight gloves provide safety, but latex gloves will inhibit curing Measuring part B
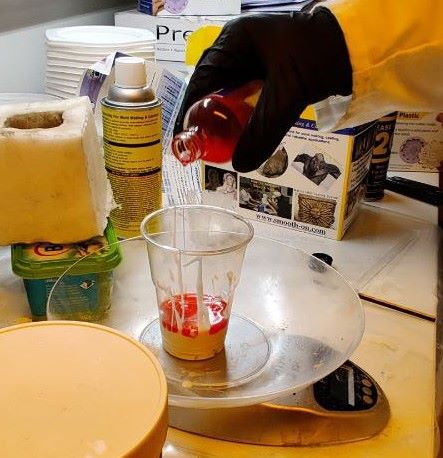
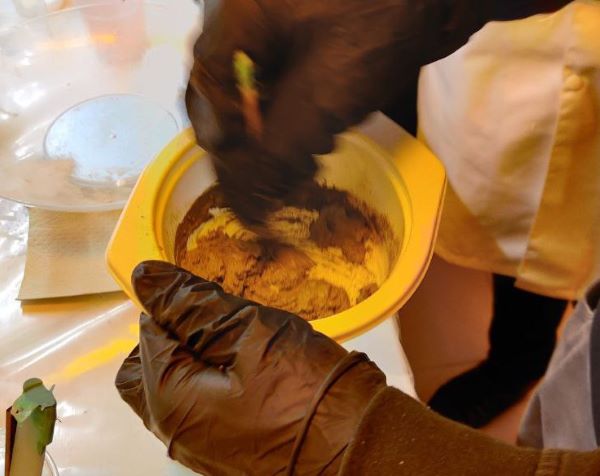
We decided to start with Smooth-Sil 940 because it had the longest pot life (30 minutes) of the materials we were supposed to try, and no one had any previous experience with casting. Smooth-Sil 940 had a weight ratio of 100A:10B. I don't remember the exact amounts we used but I think the total weight was around 60-70 grams. Before mixing you are supposed to pre-mix part B so it's color pigments get re-dispersed. Part A of Smooth-Sil 940 was quite thick so the mixing process is also quite hard.
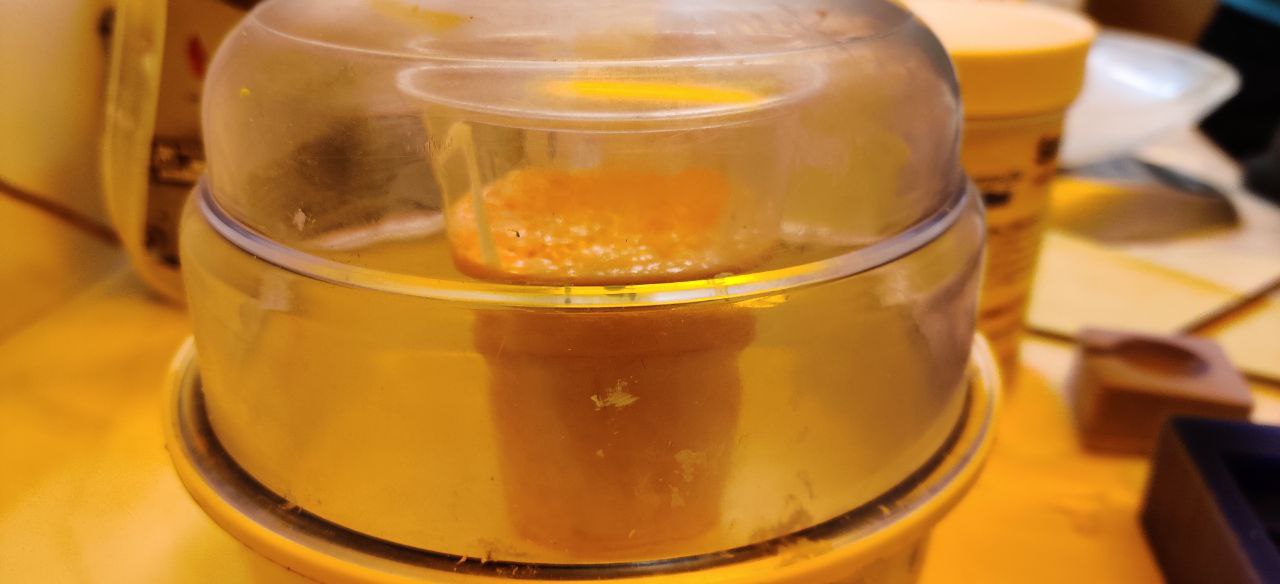
Vacuum degassing
After Joonas had mixed the parts, we put the cup in the vacuum chamber to remove the bubbles that form during mixing. At first, we had trouble getting the vacuum started and had to fiddle a bit with the valve but we got the vacuum going and the product started to expand. We had plenty of room in the cup so it wasn't a problem. When unplugging the plug, you should be careful because the air rushing in could tip the cup.
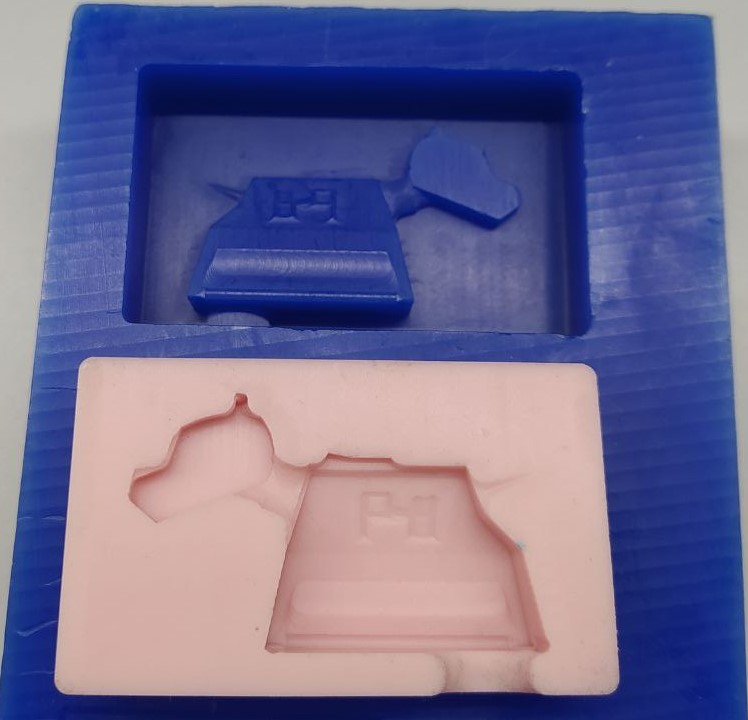
Smooth-sil 940 poured in a wax mold
Smooth-sil 940 has 24 hour cure time in room temperature. There is also an optional post curing where you keep the silicone in 80°C for two hours or at 100°C for one hour.
Safety
- Adequate ventilation
- Safety glasses
- Any liquid-tight gloves provide safety, but latex gloves will inhibit curing Blue part A of OOMOO 25
We were supposed to use OOMOO 25 but after scraping the tub and trying to search a new packet for too long we gave up. It would be nice if Fab Lab would stock materials that we are supposed to use.
Safety
- Adequate ventilation with local exhaust
- Safety glasses
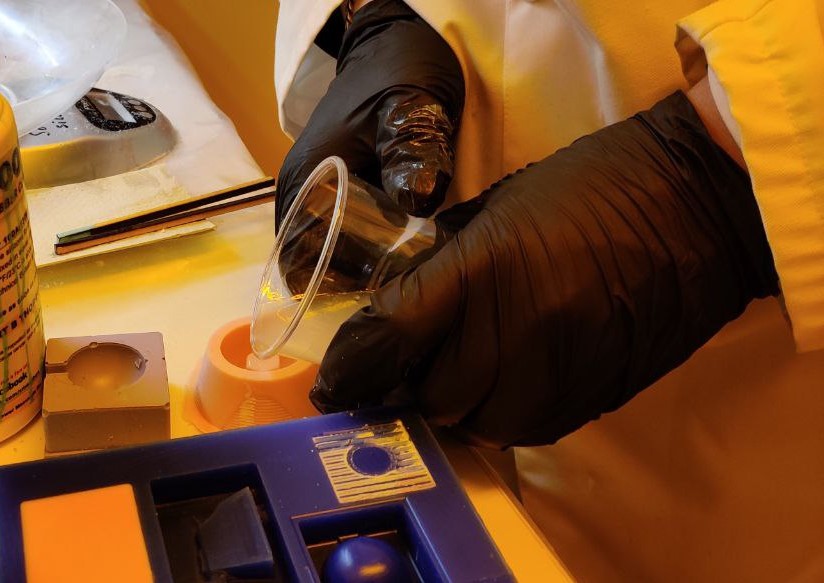
- Any liquid-tight gloves Pouring mixed product to soft mold
We shook both parts before mixing them by weight, 100A:90B, but you could also mix them by volume in 1:1 ratio. Smooth-Cast 300 has only three minute pot life so you should be quite fast while mixing but still be careful not to splash because of the low viscosity of the product. We almost poured the product in the wax mold but before pouring remembered that it should be poured into soft mold, because it cures to hard material.
Already starting to cure
Smooth-cast 300 has a 10 minute curing time. It warms up when it is curing. Post-curing can be done at 65°C for 4-6 hours.
Safety
- Use only outdoors or in well-ventilated area
- Safety glasses
- Protective gloves Pouring mixed product to soft mold
The mixing ratio is 100 g kneading cement and 30 g water, but the consistency can be adjusted by the quantity of the water. I added a bit too much water, so I added more cement and mixed the material. Pot time is around 1 hour. Then we pushed the material in the mold and left it to harden which takes 6-8 hours and full cure takes approx. 72 hours.
Results
Smooth-Sil 940
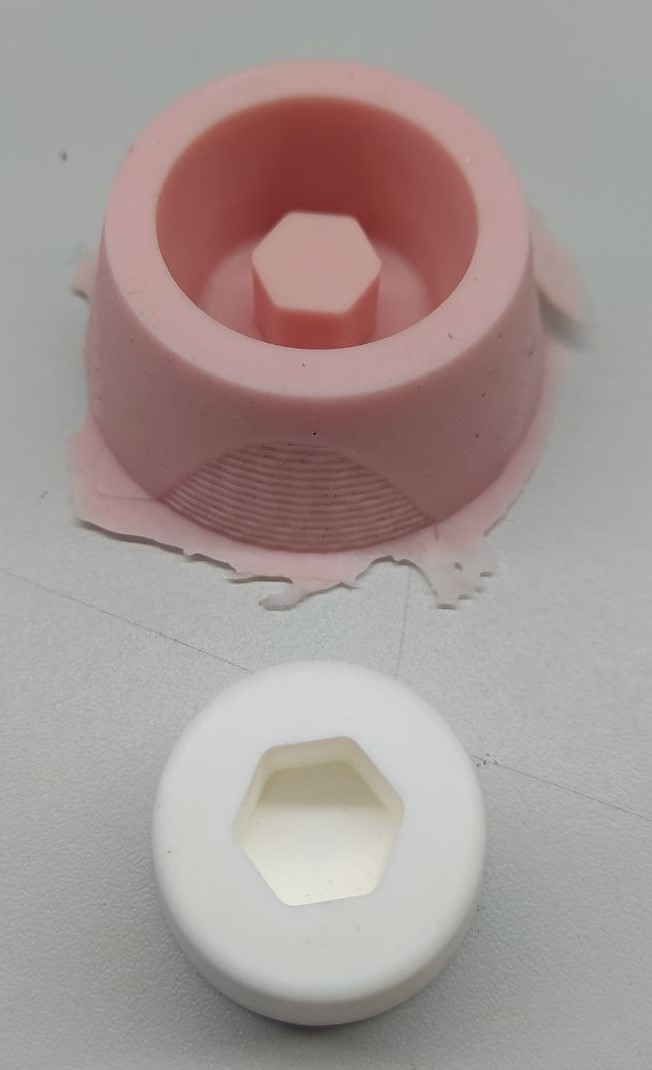
After maybe 45 hours I demolded Smooth-Sil 940. It was pretty hard to remove from the mold, so I lifted one corner up and blew compressed air from there. This did the trick and casting came out. The casting was smooth and rubbery silicone product ready for use.
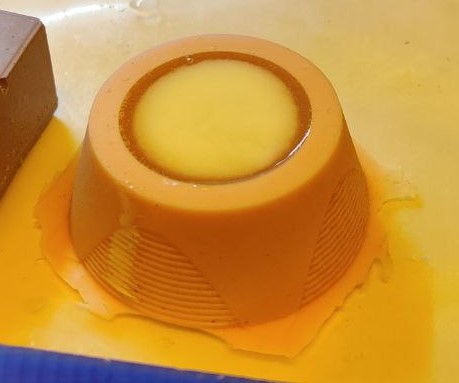
Smooth-Cast 300
The hard Smooth-Cast 300 casting came out of the soft mold easily and the surface seemed nice.
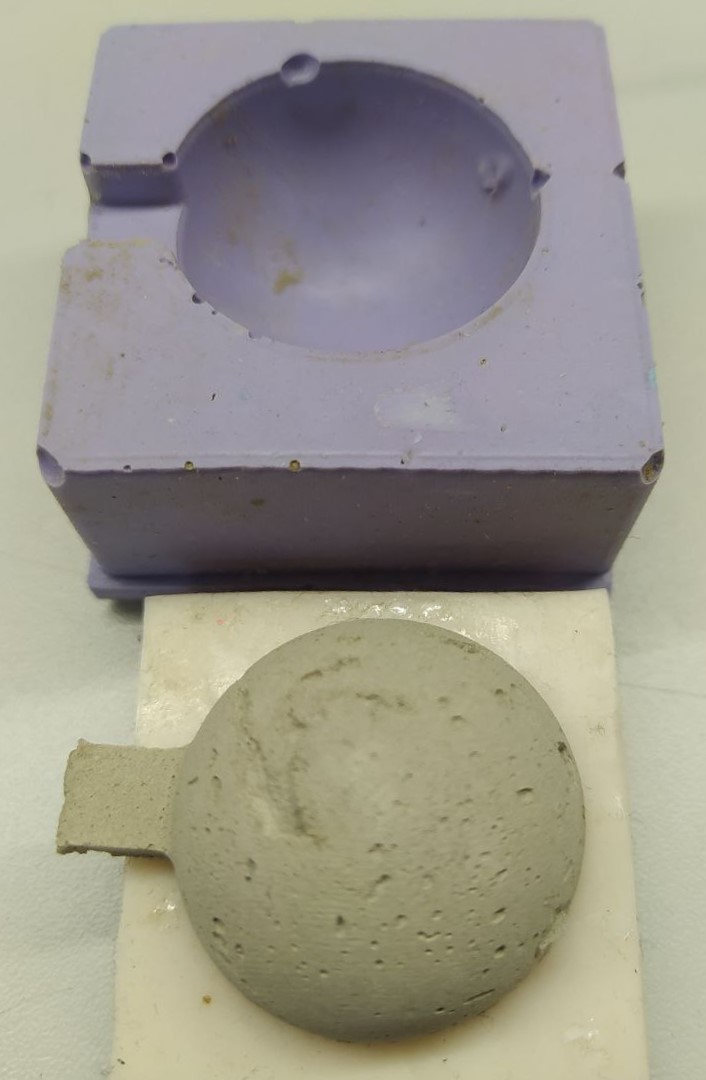
Glorex Creative Knetbeton
I think the the cement had shrunk during curing because it practically had demolded itself. Surface is like regular cement, so it has bubbles or holes. I don't know if you could get a smoother surface by rubbing the surface with water while you are casting it.
Material
Mix ratio by weight
Pot life
Cure time
Vacuum degassing
Smooth-Sil 940
100A:10B
30 minutes
24 hours
Recommended
Smooth-Cast 300
100A:90B
3 minutes
10 minutes
Not necessary
Glorex Creative Knetbeton
100 cement, 30 water. Mixing ratio can be adjusted
First, I planned to do chocolate holograms like Ben Krasnow has demonstrated in his video. But there were three reasons why I didn't do it. First reason was that I didn't find any holograms at the stores I usually go. Second reason was that the Smooth-Sil 940 is thick, and it might be impossible to get it in the small grooves of holograms. Third reason was that we would need "three-axis finish cut" and the hologram chocolates would be kinda flat. I still want to try making those later.
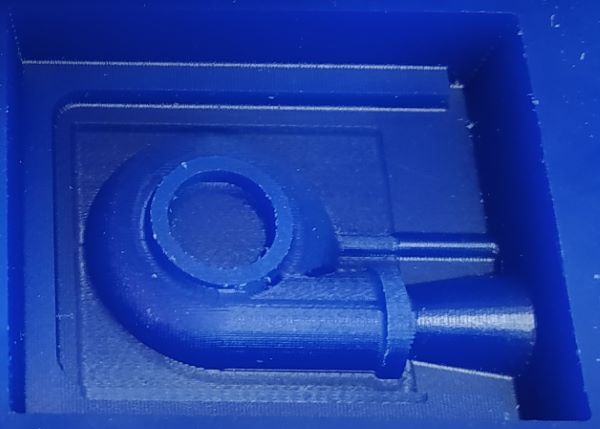
Next idea was to make a turbo keychain made out of metal. But since we didn't have an instructor in Oulu this week, I thought that metal casting would be out of the question. I still decided to model a turbo compressor housing and make the molds out of that. I started with two different sized toroids but in the end, I just used one toroid and cylinder to make the basic shape of turbo. Then I used the loft tool to make the transition between the two shapes. Then it was just making sketches and extruding basic shapes.
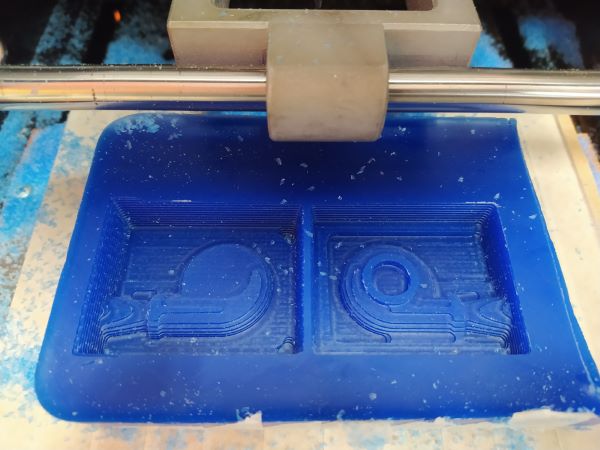
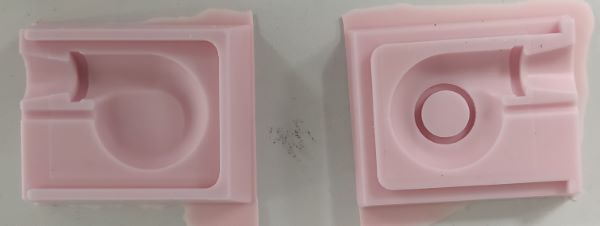
I modeled the turbo around the origo so I could use the XY-plane to split it in two parts that could be milled from one side. I made a sketch around the part so I could do the registering parts and walls around the model. I extruded the walls and the registering parts, split all the bodies with XY-plane, moved the bodies next to each other, added some draft to walls, modified the one of the registering bits and added a small air vent. I had to scale my model smaller so it would fit a wax block that were available at Fab Lab. I exported the STL file for toolpath generation.
Mold model
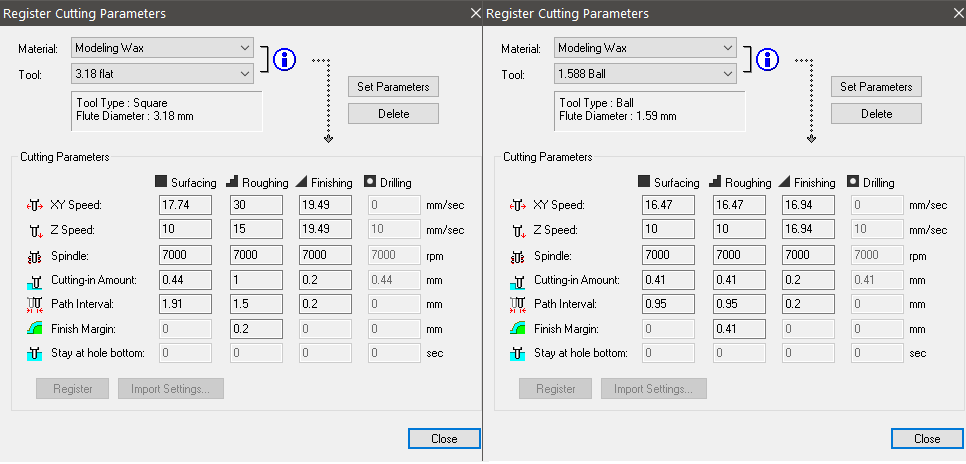
I downloaded MODELA Player 4 and Virtual MODELA to my own computer so I could do the toolpaths at home. I added two new tools from Options→Add/Remove Tool... menu. I added 3.18 mm flat end mill and 1.59 mm ball nose end mill. You can see the settings I used from the picture below.
Tools
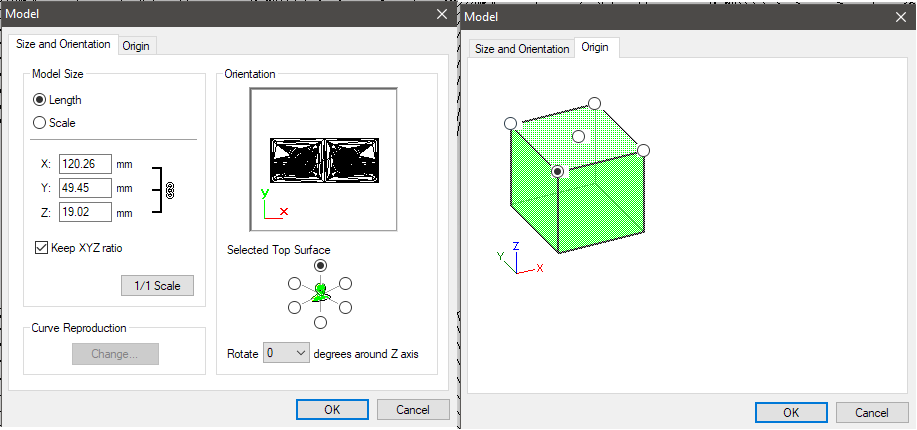
I opened the STL file in modela, checked and set the correct model settings from the Set→Model... menu.
Model settings
I made a New Process, used Roughing type, used top as a cutting surface, used 3.18 flat end mill as a tool, left cutting area and depth to all and default and used Contour LinesUp cut as a toolpath type. I used the cutting parameters that can be seen from the tools picture above.
I did a Finishing process similar way but used Scan Lines in Y-axis and 1.58 mm ball nose end mill as a tool. I exported the NC files to be used with the Roland SRM-20 milling machine.
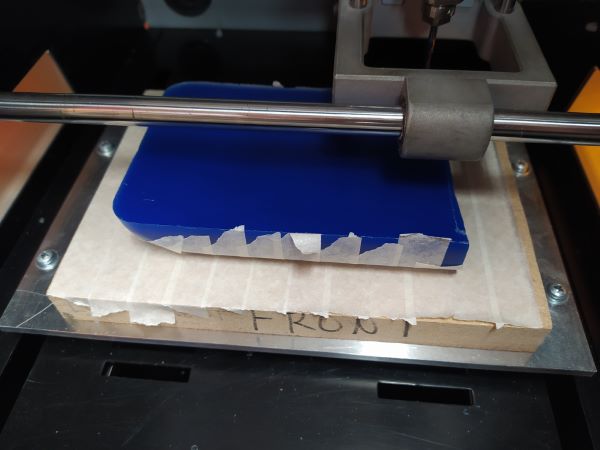
Wax block hot glued to milling machine
I had been previously in Fab Lab while Gleb Bulygin had instructed Antti Rytilahti in his exercise, so I had picked up some knowledge on how to set up the mill for wax milling. I covered the wax block with masking tape. The milling table was already masked so I just used hot glue to attach the block to the milling table.
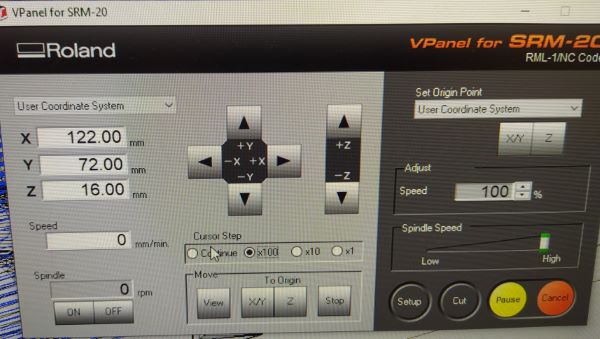
Z-axis zeroing location
I set the X/Y origin near the bottom left corner. I didn't set it directly to the bottom left corner because the wax block's edges are slightly tilted. My design was 120x50 mm so I moved away from that area to top right where the block was pretty flat. I took a picture of this location so I could always set the Z-axis origin in the same place. When I was setting Z-origin by loosening the collet the saddle (or the spindle support, I don't know the correct term) would always interfere with the collet key. I bet there is a super simple solution for this problem but I just couldn't figure anything clever out so I just tightened the collet lightly and lifted it up and then thightened it snuggly.
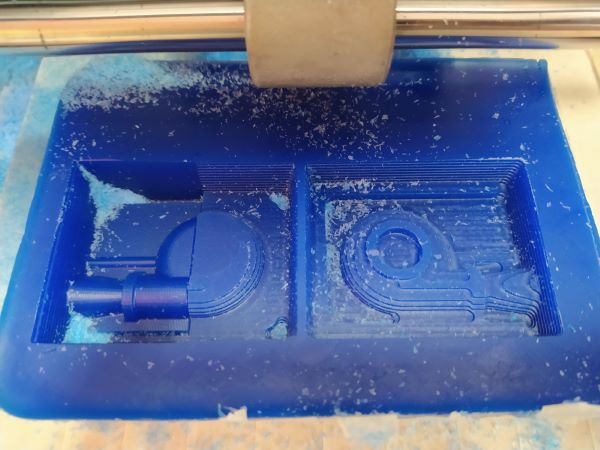
Roughing pass done with 3.175 mm bitStarted finishing pass with 1.58 mm ball nose bit
I wasn't happy with the finish that the ball nose end mill left and I started to doubt how well the registering would work with a corner radius. I changed to 1.58 mm flat end mill and made finishing toolpaths just for the registering parts of the mold.
Lower left part of the turbo has a test pass with 1.58 mm flat end millYou can see the area that is lower and different surface finish in the air pipe
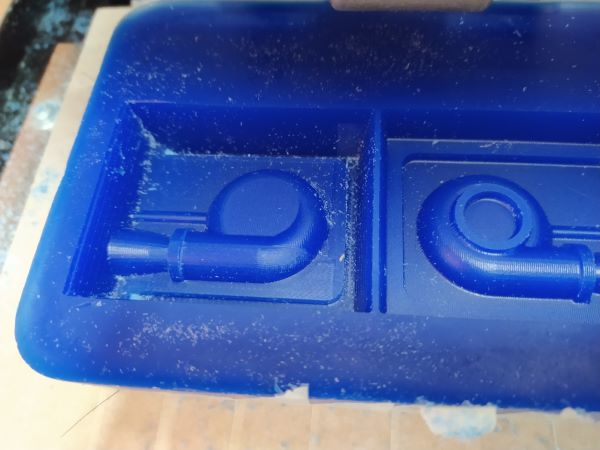
I wanted to mill the actual part with the flat end mill too, so I limited the milling area around the part and made new toolpaths. The milling bit wasn't really cutting anything, so I lowered the Z-origin little bit and tried again. I repeated this couple of times and in the end I lowered Z-origin 0.12 mm. You can see the step that this created around the part in the picture above. At the time I was worried that this might cause the casting material to leak around the part because the surroundings were lower than the rest of the part. Only after making the mold, I realized that in the mold, the area is actually higher around the part.
Smooth-Sil 940 poured in the moldsMolds
I made the negative molds out of Smooth-sil 940. I was a bit worried if I had mixed the material enough because the poured surface wasn't completely uniform. I think that might have been the stretching from the material when I poured it in the end as narrow string.
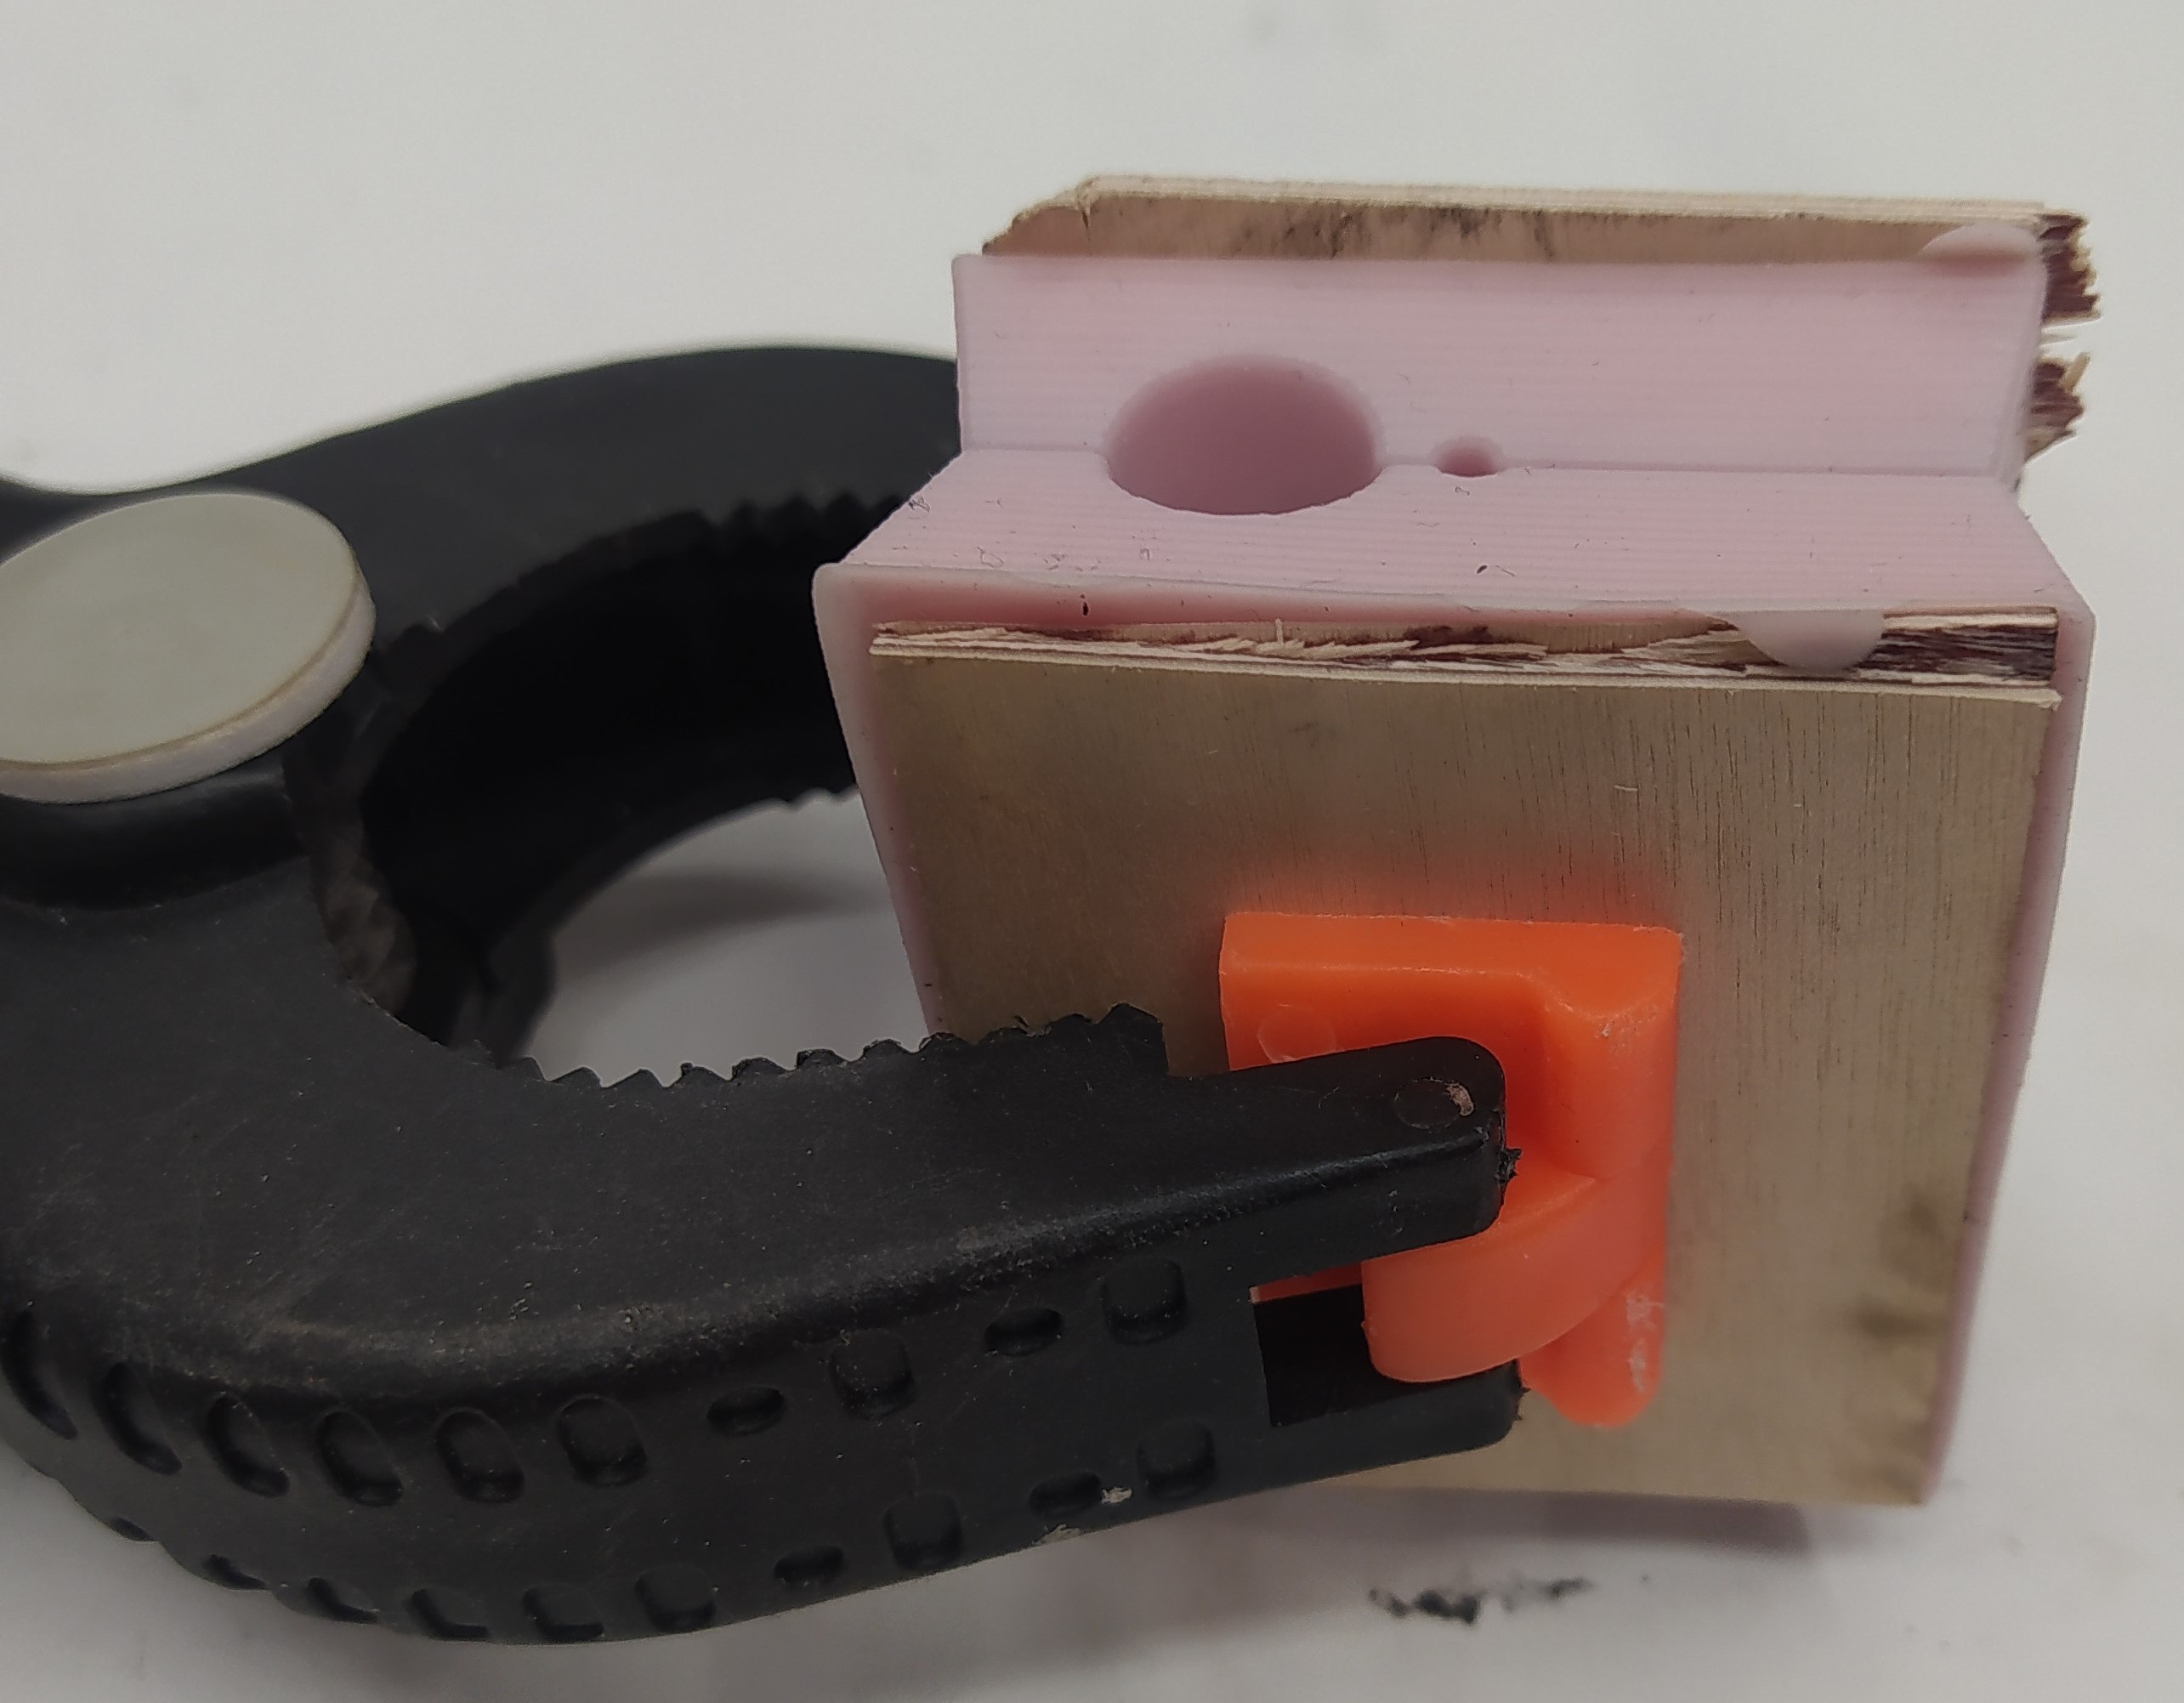
Mold halves clamped togetherVisible seams
I cut two pieces out of scrap plywood to spread the clamp's force more evenly. I might have used a too strong clamp and that might have caused some misalignment on one side.
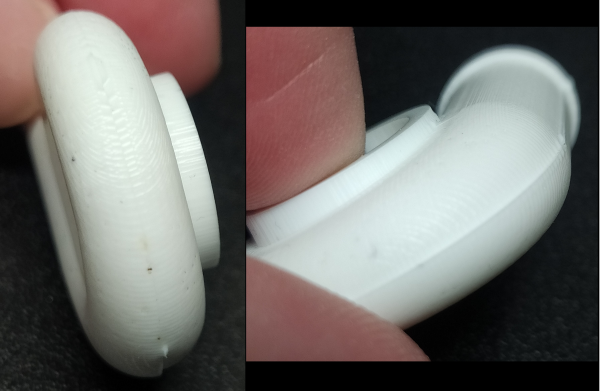
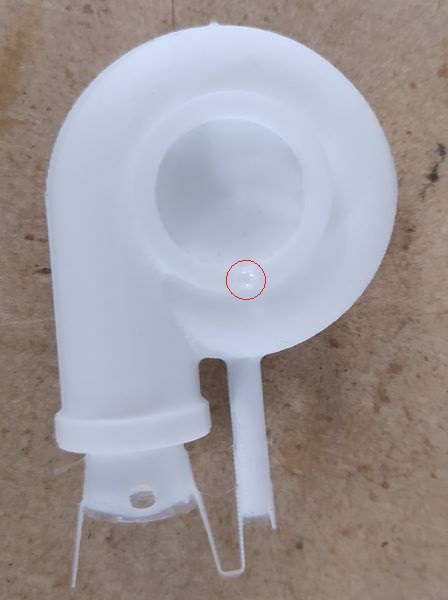
Part made out of Smooth-cast 305
There was also void caused by an air bubble that I could have prevented if I just had tilted the mold in the right direction during casting.