4. Computer controlled cutting
Individual Assignment
- Design, lasercut, and document a parametric press-fit construction kit, which can be assembled in multiple ways. Account for the lasercutter kerf.
- cut something on the vinylcutter
🔪 Vynil Cutter
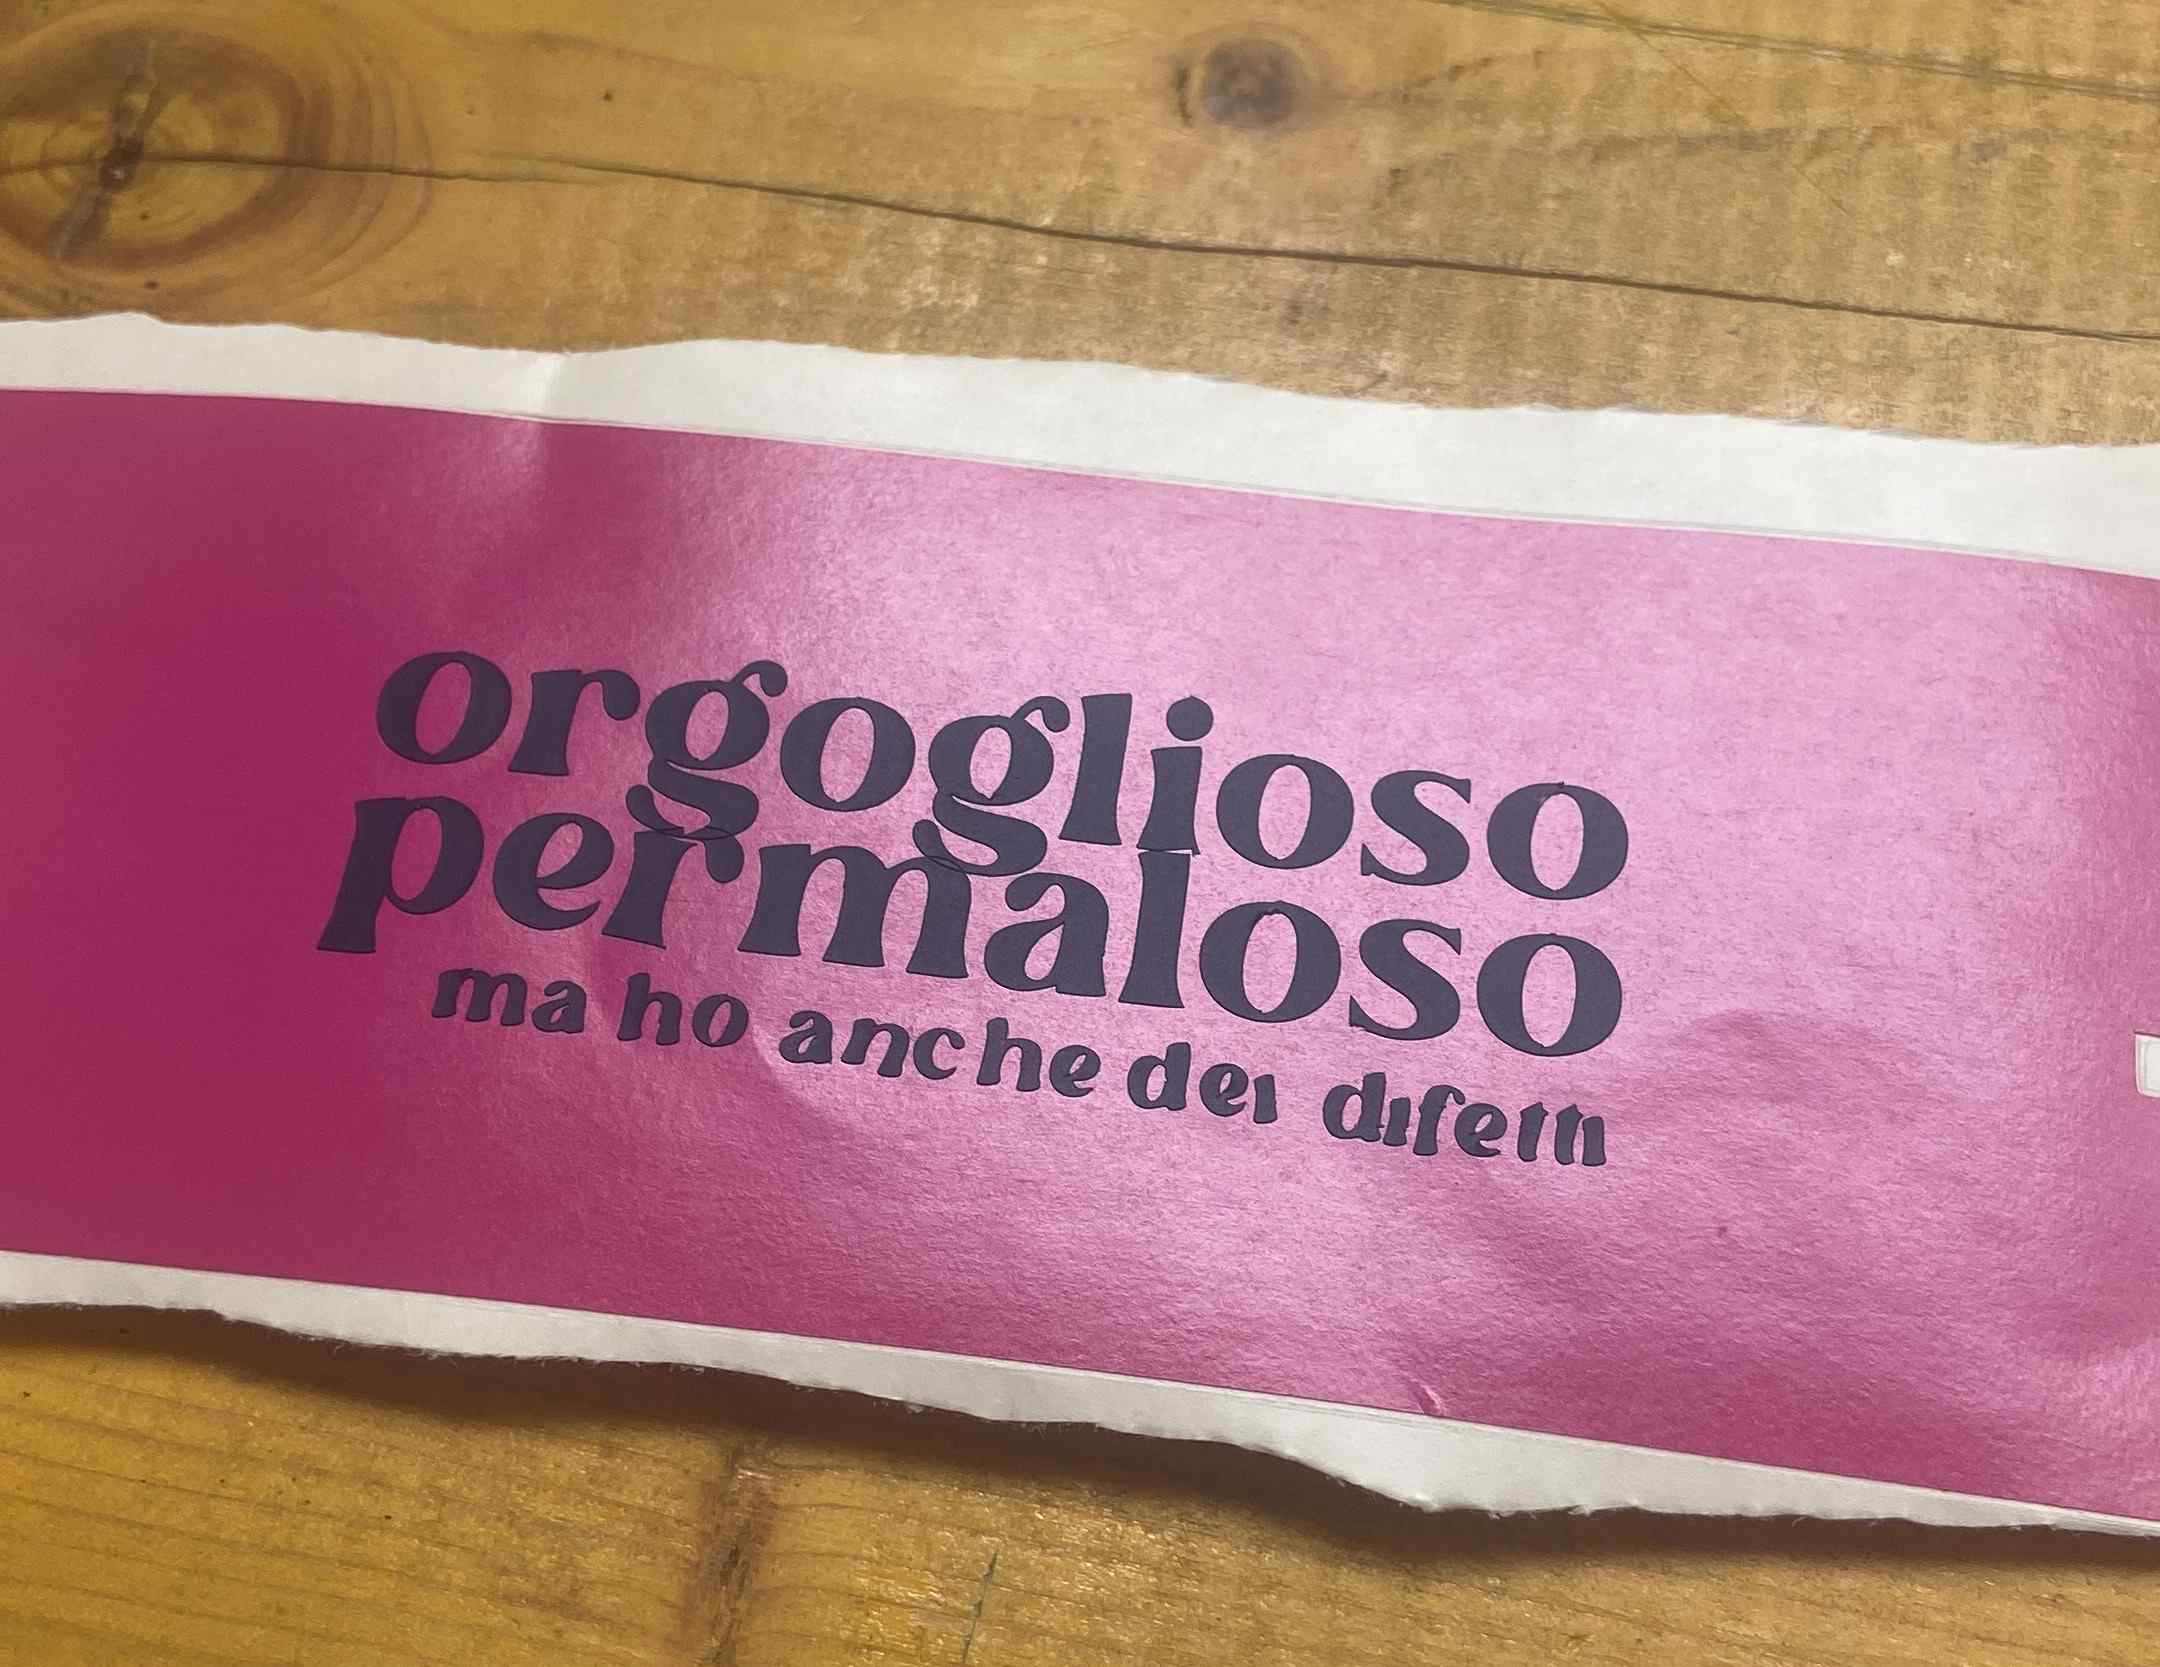
For this week assignment I started with the vynilcutter. I designed a set of stickers for my colleagues.
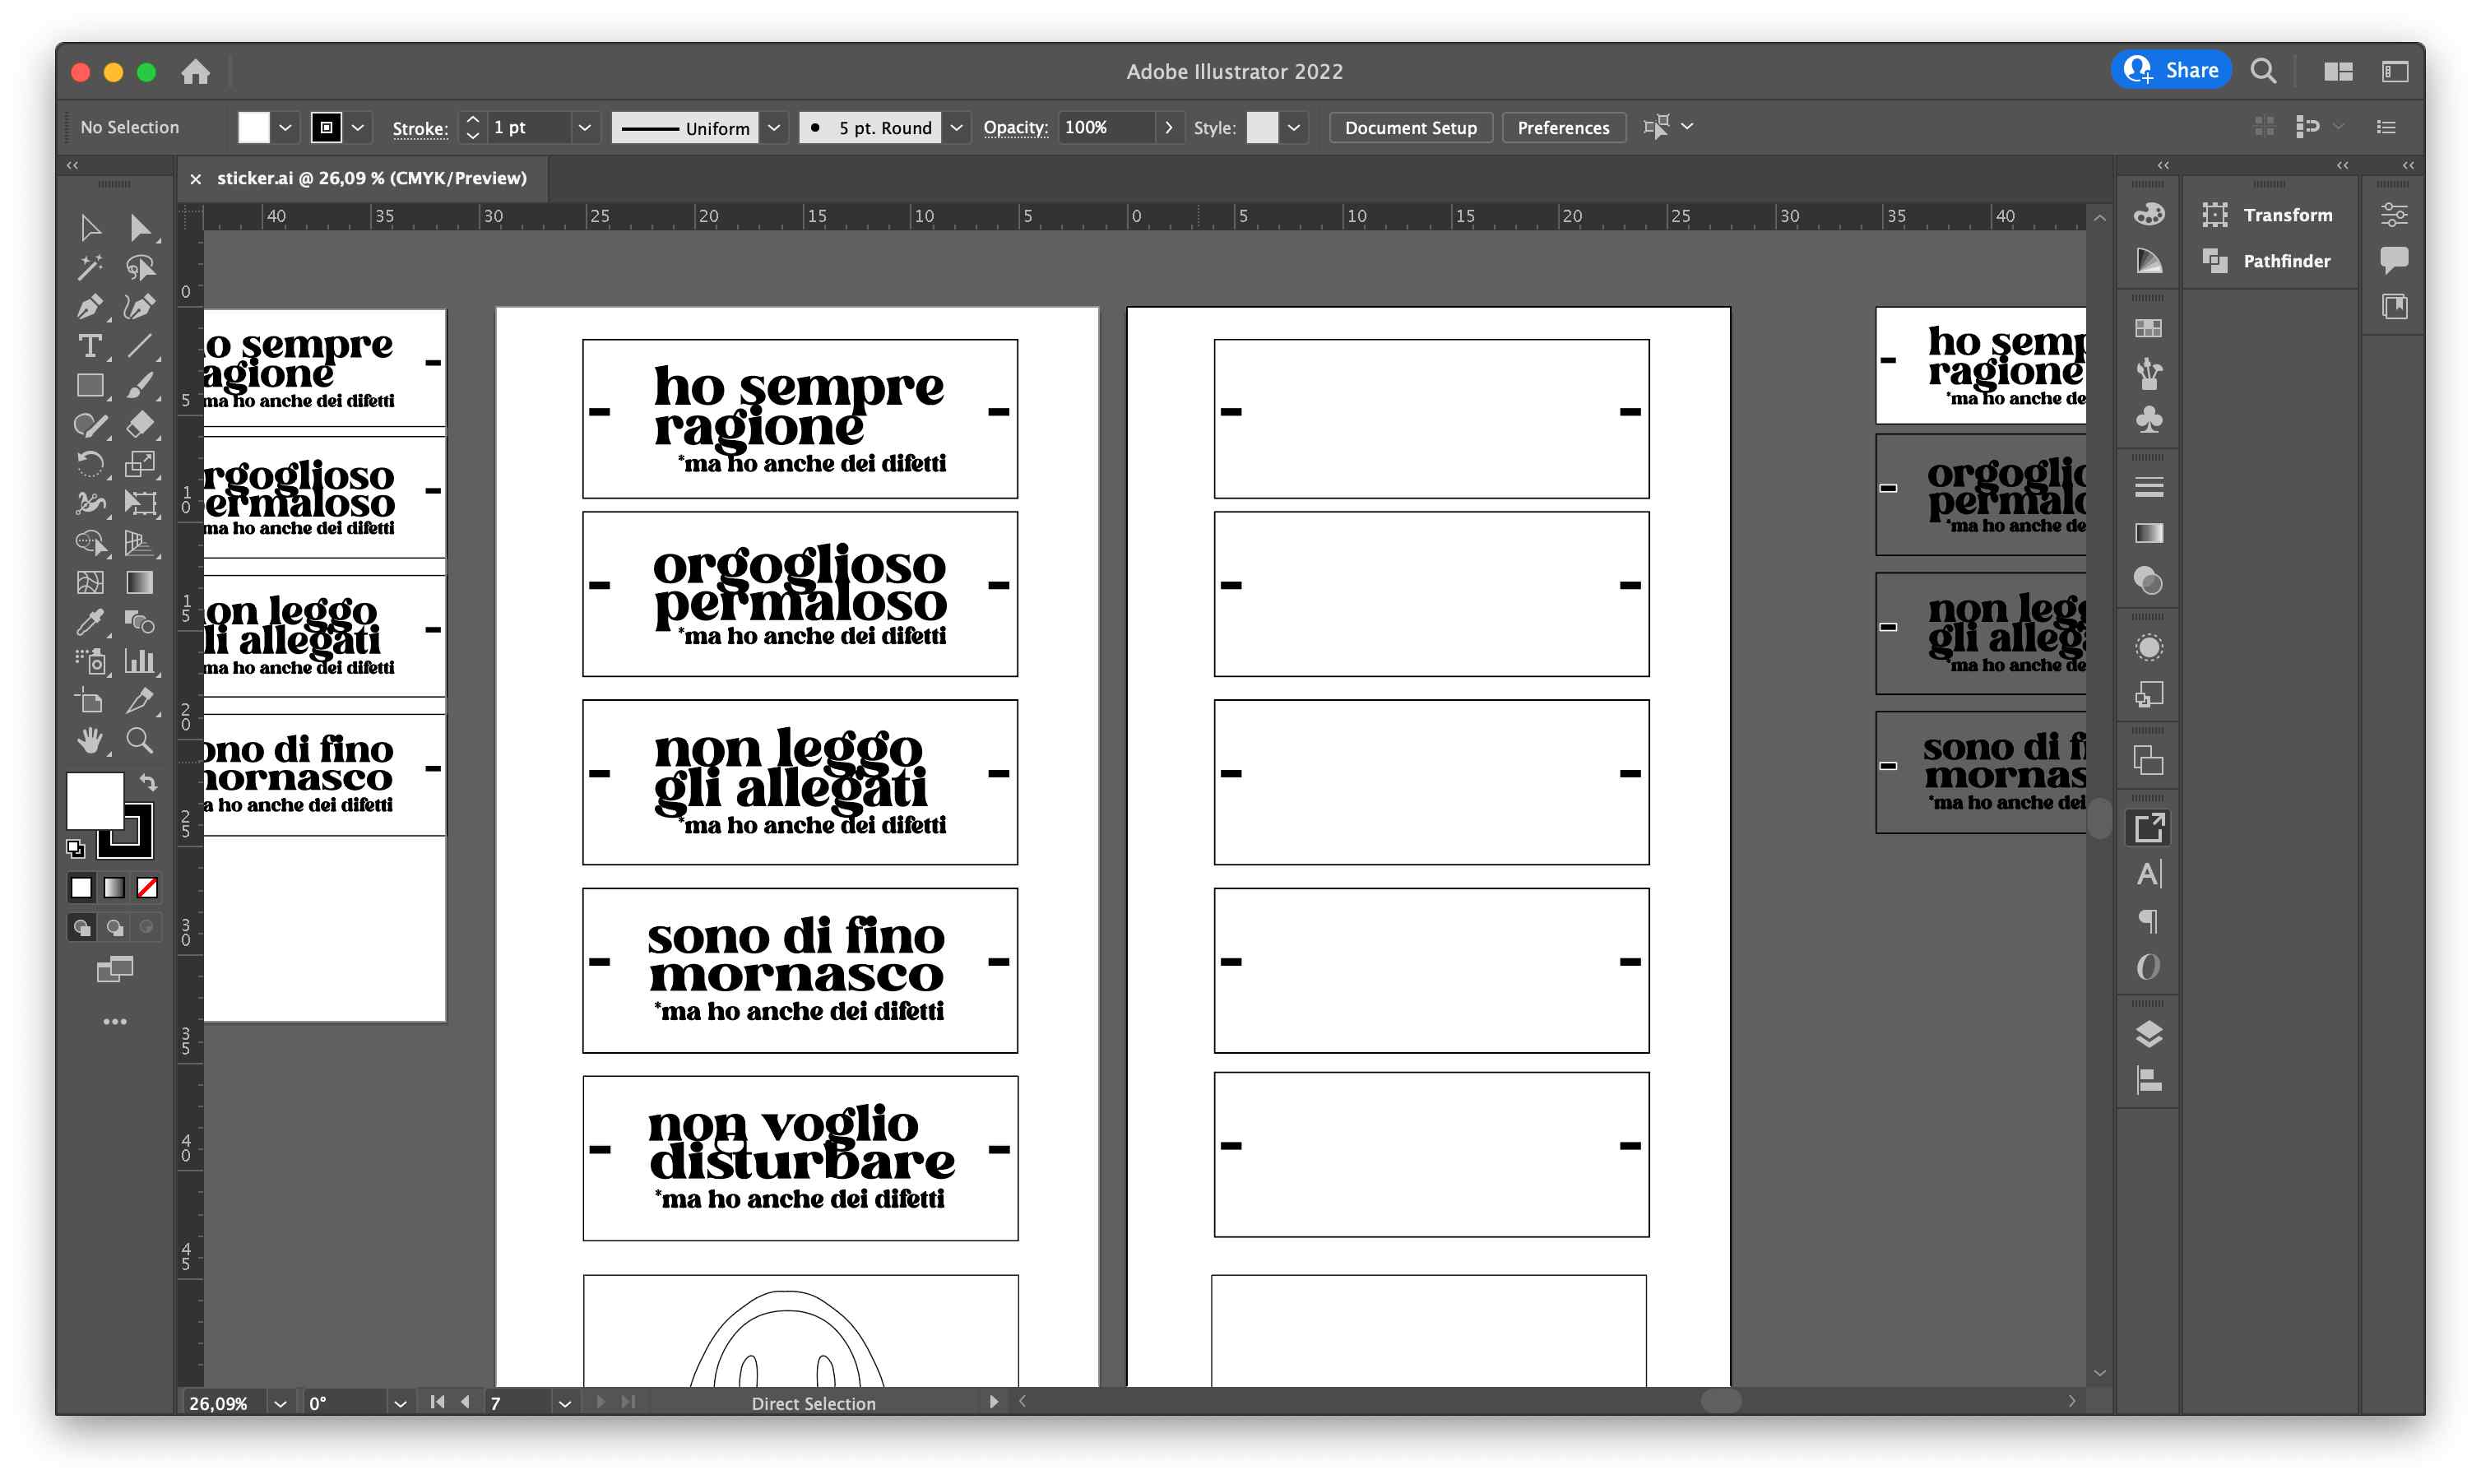
I decided to do a multicolor sticker but decided to start with one color to understand the machine.
Once I had my design ready in Illustrator, I exported it in svg and opened it in InkScape. I then opened it with the extension RolandCutStudio. While the file was loading (the computer is very slow, sigh) I turned on the Vynil Cutter and loaded a piece of vynil, selecting in the machine that I loaded a PIECE and not a ROLL. I set the ORIGIN and the machine was ready to go.
Once CutStudio was ready, I set the software to take the dimensions of my sheet from the machine and then I started to cut.

The final result was fine, so I cut the remaining stickers and cut their backgrounds too.
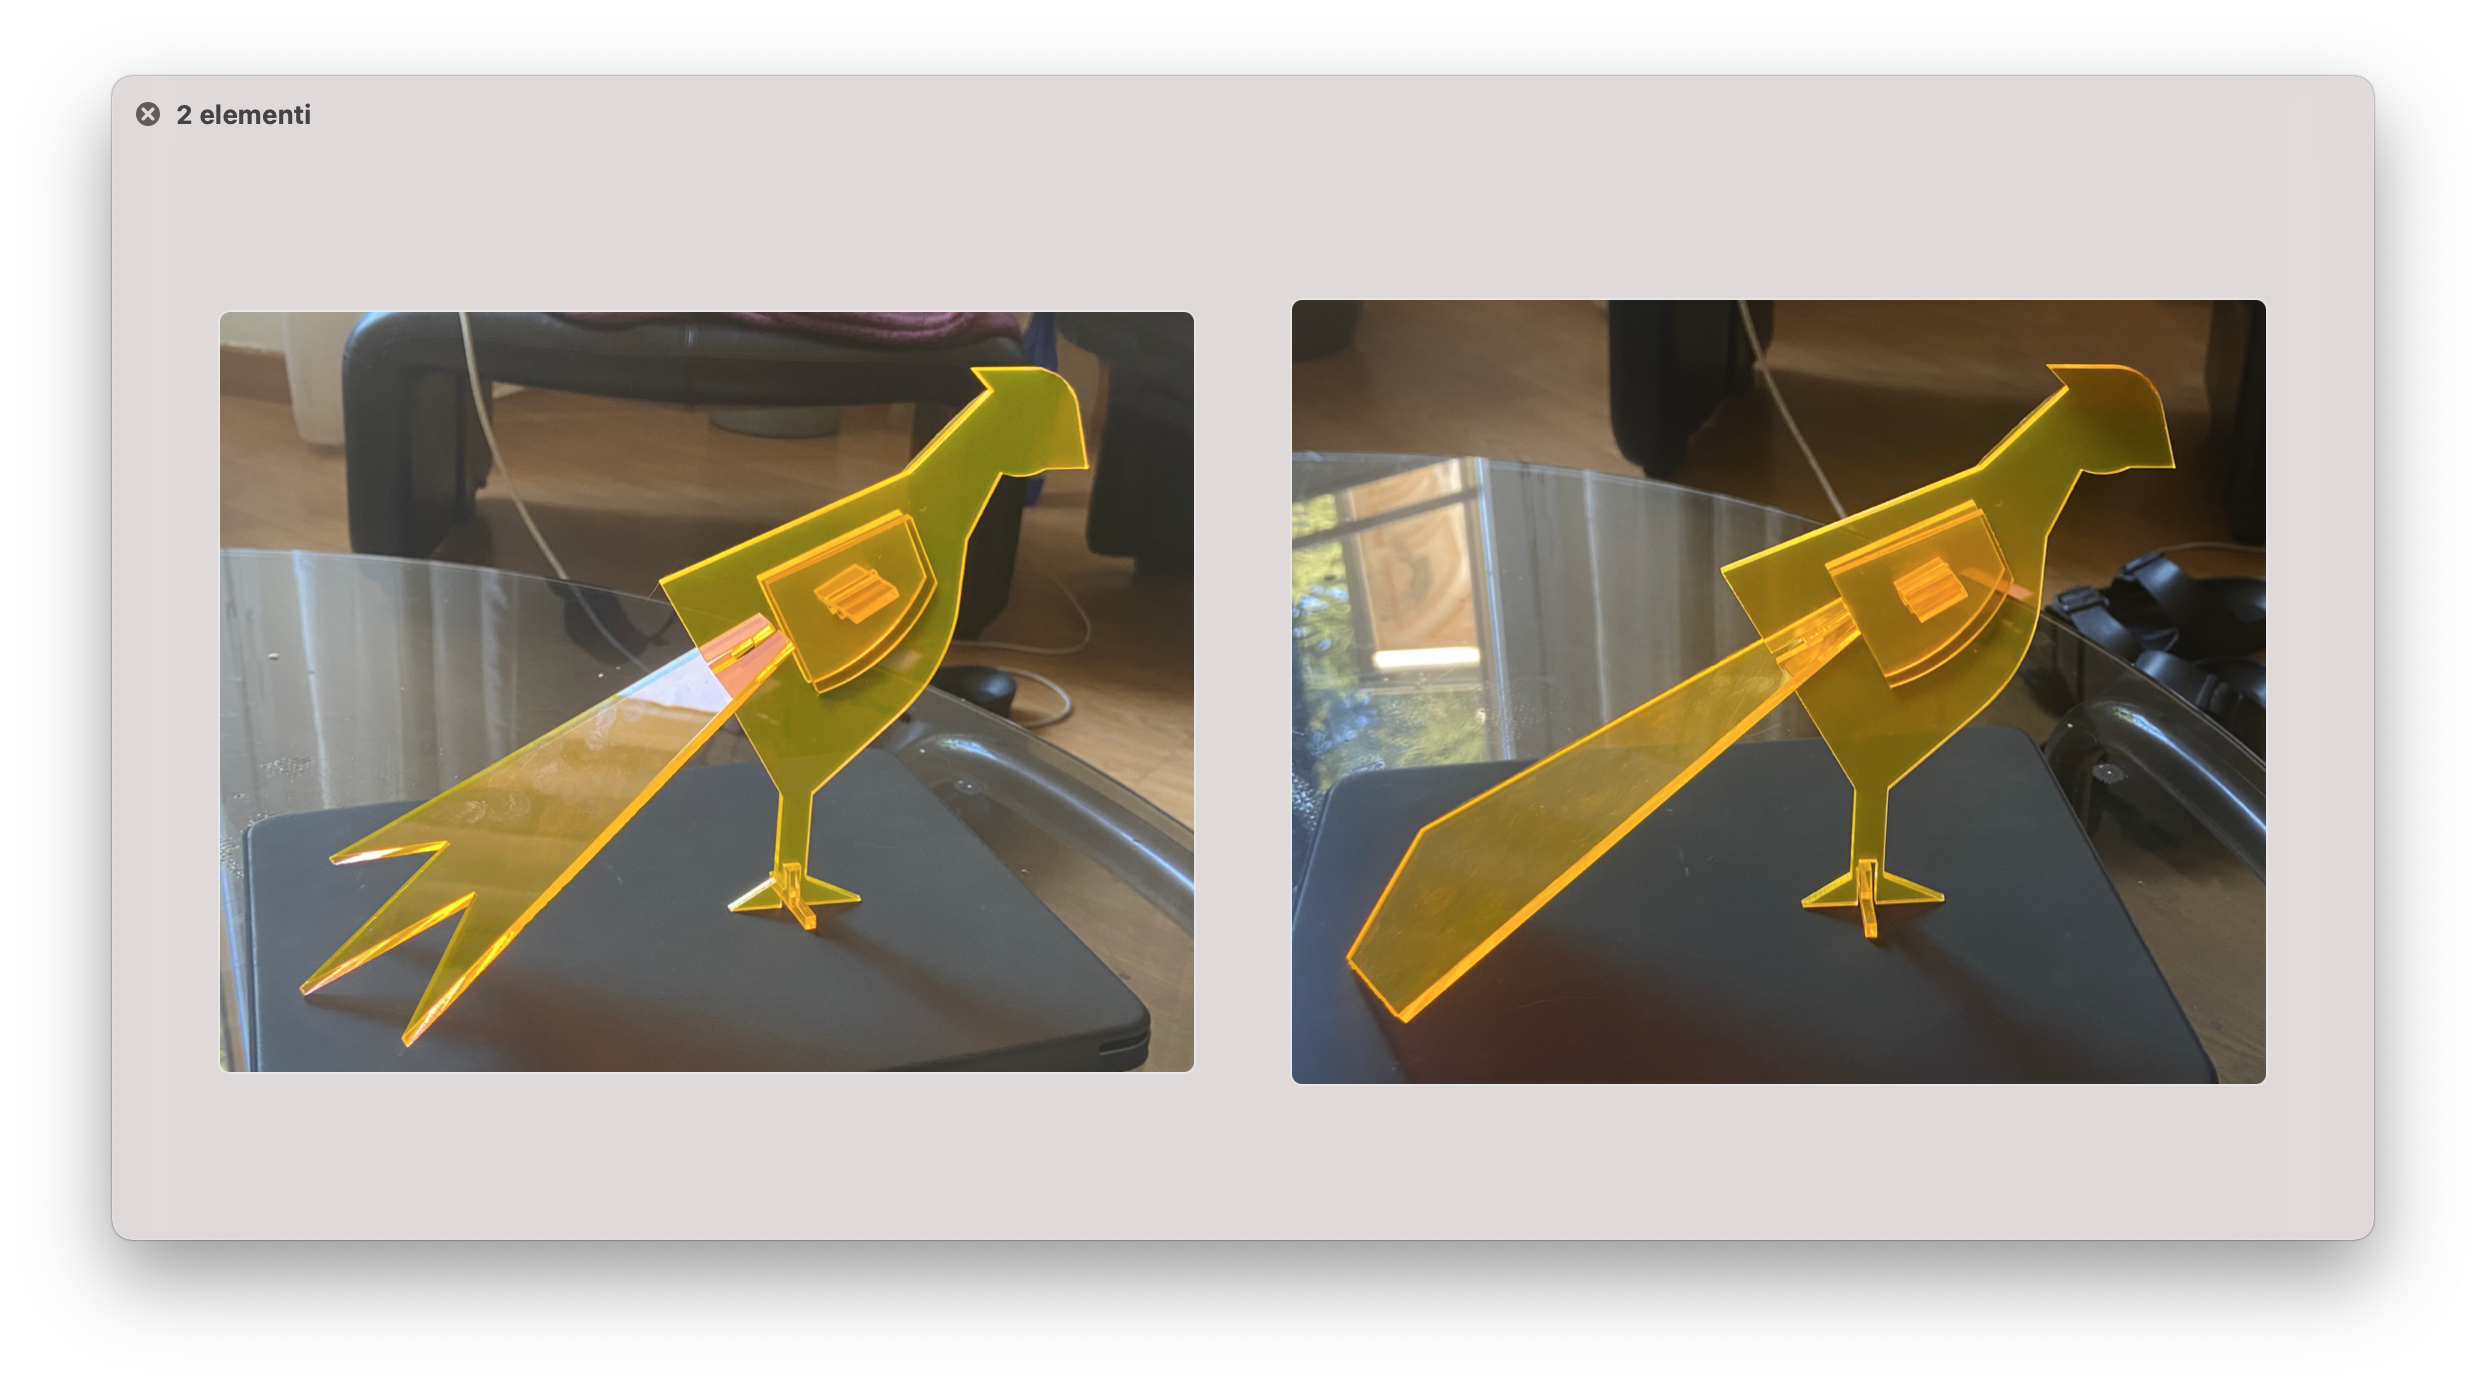
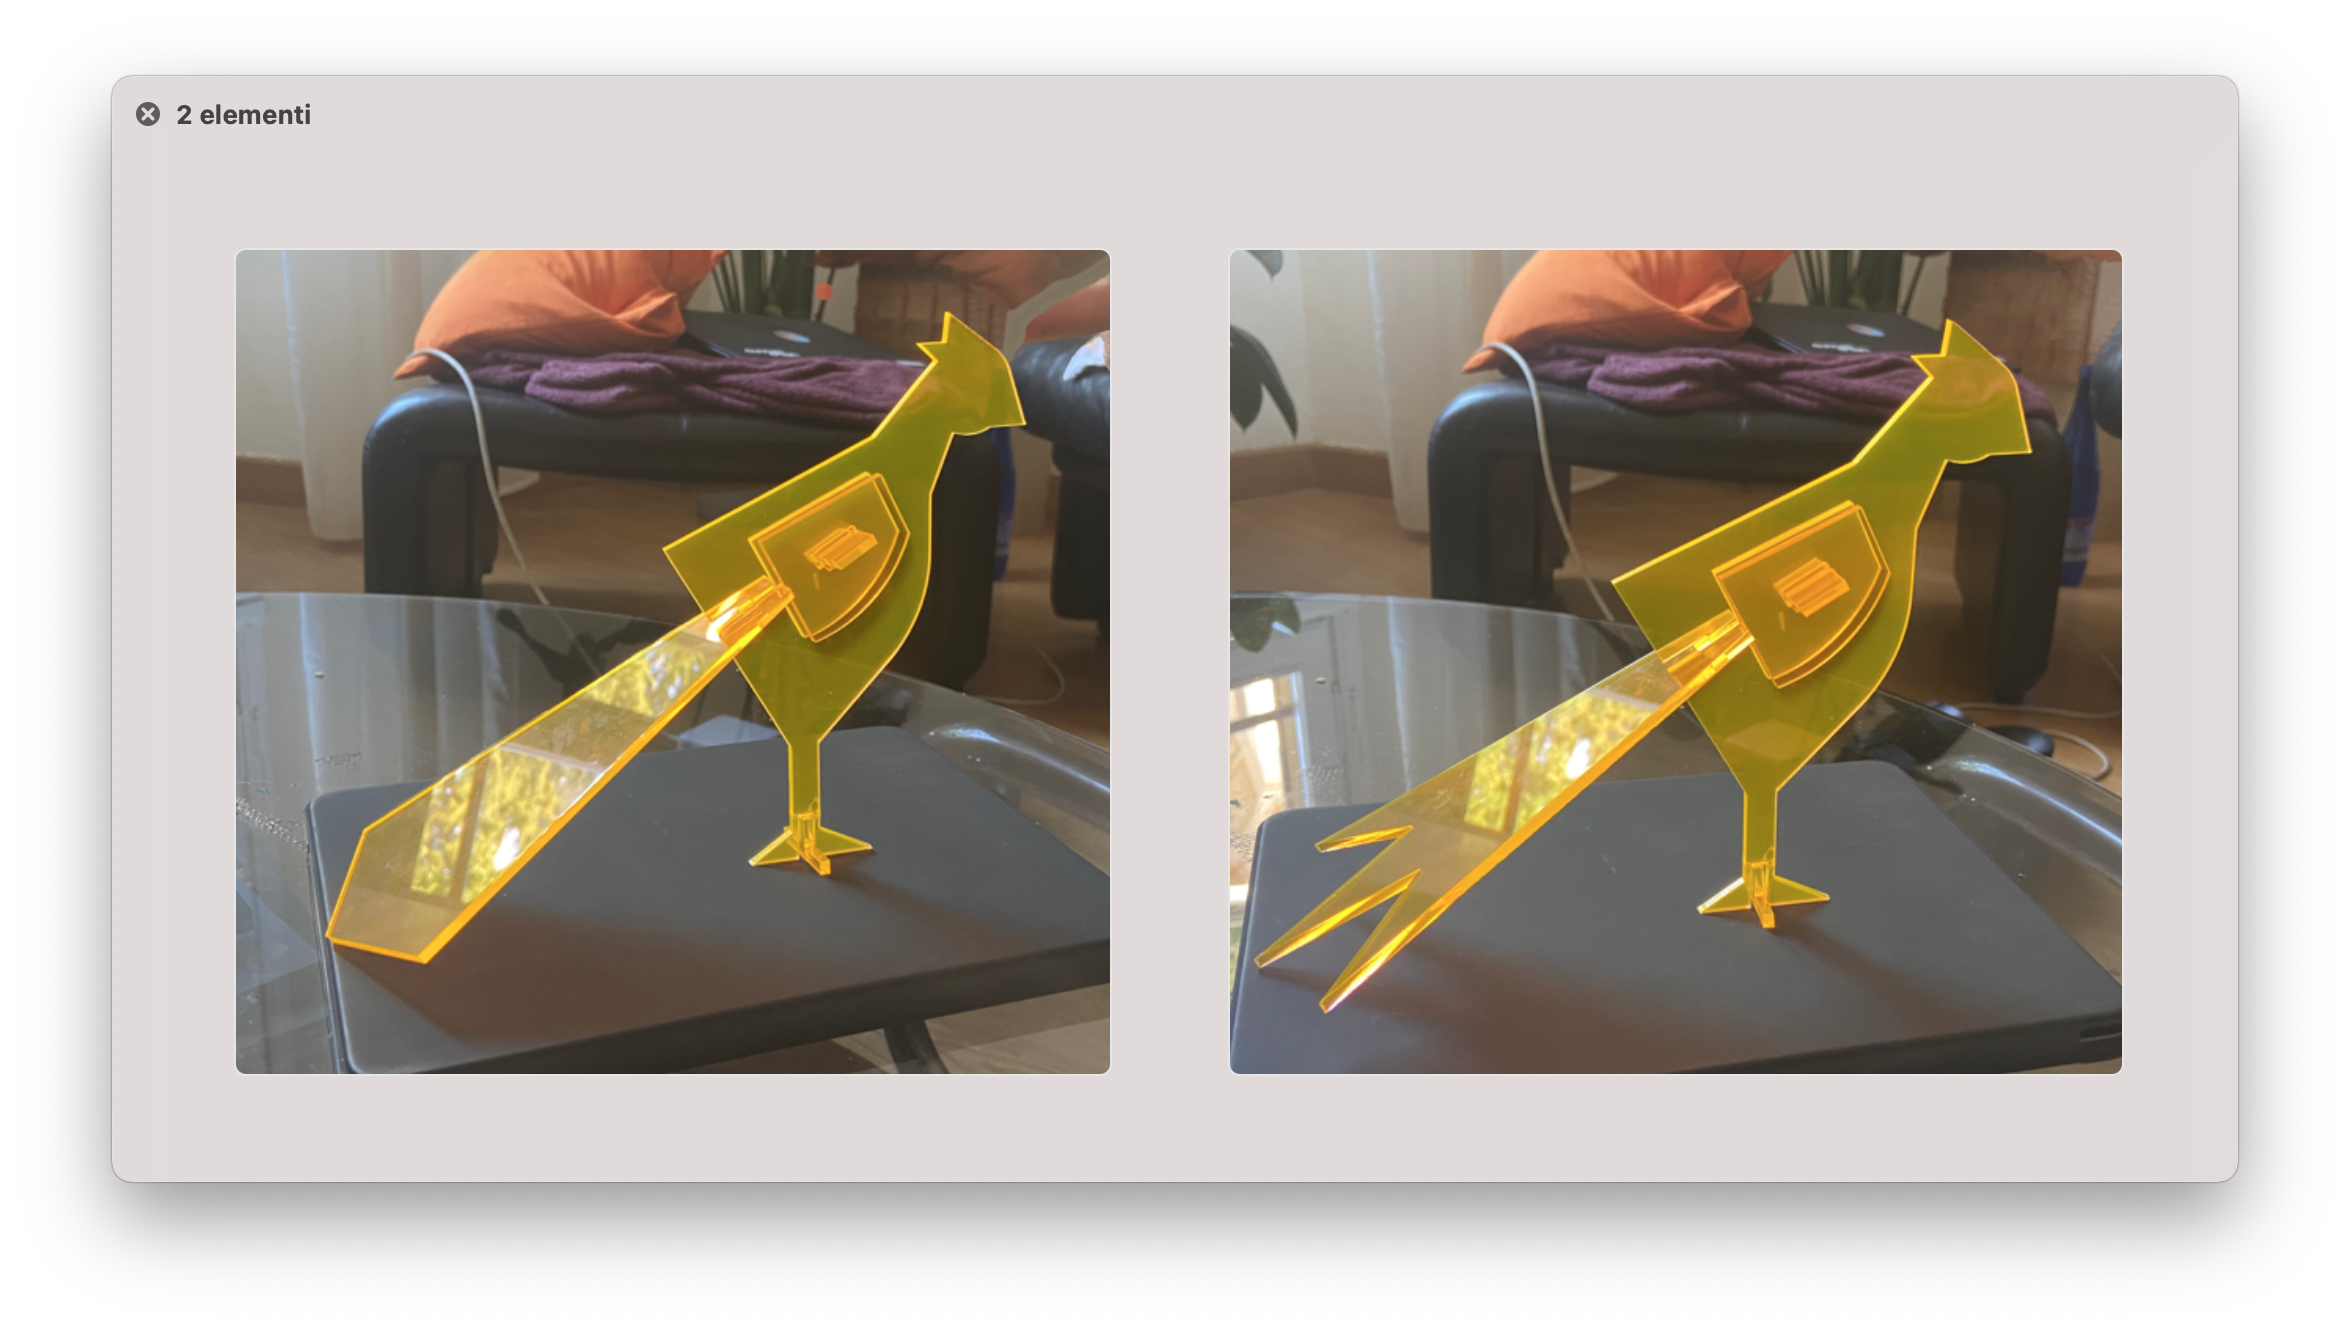
🔪 Laser Cutter
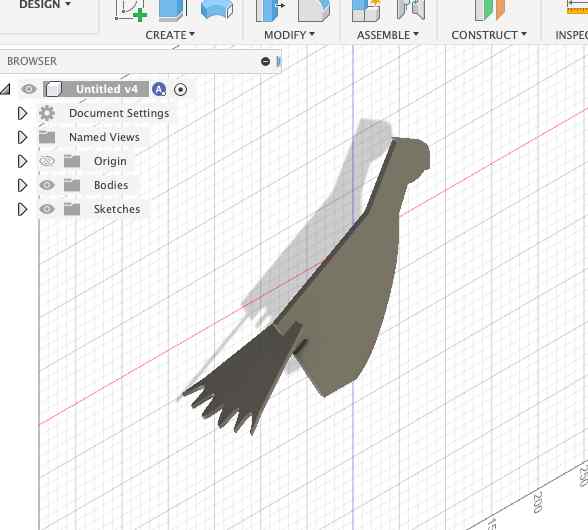
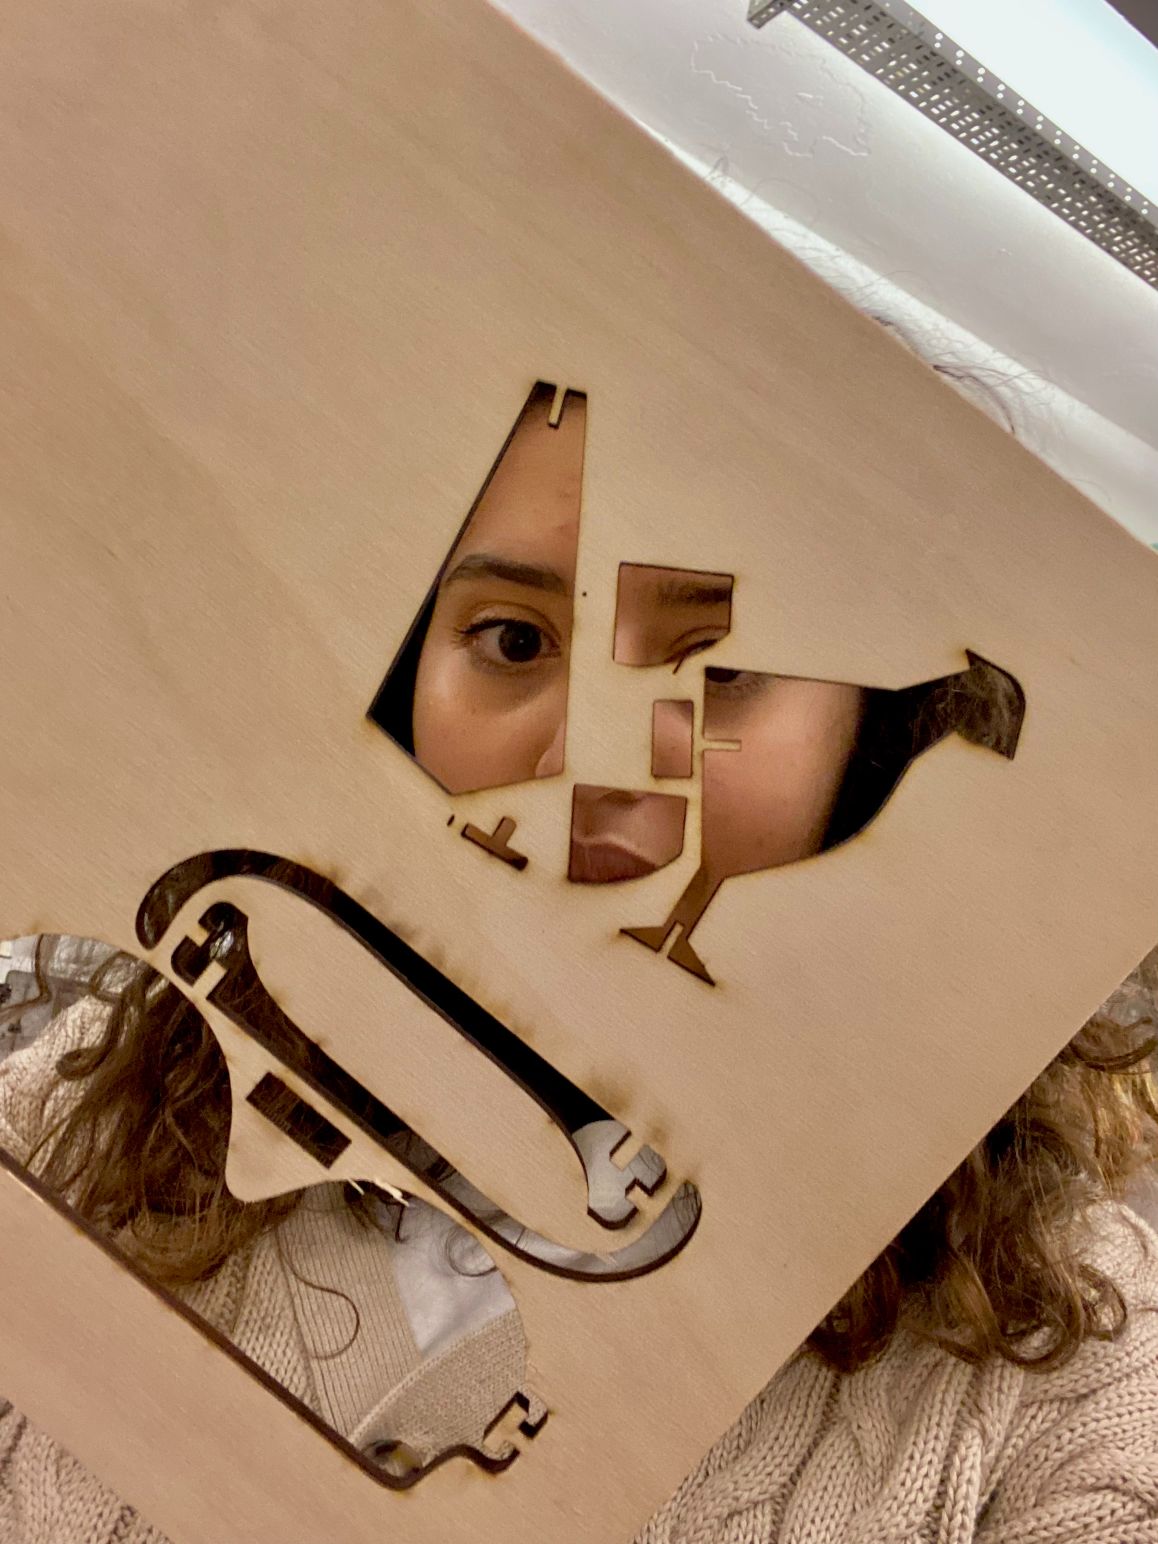
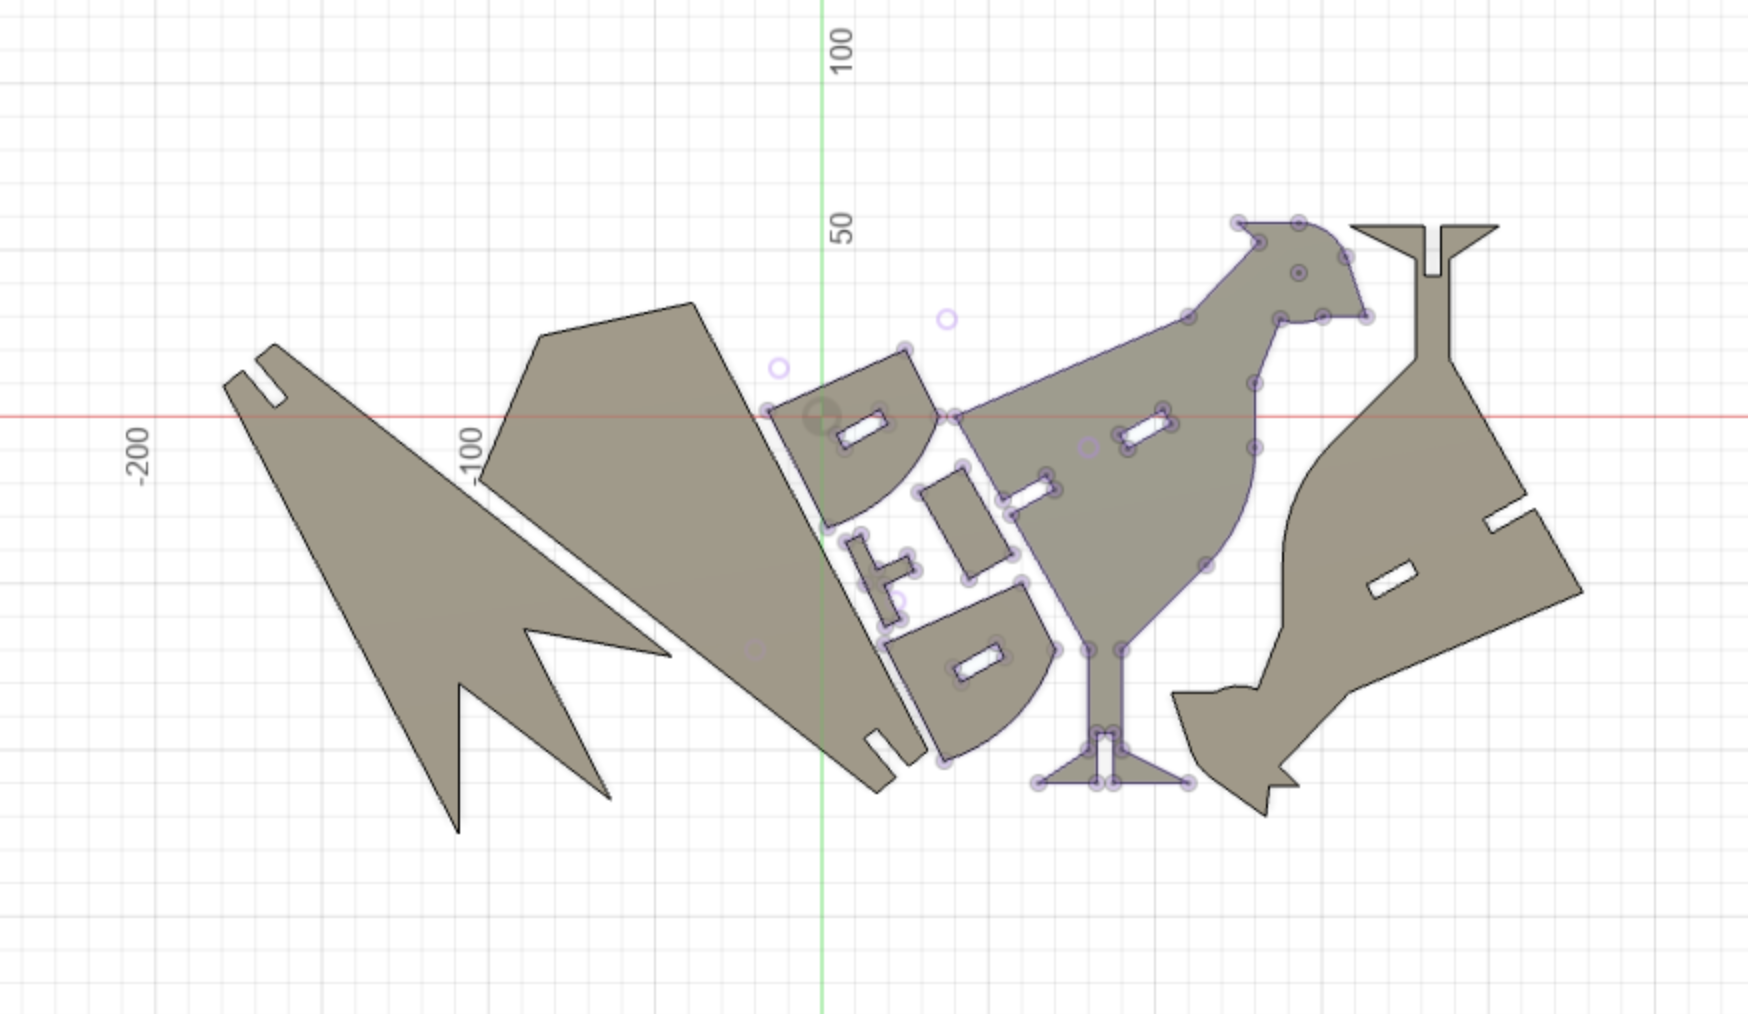
For the laser cutter I wanted to do something fun: an assemblable phaesant as a present for my friend who always calls me “pheasant”. Why? No one knows. I started designing my pheasant in the old-fashioned-way: with paper and pencil. I did so tu understand the
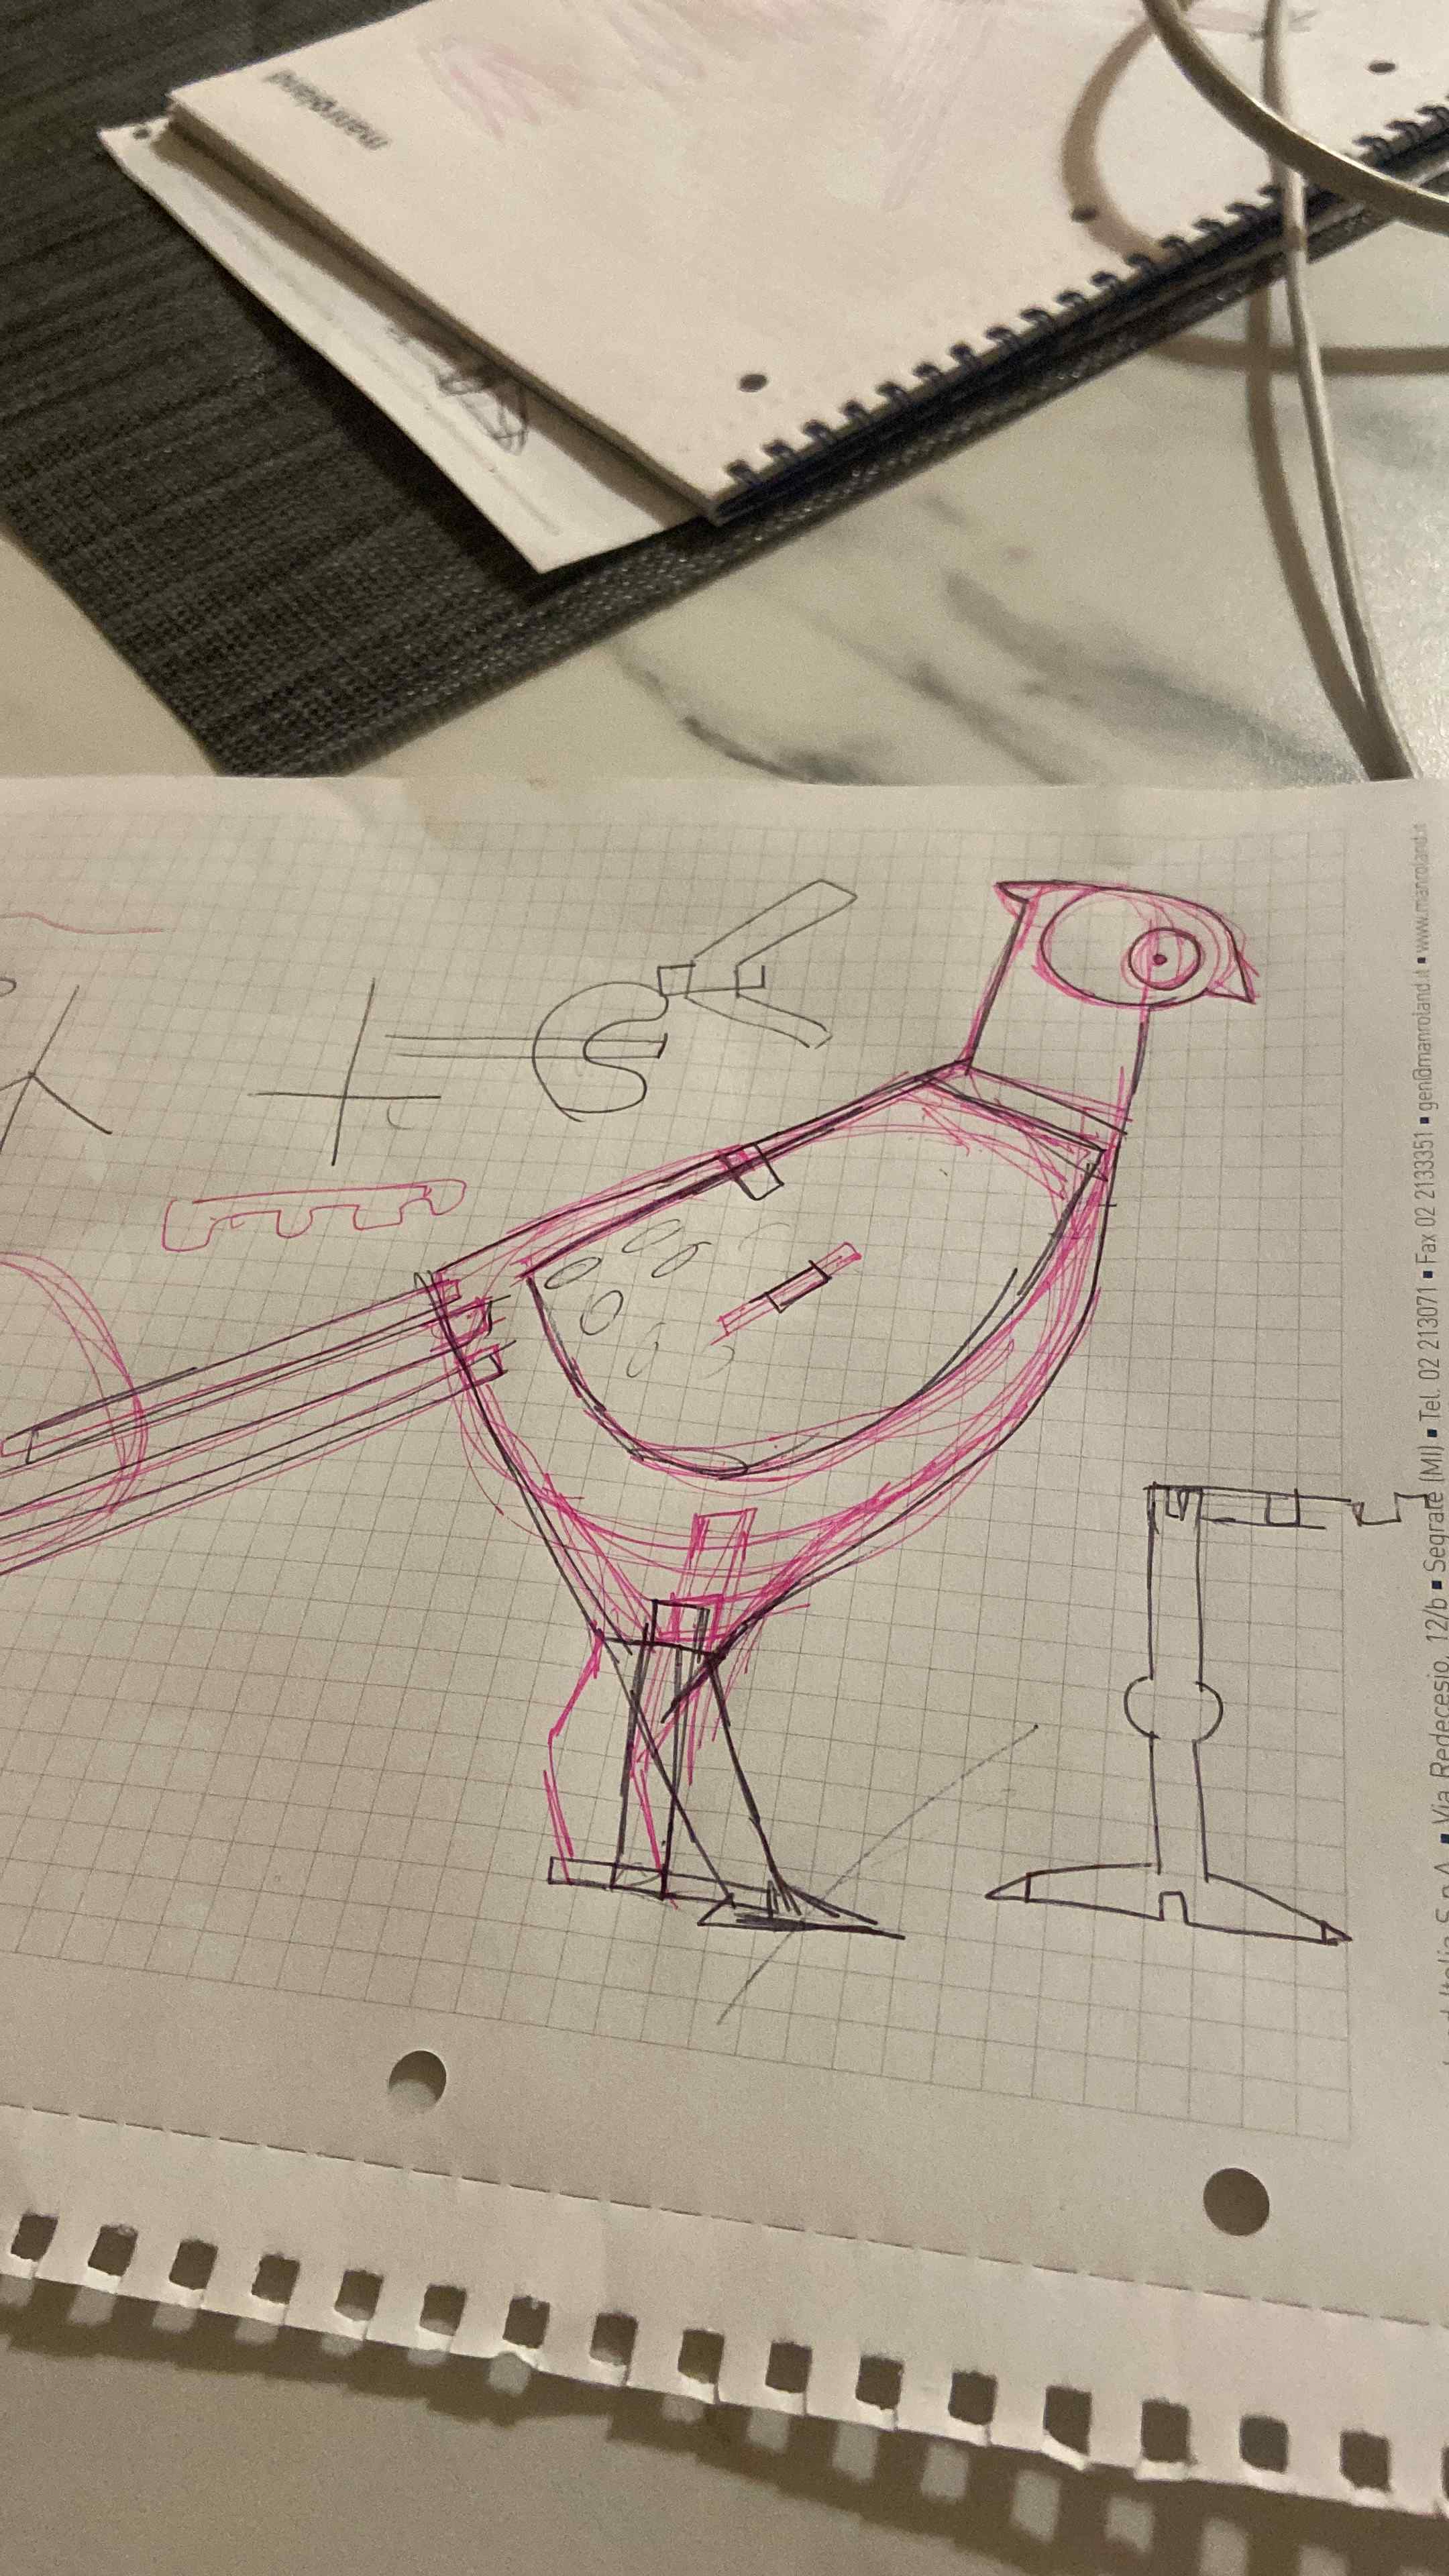
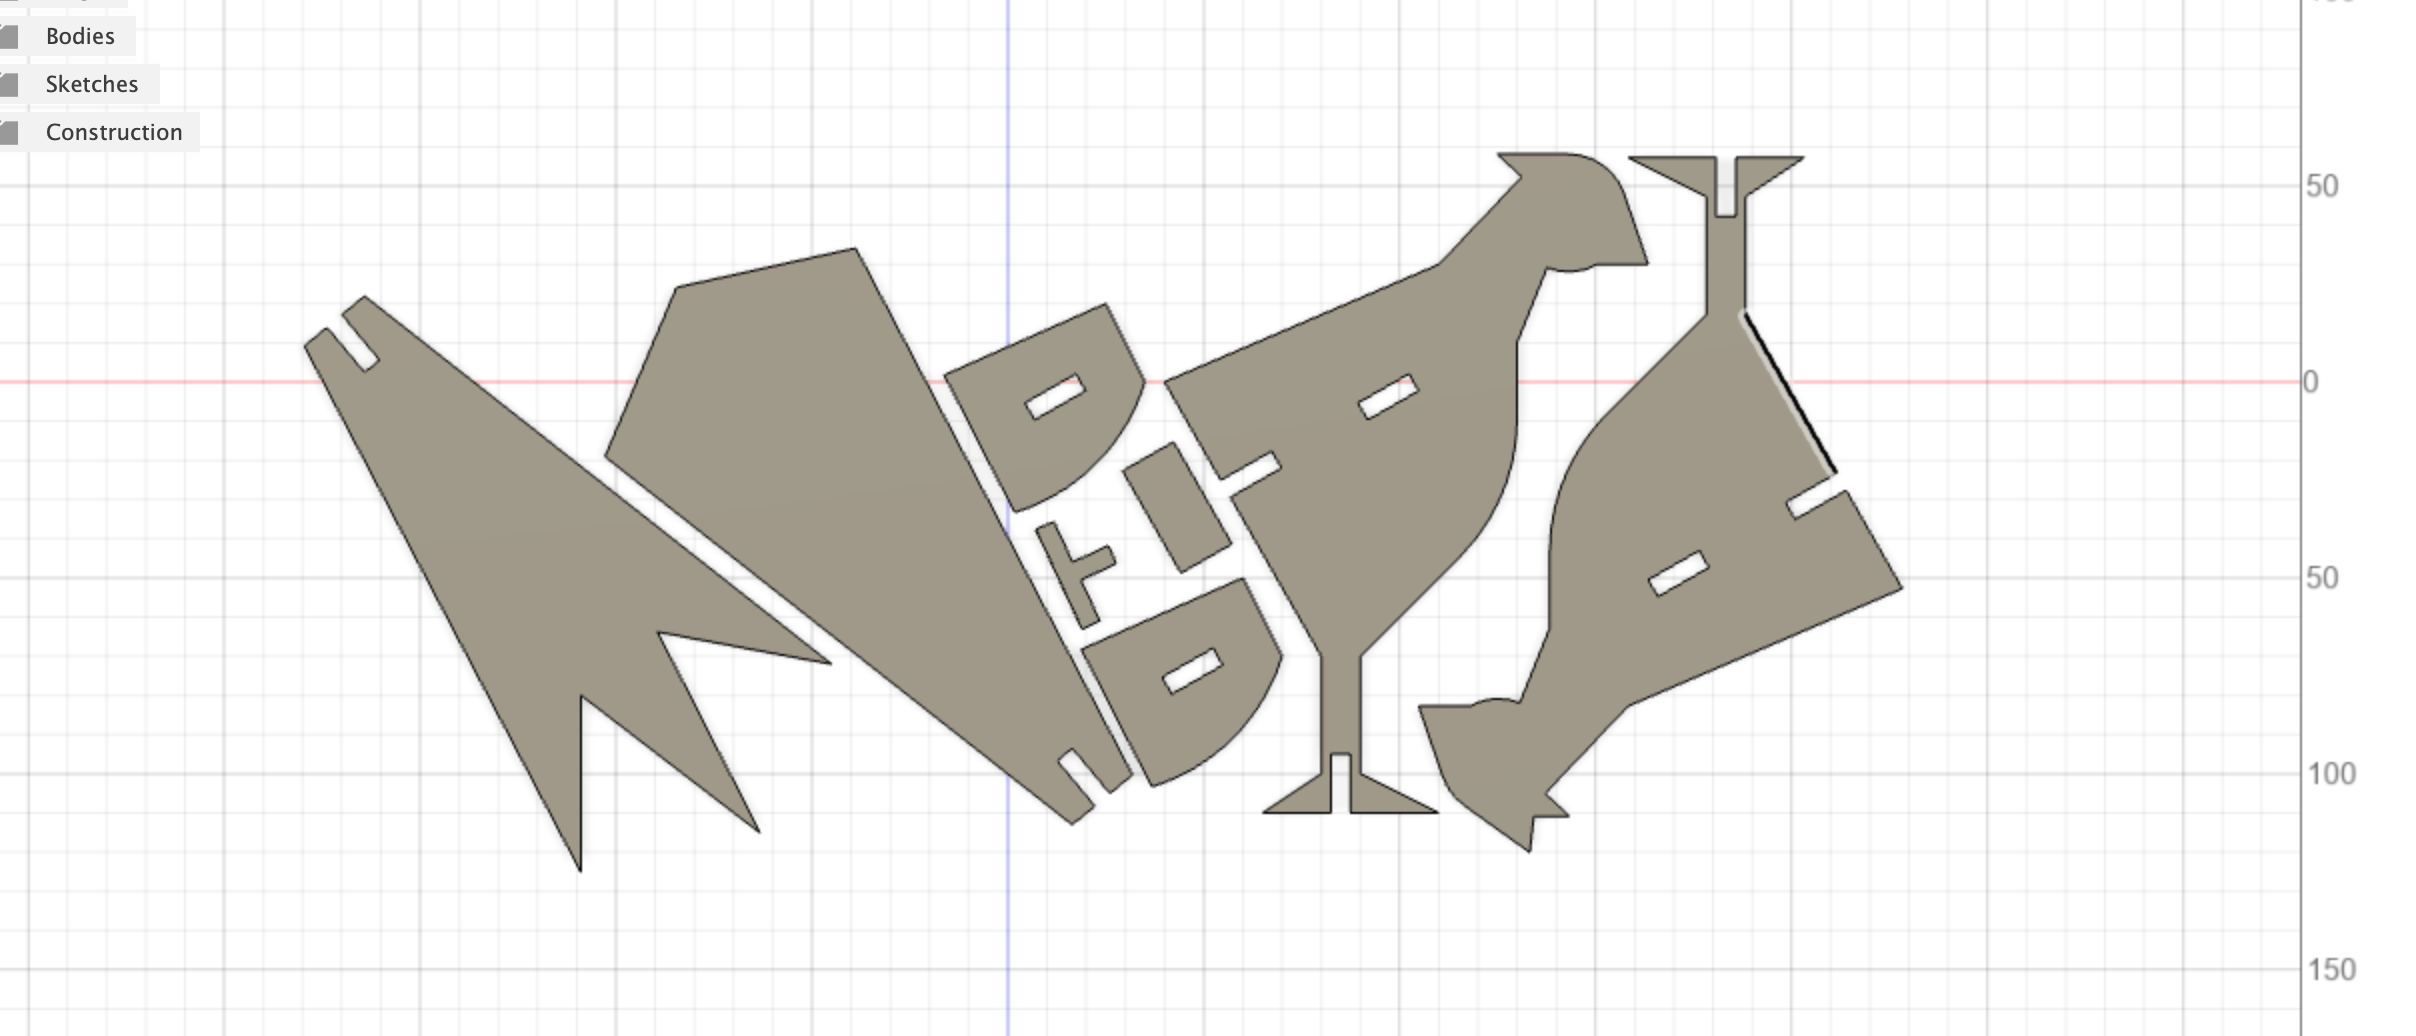
I then transferred this drawing on Fusion360 to do it parametric. I drew the body, then the wings, the tail and the legs. I did this in order to first understand how the pieces would fit together and how many there should be.
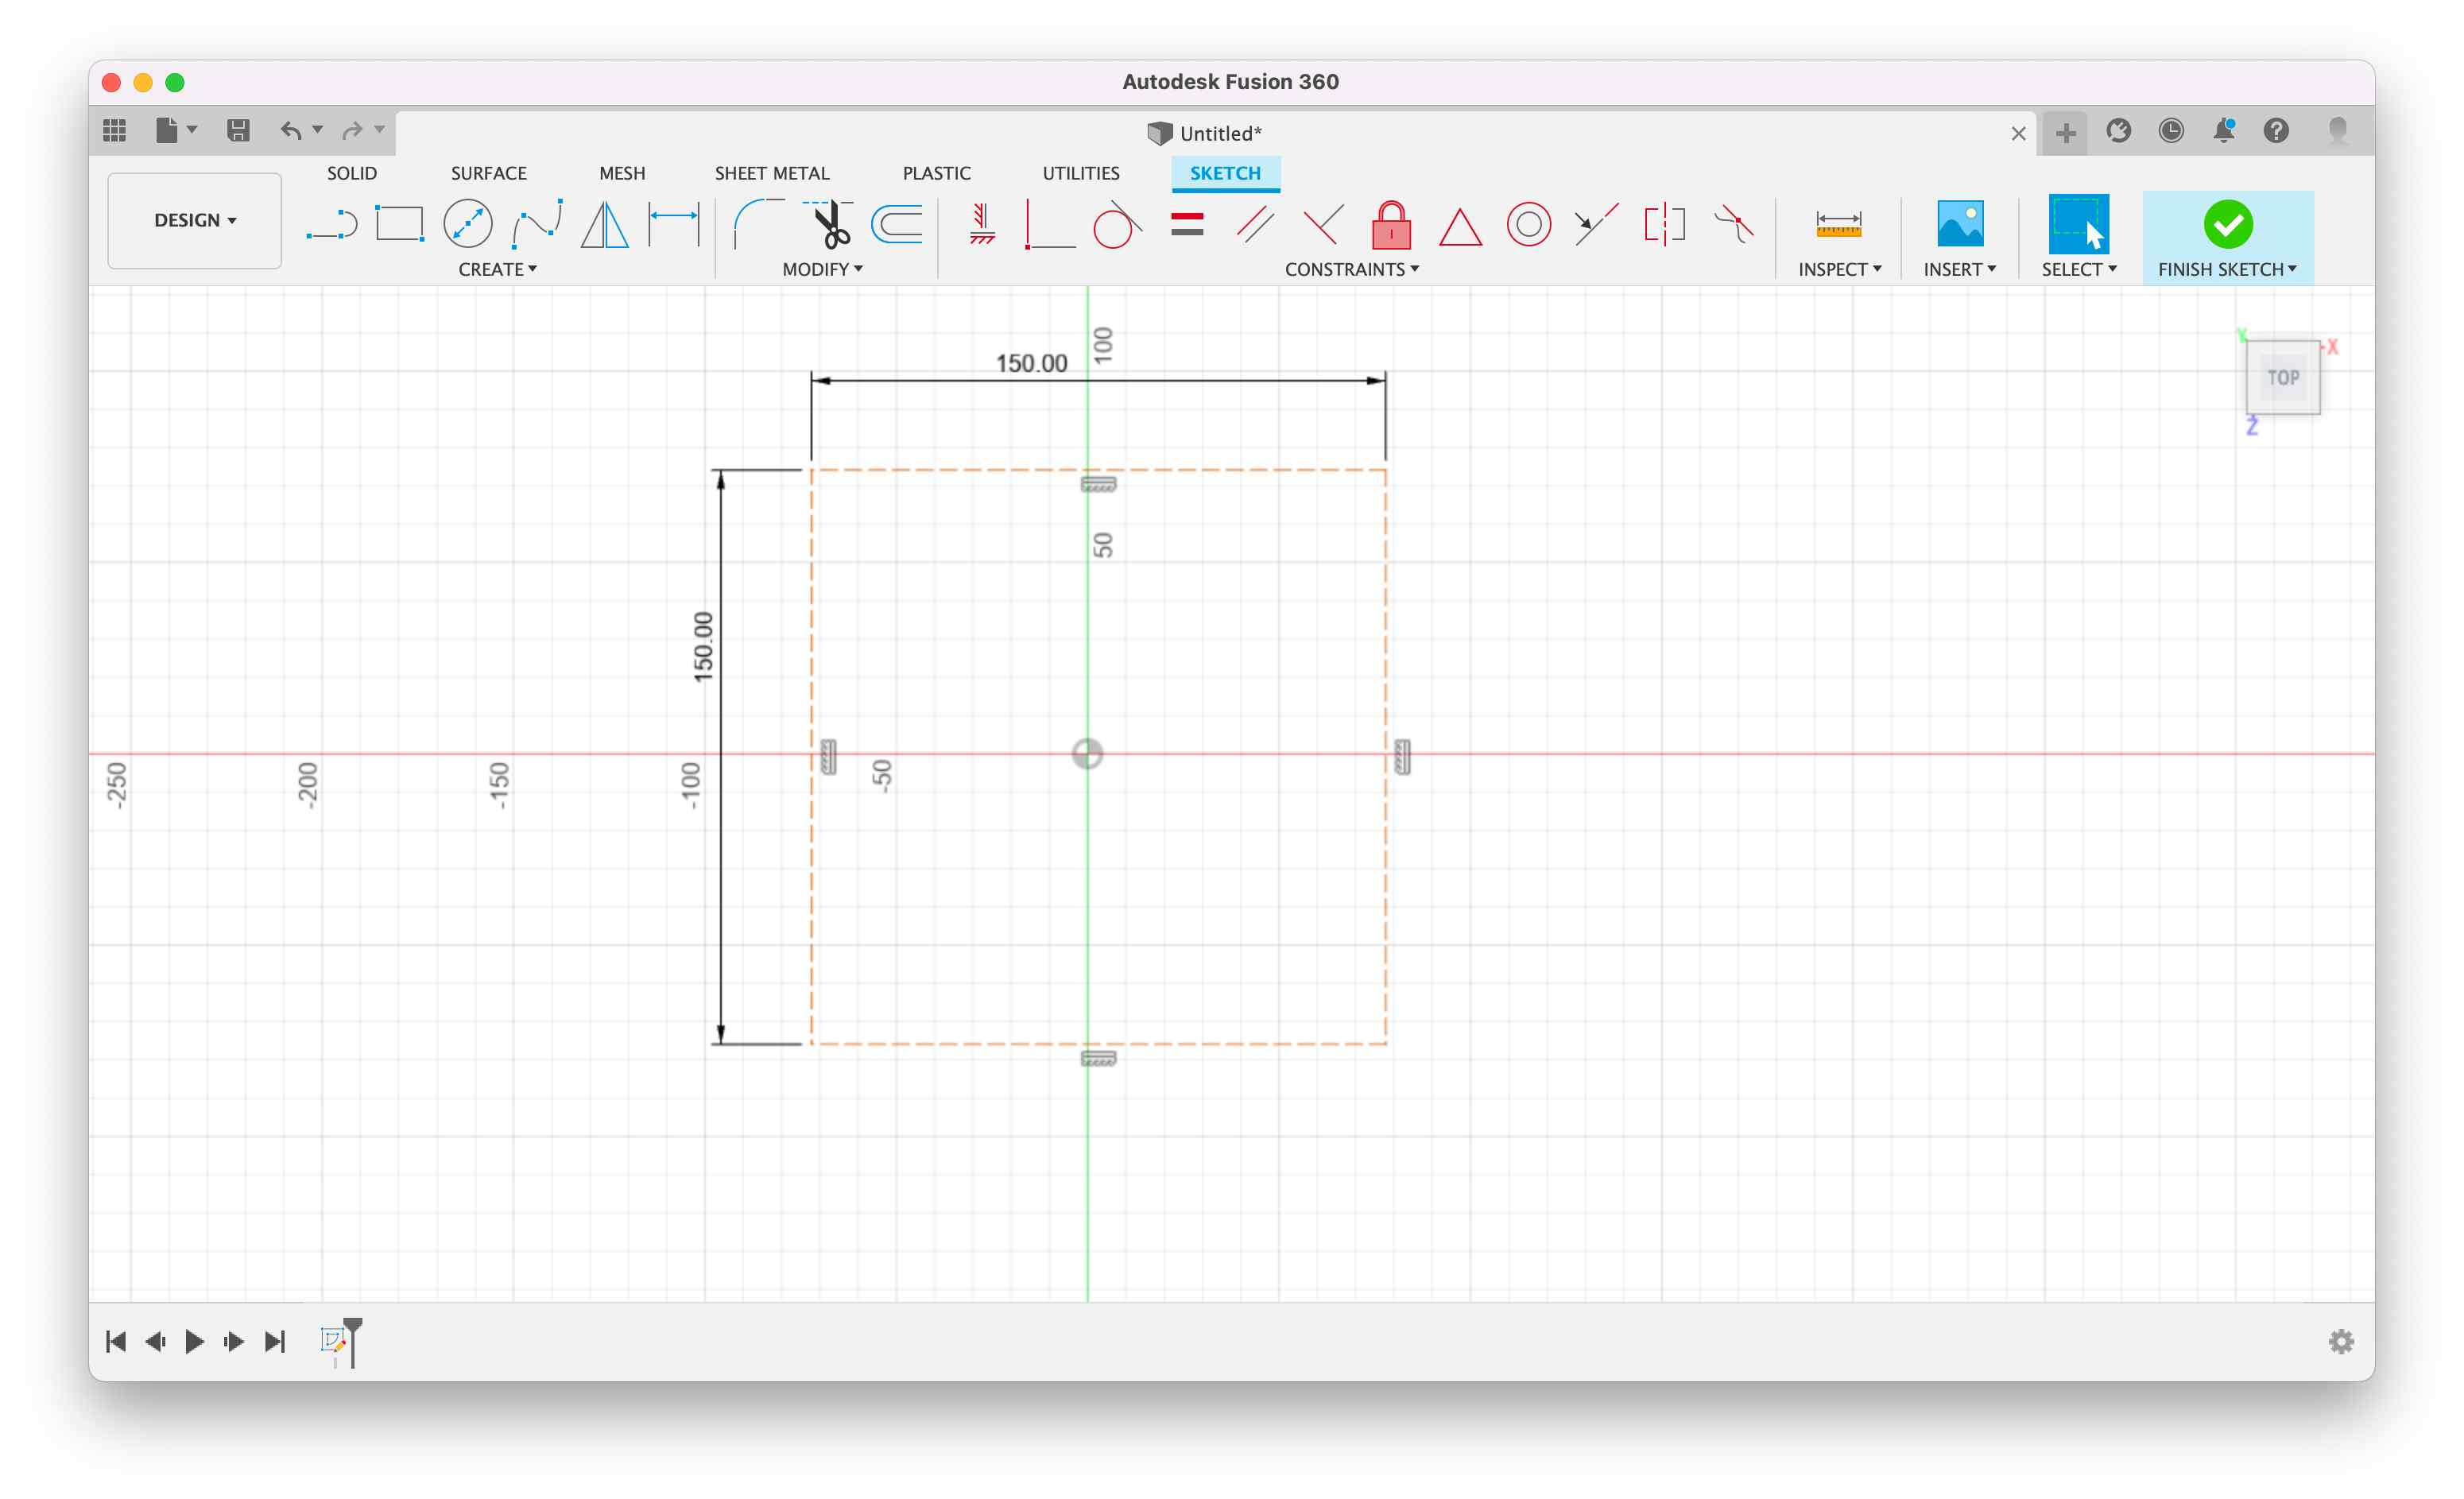
I struggled in understanding how to make it really parametric and actually it does not work very well.
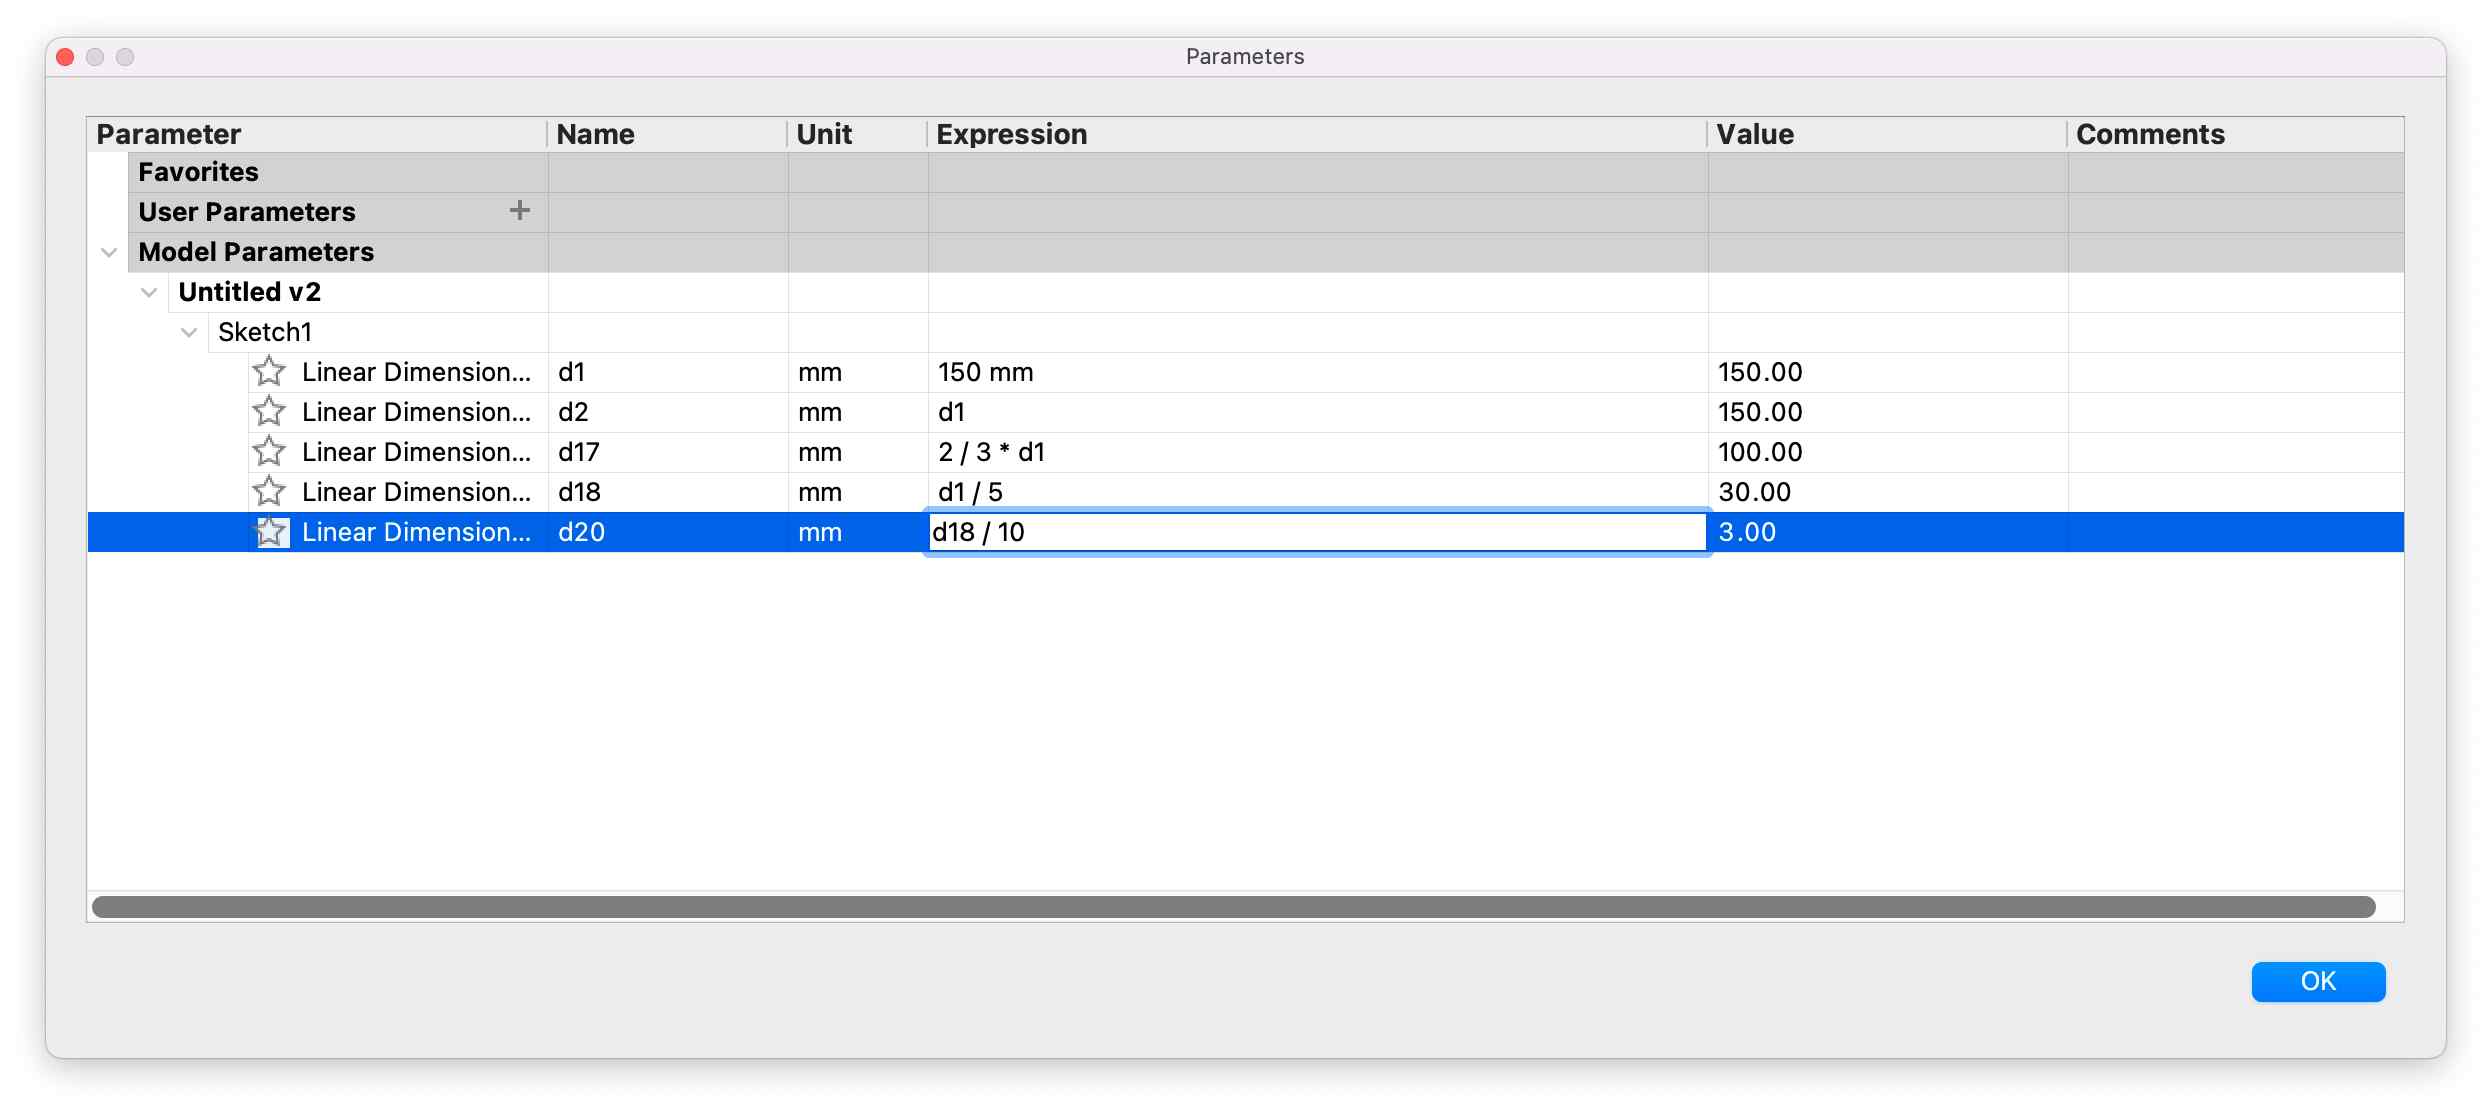
However, the most important part is that I managed to make the holes for each part parametric so that when the thickness of the material to be cut changed, the height of the joints would also change automatically. Once I was ready and satisfied with my design, I exported the dxf from Fusion360.
💀 failure alert
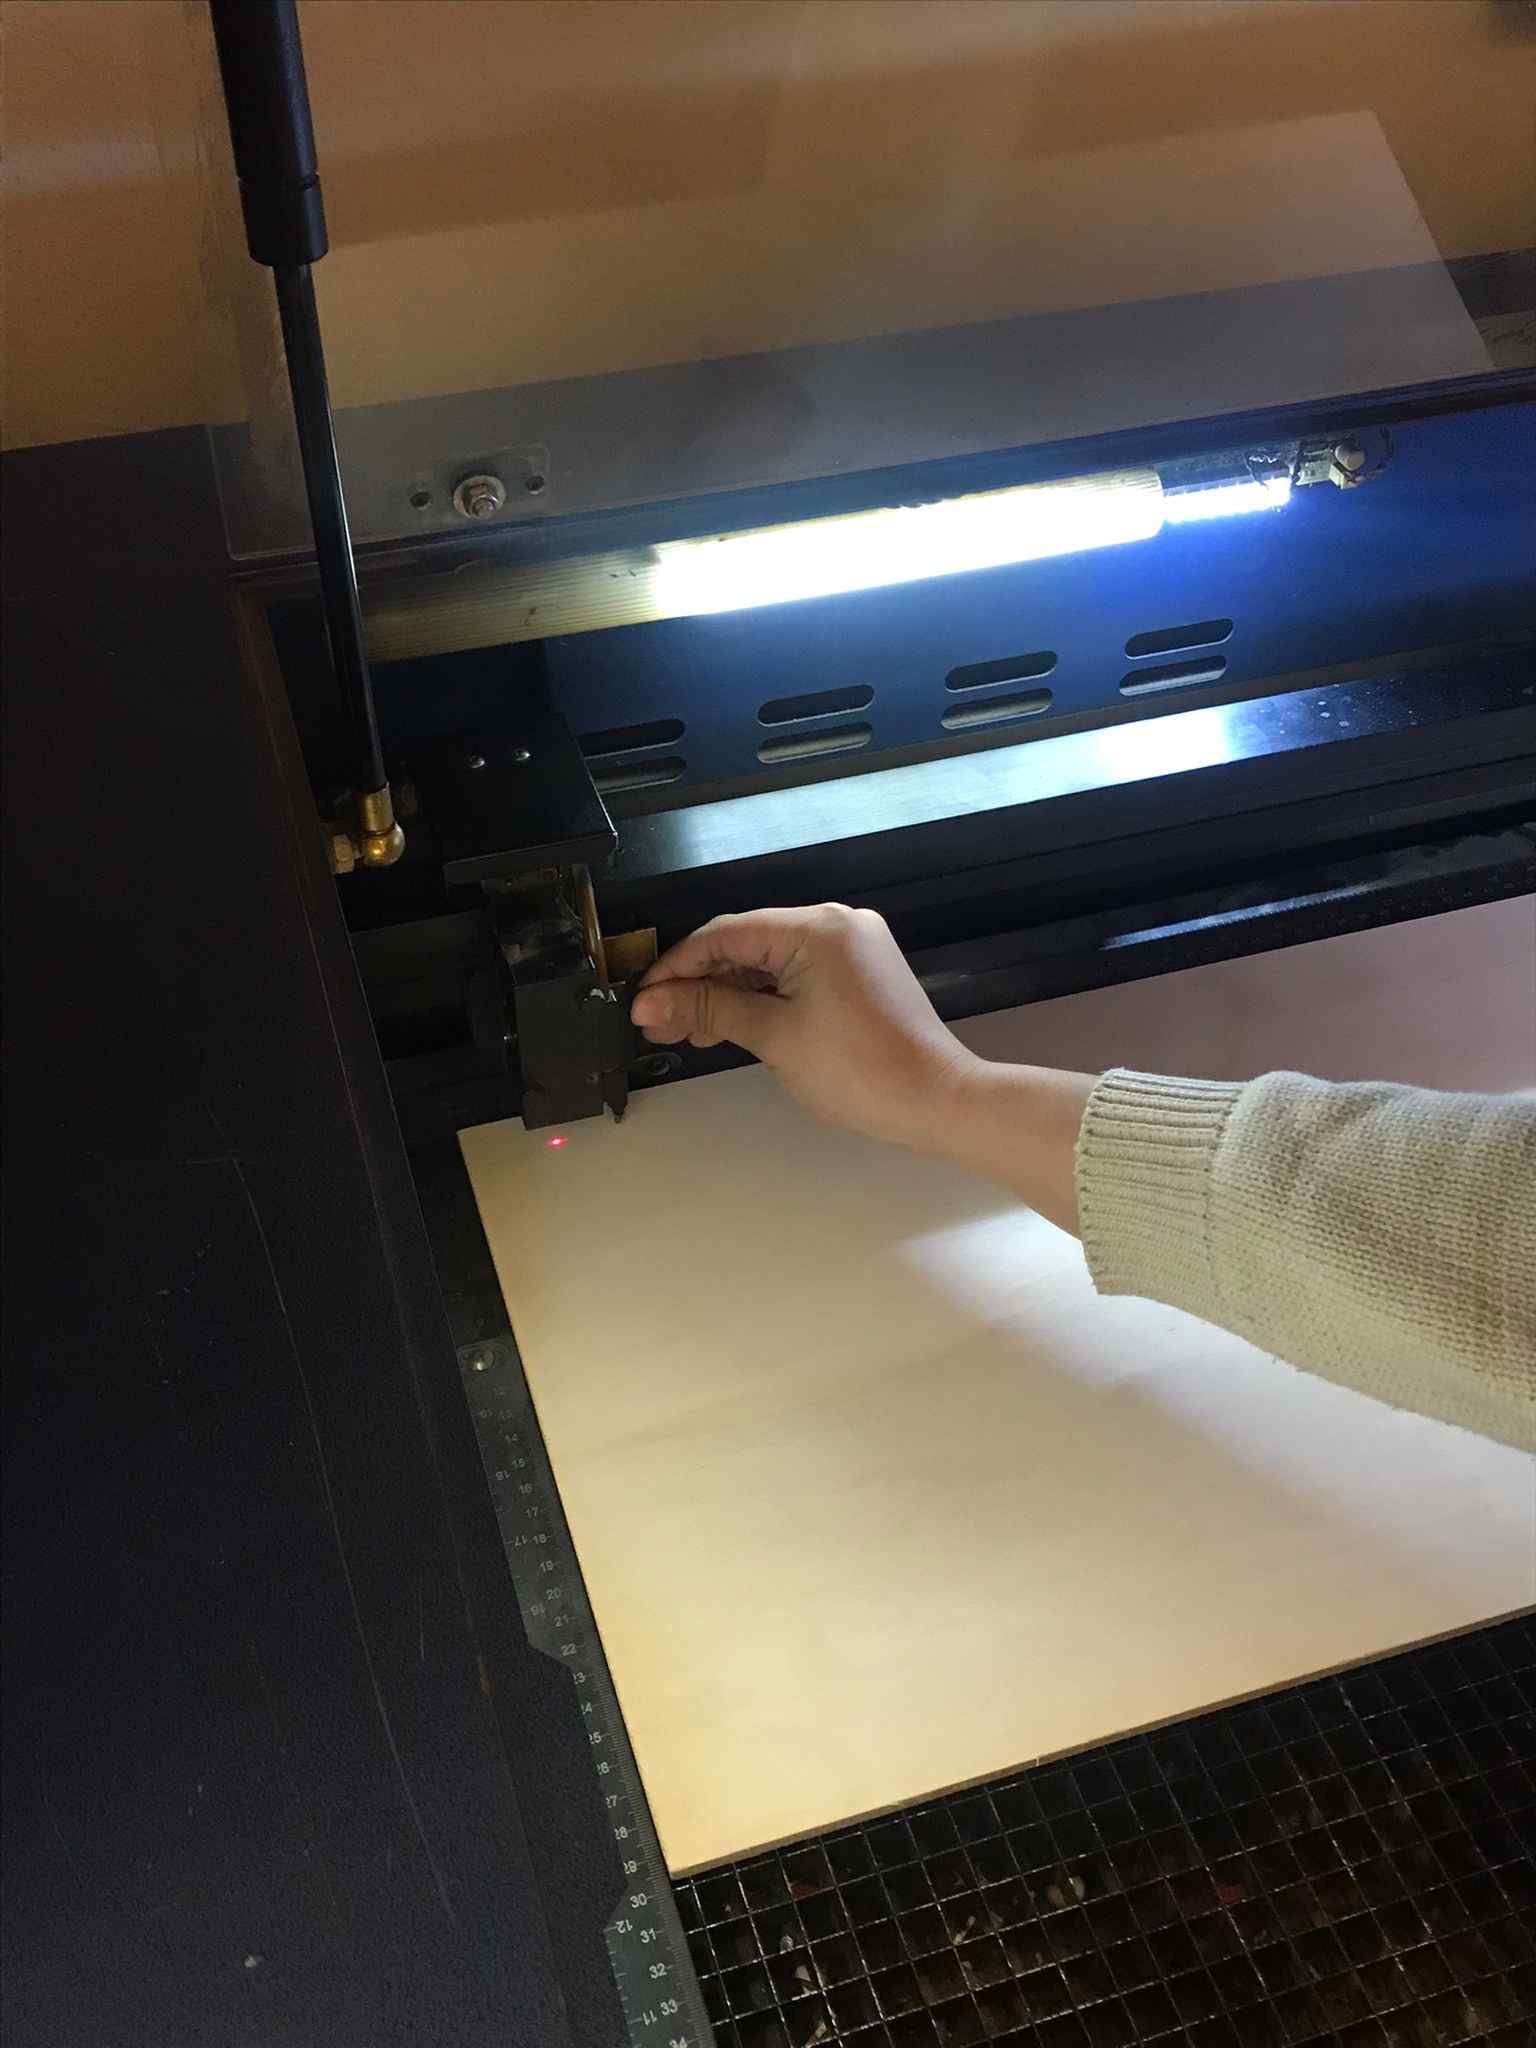
I was in a hurry, I have to admit: I had budgeted an afternoon to do vynil cutter and laser cutter in the workshop but time was running out. I exported the file to dxf to import into Rhino. I chose the material, a 6mm wood which was fine as the holes were 5.5mm and I anticipated that the kerf would eat away some material.
I placed the wood in the machine after turning it on. I checked the laser’s focus with autofocus and then went back to Rhino.
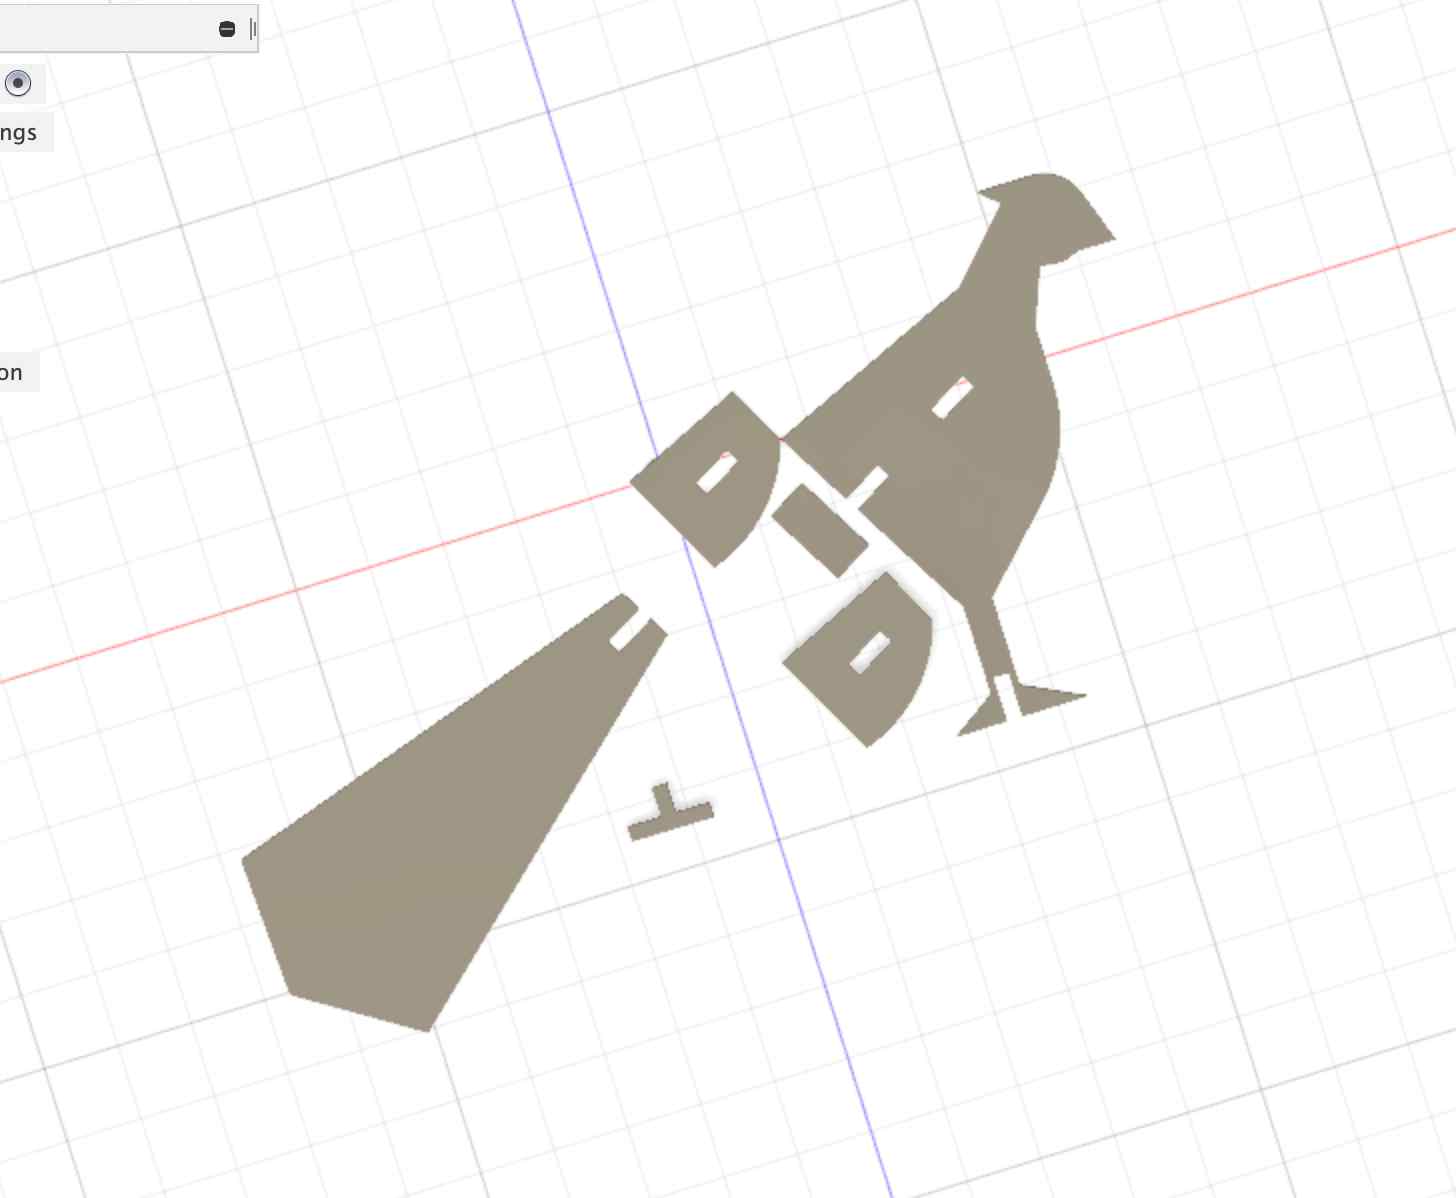
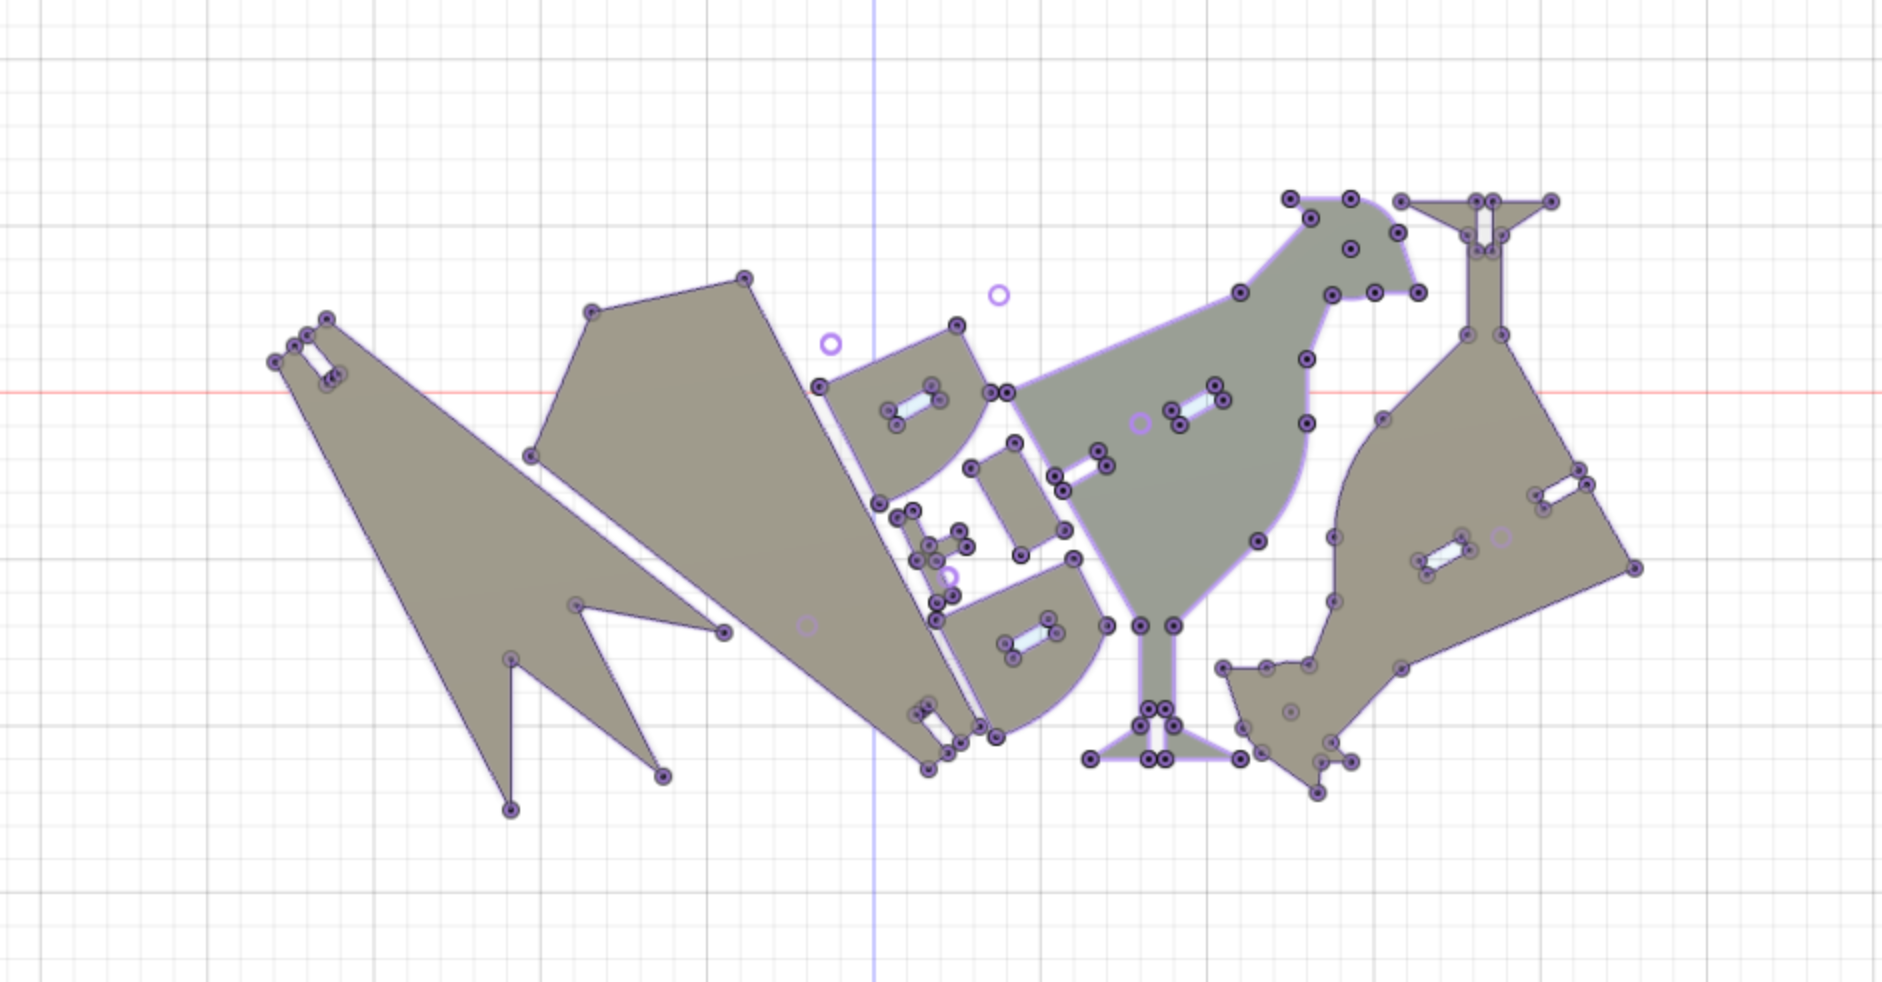
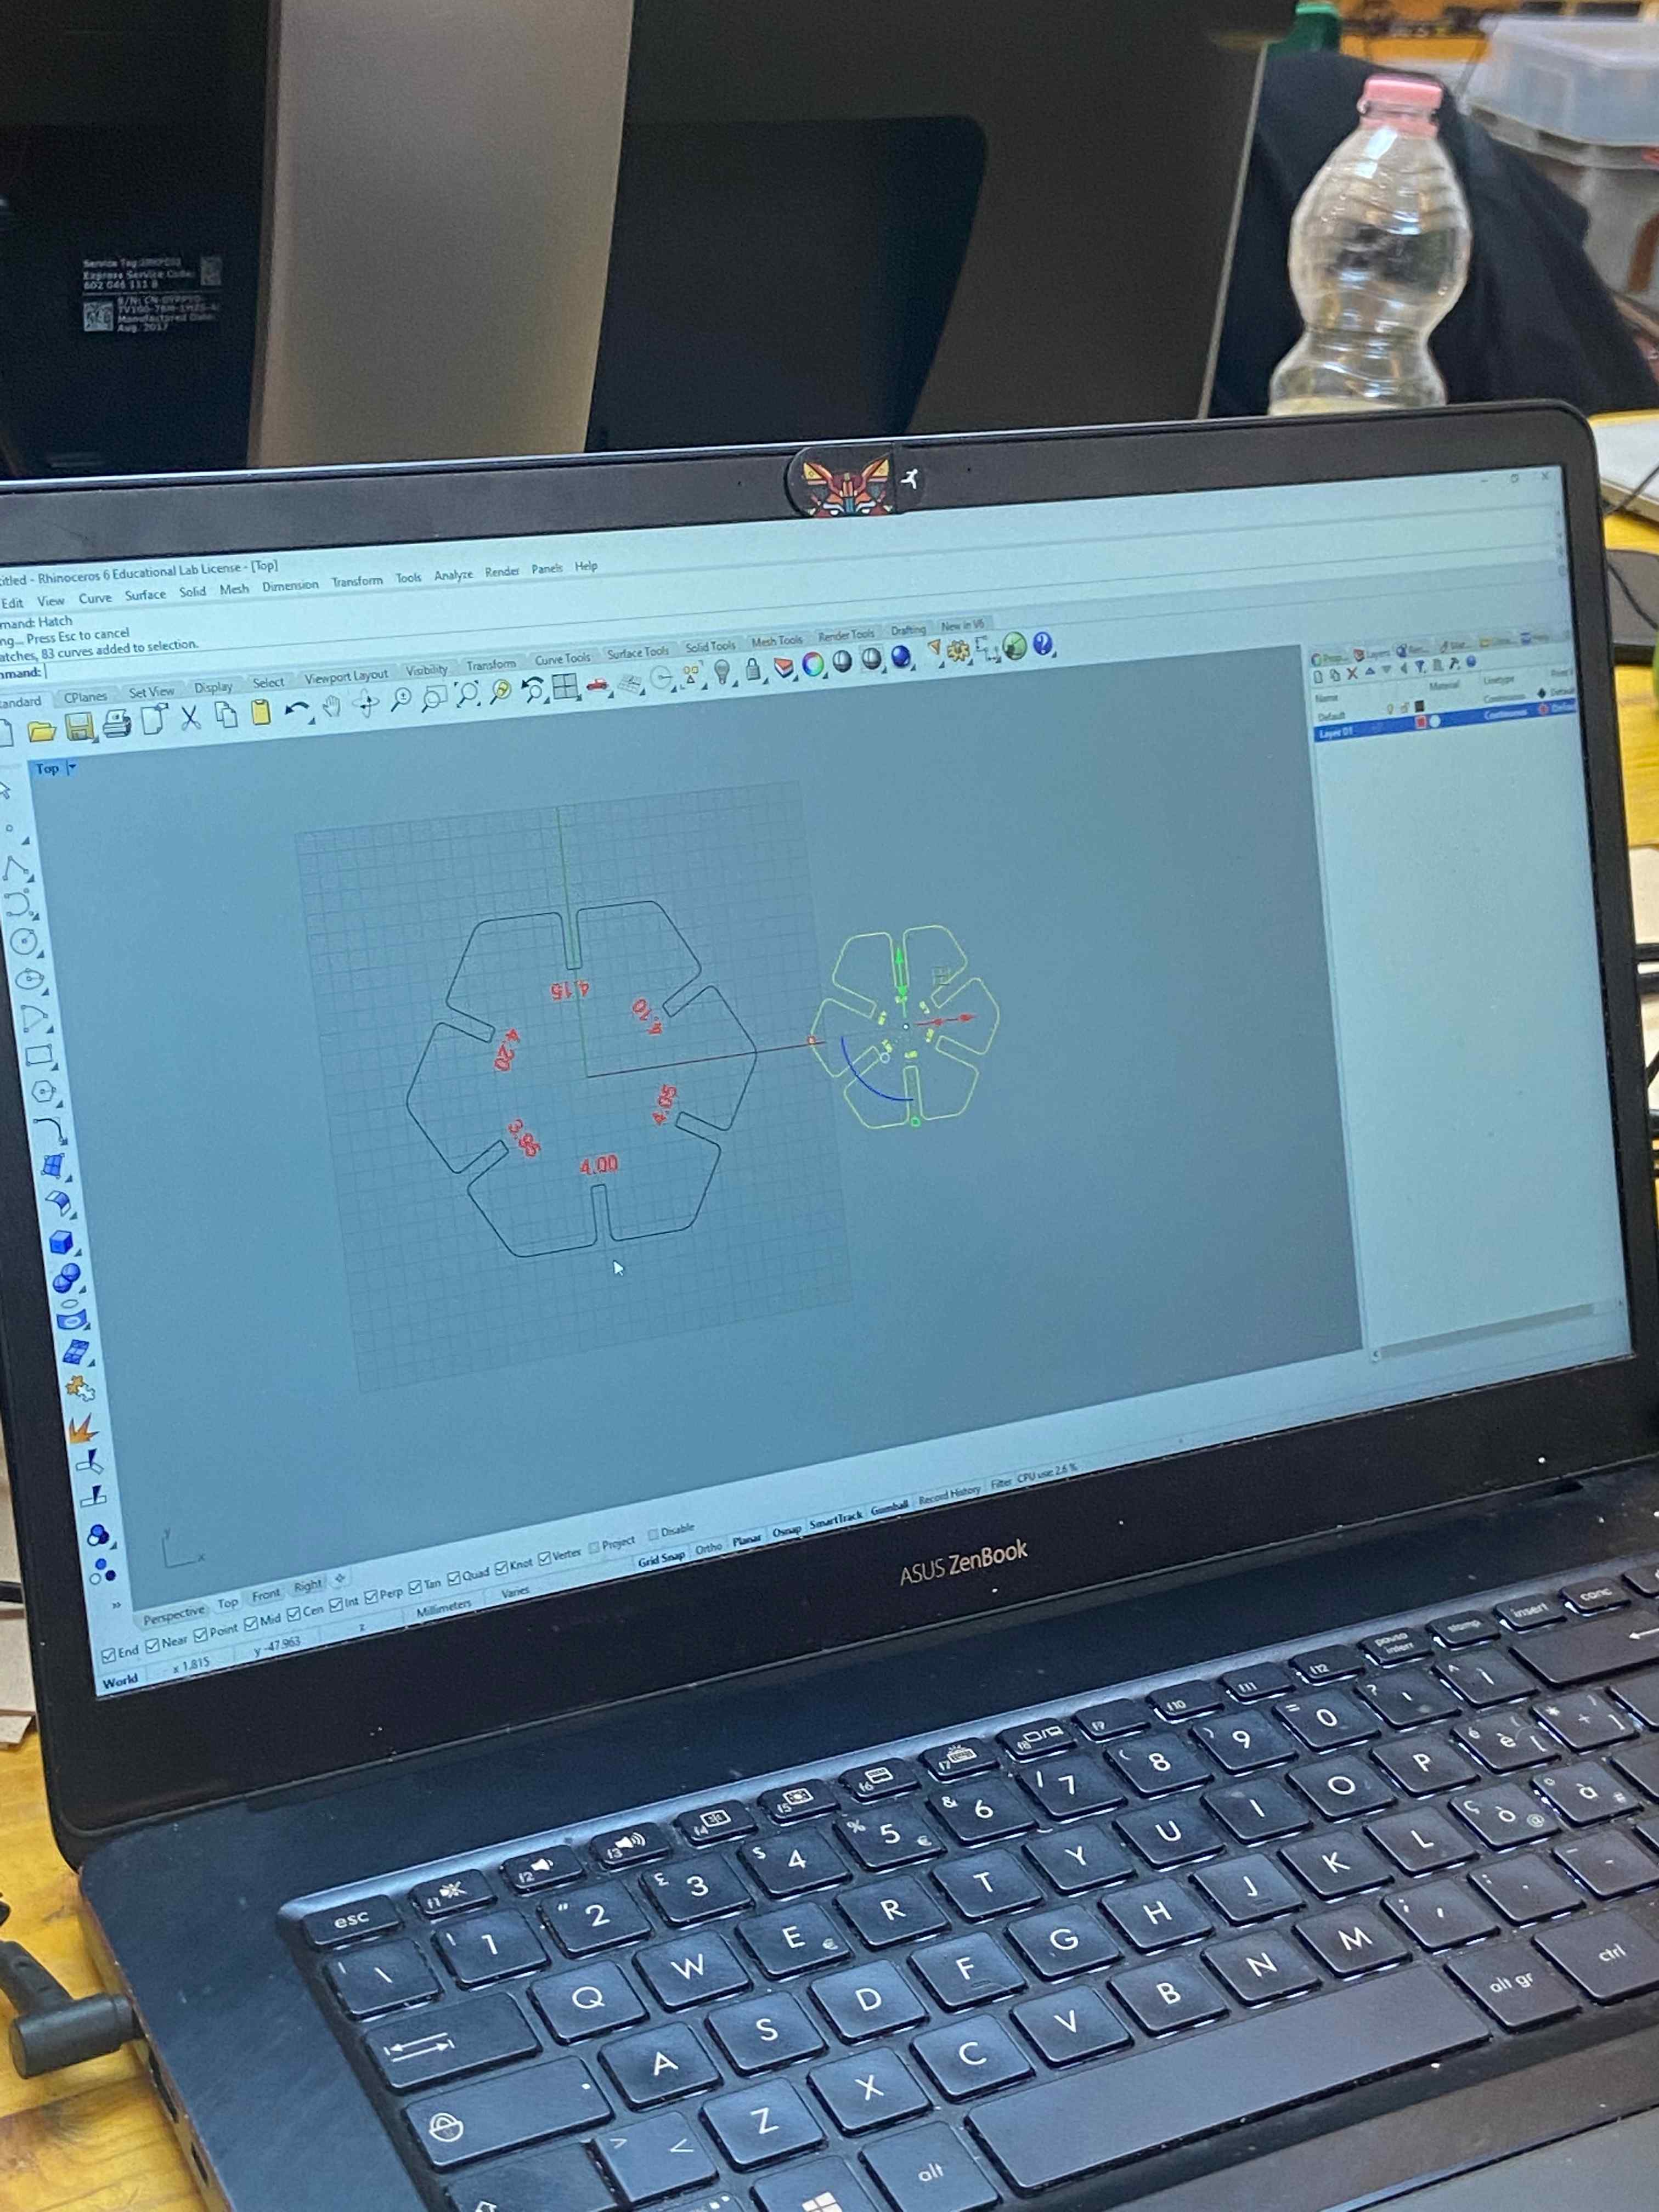
Once I saw the dxf imported in Rhino, I knew something was wrong. Rhino saw my solid objects as meshes so it kept all the lines inside the pieces. At that point, I just wanted to see if the dimension of my pieces were good or not, no matter what.
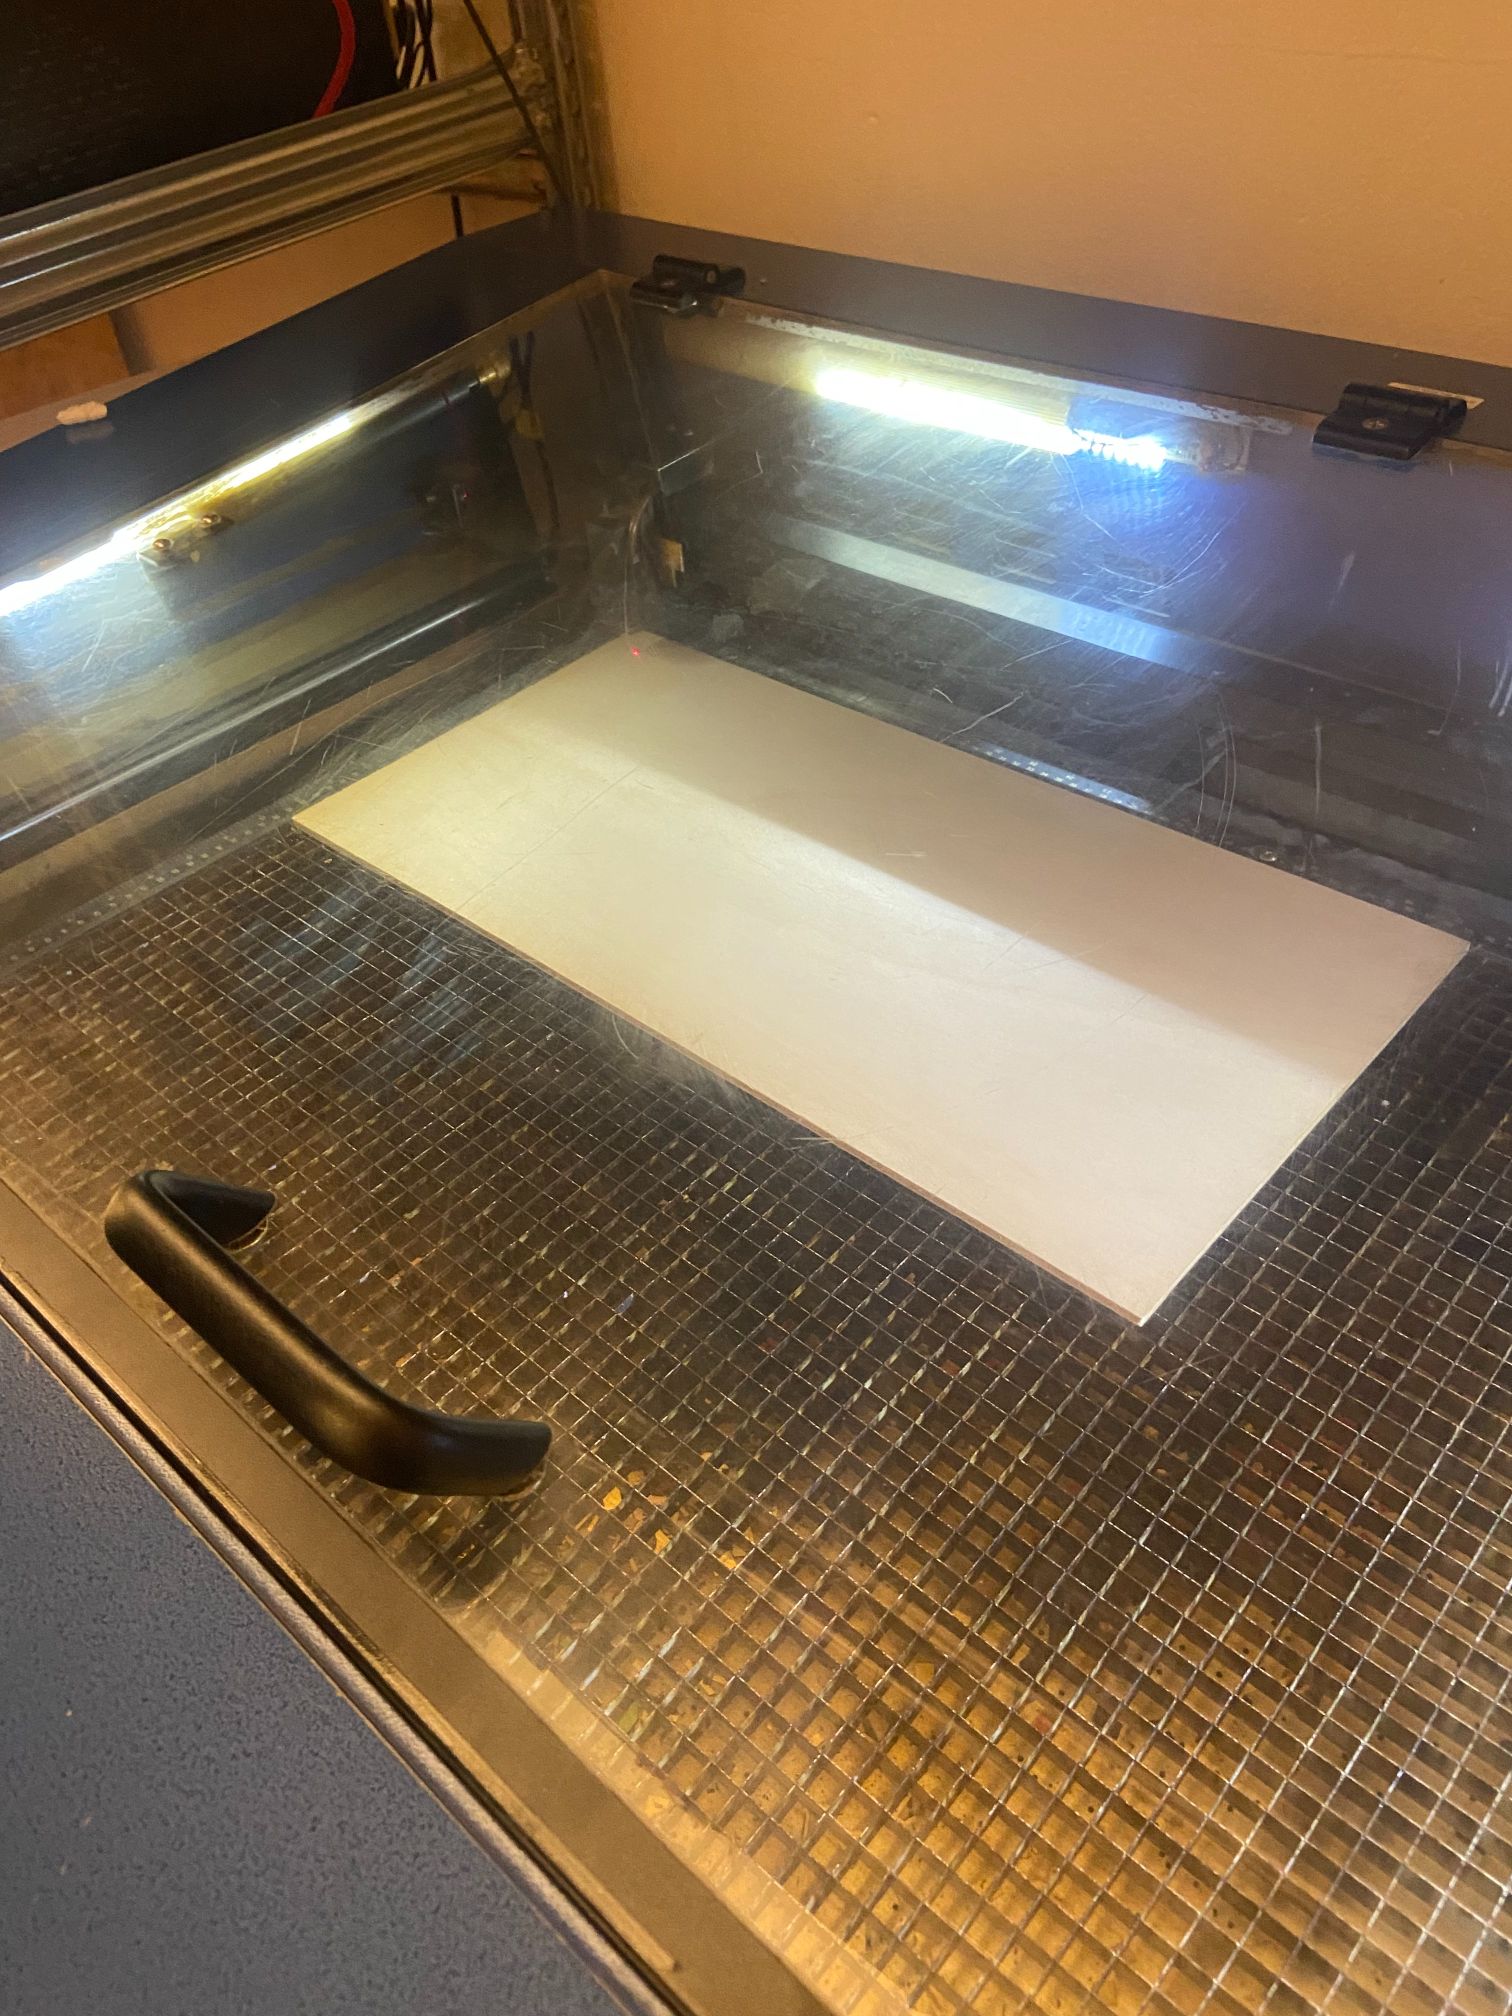
I set the Default layer in Rhino at the speed of 2.0 and 100% power and I started to cut.
As I foreseen, the meshes were a problem beause Rhino recognized all the lines as lines to cut therefore it cut all my beautiful pheasant in pieces.
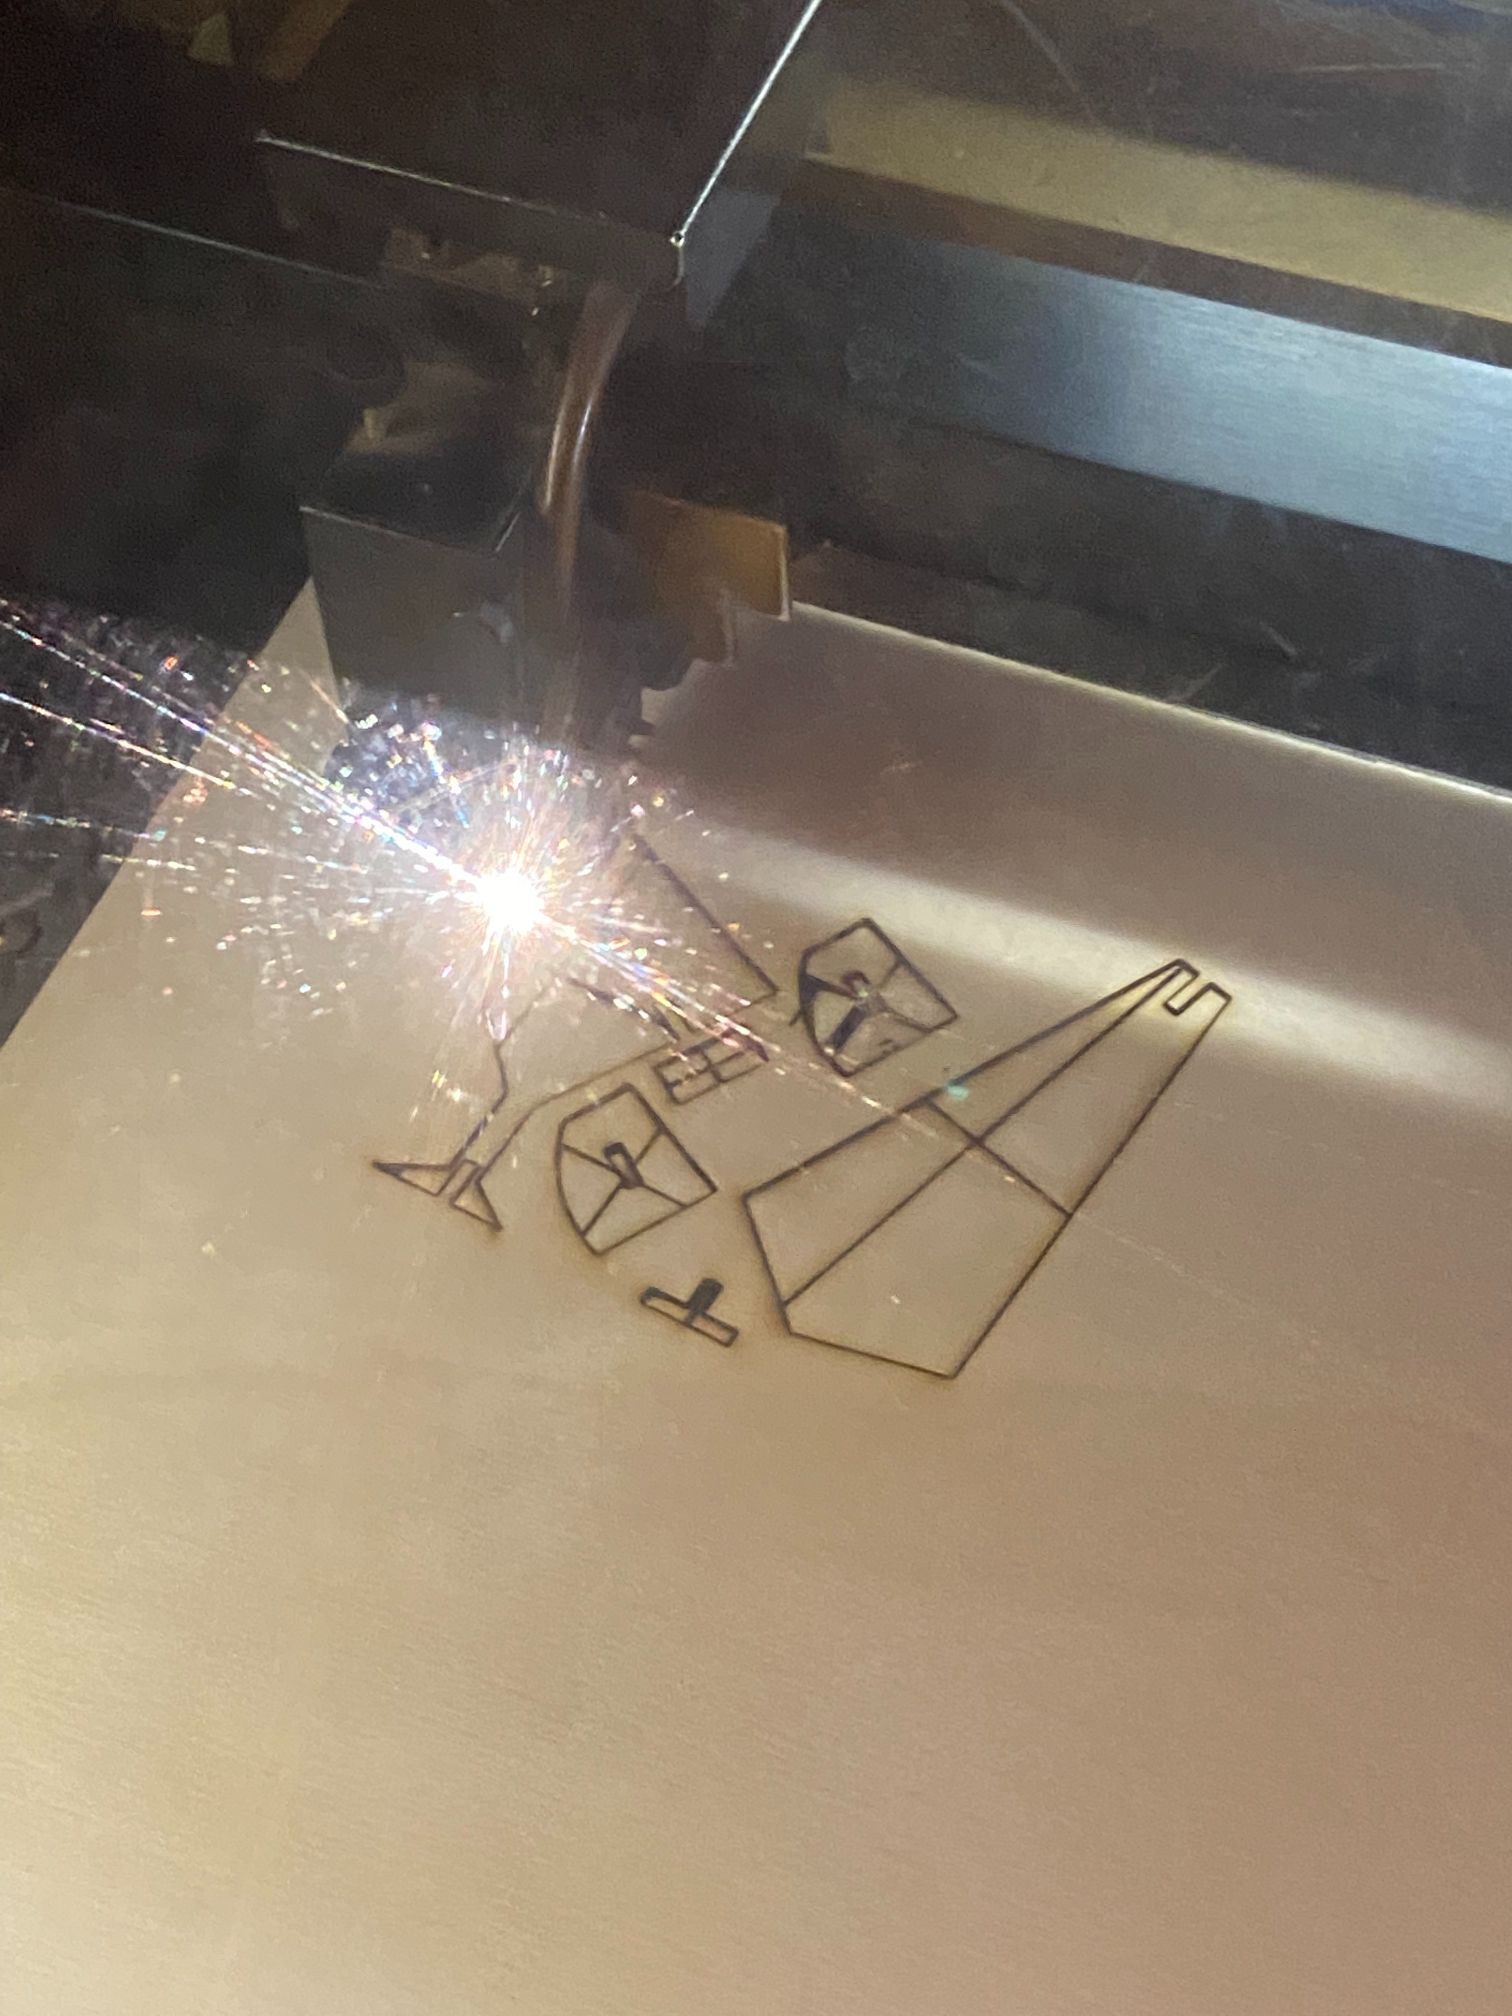
I learned that the meshes are not a good starting point with Rhino but they work pretty well if you want to cut your own heart in pieces looking at you work destroyed.
🐹 update
After some time, I tried again and this time I exported the dxf in the correct way which is:
- create a sketch on a plane in Fusion (I selected a surface among ones of the pieces I had)
- Project all the perimeters of your shape in that sketch
- close the sketch
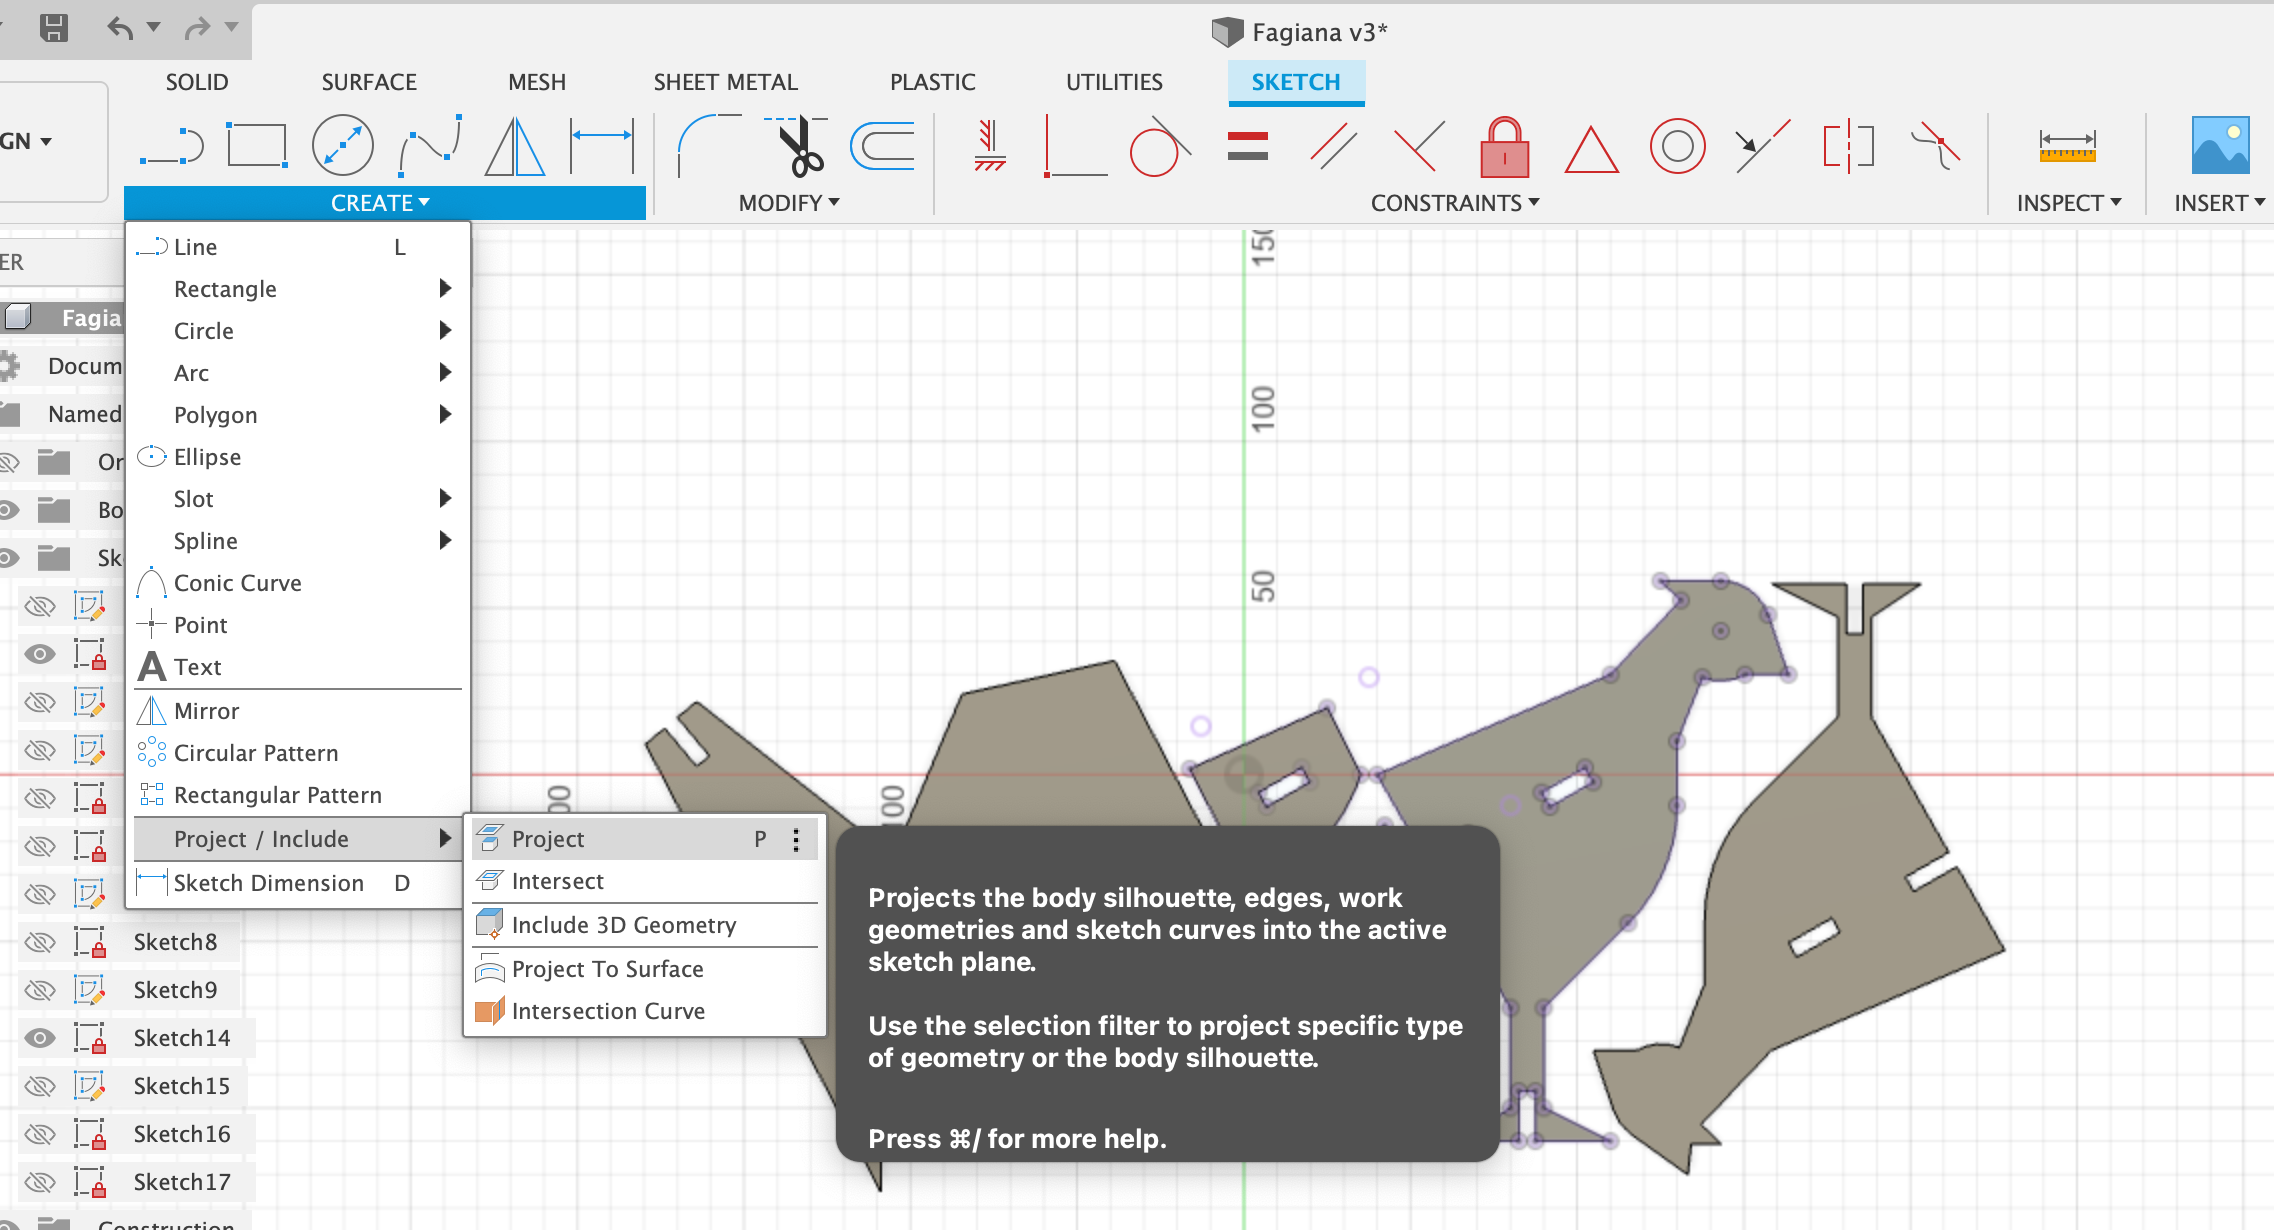
- Go on your sketch, right click and select export as dxf.
With that dxf you can go in Rhino and laser it correctly.
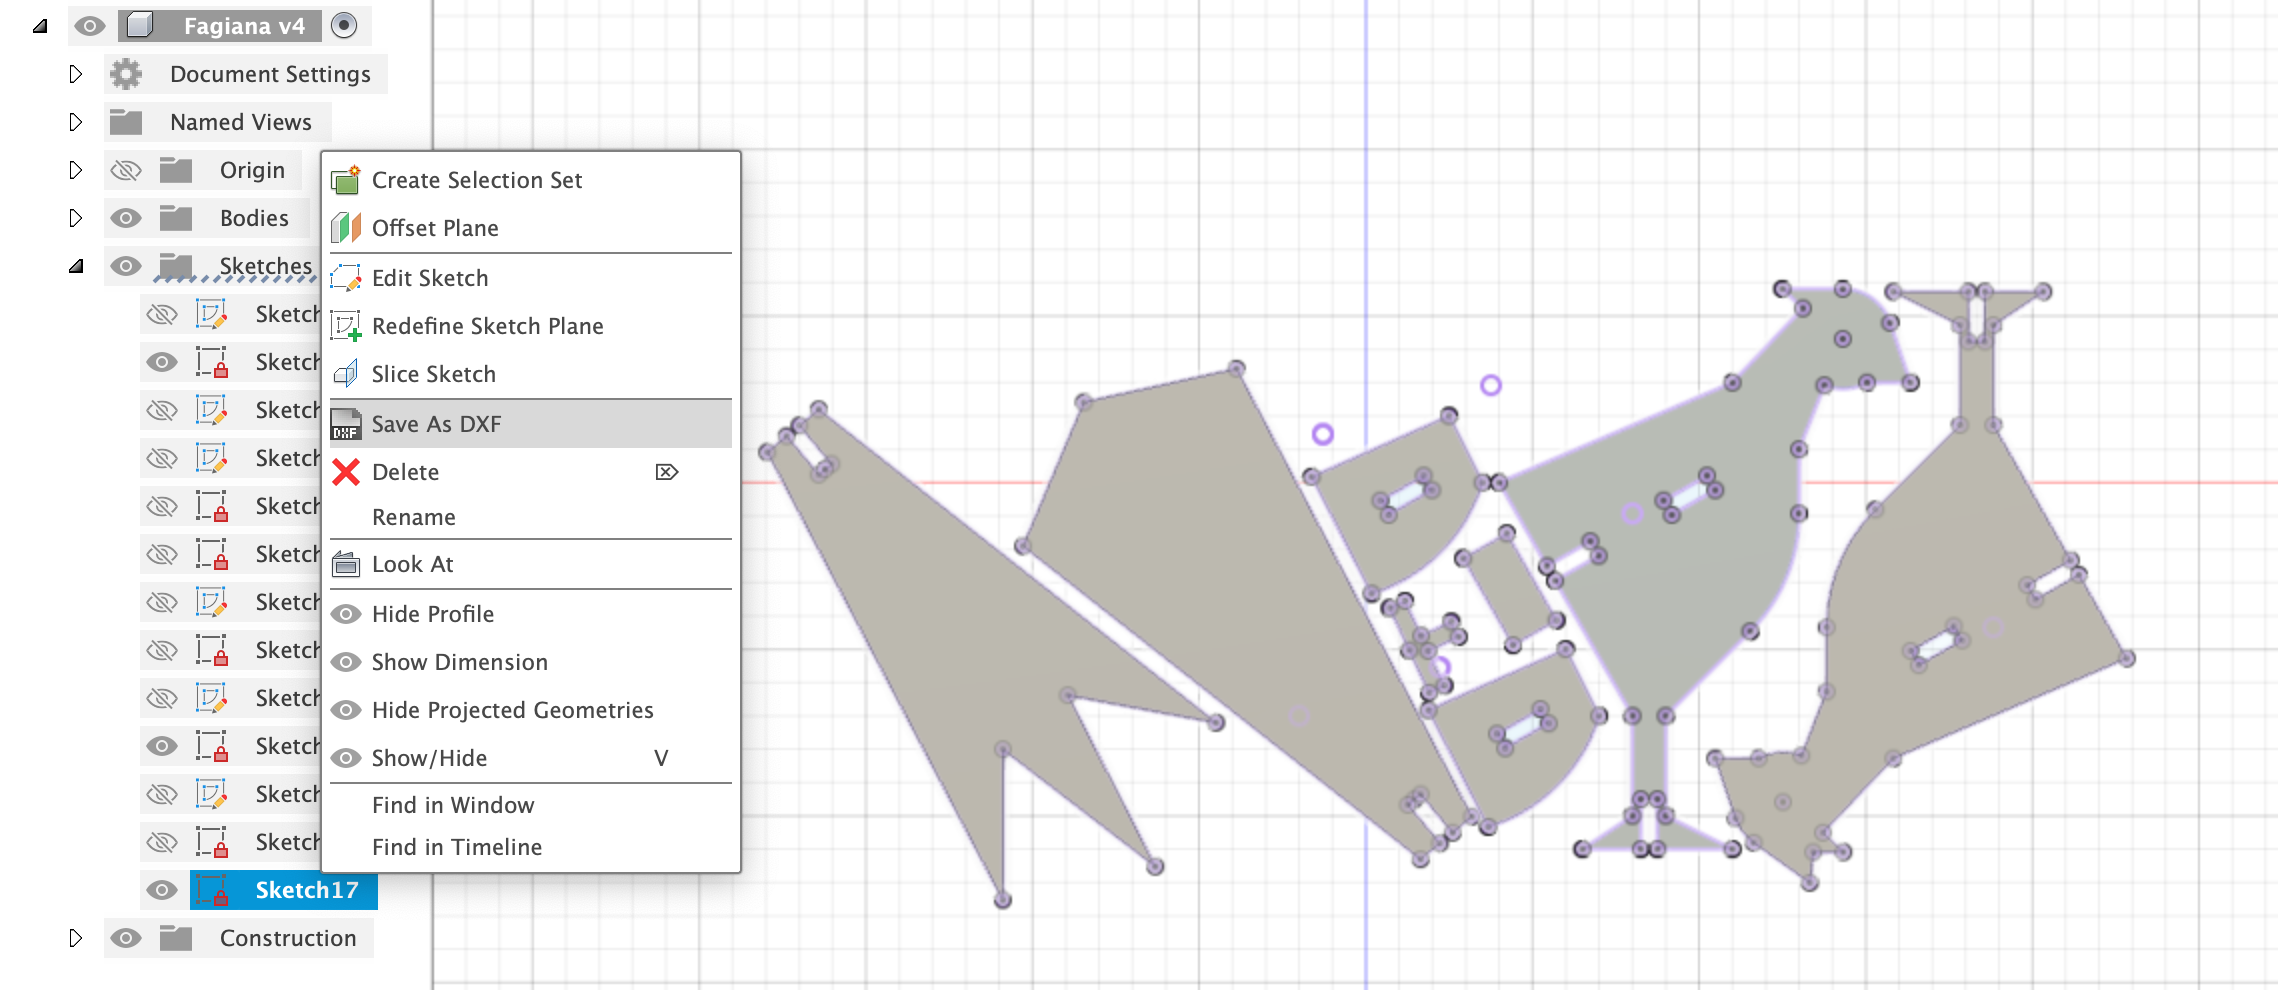
That’s exactly what I did following all the previous steps.
This are the final results with different configurations:
👩👩👦 Group assignment
For the group assignment, we did several tries. First of all, we wanted to change the speed and the power on different materials to see the difference.
We started by drawing on Rhino two hexagons with joints. We drew the joints with depth 15 and did a polar array. We selected 4mm wood and made each joint, starting from 3.95mm wide, with an increment of .05 for each.
We set the power for the engraving level in Rhino at speed 0.9% and power 100%. We started with the fear and the fascination of setting something on fire, and well, we managed to:
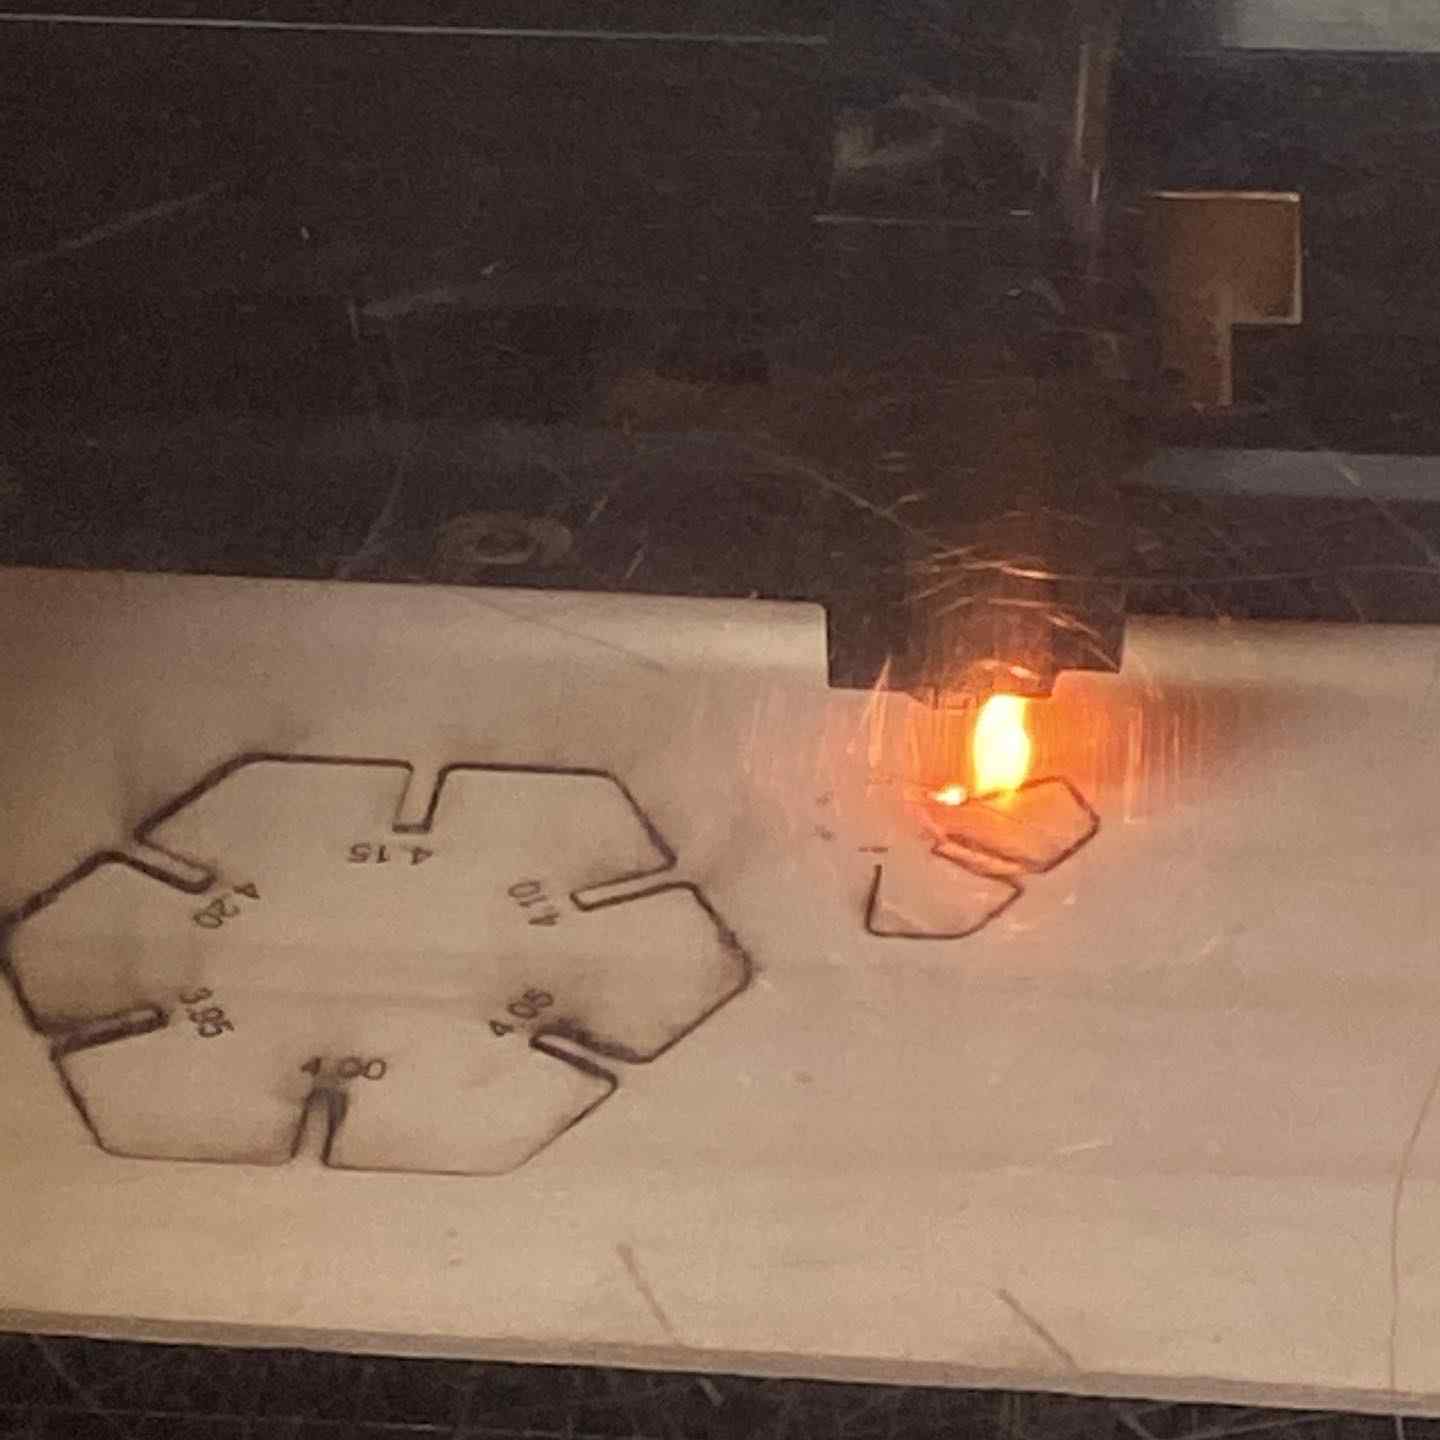
We understood that the speed was too slow and decided to do more tests to be compared in this case, as well as the engraving difference.