10. Molding and casting
- Design a 3D mould around the stock and tooling that you’ll be using, mill it (rough cut + (at least) three-axis finish cut), and use it to cast parts.
🌵 Designing the cactus
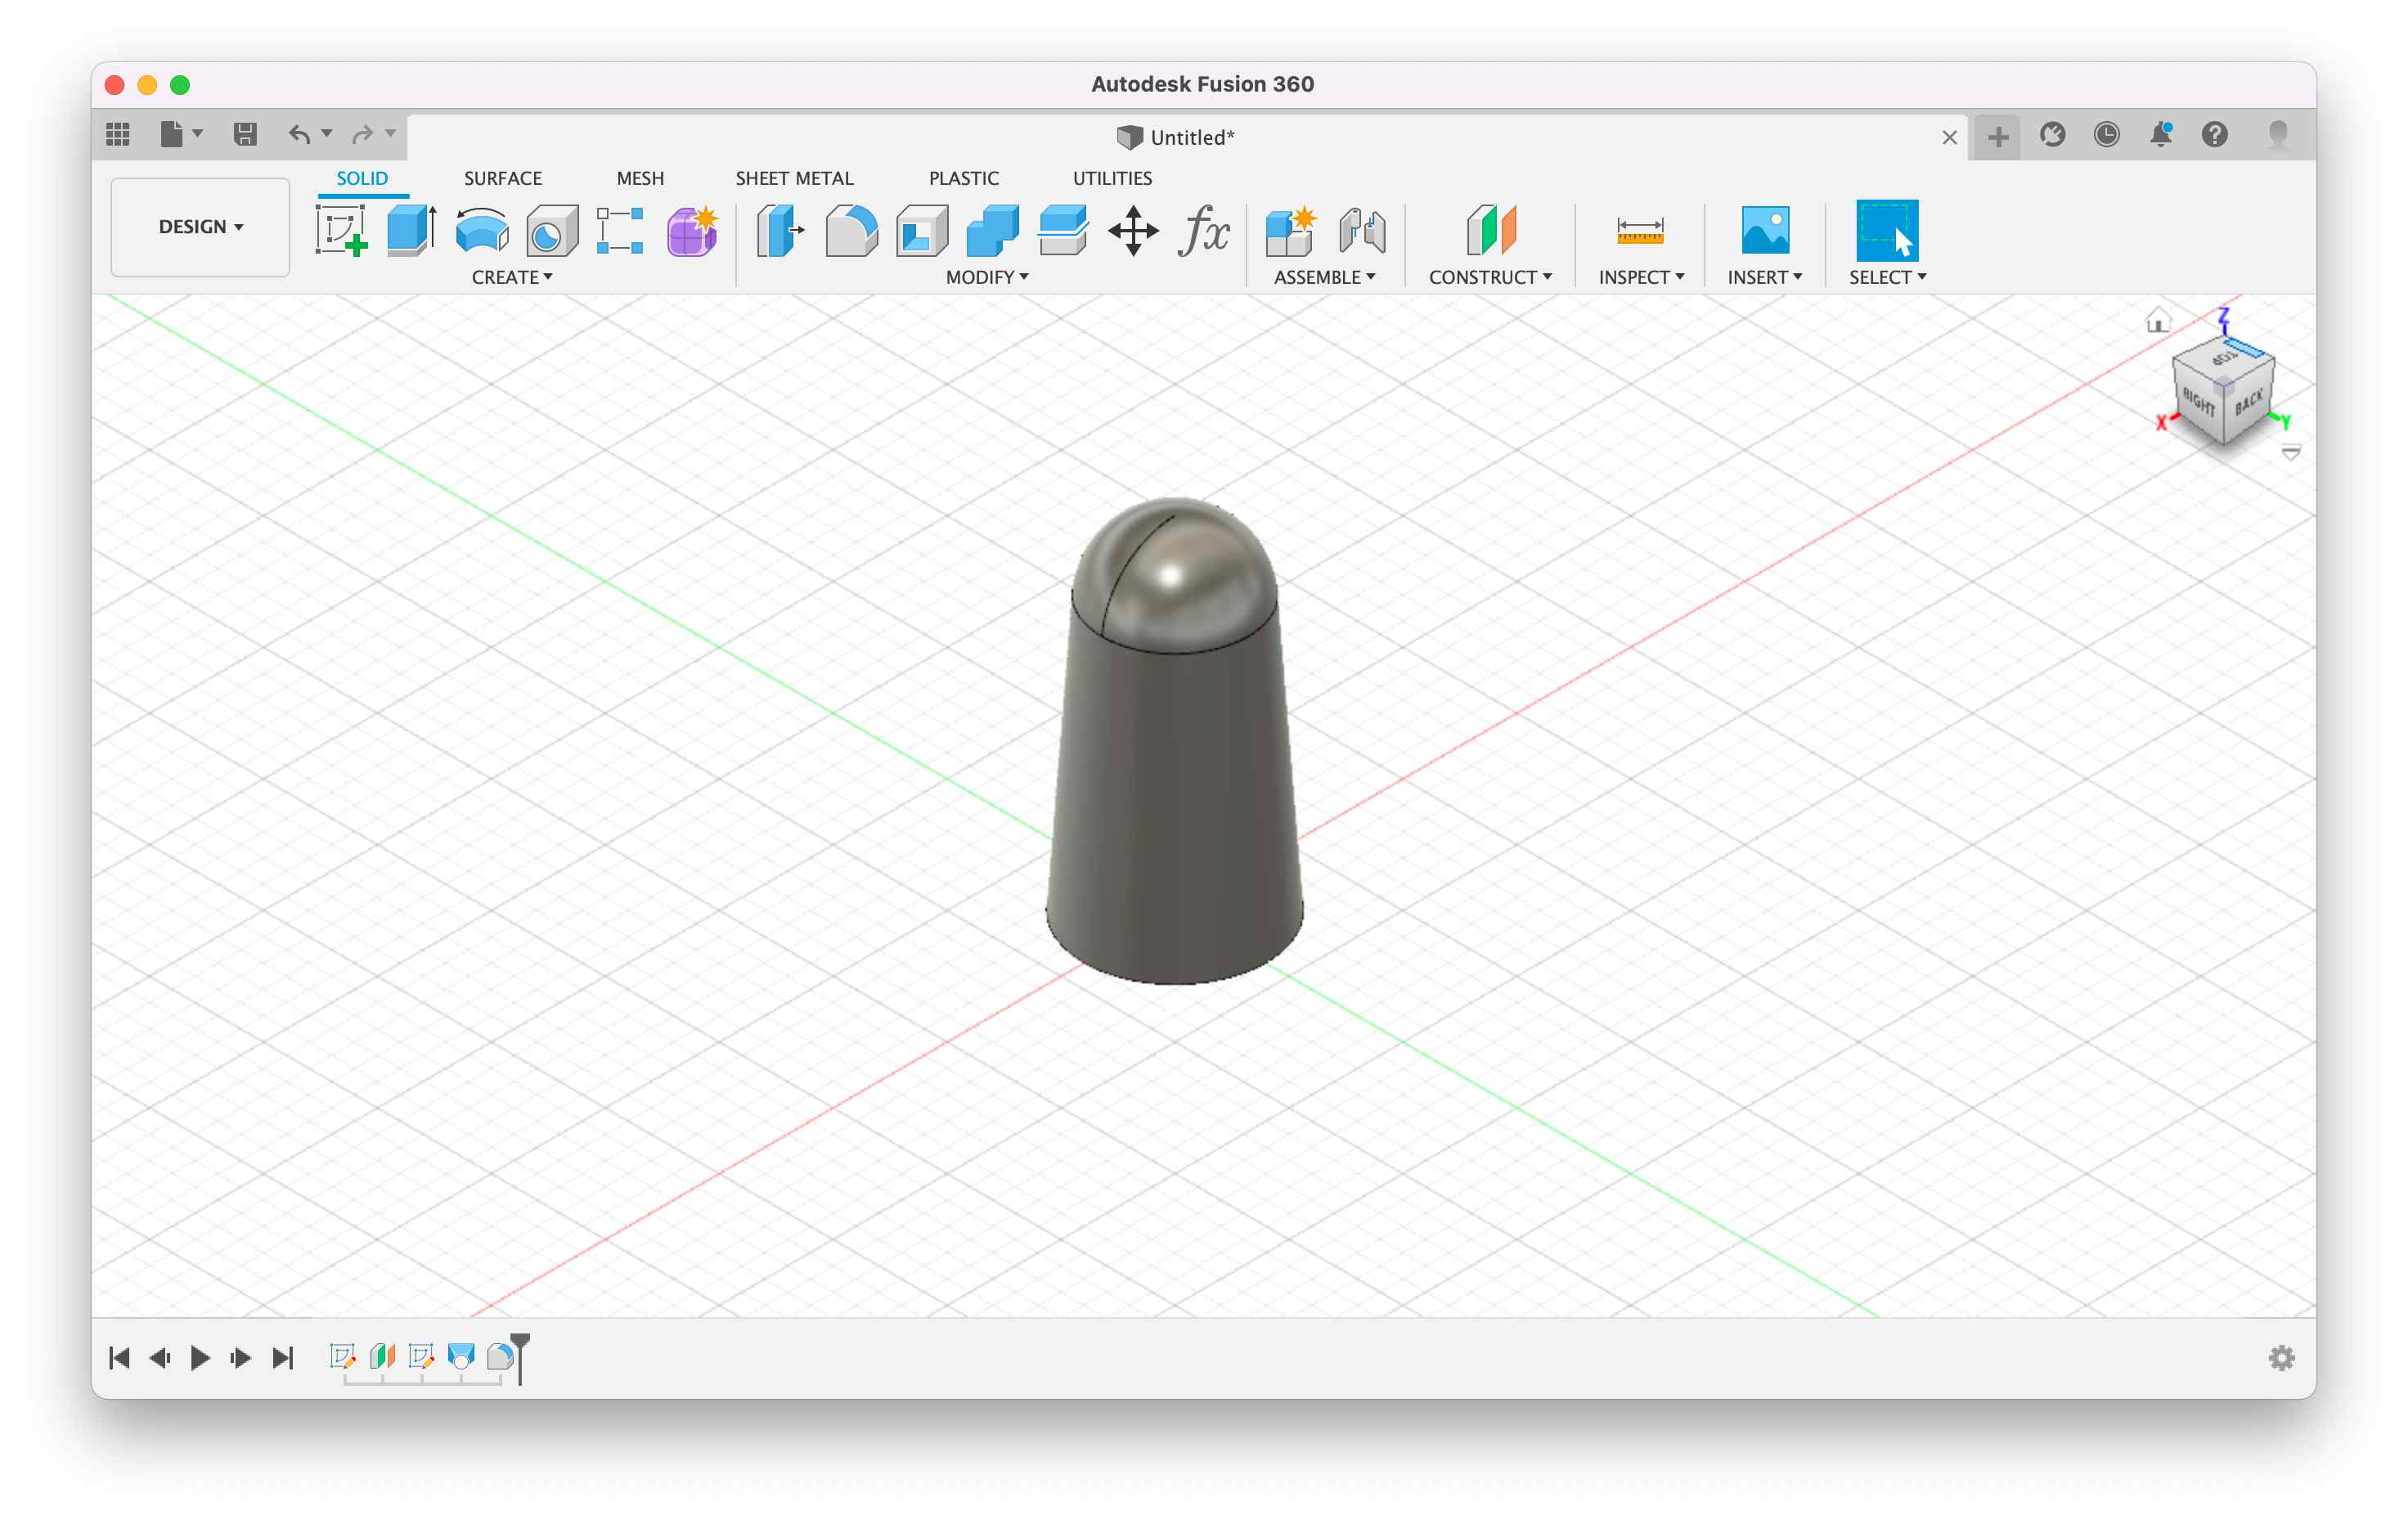
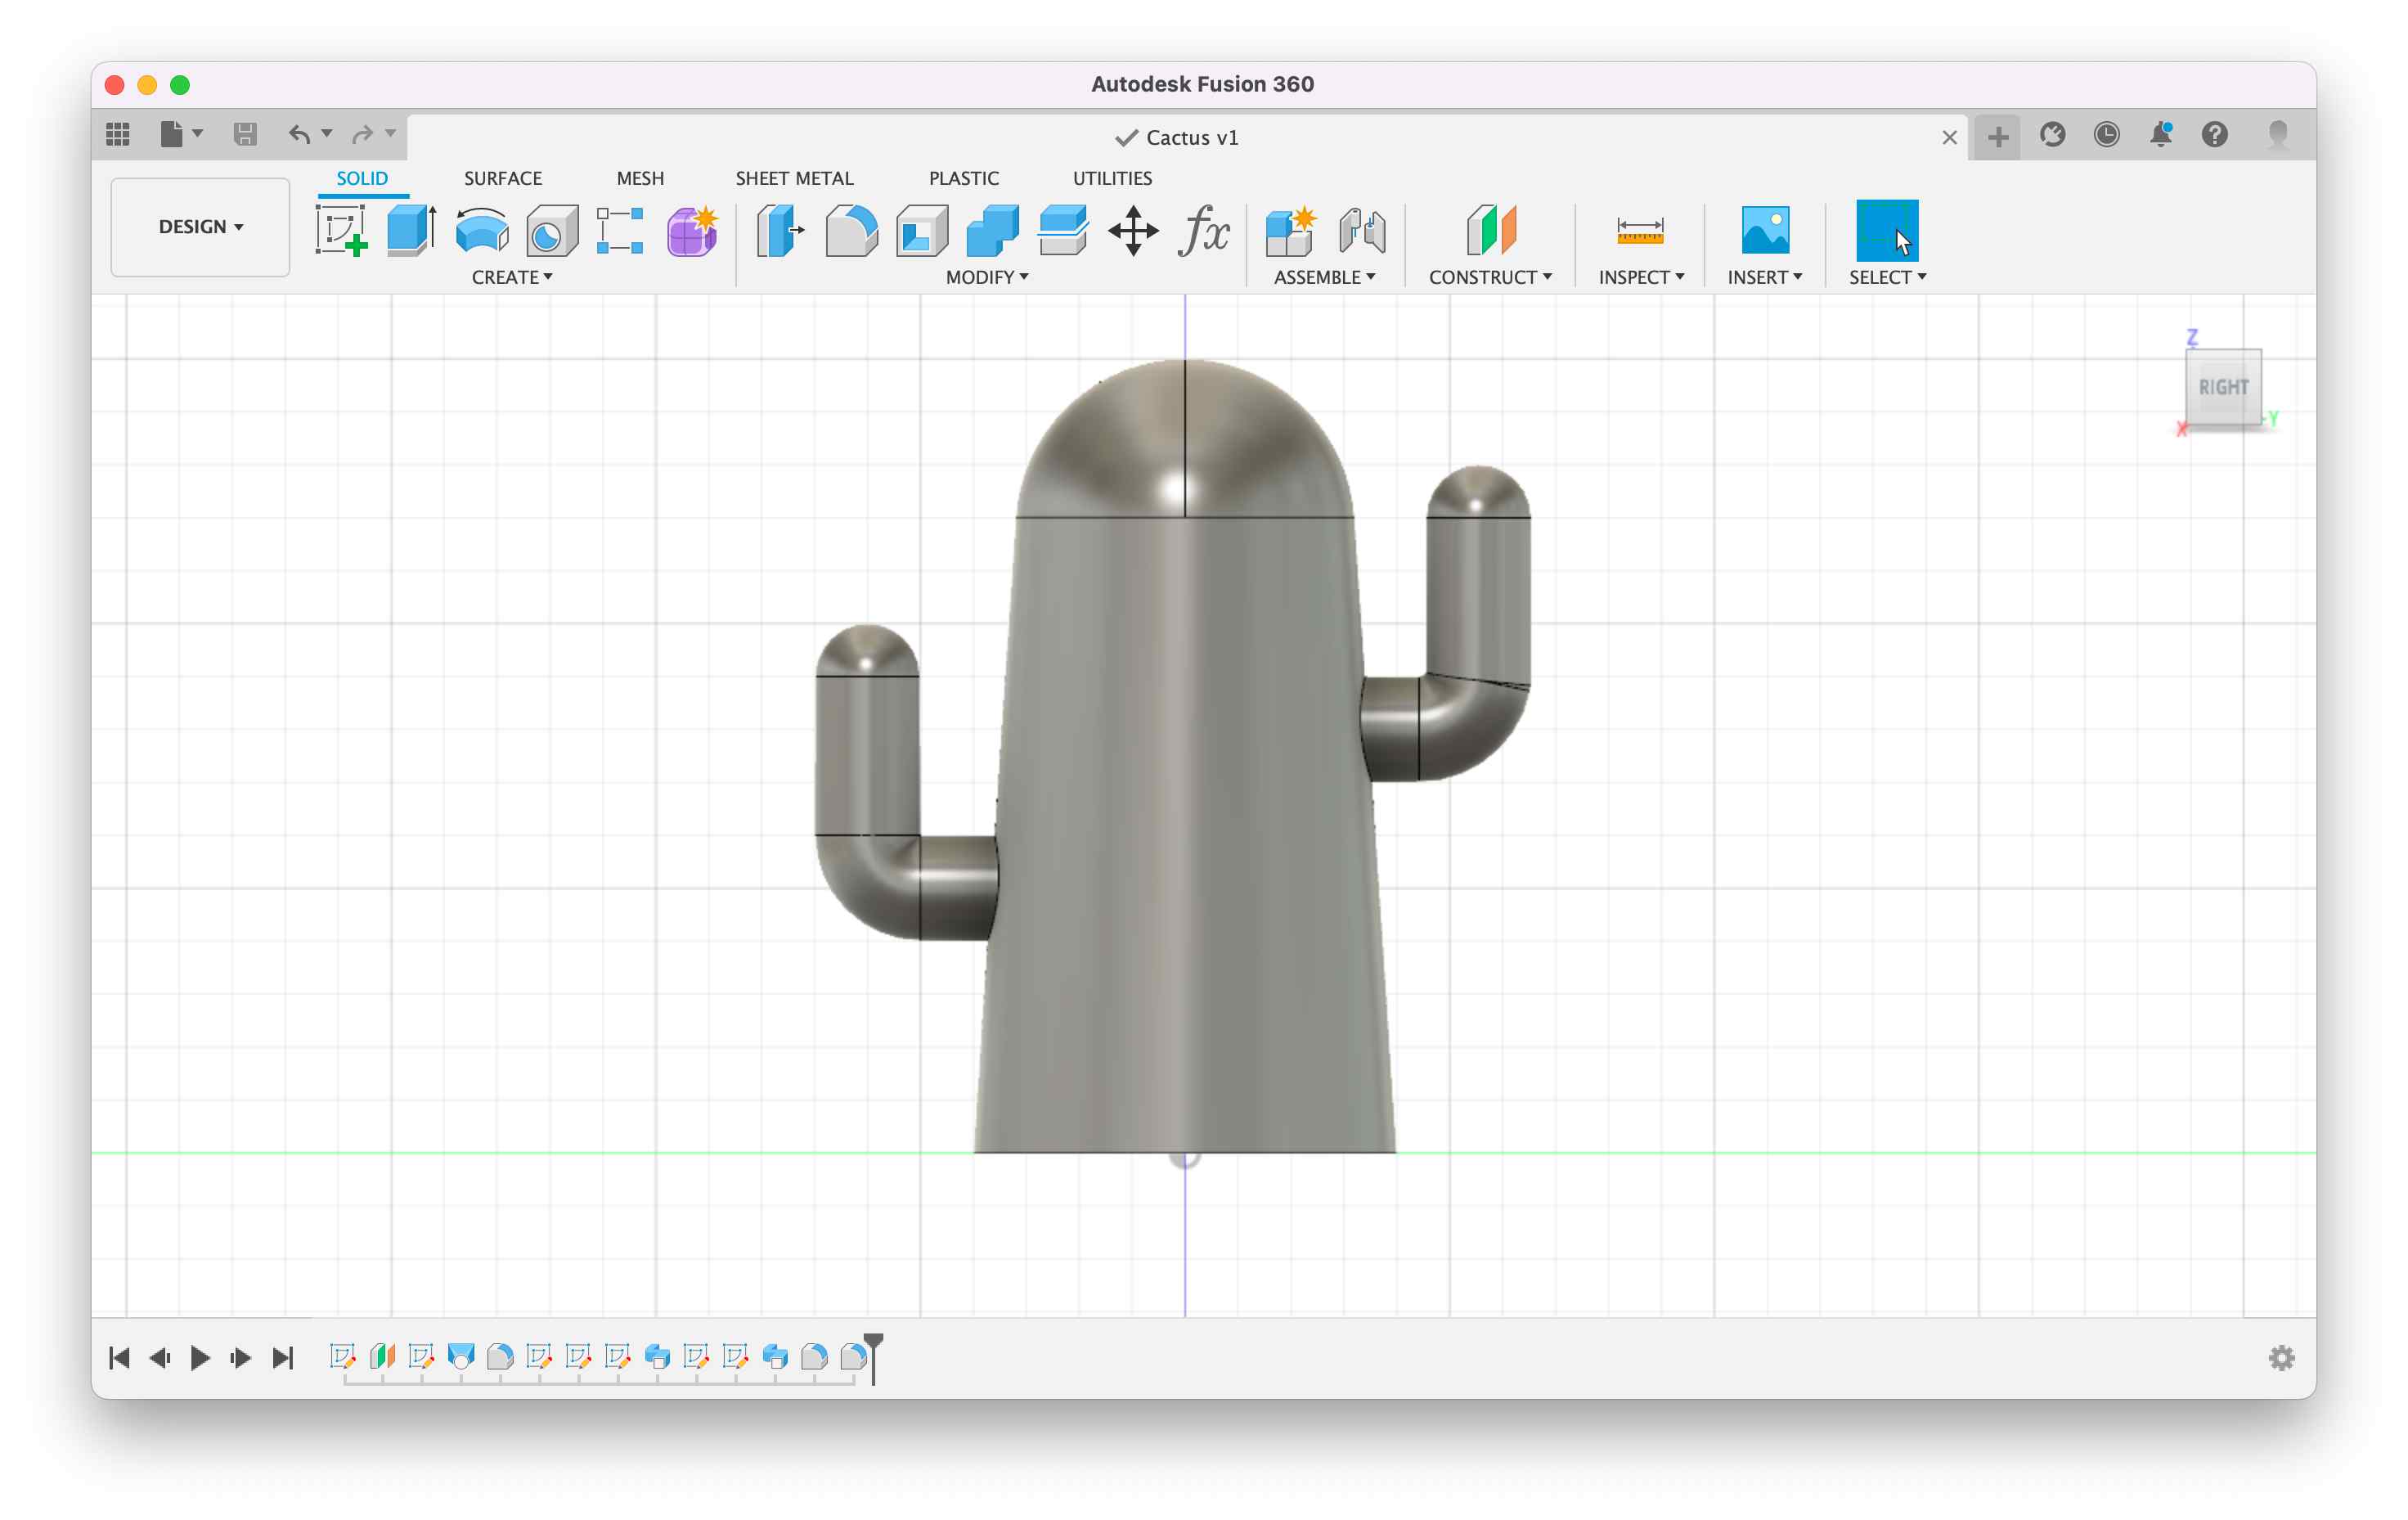
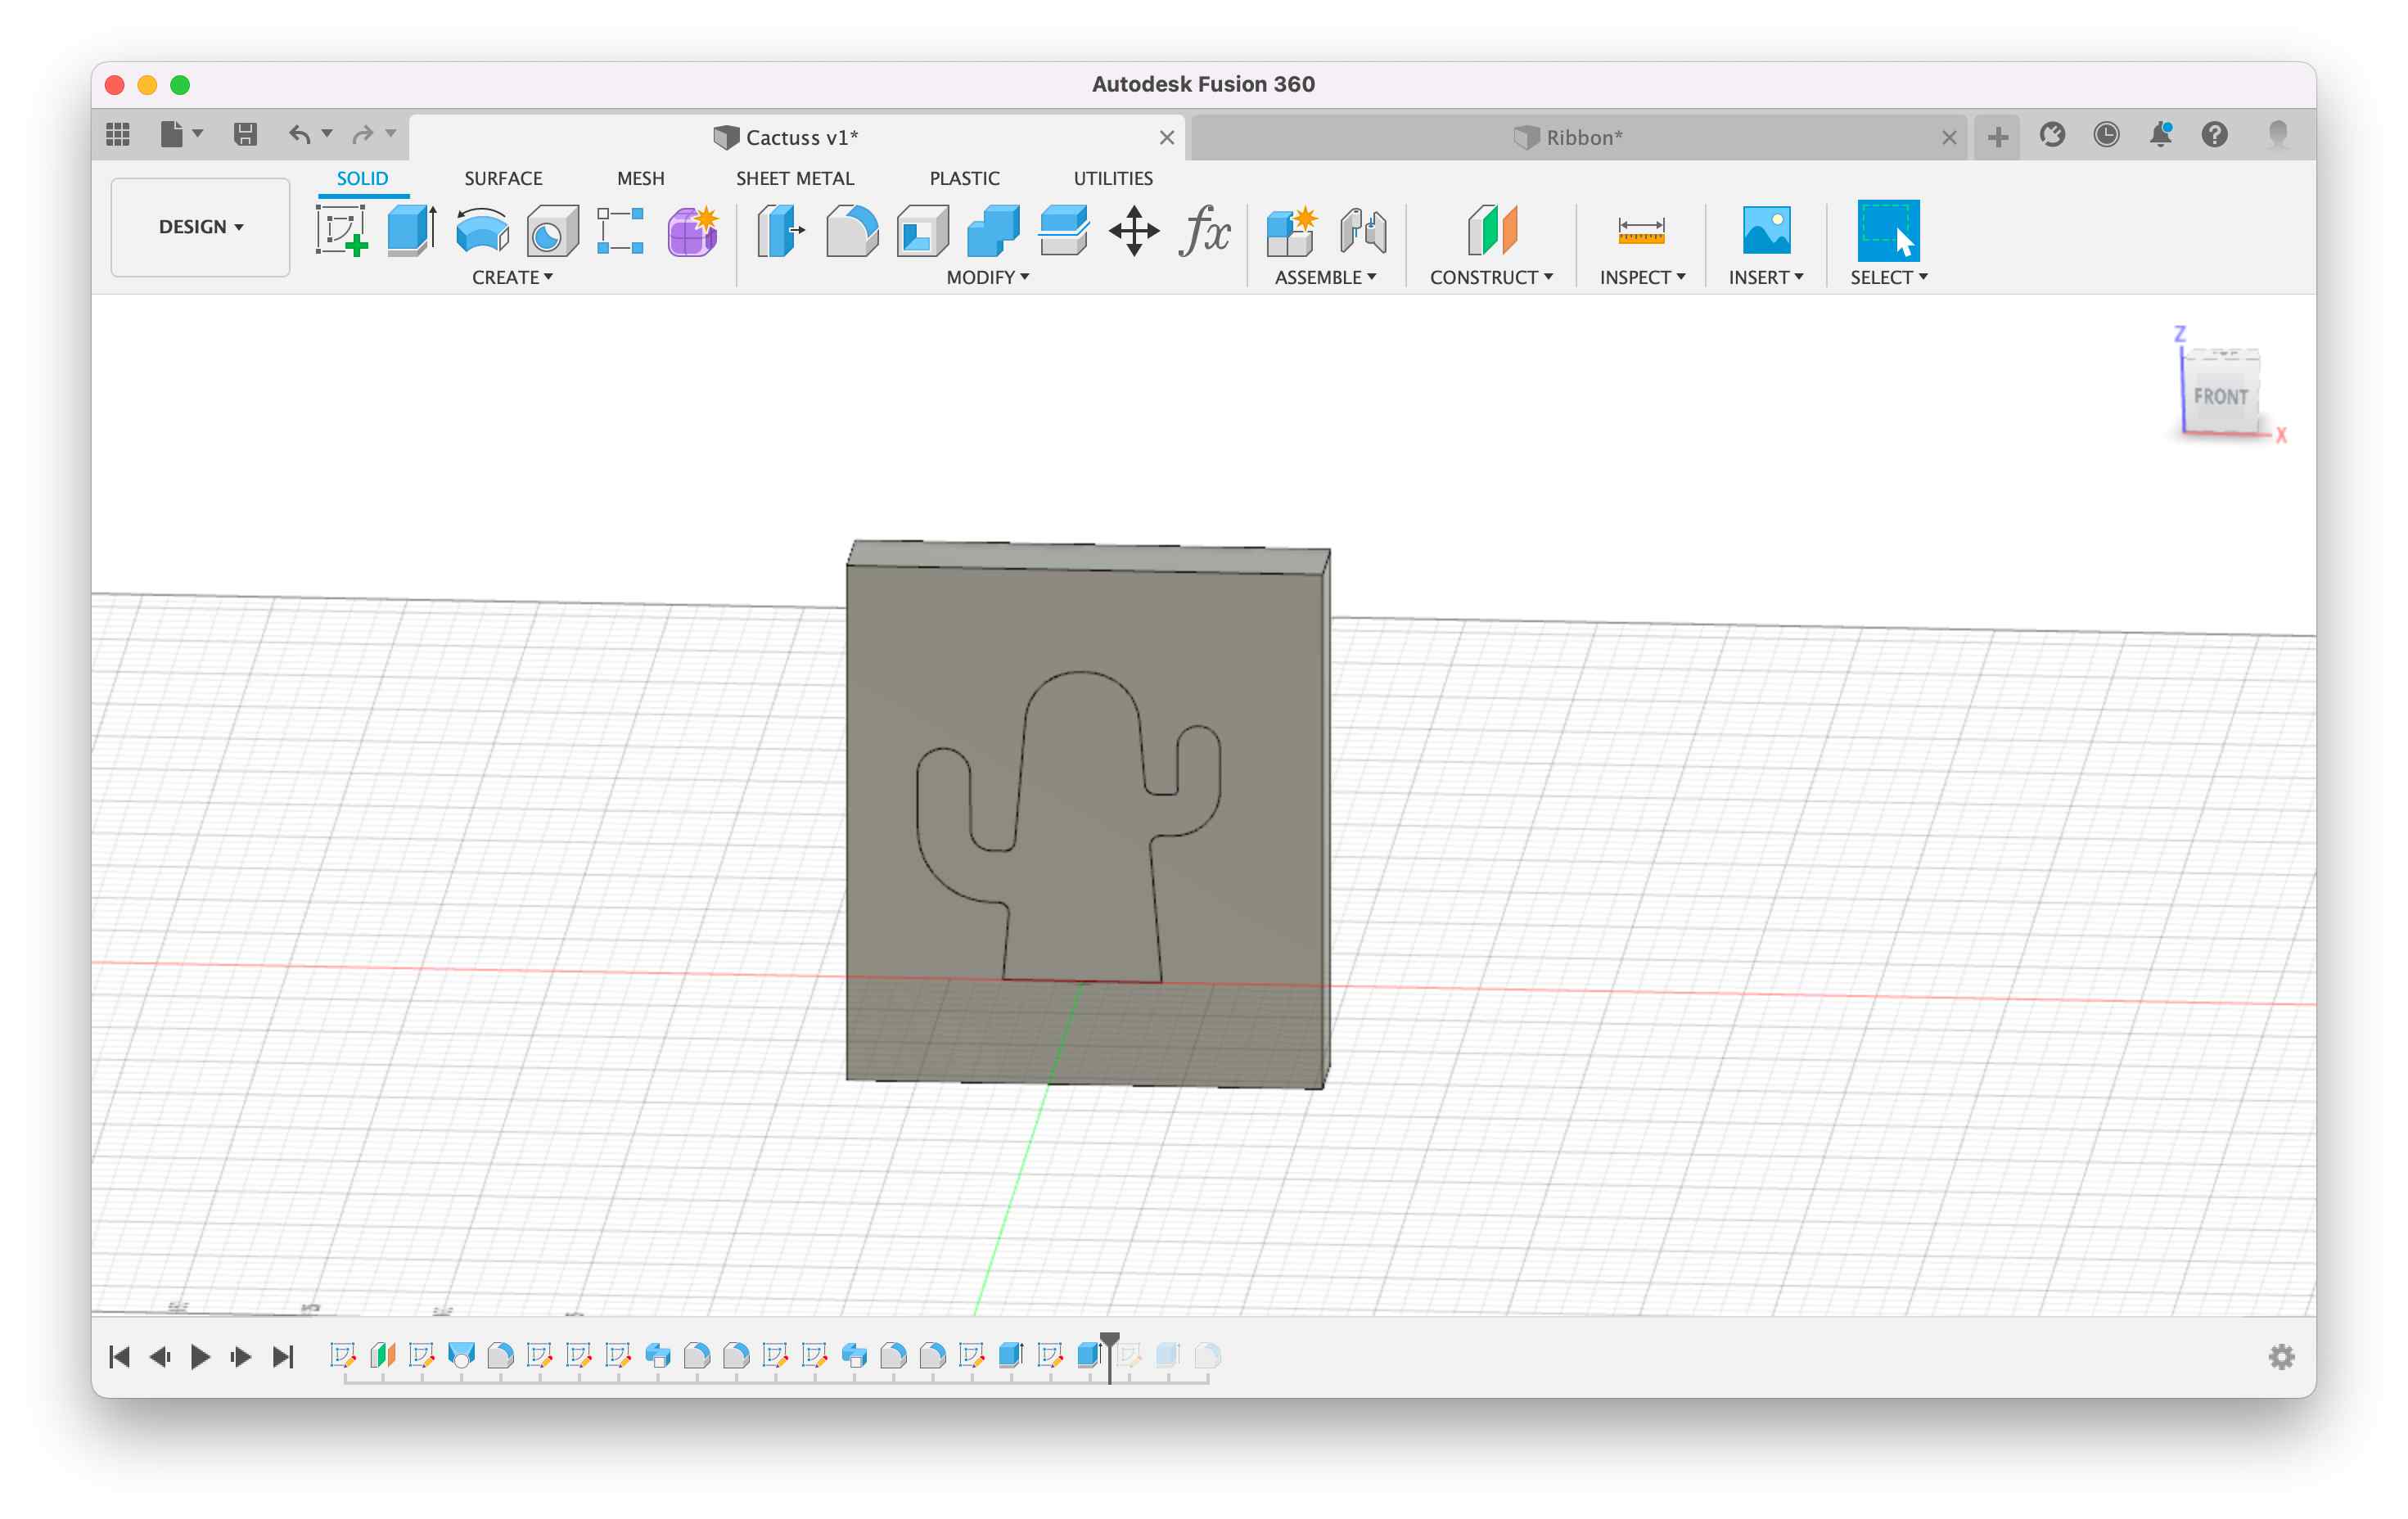
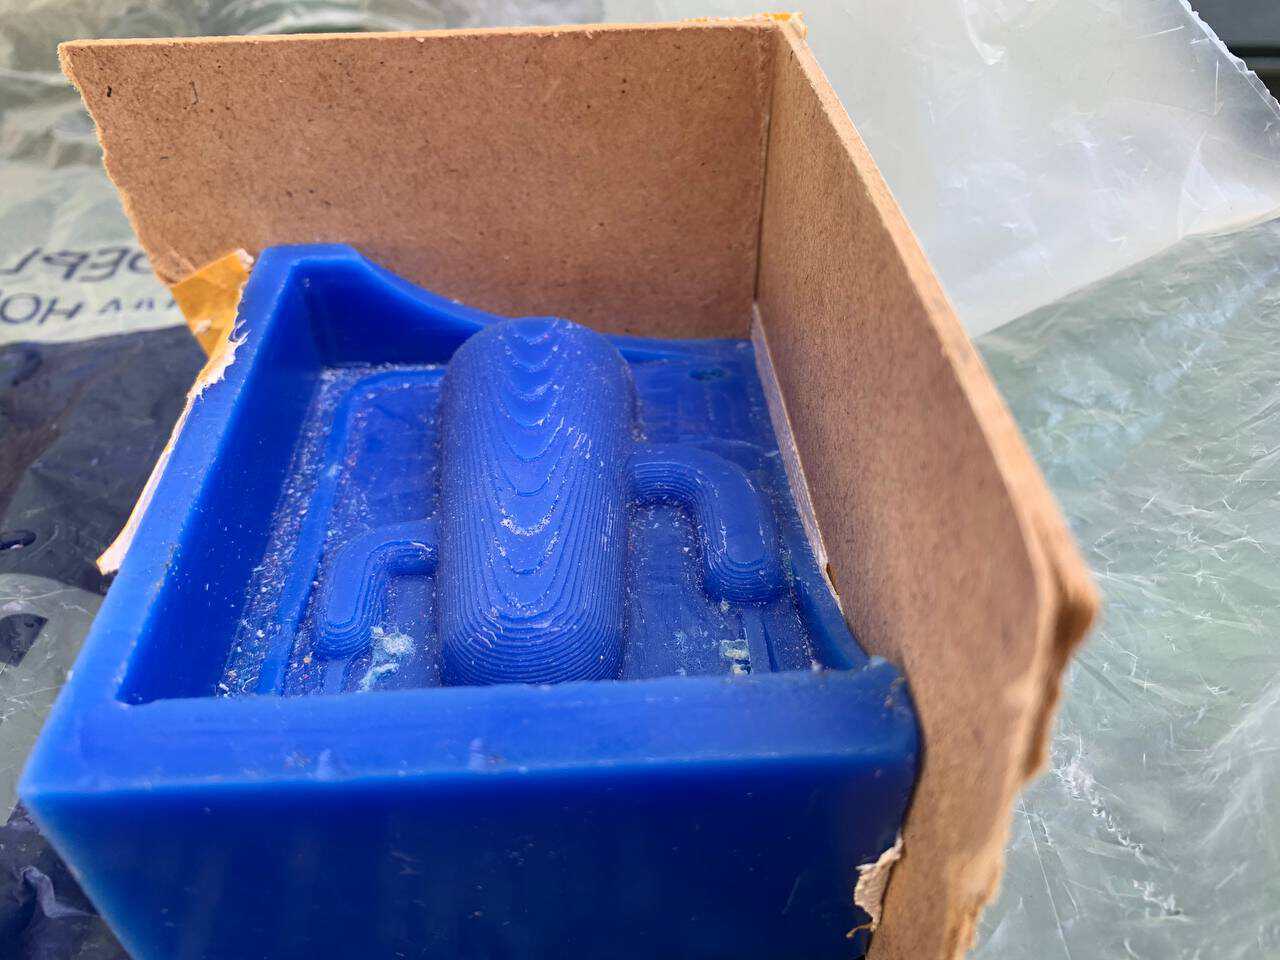
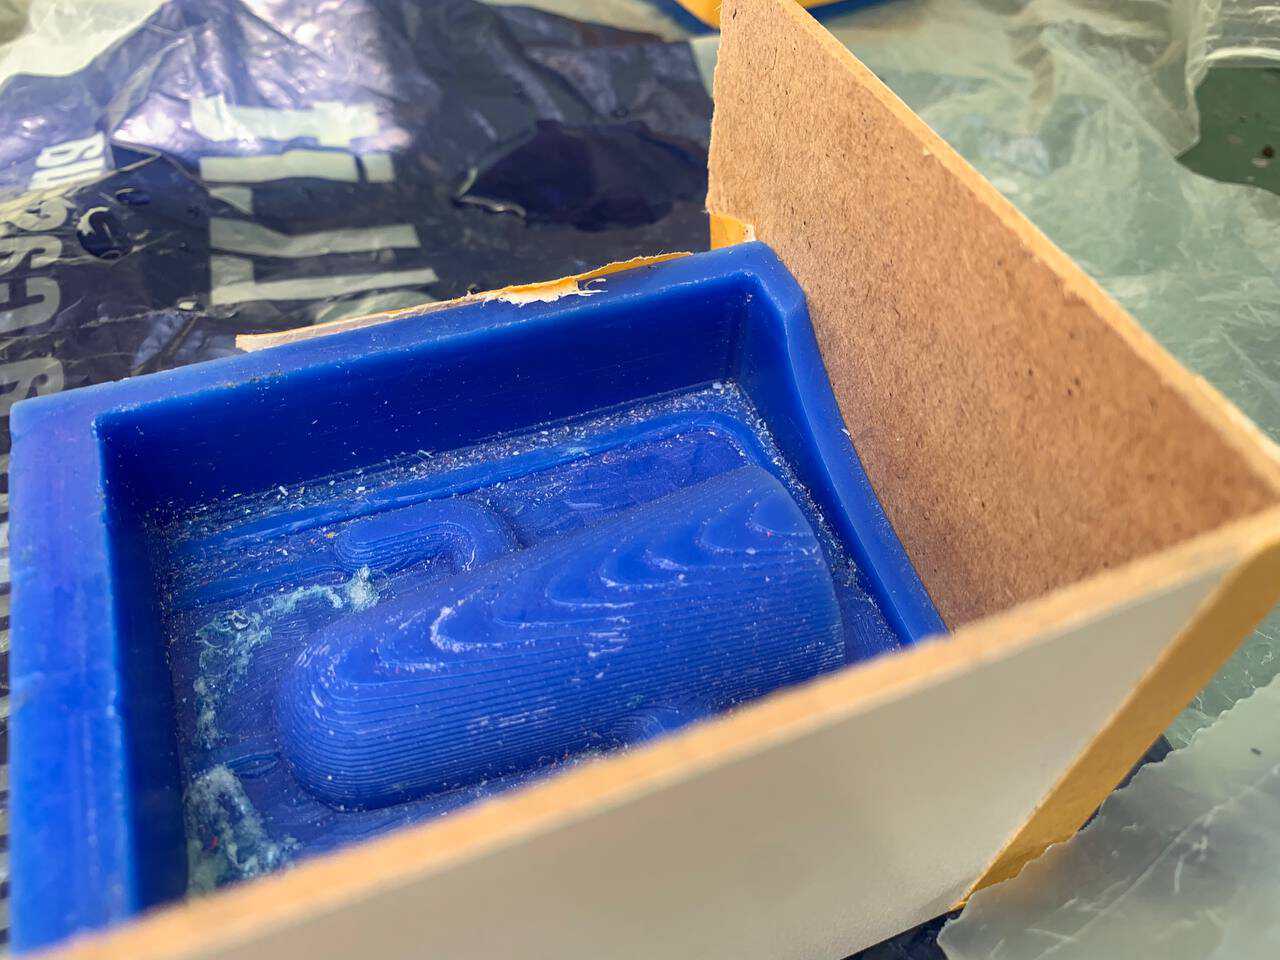
For this week assignment I decided to cast a cactus with concrete. I started off by designing the final object with Fusion360.
I then created the first mould. Since I wanted to use concrete I needed to create a mould for the mould, in order to use silicone in the mould of the mould and the mould inside the concrete (am I making any sense?).
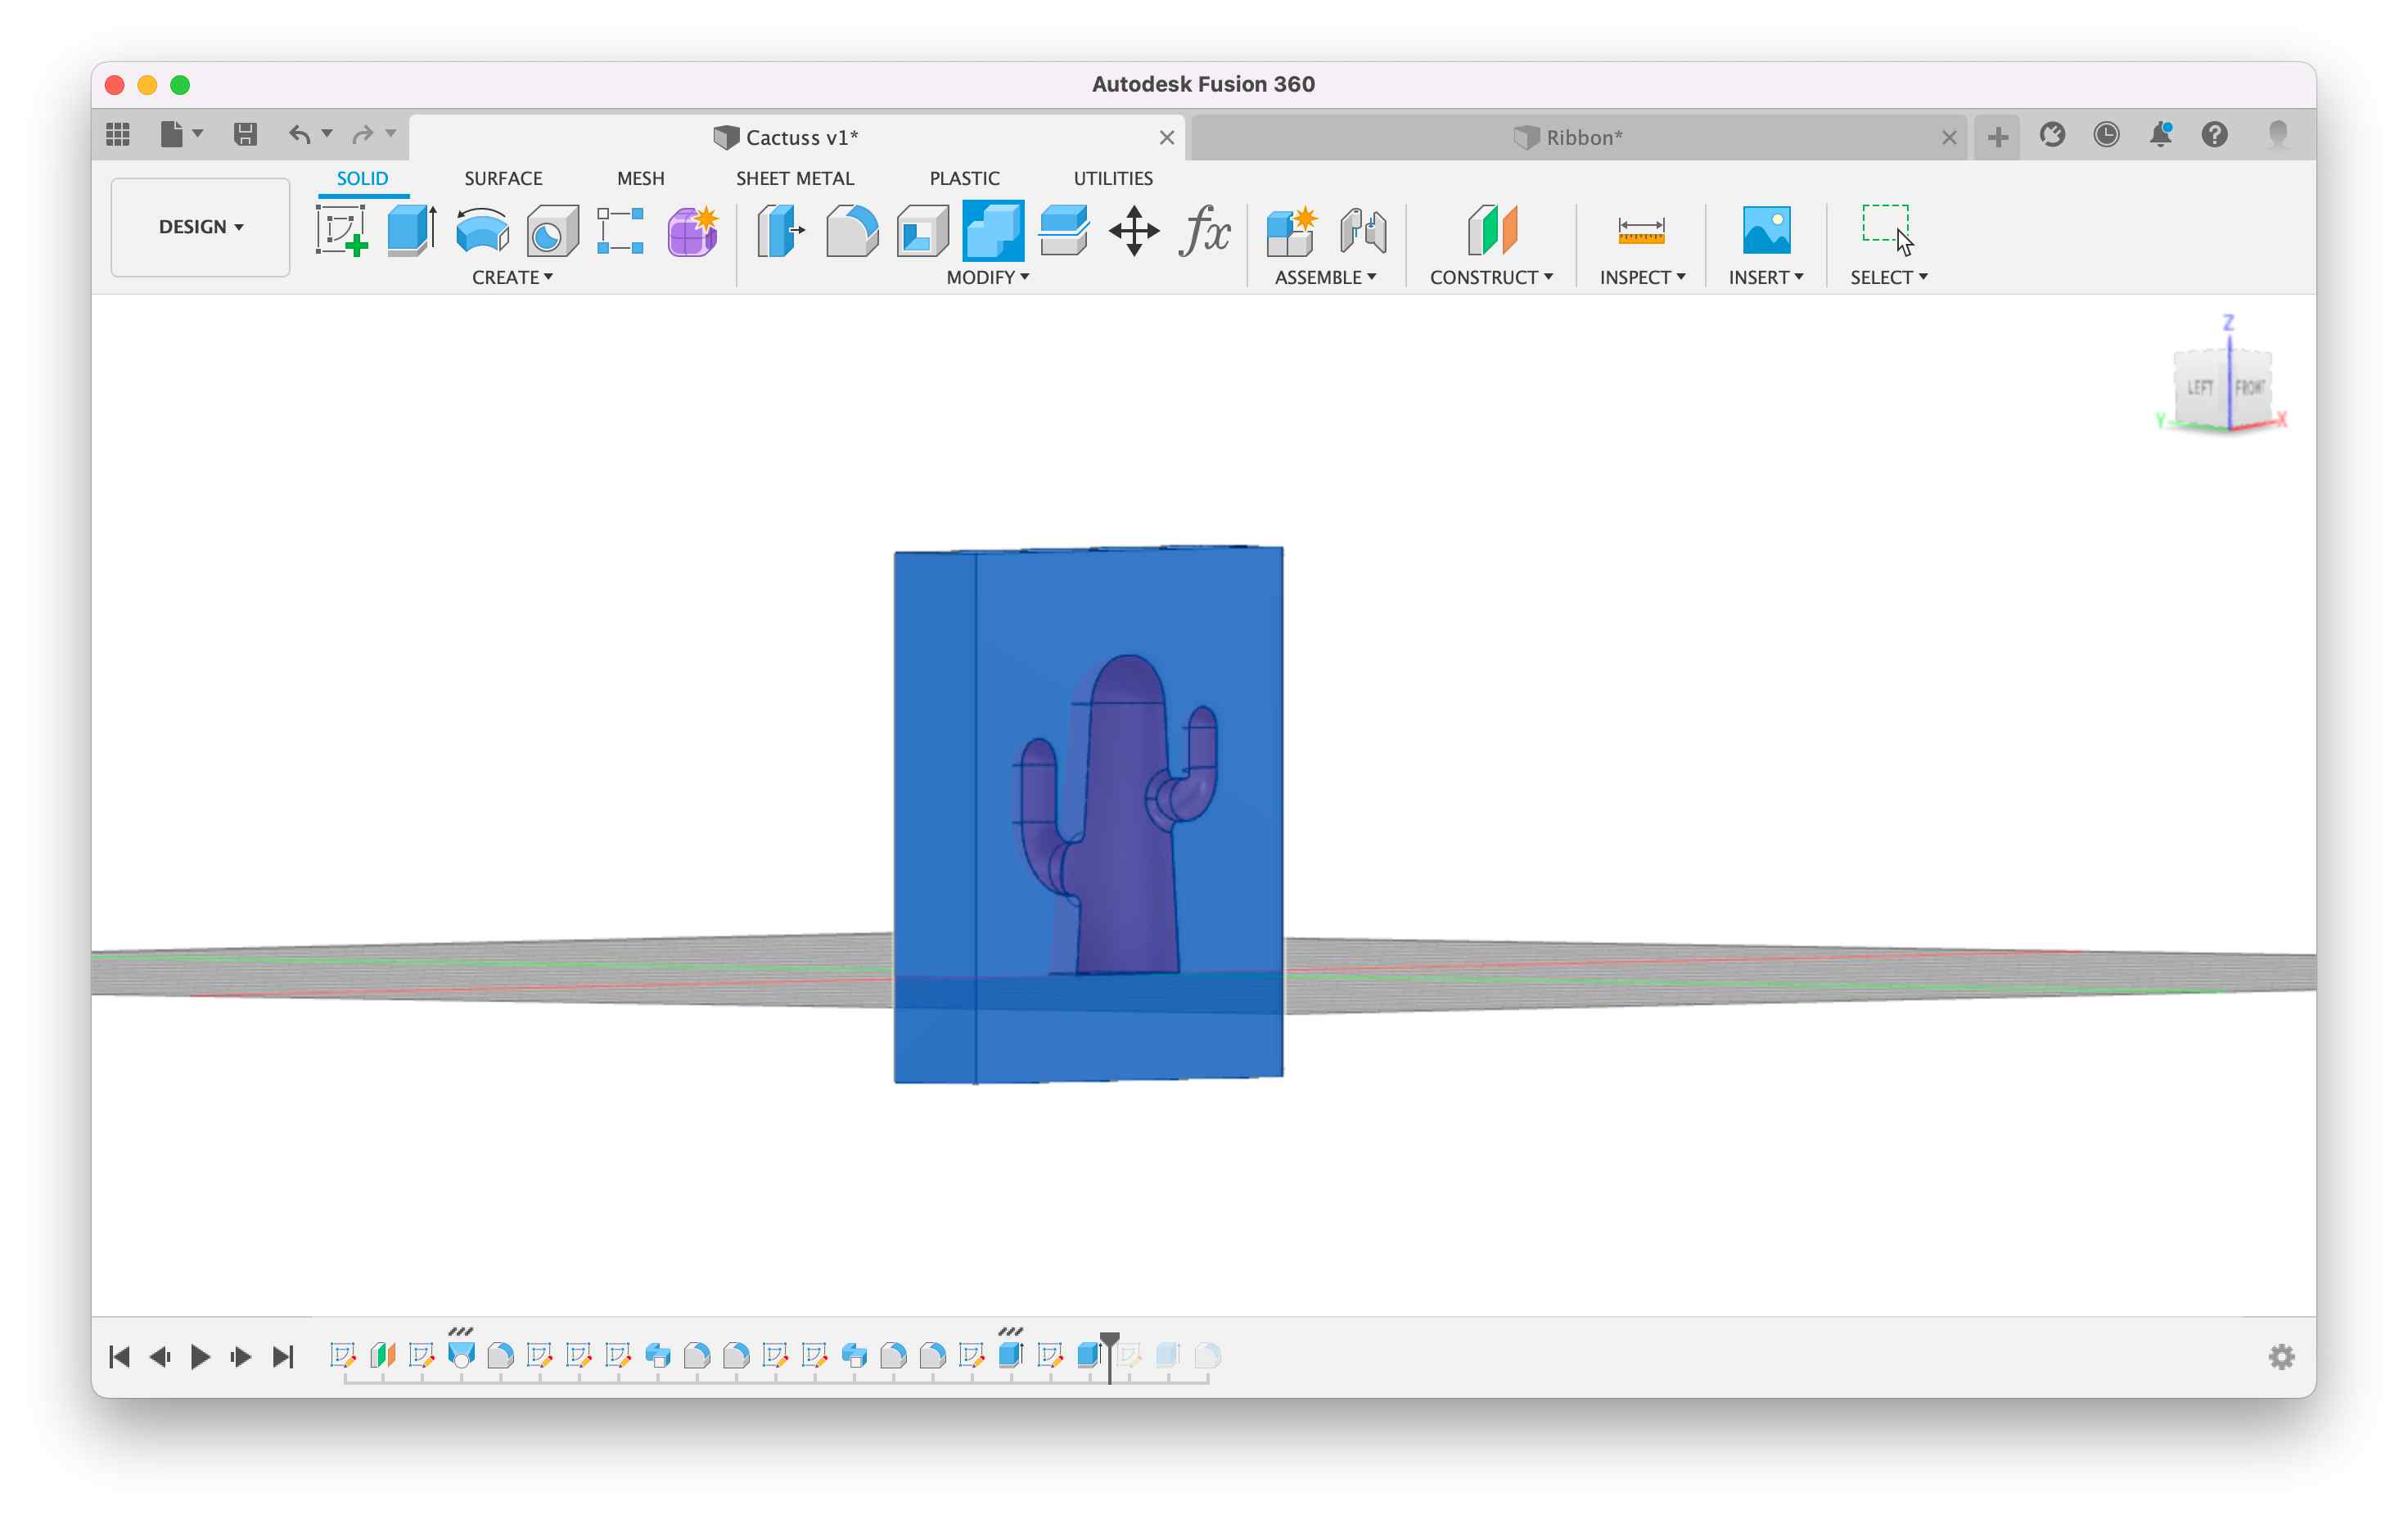
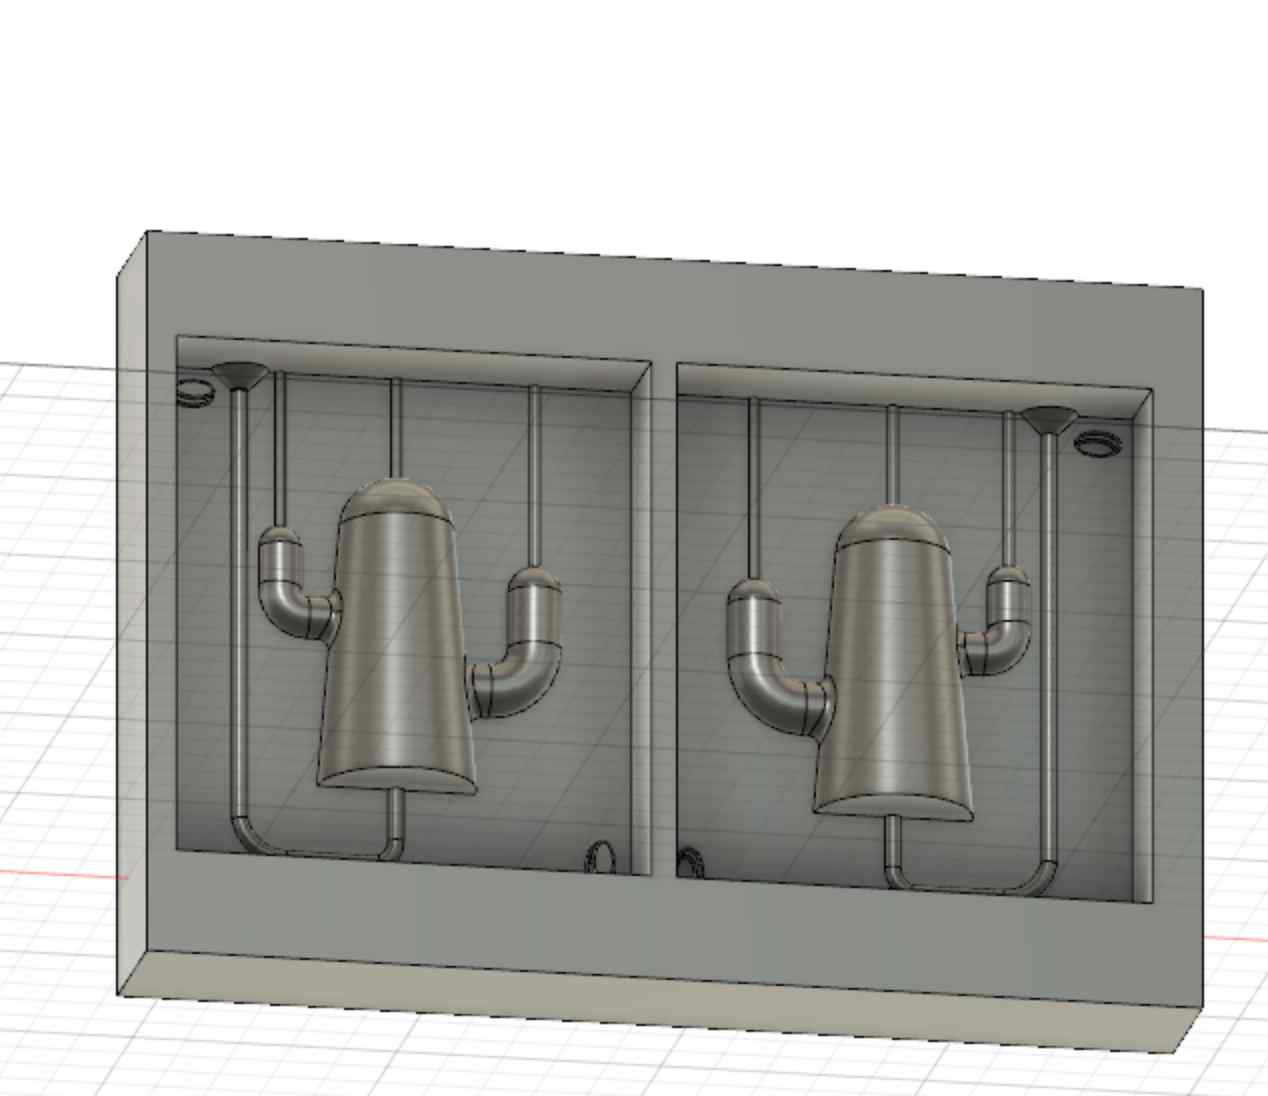
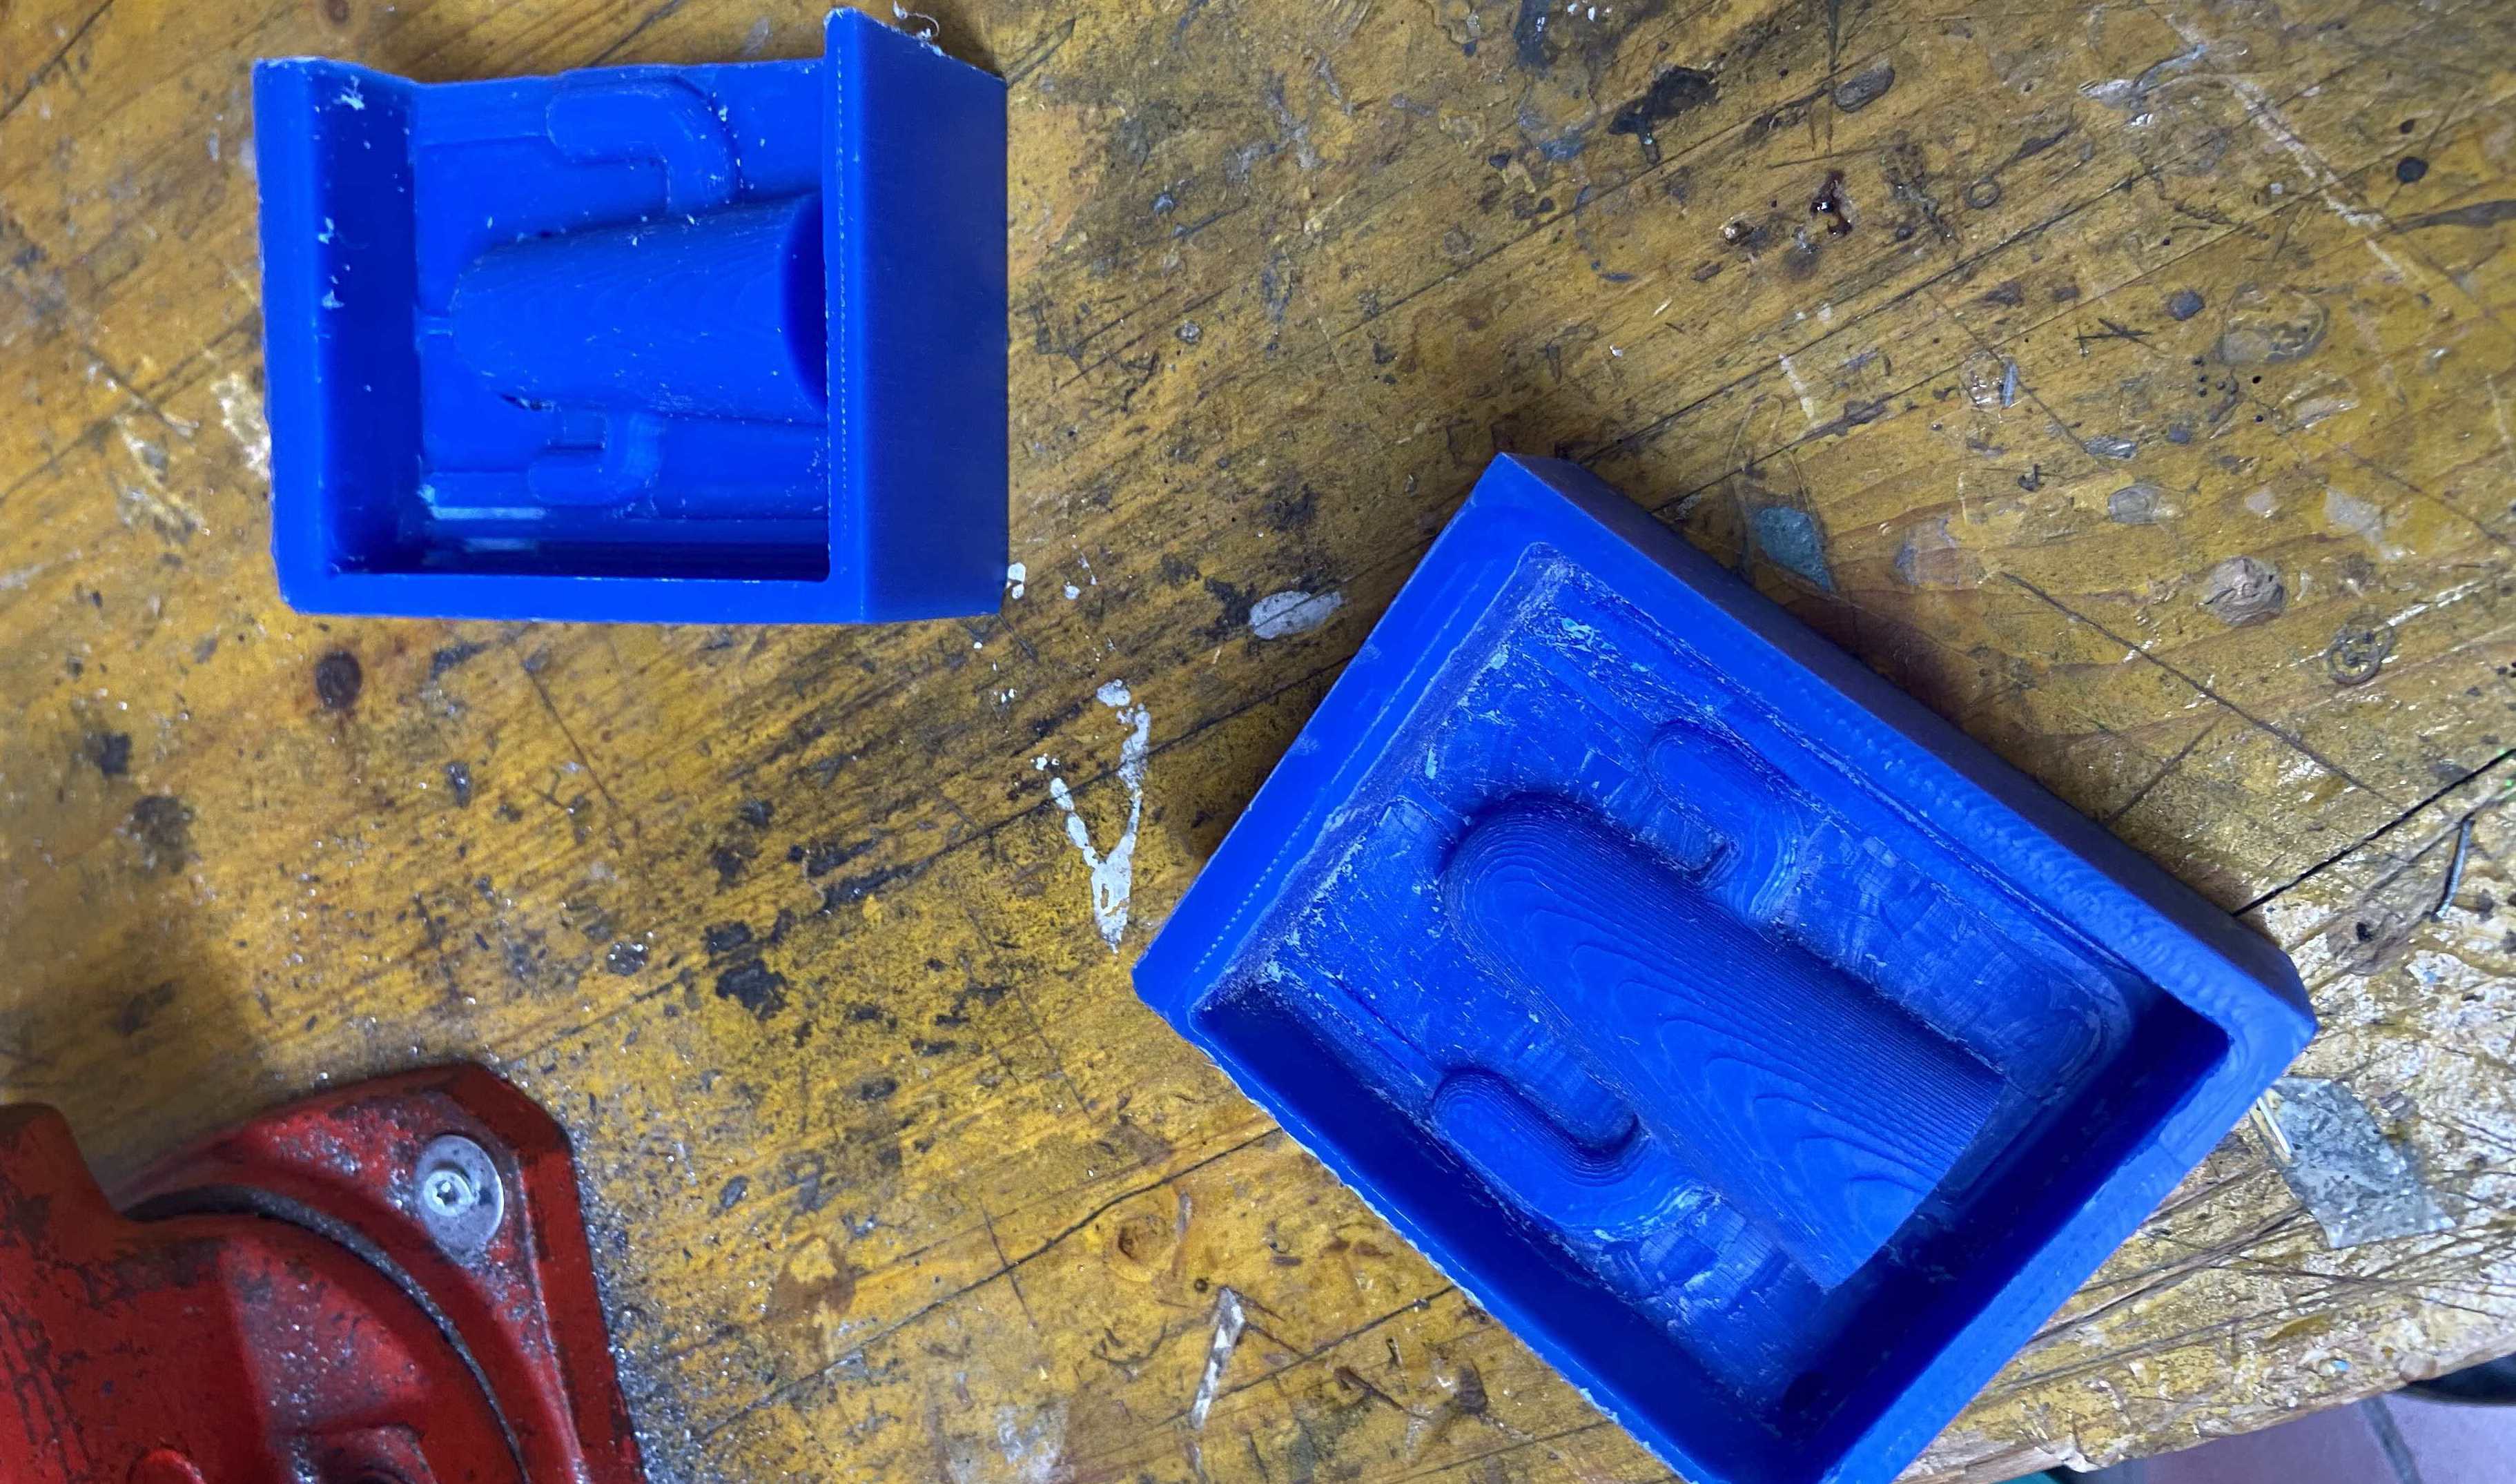
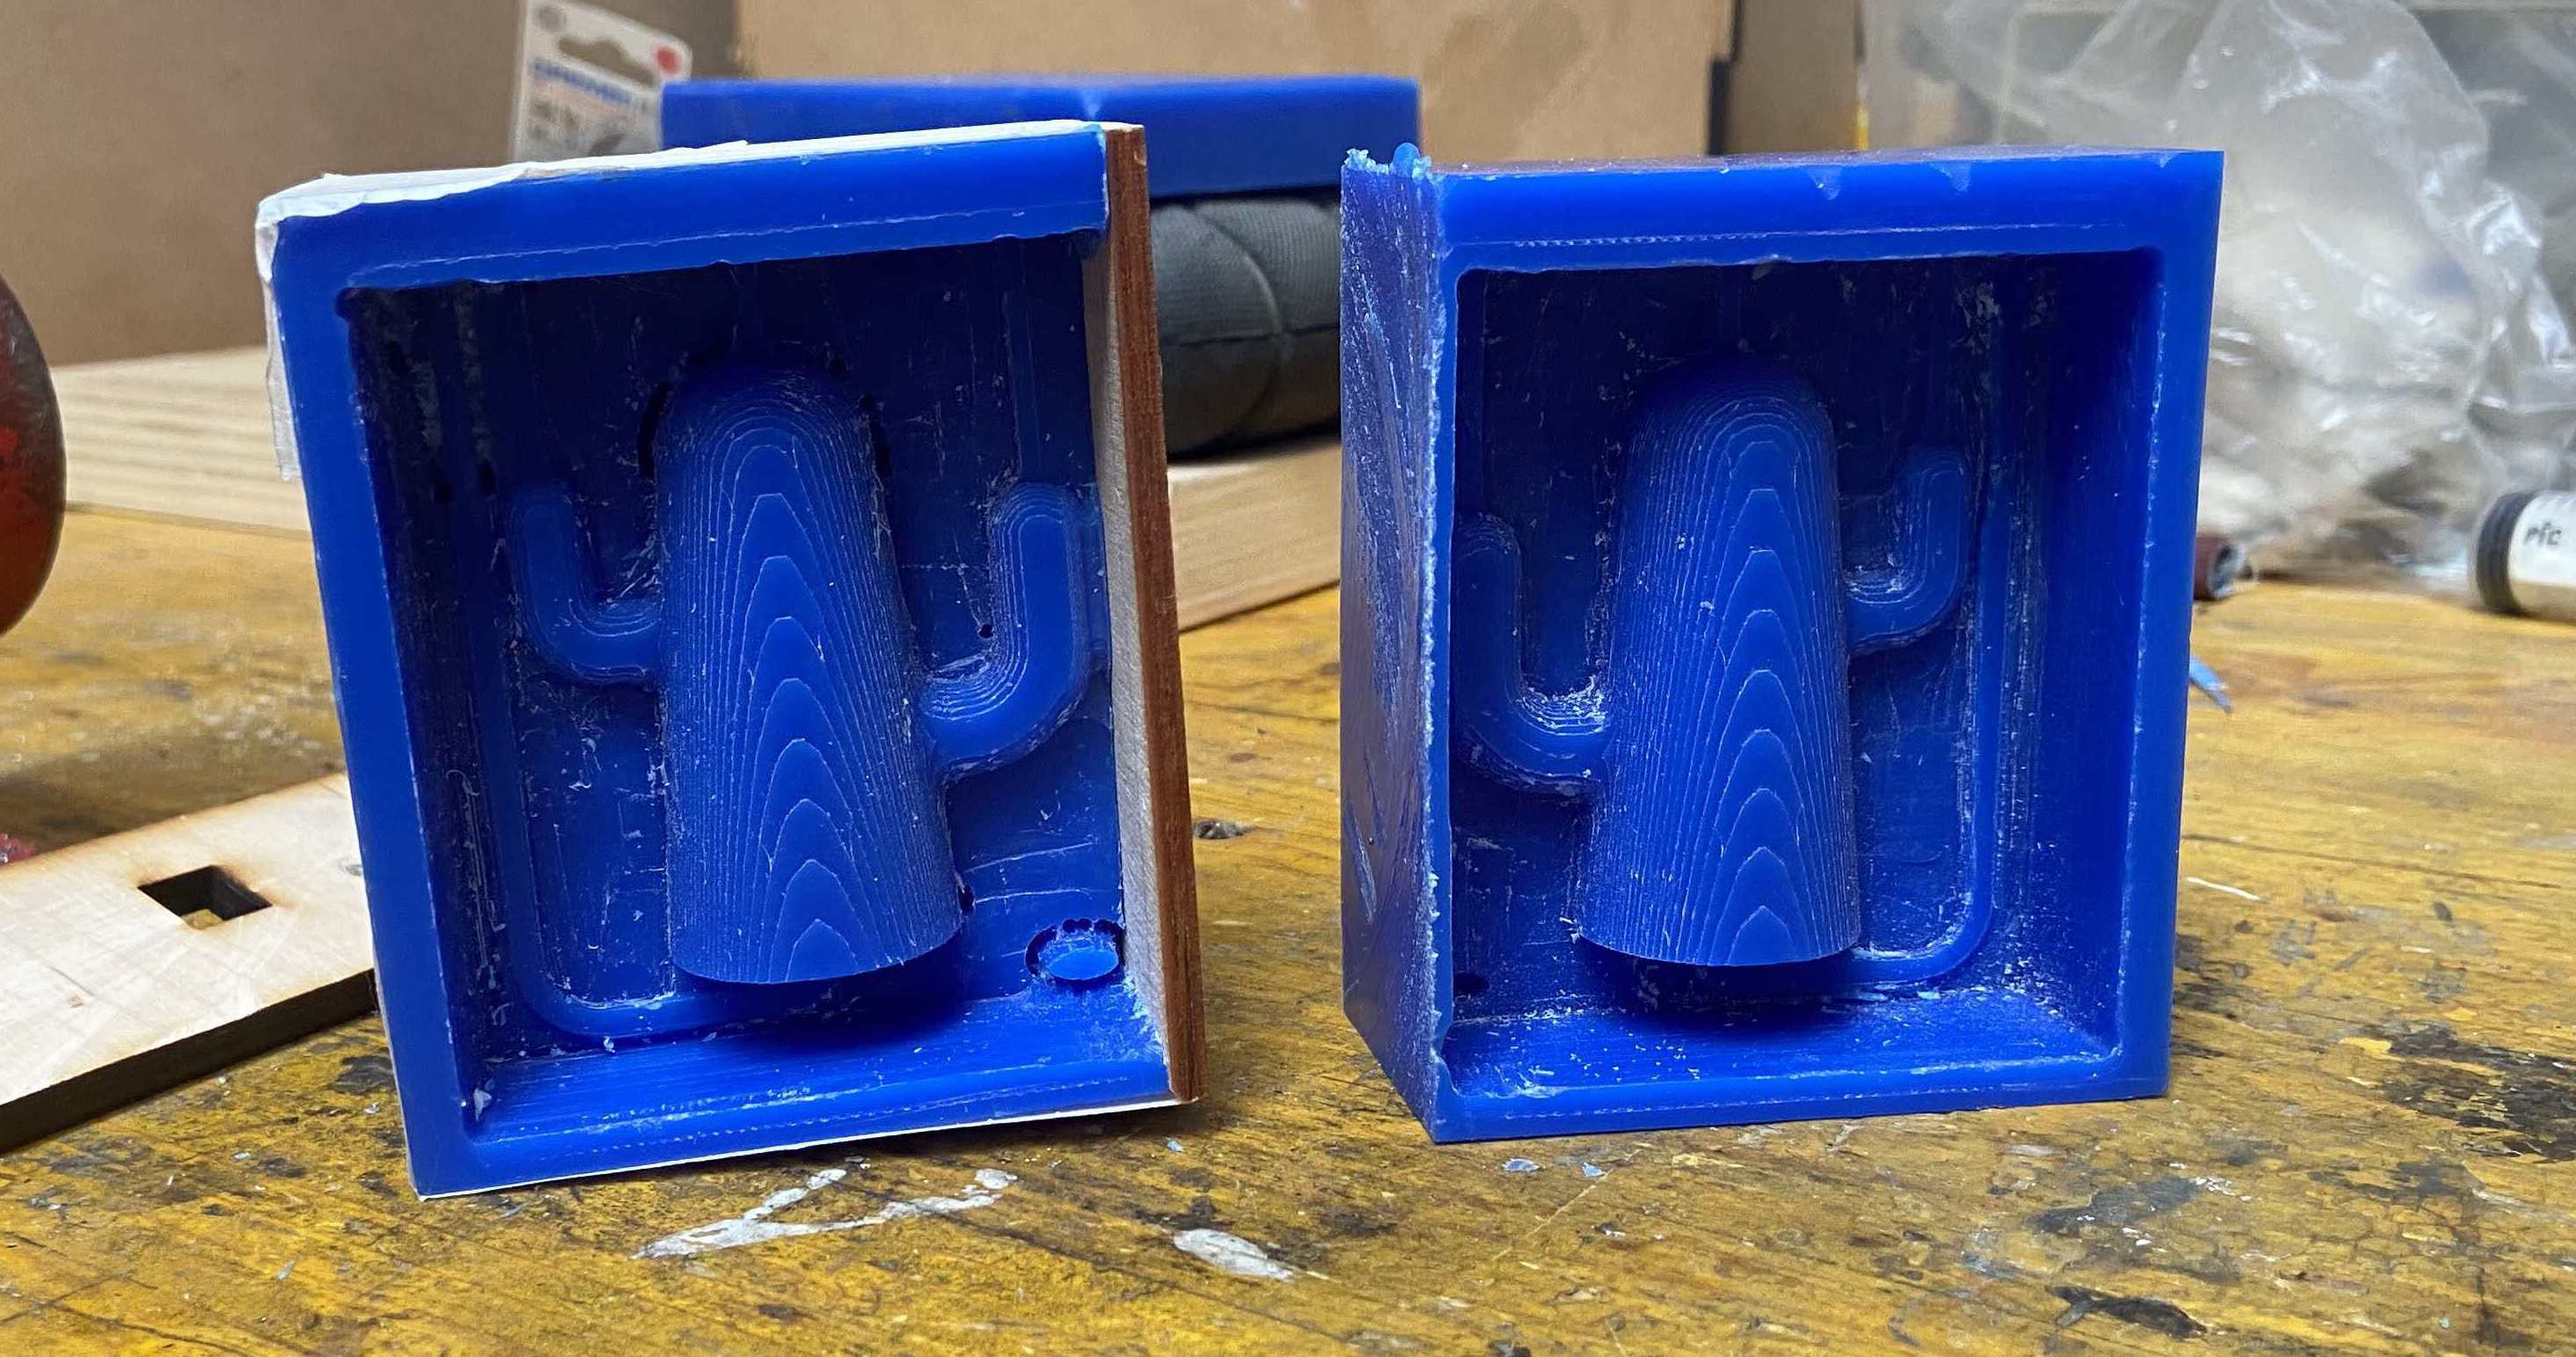
I cut a rectangle as big as half my stock of wax with the cactus and then I created the air vent holes and the casting hole for the cement. I also designed two register ellipses to match correctly the two sides of the cast. Once I was satisfied, I mirrored the cast and obtained the two casts.
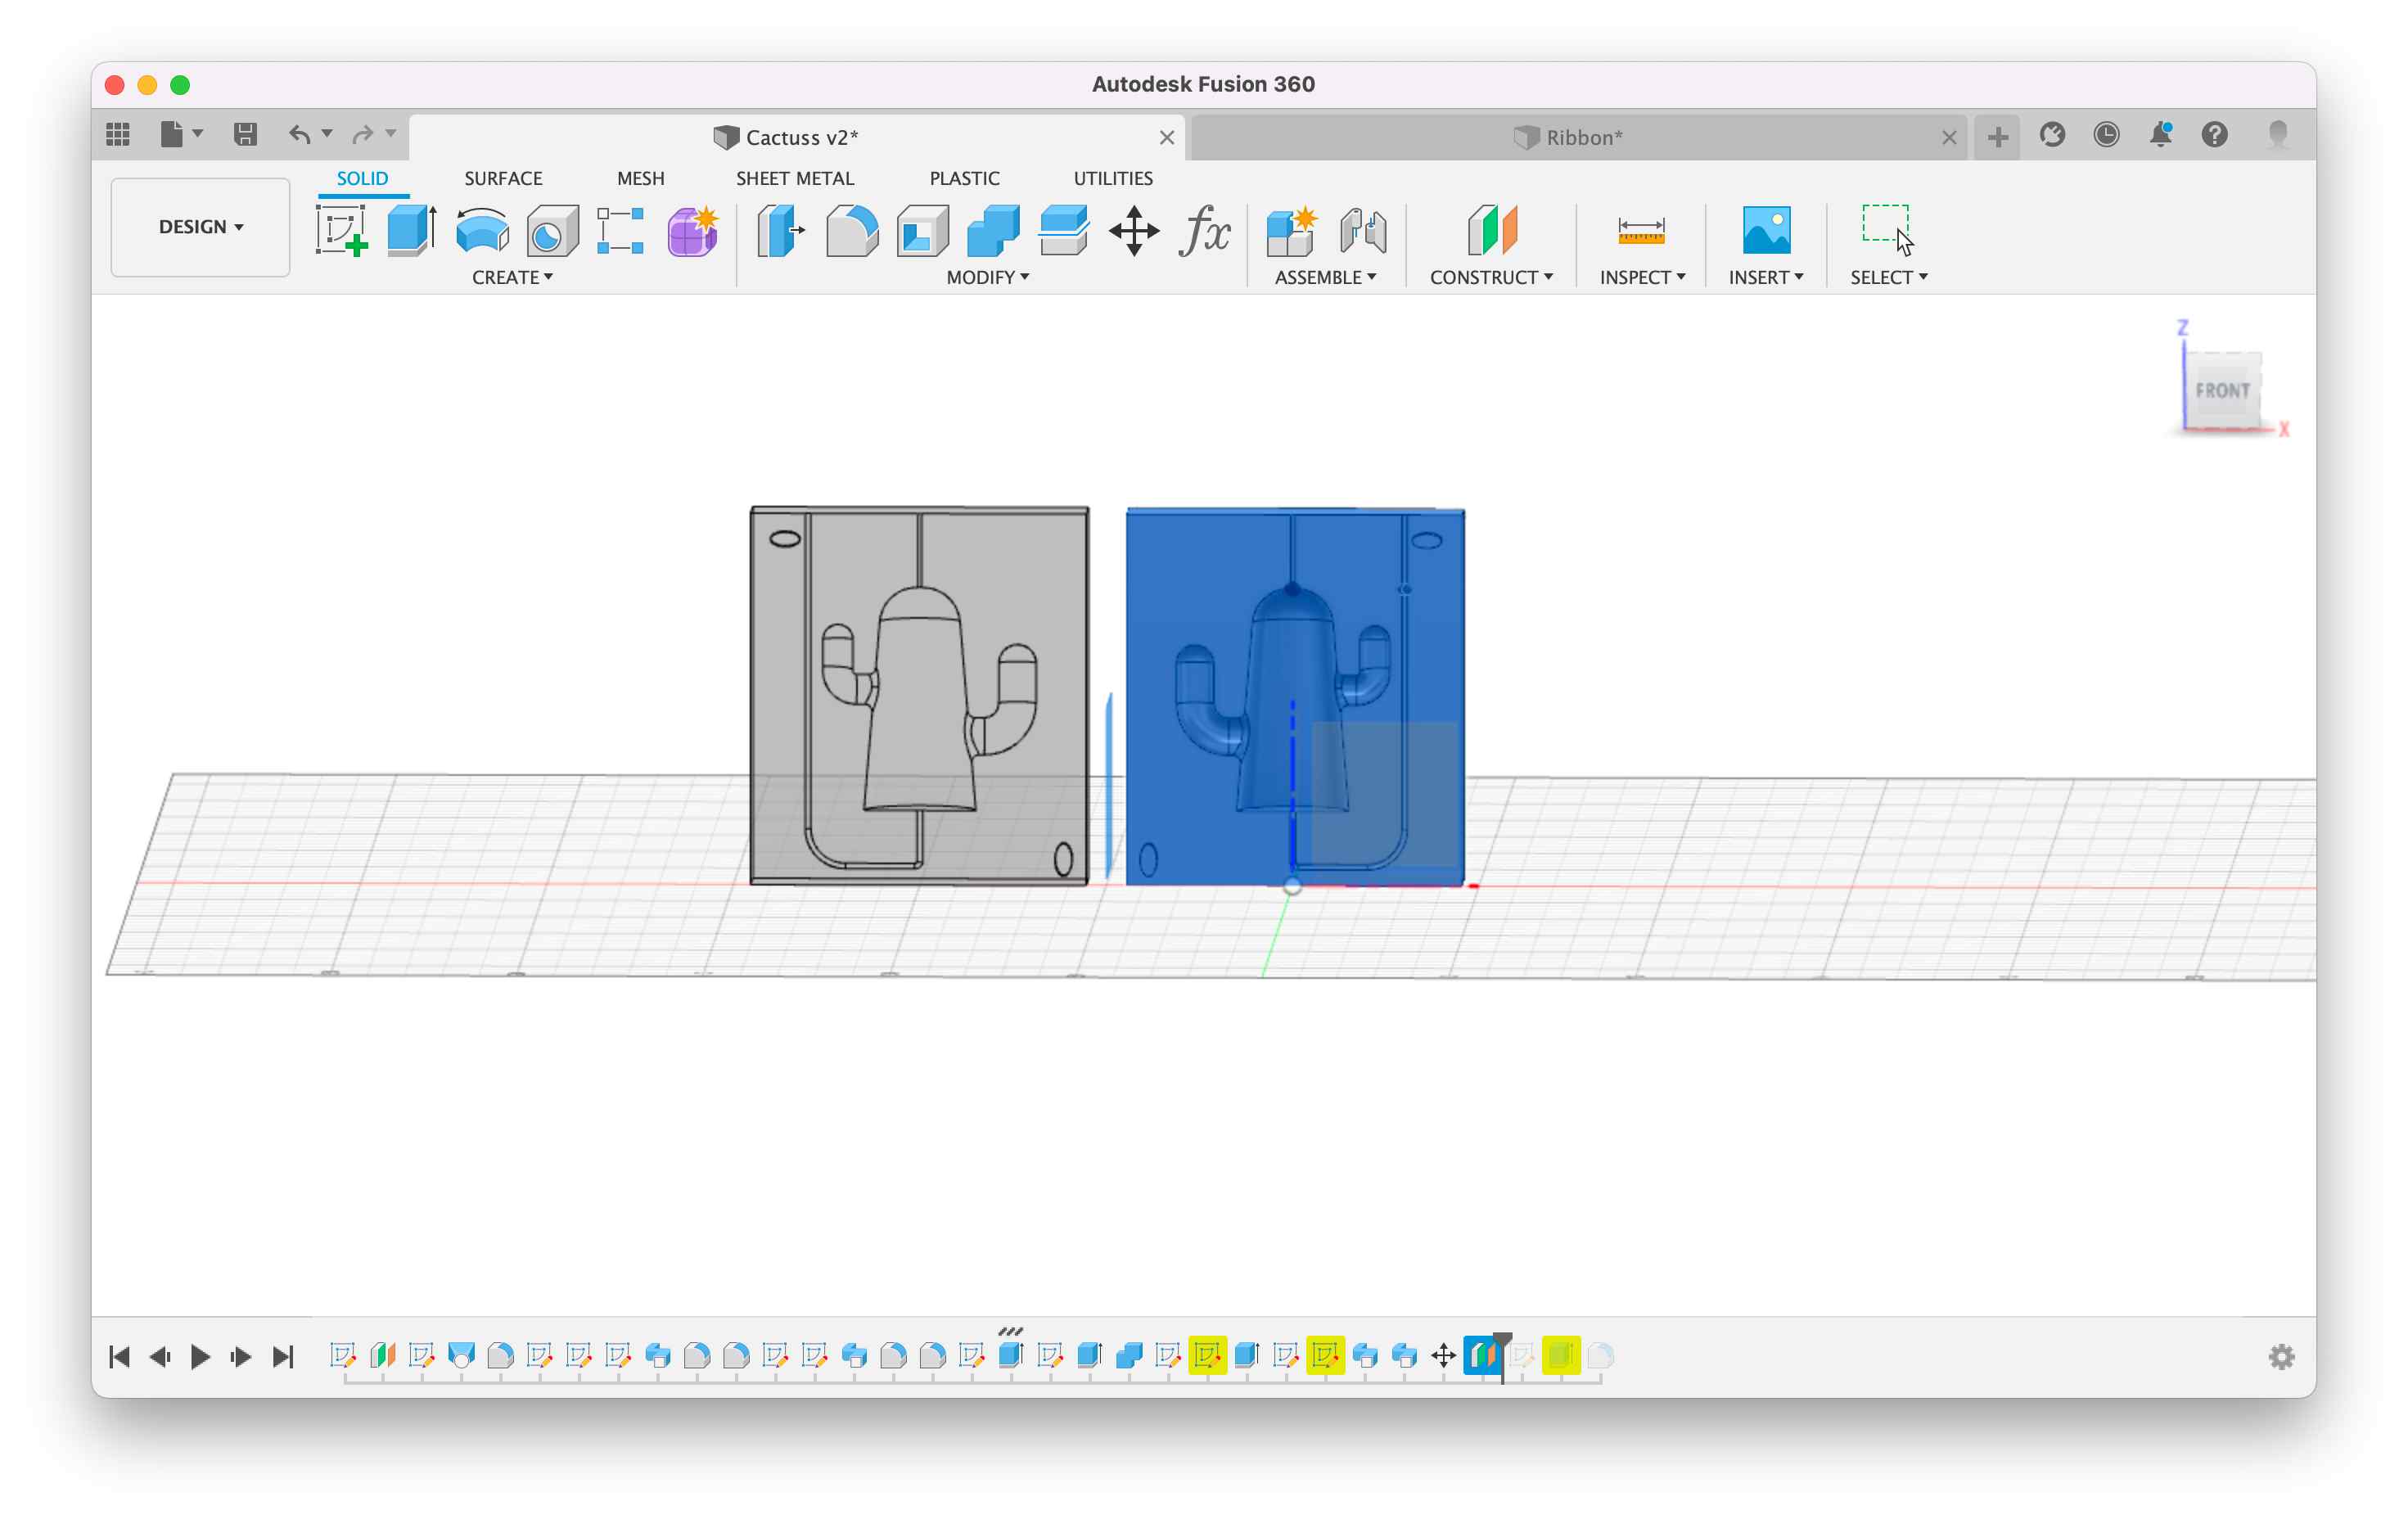
I then created a rectangle as big as my wax stock and cut it with the mould I created. Doing so I obtained the cast for the cast.
🪡 CAM moment
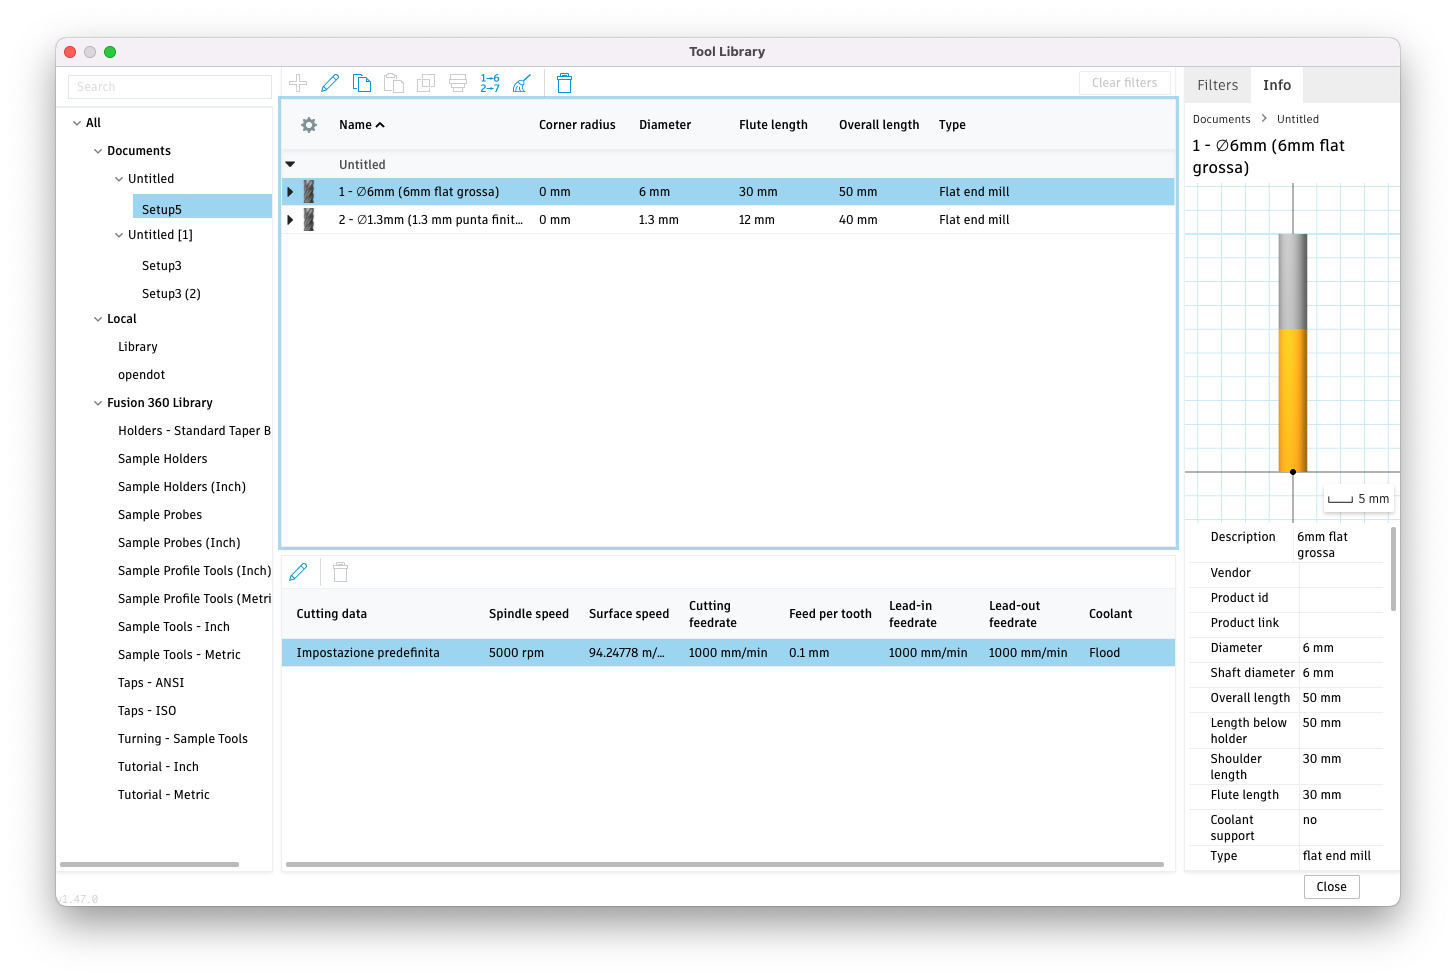
Once the cad was ready, I searched for the mills to use. I decided to use a Flat end mill for the first processes and a ball for refining the whole object. I added the two mills in the Tool Library in Fusion360:
-
FLAT END 6mm for the big drills.
-
FLAT END 1.3mm for the details.
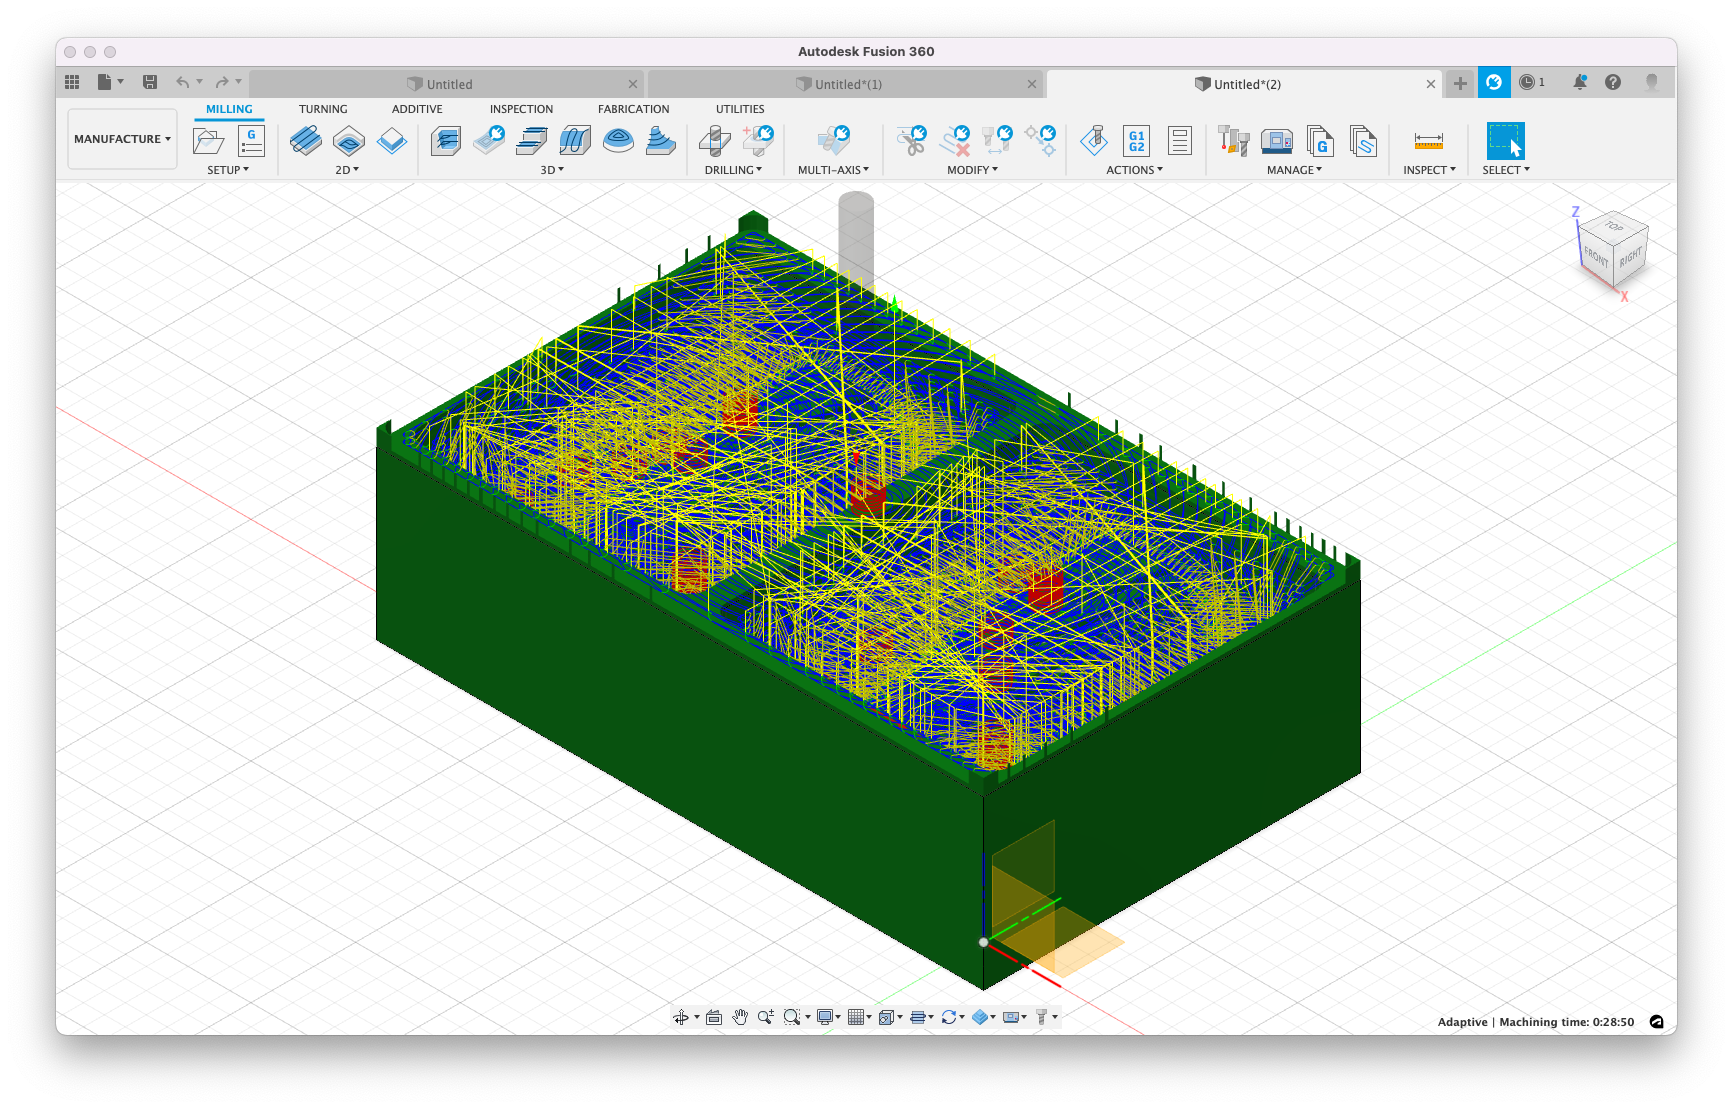
For the first processes I did an adaptive process to clear all the material with these settings:
- Tolerance: 0.1mm.
- Optimal Load: 2.4mm.
- Minimum cutting radius: 0.6mm.
- Direction: Climb.
- Maximum Roughing Stepdown: 2mm.
- Fine stepdown: 1.5mm.
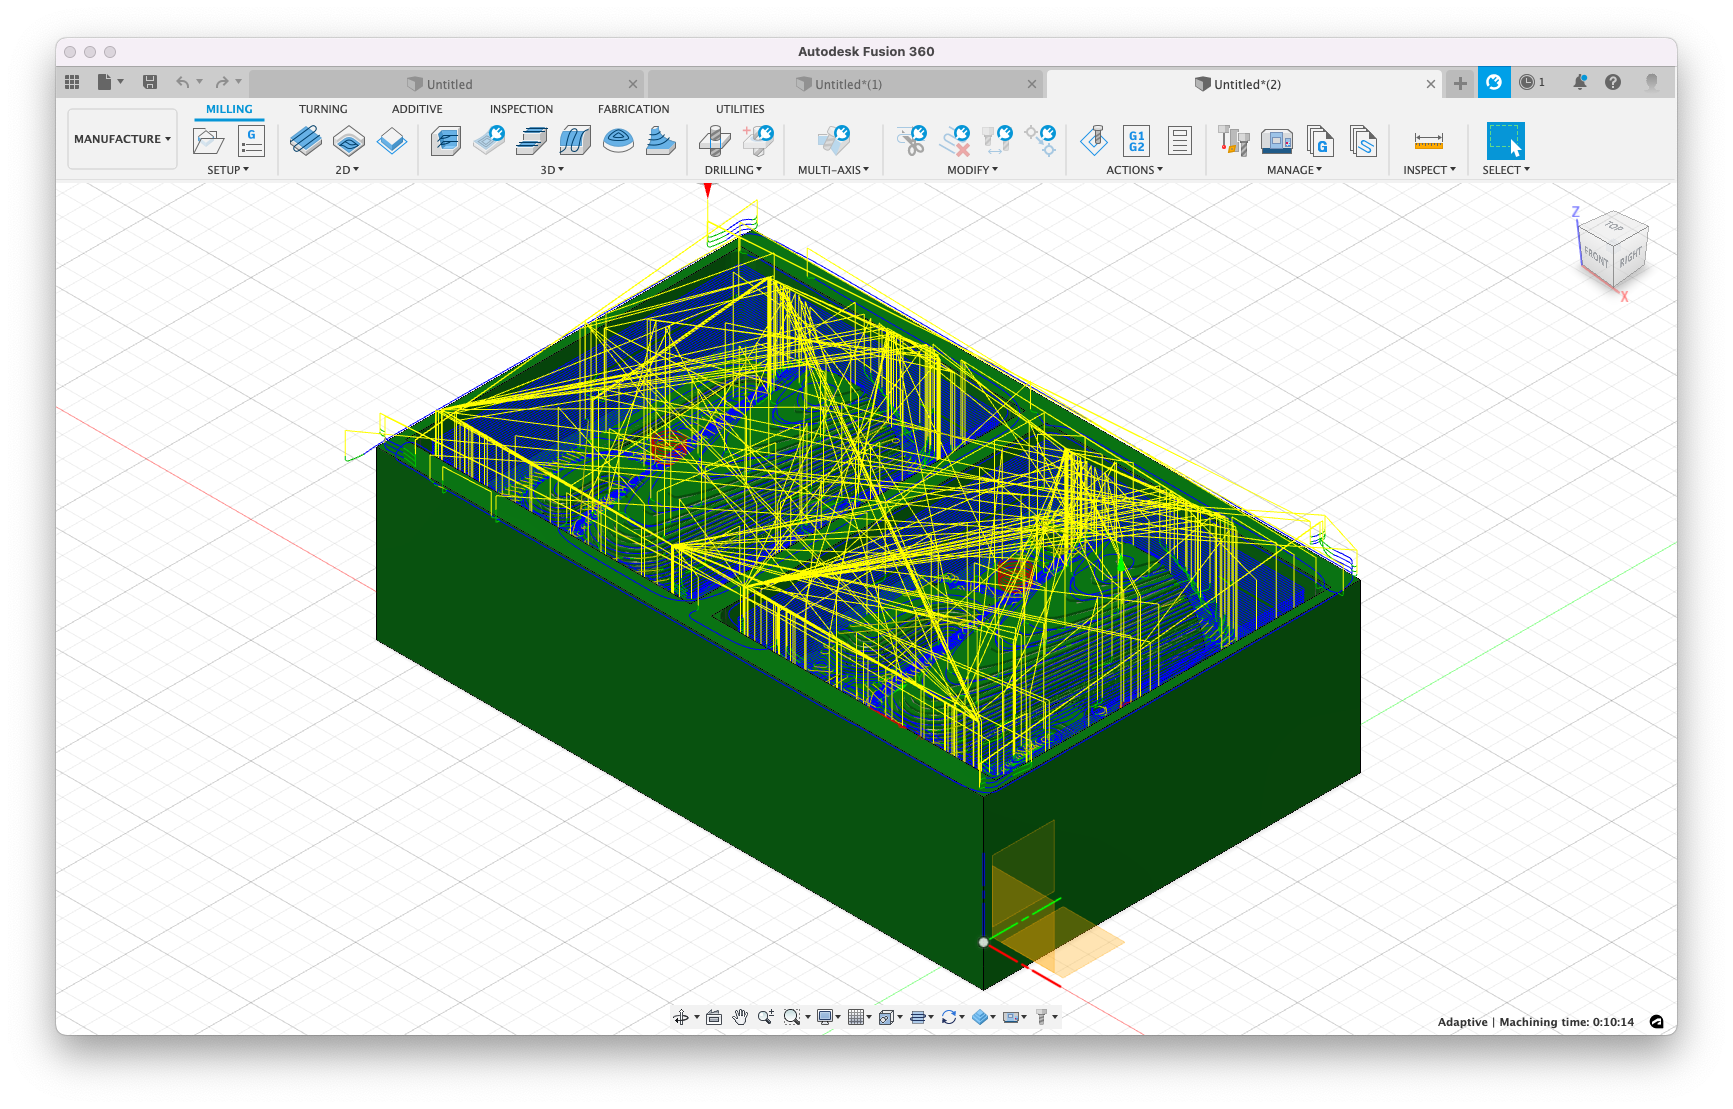
I repeated the adaptive with these settings this time. Clearly, the Stepdown is smaller so it will clear more in detail and in higher resolution.
- Tolerance: 0.1mm.
- Optimal Load: 2.4mm.
- Minimum cutting radius: 0.6mm.
- Direction: Climb.
- Maximum Roughing Stepdown: 1mm.
- Fine stepdown: 0.5mm.
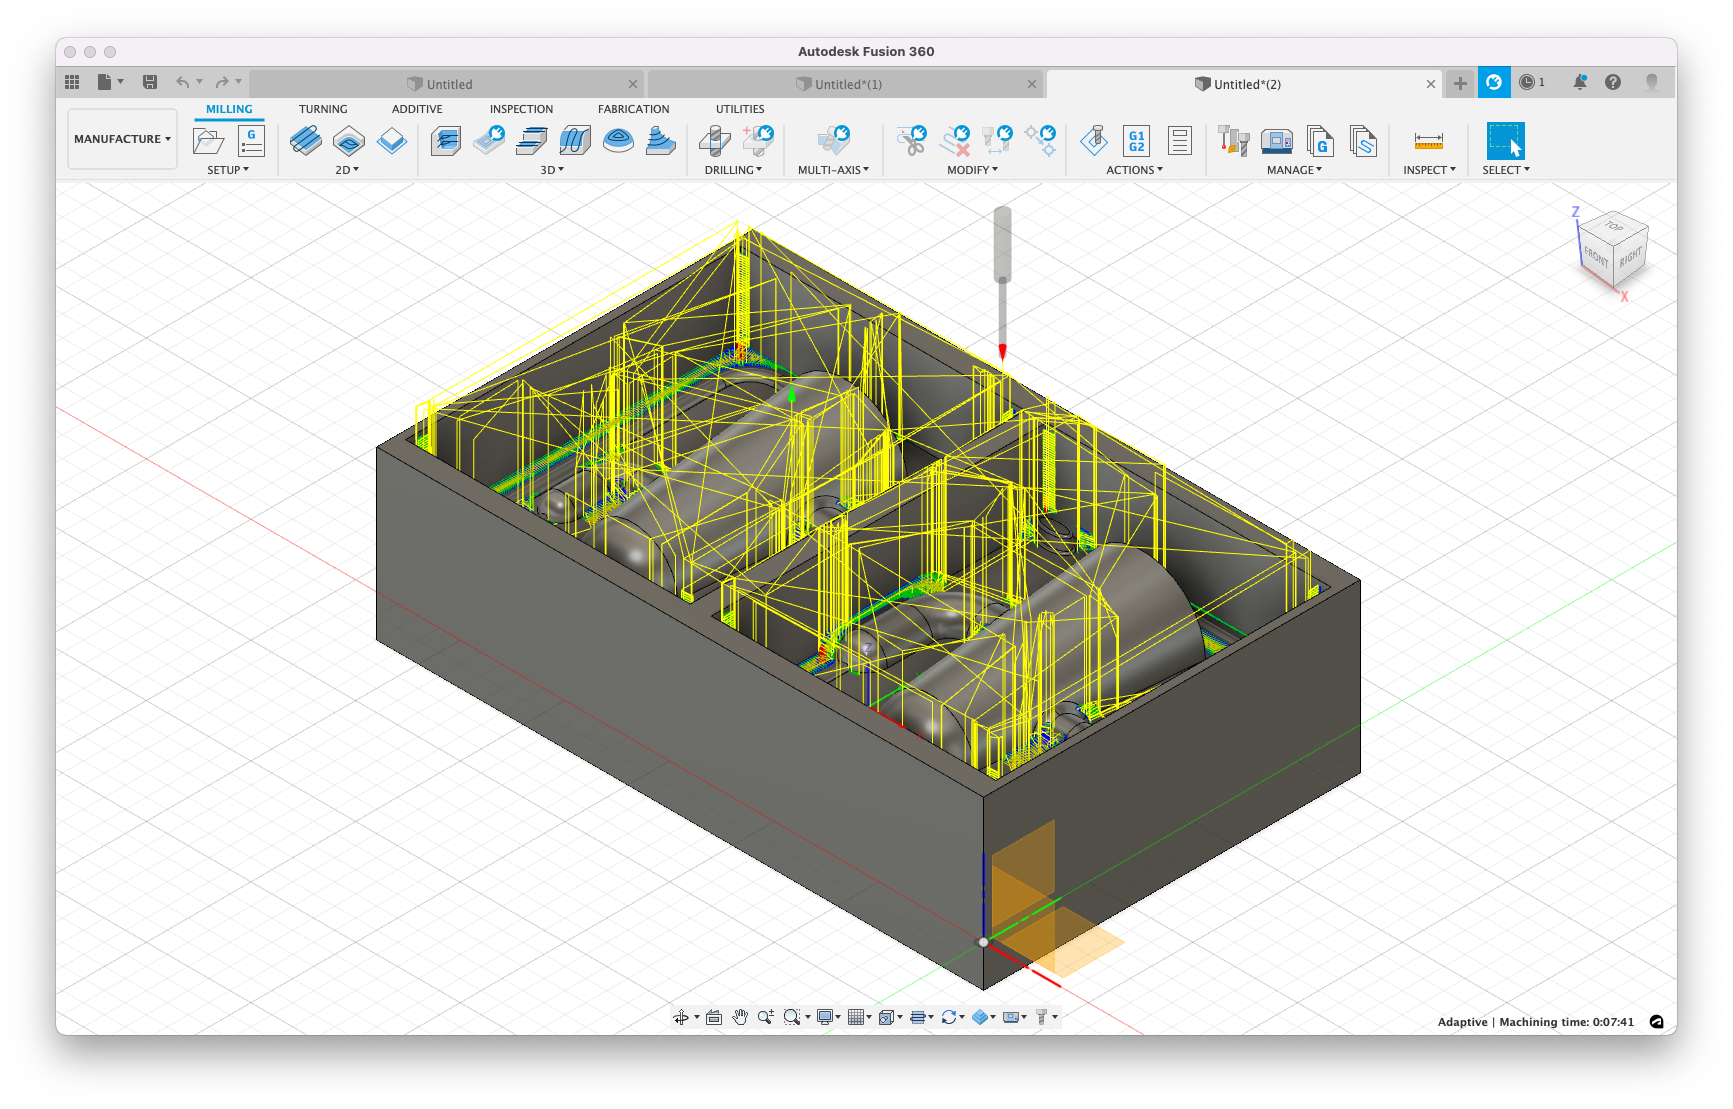
I then did another adaptive,this time the Optimal load is also more detailed. The optimal load is the depth of pass the software should shoot for on each “scoop” into the material.
- Tolerance: 0.1mm.
- Optimal Load: 0.52mm.
- Minimum cutting radius: 0.13mm.
- Direction: Climb.
- Maximum Roughing Stepdown: 0.5mm.
- Fine stepdown: 0.25mm.
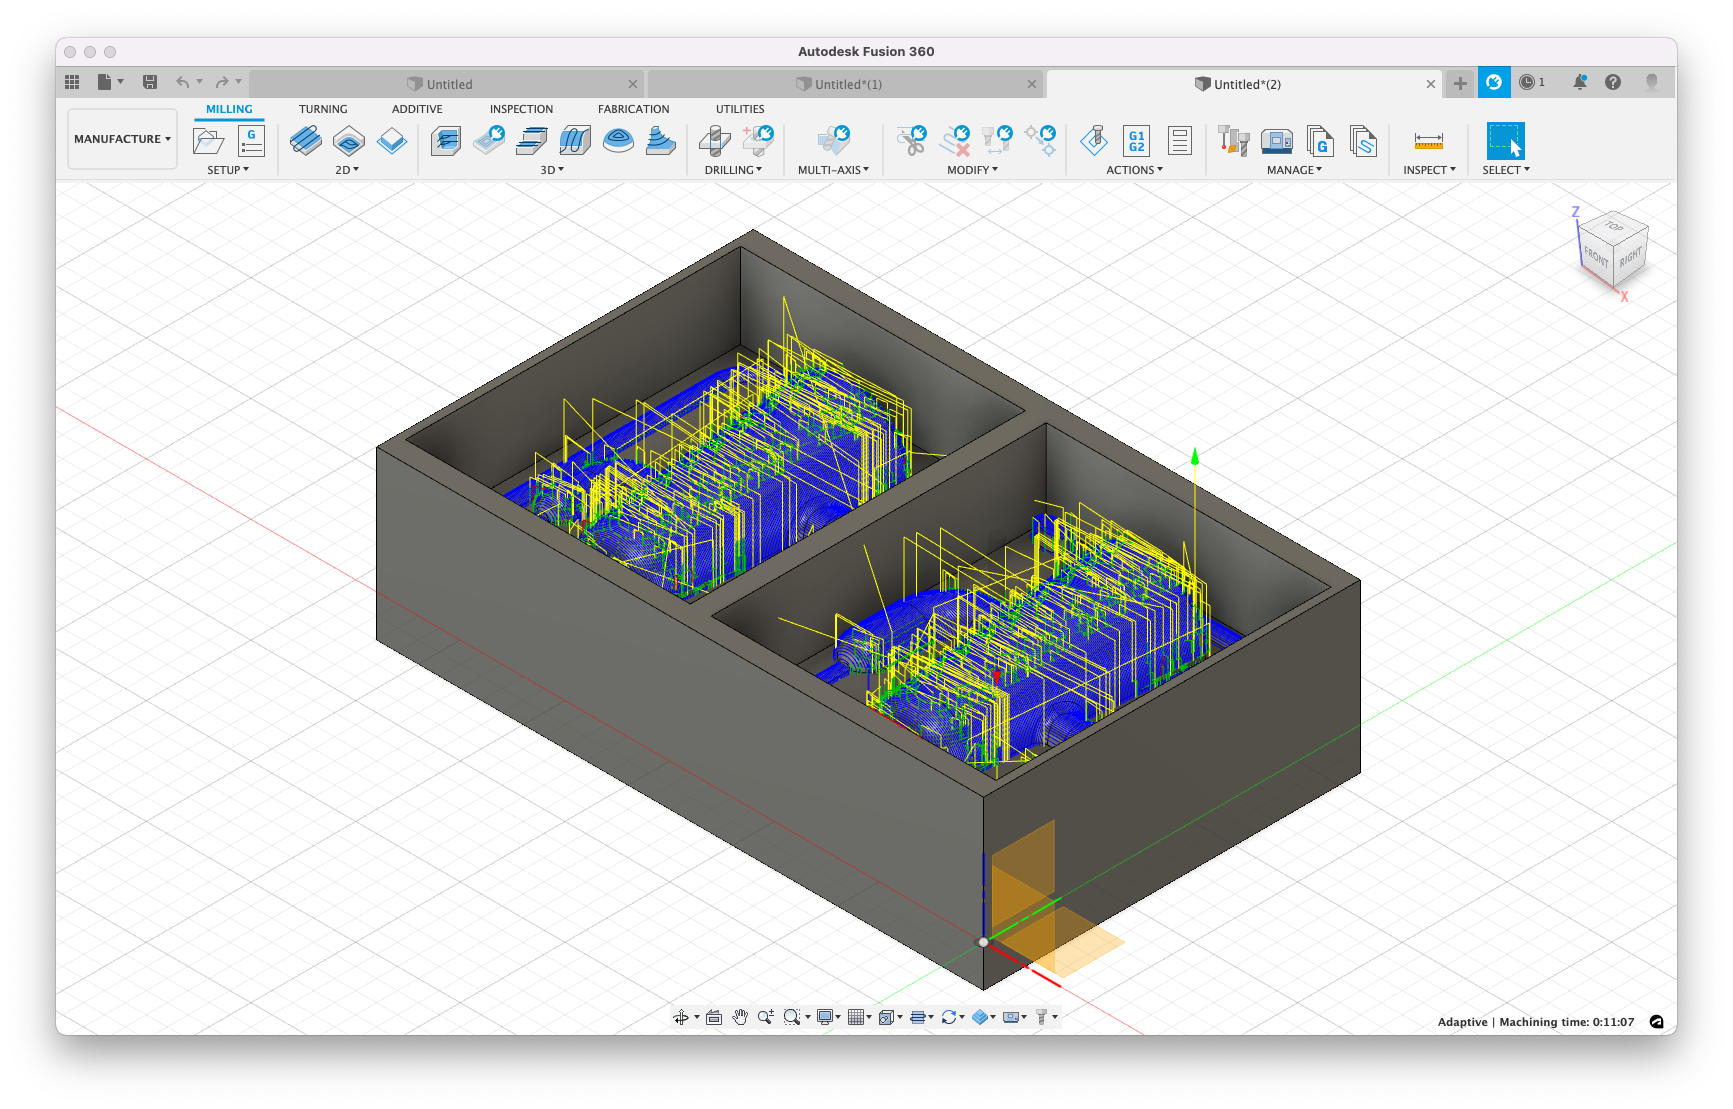
Finally, I did a parallel drill with:
- Tolerance: 0.01mm.
- Pass direction: 0 deg.
- Stepover: 0.325 mm.
- Direction: Both.
- Up/Down Milling: Both.
I then created two NC programs:
-
one for the first two adaptive setups (with the 6mm mill);
-
the second one with the adaptive and the parallel (with the 1.3mm mill).
🥳 Milling
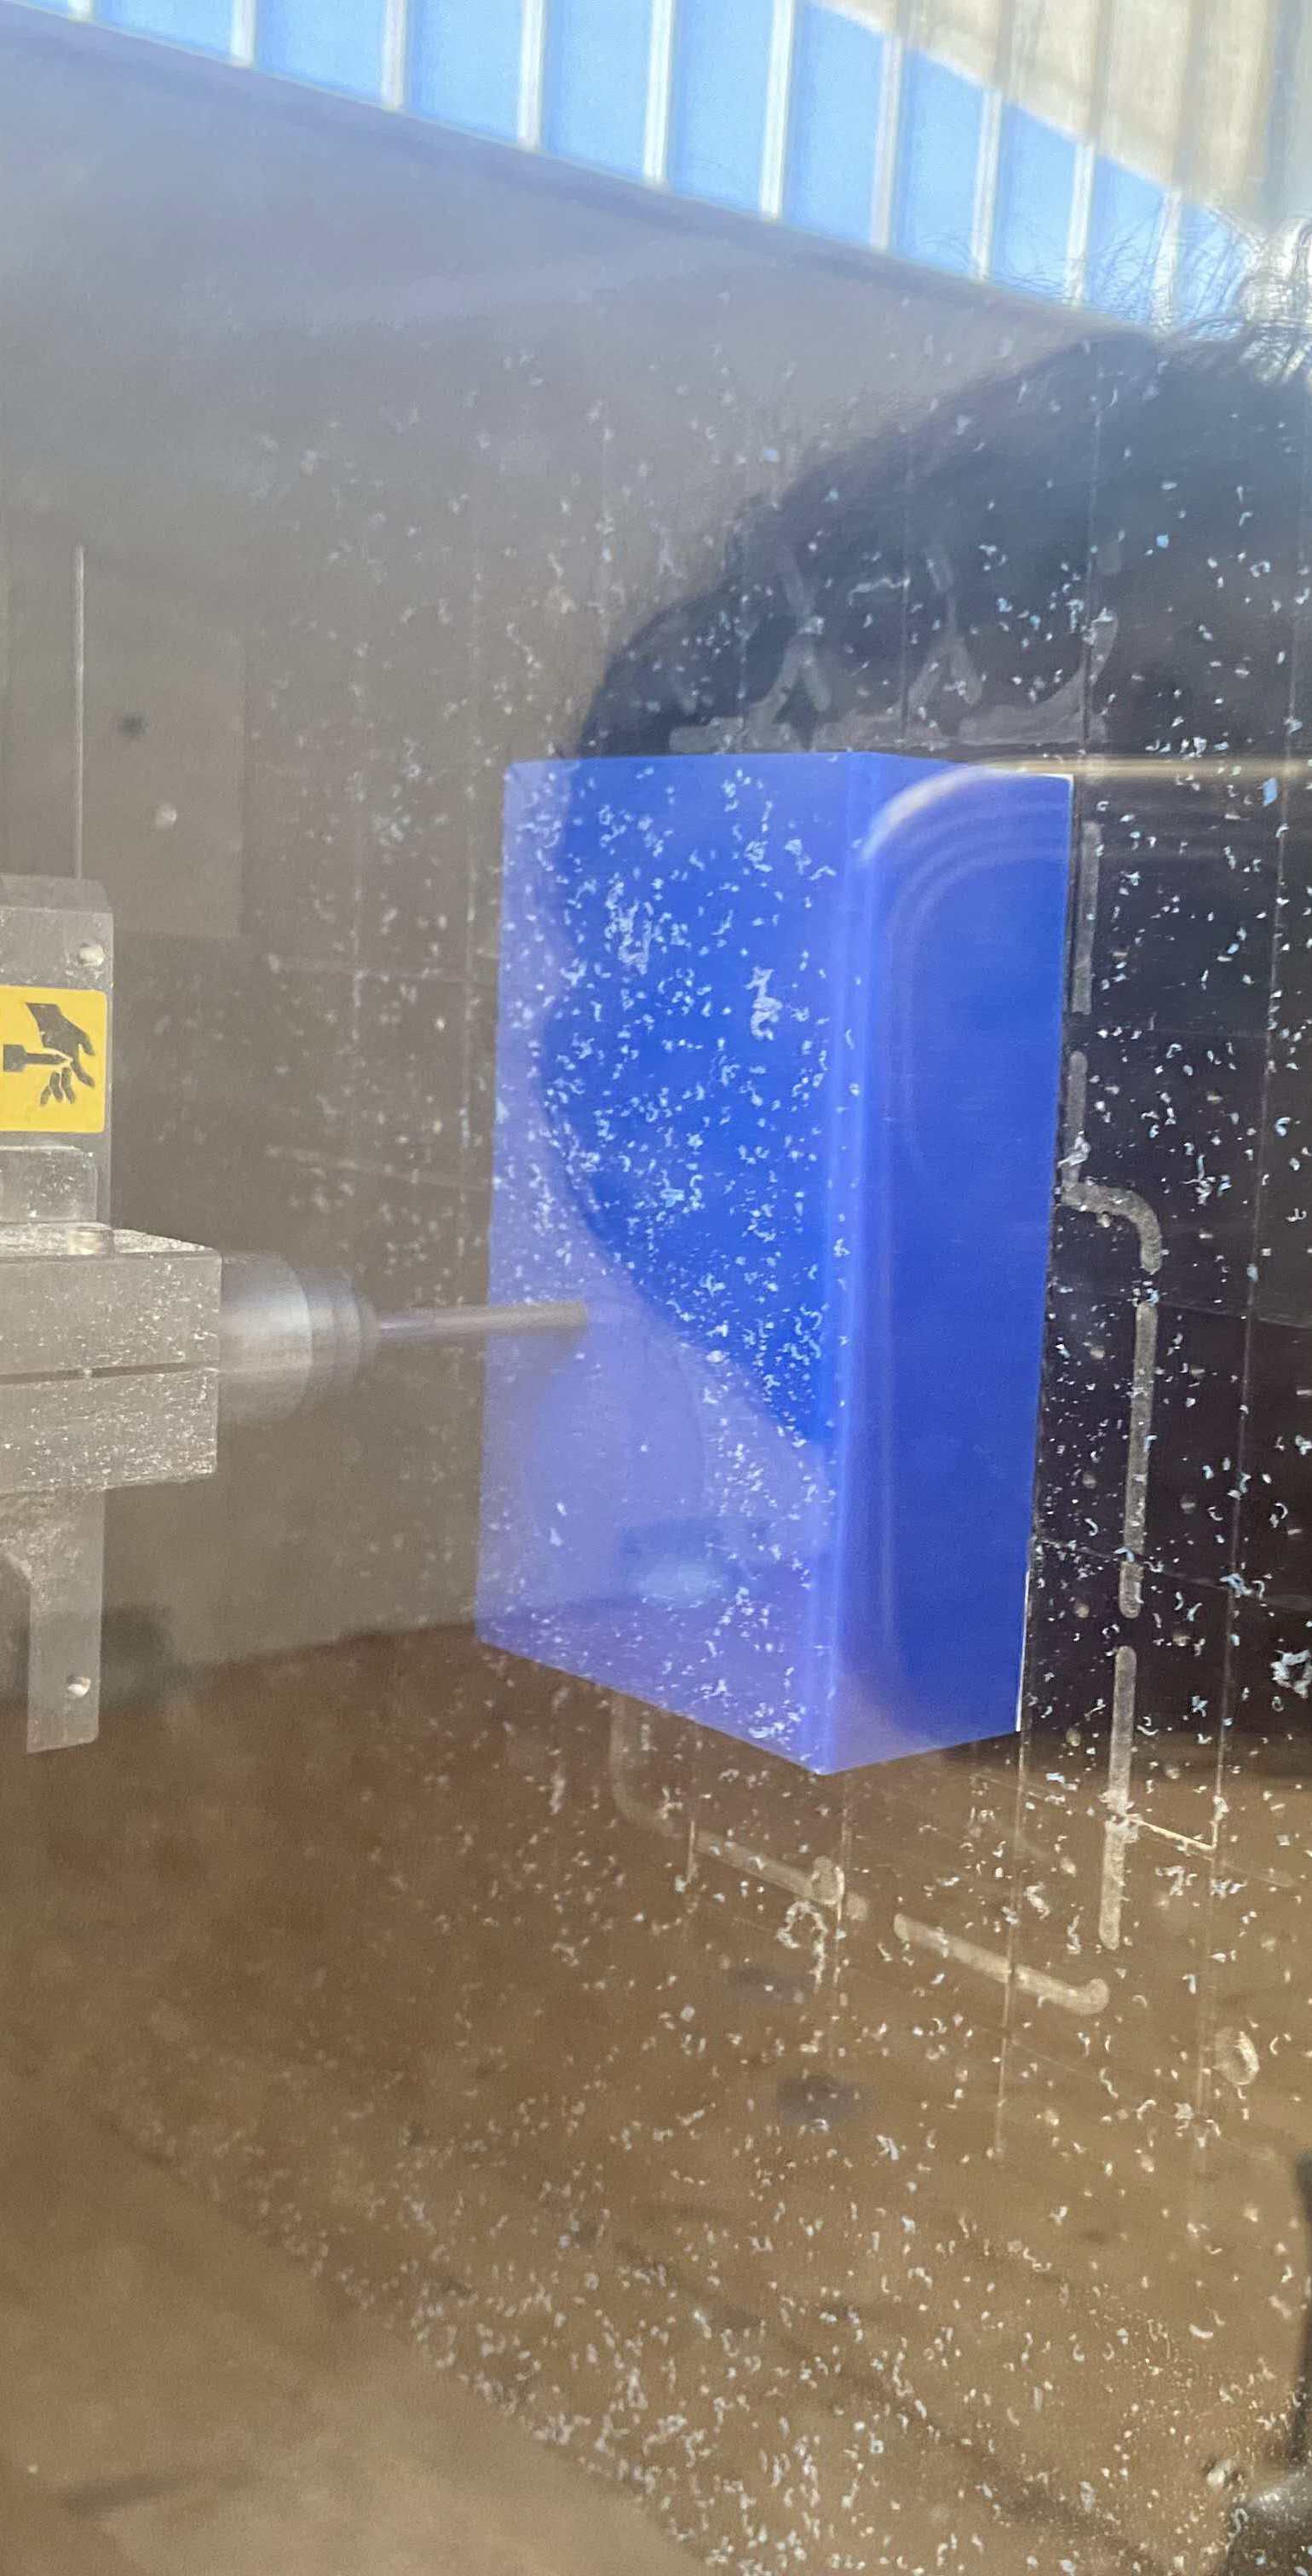
I took the wax rectangle and taped with double sided tape in order to attach it to the machine sacrifical plane.
I started with the first program and everywith was going well. With the second one there started to be problems (the wax was oscillating) and I decided to create some wooden “Ls” to attach more the wax to the Roland. I designed them in Fusion360 and laser cutted them.
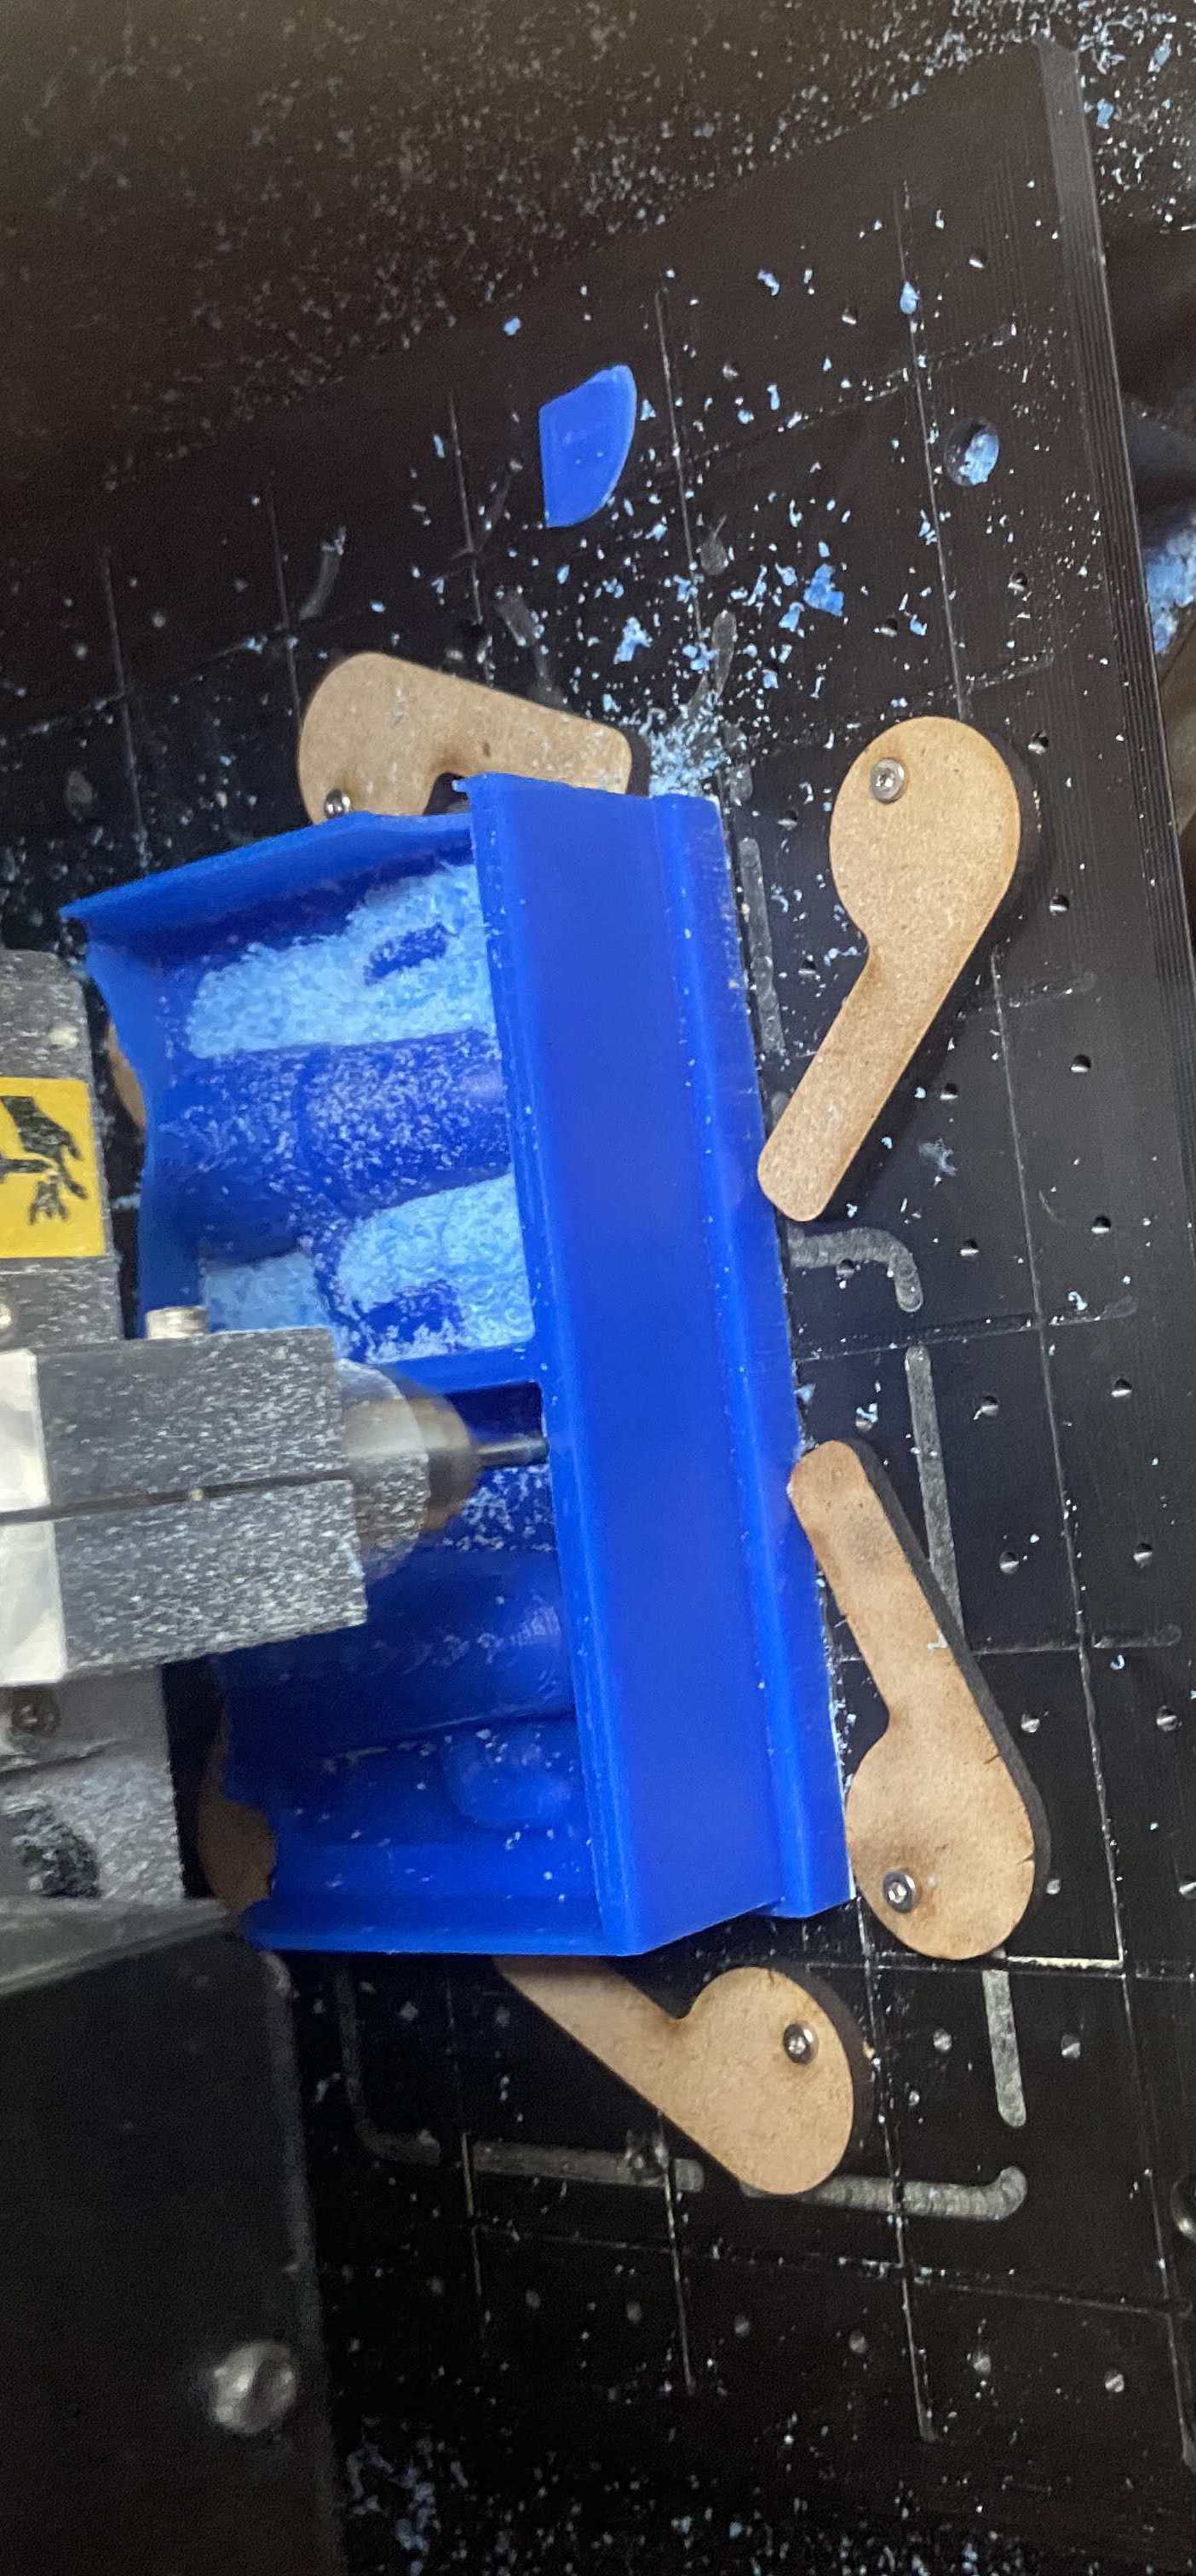
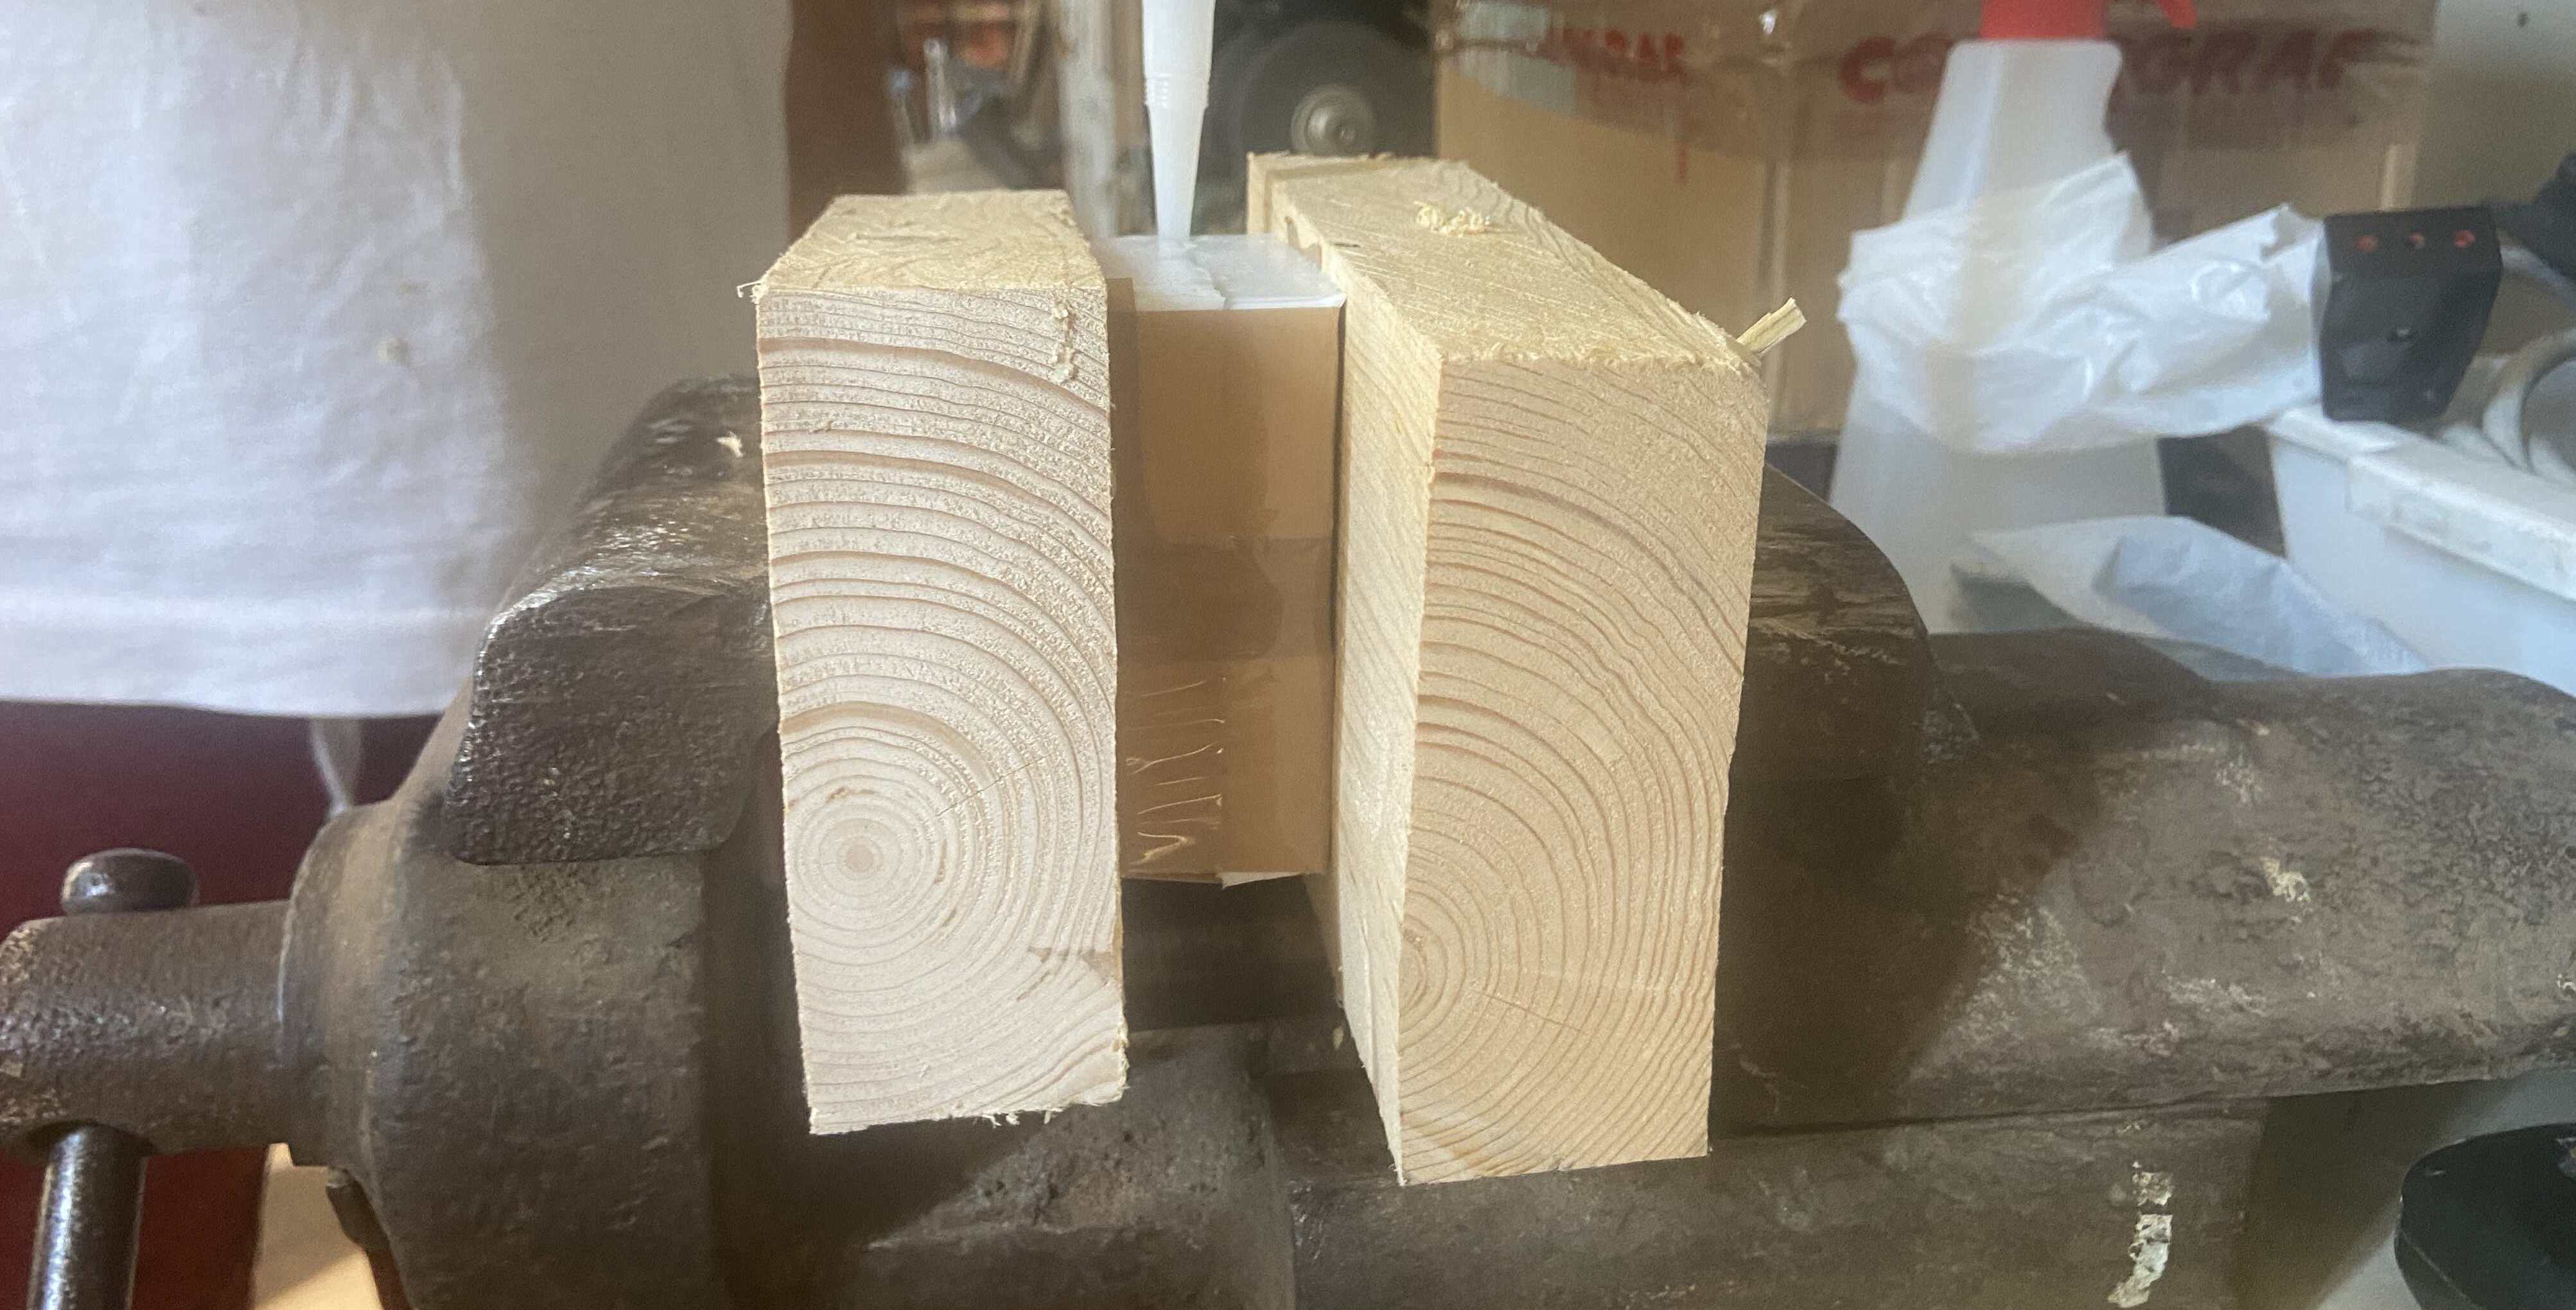
After milling with the Roland MDX-40 I divided the two halves of the mold with a circular saw but the space in between the two halves was too small
and so I had to create with a wooden rectangle a wall of one mold.
💩 Silicon
I decided to use the sintagom to do the first mold and first of all I followed the instructions on the packaging, weighting 100 part of component A and 25 part of component B. Since my mate Danilo had warned me, I first tried a small sample of silicon in a glass to see if it could cure. He had some troubles with the silicone of the lab and he wanted to protect me.
The glass I used seemed to cure so I poured the silicon in the mold.
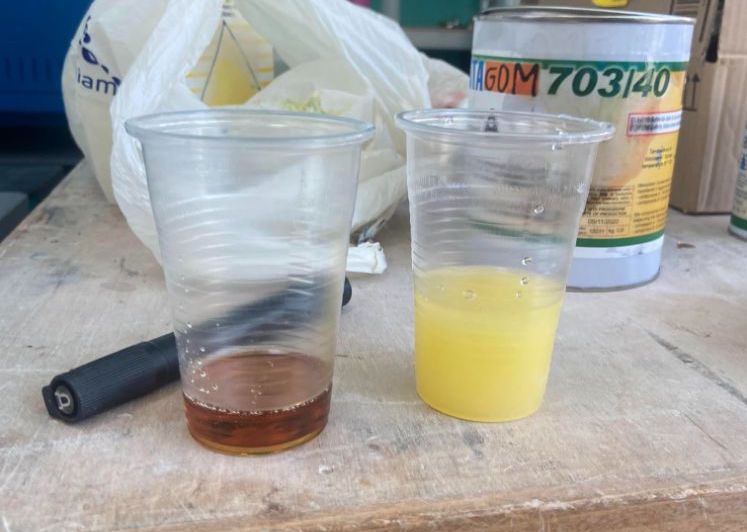
I waited two days and one of the two molds looked normal but the other one had some bubbles. I guess this happened because I put the release spray for molds and it reacted with the silicon.
I waited 72 hours as the instructions said and the silicon did not cure. Danilo was right.
I cleaned the molds so I would be able to start again. I will keep you posted.
🫰🏽 Silplay
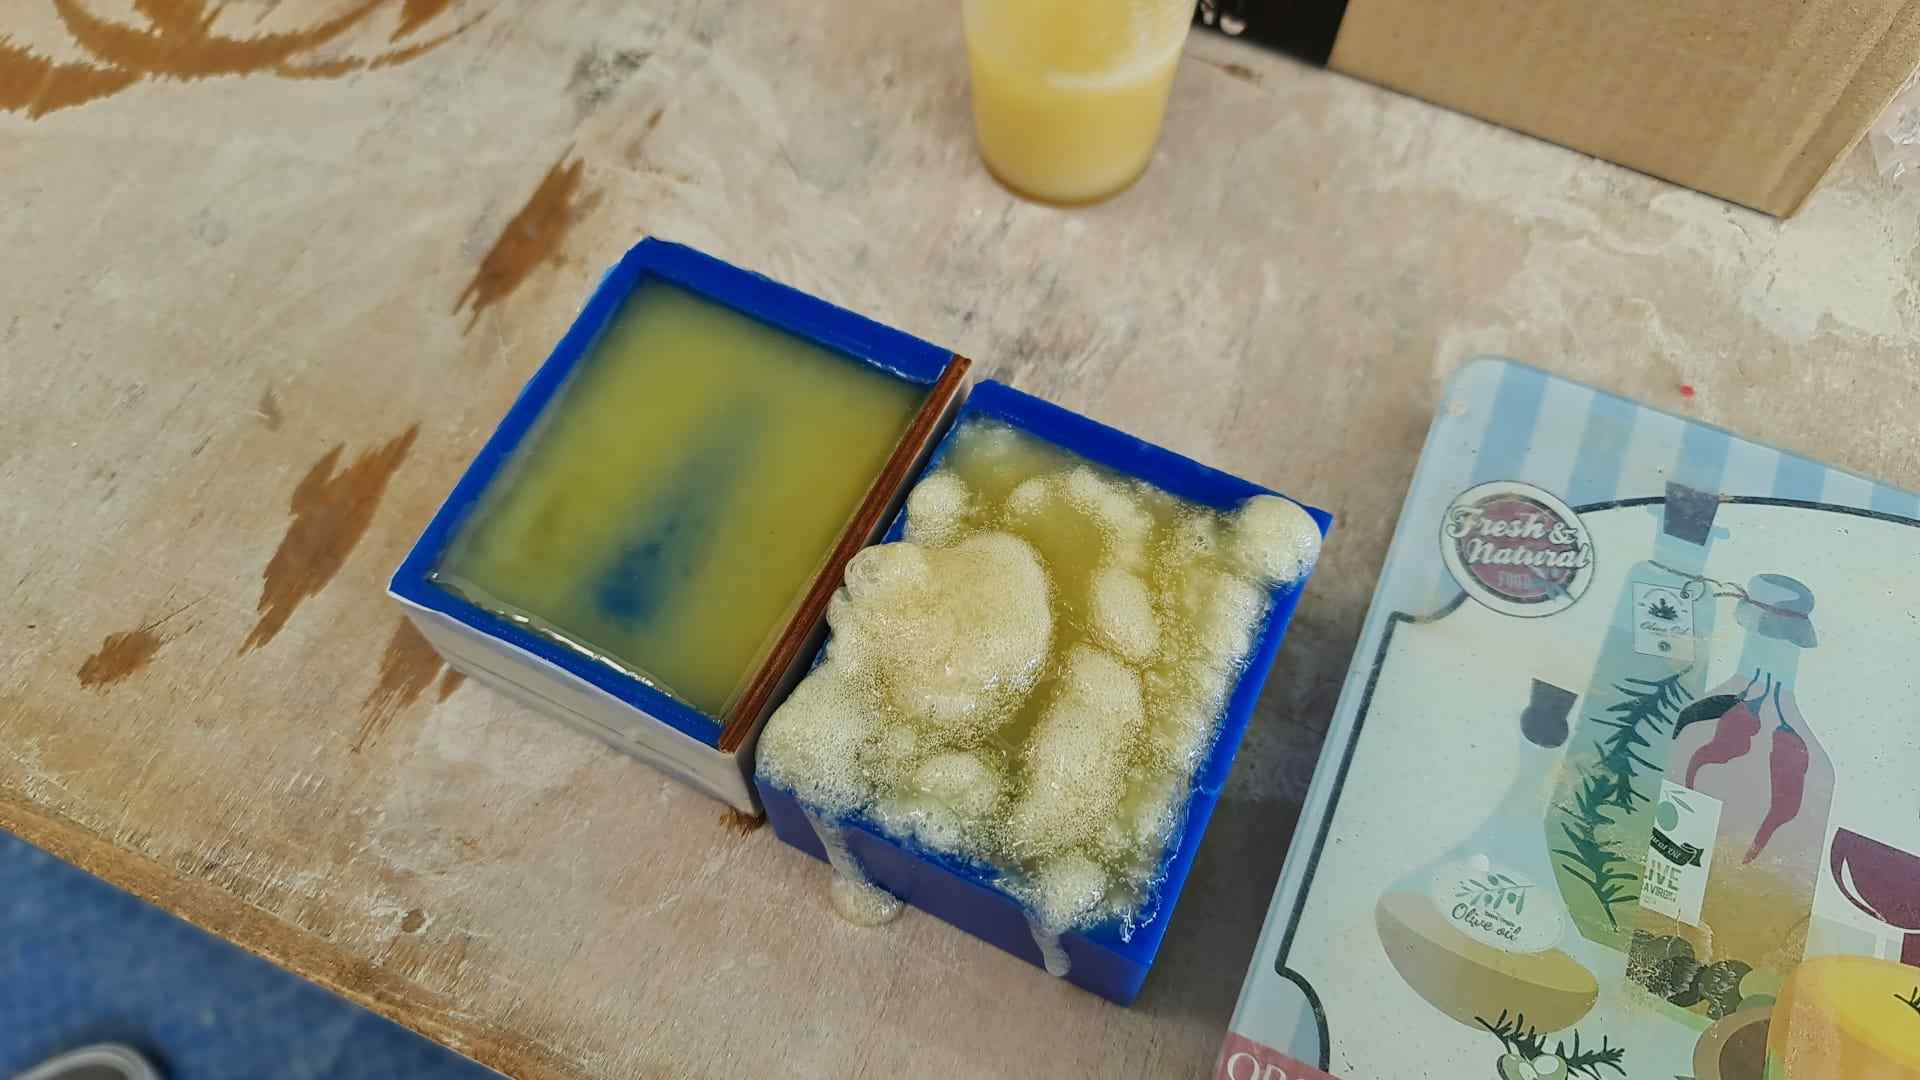
After cleaning the molds carefully, I decided to try again but this time with 184 Silplay.

The first thing I did was to create some wood pieces to close the molds that were broken. In this way I could pour inside the Silplay without leakage.
While I did this I was in quarantine at home so I did not have access to a laser cutter. Therefore I just broke the wood in pieces that could fit and taped them in the best way I could.
🫐 Instructions
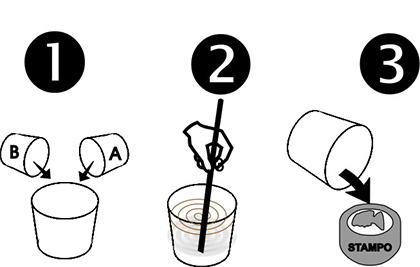
After that, I read the instructions for the Silplay, which came in two parts, A and B respectively the silicone rubber and its catalyser:
-
Pour Silplay silicone rubber 184 and the respective catalyser in equal parts into a container.
-
Mix thoroughly with a spatula in order to obtain a homogeneous mixture.
-
The silicone rubber compound 184 Silplay and hardener must rest for 10 minutes before being poured slowly into the mould.
-
The curing process takes at least 18 hours at 20° C. Once complete, remove the silicone rubber block 184 Silplay and, with a slight bend, pull out the mold.
🛸 The making
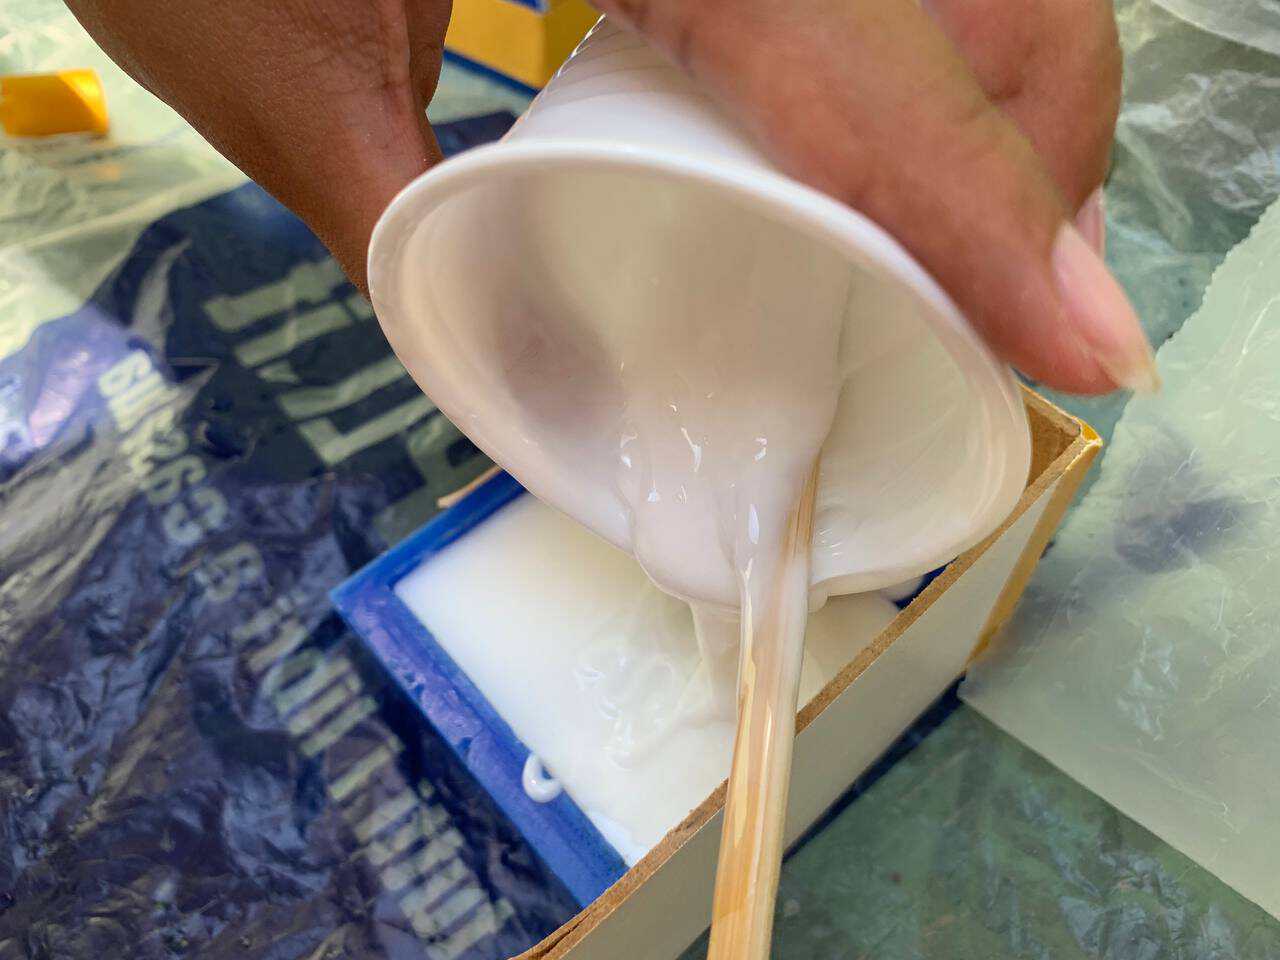
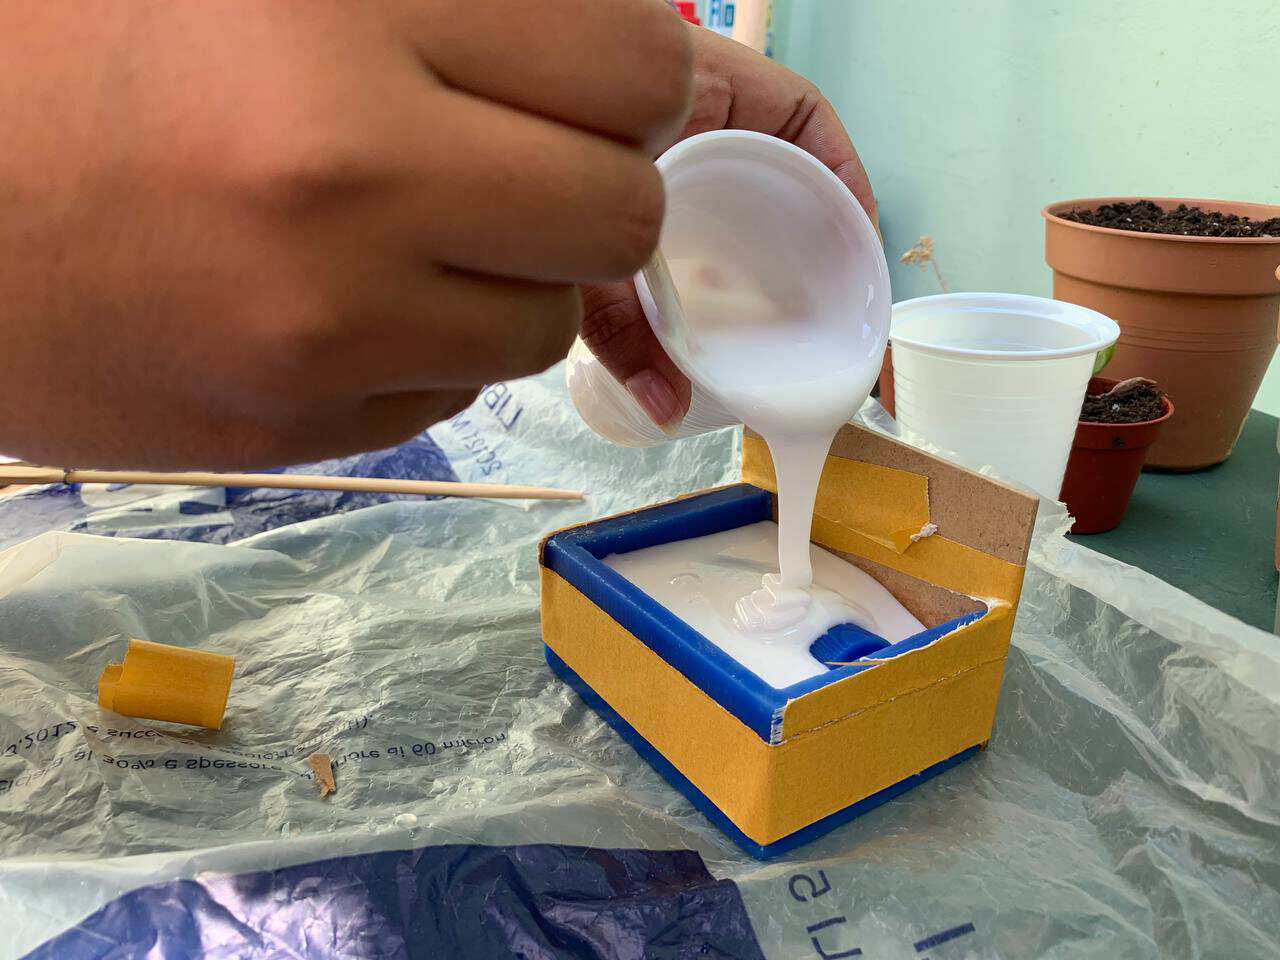
Before starting, I measured how much liquid I would need by pouring some water in the mould. Of course the density of the two liquids is not the same but I had an idea of amount of silicone needed. Then I poured the silicone in a PLA glass and the same amount of catalyser in another glass. I then poured the catalyser in the silicon and started to stir well until everything was mixed. I let the mixture sit for 10 minutes and then I started to pour it in the mould.
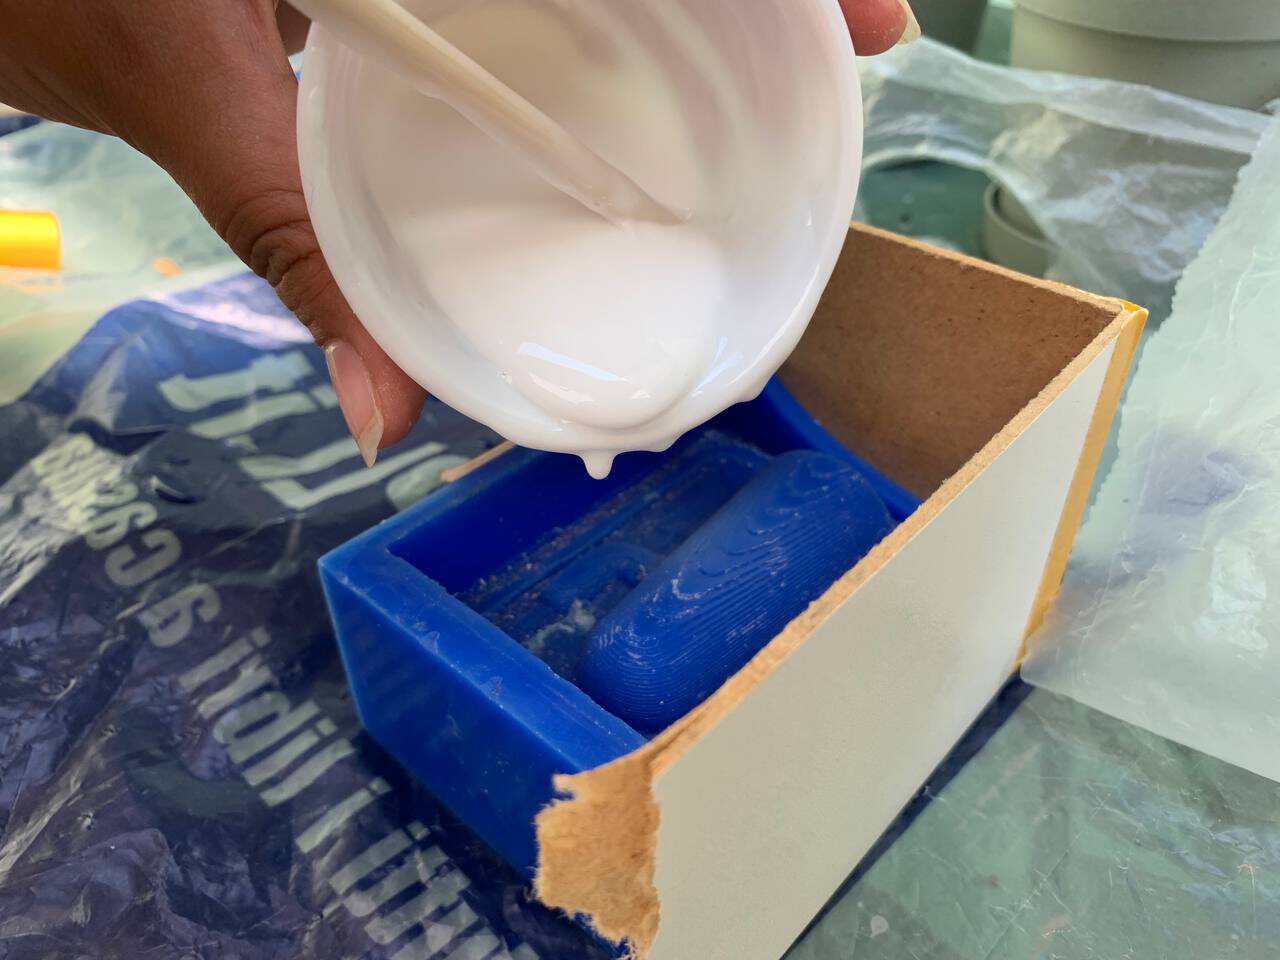
I tried to start from an angle so that everything would fill up smoothly and with less bubbles as possible.
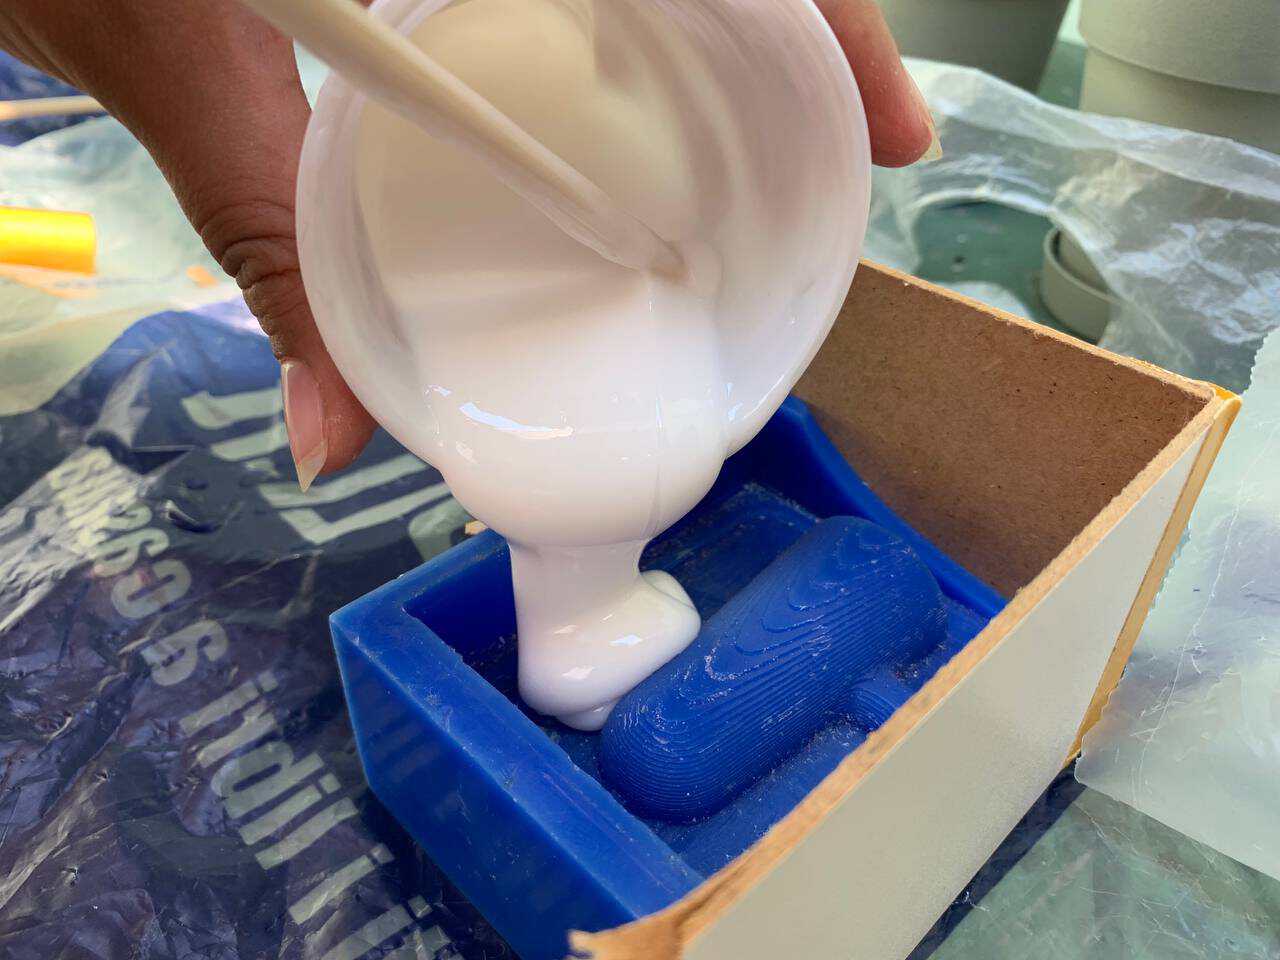
I continued to pour in both the moulds until the cactus was covered.
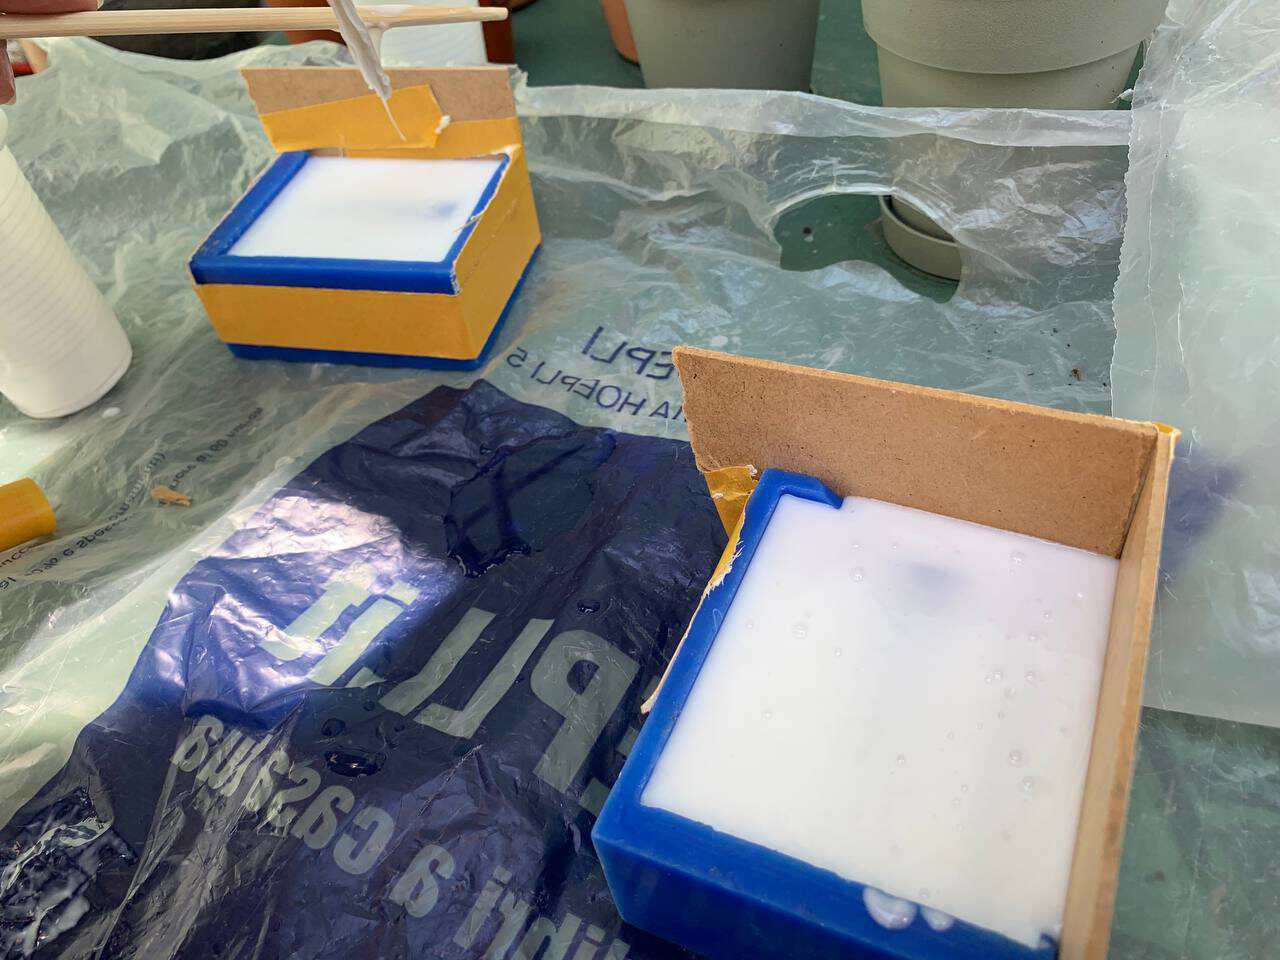
I let the two moulds sit for 20 hours, cheching in this time, so I was sure that the silicon was curing.
After 20 hours the cast were ready and I gently pulled them out the molds.

🫡 Cement
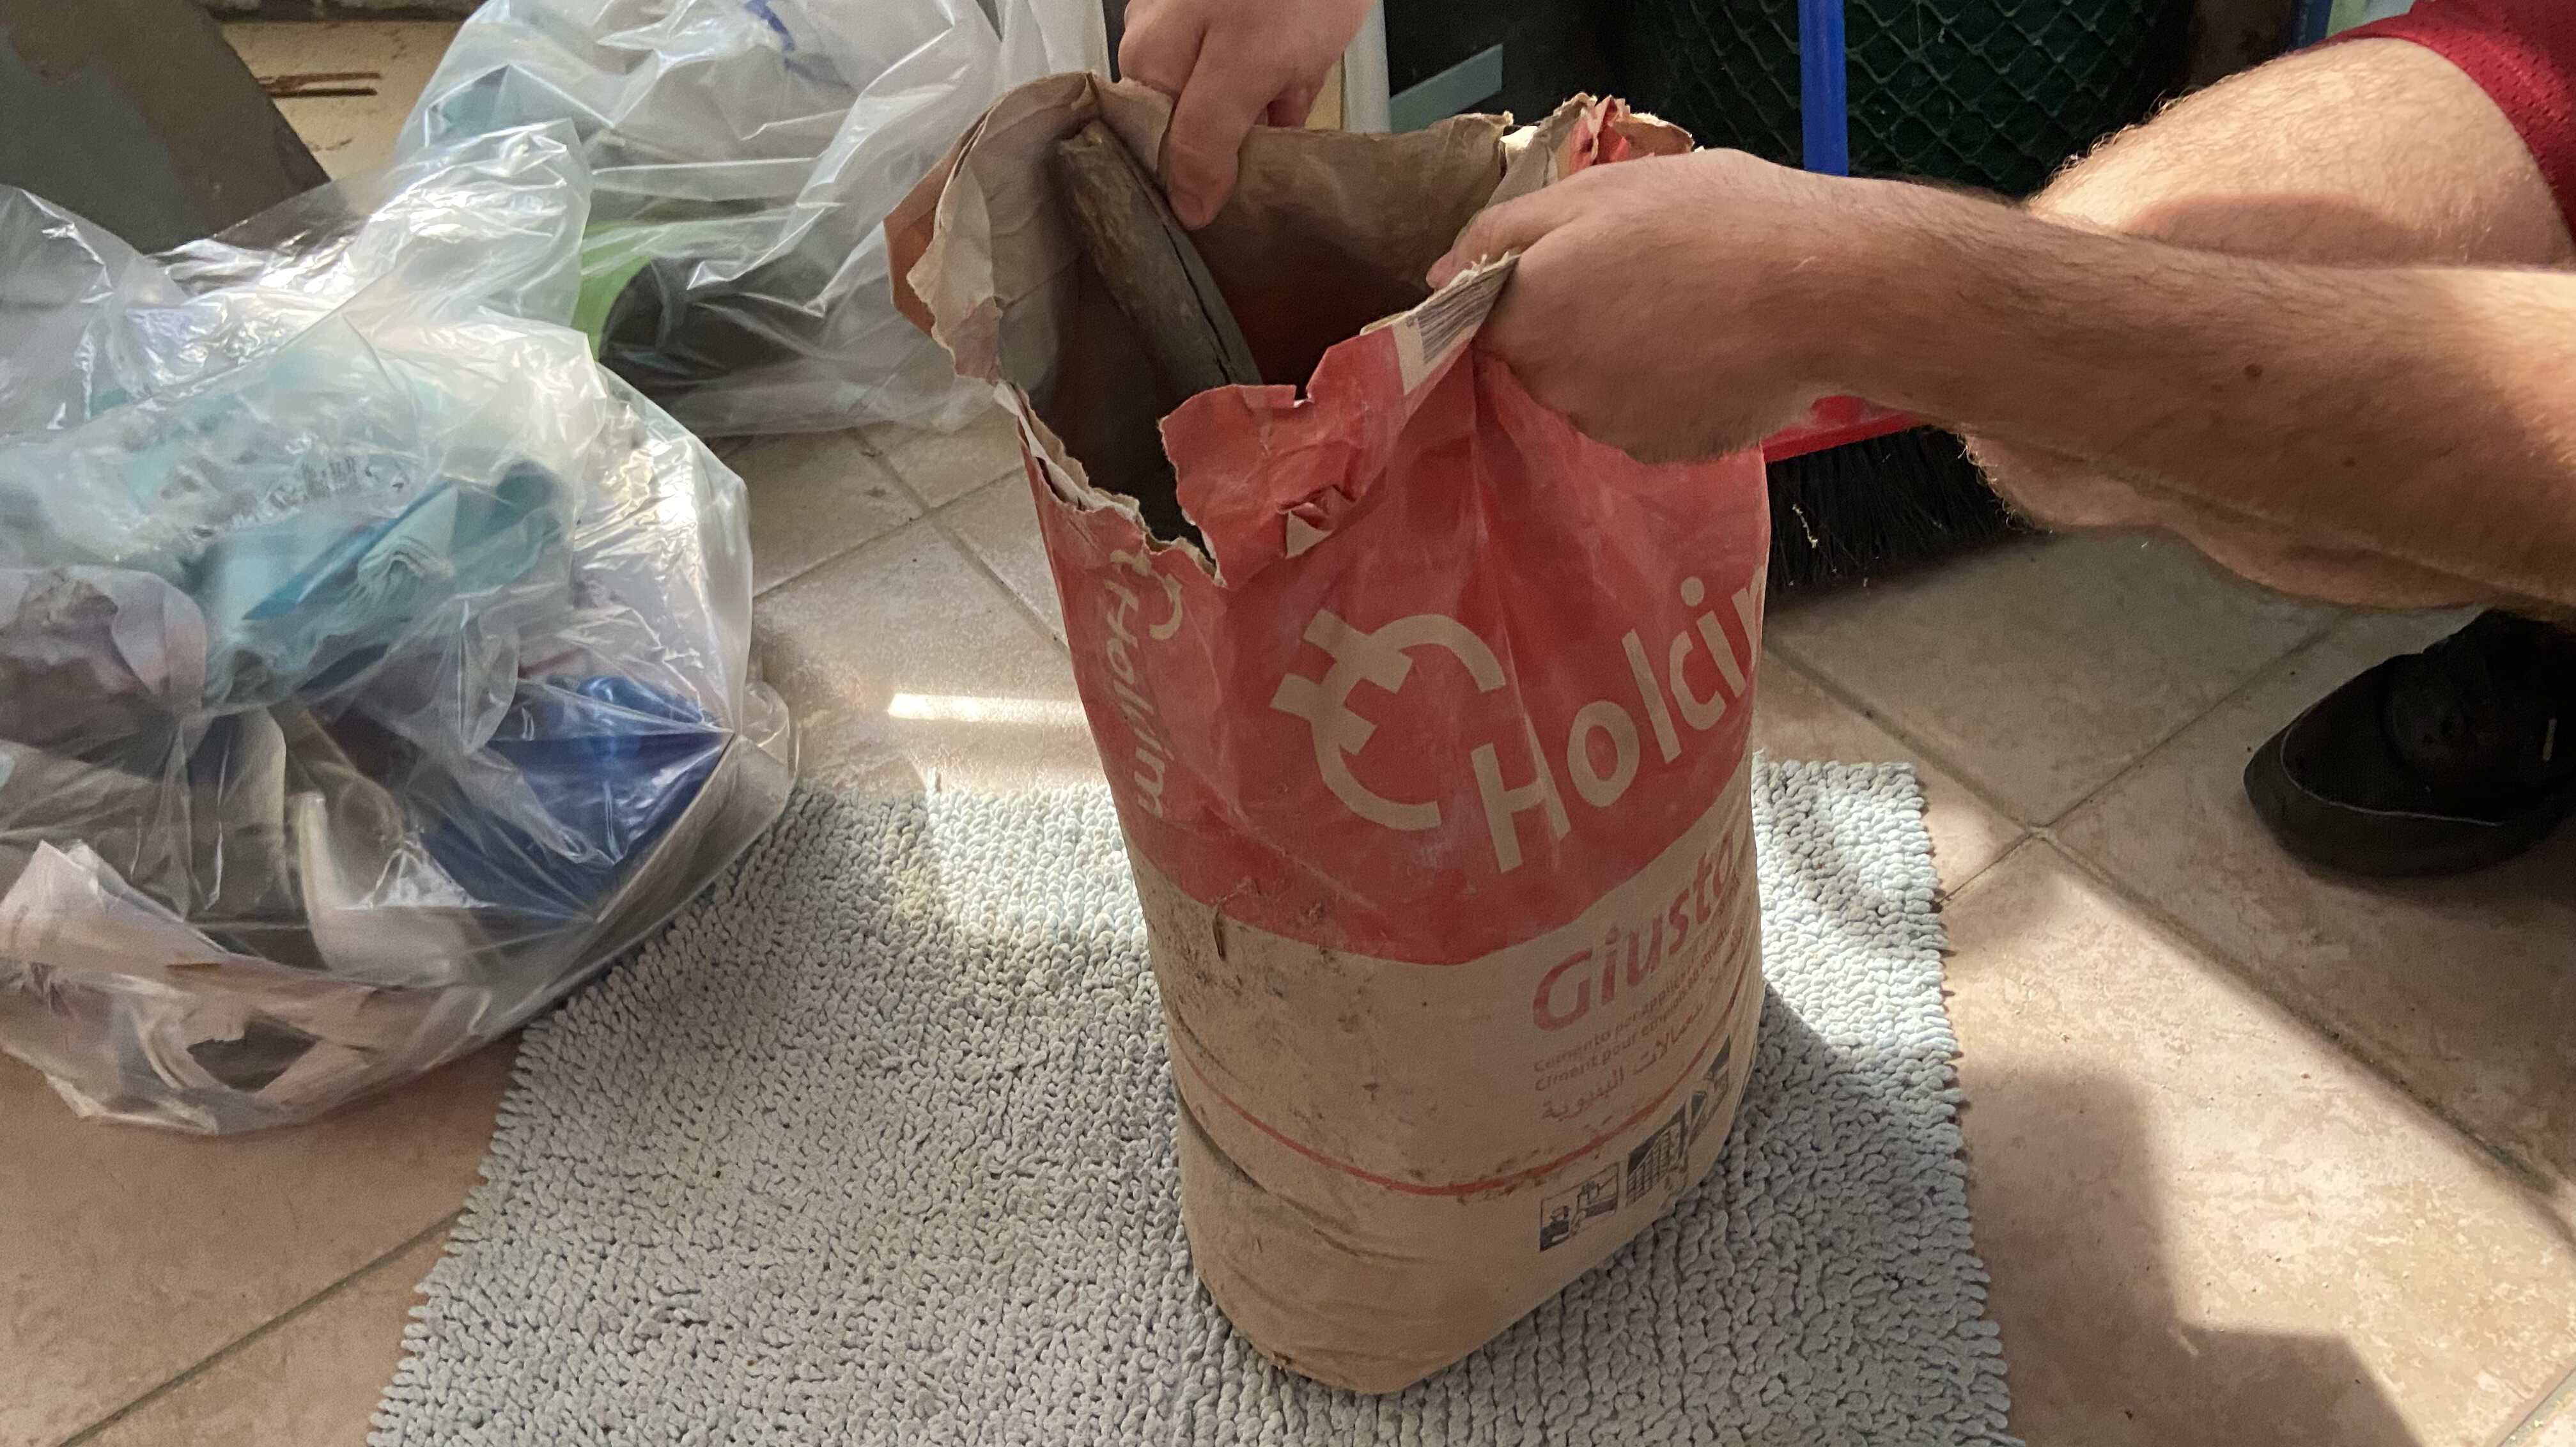
The final part of my assignment was to create a cement cactus. Therefore I used some cement I found at home:
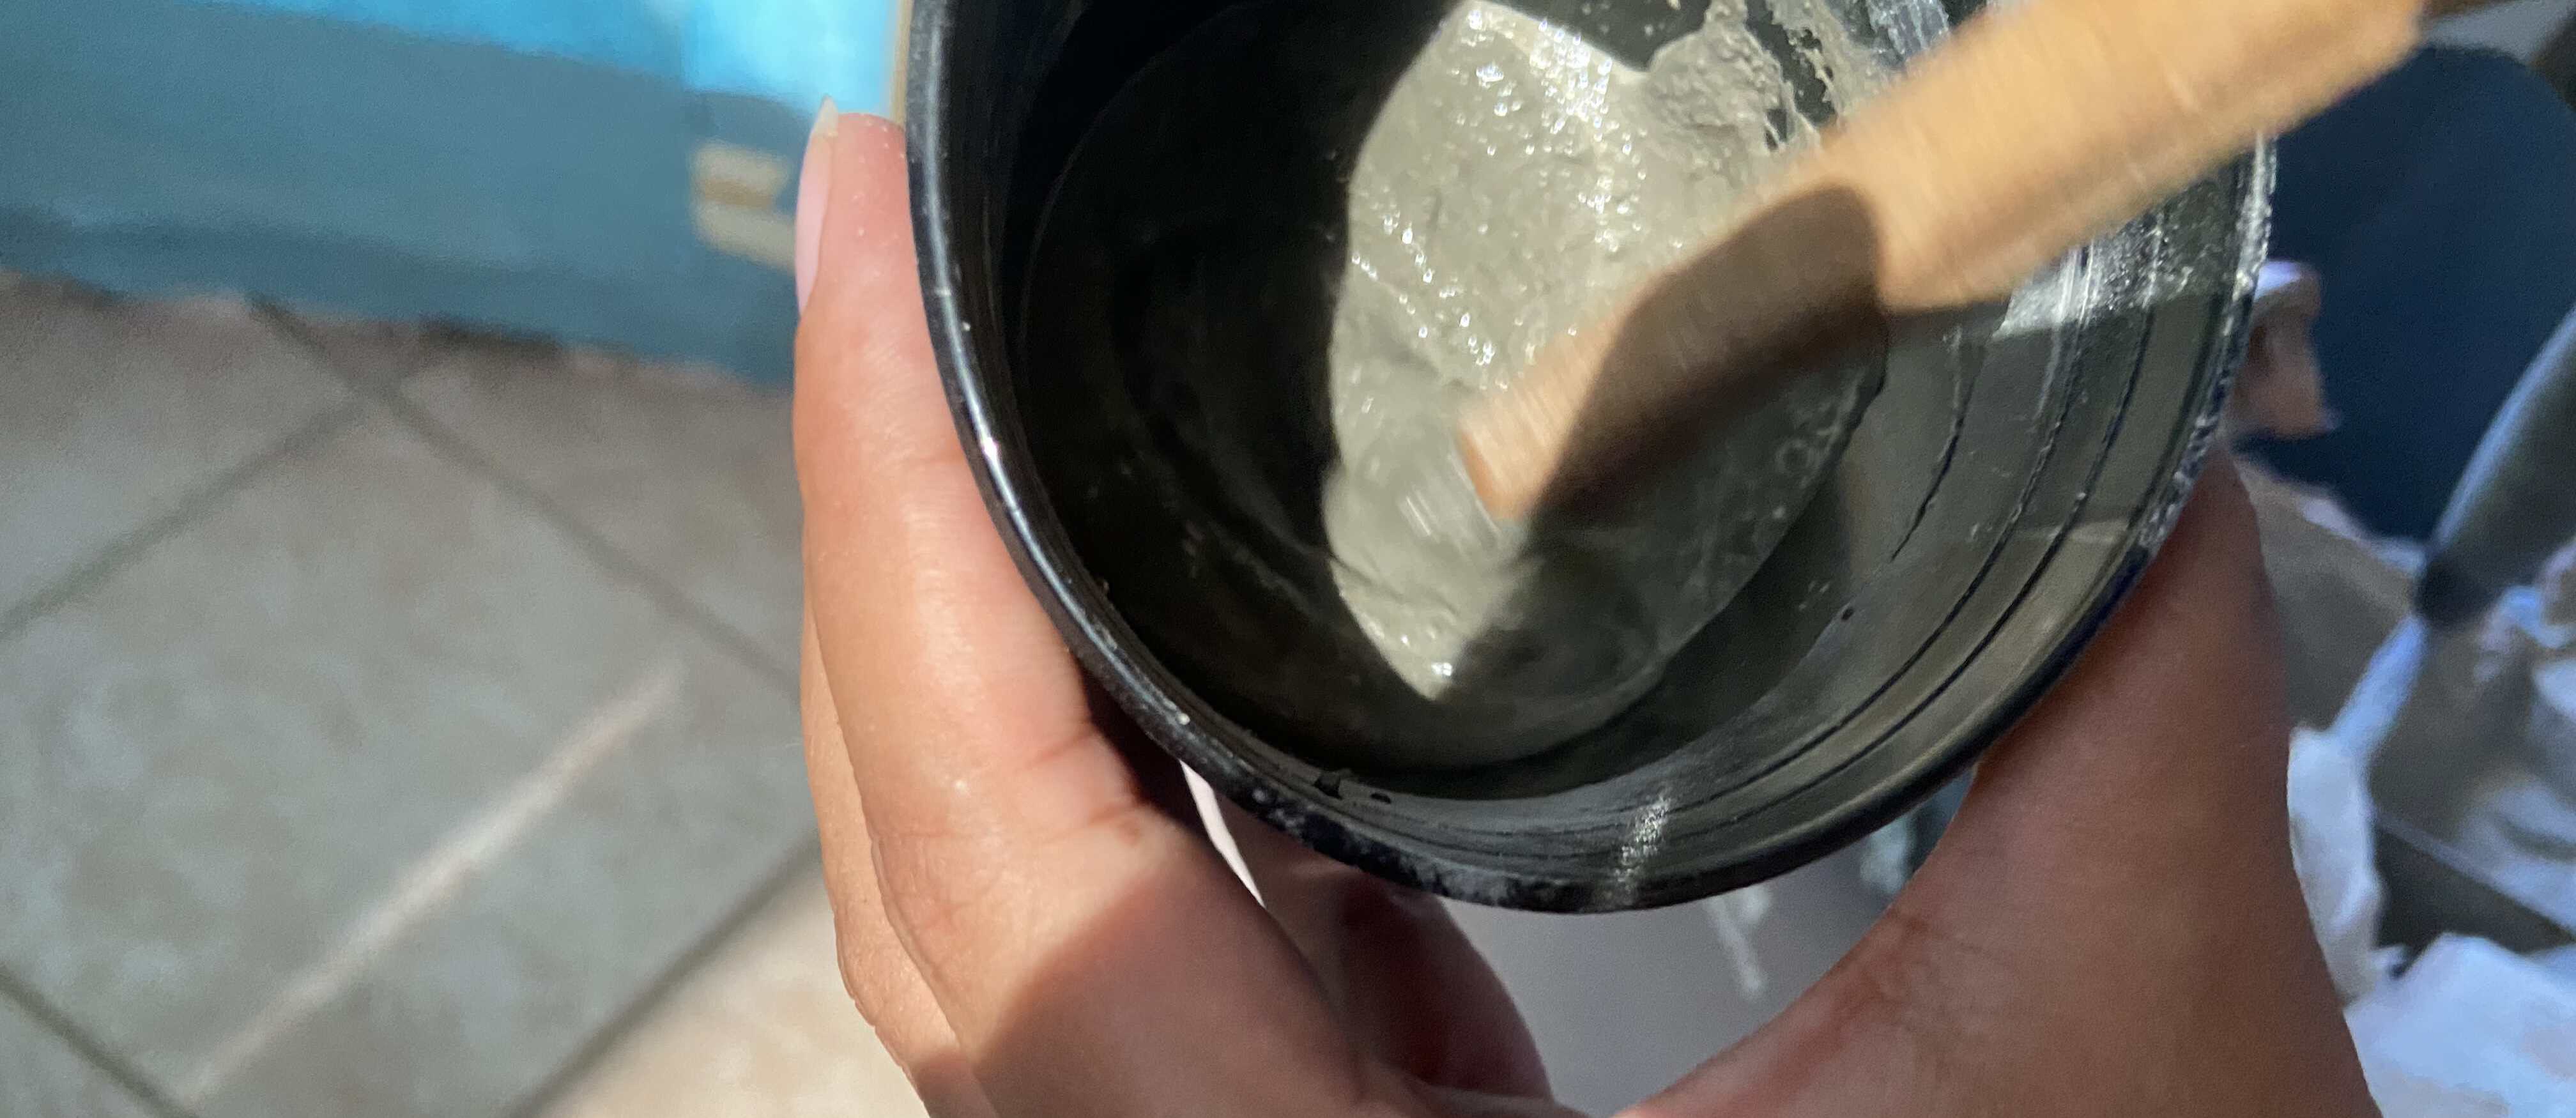
I poured the cement powder into a container and put a small amount of water and I stirred until I reached the right consistency.
In the meantime, I aligned the two halves of the mold and closed it very well with some tape. Moreover, I put the mold in a clamp with two pieces of wood to make the pressure more even.
I put also two funnels (one smaller than the other) inside the feeding hole of the mold.
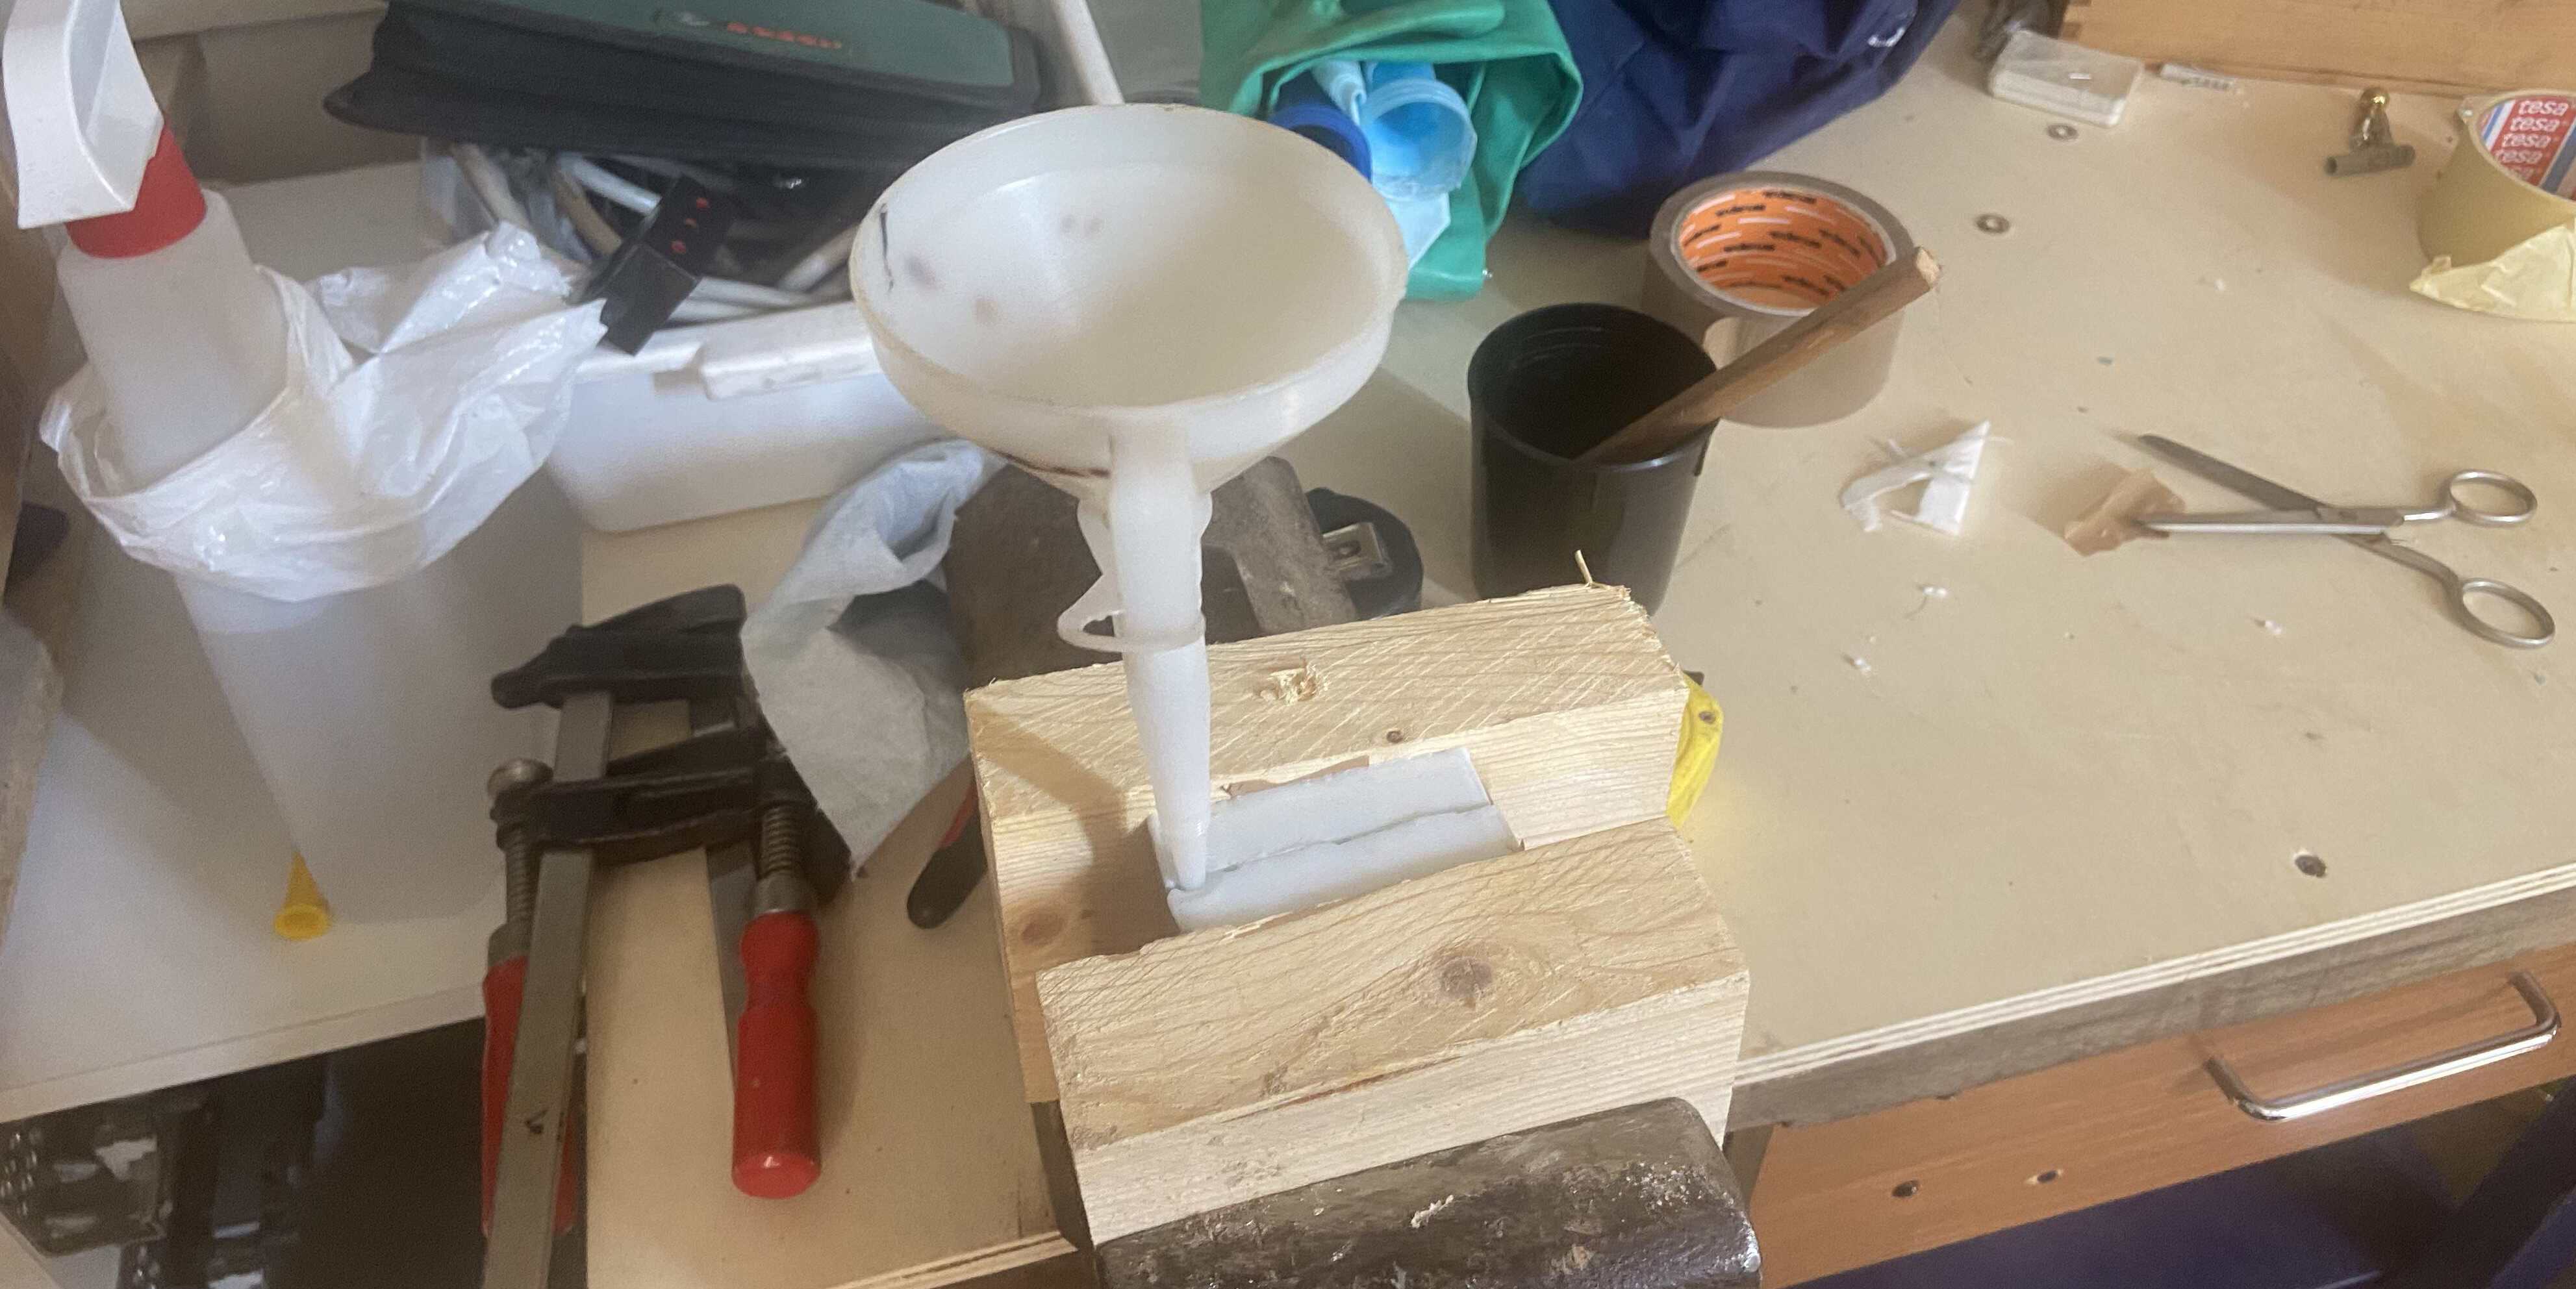
I then poured the cement in the funnel and I helped myself with a wood bar to fill the whole mold.
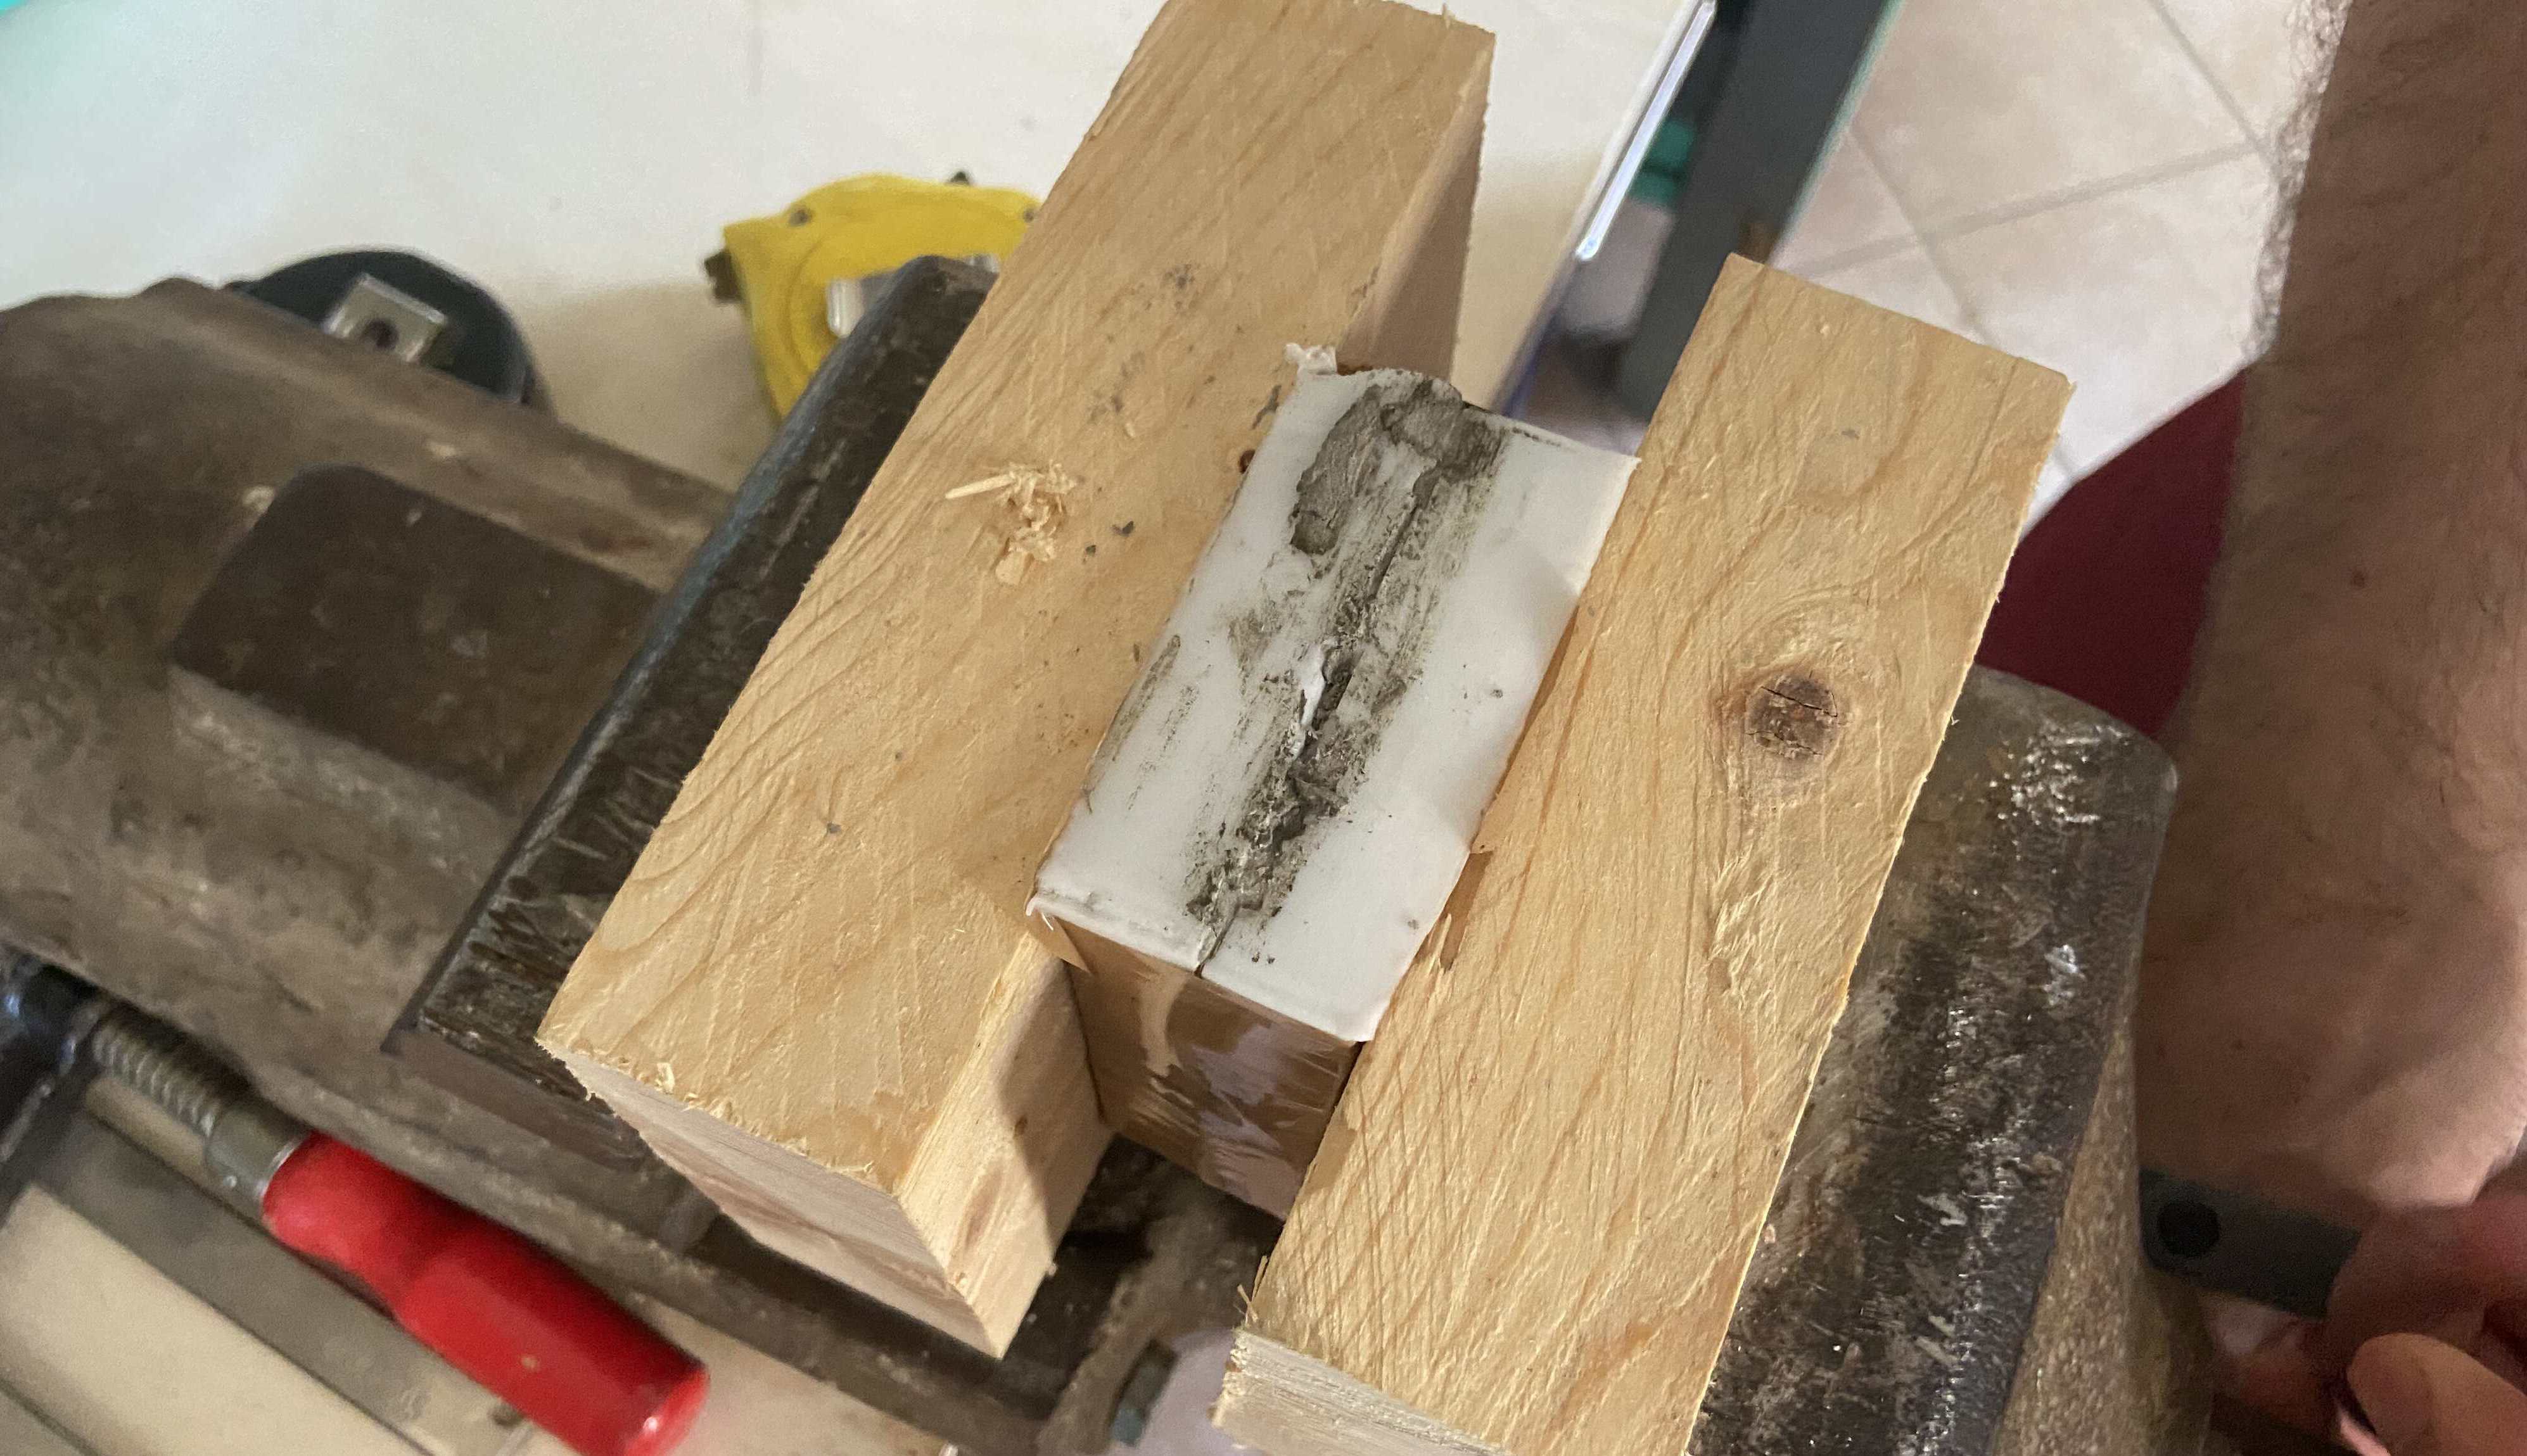
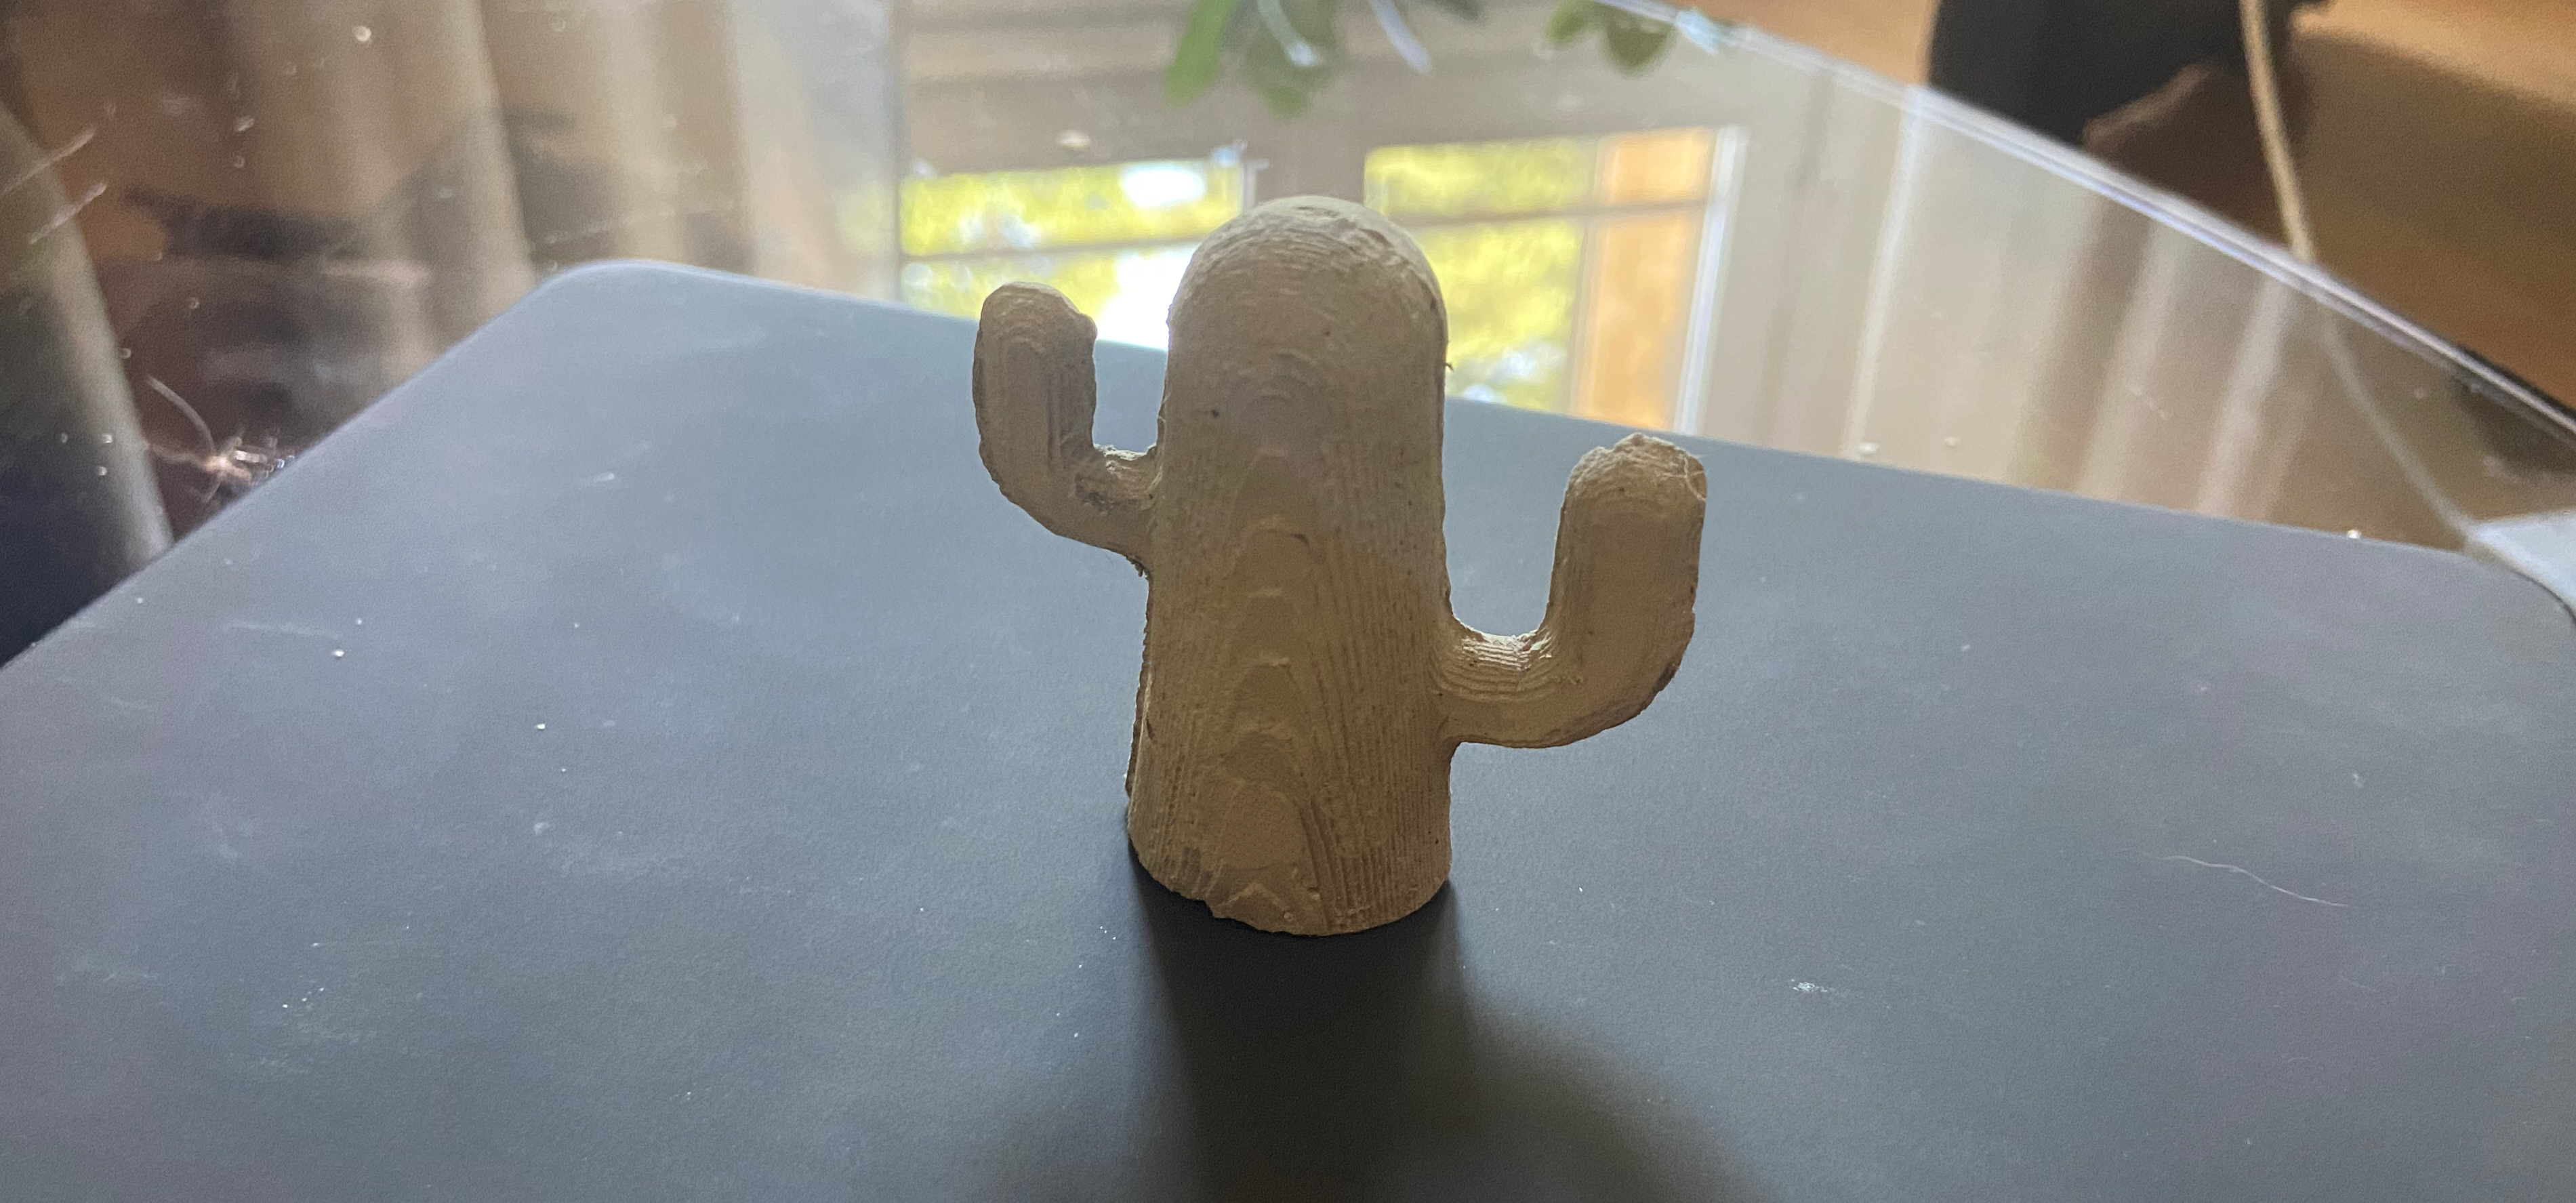
The result was quite messy, I will admit it. I waited 24 hours for the cement to solidify.
Once the cement was solid, I took all the tape away and I opened the mold. Inside there was my cactus, that I proceeded to take out.
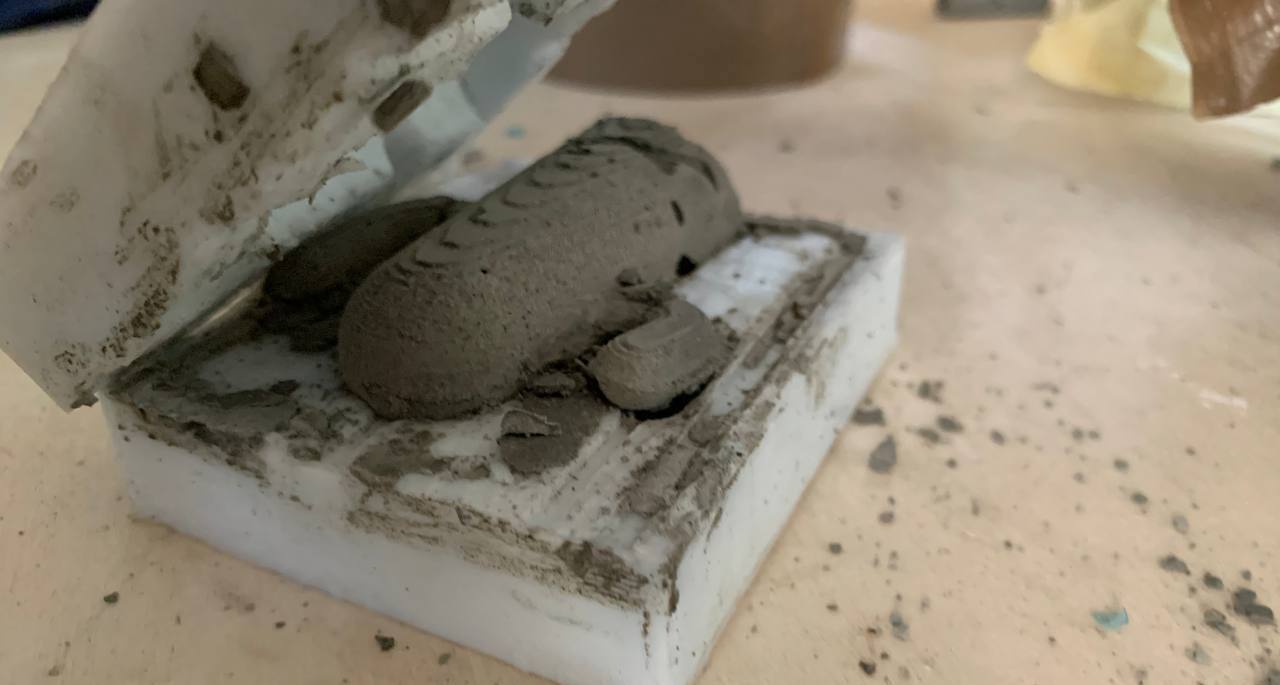
I then proceeded to clean it and here it is in its greatness: