Input devices
This week there are two types of assignments, one group and one individual. In my case I’m alone in ESNE’s Fab Lab so I am doing both.
Assignment
Group assignment:
- Probe an input device's analog levels and digital signals
Individual assignment:
- Measure something: add a sensor to a microcontroller board that you have designed and read it
Group assignment
Group assignment page
In the following link you can access the Leon Fab Lab page that contains all the group assignments: Fab Lab Leon group assignment page
Probe an input device’s analog levels and digital signals
Potentiometer measurement with multimeter (analog)
The first measurement I made was that of my potentiometer (analog) with a multimeter, in the video we can see how the values go from 0 to 5 V depending on the position of the multimeter.
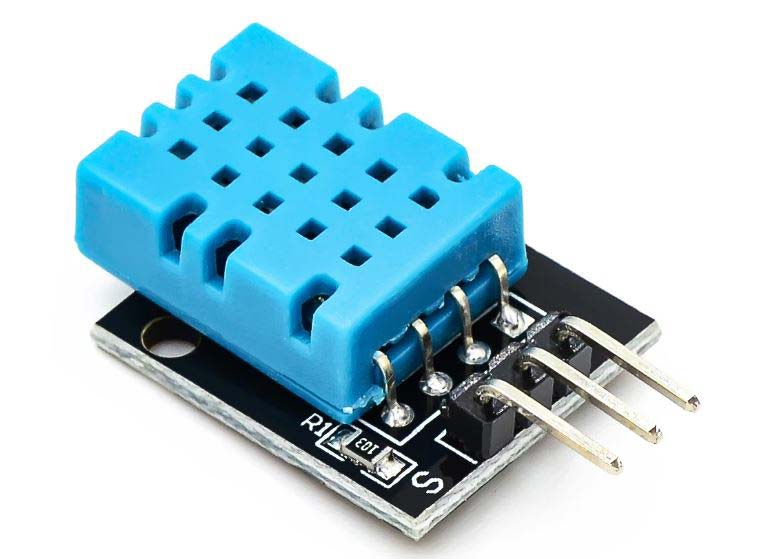
Potentiometer measurement with temperature and humidity sensor DHT11 (digital)
When measuring the temperature and humidity sensor (digital) with the multimeter, the multimeter values varied between different values, many of them were repeated, but I have not come to understand these figures
Individual assignment
Measure something: add a sensor to a microcontroller board that you have designed and read it
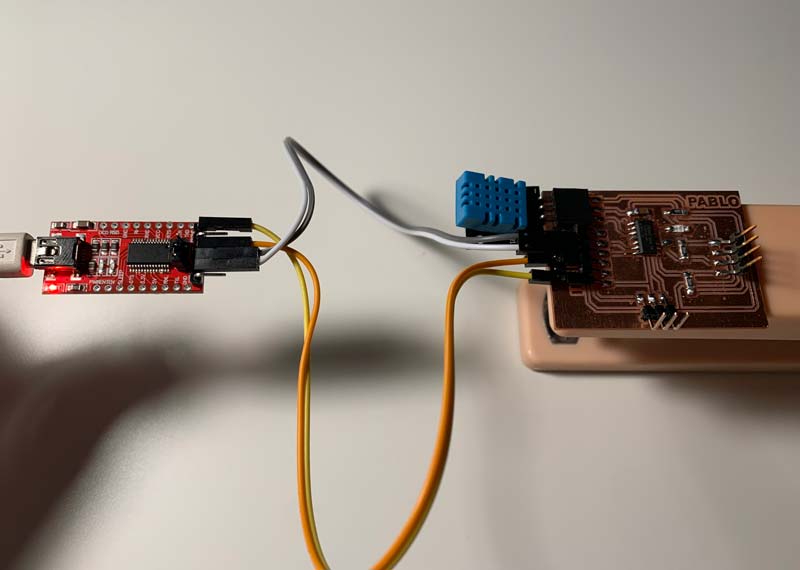
Temperature and humidity sensor DHT11
This week for my input board I wanted to take advantage of a temperature and humidity sensor that I had in my fab lab, maybe my final project will use this sensor too
I started designing my input board in Kicad, in addition to the necessary components for the temperature sensor, my instructors recommended me to add an LED to my board and my colleague Luis some male pins to be able to use the i2c that was free.
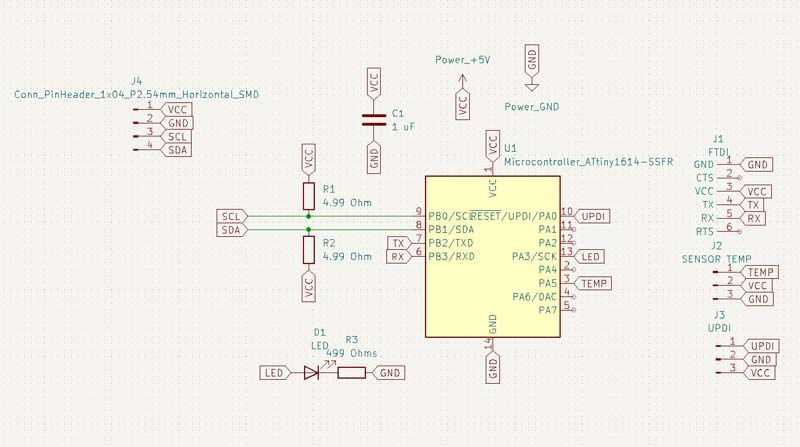
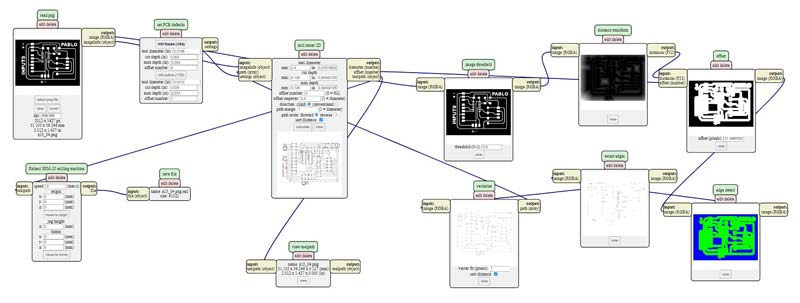
Then go to the design of the paths in Kicad
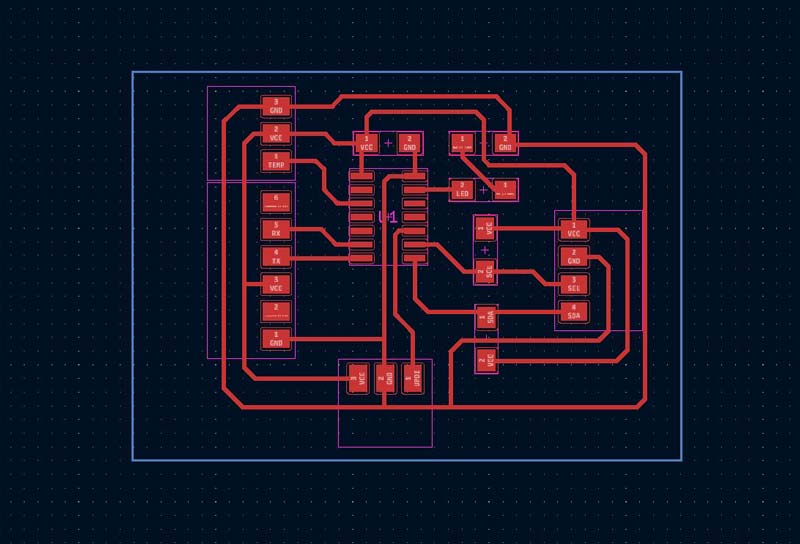
Then I personalize my board in Adobe Photoshop.
With this png go to mods and mill my board
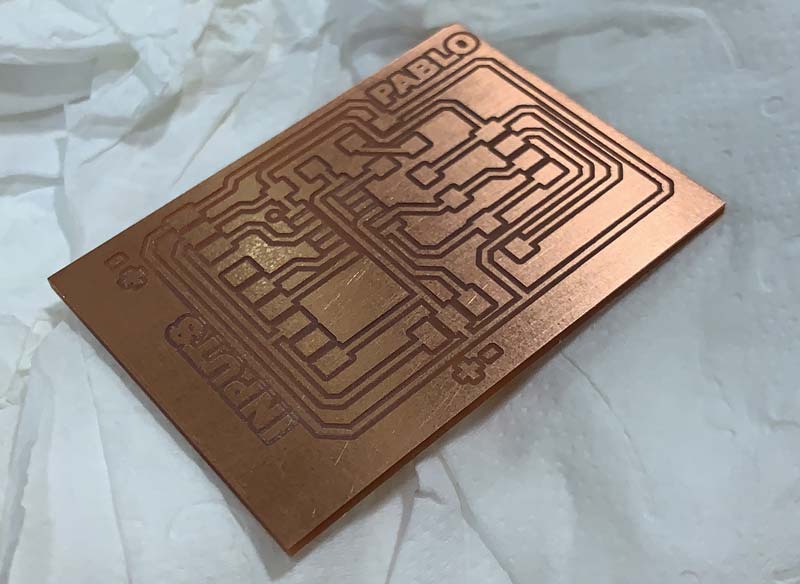
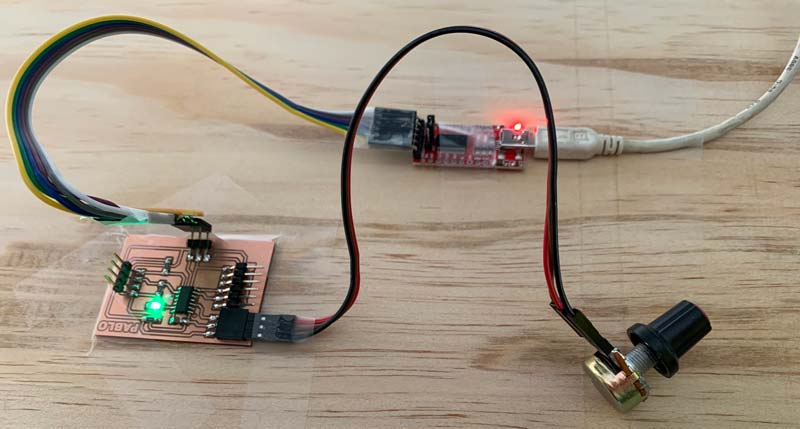
I soldered the components on my board, but when soldering the components I made a couple of mistakes, because this is the first board that I can mill and solder correctly in my Fab Lab, I will document them later.

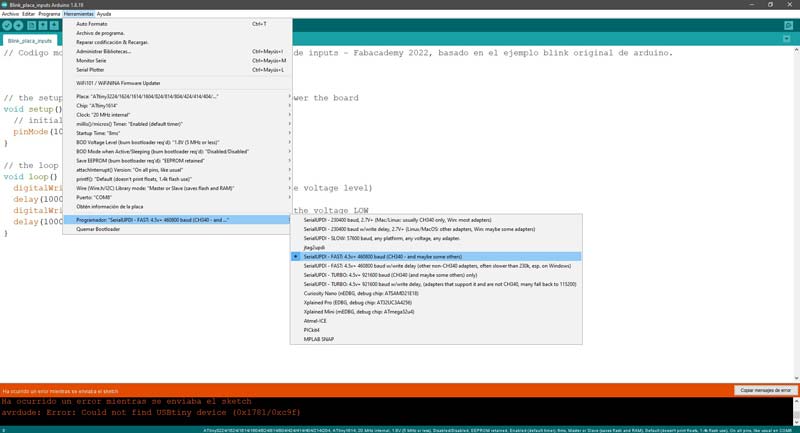
With my board ready, my instructor Nuria gave me a class on how to connect the elements to my board, the correct configuration of the Arduino IDE and the installation of the necessary libraries for my sensor. During this class, Nuria advised me to use flat male pins for my future boards, which seemed like a very good idea XD.
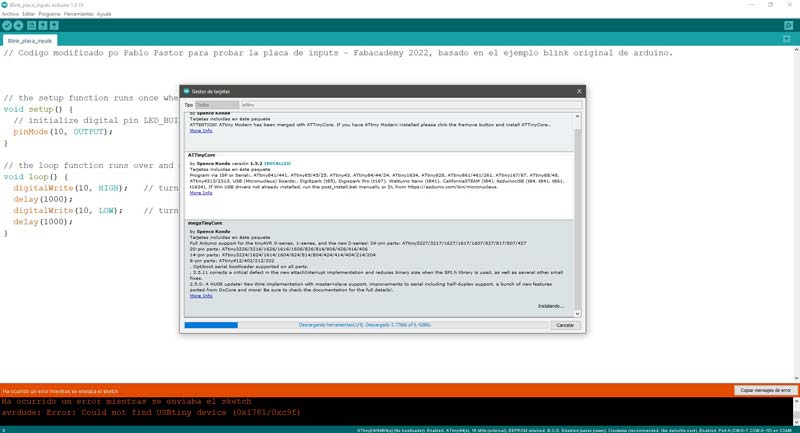
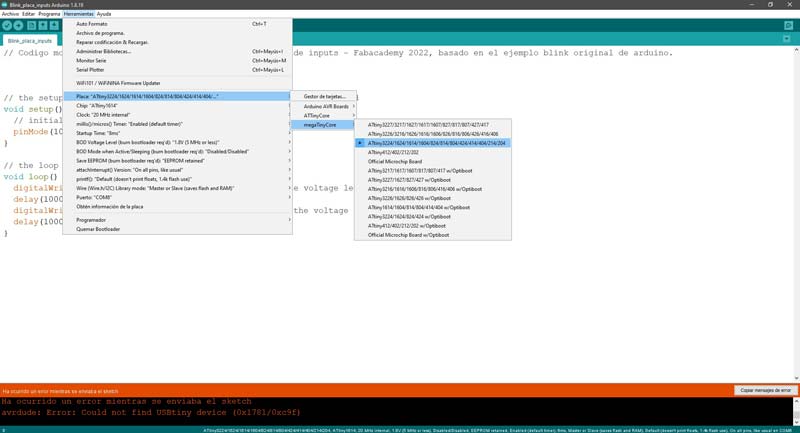
The first problem I had was the following: The code uploaded correctly to my board but I could not read the sensor values on the serial monitor.
Talking about this problem with Nuria and sending her photos of how I was connecting my board. Nuria realized that there was an error in the Tx and Rx connections, I was connecting Tx with Tx and Rx with Rx. To fix it I had to change these connections.
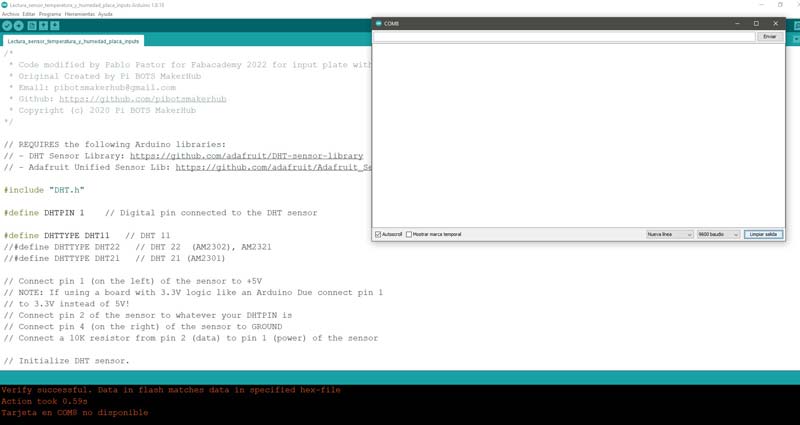
When I connected the cables correctly, the serial monitor showed me the temperature and humidity of my room every two seconds.
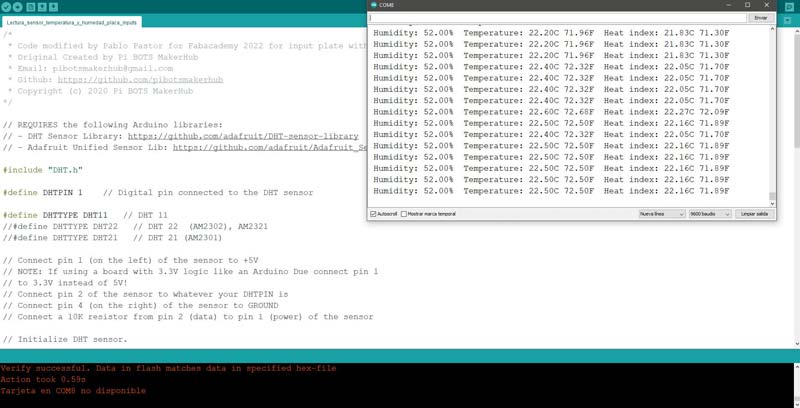
Here is the code I used
/*
 * Code modified by Pablo Pastor for Fabacademy 2022 for input board with Attiny 1614
 * Original Created by Pi BOTS MakerHub
 * Email: pibotsmakerhub@gmail.com
 * Github: https://github.com/pibotsmakerhub
 * Copyright (c) 2020 Pi BOTS MakerHub
*/

// REQUIRES the following Arduino libraries:
// - DHT Sensor Library: https://github.com/adafruit/DHT-sensor-library
// - Adafruit Unified Sensor Lib: https://github.com/adafruit/Adafruit_Sensor

#include "DHT.h"

#define DHTPIN 1    // Digital pin connected to the DHT sensor

#define DHTTYPE DHT11   // DHT 11
//#define DHTTYPE DHT22   // DHT 22  (AM2302), AM2321
//#define DHTTYPE DHT21   // DHT 21 (AM2301)

DHT dht(DHTPIN, DHTTYPE);

void setup() {
  Serial.begin(9600);
  Serial.println(F("DHTxx test!"));
  Serial.print("hello");
  dht.begin();
}

void loop() {
  // Wait a few seconds between measurements.
  delay(2000);

  // Reading temperature or humidity takes about 250 milliseconds!
  // Sensor readings may also be up to 2 seconds 'old' (its a very slow sensor)
  float h = dht.readHumidity();
  // Read temperature as Celsius (the default)
  float t = dht.readTemperature();
  // Read temperature as Fahrenheit (isFahrenheit = true)
  float f = dht.readTemperature(true);

  // Check if any reads failed and exit early (to try again).
  if (isnan(h) || isnan(t) || isnan(f)) {
    Serial.println(F("Failed to read from DHT sensor!"));
    return;
  }

  // Compute heat index in Fahrenheit (the default)
  float hif = dht.computeHeatIndex(f, h);
  // Compute heat index in Celsius (isFahreheit = false)
  float hic = dht.computeHeatIndex(t, h, false);

  Serial.print(F(" Humidity: "));
  Serial.print(h);
  Serial.print(F("%  Temperature: "));
  Serial.print(t);
  Serial.print(F("C "));
  Serial.print(f);
  Serial.print(F("F  Heat index: "));
  Serial.print(hic);
  Serial.print(F("C "));
  Serial.print(hif);
  Serial.println(F("F"));
}
Potentiometer and LED
In my board design I added a led on an analog pin to load a blink to check that the board was working properly. Taking advantage of the LED I wanted to program my board to be able to control the brightness of the LED with a potentiometer.
As the potentiometer does not have the vcc, gnd and information pins in the same position as the humidity sensor, I had to connect it using cables.
Here is the frankenstein :)
This is the code I used, everything worked perfectly
//Code to control the intensity of a led with a potentiometer
on the input board with an Attiny 1614 for Pablo Pastor's Fabacademy 2022
const int LED =10; // LED on pin 10
const int potenciometro =1; // Potenciometer on pin 1
int intensidad; //variable for brightness intensity
void setup() {
pinMode (LED, OUTPUT); // we declare the led as output
}
void loop() {
// the analog values are used between 0 and 255, so the value of the potentiometer is divided by 4
intensidad = analogRead (potenciometro) / 4;
//analogWrite receives the analog values from the pin and writes them to the LED
analogWrite(LED, intensidad);
}
Download files
Input board .png
Input board .png
See you next week!