Embedded programing
This week there are two types of assignments, one group and one individual. In my case I’m alone in ESNE’s Fab Lab so I am doing both.
Assignment
Group assignment:
- Compare the performance and development workflows for other architectures
Individual assignment:
- Read the data sheet for your microcontroller
- Use your programmer to program your board to do something
Group assignment
Group assignment page
In the following link you can access the Leon Fab Lab page that contains all the group assignments: Fab Lab Leon group assignment page
Compare the performance and development workflows for other architectures
Micro:bit
In April of this year I traveled to León to do a group practice with Luis, on Friday morning they left me a micro bit to test it (I had never used one)
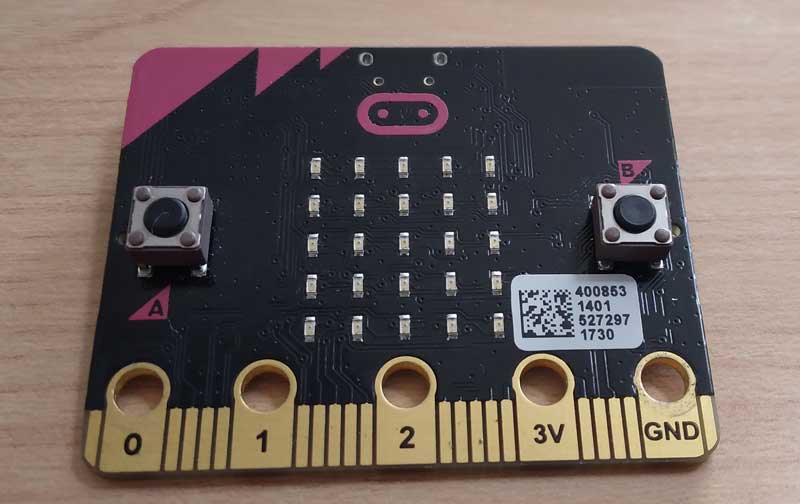
I started doing the code on the micro:bit website.
Making the code with the blocks is simple and I find it very intuitive from the beginning
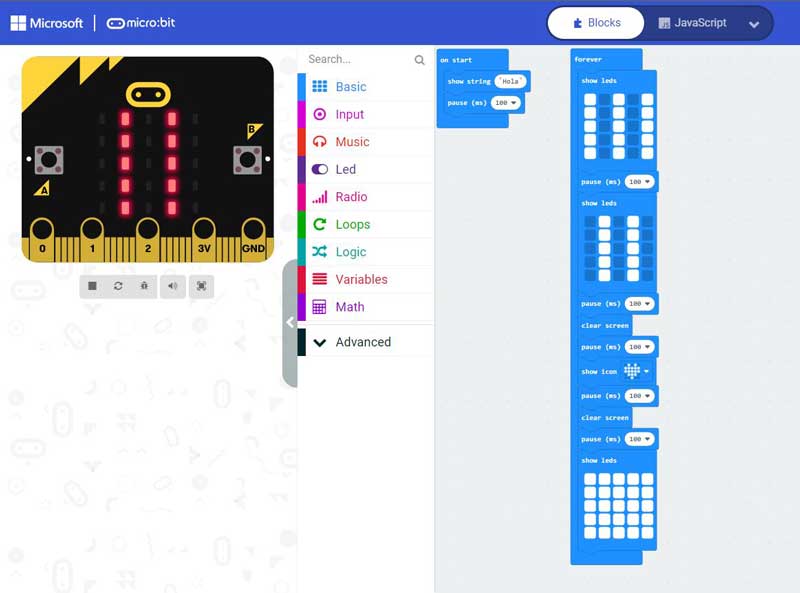
The browser also allows you to view and edit the code with Java Script.

In Microbit I made several programs that changed which LEDs turn on and off over time, I found the emulator on the left side of the screen to be very useful, allowing you to see what the Microbit is going to do when executing the program.
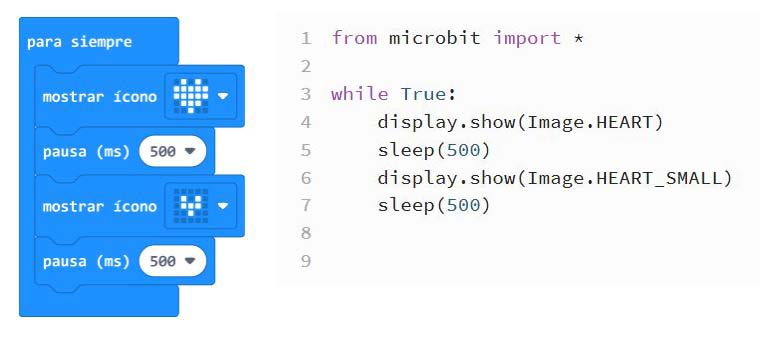
After testing for a while I made a program of a “beating” heart in the program the heart gets bigger and smaller every so often giving the sensation of beating, here is the program
Arduino Uno
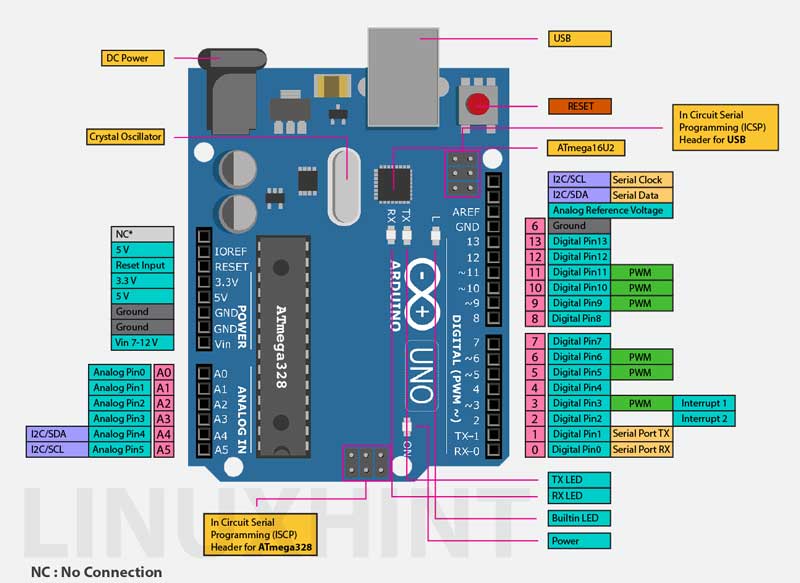
Arduino Uno is a microcontroller board based on the ATmega328P. It has 14 digital input/output pins (of which 6 can be used as PWM outputs), 6 analog inputs, a 16 MHz ceramic resonator (CSTCE16M0V53-R0), a USB connection, a power jack, an ICSP header and a reset button.
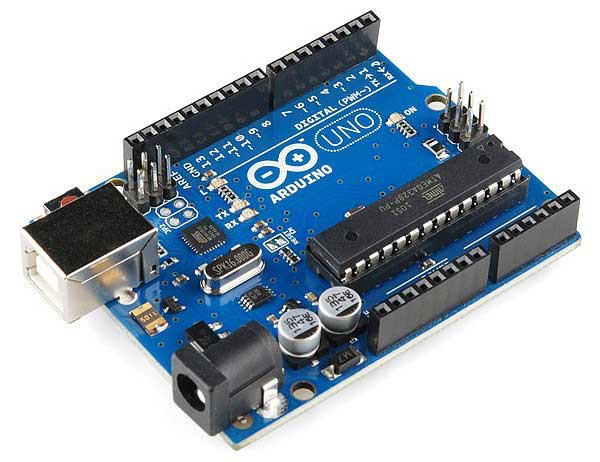
It contains everything needed to support the microcontroller; simply connect it to a computer with a USB cable or power it with a AC-to-DC adapter or battery to get started.
I usually use arduino for any electronic project, today it seems to me a very useful tool and it seems more like using it than designing, milling and soldering an entire board
Conclusions
Micro bit seemed like a simple system to use thanks to the web page that allows you to program it by dragging blocks and the emulator that allows you to see what you are doing at all times. But I think that for more complex projects it would be cumbersome to use.
Arduino seems to me a good option to prototype electronic circuits, the board has a large number of pins to connect all the necessary inputs and outputs, besides this for me the best part is the library that there is on the arduino page which is very useful to connect any input or output
Individual assignment
Read the data sheet for your microcontroller
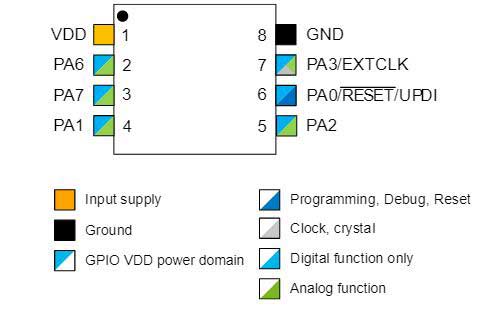
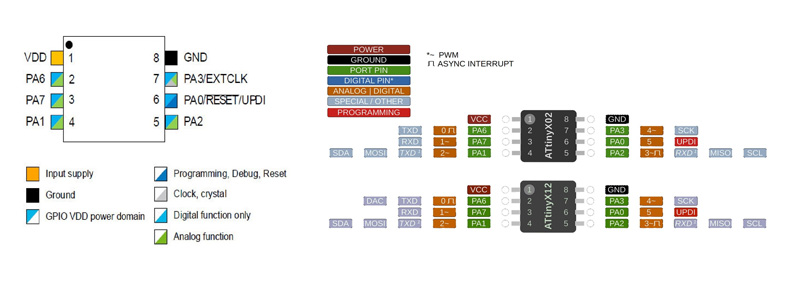
ATtiny 412
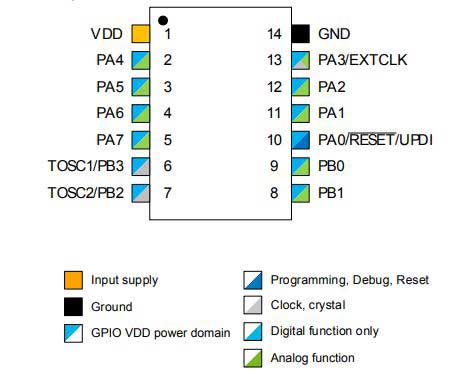
The last microcontroller that I have used has been the ATtiny 412, in its datasheet we can find all the necessary information about the memory it has and the function of each of its pins
ATtiny 1614
For my inputs, outputs and final project I have used the attiny 1614, due to its greater capacity and its greater number of pins
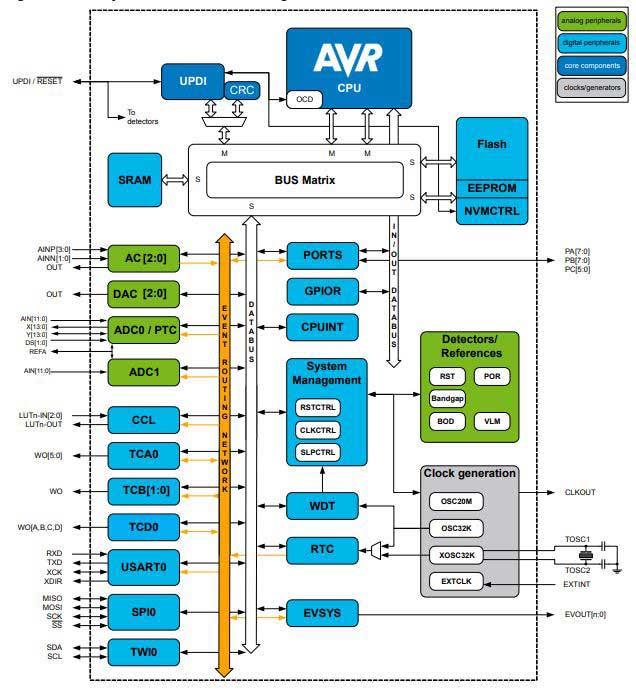

What have I learned from my microcontroller datasheet?
The main thing for me are two things, the first of which is the number of pins that each microcontroller has, because it depends on the project that I want to carry out, I will need a series of inputs and outputs in my microcontroller, also to know if these pins are inputs analog, digital or PWM on which the project will also depend.
The second thing I have learned when choosing the microcontroller is to look at its memory capacity, since depending on the program that needs to be loaded I will have to choose at least one microcontroller that fits. In addition to what is mentioned in the previous paragraph
Use your programmer to program your board to do something
I used my Hello ATtiny412 board to program, I made a program so that when we press the button the green LED turns off and the red one lights up for a second, then the green LED turns on again. I made the whole program in arduino, it is the program that I have used the most to program so it is comfortable for me.
// Code for Hello ATtiny 412 with 2 leds and 1 button
//By Pablo Pastor Fabacademy 2022

int ledR = 0; // LED RED
int ledG = 1; // LED GREEN
int boton = 4; // Button

int presionado = HIGH;

void setup() {

  pinMode(ledR, OUTPUT);  // initialize digital pin Led Red
  pinMode(ledG, OUTPUT); // initialize digital pin Led Green

  pinMode(boton, INPUT); // initialize digital pin Button
}

void loop() {

  digitalWrite(ledR, HIGH);   // turn the LED Red on
  digitalWrite(ledG, LOW); // turn the LED Green off

  presionado = digitalRead(boton);

  if (presionado == HIGH) {

    digitalWrite(ledR, LOW);   // turn the LED Red off
    digitalWrite(ledG, HIGH);  // turn the LED Green on
    delay(1000);

  }

}
See you next week!