14. Interface and Application Programming
This week I learned about Networking and Communications.
14.0 Assignment of this week
14.0.1 Individual assignment
Write an application that interfaces a user with an input &/or output device that you made
14.0.2 Group assignment
Compare as many tool options as possible
14.1 The personal object of the assignment this week
Graphical user interface programmings have been not familiar with me, so I would get accustomed to them through the assignment.
Also I would like to check if hall sensor devices could be used for my final project.
14.2 Design
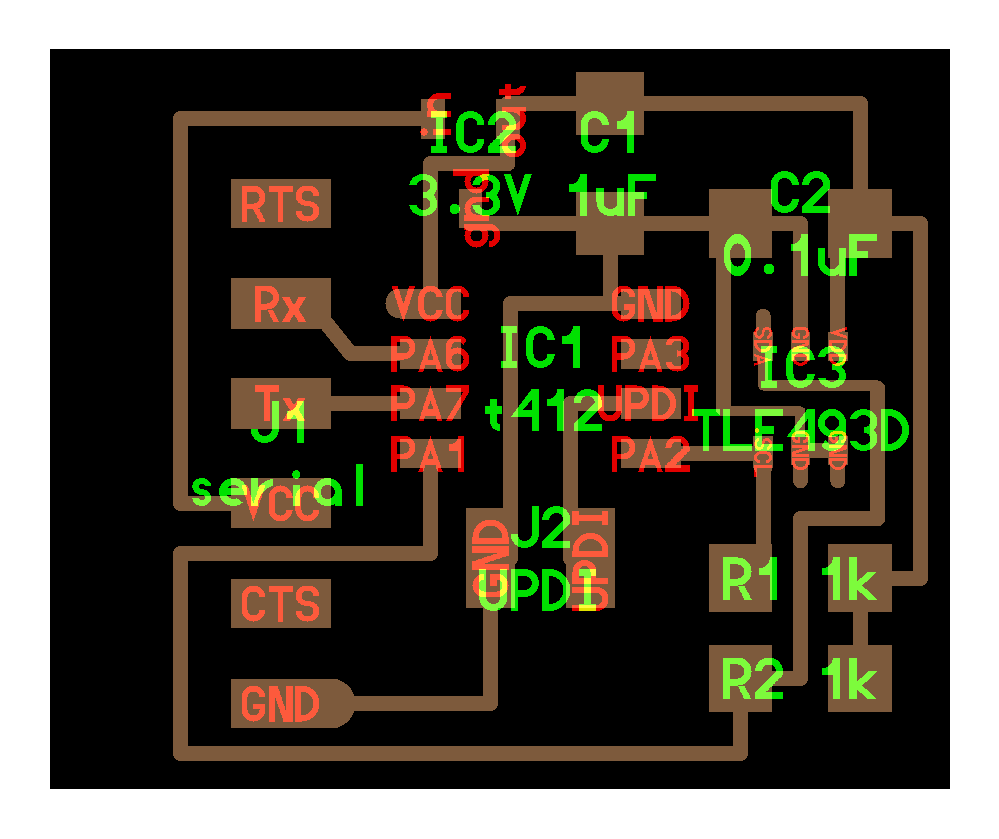
I was inspired with Neil’s sample project ‘hello.TLE493D.t412’ using a 3D hall effect sensor chip. I thought that the device could be installed to gaming joysticks.
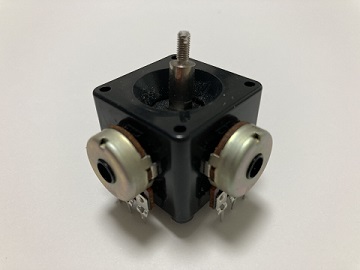
Joystick:
It originally came with a couple of potentiometers to detect X/Y axis rotation. It was salvaged from a junk parts shop without any detailed product information.
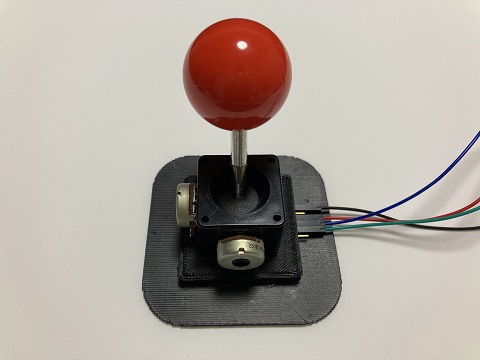
Final image:
I planned to add hello.TLE493D.t412 board to the joystick and turned it to a hall sensor joystick.
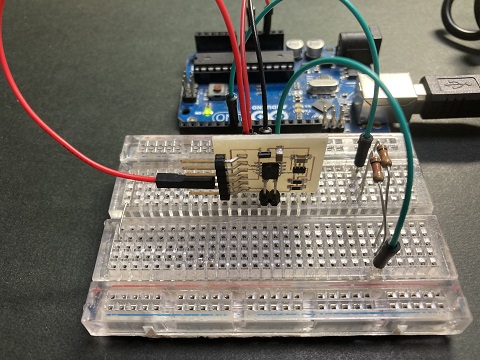
14.3 Cut and print
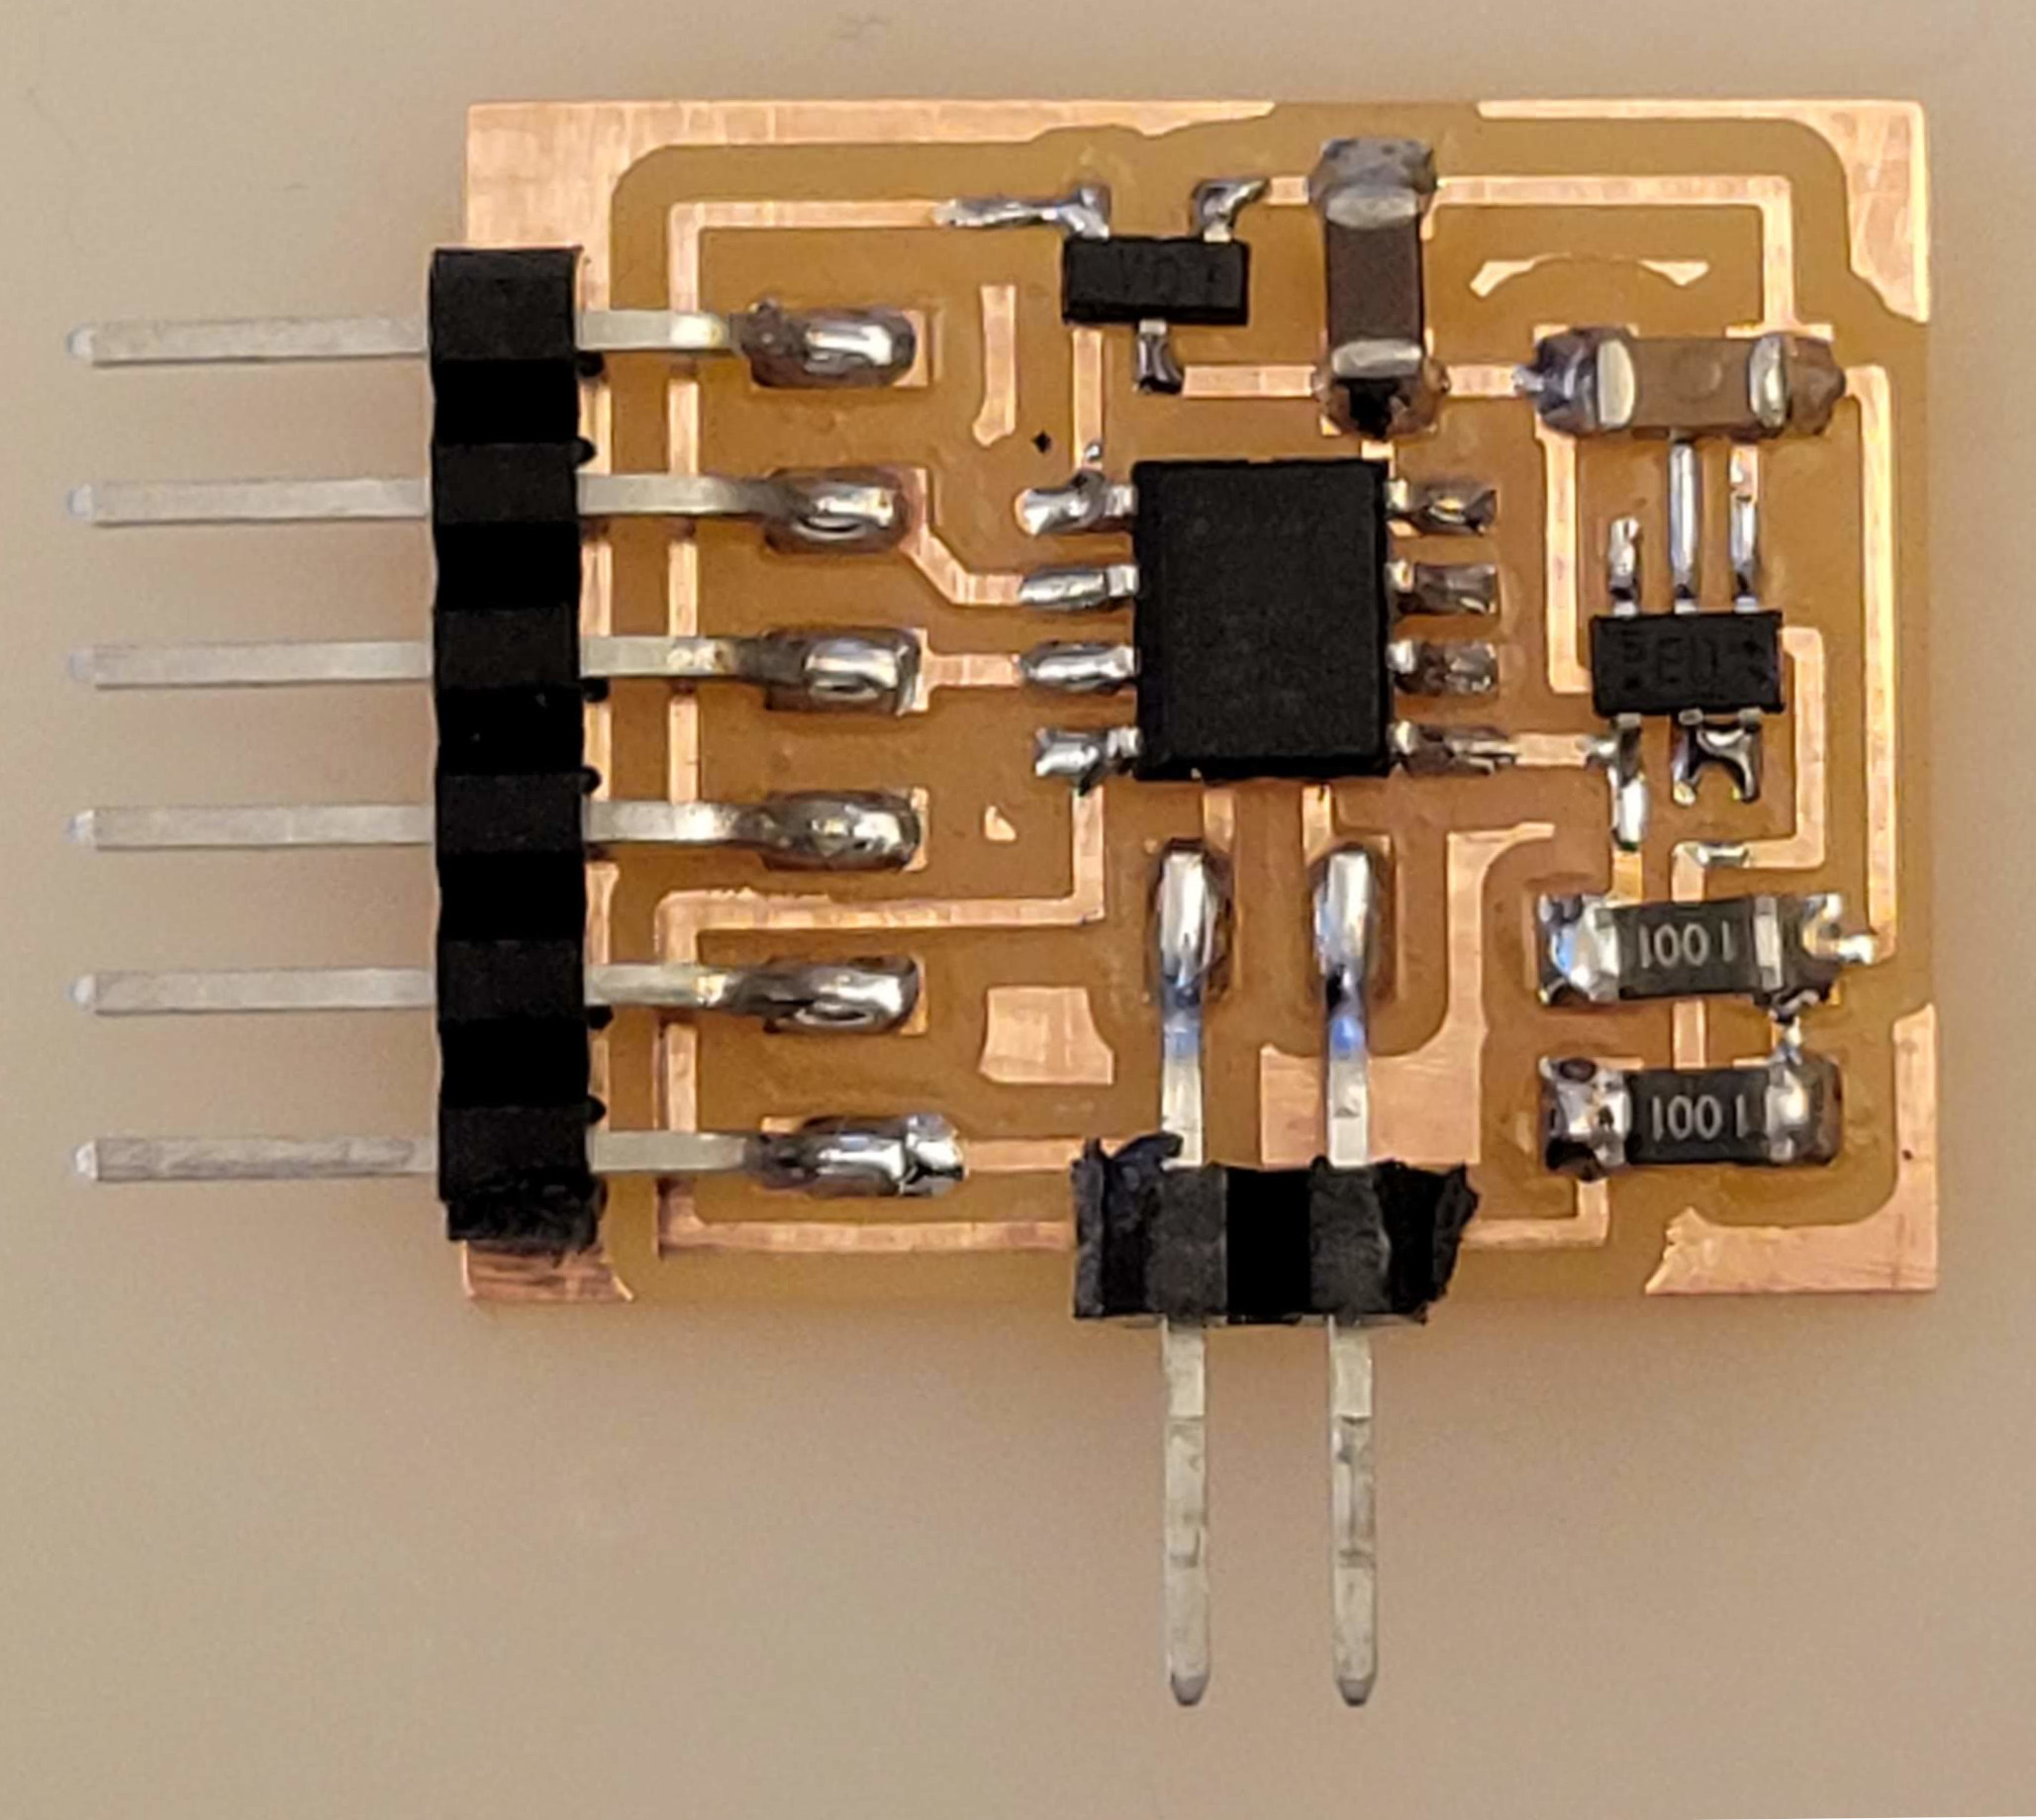
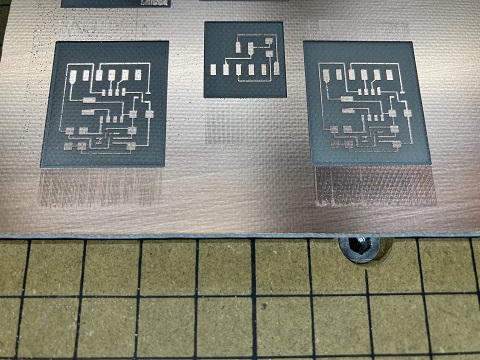
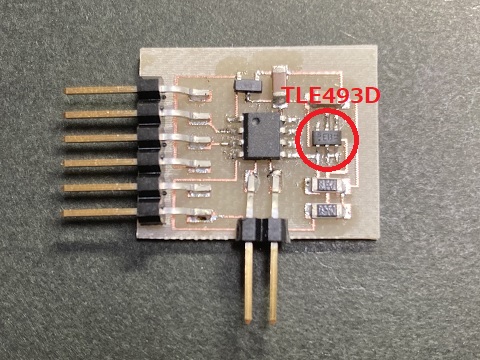
Circuit boards was cut again using Snapmaker 2.0. For the pattern, I used hello.TLE493D.t412 board as it was.
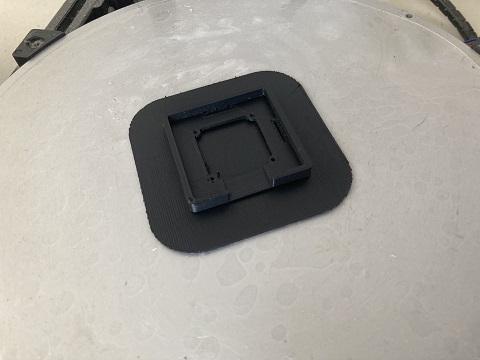
I also designed 3D print base for the device.
STL files:
TLE493D-t412.stl
base.stl
14.4 Soldering
TLE493D was a very small chip with pin pitch only 0.95 mm, but I could solder it to the board using a solder paste.
14.5 Programming the boards
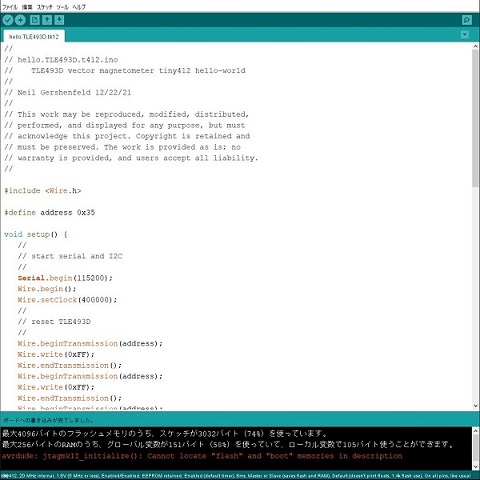
I programmed the board using Arduino UNO as a UPDI writer. I used a sample code by Neil as it was.
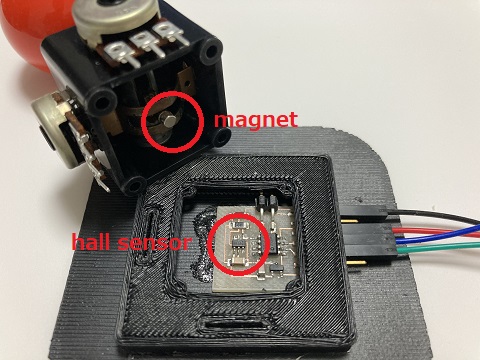
14.6 Assembly
I added a small neogium magnet at the end of joystick and then I set the joystick over the board.
14.7 Test
I connected the joystick assy to a USB-serial converter and ran a Python program on PC. The code was slightly modified to match the color of the Joystick.
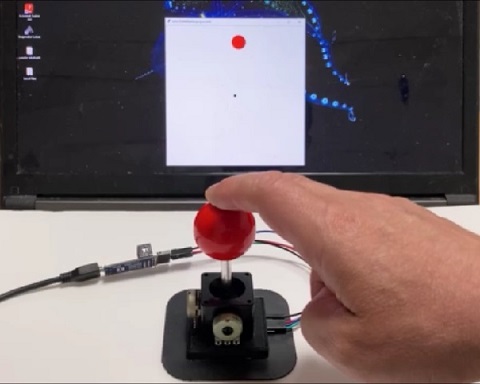
It worked well:
Modified sections of Python code:
#   canvas.coords(‘circle’,limits(0.5+xf/xyscale,0.5+yf/xyscale,zf/zscale))
canvas.coords(‘circle’,limits(0.5+xf/xyscale,0.5+yf/xyscale,0.05))
# canvas.create_oval(limits(0.5,0.5,0.5),fill='blue',tags='circle')
canvas.create_oval(limits(0.5,0.5,0.05),fill='red',tags='circle')I fixed the size of a circle as I would like to indicate X/Y axis movements only without Z axis movement.
Modified Python code:
hello.TLE493D.t412mod.py
14.8 Comparison with other tool options(as group assignment)
14.8.1 Preceding project
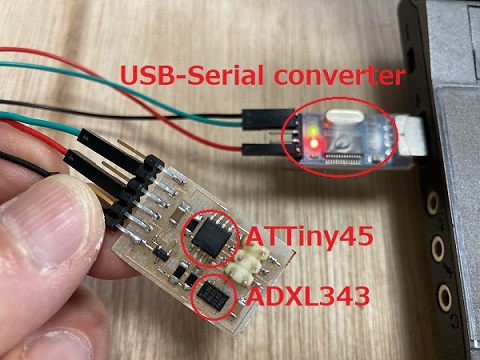
I had made the ADXL343 demo board coupling with a sample python code(hello.ADXL343.py) as a user interface as a part of Week 12 assignment.
Soldering of ADXL343 was a bit difficult, but they worked well:
The experience of Week 12 helped me to develop the project of this week very much!
14.8.2 Final project
In addition to both TLE493D and ADXL343 test boards, I checked an on-board accelerometer of micro:bit.
Specifications of LSM303AGR(on-board accelerometer of micro:bit):
| Item | Details |
| Features | 3 magnetic field and 3 acceleration axes , 2/4/8/16g ranges |
| Resolution | 8/10/12 bits |
| On board gestures | ‘freefall’ |
| Other gestures | Other gestures are implemented by software algorithms in the runtime. |
Implementation to the working device(the motion controller for the final project):
14.9 Conclusion
I could made a test system which demonstrates a HID device using a hall sensor on the input side and a graphical user interface using Python on the output side .