2. Computer-aided design
This week I learned about several computer-aided desiging (CAD) tools and tried some of them.
I also made a visual description of my possible final project.
2.0 Assignment of this week
Model (raster, vector, 2D, 3D, render, animate, simulate, …) a possible final project, compress my images and videos, and post a description with my design files on my class page.
2.1 Research and preparation
2.1.1 Check the availability of CAD tools
I checked my PC and found some tools shown in the last lecture have already installed in my PC.
Inkscape for handling 2D vector images, Gimp for 2D raster images.
FreeCAD, Fusion 360 and 123D Design for handling 3D data.
I love 123D Design as it was my first 3D CAD, but sadly Autodesk has already ceased the support for the program. I should step up to FreeCAD or Fusion 360 reluctantly…


2.1.2 Installing a new program
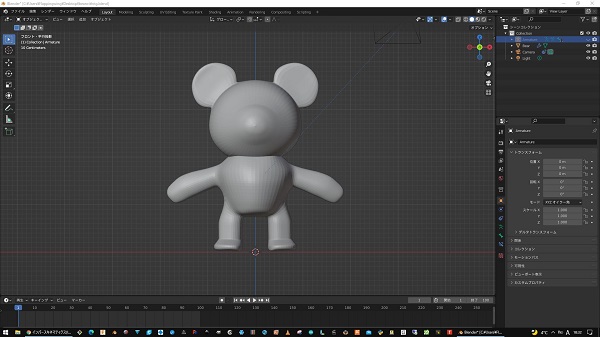
I installed Blender, which had not been installed in my PC yet. It was expected that Blender would make my final project image animated.
Installing Blender was quite easy. Only I should do was to download the installer from the official Blender site and execute it.


2.2. Learning about CG animation software
2.2.1 Blender
I learned about basic commands of Blender for creating/modifying and manipulating various 3D objects on my PC screen.
Usually we start from the object editor. We add a new shape(mesh) to the workspace and edit the object using various menu like scale, sculpting, etc.
We can also add various textures to the surface of the object display realistic images on the PC screen by lendering it.
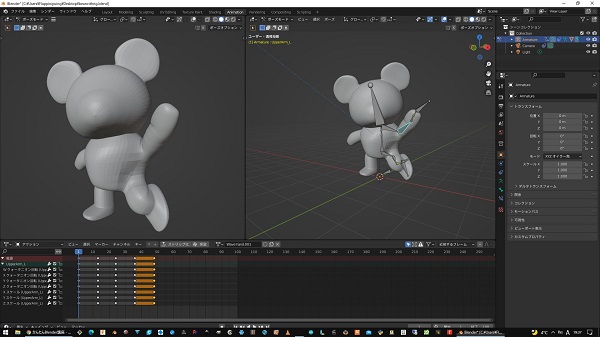
I also learned about ‘Animation’ menu of Blender. The menu enables us to make our 3D objects animated.
One of the main compornents in ‘Animation’ menu is “born”. We can animate meshes by moving borns(skeltons) inside the meshes.
Inverse Kinematics(IK) generates natural deformation of skeltons.
2.3. Let’s make my final project animated!
2.3.1 3D object of my final project
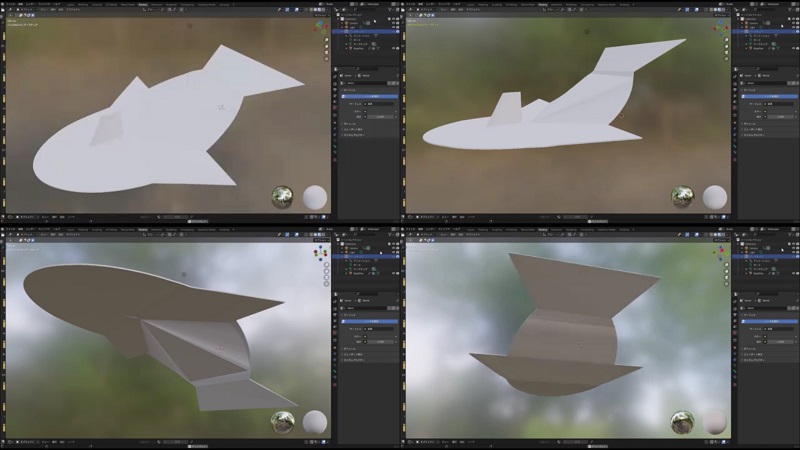
My final object under planning is a kind of ornithopter (flapping wing flyer) with an unconventional wing configuration. It would fly in the air by swinging its tail fin, not by wings. Positive early test results using a hand-made small rubber-powered model has encouraged me to build far larger, advanced models.
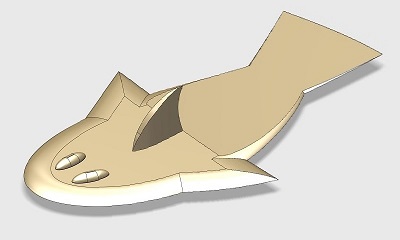
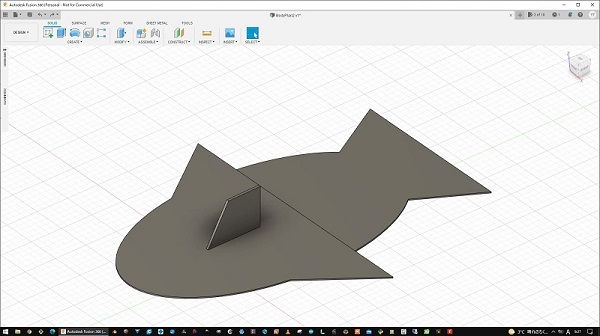
I designed a simplified 3D object using Fusion 360. It is a rough expression of my final project.
STEP file:
FFF.step
STL file:
FFF.stl
2.3.2 Slide show
At first, I made a stop motion movie.
I took some screenshots of the 3D object on Fusion 360 and located the images to PowerPoint slide sheets. Then I exported them as a single movie file (.mp4) and it worked pretty well!
But its motion is a bit cranky and less real, because it lacks an elastic vending motion like a real thing.
2.3.3 Blender animation
Next, I imported the 3D object data (.stl) to Blender, designed the motion and made it animated.
Finally, my object started swinging smoothly on PC screen!

Blender file:
FFF.blend