9. MOLDING AND CASTING
Assignments
Group assignment:
- Review the safety data sheets for each of your molding and casting materials
 .
.
- Make and compare test casts with each of them
There are many types of candle system that require different types of paraffin wax. I have to explore from distributor to consumer to find suitable waxes for various types pillar, container, from small sizes to large sizes pillar commonly found in religious candles. We try to use local/natural material which more accessible, more safe, and environmental friendly. We used four types of material natural/organic wax, white candle wax/parrafin, palm oil soap, and gypsum.
Based on our milling results, candle white wax/parrafin has the best performance for molding. For organic/natural wax is safe material, but it is easy to melt when we milled due to the low melting point, also for palm oil soap.
For gypsum (three-calcium-silica) has very hard texture. We worried for milling collet/machine will be broken because of the mechanical impact during milling process. We have to make sure the proces run properly.
For group assignment you can find in HERE
Individual assignment:
Design a 3D mould around the stock and tooling that you’ll be using, mill it (rough cut + (at least) three-axis finish cut), and use it to cast parts.
Learning outcomes
Design appropriate objects within the limitations of 3 axis machining
Demonstrate workflows used in mould design, construction and casting
In preparation of this week’s task, We are planning the following steps in spiral development:
| Spiral | Task | Time |
|---|---|---|
| 1 | Group assignment | 15 hours. |
| 2 | Parametric design of the mold | 3 hours. |
| 3 | Documentation design of the mold | 2,5 hours. |
| 4 | 3-axis machining of the mold | 1 hours. |
| 5 | Post-processing mold | 2,5 hour |
| 6 | Casting part 1: the mold | 1 hours. |
| 7 | Casting part 2: the cast | 1 hours. |
| 8 | Documentation | 3 hours. |
Let’s get started!
This week’s results
We to read carefully and follow safety instruction due to working with hazardous materials.
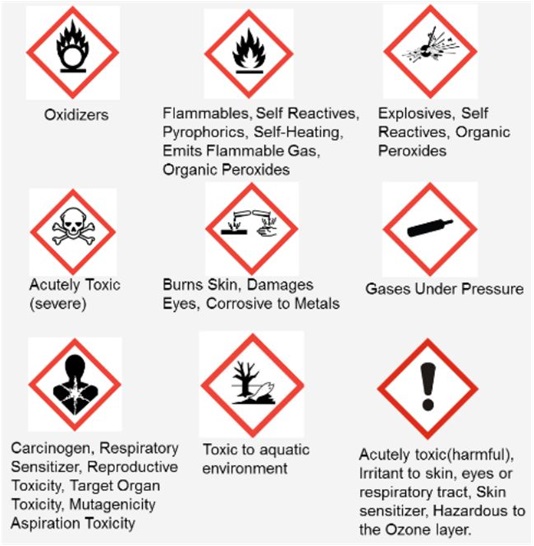
This product has two GHS warning labels, acutely toxic, and negative impact to human with respiratory problems for being a carcinogen. An overview of all GHS Labels and Dangerous Goods labels is shown in the picture below, by ChemSafetyPRO.
Safety induction, clear and clean area with proper ventilation play important role for the health of Fab Academy activities, they should be incorporated into this week’s curriculum as an option alongside petroleum-based materials.
We have been completing some parts this week with a cast of a infant bottle milk to represent my work objective area. Here are the results:
Group assignment
This week, our group assignment is to review the safety data sheets for each of the molding and casting materials we’ll be using. The second task is to make and compare test casts with each of them. Before we started, our team (me, Setyawan, and Jans) sorted all materials provided by Fablab Kamakura (Youka-san and team). They spray in the middle is for taking out the cast from the mold more easily.
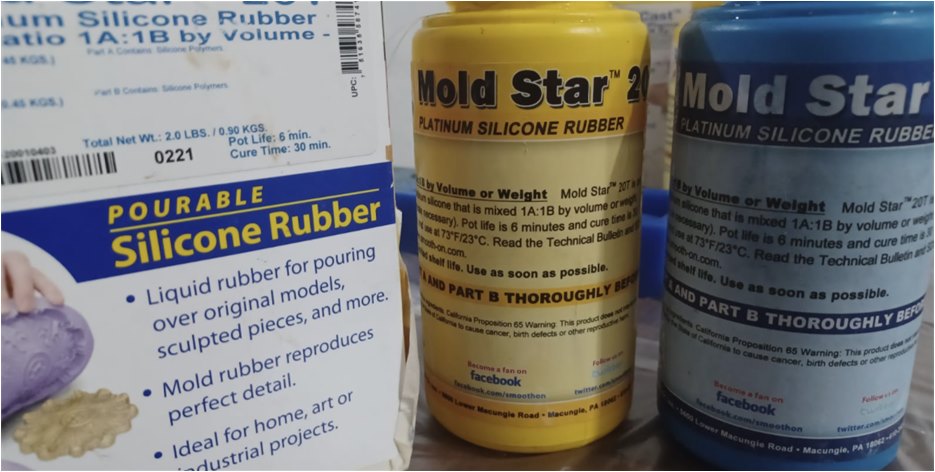
There are three types of molding products available to us: two types of pourable silicone rubber and one type of urethane rubber.
The method for creating test casts is as follows:
-
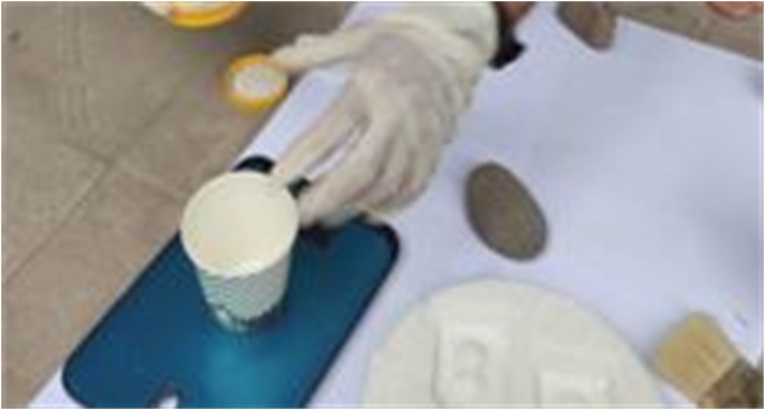
Take a mold from previous years or pick a small object and place this in a paper cup.
-
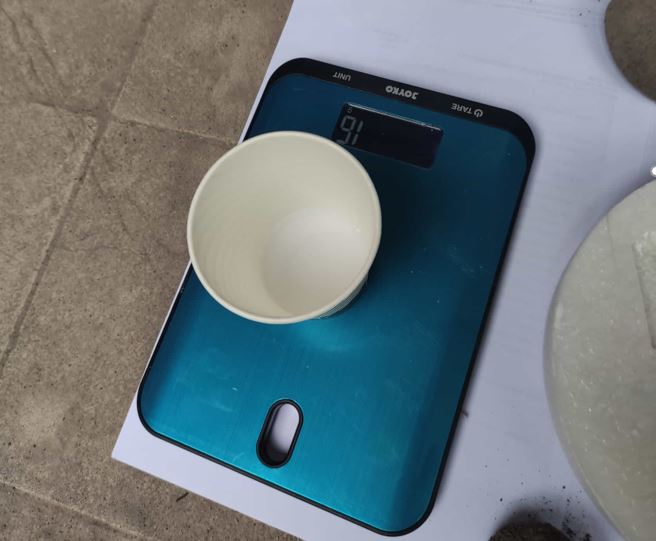
Measure the amount of casting material needed, by pouring water in the cup or the mold. For the cup, make sure to fill it with enough water to cover the entire object including about 0,5 - 1 cm space on top.
-
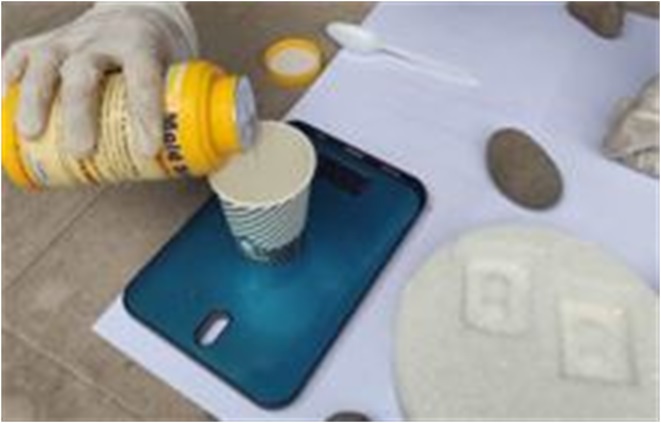
Calculate the amount of molding or casting material needed based on the amount of water. 1 gram of water has a volume of 1 mililiter (mL). Make sure to add a little more.
-
Read the safety data sheet and mix the materials accordingly. An important word to look out for is pot life. This tells you how long you have for mixing before the substance solidifies.
-
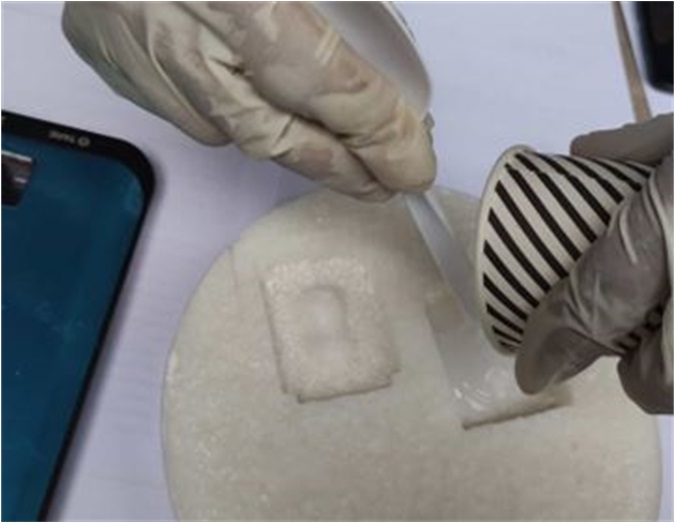
Cast it in the mold and wait for it to dry.
-
Carefully remove your cast from the mold.
Material Preparation
Material for Molding Process
A blend of paraffin wax is used in batik as a resist or negative process, to resist the dye absorption in the coloring process. Carefull composition in the wax is to ensure the final wax has good dye resistance, with good flexibility and elasticity as to resist cracking in the wax washing process, good viscosity as to be easily used, and have the correct melting point to be easily applied, as well as easily removed in the washing process.
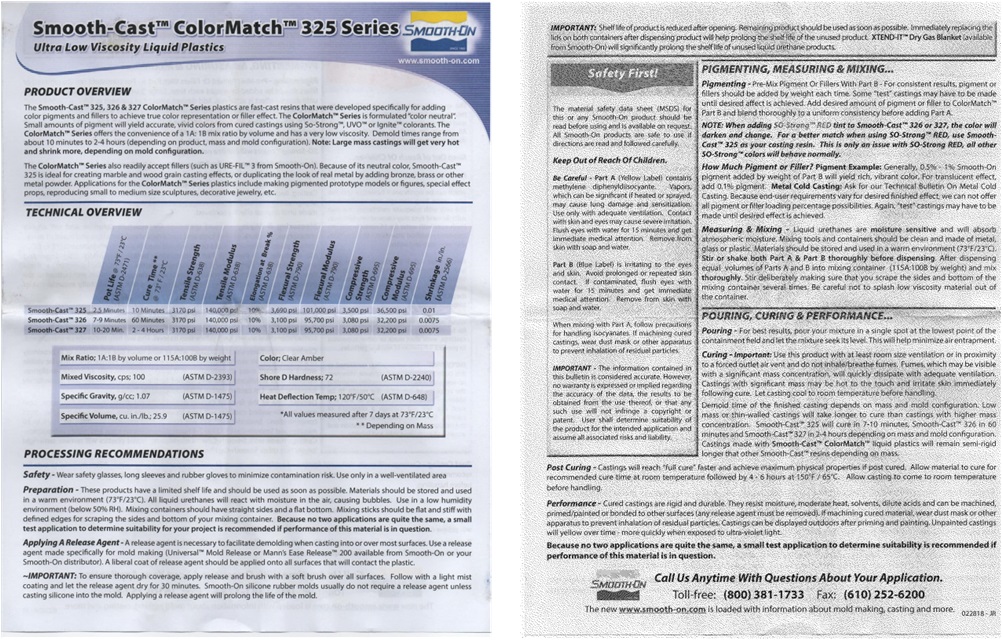
We used Smooth Cast 300 (Ultra-low viscosity casting resin), Smooth Cast 325 (ColorMatch Series plastics are urethane resin), Mold Star 20,. Those material, among the 4 we teste, are the ones with the greatest hazzards. Many of them Class 1 and 2 (the highest risk) Eye, nose, mouth, skin protection needed to work with this material.
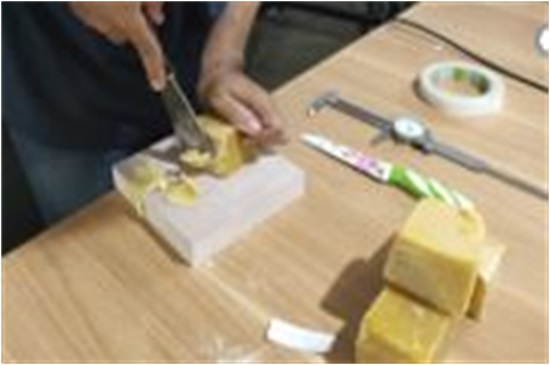
At this moment, I shredded the material in the form of organic wax as a dye for the (traditional fabric) batik pattern using a shaver. Shredding is carried out in addition to separating impurities and contaminants but also accelerating the melting process.
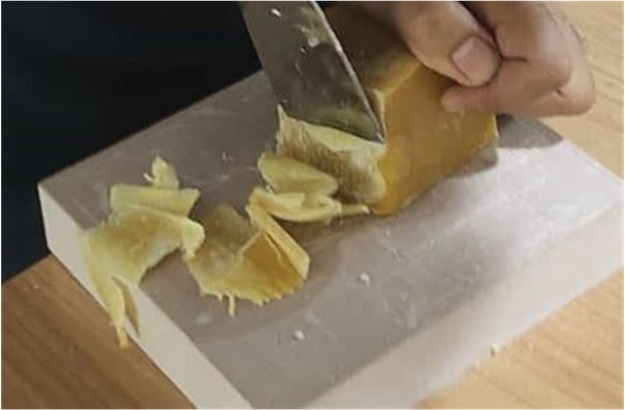
I hand to spend more time and energy into shredding process because the texture of organic wax is very sticky and dense.
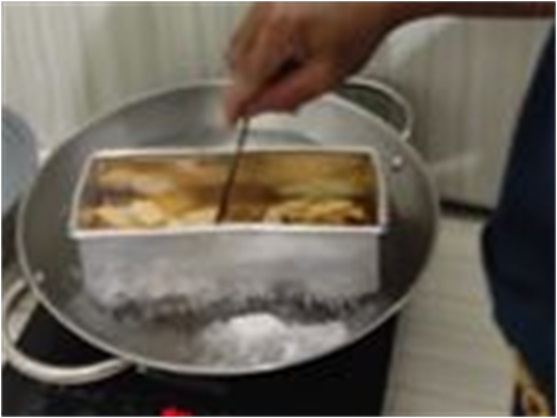
After working with organic wax, I placed them in a box tin for further heating so that it melts and the dirt can be separated, so that the product obtained is cleaner.
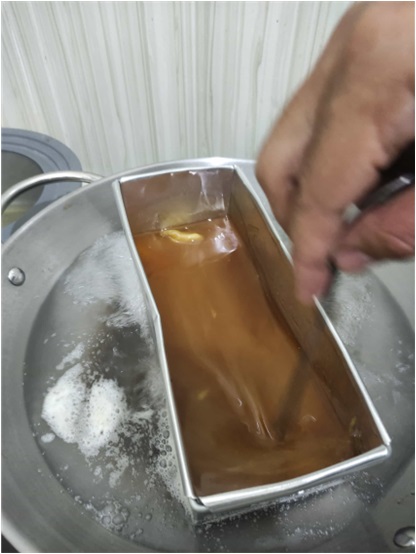
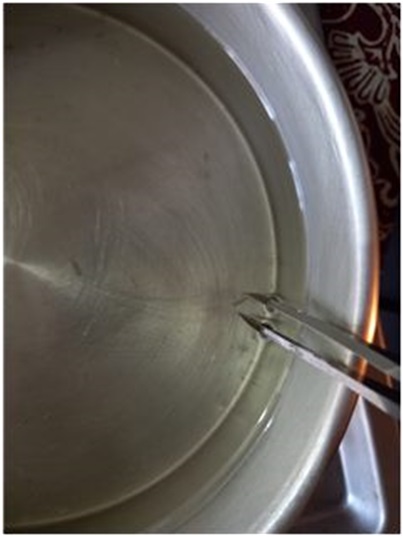
The heating process is carried out by conduction by placing a baking sheet containing organic wax shavings in water in a pan and then heating it until the product melts completely. Stirring is done to remove foam or air trapped in the product. The same thing is also done to melt paraffin wax.
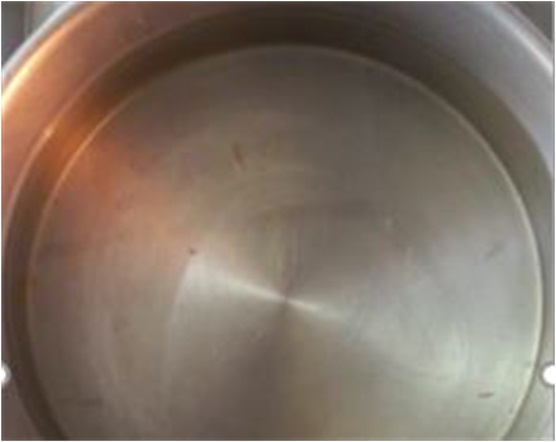
For paraffin wax I didn’t need to reduce the size (shredding process), just place them on a tray and heat them until melting.
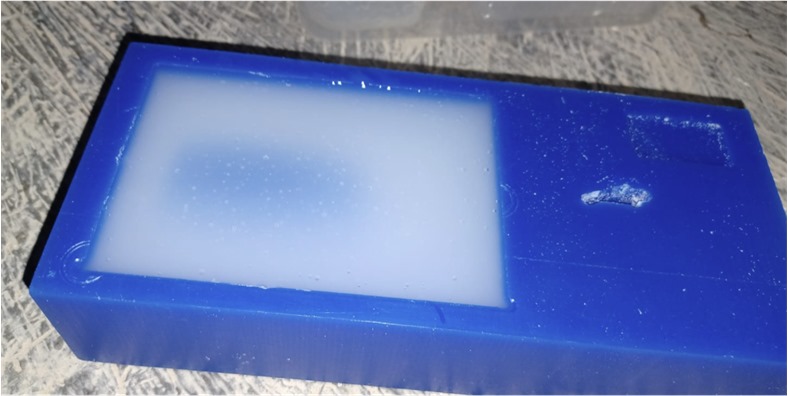
Melted paraffin wax had clearer and brighter than organic wax. This is because the mixture of materials is less and homogeneous than organic wax which is very diverse.
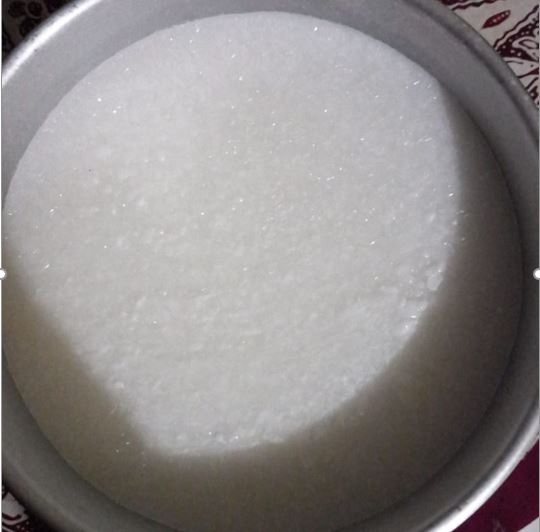
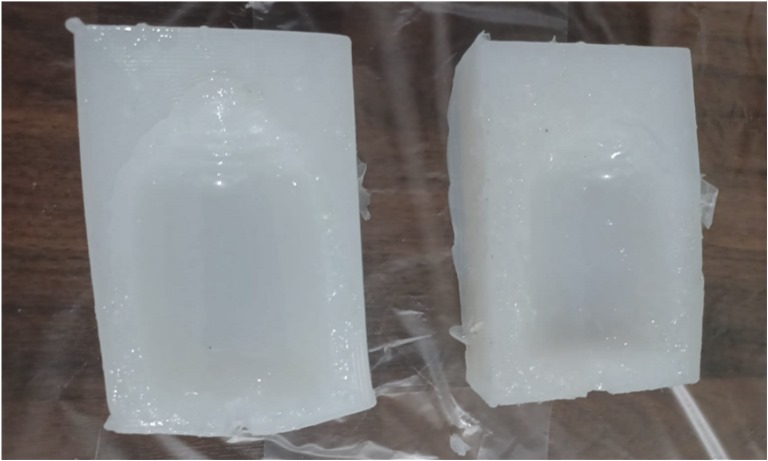
After solidification, paraffin wax texture is harder and cleaner. With almost the same mass and volume.
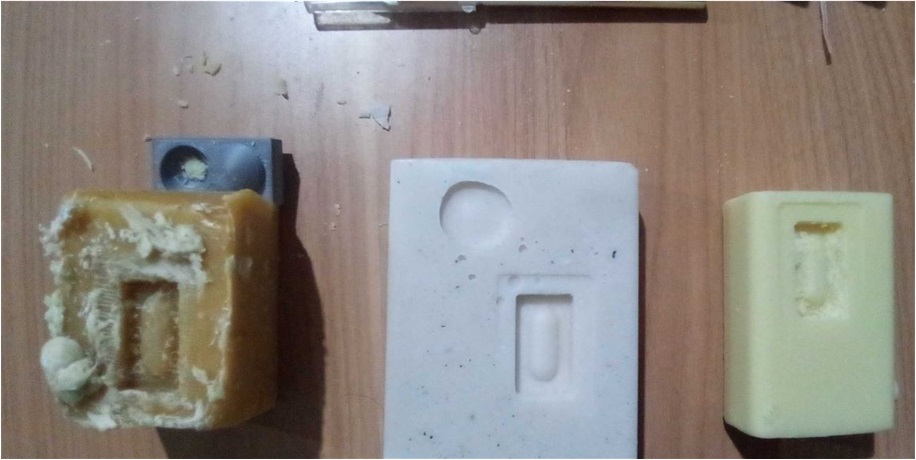
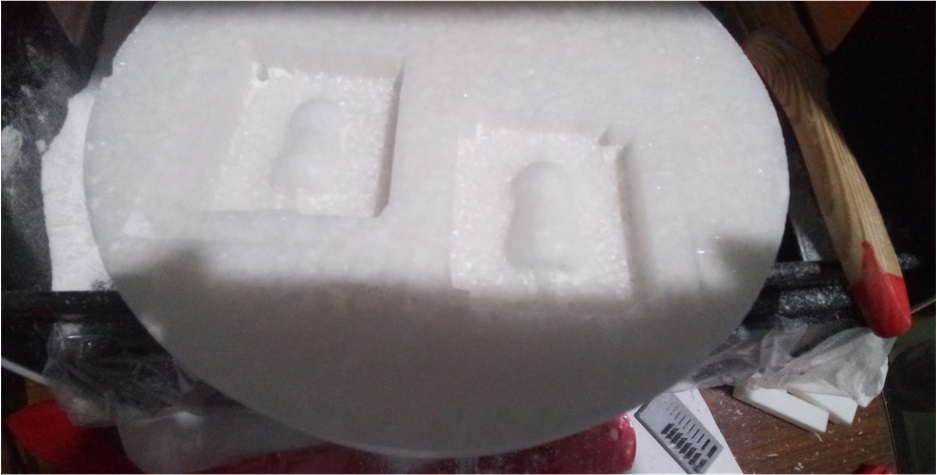
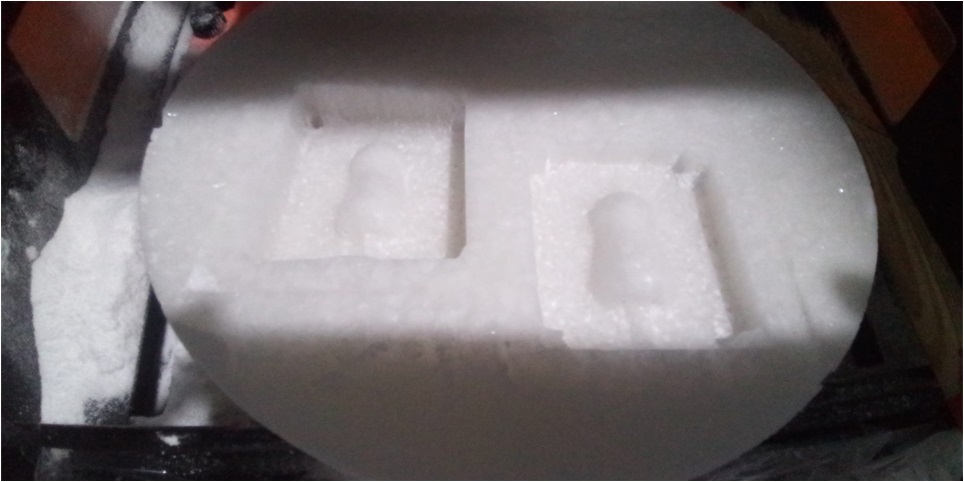
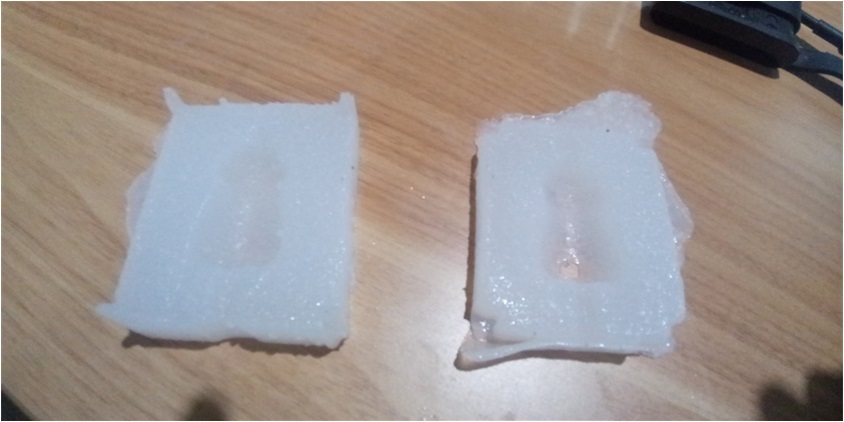
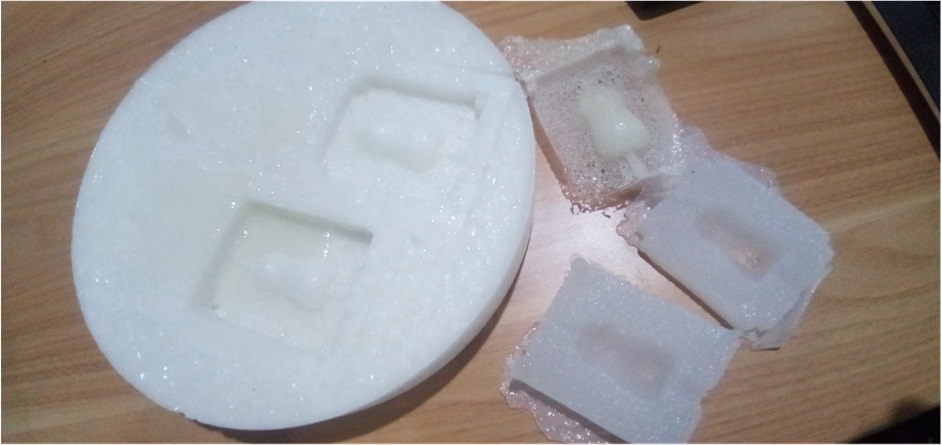
The picture above is a comparison of the results of the molding process for each material (organic wax, paraffin wax, and soap).
Project management
I see that from the pictures you are using white gloves, are they latex? most of the fast curing silicones the curing in inhibited by latex watch out that. Is always stated in the datasheet of the product that you should have read.
Prepare The Design
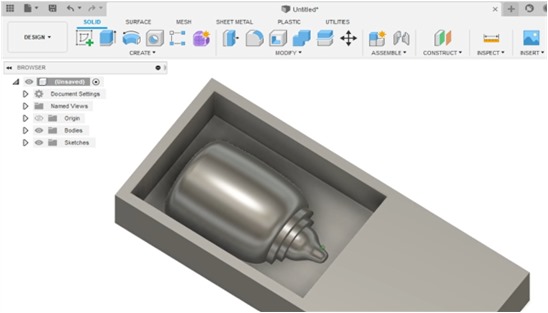
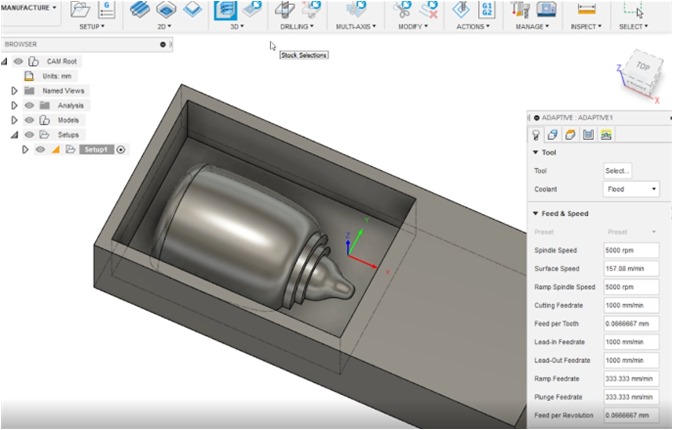
We used Fusion360 to design our infant milk bottle.

After getting the initial sketch from Rico (my instructor-Kamakura Fablab), I followed up by developing the size and image of the left, right, and top views.
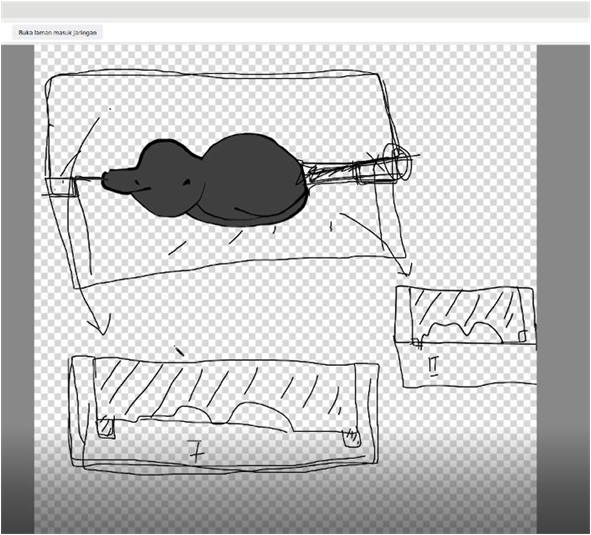
In addition, to develop the main object, the feeding bottle, the press fit of the upper and lower molds also designs the holes to enter the resin for the casting process.
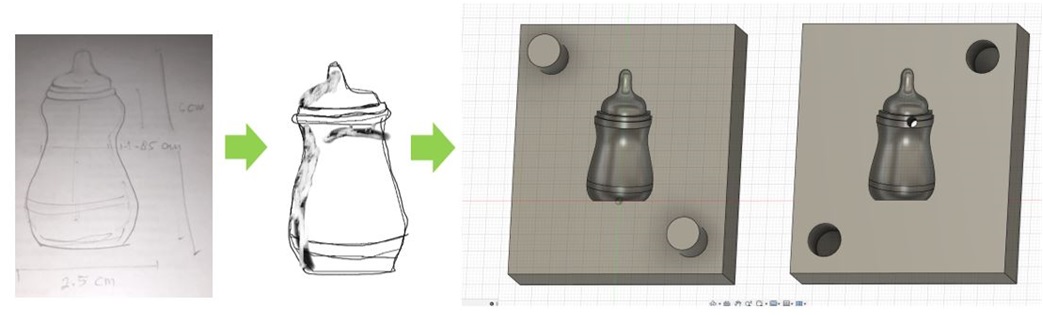
After the manual sketch is completed, I continued to draw 2D and 3D before the milling process. At the initial stage, the hole for entering the resin liquid is placed on the side of the main design (bottle).
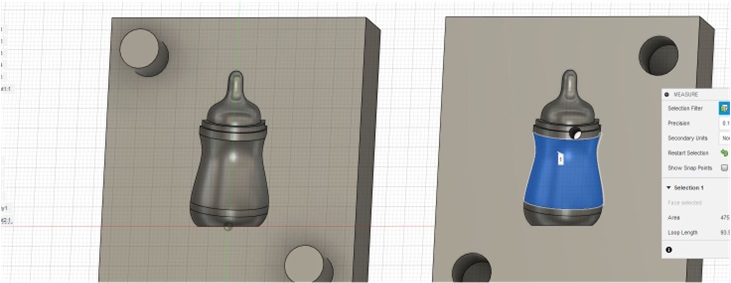
In addition, the holes to keep the position of the mold from coming off are made diagonally.
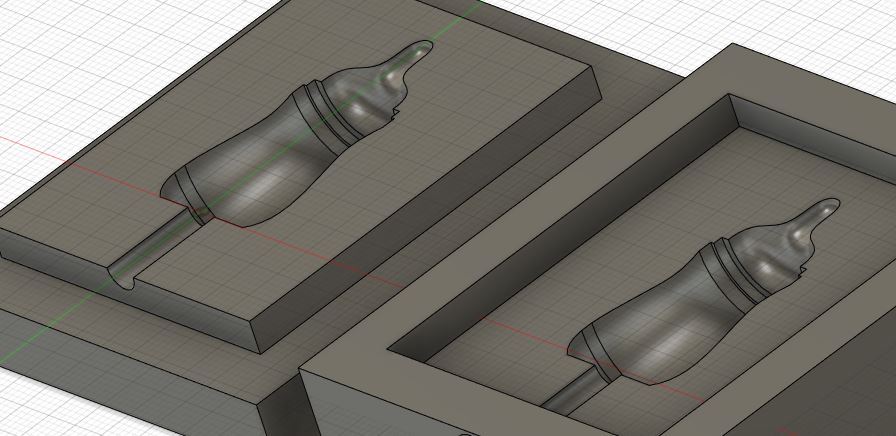
To anticipate the difficulty when inserting liquid into the mold, I shifted the position of the hole from the side to the bottom.
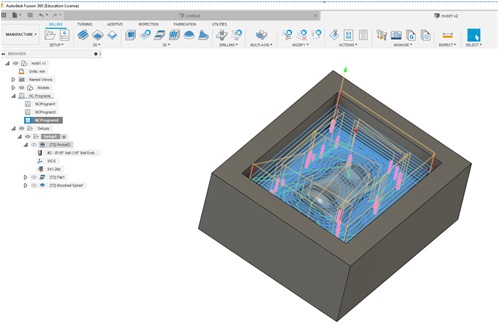
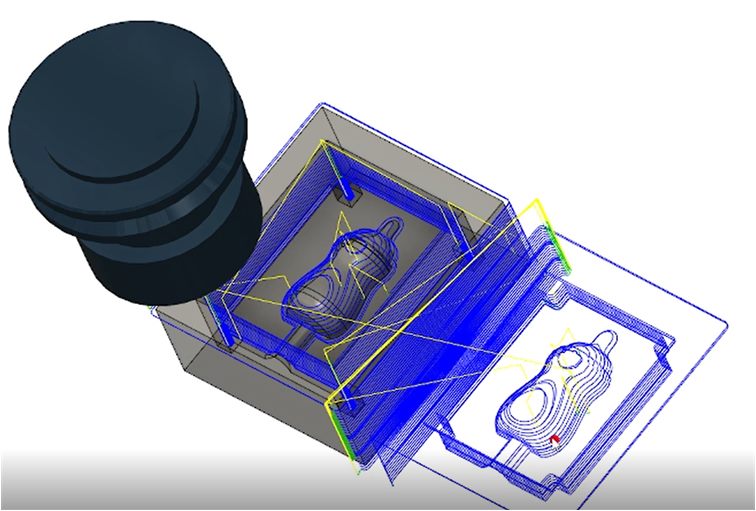
At this stage, Pocket clearing settings are carried out with the grooves from Tool –> Select –> Fusion 360 library –> sample tools (Inc) –(select) diameter 1/8” (1/8” Ball end mill).
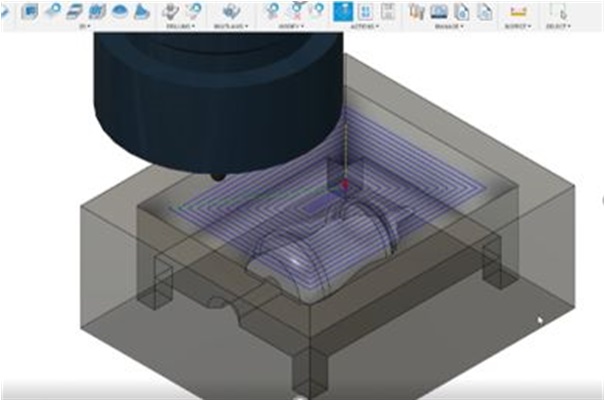
In this stage, Linking, Leads and Transition, and Ramp settings play an important role for precision and simulation of the milling process.
In the milling simulation process, the spindle speed used is 8000 rpm; surface speed 79.7965 mm/min; Ramp spindle speed 12000 rpm; Cutting feedrace 1274.88 mm/min; Feed per tooth 0.0531201 mm/min; Load in Feedrace 1274.98 mm/min; Load-out Feedrace 1274.98 mm/min; Ramp Feedrace 1274.98 mm/min; Plunge Feedrate 474.96 mm/min; Feeds per Revolution 0.531201 mm/min.
I used 0.1 mm for tolerance; 0 mm for minimum diameter and minimum cutting radius; 0.0635 smoothing deviation; 0.5957 maximum roughing stepdown; 0.5 mm radial stock to leave and 0.5 axial stock to leave.
Our Milling Results
We used Roland SRM 20 millind machine to create molds. For end mill, we choose 136596 1/8 SE 4FL EM. We took 1 hour 24 minutes and 1 hour 13 minutes using white candle materials.
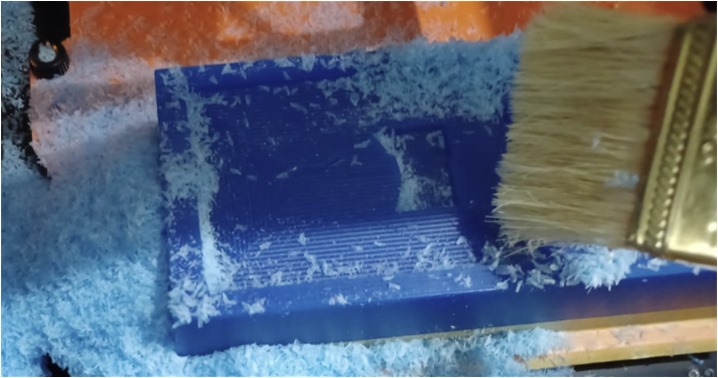
Since the beginning of the milling process, there are a lot of small flakes of paraffin wax on the mill surface due to its density and stickiness.
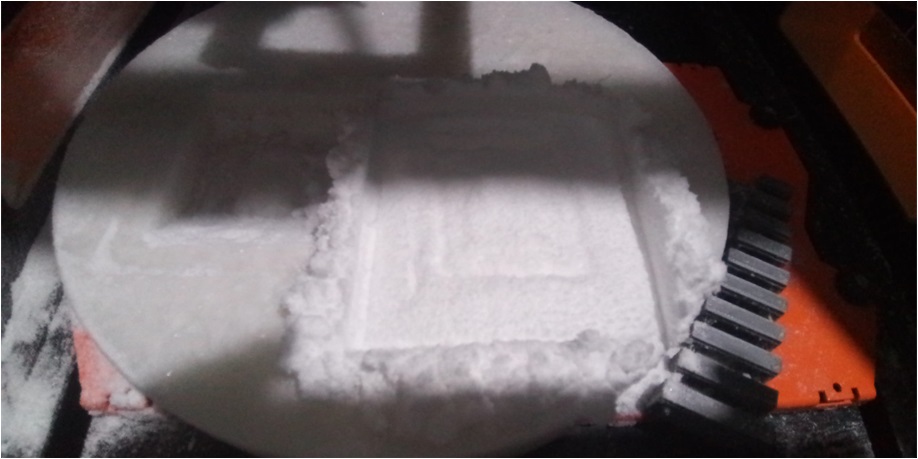
I had to immediately clean the milling surface with a dry brush to anticipate any discrepancies in the processing results (by pressing the PAUSE button on the Roland SRM-20 VPanel). Cleaning is carried out because the mechanical energy resulting from the rotation of the drill produces heat which affects the level of adhesion of the paraffin wax (sticky to the object), so that a lot of it sticks to the surface being milled.
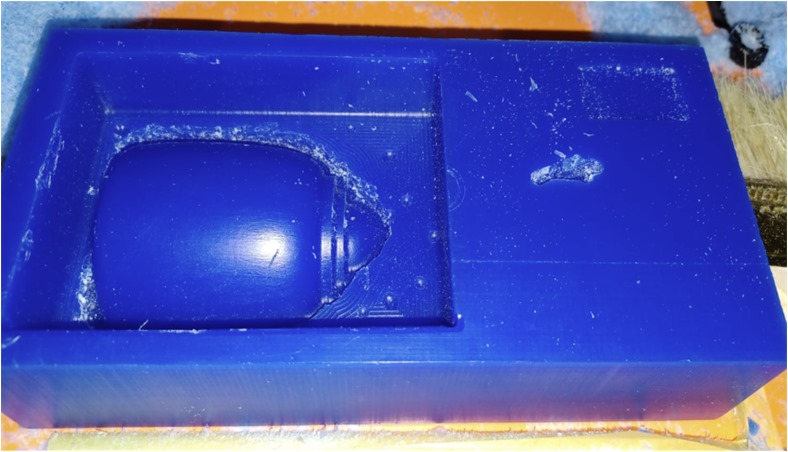
The precision and surface texture of the milling process looks rough because of the many fine flakes of paraffin wax that stick to the object due to the mechanical energy that produces heat that can melt the object.
Even though the results were not so good, I tried to continue the molding process.
In my milling process, rough cut or roughing pass was conducted in subtractive manufacturing processes. This process indicated from layer by layer material was removed from a solid workpiece/parrafin wax. The amount of parafin wax was quickly removed from workpiece as per required feature. Higher feed rate and depth of cut are utilized. Material removal rate (MRR) was high. Surface roughness after rough pass was more; thus surface finish was poor. It could not provided high dimensional accuracy and close tolerance. Here very low feed rate and depth of cut were employed.
I could not continued finish cut or finishing pass due to a lot of material sticked to the spindle and the mechanical energy from milling process that generates heat makde the texture of the parrafin wax deformed due to its low melting point. I was worried for worse texture.
MOLDING PROCESS
Before the molding process is carried out. The ratio of the amount of material must be determined to get the desired output quality.
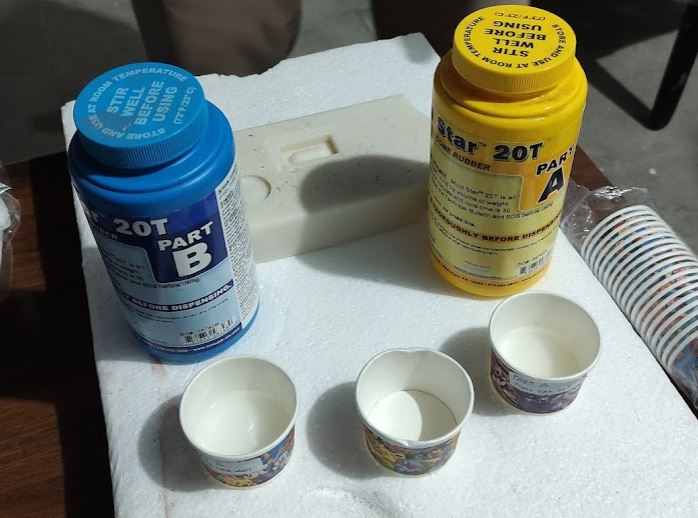
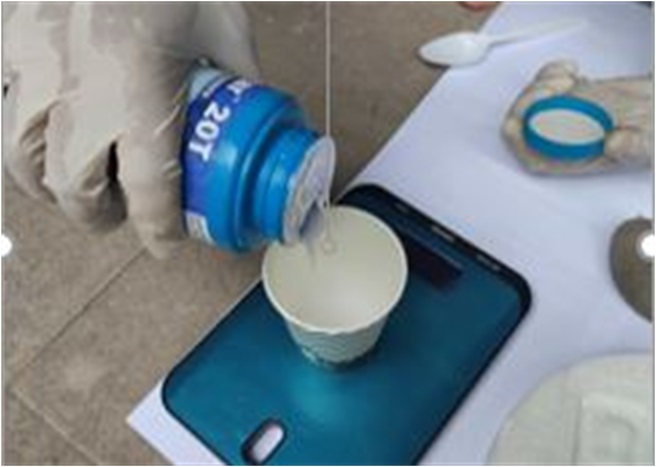
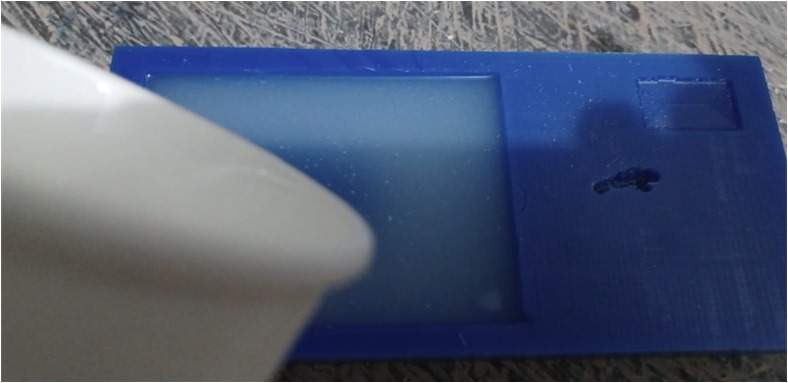
We used two materials (Part A and Part B) for casting and tried silicon to put into wax mold, We mixed the two together (50 g each, in a 1:1 ratio). then… and they would be the silicon mold.
Weighing, mixing and stirring I dd very carefully and quickly because of the nature of the material is dangerous, sticky, expensive, and easy to harden.
During the mixing process, bubbles occur or there is trapped air that must be removed because it is feared that it will affect the results of the mold. However, I cannot observe if bubbles appear in the mold after the resin is poured into the mold.
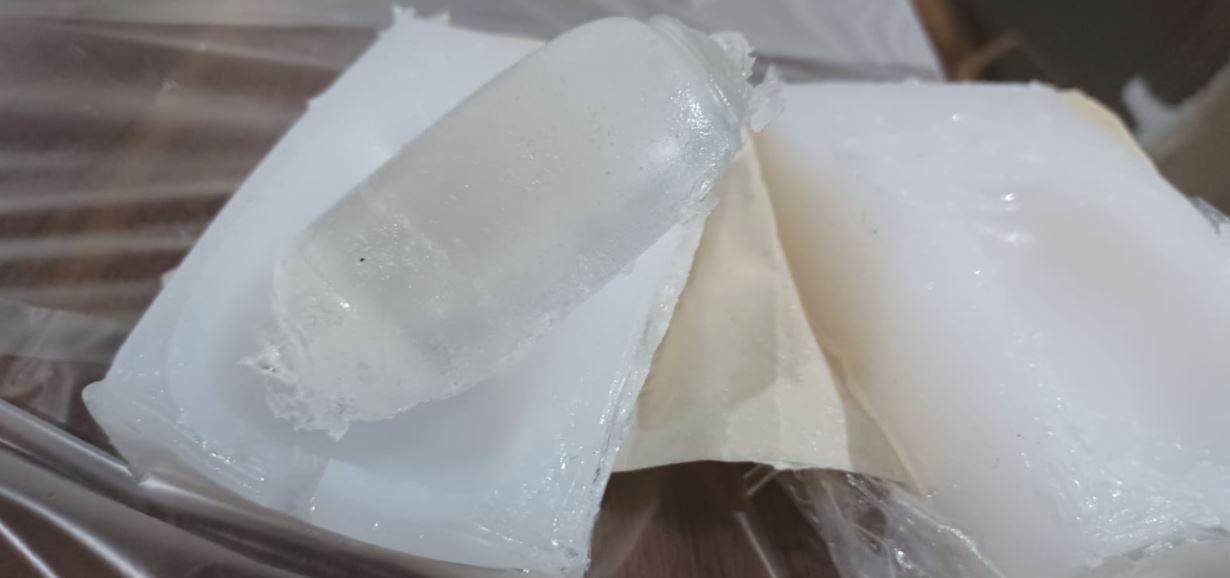
After 20 minutes and even though it had hardened, the product was still sticky to the mold, so I added another 15 minutes. However, the printout was still sticky, and I removed it from the mold.
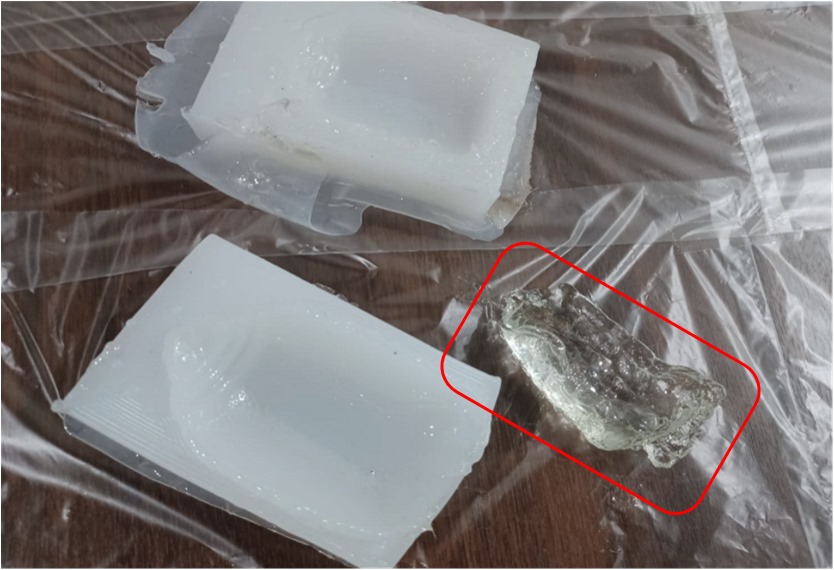
The results I got were not what I expected because of the sticky and chewy texture like jelly. I haven’t fully figured out the reason why this condition occurs.
However, the important thing to note after working and comparing the results with my friends is the 2-part materials need to be mixed properly, if that is not the case.
They will not work as expected. The problem is, that stirring introduces air-bubbles. This creates a challenges, especially if the pot time is in the range of 5 min. Mix, stir, pour, de-gas (if available). Too fast, air bubbles. Too slow, materials starts to hardens.
OUR RESULTS FOR MOLDING AND CASTING
These are our impressions of working with the various materials. All the materials were 2-part mixes of two chemical compounds in liquid form.
we haven’t had any success so far, but we will try again and again. This week’s assignment is very interesting because it stimulates us to learn many things. we want to learn and develop local resources (organic/natural resin) for molding and casting.
For liquid plastics, it is ultra-low viscosity casting resins. Although is has lower hazardous substance, we have to work carefully using safety glasses and gloves because some heat of reactions were released during process.
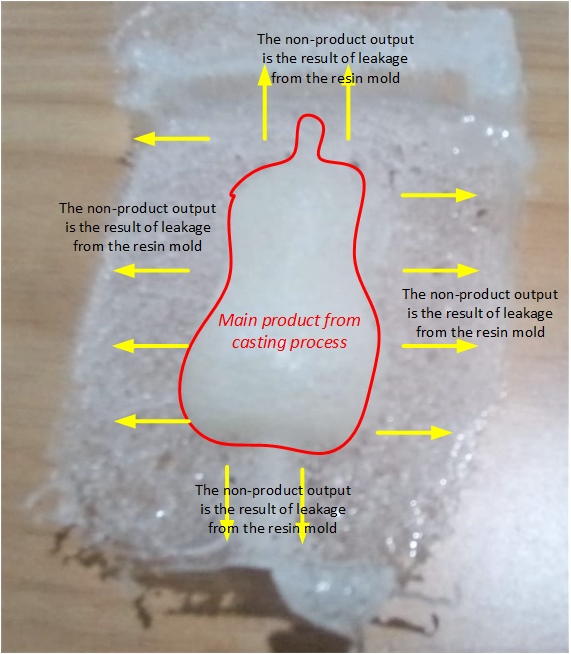
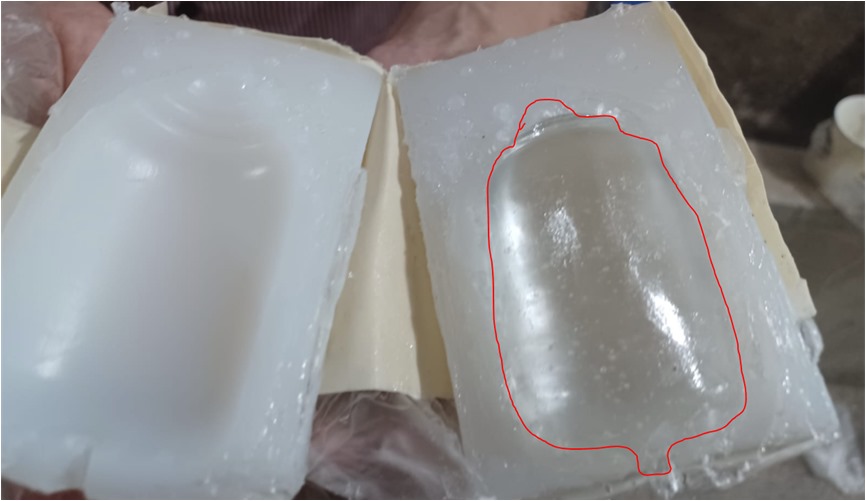
Resin leakage from the mold was caused by the presence of cavities that occur as the two surfaces of the mold that were joined together were not fit and strong enough to withstand the flow of the inserted resin. This happened because the mold used was very flexible and tough. Such mechanical properties of the mold seem to be caused by mismatches in the proportions of the mixture and the mixing process.
Knowing the material character play important role in this assignment. The material are composed of two parts: a liquid resin and a suitable hardener, also in liquid form. Once these two liquids have been mixed together, a chemical reaction will begin to take place that results in the solution hardening into a solid over a designated period of time. This reaction begins the moment the two liquids have been mixed and will produce a certain amount of heat as a result.
The low viscosity of this resin means that it takes much longer to harden.I had more time to process and work with the resin in its liquid state, but it will take several hours before the surface is dry to the touch, and a few days for the resin to cure into a completely hardened substance.
Feedback and Evaluation
3D Design for Infant Bottle
CAM (Manufacture)
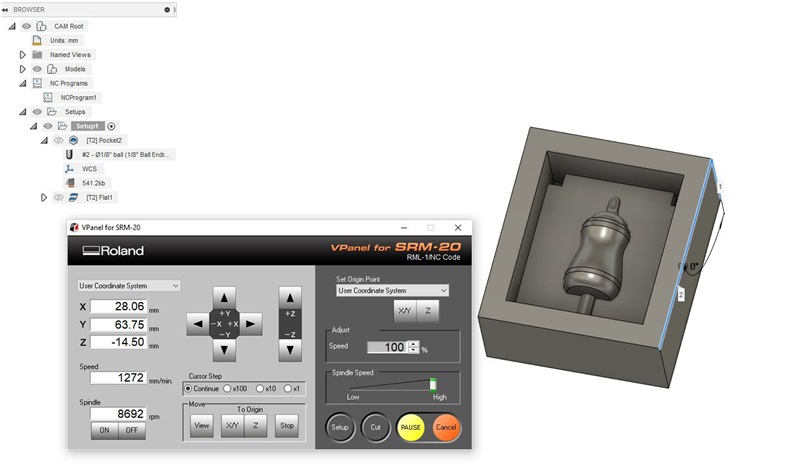
- To generate G-Code (CAM) I used “Fusion 360 Manufacture”after drawing the 3D Model. There were some steps to perform CAM process.
- Open the Manufacture worksheetfor SETUP and set the Stock (material for mill), on the origin position.

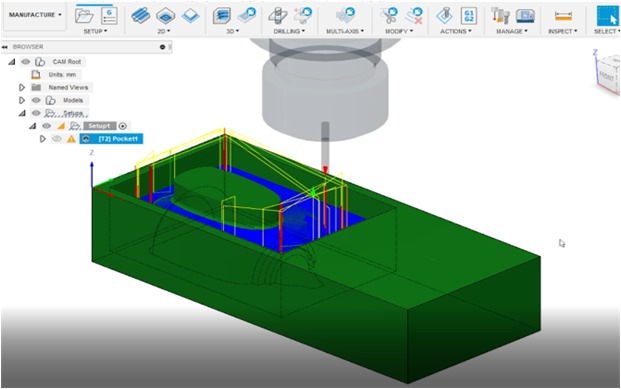
Roughing process (pocket) was the first process to speed up machining (substractive manufacturing) to meet the target nor speed in feeding.
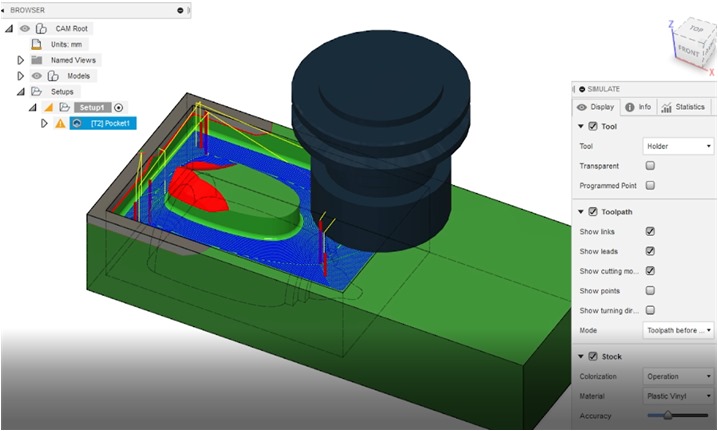
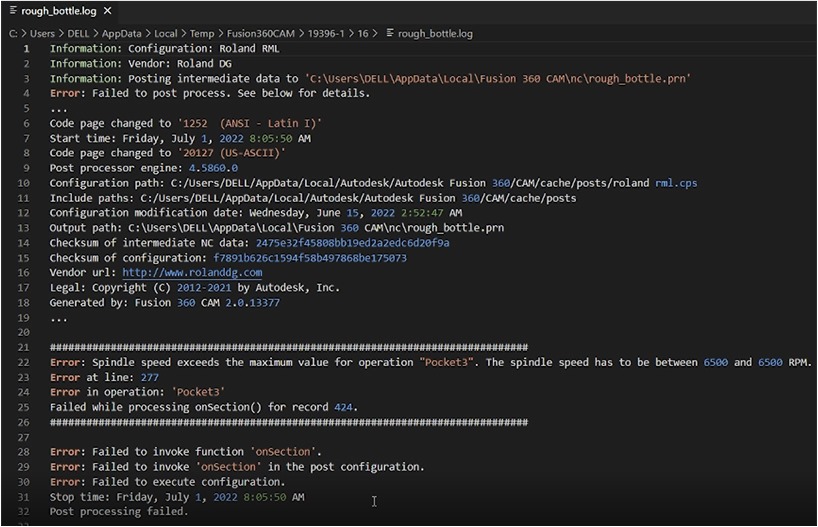
Some errors were occured, especially in the roughing stage. To repair and evaluate I changed the spindle speed exceeds the maximum value operation “Pocket3” to 6500 rpm.
Based on evaluation from my local and global evaluator, I had to redo my assignment using a proper material. To follow up this feedback, I worked with machinable_wax and tried for example milling process.
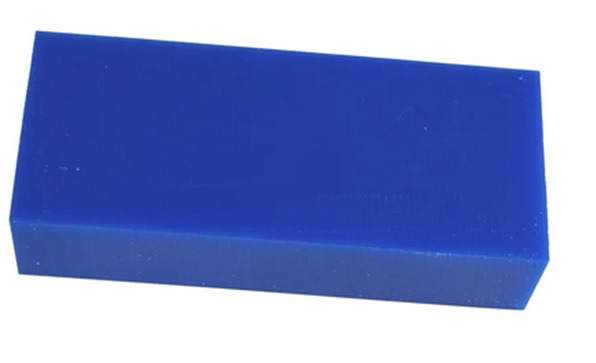
This material is an extremely hard wax that has been formulated to deliver exceptional machining properties including high resolution detail. Since it is harder and has a higher melting temperature than most other waxes, machinable wax can be machined, cut, or shaped using standard metalworking or woodworking equipment.
High quality surface detail and dimensional accuracy are possible and ideal for verifying CNC machining programs. It is often used for precision lost wax casting.

Machinable wax, brush, spatula, and double-sided tape are prepared for the milling process.
 .
.
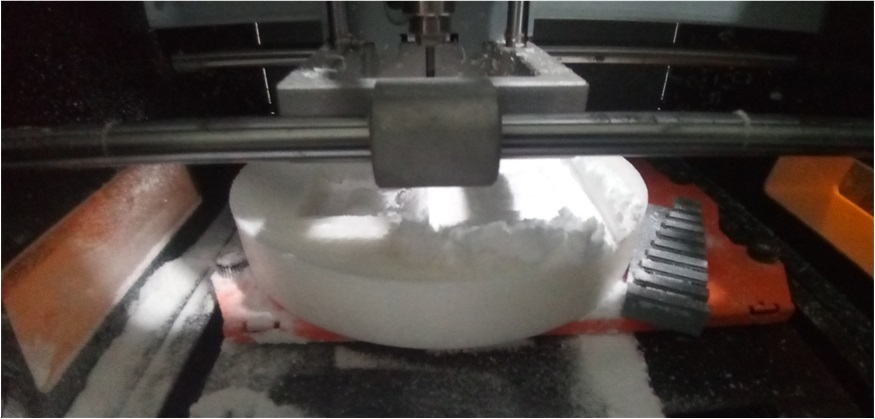
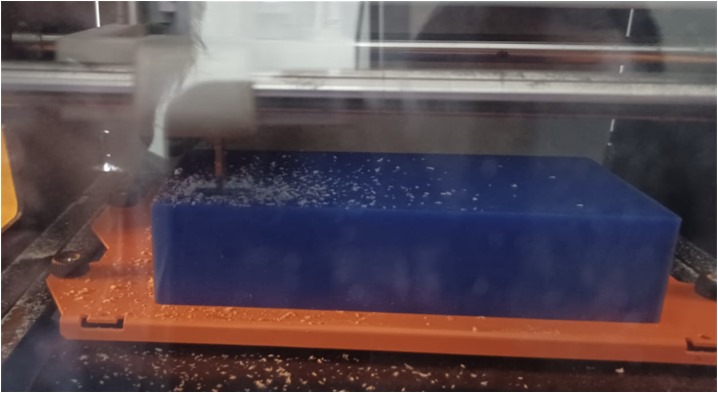
Furthermore, the milling process at the roughing stage is shown in the image and video below.
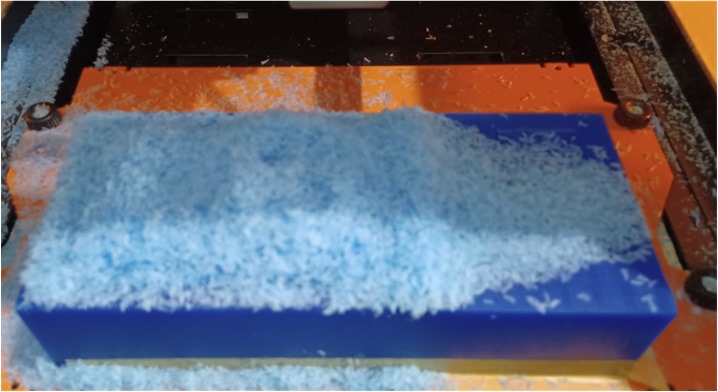
Every 10 minutes I have to pause the process to clean the dust and small bits of milling that are around the object to ensure that the process runs properly.
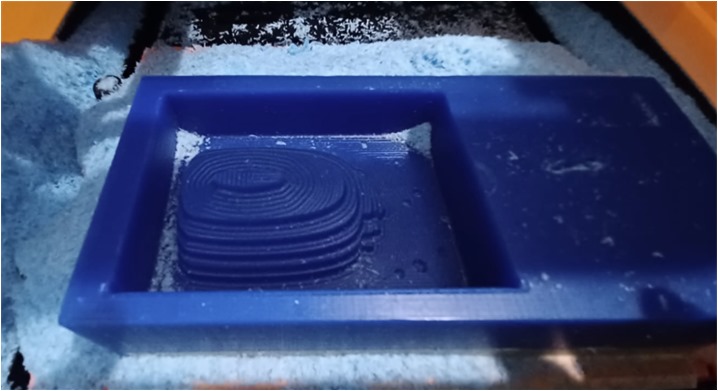
After the roughing process is complete, the finishing process is carried out to get smoother and better results.
Casting Process
The casting process is carried out using pourable silicon rubber A and B with a ratio of 1:1 of 25 grams each.
After pouring, I waited about 8 minutes to make sure the silicone rubber became solid and ready to be removed from the mold.

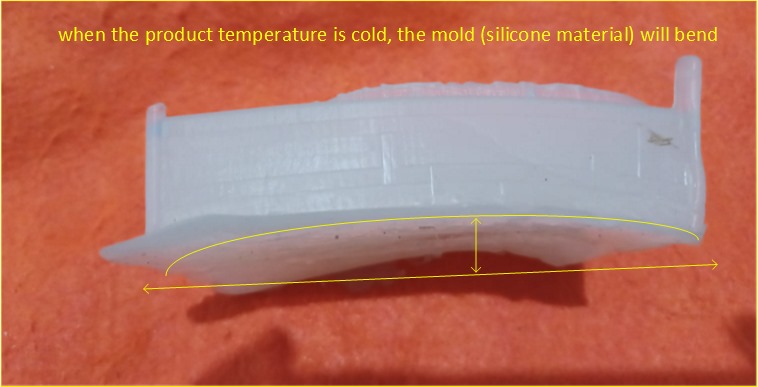
The silicone bended after it cools down and I had a hard time getting it together. There are many gaps that can cause liquid plastic to come out during the pouring process. So I used a rubber band to hold the two silicone molds together.
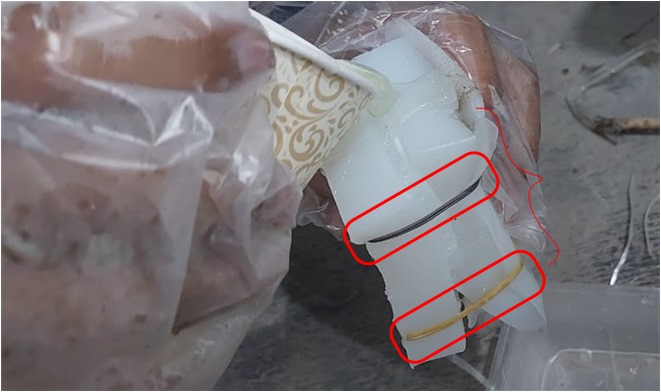
I got bad results because a lot of plastic liquid leaks out through the gaps that are not tightly closed.
My Second Result
My Third Result
Because I haven’t gotten good and satisfactory results, so I made a third mold from silicone rubber.
For the third silicone mold, it also experienced bending, therefore I used paper tape to attach it in the hope that the open gap could be more closed so that there was a potential for plastic liquid leakage at the joint.
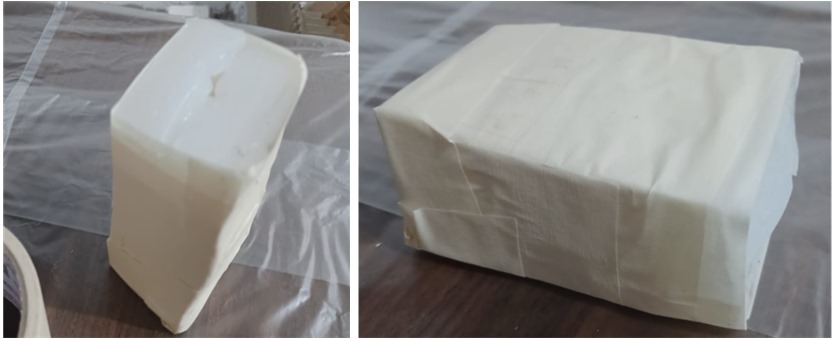
The following picture is the result of the third printing process with a 1:1 ratio of liquid plastic in A and B (17 grams each) for the second and third experiments.
The time for changing the liquid to solid phase takes 18-26 minutes for these two second-stage experiments. I did not do any variation in the ratio of the amount of material A and B (hardener).
LEARNING OUTCOMES
After conducted these assignment, I got more experience and knowledge about:
-
Molding and casting process
-
Safetyinduction and data sheet which gives instructions on how to use it, general safety measures to take, mixing ratio’s, curing times, etc.
-
Using 3D and 2D design for casting and molding
For ‘limitations of 3 axis machining’, after observing the system, it’s worth noting that tool availability may be a design constraint in CNC milling. Because of the three axes, some places may be inaccessible. It is possible to rotate a workpiece, so it is not an issue, but repeated rotations may raise your machining and labor expenses.
Important Files
References
-
http://fablabkamakura.fabcloud.io/FabAcademy/local-sessions/week15/.
-
https://xbau.eu/products/smooth-cast-300-series-casting-resin