16. Wildcard Week
Design and produce something with a digital fabrication process (incorporating computer-aided design and manufacturing) not covered in another assignment, documenting the requirements that your assignment meets, and including everything necessary to reproduce it. Possibilities include but are not limited to wildcard week examples.
Learning outcomes: - Demonstrate workflows used in the chosen process - Select and apply suitable materials and processes to do your assignment.
Have you: - Documented how you made your creation - Described problems and how you fixed them - Included your design files and ‘hero shot’ of the result
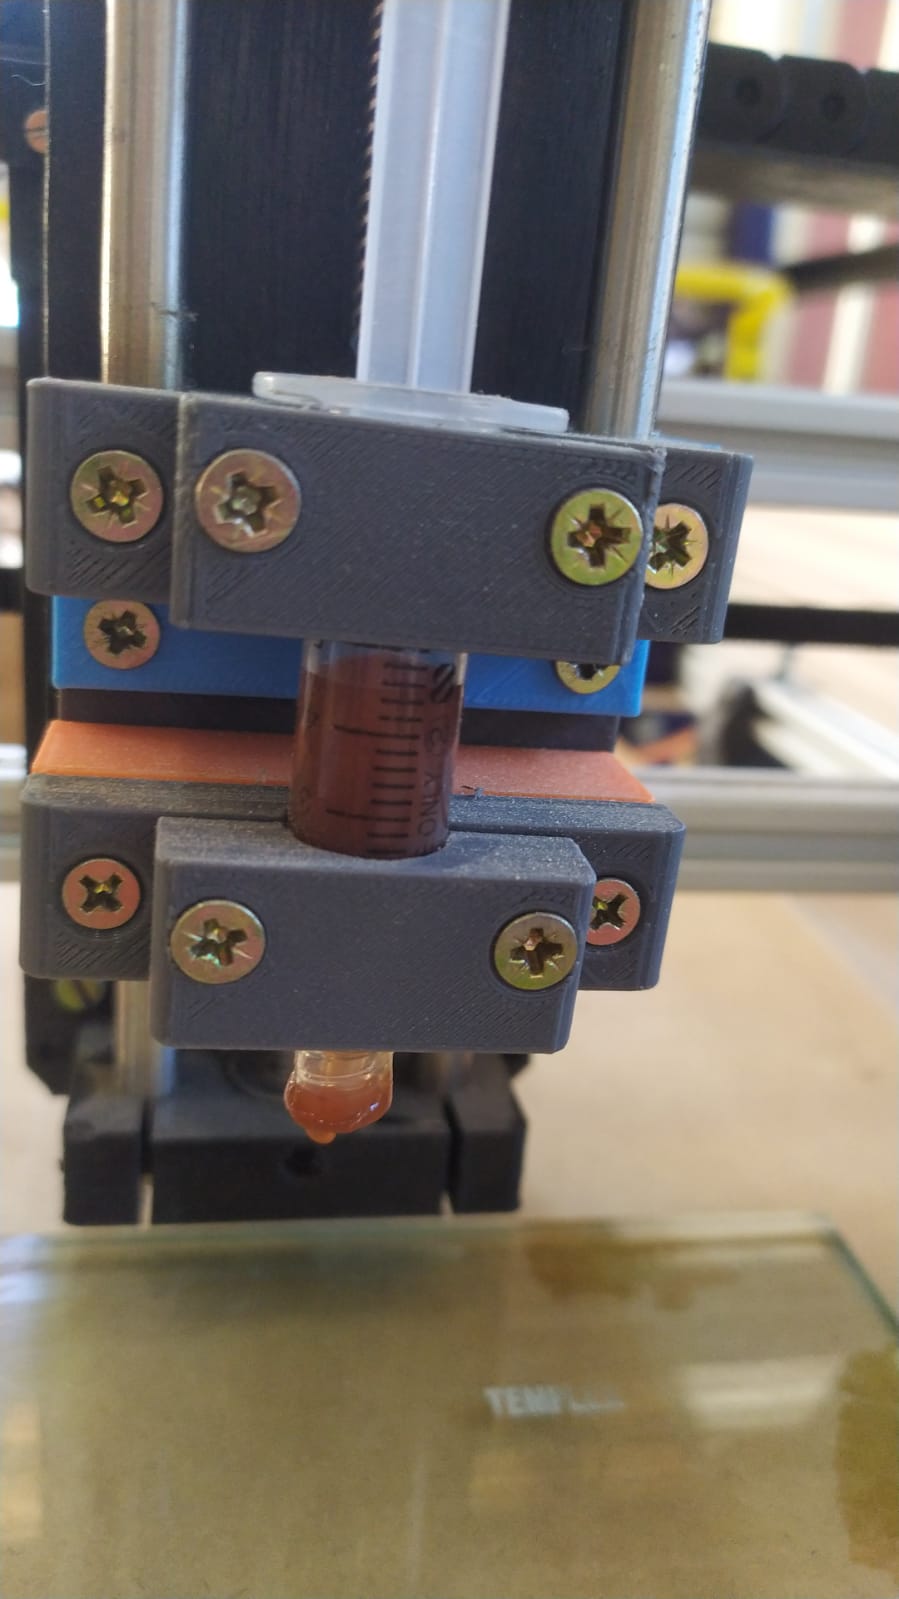
Syringe printing
CAD design
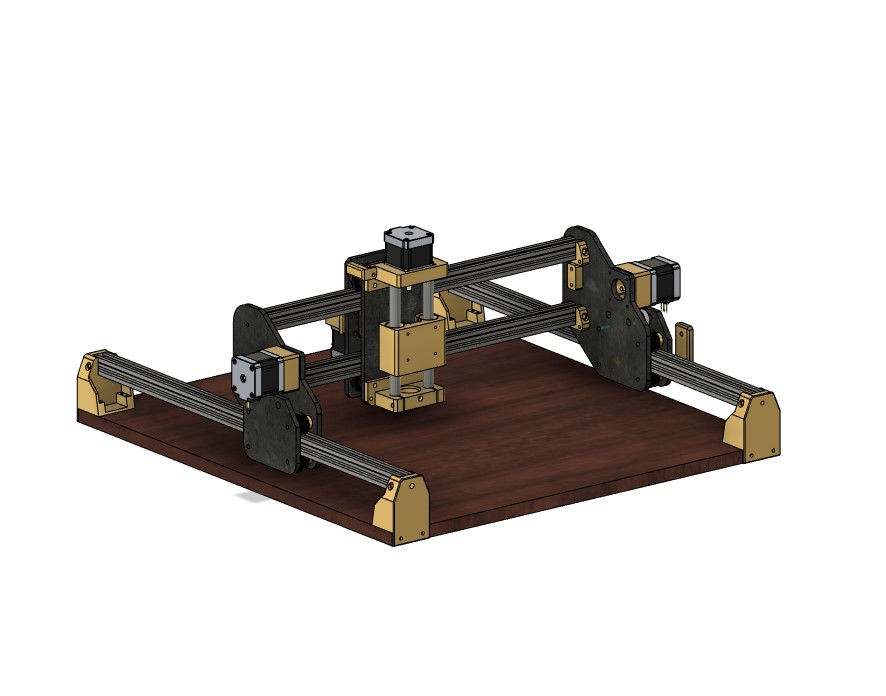
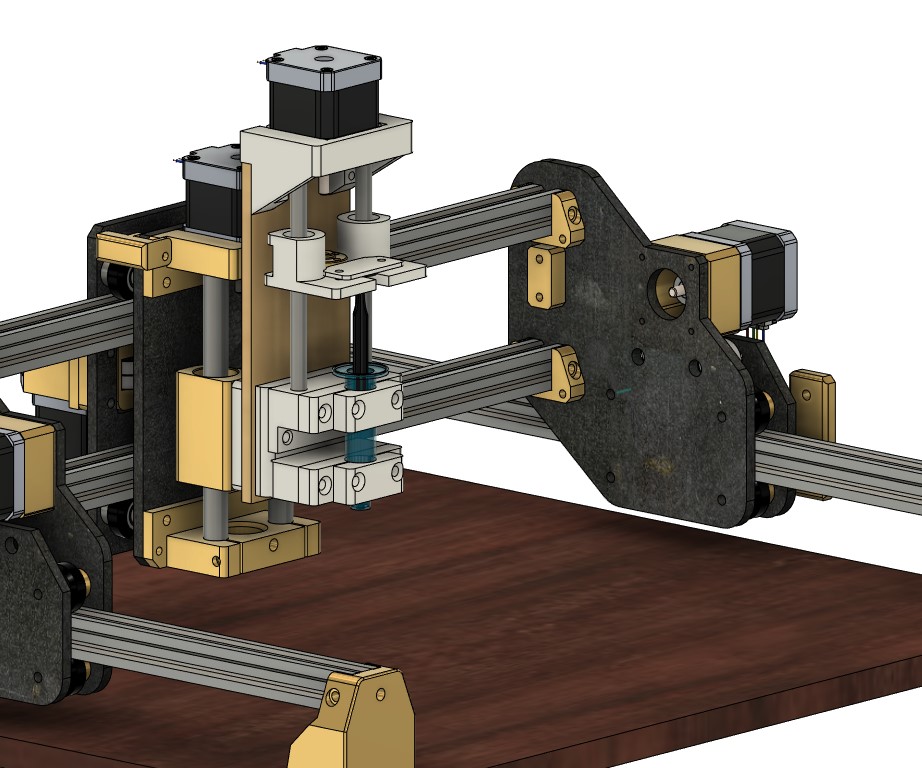
For the main design I used one of my own machines model, I just call it V-slot CNC because it is made with 2020 v-slot aluminium profiles, I try not to use much time deciding names and focusing on what I consider more relevant.
Extruder axis
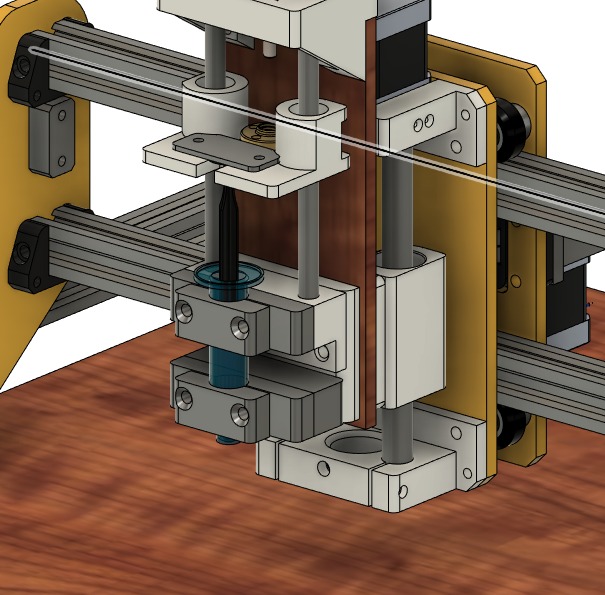
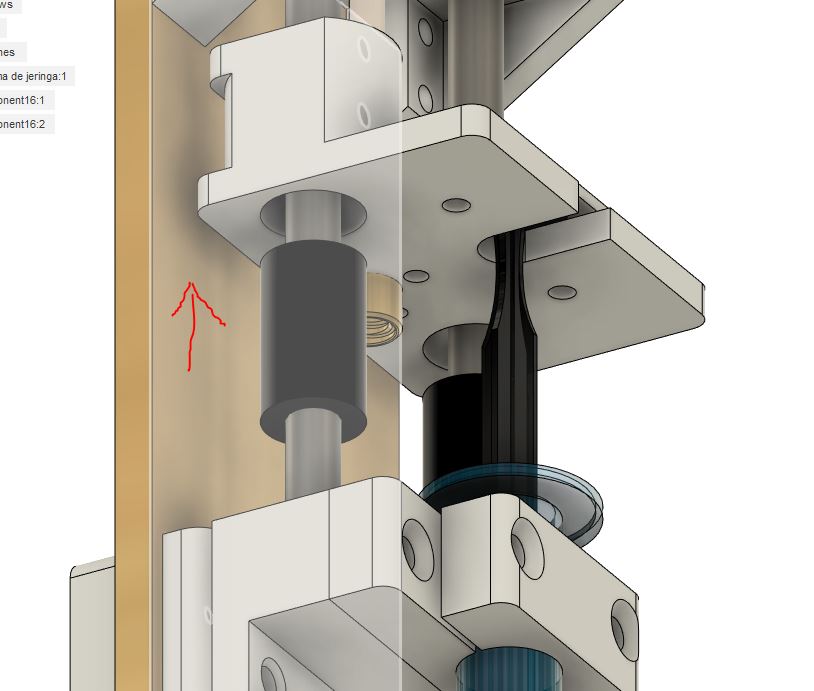
To design the extruder axis I used CNC routed 6mm plywood and 3D printed parts. The mechanical parts are 8mm stainless steel smooth rods and 2 LM8uu bearings, and a T8 leadscrew and nut to move the syringe and push the liquid.
I designed everything to be assembled with lag screws in order to save some time assembling the machine with a hand cordless drill.
The main structure of the Z axis uses 12mm stainless steel rods, with a nema 17 stepper motor and T8 leadscrews as well.
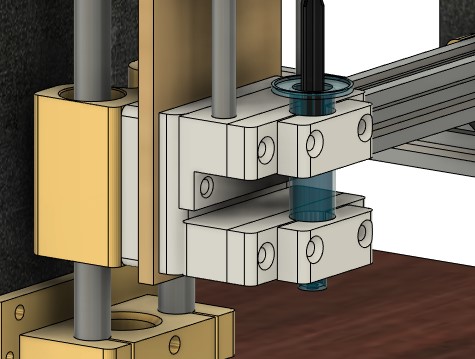
The extruder also uses a nema 17 stepper motor with a small 3D printed part that pushes de syringe bottom and causes the liquid to flow, with this method I can precisely dose the amount of liquid during the printing process.
Here are the cad files of the syringe mechanism on the link below.
Hardware
For the mainboard I choose Arduino Mega + Ramps 1.4 and used a 12V 25A power supply, it has a total of 5 drivers, using an auto-squaring system with 2 endstops on the Y axis.
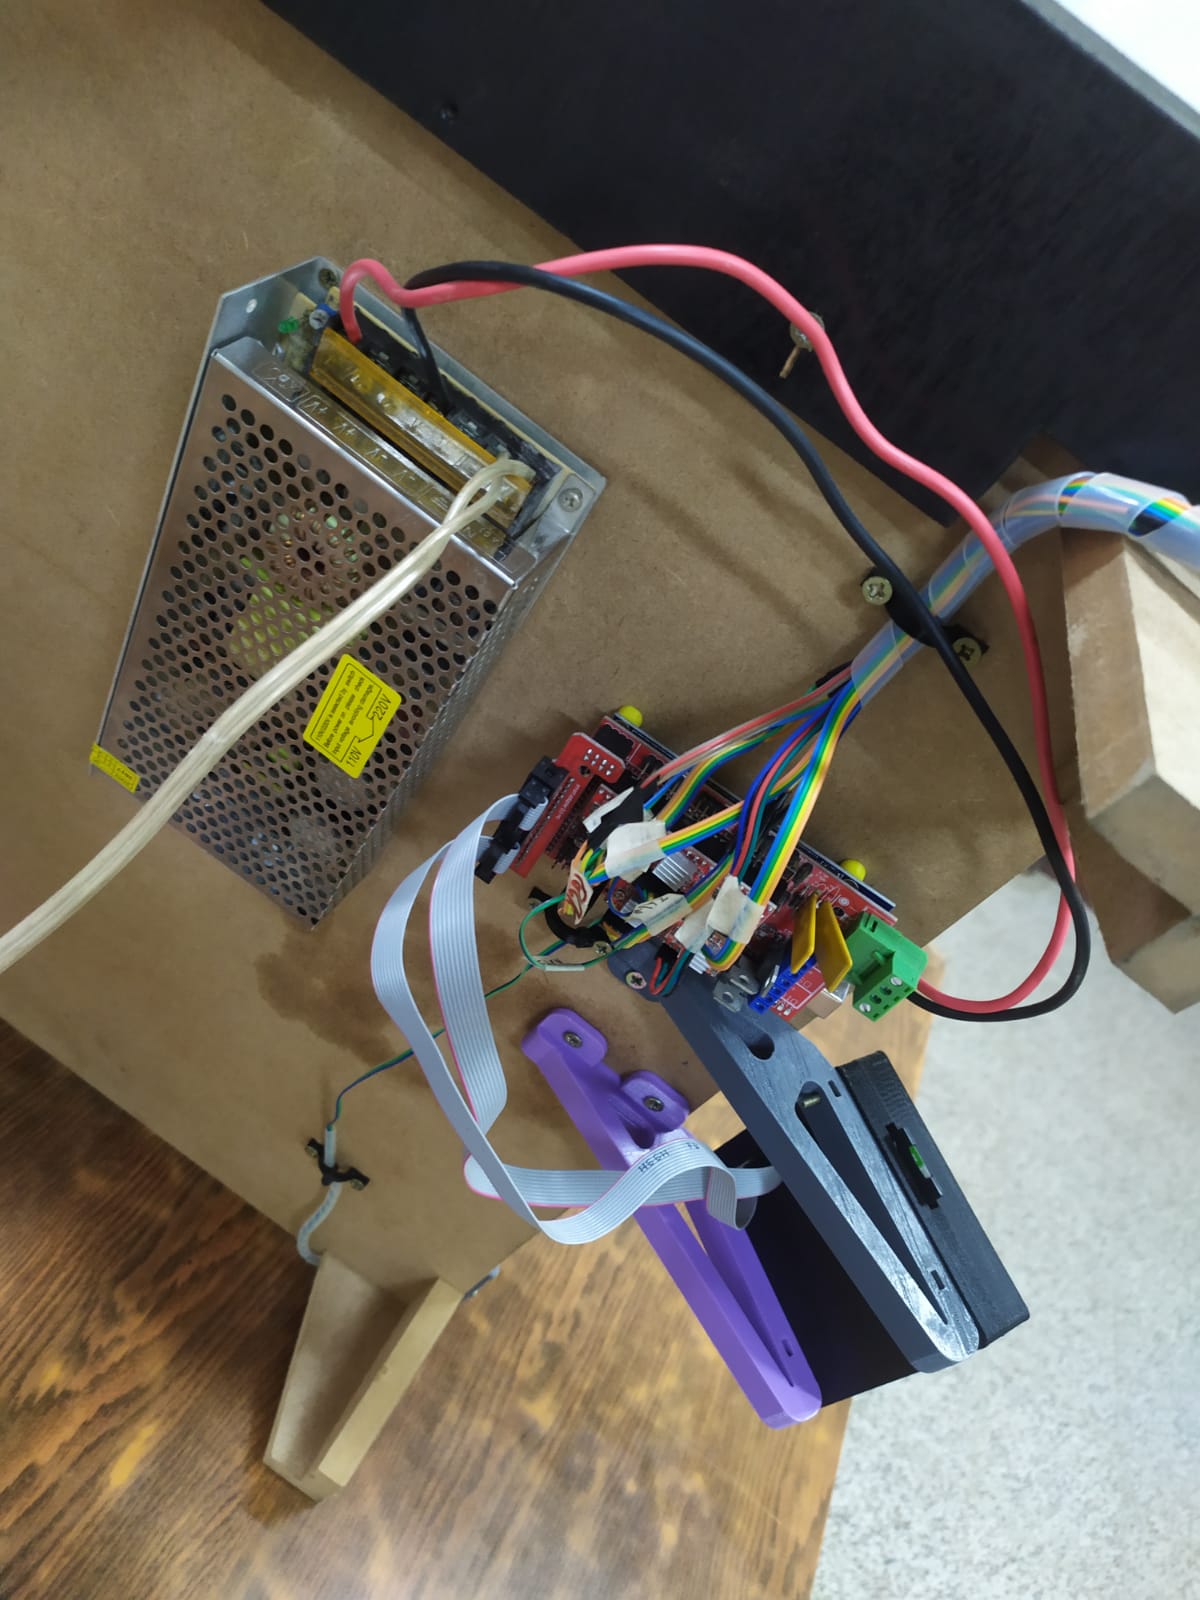
As you can see the Y axis has 2 independent Nema 17 motors wich can Home individually on each side. Also it has 3d printed cable chains to keep the wiring neat and working properly for a long period of time.
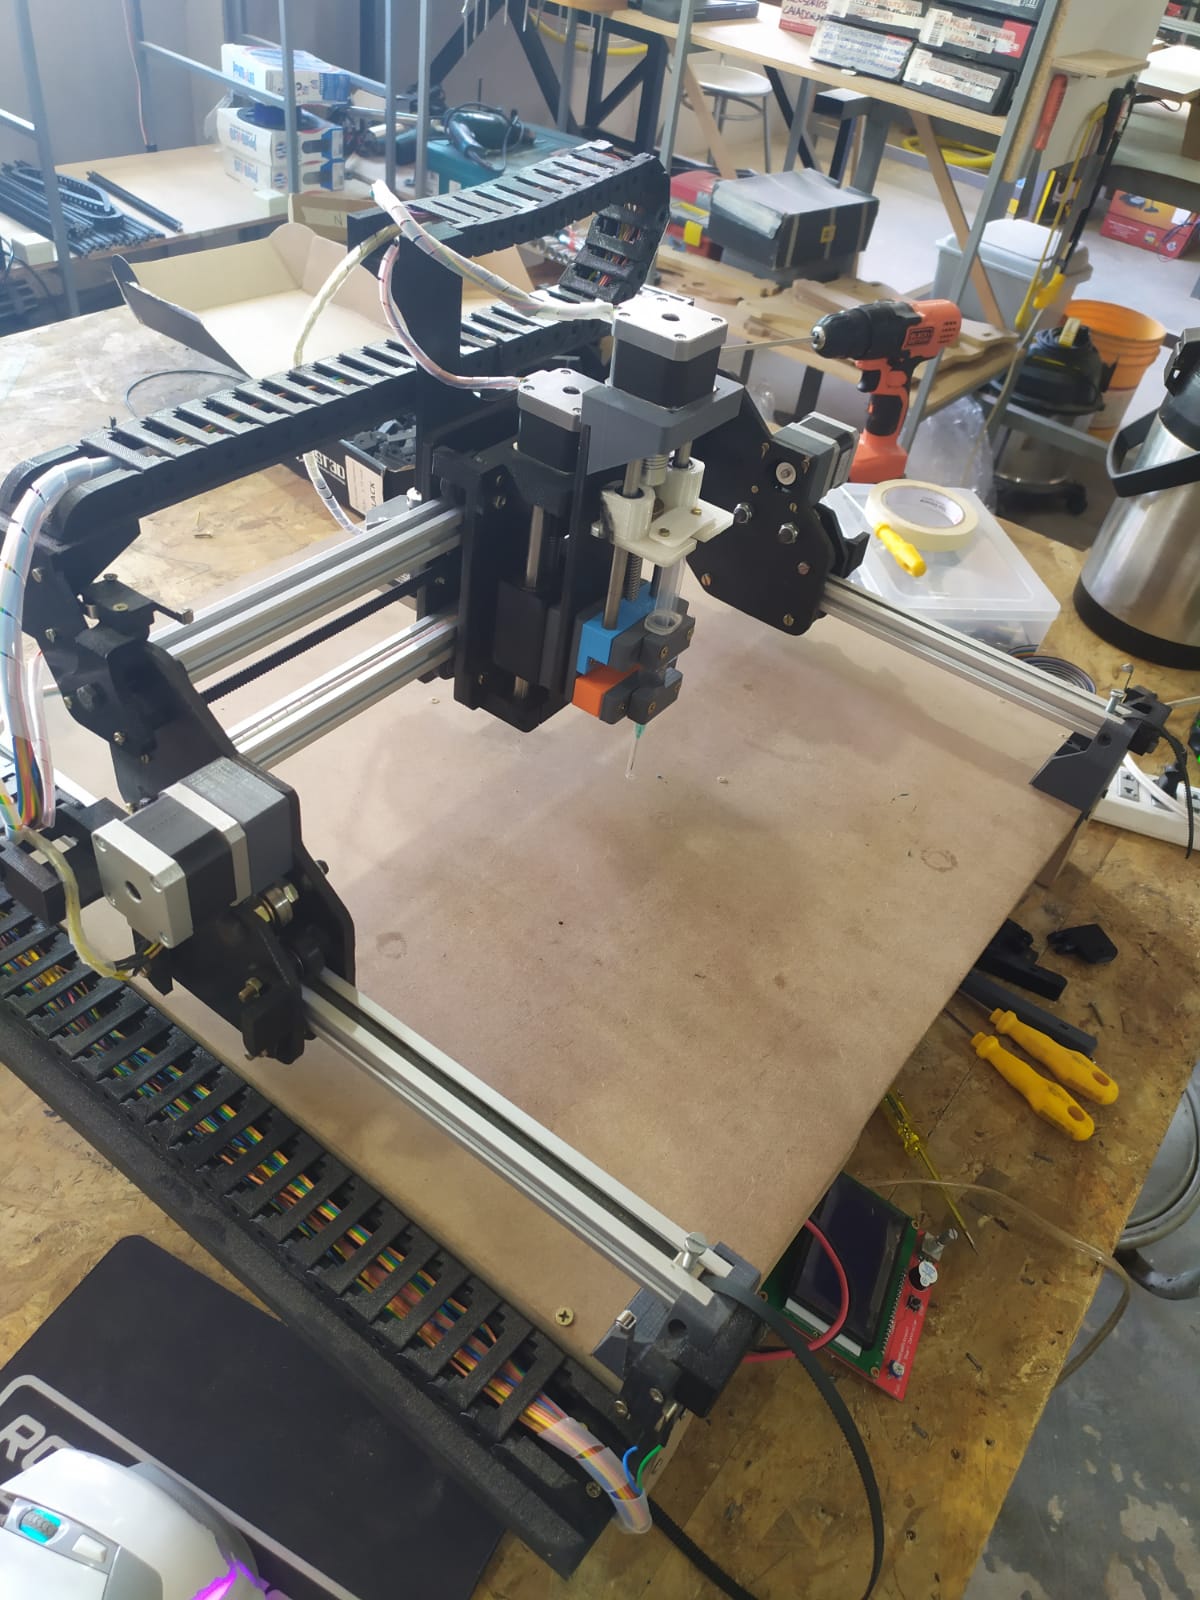
The original design was made for a Dremel tool or a 500W chinese cnc spindle so it holded properly with the extruder system.

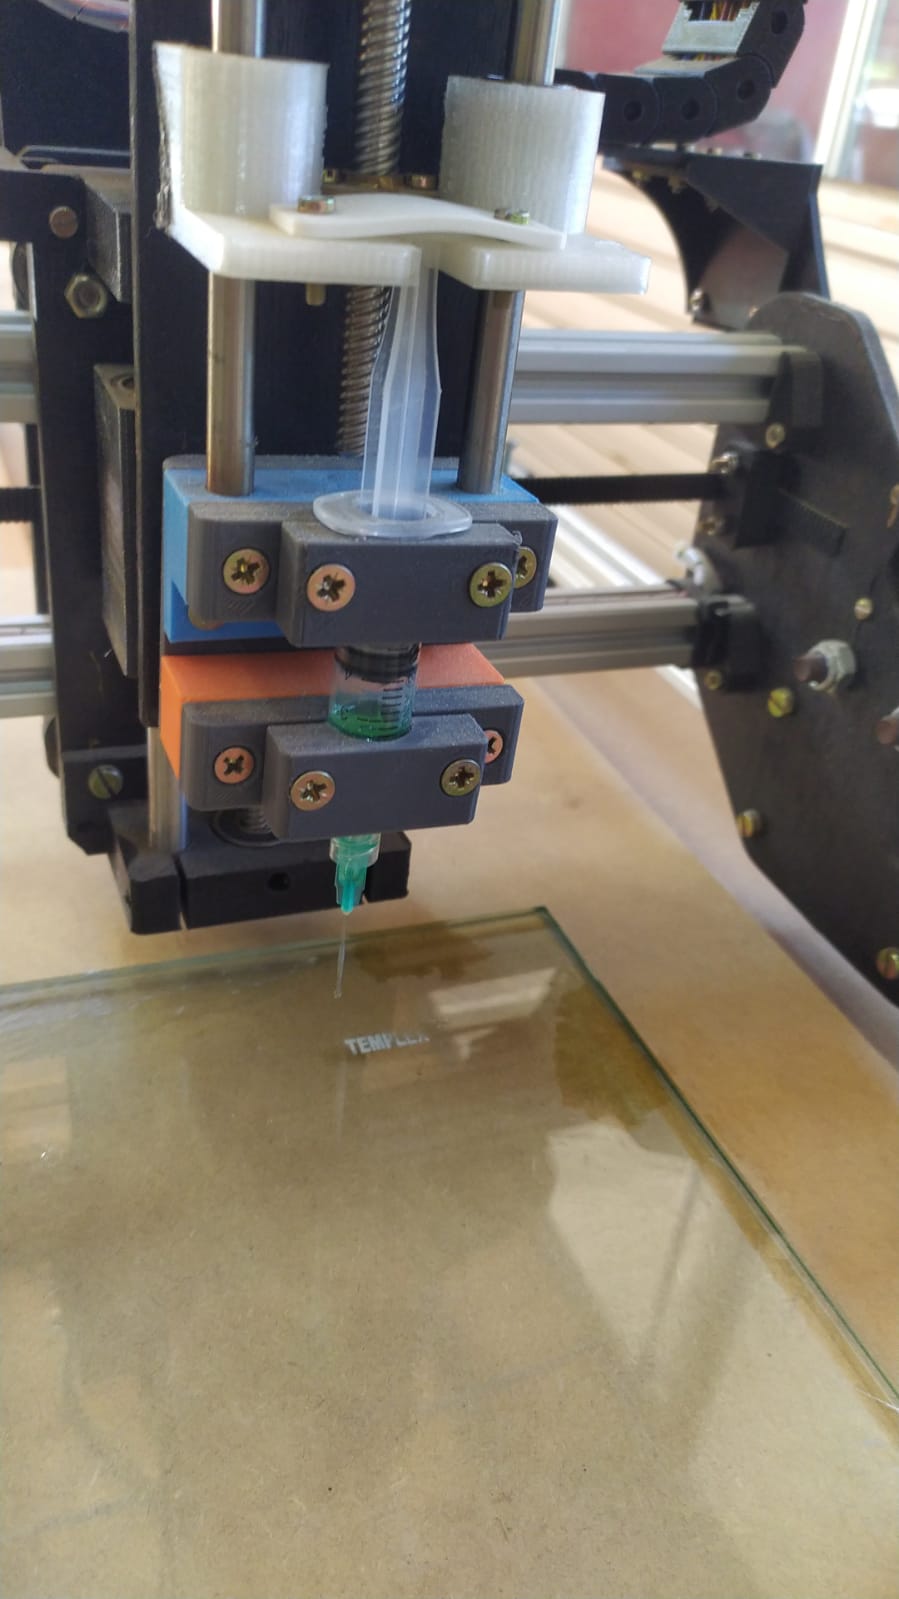
In this case I used a Small 5ml syringe but is perfectly interchangeable with bigger ones.
I divided the pieces in several 3D printed parts to work in 5 machines at the time and print everything faster.
Fabrication
Besides of the main CNC machine the fabrication is pretty straight-forward, I putted the bearings on the 3d printed part and assembled the machine
I used lag Screws to fix the first 3D printed part to the main carriage,
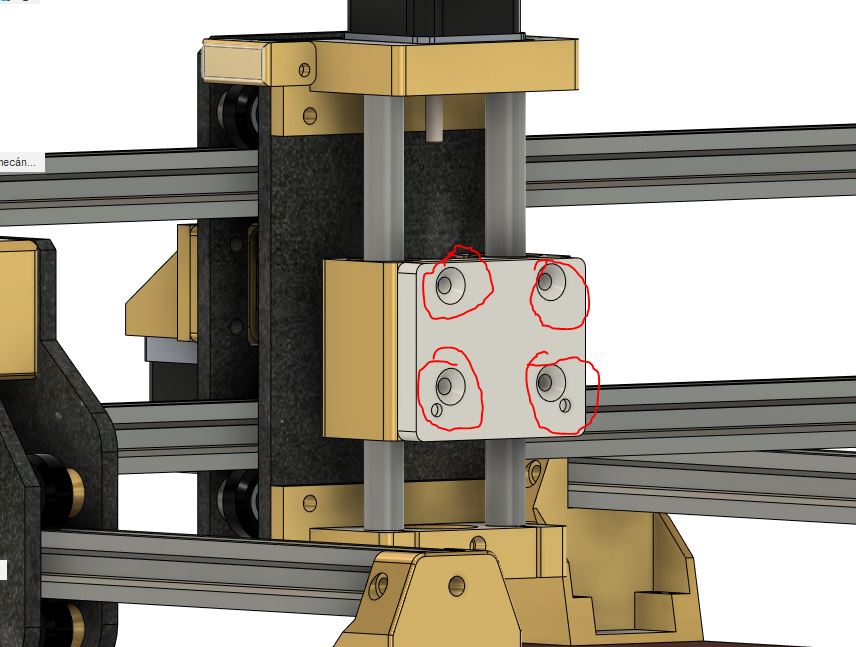
then I used 4 more to fix the main wooden panel of the extruder, and in the top, I left 4 holes for the nema 17 motor mount.

I used M3 bolts to fix the motor and the motor mount in place.
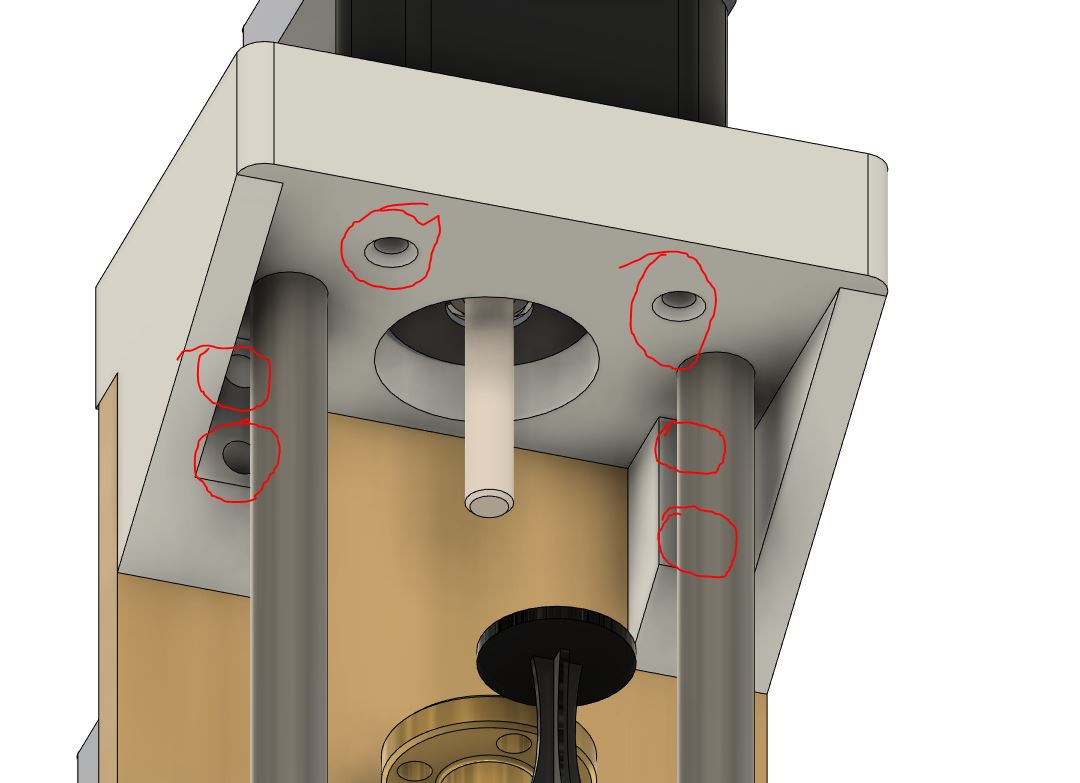
I putted the smooth rods in the 3D printed parts and located the couplings and leadscrew in place and the result is as following.
Software
1- Firmware
The firmware I used is a modified version of the original marlin firmware
To program the arduino and upload the lastest version I used Visual studio code with a plugin called Platformio.
After downloading the Marlin firmware I needed to open a new project and upload the marlin firmware link
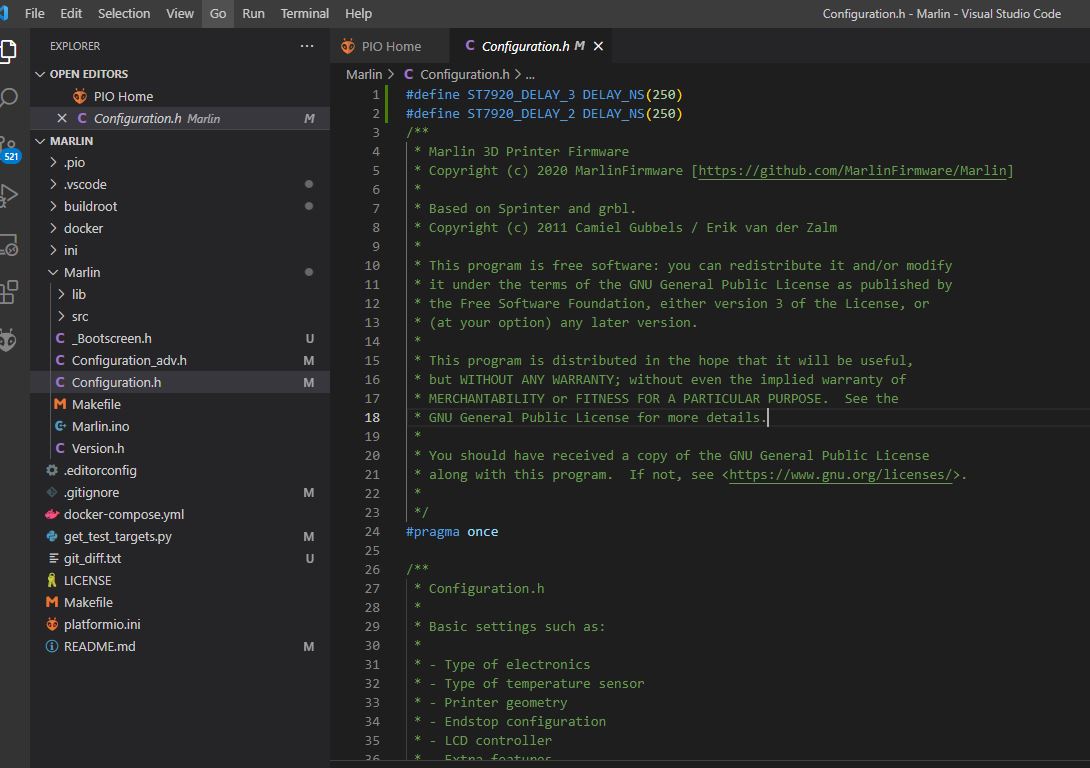
In order to keep this documentation not too long, I´m uploading the configuration and configuration_adv files of the marlin firmware I modified, and going to talk about the main parameters I´ve changed and explain a little bit about this 2 files.
Configuration.h
This is the main parameter settings configuration file for 3D printer programmers, even though it is not that easy to master all the parameters in this header, this is where every begginer must feel comfortable before going to more advanced settings. In this header you can configure name of the machine, movement settings, driver settings, endstop settings, temperature settings, and every main function a 3D printer has. If you want to enable special features, or use your machine as a different kind of CNC, you will have to jump to configuration_adv.h or other headers of the marlin firmware.
The main change from the regular printers I had to do in this part were 2:
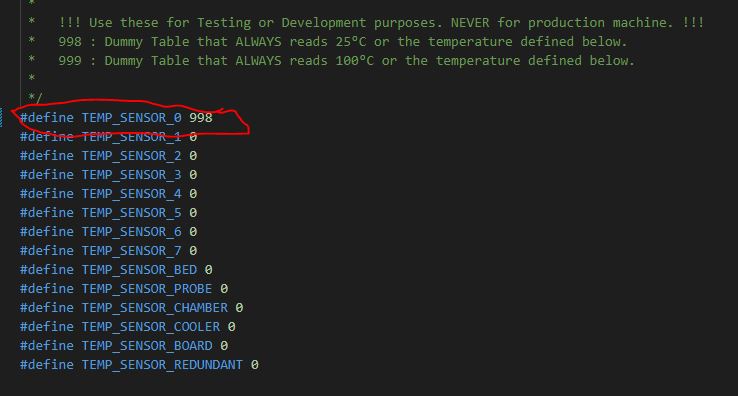
1- Activate a dummy thermistor in order to allways measure 25 degrees on the screen, as you can see, it is very well documented so if you want to dive inside go ahead it has a lot of information within the code.
2- The second thing was to disable prevent cold extrusion, wich is a safety measure for the 3D printer to not try to move the extruder motor when the hotend is cold. In this case I´m using a syringe so temperatures

You can find the configuration files on the link below.
Configuration_adv.h
This is the place where you can find most special features in marlin, for example if you want to use your 3d printer or machine as a laser cutter or engraver, or maybe a CNC router with automatic spindle, add more extruders, etc.
In this case I used this files to make my 2 Y axis stepper motors independent, there is also a cool feature called babystepping wich allows you to move your z axis really slowly as you are 3d printing in order to calibrate the printing surface distance to the head of your machine.
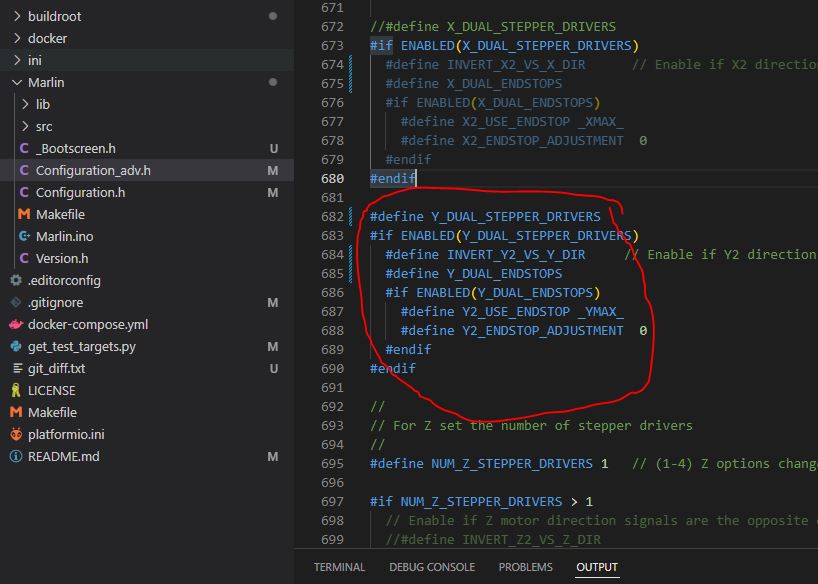
You can find the files on the link below.
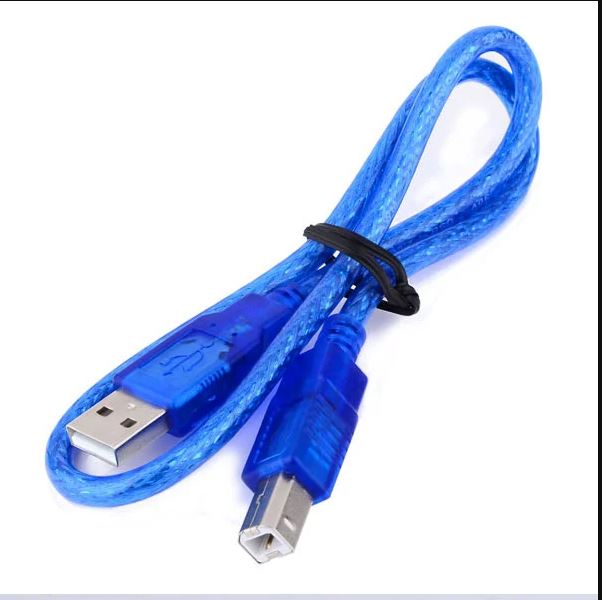
After finishing the process you have to compile the code and uploading to the arduino using a usb cable like the image below.
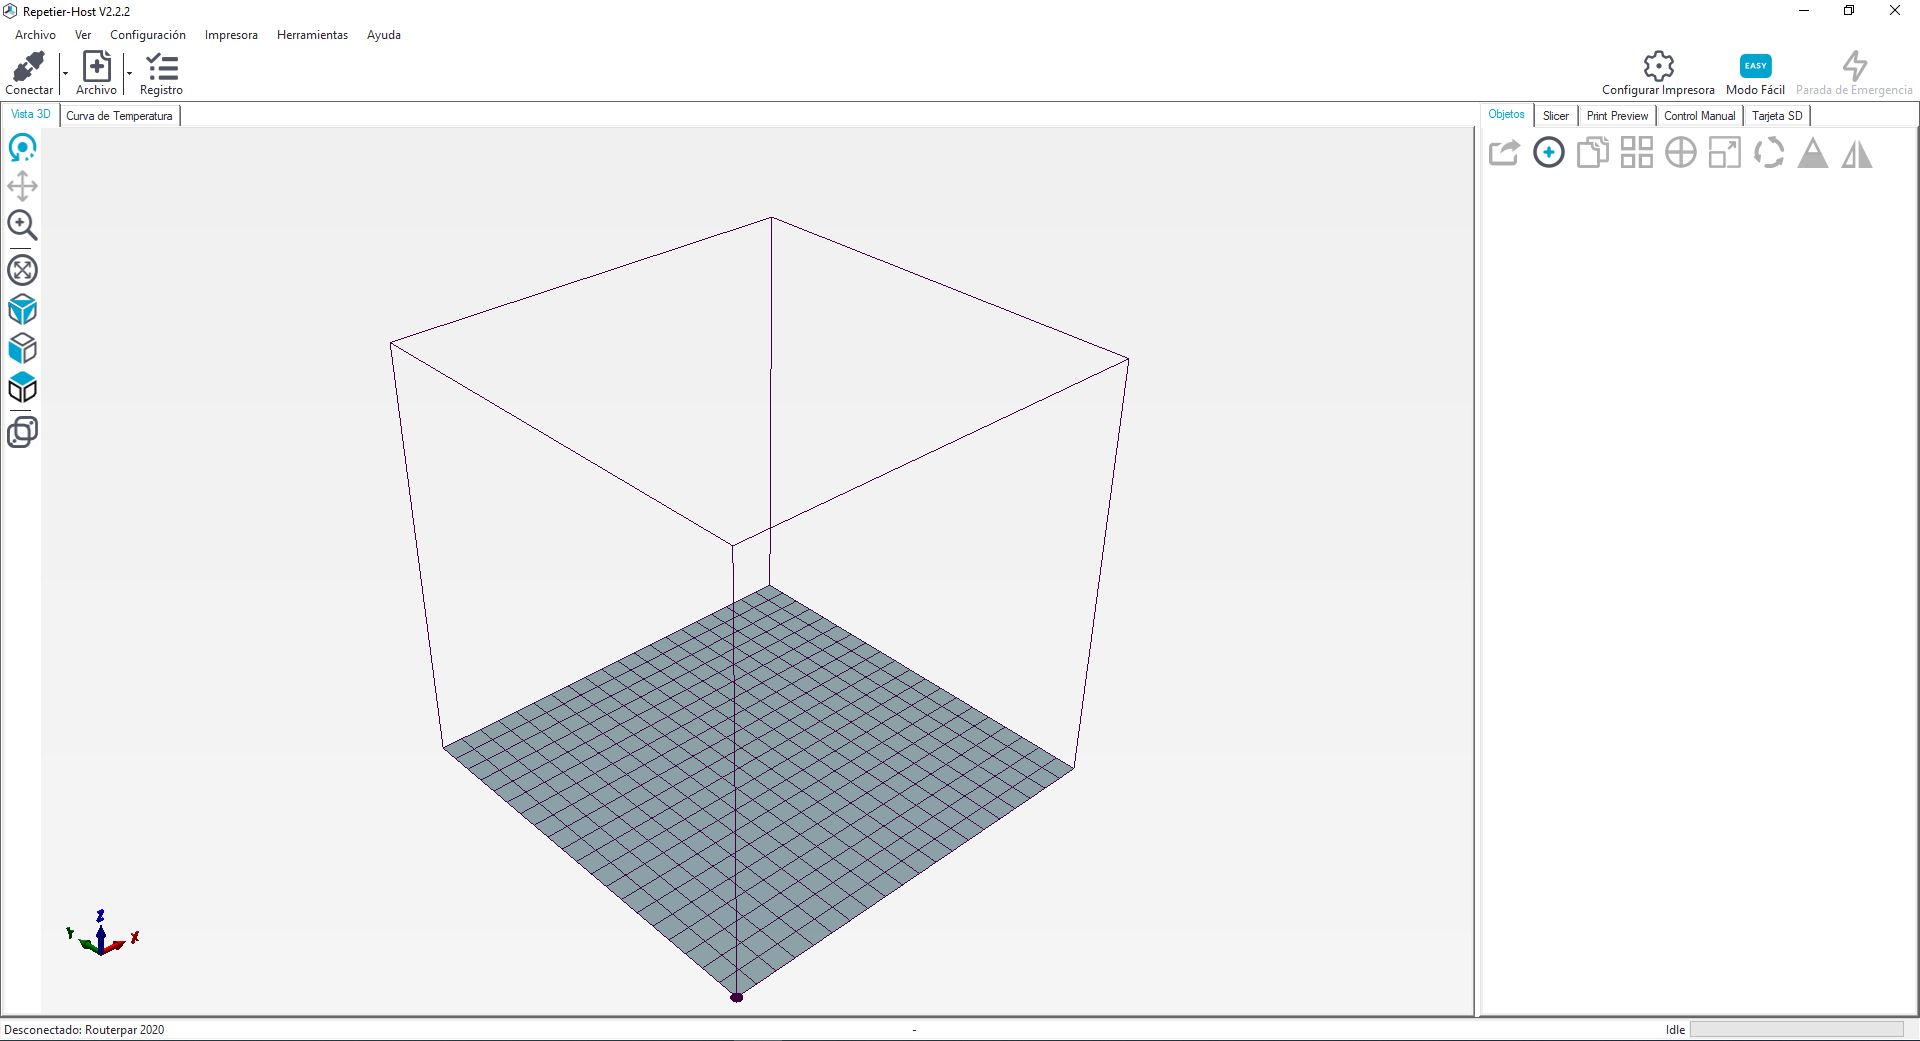
Slicer Software - Repetier Host
To make the gcode and the configurations for the machine I used Repetier host, wich is a slicer for 3D model lamination.
As a test for the printing I choose a small 2 cm star, later I realized it was too small to calibrate the extruder properly.
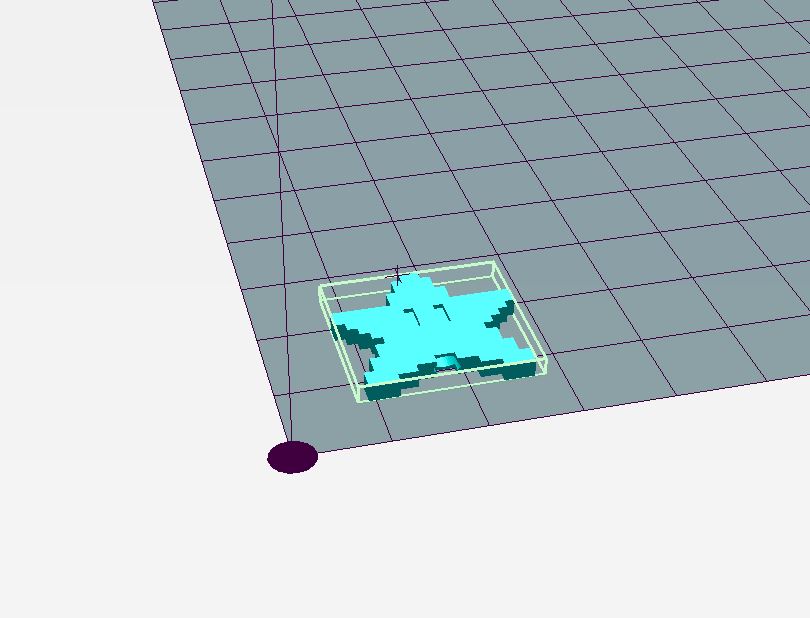
You can download the file Star.stl if you want to print it yourself.
But in the meantime, it is enough to star adjusting the parameters for initial printing.
Te first parameter to modify is the extruder diameter, wich will tell the machine the diameter of the nozzle for 3D printing, when you use a syringe the diameter of the tip determines the diameter the machine will use.
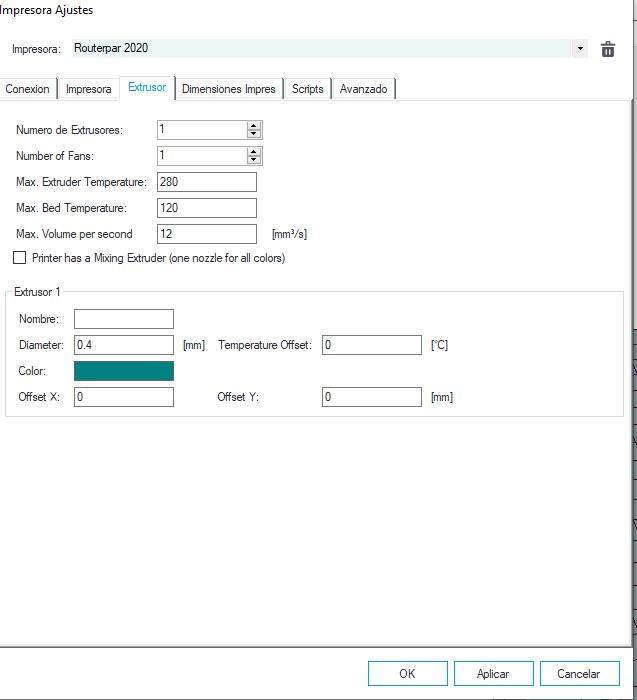
In this case I tried diferent tips, so the diameter will vary, and that will vary the extrusion wich I will calibrate by trial and error using the flow parameter of the extrusion wich is the next parameter to configure.
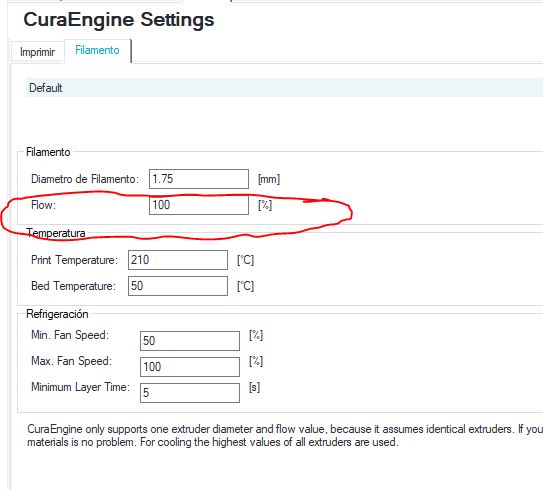
The flow parameter is directly porportional to the amount of liquid the syringe pushes through.
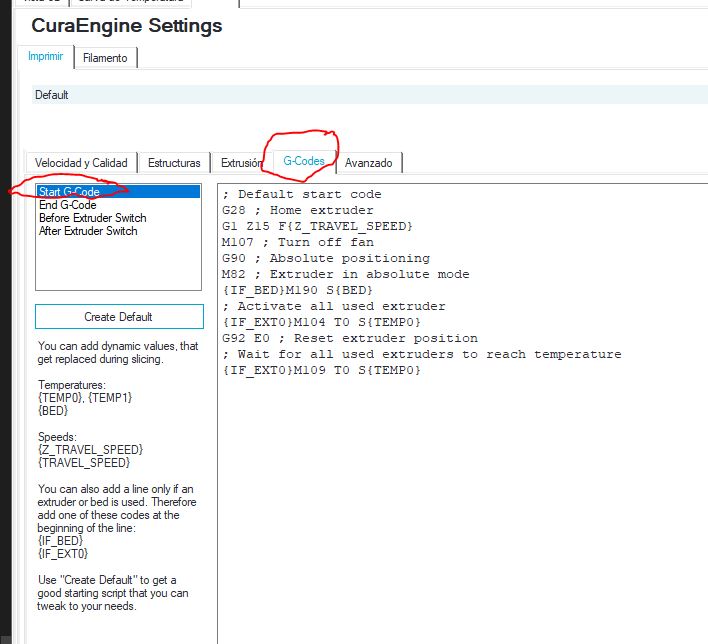
The next things to configure are the start gcode commands, wich have to be deleted in order for the machine to function properly, because the first layer calibration is manual, and I have no endstop for the home instruction or heating instructions. That ensures that the machine only recieves moving commands wich is necessary for it to work properly.
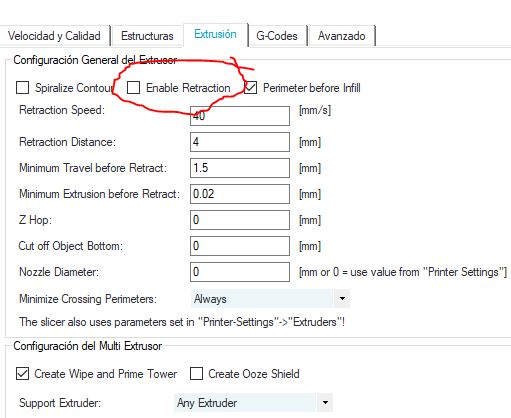
The next step is to disable retraction, that will make a continuous extrusion diminishing gaps between printed lines.
After that we have to configure, speeds and feeds and layer heights for the printing. You can use the same parameters as the image to continue the journey.
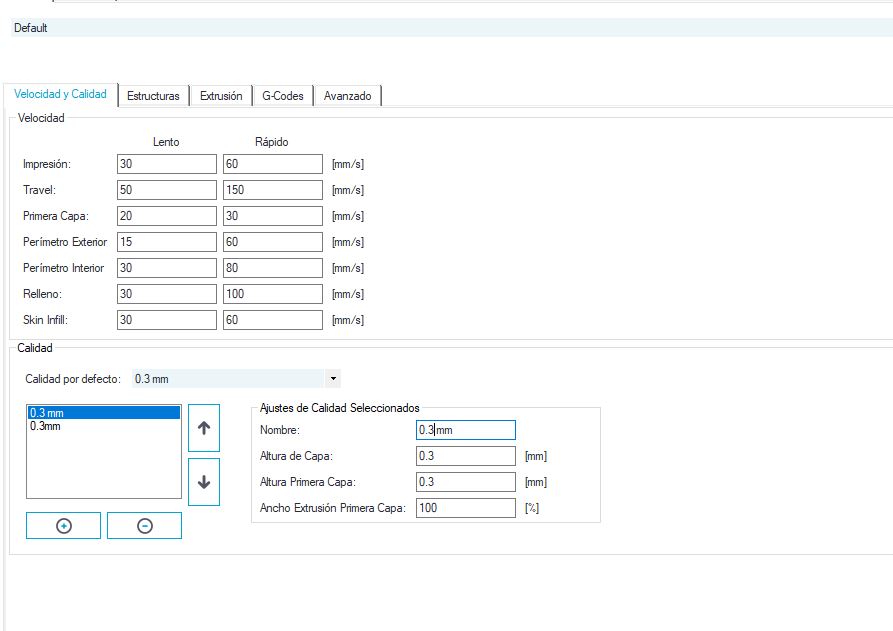
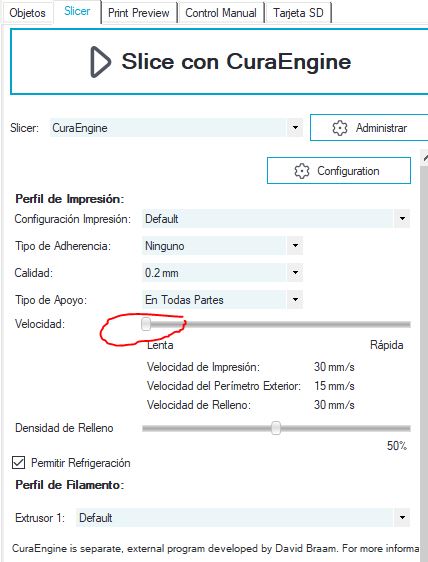
The last step is to slice the model and calibrate the parameters with trial and error. To slice the model you should choose the lowest speed to minimize error caused by inertia and fast speeds, this will help you to realize easier of problems not related to movement.
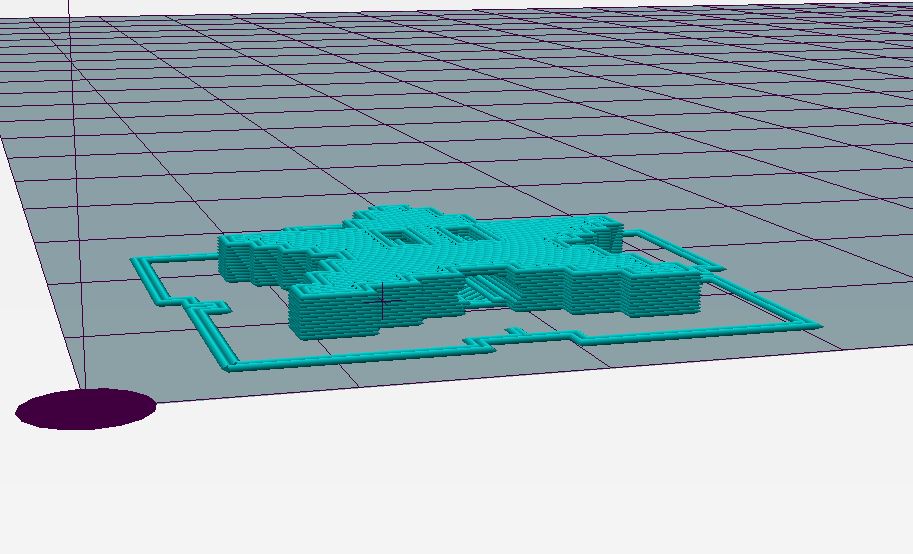
Later you will be able to see how the piece will look like after printing.
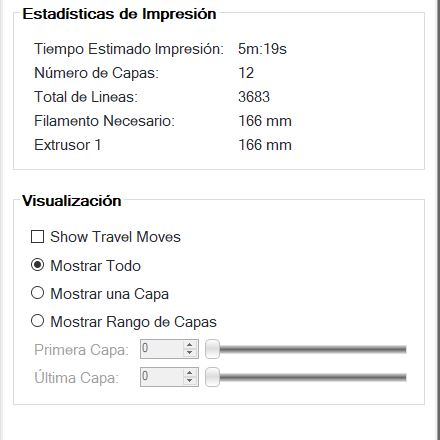
And the time the print will take and layer count.
You can save the file into an SD card and upload it to the printer.
Printing
Before printing I wasn´t sure what would I use to print, so I went to the shop in front of our lab and choose some stuff.
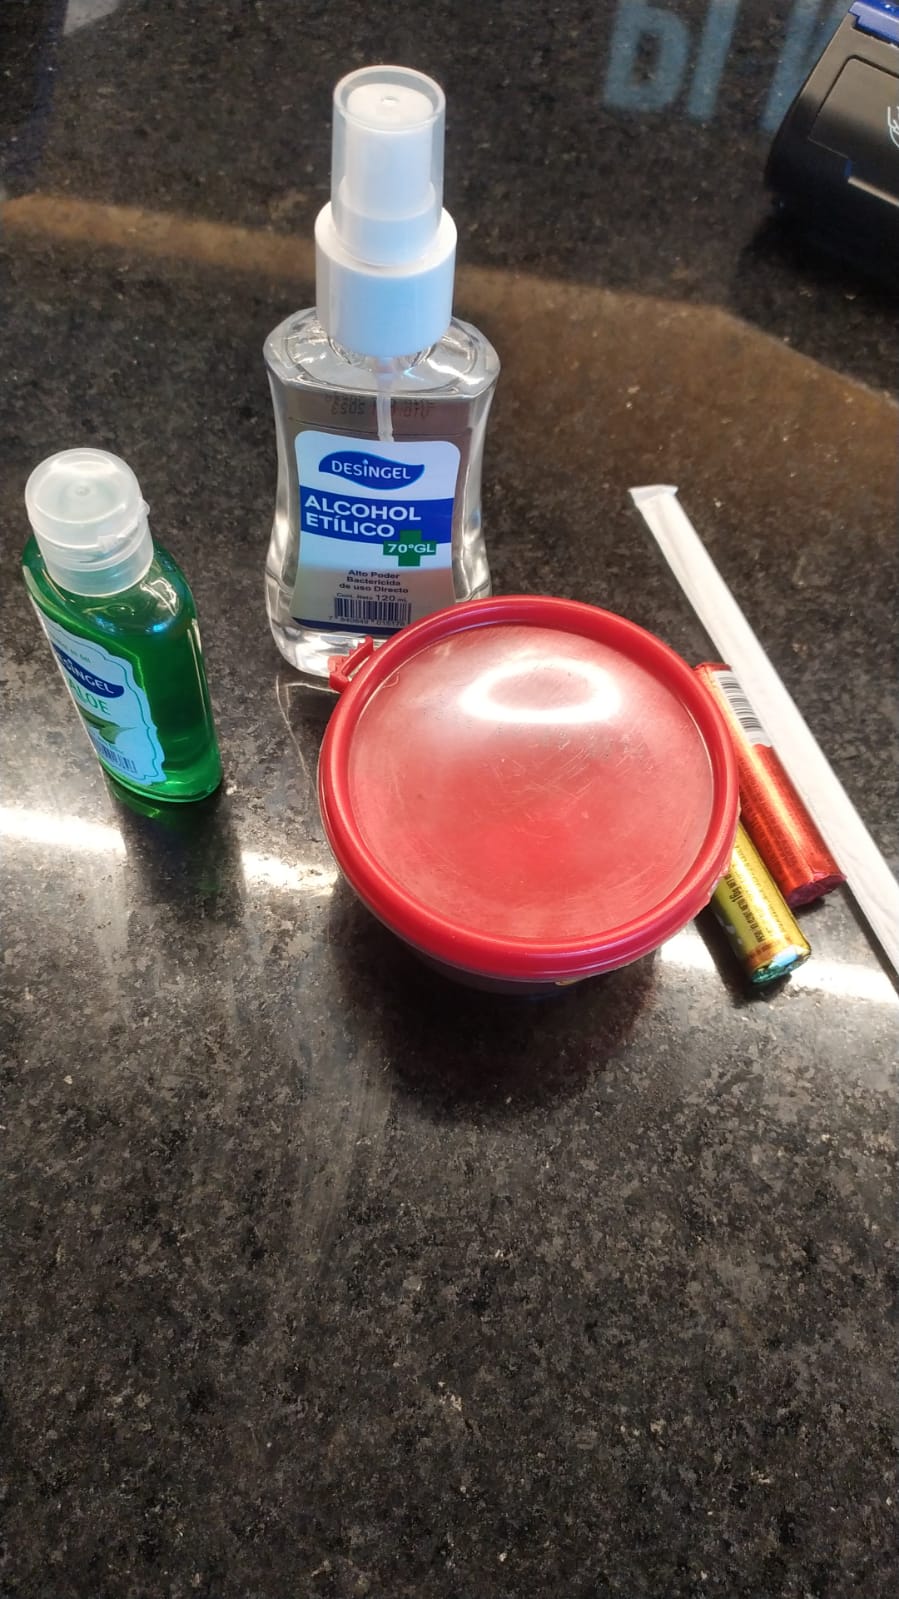
First Gel Alcohol, some Jelly, chocolates, and I wanted a straw to use as a tip of the syringe, so I bought a etilic alcohol just to remove the straw, I ended up not using it because I found some teflon tube.
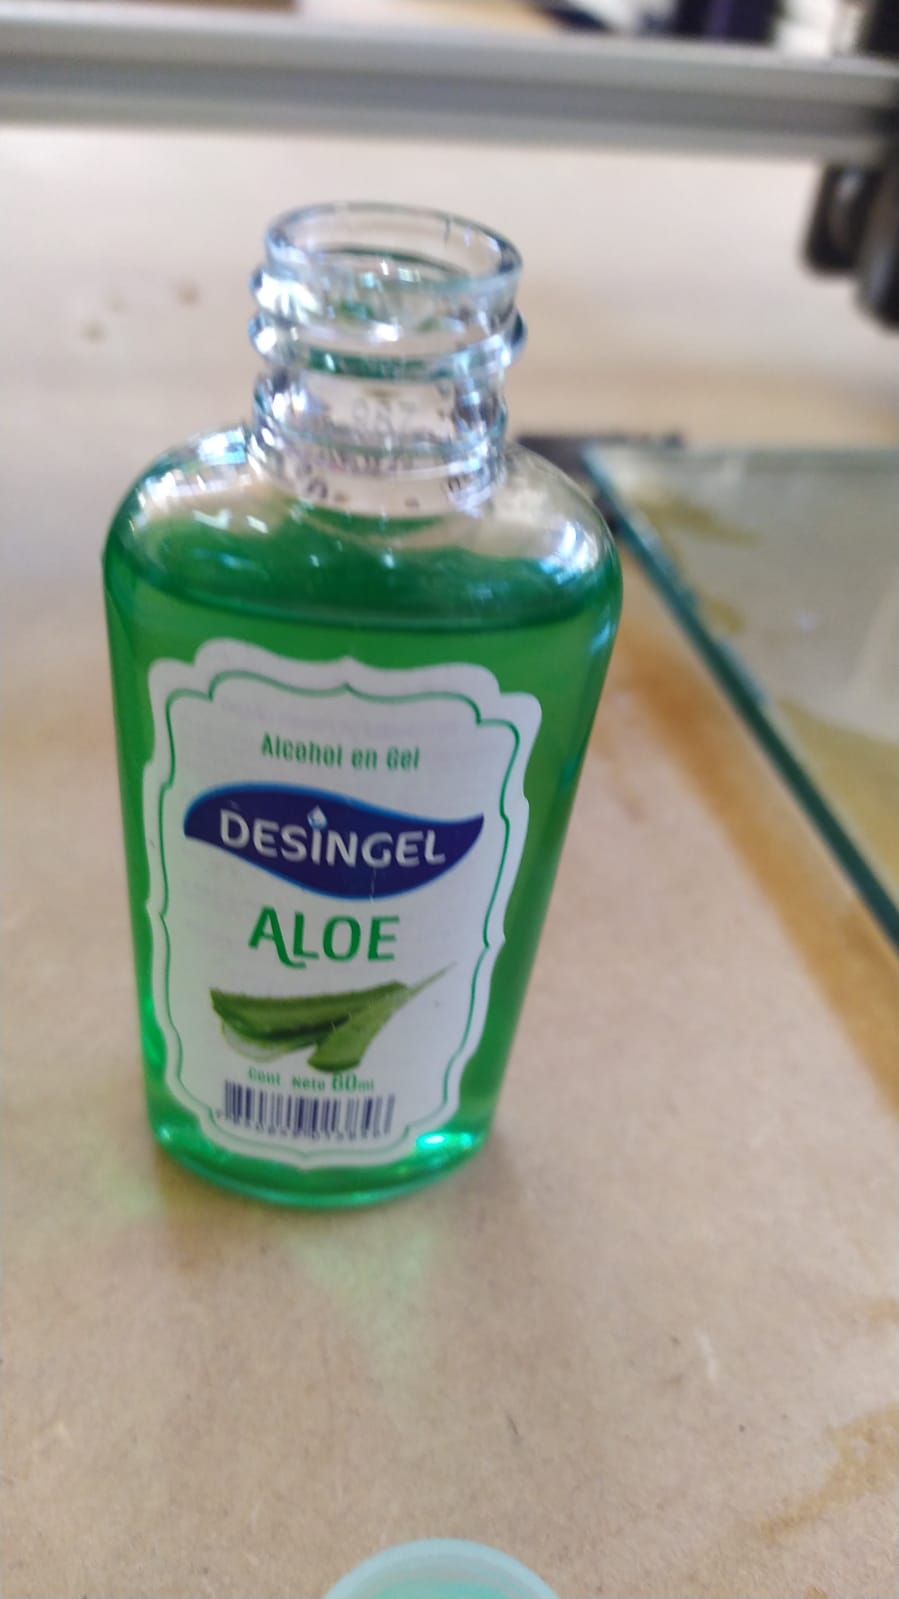
The first attempt the Gel alcohol as with the small syringe tip, the machine extruded fine, but needed some flow calibrations. Also I realized the retraction caused it to not extrude properly and that I needed a larger print to be able to calibrate the flow properly.
The second attempt was the “guayaba Jelly” this jelly have a lot of sugar and big particles in it so it jammed the tip of the syringe.
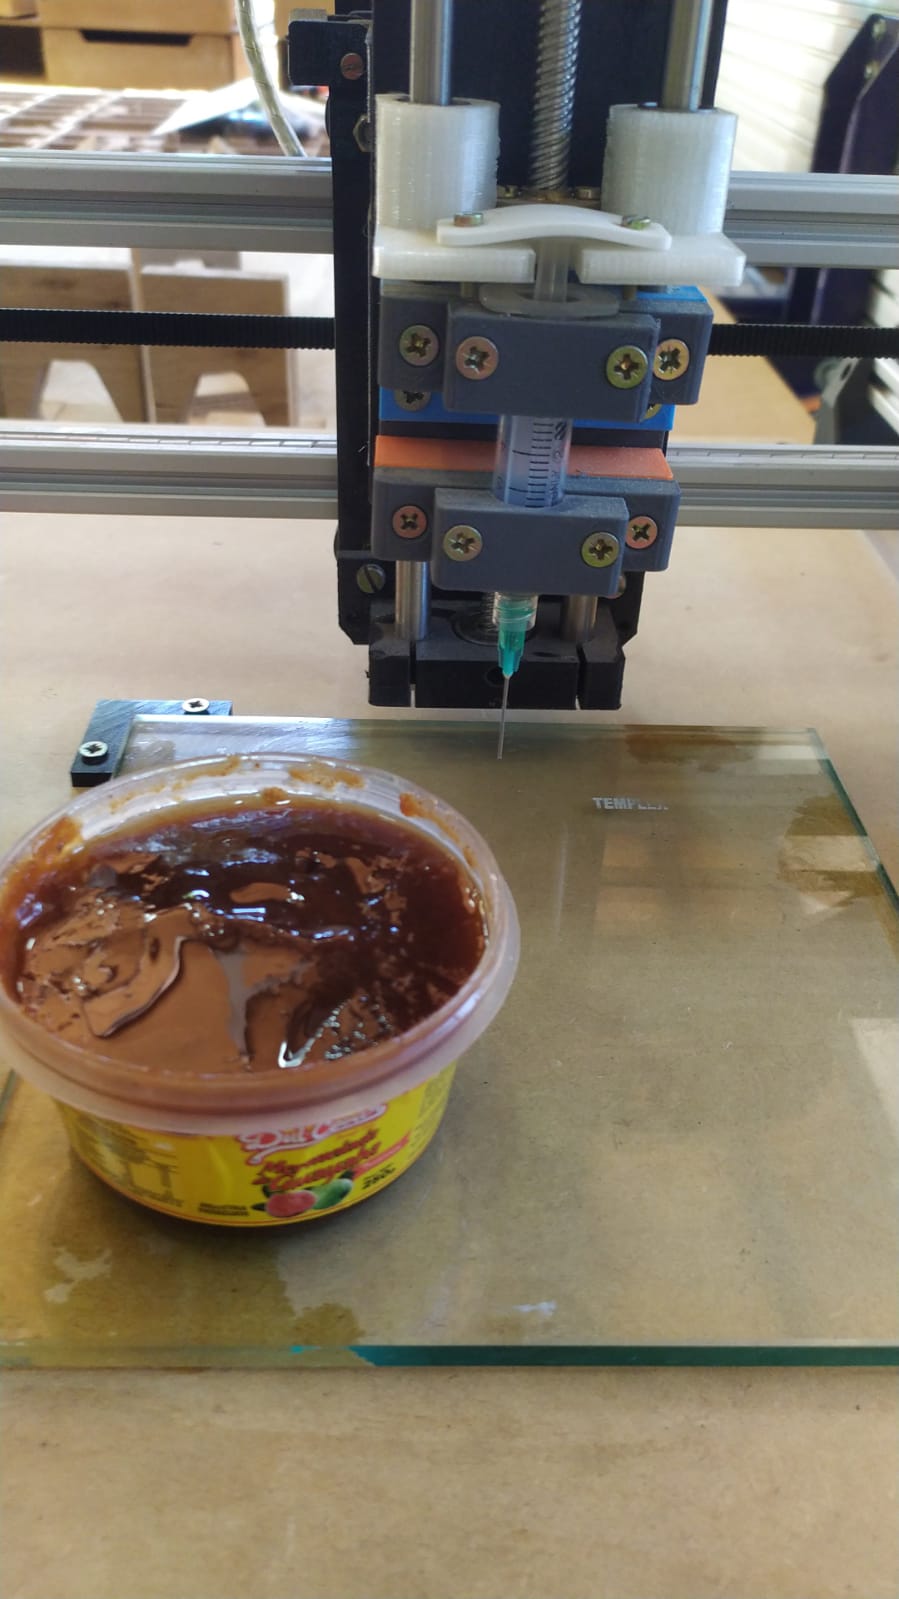
I charged the syringe with no tip
and made a teflon DIY tip with a hot Glue Gun and used the soldering iron to open up the top of the teflon tube.
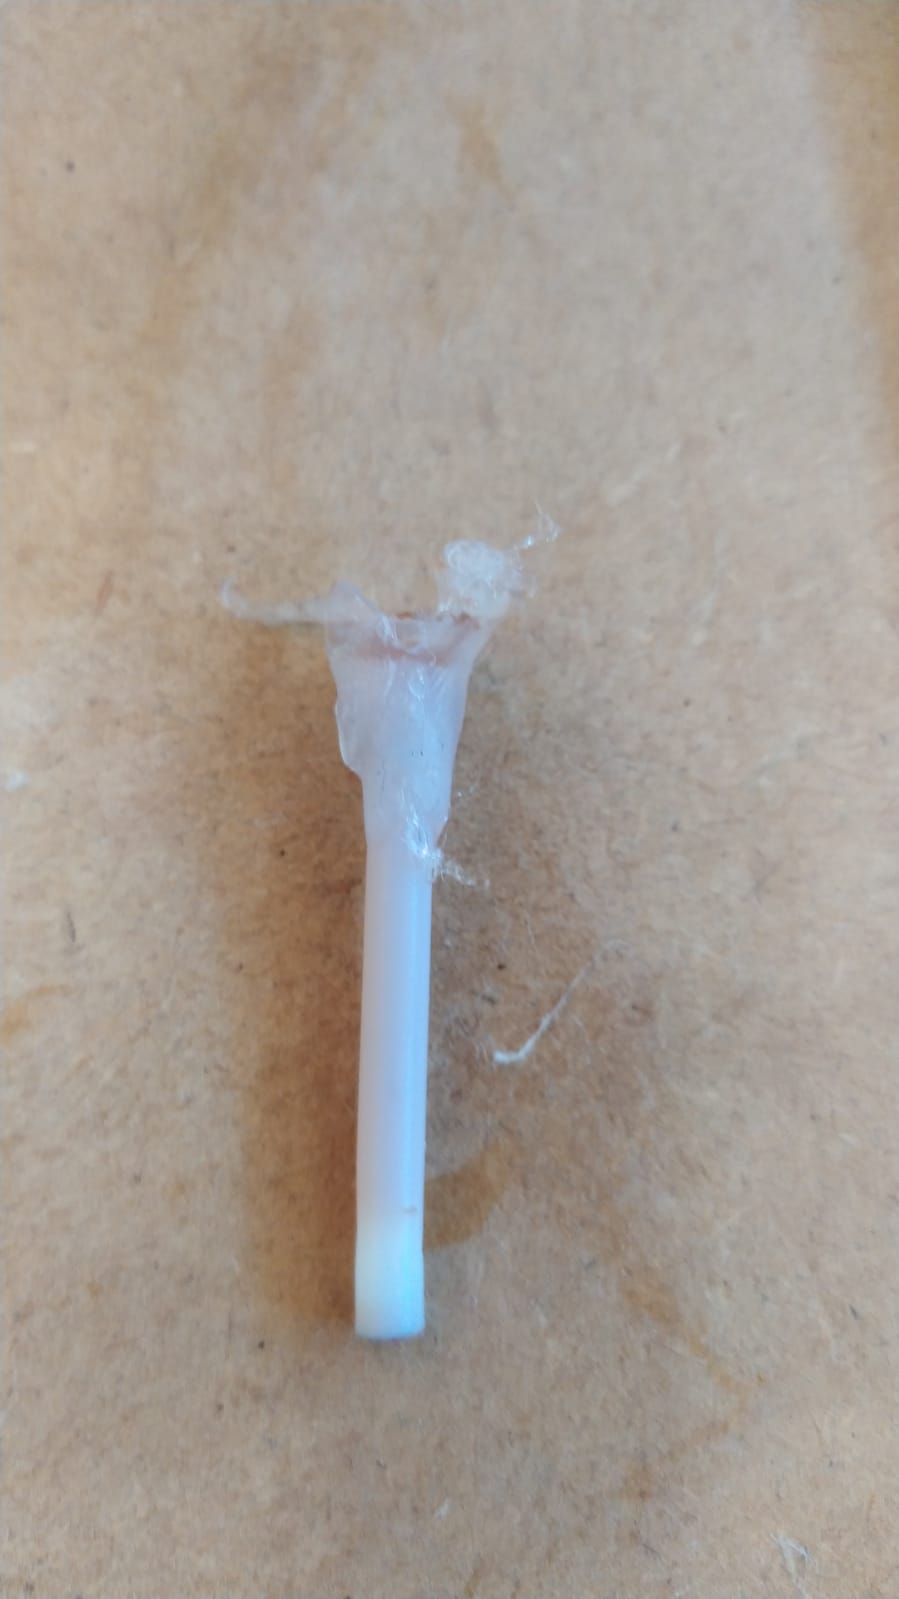
In this video you can see that the machine was over extruding and I needed to print a bigger piece to calibrate it properly.
Problems and How I fixed Them
- The first problem I had was over extrusion, I fixed this with steps per mm calibration on the marlin firmware.
- The second problem was that the sugar in the jelly was too thick for the needle, so I used a teflon tube with hot glue to be able to extrude the material.