6. 3D Scanning and printing
GROUP ASSIGNMENT
3D Printng
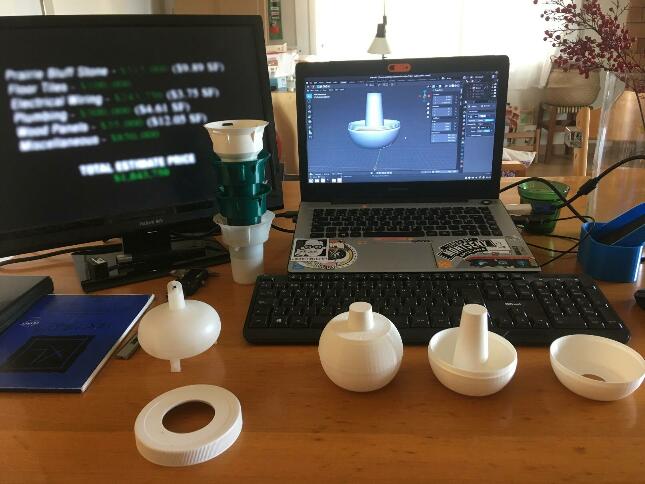
I had a project which I have been working for some weeks that is going to be ideal to finish this week printing the final piece.
for this project thw objective is to make a filter to collect water in to pots to mesure after the pollution collected in the ground.
The idea is to put some recipients under the sewer and when it rains tha water is collected, but when the pot is full has to close the entrance automaticly in order to conserve the sample.
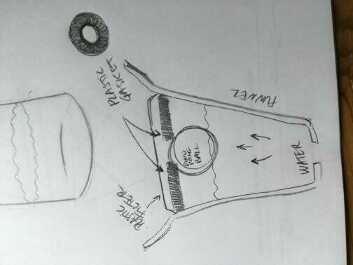
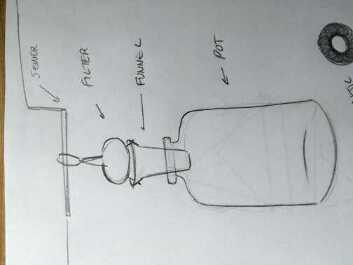
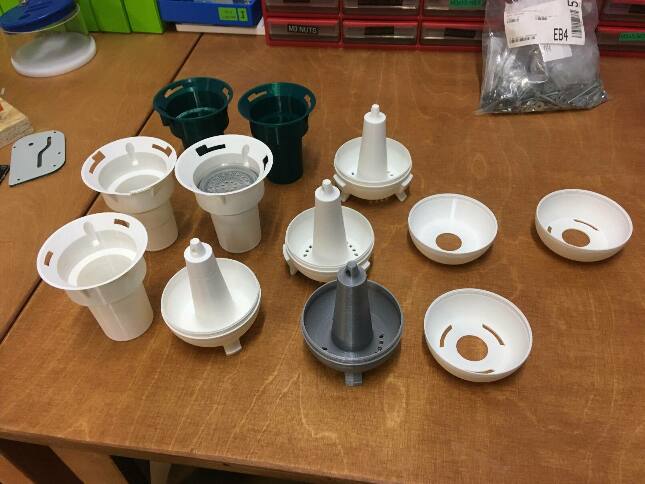
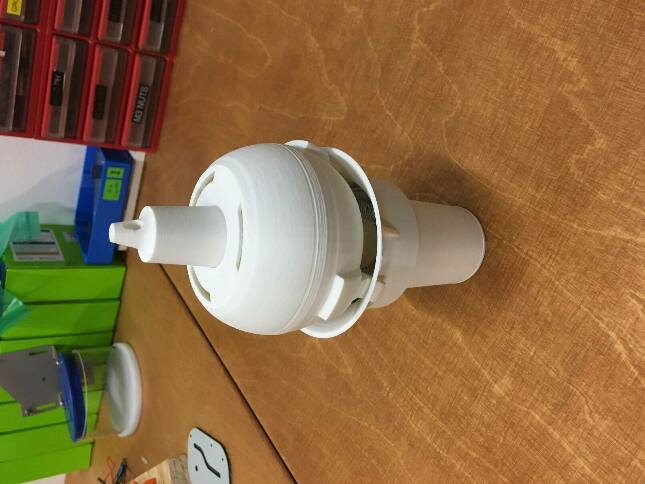
I have modeled the pieces in Blender. in total there are six pieces the Funnel, the filter which has two pieces that are screwed together and three legs.
Funnel
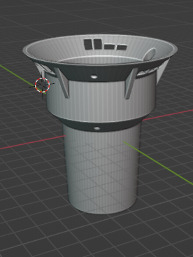
This is the part where the water is collected and gets in to the jar, inside there is a ping pong ball and a plastic gasket.
When the jar is full the water push the ball against the plastic gasket and does not let more water get in to the jar.
Filter
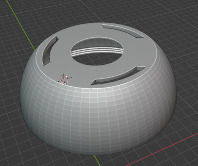
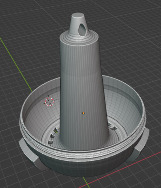
This two pieces are screwed together to make an sphere that will prevent leaves or other large items from clogging the funnel entrance letting the water slide and getting in to the funnel.
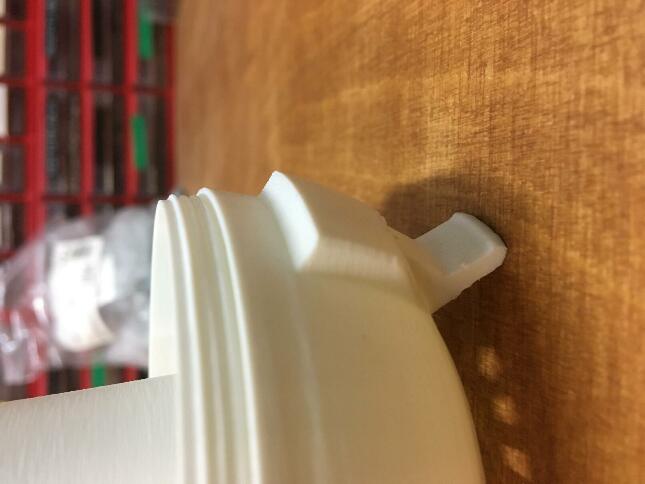
Legs
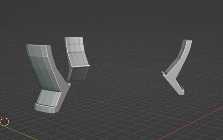
Adapting the legs ft 3D printing it has been a little bit tricky because they have to hold some weight and the fiber direction is quite important so its better to print them sideways and after fit them in to the filter.
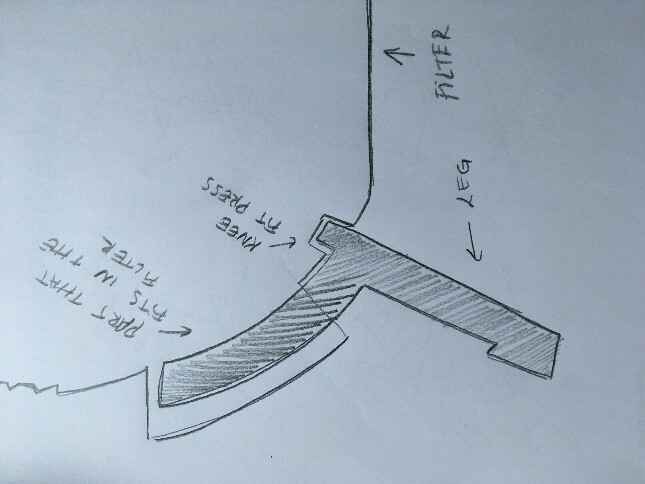
This knee fits in to the filtes and does not let the leg go out, without any kind of glue the leg fits in to the filter and remaids there fix.
To be able to optimize the 3D priting time all the pices are build in 45º angles to avoid suppots duting the printing proces.
During all the proces I have been printing LOTS of prototipes until I have reached the good one, 3D printing makes very easy to print diferent versions of the same piece until you reach the final result.
Just be carefull you don’t waste a lot of material and be sure that the changes you are making are going to work, do not do the same as me.
And final the result.
Slicing
To make the slicing proces I am using PrusaSlicer.
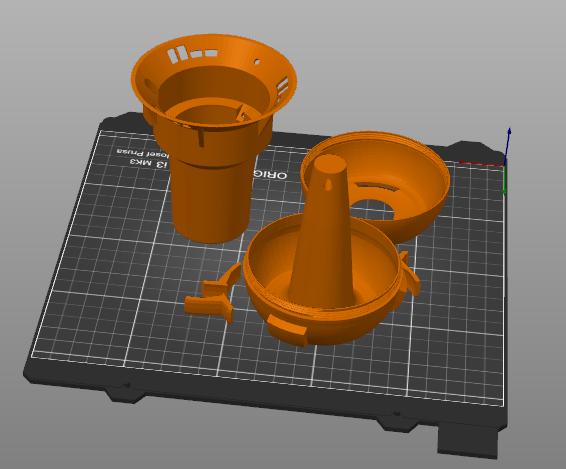
All he pieces are thinked to be printed in one specific position to be able to print without supports. the whole print will take 11 hours.

For this print I am using PLA, and I will be printing at 0.2mm each layer, this wil give me a fine resolution and it will be quite fast. (3D printing is really slow)
PLA is normally printed between 200º and 220º, in this case I will print the piece at 215º and the bed at 60º. It is not that necesary to heat the bed when printing PLA but it will help a little to stick the material correctly during the printing.

3D Scanning
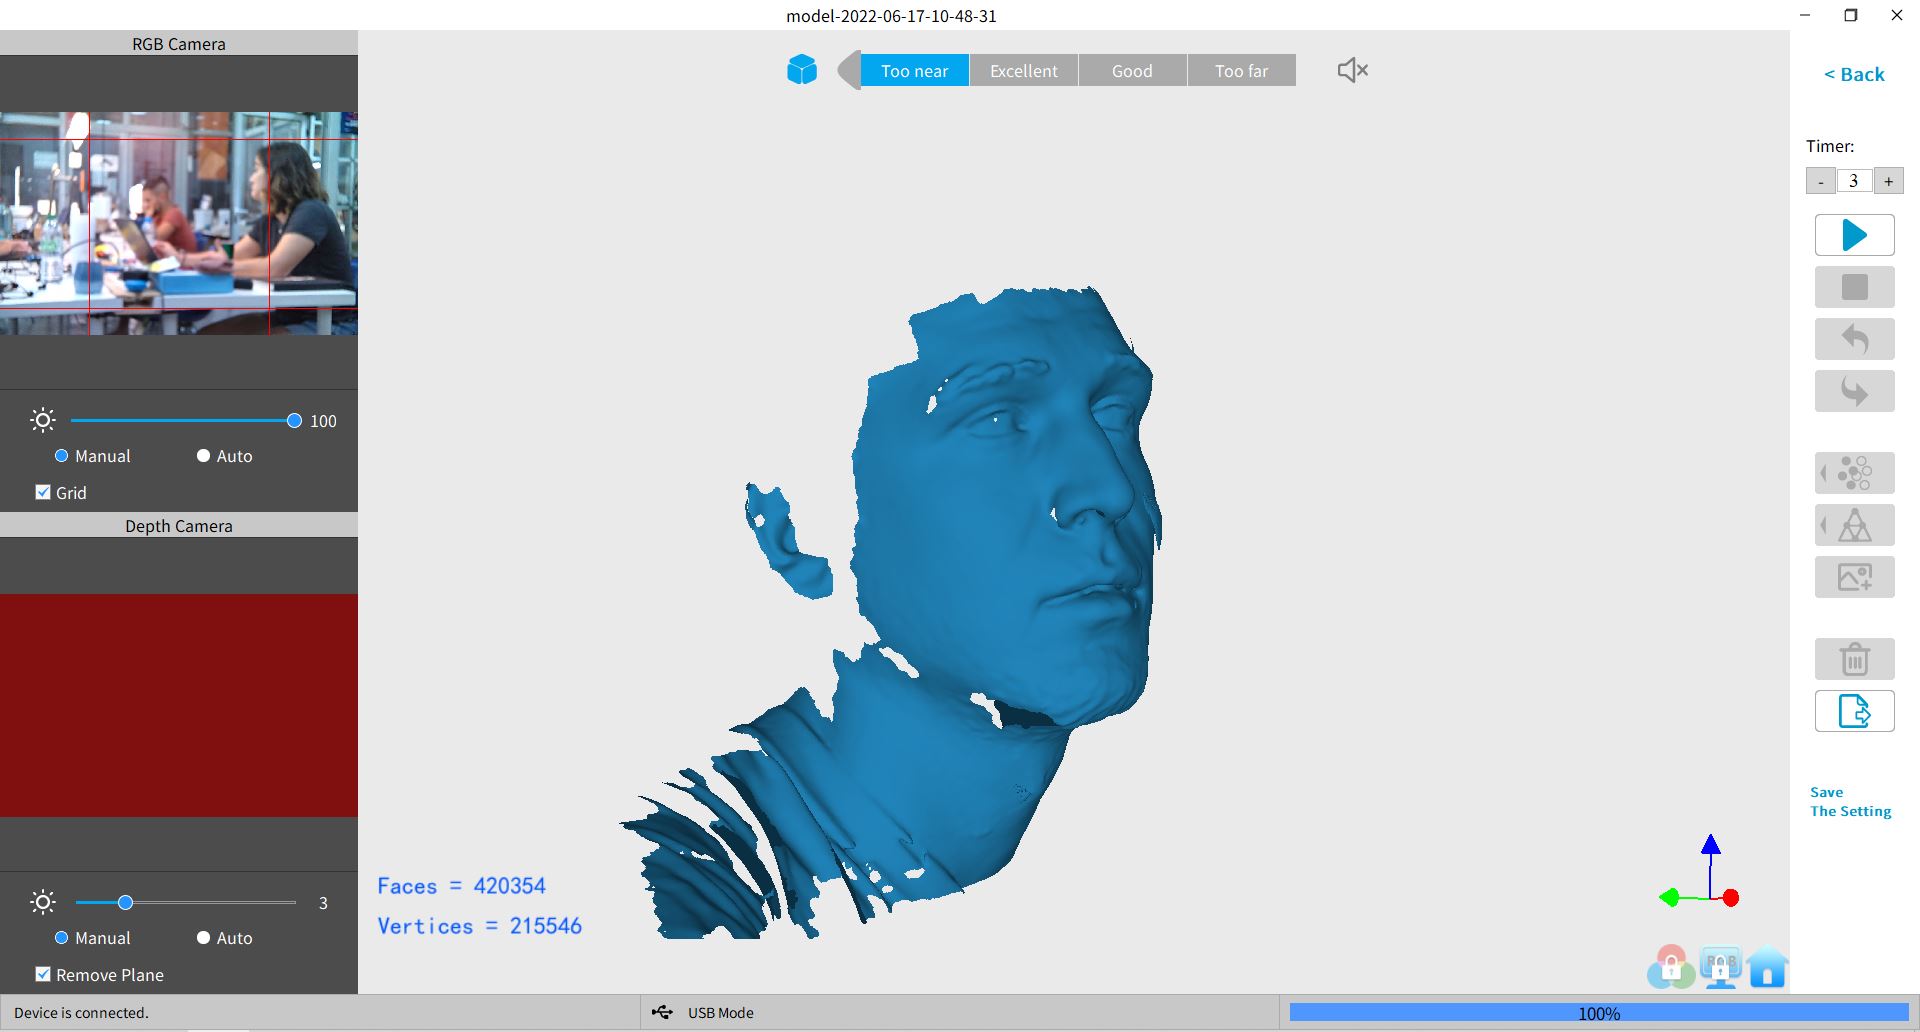
For the 3D scaning I have used the new scan that has just arrived to the lab REVOPOINT.
To scan something even if its a building or just an small object the idea is to collect as much images as posible, and they must overlap each other. For my scaning exercise I used the software Revo Scan which is the one they recomend to use wih this camera.
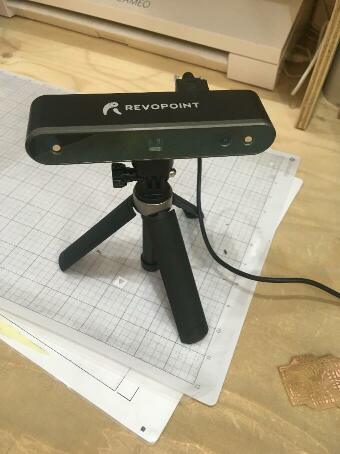
When you start the snanning proces you have to tune the parametes of the camera, light and focal distance. Once this is done you can start.
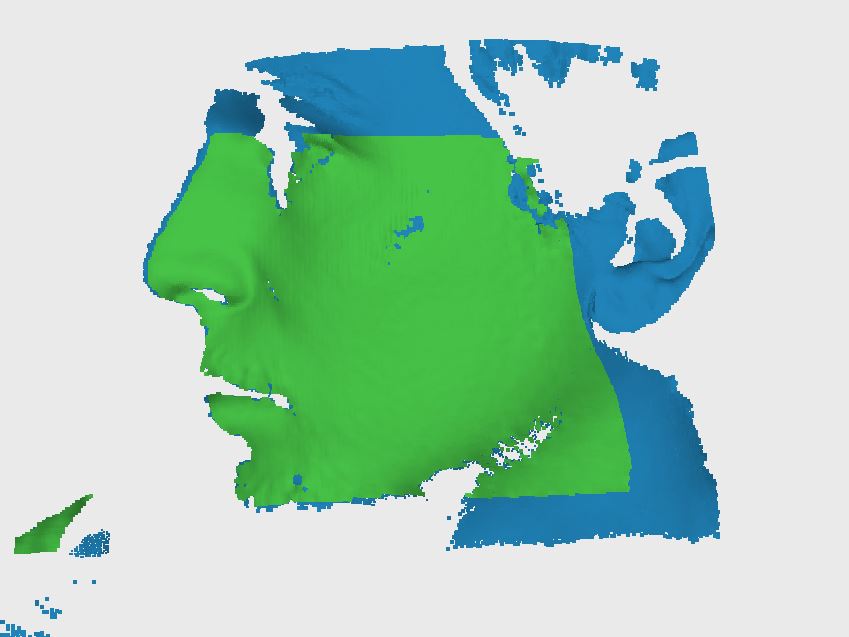
The software is going to gide you if you are to close or to far from the the target. This green surface is what we have to see while scanining.
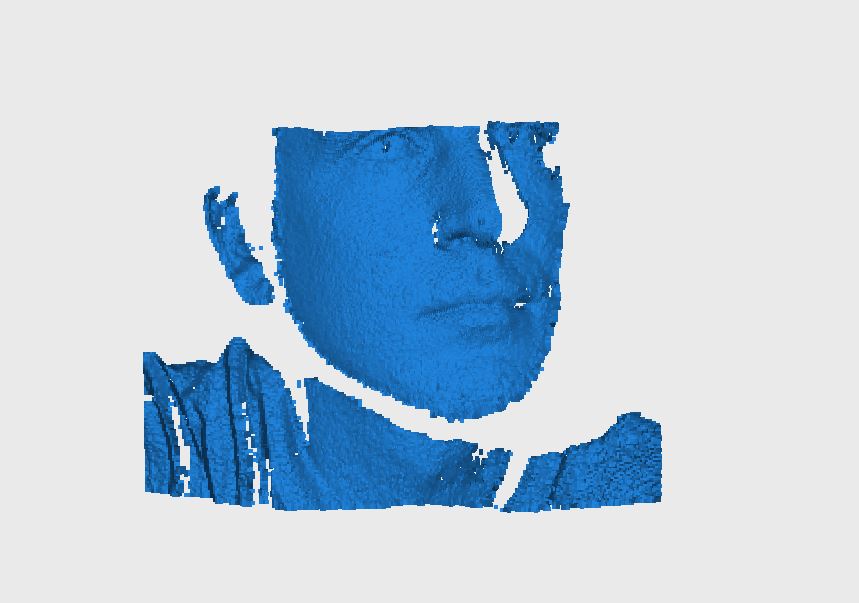
Continue moving the camera arround the target and descrive a dome arround to capture all the surface of it.
When the scaning is done stop thr scanning proces and the prohram is going to let you convert the point cloud to a mesh.
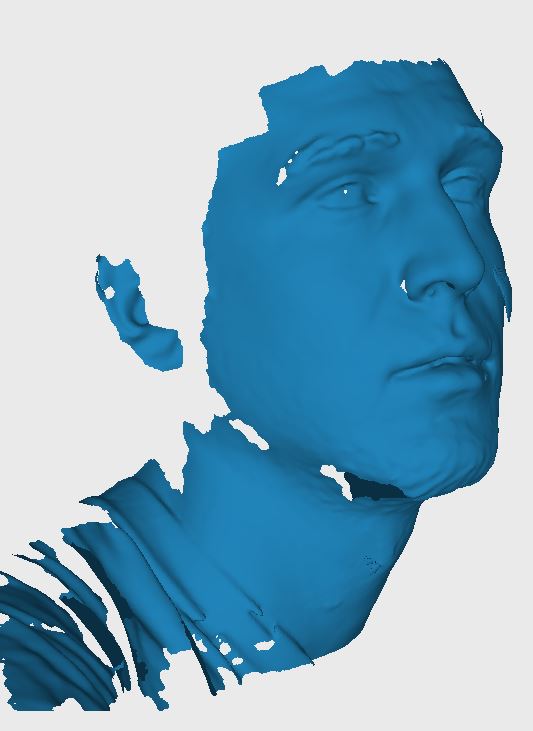
Once the mesh is done we can export the object to an .STL and open it with an slicing progrm to print it, or move it to another program to clean the mesh.
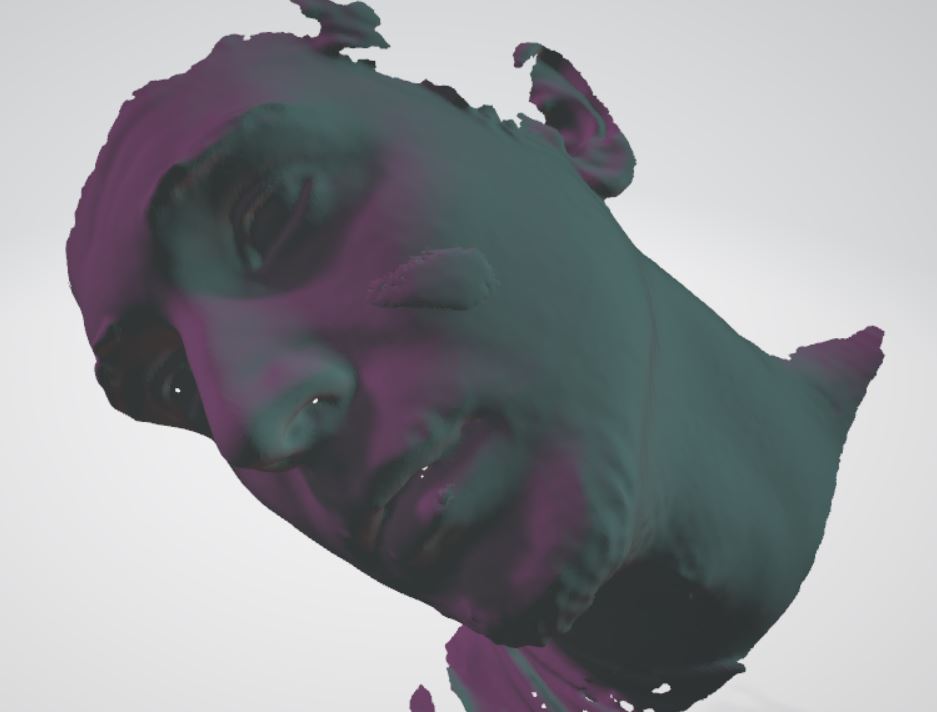
I have cleaned the mesh using Blender in order to have a better .STL to 3D print aferwords.

Water filter files
.STL upper part .STL lower part .STL funnel .STL legs