20. Project development
2D and 3D Modeling
To model all the parts of the machine and acomodating the motors, limits and electronics I have been using Blender.
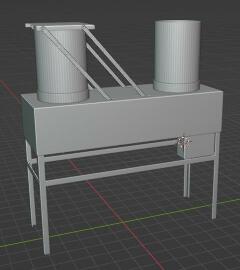
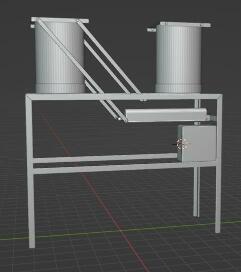
This design is based in a deposmeter installed in Barcelona at the “Institute of Environmental Diagnosis and Water Studies”. But the idea of this project is beeing able to build and develop localy our own machine. In order to be able to make updates if necessary.
Some parts of the machine that are a little bit more critical I have been exploring some options building prototipes to see how it actually behaves.
I have been experimenting a little bit which is the best way to put all the bearings ang how the axis have to be connected, the first idea was to make a ong axis that would connect two moing parts to ensure that position, but the aluminium bar I used was too weak and it broke really easy.

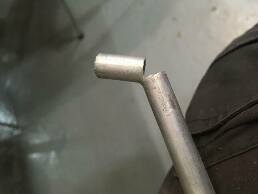
Then I started working without that long axis connecting both moving parts, and it went really well, the steel profiles are strong enough and still easy to make wholes and work with.
Click on the next image to see how it moves. ↓↓↓

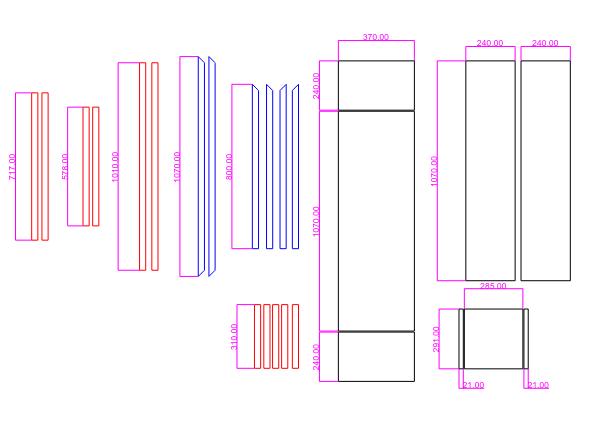
Once the design is tested is time to start looking for the final materials, there is a local supplier that can sell the steel and cut it as desired, also for the metal sheet and the folding of the parts.
Materials
| Qty | Description | Price | Link |
|---|---|---|---|
| 1 | Rain Gauge Model RG-11 | 59.00 $ | https://rainsensors.com/wp-content/uploads/sites/3/2021/04/rg-11_instructions.pdf |
| 2 | limit switch | 12,45 € | https://docs.rs-online.com/74c2/0900766b8169e3c7.pdf |
| 1 | Electric Linear Actuator | 207,00 € | https://docs.rs-online.com/77a5/A700000007396897.pdf |
| 4 | Bearings Ø int. 8mm, Ø ext. 22mm | 2,37 € | https://docs.rs-online.com/bb7b/A700000007851252.pdf |
| Steel profiles and bars | 115 € | Local shop “Ferros Blanch” | |
| Galvanized metal sheet | 130 € | Local shop “Ferros Blanch” | |
| 1 | 13mm plywood | 28,23 € 1 /m2 | https://www.mausa.es/producto.php?id_producto=33903 |
Building
Structure
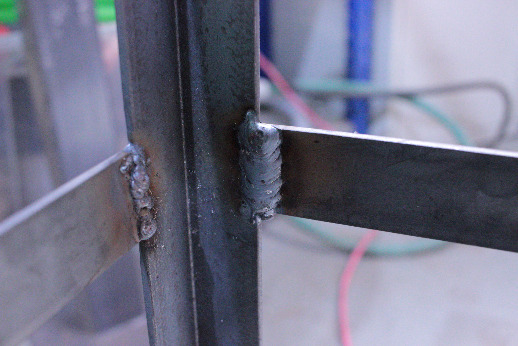
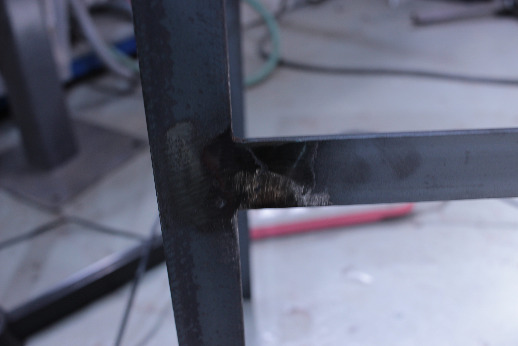
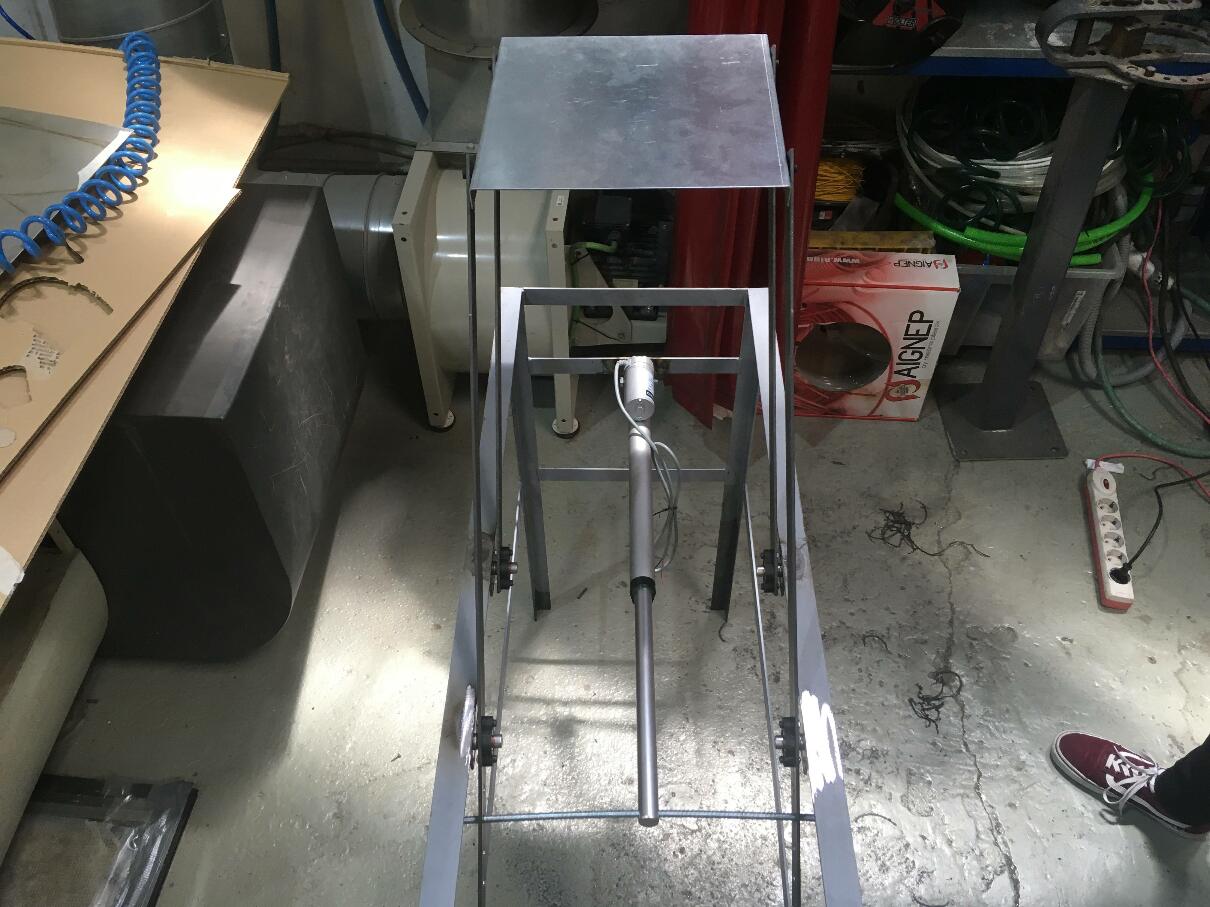
To build all the structure of the depostimeter I welded a steel frame with two types of profiles:
- L profiles 30mm x 30mm 3mm thickness
- flat profiles 30mm 3mm thickness
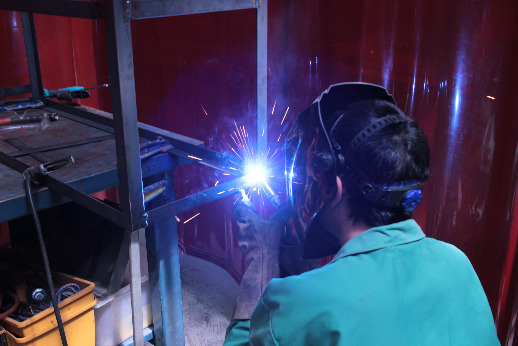
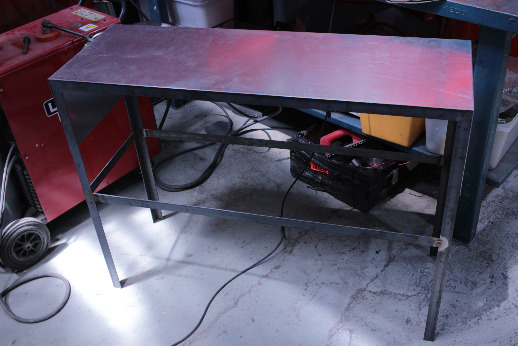
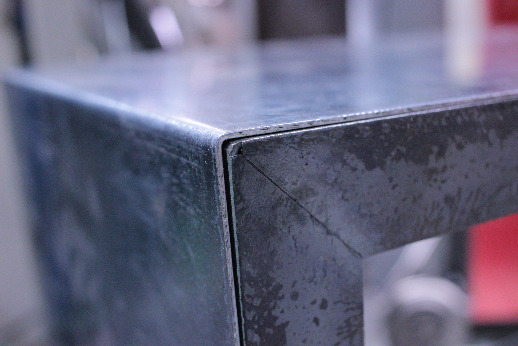
Once the frame was build, I cleaned all the welded parts with the grinder to leave it nice and flat.
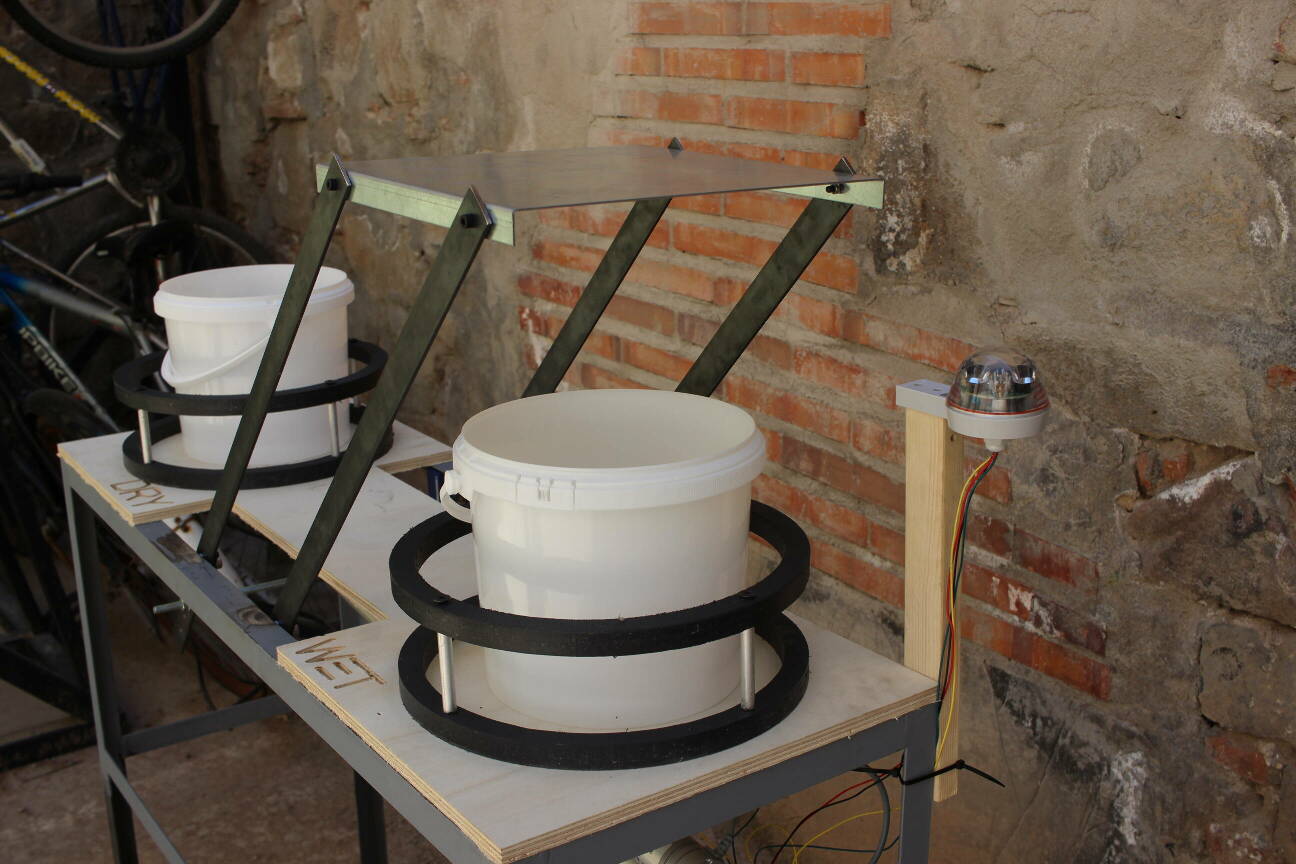
Once the structure was build everything was fitting correctly, the galvanized top was perfect fit.
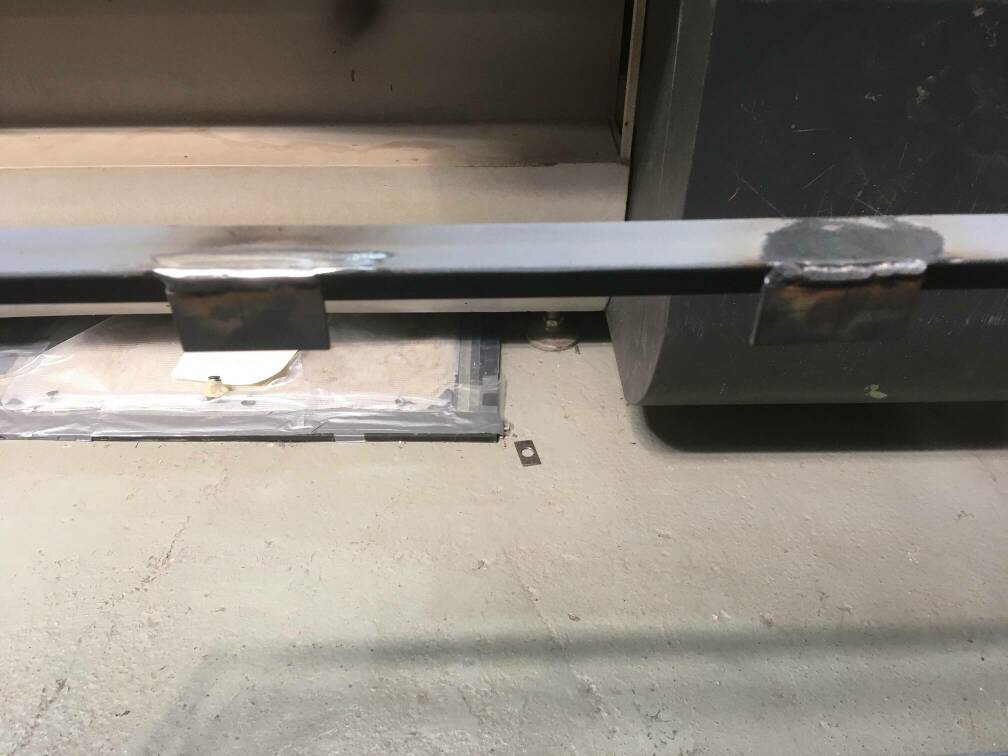
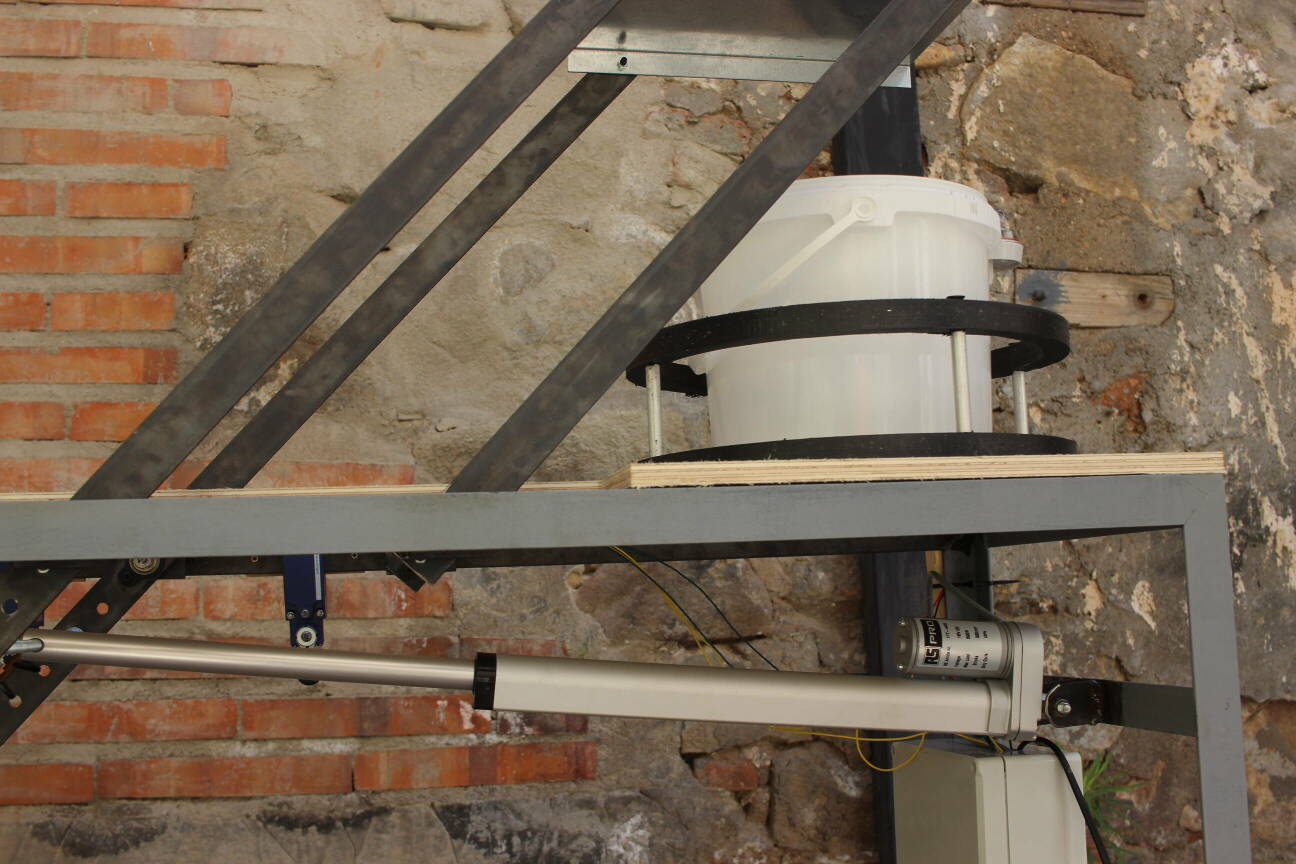
Mounting the motor
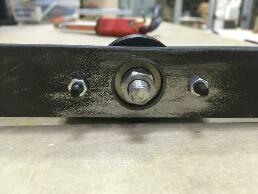
The motor is held in place by two flanges welded in the frame and a threaded rod that, this leaves some space for the motor to be able to move a little.
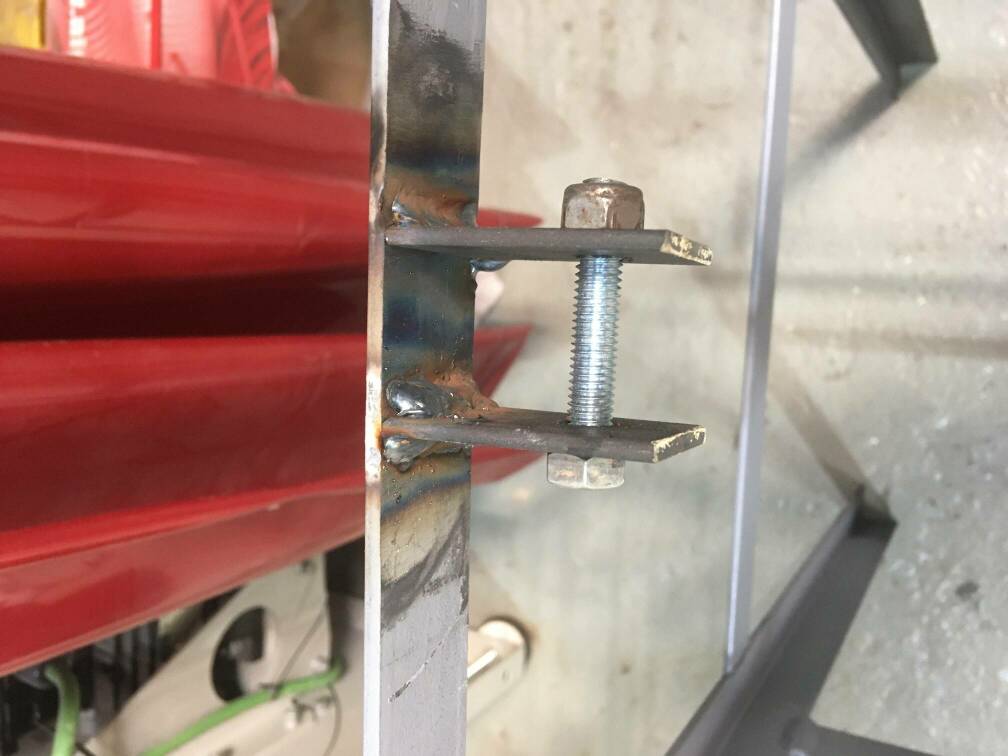
The other end of the motor is going to be connected to the profiles that are going to hold the lid. Using a threaded rod to connect two of the profiles I will be able to push and pull the lid.
To be able to try different positions of the motor I drilled several holes to the profiles, with this I can see where the motor can move better and suffer less.
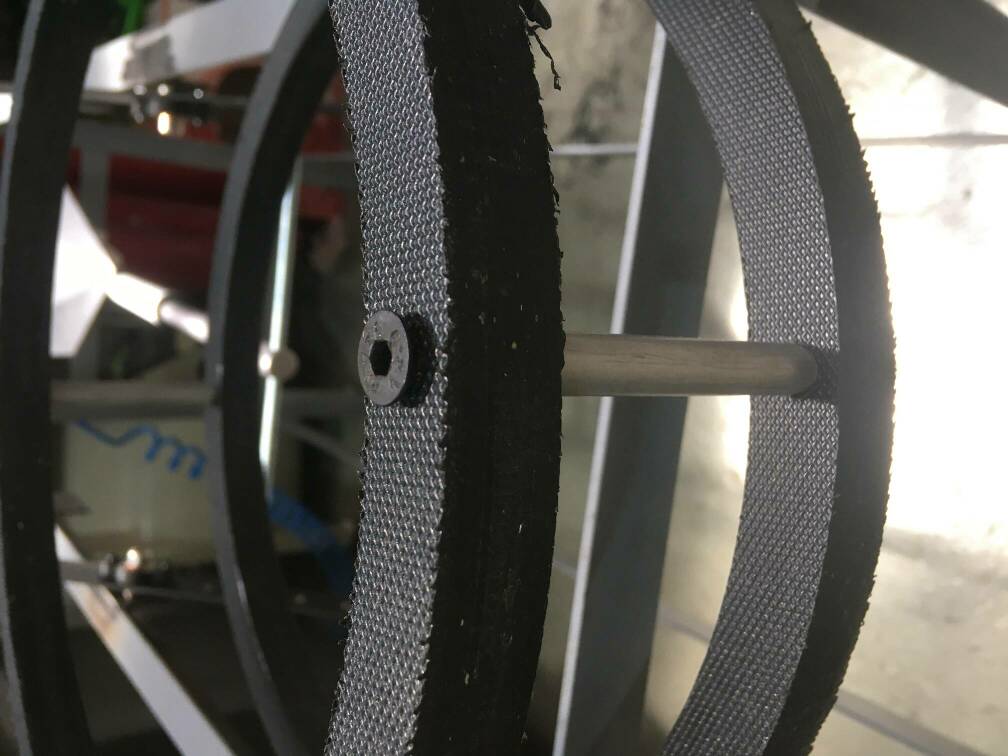
Mounting the lid
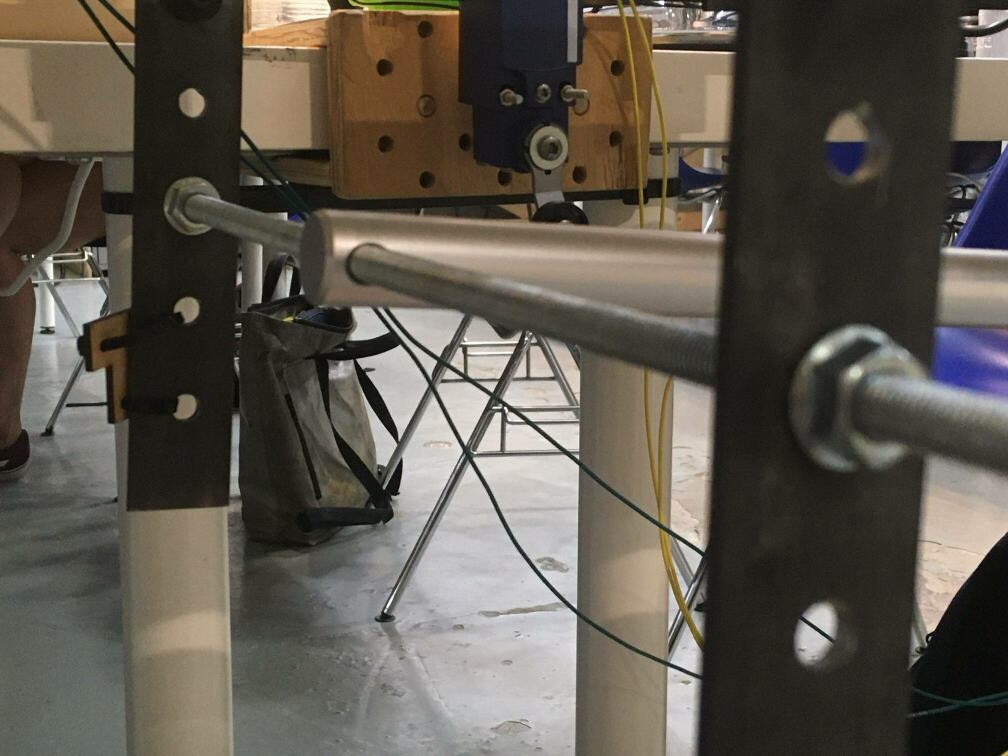
The lid is held with 4 parallel steel flat profiles that can rotate freely, these profiles are attached to the structure using some 3D printed parts that have a recessed bearing.
Between the bearing and the steel frame I had to put some washers to leave some space for the head of the screws, without this washers the screws were hitting the frame and it got sucked several times.

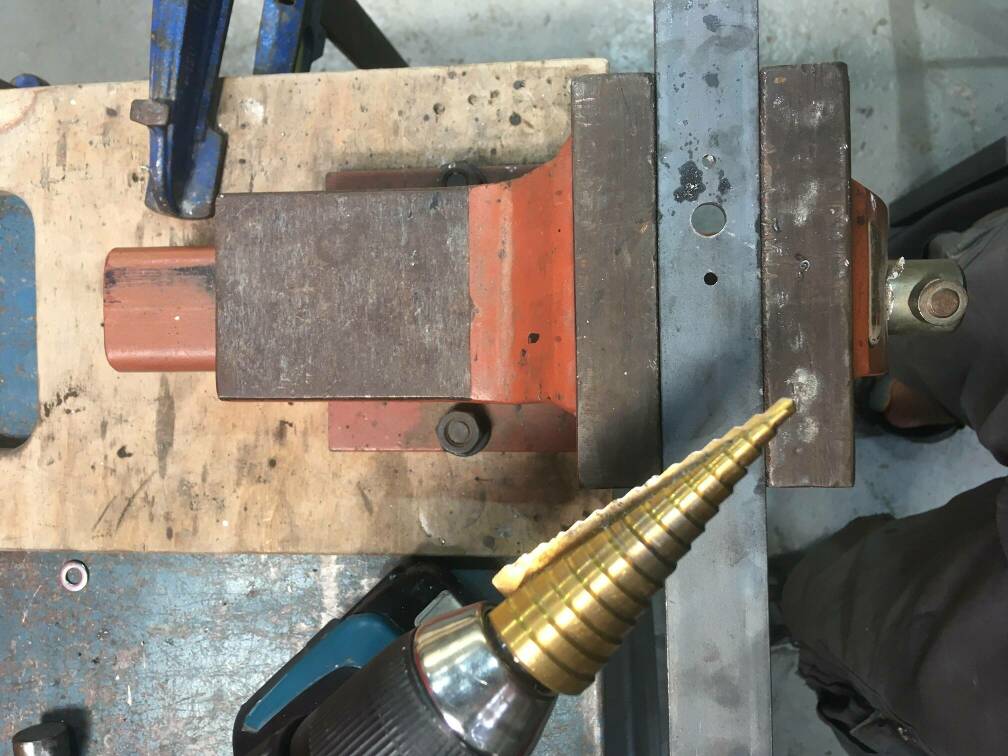
To make the wholes to the flat steel profiles I was using lots of drill bits, each time a bit bigger and finally a step drill bit to be able to pass the screw that makes the shaft and to fit the washers that make the separator.
Finally with smaller holes at the other end of the profile I attached the lid with some M4 screws and some nylon nuts.
End stops
To control the movement of the lid I have installed 2 limit switches to make sure the position of the lid and the motor.
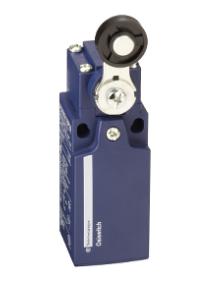
This limit switch will be placed in the structure (for now is attached using a laser cut support) and it’s triggered by one of the profiles that is connected to the lid and to the motor.
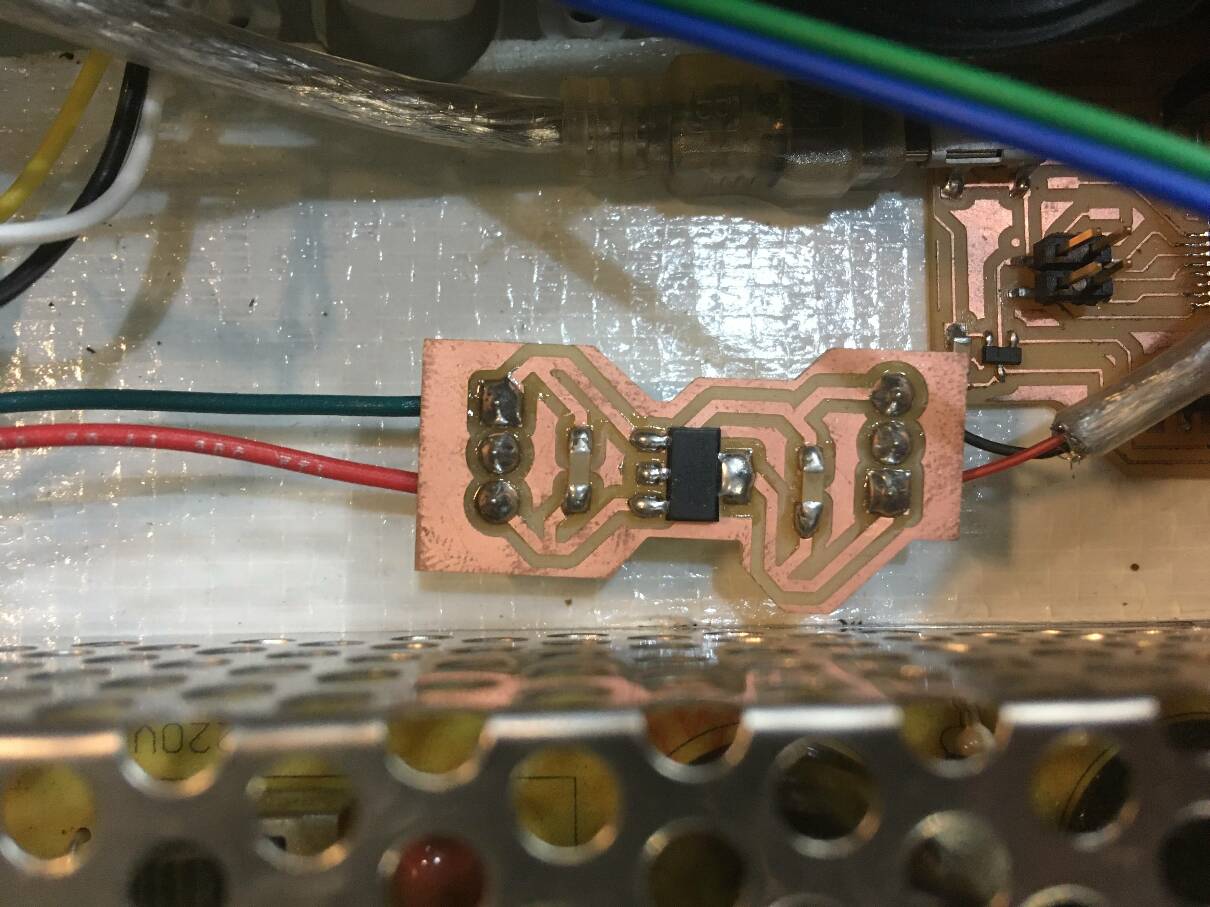
Electronics
The electronics for this machine it was planned to be just one board, but the board I cut was not working (still don’t know why).
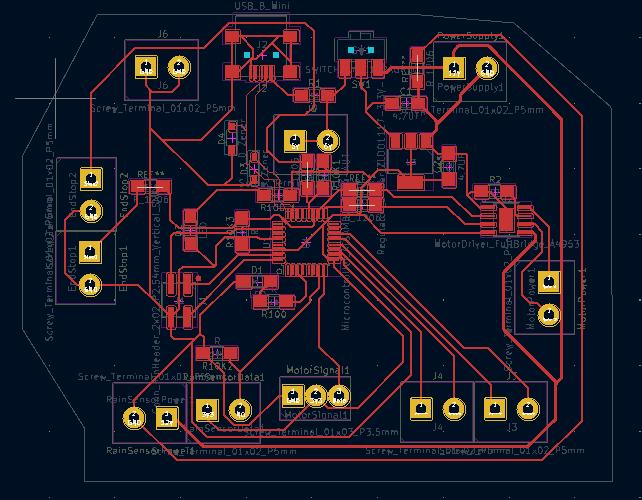
The board that I started using I was capable to burn the bootloader for the SAMD21E17A but when I jumped to Arduino to flash some firmware, Arduino did not recognize the PCB. I tried different settings and nothing worked, so I decided to split the board in to three.
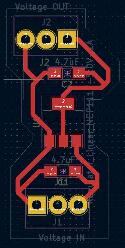
The first one for power management, to low the power from 12V to 5V to power the board that holds the SAMD21.
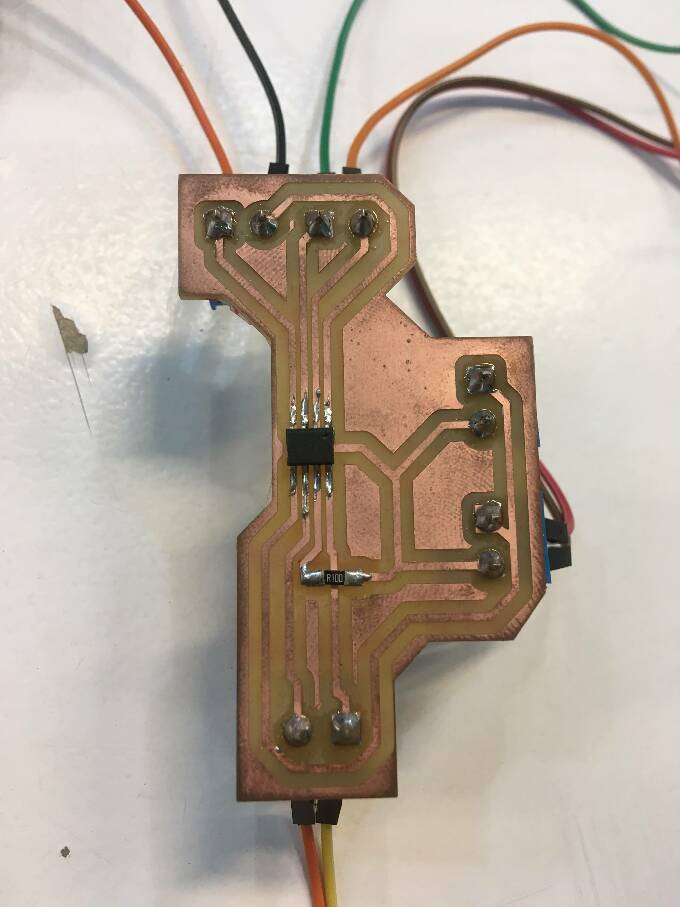
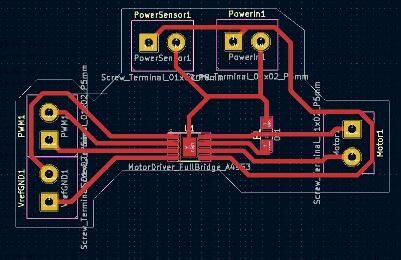
The second one is to connect all the components that work at 12V and also have the H-Bridge to control the direction of the motor.
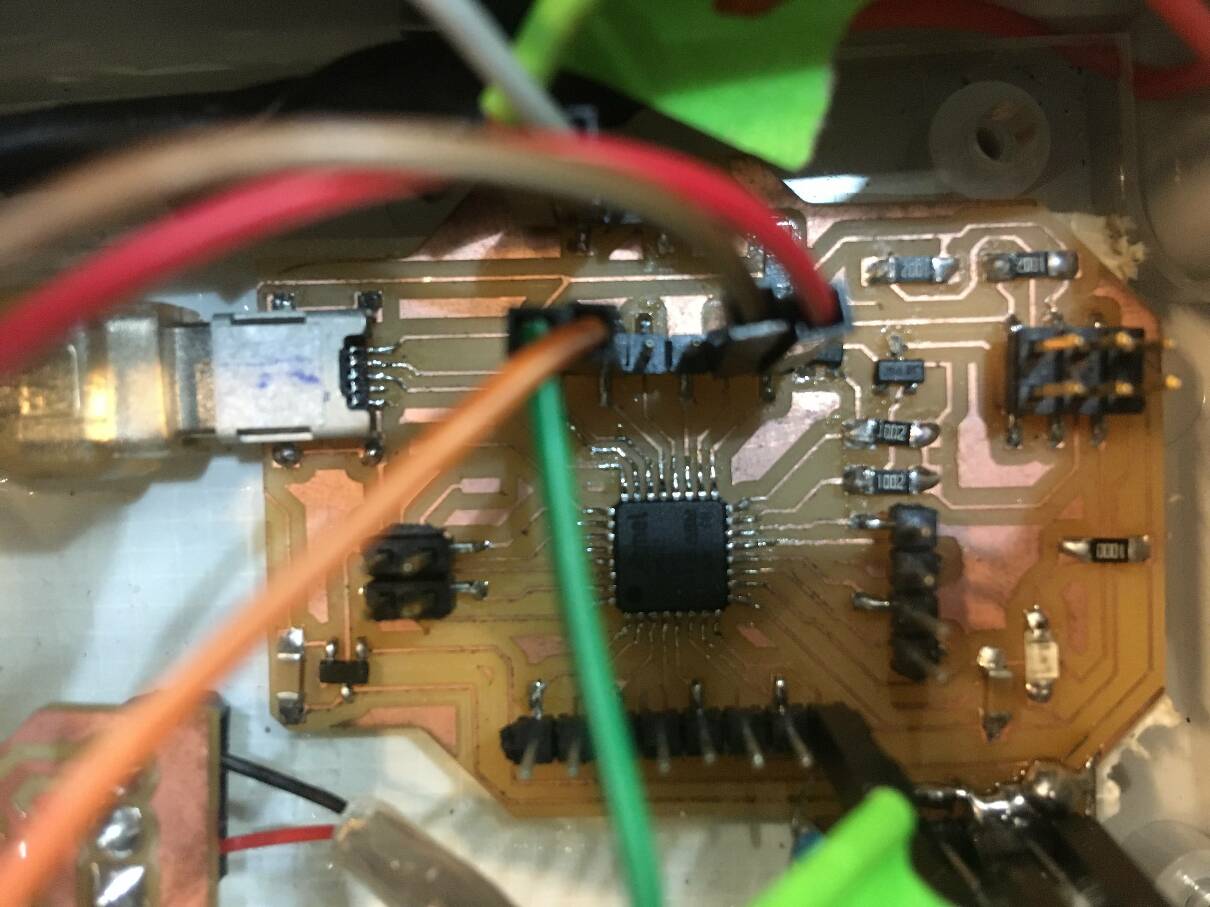
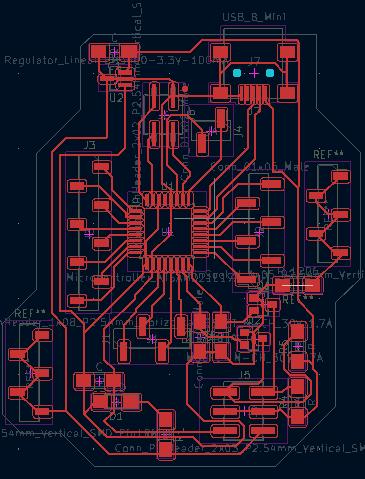
Finally the brain of the machine. Controlled with a SAMD21.
Splitting the board makes it easier to track where is the problem and solve it.
Coding
The machine itself is not that complicate, and the movement that it have to do is quite simple. It just have to make one movement and when you reset the machine go to the original position.
int DIR_1 = 17;
int DIR_2 = 16;
int NO = 7;
bool rainsensor = LOW;
int end_dry = 23;
int end_wet = 22;

//////////////////////////////////////////////////////////////////

void setup() {

  Serial.begin(9600);
  delay (500);

  pinMode (DIR_1, OUTPUT);
  pinMode (DIR_2, OUTPUT);
  pinMode (NO, INPUT);
  pinMode (end_dry, INPUT_PULLUP);
  pinMode (end_wet, INPUT_PULLUP);
  Serial.println("finish pin setup");
  delay (500);


  while (digitalRead(end_dry) == HIGH) {
    digitalWrite(DIR_1, LOW);
    digitalWrite(DIR_2, HIGH);
    Serial.println("going home");
    delay(300);
    // digitalWrite(DIR_1, LOW);
  }

  digitalWrite(DIR_1, LOW);
  digitalWrite(DIR_2, LOW);
  Serial.println("setup finish");
  delay(5000);
}

//////////////////////////////////////////////////////////////////////

void loop() {
  Serial.println("looping");

  // put your main code here, to run repeatedly:
  rainsensor = digitalRead(NO);
  Serial.print("rainsensor---");

  Serial.println(rainsensor);


  while (rainsensor == HIGH && digitalRead(end_wet) == HIGH) {
    digitalWrite(DIR_1, HIGH);
    digitalWrite(DIR_2, LOW);
    Serial.println(" rain rain rain rain");
  }

  digitalWrite(DIR_1, LOW);
  digitalWrite(DIR_2, LOW);

}
Useful links
Gallery
FILES