9. Embedded programming
This week I have to read a microcontroller data sheet(ATtiny44) and program the board from week 07 to do something.
Arduino Board
Arduino boards provides inputs and outputs such as:
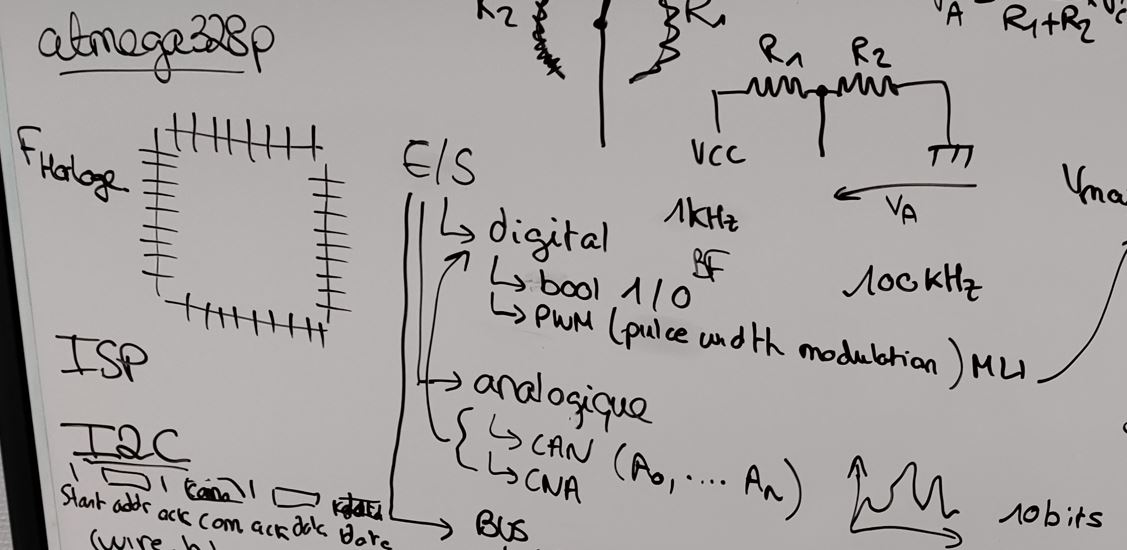
digital outputs:
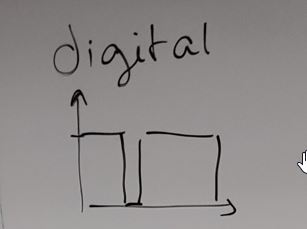
bool 1/0 PWM also called MLI in frenche.

According to the time, we can calculate la tension moyenne.
analog outputs:
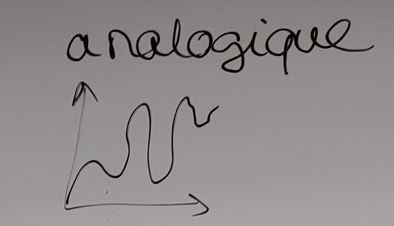
CAN (A0,A1,A2) CNA
It works on the clock (Frequency) to send datas. As a maestro, the rythm of the music has to be on time for each instrument to synchronize.
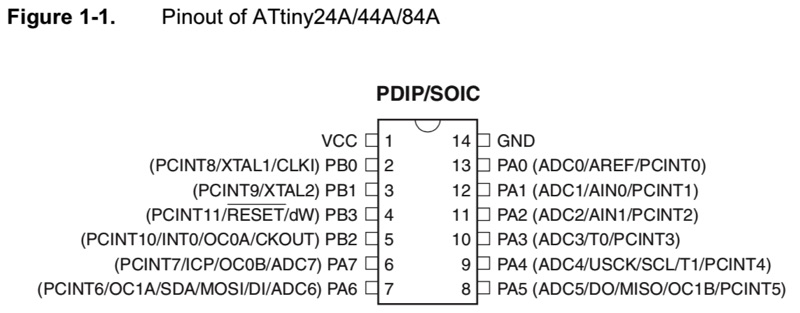
Data sheet:
To familiarize myself with the technical data of microcontroller and especially to know the specifics of each pin, I read the ATtiny44 A datasheet. I also had to look for the correspondence between the different pins according to the languages and programming tools used. Especially to make the serial communication work.
| cellule 1 | cellule 2 |
|---|---|
| A | B |
| C | D |
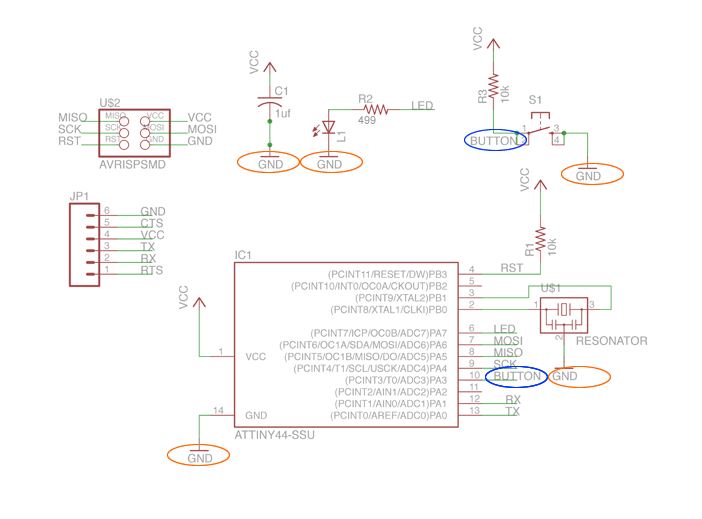
Here comes my schematics from my ATtiny44 board:

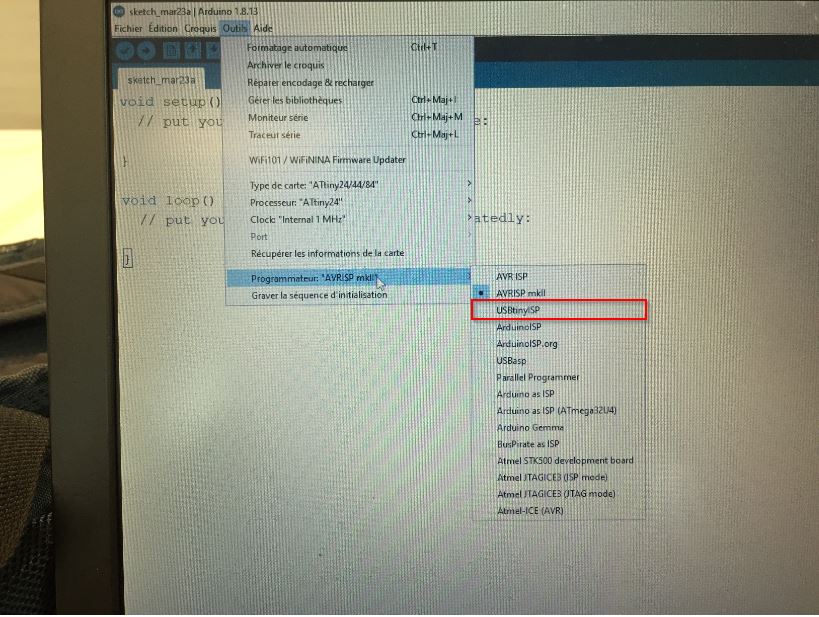
ARDUINO IDE.
I need an in-system programmer (ISP) created during the week05: THE FABISP
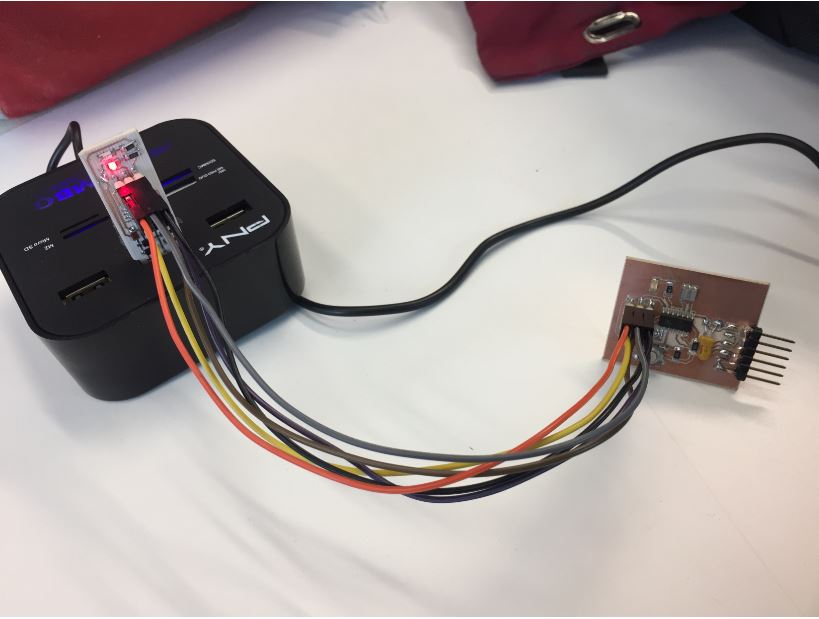 To be at work, I download the usbtiny driver from adafruit.
The programmer fabisp has been selected:
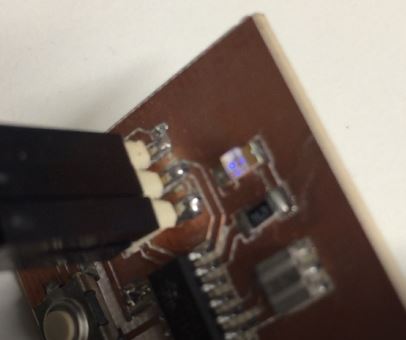
I had some FAILS because I did not find the proper pinnouts. Firstly, I changed the pinnout from blinking to pin6. But pin6 is called PA7 and Button is on pin 10 which means : PA3
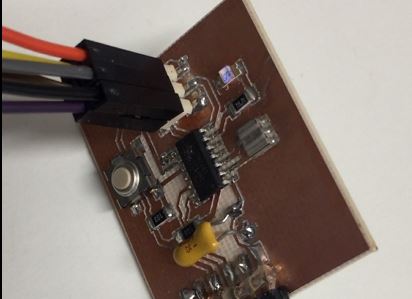
When the board was flashed, I did not see anything. In fact, my blue LED is not shiny.WRONG CHOICE. Anyway I thought the board had a problem but not. Great
Blinking
// the setup function runs once when you press reset or power the board
void setup() {
  // initialize digital pin LED_BUILTIN as an output.
  pinMode(LED_BUILTIN, OUTPUT);
}

// the loop function runs over and over again forever
void loop() {
  digitalWrite(PA7, HIGH);   // turn the LED on (HIGH is the voltage level)
  delay(1000);                       // wait for a second
  digitalWrite(PA7, LOW);    // turn the LED off by making the voltage LOW
  delay(1000);                       // wait for a second
}
Switch button
// constants won't change. They're used here to set pin numbers:
const int buttonPin = PA3;     // the number of the pushbutton pin
const int ledPin =  PA7;      // the number of the LED pin

// variables will change:
int buttonState = 0;         // variable for reading the pushbutton status

void setup() {
  // initialize the LED pin as an output:
  pinMode(ledPin, OUTPUT);
  // initialize the pushbutton pin as an input:
  pinMode(buttonPin, INPUT);
}

void loop() {
  // read the state of the pushbutton value:
  buttonState = digitalRead(buttonPin);

  // check if the pushbutton is pressed. If it is, the buttonState is HIGH:
  if (buttonState == HIGH) {
    // turn LED on:
    digitalWrite(ledPin, HIGH);
  } else {
    // turn LED off:
    digitalWrite(ledPin, LOW);
  }
}
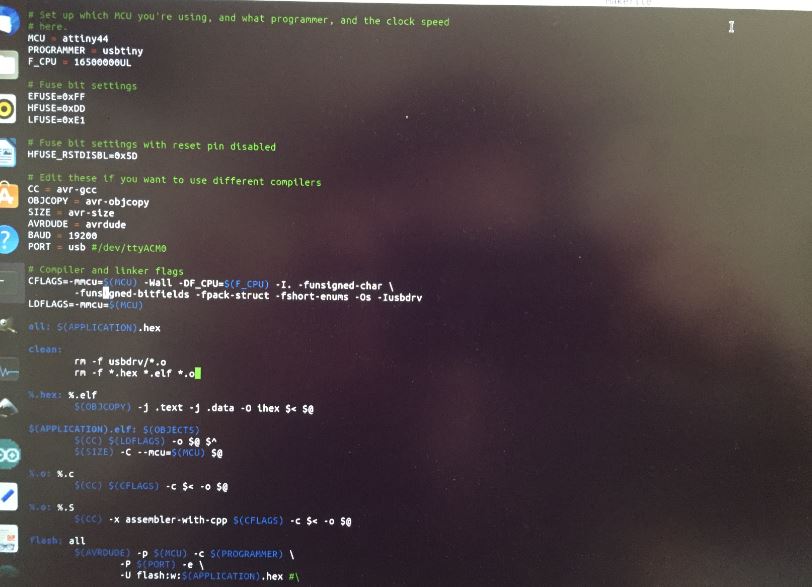
Program using anything else.
Alex, a electronics teacher and students Arthur, Johnny and Axel explained me the inside of the microprocessor.
I have recently got a linux pc, but I need to move all my datas to this computer. Anyway.
They explain me the tool chain,avrdude MAKE and all the buddies: flash , etc… main.c o etc… It is still a little bit complex for me but I am learning and try to keep that way.