
This work is licensed under a Creative Commons Attribution-NonCommercial-ShareAlike 4.0 International License
Week 1: Project Management
Jan 31, 2021Summary
This week's assignments
- Make a website and describe how you did it ✔
- Introduce yourself ✔
- Document steps for uploading files to archive ✔
- Push to the class archive ✔
- Sign and upload Student Agreement ✔
Resources Used
- Text Editor: Brackets
- Image Editors: Adobe Photoshop Express, TinyPNG
- HTML and CSS: W3Schools, Coursera (HTML and CSS course), Free CSS (website template)
- Git: Udemy (Git course), Pro Git Book, Fab Academy Tutorials (1, 2, 3, 4), Xcode
Skills Gained
- HTML, CSS, Basic Git Commands
My Weekly Schedule
Alongside the Fab Academy, I will be working on a capstone project for my graduate studies until May this year, so I need to organize my time wisely. I really like Elena's suggestion for creating a weekly planner as it helps me to stay on top of things!

Web Development
Exploring Markdown
The first part to documenting my progress on Fab Academy was to make a website. In fact, Fab Academy has prepared a personal site template for us to get things started right away!
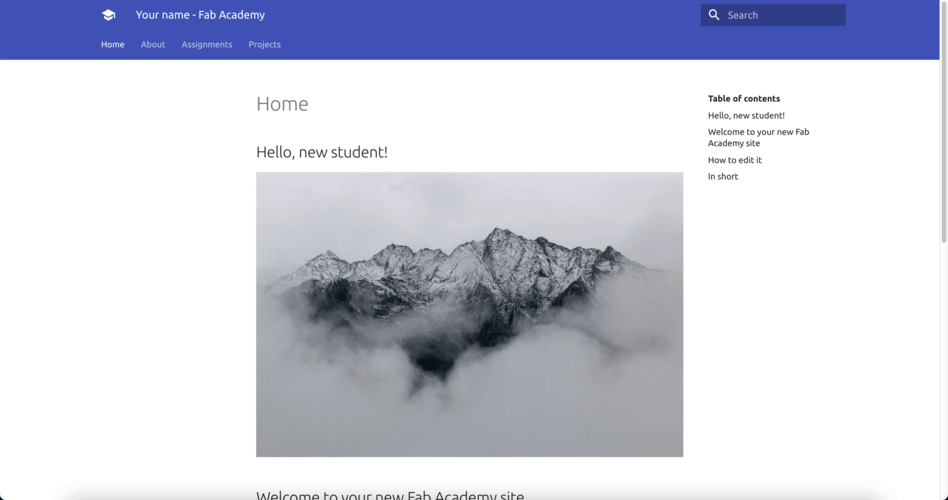
The markdown content of the website is generated by the MkDocs tool, and we can change the website appearance in the mkdocs.yml file. I found that Markdown allows for seamless learning because it looks very similar to a regular word document. Before the Week 1 Lecture, I only knew how to make edits using the GitLab online editor and it was not efficient because I had to switch folders all the time and the changes I made were not reflected to the public site until about an hour after I committing the changes.
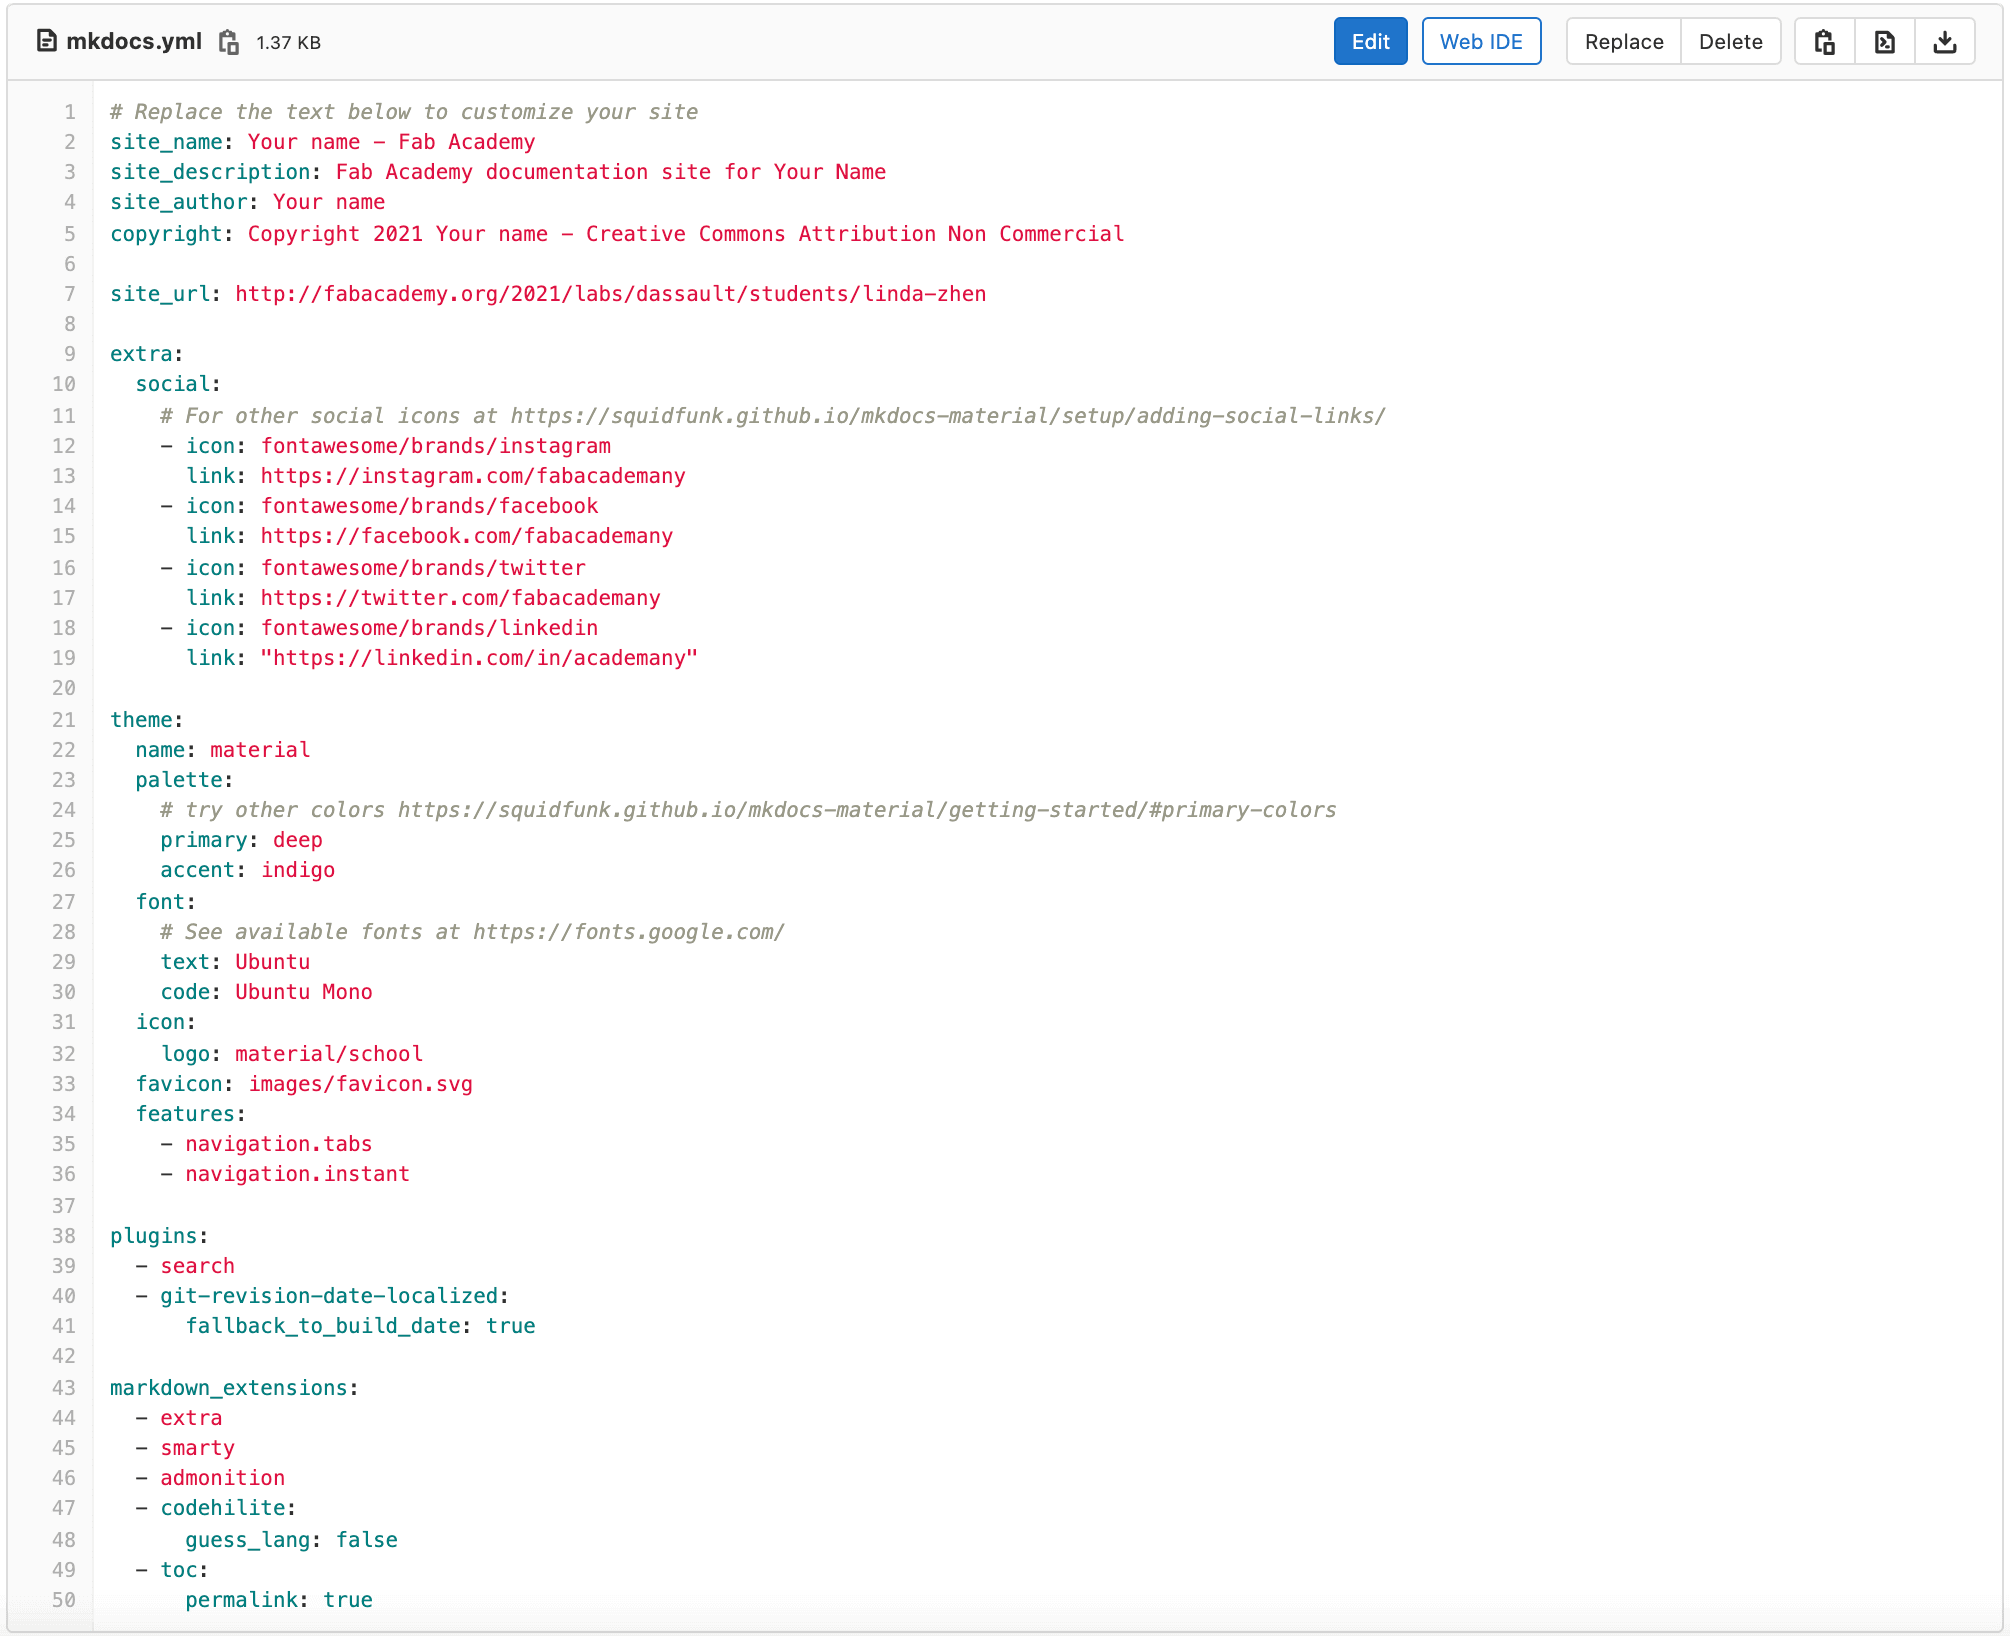
mkdocs.yml fileThen, I learned that it would have been much easier if I had done a Git tutorial first and cloned the repository to work with it locally 😁.
HTML & CSS Training
During the student boot camp, we were introduced to building a website using HTML, and I decided to take this route because I wanted to get a taste for web design, so the next step for me was to explore video courses and interactive practice sessions on HTML & CSS. For this, I took an introductory course in Coursera and went through the W3Schools tutorials to get myself familiar with the basics.
HTML stands for Hyper Text Markup Language and is the most used language to create web pages for display on web browsers.
CSS stands for Cascading Style Sheet and it describes how the HTML elements will be displayed on the screen.
Another great way to learn website development is by viewing a web page's source: for Windows, press F12 on the keyboard, and for Mac, press option + command + U after enabling the "Develop" tool.
Currently, the most useful HTML tags for me are as follows:
- First thing in the HTML document:
<!DOCTYPE html> - Second thing in the HTML document:
<html>...</html> - Define head elements:
<head>...</head> - Define the footer:
<footer>...</footer> - Define document's body:
<body>...</body> - Title heading:
<h1>...</h1> - Section heading:
<h2>...</h2> - Subsection heading:
<h3>...</h3> - A paragraph:
<p>...</p> - Single line space:
<br> - A link :
<a>...</a> - An image:
<img> - Figure caption:
<figcaption>...</figcaption> - A table:
<table>...</table> - Bold text:
<b>...</b> - Italic text:
<i>...</i> - Unordered list:
<ul>...</ul> - Ordered list:
<ol>...</ol> - List element:
<li>...</li> - A block-level container for content:
<div>...</div> - Code snippets:
<code>...</code> - Define keyboard input:
<kbd>...</kbd> - Center the content:
<center>...</center> - Indent the content:
<blockquote>...</blockquote> - HTML comment:
<!-- write the comments here -->
Here are some useful HTML attributes for me when referring to other sites and images:
- For links:
<a href="[link]" target="_blank">...</a>hrefspecifies the link.target="_blank"opens the link in a new window or tab.
- For images:
<img src="[image_path]" alt="" style="width:90%"> srcspecifies the image path.altprovides an alternate text for an image.styleadds styles to an element, such as color, font and size. The example above will resize the image to 90% of its original size.
I also like to use symbols and the HTML codes for some of them are as follows:
- & =
& - Non-breaking space =
- ✔ =
✔ - < =
< - > =
> - « =
« - » =
» - 😁 =
😁
Choosing the Website Template and Text Editor
Since I was new to web development, I decided to build my site using a template. There are some resources offering free responsive website templates, such as Free CSS, Boostrap (source 1 and source 2), HTML5 Up, OS Templates and colorlib. After downloading and testing several different templates, I settled on the Skaxis template for my website wireframe, mainly due to its great user interface (UI) design.
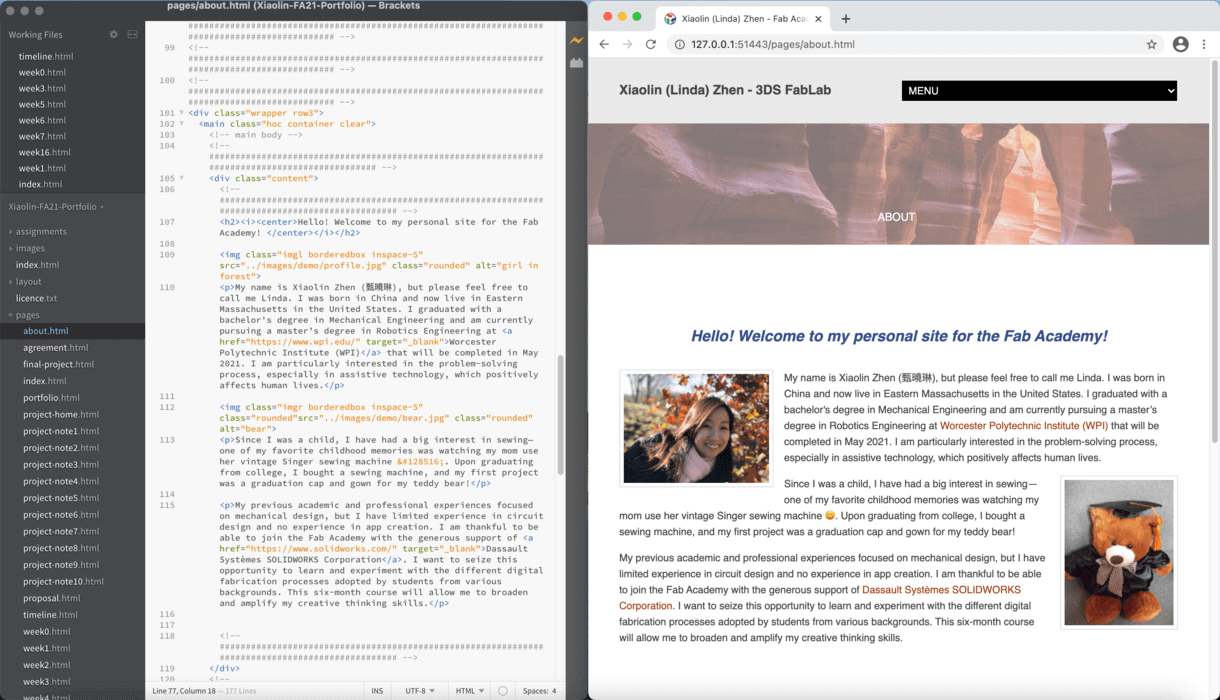
To edit the source I use Brackets, which is a text editor that allows the user to change the HTML and CSS, and visualize how the site looks with "Live Preview".
Wireframing and Styling the Website
For the Fab Academy personal site, I need the following web pages:
- "Home" page
- "About" page
- "Portfolio" page showcasing the weekly assignments
- "Final Project" page
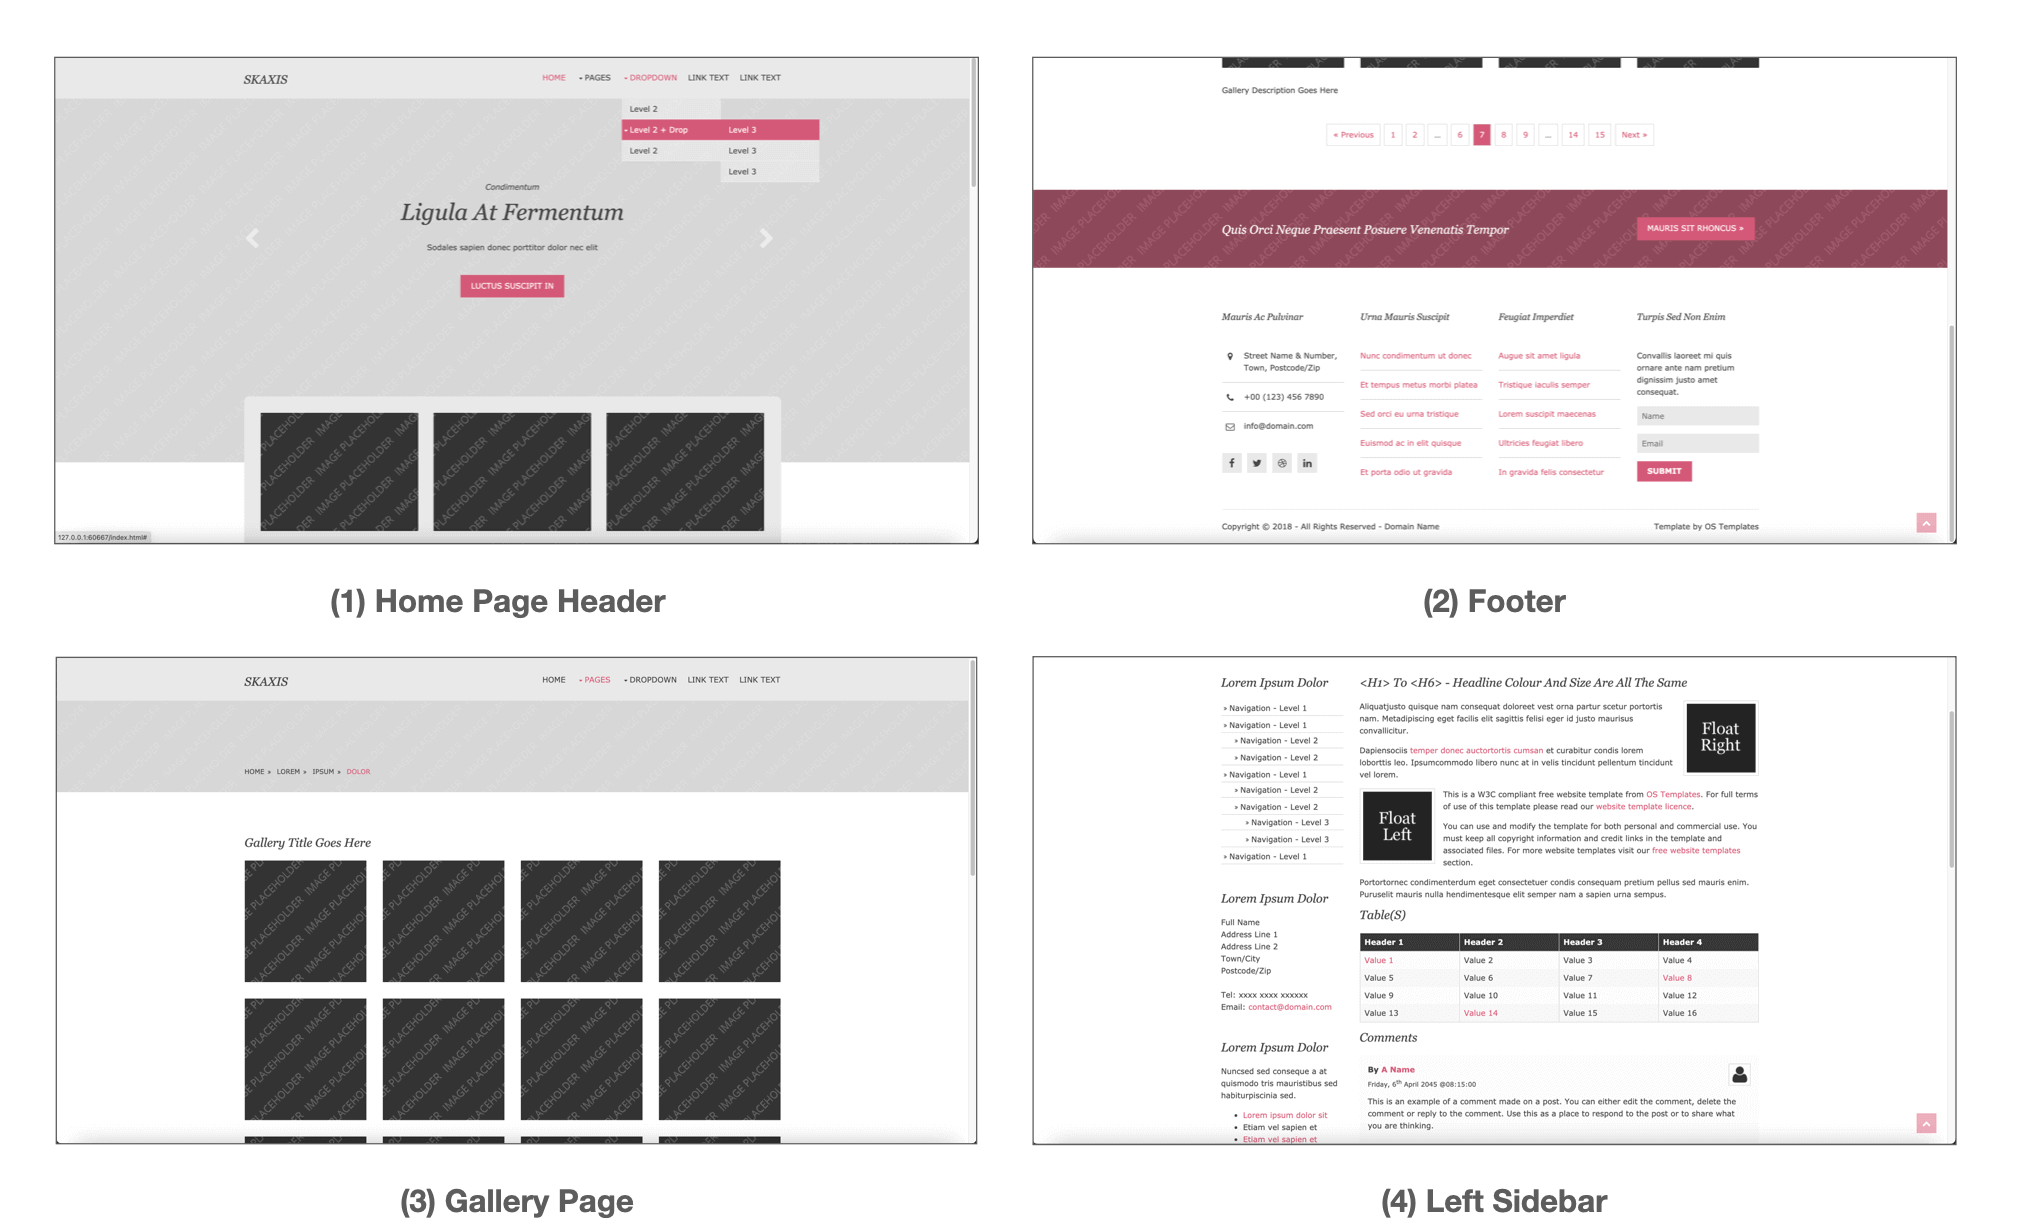
The Skaxis template already had the basic structure I was looking for, it also contained different page styles (i.e. full-width, left sidebar, right sidebar) that I can use for the content pages, so I only needed to make small modifications.
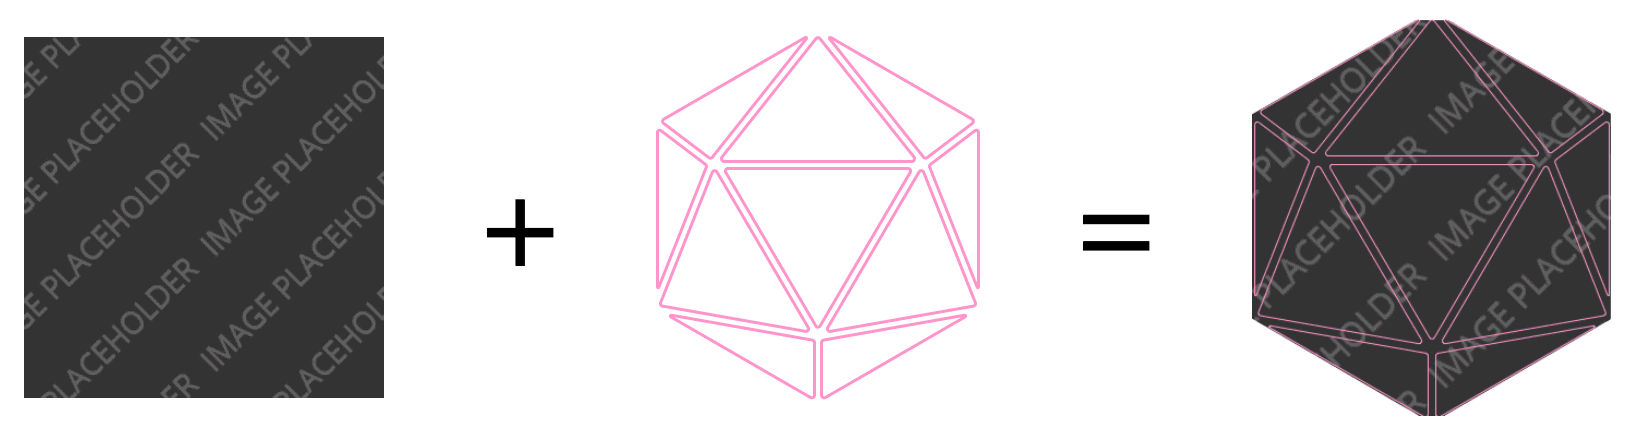
I edited the source code from the template to remove some of the bottom navigation that I didn't need and add more rows to set up the gallery for all of the weekly assignments I'll complete. Just for fun, I changed the shape of the gallery placeholder from square to hexagon. In addition, I set to use the right sidebar for my weekly assignments and the left sidebar for my final project activity logs.
Next, I revised the margins and the colors of the headings to better demonstrate the hierarchical structure of the content.
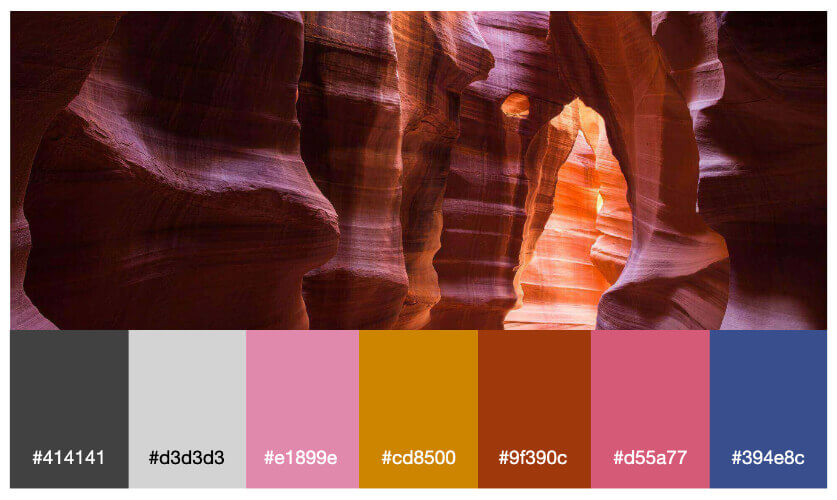
I chose to replace the original background image with an Antelope Canyon image, and selected the major colors for my site based on that for a whimsical theme 😺. I used colorhexa to help me achieve the latter task. To do that, I first typed in the color by name (i.e. "orange") in the search bar, and its Hex color code would be generated. Then, I used the "Shades and Tints" table on the page to find out the right color for a more visual appealing result.
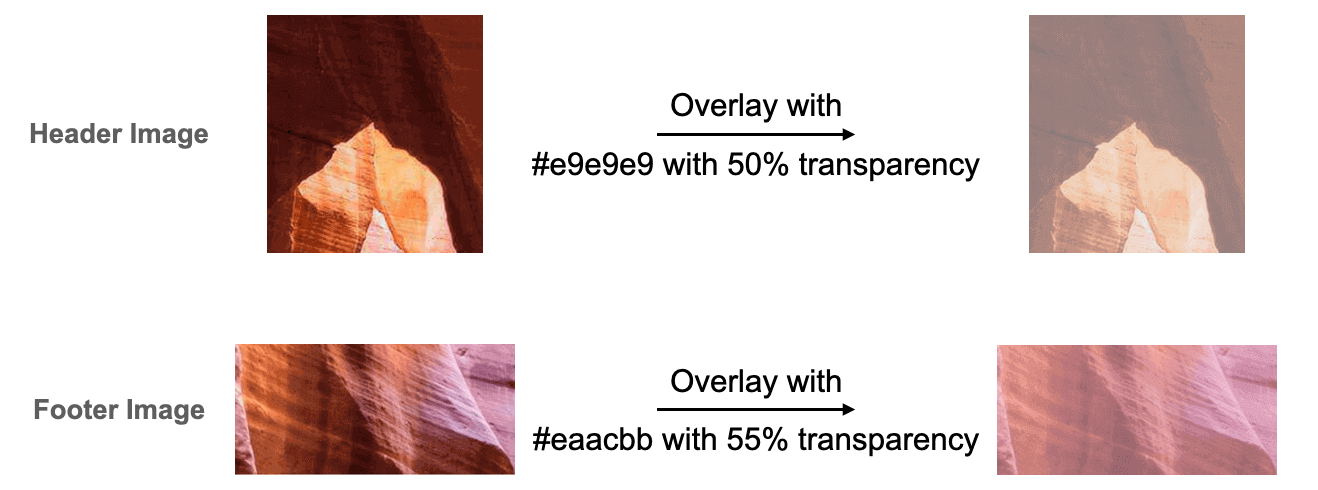
Learning from this tutorial, I also experimented with the overlay effect to soothe the vibrant colors of the background image.
Adding Enhancement Features
After getting more comfortable with HTML/CSS syntax as well as the website template, I started to learn to add features that would make the website more user-friendly, and I found Free Frontend and W3Schools very useful. The features I decided to add include: a timeline, shortcut dropdown buttons, and previous-next buttons.
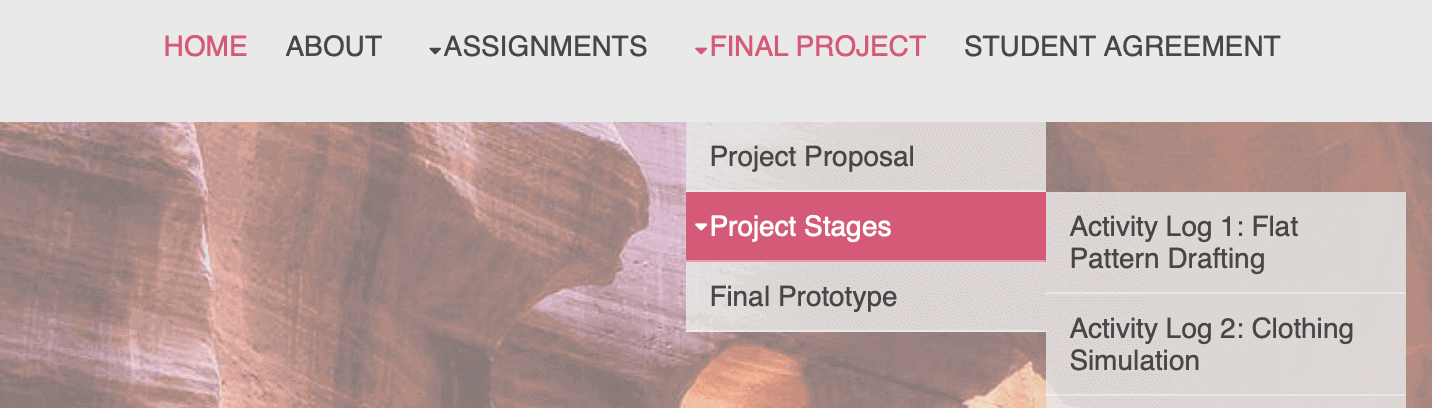
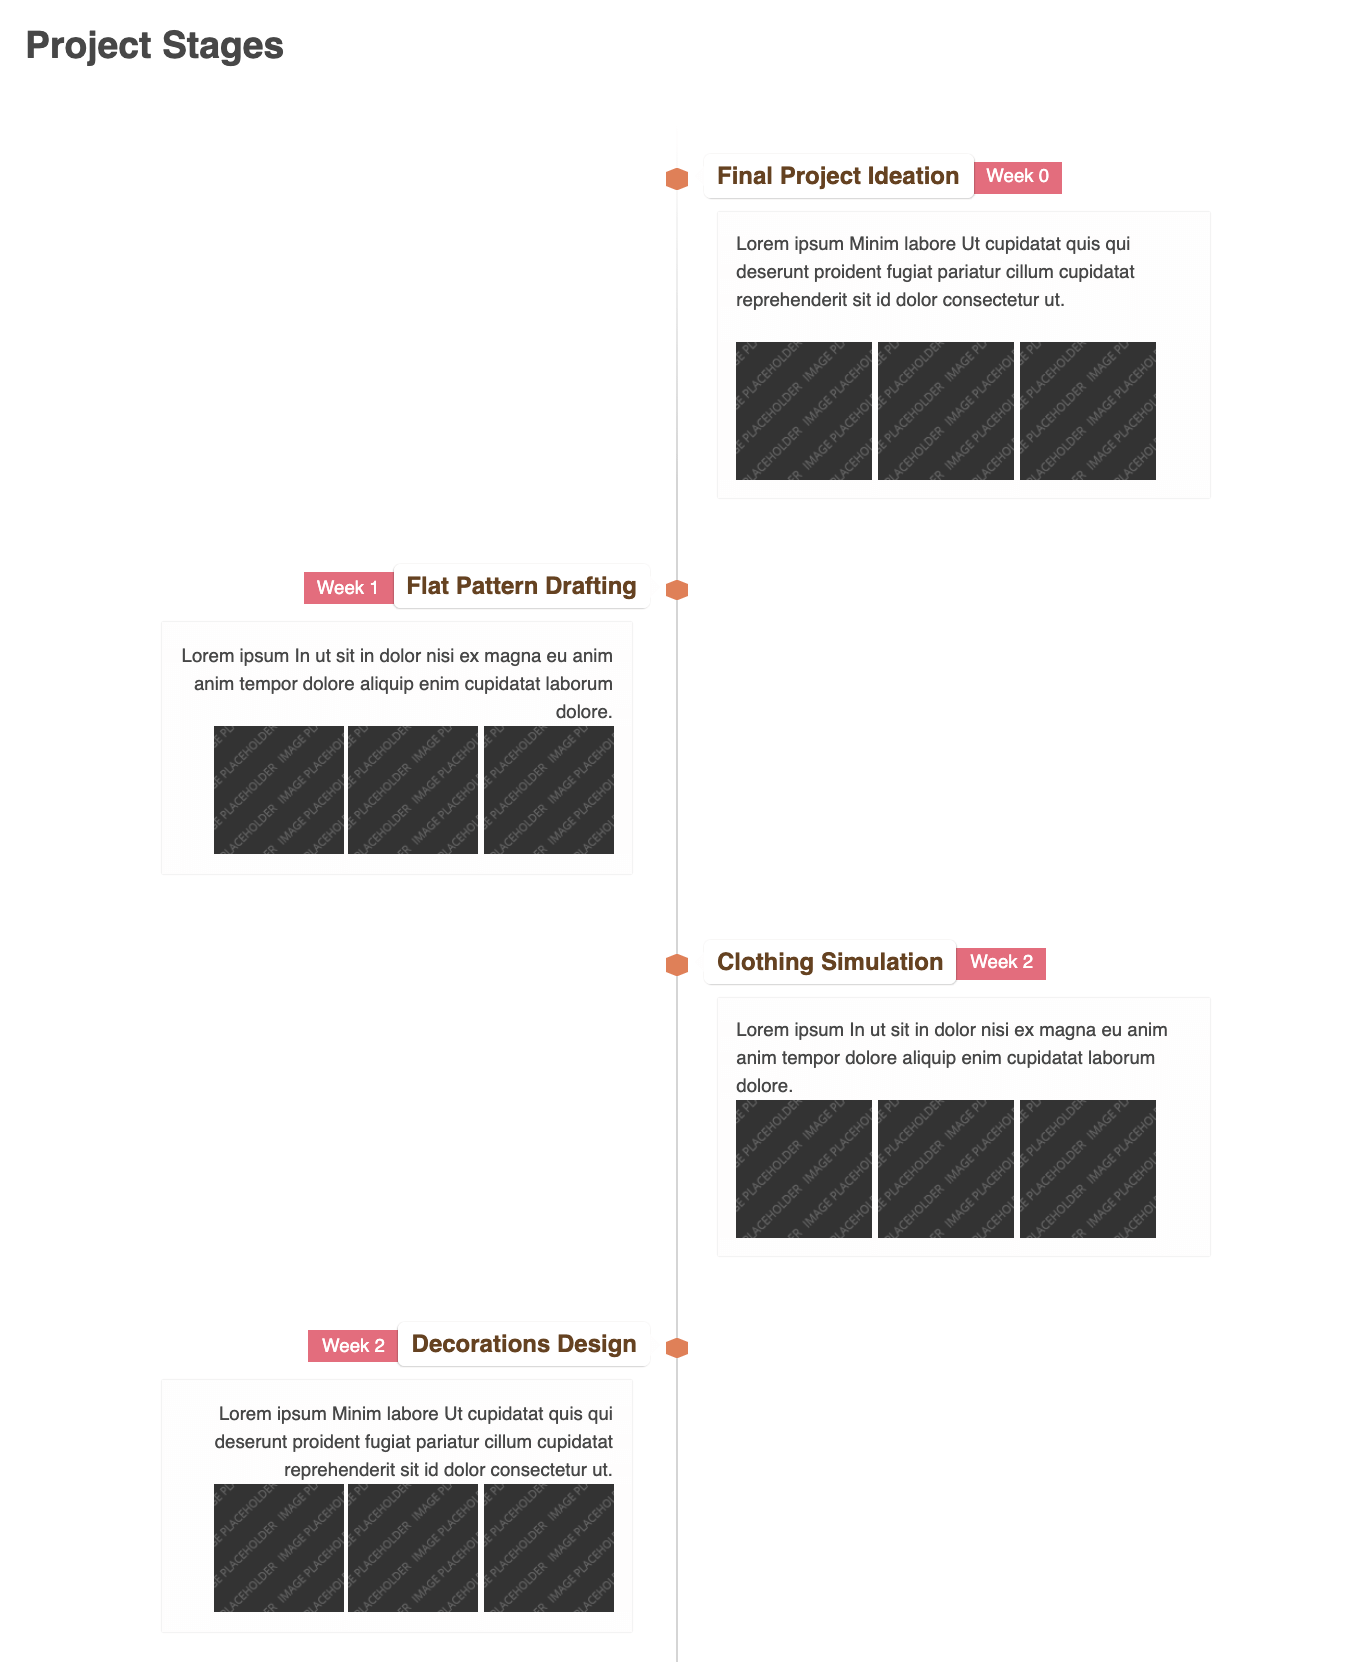
- Inspired from 3DS FabLab's page, I decided to add a timeline to my Project Stages page using the code snippets for the CSS3 Timeline from this collection.
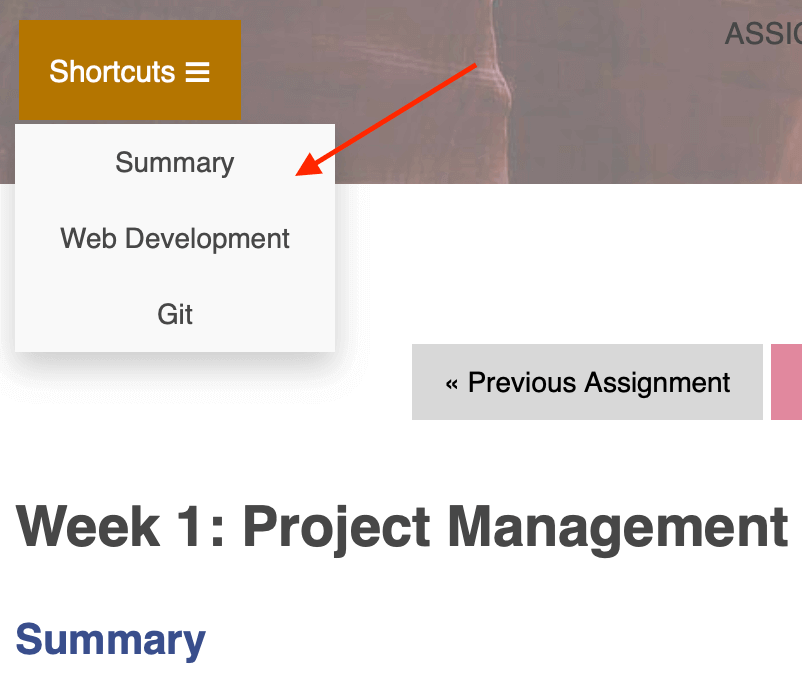
- To complement the "scroll back to top" button, I added a shortcut dropdown menu for the weekly assignments and project activity logs by following this tutorial.
- I also added a previous-next button for the weekly assignments and project activity logs. In order not to affect the other elements on the website, I made small tweaks on the code instead of using as is.
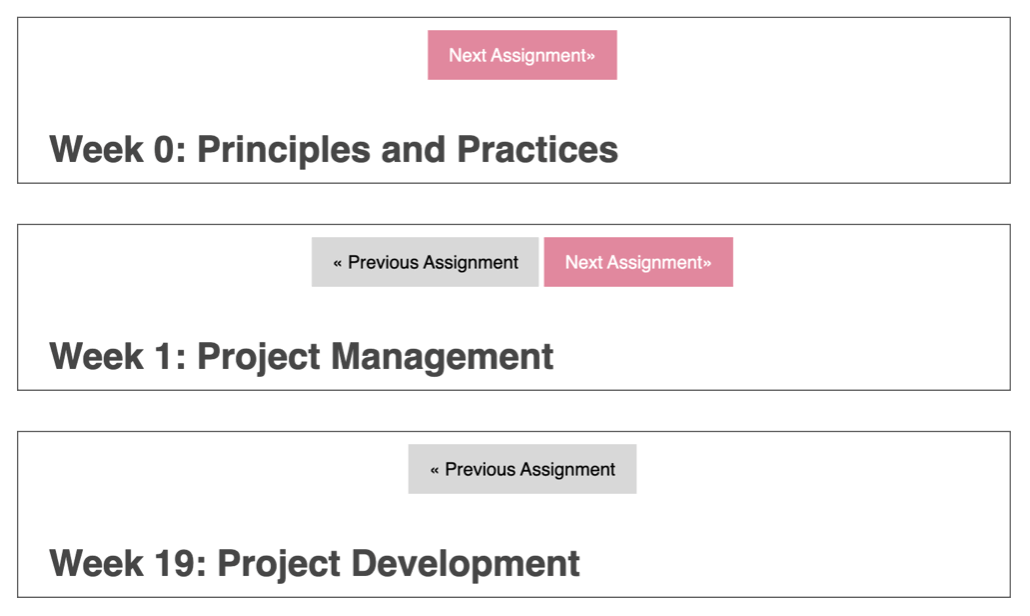
<!-- Place the HTML code above the title heading -->
<center><a href="week0.html" class="previous">« Previous Assignment</a>
<a href="week2.html" class="next">Next Assignment »</a>
</center>
/* Custom CSS code for the button layout */
                    .previous {

                      background-color: #d8d8d8;

                      color: black;

                      text-decoration: none;

                      display: inline-block;

                      padding: 8px 16px;

                    }


                    .next {

                      background-color: #e1899e;

                      color: white;

                      text-decoration: none;

                      display: inline-block;

                      padding: 8px 16px;

                    }


                    .round {

                      border-radius: 50%;

                    }
/* No JavaScript code is needed */
Image and Video Optimization for the Web
A final step for me was to double check if all requirements were met, especially the file size. Files over 10 MB cannot be pushed to the repository. To avoid this issue, I needed to compress all images and videos before uploading.
I accomplished the image compression task in two steps. First, I used Adobe Photoshop Express to reduce the image size and saved as PNG format for higher quality. Then, I compressed the resized image with TinyPNG. The reason I opted for TinyPNG was that the images processed by TinyPNG didn't seem to lose much resolution even though the file sizes were reduced dramatically.
Before placing the files to the folder, I also made sure the filenames were saved with "absolute path", meaning short and contained no spaces.

Our instructors shared to us a great video conversion tool called ffmpeg. It can be used in Linux, macOS X, and Windows...etc. I have not tried it yet but I think it would be a nice starting point for me to learn Linux since we will most likely rely on this operating system for the electronics part of the course.

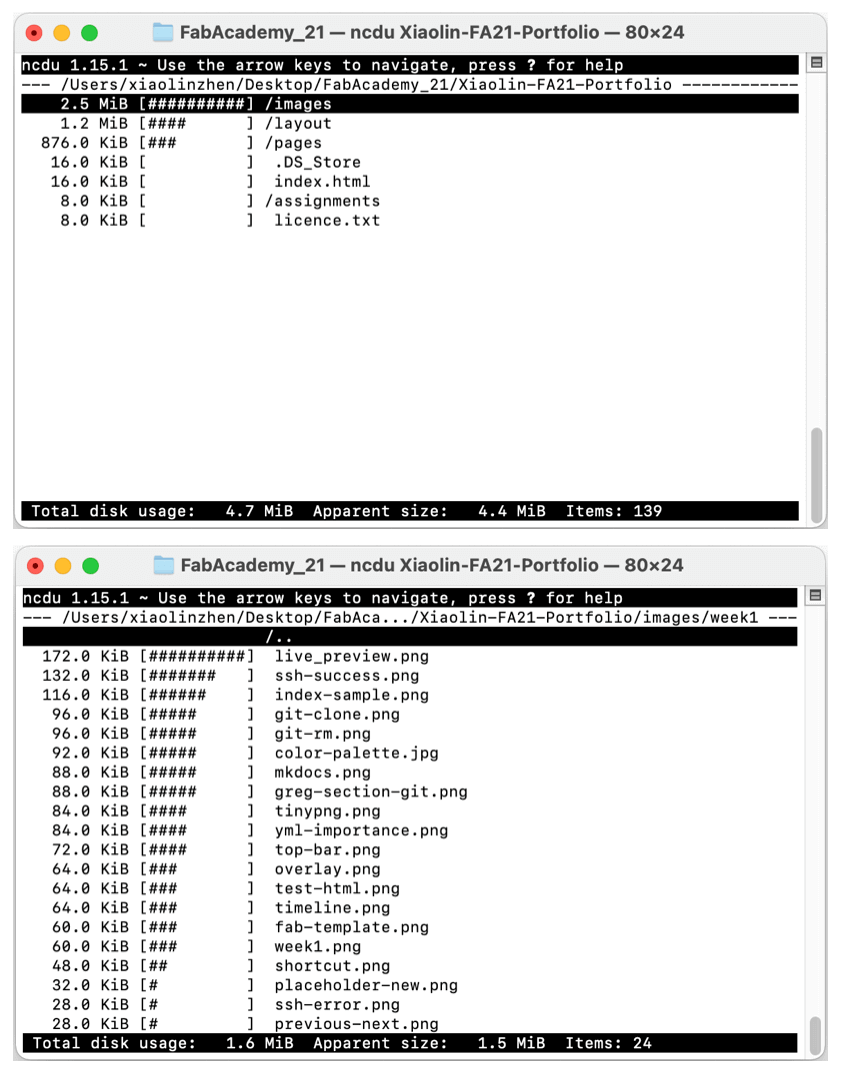
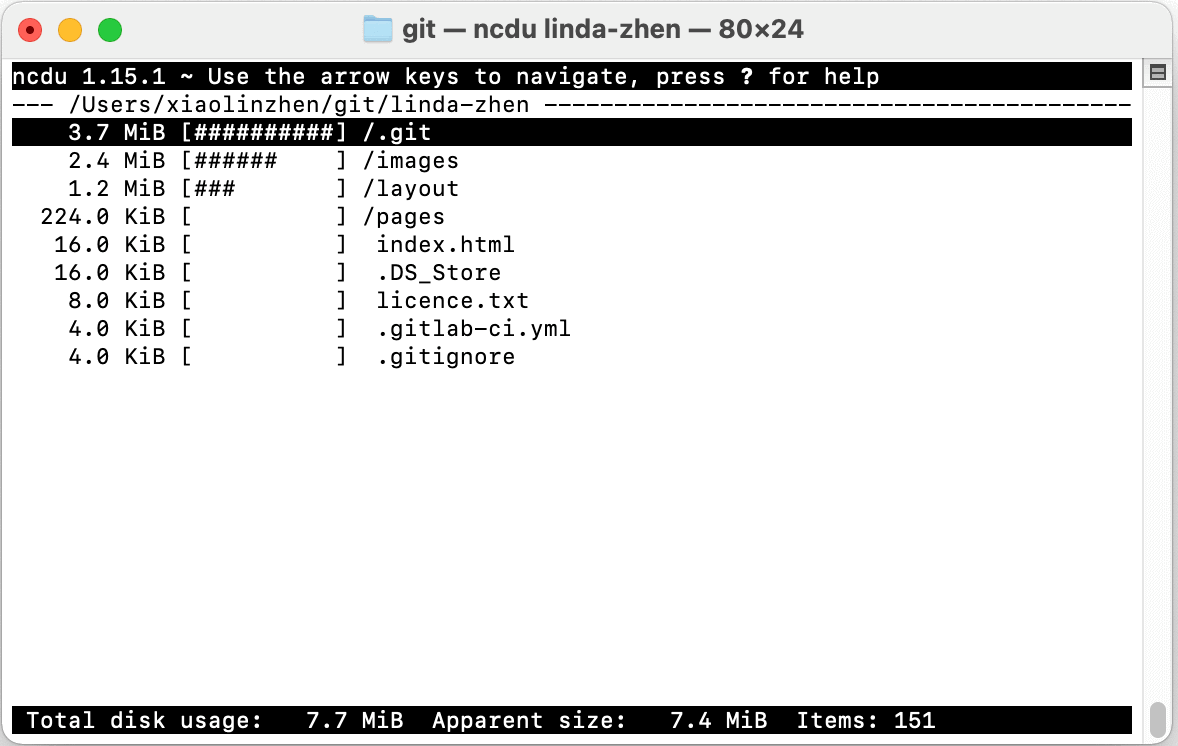
I followed the Homebrew instruction to install Ncdu, a size checking tool that Neil recommended during the class, and I must agree it is a great tool to double check the size before committing 👍!
Git
Git Training
The second part to the documentation process was to upload my website to the Git repository, which is a version control tool for managing changes to the documents. The major steps for this task are as follows:
- Install Git
- Generate the SSH Key
- Clone the Repository URL
- Update the Repository
I began by working through the Pro Git Book and some interactive sessions on Git, and I found this free Udemy Git course very useful, since it provided step-by-step instructions. I also watched the Fab Academy YouTube tutorials to reinforce the concepts I learned from the Udemy course.
In addition to the Git training, I found the following commands very useful when working with Terminal:
pwd: Print the path of the working directoryls: List the contents in the directorycd: Change the directorymkdir: Create a directorycat: Display contents of a filerm: Delete a filecp: Copy a filemv: Move a file
Installing Git on macOS
Next, I followed this Git Simple Cheat Sheet to get things set up. After consulting this page, I figured that I would need to install “Git” on my computer, so I followed the steps below to install "Xcode" in Terminal Using Homebrew.
Xcode automatically sets up a Git repository on the Mac. For Windows, Git BASH is the interface to communicate with our online repository in GitLab.
Step 1: Press command + space to open the Search bar, then type in "Terminal".
Step 2: Install Homebrew by pasting the following command in the Terminal - this will also install Xcode (and Git) automatically!
/bin/bash -c "$(curl -fsSL https://raw.githubusercontent.com/Homebrew/install/HEAD/install.sh)"
Step 3: Git should be installed once Step 2 is done, but we can double check via:
git --versionStep 4: The latest Git development version can be found here. If we need to update Git, we can type the following:
brew install git
**Special Note**: According to the Udemy course as well as the Homebrew Common Issues page, Git may not be working following the yearly macOS upgrade (i.e. from Catalina to Big Sur), so it would be necessary to reinstall the Xcode Command Line Tools and brew upgrade all installed formula:
xcode-select --installbrew upgrade
Generate the SSH Key
Once Git was installed, the next step for me was to generate my SSH Key. I wanted to take a short cut so I copied the commands from the Git Simple Cheat Sheet and pasted them to the Terminal with my information. However, I got an error like this:

Then, I typed in the commands and the issue got resolved! I compared the commands and noticed that the double dashes in --global looked slightly different when copying and pasting the commands instead of typing them... I guess this could be the reason why I received the above error 😲. As soon as I set up my GitLab SSH Key, I saved my public key to my page on Fab Academy’s GitLab, and this is how it looks:

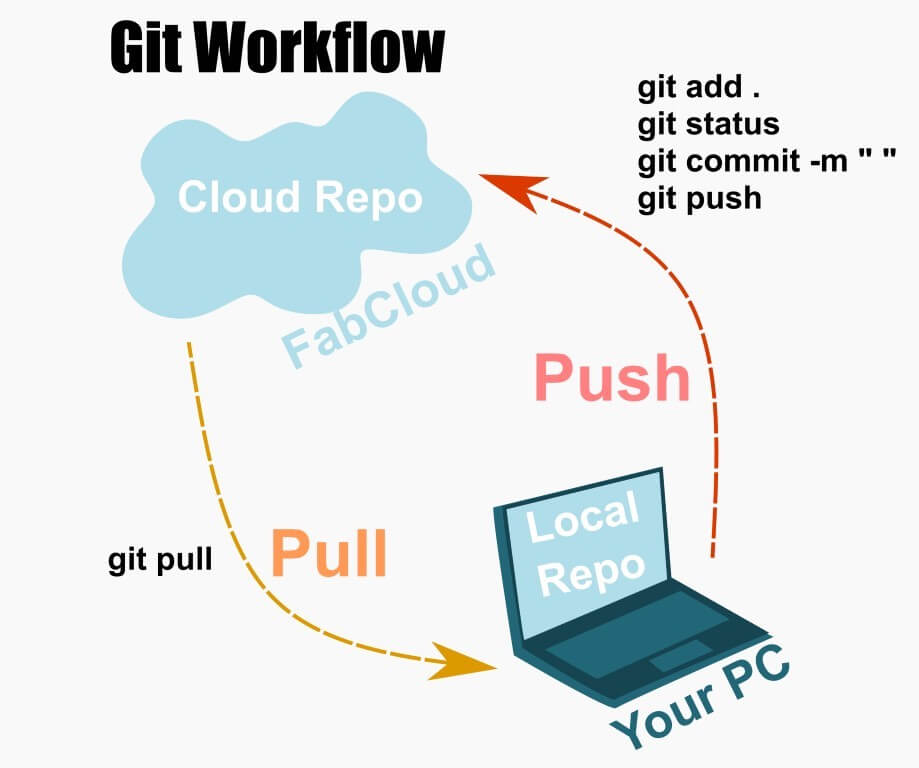
Clone the Repository URL
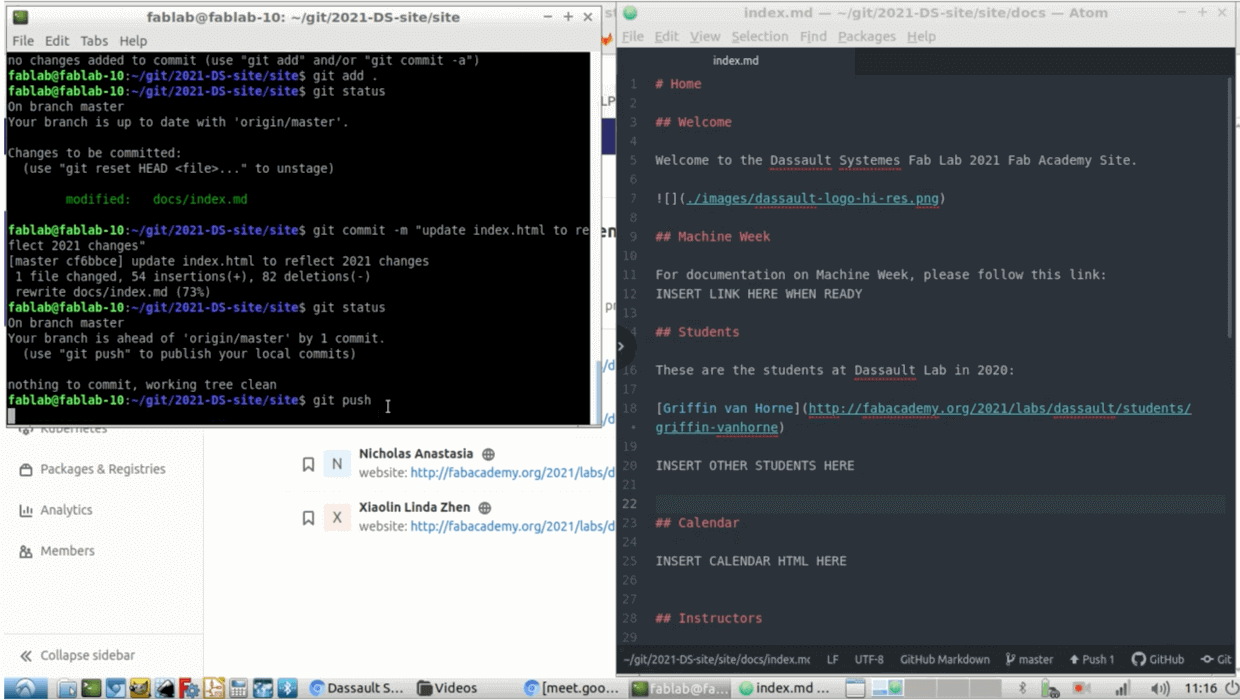
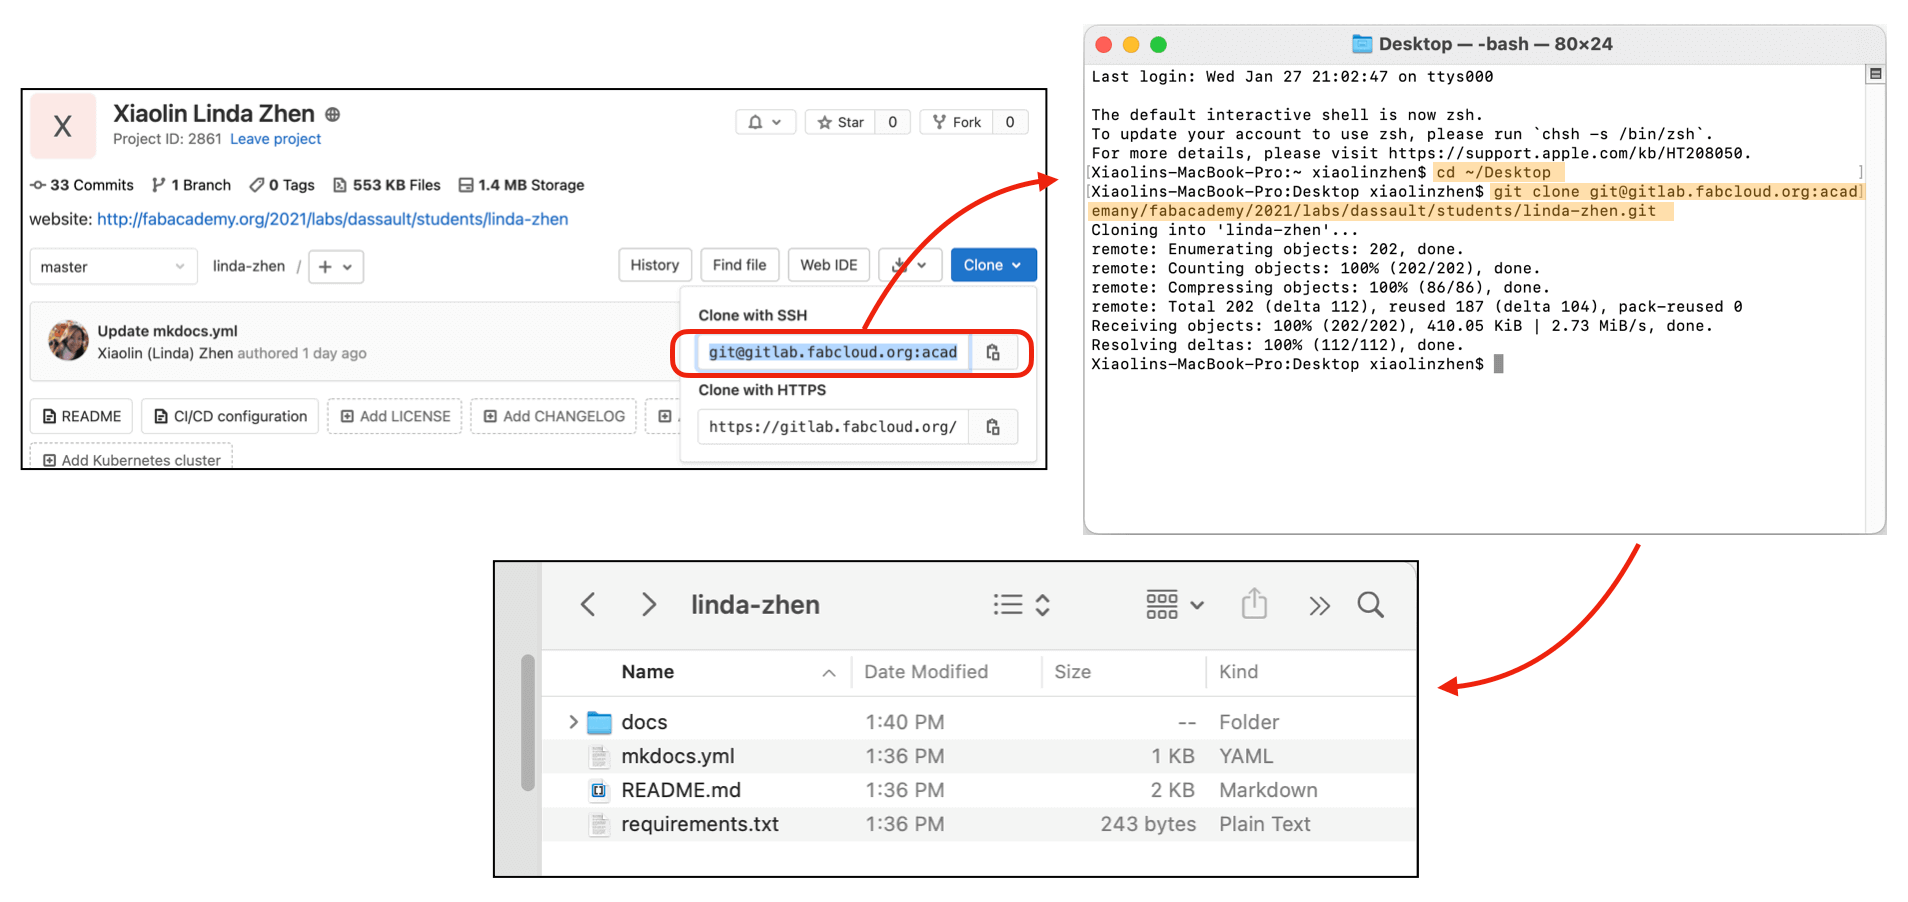
Although I have decided to use the HTML site for my documentation, I still wanted to get a copy of the existing Markdown repository from my GitLab page, so I used the cd ~/Desktop and git clone commands to save the repository to my desktop. The image below shows the workflow that I followed to realize this function.
Update the Repository
To empty some room for my HTML site, I had to remove the files that I would not be using from my repository. At first, I was only deleting the files one by one using the GitLab online editor, but then I learned to use the git rm command to remove files. To play safe, I was still removing items one by one, so it was a great way to practice my Git skills on the other hand!
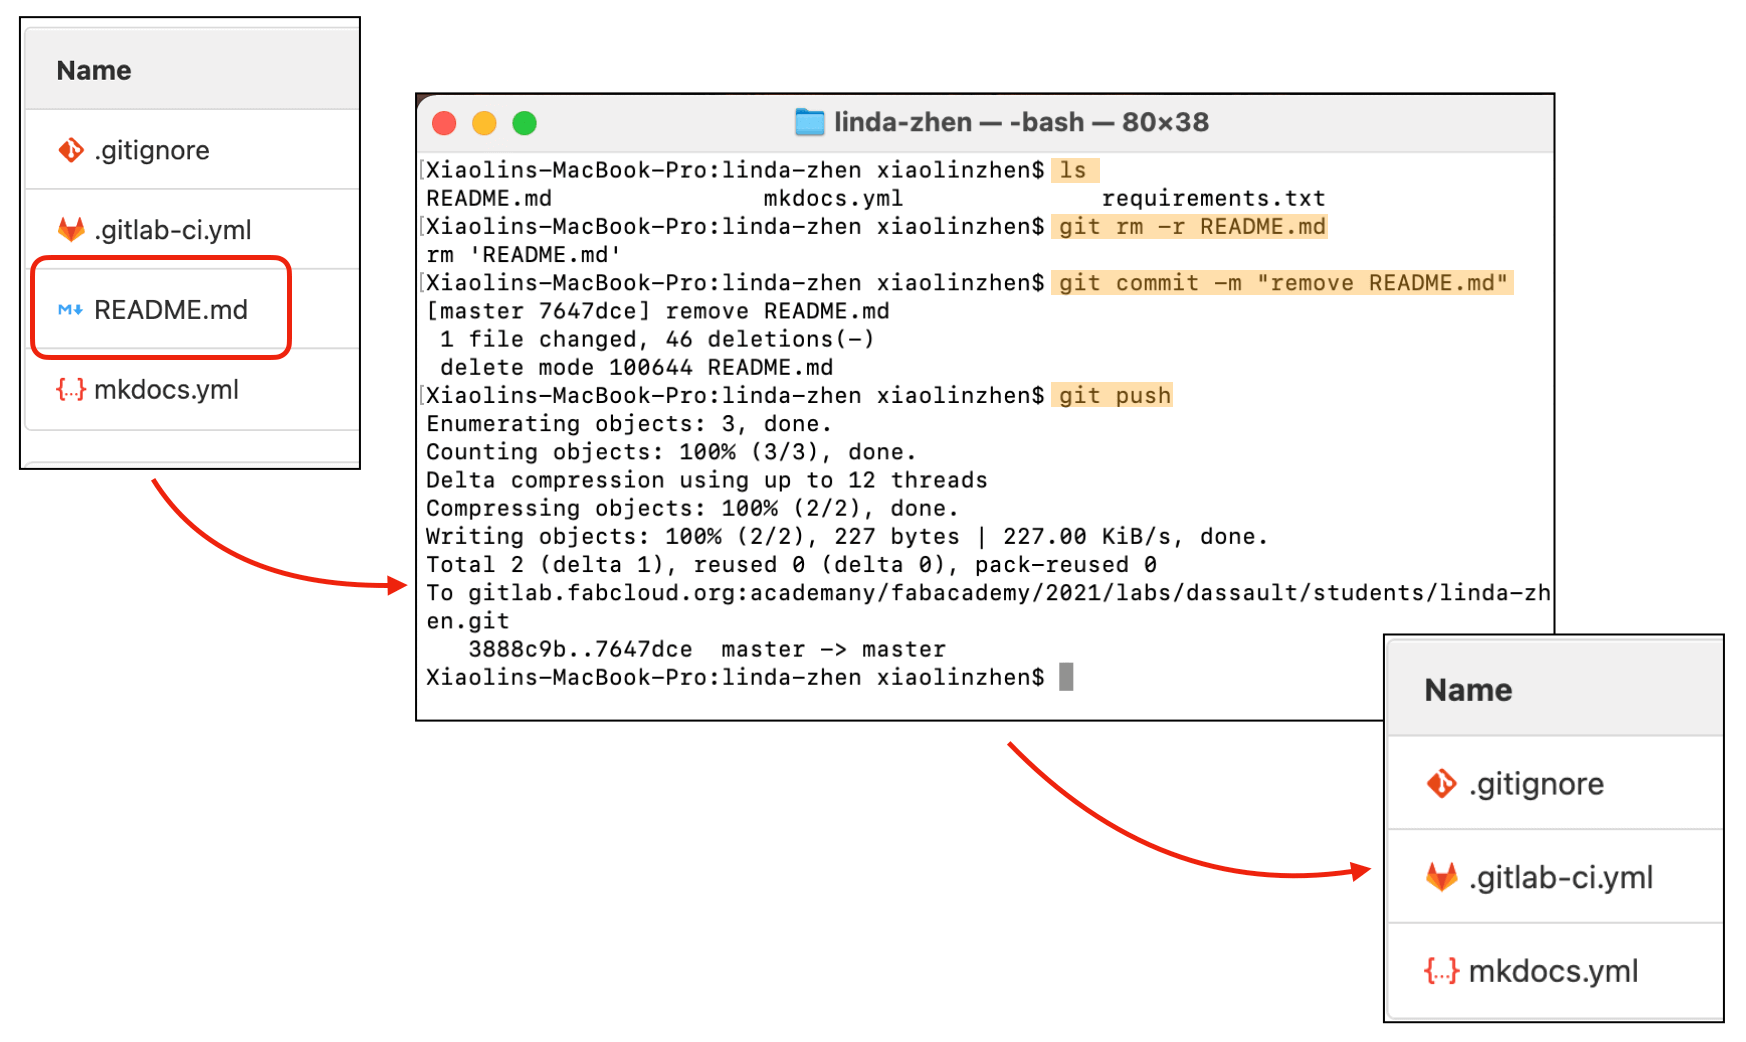
README.md file with git rmOne thing I noticed while using git rm was that, every time after I removed a file from the repository, I would receive a warning email from the Academany IT that the pipeline triggered by me had a failed build. I didn't understand what that meant, and I started to feel concerned as I received more warning emails and noticed my repository size was getting larger instead of smaller... Putting aside the warning, I moved on to create an index.html file and the .gitlab-ci.yml file as my instructor suggested.
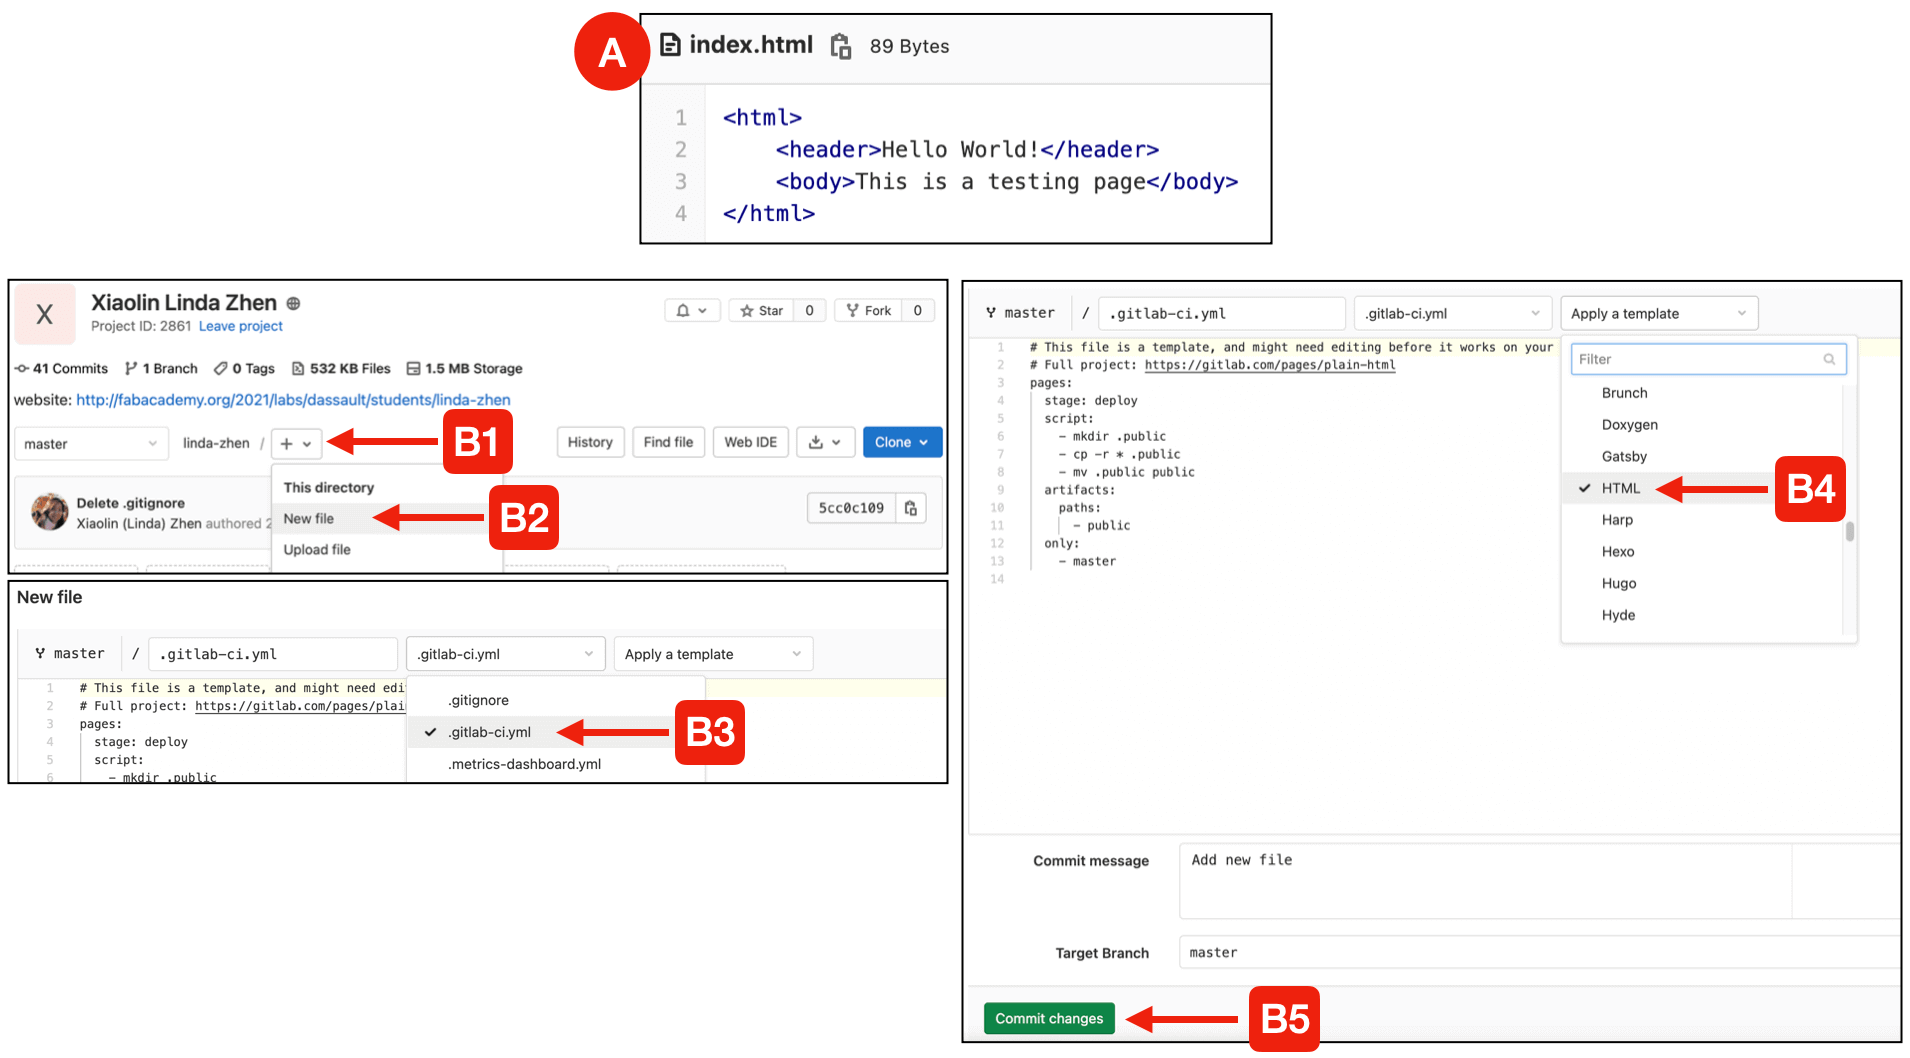
index.html file and (B) the creation of the .gitlab-ci.yml fileAnd...
Ta-da! The pipeline got fixed! And my repository storage became smaller too!
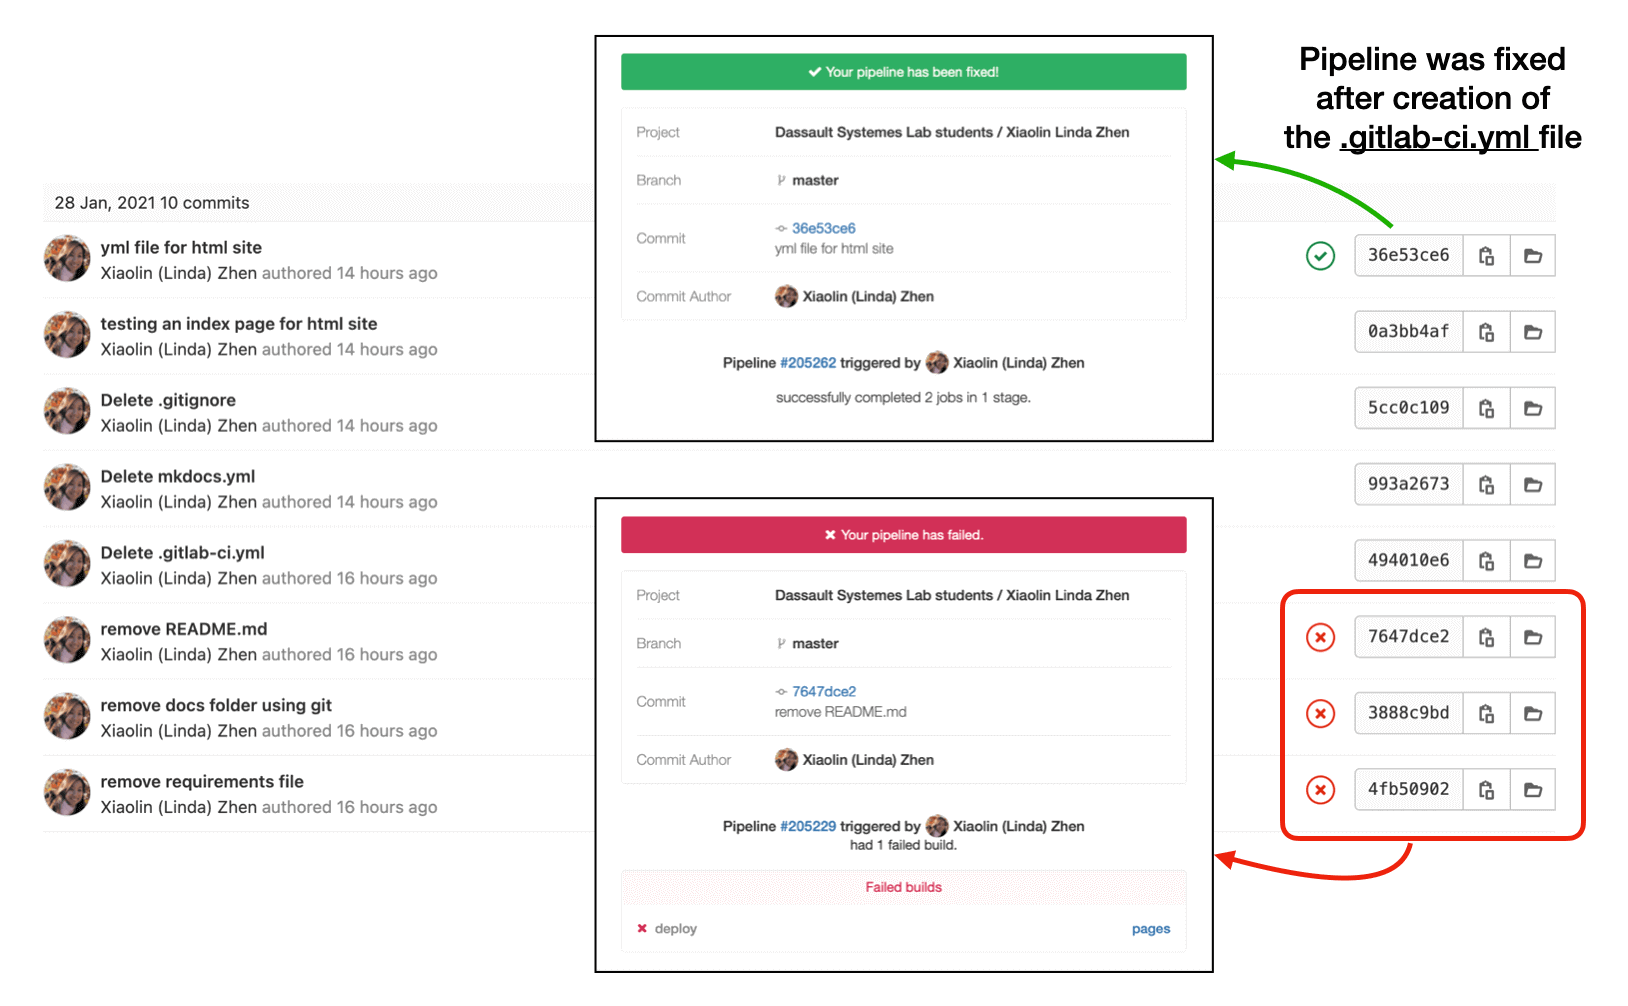
.gitlab-ci.yml file is like the backbone of my websiteGreg explained that, the reasons I received the warnings were probably because I deleted my .gitlab-ci.yml file, or other files that were required to build my markdown site; and since I was to use the HTML site, I would need a .gitlab-ci.yml file that was specific to configurating HTML sites. The .gitlab-ci.yml file defines what we want the server to do with the site, so we must not delete it from the repository as it will introduce a 404 error; we should also have the index.html file as the home page or we will receive the "pipeline got a failed build" email.
Git Commands Cycle
After understanding how GitLab works, I was ready to add my files to my repository from Terminal.
For each synchronization cycle, I will run the following Git commands:
git pull: Download the content from the remote repository. Doing this as the first step will ensure my local copy is in sync with my remote repository.- "Always Pull Before a Push" in case there is any modification in the remote repository. If we push before the sync then there will be a merge conflict.
git status: Check what changes have been made since the last push.git add --allorgit add [filename]: Add files to the staging area.- The limit for a single commit is 10 MB.
git commit -m "[description of the change]": Confirm the changes.git push: Make the changes effective and update the remote repository.git status: Double check to see if there are any unattended changes.
Issues & Troubleshooting
Issue: Large .git Repository Size
Since I committed quite often these past few days, my .git repo size was growing much faster than I intended. I searched for resolutions online and found that using the following command could help:
git repack -a -d --depth=250 --window=250I tried it out and my .git repo size reduced from 6 MB to 4 MB on the first attempt! I was ecstatic and then I used this command to repack my .git repo every time after I made a commit; however, I noticed that the .git repo size reduced only about 0.1 MB ever since and this may not be sufficient in the long run, so I am on a search mission again 😄.
UPDATED Feb 2, 2021 - I was fortunate to find Hyejin's documentation on reducing large Git repo size and I will follow her process from now on!