-
01. Principles and practices
-
02. Project management
-
03. Computer-Aided design
-
04. Computer controlled cutting
-
05. Electronics production
-
06. 3D Scanning and printing
-
07. Electronics design
-
08. Computer controlled machining
-
09. Embedded programming
-
10. Input devices
-
11. Applications and implications
-
12. Output devices
-
13. Interface and application programming
-
14. Invention, intellectual property and income
-
15. Networking and communications
-
16. Molding and casting
-
17. Wildcard week
-
18. Machine design
-
19. Project development
-
Glossary
Week 3. Computer-Aided Design
Feb 11, 2020
Assignment
- Render your final project with 2D and 3D tools
Tools
The tools I use marked in bold.
2D Tools
- GIMP (Raster)
- Adobe Photoshop (Raster)
- Inkscape (Vector)
- Adobe Illustrator (Vector)
3D Tools
- Fusion 360
- Blender
- FreeCAD
There are a variety of options available for 2D and 3D drawing and rendering. My choice was Procreate for drawing the raster design, Adobe Illustrator for the vector design, and Fusion 360 for the 3D design. Procreate is a raster graphics editor app for iOS and iPadOS. I could've just used Adobe Illustrator alone, but I am more used to drawing on Procreate. So I am going to mainly use Procreate, and I will use Adobe Illustrator if I need a vector design.
Fusion 360 class by Mauro
The class was intensive and I learned a lot. Let's see what I learned throughout the class.
Parametric Design
Parametric design is a process based on algorithmic thinking that enables the expression of parameters and rules that, together, define, encode and clarify the relationship between design intent and design response.
Mauro and Henk both emphasized the parametric design concept. I still don't 100% get what parametric design is, but I think we will learn more about it next week.
Updated - 6 June 2020
The following week, I made a parametric kit. By designing with parameteres, I was able to modify a design in a more efficient way. I think I overthought what parametric design is, but the concept was simpler than I thought, especially after trying it out on my own.
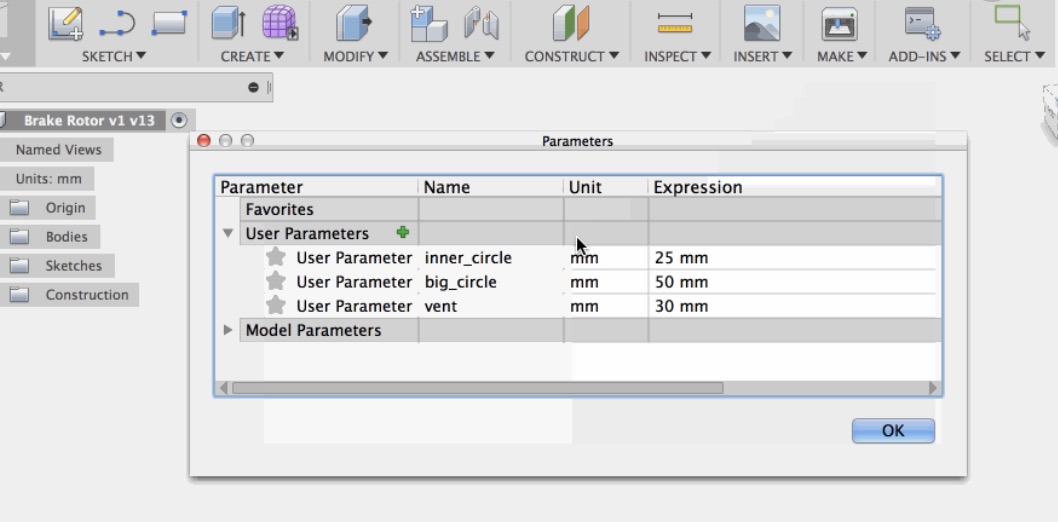
I used the Fusion 360's parameter feature for making the parametric kit. And now I'm working on my final project, the smart miniature house, and this parameter feature really comes in handy since there are a lot of parameters I have to remember.
Create a sketch
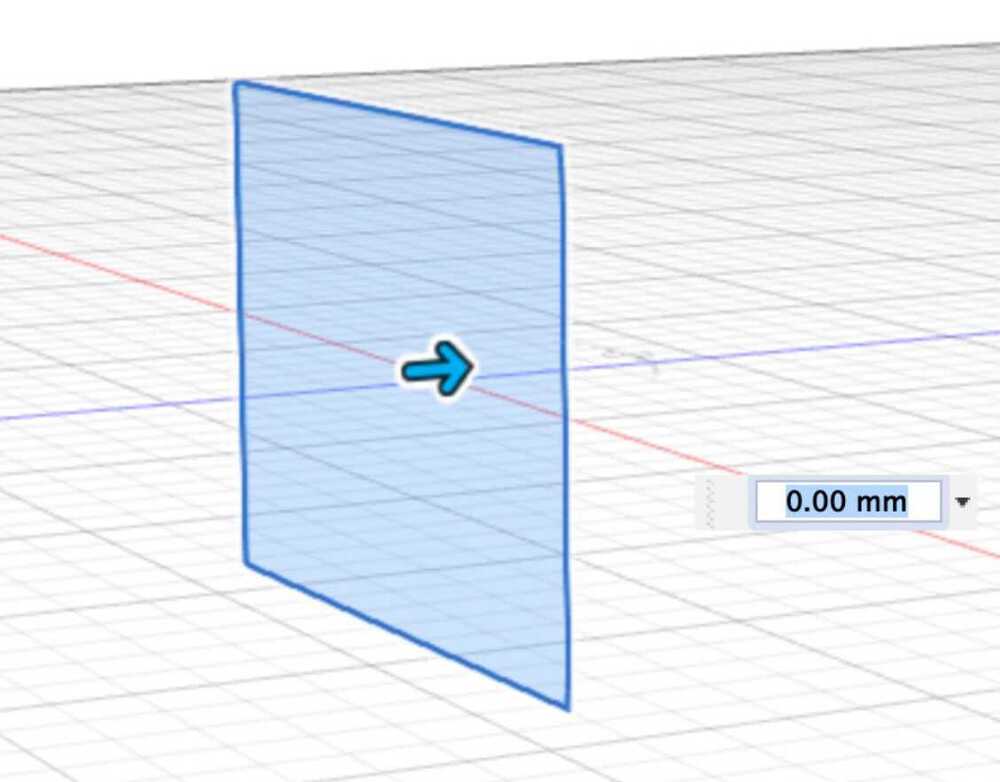
You can start working on Fusion 360 by clicking the Create Sketch button. First, you have to choose on which plane you want to work on. Once you click the plane, you will be on the sketch mode. Click the FINISH SKETCH button on the top right when you want to get out of the sketch mode.
Extrude
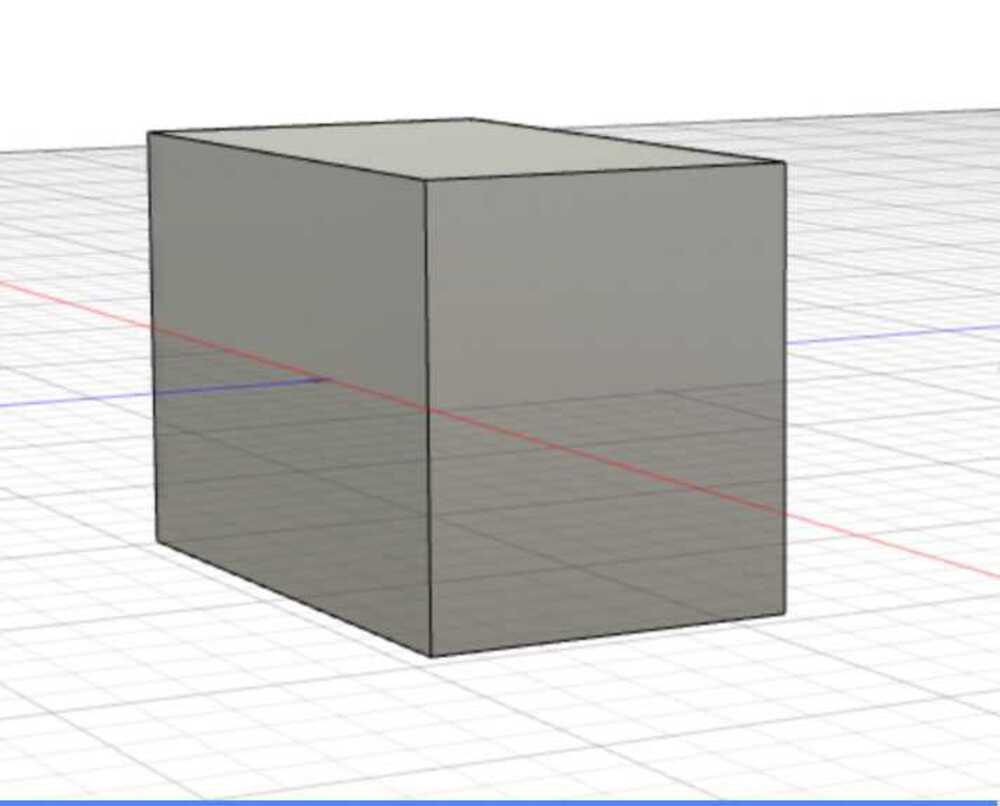
Once you get out of the sketch mode, you can start converting a 2D drawing into a 3D object by using the Extrude tool.
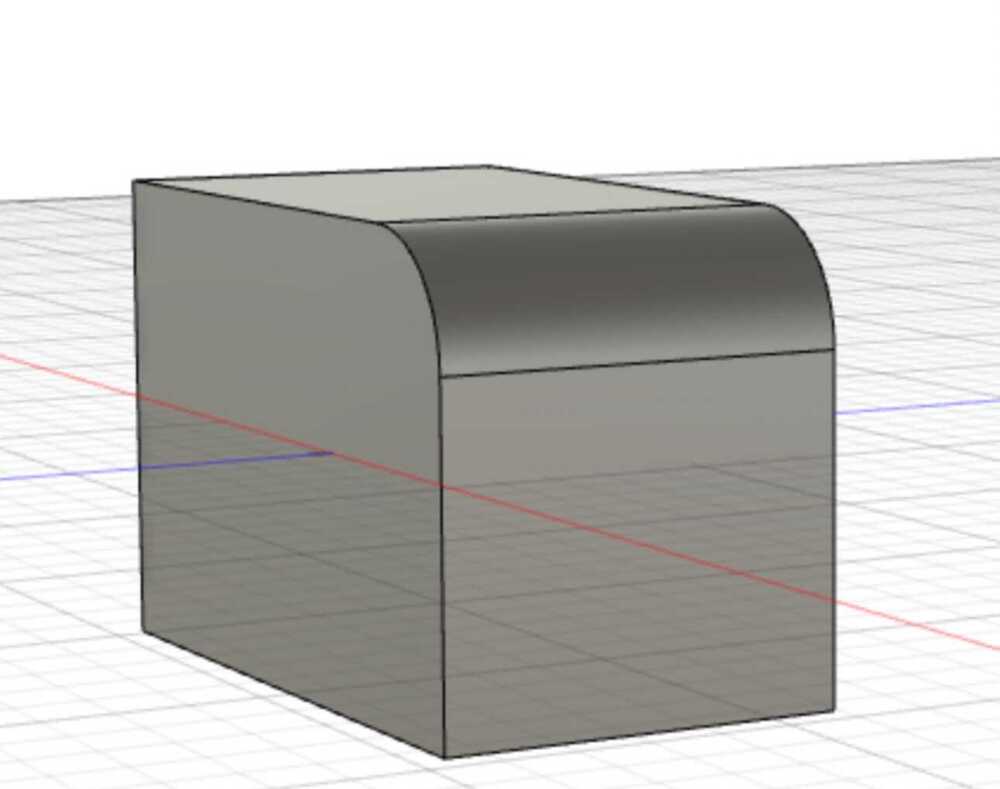
Fillet & Chamfer
You can use the Fillet tool to add curve on the edge, or the Chamfer tool to apply a bevel on the edge.
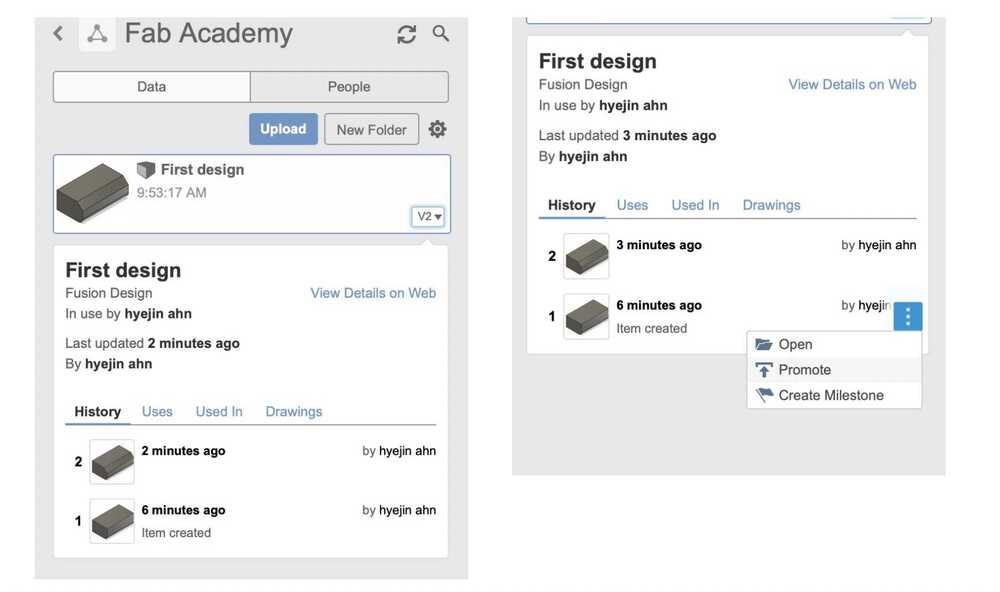
Versioning
With cmd + s key, you can save a project that you are currently working on. It will be automatically saved with a version named V1. If you make more changes and save again, it will ask you a version description. If you save as User Saved, it will automatically update V1 to V2. You can also go back to the previous version and work on it. If you work on a previous version and save it, it will create a new branch of version, instead of deleting the existing versions.

Line tool
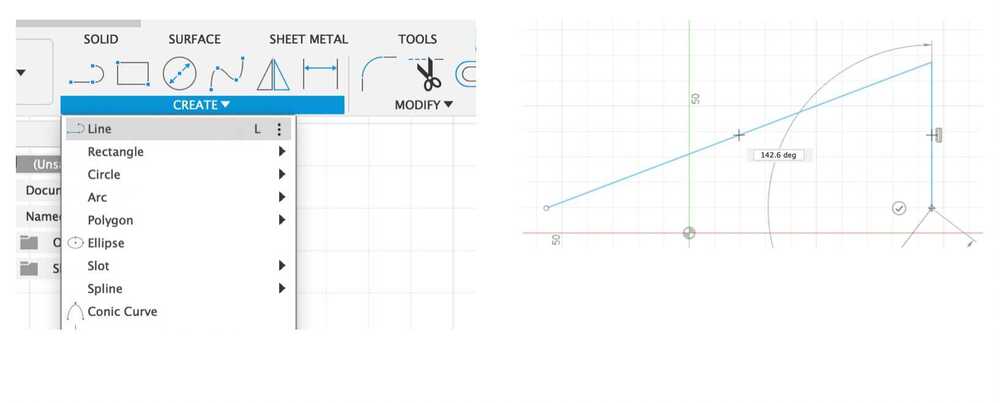
The line tool is a very basic tool. You can create a line by clicking two points you want to make a line between. You can stop creating a line by clicking the check mark right next to the line you just created. You can hit the escape key to get out of line tool mode, but this would completely end line mode. But if you click the check mark, you will be still in line and but you can start a completely new line.
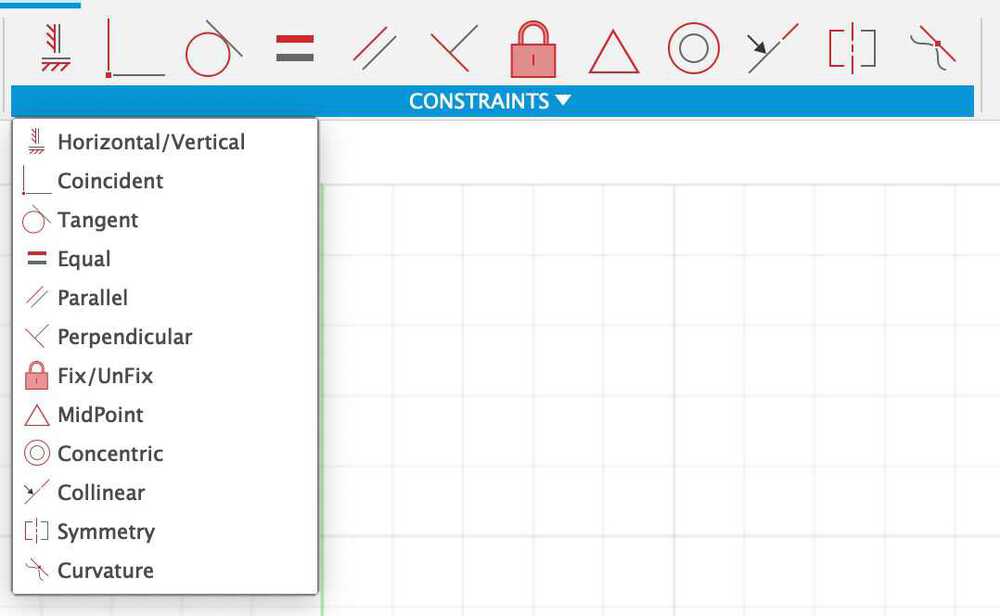
Constraints
Constraints are very useful. If you use constraints, you can move or modify a component without breaking the connections between components. There are many different constraints you can use.
Mirror
Mirror is one of my favorite tools. It comes in handy when you want to make a symmetrical component. All you have to do is select an object you want to reflect and an axis on which you want to mirror.
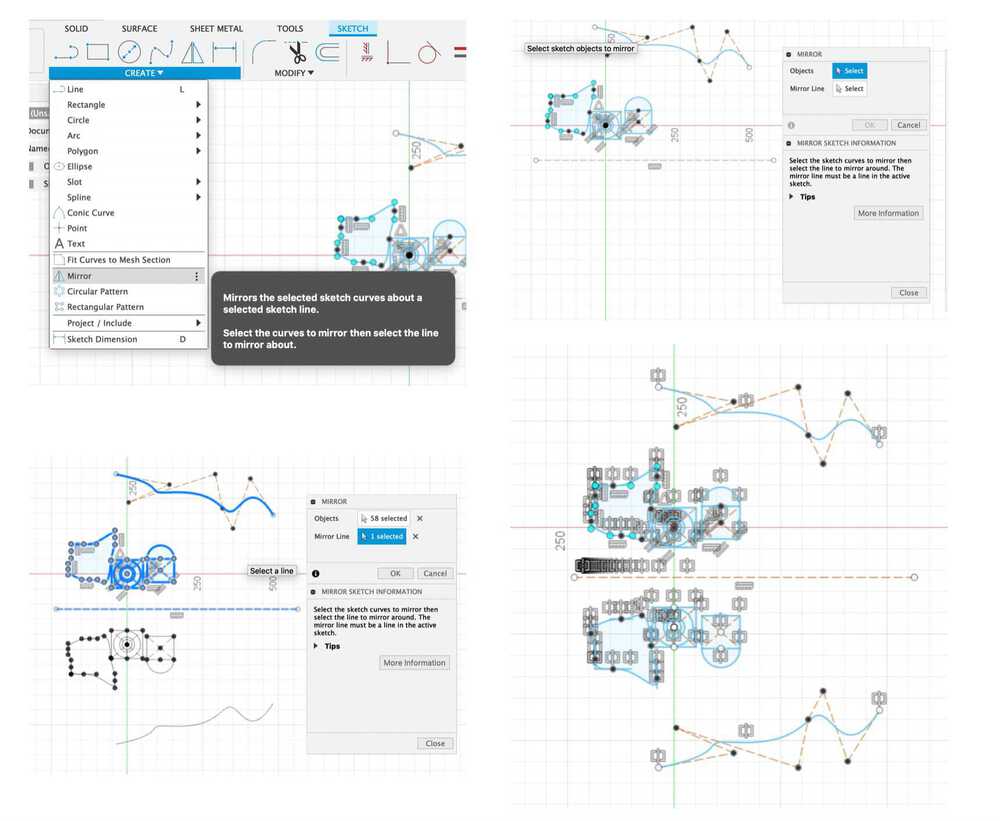
Patterns
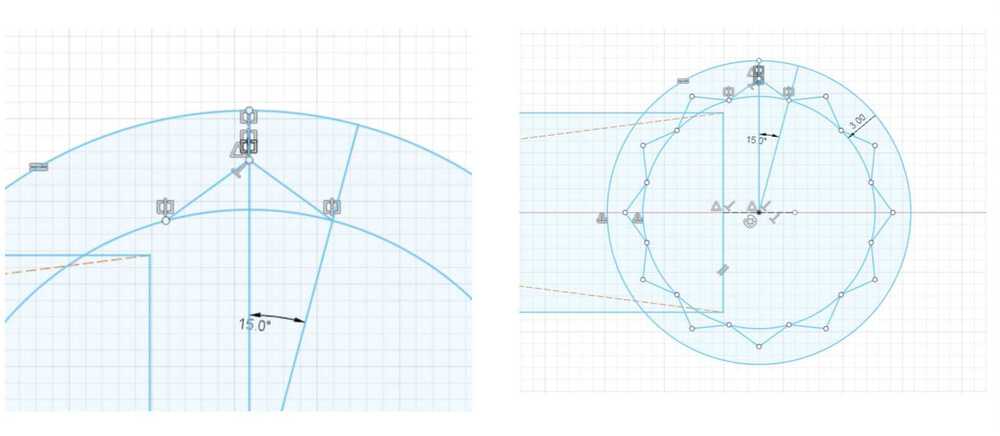
This is also one of my favorite tools. There are 2 patterns you can make, a circular and rectangular pattern. Let's see the circular pattern first.
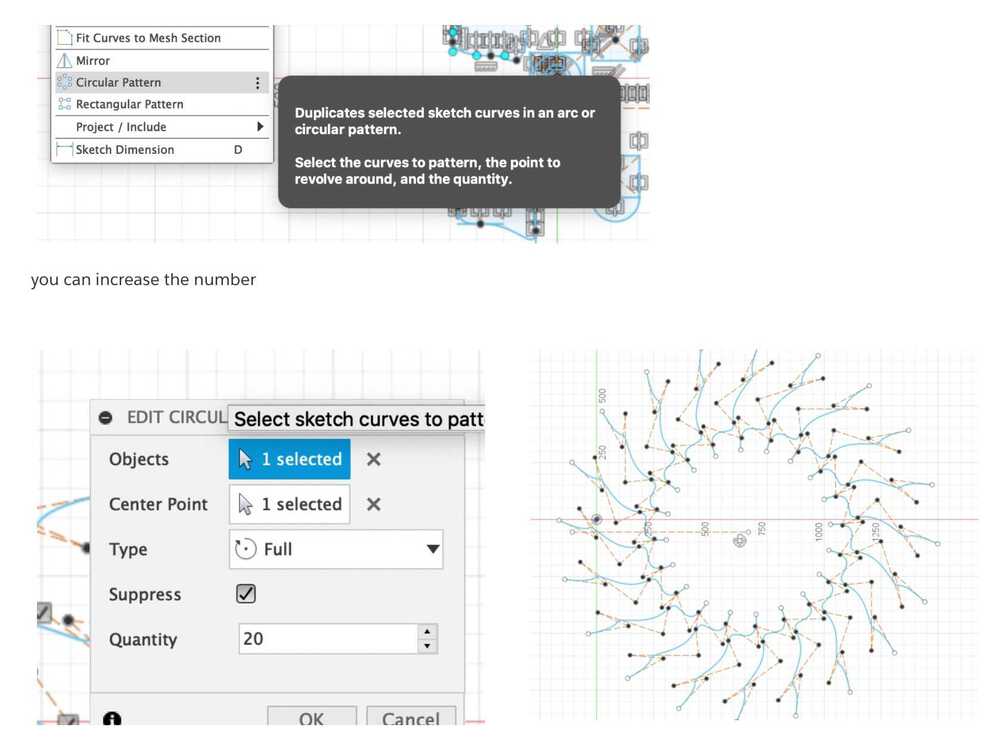
Select the object you want to make a pattern with, and then select the center point. Unlike the Mirror tool, you should select a point, not a line as the center point. Then the pattern will show up in the circular shape along with the center point you selected. You can also choose how many patterns you want to see.
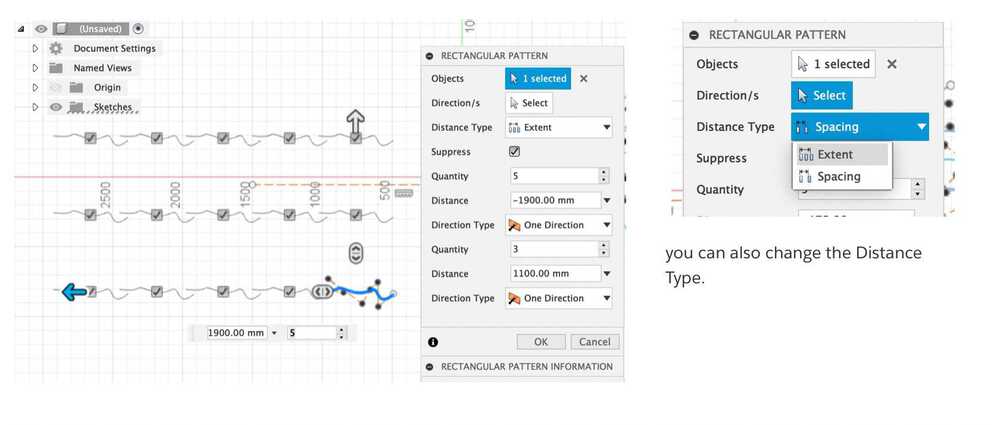
Second one is the rectangular pattern. It's a bit different from the circular pattern. After choosing an object, you have to choose the direction, not a point. You can move in both directions, horizontally and vertically. If you want to make a pattern in a different angle, you can simply create a line in that angle and reference that line.
Challenge 1. A wrench
Our first challenge was drawing a wrench. First, we created a rectangle between the two circles.
Then, we gave a more detail on the shape of the wrench's head. Mauro said if we want to extend a line, we can use either the Extend tool or a line with collinear constraint. The difference is, if you use the Extend tool, we can lose the reference between objects we created previously. We created a line with the contraint this time just in case of losing the reference, but you can use either one if there's no reference between objects.

And then we created a triangle and used the circular pattern method we learned right before.
After finishing the sketch, we went to the 3D working screen and continued the process.
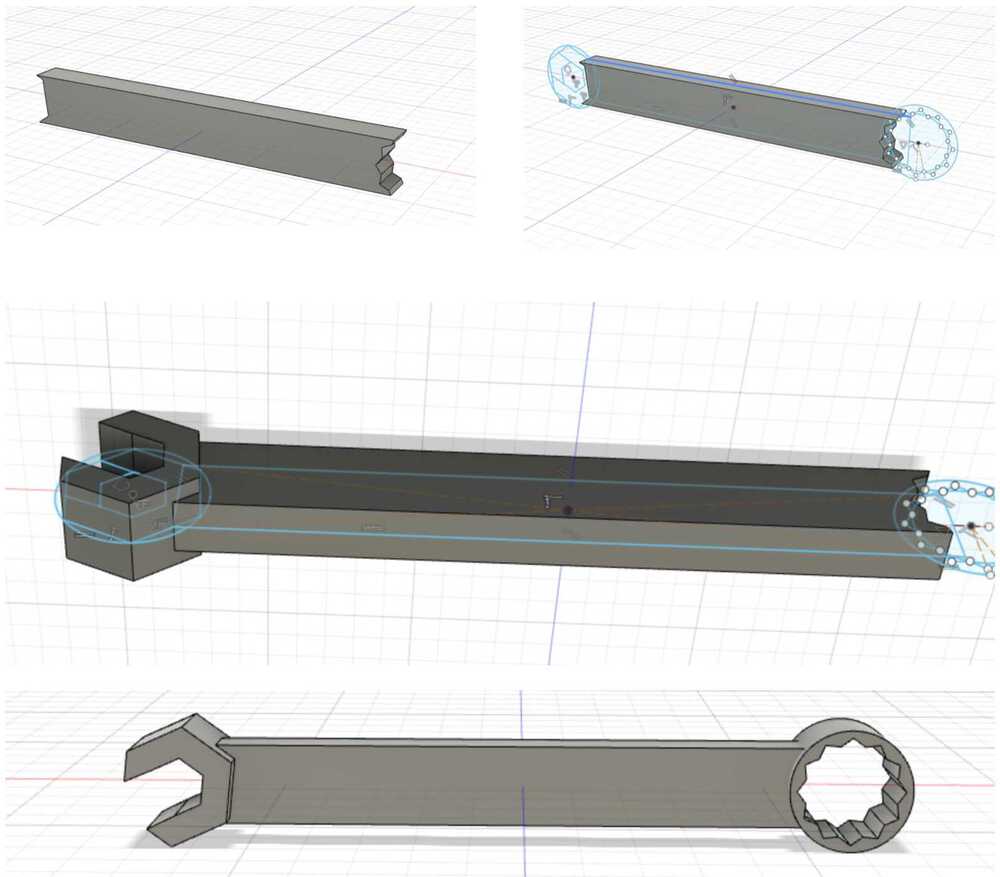
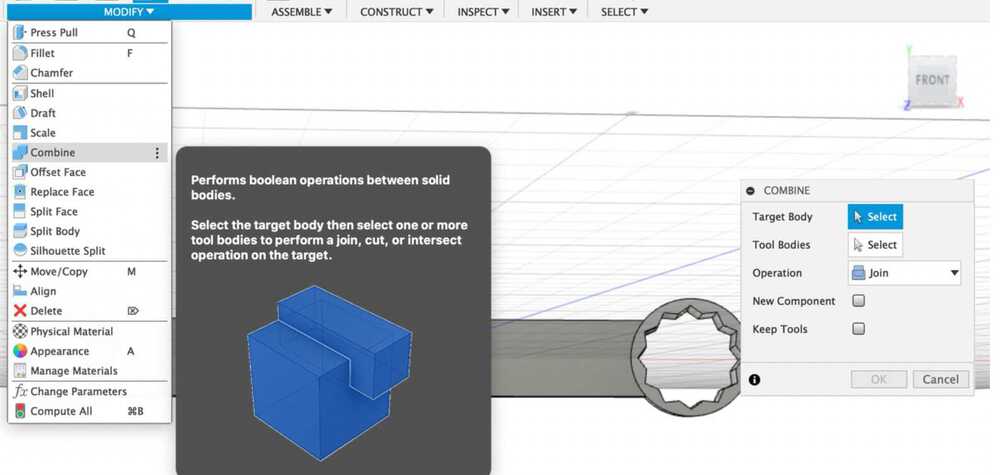
As you can see in the image above, there was a part sticking out on the head of the wrench. We needed to remove it. So we used the Combine tool to get rid of the part.
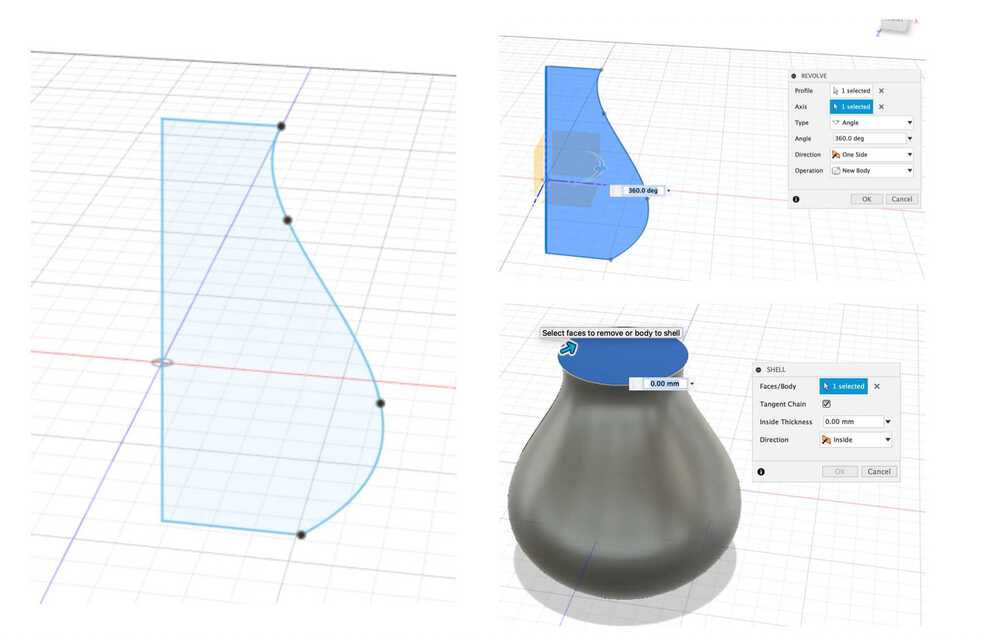
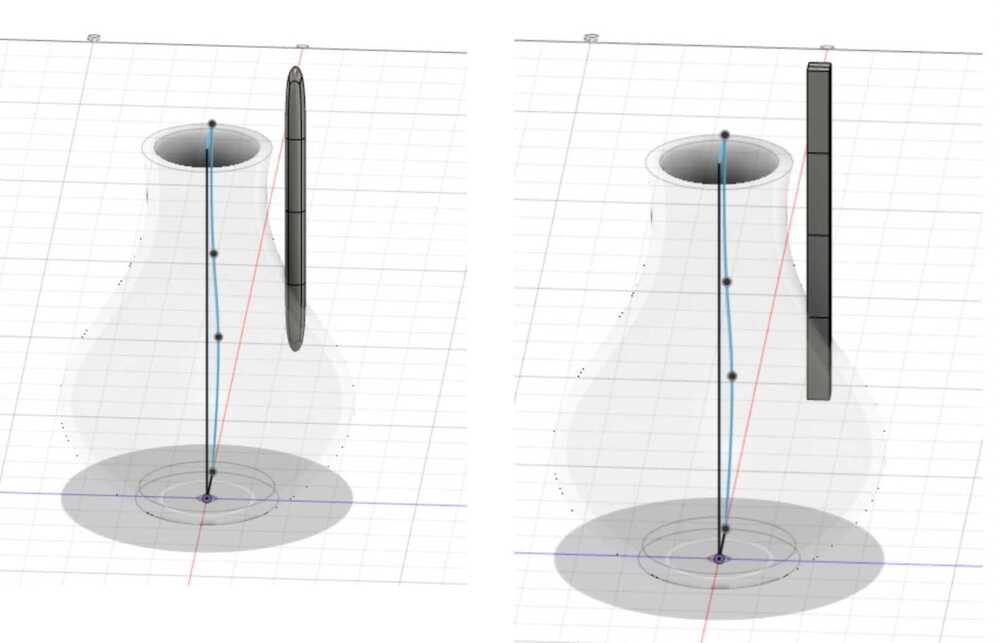
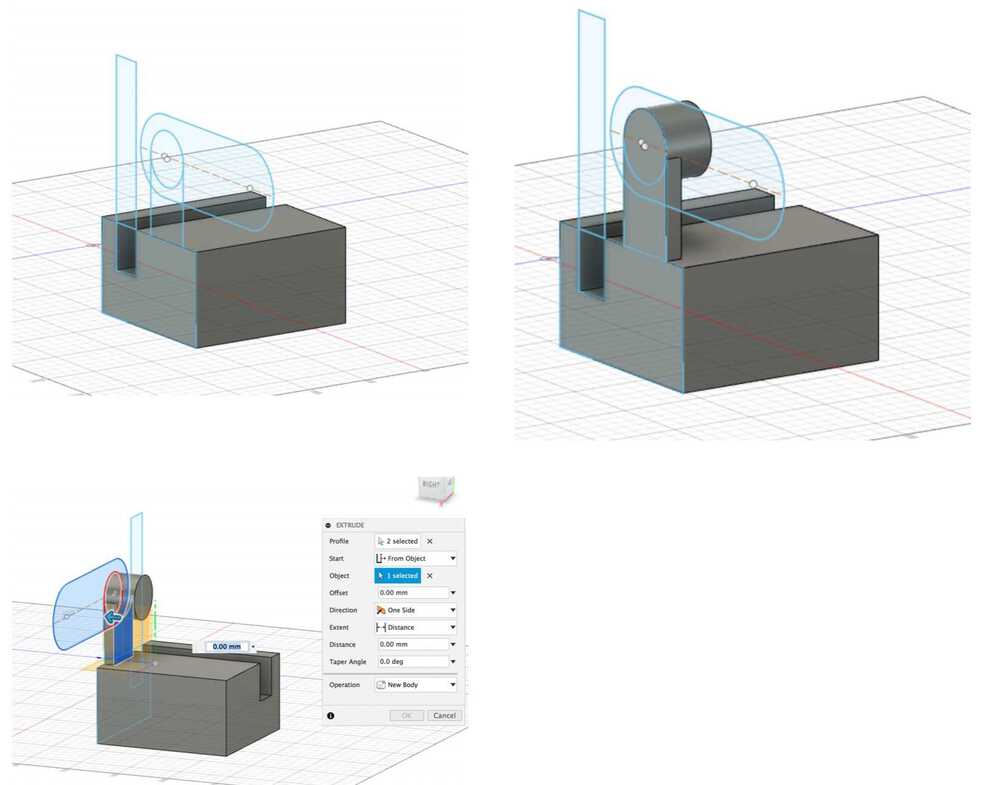
Revolve
The Revolve tool needs two things. An object you want to revolve and an axis that you want to revolve around. You've probably seen something like this during geometric class in school. You can make a vase or a wheel like below with this tool.
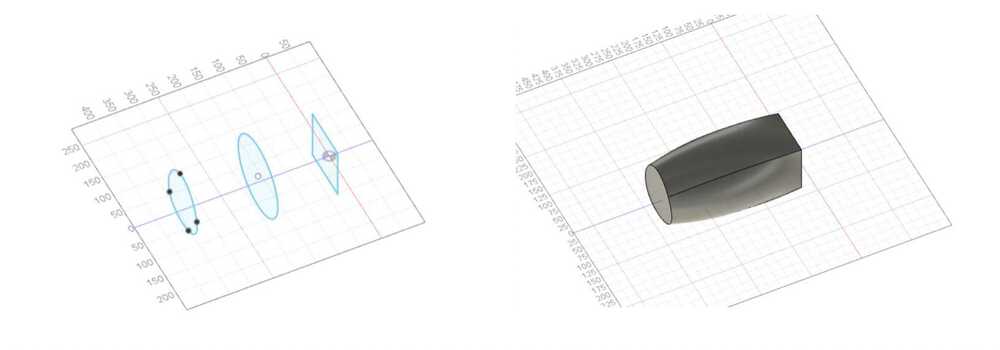
Loft
The Loft creates a shape between two or more sketch profiles or plane surfaces. We created three different profiles, and then connected them with the Loft.
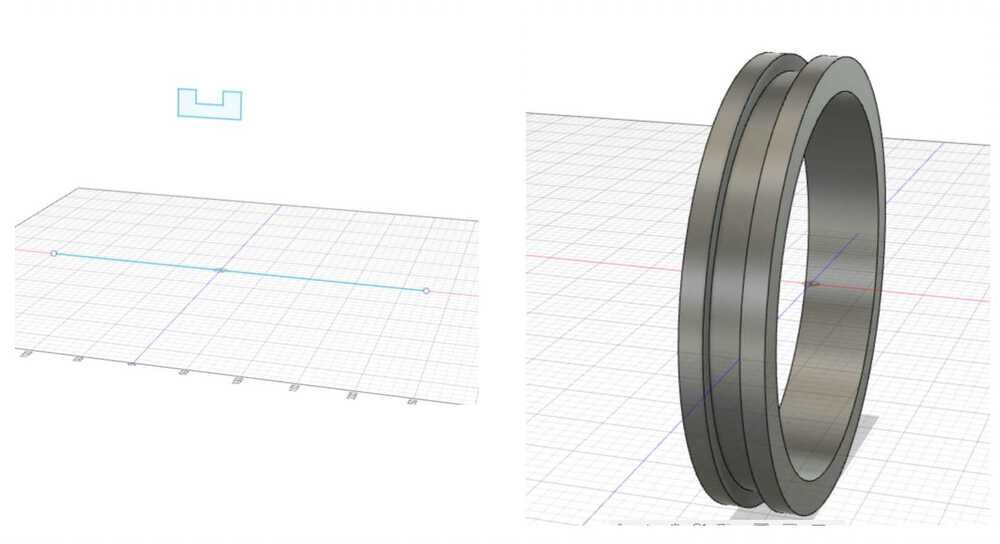
Sweep
The Sweep creates a shape along a selected path. But if you make a path in a wrong curvature, it will raise an error like below. The error below was gone after I made the line less curved.
Surface
The Surface mode acts a little bit different from the Solid mode. When you extrude a rectangle in the Surface tab, it will create an empty box instead of a filled box.
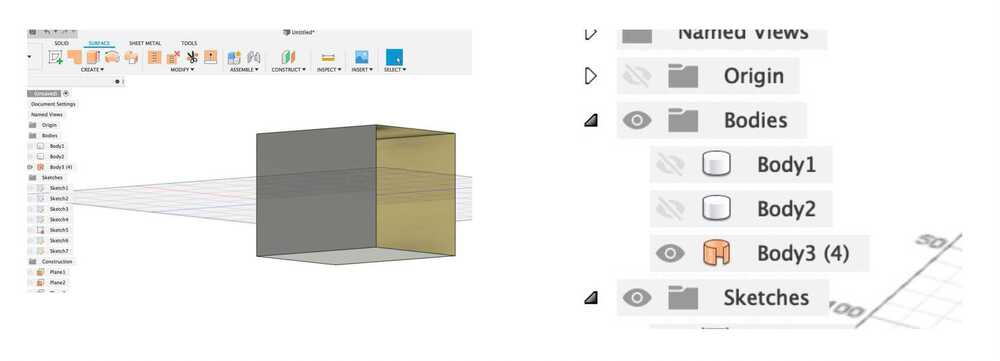
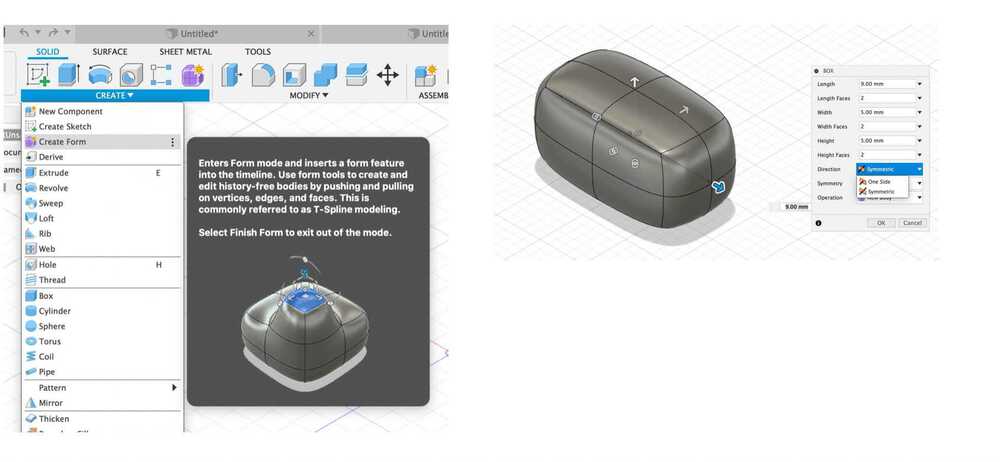
I'm quite not sure when to use the Solid or when to use the Surface mode yet. But we could create this cool glasses' leg on the Surface tab.
It was really cool that you could create a bended surface and extrude it. One thing you have to be careful of is, do not use a keyboard E shortcut for extruding, when you work on the Surface mode. Because if you use the keyboard shortcut, the program will use the Solid mode extrude, not the Surface mode one and the result can be different.
You can keep modifying the shape of the glasses by moving the points on the sketch.
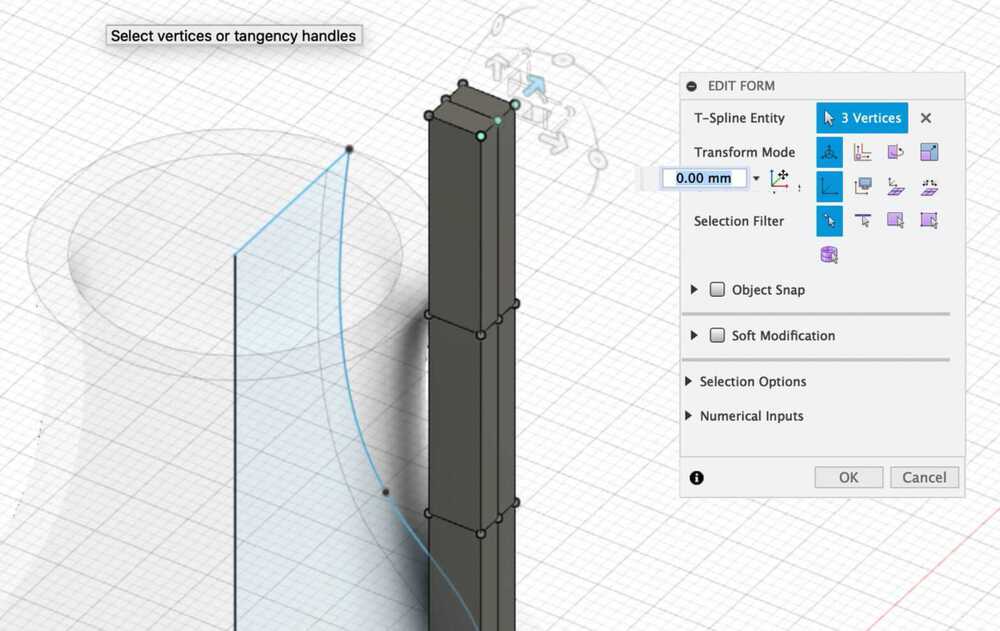
Create Form
This one was one of the hardest parts of the class. I couldn't 100% really understand when and how I should use it, but what we did during the class was really fun. The Create Form mode is a totally different environment from the Solid mode or the Sketch mode. It lets you create an object with more curves. If the Solid mode is a line tool, this could be an arc tool.
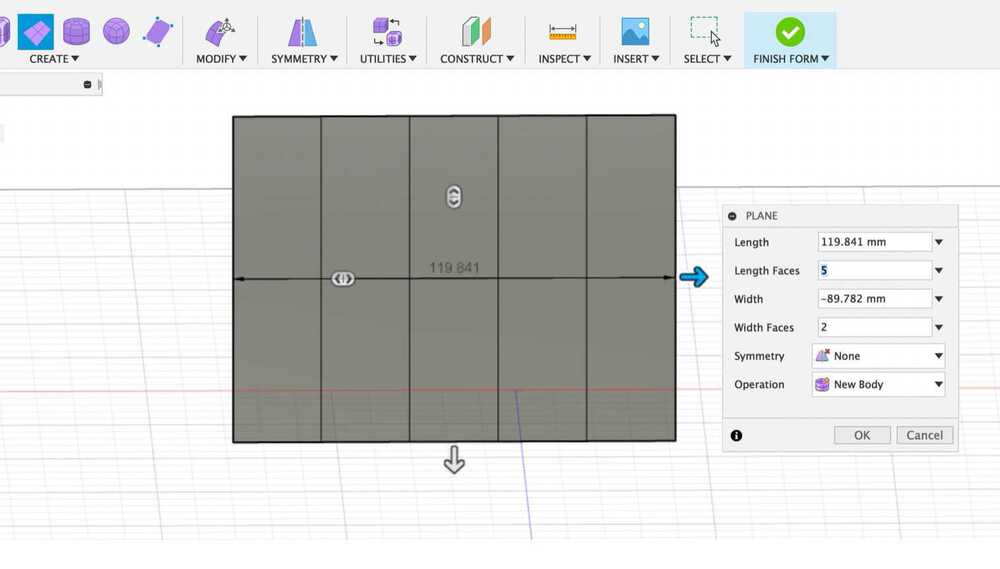
For practice, we created a plane with 5 length faces and 2 width faces. We could also switch between views like the image below, with the Control + 1, 2, 3 keys. I couldn't understand what each view was for though.
We used the Insert Edge to modify the original form.
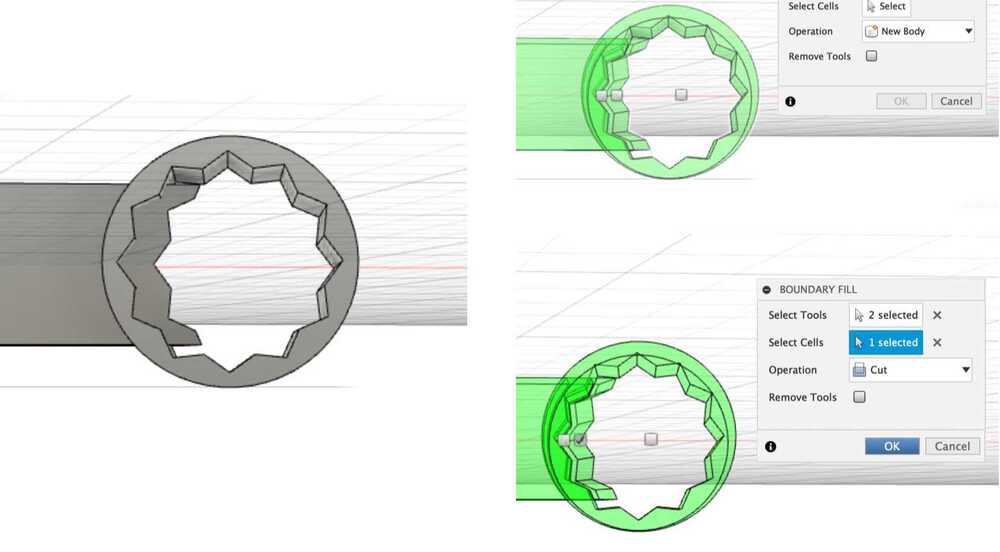
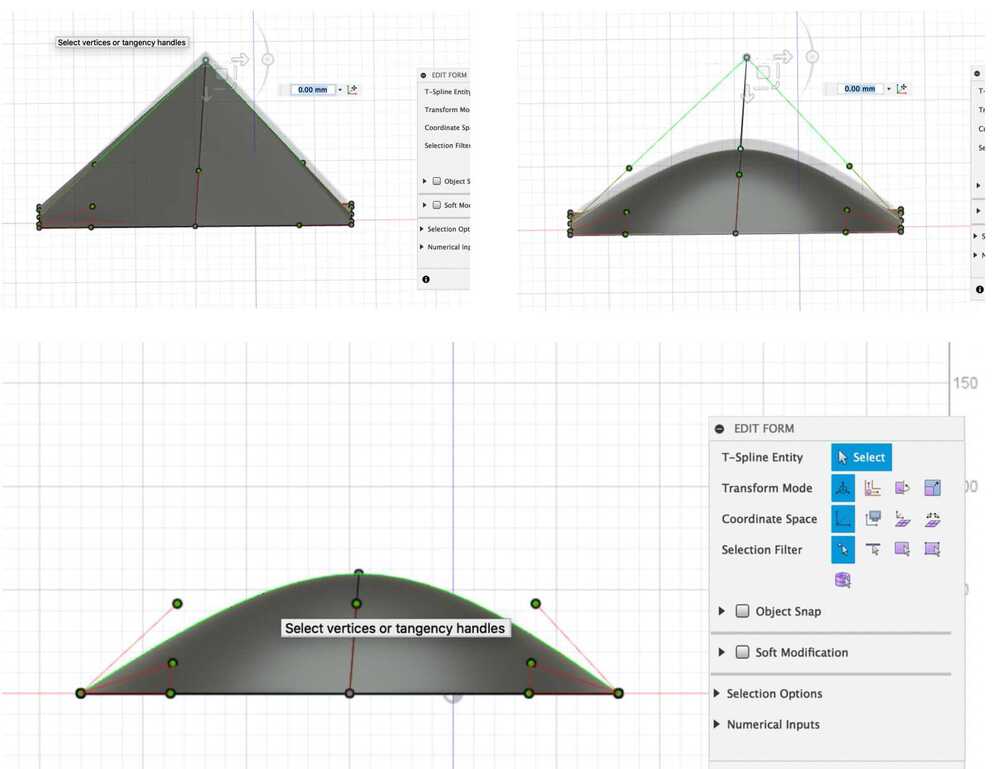
Challenge 2. A vase with a pattern
The second challenge was way harder than the first one. I didn't even know what I was making until the middle of the entire process. Everything made sense at the end though.
First, we created a vase and a long object with Form tool. Then, click the Edit Form to modify the form we created.
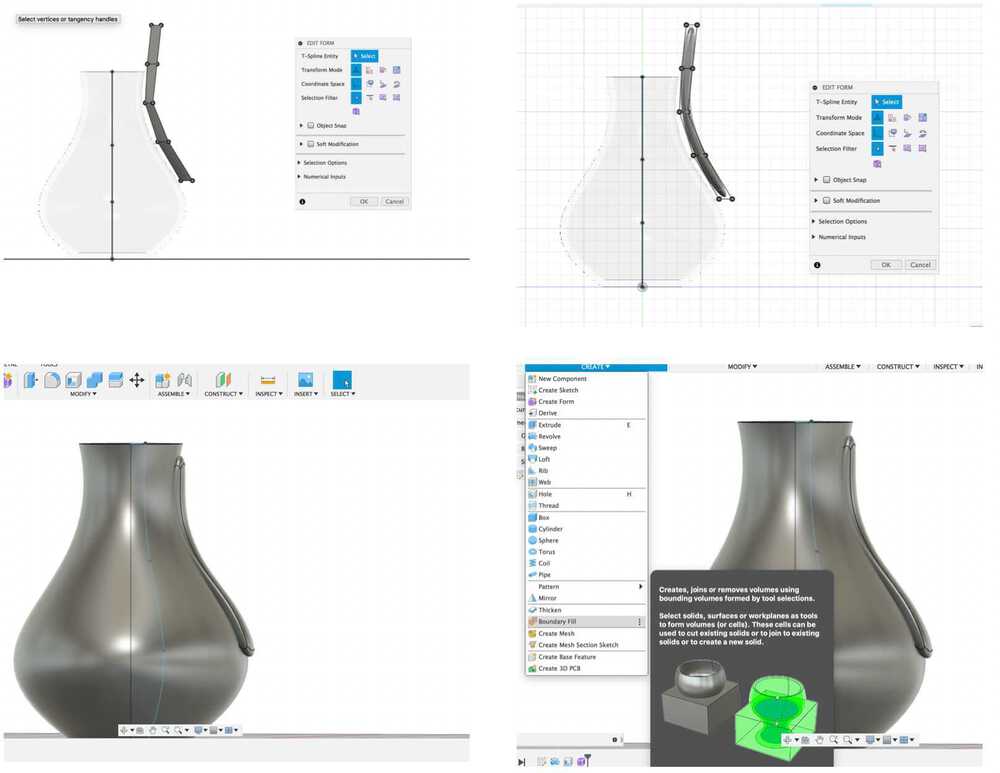
We moved the form close to the vase so that they overlapped a little bit.
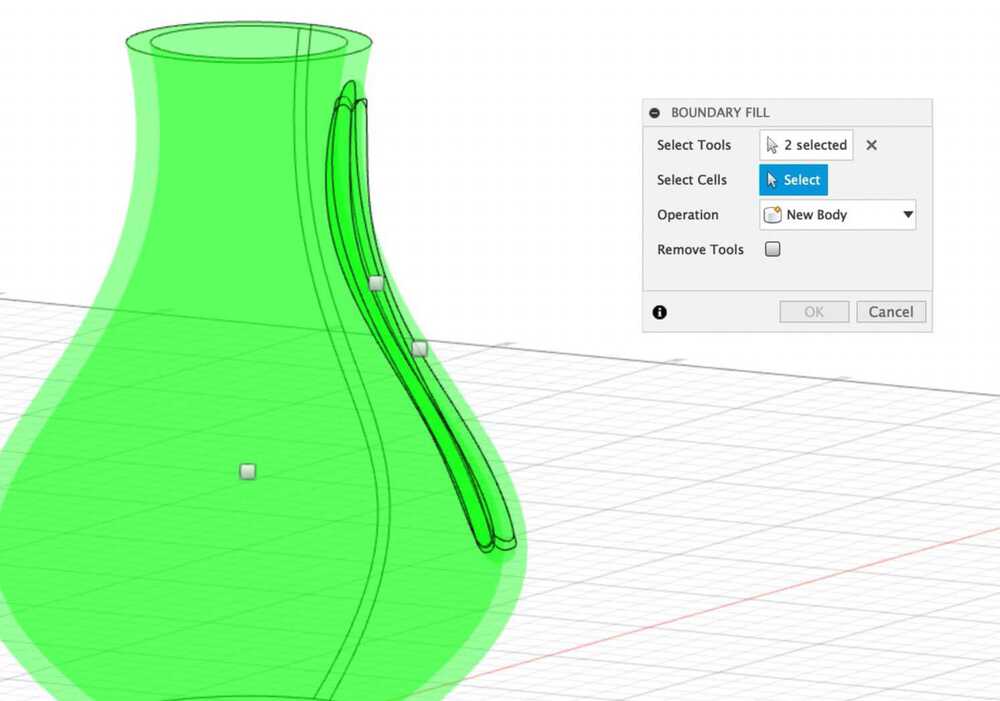
Then, we used the Boundary Fill function to carve the shape of the overlapping part into the surface of the vase. Ta da! Check out that nicely carved vase.
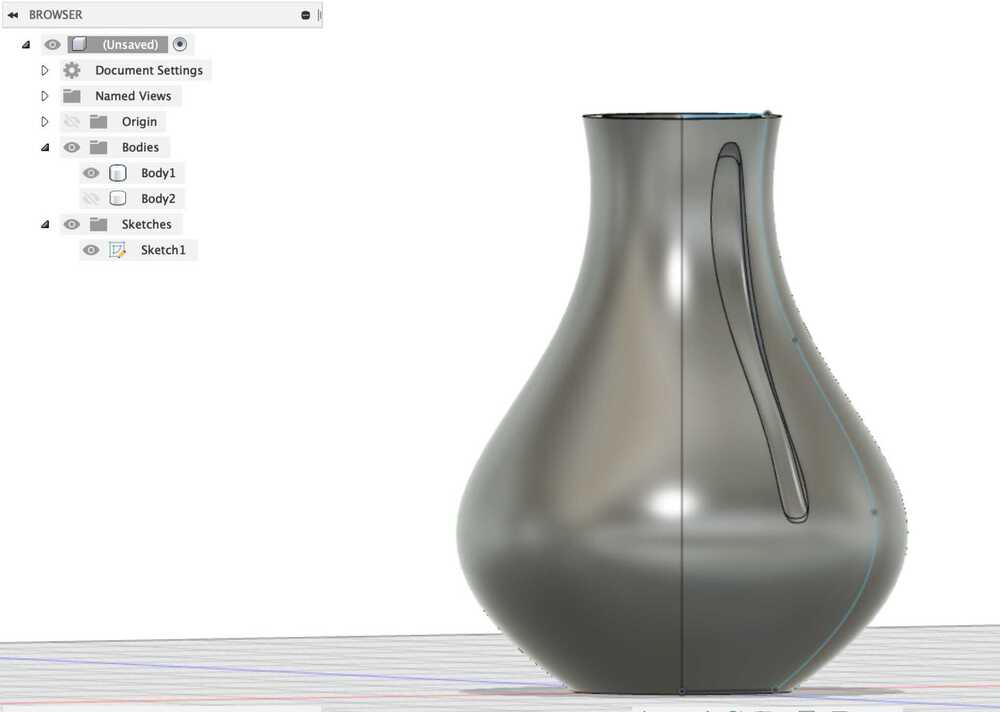
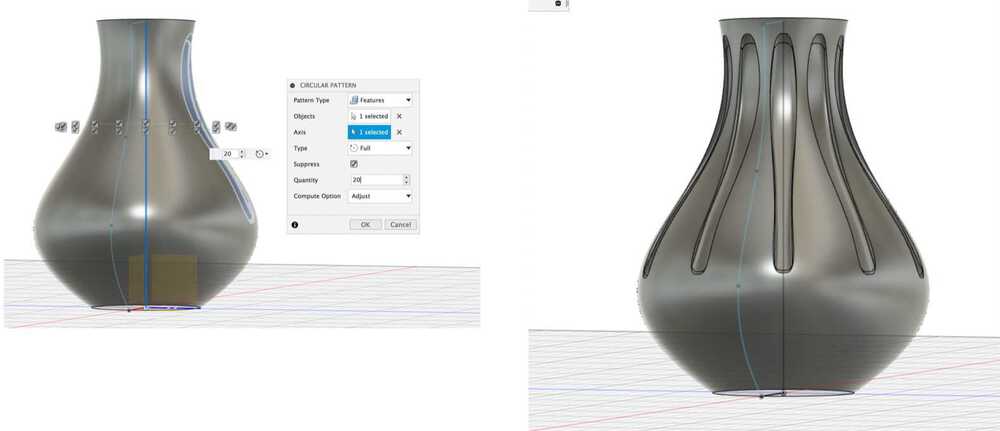
The last part was making a pattern. We used the circular pattern method we learned before. The final result looked great!
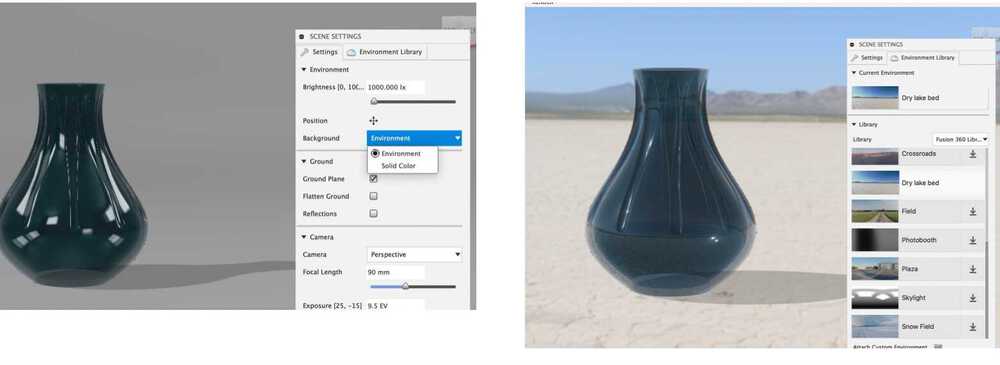
Render
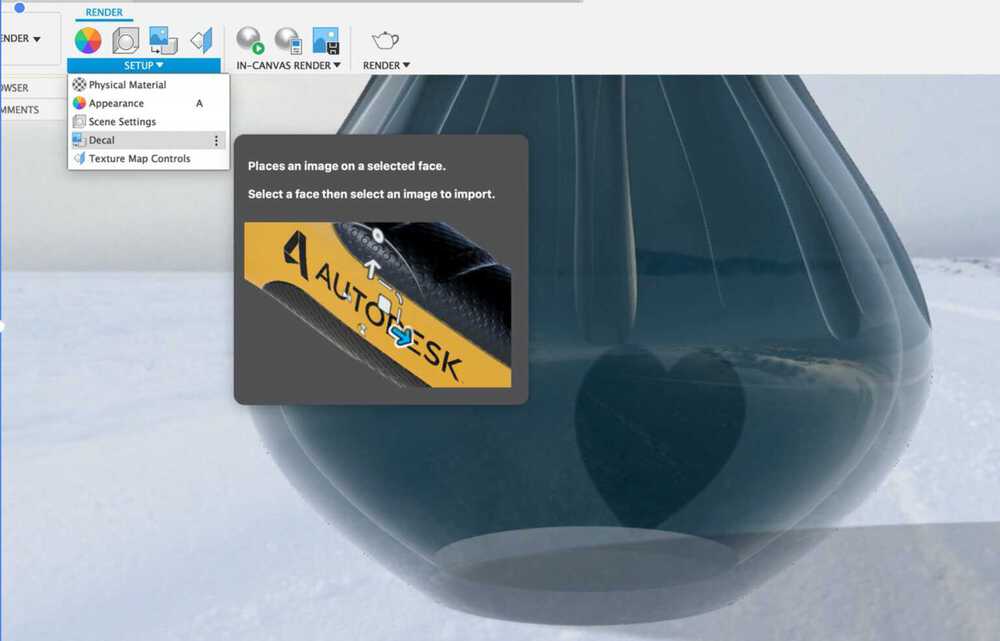
Until here, we worked on the Design tab. You can click the Render tab if you want to render the object you designed.
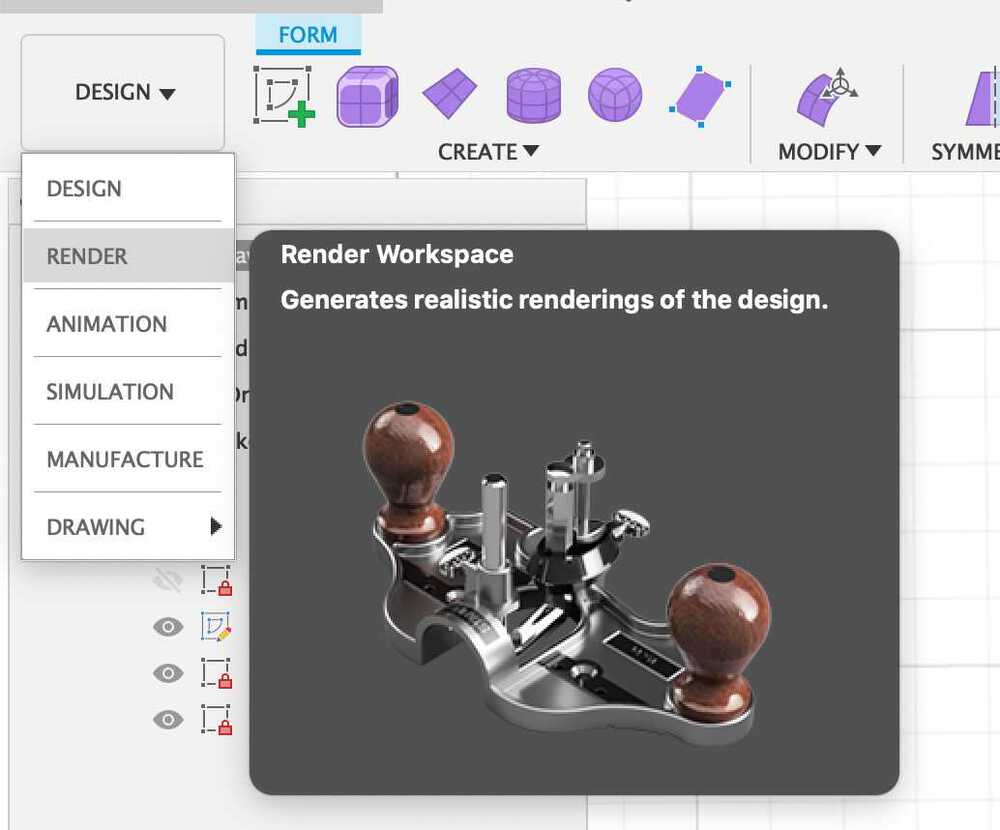
You can give a texture to the object or even set a background to it.
You can also add an image on the object surface. I added a heart shape image on the vase I created.
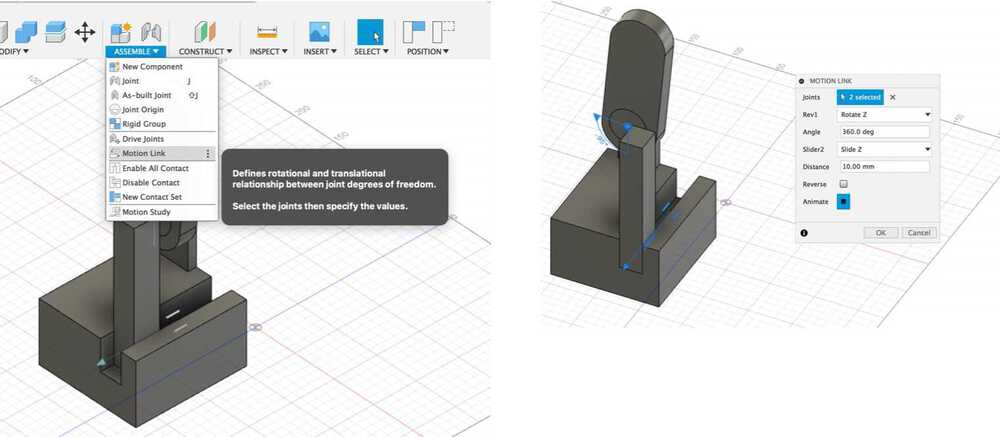
Animation
I also learned how to add an animation to the object.
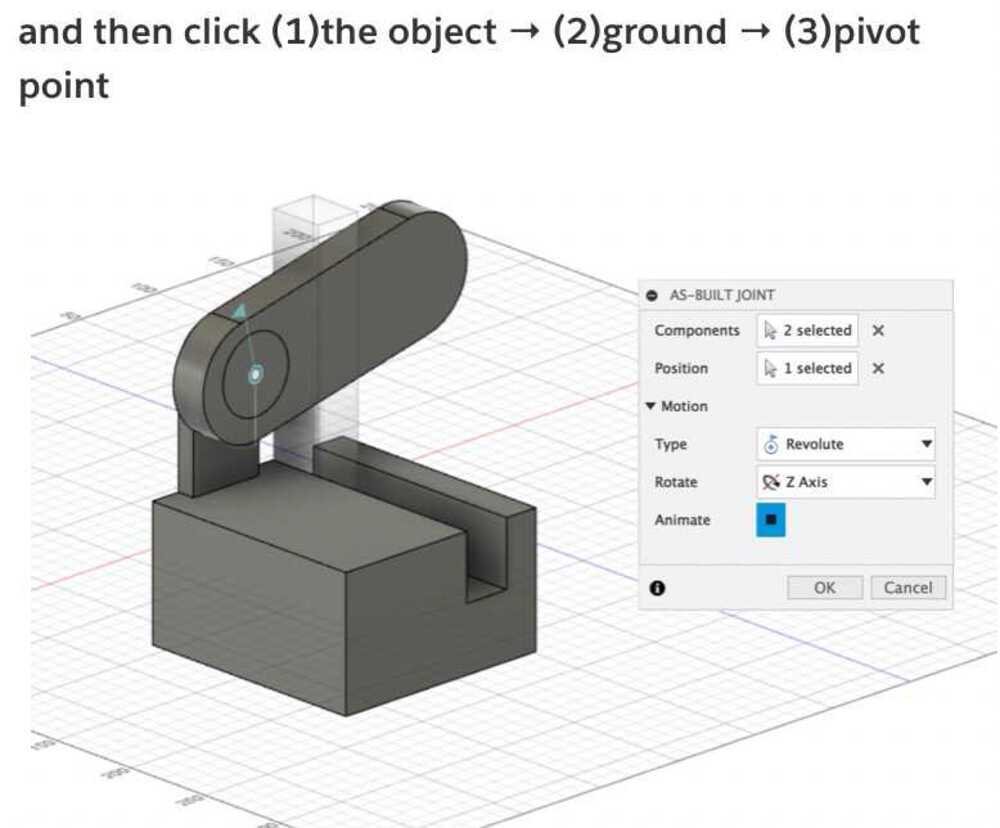
First, create 3 different objects.
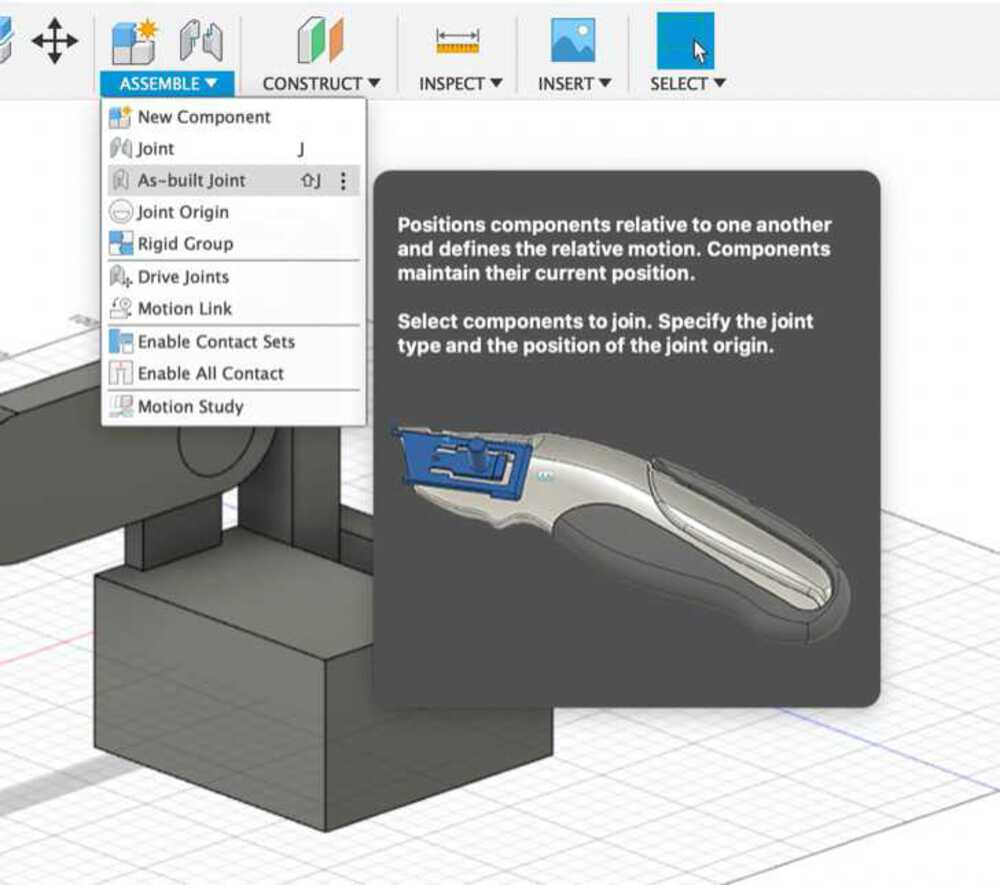
After creating 3 objects, set one of them as a ground object.
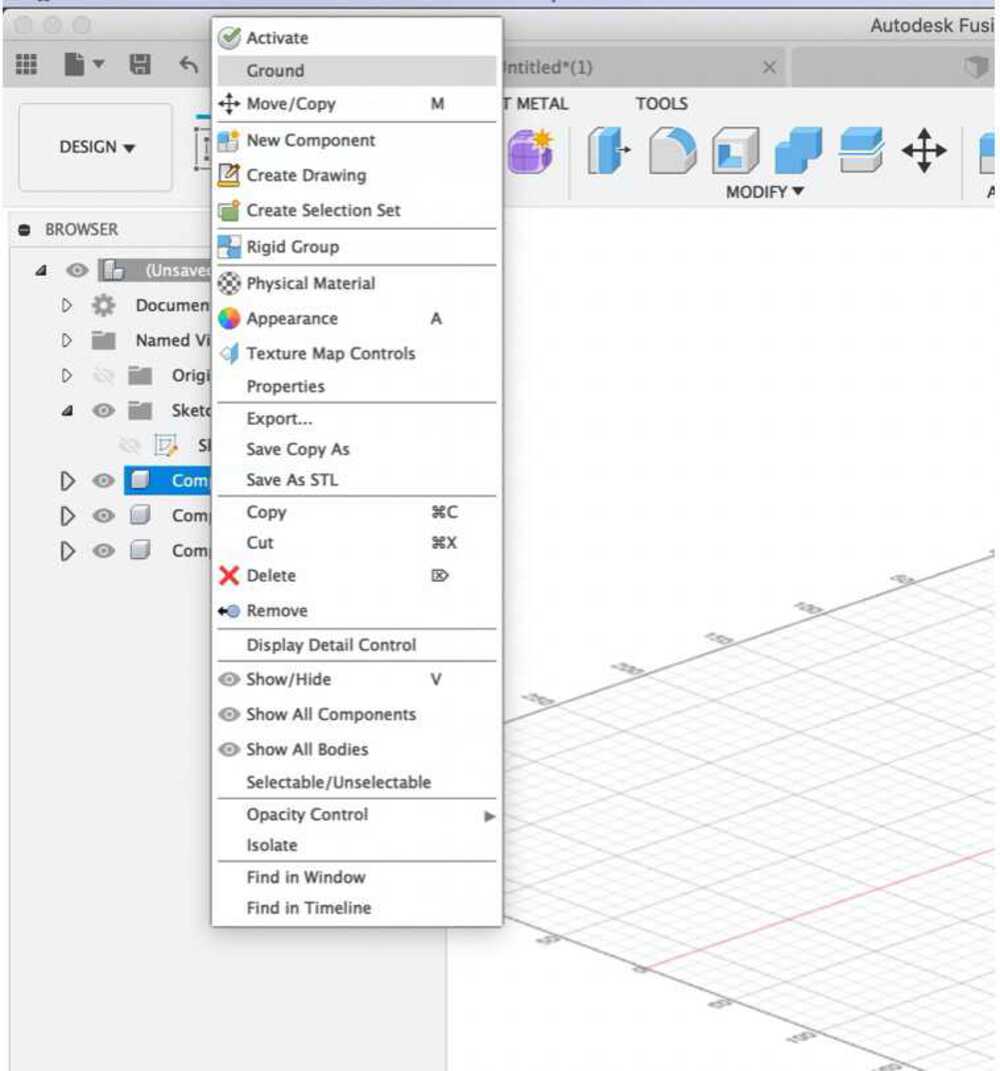
When you click As-built Joint, a popup menu will show up. Then, click the object you want to animate and the object that will be the ground. Lastly, click the object that will be the center of the rotation. Then you will see the object rotating around the center. Don't panic if your object rotates in a wrong direction. You can change the rotation axis from the popup menu and it will rotate as you expect.
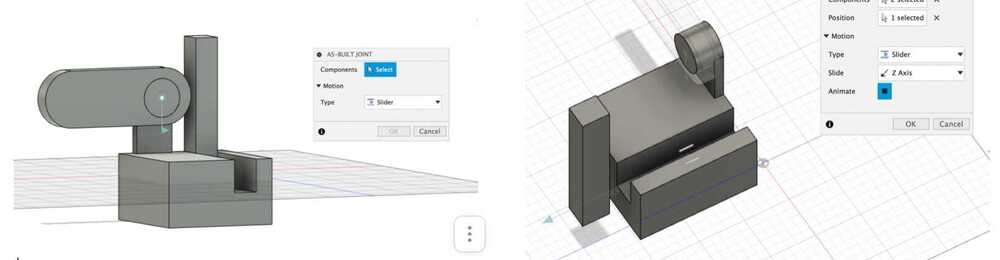
You can also add a sliding animation. But as you can see in the second photo below, the bar slides out of the ground object. How can we make it slide within the range of the ground object?
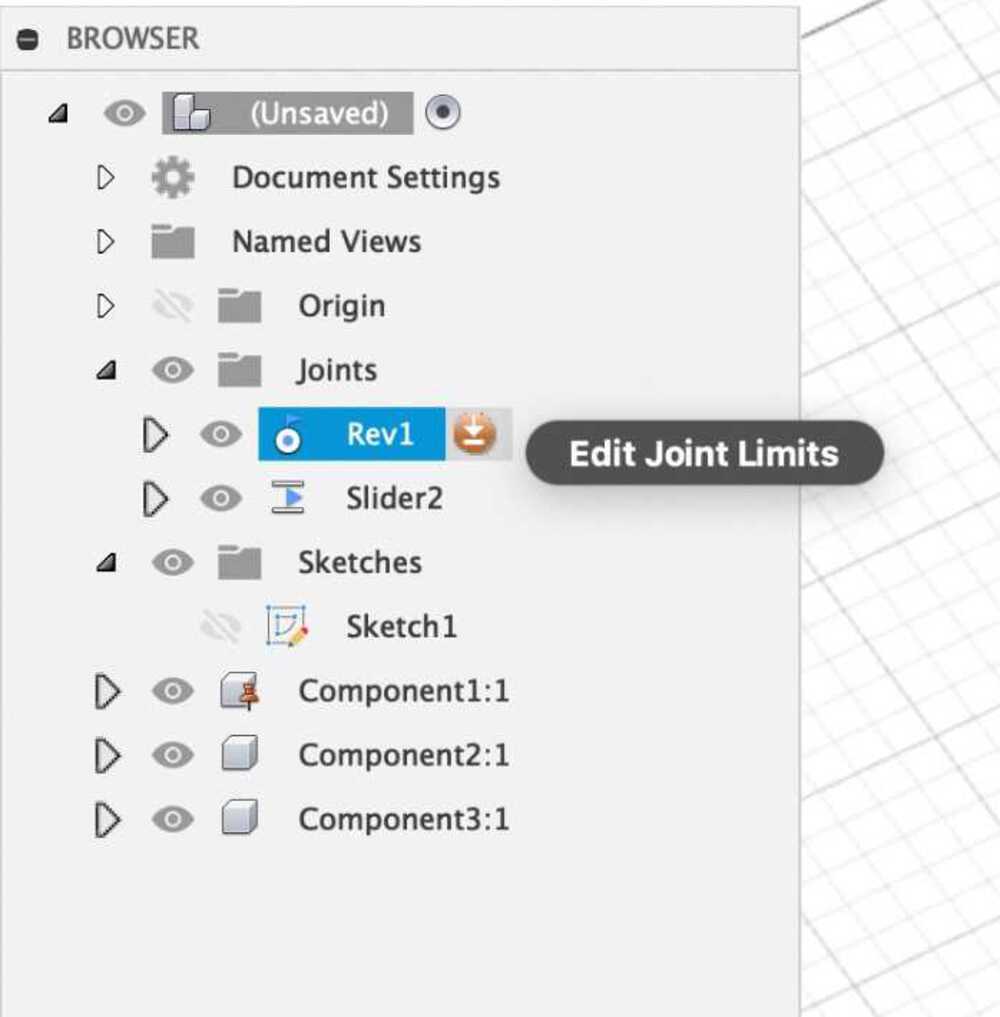
To do that, you can use Edit Joint Limits. You can limit the range of an animation with this.
If you want to animate objects together, you can use Motion Link. It will prevent the objects from going through each other while they are moving around.
Wrapping up
Mauro taught us a lot about Fusion 360 in one day, from the basics to some very advanced skills. I tried to write down everything what I learned, so that I could refer to it later. There are some parts that I couldn't fully understand, but I think I will get my head around it once I really start using it. Thanks again, Mauro!
My project in 2D
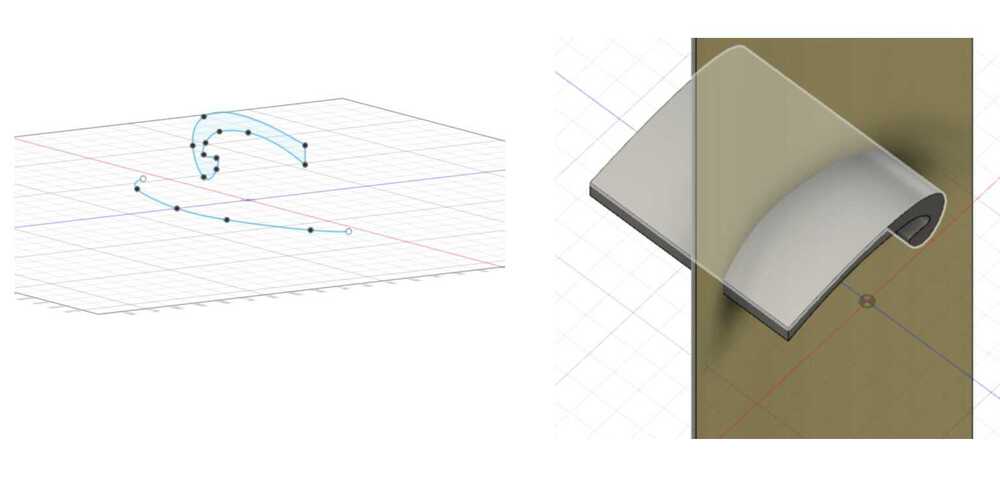
This is the sketch of my final project that I drew in Procreate.
Procreate has a built-in time-lapse recording function, so I could record this sweet video of me working.
I came up with many ideas while I was brainstorming, but I'm not sure if I can implement all of them in time. I googled how each feature can be implemented. Fortunately, I found a lot of blogs and websites related to the technologies I need. I think I can tweak them for my miniature house. Voice control seems the hardest to build, because I'm not going to use a commercial smart speaker like Google Home or Amazon Echo. I searched more about how I can make a voice recognition tool from scratch, but it seemed like too much work. Instead, I think I can use a smartphone to analyze the voice, and let it talk to the house through Bluetooth.
My project in 2D
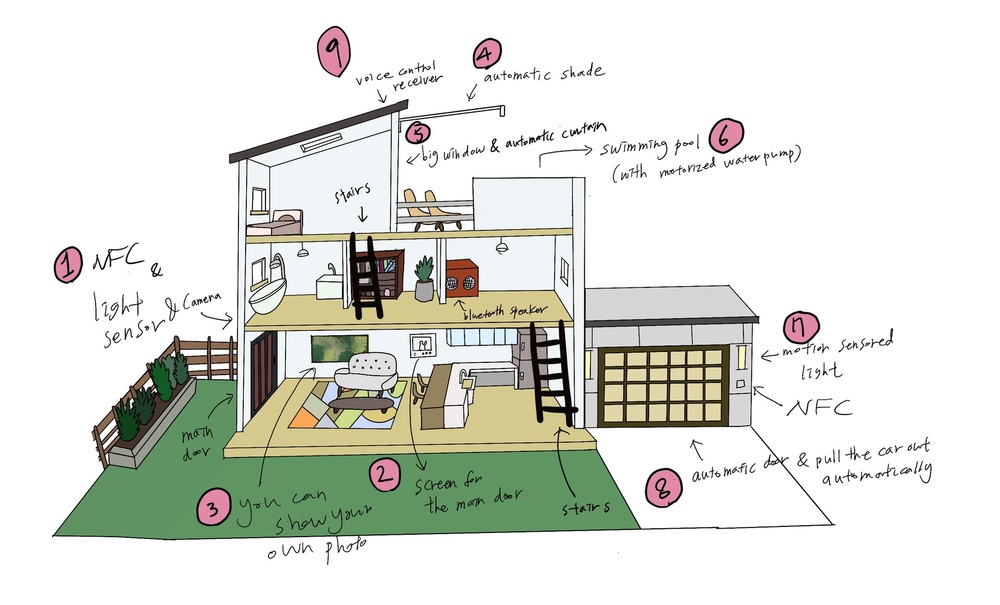
Features I want to implement on the miniature house
1. NFC lock, motion sensored light, doorbell and mini camera on the main door
2. Screen on the wall to see who's on the door when someone rings the doorbell
3. Photo frame on the wall - you can show your own image by connecting your phone through bluetooth
4. Automatic shade for the rooftop
5. Automatic curtain
6. Swimming pool water controlled with a water pump
7. Motion sensored light, NFC lock on the garage
8. Automatic garage door, the rail on the garage floor which pulls your car out of the garage
9. Control with the voice command
10. Control with an app
11. Light control (color, brightness)
Existing projects that might help
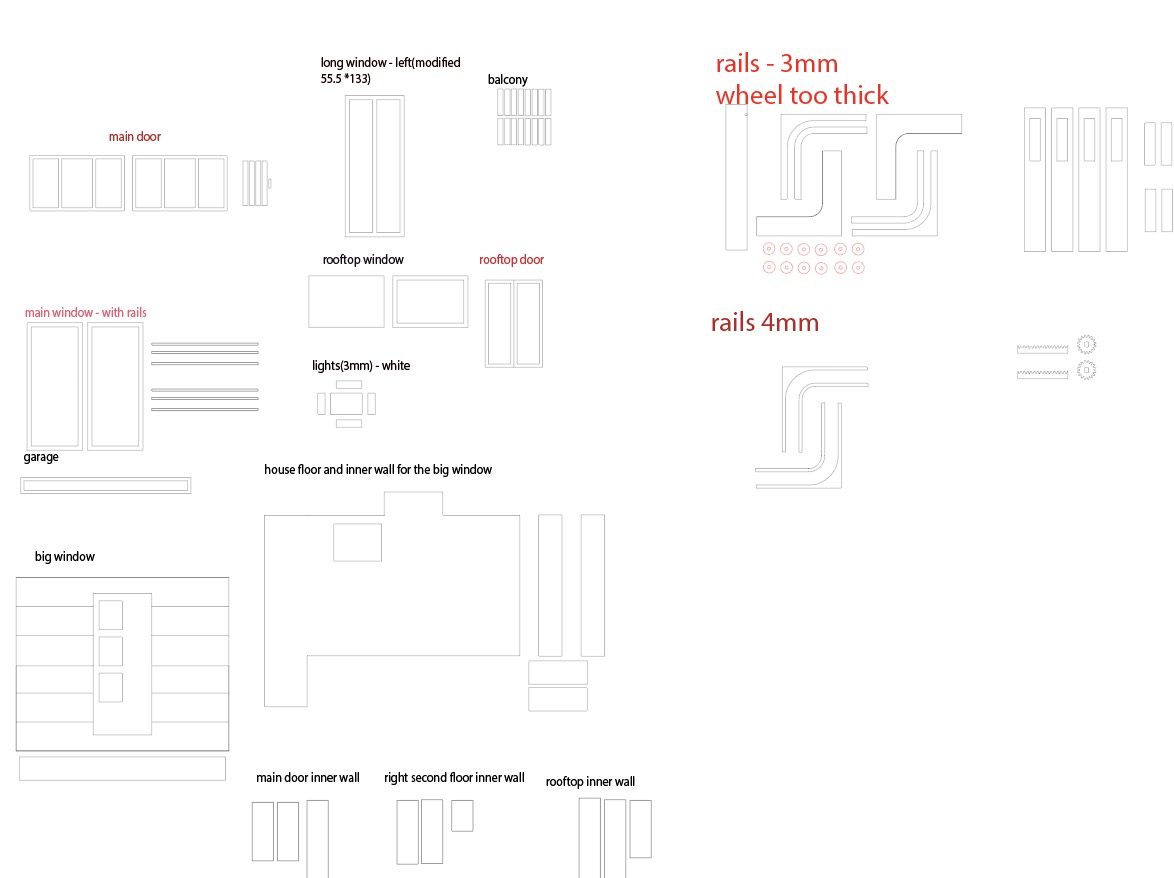
For the final project, I used Adobe Illustrator to design some furniture and frames.
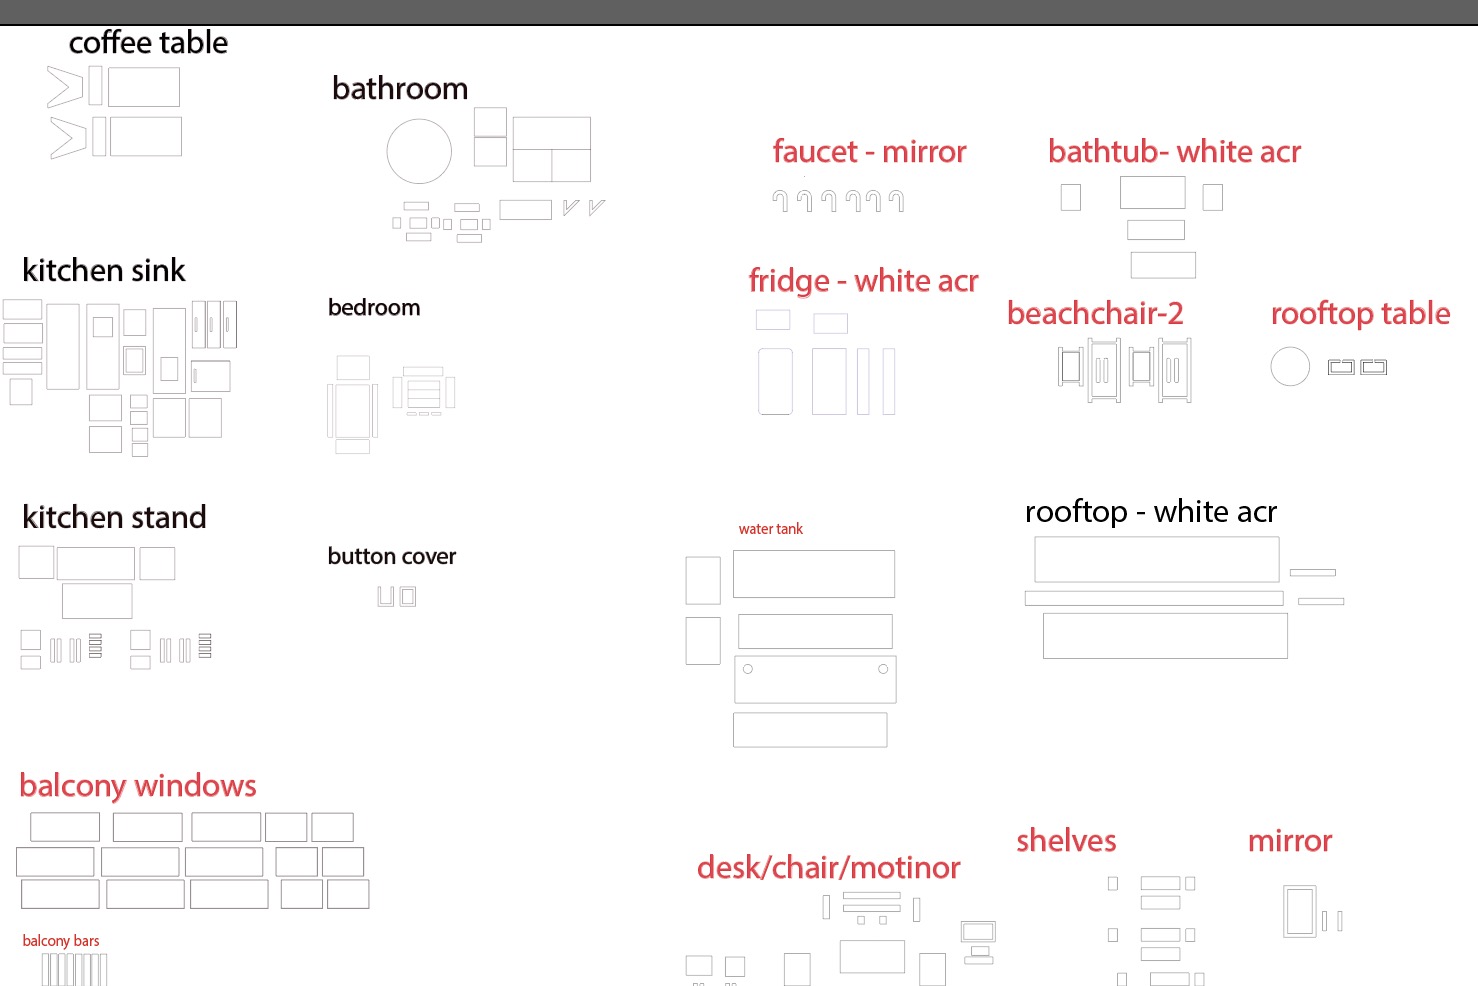
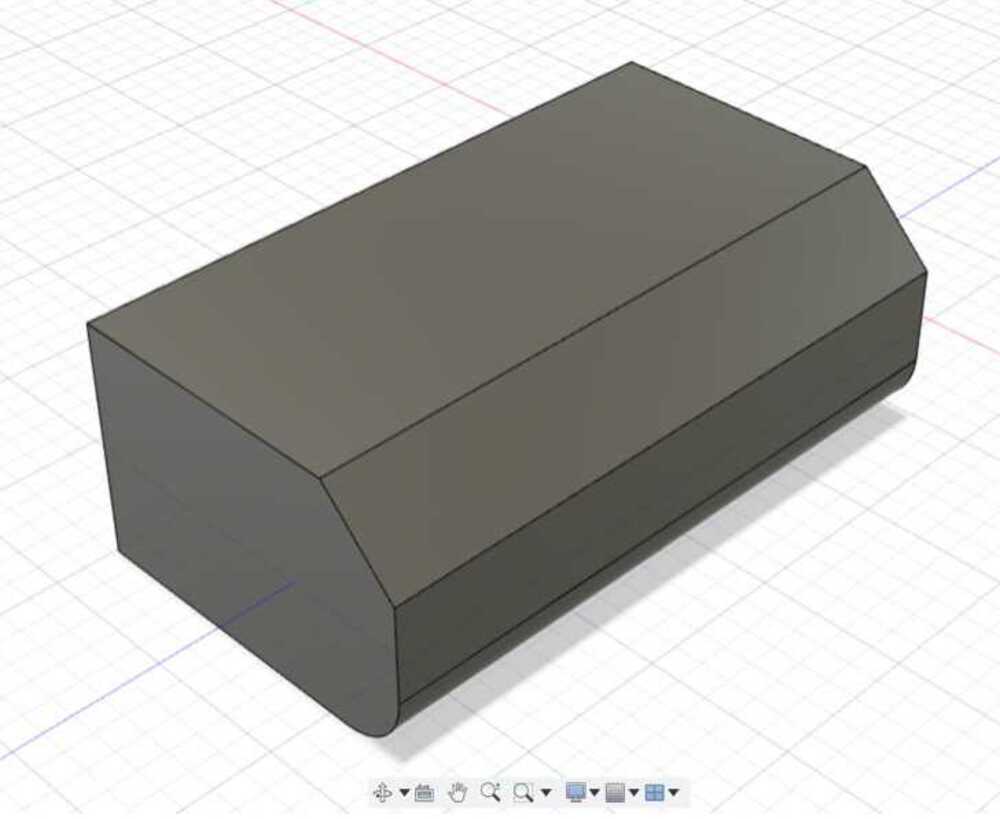
My project in 3D
The first house I built
For 3D rendering, I used Fusion 360. I took a time-lapse video of the process.
I worked on this house in Fusion 360 for three days. I became more comfortable with Fusion 360 after going through lots of trial and error.

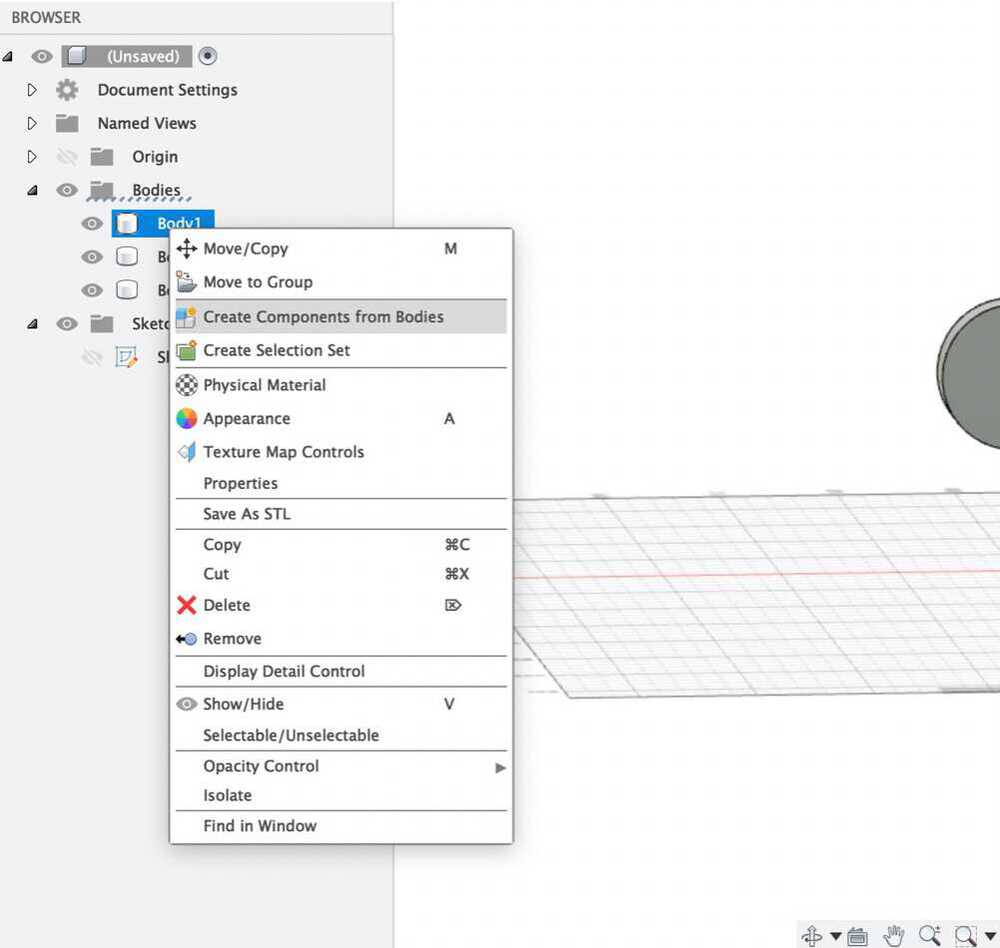
As you can see in the left side of the photo above, I made a components folder for each room. It wasn't organized like this when I first started working on it. I just kept creating components. At some point, I realized that I needed to organize the files, or it would be messier as time goes on.
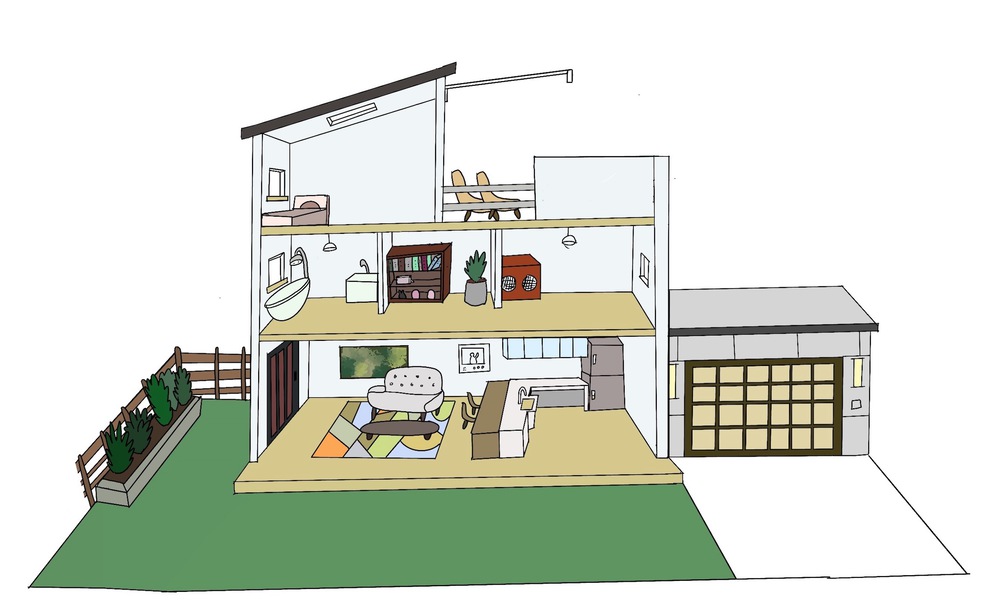
This is what the house looks like when it's rendered. I love that I can see the texture of furniture, walls and floors. It looks like a real house.
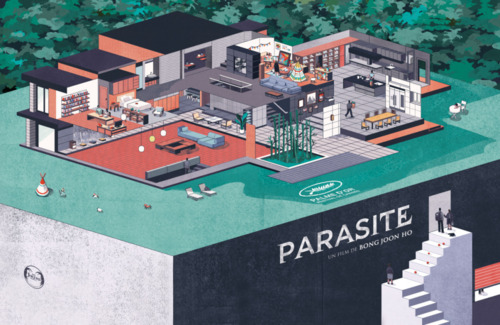
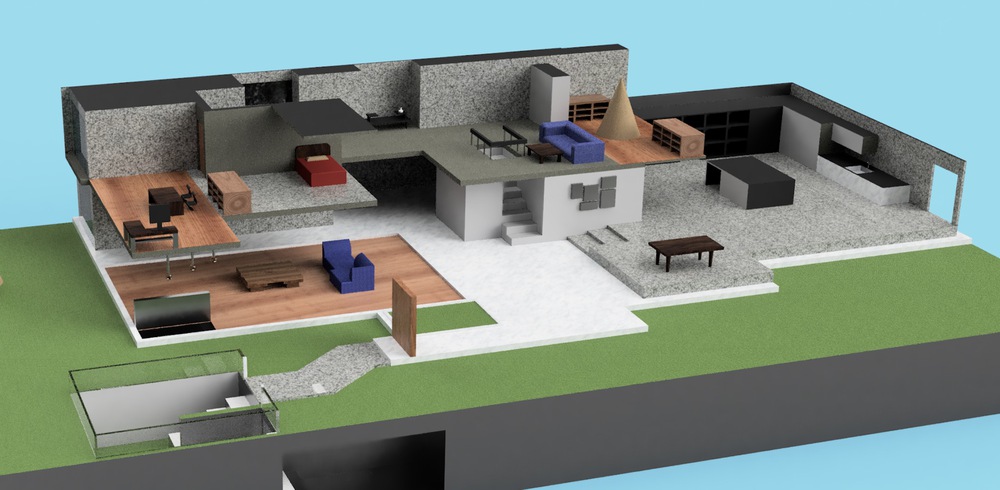
The second house I built
I had so much fun making the first house. When I heard the movie Parasite got awards last night, the nice house from the movie came into my mind. I did a search and I found some nice images that inspired me.
Even though the house was much more complicated, it took less time for me to build than the first house.
And this is the final design after adding textures to the components.
I still haven't decided which house design to use for my final project. The biggest difference between two houses is that the first house has a vertical layout and the Parasite house has a horizontal one. I have to think about which one is easier to work with the other features I want to add.
Issues & How I solved them
Issue 1. Always organize your components when using Fusion 360
When I first started using Fusion 360, I only had a house outer wall and very little furniture. After working for a while, I made so many components that I had trouble finding them. At some point, I needed to fix it.
I created folders for each room and subfolders inside of them. Then, I moved the existing components into corresponding folders. After organizing the files, it looked much better and it took less to find a file I needed.

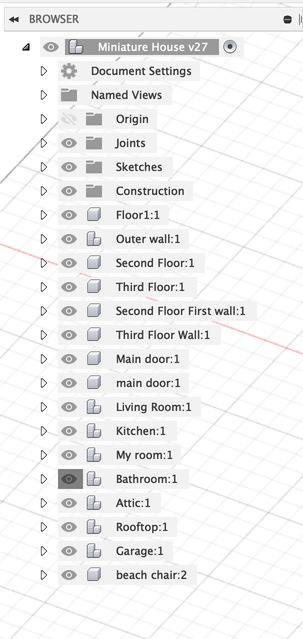
The before and after I organized the components
Issue 2. Large Git repo size AGAIN
I wrote about how to deal with a large Git repo size last week. My former solution was removing the entire Git history and starting it again. But I wanted to find a better solution than that. While writing the week 3 documentation, I was being careful and still I ended up adding large files to the Git history.
This time, I spent more time on googling and I found this link. (Reducing the repository size using Git)
The blog described two ways to reduce the Git repo size, and I chose the second one, using git filter-branch.
Before you try this, please make a copy of your repository.
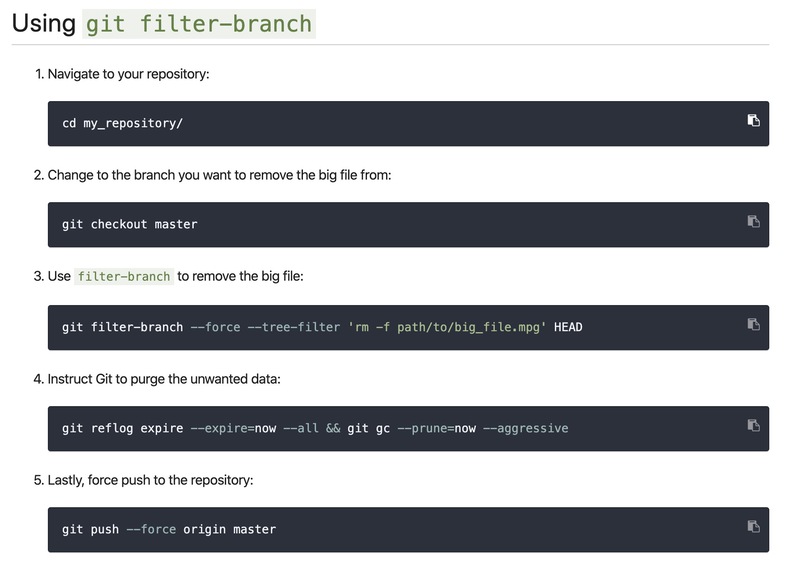
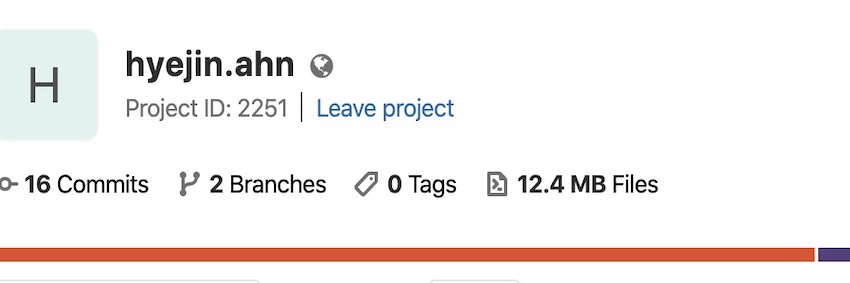
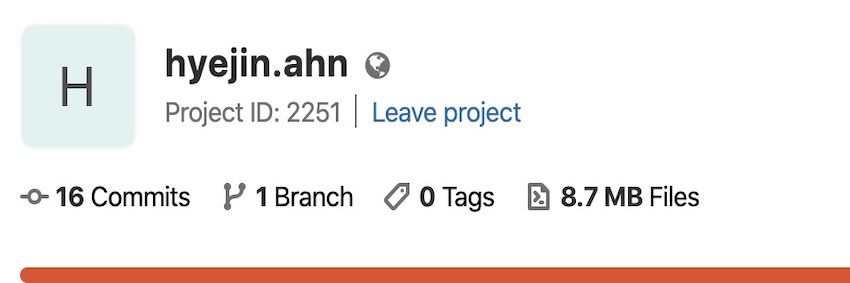
I followed the instructions above and it worked well. I only had to change the path/to/big_file.mpg with the path to the file I wanted to delete from the Git history. Below is the before and after of my git repo size.
I think this way is better than deleting your entire Git history, especially if you don't want to lose your Git history.