-
01. Principles and practices
-
02. Project management
-
03. Computer-Aided design
-
04. Computer controlled cutting
-
05. Electronics production
-
06. 3D Scanning and printing
-
07. Electronics design
-
08. Computer controlled machining
-
09. Embedded programming
-
10. Input devices
-
11. Applications and implications
-
12. Output devices
-
13. Interface and application programming
-
14. Invention, intellectual property and income
-
15. Networking and communications
-
16. Molding and casting
-
17. Wildcard week
-
18. Machine design
-
19. Project development
-
Glossary
Week 2. Project Management
Feb 3, 2020
Assignment
1. Work through a Git tutorial
2. Build a personal site
I knew how to use Git, text editor and terminal, but I learned something I didn't know before from this class. Let's see what I learned this week!
Terminal
pwd # shows current working directory
ls # shows all the files in the current directory
ls -al # shows all the files in the current directory including the hidden ones
ls | grep keywordor ls *keyword*# shows files which have the given keyword in their file names
ssh # secure shell
cd - # goes back to the previous directory
Git
Git is a distributed version-control system for tracking changes in source code during software development.
Git is very powerful. Once you get the hang of it, it will make your life so much easier.
First, we need to install Git. There are many ways to download Git. I've already got it on my machine because it comes with macOS, so I didn't have to download it.
After downloading it, you have to configure your name and email address. Git is meant for sharing code with other people, so this makes it so you can see who wrote what code.
  git config --global user.name "Hyejin Ahn"
  git config --global user.email "hyejin@gmail.com"
Then, you can make a directory and create a new Git repository.
  mkdir my_project # this makes a directory called my_project
  cd my_project # then you can go to the directory you created
  git init # this creates a new Git trepository
GitLab
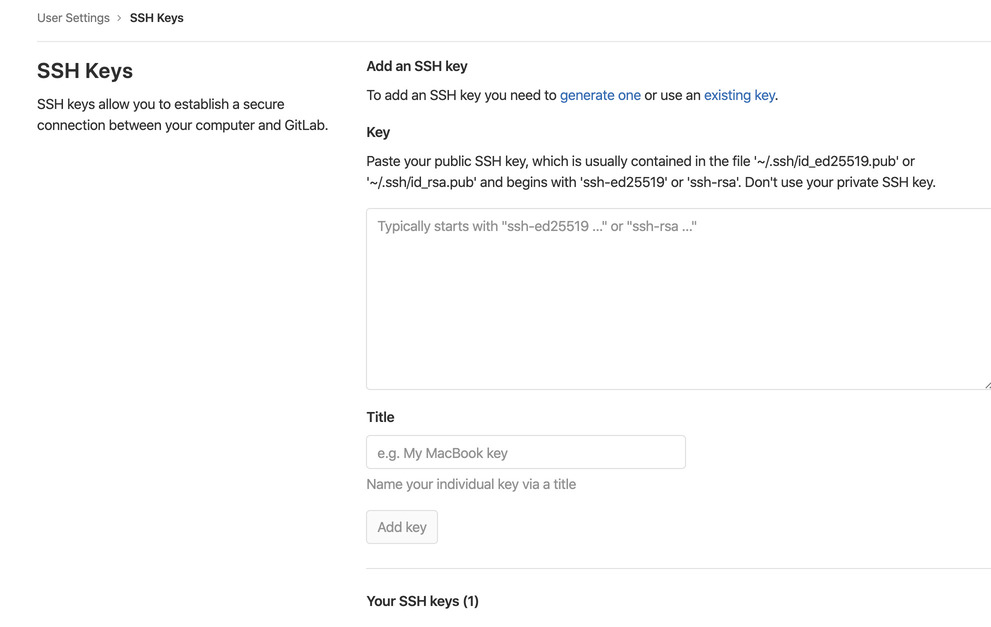
Now that you know a few Git commands, it's time to download your Fab Academy GitLab repository. To do that, you need to create an SSH key first. I already have one so I used that one.
  ssh-keygen -t ed25519 -C "email@example.com" # generates a new SSH key
  cat ~/.ssh/id_ed25519.pub# prints out the public key to the terminal and copy it
Then go to the GitLab settings page and click the SSH keys tab on the left side. Now, paste the key that you copied into the text field.
Then, go back to your repository and click the copy URL button right next to the Clone with SSH text. Go back to the terminal and go to the directory in which you want to clone your project, and type the commands below.
  git clone git@gitlab.fabcloud.or...# clones your repository with SSH key
  cd your_repository# goes to the repository you just cloned
Now it's time to make some changes to your project. Create a file and edit it.
  touch test.txt# creates test.txt file
  git status# see which files have been changed
git status is very important for keeping track of your changes.
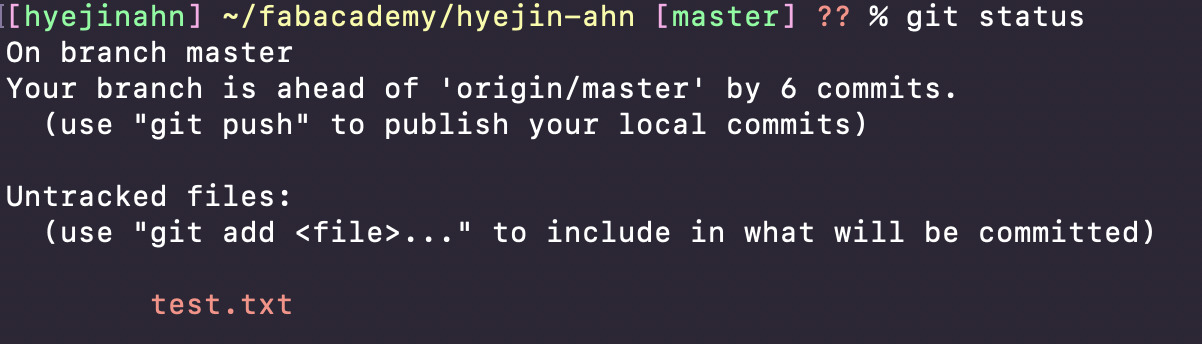
You can see test.txt file is created, but has not been tracked yet. Add the file on git and then make your first commit.
  git add test.txt# puts the file on the stage
  git commit -m "Your commit message here"# write your first commit message
  git log# you can see all the git commits you made previously
Text Editors
There are a lot of good text editors available. You can choose whatever you think is the best after trying them out. The most commonly used ones are..
- vi or Vim
- Sublime Text
- Visual Studio Code
- Atom editor
- GNU nano
I usually use Visual Studio Code when I do software development work. I'm using Sublime Text for this documentation, because it's very light and easy to use. There are a lot of useful packages that Sublime Text offers. Some people like to use vi or Vim, but I never really got used to it. (When I first used Vim, I didn't know how to get out of the editor. So I had to turn the entire terminal off.)
ImageMagick
ImageMagick is a free and open-source software suite for displaying, converting, and editing raster image and vector image files.
  [hyejinahn] ~/Downloads  % identify user.png
  user.png PNG 90x90 90x90+0+0 8-bit sRGB 983B 0.000u 0:00.000 # you can see the info of images

  [hyejinahn] ~/Downloads  % convert user.png user.jpg # converts png file to jpg
  [hyejinahn] ~/Downloads  % convert -resize 50%  user.png user.jpg user_50.png # resizes the image to 50% of the original size

  [hyejinahn] ~/Downloads  % identify user_50.png
  user_50-0.png PNG 45x45 45x45+0+0 8-bit Grayscale Gray 715B 0.000u 0:00.001 # you can see the size of the image was halved
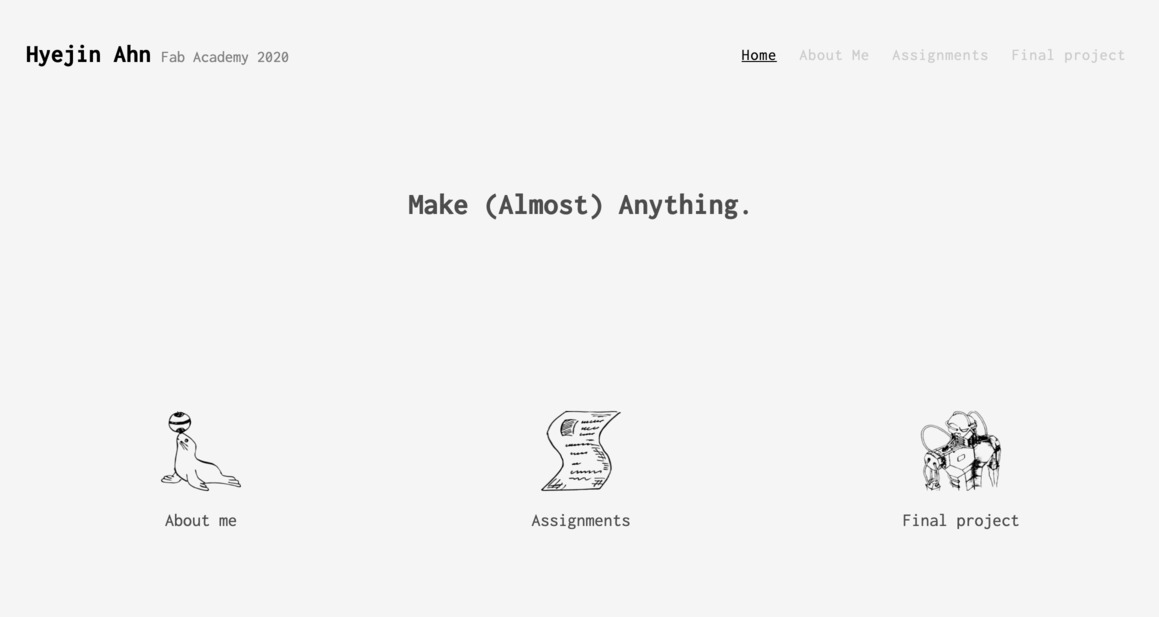
Making your website
I used a free HTML/CSS template that I found on the internet. I chose one that has some basic components in it and I added some more components that I needed. I wanted this documentation site to look clean, have high readability and look good on phones.
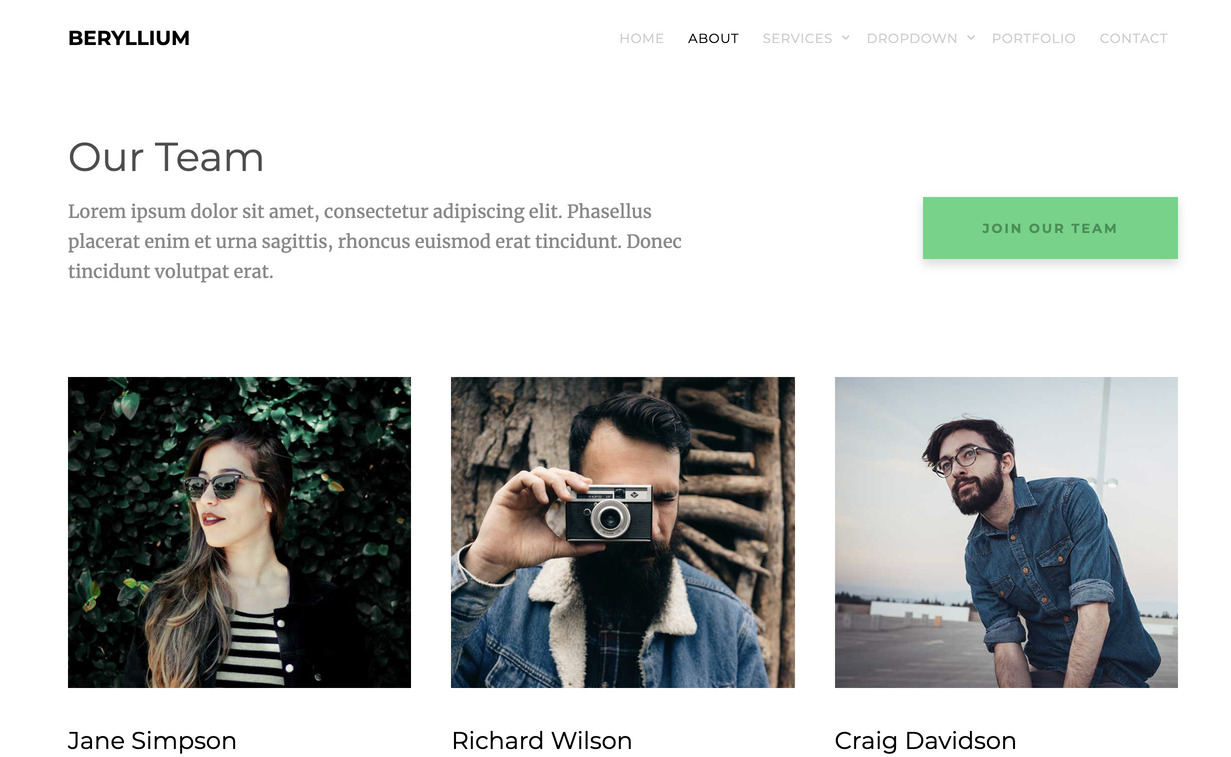
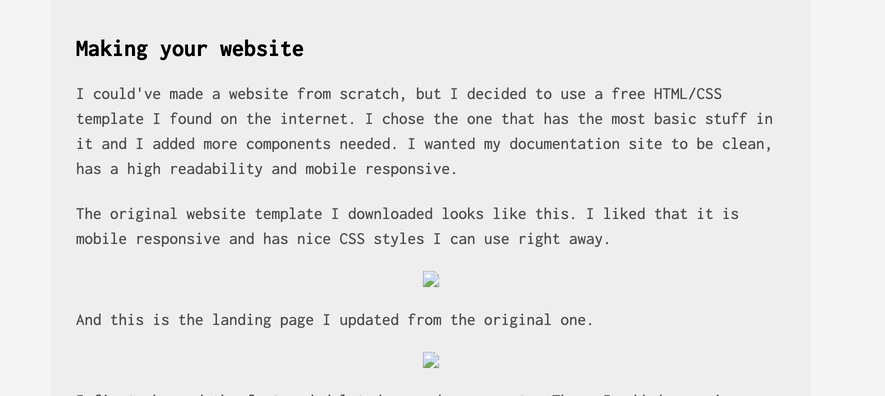
The original website template I downloaded looked like this. I liked that it is mobile responsive and has nice CSS styles.
I changed their landing page around a bit.
First, I changed the font and deleted the components I wasn't using. Then, I added some icons and modified some layouts. I was going to stick with nothing but .html and .css files, but there were some problems. There were some parts that repeatedly showed up on every page, such as the navigation bar or the sidebar. Pure HTML doesn't provide a way to include pages inside other pages, or share layouts between pages. So I decided to use Jekyll. I realized that I could've just used a Jekyll theme, but oh well..
How to install Jekyll into an existing project
If you are making a new site from scratch, you can simply run this command.
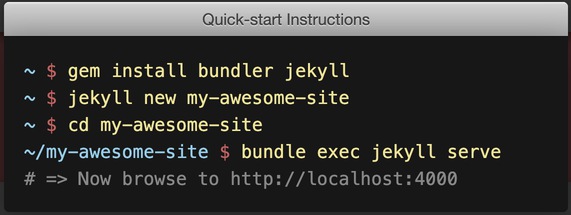
But since I was adding Jekyll to an existing project, I had to run a slightly different command.
  jekyll new . --force # run this inside of your repository
  jekyll build # builds HTML and CSS files to ./_site (by default)
  jekyll serve # builds your site and serves it locally
Then, I looked at the documentation for Layouts. At first, I was a bit confused and had to try in different ways to figure out how to use it.
Jekyll looks for the _layouts directory for layouts. So you need to create a _layouts directory first, and then create a layout file inside of that directory.
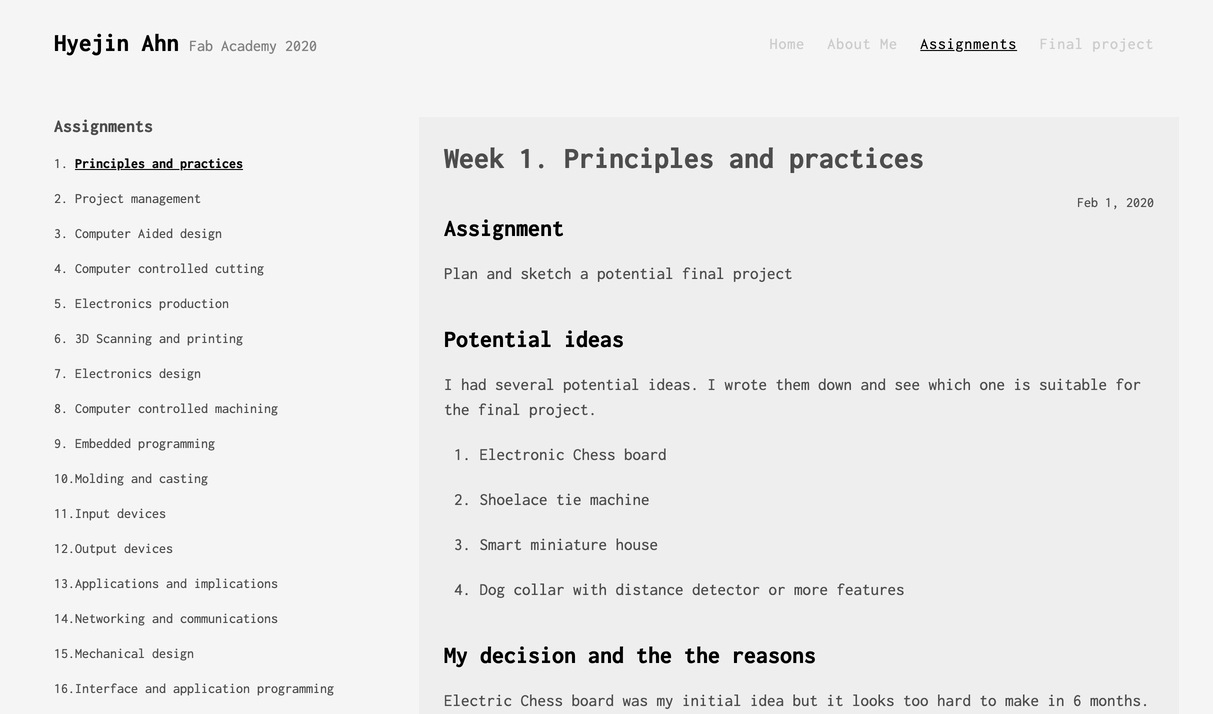
I created two layouts. The first one is called default.html, and the other one is called assignment.html. The default.html file has basic layout like a navigation bar. I made an assignment.html because the assignments from each week need to share a common layout. That's its own section of the site which has a sidebar linking to the other assignments.
How to push the repository to GitLab
It's time to push your project to GitLab. First, you have to run git status before pushing to see if the all changes are committed. It should something like working tree clean. If it doesn't say that, then you might still have changes to add. When you're ready, type git push origin master to push everything to your GitLab repository.
I ran into some issues during the process and I want to share how I solved them.
Issues & How I solved them
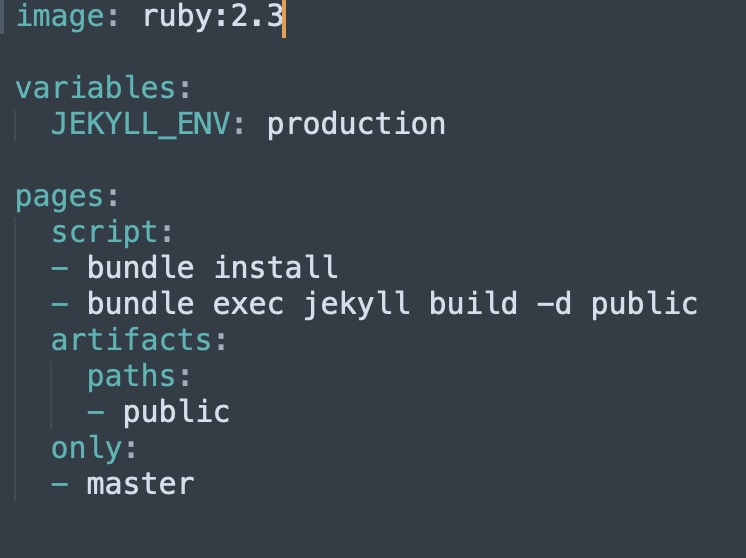
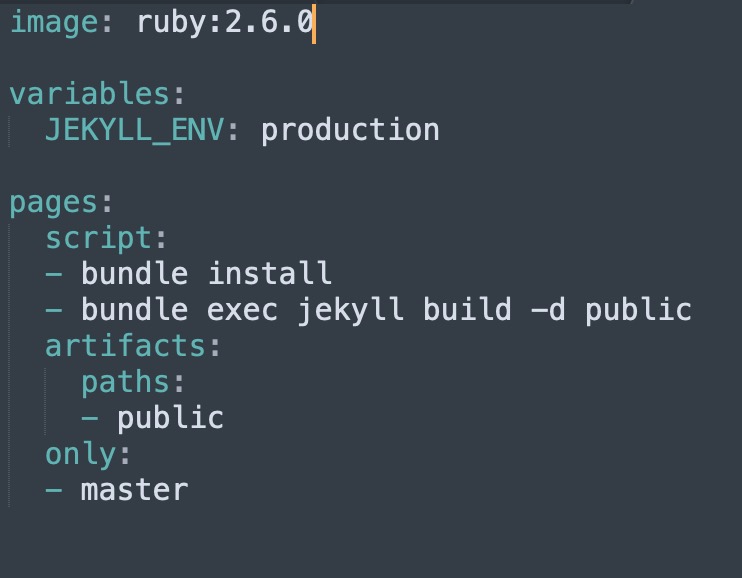
Issue 1. Wrong Ruby version
3 minutes ater I pushed my repository, I received an error email from GitLab. It said the pipeline failed because of the Ruby version I specified on gitlab-ci.yml file.
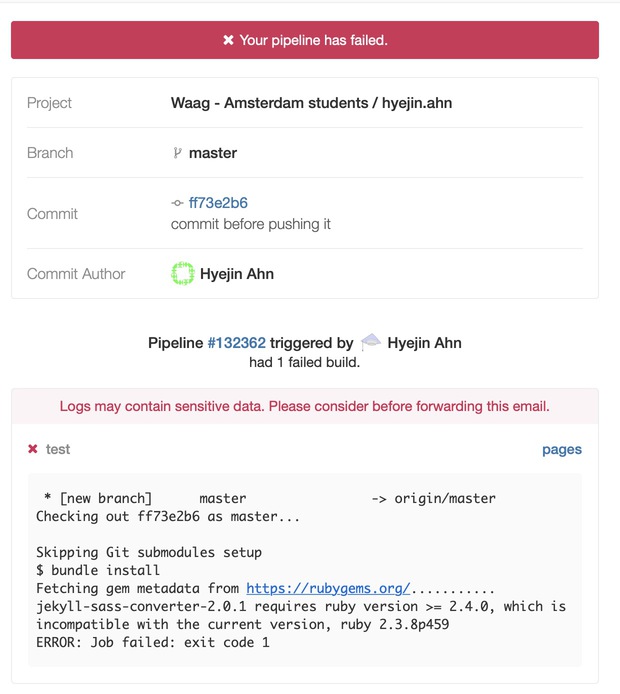
I got the gitlab-ci.yml example file from the GitLab documentation. The error message said that the Ruby version 2.3 is not compatible with the gem that I was using. The fix was easy. I just changed the Ruby version to 2.6.0 and it was fixed.
Issue 2. Missing images
There was another issue, missing images. The weird thing was the images on the week 1 page showed up correctly, but not the images on week 2.
I opened the Chrome inspector to see what was different between the week1 and week2 pages. It turned out that I added / in front of the src attribute of each image tag. I simply removed the / and pushed it again, and the missing images showed up beautifully.

Issue 3. Large Git repo size
UPDATED(2020/2/9): I found a better way to reduce the Git repo size. (Link)
Several days ago, I got an email from the Fab Academy coordination saying that there's a 10MB cap per push for GitLab repository. Dring the class, Henk told us to be aware of the size of images or videos. But I accidentally added large images to my Git history. Even if I deleted those files later, it stayed on my Git repo. I pushed my project to GitLab, and I found that my whole project was 17MB.

I googled how to delete some files from Git history completely, but I couldn't find a simple solution. So I decided to start from the beginning by deleting the Git repository.
First, I copied my entire project just in case I made a mistake. Then, I deleted the .git directory and created a new Git repository. After then, I copied the .git/config file from the backup repository to the current repository. It sounds complicated, but it's pretty simpe if you do it step by step.
  cp -r my_project my_project.bak # copies the directory to the new directory called my_project.bak. You have to run this command from the parent directory of your project, not inside of your project.
  ls # see if my_project.bak directory exists
  cd my_project # goes to your original repository
  rm -rf .git # removes your Git repository
  git init # starts a new Git repository
  cp ../my_project.bak/.git/config ./.git/config # copies the original Git config from the backup directory to the current directory
  git add . # adds everything
  git commit -m "git init" # commits all files
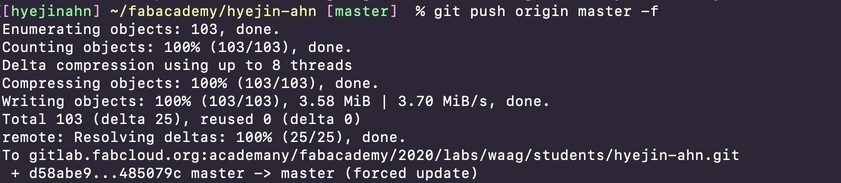
After doing all steps above, I force pushed the repository to overwrite the existing repository.
git push origin master -f # force push to the master
But there was another problem.😭
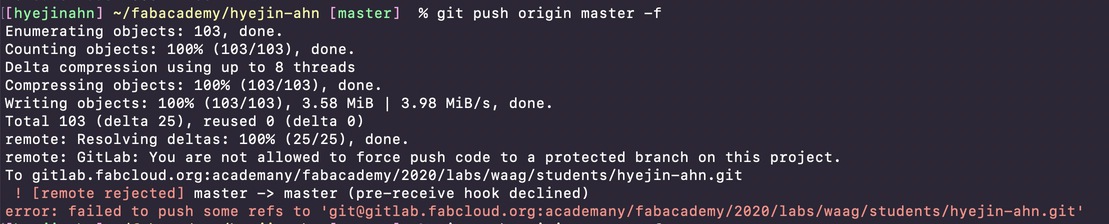
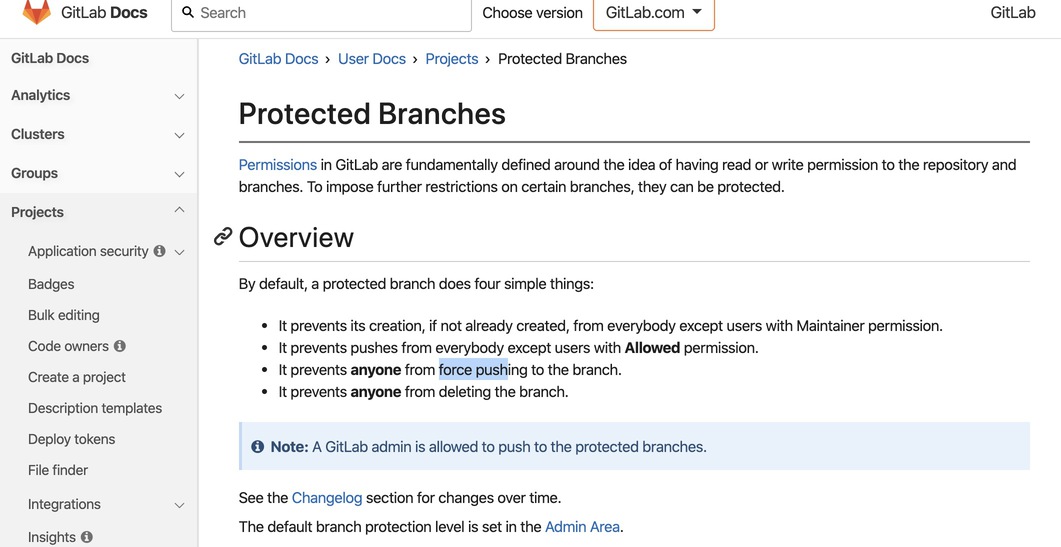
The error message said my force push got rejected. I googled gitlab force push and found a link about GitLab Protected Branches. It said GitLab prevents anyone from force pushing to the branch by default.
To configure protected branches, I navigated to my project's Settings -> Repository -> Protected branches section.

Then, I clicked the expand button next to the Protected Branches text. I scrolled down a bit and I saw that there was a protected branch for the Maintainers group.

I clicked the Unprotect button to remove it from the protected branch.

And I force pushed again and ta-da! It worked.
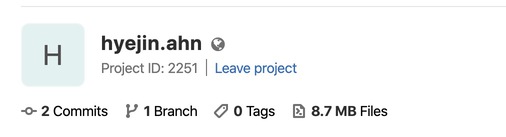
The whole repository size was reduced to 8.7MB from 17MB. Mission accomplished.