-
01. Principles and practices
-
02. Project management
-
03. Computer-Aided design
-
04. Computer controlled cutting
-
05. Electronics production
-
06. 3D Scanning and printing
-
07. Electronics design
-
08. Computer controlled machining
-
09. Embedded programming
-
10. Input devices
-
11. Applications and implications
-
12. Output devices
-
13. Interface and application programming
-
14. Invention, intellectual property and income
-
15. Networking and communications
-
16. Molding and casting
-
17. Wildcard week
-
18. Machine design
-
19. Project development
-
Glossary
Week 8. Computer controlled machining
March 18, 2020
Assignment
Group assignment
- Test runout, alignment, speeds, feeds, and toolpaths for your machine
Individual assignment
- Make (design + mill + assemble) something big
Safety rules for the Shopbot
Basic rules
- When the machine is on, don't place your hand on the machine table or the rails
- Before starting the machine, the table needs to be cleaned. Look around the surroundings to see if there's anything to clear out
- Do not rush. Do not start the machine after 4PM or 2 hours before you have to leave
- Check if there are any strings on your clothes. Tie up your hair and do not wear clothes with strings
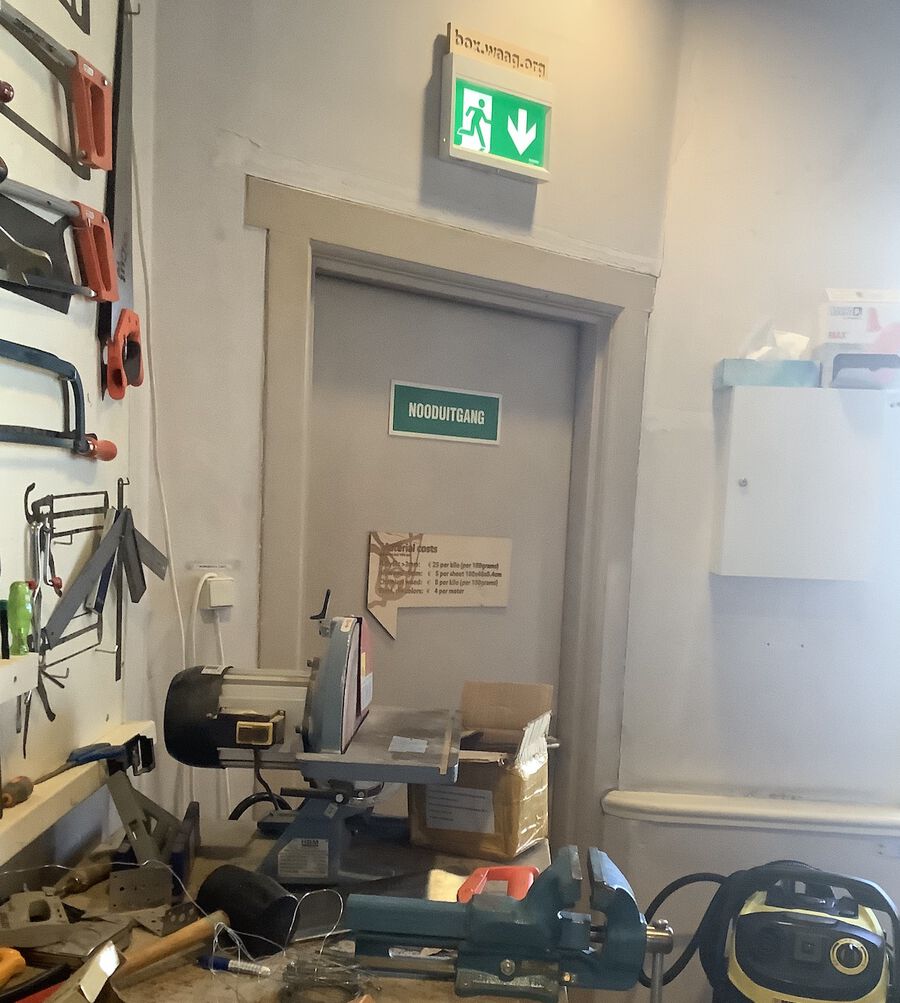
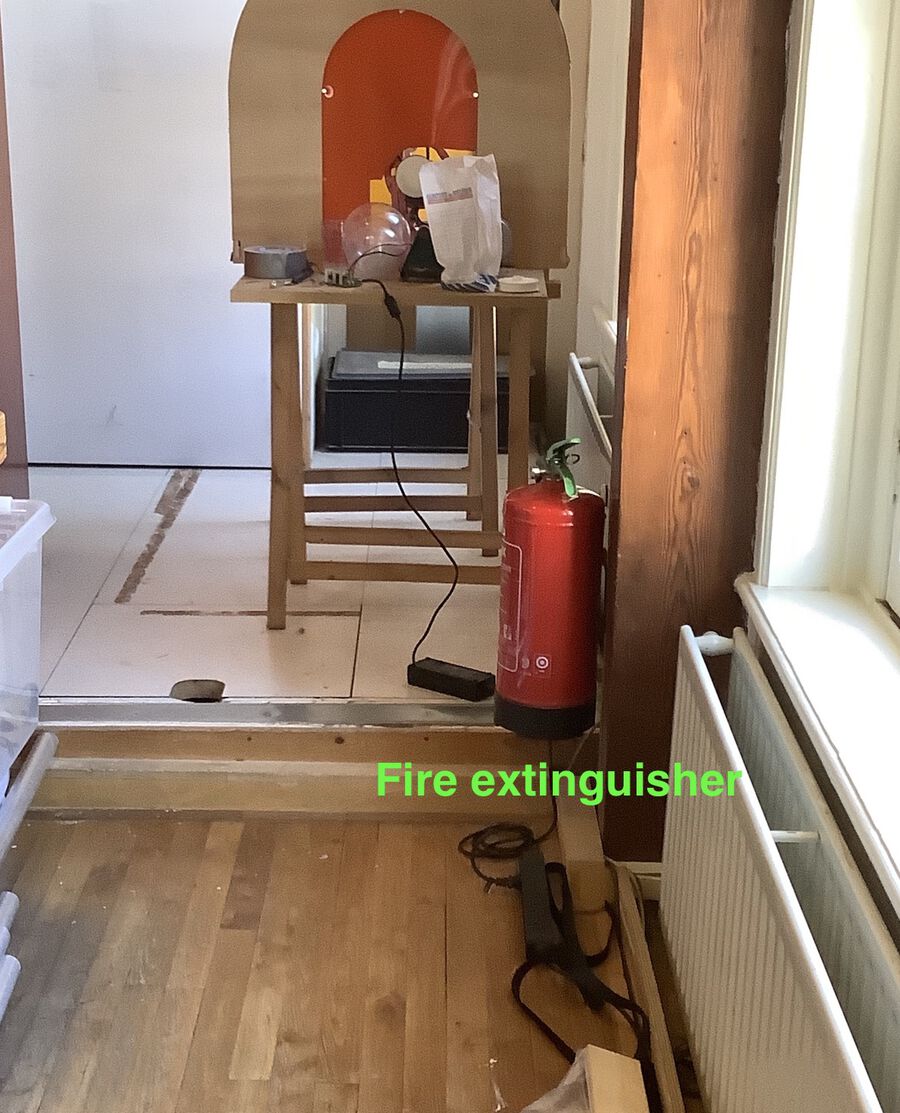
- Remember the location of the emergency exit and a fire extinguisher
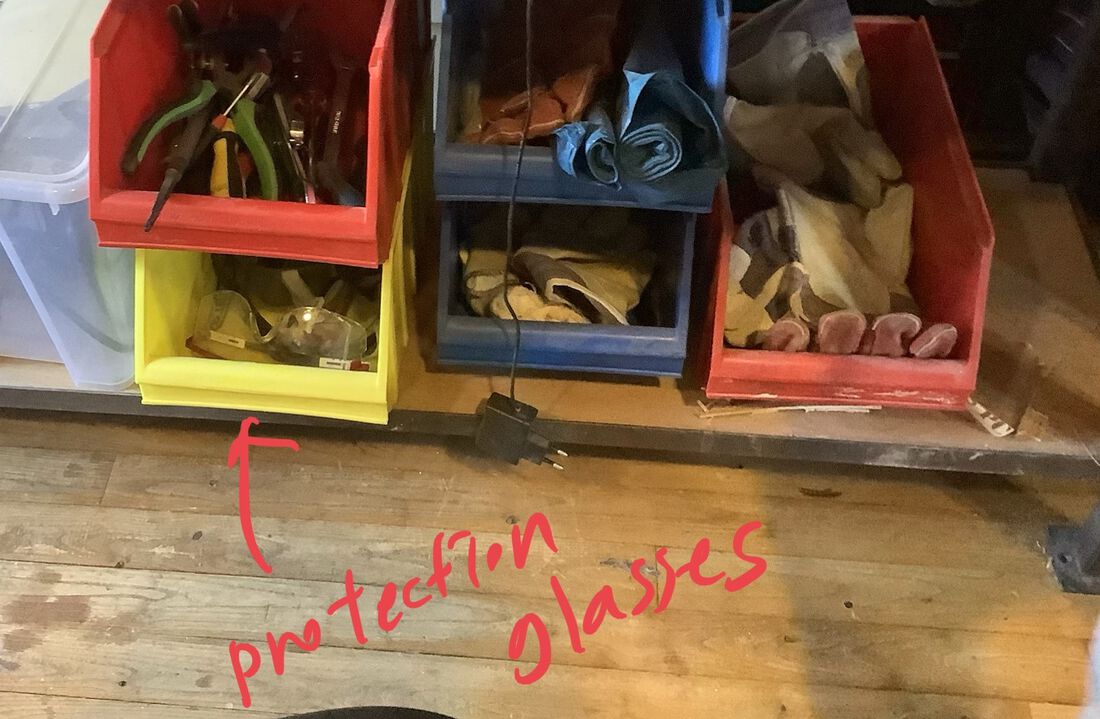
- Wear safety gears if needed
Fire hazard
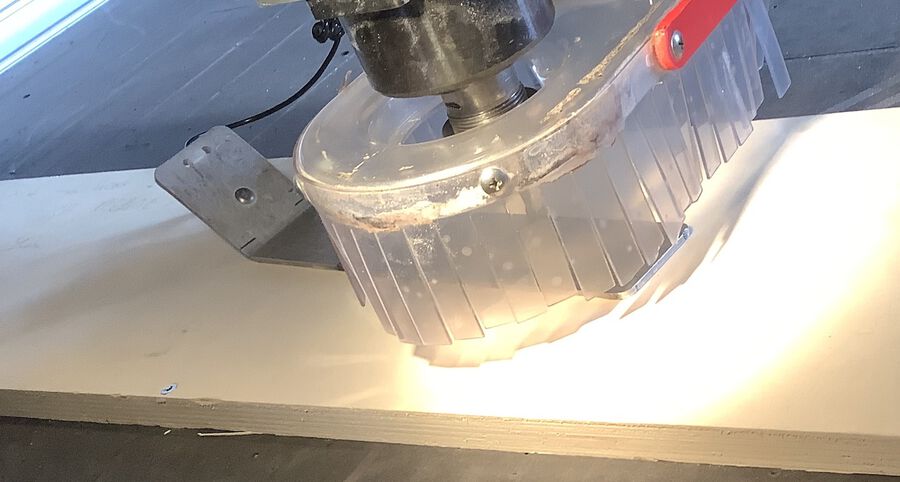
A spark can happen for different reasons. One of the causes is stopping the machine and without lifting the z-axis right away. If you stop the machine while the endmill is touching the wood, the wood can get hot and make a flame. Sparks can also occur when the drillbit hits the screws on the wood, which are used to fix the wood to the table. To prevent a fire caused by sparks, there are several instructions you have to follow.
- If you stop the machine, lift the z-axis up so that the drillbit isn't touching the wood
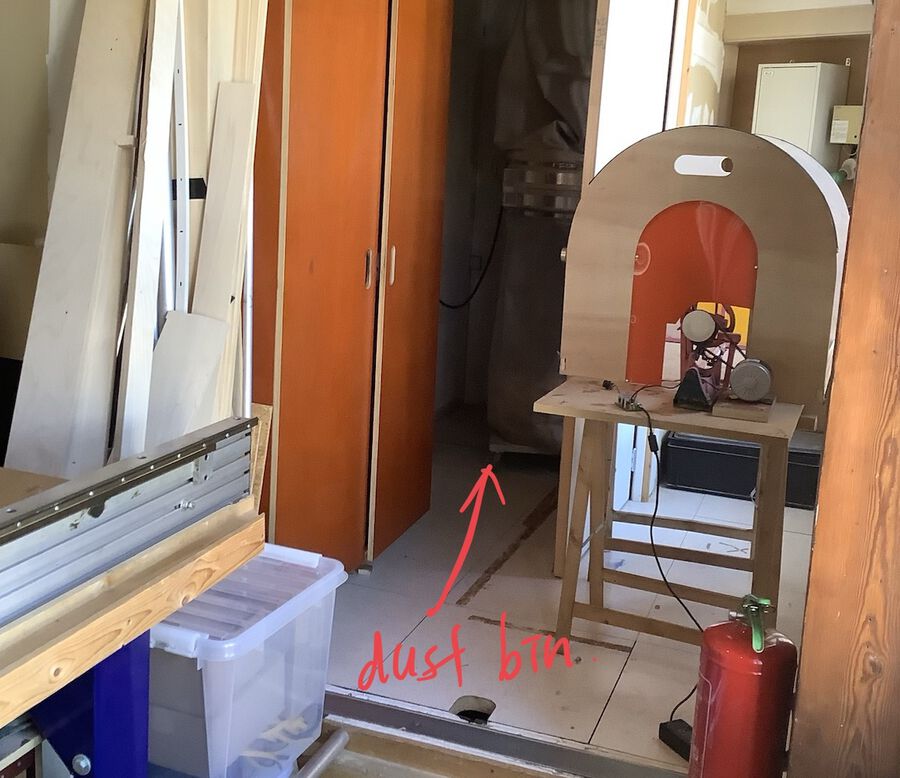
- Check the dust collector bin. Open it to see if you see any smoke or hint of fire in there
- Replace the dust collector bag and put the previous bag outside the room
- Take a rest for a while. Don't start the machine right away. You need to chill first
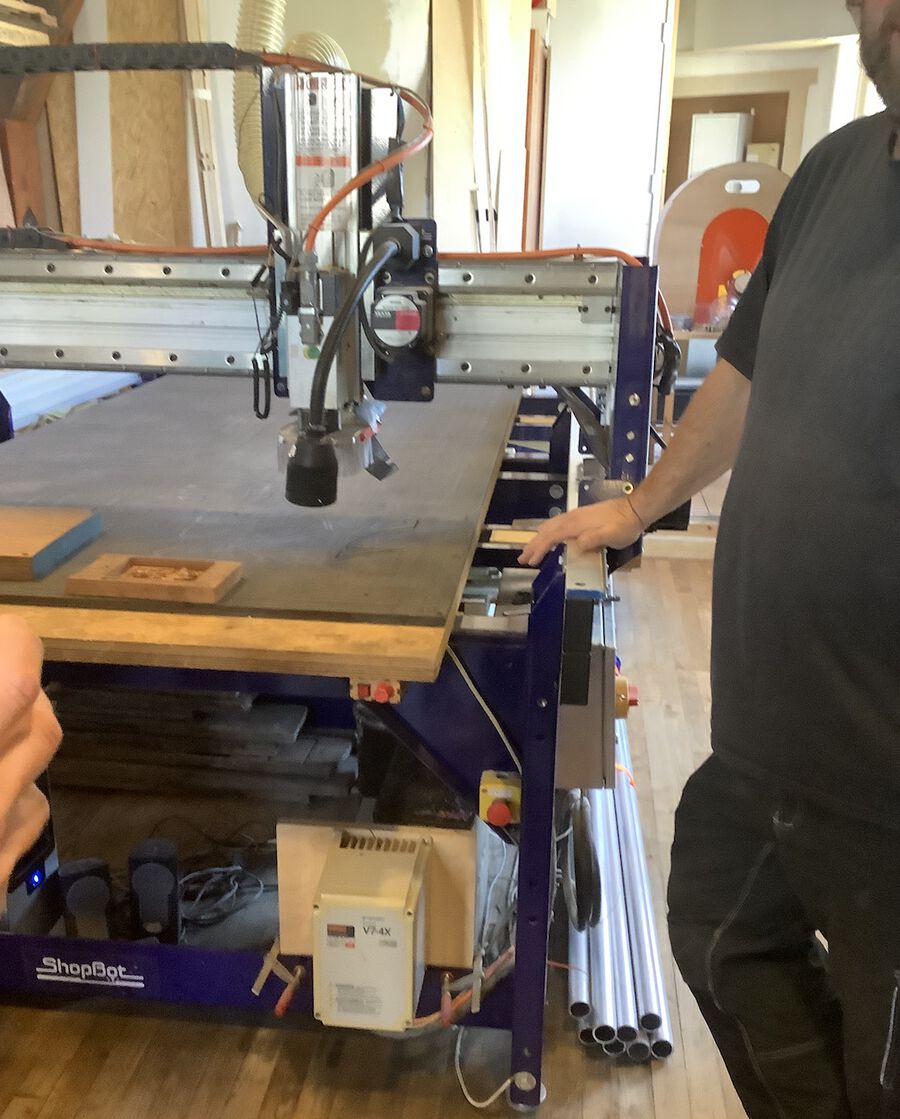
How to use Shopbot
The table size of the Shopbot we have at the Waag is 122cm x 244cm. After teaching us about the safety rules, Henk taught us how to use the Shopbot machine step by step.
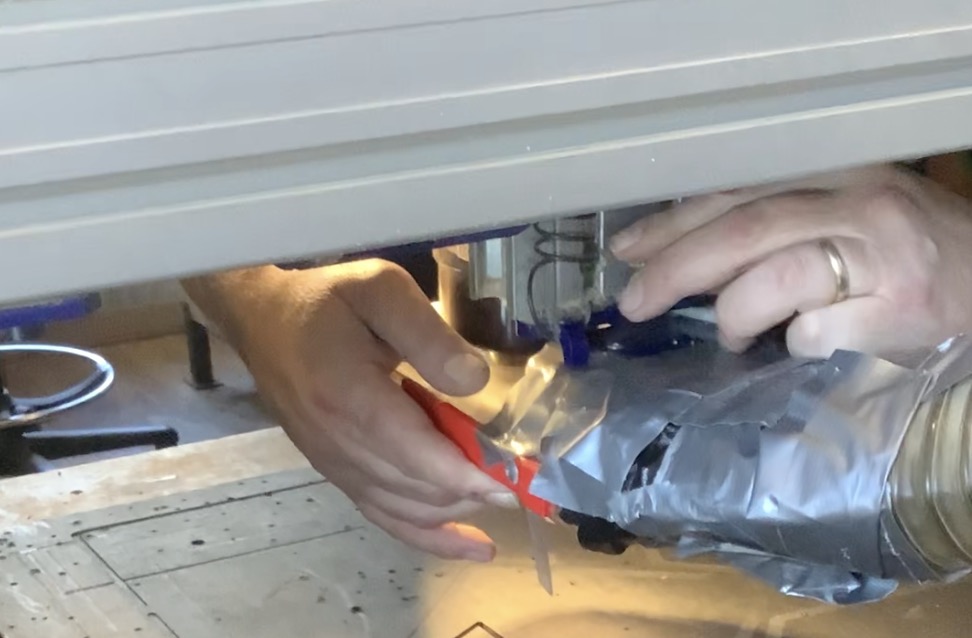
Move the drill head to where you are standing to put the endmill into the spindle.
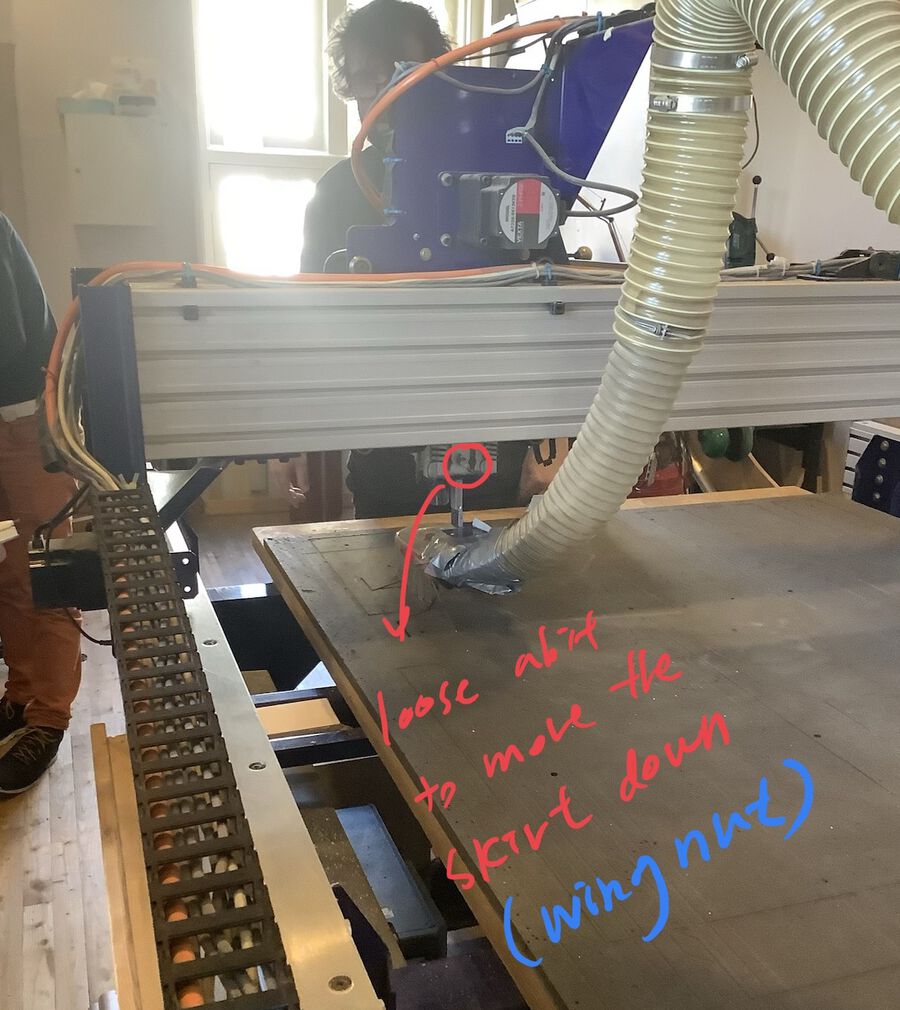
Loosen the wingnut located behind the spindle and lower the spindle skirt connected to the dust collector
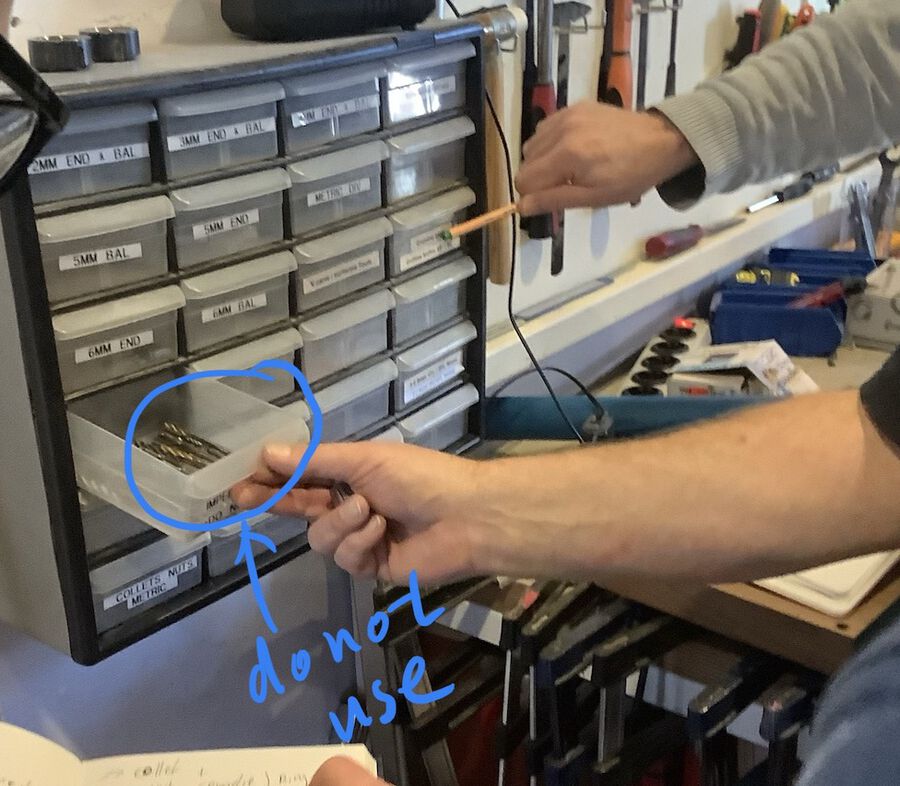
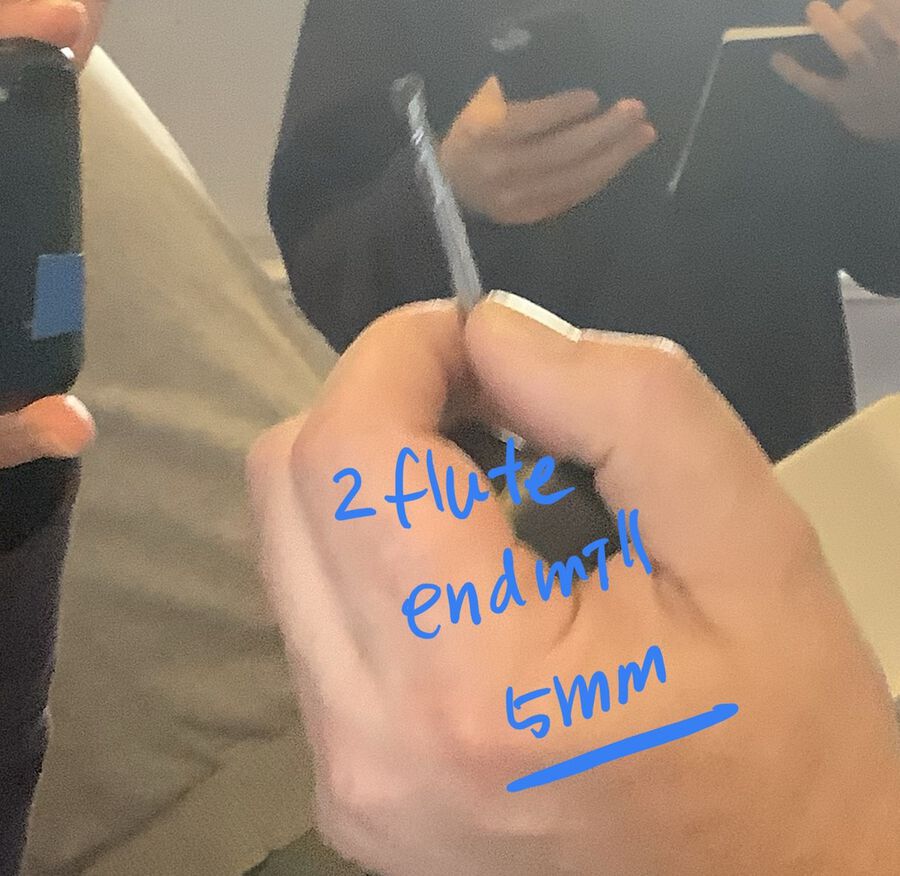
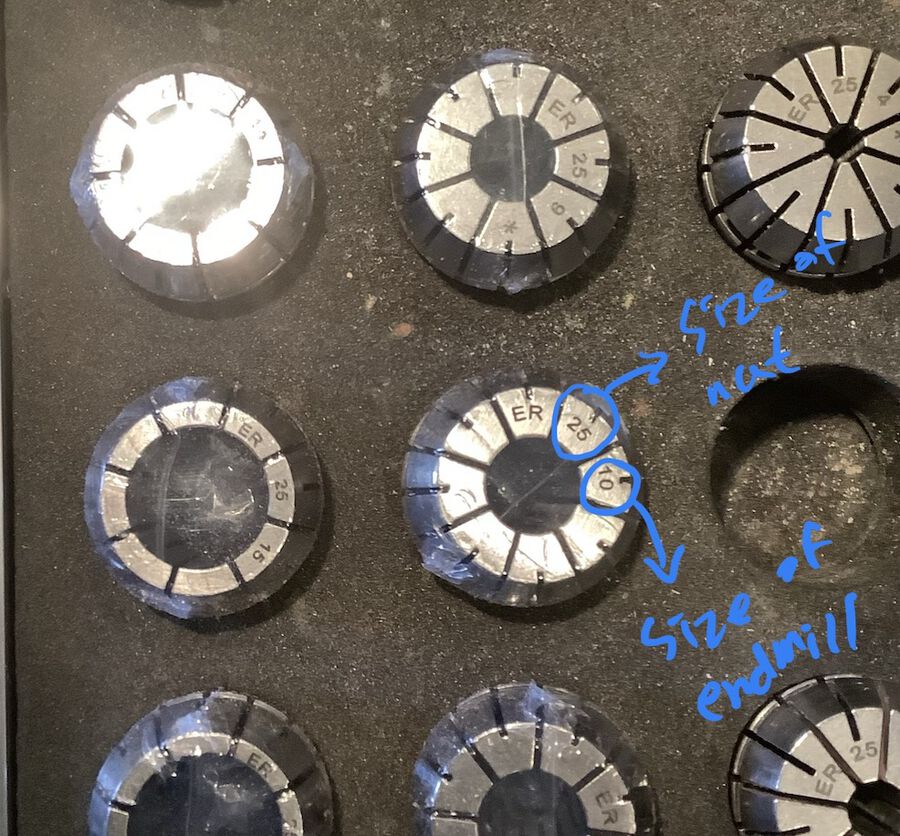
Choose an endmill, collet and nut from the drawer. Every endmill has a matching collet. Henk chose the 2-flute, 5mm endmill.
The sizes for the endmill and nut are written on the collet, but you can also try to put the endmill into the collect if you are not sure. They should fit together tightly
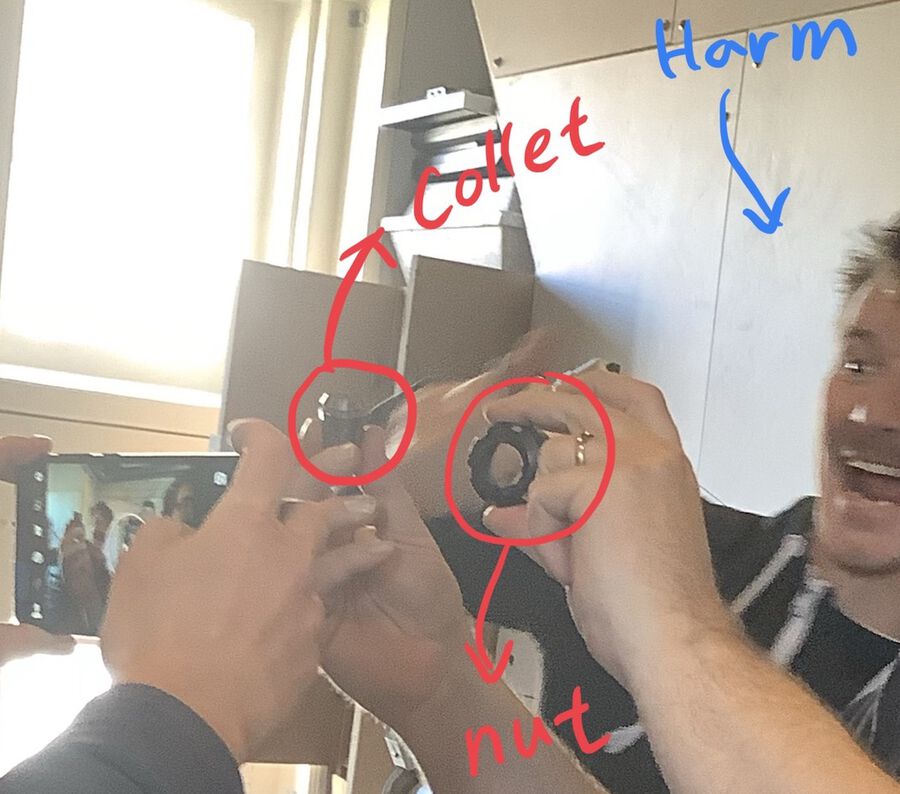
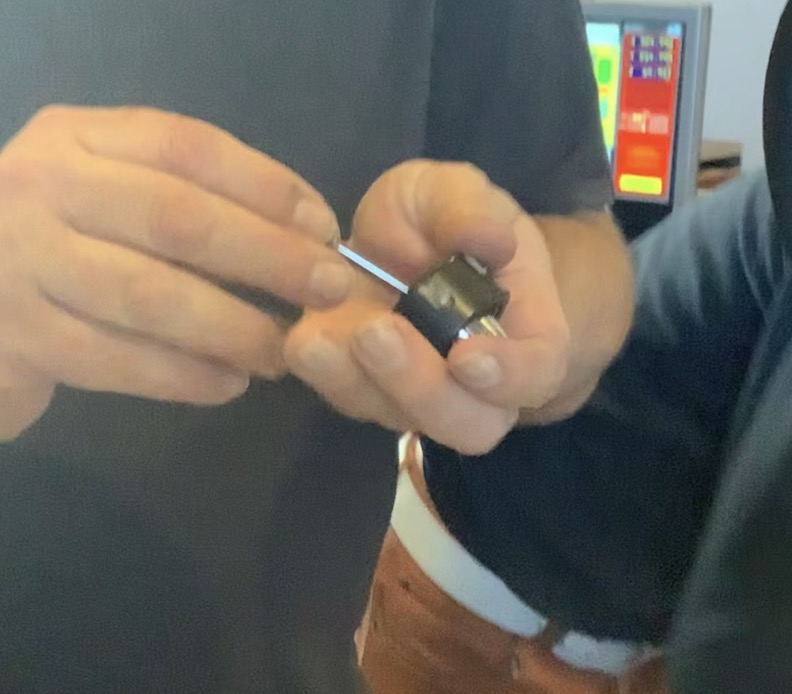
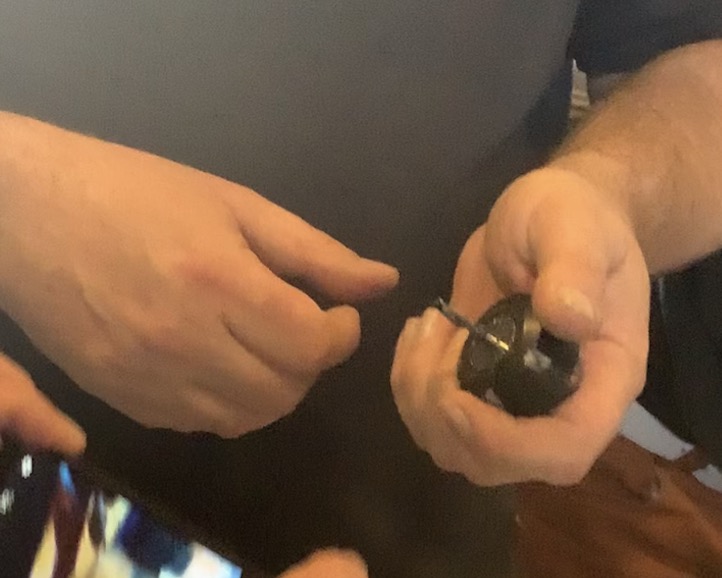
Put the collet into the nut first. Press it from the top so that the collet fits tightly with the nut
Then, put the endmill into the collect. When you take them apart, do it in the reverse order. Take out the endmill first, and take the collet apart from the nut.
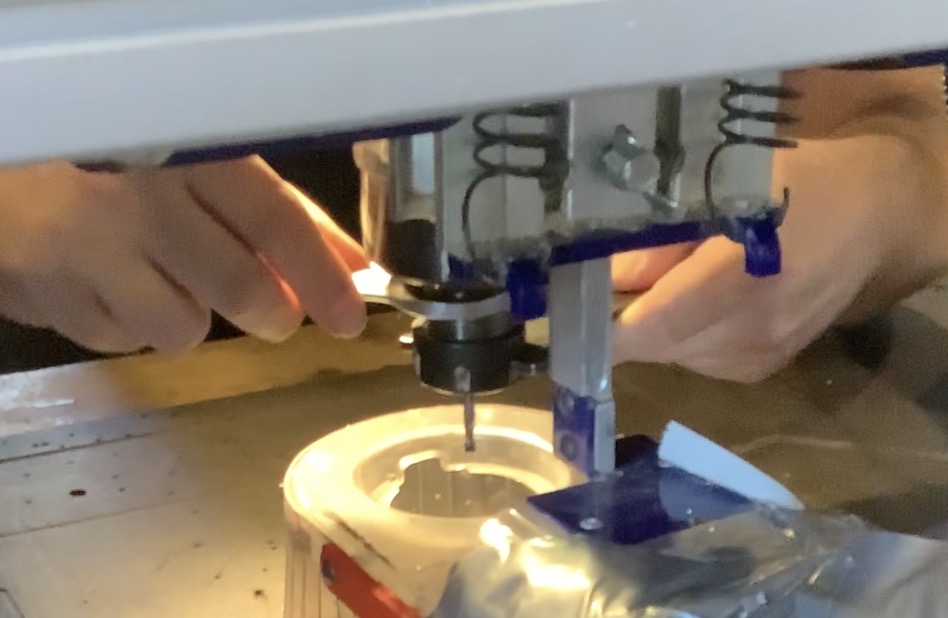
Place the nut, endmill, and collet into the spindle and fasten them with two wrenches. One of the wrenches is connected to the key used to start the spindle. So while fastening the spindle, you're not able to actually turn it on
After fastening the spindle, lift the spindle skirt back and fasten the wingnut
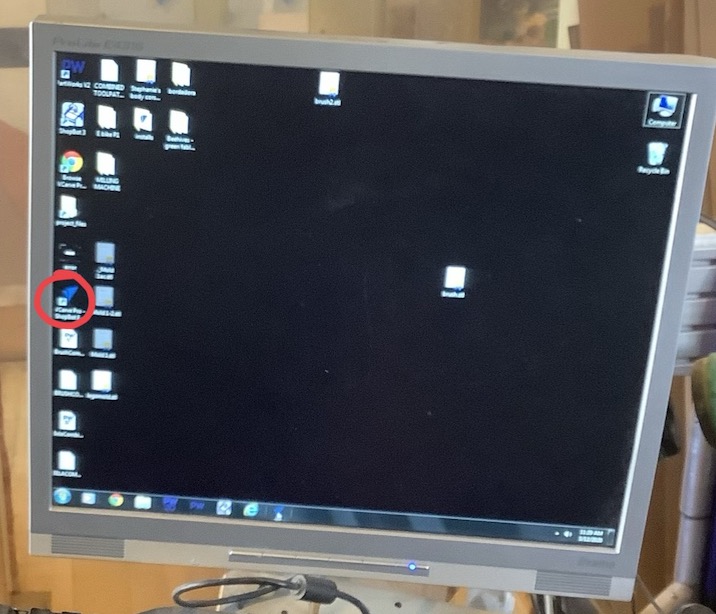
Now, open the VCarve program on the computer
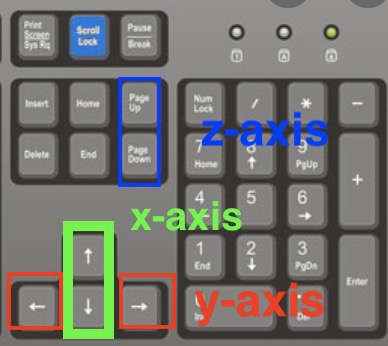
You can move the drill head with the keyboard keys. Be careful when you move around z-axis because it can damage the sacrificial board if you lower it too much
Open a file from File > Open
To update the Job Setup, measure the size and the thickness of the wood.
-
Job size: the size of your wood (width and height in cm)
Material(Z): select the top radio button and enter the thickness of the wood
XY Datum Position: select the bottom left one
Units: mm
Modeling Resolution: Standard
Appearance: whichever you want (it won't affect anything)
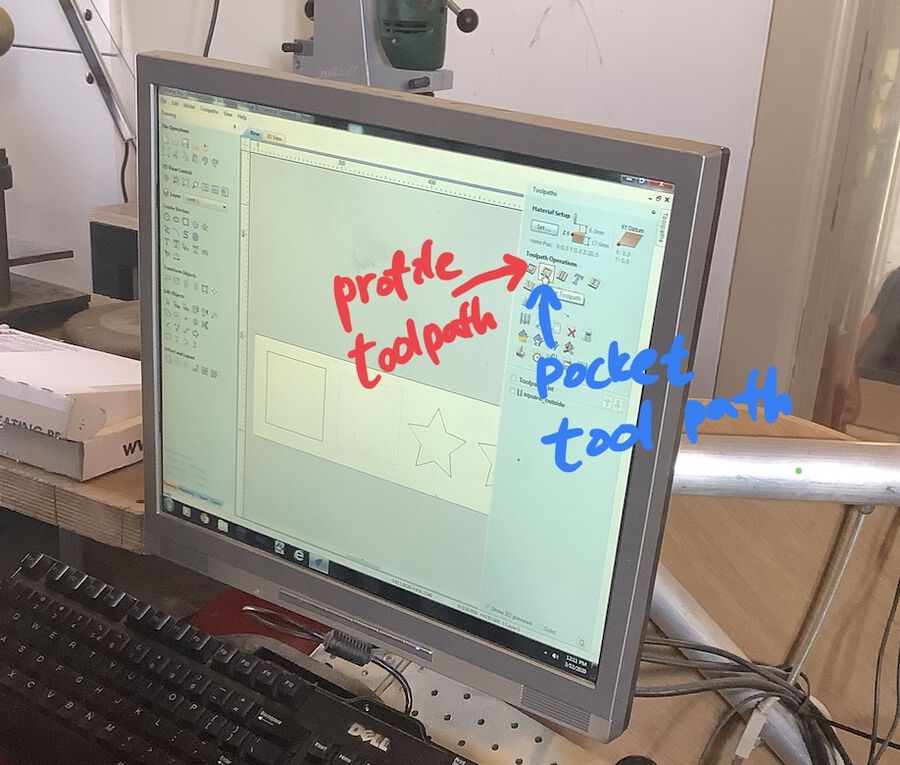
In the Toolpath Operations tab, click either Profile (for cutting outline) or Pocket (for cutting inside)
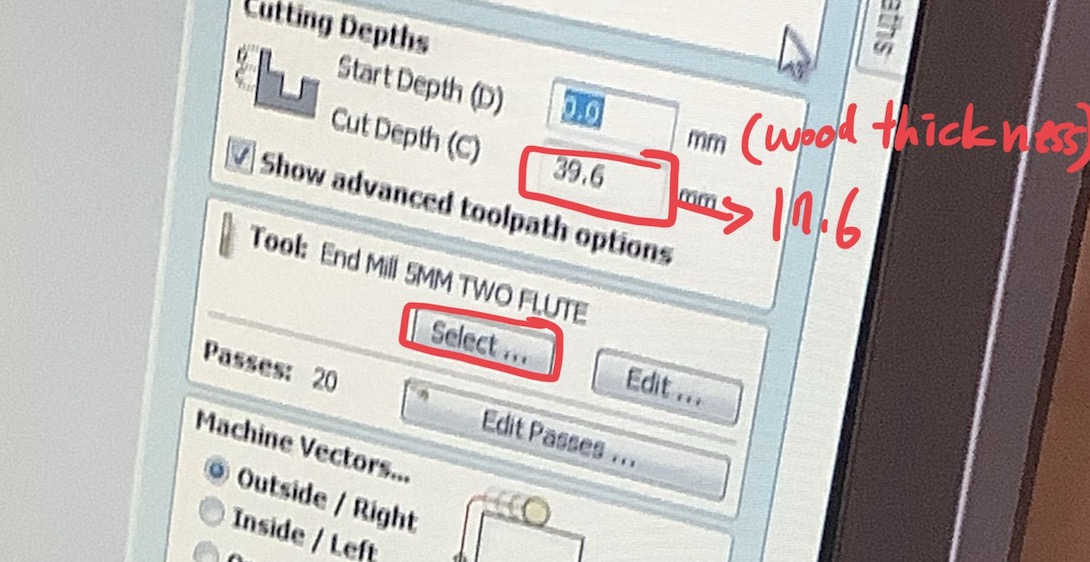
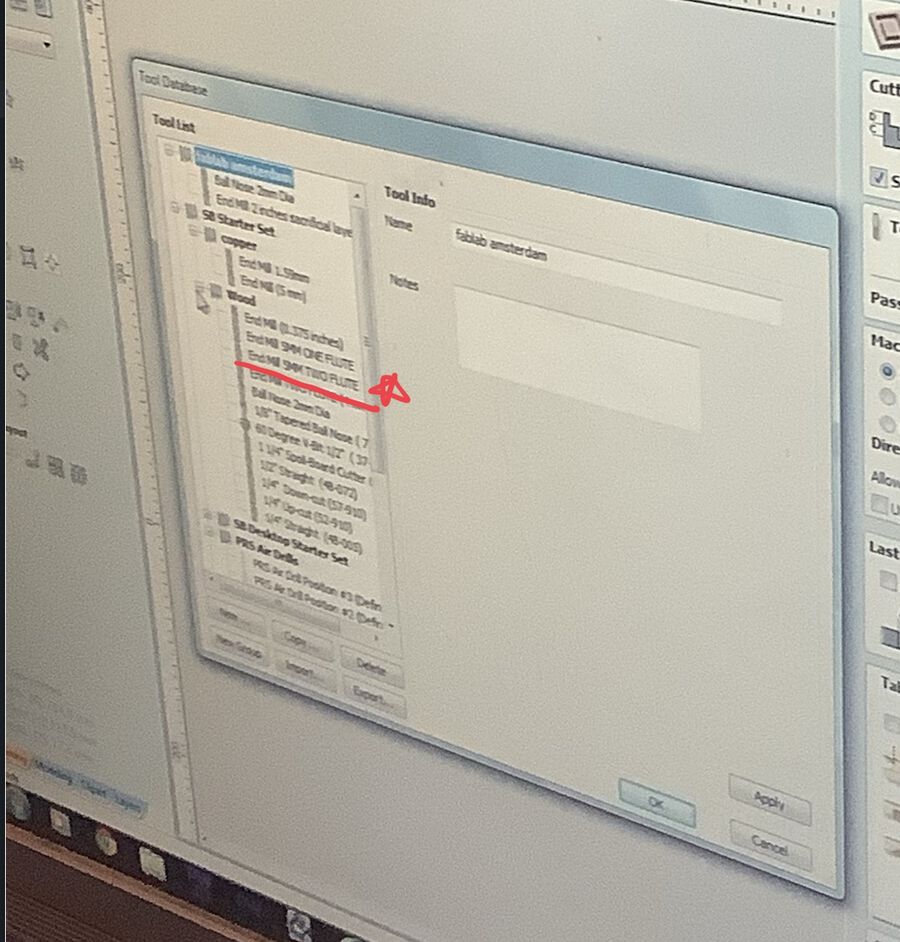
In the Toolpaths window, set the Cut Depth to the thickness of the wood (only when you cut all the way through) and click Select in the Tool tab
Select the type of endmill you will use
-
In the fields in the right side, set
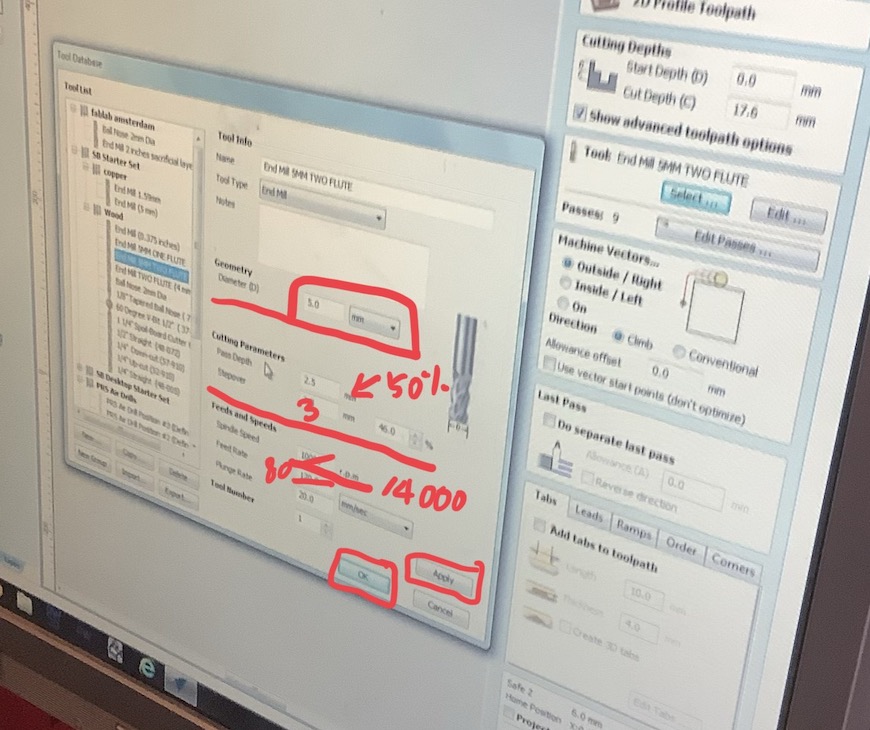
Diameter: diameter of the endmill (5mm)
Pass Depth: half of the diameter (2.5mm)
Stepover: 50% ~ 60% of the diameter (3mm)
Spindle Speed: 14,000
Feed Rate: 80%
and click Apply and OK
-
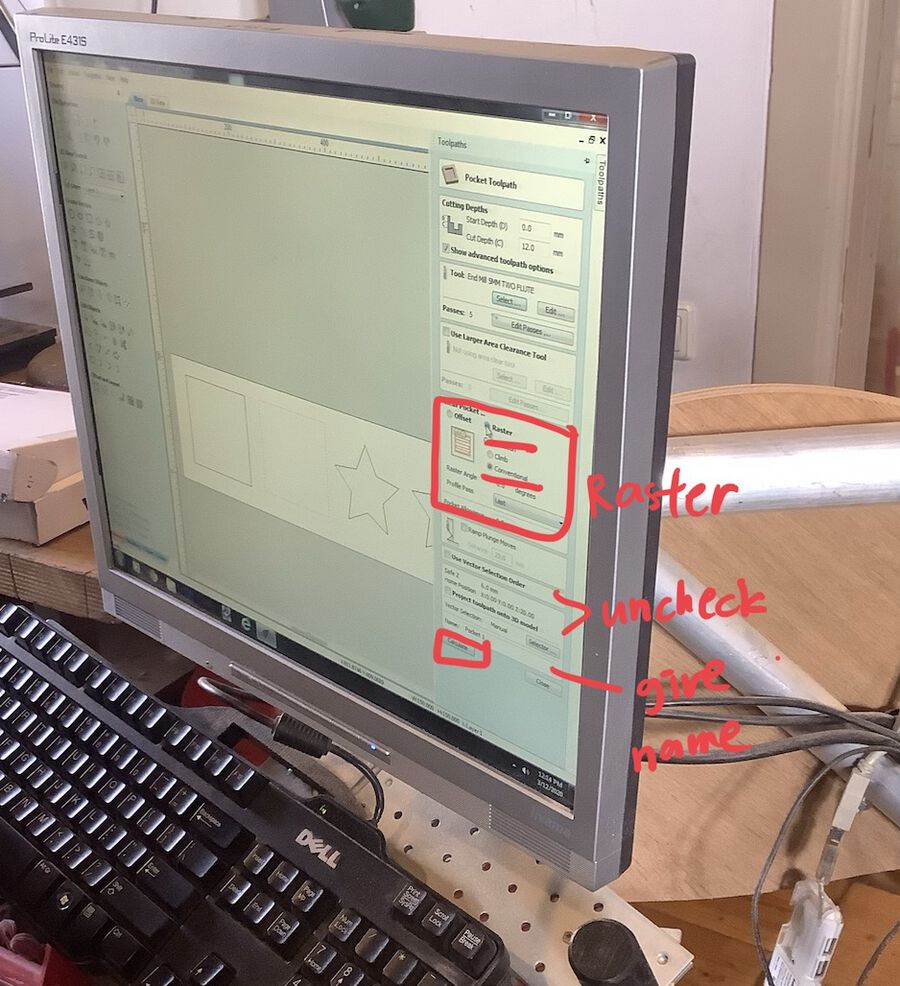
Then, do the rest of the settings in the Toolpaths option
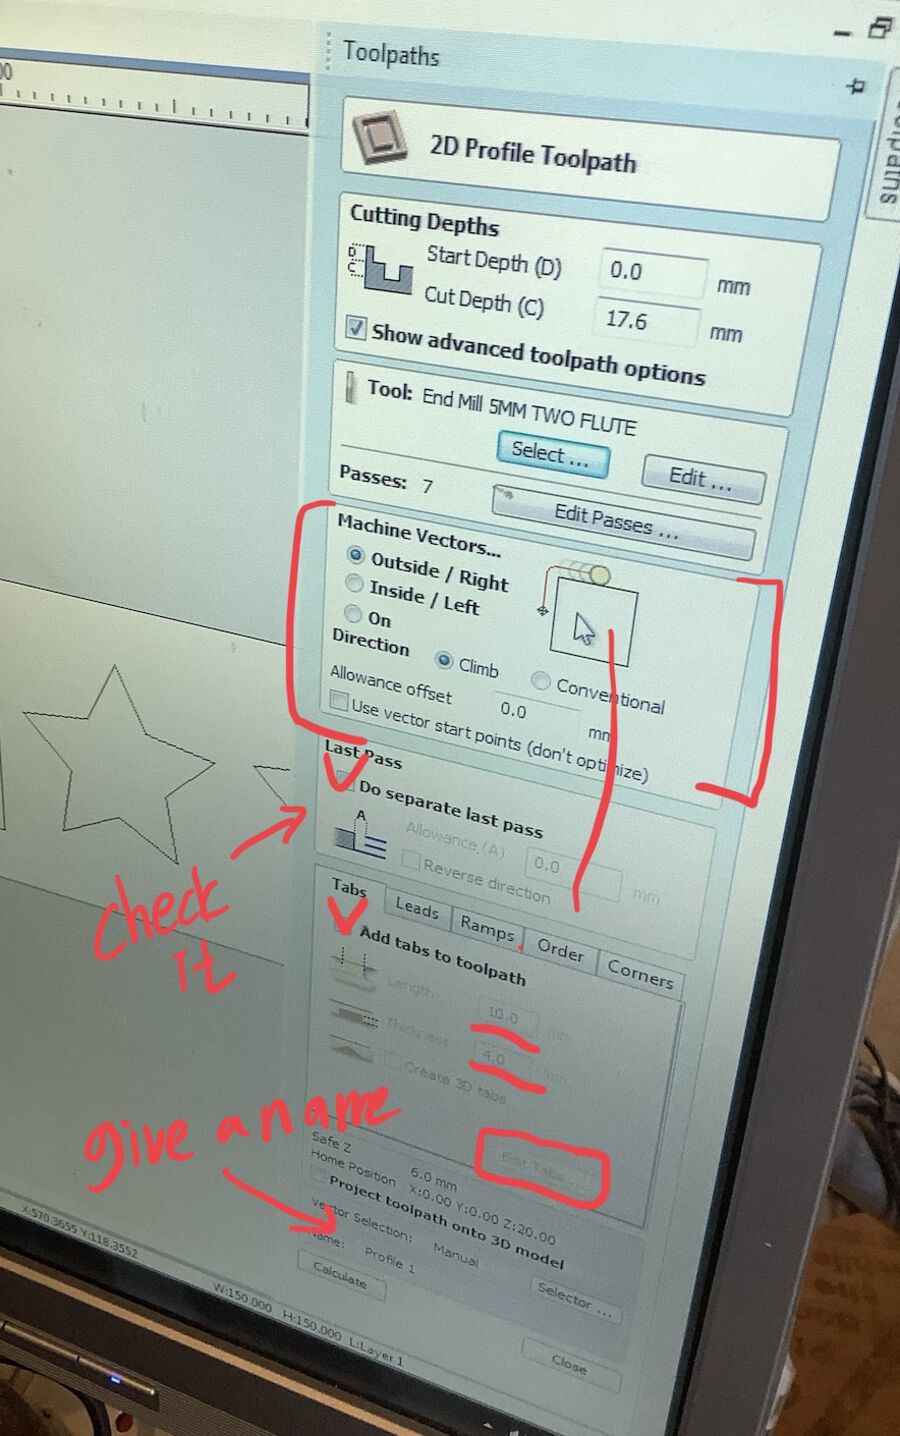
Select the Machine Vectors and the Direction
Check Do separate last pass in the Last pass if needed
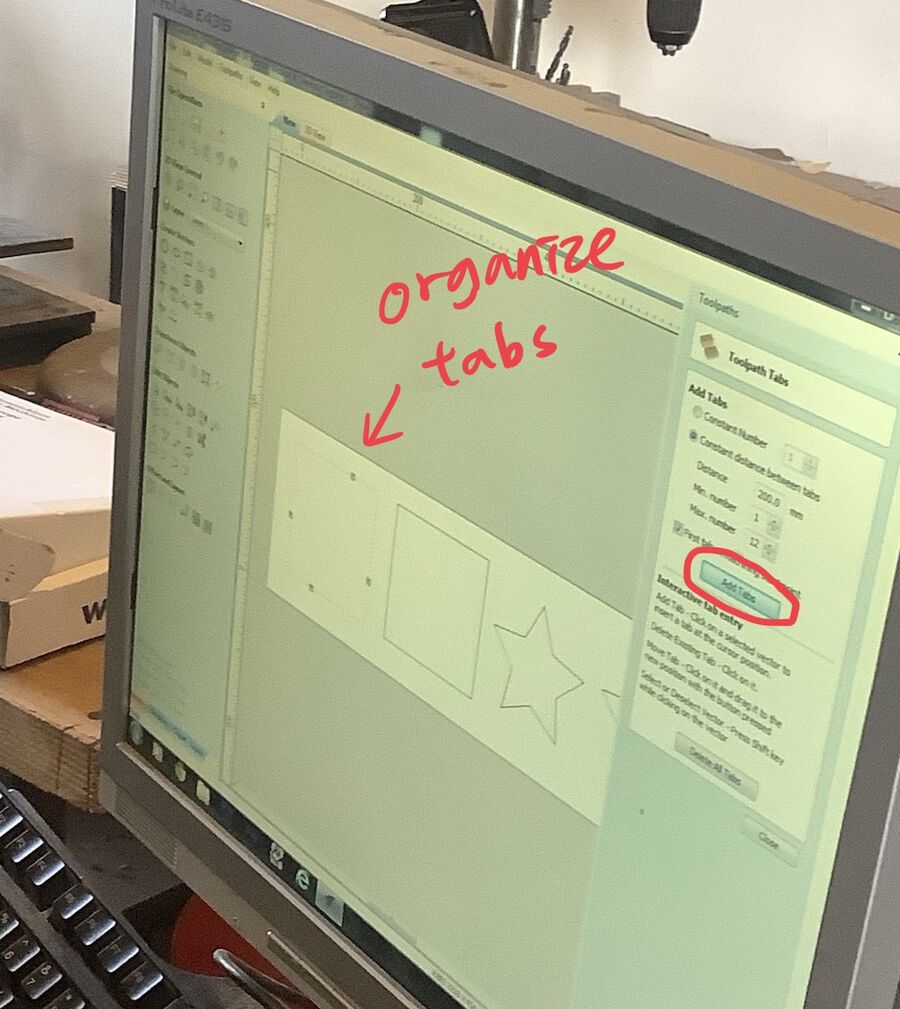
Check Add tabs to toolpath and set the length to 10 and thickness to 4. Then click the Edit tabs
Click Add tabs and add tabs wherever you want
You can change the name if you want
-
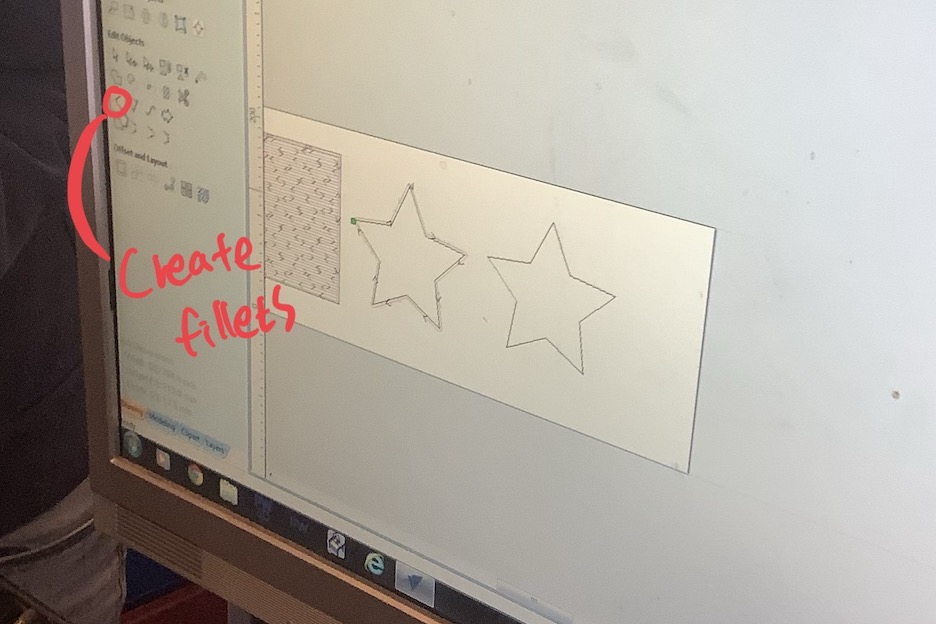
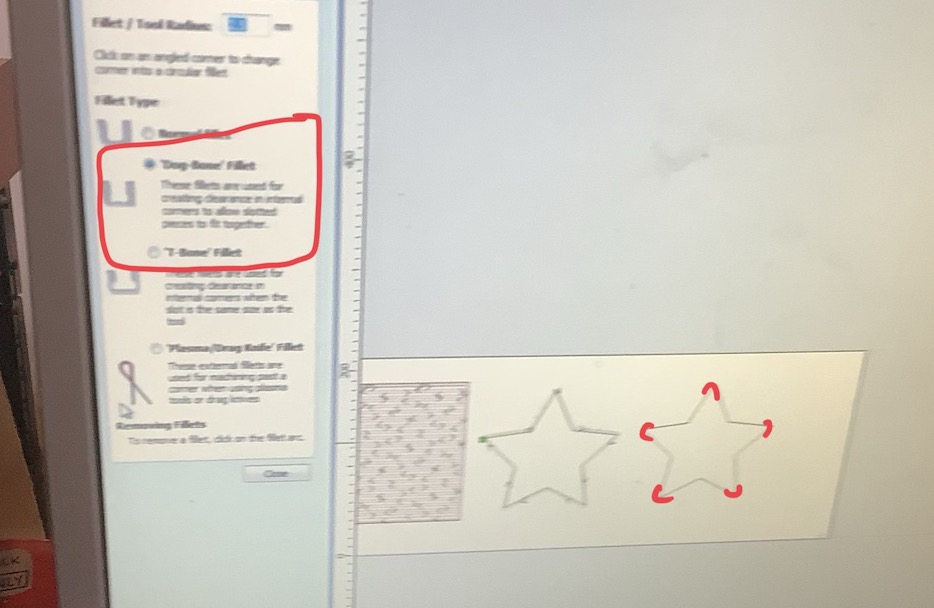
If you want to add a fillet, click Create fillets and select Dog Bone Fillet
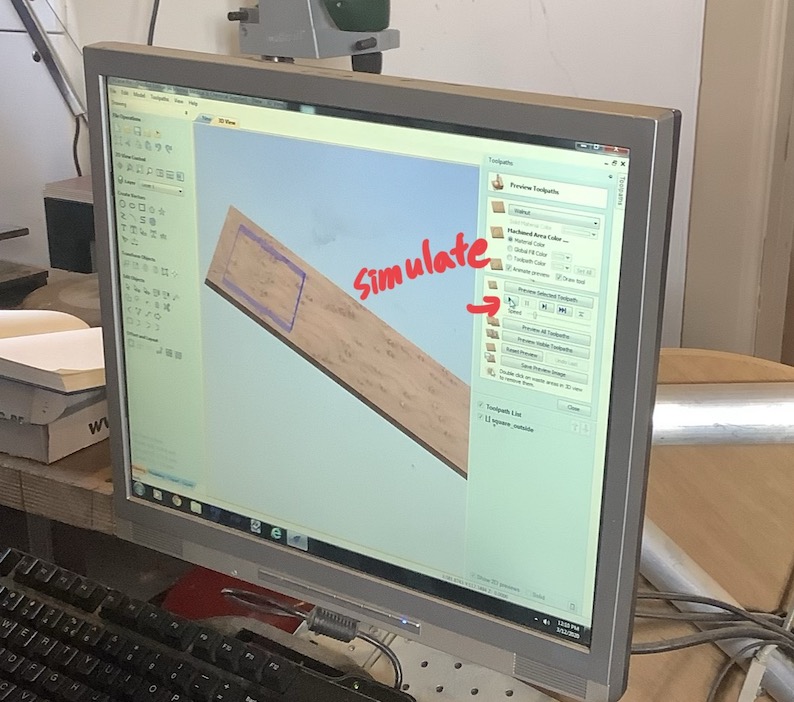
When you are done setting, click Calculate
You can click the Play button to see the simulation
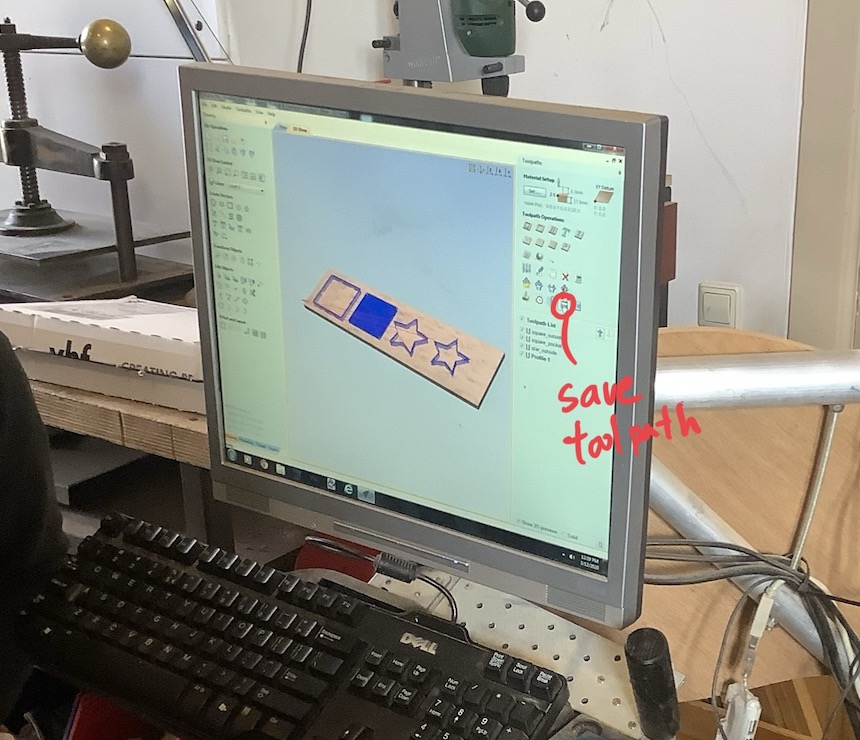
Click the Save toolpath icon
If you are going to use the same endmill for everything, you can save them together
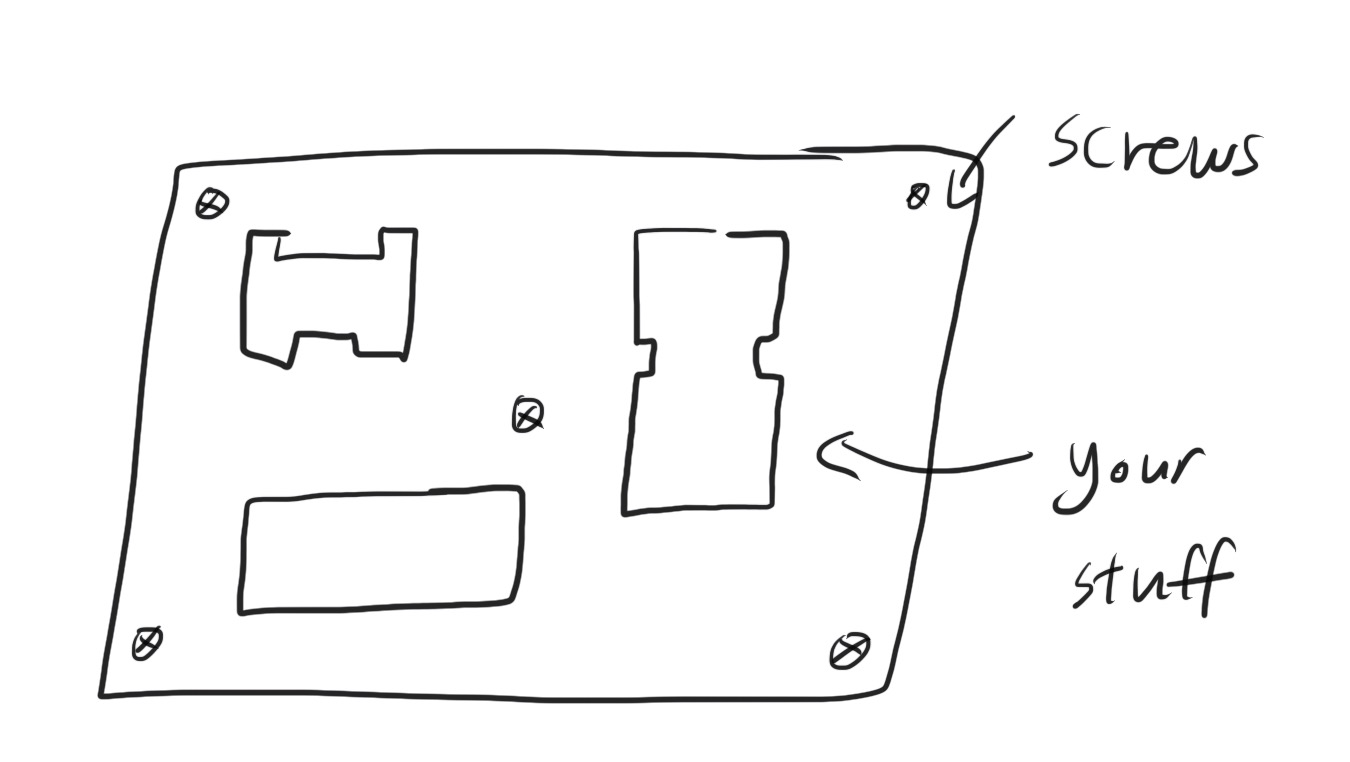
Use screws to fix the wood onto the working table. Press hard so that the wood won't lift up while drilling. If you need to drill the screw in the middle of the wood, you can draw small circles in the sketch and run the milling job first. Then, you can drill the screws into the spots you mill, and place your design where the screws don't exist.
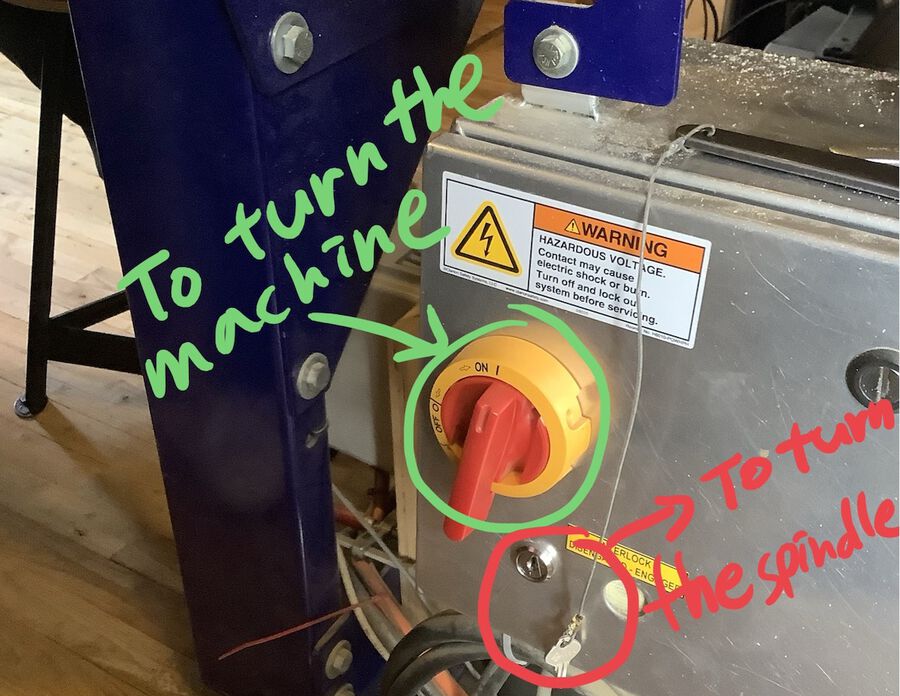
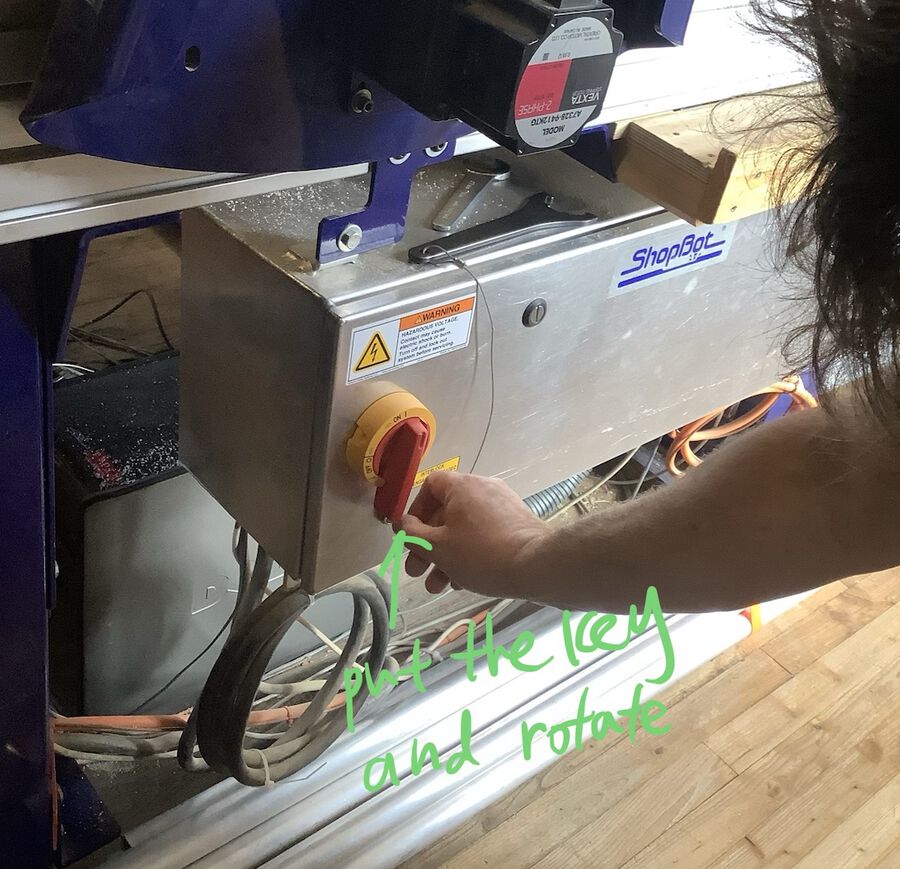
Turn on the machine by turning the red handle to ON
Turn on the lamp on the machine
Open the Shopbot program
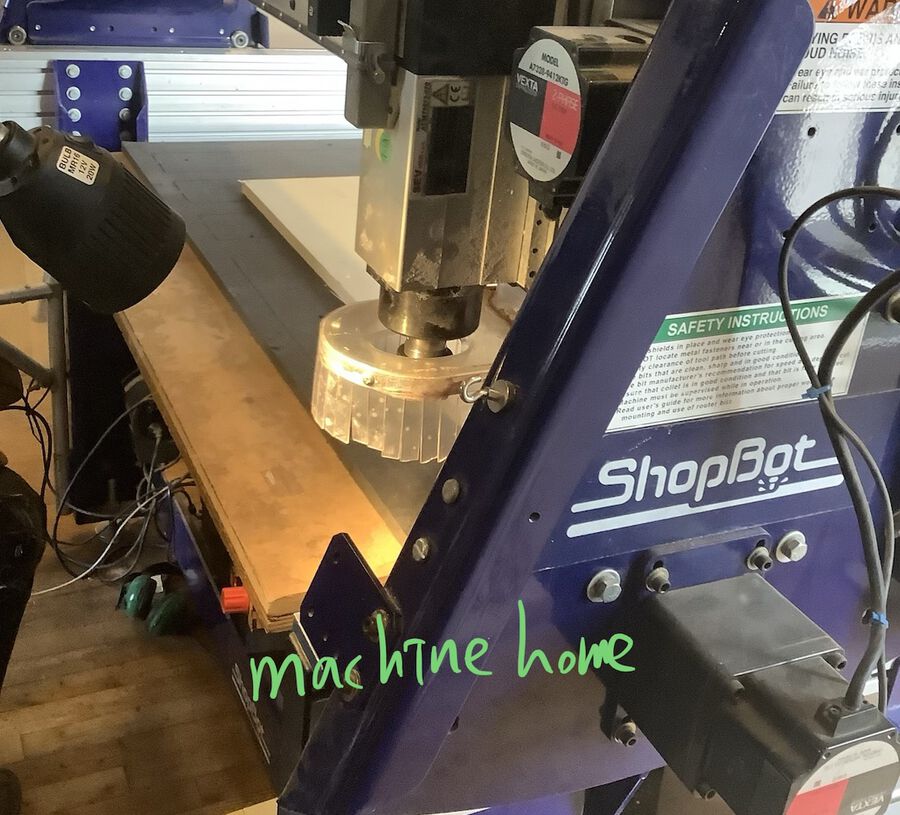
Click Machine home. The spindle will be moved to the machine home
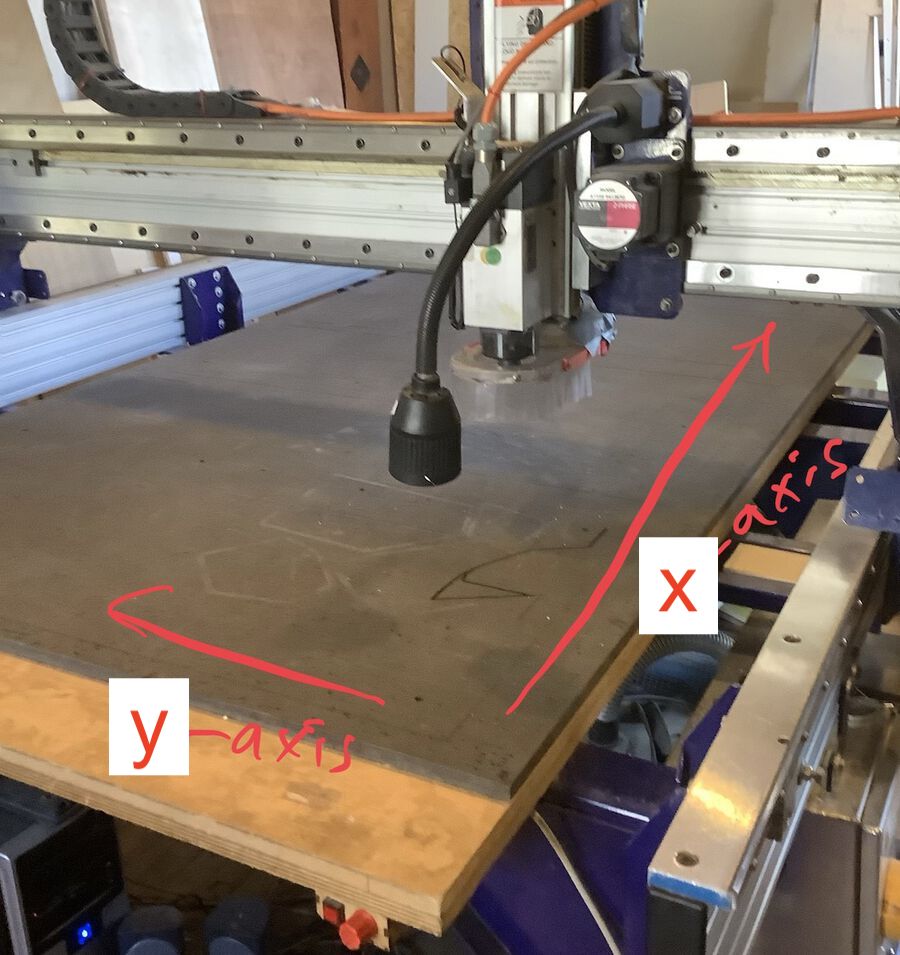
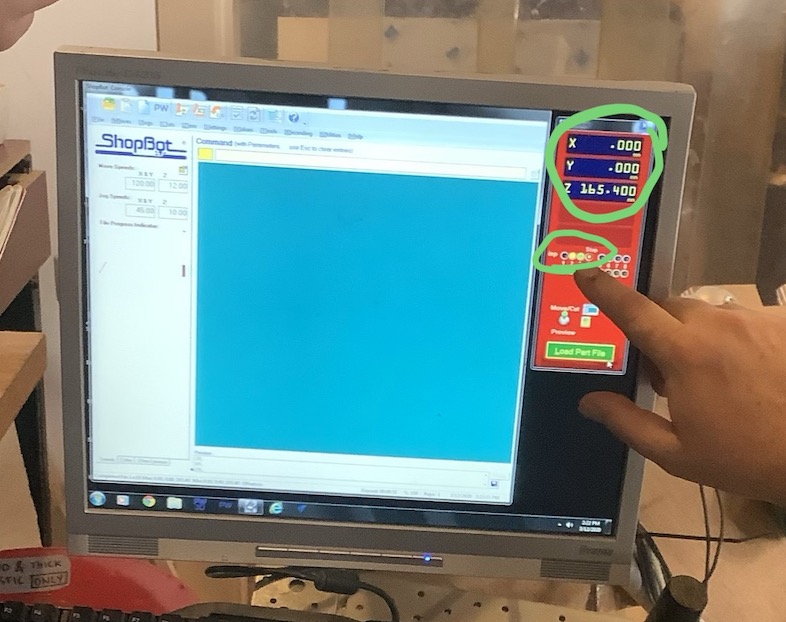
Press k. Then you will be able to use a keyboard to move the spindle to the origin of the wood.
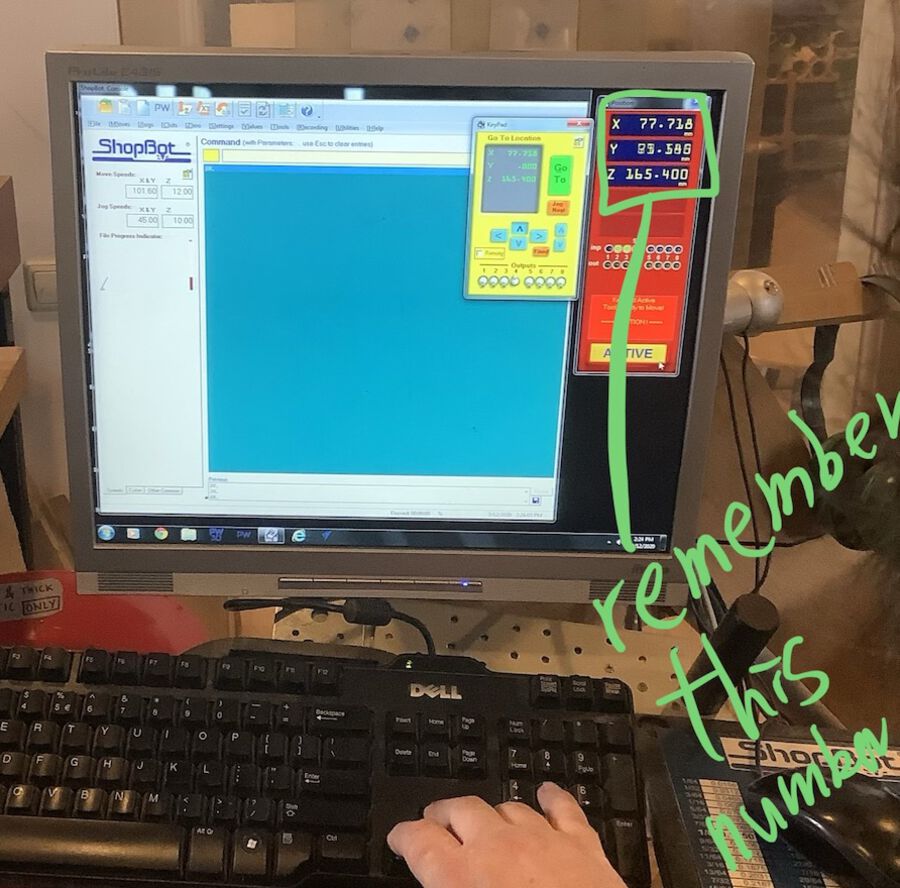
Write down the x and y values shown on the screen. You might need them when you want to restart the job
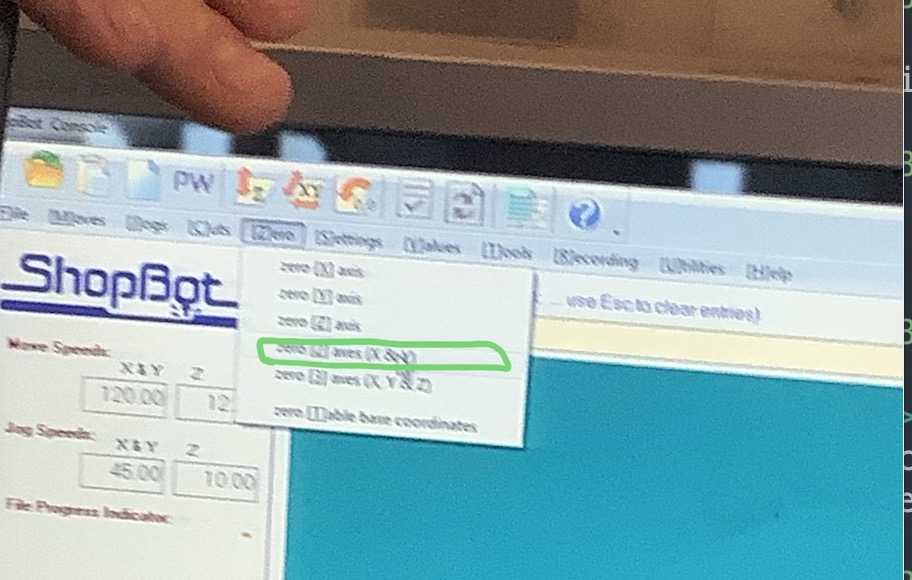
Go to Zero > Zero[2] axis(X&Y) and click it. This will reset the x and y values on the screen
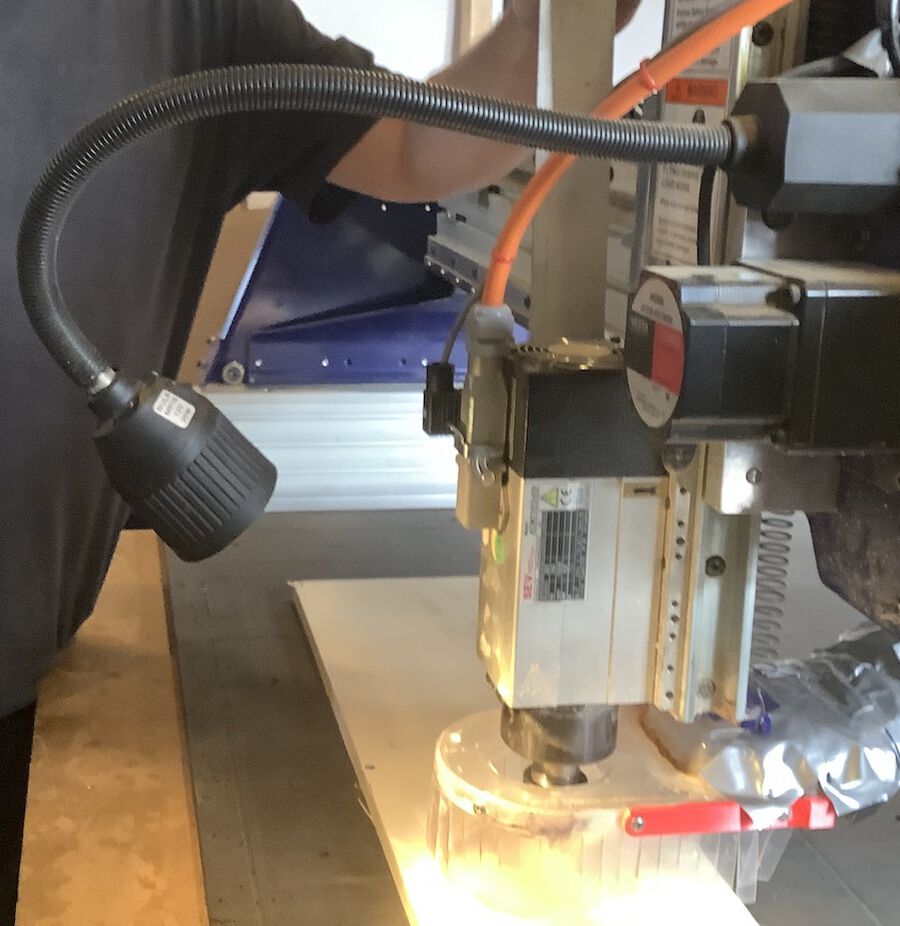
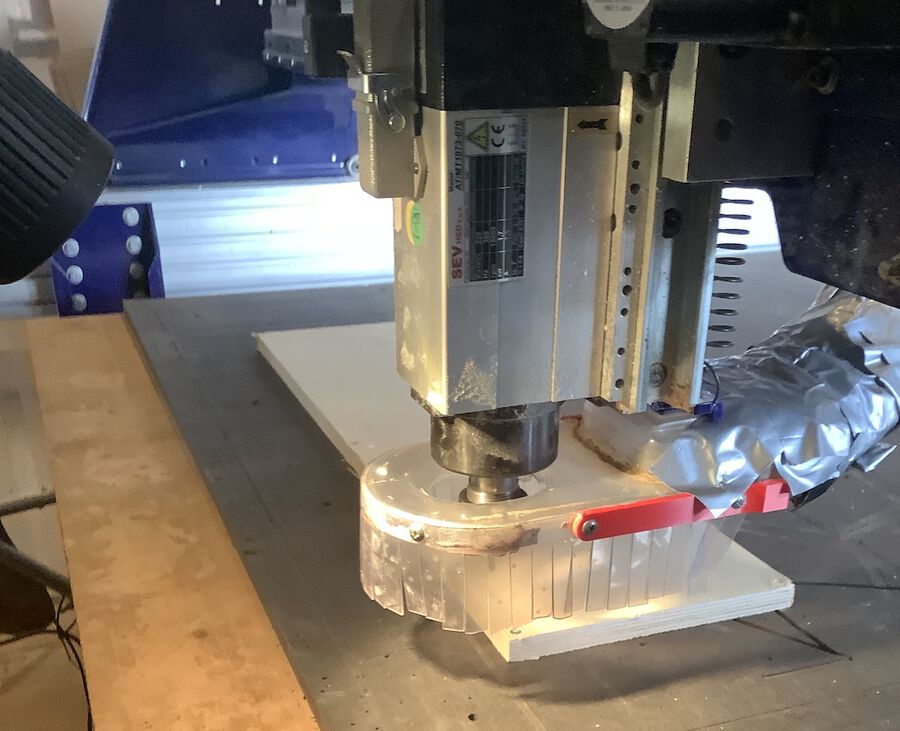
Take out the metal plate and place it under the endmill. Make sure it's actually under the endmill, it can be hard to see because of the spindle skirt.
Go back to the program and click Z Zero. This will automatically lower the endmill until it hits the metal. (The metal thickness was 3.07mm)
Once the Z setting is done, move the spindle up by pressing the page up key.
Import the file you save in the step 23.
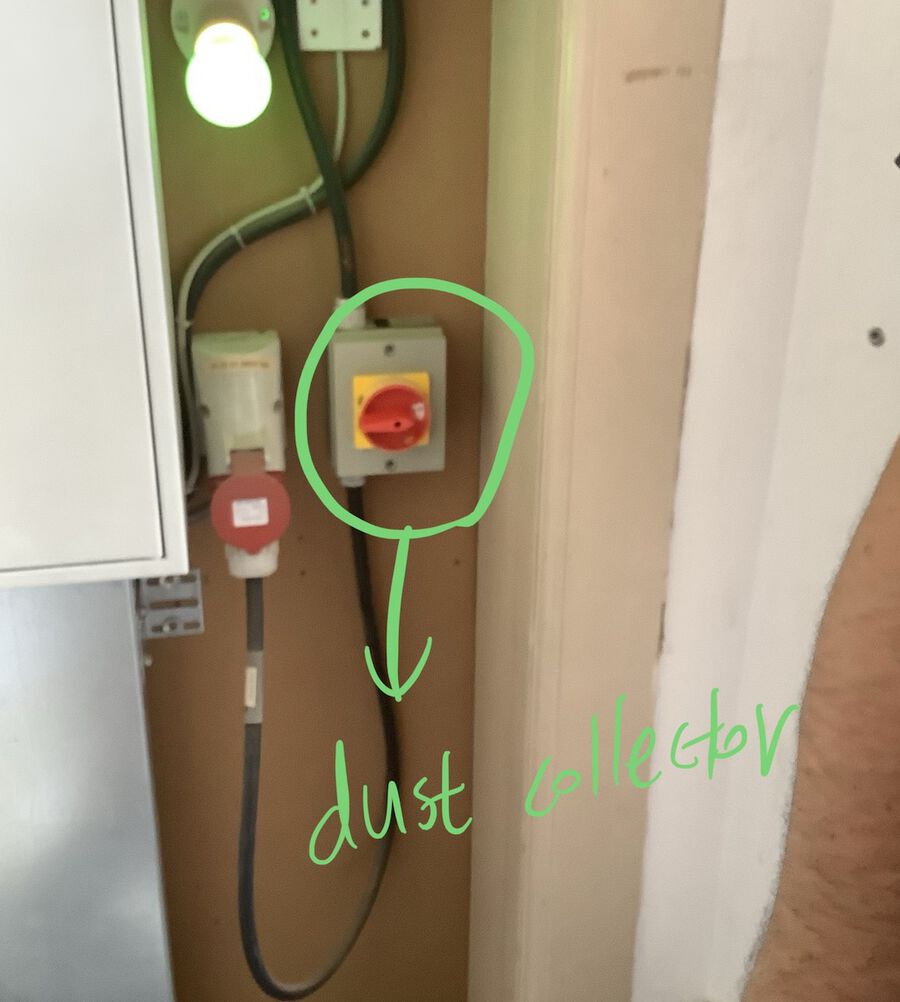
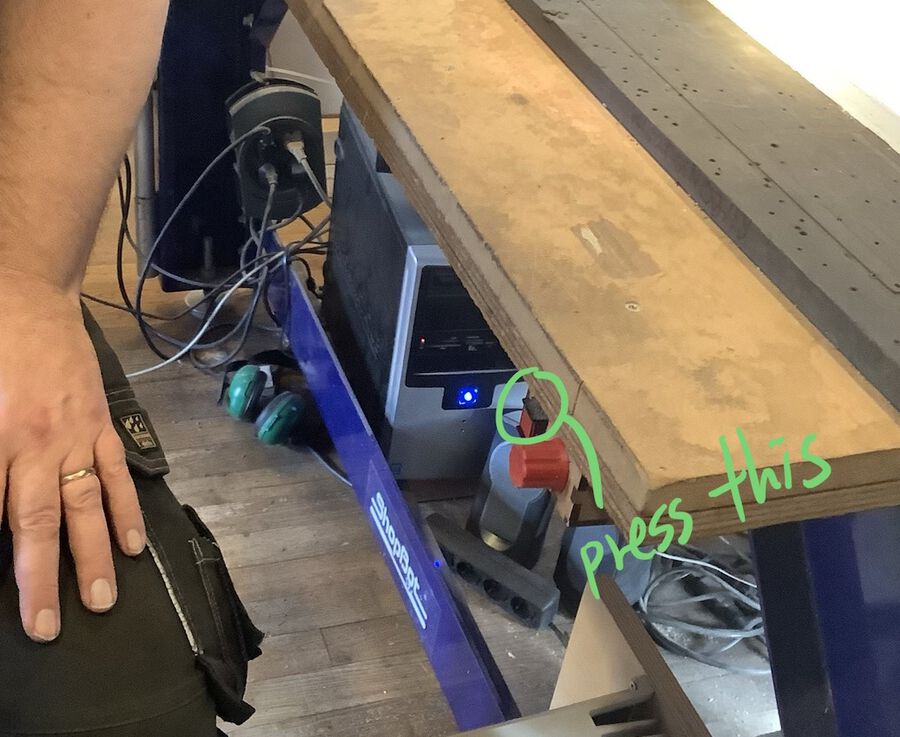
Go to the where dust collector bag is, and turn the machine on
Come back to the milling machine and press the small red button to turn on the dust collector. You can adjust the power of the dust collector by rotating the button next to it
Make sure nothing is on the working table. Also, check the surroundings of the machine.
Go to the side of the machine and rotate the key to turn on the spindle. Now you really have to be careful
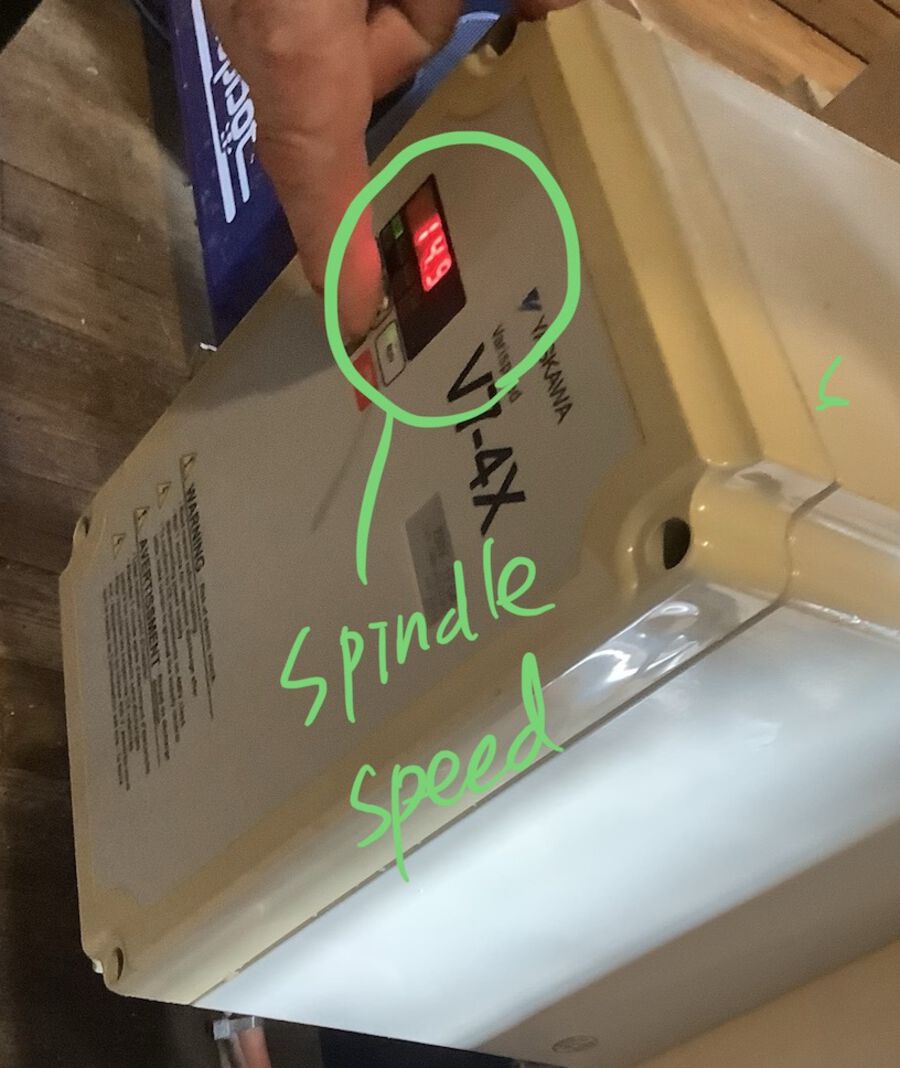
You can change the spindle speed if needed
Press the start button on the program. Place your finger on the spacebar to pause the machine right away if the job goes wrong
When your job is done, turn the spindle key off
Move the spindle away from the wood and unscrew the screws
Sand the spots on the working table where the screws were to make an even surface
Clean up the workspace

This step is very important. If you don't do it correctly, the endmill will be loose and it can ruin the process
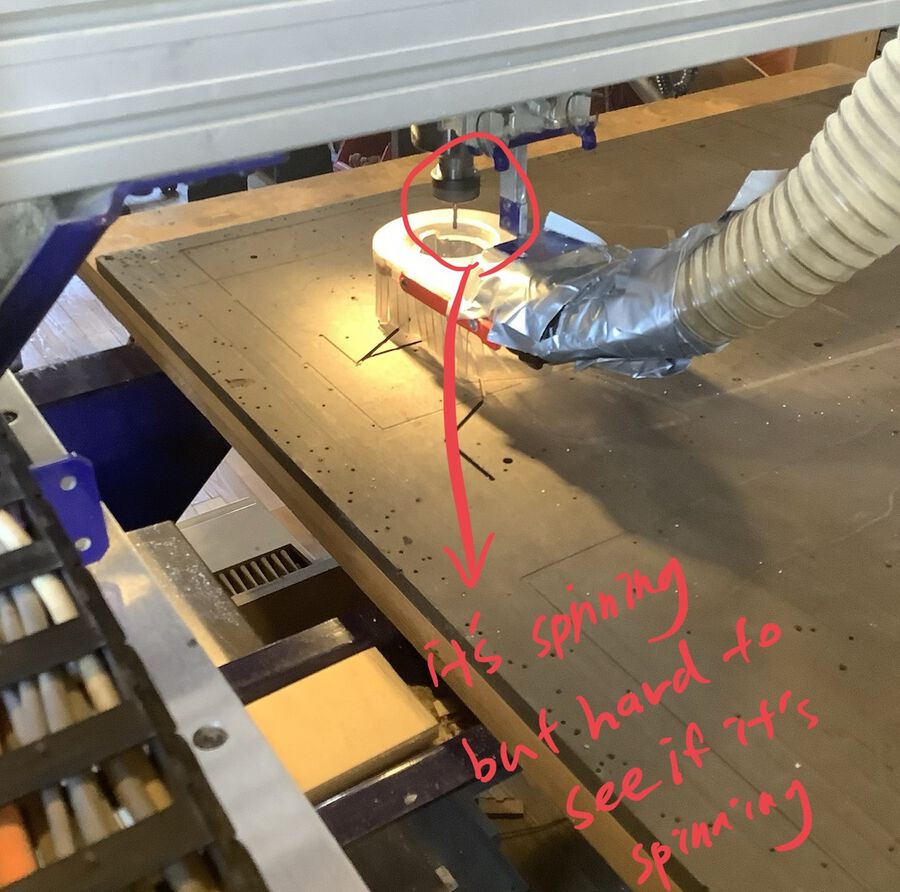
Even though the spindle is spinning, it's hard to tell if it's spinning or not because it's really fast. That's why it's important to make sure the spindle is not spinning whenever you want to handle it.

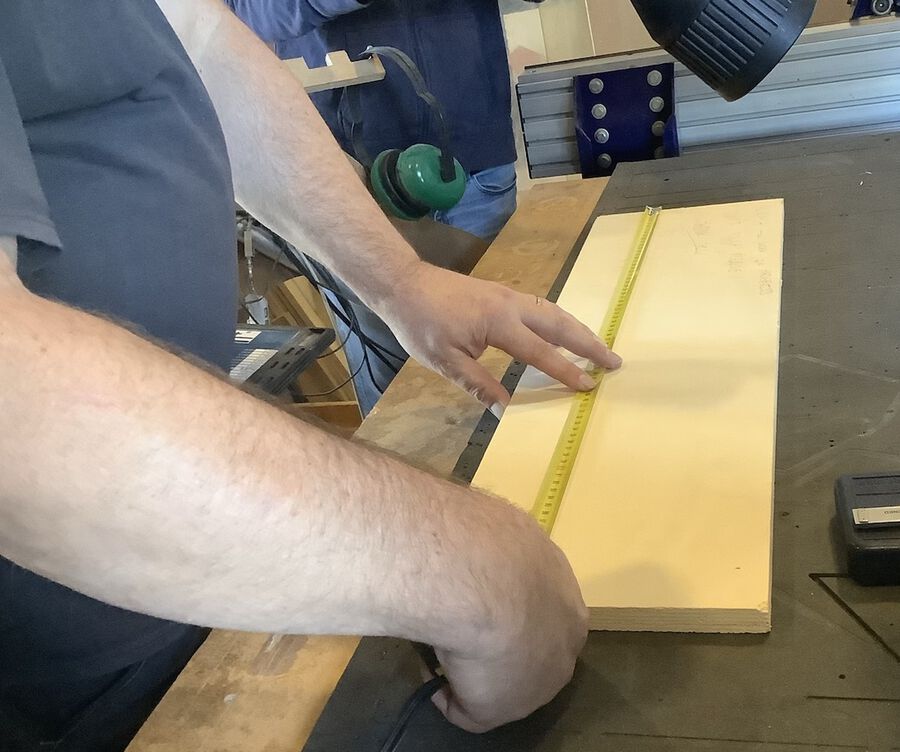
Measure the size and thickness
If you are using the Pocket toolpath, the settings will look a little different.


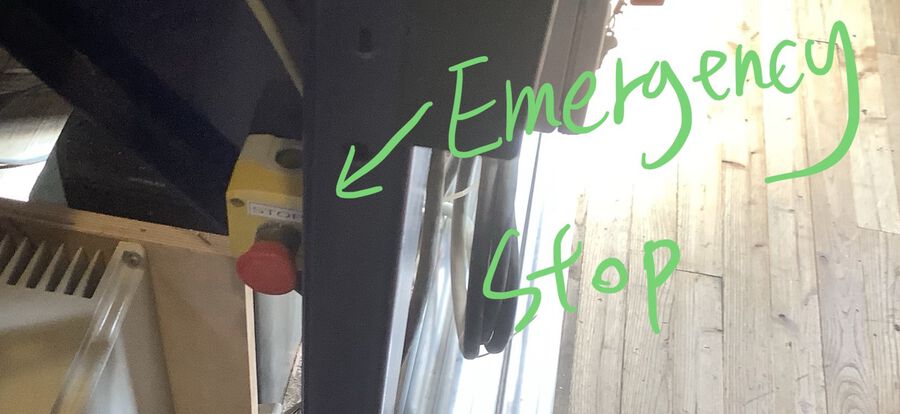
Press the emergency stop button if there's an emergency. If you just want to pause the process, press the space key on the keyboard.
If you need to replace an endmill in the middle of the process, don't forget to reset the z-axis after replacing it.
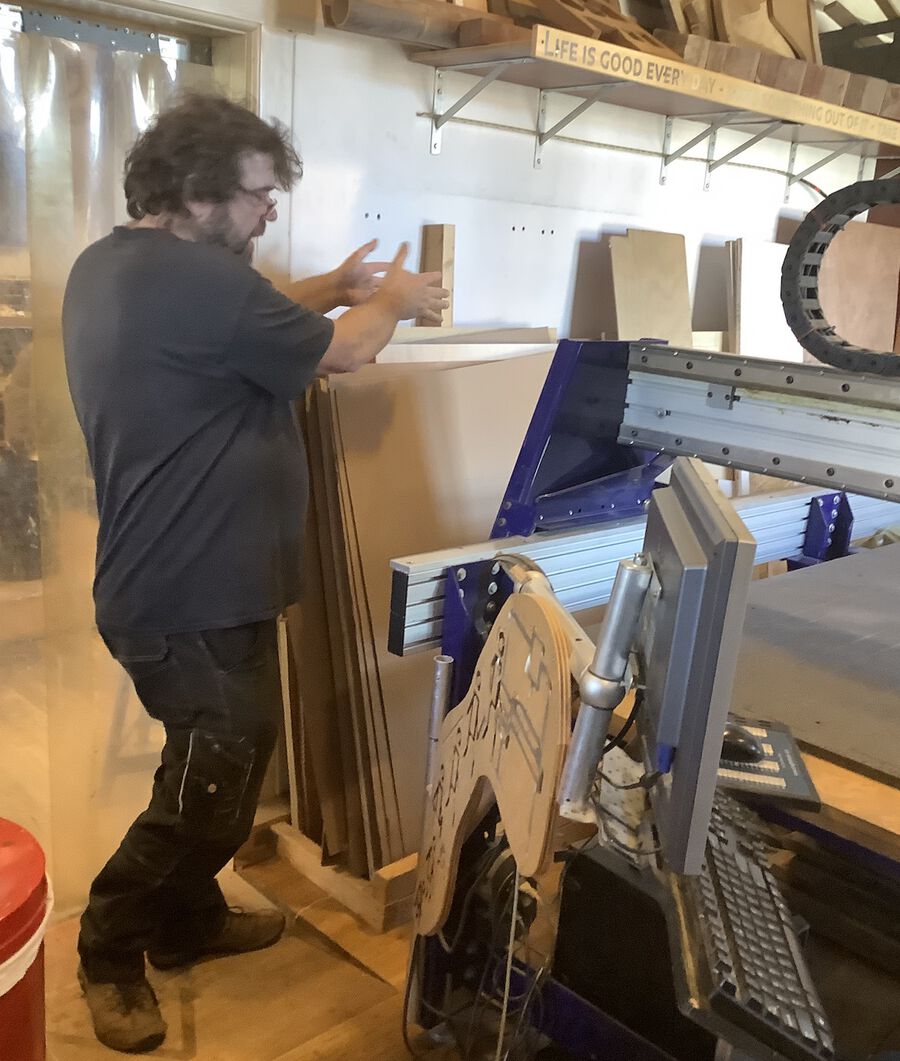
Where to get woods
After the group assignment, we went out for wood shopping. The wood store was only 5 minutes away.
The place reminded me of Diagon Alley from Harry Potter. They've got many different kinds of wood and wood related tools.

The wood shopping was the fun part. Carrying the woods up to the fablab was a lot of work. But it was a fun field trip :D
Individual Assignment
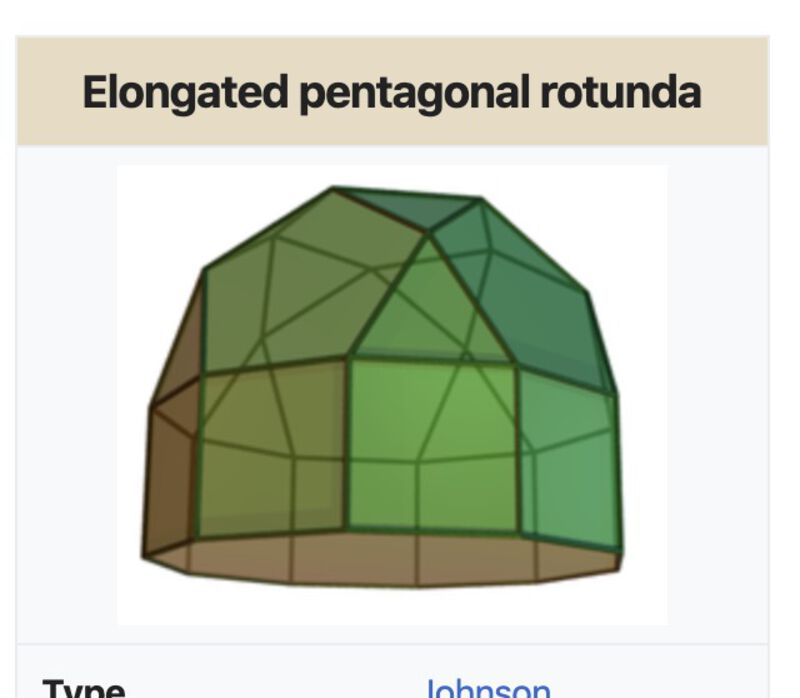
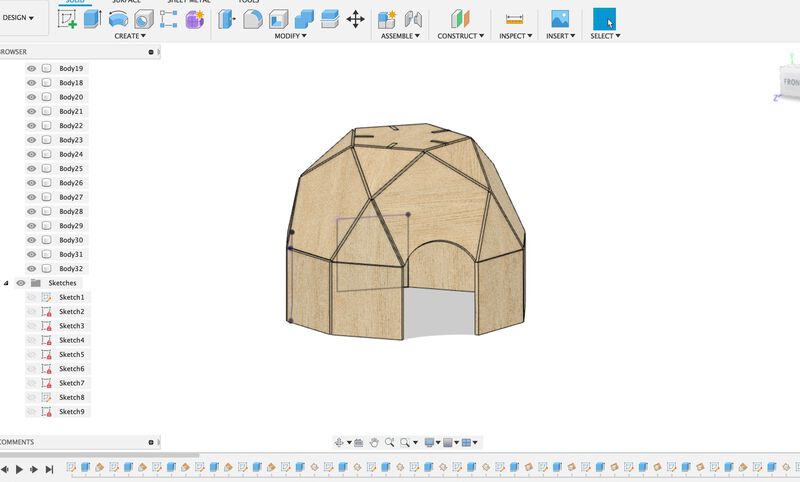
This week, I decided to make a dog house. I wanted to make it as a dome shape. I found something called elongated pentagonal rotunda which looked perfect for the dog house I wanted to make.
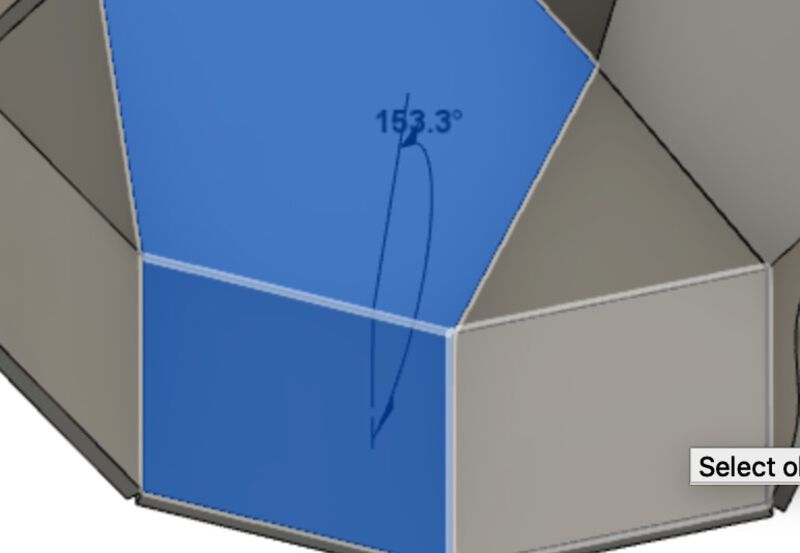
I used Fusion 360 to draw the house. I wanted to figure out the angles in a more mathematical way so that it could be perfect, but I couldn't find any resource for that. So I drew a 3D shape and measured the angle between faces.
After drawing the 3D design, I rendered it to 2D and exported it to Adobe Illustrator.
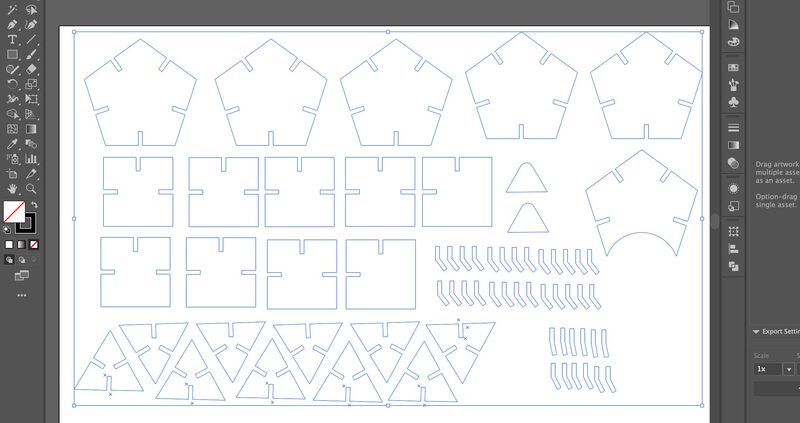
Then, I saved and exported the file from Adobe Illustrator as Illustrator 8 (I think the version really doesn't matter though). I opened the VCarve program on the milling machine computer and opened my design file.
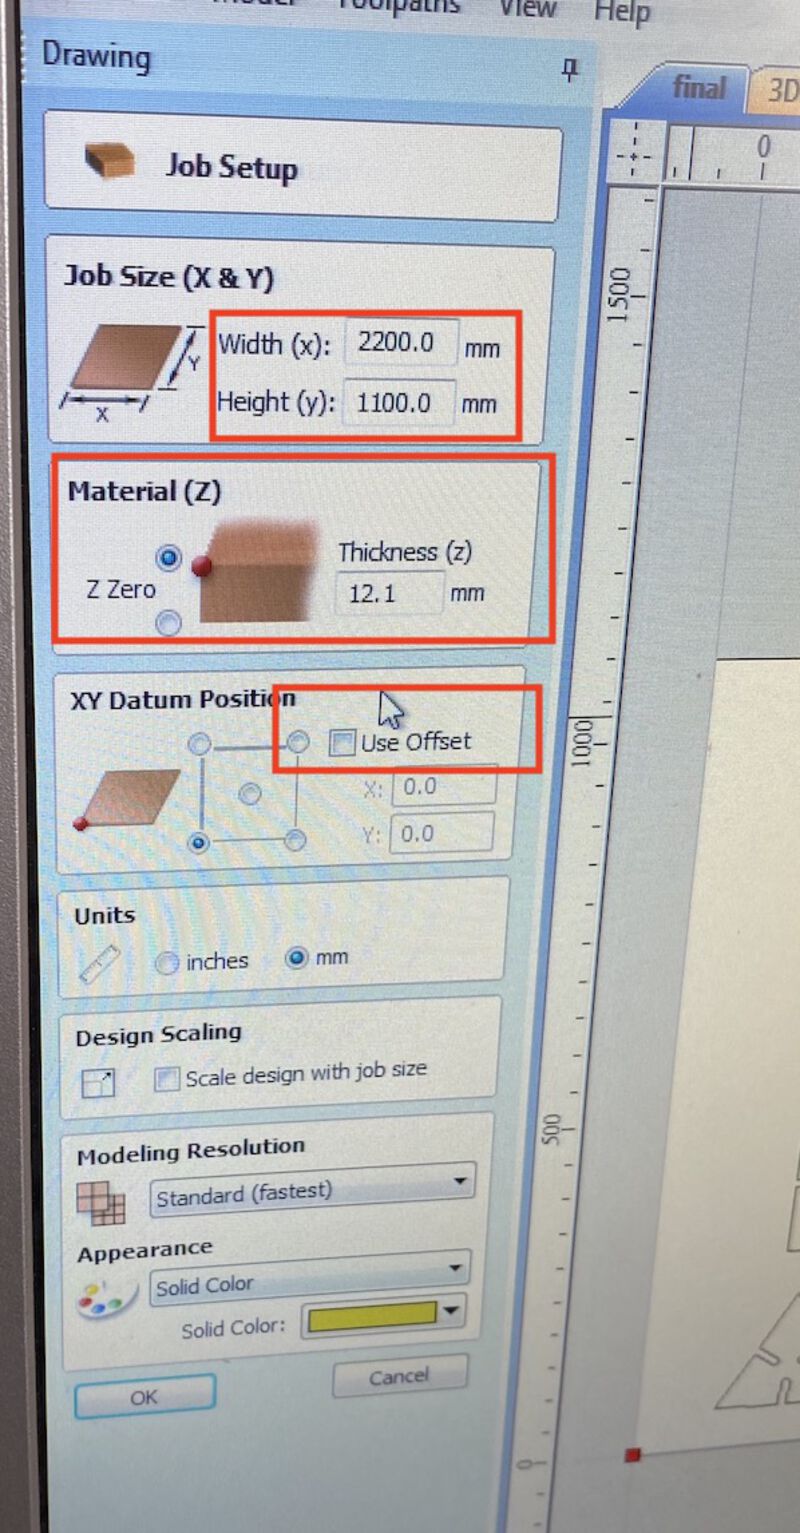
Job Size: Width (x) to 2200mm, Height (y) to 1100mm
Material Thickness: 12.1mm and select Z Zero
Use offset: uncheck
The wood size was 2350mm X 1220mm, but Rutger said it's better to set it as 2200mm X 1100mm, which is a bit smaller than the actual size. This way, we can make sure that all sketches are within the wood. Also, I changed the material thickness to 12.1mm, which was the thickness of my wood, and unchecked Use offset.
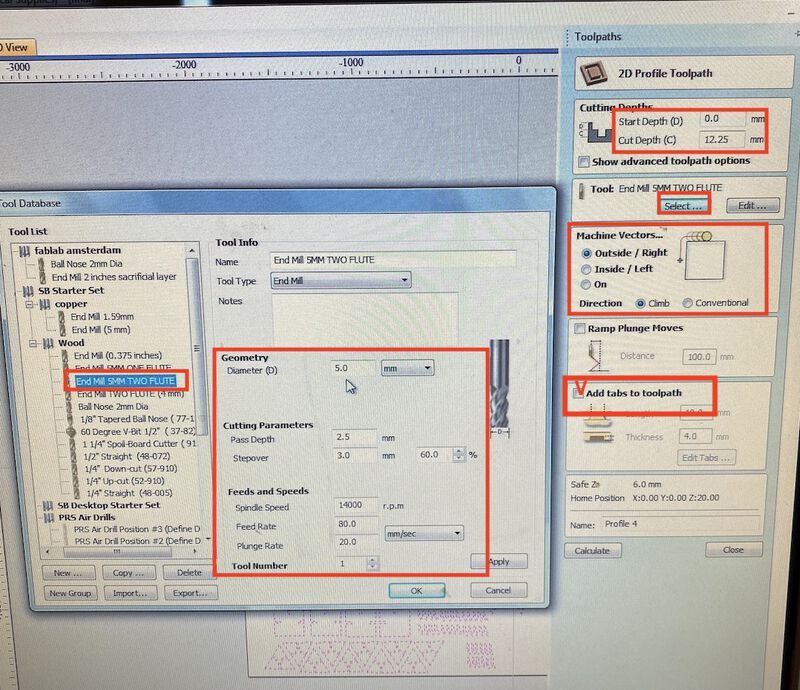
Cut Depth: + 0.1mm of the material thickness
Tool: 5mm 2 flute
Machine Vectors: Outside/Right, Direction: Climb
Add tabs to toolpath: Check and add tabs
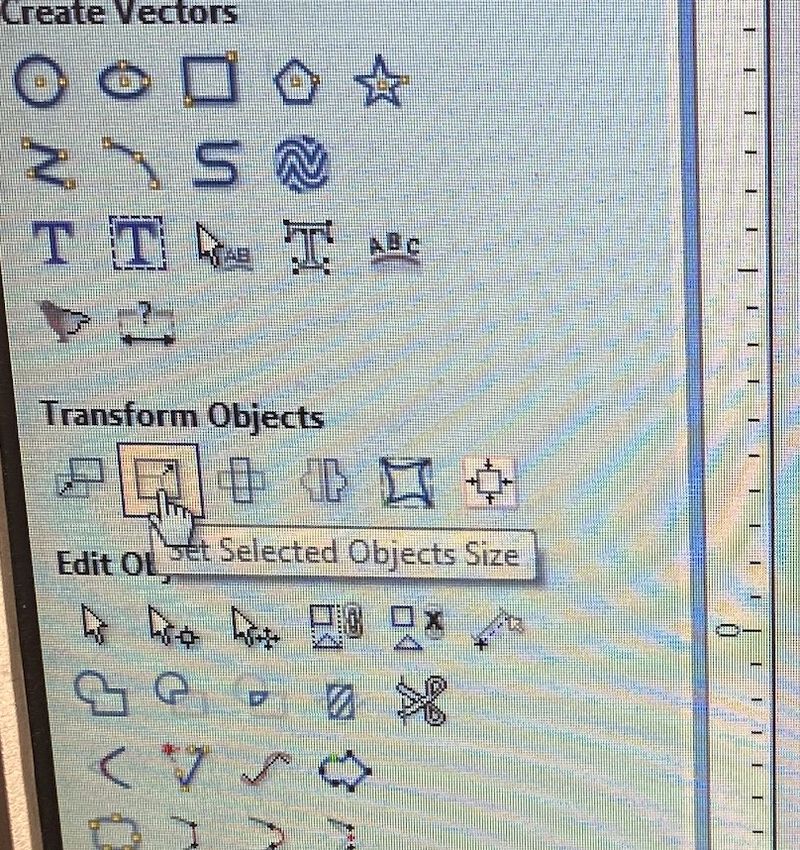
After updating the settings, I clicked Calculate. Before saving the file, Rutger checked the size of the object. (Transform Object > Set Selected Object Size). Everything looked good, so I saved the file.
Then, I opened the Shopbot program and turned on the machine (I turned on only the machine, not the spindle).
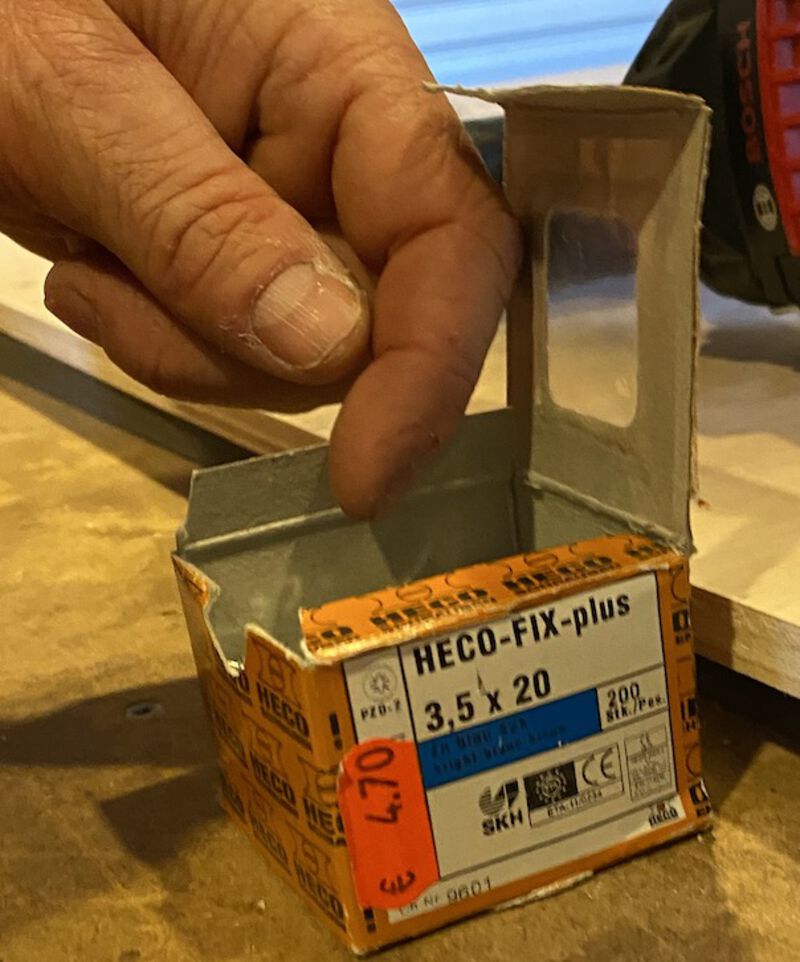
Harm already assembled the 5mm 2 flute, a collet and a nut together and put it in the spindle, so I could skip this step. I put the wood in the table, and Harm screwed it to the table. Before screwing, we made sure if the length of the screw was shorter than the sum of the thickness of wood and the sacrificial wood. We used this 3.5 cm one and it worked well.
Then, I set the x,y and z coordinates of the machine. First, I selected the Machine Home button and I moved it to the point where I expected the job to start.
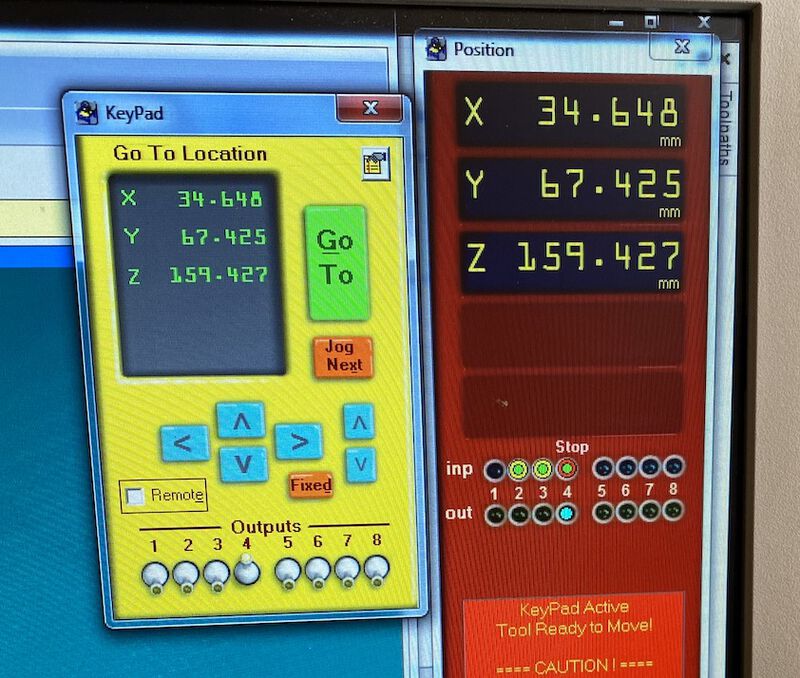
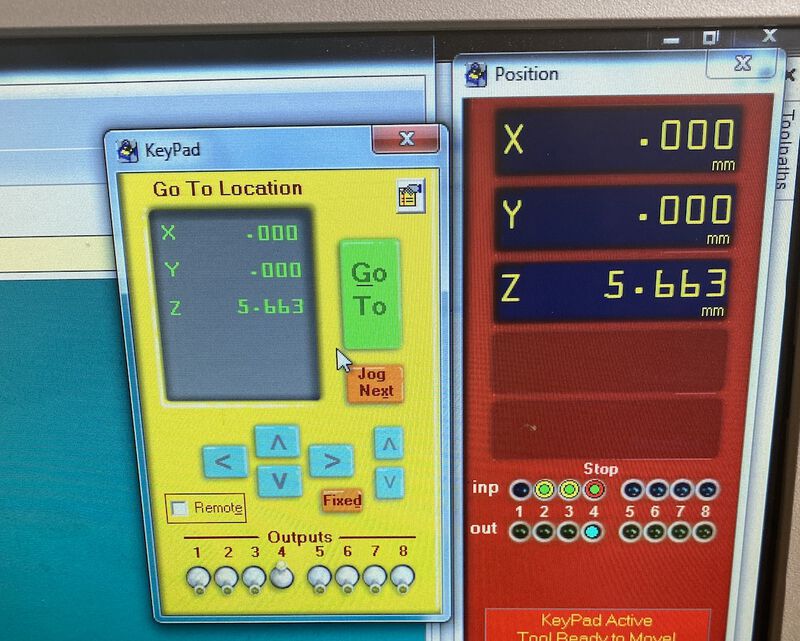
And I took a photo of my origin, and then clicked Zero > Zero[2] axis(X&Y). Then, I put the metal plate underneath the spindle so that I could measure the Z axis. After all measuring was done, I set the X and Y values to 0 like in the photo below, to see if it really went to the job start point. I double checked to make sure that the spindle would never hit any of the screws.
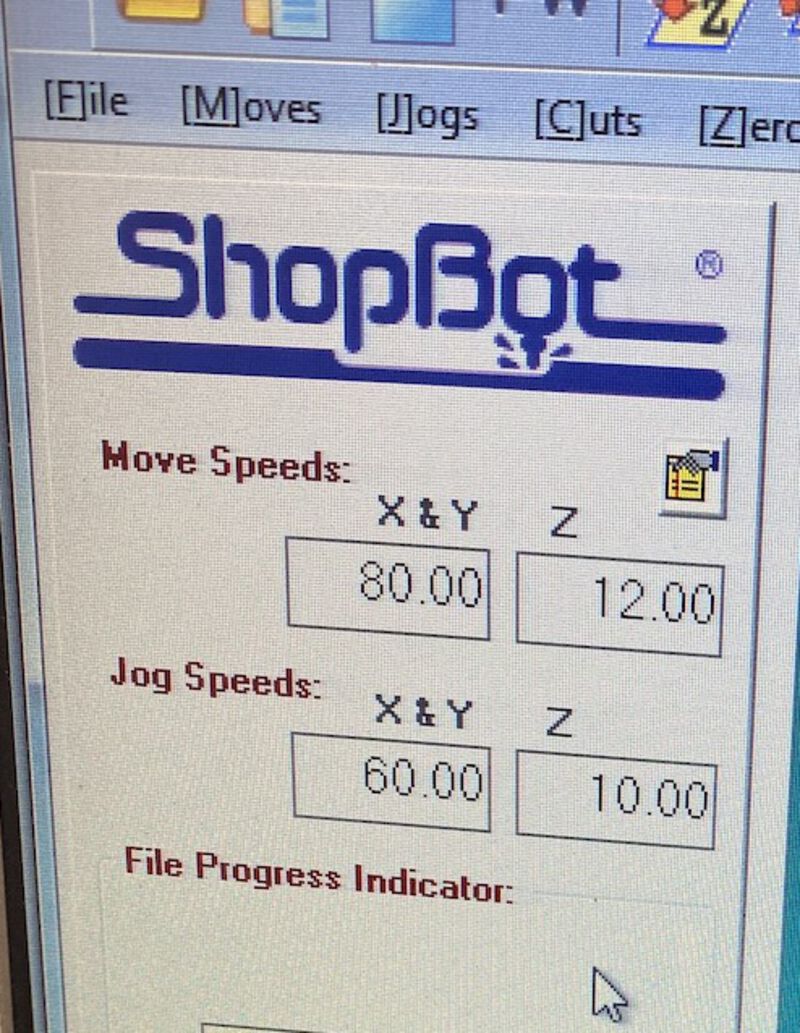
Rutger also tested the Z value by lowering the spindle. I also set the Move Speeds X & Y to 80 and left the rest of the settings as they were.
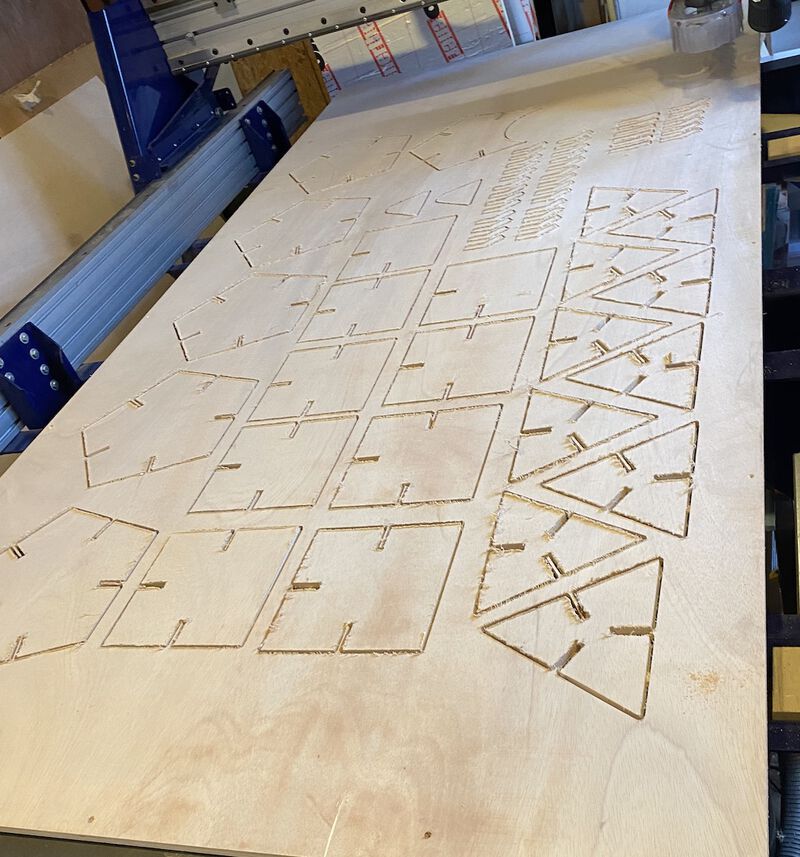
I once again made sure everything looked okay, and opened the VCarve file I saved. And finally, I clicked the Start button. It took around 2.5 hours and the result looked good.
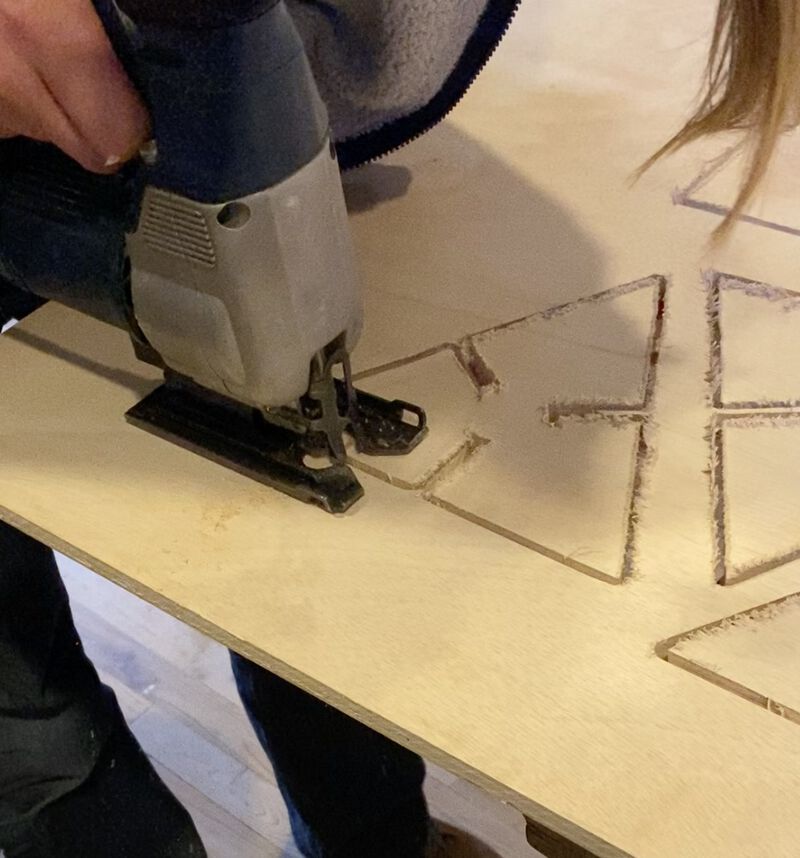
Rutger used the electric saw to cut the pieces out of the wood.

Because of the coronavirus, I couldn't use the electric sanding machine at the lab. So I brought the pieces home and sanded it for 5 hours while watching Netflix.
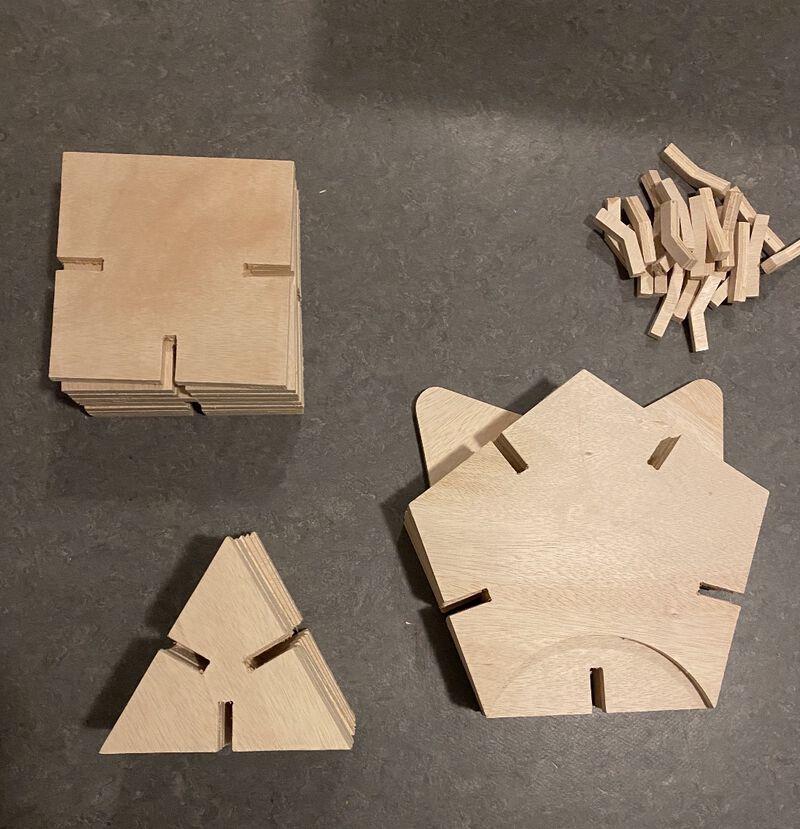
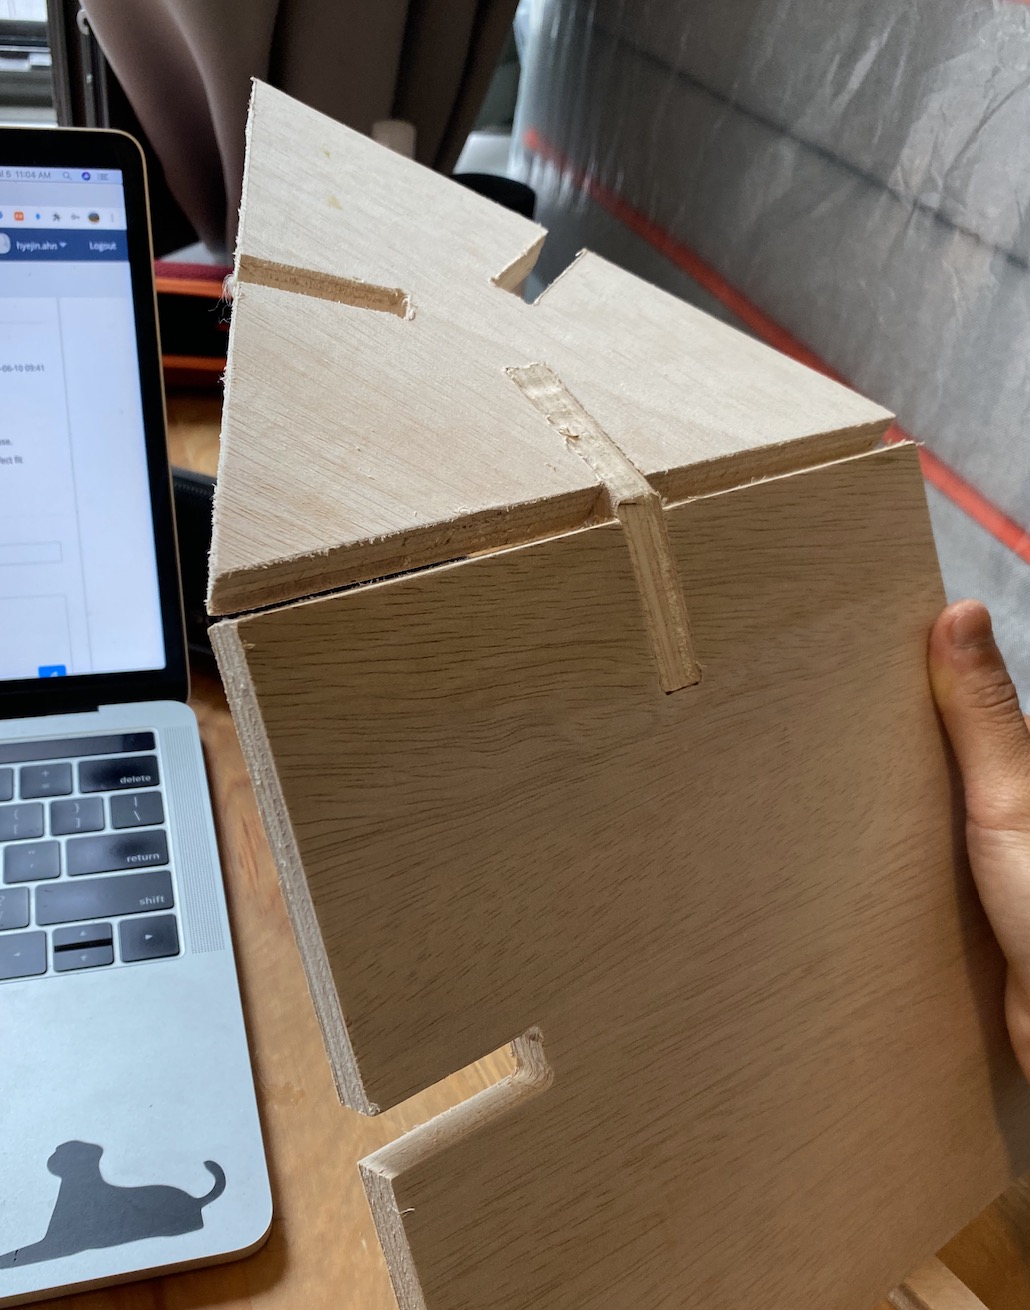
I was so exhausted from all that sanding that I couldn't even use my arms the following day. But the result seemed very nice. Some parts needed to be sanded more to fit together, while other parts were a bit loose and needed glue. I don't want the parts stuck together permanently because I want to be able to take the doghouse apart later and mail it to my boyfriend.
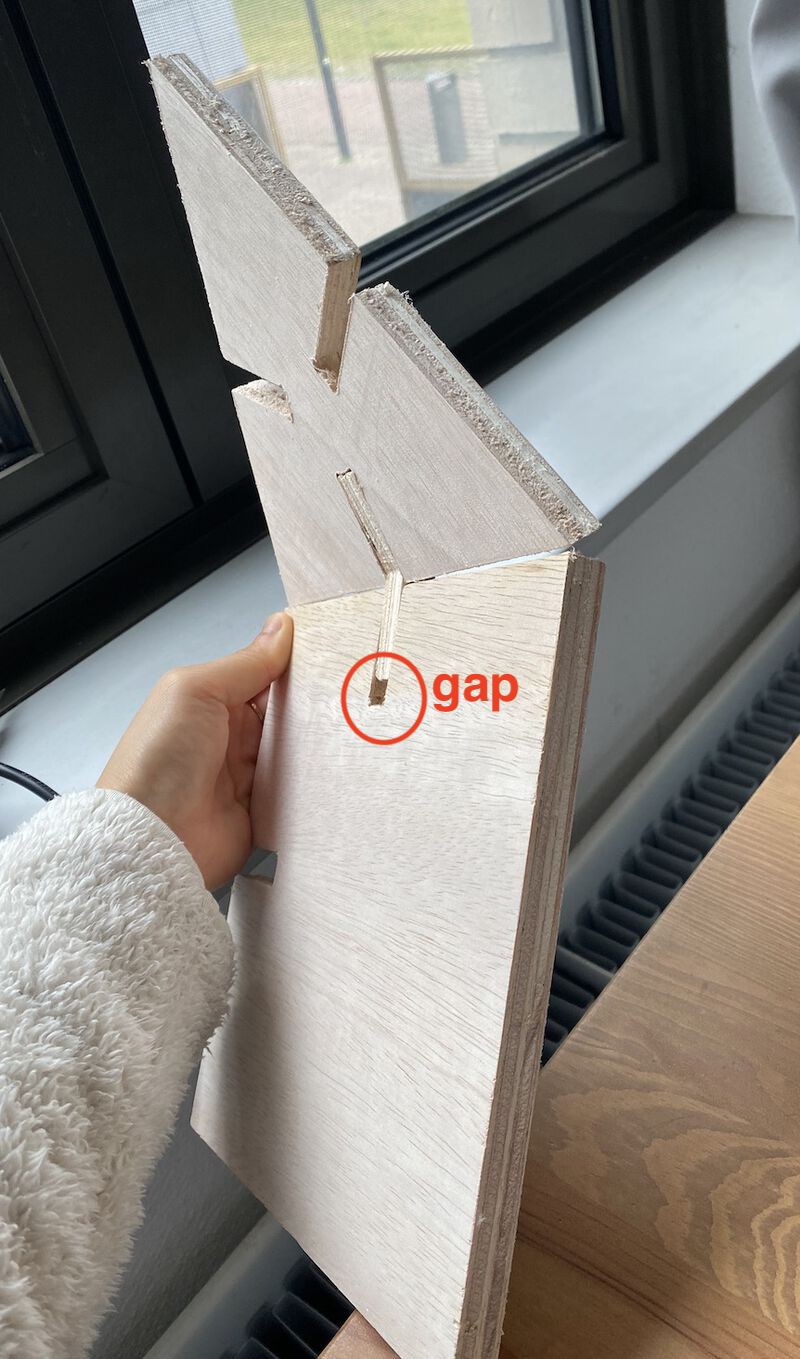
The connectors were a little bit shorter than the slots they're supposed to fit into. I miscalculated the length of the connectors and it created a gap on each surface. When the lab is open again, I want to create new connectors that fit perfectly.
Updated - July 2020
I cut the modified connectors again with the milling machine, and it fit perfectly. I can't build it now, because I am going to send this to San Francisco where my boyfriend is living. Since it's designed as a press-fit, it's very hard to disassemble it once I assemble it, and also the connection part will be loose. I was going to move there soon, but because of the coronavirus, my visa process is getting delayed. I can't tell when I can build this but I will upload the photo once I assemble this kit.
Issue 1. Open vectors
When I clicked the Calculate button, I got this message, saying there were open vectors and they would be ignored. I checked my design but I couldn't find any open vectors. I went back to Adobe Illustrator and exported the file again, but I still got the same message.
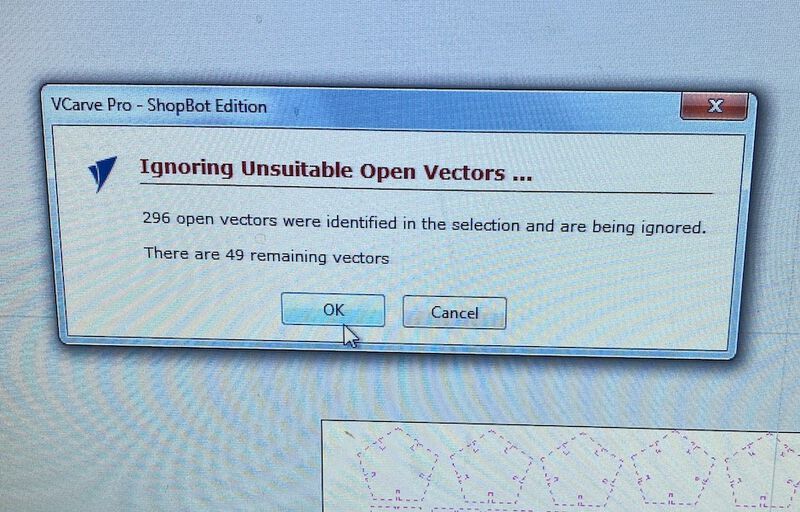
I asked Rutger and he told me how to fix it. The solution was very simple.
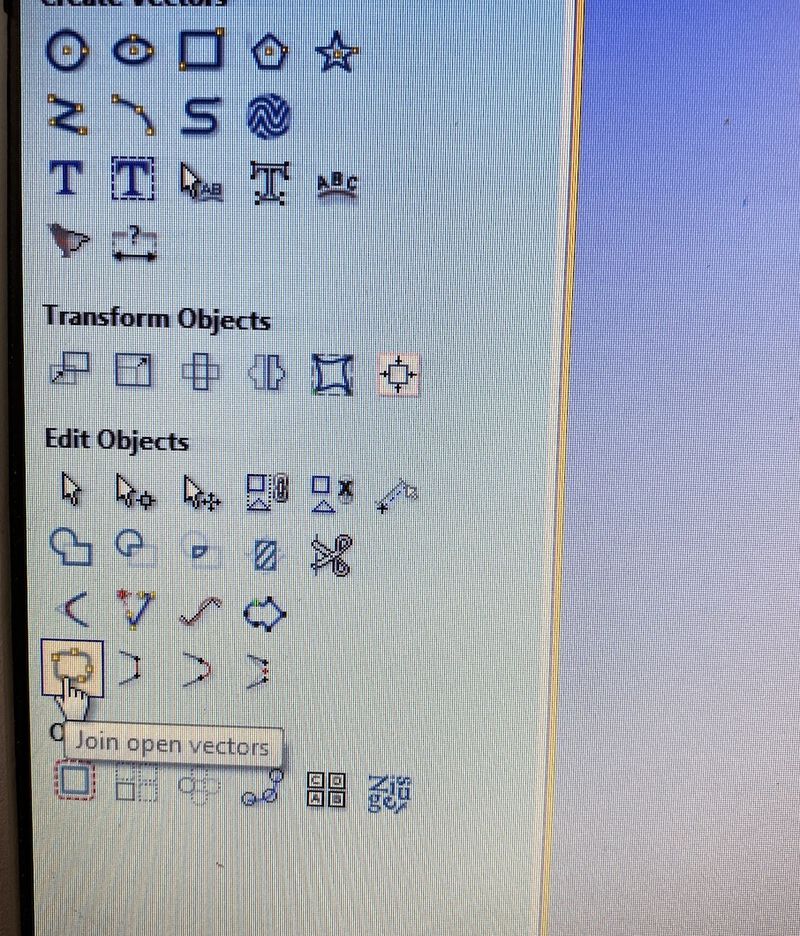
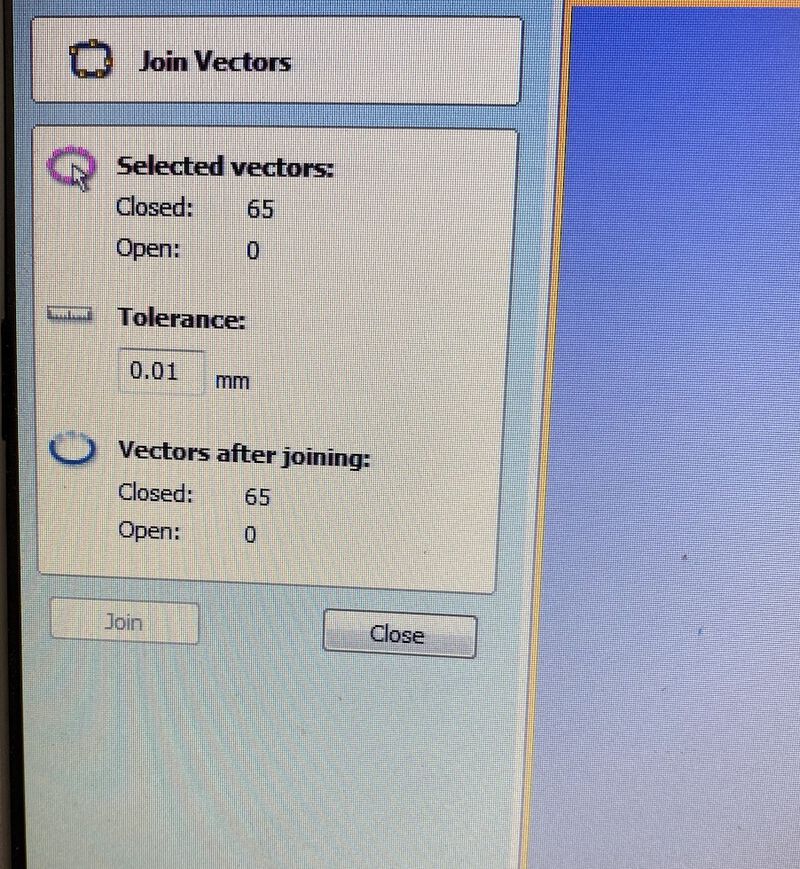
I clicked the Join open vector icon on the left panel, and clicked Join. And I clicked the calculate button again, and it worked this time without the open vector message.
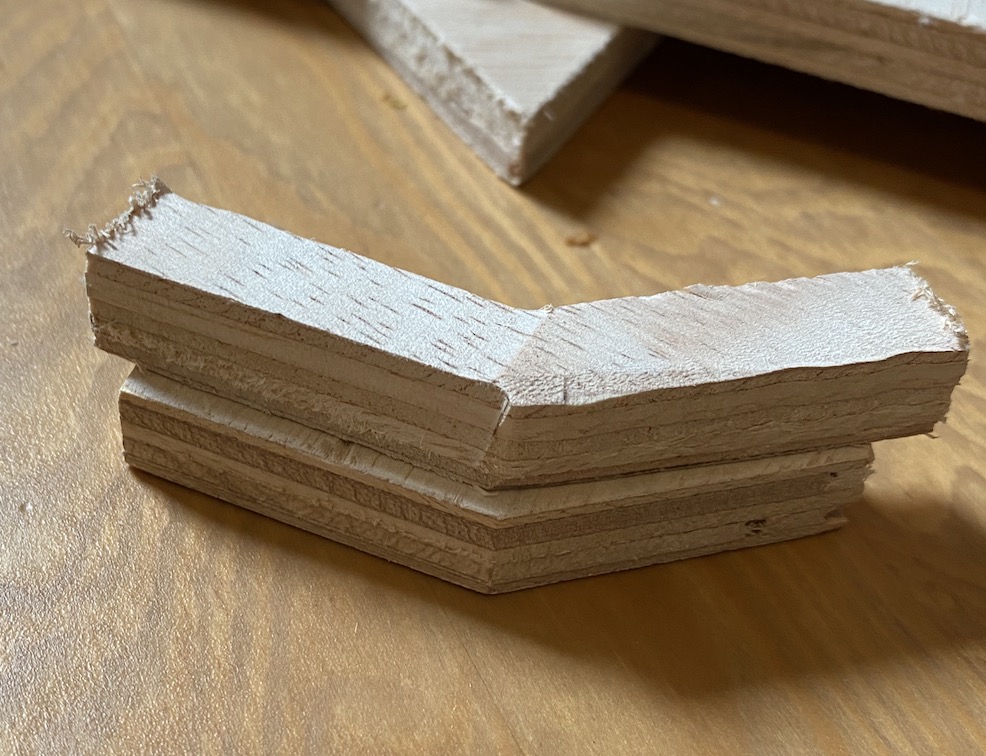
Issue 2. Splinters
For some reason, the cut wasn't that clean. It created a lot of splinters which didn't happen to Harm's wood. I think it might be because my wood was harder than Harm's. I lowered the move speed to see if it could be better, but it didn't really help that much. I could just sand it later, but it seemed like a lot of work.

Issue 3. When the machine is paused
Henk told us that when pausing the machine, the spindle should be in the air. It's because if the spindle is in the wood, it could cause a spark due to the friction. But I once unintentionally paused the machine. When the milling job was running, I wanted to save the file on the computer. And I accidentally clicked the pause button and it stopped. Fortunately, the spindle was in the air when I paused it, so I just resumed the job.
When you pause the machine by accident, don't panic. Resume the job as fast as you can.
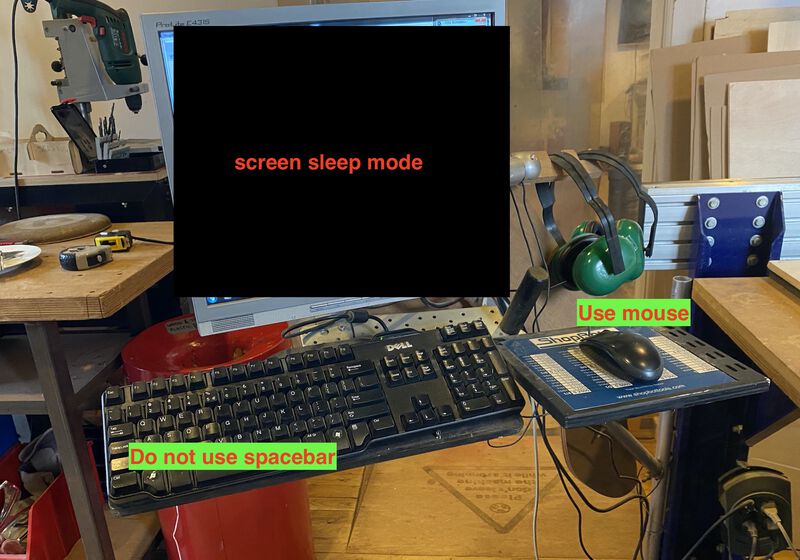
Also, it is likely that you press the spacebar when the computer falls asleep like you always do. Remember to use a mouse to wake the computer up, not the spacebar because that will pause the machine.
Group assignment
This week's group assignment(group assignment documentation) was to test runout, alignment, speeds, feeds, and toolpaths for your machine. Our instructor, Henk, drew 2 squares and stars first to show us how to use different toolpaths.
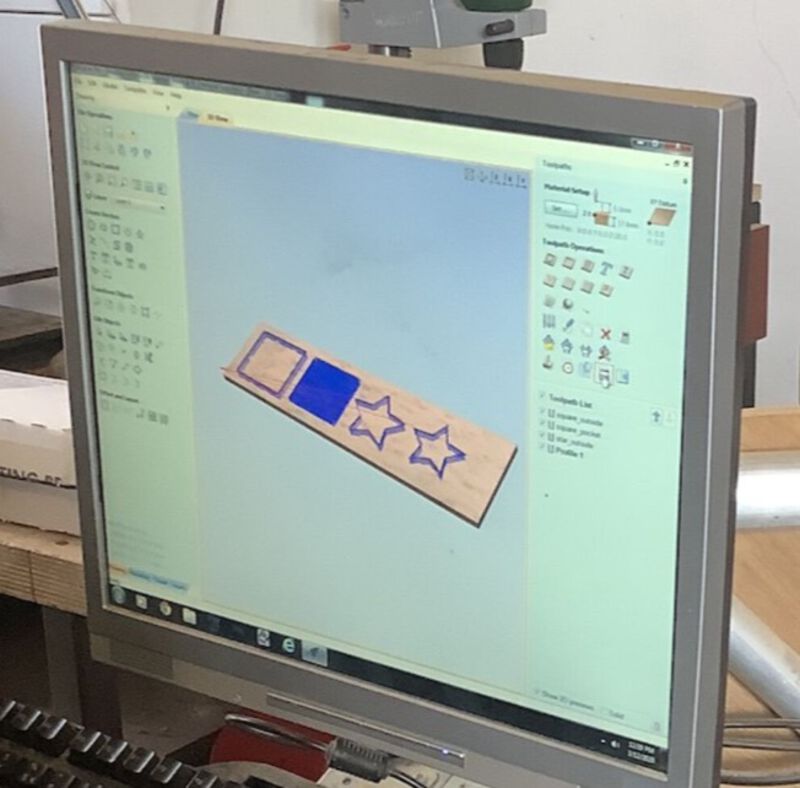
Square 1 : outside line (150mm X 150mm)
Square 2 : inside line & pocket (150mm X 150mm)
Star 1 : outside line + pocket
Star 2 : inside line
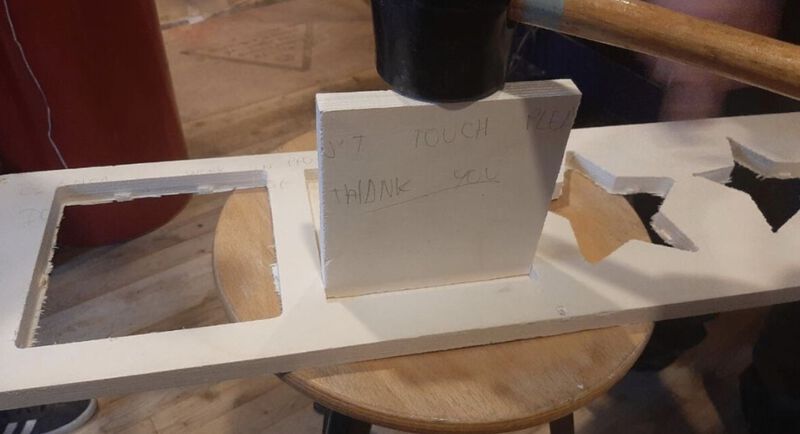
The first square was supposed to fit on the second square perfectly, but it didn't. The size of the first square was 151.15mm x 150.78mm, and the inner width and height of the second square was 149.57mm x 150.15mm. Also, the stars didn't fit together but it was mainly because we didn't add the dog bones on the corner of the second star.
Additionally, we tested with the different move speeds, drill speeds, endmill sizes, flutes and Z value. We also tested both new and old endmills.
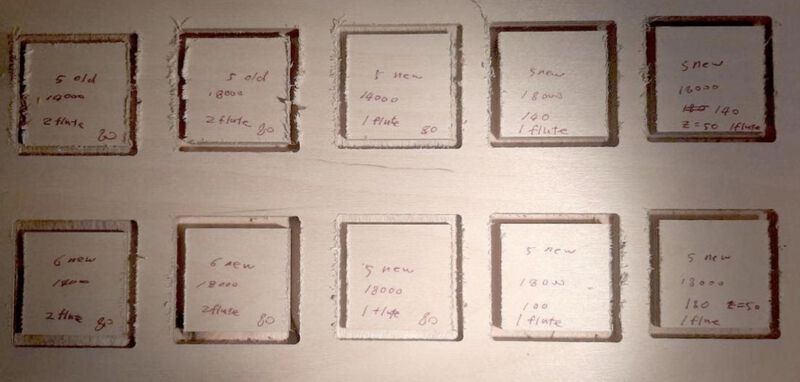
Drill speed : We didn't see much difference but 18000 was slightly better
Old drill v new drill : The new drill was much better
Move speed : the faster it is, the more sprinters occured
Flute : The edges cut by the 2 flute drill were less rough than the one cut by 1 flute drill